
Sniper Ghost Warrior 2 Guide Multiplayer Mutliplayer
Multiplayer - Advanced Cover Tactics
Ok, so you’ve jumped in a match and have experienced the cold steel ringing in your head a few times and have now decided enough is enough. What do the people at the top of the leader boards know that you don’t? What are the secrets and tactics they employ to pop your melon so consistently?
Well folks, you’re about to find out, so please put the rifle down for a moment and put your thinking caps on.
Movement:
Chances are unless you’re “King Kill Count” you’re likely to die once or twice during a match. When you do, you have to consider that most, if not all, of your opponents are already in cover scanning the terrain for their next victim. Outside of the first 20 seconds of a game, you’re movement not only makes you a target but will get you killed when running for cover.
Situational awareness is hugely important; don’t get caught up in seeking your revenge as that will likely get you killed again. Learn to covet your low death score as much as your high kill count and that means don’t do anything drastic, be methodical. Everything about a sniper is methodical and calculated, patience is king.
The moment you spawn, get out of sight immediately. Now this doesn’t mean jump in the first bush you find. It’s not about finding cover, but finding the right cover. Move as fast as you can through open spaces and always try to put as much space as possible between you and the kill starved predator lining you up in their sites.
Move behind trees, walls, through the tunnel systems…you get the picture. A moving target is always harder to hit than someone enjoying the sunrise or Mr. Super Stealth who thinks the only form of movement is either crouched or prone.
While hoofing it to your favorite position, try to move erratically. When dropping targets on the run, you need to lead the target to compensate for the bullets travel time. This means you need to predict where the target is going to be a second ahead of when you pull the trigger. Knowing this, when moving in a straight line you’re playing into your opponents hand nicely.
Always assume you’ve been spotted and that someone is actively trying to line you up in their scope. What this means is that every once in a while, when making big movements, you should sidestep to one side, forcing the player to recalculate their shot. Now this doesn’t mean you should zigzag across the battlefield as that will draw further attention to your location, throwing in a sidestep either direction every once in a while should do the trick.
Choosing Your Cover Wisely
So you’ve managed to make it into cover safely. Congratulations, but you’re not out of the woods yet. Choosing cover depends entirely on your play style, try different types and see what works best for you. There are three types of cover on any given multiplayer map: Stealth, Barrier, and Stealth Barrier cover. Let’s explore these three a bit closer.
Stealth Cover
Stealth cover is any location that hides your position from the enemy but provides limited protection from incoming fire. This type of cover is usually found in bushes, behind trees, in shadows, sitting next to complex objects, and so on. While its ability to mask a sniper’s position is amazing for the first couple shots, once that kill cam appears overhead, you’re cover is blown.
While this can be a very effective strategy, it’s difficult to master. Always remember to stick and move. Gobble up a couple kills from this position then move. Rest assured the person you just killed knows where you are and I promise they’re looking to repay the favor. Moving even a few feet to the right or left may be enough to throw off your opponent to your position.
However, this only lasts for so long and at some point you’re going to need to move. You want to keep these secret spots secret and the longer you camp out, the more your victims will be sure to clear that spot in the future when scanning for targets. Once this has happened, returning to that location during a given match is a death sentence.
Try to line up similar spots in your general area to move to and alternate between them frequently. Keep them guessing. Always remember that even if you don’t rain death on your enemies from this position, eventually your scope reflection will give you away. Always be conscious of the time you spend in this type of cover. If you’ve been hanging out for a while move and come back to it again.
When selecting alternate cover positions in the same general area; try to line them up as close to each other as possible. You want to minimize your travel time and maximize the amount of time you spend hunting for your next victim. If your next position is just a few feet away, stay prone and move as quickly as possible. If it’s a few yards away, just run and drop prone. If it’s further than a few yards, try to stay behind objects when traveling and move quickly.
Barrier Cover
These are positions behind walls, peering through gaps in structures, or maneuvering around sandbags. If you know what you’re doing and follow the appropriate steps, then you shouldn’t need to move regardless of who knows you’re there. The key to these locations is your positioning behind the solid barrier.
You’re goal should always be to show as little of your body as possible and sit as far away from the barrier as you can while keeping a clear eye on the battlefield. Keep in mind that if you can see the battlefield through your scope, then your opponent can see you as well, so the trick is scan and clear.
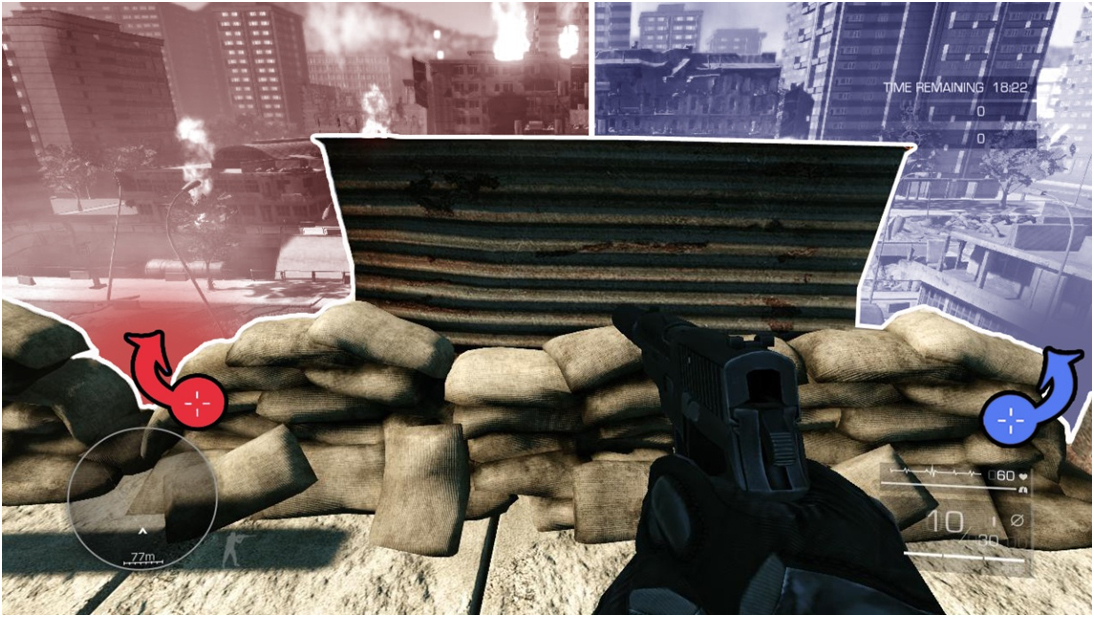
The premise behind this tactic is to view only a small portion of the battlefield at your first zoom level. Scan the area for any enemy threats, zooming in when necessary. You’ll want to look for anything out of the ordinary but the first order of business is to clear any possible cover locations. Once you’re certain there are no looming threats, inch out further revealing a bit more of the battlefield, then repeat. Clear the new area, but before inching out further, clear the previous area to make sure no one has moved in behind you. Rinse and repeat.
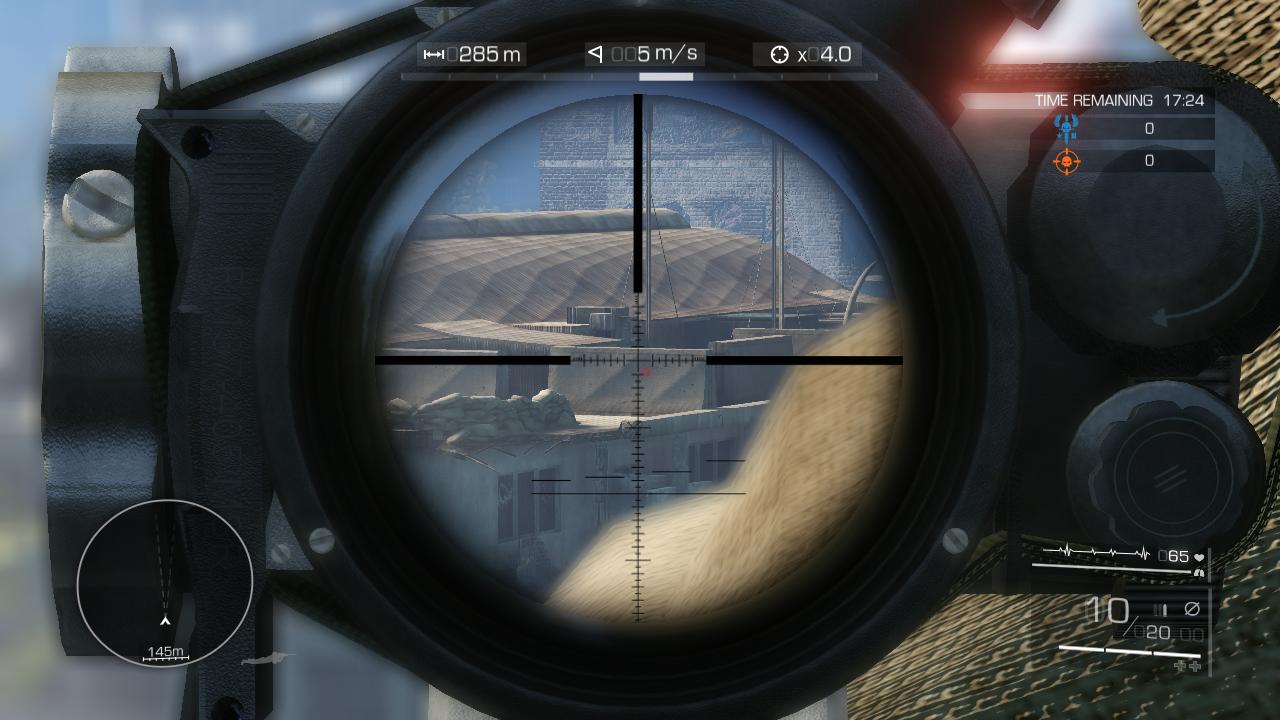
Your first peek at the battlefield should only reveal this much.
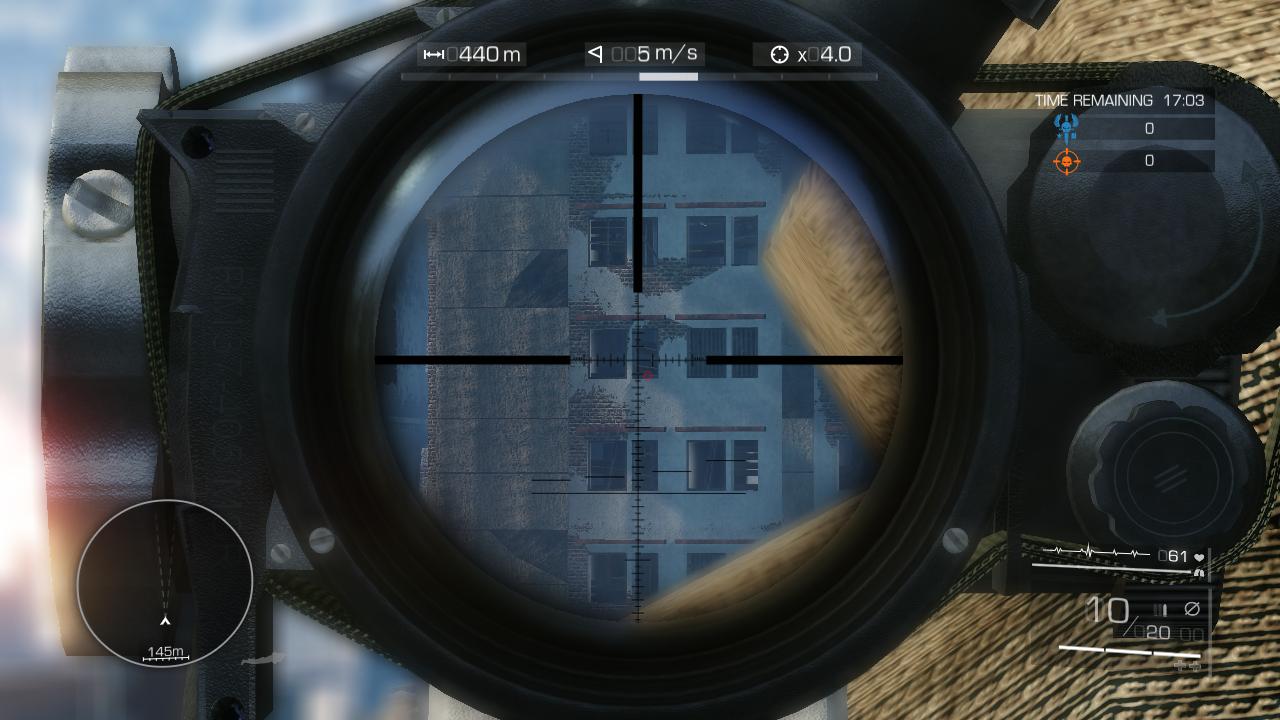
The second should be slightly more than the previous look, clearing and scanning as you go.
Keep up this strategy until you have a little less than half of the battlefield exposed. What this means is that half of your body is hanging out for other players to plant some lead, so the closer you get to viewing the center of the map, the more exposed you become. At this point you’ll need to pick up the pace.
Scan the new area as fast as possible, hitting potential cover spots first, then quickly duck back behind cover. Once you’ve cleared one side of the map, it’s time to move to the other side of the barrier and start again
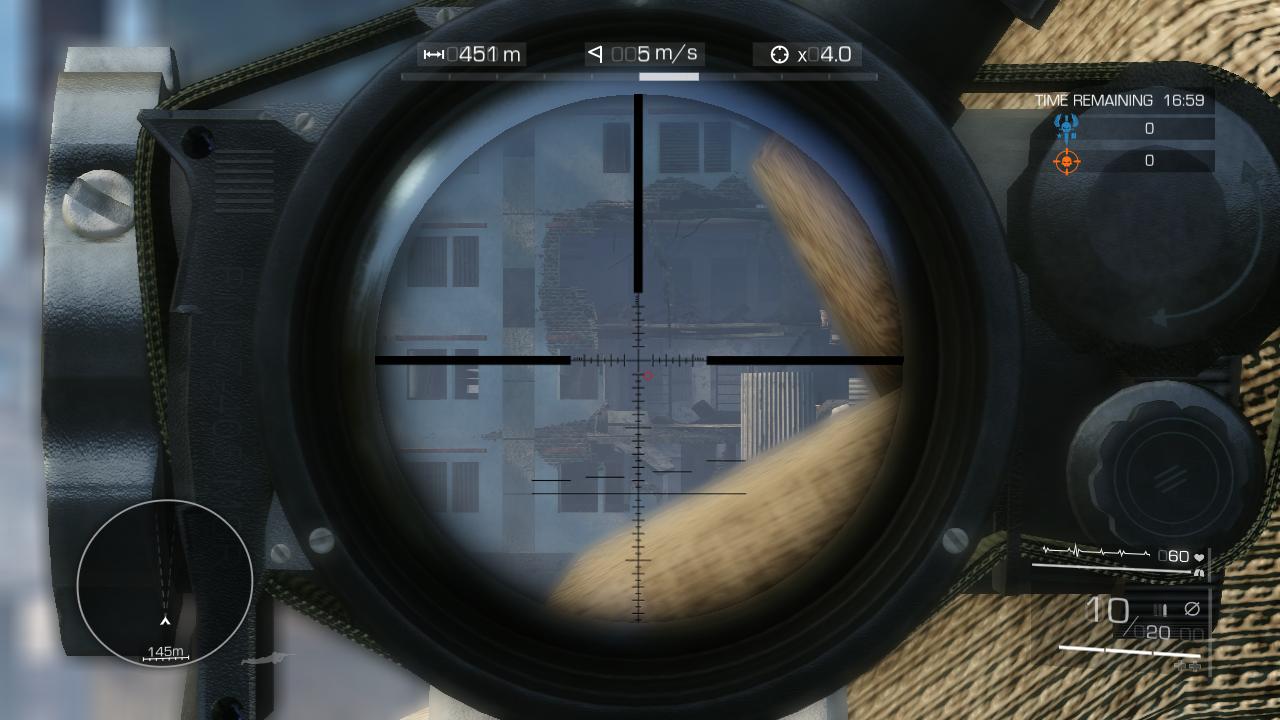
Your third look should reveal slightly less than half the battlefield. Remember, at this point you are greatly exposed. Scan and clear quickly then reduce your visible area or switch to the opposite side of the barrier as soon as possible.
Stealth Barrier
Being primarily a barrier cover, these types of locations usually incorporate trees, shrubs, or debris to help mask its position. Navigating twigs and branches while lining up shots may be slightly cumbersome at first, but your patience will come with great rewards as you rain pain on your opponents.
Stealth barrier locations are very rare and often heavily used by other players. However if you can manage to locate one, it will quickly become your favorite hangout. After identifying these positions, be sure to incorporate them as high profile targets when sweeping and clearing the battlefield.
Pay close attention to your hit indicator as you will likely not see your opponent here. Below is an example of an excellent Stealth Barrier position.
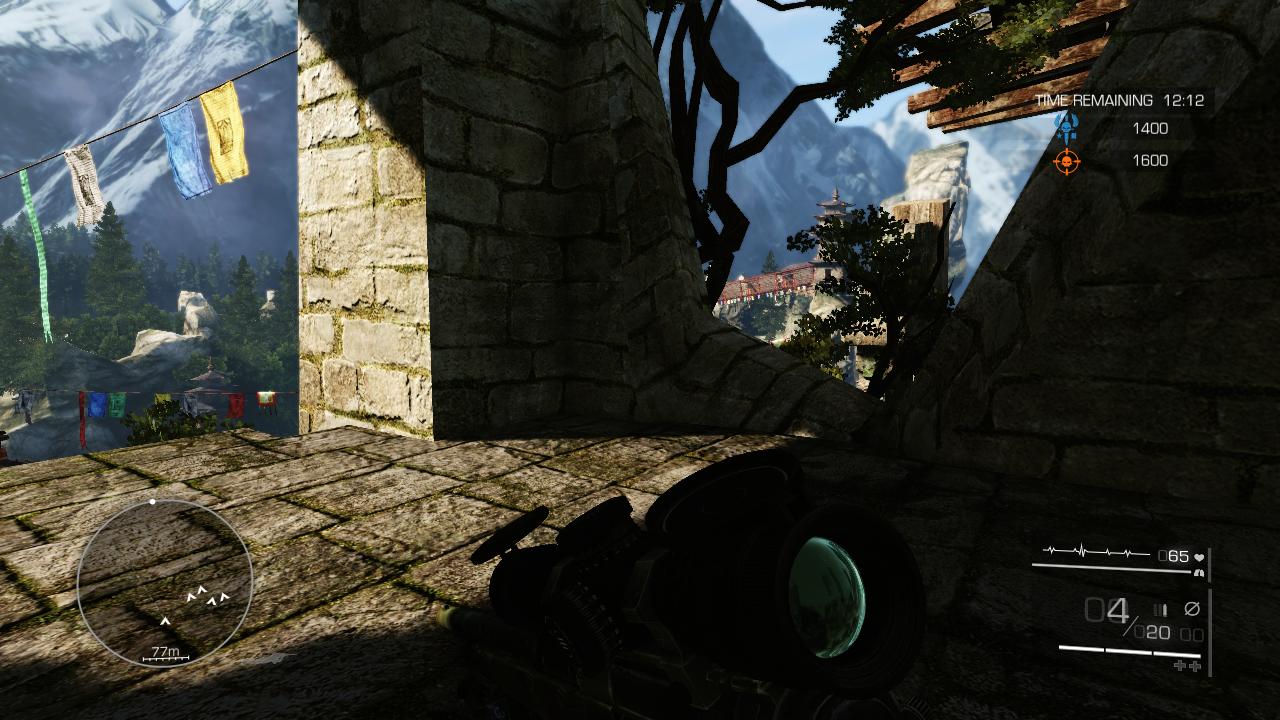
This location can be found on the Temple Crossing map
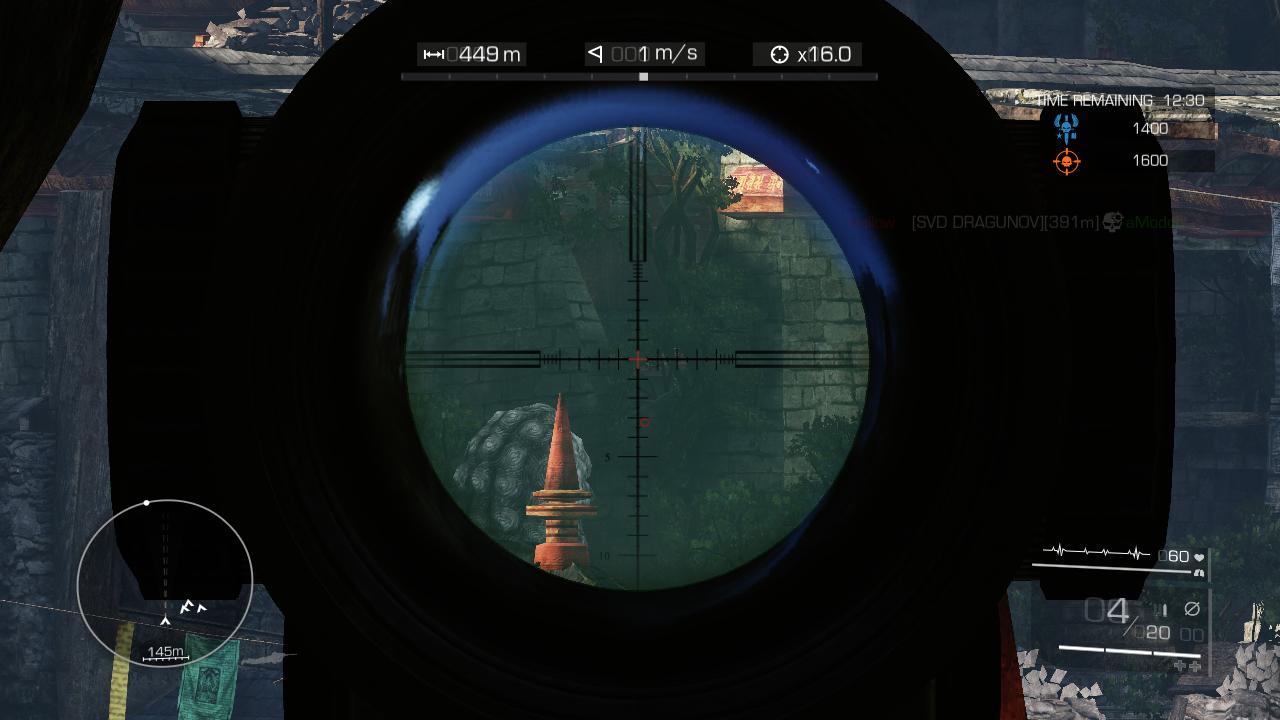
Here’s the same position from your opponents perspective. Deadly!
The tactics used for this type of cover are identical to that of Barrier cover, as you’ll use the sweep and clear technique to locate your opponents. With this example only one side of the pillar has stealth components, so be extra cautious when sticking your neck out on the left.
However, due to the bushes and trees masking your position on the right, you should be able to safely peer out further than normal to compensate on that side. The only time this is not true is when you’ve been camping there for a while and have racked up a healthy kill count. Being at the top means you’re not making many friends, so just keep your head down and be extra cautious.