
Sniper Ghost Warrior 2 Guide Essentials Sniper Survival Kit
Your Screen
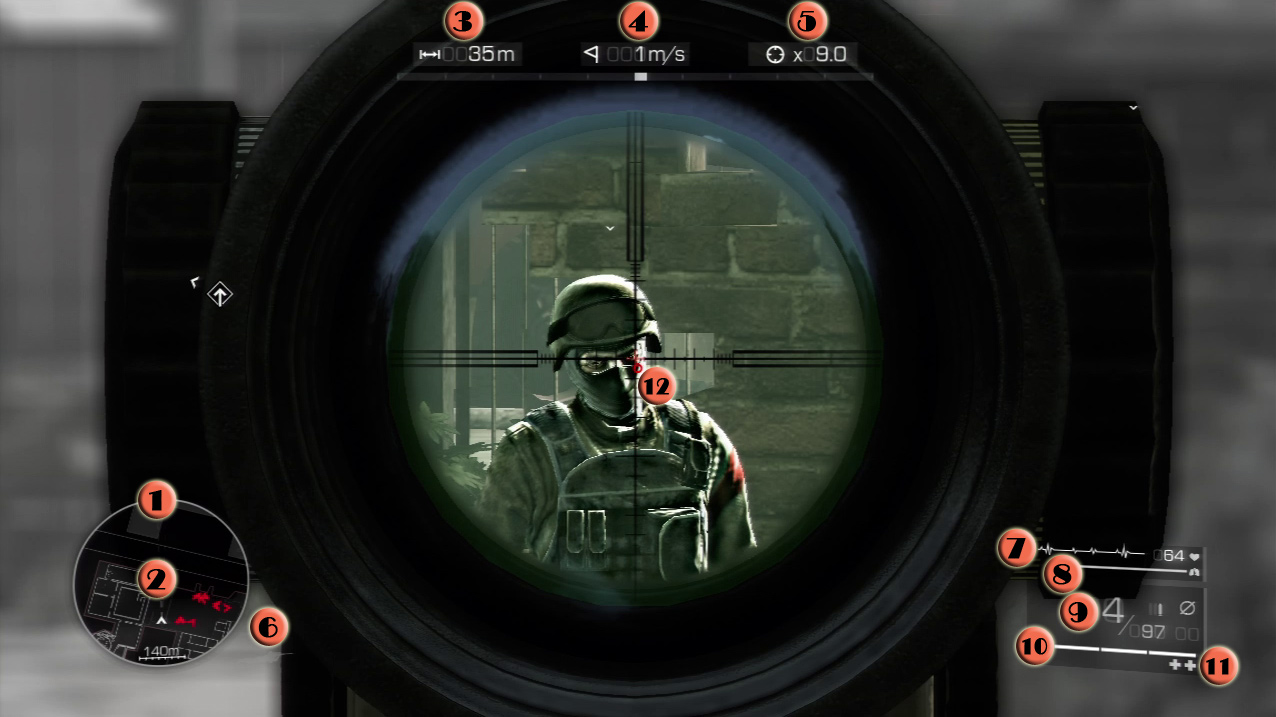
1. Visibility Indicator: This shows if you might have been spotted by an enemy, from which direction, and how much time is left until you are definitely spotted.
2. Minimap: This shows your position, as well as the position of your allies and enemies.
3. Range Finder: Details how many meters to the target. Very useful if you’re playing on Expert mode and need to calculate a shot without the Hit Indicator.
4. Wind Sensor: This shows the strength and direction of the wind. Very useful if you’re playing on Expert mode and need to calculate a shot without the Hit Indicator.
5. Magnification: Weapon’s zoom level for the current setting.
6. Position Icon: An icon that indicates your current stance, either standing, crouching, or lying down prone.
7. Heartbeat Monitor: 60 beats per minute is good. 120 is not.
8. Air Supply: Displays how much air you have left. This becomes particularly useful when swimming underwater to determine how long you can stay submerged.
9. Ammunition Counter: Indicates how much ammunition is left for the weapon currently being used.
10. Health Bar: Three bars means full health. You slowly regenerate your first health bar, but need medkits to regenerate the second and third health bars.
11. Medkit: This shows how many healing kits you have left. You can carry a maximum of two, and each use restores you to full health.
12. Hit Indicator: The red dot visible when looking through a scope of a sniper rifle shows the hit spot of a bullet. Its position is based on the strength of the wind and the distance. On Expert difficulty level this element is not available.