
Prima Games eGuides
primagames.com Browse Redeem a code Help
Army of Two: The Devil's Cartel eGuide
Sign in My Guides

Sign in or create an account

We'll email you a link. No password needed, and if you don't have an account yet, the link makes one.

By creating an account or signing in, you agree to our Terms of Service and Privacy Policy.

Have a password?

Had an account on the old eGuides site, or a code from a printed guide? Help and troubleshooting

Sign in with a password

By signing in, you agree to our Terms of Service and Privacy Policy.

Check your email

A sign-in link is on its way. It works once and expires in 15 minutes. Open it and you're in, with an account if you didn't already have one.

Contents

  • Essentials
    • Welcome Back to Tactical Worldwide Operations
      • Welcome Back to Tactical Worldwide Operations
    • Operational History and Character Bios
      • Operational History and Character Bios
    • Tactical Operations Manual
      • Tactical Operations Manual
    • Two Gear
      • The Gear Makes The Man
      • Modifications
      • Weapon Skins
      • Tactical Gear
      • Tattoos
    • The Enemy
      • The Enemy
    • Contracts
      • Contracts
    • Achievements and Trophies
      • Achievements and Trophies
    • Concept Art
      • Concept Art
  • Walkthrough
    • Mission 1: New Blood
      • Special Callouts
      • Chapter 1: Protection
      • Chapter 2: Tutorial
    • Mission 2: Cause And Effect
      • Chapter 3: Permission to Engage
      • Chapter 4: Foxhunt
      • Chapter 5: Split Decision
      • Chapter 6: Baptism by Fire
    • Mission 3: Rally Point
      • Chapter 7: Politics in Action
      • Chapter 8: Picking Up the Pieces
      • Chapter 9: Into the Chaos

      • Chapter 10: Riot Act

      • Chapter 11: Urban Chaos

    • Mission 4: Outside Contact
      • Chapter 12: Fuel for the Fire

      • Chapter 13: Observe and Detect

      • Chapter 14: Local Heroes

      • Chapter 15: Stronghold Assault
      • Chapter 16: Suicide Run

    • Mission 5: Last Resort
      • Chapter 17: Holiday Retreat

      • Chapter 18: Room Service

    • Mission 6: Salvation
      • Chapter 19: Among the Dead

      • Chapter 20: Open Season

      • Chapter 21: Rest for the Wicked

      • Chapter 22: Shadows Walk

      • Chapter 23: Into the Light

      • Chapter 24: Loose Cannon

      • Chapter 25: Special Delivery

    • Mission 7: Enemy Territory
      • Chapter 26: Behind Enemy Lines

      • Chapter 27: Guardian Angel

      • Chapter 28: Manhunt

      • Chapter 29: Fight for the Future

      • Chapter 30: Desperate Measures

      • Chapter 31: Objective Lost

    • Mission 8: Narco Hell
      • Chapter 32: Scavengers

      • Chapter 33: Game Face

      • Chapter 34: A Ray of Sun

      • Chapter 35: Rooftop Rampage

      • Chapter 36: Adrenaline High

      • Chapter 37: Mad Science

      • Chapter 38: The Butcher

    • Mission 9: Assault
      • Chapter 39: The Assault

      • Chapter 40: Down But Not Out

      • Chapter 41: Get Her Back

      • Chapter 42: Race to the Quarry

      • Chapter 43: Fish in a Barrel

    • Mission 10: Confrontation
      • Chapter 44: Burning Bridges

      • Chapter 45: No Return

      • Chapter 46: A Hero's Rescue

      • Chapter 47: The Lion's Den

      • Chapter 48: Salem On Trial

      • Chapter 49: The Devil's Due

  • Overkill Vids
    • Mission Overkill Videos
      • Mission Overkill Videos

Army of Two: The Devil's Cartel Guide › Walkthrough › Mission 6: Salvation

Chapter 22: Shadows Walk


Chapter 22: Shadows Walk
Suggested Armament

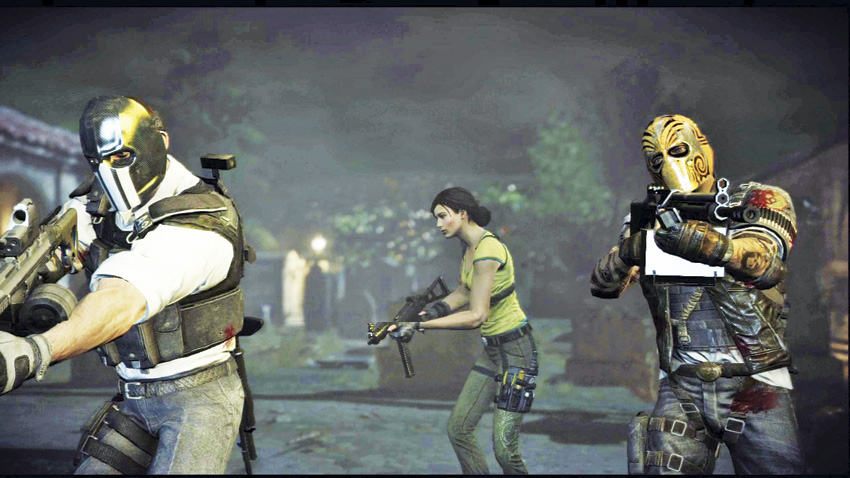
This chapter takes place primarily inside of unlit (or barely lit), narrow passageways. Fiona passes Alpha a pistol with a tactical light before you enter the catacombs, and it’s the only light source you’ll have for large sections of this mission. If you are playing with a friend, the player in Bravo’s role should be prepared with either high capacity weapons or shotguns for close quarters combat. Whomever is playing Alpha will likely be sticking to the pistol for the light, but should be prepared to switch to their other weapons to assist during portions of the chapter that have good ambient lighting.

Tip

Other than to check for hostiles trying to flank you, there’s little reason to leave the main path to the church. In order to navigate through this chapter quickly, you need to follow the electric wiring on the walls. You will always know that you’re on the right track if you follow the wiring and encounter cartel soldiers along the way.

The corridor you start in is lit by a single flickering light, but only a short distance away the tunnel falls into pitch blackness. You’ll make a right and encounter your first guard who is protecting a small room. Notice the electric wiring on the upper right portion of the tunnel—that’s your guide.

From the room protected by the first guard, you’ll want to make a left. The next room has a small coffin at the center, and it is protected by four mercenaries. The room they guard is well-lit, so you can switch to a different weapon if you’d like. Put them down, and then follow the wiring into the left passage .

You’ll encounter another pair of mercs as you follow the corridor. Make a left and head down the passage they came from, where more guards await . From there, make an immediate right to keep following the wire, and then another left when you reach the next room . Watch for potential flanking movements in the side passages.

A mercenary Stabber hides in this room.

Keep pushing forward from the Stabber room. You’ll eventually reach a door you need to breach . Just beyond the door, a second pistol mounted with a light can be found on the ground.

Alpha will call out a warning that the enemy is dropping in from above as you progress forward. The Stabber by itself is not a major threat, but the gunman further down the corridor can complicate things. Keep following the wire. You’re a little over half-way to your objective.

The corridor curves to the left before you run into a series of crates that force you down a right passage. Another Stabber and gunman ambush you. Keep following the corridor to encounter another Stabber and gunman combo in the next large room .

You’ll want to follow the passage straight ahead until you reach a room where the roof has been blasted open, revealing the night sky. In addition to cartel trying to jump down into the area from the hole in the roof, every room leading up to it has at least a couple of hostiles ready to ambush you. From the open-air room, make a left and follow this corridor until you reach a Y-junction. Take the right-hand corridor to stay on track.

It’s more or less a straight shot from here. Keep following the wire and killing cartel members as they appear. You’ll eventually reach an open door which leads you down one last narrow corridor with half a dozen more hostiles standing between you and the catacombs exit.

Keep reading with a free account

The first 3 sections of Army of Two: The Devil's Cartel are open to everyone. An account opens the rest of it, and every other guide in the archive. It's free, and there's nothing to buy.

Bought guides on the old Prima Games site? Your account and every guide you own moved here, so there's nothing to buy again. Sign in.

Create a free account Or browse our free guides

PreviousChapter 21: Rest for the Wicked
 NextChapter 23: Into the Light