Prima Games eGuides
primagames.com Browse Redeem a code Help
Army of Two: The Devil's Cartel eGuide
Sign in My Guides

Sign in or create an account

We'll email you a link. No password needed, and if you don't have an account yet, the link makes one.

By creating an account or signing in, you agree to our Terms of Service and Privacy Policy.

Have a password?

Had an account on the old eGuides site, or a code from a printed guide? Help and troubleshooting

Sign in with a password

By signing in, you agree to our Terms of Service and Privacy Policy.

Check your email

A sign-in link is on its way. It works once and expires in 15 minutes. Open it and you're in, with an account if you didn't already have one.

Contents

  • Essentials
    • Welcome Back to Tactical Worldwide Operations
      • Welcome Back to Tactical Worldwide Operations
    • Operational History and Character Bios
      • Operational History and Character Bios
    • Tactical Operations Manual
      • Tactical Operations Manual
    • Two Gear
      • The Gear Makes The Man
      • Modifications
      • Weapon Skins
      • Tactical Gear
      • Tattoos
    • The Enemy
      • The Enemy
    • Contracts
      • Contracts
    • Achievements and Trophies
      • Achievements and Trophies
    • Concept Art
      • Concept Art
  • Walkthrough
    • Mission 1: New Blood
      • Special Callouts
      • Chapter 1: Protection
      • Chapter 2: Tutorial
    • Mission 2: Cause And Effect
      • Chapter 3: Permission to Engage
      • Chapter 4: Foxhunt
      • Chapter 5: Split Decision
      • Chapter 6: Baptism by Fire
    • Mission 3: Rally Point
      • Chapter 7: Politics in Action
      • Chapter 8: Picking Up the Pieces
      • Chapter 9: Into the Chaos

      • Chapter 10: Riot Act

      • Chapter 11: Urban Chaos

    • Mission 4: Outside Contact
      • Chapter 12: Fuel for the Fire

      • Chapter 13: Observe and Detect

      • Chapter 14: Local Heroes

      • Chapter 15: Stronghold Assault
      • Chapter 16: Suicide Run

    • Mission 5: Last Resort
      • Chapter 17: Holiday Retreat

      • Chapter 18: Room Service

    • Mission 6: Salvation
      • Chapter 19: Among the Dead

      • Chapter 20: Open Season

      • Chapter 21: Rest for the Wicked

      • Chapter 22: Shadows Walk

      • Chapter 23: Into the Light

      • Chapter 24: Loose Cannon

      • Chapter 25: Special Delivery

    • Mission 7: Enemy Territory
      • Chapter 26: Behind Enemy Lines

      • Chapter 27: Guardian Angel

      • Chapter 28: Manhunt

      • Chapter 29: Fight for the Future

      • Chapter 30: Desperate Measures

      • Chapter 31: Objective Lost

    • Mission 8: Narco Hell
      • Chapter 32: Scavengers

      • Chapter 33: Game Face

      • Chapter 34: A Ray of Sun

      • Chapter 35: Rooftop Rampage

      • Chapter 36: Adrenaline High

      • Chapter 37: Mad Science

      • Chapter 38: The Butcher

    • Mission 9: Assault
      • Chapter 39: The Assault

      • Chapter 40: Down But Not Out

      • Chapter 41: Get Her Back

      • Chapter 42: Race to the Quarry

      • Chapter 43: Fish in a Barrel

    • Mission 10: Confrontation
      • Chapter 44: Burning Bridges

      • Chapter 45: No Return

      • Chapter 46: A Hero's Rescue

      • Chapter 47: The Lion's Den

      • Chapter 48: Salem On Trial

      • Chapter 49: The Devil's Due

  • Overkill Vids
    • Mission Overkill Videos
      • Mission Overkill Videos

Army of Two: The Devil's Cartel Guide › Walkthrough › Mission 2: Cause And Effect

Chapter 5: Split Decision

Chapter 5: Split Decision
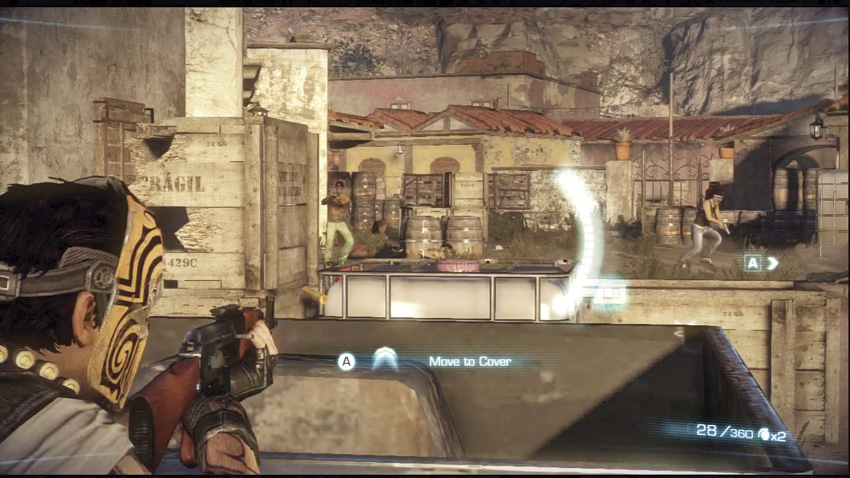
Rios and Salem split off from Alpha and Bravo shortly after this chapter starts, and there are no enemies in sight early on. All of that changes once you reach another open area flanked by multiple buildings . Wooden barrels and storage crates are scattered around the area. Keep an eye on the structures to your left as you advance; thugs tend to use those structures for ambushes.

OVERKILL

This is a great place to use Overkill if you want to swiftly clear the zone—particularly if you’re playing with a human partner. If you work fast enough, you can clear the area and shut off Overkill to preserve some of the meter for later fights in the chapter.

You reach the gate to the next section of the compound, but there’s no safe way to get over it. Rios suggests you push through a nearby alley to rejoin him and Salem. As you might expect, the close quarters of the winding alley is absolutely perfect for a cartel ambush. Watch your flanks and be on the lookout for thugs with shotguns. One good shot at close range can put you in the Wounded state immediately. Also, be aware of any explosive barrels or canisters you can use while you navigate the alley.

The alley opens up to another back street on the other side of the gate. Thugs will stream in from the far end of the street, but you can easily position yourself to cut them down as they enter the area. Once you’ve cleared the street, you’re ordered to stack up at the door of the building where the hostages are said to be located.

This is your first synchronized door breach! After Alpha and Bravo stack up on the door, they kick it open and rush into the room, entering a bullet-time state. You only have a few seconds in this state to kill all of the hostiles on the other side of the door. If you manage to do this, you earn a Flawless Breach score bonus.

Tip

Flawless Breaches are harder to manage when playing with the AI Bravo because you can’t delegate targets in the same way that you can with a human partner. Weapons with low-magazine capacity are not recommended for breaching sequences, since time spent reloading is time wasted. If you do run out of ammo, switch to your sidearm and finish off any stragglers with carefully aimed headshots.

You’ve almost reached the hostages. One last corridor filled with barrels and soon-to-be-perforated thugs stands between you and them.

Unfortunately, the target of your rescue effort lies dead on the ground, clearly dispatched at the hands of the cartel. Another young woman is found nearby, but is too afraid to respond to any of the mercenaries. Rios elects to take this hostage with them, prompting Salem to storm off to look for an exit. After Salem leaves the group, a swarm of cartel soldiers begin to invade the halls you just cleared. Eliminate them all and reach the designated door .

Keep reading with a free account

The first 3 sections of Army of Two: The Devil's Cartel are open to everyone. An account opens the rest of it, and every other guide in the archive. It's free, and there's nothing to buy.

Bought guides on the old Prima Games site? Your account and every guide you own moved here, so there's nothing to buy again. Sign in.

Create a free account Or browse our free guides

PreviousChapter 4: Foxhunt NextChapter 6: Baptism by Fire