
Prima Games eGuides
primagames.com Browse Redeem a code Help
Army of Two: The Devil's Cartel eGuide
Sign in My Guides

Sign in or create an account

We'll email you a link. No password needed, and if you don't have an account yet, the link makes one.

By creating an account or signing in, you agree to our Terms of Service and Privacy Policy.

Have a password?

Had an account on the old eGuides site, or a code from a printed guide? Help and troubleshooting

Sign in with a password

By signing in, you agree to our Terms of Service and Privacy Policy.

Check your email

A sign-in link is on its way. It works once and expires in 15 minutes. Open it and you're in, with an account if you didn't already have one.

Contents

  • Essentials
    • Welcome Back to Tactical Worldwide Operations
      • Welcome Back to Tactical Worldwide Operations
    • Operational History and Character Bios
      • Operational History and Character Bios
    • Tactical Operations Manual
      • Tactical Operations Manual
    • Two Gear
      • The Gear Makes The Man
      • Modifications
      • Weapon Skins
      • Tactical Gear
      • Tattoos
    • The Enemy
      • The Enemy
    • Contracts
      • Contracts
    • Achievements and Trophies
      • Achievements and Trophies
    • Concept Art
      • Concept Art
  • Walkthrough
    • Mission 1: New Blood
      • Special Callouts
      • Chapter 1: Protection
      • Chapter 2: Tutorial
    • Mission 2: Cause And Effect
      • Chapter 3: Permission to Engage
      • Chapter 4: Foxhunt
      • Chapter 5: Split Decision
      • Chapter 6: Baptism by Fire
    • Mission 3: Rally Point
      • Chapter 7: Politics in Action
      • Chapter 8: Picking Up the Pieces
      • Chapter 9: Into the Chaos

      • Chapter 10: Riot Act

      • Chapter 11: Urban Chaos

    • Mission 4: Outside Contact
      • Chapter 12: Fuel for the Fire

      • Chapter 13: Observe and Detect

      • Chapter 14: Local Heroes

      • Chapter 15: Stronghold Assault
      • Chapter 16: Suicide Run

    • Mission 5: Last Resort
      • Chapter 17: Holiday Retreat

      • Chapter 18: Room Service

    • Mission 6: Salvation
      • Chapter 19: Among the Dead

      • Chapter 20: Open Season

      • Chapter 21: Rest for the Wicked

      • Chapter 22: Shadows Walk

      • Chapter 23: Into the Light

      • Chapter 24: Loose Cannon

      • Chapter 25: Special Delivery

    • Mission 7: Enemy Territory
      • Chapter 26: Behind Enemy Lines

      • Chapter 27: Guardian Angel

      • Chapter 28: Manhunt

      • Chapter 29: Fight for the Future

      • Chapter 30: Desperate Measures

      • Chapter 31: Objective Lost

    • Mission 8: Narco Hell
      • Chapter 32: Scavengers

      • Chapter 33: Game Face

      • Chapter 34: A Ray of Sun

      • Chapter 35: Rooftop Rampage

      • Chapter 36: Adrenaline High

      • Chapter 37: Mad Science

      • Chapter 38: The Butcher

    • Mission 9: Assault
      • Chapter 39: The Assault

      • Chapter 40: Down But Not Out

      • Chapter 41: Get Her Back

      • Chapter 42: Race to the Quarry

      • Chapter 43: Fish in a Barrel

    • Mission 10: Confrontation
      • Chapter 44: Burning Bridges

      • Chapter 45: No Return

      • Chapter 46: A Hero's Rescue

      • Chapter 47: The Lion's Den

      • Chapter 48: Salem On Trial

      • Chapter 49: The Devil's Due

  • Overkill Vids
    • Mission Overkill Videos
      • Mission Overkill Videos

Army of Two: The Devil's Cartel Guide › Walkthrough › Mission 4: Outside Contact

Chapter 16: Suicide Run


Chapter 16: Suicide Run
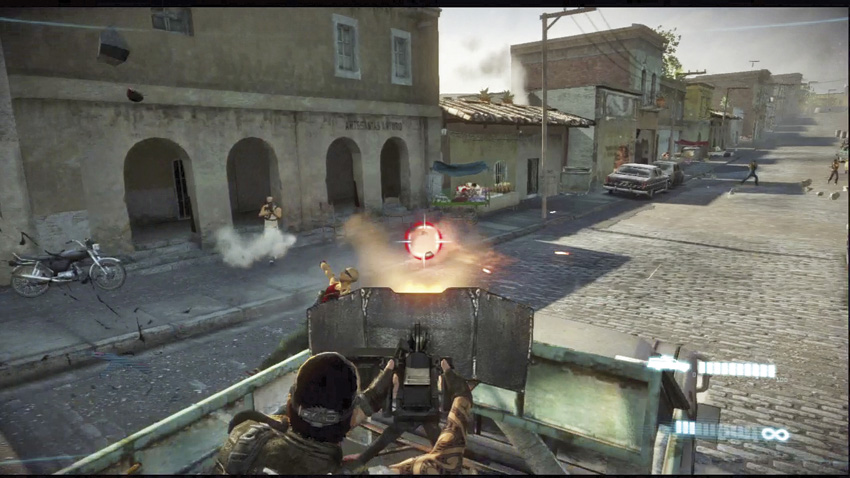
Considering how things went during the last chapter, it’d be nice to have some sort of break, or at least a reward for your efforts thus far. This comes in the form of an abandoned cartel technical that Alpha and Bravo discover. They decide to drive the technical into the cartel hideout, packed with the C4 they recovered from the junkyard.

You now have to decide who drives the truck, and who mans the guns. If you’re playing alone, Bravo does a good job at either role, so you should pick depending on what strikes your fancy: do you want to shoot things and cause explosions, or do you want to drive a truck through hapless cartel foot soldiers?

A few things to keep in mind: First off, the truck is not particularly maneuverable or very fast, meaning that you’ll have to react immediately to potential obstacles if you’re the driver. Second, the truck is not invincible. If you want to live up to the chapter’s name, you’ll run into things constantly and you’ll allow RPGs to strike the vehicle. Don’t do those things, and you’ll be just fine. Lastly, if you’re the gunner, know that the gun can overheat if it is fired for too long. While it is fun to just destroy everything, try to pace yourself somewhat so that you can have the gun ready when immediate threats need to be addressed.

Shortly after your rolling start, you’ll pass through a plaza filled with decorations and fireworks. If you’re driving, try to avoid hitting things with the truck in this area, as there are a lot of explosive hazards.

Just beyond the plaza, the cartel sends some sport trucks to try and block the road. These are easily avoided—especially if the gunner blasts them to pieces.

Shortly after the laughable attempt at a roadblock, the cartel sets up technicals with MMGs along the road. Clearly, they have gotten serious about stopping you.

After you tear through the technicals, thugs armed with RPGs are spotted along the sides of the street, on rooftops, or atop parked vehicles. The game marks these threats for both the driver and the gunner. The driver should concentrate on defensive driving, even if that means that the gunner can’t get easy shots on the hostiles. It’s better to avoid taking a direct hit, especially when you’re so close to the finish.

The final stretch is all downhill, right into the front gate of the hideout. The gate is guarded by a pair of MMGs that the gunner needs to take out before the truck sustains too much damage. At this point, the driver only needs to make sure the gate is directly in front of the truck as they travel toward the hideout.

Surviving the crash through the gate, Alpha and Bravo dust themselves off, ready to congratulate themselves for being the badasses they know they are.

That is, until a familiar and very unpleasant-looking cartel lieutenant stomps onto the scene with his personal gang of thugs. He is armed with what really ought to count as a proper sword, his charming good looks, and little else. El Carcinero is less than pleased to see you, but he’s definitely thrilled at the possibilities should he manage to get his hands on you. You can tell by the low growl he uses to communicate to his underlings.

Help arrives in the form of your contact Fiona, who manages to extract Alpha and Bravo from the compound. They trigger the C4 during the escape.

El Carcinero doesn’t seem to notice the parting gift, though.

Keep reading with a free account

The first 3 sections of Army of Two: The Devil's Cartel are open to everyone. An account opens the rest of it, and every other guide in the archive. It's free, and there's nothing to buy.

Bought guides on the old Prima Games site? Your account and every guide you own moved here, so there's nothing to buy again. Sign in.

Create a free account Or browse our free guides

PreviousChapter 15: Stronghold Assault NextChapter 17: Holiday Retreat