Prima Games eGuides
primagames.com Browse Redeem a code Help
Army of Two: The Devil's Cartel eGuide
Sign in My Guides

Sign in or create an account

We'll email you a link. No password needed, and if you don't have an account yet, the link makes one.

By creating an account or signing in, you agree to our Terms of Service and Privacy Policy.

Have a password?

Had an account on the old eGuides site, or a code from a printed guide? Help and troubleshooting

Sign in with a password

By signing in, you agree to our Terms of Service and Privacy Policy.

Check your email

A sign-in link is on its way. It works once and expires in 15 minutes. Open it and you're in, with an account if you didn't already have one.

Contents

  • Essentials
    • Welcome Back to Tactical Worldwide Operations
      • Welcome Back to Tactical Worldwide Operations
    • Operational History and Character Bios
      • Operational History and Character Bios
    • Tactical Operations Manual
      • Tactical Operations Manual
    • Two Gear
      • The Gear Makes The Man
      • Modifications
      • Weapon Skins
      • Tactical Gear
      • Tattoos
    • The Enemy
      • The Enemy
    • Contracts
      • Contracts
    • Achievements and Trophies
      • Achievements and Trophies
    • Concept Art
      • Concept Art
  • Walkthrough
    • Mission 1: New Blood
      • Special Callouts
      • Chapter 1: Protection
      • Chapter 2: Tutorial
    • Mission 2: Cause And Effect
      • Chapter 3: Permission to Engage
      • Chapter 4: Foxhunt
      • Chapter 5: Split Decision
      • Chapter 6: Baptism by Fire
    • Mission 3: Rally Point
      • Chapter 7: Politics in Action
      • Chapter 8: Picking Up the Pieces
      • Chapter 9: Into the Chaos

      • Chapter 10: Riot Act

      • Chapter 11: Urban Chaos

    • Mission 4: Outside Contact
      • Chapter 12: Fuel for the Fire

      • Chapter 13: Observe and Detect

      • Chapter 14: Local Heroes

      • Chapter 15: Stronghold Assault
      • Chapter 16: Suicide Run

    • Mission 5: Last Resort
      • Chapter 17: Holiday Retreat

      • Chapter 18: Room Service

    • Mission 6: Salvation
      • Chapter 19: Among the Dead

      • Chapter 20: Open Season

      • Chapter 21: Rest for the Wicked

      • Chapter 22: Shadows Walk

      • Chapter 23: Into the Light

      • Chapter 24: Loose Cannon

      • Chapter 25: Special Delivery

    • Mission 7: Enemy Territory
      • Chapter 26: Behind Enemy Lines

      • Chapter 27: Guardian Angel

      • Chapter 28: Manhunt

      • Chapter 29: Fight for the Future

      • Chapter 30: Desperate Measures

      • Chapter 31: Objective Lost

    • Mission 8: Narco Hell
      • Chapter 32: Scavengers

      • Chapter 33: Game Face

      • Chapter 34: A Ray of Sun

      • Chapter 35: Rooftop Rampage

      • Chapter 36: Adrenaline High

      • Chapter 37: Mad Science

      • Chapter 38: The Butcher

    • Mission 9: Assault
      • Chapter 39: The Assault

      • Chapter 40: Down But Not Out

      • Chapter 41: Get Her Back

      • Chapter 42: Race to the Quarry

      • Chapter 43: Fish in a Barrel

    • Mission 10: Confrontation
      • Chapter 44: Burning Bridges

      • Chapter 45: No Return

      • Chapter 46: A Hero's Rescue

      • Chapter 47: The Lion's Den

      • Chapter 48: Salem On Trial

      • Chapter 49: The Devil's Due

  • Overkill Vids
    • Mission Overkill Videos
      • Mission Overkill Videos

Army of Two: The Devil's Cartel Guide › Walkthrough › Mission 1: New Blood

Special Callouts

Campaign Walkthrough

Special Callouts

The campaign for Army of Two: The Devil’s Cartel consists of ten missions, each divided into multiple chapters. This walkthough is organized accordingly, with each mission section divided into its chapters. You’ll be given relevant information regarding the enemy force’s composition, as well as solid methods for breaking apart every hostile position, defensive line, or ambush. Additionally, you’ll see special attention being paid to Flanking Routes, Decision Points, Suggested Armaments, and ideal Overkill moments.

Flanking Routes

Technically, any path you take that gets you pointed at the unguarded flank of the enemy could be considered a flanking route. There are, however, a number of alternate routes that are built into the environments themselves. For example: a back alley might let you get behind a mounted machine gun, and using a Team Action to boost your buddy to an elevated position could allow him to take out enemies on adjacent rooftops while also sniping at enemies you’re facing on the street level.

Decision Points

Occasionally, you’ll encounter situations that require you to choose between two options. These Decision Points split Alpha and Bravo apart from one another, and are very dangerous. If you’re taken down by the enemy while alone, it’s game over, and you’ll be sent back to the closest checkpoint! Decision Point sections of the guide will cover both possible routes so that players playing alone or with a partner will know what to expect no matter what choice they make.

Suggested Armaments

It is entirely possible to rip apart the poor saps the cartel sends your way with nothing more than the default M4 Assault Rifle and some very accurate shooting. However, there are plenty of battles throughout the game that can be made significantly easier if you decide to use specific types of weapons. When situations can be made easier by utilizing a specific type of loadout, the Suggested Armaments sections will let you know. Don’t forget, in between every single chapter of the game, you’re given the opportunity to change your loadout before continuing forward, so be willing to change your equipment if you feel you’re struggling.

Overkill

Overkill is an incredibly powerful tool that allows your mercenary to become something that resembles a force of nature, as opposed to being just another guy with a gun. However, you can only utilize this mode for short periods of time, even if you trigger a Double Overkill. It might not even be available right when you need it the most, depending on how well you’re racking up points during combat. Overkill callouts in the guide will let you know when you’ve entered a target-rich environment that you can use to rack up Overkills and fatten your wallet.

Difficulty Settings

There are four difficulty settings for The Devil’s Cartel: Easy, Medium, Hard, and Insane. Insane only becomes available after you complete the game once. The difficulty settings determine just how much damage you can take before being put in the Wounded state, and also determine how fast you bleed out. Playing on higher difficulties increases a modifier that improves your overall score at the end of every chapter. This guide is written for the Hard difficulty setting, but the tips here are universal to all difficulty settings since enemy numbers and health levels are not affected. You may find that you tend to be a bit more cautious when playing at higher difficulty levels because you have significantly less leeway to make mistakes.

For players who have extensive experience playing third-person shooters, or for those intending to run through the game with a partner, we recommend starting on the Hard difficulty. The challenge might be frustrating at first, but the chance to make more money and rank up faster is not something to take lightly. The sooner you build up ranks, the sooner you can gain access to better weapons in the Armory.

Mission 1: New Blood
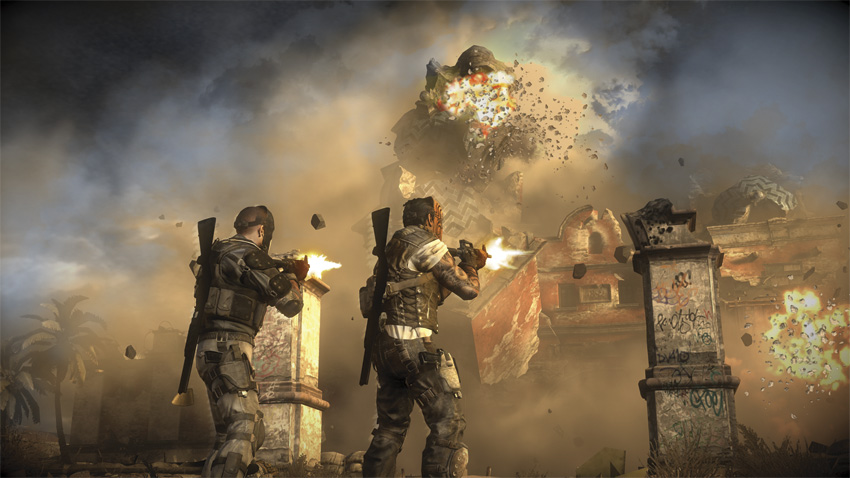
Hired by the mayor of La Puerta, T.W.O. has deployed its finest to the city in order to protect their client against potential assassination attempts. It should be a simple job; just a bunch of hired muscle putting on a dog and pony show so that locals inclined toward violent conflict resolution don’t get uppity. No complications. Nobody is going to do any shooting today.

Right.

Keep reading with a free account

The first 3 sections of Army of Two: The Devil's Cartel are open to everyone. An account opens the rest of it, and every other guide in the archive. It's free, and there's nothing to buy.

Bought guides on the old Prima Games site? Your account and every guide you own moved here, so there's nothing to buy again. Sign in.

Create a free account Or browse our free guides

PreviousConcept Art NextChapter 1: Protection