
Prima Games eGuides
primagames.com Browse Redeem a code Help
Army of Two: The Devil's Cartel eGuide
Sign in My Guides

Sign in or create an account

We'll email you a link. No password needed, and if you don't have an account yet, the link makes one.

By creating an account or signing in, you agree to our Terms of Service and Privacy Policy.

Have a password?

Had an account on the old eGuides site, or a code from a printed guide? Help and troubleshooting

Sign in with a password

By signing in, you agree to our Terms of Service and Privacy Policy.

Check your email

A sign-in link is on its way. It works once and expires in 15 minutes. Open it and you're in, with an account if you didn't already have one.

Contents

  • Essentials
    • Welcome Back to Tactical Worldwide Operations
      • Welcome Back to Tactical Worldwide Operations
    • Operational History and Character Bios
      • Operational History and Character Bios
    • Tactical Operations Manual
      • Tactical Operations Manual
    • Two Gear
      • The Gear Makes The Man
      • Modifications
      • Weapon Skins
      • Tactical Gear
      • Tattoos
    • The Enemy
      • The Enemy
    • Contracts
      • Contracts
    • Achievements and Trophies
      • Achievements and Trophies
    • Concept Art
      • Concept Art
  • Walkthrough
    • Mission 1: New Blood
      • Special Callouts
      • Chapter 1: Protection
      • Chapter 2: Tutorial
    • Mission 2: Cause And Effect
      • Chapter 3: Permission to Engage
      • Chapter 4: Foxhunt
      • Chapter 5: Split Decision
      • Chapter 6: Baptism by Fire
    • Mission 3: Rally Point
      • Chapter 7: Politics in Action
      • Chapter 8: Picking Up the Pieces
      • Chapter 9: Into the Chaos

      • Chapter 10: Riot Act

      • Chapter 11: Urban Chaos

    • Mission 4: Outside Contact
      • Chapter 12: Fuel for the Fire

      • Chapter 13: Observe and Detect

      • Chapter 14: Local Heroes

      • Chapter 15: Stronghold Assault
      • Chapter 16: Suicide Run

    • Mission 5: Last Resort
      • Chapter 17: Holiday Retreat

      • Chapter 18: Room Service

    • Mission 6: Salvation
      • Chapter 19: Among the Dead

      • Chapter 20: Open Season

      • Chapter 21: Rest for the Wicked

      • Chapter 22: Shadows Walk

      • Chapter 23: Into the Light

      • Chapter 24: Loose Cannon

      • Chapter 25: Special Delivery

    • Mission 7: Enemy Territory
      • Chapter 26: Behind Enemy Lines

      • Chapter 27: Guardian Angel

      • Chapter 28: Manhunt

      • Chapter 29: Fight for the Future

      • Chapter 30: Desperate Measures

      • Chapter 31: Objective Lost

    • Mission 8: Narco Hell
      • Chapter 32: Scavengers

      • Chapter 33: Game Face

      • Chapter 34: A Ray of Sun

      • Chapter 35: Rooftop Rampage

      • Chapter 36: Adrenaline High

      • Chapter 37: Mad Science

      • Chapter 38: The Butcher

    • Mission 9: Assault
      • Chapter 39: The Assault

      • Chapter 40: Down But Not Out

      • Chapter 41: Get Her Back

      • Chapter 42: Race to the Quarry

      • Chapter 43: Fish in a Barrel

    • Mission 10: Confrontation
      • Chapter 44: Burning Bridges

      • Chapter 45: No Return

      • Chapter 46: A Hero's Rescue

      • Chapter 47: The Lion's Den

      • Chapter 48: Salem On Trial

      • Chapter 49: The Devil's Due

  • Overkill Vids
    • Mission Overkill Videos
      • Mission Overkill Videos

Army of Two: The Devil's Cartel Guide › Walkthrough › Mission 10: Confrontation

Chapter 47: The Lion's Den


Chapter 47: The Lion’s Den
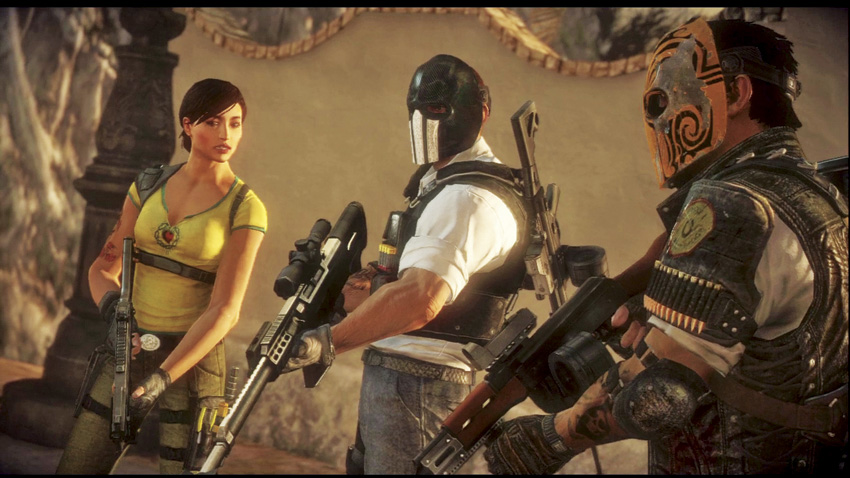
Fiona has managed to escape on her own, and rejoins with Alpha and Bravo as they enter the cartel compound. She insists on staying with the T.W.O. operatives, unwilling to flee while Bautista is still alive. She’s in it for the long haul.

Right out of the gate, you start with a dual breach sequence. A pair of elites and a Brute armed with a grenade launcher advance towards you. You have very little time before you’re back to full speed, so make absolutely certain that these enemies go down.

The fight to secure this grand hall will require you to deal with elites on both the ground level and the second floor balconies . Check to your left after the breaching sequence to eliminate any elites that may be flanking you, and then immediately get to cover behind the nearby pillars and start handling the hostiles on the ground floor. If you equipped a sniper rifle (again, the AMR-50 is the king of counter-sniping), then you can make short work of any elite that exposes themselves.

Staying on the ground level is not advised. The elites, especially the ones on the second floor, are very liberal with their grenades. They can toss grenades behind your cover with alarming frequency. Once you get a chance, get to the second floor and continue taking down hostiles.

As you cut through the enemies, more elites and another Brute enter the area through a door on the second floor . Ideally, you want to already be on the second floor yourself, which makes it much easier to get good shooting angles on these hostiles. These reinforcements are the last Los Soldados that must be dealt with in the grand hall before you can call the area secure.

OVERKILL

Don’t be surprised if you have to use Overkill to save yourself or your partner from one of the many grenades the elites will toss your way. The nature of the room and the general enemy disposition makes it a little tough to score large combo chains of kills, but the defensive properties of Overkill can help you survive the initial frantic moments of the firefight.

As Alpha, Bravo, and Fiona ready themselves to leave the room and search the rest of the compound, Esteban Bautista suddenly appears before them. He fails to escape before getting disarmed and being forced to his knees. Even in the face of impending death at the hands of the woman he kidnapped five years before, he is thoroughly unrepentant and proud of who and what he is. What follows is well deserved.

Taunting you over the compound’s loudspeakers, Salem applauds your efforts thus far, but recommends that you find cover and a way out of the area. A small army of cartel elites is headed your way. Fortunately, you start next to some excellent defensive cover and have a perfect line of sight on the door the elites and their Brute escort try to breach . After they’re finished, push through to the corridor beyond.

Your first order of business is to fight your way down the corridor until you reach the central fountain. Use the fountain for cover while you clear out any resistance on the other side of it, farther down the corridor . As you finish dealing with these initial hostiles, another group of elites and a Brute show up behind you . Transition to the other side of the fountain as quickly as you can, and then take out the second group.

More elites and yet another Brute attack from the direction the first group of hostiles were located . Take them out, and then advance down the hall. You’ll eventually reach a small stairwell on the left side of the corridor where a Shield Soldier and another elite squad make their last stand in hopes of stopping you. The chapter ends after you walk over their corpses.

OVERKILL

Narrow corridor? Check. Lots of hostiles cramped together? Check. Without Overkill, the two-front assault in the corridor can be quite challenging to overcome. The amount of dust and debris that gets kicked up over the course of the fighting, combined with the sunlight coming through the windows, can make it very difficult to spot targets. Use staggered Overkills to rip through this chapter’s last firefight with equal speed and fury.

Keep reading with a free account

The first 3 sections of Army of Two: The Devil's Cartel are open to everyone. An account opens the rest of it, and every other guide in the archive. It's free, and there's nothing to buy.

Bought guides on the old Prima Games site? Your account and every guide you own moved here, so there's nothing to buy again. Sign in.

Create a free account Or browse our free guides

PreviousChapter 46: A Hero's Rescue
 NextChapter 48: Salem On Trial