
Prima Games eGuides
primagames.com Browse Redeem a code Help
Army of Two: The Devil's Cartel eGuide
Sign in My Guides

Sign in or create an account

We'll email you a link. No password needed, and if you don't have an account yet, the link makes one.

By creating an account or signing in, you agree to our Terms of Service and Privacy Policy.

Have a password?

Had an account on the old eGuides site, or a code from a printed guide? Help and troubleshooting

Sign in with a password

By signing in, you agree to our Terms of Service and Privacy Policy.

Check your email

A sign-in link is on its way. It works once and expires in 15 minutes. Open it and you're in, with an account if you didn't already have one.

Contents

  • Essentials
    • Welcome Back to Tactical Worldwide Operations
      • Welcome Back to Tactical Worldwide Operations
    • Operational History and Character Bios
      • Operational History and Character Bios
    • Tactical Operations Manual
      • Tactical Operations Manual
    • Two Gear
      • The Gear Makes The Man
      • Modifications
      • Weapon Skins
      • Tactical Gear
      • Tattoos
    • The Enemy
      • The Enemy
    • Contracts
      • Contracts
    • Achievements and Trophies
      • Achievements and Trophies
    • Concept Art
      • Concept Art
  • Walkthrough
    • Mission 1: New Blood
      • Special Callouts
      • Chapter 1: Protection
      • Chapter 2: Tutorial
    • Mission 2: Cause And Effect
      • Chapter 3: Permission to Engage
      • Chapter 4: Foxhunt
      • Chapter 5: Split Decision
      • Chapter 6: Baptism by Fire
    • Mission 3: Rally Point
      • Chapter 7: Politics in Action
      • Chapter 8: Picking Up the Pieces
      • Chapter 9: Into the Chaos

      • Chapter 10: Riot Act

      • Chapter 11: Urban Chaos

    • Mission 4: Outside Contact
      • Chapter 12: Fuel for the Fire

      • Chapter 13: Observe and Detect

      • Chapter 14: Local Heroes

      • Chapter 15: Stronghold Assault
      • Chapter 16: Suicide Run

    • Mission 5: Last Resort
      • Chapter 17: Holiday Retreat

      • Chapter 18: Room Service

    • Mission 6: Salvation
      • Chapter 19: Among the Dead

      • Chapter 20: Open Season

      • Chapter 21: Rest for the Wicked

      • Chapter 22: Shadows Walk

      • Chapter 23: Into the Light

      • Chapter 24: Loose Cannon

      • Chapter 25: Special Delivery

    • Mission 7: Enemy Territory
      • Chapter 26: Behind Enemy Lines

      • Chapter 27: Guardian Angel

      • Chapter 28: Manhunt

      • Chapter 29: Fight for the Future

      • Chapter 30: Desperate Measures

      • Chapter 31: Objective Lost

    • Mission 8: Narco Hell
      • Chapter 32: Scavengers

      • Chapter 33: Game Face

      • Chapter 34: A Ray of Sun

      • Chapter 35: Rooftop Rampage

      • Chapter 36: Adrenaline High

      • Chapter 37: Mad Science

      • Chapter 38: The Butcher

    • Mission 9: Assault
      • Chapter 39: The Assault

      • Chapter 40: Down But Not Out

      • Chapter 41: Get Her Back

      • Chapter 42: Race to the Quarry

      • Chapter 43: Fish in a Barrel

    • Mission 10: Confrontation
      • Chapter 44: Burning Bridges

      • Chapter 45: No Return

      • Chapter 46: A Hero's Rescue

      • Chapter 47: The Lion's Den

      • Chapter 48: Salem On Trial

      • Chapter 49: The Devil's Due

  • Overkill Vids
    • Mission Overkill Videos
      • Mission Overkill Videos

Army of Two: The Devil's Cartel Guide › Walkthrough › Mission 4: Outside Contact

Chapter 13: Observe and Detect


Chapter 13: Observe and Detect
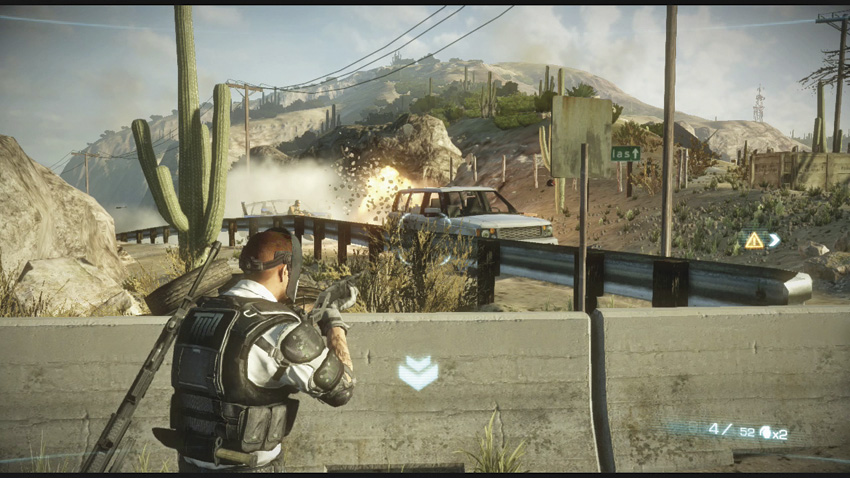
Leave the gas station and follow the path indicated by the waypoint until you reach a wall. Alpha and Bravo need to help each other up. As you make the climb, cartel vehicles pull up near your position and unload more troops to fight. Use the retaining walls near the road for cover, and try to mow the enemy down before they have a chance to fight back.

As you head toward the radar station that your contact calls out, an MMG opens fire on you. You’re prompted to use a truck for cover. Alpha and Bravo must push the truck toward the station until they reach other pieces of viable cover. In addition to the MMG itself, a number of cartel thugs are scattered throughout the area directly in front of the radar station, and they will attempt to flank you.

Tip

If you took the advice given in the previous chapter and equipped a weapon suitable for long-range wetwork before starting this chapter, you can use the truck for cover as you move forward, occasionally popping out to snipe a thug who sticks his head out for too long. In this way, you can thin out the enemy forces a little bit before you start to deal with the MMG itself.

Once you manage to get the truck as far forward as you’re allowed to, you can choose from two main paths up the hill: the left and right flanks of the MMG , respectively. By the time you reach this point, troops will have dispersed to cover the paths. In order to successfully advance up the paths without drawing the attention of the MMG and any troops in the area, someone is going to have to draw aggro from everyone in the area while the other merc advances as quickly as possible up the hill. Then, try to find cover from which you can either draw the MMG’s attention or take out its gunner from.

With the MMG finally dealt with, you’re not quite done. More cartel thugs begin to run out of the radar station in a large-scale counter attack, making the small lot in front of the building a very hazardous place to be. However, Alpha or Bravo can man the MMG and turn it on these goons. If you’re fast enough, you can use a hail of bullets to prevent them from even leaving the building. Alpha and Bravo will call the area clear once you finish off the enemy. Enter the radar station to reach the new rendezvous point.

OVERKILL

The battle for the radar station is a prime place to use Overkill if you can. It certainly makes dealing with the gun easier, and the sheer number of targets can really boost your Overkill score.

Keep reading with a free account

The first 3 sections of Army of Two: The Devil's Cartel are open to everyone. An account opens the rest of it, and every other guide in the archive. It's free, and there's nothing to buy.

Bought guides on the old Prima Games site? Your account and every guide you own moved here, so there's nothing to buy again. Sign in.

Create a free account Or browse our free guides

PreviousChapter 12: Fuel for the Fire
 NextChapter 14: Local Heroes