
Pilot Boosts
The new Pilot boosts are a derivative of the Burn Card system from Titanfall. These boosts give Pilots an additional tactical advantage range, including access to special weapons like Ticks and the Smart Pistol. Once a boost is selected (in the Identity menu) it must be earned before it can be deployed in combat. Progress toward earning a boost is tracked on the Titan meter, located in the lower left corner of the HUD. While you make gradual progress toward your boost (and Titan) over time, you can expedite the process by scoring kills and helping your team attack and defend objectives. When your boost is available, a message appears on the HUD. Some boosts are best deployed right away, while others are situational. Reference this section to understand how the different boosts function and when to activate them.
Amped Weapons

| Description | Supercharge your primary and secondary weapons. |
| Activation Cost | 80 percent |
| Unlocks at | 1 |
| Cost | N/A |
Field Notes
Triggering the Amped Weapons boost gives you a huge advantage in any firefight. Taking on a Pilot close to your skill level can come down to who gets the lucky shots, so why leave it to chance? The Amped Weapon boost does not go away until you are killed, once triggered, so if you’re in a decent situation go ahead and activate the Amped Weapons. This is an all the time-type boost, so do your best to earn this boost and become a very powerful weapon on the battlefield.
There are some specific weapons that might benefit from Amped Weapons a little more than others. Any of the submachine guns in the game is great for amping because boosting a weaker weapon with a major advantage in the fire rate department gives it a whole new shine. It is probably not a great idea to use Amped Weapons on the Kraber, as it is already a one-shot kill.
Battery Backup
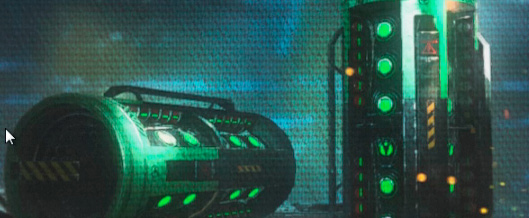
| Description | Give yourself a free battery. |
| Activation Cost | 80 percent |
| Unlocks at | 28 |
| Cost | 250 |
Field Notes
Battery Backup is a useful boost, especially in a pinch. There are many ways to get a battery, and some game modes have greater opportunities than others, but this boost comes in handy for game modes without minions to gather batteries from. In most cases, your only method of receiving a battery is to steal it from an enemy Titan, which can be extremely dangerous. Earn your boost by going after enemy Pilots or firing at Titans from a distance. This will get you close to dropping your own Titan where you can place the battery and have a major advantage.
Giving yourself a battery in a situation where you really need a final push is helpful in game modes like Amped Hardpoint. Being able to use your battery for a variety of things leaves a lot of options for use, but some extra time with your Titan will do some good.
Smart Pistol
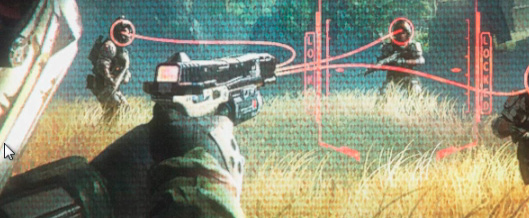
| Description | Locks onto nearby targets for guaranteed hits; equipped with two 12-round magazines (replaces secondary weapon). |
| Activation Cost | 60 percent |
| Unlocks at | 42 |
| Cost | 250 |
Field Notes
One of the most anticipated features in the game is the return of the Smart Pistol. In Titanfall 2, the Smart Pistol is in the boosts section, which means you have to earn it. However, that means there is a good chance that you will have the Smart Pistol at least once per match, which is extremely powerful. The Smart Pistol can be effectively used in every game mode on every map. Just understand that it will replace your secondary weapon, which is important if you have an anti-Titan weapon.
With enough rounds to keep you alive for awhile, it is important to know when to use the Smart Pistol. Fortunately, there is no wrong time to whip out this powerful boost because, even if you’re near a Titan, you always have the option to run away. The Smart Pistol funtions best when you give it time to lock on to enemy targets, but be careful not to wait just because you want to get the most out of it. Using the Smart Pistol with one lock is fine, especially if it will get you out of a jam. If you pair the Smart Pistol up with Cloak, you can sneak up on a group of enemies and allow the weapon some time to get the maximum number of locks possible, taking out every single one without giving them a chance to react.
Radar Jammer

| Description | Scramble the enemy’s radar. |
| Activation Cost | 40 percent |
| Unlocks at | 31 |
| Cost | 250 |
Field Notes
Radar Jammer is pretty cool when it comes to the general idea of what it does. However, there are some pretty key points on when to use it. This boost will scramble the enemy’s minimap really well, making the map unusable while activated. Jamming the enemy’s radar is ideal for any game mode with a location specific objective, and best used when the enemy is indoors.
Since it is a boost, it will take a little bit of time to earn it, so rushing straight to the other team’s objective point is not where Radar Jammer will benefit you most. This does not necessarily mean that you should keep attacking until you receive your boost and then use it on the next try, but that will work. The most ideal time to use the Radar Jammer is after you’ve taken out most of a single wave of enemies, putting the majority of them in a respawn timer. This method isn’t easy by any means, but if you work with your team and pull this off right before you trigger Rader Jammer, you can all but guarantee an objective capture.
Hard Cover

| Description | Reinforced Pilot-sized particle shield. |
| Activation Cost | 20 percent |
| Unlocks at | 46 |
| Cost | 250 |
Field Notes
Hard Cover provides an excellent form of improvised cover that can be used absolutely anywhere you can stand. This boost is perfect for those that serve the role as the defender for the team. If you are someone that likes to make a base and call it your home, Hard Cover is perfect for you, especially when the enemy team decides to make a big push on your position. Pair this boost with the Tank Pilot loadout and you can reinforce the tank more than it already is, so to speak.
Not only is Hard Cover used for defenders, it is also extremely useful for snipers that really need to get their shot off, even if it means taking it from a dangerous position. Know where you need to take the shot from and pop your Hard Cover, take the shot, and get out of dodge. Staying in that position too long is sketchy, considering there is a timer on your particle shield, and it can be taken down with enough damage. Stay aware of your surroundings and use this to its biggest advantage.
Ticks
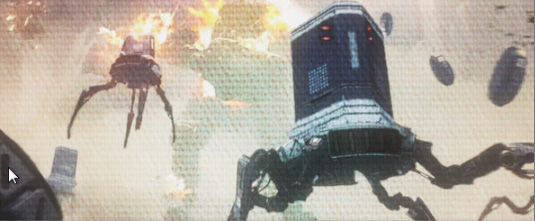
| Description | Spider-like drones actively seek out enemies before self-detonation. |
| Activation Cost | 65 percent |
| Unlocks at | 6 |
| Cost | 250 |
Field Notes
Ticks are perfect for players who like to set and forget equipment for a later payoff. You get two Ticks when you earn your boost, and it is best to place them into separate locations so that they do not find the same target. The Ticks will seek out a target, which more than likely will be a Pilot, unless you’re playing a game mode with NPC enemies. Because of modes such as Bounty Hunt, you should be careful not to toss these Ticks too close to the minions, thus wasting them.
Pilot Sentry
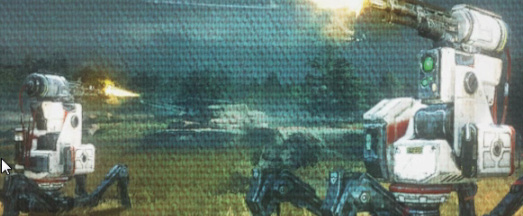
| Description | Anti-Personnel automated turret. |
| Activation Cost | 72 percent |
| Unlocks at | 17 |
| Cost | 250 |
Field Notes
These anti-personnel turrets are perfect for almost every situations, but they need to be placed properly. Pilot Sentries cannot damage Titans, but they can attack Grunts and Spectres alike. Think of the Pilot Sentry as a companion, instead of a “set and forget”-type item. This boost has a few different uses, especially when you’re defending a location. As a companion, the Pilot Sentry can be your blind spot defender. This has a huge use in game modes like Amped Hardpoint because it may only take one Pilot to take over a hardpoint. Earn your bonus and attack the other team’s base. This doesn’t make it easy, but you will have a better chance if you are the only one on your team in enemy territory.
The Pilot Sentry can all so be another gunner on the Drop Zones for Bounty Hunt. The objective for Bounty Hunt is to collect as many bounties as fast as possible, so why not have another gunner helping you out? Beware that the Pilot Sentry only lasts thirty seconds, so placing it early won’t get you the efficiency you need.
Titan Sentry
| Description | Anti-Titan automated turret. |
| Activation Cost | 35 percent |
| Unlocks at | 34 |
| Cost | 250 |
Field Notes
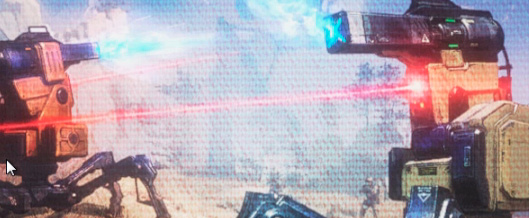
The Titan Sentry is an automated “companion” that you can set and help attack the enemy. However, very much unlike the Pilot Sentry, is it is only focused on enemy Titans, which means it has a very specific use—but there are several ways to use this effectively. The Titan Sentry is not a high damage weapon, meaning it more than likely won’t take an entire Titan armor down to zero before the enemy finds it and destroys it. It does mean that the sentry will do enough damage to annoy the Pilot inside and distract them from being able to fully do their job. In many cases distraction is all you need to take advantage of the enemy.
Place a Titan Sentry on one side of a choke point while you and/or your Titan are on the other side of it. If you place them all at the right time, the enemy Titan will have three different enemies firing upon them, but they will not know that they are all yours. Paired with your auto-Titan, whip out your anti-Titan weapon to become part of this trio. However, piloting the Titan might be just as effective; this part it up to you.
Phase Rewind

| Description | Phase Shift to a location visited shortly before activation. |
| Activation Cost | 25 percent |
| Unlocks at | 44 |
| Cost | 250 |
Field Notes
Unlock your ultimate Phase ability with Phase Rewind. If you’ve ever wanted to know what it’s like to time travel right after you’ve realized you’ve made a big mistake, this is the closest you can get in Titanfall 2. Activating Phase Rewind will literally take you back to where you were just a few seconds prior. Using this boost is one of the more difficult boosts to master, but once you get it, you can become virtually untouchable.
Using Phase Rewind requires some very quick reflexes, but sometimes you can plan out a very useful way to utilize the Phase Rewind. Being able to click your Phase Rewind at a moment’s notice will serve you the best, as it can save your life. However, there is another use that makes it very similar to the grappling hook. When you rodeo an enemy Titan to steal their battery, it will explode you in the opposite direction. However, if you use Phase Rewind, you can appear right back on the back of the Titan to toss a grenade right where you just stole the battery from.
Map Hack

| Description | Reveal enemies to your entire team. |
| Activation Cost | 70 percent |
| Unlocks at | 23 |
| Cost | 250 |
Field Notes
Map Hack is arguably one of the most dangerous boosts that can be used against Pilots. In almost every mode, short of Last Titan Standing, this boost will give you a major advantage over the entire enemy team. Obviously, Map Hack is great for game modes like Pilots vs. Pilots because it allows you to pinpoint your targets and go after them without revealing your location. What may not be so obvious is in a game mode like Capture the Flag, where activating your boost can help you and your team pinpoint the enemy locations and avoid them while running the enemy flag back to your base.
Map Hack has a limited amount of time, so it is pertinent that you activate it when you really need it. Activate Map Hack when you’re locked and loaded but not too far from the action because you don’t want to waste time getting to the enemy position and lose your power too soon. A good rule of thumb is to activate it about twenty seconds after moving forward from your spawn. This should get you close enough to make Map Hack the most effective.
Holo Pilot Nova

| Description | Create multiple decoys of yourself. |
| Activation Cost | 40 percent |
| Unlocks at | 50 |
| Cost | 250 |
Field Notes
Holo Pilot Nova is a great boost for all loadouts for different reasons. The most useful loadout that this boost can be on is a sniper loadout. Getting snuck up on from behind is still dangerous, even with Holo Pilot, but it can really help against counter-snipers. If you’re not being tracked yet, but you see another sniper in the distance, it is safe to take a precaution and activate your Holo Pilot before you take your shot. This way, if you were to miss and the sniper swings his or her weapon in your direction, he or she will have several targets to choose from, giving you another chance to take a shot while the decide. For Pilots on the move, use Holo Pilot to throw trackers off as you break off in a direction they may not expect.
Dice Roll
| Description | A randomly chosen boost is activated upon use. |
| Activation Cost | 36 percent |
Field Notes
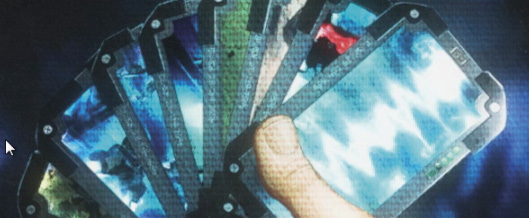
The Dice Roll is almost literally a roll of the dice, but it is very much a gamble on what you might get. Granted, there are very good uses for each individual boost in the game, sometimes you may just not have a use for some boosts at the time you acquire said boost. The Dice Roll has a major advantage, however, and this may convince a good number of players to equip this boost, instead of a specific one. The requirement to earn the Dice Roll is relatively low, which means you can earn it early. This is great because, if by chance you get a boost that would normally require above 60 percent, you are truly given a gift from the randomness.