
Advanced Customization
Now that you know how all the Pilot weapons, abilities, and kits function, it’s time to put it all together. Your ability to customize your Pilot is largely determined by your progression. The more you level up, the more customization options become available. Here, we take a look at some sample loadouts. While you may find some of these loadouts beneficial, feel free to tailor them to your own specific needs. These loadouts should only serve as a starting point, provided to inspire your own Pilot configurations.
Specialized Loadouts
What’s your role? These loadouts give you some options to think about when customizing your Pilot. Do you want to rush the enemy and engage at close range? Or perhaps you’d rather skirt around the perimeter of the map and pick off enemies with stealth and precision. Here are a few loadouts capable of filling specific roles on your team. Feel free to tweak and further customize them to match your style of play.
Hyper-Flight Hero
Loadout
| Equipment | Slot/Name | Description |
|---|---|---|
 |
Tactical: Stim | Quickly heals and boosts your speed for a short time. |
 |
Ordnance: Arc Grenade | Stuns Pilots and blinds Titans. |
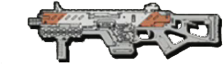 |
Primary Weapon: CAR | Consistent recoil SMG. |
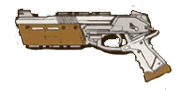 |
Secondary Weapon: SA-3 Mozambique | Controlled spread triple barrel shotgun pistol. |
 |
Kit 1: Fast Regen | Health regeneration begins sooner. |
 |
Kit 2: Low Profile | No jump jet trails and silent Titan rodeo climbing. |
This loadout is ideal for moving from point-to-point quickly without being an easy target. What makes that extremely important for small- to medium-sized maps is that even though there is a large amount of cover, moving from one to the other is extremely dangerous. Since this is an ideal loadout for getting from point-to-point, like cover to cover, it makes the Hyper-Flight Hero the loadout for the ultimate point-to-point game mode: Capture the Flag.
Mid-Range Master
Loadout
| Equipment | Slot/Name | Description |
|---|---|---|
 |
Tactical: Grapple | Grappling hook for getting to out of reach places quickly. |
 |
Ordnance: Firestar | Incendiary throwing star. |
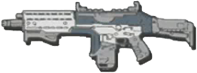 |
Primary Weapon: Hemlock | Burst-fire assault rifle. |
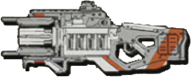 |
Secondary Weapon: Charge Rifle | Charged precision beam Anti-Titan sniper. |
 |
Kit 1: Phase Embark | Quickly teleport into your Titan. |
 |
Kit 2: Wallhang | Hang onto walls by aiming while wallrunning. |
The Mid-Range Master is ideal for those that wish to focus fully on dealing pure damage to their enemies. The Grapple’s main purpose is simply to get the angle on your opponent in any situation, quickly. Keep in mind the primary weapon that you have equipped when choosing the position to grapple to. Equipped with the Hemlock, you don’t want to get to close to the enemy, so keep some distance and control the battlefield with the Mid-Range Master.
Shock Seeker
Loadout
| Equipment | Slot/Name | Description |
|---|---|---|
 |
Tactical: Pulse Blade | Expose enemies through surfaces with this sonar pulse-emitting throwing knife. |
 |
Ordnance: Satchel | Two remotely detonated heavy explosives. |
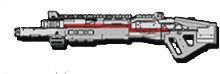 |
Primary Weapon: Mastiff | Auto-loading shotgun with wide spread. |
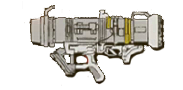 |
Secondary Weapon: Archer | Rocket launcher with anti-Titan lock-on. |
 |
Kit 1: Power Cell | Tactical is more readily available (faster cooldown). |
 |
Kit 2: Kill Report | Enemy death locations marked by skulls on the HUD. |
The Shock Seeker is the ultimate in-your-face loadout that is not great at range, but depending on the map, there is no need to engage at a distance. The Pulse Blade is something that allows you to see around the corners of a major conjunction through which you are about to travel. Because of the Power Cell in Kit 1, you are able to use Pulse Blade often, and you should. Noticing a squad around the corner you’re about to walk through doesn’t need to be a sacrifice, and that’s why you have high explosive satchels at your disposal. Act quickly and blow them sky high.
Phase Pilot
Loadout
| Equipment | Slot/Name | Description |
|---|---|---|
 |
Tactical: Phase Shift | Teleport into an alternate space for a short time. |
 |
Ordnance: Gravity Star | Pulls in enemies and projectiles before exploding. |
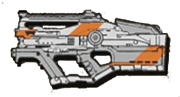 |
Primary Weapon: L-Star | Rapid-fire energy LMG. |
|
Secondary Weapon: Charge Rifle | Charged precision beam Anti-Titan sniper. |
|
Kit 1: Phase Embark | Quickly teleport into your Titan. |
 |
Kit 2: Hover | Aiming while airborne allows you to hover. |
The Phase Pilot loadout is a powerful offensive loadout and is great for maps with mid- to long-range distances. There is a clear theme with this loadout, but there is a tactical explanation as to why. For the most part, the Phase Pilot is designed for mid-ranged firefights, but equipped with Phase Shift, the loadout is designed to evade close encounters as your enemy attempts to flank or overwhelm your position. Phase Shift past them and drop a Gravity Star to deter them as you create some distance and make them pay for pushing your position.
Rough Recon
Loadout
| Equipment | Slot/Name | Description |
|---|---|---|
 |
Tactical: Holo Pilot | Create a holographic copy of yourself mimicking your actions when activated. |
 |
Ordnance: Electric Smoke Grenade | Carpets an area with electric smoke. |
 |
Primary Weapon: Kraber | Scoped heavy rifle. |
|
Secondary Weapon: Charge Rifle | Charged precision beam anti-Titan sniper. |
|
Kit 1: Fast Regen | Health regeneration begins sooner. |
|
Kit 2: Kill Report | Enemy death locations marked by skulls on the HUD. |
Rough Recon is a strong loadout that requires a skilled player because this is a very specialized combination. Holo Pilot takes some time to restore its use, but that is not a problem, as you should only need it when you’re in danger. The combination of Holo Pilot and Kill Report should allow you to have a good survey of the where the action is and roughly where the enemies might be coming from. But in case there aren’t any reports coming in, you can be ready to launch your Holo Pilot and buy some time for you to get away. Both your primary weapon and your secondary weapon are meant for you to keep your distance, so don’t be afraid to flee when the things are getting too hot and you need to get out of the kitchen.
Rough Recon v2.0
Loadout
| Equipment | Slot/Name | Description |
|---|---|---|
 |
Tactical: Holo Pilot | Create a holographic copy of yourself mimicking your actions when activated. |
|
Ordnance: Electric Smoke Grenade | Carpets an area with electric smoke. |
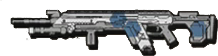 |
Primary Weapon: Longbow-DMR | Semi-auto sniper. |
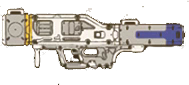 |
Secondary Weapon: Thunderbolt | Fires a powerful ball of electricity. |
|
Kit 1: Fast Regen | Health regeneration begins sooner. |
|
Kit 2: Kill Report | Enemy death locations marked by skulls on the HUD. |
Rough Recon is a strong loadout that requires a skilled player because this is a very specialized combination. Holo Pilot takes some time to restore its use, but that is not a problem, as you should only need it when you’re in danger. The combination of Holo Pilot and Kill Report should allow you to have a good survey of the where the action is and roughly where the enemies might be coming from. But in case there aren’t any reports coming in, you can be ready to launch your Holo Pilot and buy some time for you to get away. Both your primary weapon and your secondary weapon are meant for you to keep your distance, so don’t be afraid to flee when things are getting too hot and you need to get out of the kitchen. The difference between this version and its previous version is the weaponry. For certain maps, there is no need for the extremely powerful Kraber. Because of the Kraber’s fire rate, being able to get off a second shot before your enemy finds cover or even charges after you is crucial, especially because the distance that your opponent needs to close is smaller.
Ghost
Loadout
| Equipment | Slot/Name | Description |
|---|---|---|
 |
Tactical: Cloak | Become nearly invisible. Cloak has increased effectiveness versus Titans. |
|
Ordnance: Arc Grenade | Stuns Pilots and blinds Titans. |
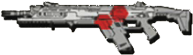 |
Primary Weapon: R-201 | Full-auto and high accuracy. |
|
Secondary Weapon: Charge Rifle | Charged precision beam anti-Titan sniper. |
|
Kit 1: Phase Embark | Quickly teleport into your Titan. |
 |
Kit 2: Low Profile | No jump jet trails and silent Titan rodeo climbing. |
The Ghost loadout is ideal for a full-on offensive mission with the ability to back off if things get desperate. Use Cloak as a way to get closer to your enemy and always take the positioning of you and your opponent as priority. The purpose of the R-201 is so that you are able to keep your distance from enemy Pilots, due to the fact that you are much more visible, even while Cloaked, up close. The same goes for why you have the Charge Rifle at the ready, just in case you must take down a Titan. You may be faced with no other option than to flee, because it’s much better to flee and fight another day rather than give the other team a Pilot kill and make it easier for them to call in their Titans. Always know where your exits are, and as soon as you think things are looking grim, activate your Cloak. Run toward the exit, and don’t be afraid to jump and get acrobatic on your way out. That’s what Low Profile is for.
Ghost v2.0
Loadout
| Equipment | Slot/Name | Description |
|---|---|---|
|
Tactical: Cloak | Become nearly invisible. Cloak has increased effectiveness versus Titans. |
|
Ordnance: Arc Grenade | Stuns Pilots and blinds Titans. |
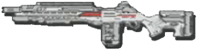 |
Primary Weapon: G2 | Semi-auto precision rifle. |
|
Secondary Weapon: Archer | Rocket launcher with anti-Titan lock-on. |
|
Kit 1: Phase Embark | Quickly teleport into your Titan. |
|
Kit 2: Low Profile | No jump jet trails and silent Titan rodeo climbing. |
The Ghost loadout is ideal for a full-on offensive mission with the ability to back off if things get desperate. Use Cloak as a way to get closer to your enemy and always take the positioning of you and your opponent as priority. The difference between Ghost and Ghost v2.0 is the choice in weaponry; both the primary weapon and secondary weapon are chosen for a slightly longer effective range. Certain maps require a little more range than others, but Ghost is still a very powerful loadout so with a few tweaks it is a great loadout for every map. You may be faced with no other option than to flee, because it’s much better to flee and fight another day rather than give the other team a Pilot kill and make it easier for them to call in their Titans. Always know where your exits arem and as soon as you think things are looking grim, activate your Cloak. Run toward the exit, and don’t be afraid to jump and get acrobatic on your way out. That’s what Low Profile is for.
Tank
Loadout
| Equipment | Slot/Name | Description |
|---|---|---|
 |
Tactical: A-Wall | Pilot-sized particle shield that amps outgoing shots. Destroyable only at its protected base. |
 |
Ordnance: Frag Grenade | Cookable explosive ordnance. |
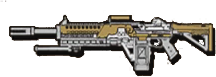 |
Primary Weapon: Devotion | Ramps up fire rate over time. |
|
Secondary Weapon: Archer | Rocket launcher with anti-Titan lock-on. |
 |
Kit 1: Phase Embark | Quickly teleport into your Titan. |
 |
Kit 2: Hover | Aiming while airborne allows you to hover. |
The Tank loadout is built just as its name implies: a tank. You can’t increase the health of your Pilot in any way possible, so there is only a couple ways to defend yourself from direct fire. Dropping a particle shield that you are able to fire outwardly from is a great way to give you the advantage against enemy Pilots. The best areas to play this loadout are out of the reach of Titans and right in the pathway of Pilots. Pilots will want to take alternate routes that Titans cannot take, and you are the Pilot-sized Titan that can take more than your opponent. The fact that the Devotion gains a faster fire rate the longer you hold the trigger, you are in the role to hold an entire sector with only your primary weapon and your particle shield.
Grapple Glider
Loadout
| Equipment | Slot/Name | Description |
|---|---|---|
 |
Tactical: Grapple | Grappling hook for getting to out of reach places quickly. |
 |
Ordnance: Firestar | Incendiary throwing star. |
|
Primary Weapon: Mastiff | Auto-loading shotgun with wide spread. |
|
Secondary Weapon: Thunderbolt | Fires a powerful ball of electricity. |
 |
Kit 1: Ordnance Expert | Ordnance is more readily available (quicker cooldown)and enables you to see the projected trajectory of your ordnance. |
 |
Kit 2: Wallhang | Hang onto walls by aiming while wallrunning. |
This loadout is meant for situation where you’re staying mobile at all times in an urban environment. You are able to use your Grapple twice at a full charge, and when up against a Titan, helmet to nose, being able to find the nearest high place and pull yourself out of harm’s way fast can save your Pilot’s life and keep you close to the objective. Firestar is great for covering your tracks when attempting to get away. With the use of Ordnance Expert, it is easier to throw the Firestar right at the enemy Titan’s nose, blinding the Pilot inside. The Grapple Glider is designed for swift, close-quarters offensive strikes. Using the wide-spread shot of the Mastiff, gather as much momentum as possible by swinging around corners and sliding to keep up your speed. Make sure you have enough speed because attacking your enemy straight on is extremely dangerous. But going fast enough makes you a difficult target to even see.