
The Legend of Zelda: Tri Force Heroes Guide Accessorize
Tools of the Trade
In this chapter, you will find descriptions for all of the Sub-Weapons, Outfits, and Materials in the game, which happen to be all of Link’s tools of the trade in the game. This section isn’t about where to find these items, but about what they are, what they look like, and what Madame Couture thinks about them. Enjoy!
Here, you’ll find all of Link’s tools in the order they appear in the game (provided you’re going through each of the worlds numerically, instead of hopping around all willy-nilly).
 Hero’s Sword

Link’s trusty sword—where would he be without it? No true adventure can begin and no would-be hero could ever call themselves an adventurer without one. Its simplicity makes for ease of use, but its sharpness is the bane of all foes everywhere. Most Sub-Weapons in the game will help Link overcome puzzles, some will help defeat enemies, but none will be as useful to Link as this sword, his loyal friend.
 Bow
Bow

The Bow is likely the most practical of all of Link’s tools (aside from the Hero’s Sword, of course). The Bow not only damages enemies, but it’s one of the most essential and used Sub-Weapons for solving puzzles. It’s the only other weapon in the game that we’d say is a safe bet to use instead of the sword, but the good news is you won’t have to make that decision! Combine the Bow with the Kokiri Clothes and you’ve got yourself a wooden, pointed, enemy-shooting machine.
 Bombs
Bombs

Another Zelda staple, the Bombs can be placed, thrown, air blasted, and exploded, all with great effect. They are excellent for defeating foes that tend to block attacks or for defeating enemies that are hiding in locations unreachable by your Links. Throw on the Big Bomb Outfit and you can raise some real chaos. Every Bomb, whether of your own creation or not, that your Link touches while wearing the Big Bomb Outfit will turn into a massive, monster enemy exploder that’ll shred friend or foe alike.
 Water Rod

Magic rods have been around the Zelda series for some time, but they’ve never been used in quite as interesting of a way as the Water Rod. Instead of just blasting enemies with water, the Water Rod creates vertical platforms of pure H2O. A lot of areas in Tri Force Heroes require all three Links to stack to reach a higher platform or a flying enemy, but the Water Rod circumvents that whole system altogether. Just create a water platform on the ground and BOOM! You’re looking a flying enemy right in the eyes, instead of trying desperately to reach it from below. You can also create the water platforms directly underneath enemies to lift them into the air and stun them temporarily. This Sub-Weapon gives new meaning to the age-old idiom “You’re all washed up”.
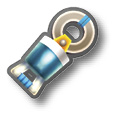 Gripshot
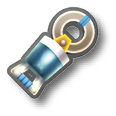
The Gripshot is exactly how you remember it from all of its previous Zelda roles. Point this grabby grappling hook at a peg, another Link, or a chain-link fence and you’ll be dragged across the room toward it. Use it on enemies to stun them at a distance, then move in and give them the ol’ one-two slasher with your sword. The Gripshot’s utility is pretty limited, but when you get to used it, my oh my is it a good time.
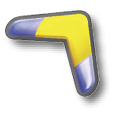 Boomerang
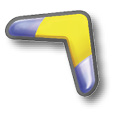
Is there a single item in the Zelda series that is more renowned, more beloved, and more used than the Boomerang? We think not! Series veterans will know this Sub-Weapon all too well and will know exactly how to use it. If you are new to the franchise or haven’t been around in a while, let us give you a refresher. The Boomerang can be thrown to hit switches, grab other Links, and pick up Rupees and Hearts, as well as for stunning enemies. Once you’ve tossed it, you can expect it (like all good boomerangs) to come right back to you. That means you can throw the Boomerang and then, if you miss whatever you were trying to hit, you can move to adjust the Boomerang’s return path. This will in turn hit enemies or grab whatever you’re trying to get your hands on, provided you move in the right direction. Get some practice with it and you’ll be a pro in no time!
 Gust Jar
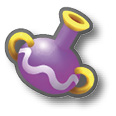
The Gust Jar is perfect for putting out fires and blasting your friends across otherwise uncrossable gaps. It’s also an excellent tool for stunning enemies, as it can stun multiple enemies at the same time. It can be a bit tricky to get the hang of, but once you’ve got it down it’s an invaluable tool for solving puzzles and defeating enemies.
 Fire Gloves
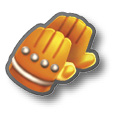
The Fire Gloves are likely the most technical of Link’s Sub-Weapons. They specialize in two things: Lighting torches and melting ice. And while it specializes in those things, that’s far from the limits of the Fire Gloves. You can use them to swiftly defeat ice-based enemies and light dark rooms. You can hold the Y Button to create and hold a fireball, which a Bow or Boomerang Link can fire an arrow or throw a Boomerang through to light them on fire. The fireballs can also melt platforms and bounce around corners. Yes, the Fire Gloves truly offer the most utility of any other Sub-Weapon in the game.
 Magic Hammer
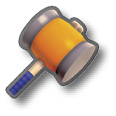
Likely the most direct of Link’s tools, the Magic Hammer does one thing and it does it very well: It smashes things. Smash enemies into the ground, smash destructible objects, smash down pegs, smash smiling spring pads—you name it, the Magic Hammer can probably smash it. Add into the mix the Hammerwear Outfit and you’re now a terrible smashing machine that cannot and will not be stopped.