
Final Fantasy Type-0 HD Guide Walkthrough
Mission 3
The Capture of Togoreth Stronghold
Mission Level: 13
S-Rank Requirements
| Time | Phantoma | Casualties |
|---|---|---|
| 25:00 | 90 | 0 |


 Main Gate
Two Militesi Coeurls and an Imperial Trooper are near the bottom of the S-shaped slope, waiting to greet you. At the top of the slope are two more Coeurls and another Trooper. As soon as you step foot into the confines of the concrete structure, three more Coeurls and a CO appear. There are gunners in the windows on either side of the structure, but taking out the CO swiftly will save you the trouble of having to deal with them. You’re going to want to take out the CO as quickly as possible if you’re doing the SO for this area.
 Central Stairwell
In the center of the room are two Nymurods; three Imperial Troopers will pour out of the gate behind them. Three more Imperial Troopers each line the left and right walls above the north gate. The CO is walking along the wall on the left side of the gate–you’ll have to use Lock-On and begin switching targets with the Right Analog Stick until you’ve targeted him to attack him. If you took the SO, you’ll have invincibility for thirty seconds. If you want to end this fight quickly, immediately race up to the left wall and try to target the CO to take him out. There are experience and Phantoma to be gained here, if you’re willing to stick it out.
Once you’ve cleared the room, head through the west passage.

 West Stairwell
This is one of the harder rooms in the game. Once you reach the center of the room, the device (called a Channelgate) that is blocking the passage on the right will activate and block the only ways in and out of the room. Shortly after, a Golem appears that will kill any of your party members in a single hit. You need to either destroy the Channelgate and risk attacks by the Golem, or you need to avoid the Golem for a minute while waiting for the entrance and exit to open again.

If you plan on completing the SO in this room, you’ll need to get as far away from the Golem as possible. The hard part is keeping your party alive, since they tend to attack any enemies regardless of how strong. If you run to the north passage immediately after starting the SO, you can wait it out until you’ve completed it; the Golem is far too slow to reach you before you complete the SO.
After a minute, head through the north exit.
 North Gate
A Warrior CO and a couple of Imperial Troopers are in the middle of this area. After you’ve defeated them, head through the south passage.
 Second Laboratory (Safe Zone)
There isn’t much to do here except grab the items scattered around the room, save, and use the Recovery Portal to heal up. When you’re finished, head through the southeast exit to the Matériel Storage.
 Matériel Storage
There are a couple of Militesi Coeurls and a Supersoldier CO when you first enter the area. If you picked up the SO, race toward the CO and kill him swiftly to complete it.
 Inner Corridor
There are two Imperial Troopers in the center of the hall and two on each side of the hall’s upper level. If you take the SO, you’ll need to defeat the two Troopers in the hall’s center immediately to get the Warriors to appear. Whenever the Warriors do a shoulder-press, a Killsight opportunity will appear. Using a ranged character for this makes it a lot easier to avoid getting cornered by both Warriors. Wait for the shoulder-press, then immediately attack.

 Sample Depository
Approach the NPC in the center of the room and speak with her to be given a Summoning Permit and your first Eidolon, Ifrit. Eidolons are incredibly powerful monsters that you can summon with the sacrifice of your active leader. They’ll replace him or her for limited time and also act as another party member if you stop controlling them. Because of the sacrifice of a party member, using Eidolons should be a last resort and should never be used if you’re trying to S-Rank a Mission.
For this room, hold off on using an Eidolon; the next room will be much easier if you wait. For now, defeat the Demonicorns and Troopers that pour into the room, then head through the west passage to the Dynamo Access.
 Dynamo Access

On the north side of the room is another Channelgate blocking access to your destination. Another Golem is also roaming around in the center of the room. You need to destroy the Channelgate while avoiding the Golem. This would be a good time to summon Ifrit, as he will give you a better chance of surviving the Golem’s attack. In addition, Ifrit’s damage output will make destroying the Channelgate go much faster.
To avoid Ifrit’s death at the hands of the Golem, summon him while at the top of the stairs and use Meteor Strike on the Channelgate until its health is at one bar. Head down and finish the Channelgate off with melee attacks; the Golem won’t have enough time to kill Ifrit before you destroy the Channelgate.
Completing the SO during this playthrough is pretty much impossible, so don’t worry about it right now. Just get out of the room as quickly as possible.
 Central Dynamo (Safe Zone)
Approach the dynamo and shut it down. After the dynamo shuts down, the security system for the base will be shut down, which will disable the Channelgates from summoning Golems in the base. A Relic Terminal and a Recovery Portal appear after the dynamo is disabled.
 Dynamo Access Revisited
Several Coeurls and Imperial Troopers flood into the room while the Warrior CO sits in the southeast corner of the room. You’ll need to head through the south passage to enter the next area, but you need to defeat the CO before the door will open.
Before heading through the south passage, you can head up the western staircase and proceed through the door in the southwest corner of the room to reach area 10.
 First Laboratory(Safe Zone)
 Stronghold Core
There are lots of Imperial Troopers in this room, but if you don’t want to fight off the enemy forces, you can just head through the south passage to reach the Central Stairwell.

 Central Stairwell Revisited (Safe Zone)
There isn’t much to do here, but if you want to complete another SO that has an item as a reward, just head south back to area one and complete the SO listed below.
When you’re finished with 2-2, head through the west passage to re-enter the West Stairwell.
 West Stairwell
The West Stairwell is packed with Imperial Troopers, and a Mid-Sized Carrier is hovering next to the center of the area. Use a ranged character and shoot down the Carrier, then head through the east passage to reach the West Stairwell [2].

You can also head through the north passage and complete the SO listed below to earn yourself a Megalixir. You don’t need the Troopers to actually be fleeing when you hit them with a Killsight strike for it to count. You’ll also need to look over the left side of the center of the map to find most of the soldiers that you need to hit Killsight on.
Head to the West Stairwell [2] when you’re finished.
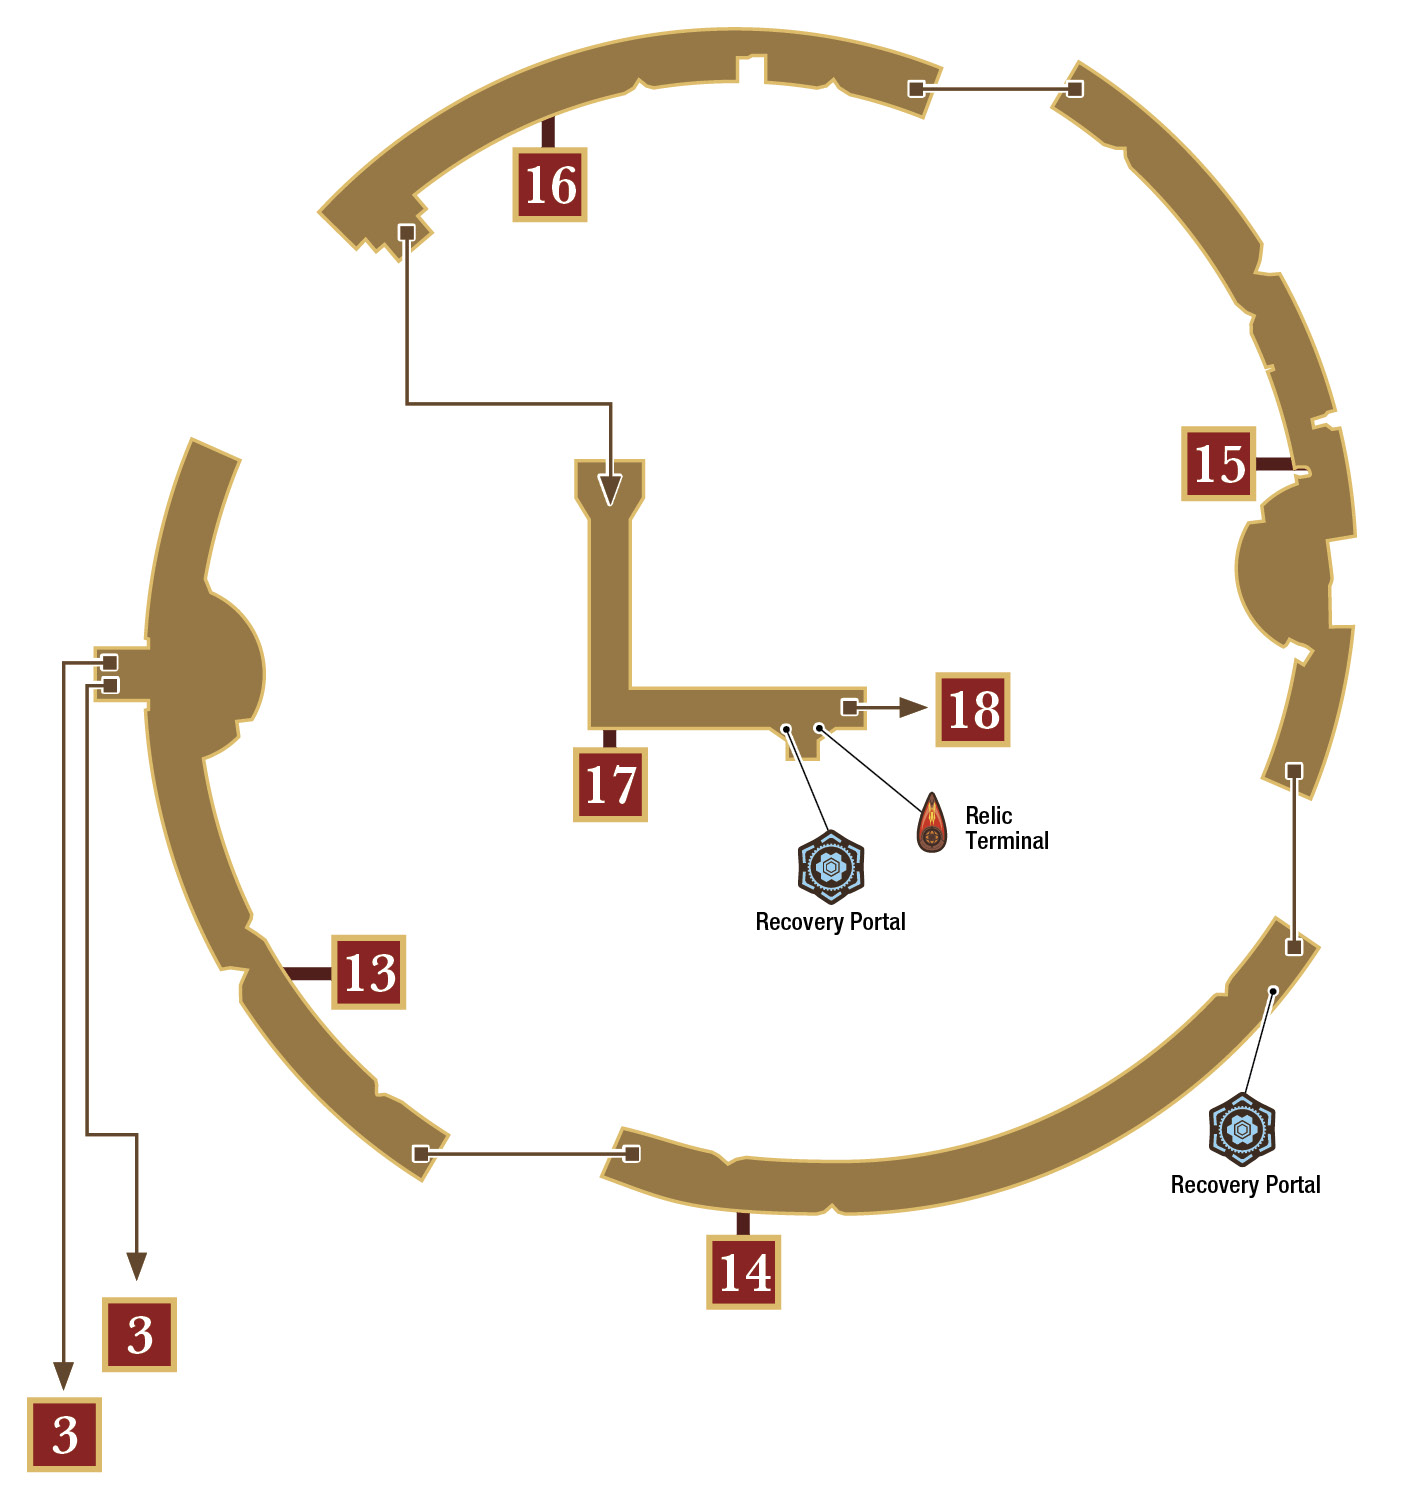
 West Stairwell [2]
There are plenty more Troopers in this room, along with several Warriors. You’ll need to wait for the Warrior CO to enter the field before you can defeat him and exit the area.
 South Concourse
This room is loaded with Coeurls. You’ll also have to contend with a Mid-Sized Carrier that is looming over the right side of the area. After you defeat a few of the Imperial Troopers, a Supersoldier CO will enter the field. In order to exit the area you’ll need to defeat him.
 East Stairwell
If you’re looking to complete the SO for this area, you’ll need to ignore the Troopers in front of you and race to the other side of the room. Find and defeat the Warrior CO, then turn back around and inspect all of the surrendered soldiers. You’ll very likely find an item that can be used in battle, so long as there is a decent amount of surrendered soldiers on the field.
When you’re finished, head through the northwest pass to reach the North Stairwell.
 North Stairwell
Several Imperial Troopers litter the North Stairwell, and a Nymurod is lying in wait for you in the center of the room. Focus on taking out the Nymurod; Commander Schmitz is in this room and he’ll provide buffs like Rage to the other enemies in the room until you defeat the Nymurod—he’ll flee after the Nymurod has been defeated, cowardly as he is. Defeat the remaining enemies to complete the SO, then head to the top of the stairs to reach the passage to the next area.

 Upper Corridor (Safe Zone)
Use the Recovery Portal and save your game to prepare for the next room. The commander of the base is in the next room, and he can hit rather hard.
Make sure you have a ranged character with lightning magic. The boss fight is coming up and you’ll have a massive advantage if you are prepared. Just don’t bring Trey as your ranged character; he won’t be able to keep up with the boss’s speed.
 Imperial Command
Head up the passage until you reach the conference room. There are several Imperial Troopers who attempt to impede your progress. Once you reach the conference room, you’ll have to face off with the CO, an Imperial Trooper, and a Supersoldier.
Focus on taking out the Trooper and Supersoldier first. You can use the end of the hallway leading into the conference room as cover. Hide behind the corner, pop out with a ranged character, fire a few shots, then go back to cover before you can take a hit.

On that note, the CO doesn’t do much that a Trooper doesn’t do, but his attacks do far more damage and he isn’t easily staggered by your attacks. Expect counterattacks after each of your attacks. Try a stick-and-move approach by attacking once or twice and then dodging. Get a feel for his attack pattern, so you can more safely dodge his attacks, and don’t be afraid to burn through your Potions to survive this fight. A melee character is much better suited for this fight; ranged characters tend to get knocked over by the CO’s shot before doing a significant amount of damage themselves.
|
 Outskirts


Mission Accomplished
Completing this Mission will net you the Ice Eidolon, Shiva. You can only bring one Eidolon with you at a time, and you’ll have to make the choice when you’re selecting your party for a Mission. Don’t worry: Eidolons are powerful enough that you’ll deal plenty of damage no matter who you bring.