
Final Fantasy Type-0 HD Guide Walkthrough
Mission 1
The Cadets’ First Deployment
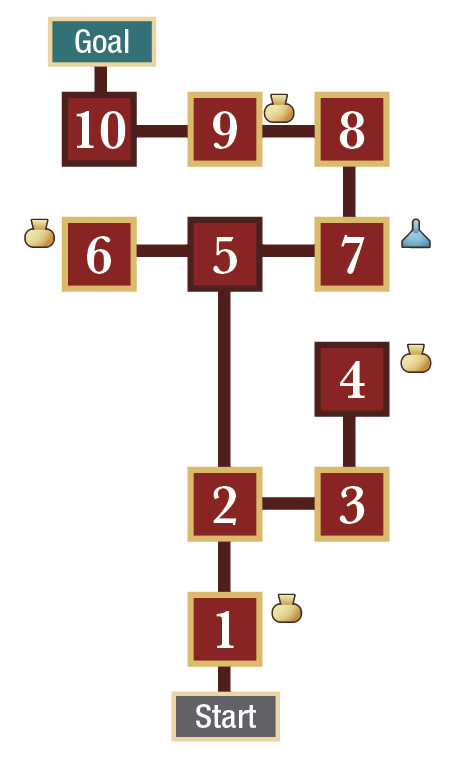
Mission Level: 12
S-Rank Requirements
| Time | Phantoma | Casualties |
|---|---|---|
| 06:00 | 48 | 0 |
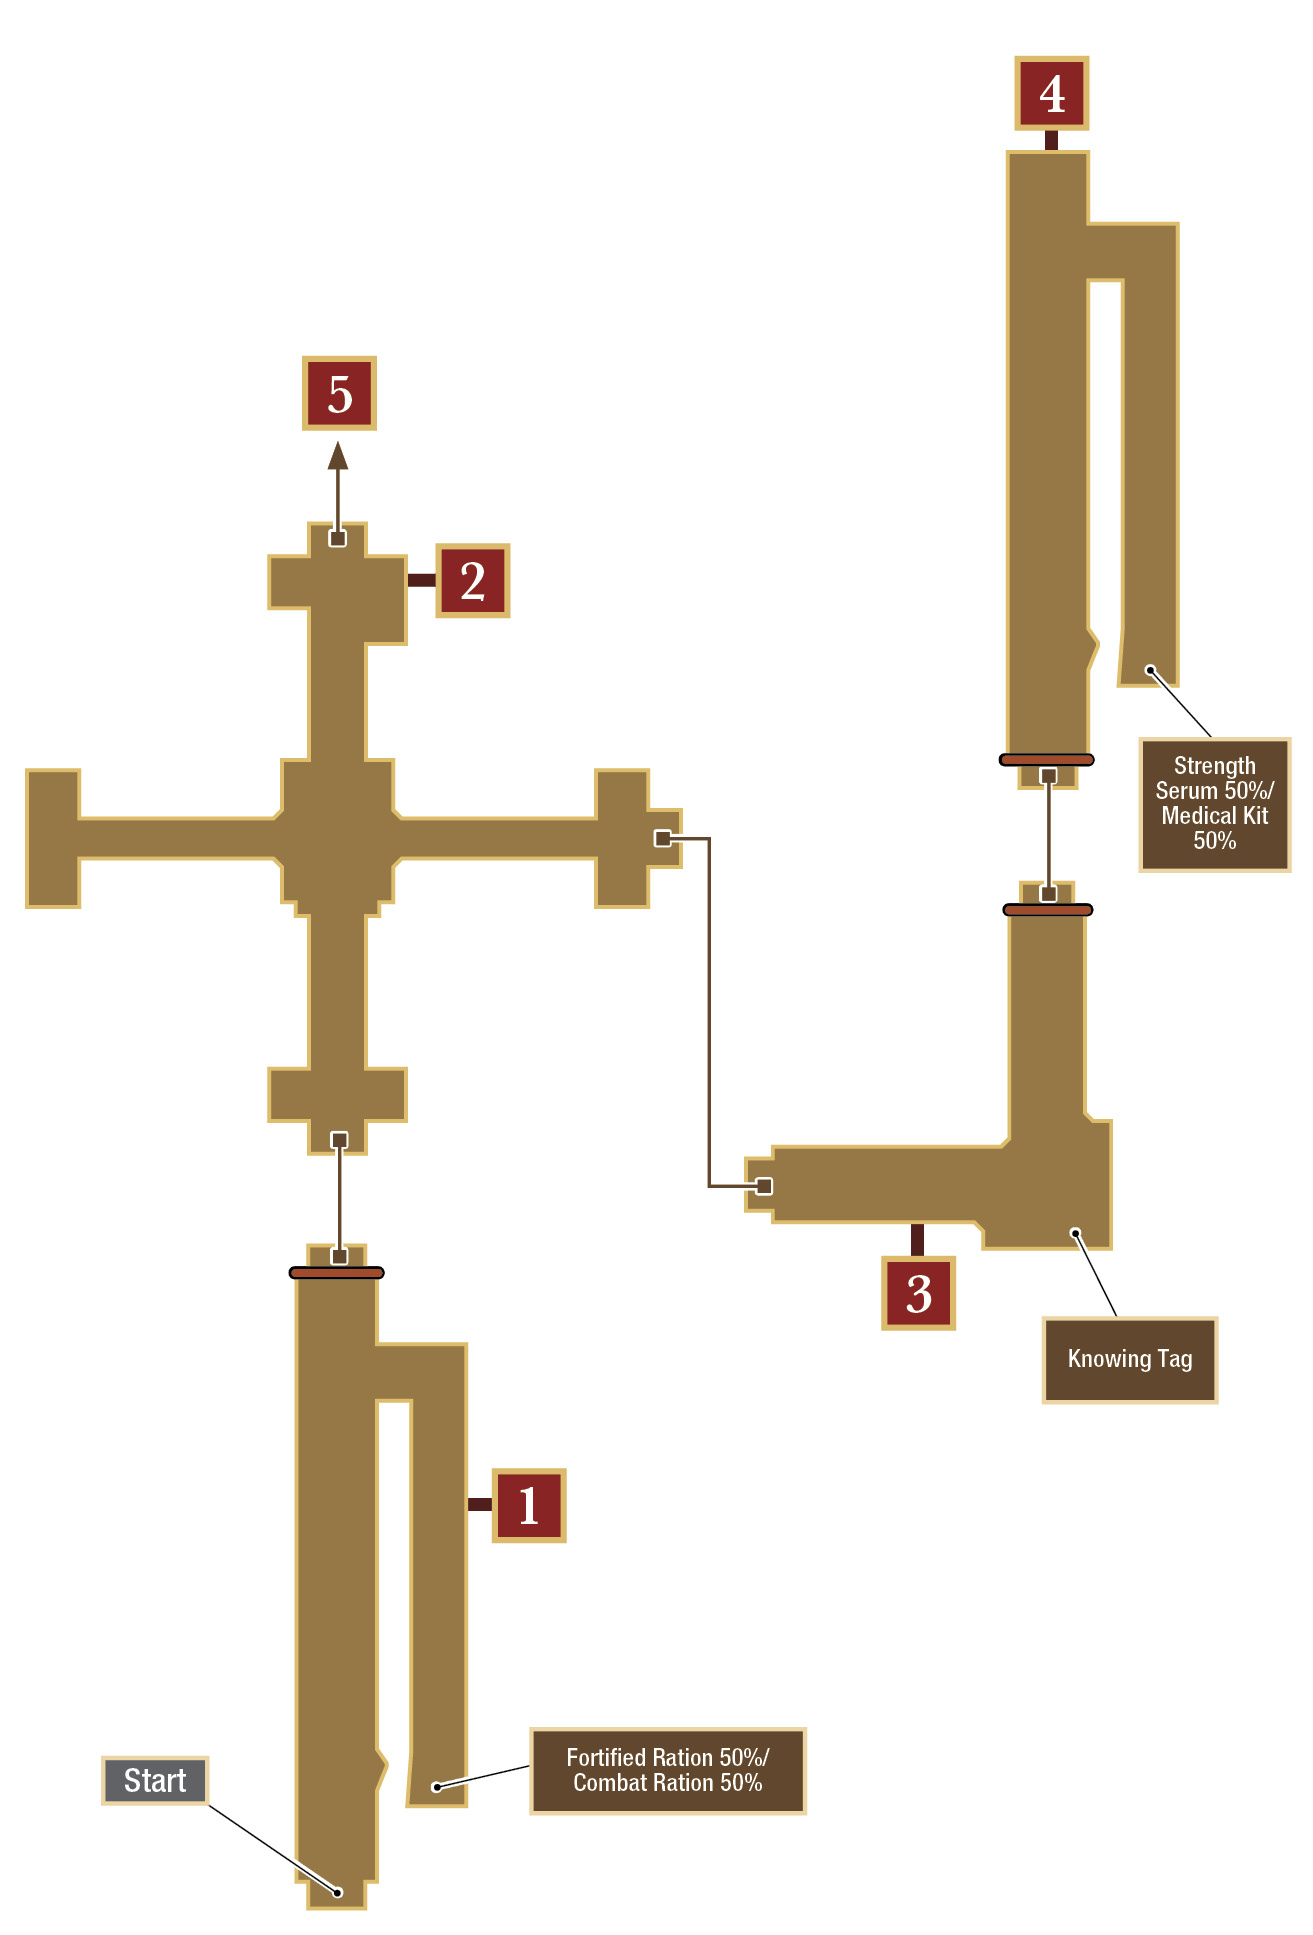
 McTighe Midtown [1]
As soon as you enter McTighe, you encounter three Imperial Troopers running away from you. Defeat them and head through the north passage to enter the next area.
 McTighe Midtown [2]
Three more Imperial Troopers are waiting for you in the center of this area. Defeat them, then head through the east exit to reach McTighe Midtown [3].
 McTighe Midtown [3]
You’ll find four Imperial Troopers in this area: One at the bend and three more behind barricades on the other end of the area. Defeat all four of them to get the northern door to open.
 McTighe Midtown [4]

In the center of this area are a couple more Troopers and a Commanding Officer. If you accept the SO for this location and complete it, you’ll be given an Elixir as a reward. The SO simply requires you to defeat the enemies in this room, which means you only need to kill the CO to claim the reward. After completing the room, return to area 2 and go north.
 Imperial Line

In the midpoint of this area is a set of stairs (they will be on your right). Imperial Troopers have covered the stairs with barricades and planted themselves at the top of them; they even have two Autoturrets at the top of the stairs to gun you down. Moglin suggests you go through the area’s west exit and wrap around on the soldiers, but if you’re willing to brave a frontal assault, you can accept the Performance Evaluation SO for this area to earn yourself an item.
As intimidating as this area might seem, all you need to do is switch to a melee character, or a character with Blizzard BOM, and destroy the barricades. Once you’ve cleared a set of barricades, defeat the soldiers behind them. Then move on to the next set of barricades until you’re at the top. Attack the Autoturrets from behind, but be as quick as you can about defeating them or they’ll shred you before you can finish them off.

Once you’ve defeated the Troopers and Autoturrets, take a left-handed U-turn at the top of the stairs, moving past the warehouse on your right. Follow along the railing on your left until you encounter a third Autoturret. Destroy it, then follow the railing back to the warehouse. The doors open and a CO and his two Troopers appear. Defeat them and you’ll have completed the Performance Evaluation SO for this area.
Head to area 6 via the west exits of this area if you’re interested in getting another item. If not, head east to area 7 to continue on with the Mission.
 McTighe Midtown [5]
There are three Imperial Troopers along the slope in this area. If you head down the west alley, you can find the item for this area. Once you’re done, head east back into area 5, then northeast to area 7.
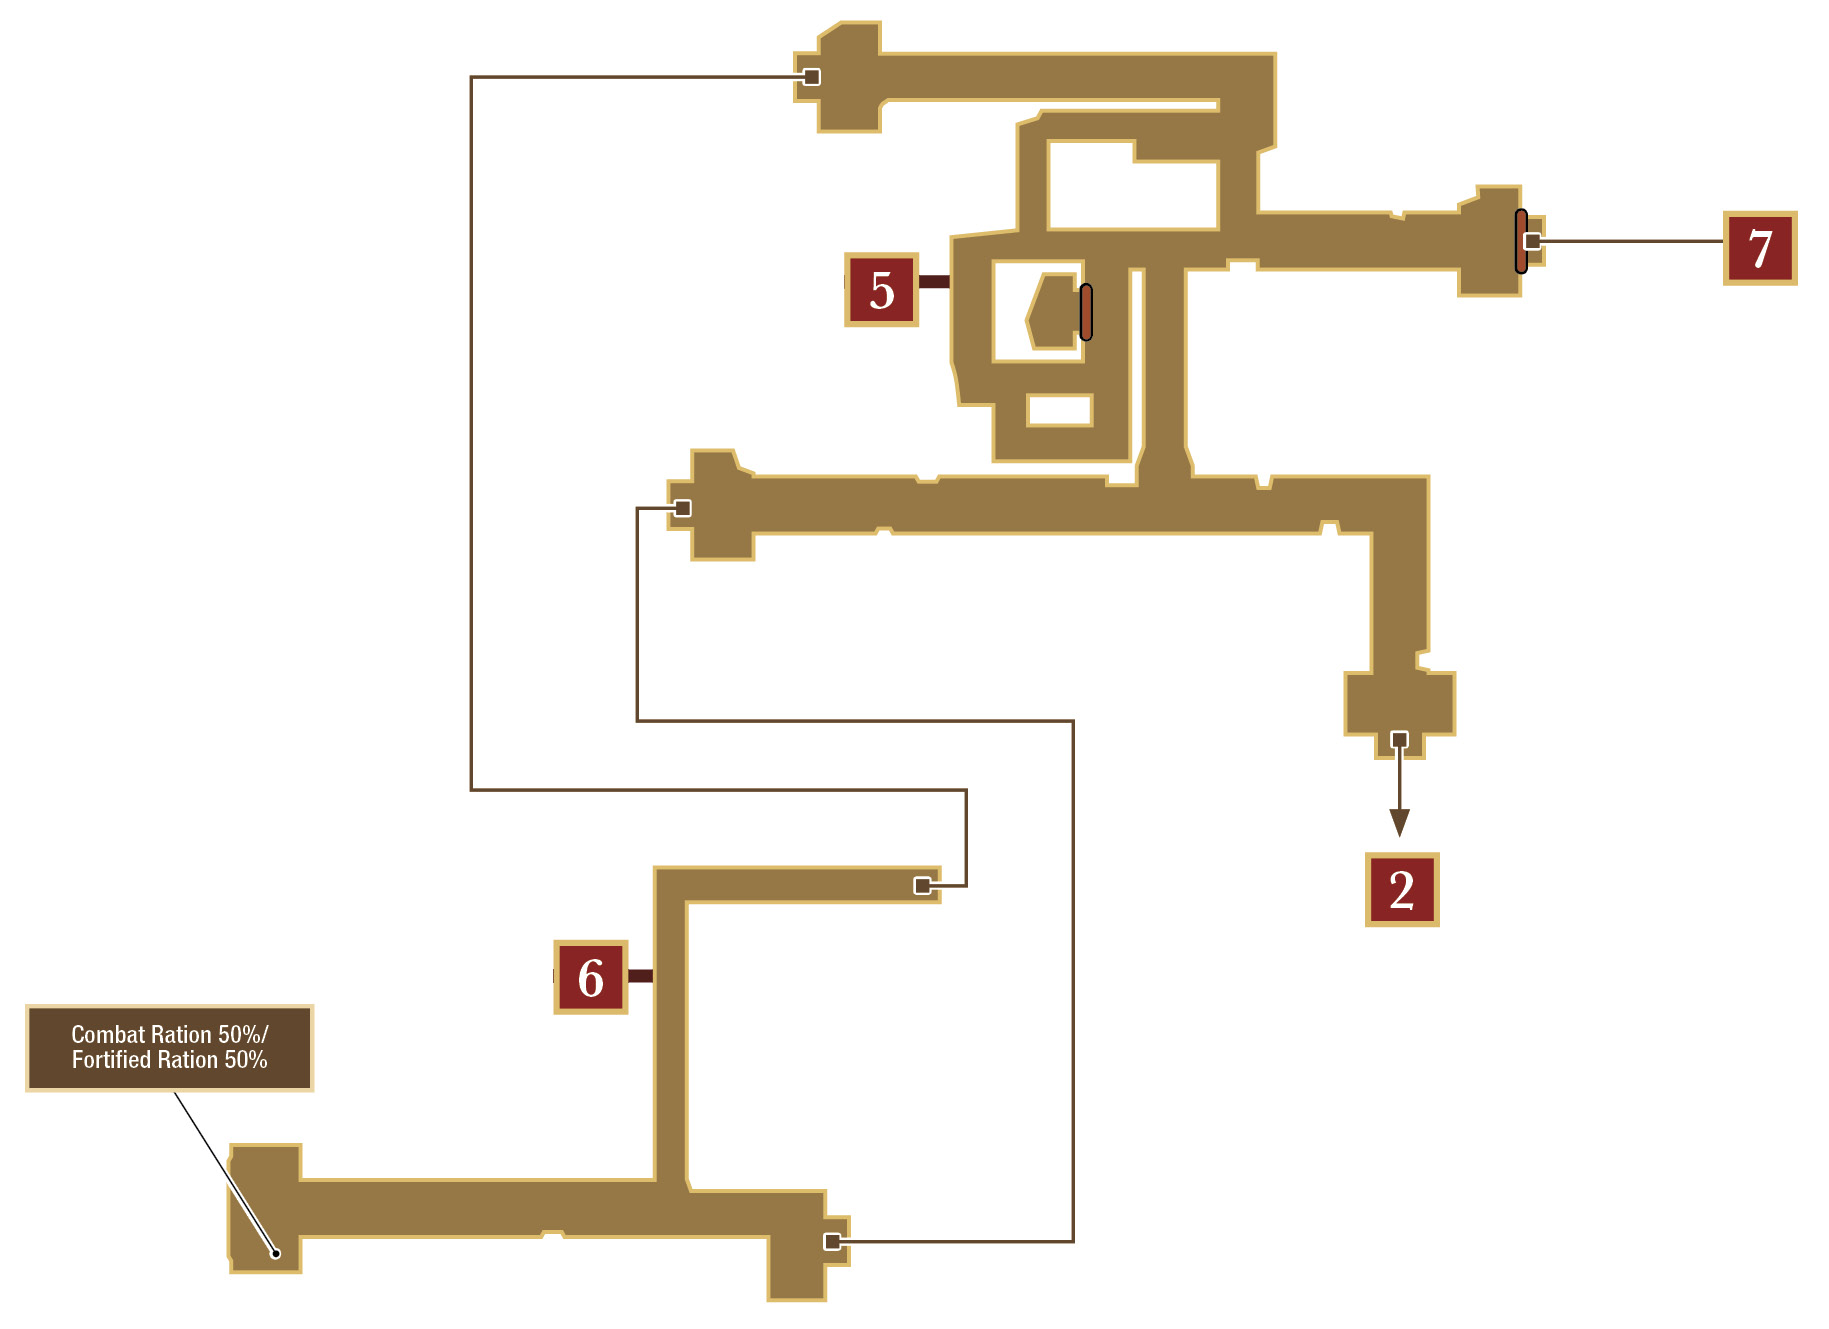

 McTighe Midtown [6]
There are four Imperial Troopers, two of which are on the elevated platform on the other side of the area. You’ll need a ranged character to take them out and clear the room. You don’t need to defeat any of the enemies in this room to move on to area 8 or to use the Recovery Portal in this room.
 McTighe Midtown [7]
There is a CO in the middle of this room and a never-ending supply of snipers on the balconies—take one out and another will come to replace it. Defeat the CO to get the doors to area 9 to open up, then head through them.
 Demolished Square (Safe Zone)
There is only an item on the top-left side of this room and nothing more. Once you’ve grabbed it, head through to area 10 to face the boss of this Mission.
 Imperial Command

The boss of this Mission is pretty simple: he’s just a CO in a Nymurod with a lot of health. Switch to a ranged character and stay to the Nymurod’s sides while attacking it.
Before focusing down the Nymurod, target Major Massena, and then use the Right Analog Stick to change targets until you select the fuel tank. Fire at it while Major Massena is on the ground to blow it up and complete the SO.
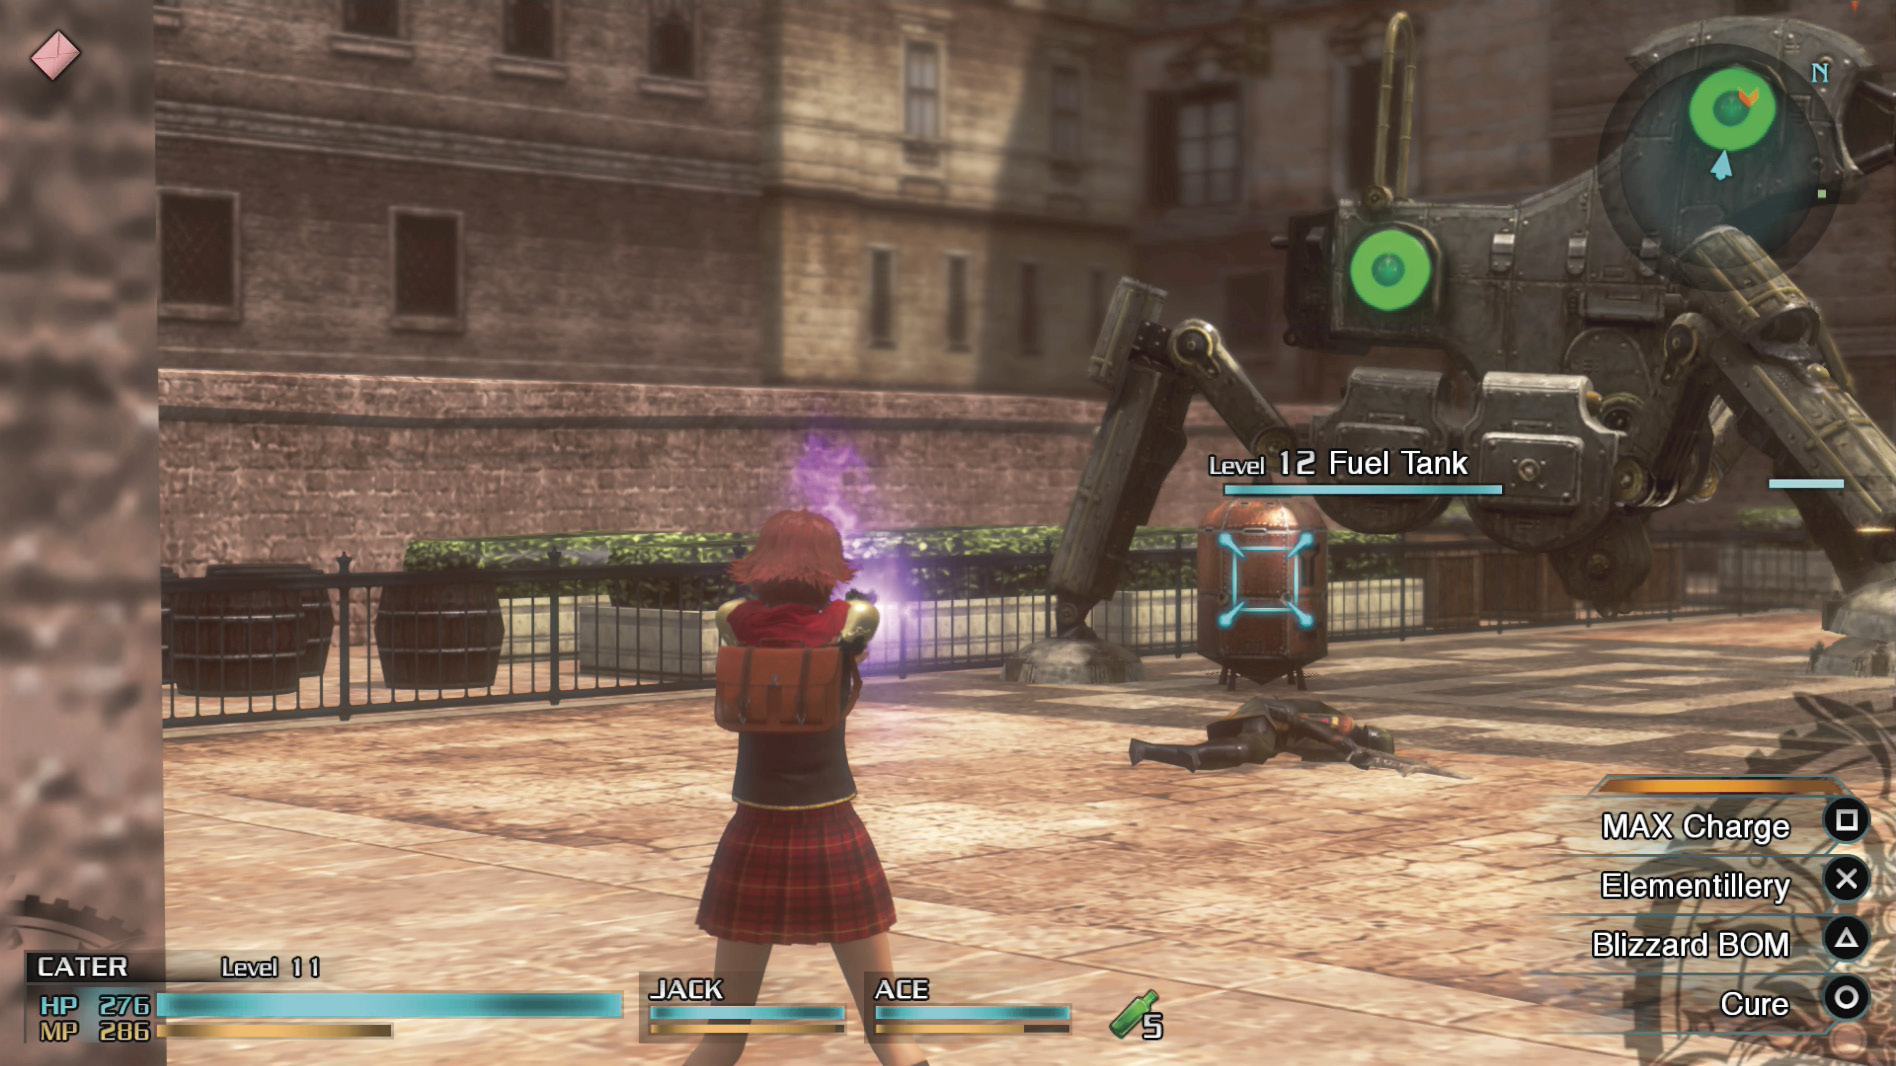
After completing the SO, start focusing on taking out the boss. He’ll have two Troopers that will come in from the southeast and southwest corners of the room. Don’t worry about them—more will appear to take their place. Just focus on taking out the Nymurod. Once the CO has been defeated, the Mission is complete.
Mission Accomplished
Before heading back to Akademeia, enter McTighe and talk to the man at the center of the platform on the other side of town. He’s the mayor of McTighe and he’s feeling pretty down about the town getting attacked. He had planned to give a speech today, but none of the townspeople showed up. Agree to help gather the people, then talk to everyone around the square. You’ll also need to check all of the doors along the walls of McTighe in order to find everybody. Once you’ve found everybody, the mayor will stand up. Talk to him again and you’ll receive l’Cie Mizu’a’s Crystal.

Once you’ve completed this informal Task, head back to Akademeia to start another round of free time. You can return to Akademeia by foot and risk battling in random encounters, or you can fast travel there from the Info screen.
Events, Tasks, and Expert Trials (Second Break–12 Hours)
Moogle Classes
| FGHT-100: Principles of Combat | 2,000 EXP |
| DFMG-100: Introduction to Defense Magic | Defense Magic +2 |
Events
| Location | Who | Reward | Note |
|---|---|---|---|
| Main Gate | Enra | Hi-Potion | — |
| Fountain Courtyard | Celestia (Short woman with white hair) | Cutscene, Turbo Ether | — |
| Fountain Courtyard | Azuma (Purple-haired cadet) | Elixir | — |
| Airship Landing | Dominion Citizen | Hi-Potion | — |
| Entrance | Class Eighth Moogle | Mega-Potion | — |
| Crystarium | Machina/Ace | Cutscene, Turbo Ether | If you’re Machina speak to Ace, and vice versa. |
| Armory /Kazusa’s Lab | Kazusa | Cutscene, Etc. | There must be 6 or less hours left in the day in order to talk to Kazusa. Refer to the Side Quests Section of this guide for details. |
| Armory | King | Ether | — |
| Ready Room | Carla | Cutscene, Pretty Pelt | — |
| Terrace | Tokito | Hi-Potion | There must be 6 or so less hours in the day in order to talk to Tokito. |
| Terrace | Class Third Moogle | Mega-Potion | — |
| Terrace | Emina | Cutscene, Etc. | There must be 6 or so less hours in the day in order to talk to Emina. |
| Terrace | Machina/Rem | Cutscene, Mega-Potion | You must have more than six hours left on the clock in order to talk to Machina/Rem. If you’re Rem speak to Machina. |
Priorities
You have twelve hours to kill in Akademeia this time, which isn’t nearly enough time to do every Event that is available to you. Remember: Type-0 HD is a game that expects you to play through more than once, so don’t worry about seeing everything the first time.
Take Moglin’s classes in Classroom Zero above anything else right now. Once you’ve completed those, talk to Machina/Rem on the Terrace to get a bit of history on the mysterious pair’s past. Once you’ve completed that, talk to Kazusa in the Armory (you must have six or less hours of Free Time remaining to do this) twice to get him to let you in to his laboratory, which is behind a bookcase on the left side of the Crystarium. This will open up some new Events for you later down the road. Just make sure that you have six or less hours before you talk to Kazusa or he won’t let you in to his lab. Any remaining time is yours to spend how you wish.
Once you’ve used up all of your time, head to Classroom Zero and talk to Kurasame to start the next Mission.
Emina
This Free Time session marks the first time you’ll be able to speak with Emina. She often spends her time on the Terrace and can only be spoken to when you have six or less hours remaining in a day. You must speak with the Sorcery Researcher in the Sorcery room and he’ll tell you what gift to bring her. You’ll then need to head to a gift merchant somewhere in Orience, buy the gift, and then give it to Emina to be able to initiate future Events.
Once you’ve completed the second Emina-related Event, you’ll be given the Sheer spell. The items you receive as rewards are different every time you complete an Event with Emina.