
Final Fantasy Type-0 HD Guide Walkthrough
Mission 10
The Kingdom’s Final Hours (RTS)
Mission Level: 34
S-Rank Requirements
| Time | Mission | Casualties |
|---|---|---|
| 35:00 | 9 | 0 |

 Neutralize the Energy Wall Around Shakara
Before you attempt to take out Shakara’s energy wall, you’re going to need to get more support. Shakara’s got a nasty dragon called an Atmosvern that is all too happy to destroy any and all who approach the town. Start by assisting the Main Camp’s troops in taking over Domain 2.
Once the Main Camp’s troops approach Domain 2, the Atmosvern will move to counterattack them. You’ll need to take its health down to its yellow bar in order to scare the unruly reptile away from your allies. Be careful, however: a single fireball will more than likely put your active leader out of commission. And if you’re using Trey like we suggested, it will make the Mission a whole lot harder if you lose him.
When the Atmosvern flees the area, continue with the takeover of Domain 2. After it’s been captured, Domain 2 will send its forces to Shakara automatically. Head over to Shakara and help push the assault forward.
 Infiltrate Shakara
Once the energy wall has been dropped, Shakara will be open to invasion. Waste no time in taking it over with Class Zero.

 Trat Gardens
There is only one room in Shakara. You’ll need to defeat a Dualistag and a Red Demonicorn to force out the commander in control of Shakara. The commander is a Dracoknight named Tonogiri. He has a good bit of health, packs a punch, and also has Haste cast on him, so stay moving and don’t let him get in close to you.
You might want to switch your active leader to a melee fighter, if one is in your squad. If not, switching to anyone besides Trey is a smart move during this fight. Trey’s weakness is fast-moving enemies, which makes Tonogiri his poison. Just make sure to switch back to Trey once the fight is over and before you’re ushered back to the world map.
 Collect Tonogiri’s Phantoma
Once Tonogiri has been defeated, Moglin will request that you absorb Tonogiri’s Phantoma. It’s a simple Mission, but completing it will add to your Mission completion total at the end of this RTS.
 Neutralize the Energy Wall at Rilochy

Once you’re back on the world map, your next Mission will be to neutralize the energy wall around Rilochy. Once again, you’ll need more troops to accomplish that task. Start by ordering Shakara’s military to attack Domain 3.
To add to the madness, the Atmosvern will appear and fly directly toward Domain 1, attacking the town as soon as it reaches it. Shoot the wyvern a few times to scare it away, then help your allies take over Domain 3. You’ll need to hurry: the Atmosvern will plant itself between Domain 2 and Domain 4, activing as a barricade to prevent your troops from reaching Domain 4 while letting enemy troops have full reign over Domain 2.
As soon as your troops reach Domain 3, the Atmosvern will fly over and begin defending the town. The wyvern will make a stand this time, so the only option is to defeat it to allow your troops to reach Domain 3.
With the Atmosvern out of the way, your allies from Domain 2 will have no problem capturing Domain 4 on their own. Once both Domains 3 and 4 are captured, head to Rilochy and wait for the energy wall to drop.
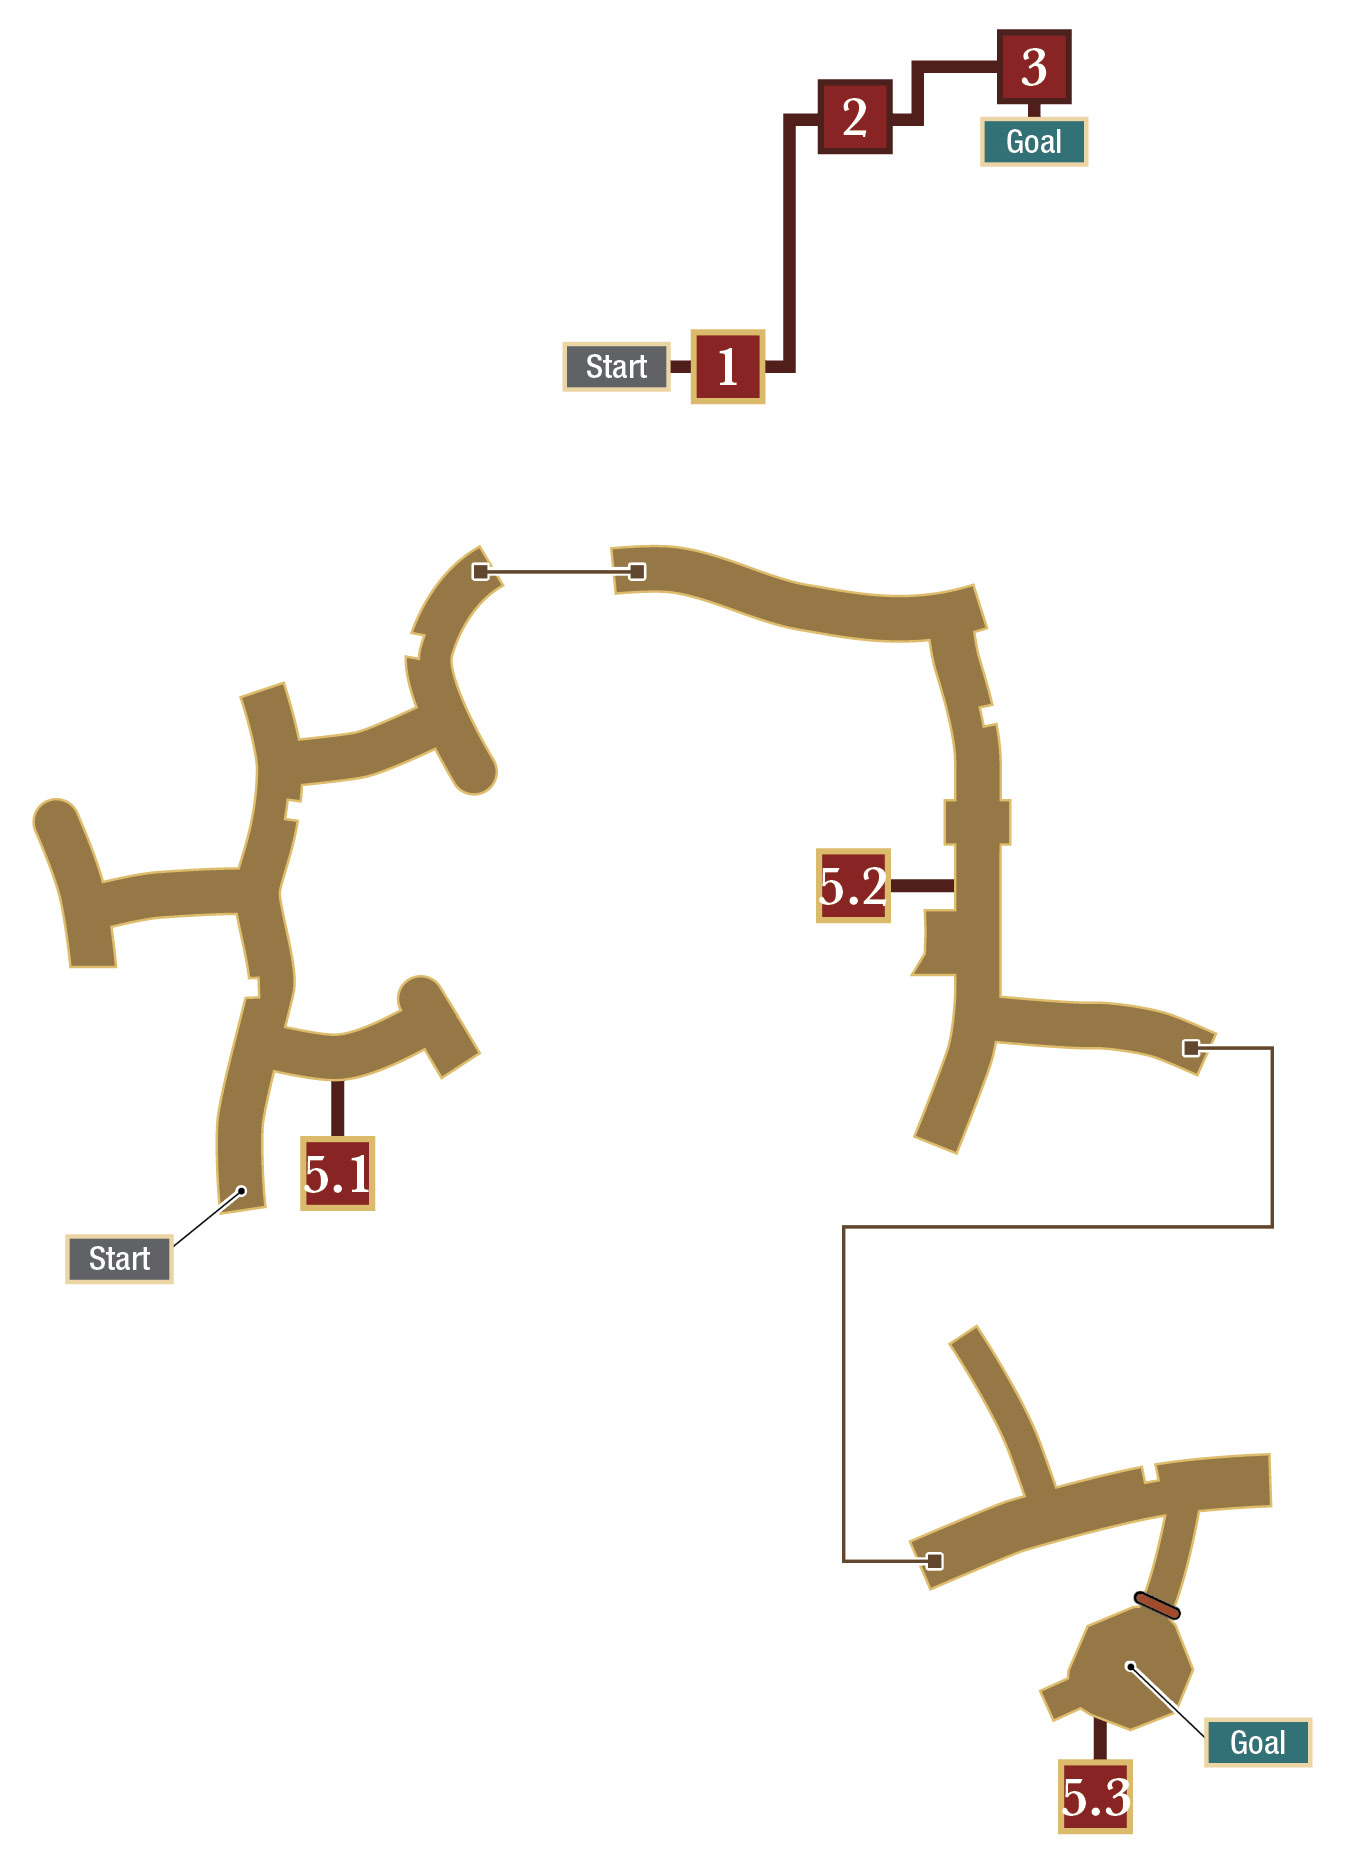
 Infiltrate Rilochy
Once the energy wall drops, it’ll be time to invade Rilochy.
 Town of Rilochy
There are several Dracoknights in Rilochy, so switching your active leader to someone other than Trey is a good idea. Capturing Rilochy will end the Mission, so you don’t have to worry about swapping Trey back to your active leader once Rilochy is in your possession.
Head toward the northeast passage to reach area 2.
 Main Street
You’ll be met with a lot of resistance in the form of a variety of flying enemies in this area; you’ll also have to deal with Cryonades and an Ironfist Giant, which is a beefed-up version of the Snow Giant and Snowsquatch.
Clear the room of enemies, then move through the southeast passage to reach the final area in Rilochy.
 Town Square

Defeat six Wingverns and a Diepvern and Rilochy will be yours. You’ll need to take out the first two Wingverns before you can reach the Diepvern, as the Diepvern is in the lower part of the area, hiding behind an energy wall.
Once Rilochy is yours, you’ll be transported to Mahamayuri, the royal capital of Concordia.
 Storm Mahamayuri

This is the final stretch of Mission 10. Reach Mahamayuri and the battle will be yours. The road to the royal capital is one long, narrow road guarded by three Flyverns. Don’t get hung up on the Flyverns: hop on a chocobo, ride right past the Flyverns to the capital’s doorstep, and the Mission will be complete.
Mission Complete
After you reach Mahamayuri you’ll be ushered back to Akademeia to start your second Free Time session.
Events, Tasks, and Expert Trials (Second Break–6 Days)
Moogle Classes
| DFMG-202: Intermediate Defense Magic II | Defense Magic +2 |
| FRMG-201: Intermediate Fire Magic I | Fire Magic +2 |
| ICMG-201: Intermediate Ice Magic I | Ice Magic +2 |
| LTMG-201: Intermediate Lightning Magic I | Lightning Magic +2 |
Events
| Location | Who | Reward | Note |
|---|---|---|---|
| Airship Landing | Hiruhata | Mega-Ether | — |
| Hallway | Quon | Cutscene, Magic Power +5 | You will only be able to complete this Event if you have completed all of his Tasks and Events up to this point. |
| Classroom Zero | Tonberry | Ether | — |
| Classroom Zero | Deuce | Cutscene, X-Potion | — |
| Back Garden | Ace | Mega-Potion | — |
| Cemetery | Gate | Cutscene, Megalixir | — |
| Armory/Kazusa’s Lab | Kazusa | Cutscene, Random Item | There must be 6 or less hours left in the day in order to talk to Kazusa. Refer to the “Side Quests” Section of this guide for details. |
| Armory | Class Eleventh Moogle | Mega-Ether | — |
| Ready Room | Carla | 222,000 Gil | The amount of Gil Carla gives you is dependent on how much you’ve given her up to this point. |
| Ready Room | Carla | Cutscene, Sublimation Ring | This Event only appears after doing all of Carla’s Tasks and Events up to this point. |
| Lounge | Seven | Mega-Potion | — |
| Terrace/Sorcery | Emina/Sorcery Researcher | Cutscene, Random Item | There must be 6 or less hours left in the day in order to do Emina Events. Refer to the “Side Quests” Section of this guide for details. |
Tasks
| Location | Who | Task | Reward | Note |
|---|---|---|---|---|
| Main Gate | Logistics Officer | Give five Megalixirs to the Logistics Officer. | Stalwart Ring | — |
| Crystarium | Class Ninth Cadet | Take ten prisoners by defeating enemy COs in the forests of the East Nesher Region. | Ballistic Shield | Before you can undertake this Task, you must first complete the “Colonel Faith’s Last Stand” Expert Trial. |
| Crystarium | Provost | Get information about the pre-RG era. | Gold Anklet | Found in the Silent Key, which is in the Veill Desolands. |
| Central Command | Chancellor Chival VI | Reach the SP Rank of Commander (50,000+ SPP). | Able to wear Formal Attire. | Second or third playthrough |
| Central Command | Commandant | Defeat six Sand Worms. | Diamond Bangle | — |
| Armory | Armory Guildmaster | Retrieve one Darksoul Swarm for the Armory Guildmaster. | Soul of Thamasa | — |
| Sorcery | Sorcery Researcher | Obtain one Ivory Phantoma for the Sorcery Researcher. | Crystal Shard | — |
| Lounge | Cadetmaster | Give 2000 SPP to the Cadetmaster. | Crystal Ball | — |
Outside of Akademeia
| Location | Who | Task | Reward | Note |
|---|---|---|---|---|
| Shakara | Ametsuchi | Defeat ten Bombs in the Rilochy Province. | Blaze Armlet | — |
| Rilochy | Akari | Defeat ten Flame Flans in the Rilochy Province. | Mythril Gloves | They are more common on the plains of Rilochy. |
| Amiter | Otokusa | Defeat ninety-nine Lesser Lopros in the Dragon Sanctuary. | Grand Bangle | Second playthrough |
| Cetme | Yatsude | Defeat twenty Imperial Troopers in Cetme. | Quake Killer | You can complete this in Akademeia’s Arena. |
Mission Preparation
This will be your last full Free Time session, so make sure to do everything you want to do. Once you begin the next Mission, the game will continually move toward the end of the story and you won’t be able to leave Akademeia any longer. The next Mission only consists of a single boss battle.
When you’ve used up your Free Time, speak with the Commandant in Central Command, then head to Classroom Zero and speak with Moglin to get the details of the next Mission. Head to the Airship Landing and speak with the Dominion Tribune to be escorted to the Mission zone. Machina won’t be selectable for this Mission, as he has left the party once again.
Bring your best ranged character to this fight, but make sure it’s not Trey. The boss is too fast for Trey’s slow-but-precise attack style. Cater with her Elementillery ability equipped and upgraded with ice and lightning shots is absolutely wonderful during this fight. Just make sure not to put the Magicite Pistol on her, or hold off on firing during the “Combat Trial: Refrain from using magic for five minutes” SO.