You have to defeat all of the enemies that come out of the west side of the area without letting a single cadet fall.
3
Performance Evaluation: Defend your allies.
2:00
Regen 1:00
Gold Anklet
You have to defeat all of the enemies that come out of the west side of the area without letting a single cadet fall.
6
Performance Evaluation: Defend your allies.
5:00
Quick 1:00
Gaia Armlet
You have to defeat all of the enemies that come out of the west side of the area without letting a single cadet fall.
9
Performance Evaluation: Defend your allies.
5:00
Invincible 1:00
Torrent Armlet
You have to defeat all of the enemies that come out of the west side of the area without letting a single cadet fall.
10
Performance Evaluation: Defend your allies.
2:00
Endure 1:00
Gale Armlet
You have to defeat all of the enemies that come out of the west side of the area without letting a single cadet fall.
Items
Room
Item
Note
4
Support Serum 75%/Fortified Ration 25%
You can only reach this item by going through area 5’s southwest passage.
Strategy
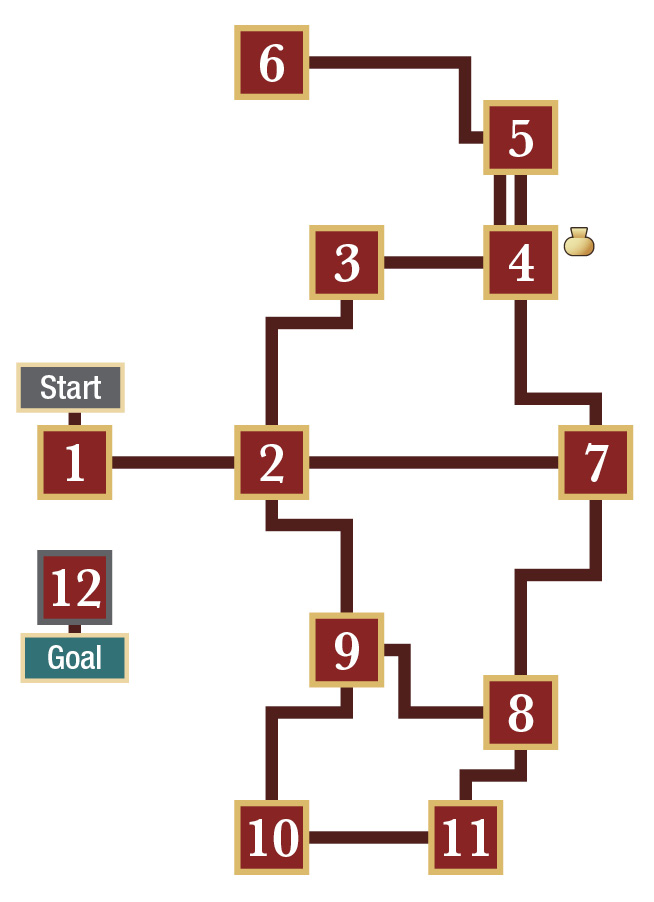
There is a twenty-minute timer in this Mission, but it doesn’t track how much time you have to complete the Mission—it marks how long you have to survive it. Things are structured a bit differently here than in all other Missions you’ve done up to this point. Instead of heading toward an objective, you’ll be waiting for them to appear on the map. Your job is to protect your allies in each of the areas that the Militesi attack. They’ll attack the map at specific times, but which area they’ll attack is random. They’ll never attack the same area twice, however. You can find the list of areas and when the Militesi will attack them below.
Once the twenty-minute timer hits zero, you’ll be teleported to an alternate dimension. You’ll have to survive in this dimension for three minutes while spectral Bahamut-like creatures attack you. The Bahamuts are pretty easy to deal with despite their size. Stick to their sides at all times and you’ll be able to avoid all of their attacks. Once the three-minute timer runs out, you’ll be escorted back to the real world and the Mission will be over.
The Triad Maneuver is absolutely vital to this battle. The SO in area 2 won’t leave you with much time, and you’ll have several Colossus units to fight off. The Triad Maneuver will help you take out huge chunks of their health, which will give you a much better chance of completing the SO.