
Super Mario Odyssey Guide Wooded Kingdom
Power Moon Locations
 Power Moons
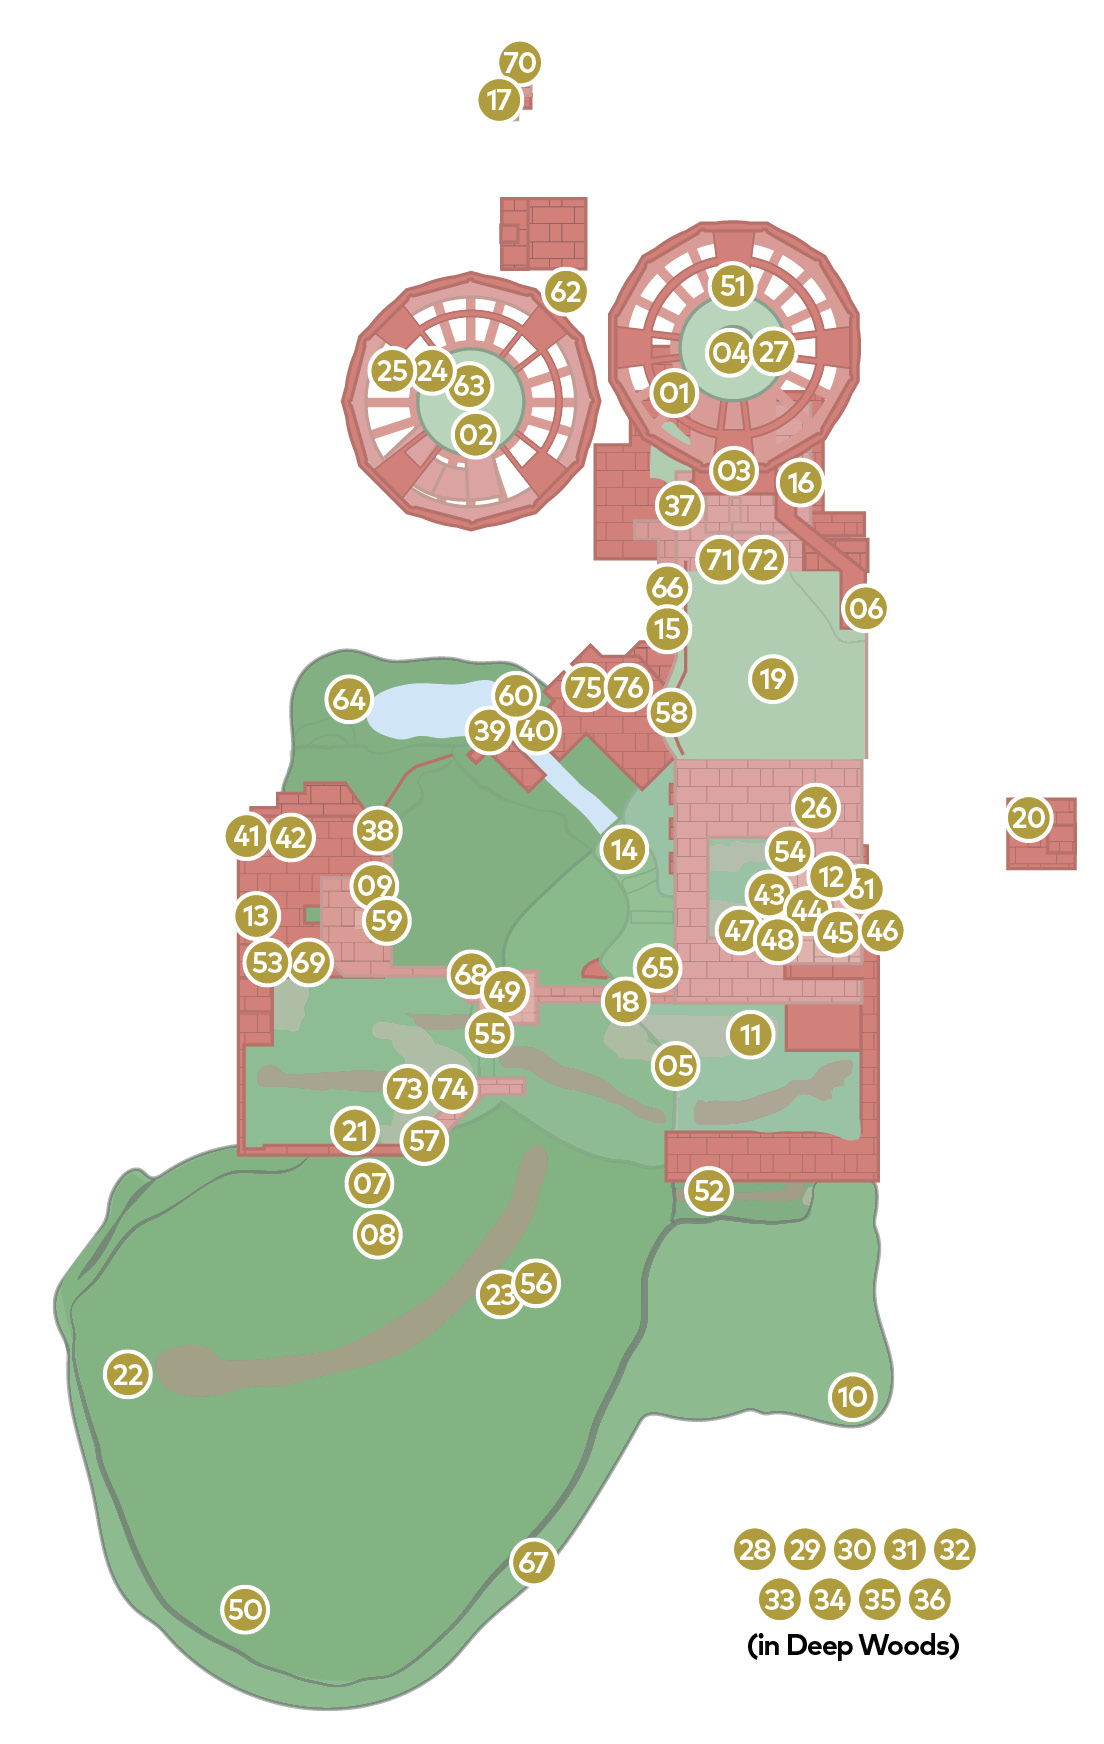
 Back Way Up the Mountain
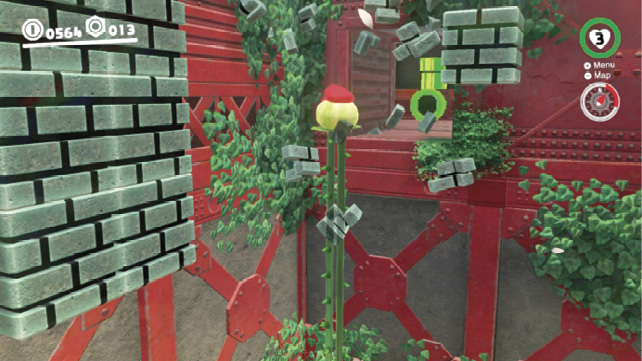
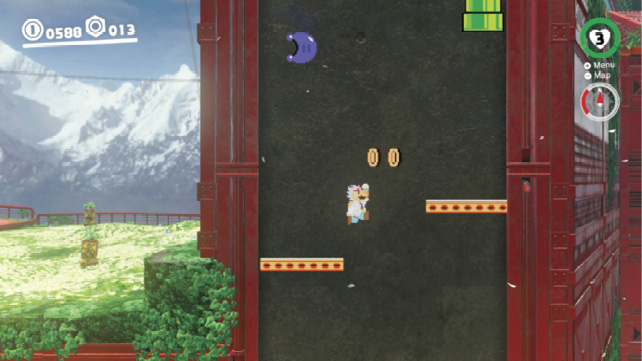
Warp to Iron Mountain Road, Station 8 and capture an Uproot in the pit below the ramp. Break open the gray blocks on the wall in the corner to reveal an 8-bit warp pipe and head inside. Run and jump along the side of the mountain to the platforms beyond the Goombas. Dash and jump from the upper right-hand platform to reach the Power Moon. There is no secret Power Moon area in this mural.
 Rolling Rock in the Woods
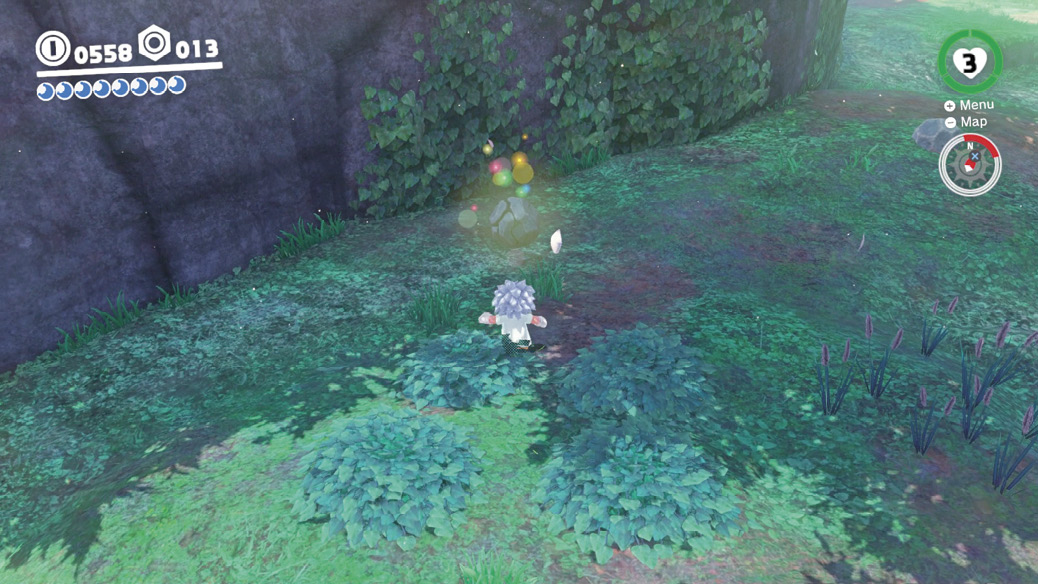
Locate the rock under the metal fence in the woods, near the rabbit, and toss Cappy at it. There are several in the area, but only one glows in different colors when struck. Continue batting this rock around the area until it breaks.
 Caught Hopping in the Forest!
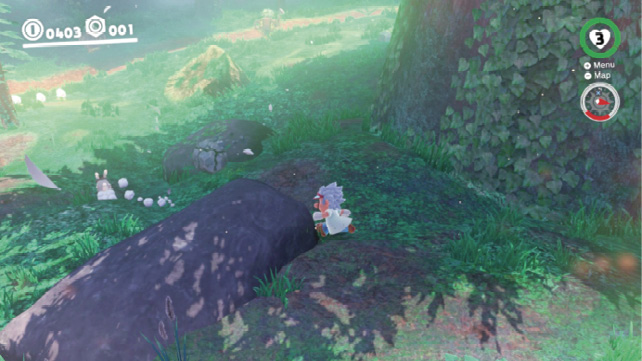
Spot the rabbit sitting near the boulders across the dirt path from Crazy Cap. The rabbit coughes up a Power Moon if you get close enough to hit it. Mario can do this via a tackle jump or by throwing Cappy at the rabbit in hopes of stunning it. Another method is to toss a rock down the hill at the rabbit and hope it hits it. This, too, stuns the rabbit so Mario can get close enough to hit it.
 Atop the Tall Tree
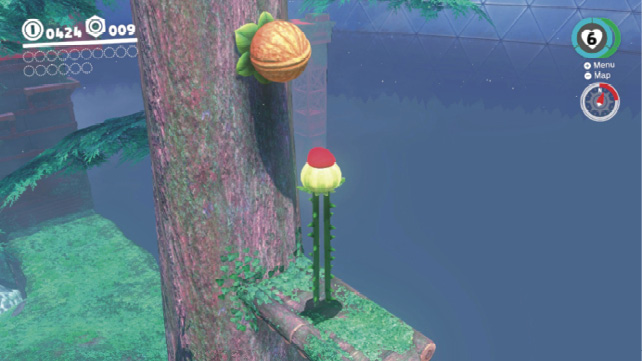
Capture an Uproot on the plateau to the east of the Odyssey and seek the tree near the southeastern edge of the area. Stretch the Uproot to reach the wooden ledge and leap onto it. Stretch again to reach the ledge above, then use the Uproot to crack apart the nut higher up the tree.
 Tucked Away Inside the Tunnel
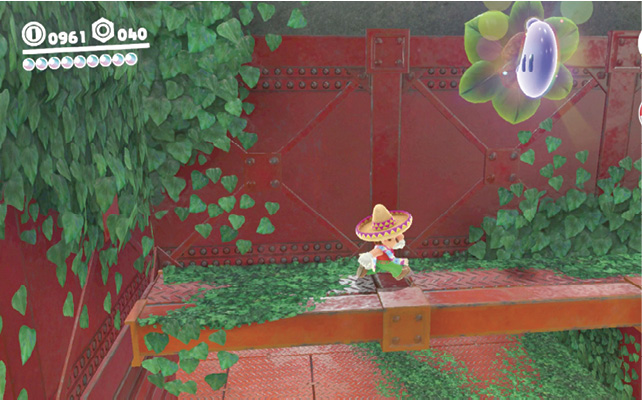
Capture an Uproot on the plateau east of the Odyssey, above the waterfall, and enter the tunnel where the water is flowing from. Use the Uproot to hop onto the Fire Bro, then stretch as tall as it will go and release the Capture so Mario can reach the upper ledge. Jump up and crack the nut with Cappy to get the Power Moon.
 Over the Cliff’s Edge
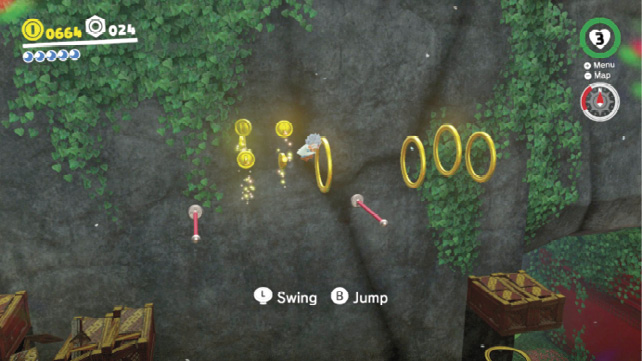
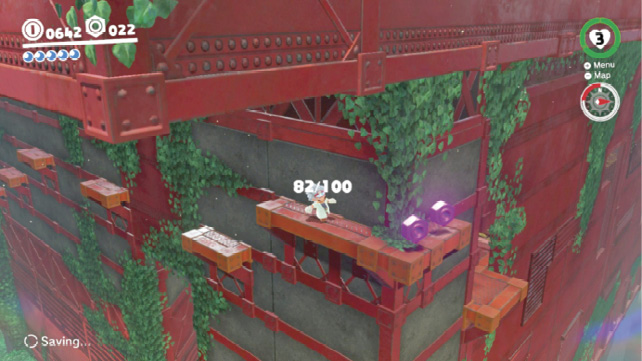
Return to the area beneath the Iron Road: Summit Path warp flag, where the Sherm is, and head around the southern ledge, to the east. Jump along the narrow ledges toward the Regional Coins in the distance and round the corner. Swing from bar to bar as you make your way through the rings near the crumbling walkway to a small alcove with a nut and a warp pipe. Crack the nut for the Power Moon and use the pipe to return.
 Climb the Cliff to Get the Nut
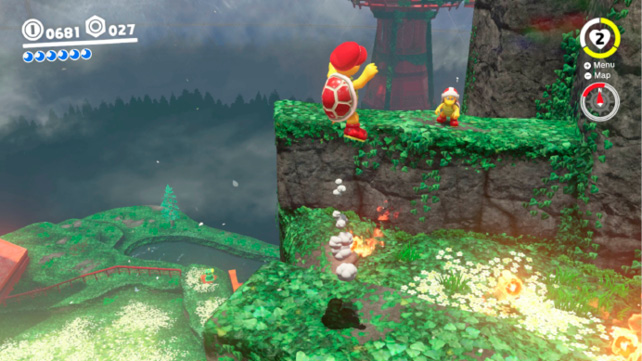
The nut containing this Power Moon is high on the cliff to the right of the entrance to the red maze at Iron Road: Entrance. To reach it, climb the wall near the Odyssey and follow it to the plateau atop the waterfall in the southeastern forest. Go through the cave with the Fire Bro and pull the lever to unlock the door. Once outside, use the Fire Bro (or nearby Uproot) to leap to the rocky ledge above the nearby purple coins. Hop along the rocks to the west, toward the red maze. Use the Fire Bro’s fireballs to break open the nut.
 Cracked Nut on a Crumbling Tower
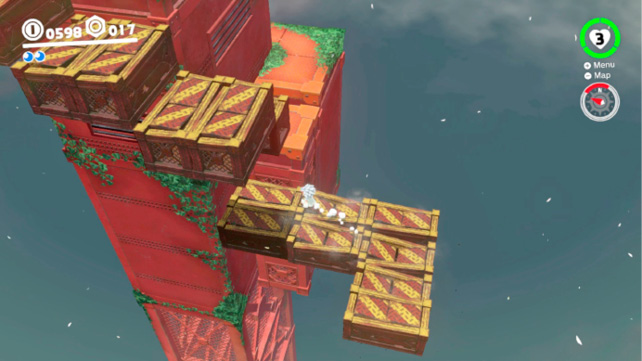
Warp to Iron Road: Halfway Point and hit the P-Switch to activate the flower road leading to the tower to the north. This time, instead of using the second P-Switch to continue to Sky Garden Road, head north along the crumbling walkway. Grab the four Regional Coins around the back side of the tower before continuing to the top of this northernmost tower.
 The Nut that Grew on the Tall Fence
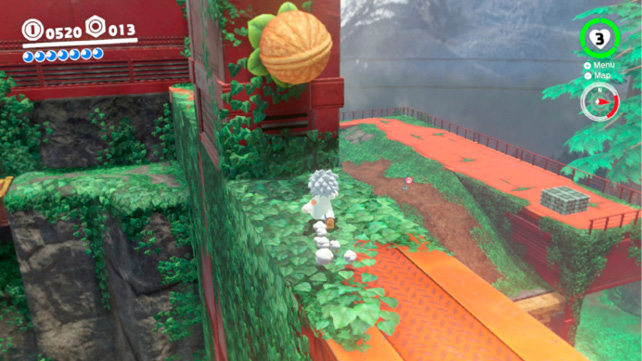
This Power Moon resides in a nut on the fence to the west of Iron Mountain Path, Station 8. Follow instructions for Power Moon #49 to reach the Iron Cage if you haven’t already done so. Drop through the crumbling walkway inside the Iron Cage to reach the top of the fence. The nut is just steps away, directly east of the tower supporting the Iron Cage.
 Fire in the Cave
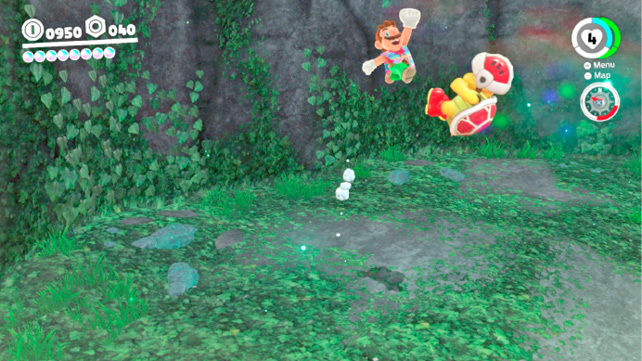
Return to the red maze near Iron Road: Entrance and circle around the left-hand side of the pistoning columns to find a scarecrow near a locked door. Toss Cappy at the scarecrow and enter the cave to battle a Fire Bro one-on-one, without Cappy. Dodge the fireballs while circling around the Fire Bro and leap up and bounce off the foe to earn a Power Moon. Mario only needs to hit the Fire Bro once without Cappy to complete the challenge.
 Hey Out There, Captain Toad!
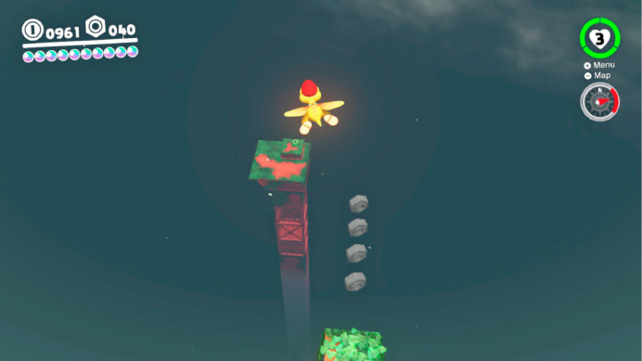
Warp to the Observation Deck (see Power Moon #54 for details) and capture the Glydon. Walk out along the narrow ledge where the purple coins were and spot the isolated tower far to the east. Glide over to that platform with the Glydon to meet Captain Toad.
 Love in the Forest Ruins
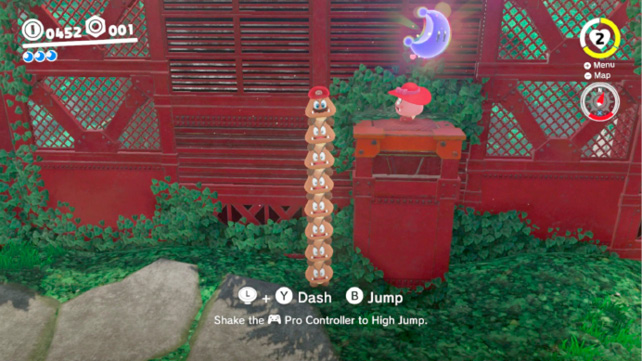
Warp to the Forest Charging Station and make your way to the area with the numerous Goombas. Capture the stack of three and hop onto the towers of two Goombas to grow in height. Build your stack of Goombas until it is eight Goombas tall then approach the Goombette on the ledge.
 Inside a Rock in the Forest
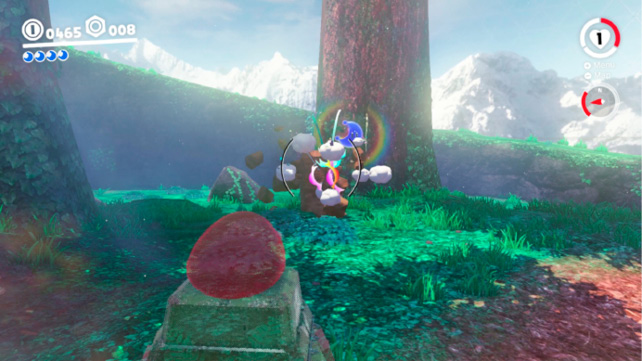
Capture a Sherm near the Forest Charging Station and steer it off the rock cliff overlooking the forest to the south. Pilot Sherm along the dirt path toward the Odyssey and open fire on the rocks near the tree across from the Odyssey to reveal the Power Moon.
 Spinning-Platforms Treasure
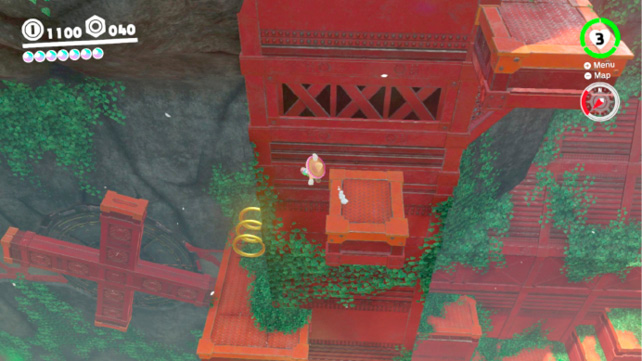
Climb the gold-colored pole on the east side of Flower Field Secret Entrance and walk north along the narrow wall above the 8-bit mural. Drop to the triangular-shaped ledge below and, from there, jump south to the other, lower ledges on the cliff face. Approach the spinning platforms near the rings and leap from one to the other. Stick close to the outer arms
of the spinning platforms and carefully leap onto the orange end-caps as they rotate vertically. This is your best chance to make the jump from one the second spinning platform to the warp pipe leading to the treasure room.
 Making the Secret Flower Field Bloom
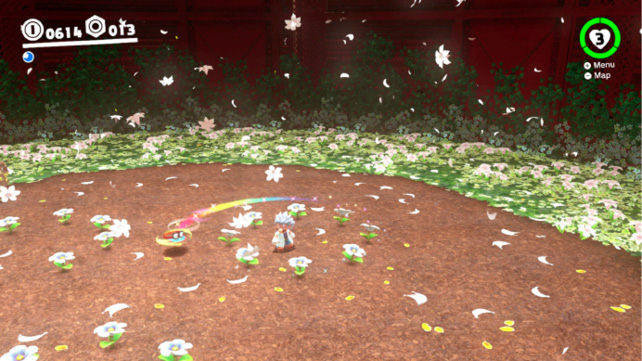
Return to the Secret Flower Field after defeating Torkdrift and leap down the hole. Note the three rings of flowers that have yet to bloom. Spin throw Cappy at each of the circles of plants to make them all bloom simultaneously. This triggers a reaction which causes the entire field to bloom, earning you a Power Moon.
 Rolling Rock in the Deep Woods
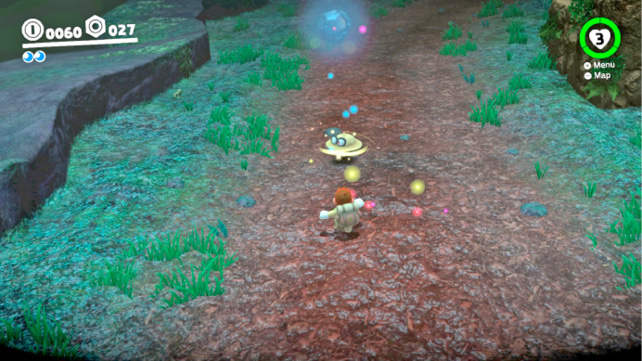
Follow the dirt path around the edge of the Deep Woods and look for a lone rock on the edge of the path, where it comes closest to the stony ledge. Hit the rock with Cappy and look for a multi-colored glow. Continue smacking this rock with Cappy to break it and get a Power Moon.
 Glowing in the Deep Woods
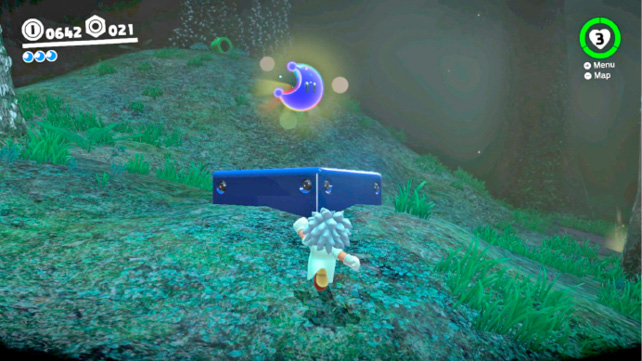
This particular Timer Challenge takes place in the Deep Woods. Locate the scarecrow near the babbling brook. The hardest part of this challenge is figuring out where the Power Moon actually is. Face the scarecrow in the uphill direction before you throw Cappy at it then immediately round the tree directly behind it and long jump into a roll straight uphill, veering off to the right of the brook. If you don’t see the Power Moon after rounding that tree, you’re headed in the wrong direction. If you’re having trouble, scout a path between the scarecrow and the warp pipe protruding from
the cliffside at the highest point in the Deep Woods; the Power Moon is on this line.
 Past the Peculiar Pipes
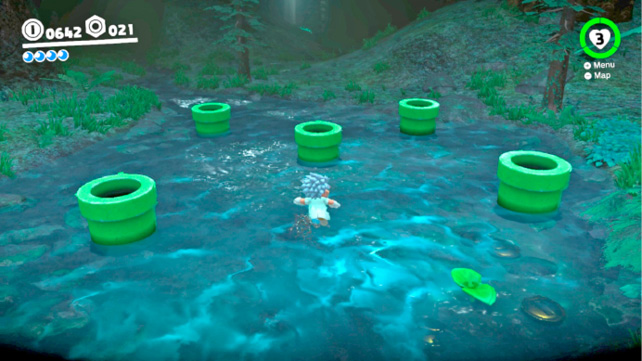
Enter the warp pipe at the top of the hill in Deep Woods to trigger a maze-like sequence of pipes. Mario must enter the pipes in the correct sequence to earn the treasure, otherwise he is forced out of the area and has to try again. Each successful choice is met by additional pipes, complicating matters further. The correct sequence changes for each game, so you must find the correct combination through trial and error, and a little bit of luck!
 By the Babbling Brook in the Deep Woods
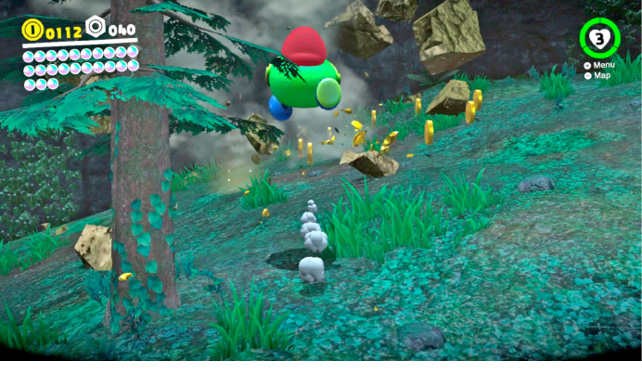
Follow the creek upstream in the Deep Woods, past the small pool where Power Moon #33 is located and head to the left. There are a number of breakable stone blocks in this area, piled against the cliff face, and there’s a Power Moon buried beneath them. The only way to break these stones is by using the T-Rex or by firing coins at them with the Coin Coffer. The latter option is much safer—and easier—though arguably not as entertaining.
 The Hard Rock in Deep Woods
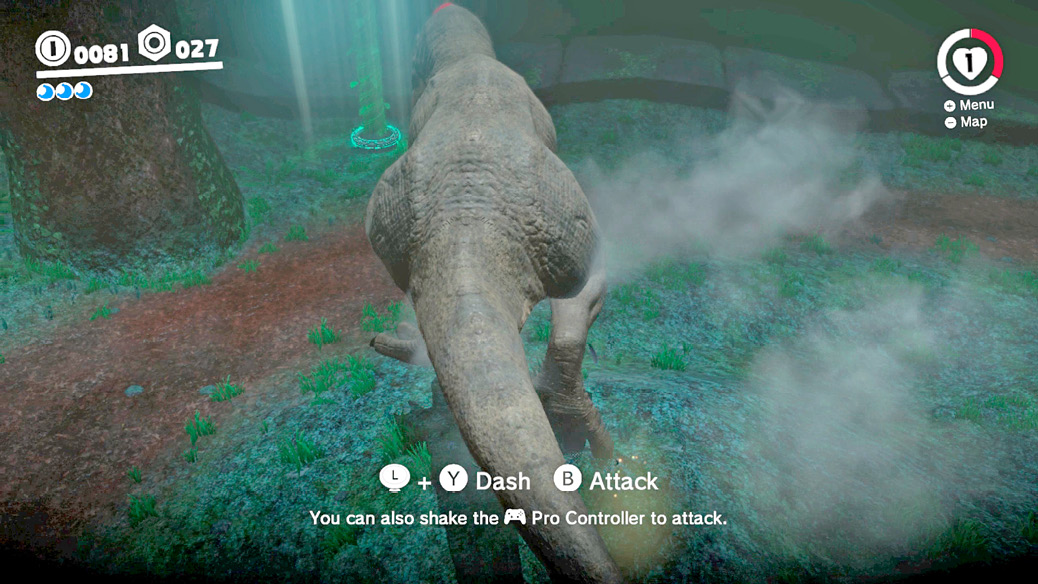
Capture the T-Rex or Coin Coffer in Deep Woods and follow the dirt path downhill toward the beanstalk near where the trail comes closest to the stony ledge. With your back to the beanstalk, spot the pile of hard rocks directly across the trail. Break through these rocks to reveal a glowing spot on the ground. Ground pound it for a Power Moon.
 A Treasure Made from Coins
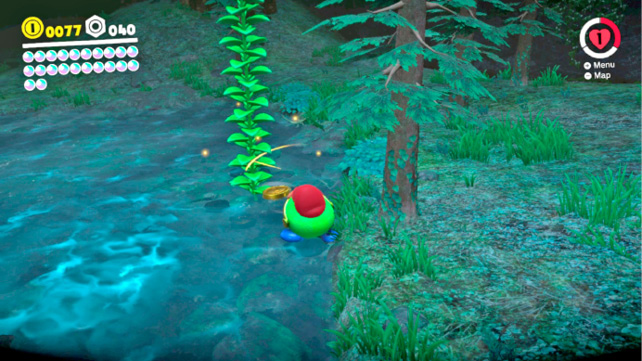
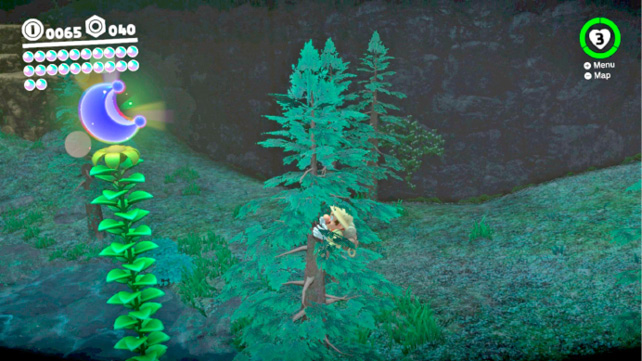
This is one of the costlier Power Moons to obtain, as you’re going to have to “feed” a plant with coins from a Coin Coffer—and it costs a lot to produce fruit! Dive into the Deep Woods and capture the Coin Coffer atop the small hummock downhill from the warp pipe at the top of the area. Follow the creek downstream to the small pool where a green plant can be seen growing amidst a number of golden buttons. Fire coins at the plant to make it grow. Make sure you have an unobstructed angle on the plant (sometimes plants or the topography can be in the way) and continue shooting coins at the plant until it grows nearly as tall as the adjacent tree. Listen for the sound of it producing fruit, then climb the tree to get the Power Moon the plant produced.
It’s entirely possible to run out of coins as you try to earn this Power Moon—the plant takes hundreds of coins to produce a Power Moon—but you needn’t leave the Deep Woods to replenish your purse. Coin Coffers grant Mario as much as 30 coins each time a new one is captured. Also, the glowing spots throughout Deep Woods each release coins and Mini Goombas that can effectively be farmed for coins. There’s plenty of gold to uncover in the Deep Woods, you just have to look for it.
 Beneath the Roots of the Moving Tree
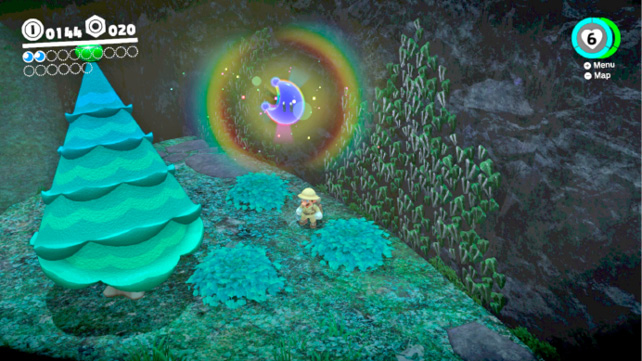
Drop into the Deep Woods and climb the stepped rock ledges to the lone tree with a green button atop it. Capture the tree and move it a few steps to the side. This exposes a glowing spot in the grass. Ground pound the glow to uncover a Power Moon.
 Deep Woods Treasure Trap
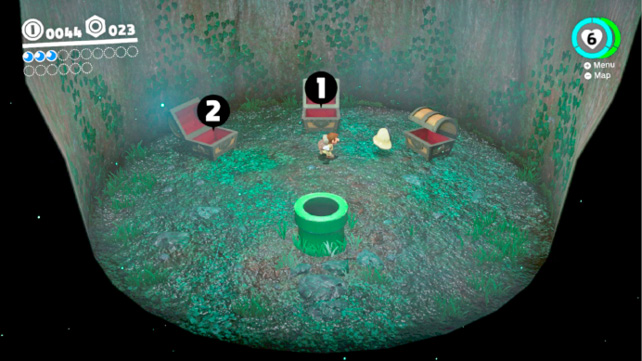
Locate the warp pipe in the base of a massive tree within the Deep Woods and head inside. There are three treasure chests here that, if opened in the proper order, yield a Power Moon. Failure to unlock them in the correct sequence causes three Chinchos to appear. Mario can defeat the Chinchos by leaping onto their heads. Nevertheless, the chests should be opened in the following sequence: middle, left, right.
 Exploring for Treasure
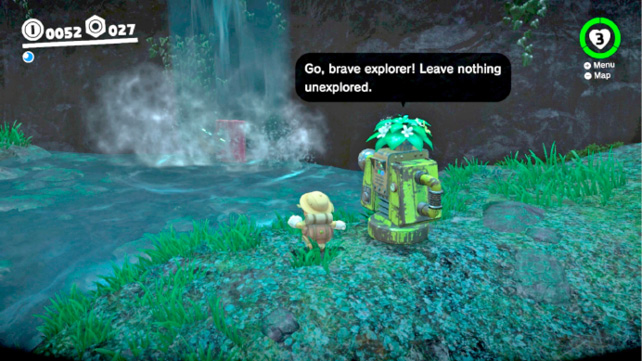
Visit the closet in the Odyssey and change into the Explorer Hat and Explorer Outfit sold by Crazy Cap in Wooded Kingdom. Return to the Deep Woods area and follow the babbling brook uphill to a locked door with a Steam Gardener nearby. Show him your Explorer attire for access to a room containing this treasure.
 Wooded Kingdom Timer Challenge 1
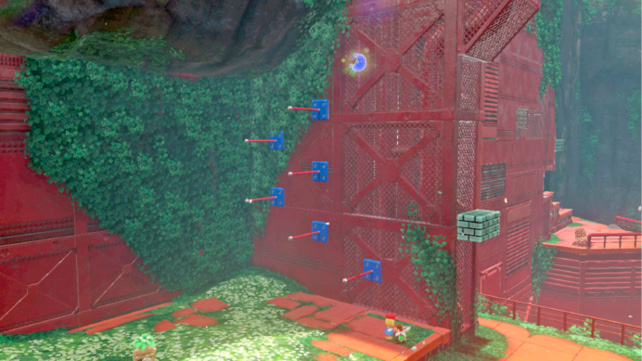
Head to the Iron Road: Halfway Point warp flag and note the scarecrow beside the flag. Toss Cappy at it to start the challenge. This Timer Challenge requires Mario to swing and jump his way up a series of red bars to reach the Power Moon. Mario can release his swing in either direction so don’t worry about having to make him turn around or trying to wall jump off the ivy. There’s even enough time to get the Power Moon if he falls once.
 Wooded Kingdom Timer Challenge 2
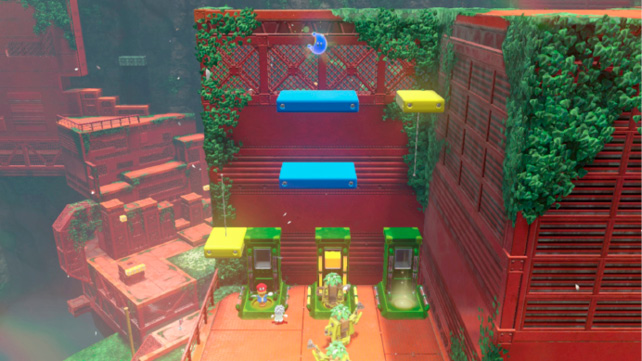
This Timer Challenge takes place in Forest Charging Station. Toss Cappy at the scarecrow from the right to start the challenge, then quickly wall jump off the center charging station to reach the yellow platform. Run and jump across the middle to the second yellow platform as it rises to the Power Moon. This is a very short challenge, but there’s no time for an errant jump. You must get onto the first yellow platform in time for its second ascent, else you won’t have time to reach the Power Moon.
 Flooding Pipeway
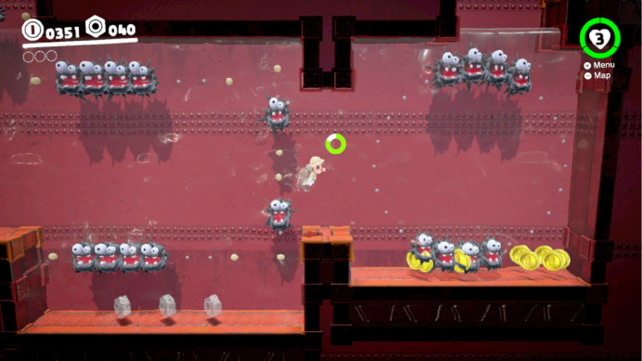
Warp to Iron Road: Entrance and leap over the railing to the pond near Talkatoo. Dive to the bottom and enter the warp pipe to access this challenge level. Floodwaters fill and empty with this Fuzzy-filled gauntlet of platforms and alcoves. To clear it, Mario needs to use the rising and falling water to swim and jump past the Fuzzies. Wait for the water to drain before moving past the first Fuzzies, then swim with the rising tide and leap out of the water at the top of the room. Swim through the gauntlet of Fuzzies up ahead while the water is high and wait on the ledge before the circling Fuzzies for it to rise again. Swim up to the Power Moon.
 Flooding Pipeway Ceiling Secret
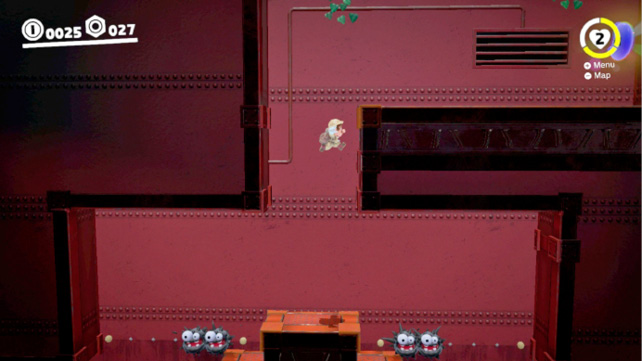
Follow the directions for Power Moon #39 and make your way to the upper platform in the middle of the level, above the water. Ground pound jump toward the gap in the ceiling and wall jump through the vertical shaft that becomes visible to reach the Power Moon up above.
 Wandering in the Fog
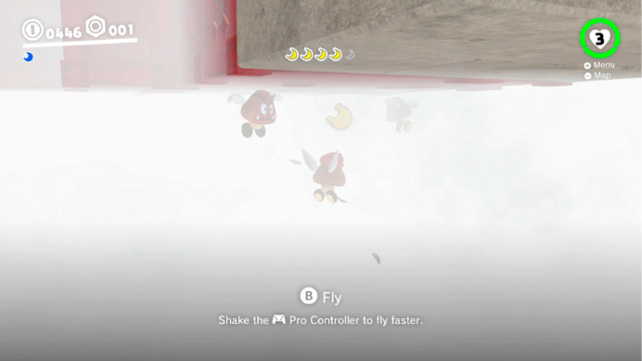
Ride the rocket from the Forest Charging Station to this fog-shrouded challenge level. Here, Mario must find five Moon Shards while navigating with limited visibility. The first two Moon Shards are near the starting point, the second of which is just down a step from the bridge leading to the ? Block. You should have two Moon Shards before crossing to the blocks. Collect the third Moon Shard near the Paragoombas.
Capture one of the two Paragoombas near the Moon Shard and fly up and over the third one nearby to find a solitary tower. From there, spot the coins in the air and follow them to the next Moon Shard. Descend along the coins and continue downward into the fog until beneath the platform with the rocket. Fly along the underside of the platforms to find the fifth Moon Shard near two more Paragoombas.
 Nut Hidden in the Fog
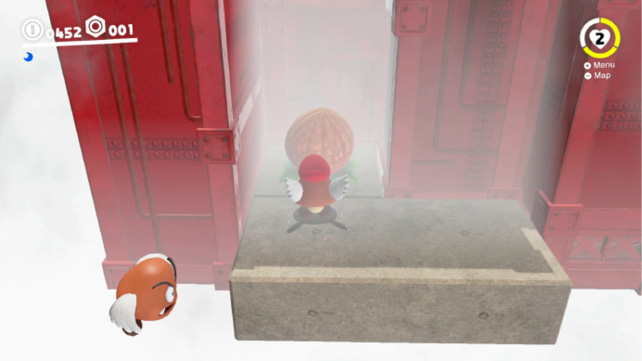
Follow the instructions for Power Moon #41 until you reach the fifth Moon Shard. Follow the coins underneath the platform until you spot another Paragoomba. Land on the concrete platform above it to locate a nut containing a Power Moon.
 Flower Road Run
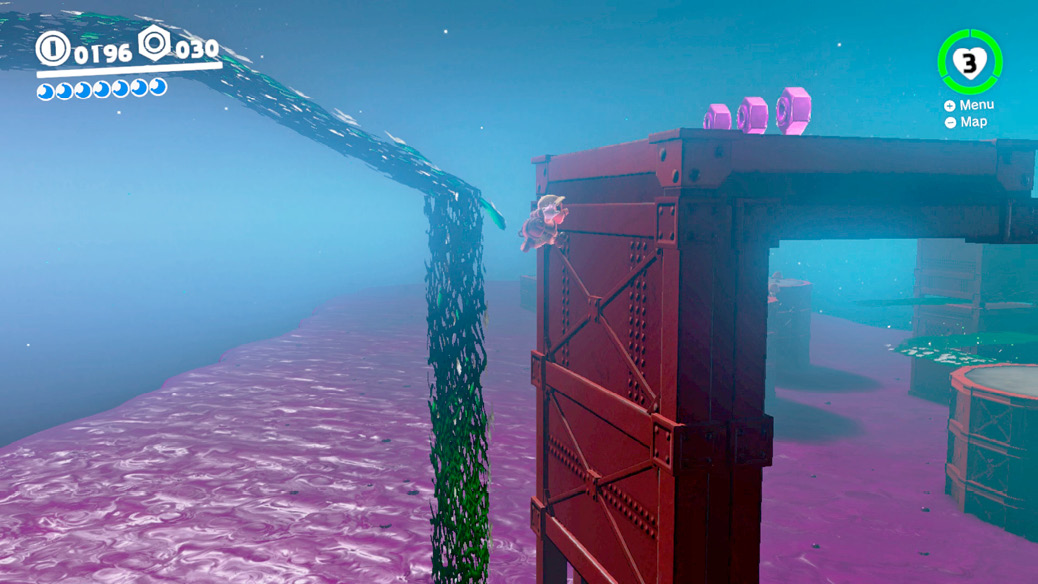
Round the corner from the base of Summit Path to the right (alongside the ramp) and wall jump up to the ledge above the coins. Enter the red door and step on the P-Switch to trigger a flower road. Run along it, ignoring the Goombas unless trying to collect Power Moon #44, and activate the second P-Switch. Let the flower road get a bit ahead of you then run along and long jump off the sharp drop to avoid the poison. Wall jump up the section of flower road that climbs vertically, grab the three Regional Coins atop the platform, and wait for the flower road to grow again before continuing. Wait at the cascading poison for the flower road to reemerge near the coins then leap across the gap. Long jump off the edge of the flower road to reach the Power Moon.
 Flower Road Reach
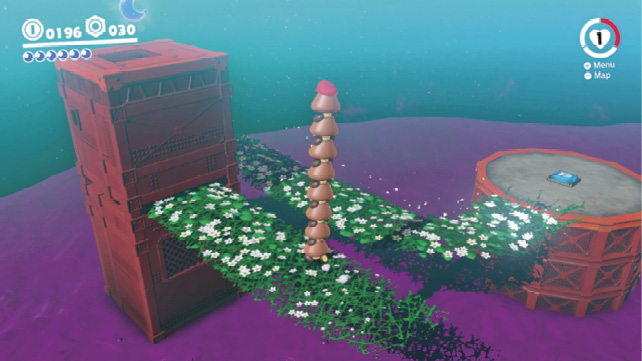
Follow the instructions for Power Moon #43 and capture the Goombas on the first island. Quickly assemble a Goomba Tower of at least seven Goombas and return to the flower road before it passes you by. Run along the flower road to the tower with the Power Moon atop it. Release the capture, grab the Power Moon, and leap back onto the flower road to continue.
 Elevator Escalation
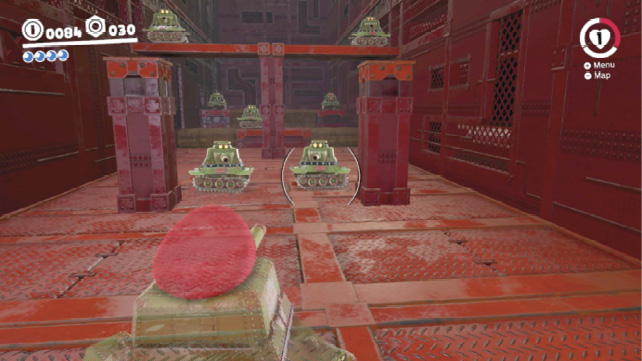
Warp to Iron Road Summit Path and use a Rocket Flower to reach the red door on the ledge at the upper right-hand corner of the ramp with the rings. Head inside and capture the Sherm near the caged P-Switch. Shoot the cage and press the P-Switch to ride the elevator to the lower level. Blast the Burrbos and the cage and hit the next switch. The third level contains several Fire Bros. Destroy the cage with Sherm and blast away at two of the three Fire Bros. Capture the remaining Fire Bro and hop up the ledges to get the three purple coins. Recapture Sherm, hit the P-Switch and descend to the fourth level where seven Sherms await. Use the metal pillars for cover and strafe in and out of protection as you blast the Sherms, starting with those closest. Blast through the breakable blocks to a cage containing a Power Moon.
 Elevator Blind Spot
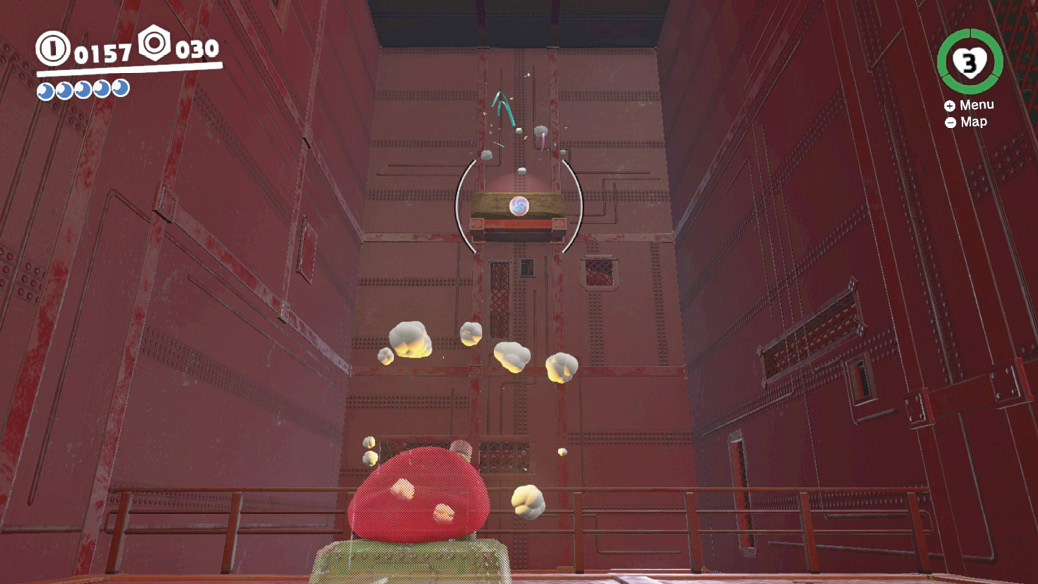
Follow the instructions for reaching the area where Power Moon #45 is. Capture the Sherm inside the entrance, but don’t descend! Instead, turn around and spot the breakable brown blocks high on the rear wall of the room. Blast away at these with Sherm’s cannon to reveal a hidden Power Moon.
 Walking on Clouds
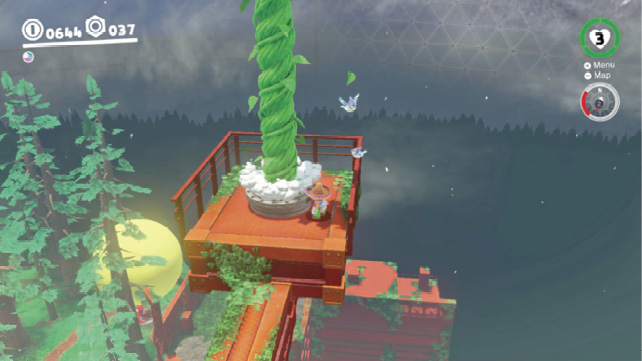
Warp to Summit Path and climb the ramp to where the Secret Gardeners are located. Get the seed from the one not watering the flowers and carry it to the P-Switch. Step on the switch to activate a timed series of platforms that deliver Mario to the Observation Deck (he can’t warp there with the seed). Once there, plant the seed in the pot to the right of the Glydon and climb the beanstalk to the clouds.
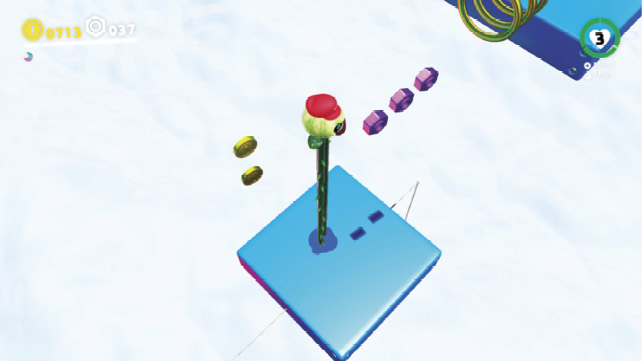
The music for this coin-choked cloud level should bring back plenty of memories for fans of Super Mario World. Capture the Uproot and hop aboard the moving platform. Stretch the Uproot’s legs to grab as many coins as you can—don’t miss the three Regional Coins—and hop from one blue platform to the other. Land on the red block and wait for the sliding platforms to pass underneath so you can ride it to the Power Moon in the distance.
 Above the Clouds
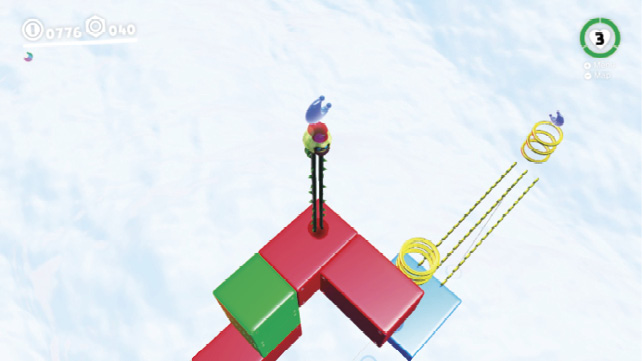
Follow the directions for Power Moon #47 and use the Uproot to make your way to the red and green blocks near the end of the cloud stage. Leap up to the upper level of this block pile and note the shadow on the ground. Stretch as high as the Uproot will go and jump straight up to get the Power Moon high above.
 Secret Path to the Steam Gardens!
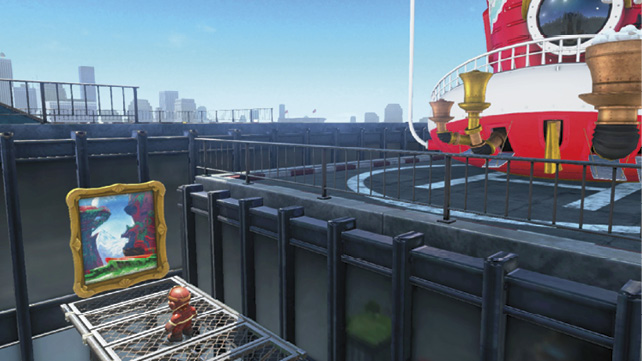
If you’ve been wondering how to reach the Iron Cage in Wooded Kingdom, you’ve come to the right place! The only way inside is via the warp painting leading from Metro Kingdom. Carefully leap over the railing near the Odyssey to land on the grated ledge to access it. The warp painting in Metro Kingdom leads to Lake Kingdom if you chose to visit Wooded Kingdom before Lake Kingdom.
 Found with Wooded Kingdom Art
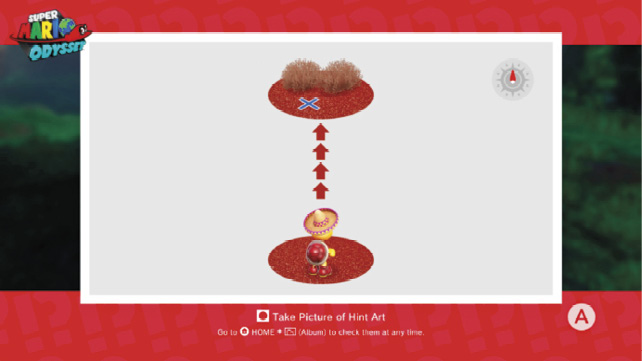
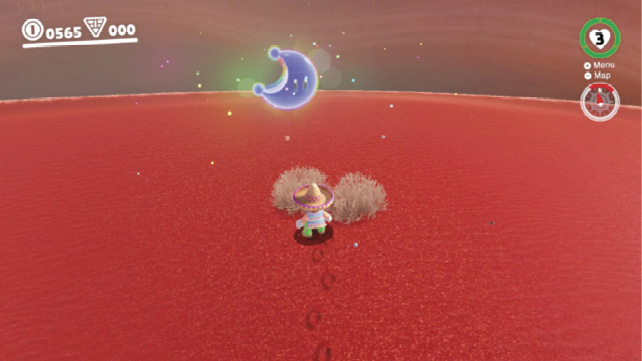
Locate the Hint Art on the tree directly south of the Odyssey and set sail for the Sand Kingdom. The art is a little more cryptic than prior puzzles, but those familiar with Sand Kingdom should recognize the Koopa pictured as the one who offers the Trace Walking challenge. The other hints are suggesting that you must walk north to find two small shrubs. This sounds easy enough, but the trick is understanding how far you must walk to find those two shrubs —they’re clear across the Sand Kingdom, on the northern edge of the desert. Make your way around the massive hole where the Inverted Kingdom was and continue north. Ground pound the spot in front of the bushes to uncover the Power Moon.
 Swing Around Secret Flower Field
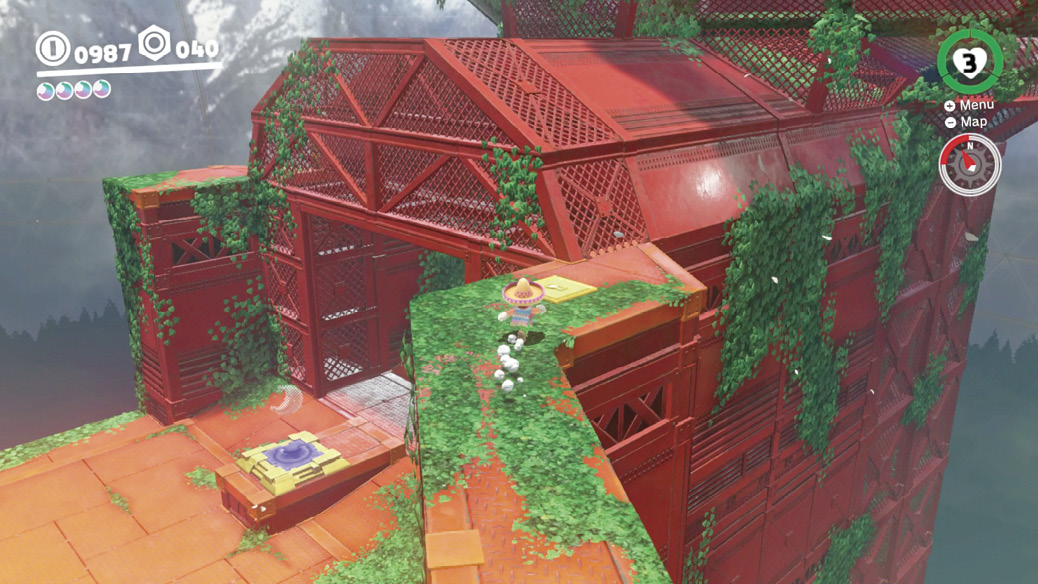
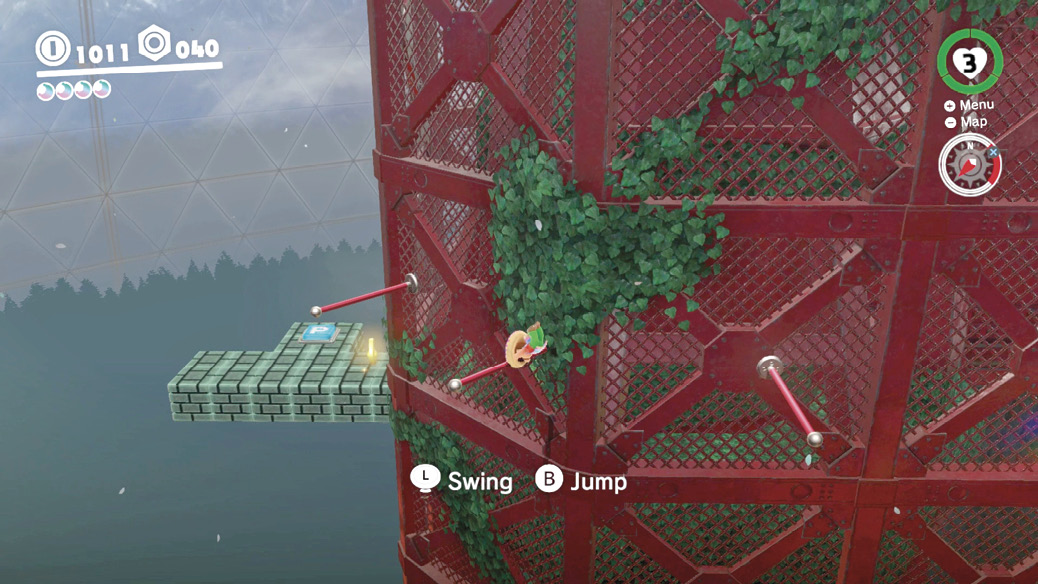
Warp to Secret Flower Field Entrance and use the golden pipe on the eastern side of the area to climb atop the wall. Note the locked panel in need of a key and make your way up and over the entrance to the wall on the other side. Descend the golden pipe to the crumbling walkway and make a tackle jump for the red bar. Swing and jump around the side of the structure to reach the key near the P-Switch. Follow the flower road to the Power Moon.
 Jammin’ in the Wooded Kingdom

Locate Toad on the ledge above the waterfall flowing into the forest after you’ve visited the cloud area (Power Moon #47). He’s beneath the Binoculars near Summit Path. Toad wants to hear a tune that fits the theme “Sky-high coins aplenty!” Select track 75 titled “Above the Clouds” to give him what he wants in exchange for a Power Moon.
 Wooded Kingdom Regular Cup
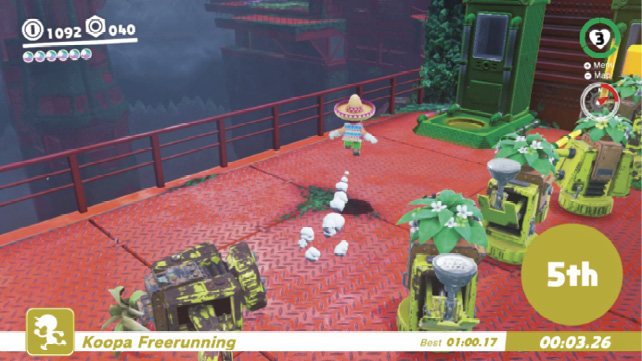
The Koopa hosting the race is near the Forest Charging Station warp flag. The race traverses the red maze of Iron Road: Entrance to Iron Road: Halfway Point, where you fought the Big Poison Piranha Plant. For the Regular Cup, we’re going to take you through the red maze while only utilizing one of the two shortcuts possible on this course. Check the Master Cup entry (Power Moon #69) below for an advanced shortcut.
Start the race by ignoring the beanstalk and the other racers. Instead, cut past the Steam Gardeners to the left and leap over the railing to Iron Road: Entrance. Long jump into a triple jump for the fastest distance. Triple Jump across the creek to the pistoning structures and capture the first Uproot you can. Hurry through the maze with the Uproot to reach the finish first.
 Peach in the Wooded Kingdom
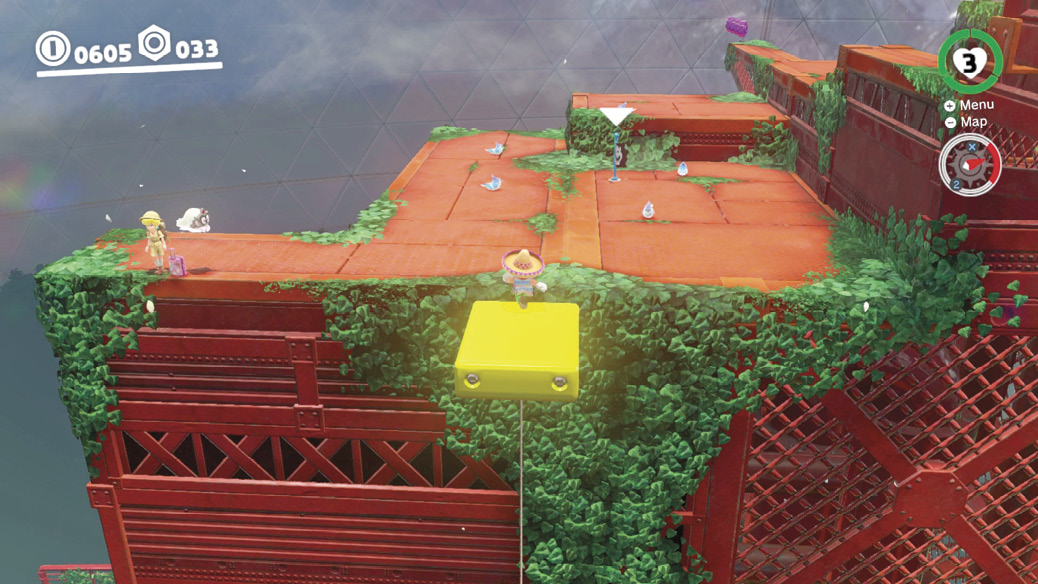
Head to Summit Path and climb the ramp toward the Secret Flower Field Entrance. Step on the P-Switch to activate a timed series of platforms that can be used to reach the Observation Deck. There, you’ll find Princess Peach and Tiara looking out over Wooded Kingdom. Activate the warp flag so don’t need to use the timed platforms in the future.
Moons from the Moon Rock
 High Up in the Cave
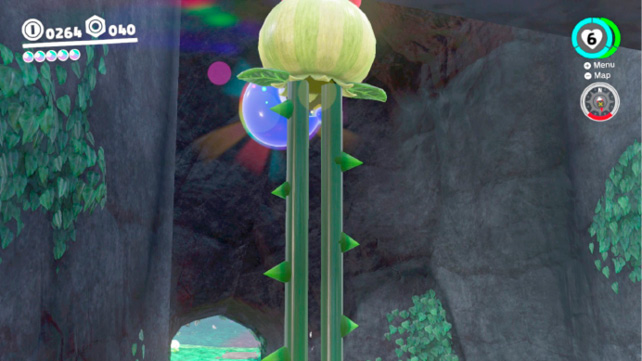
Capture an Uproot and guide it to the cave that connects the forest near Crazy Cap to Iron Road: Entrance (where the Sphynx originally was). Stretch the Uproot’s legs to pluck the Power Moon out of the air from above the cave. It’s also possible to use a Fire Bro. Advanced players may even get it with a tricky jump sequence.
 Lost in the Tall Trees
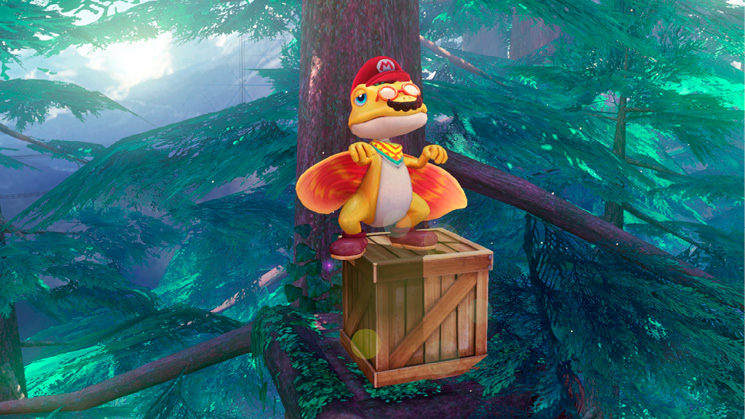
Head to the Observation Deck and capture the Glydon. Look out over the forest treetops left of the Odyssey to spot a wooden crate high on a platform in the trees. Fly to it as the Glydon, release the capture, and smash the crate with Cappy to free the Power Moon. Glide back over to Summit Path to collect it.
 Looking Down on the Goombas
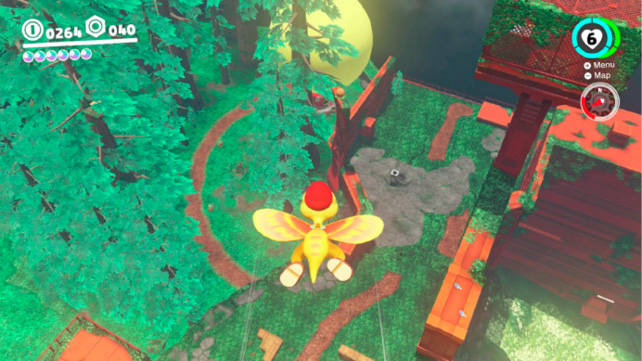
Capture the Glydon at Observation Deck and soar to the uppermost section of fence near where the Goombette is—glide on a straight path toward the Odyssey. Land atop the fence and break open the nut to get this Power Moon.
 High Up on a Rock Wall
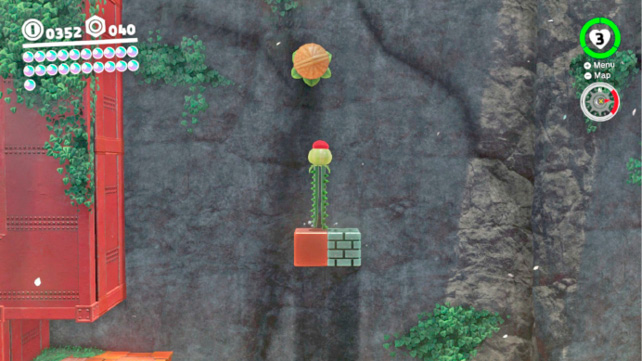
Capture an Uproot near Iron Road: Entrance and locate the three gray blocks to the right of the red maze. Get the coins from the unbreakable center block, then leap onto it as an Uproot. Stretch tall to break the nut up above the gray blocks.
 The Nut in the Robot Storeroom
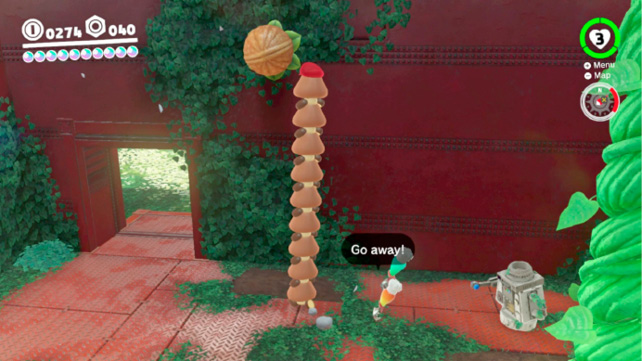
Capture an Uproot at Iron Road: Entrance and bring it inside the robot storeroom where you planted the beanstalk leading up to Forest Charging Station. Locate the nut above the door and use the Uproot to smash it open. Or, for something different, gather up a stack of Goombas near the Forest Charging Station, drop through the hole where the beanstalk emerges and crack and use the Goomba Tower to reach the nut.
 Above the Iron Mountain Path
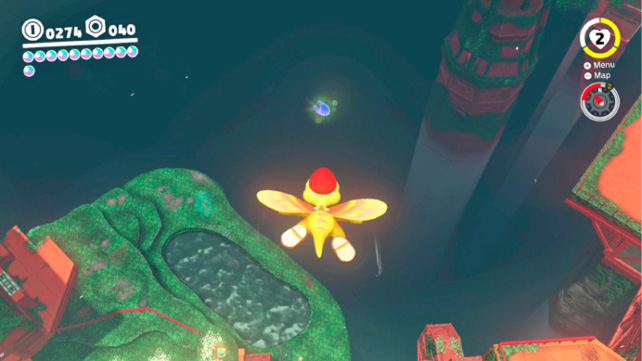
Take the Glydon for a high-flying trip across the skies above the Iron Road: Entrance area. Leap from the top of the Observation Deck while facing the pond near Talkatoo—the Power Moon is high in the air above this area. Press up on the controls to descend quickly, else Glydon might soar right past it.
 The Nut Under the Observation Deck
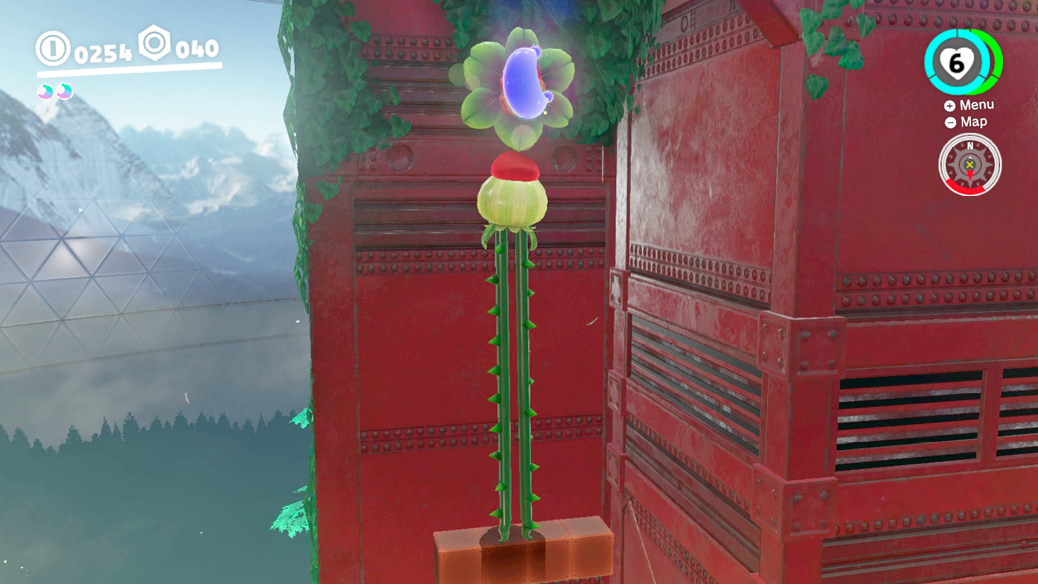
Capture the Uproot below the warp flag at Iron Mountain Path, Station 8 and guide it up the ramp toward P-Switch that leads up to the Observation Deck. Don’t step on the switch. Instead, round the corner to the left and stretch the Uproot’s legs near the railing to the left of the dirt rocks to uncover four invisible blocks high up on the wall. Leap onto the blocks and stretch again to reach the nut higher up, directly beneath the Observation Deck.
 Bird Traveling the Forest
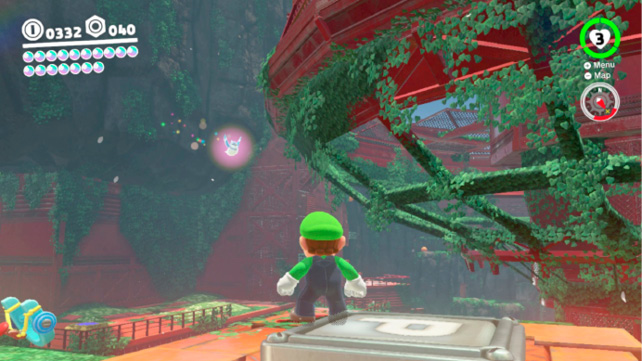
There’s a glowing bluebird circling the Sky Garden Tower and Iron Road area, lapping an area from Talkatoo to the northern side of the Sky Garden. There are several places from which to hit this bird, but it takes patience, as it changes its altitude on alternating laps. Consider following the flower road to the platform with the P-Switch on the north side of Sky Garden Tower and wait there for the bird. Every other lap that it makes of the area, it flies low enough to be hit with Cappy.
 Invader in the Sky Garden
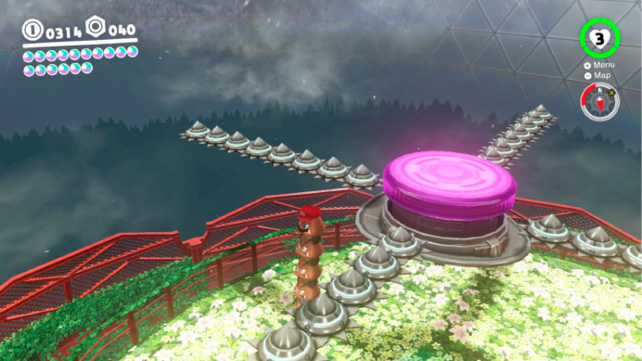
Warp to Sky Garden Tower and head up the stairs to where you earlier fought Spewart. The Broodals are long gone, but there’s a Yoofoe milling around and the only way to get high enough to bounce off his big purple button is to build a Goomba Tower. Capture a Goomba and quickly assemble a stack while avoiding the occasional cannonball dropped by the Yoofoe. The first hit is free, as the Yoofoe doesn’t try to defend itself. After that, its arms gain blades that can damage Mario if the Goomba Tower gets hit. The Yoofoe continues to deploy cannonballs and Goombas. Build the tower with seven Goombas, move toward the Yoofoe and release the capture to propel Mario onto it. Leap up and bounce onto the purple button. Land two hits to win a Power Moon.
 Hot, Hot, Hot from the Campfire
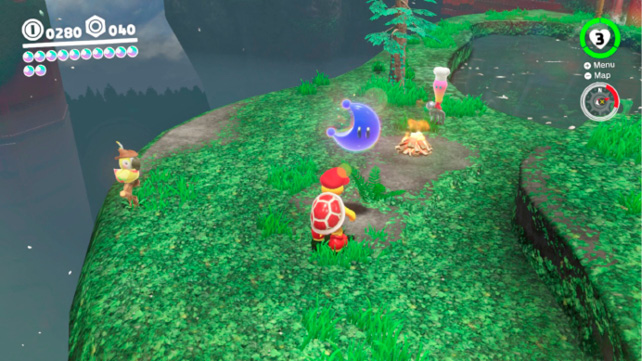
One of the visitors from Luncheon Kingdom needs help lighting his campfire near Talkatoo. A Fire Bro will come in handy. There are two places nearby to capture a Fire Bro. One option is to capture an Uproot and use it to climb the rock ledges above Iron Road: Entrance. Another option is to capture the Fire Bro within the cave above the waterfall in the forest area, near Toad. That one’s a little farther, but easier to reach. Either way, return as a Fire Bro and hurl a fireball or two at the unlit campfire to earn the Power Moon.
 Wooded Kingdom Timer Challenge 3
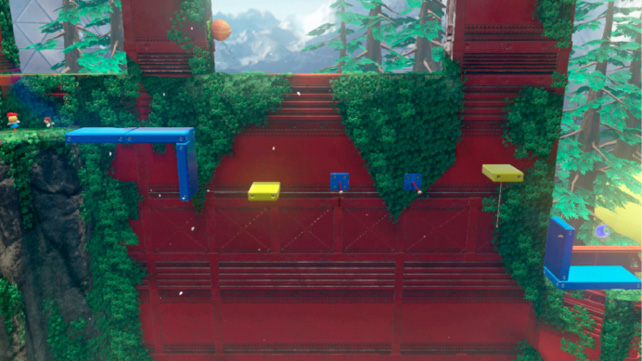
Warp to Iron Mountain Path, Station 8 and carefully leap over the railing down onto the triangular rock ledge where the scarecrow is. This is a relatively straightforward challenge, with the primary risk being that it’s easy to overestimate how far the first yellow platform travels. Drop onto it without jumping then swing and jump across the bars and other platforms. Leap into a tackle jump from the final yellow platform to reach the Power Moon.
 Moon Shards in the Forest
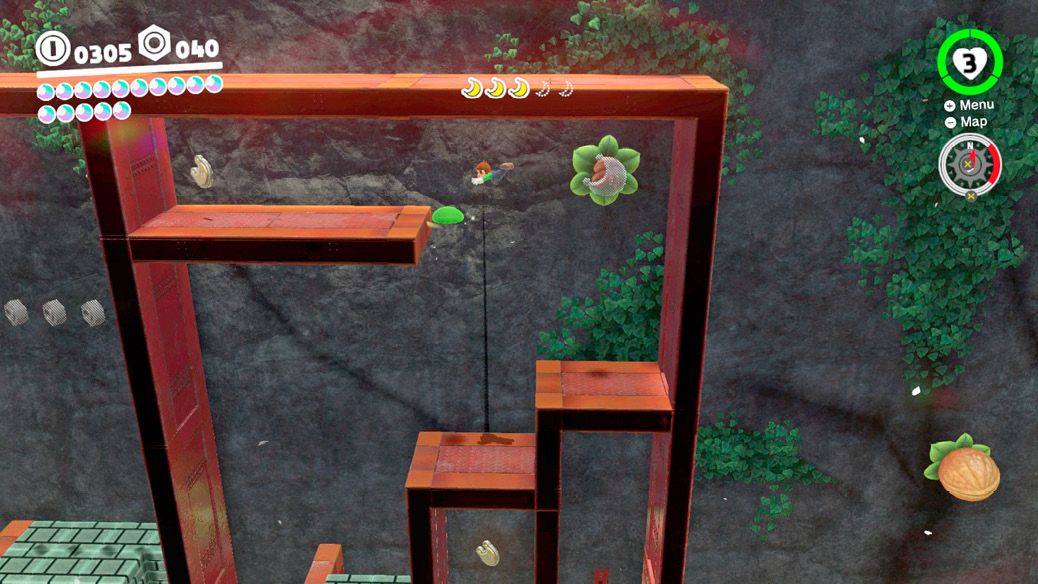
Five Moon Shards have been scattered throughout the red maze. Though it’s easiest to get them with an Uproot, via the normal right-to-left direction, it’s entirely possible to collect them in the other direction as well, provided you’re up for a lot of wall jumping. While four of the Moon Shards are quite easy to spot, one is located all the way at the top of the maze, near the nut containing Power Moon #15. Break the nut then wall jump into a tackle jump to reach the Moon Shard. Or use an Uproot. The Power Moon appears on the left end of the maze.
 Taking Notes; On Top of the Wall
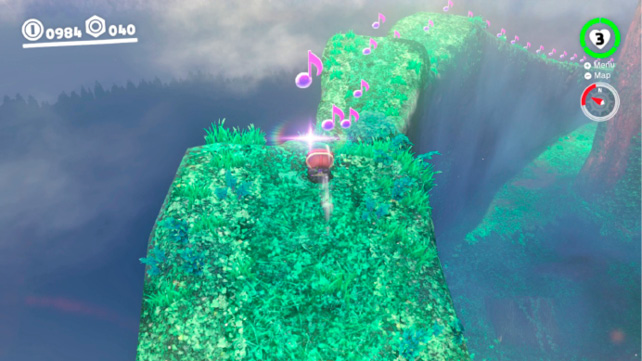
Climb onto the wall that surrounds the forest where the Odyssey sets down and locate the Treble Clef on the eastern side. Face south as you walk through the note, then immediately begin rolling. You need to really watch your balance, but the only way to get all of the notes before they disappear is to roll your way to the finish line. But don’t shake the controller! There’s no need for the extra speed, and it only makes it more difficult!
 Taking Notes: Stretching
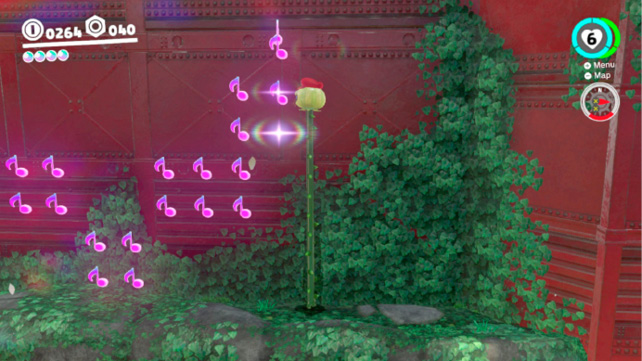
Capture an Uproot from Iron Mountain Path, Station 8 and leap up and over the railing on the west side to descend down to the rock ledges to the right of Iron Road: Entrance. The treble clef is on the rock ledge above where the three purple coins were. Start the challenge and stretch the Uproot’s legs to pluck the notes out of the air. Though it’s possible to collect the notes using homing throws and upward throws, it’s far easier with the help of an Uproot.
 Wooded Kingdom Master Cup
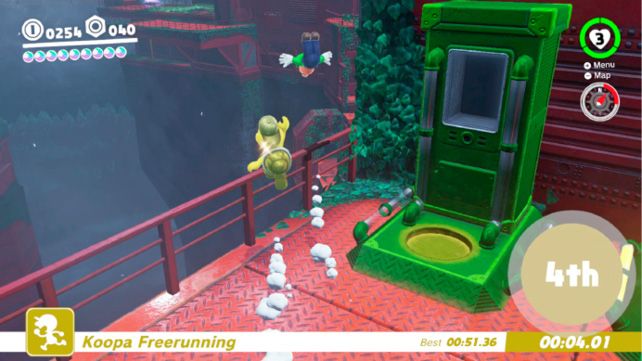
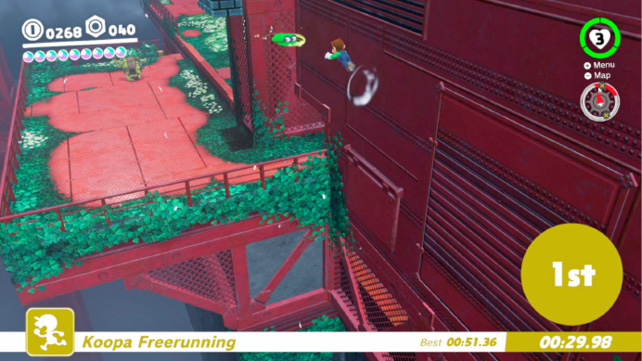
Meet the Koopa at Forest Charging Station when you’re ready to try the Master Cup race. As promised, this time we’re going to show you how to win this race without using an Uproot. That’s right, we’re skipping the red maze! Long jump into a triple jump as before, bypassing the beanstalk. Dive toward the creek to land in a roll and climb the pistoning structures toward the start of the red maze, but don’t capture an Uproot. Wall jump, turn and tackle jump onto the higher level—it’s not easy, but it’s faster than capturing an Uproot. Instead, note the gap in the fence at the left edge of the metal platform. Mario can clear this chasm with a well-timed dive jump, tackle jump combo. The Golden Koopa takes the initial shortcut, but won’t bypass the red maze. Put this advanced line to use and shave over fifteen seconds off the route discussed in the Regular Cup tactics!
 I Met an Uproot!
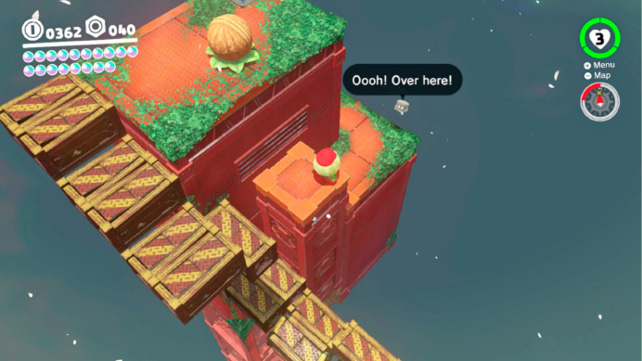
A Bonneter has made his way to the northernmost tower in Wooded Kingdom, beyond the flower roads connecting the Sky Garden with the Iron Road, and he wants to meet an Uproot. Return to Iron Road: Entrance, capture an Uproot, and guide it through the red maze to the flower road leading to the north tower. Carefully guide the Uproot across the crumbling walkway to where the Bonneter is located to earn a Power Moon.
 Invisible Road: Danger!
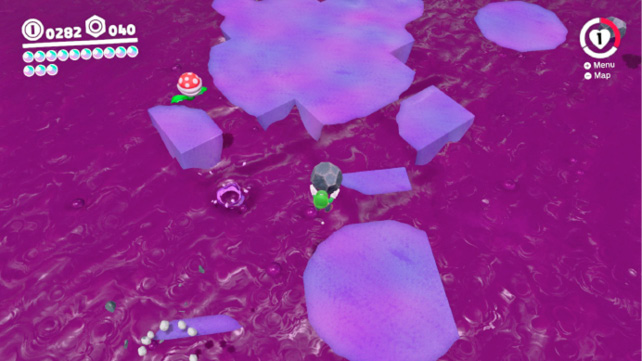
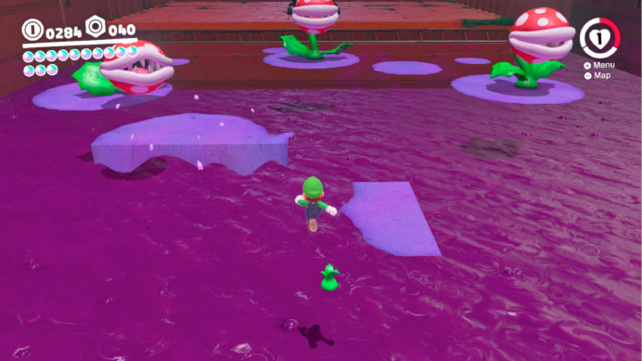
Enter the Moon Pipe at Secret Flower Field Entrance to access an area constructed of invisible platforms. There’s no Moe-Eye here to help you see the floor, but there are a number of Poison Piranha Plants whose purple ink coats many of the otherwise invisible surfaces. Toss the available rocks at the plants then toss Cappy at them to capture the Poison Piranha Plant while it’s chewing on the rock. Paint the ground if necessary, release the capture, and use Cappy to sweep a clear path. Watch the gap in the path after the second Poison Piranha Plant, then turn the corner to the left and leap for the revolving plus-shaped platform. Continue across the room until you reach the three Big Poison Piranha Plants. Jump across the gap just after the spinning platform and quickly toss Cappy at the larger plant on the left or right. Pick them off one by one by tossing Cappy at them then jumping atop their head.
 Invisible Road: Hidden Room
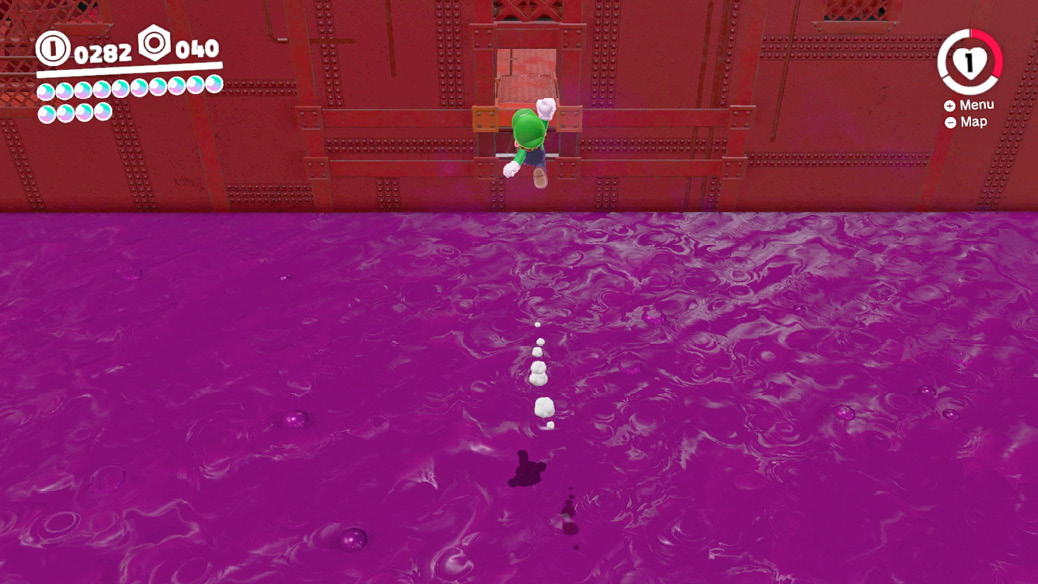
Follow the tips for Power Moon #71 and return to the rotating platform in the center of the level. There is a hidden room on the far side, opposite the side you board the spinning platform from. It can help to capture the Poison Piranha Plant so you can paint the invisible walkway with ink and see where it’s safe to walk. You can also dive jump from the edge of the rotating platform toward the doorway and trust us when we tell you that there is solid ground to land upon. Go for it!
 Herding Sheep Above the Forest Fog
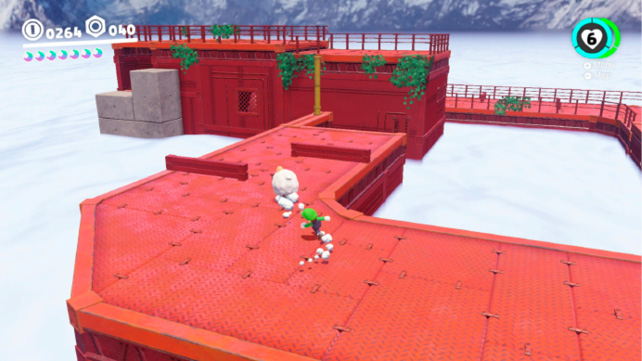
Enter the Moon Pipe near the Goombette to access this difficult sheep herding challenge. Mario must herd the sheep through a spiraling course that features several gaps, ledges, and sections without any guardrails. The key to doing this is to be patient, line Mario up behind the sheep in the direction he needs it go, and only to toss Cappy at the sheep when necessary. Much can be accomplished by walking behind the sheep. The sheep tries to avoid falling off the platforms when left to walk on its own. Don’t hurry it!
The Sheep runs away from Mario so zigzag behind it to guide it through the barriers without falling. Make sure the sheep is facing straight ahead when you knock it up and over the gap in the floor.
 Herding Sheep on the Iron Bridge
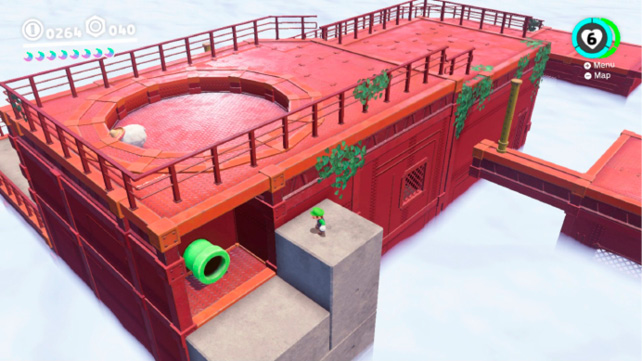
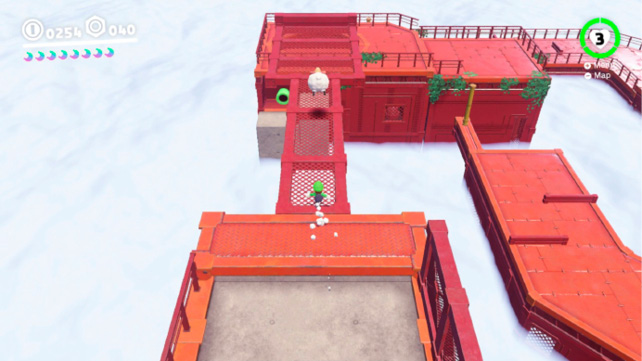
Enter the warp pipe beneath the corral in the Power Moon #73 level to access a second sheep herding challenge area. Move the sheep over to the edge before pressing the P-Switch, as iron bridge only appears temporarily once the switch is pressed. Center the sheep with the narrow walkway, hit it with Cappy, then chase after it to herd it to the far end of the bridge. Smack it with Cappy again to boot it across the gap to the corral. Stay directly behind the sheep to keep it on a straight path.
 Down and Back Breakdown Road
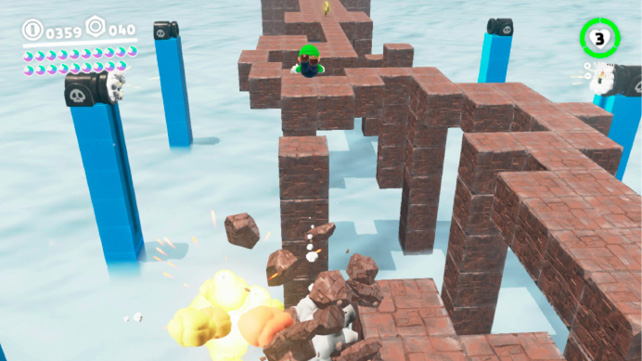
Enter the Moon Pipe in the base of the pistoning columns at Iron Road: Entrance to enter this challenge level filled with Bullet Bills. Cross the stone walkway for the key as Bullet Bills shoot at Mario from all directions. Though it’s possible to downthrow Cappy and capture a Bullet Bill, there’s not much need. Instead, stay on foot and run and leap your way to the key. This releases a Power Moon from the locked panel back at the start, but don’t head back the way you came! Instead, keep reading below for a great tip on how to earn this Power Moon and Power Moon #76 in one trip.
 Below Breakdown Road
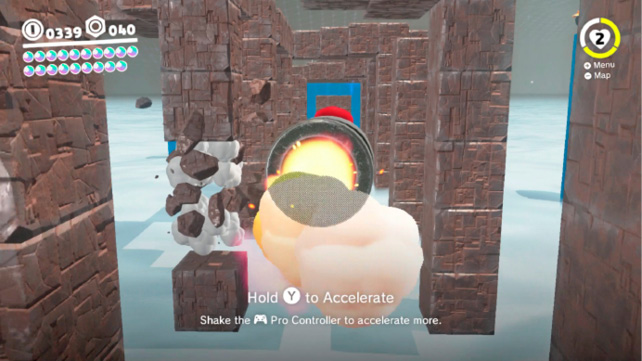
Follow the tips for Power Moon #75 to get the key needed for the prior Power Moon, but don’t turn back the way you came. Instead, dodge the Banzai Bill that appears near the key and drop to the stone blocks on the lower level. A second, lower altitude Banzai Bill blasts through the large wall in front of you. Capture it and guide it back across the level beneath the upper walkway. Pilot it straight into the massive stone wall below where you started to uncover this hidden Power Moon.