
Super Mario Odyssey Guide Dark Side
Power Moon Locations
 Power Moons
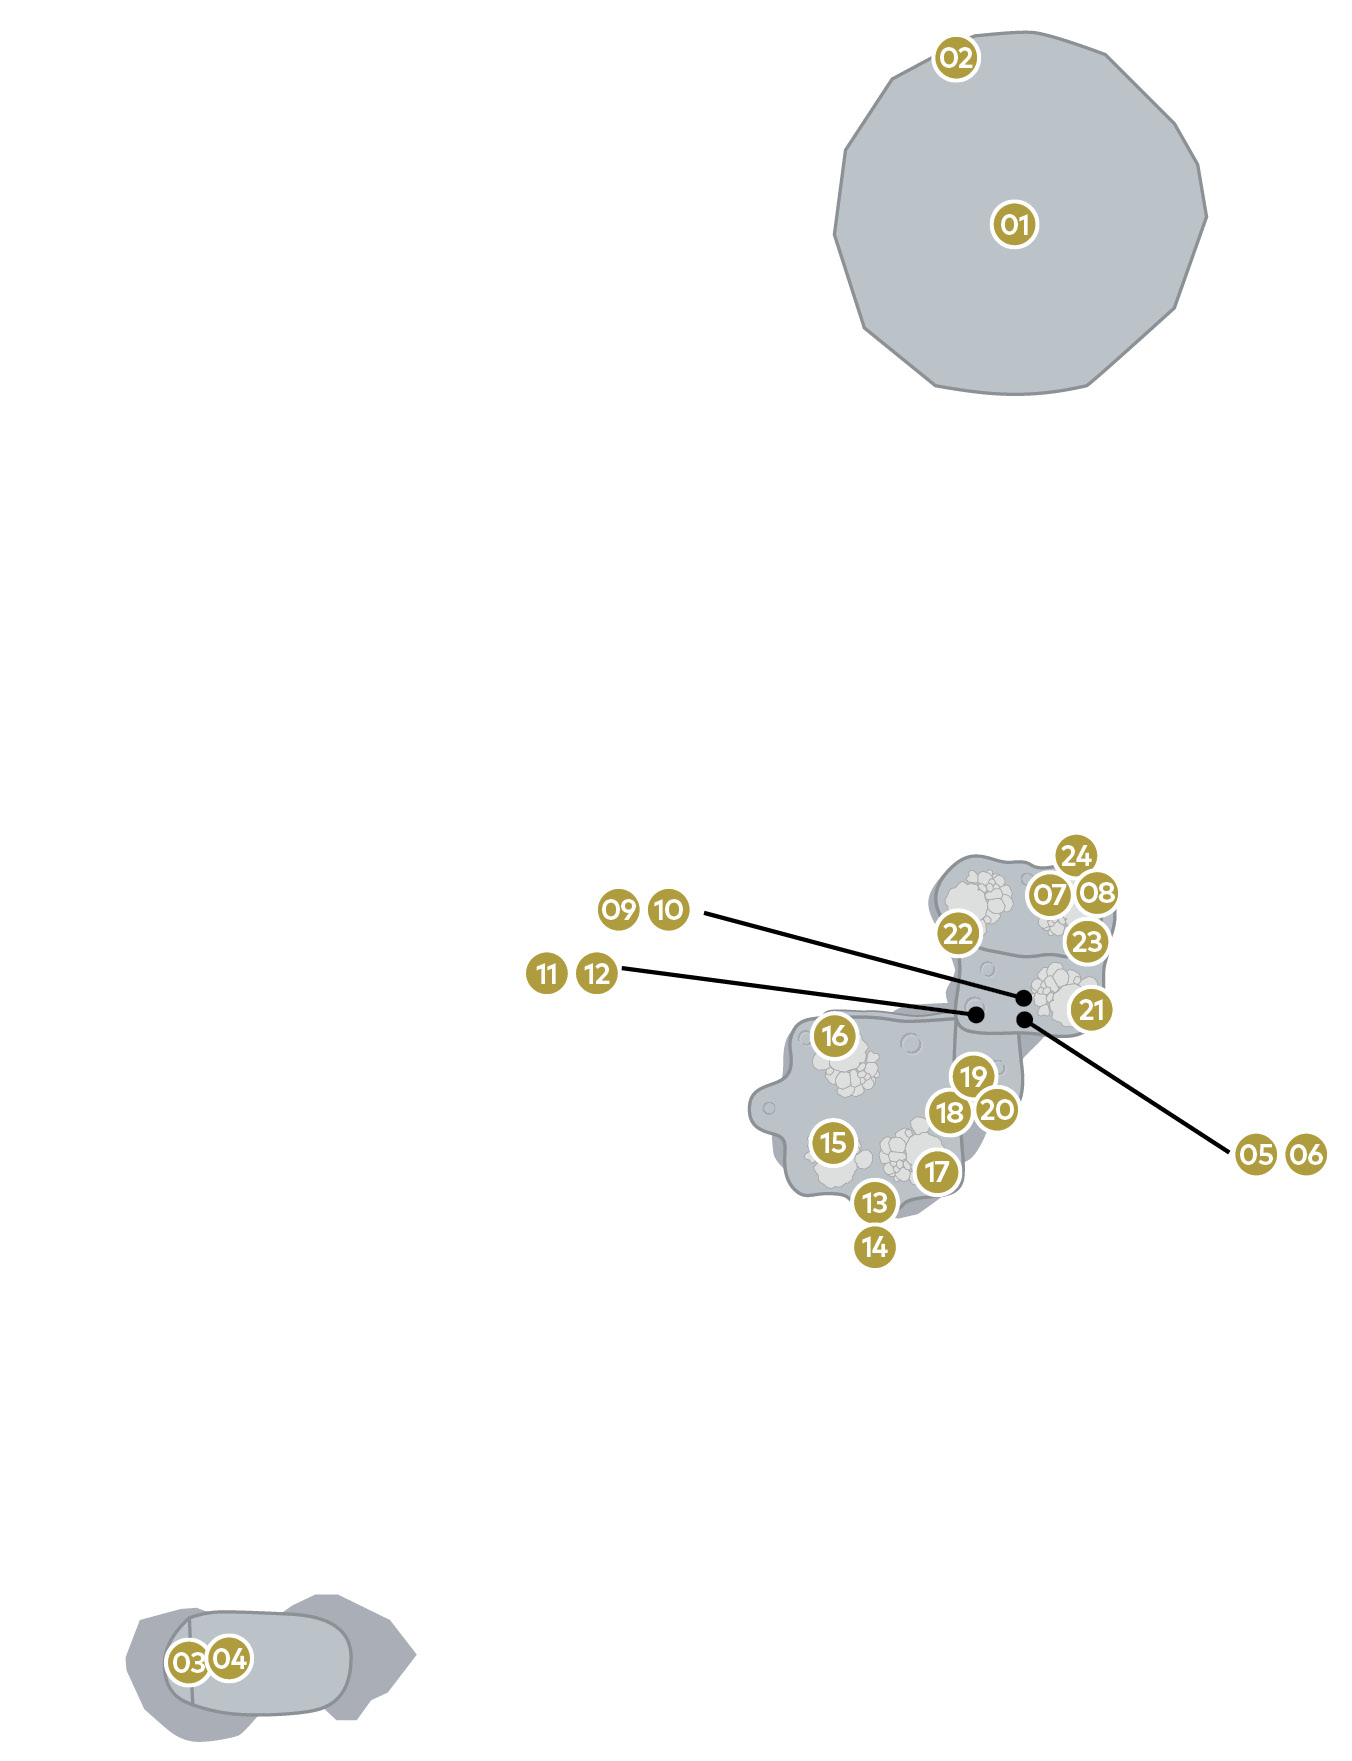
There are 24 Power Moons on the Dark Side of the Moon. Power Moons #01 and #02 were obtained while ridding Dark Side of those hares gone wrong, the Broodals. The rest of these moons are available once their threat is removed.
 Breakdown Road: Hurry!
This scarecrow challenge room is found on a shelf just behind where the Odyssey is parked overlooking Rabbit Ridge. Mario must turn in Cappy to access the room, so Mario won’t have captures, hat attacks, or hat jumps. He’s regular old Mario for this one.
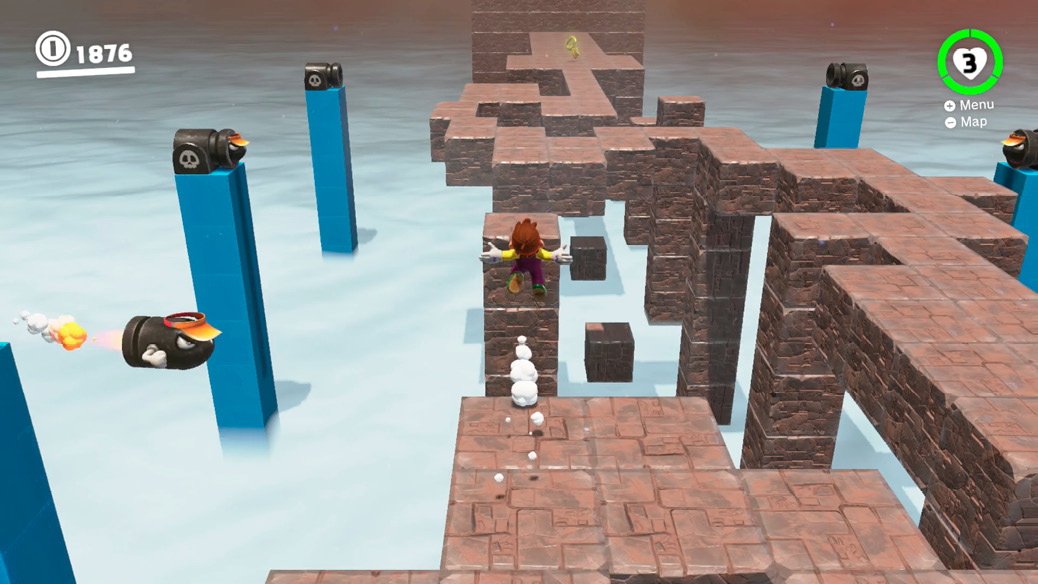
There’s a Lock near the entrance, a Key across a large gap, and a second-floor-height network of fragile blocks between them. This amounts to a rickety bridge, basically, as there are still gaps that must be crossed with jumps.
It’s not quite that simple though. On both sides, rows of cannons are locked and loaded, ready to launch Bullet Bills at anyone foolishly trying to cross the middle to grab the Key.
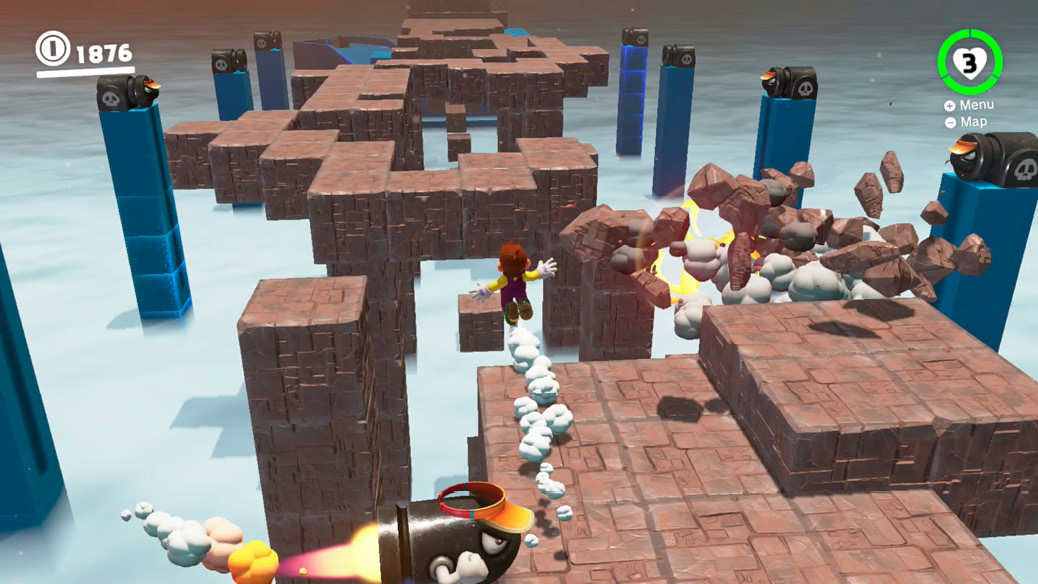
Mario must get across without falling, grab the Key, then return without falling to grab the moon. On the way back, there is even less of a bridge as on the way out, since Bullet Bills have blasted apart segments of it on the first pass. If that wasn’t enough, grabbing the key coaxes a Banzai Bill out of hiding from the far side. One way or another, a return trip posthaste is strongly incentivized!
 Breakdown Road: Final Challenge!
The Bullet Bill room has a lower floor, but it’s even dicier than the top. Just as a Banzai Bill plows across the proceedings on the top deck when Mario finally reaches to the Key, the same is true on the lower deck. Mario must coax a Banzai Bill out of hiding on the lower deck, then lead it all the way back along the bottom. The platform on the entrance side has a fragile wall of blocks visible, and it’s these the Banzai Bill must demolish to reveal the Power Moon.
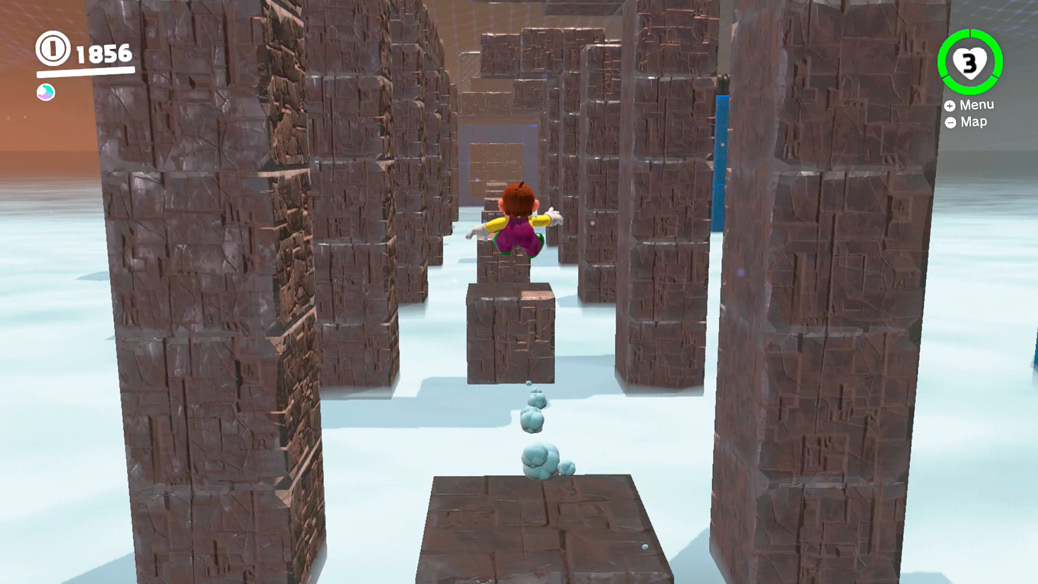
On the bottom level, just above the cloudy pit, there are a series of evenly spaced, small platforms connecting the entrance and Power Moon side with the Banzai Bill and Key side. They’re spaced out just right for running long jumps between every block, with no room for error on the leaps. If you’re going for both moons at once, you can cross on top, grab the Key, then fall to the lower level to antagonize the lower Banzai Bill launcher, then jump back, requiring just eight perfect running long jumps on the way back; if you’ve already cleared the Key Power Moon before, you can cross both ways on the bottom and avoid the Bullet Bill nuisance up top, requiring 16 flawless running long jumps in a row.
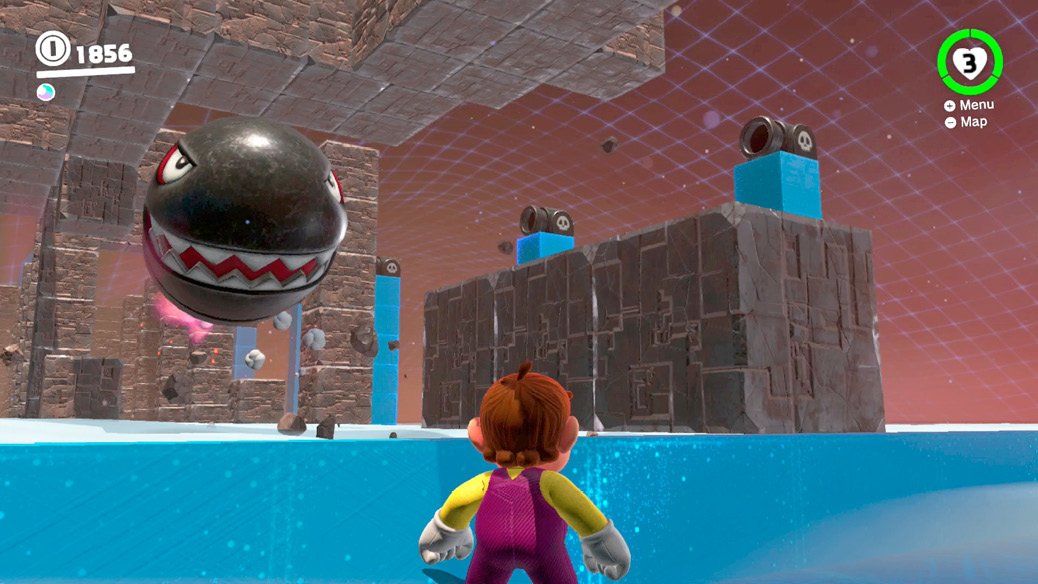
Either way, on the way back, don’t worry at all about the speed of the Banzai Bill behind Mario—Mario is way faster than a bullet while running and long jumping! Just focus on timing each running long jump to be from the edge of the current platform, aimed straight forward. On each landing, don’t jump right away, let Mario take a running step across the current platform before pressing Crouch and Jump together at the edge for the next running long jump.
 Invisible Road: Rush!
This scarecrow challenge room is found on a precarious shelf hanging down the east slope of Rabbit Ridge, just above the abyss. Beyond the door must be among the scarier sights in the game, at least at first glance: invisible platforms, Poison Piranha Plants, and no Cappy to help.
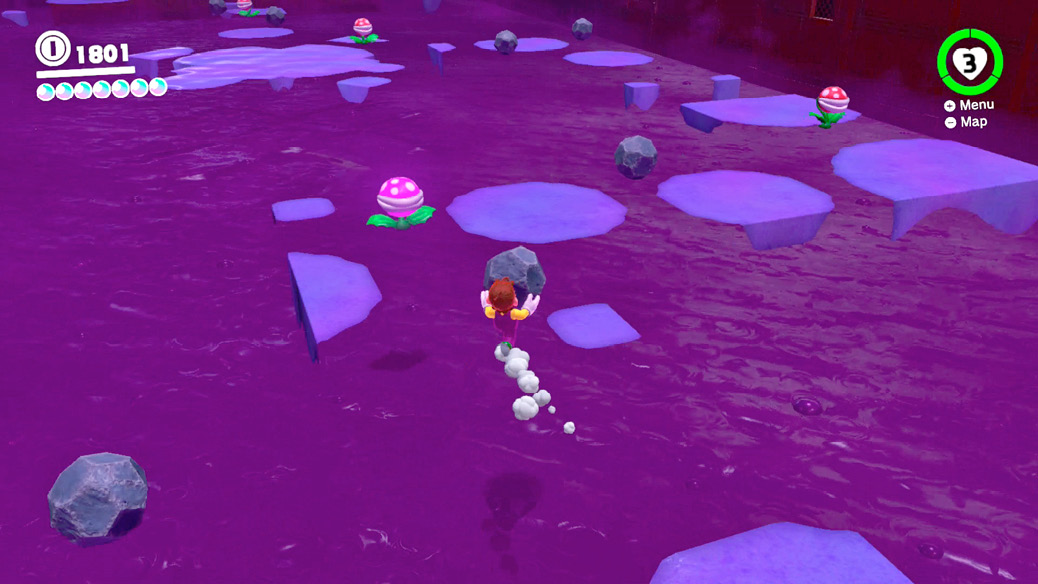
The first part involves a passage that cuts across the poison below with right angle turns. Past the first plant, turn right, then left, then left. At the halfway point is a spinning cross-shaped platform, with another plant on one of the points.
The purple poison given off by the plants at least provides some guideline for movement, and the rocks provide some form of defense. But it’s probably better to just forego trying to improvise offense with the rocks, and instead focus
on crossing the stage. If there’s a rounded purple splotch (indicating it’s not the very edge of a platform) or a Poison Piranha Plant, it’s a safe area to stand, probably. If there’s a straight-edged purple splotch, it’s a ledge edge—watch out!
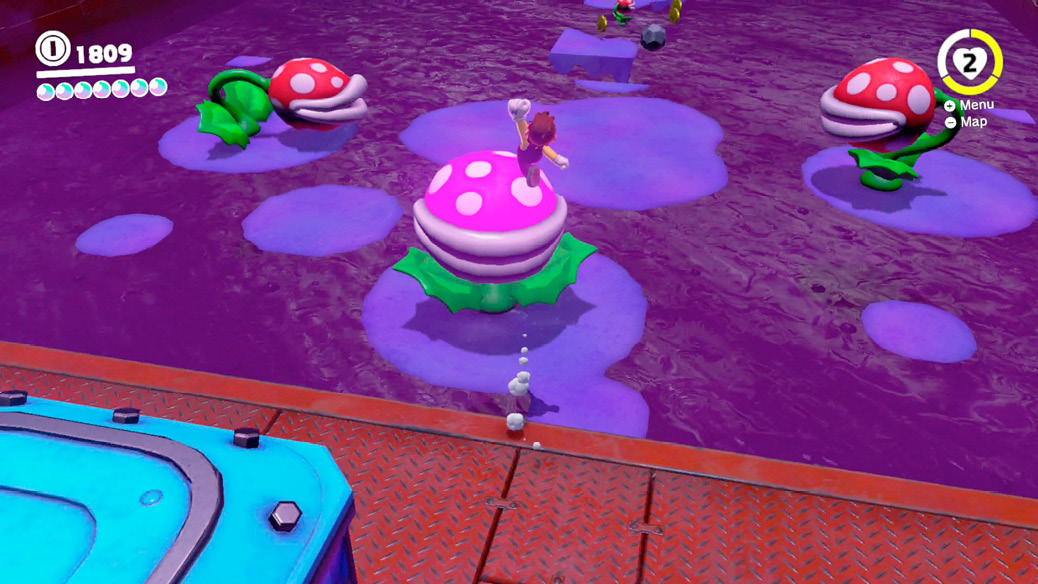
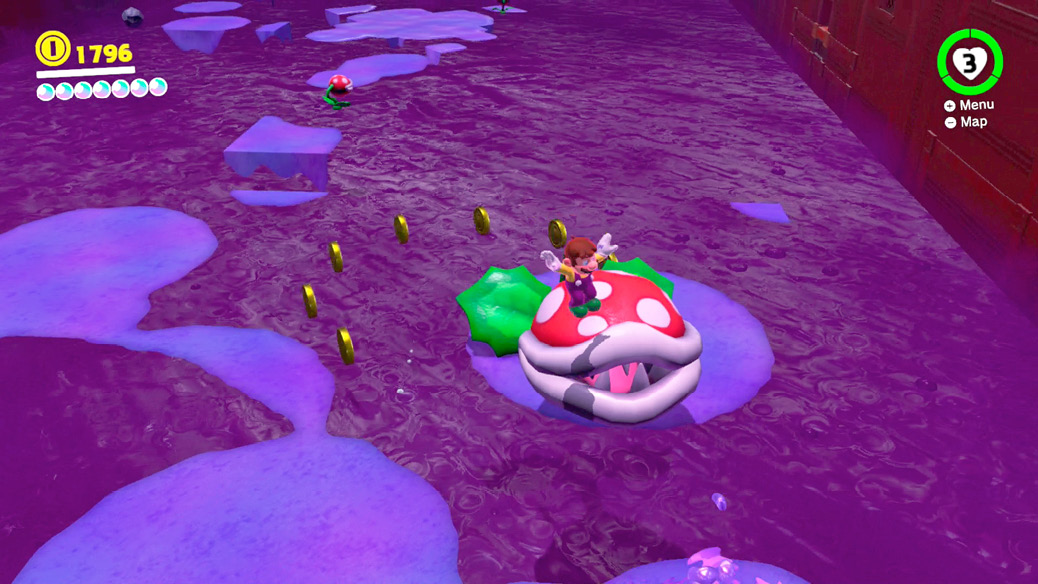
Toward the end, beyond the lazy Susan platform, are three Big Poison Piranha Plants. The section around and in between the three big plants is all safe to stand on, aside from near the snapping, spitting plants or upon their poison spit, of course. Solid, blessedly visible ground is also right beside the big plants, a bit raised like a stage. Here, a Power Moon is locked down in a cage. To release it, squash all three Big Poison Piranha Plants.
The one closest to the stage is easy to stomp on with a jump from the stage, but the other two are not. The easiest way to get enough height on a jump near them to stomp their noggins is to run slightly past them on one side, then turn 180 and jump to side somersault up next to them. Steer the side somersault onto the beast’s leafy head. Getting all three down reveals the Power Moon, and the Moon Pipe here leads back out.
 Invisible Road: Secret!
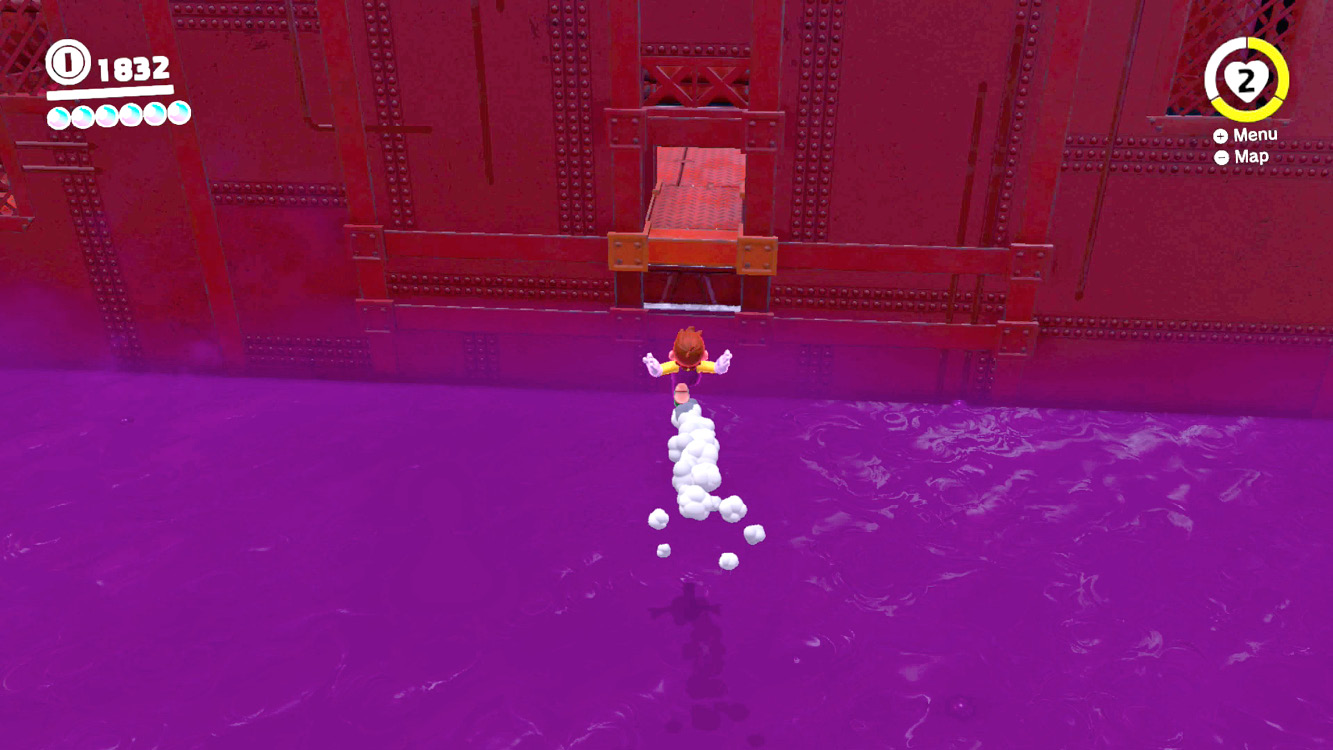
Look out from the spinning invisible platform halfway across the Poison Piranha Plant room to see a curious cutout in the wall across seemingly empty space. That’s the trick: it’s not empty. There’s a platform running from the spinning cross platform to the hole in the wall. Charge bravely across this space and enter the secret room in the wall to find a treasure chest containing a bonus Power Moon.
 Vanishing Road Rush
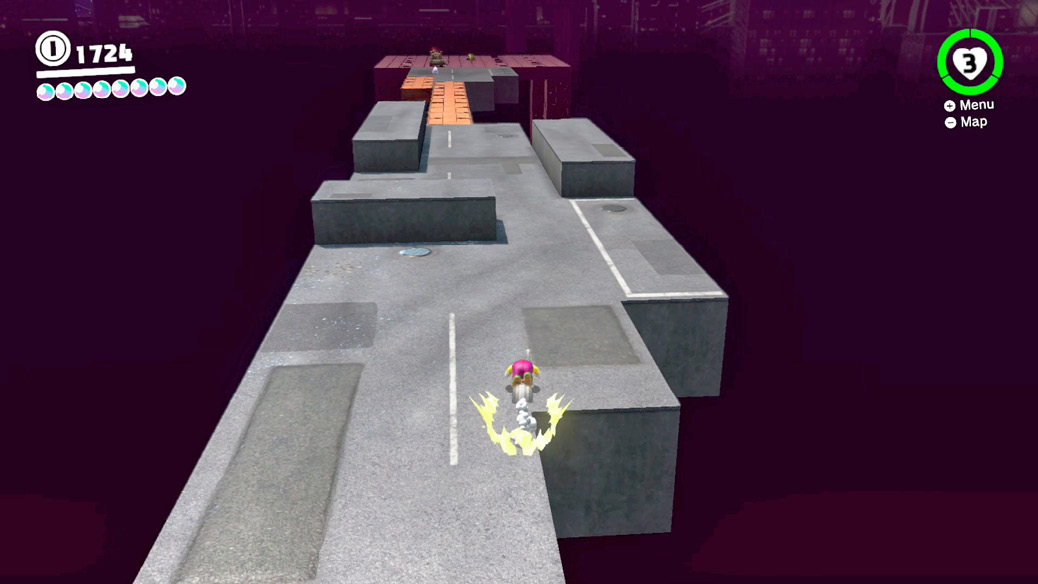
Tucked away in a crevasse on the back side of the northeast corner of Rabbit Ridge is another scarecrow challenge room.
This stretch is some nightmare vision of Metro Kingdom, where Mario must cross punishing urban environments with a harsh time limit. Hit the P-Switch at the start to begin the first section. Tuck into a roll and bounce across the whole path, curving around the rise in the road ahead on the left. Don’t slow down over the collapsible bridge, just keep trucking. Rolling is much faster with rapid motion shakes than it is with repeated Cap button presses, so keep that in mind.
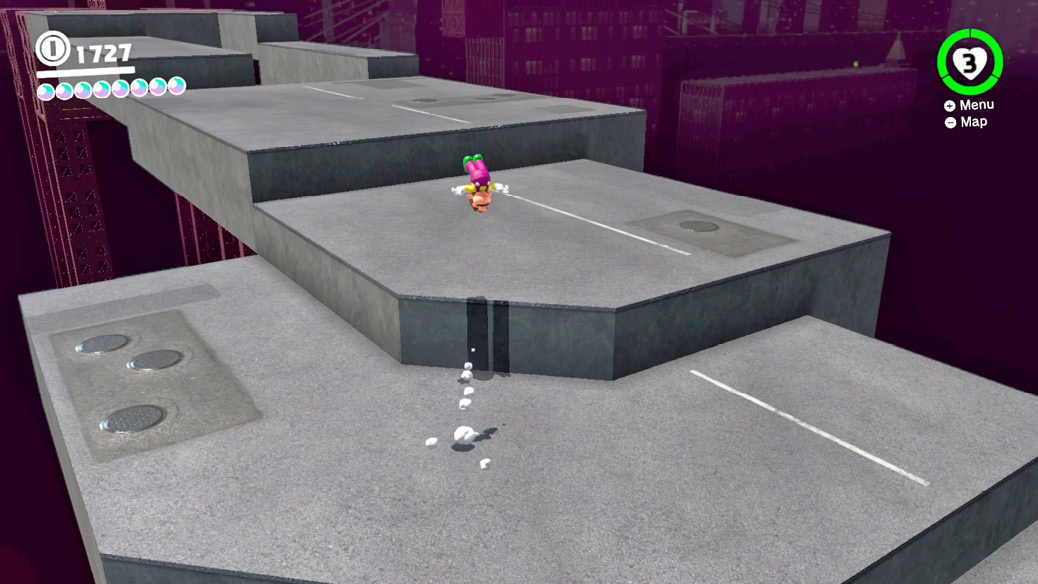
The next section starts with another switch press. A stair-like section of roads snaps into existence. The steps up are just wide enough apart so Mario can’t fully jump from one to another, but they’re too close together for rolling in between jumps to make sense. The time limit here is very harsh, so Mario must gain some extra speed somehow. The keys are continuous jumps, triple jumps, and tackling forward to reach the next step early when possible. While moving forward at full speed, launching off the ground with a continuous/triple jump gives a little speed boost, as does tackle, as does landing from a high-speed tackle. Keep up the little speed boosts and don’t slow down (don’t hit a wall with a tackle, don’t miss a jump, etc.) and Mario makes it across the roadway staircase to the next P-Switch before the ground gives way.
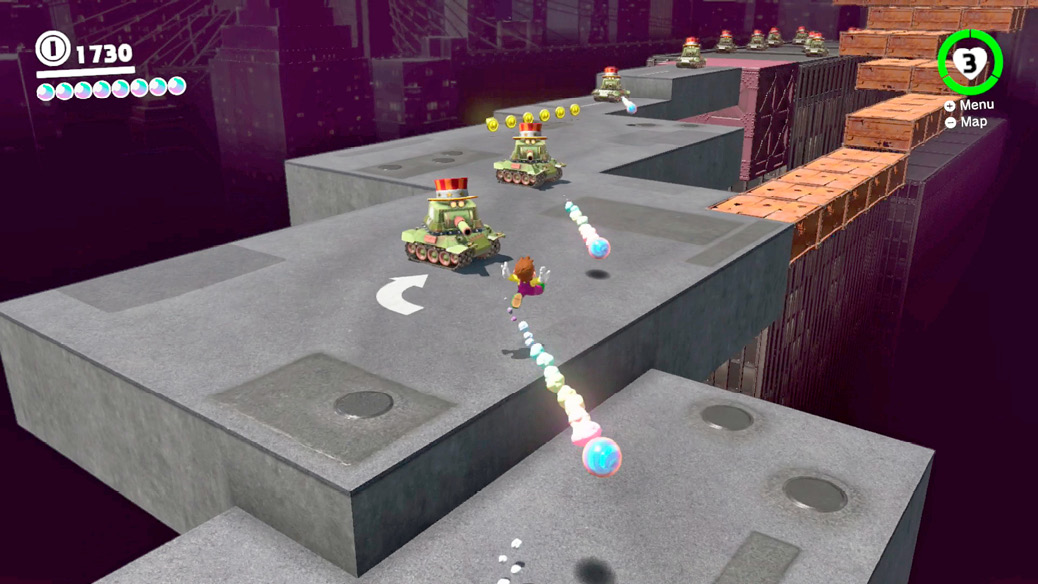
The closing section is a lot less hard to navigate than the previous two, which required precise and rapid rolling and jumping. This section is just complicated by the presence of, oh, a dozen Sherm tanks! There are so many tanks on this narrow stretch of road that half of them probably shoot each other apart in a crossfire trying to get at Mario. It’s a good thing, because that provides the opening needed to sprint to the finish, beyond a long beam extending out beyond the tanks. Dive for the moon below to finish the challenging sprint.
 Vanishing Road Challenge
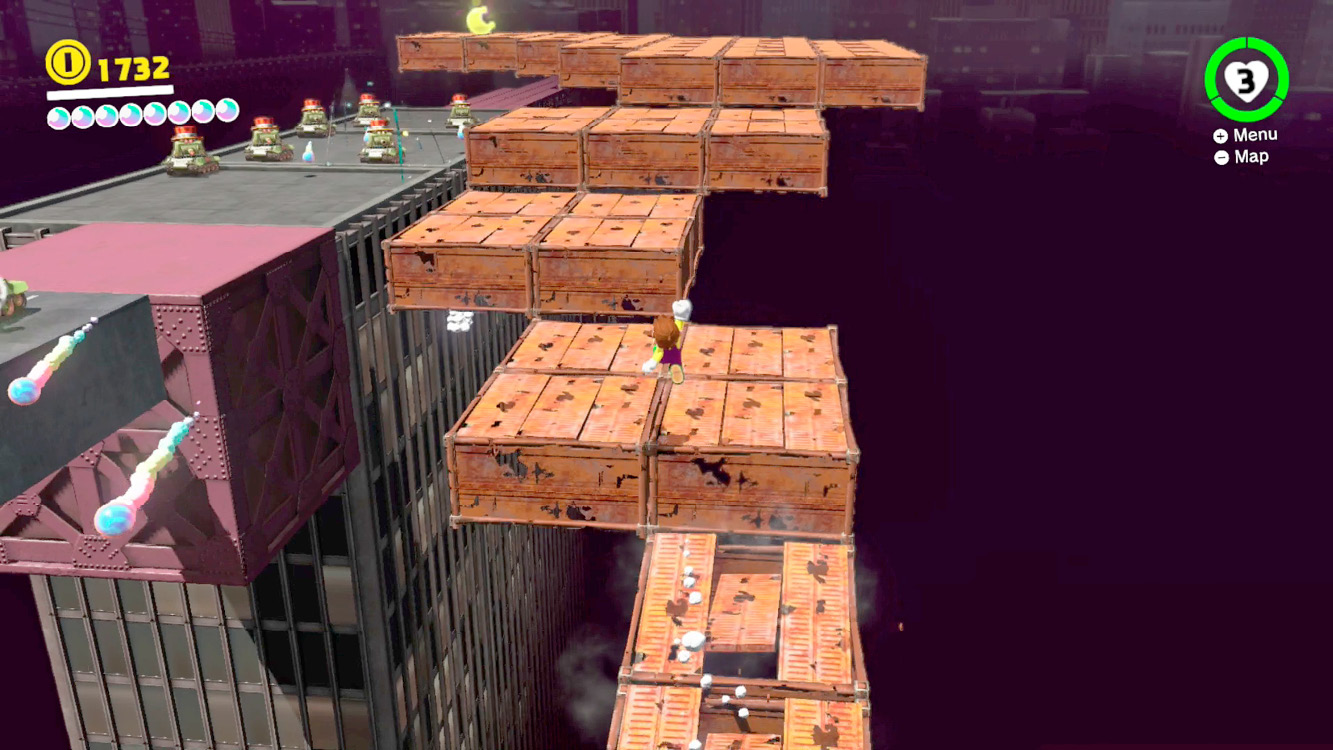
After the timed staircase road, when the tank rooftop portion of this challenge room begins, spy the right side of the roof to see a series of collapsible platforms stretching off the main path and above it. This is a bit like the stair sequence you just completed, if that sequence was also falling apart while you crossed it, and if tanks were also shooting at you! Luckily, the tanks aren’t really a problem if you keep moving forward, which you have to anyway, because any piece of floor falls away after Mario touches it. Race to the top in a series of well-timed continuous jumps, triple jumps, and tackles, then dive for the Power Moon hovering beyond the fragile platforms. Don’t worry, after grabbing the moon, you should have room to maneuver and land amid all the tanks below!
 Yoshi Under Siege
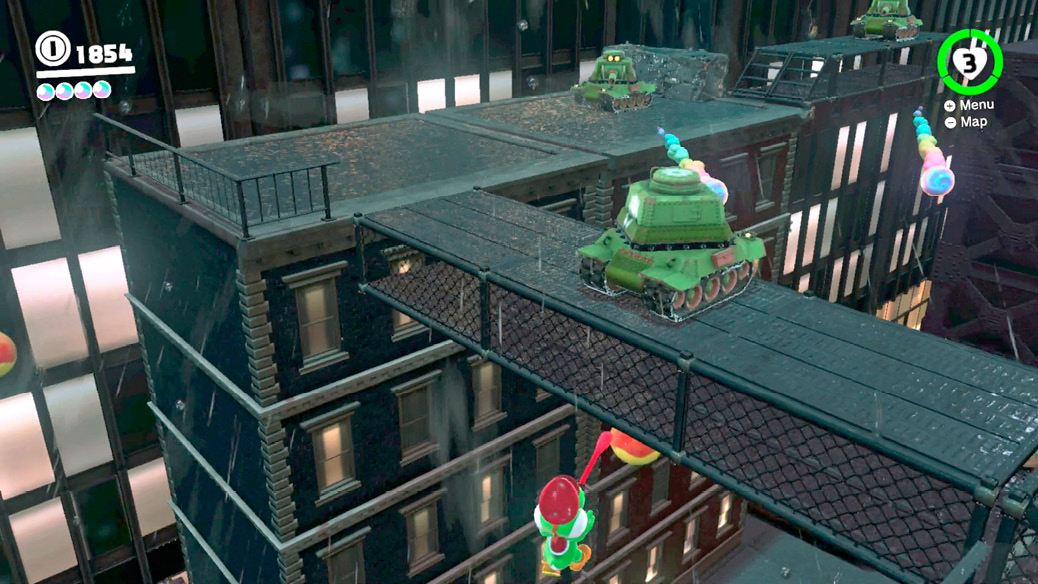
The horizontal Moon Pipe found on the hanging shelf down the side of Rabbit Ridge leads to a rain-swept alley under assault by a battalion of Sherm tanks. Yoshi’s resting here in egg form, ready to be busted out and captured. You have to use a combination of Sherm captures and Yoshi to explore the area, feeding Yoshi all the Fruits. Several block sections are rusted out and warped, ready to be blown up from Sherm fire. Usually, this collapses sections that can then be used as bridges. Collect 10 Fruits for a Power Moon.
 Fruit Feast Under Siege
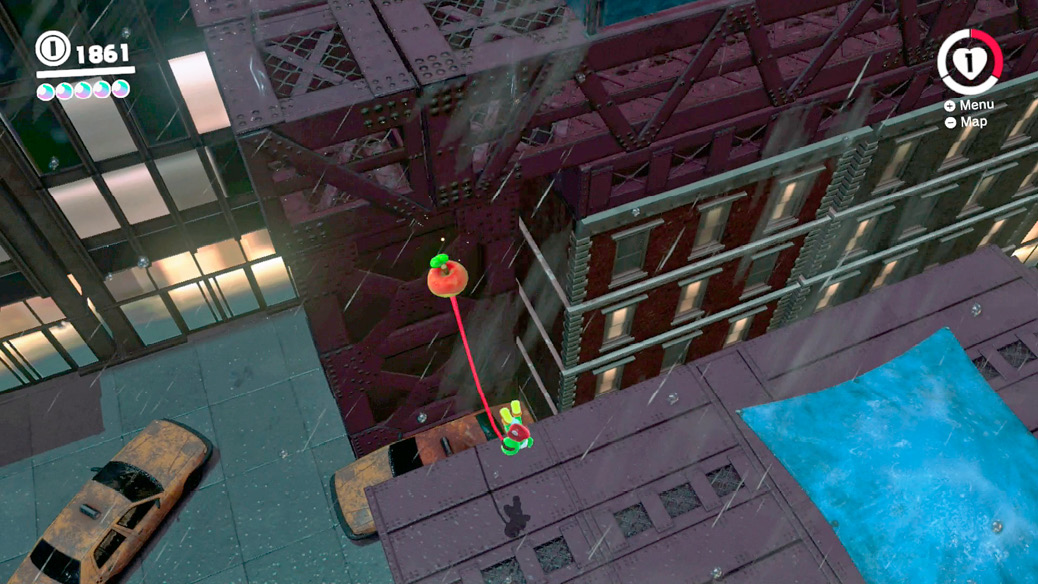
Collecting all the Fruits while under Sherm siege is a little more challenging. While plenty of the Fruits are out in the open, a couple are hovering in midair underneath high platforms. Grabbing them requires falling from above, using Yoshi’s tongue to snag them as he falls past. A few Fruit groups also hover over space along catwalks above, forcing tongue swipes or jumps out into free air to gobble them down. The final two Fruits might be the most deviously placed of all—just keep going farther into the area, away from the entrance, and you’ll find them tucked just under stairs on the far side.
 Yoshi on the Sinking Island
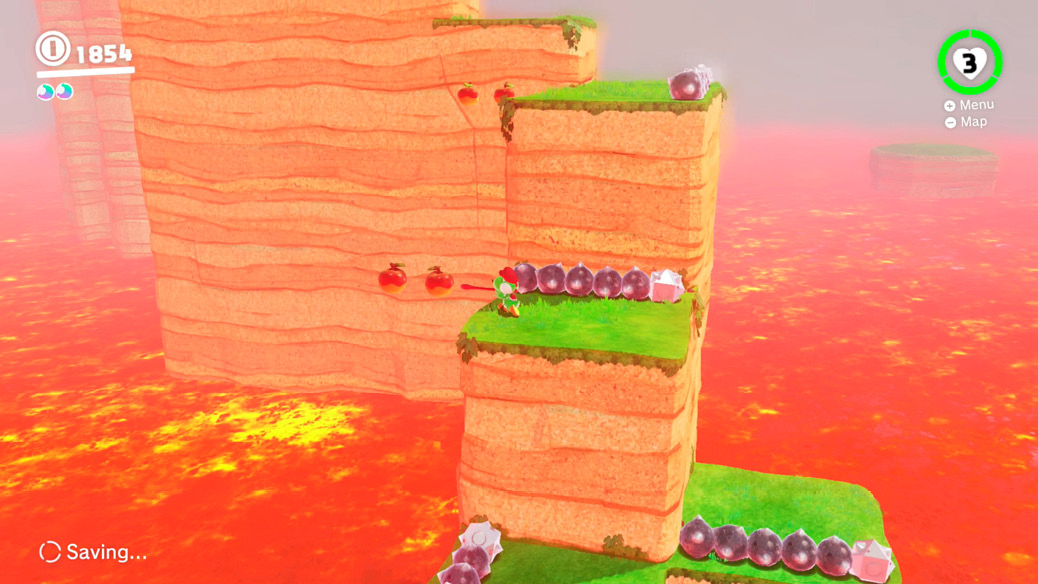
This Moon Pipe puts Mario into contact with old dino friend Yoshi, whose skills are needed to survive this scorching challenge. Take a quick look around, then break the egg and capture Yoshi to begin. The island starts sinking into the lava, forcing a rapid upward climb.
Yoshi’s unique movement tricks aid the climb greatly. There’s the flutter jump, which is like Yoshi’s giving himself a double jump out of sheer effort, flapping his feet. And there’s his tongue extension, which lets him cling just under the edges of cliffs and flip to the top. Use flutter jumps and tongue clings to advance up the hill as it’s overcome by rising lava. Dodge Moonsnakes to avoid taking needless damage.
Along the way, be sure to scarf up the Fruits that are Yoshi’s favorite food. Eat them either by running over them with Yoshi, or pulling them in with his tongue. Collect 10 Fruits during the climb and Yoshi produces a Power Moon.
 Fruit Feast on the Sinking Island
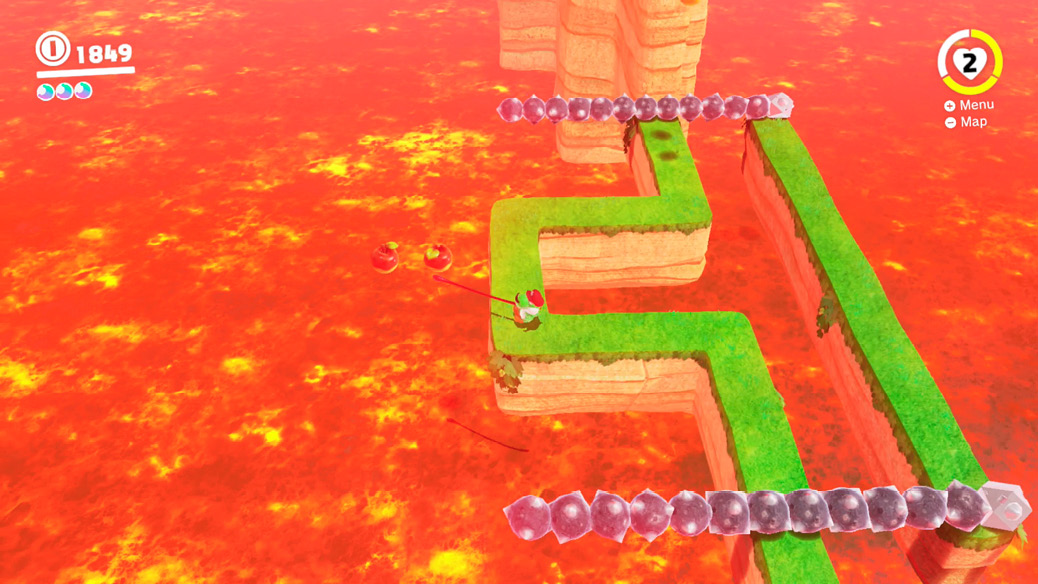
The magma island room in which Mario captures Yoshi has 20 Fruits total, starting with two at entry level where Yoshi’s egg is found, and concluding with two right before the Moon Pipe exit. Along the way, 16 other Fruits can be found in pairs, usually every two or three jumps up the sinking island. They’re all in plain sight, and they can be scooped up easily with Yoshi’s tongue if they’re too far to grab up close. They don’t have to be collected all at once—acquired Fruits show up on return visits as ghostly outlines, like Regional Coins or Power Moons you’ve already picked up. 10 Fruits in this room scores you the first Power Moon, but for the second Power Moon you need Yoshi to eat all 20.
 Yoshi’s Magma Swamp
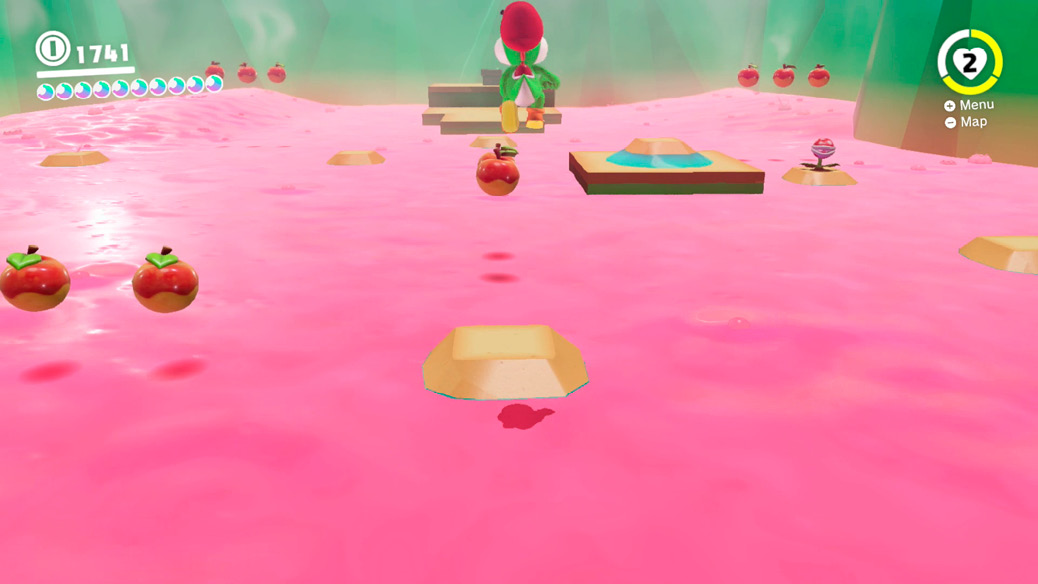
The Moon Pipe in plain sight to the south in Rabbit Ridge leads to this colorful cauldron. Break the egg and capture Yoshi to begin. Like some other rooms in Dark Side of the Moon, you accumulate Power Moons by getting Yoshi fed. Touching the hot liquid ends a Yoshi capture and hurts Mario, sending him smoking, almost out of control. The platforms here slowly rise and fall, so safe footing grows and shrinks. Keep these notes in mind while flutter jumping around, chewing up Fruits. Eat 10 Fruits to score a Power Moon here.
 Fruit Feast in the Magma Swamp!
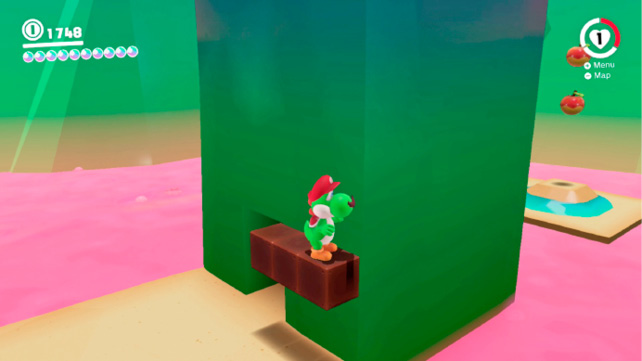
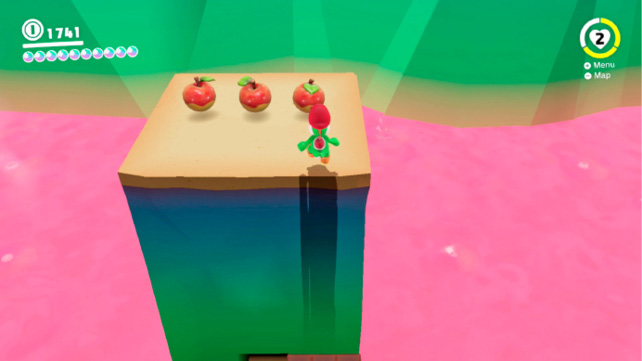
In the magma swamp, the most-hidden Fruits are right behind and above the entrance pillar. Be careful of the devious hidden blocks just to the right of the entrance door, which can bounce you into falling into the lava.
Trigger them carefully, then flutter jump straight up from the hidden blocks then tongue cling to the edge to get on top of the entrance pillar, scoring three Fruits up here. From here, it’s an easy downward hop to the small platform behind the pillar, above which hover two more Fruits. Eat all 20 Fruits in the room to gain the second Power Moon.
 Found with Dark Side Art 1
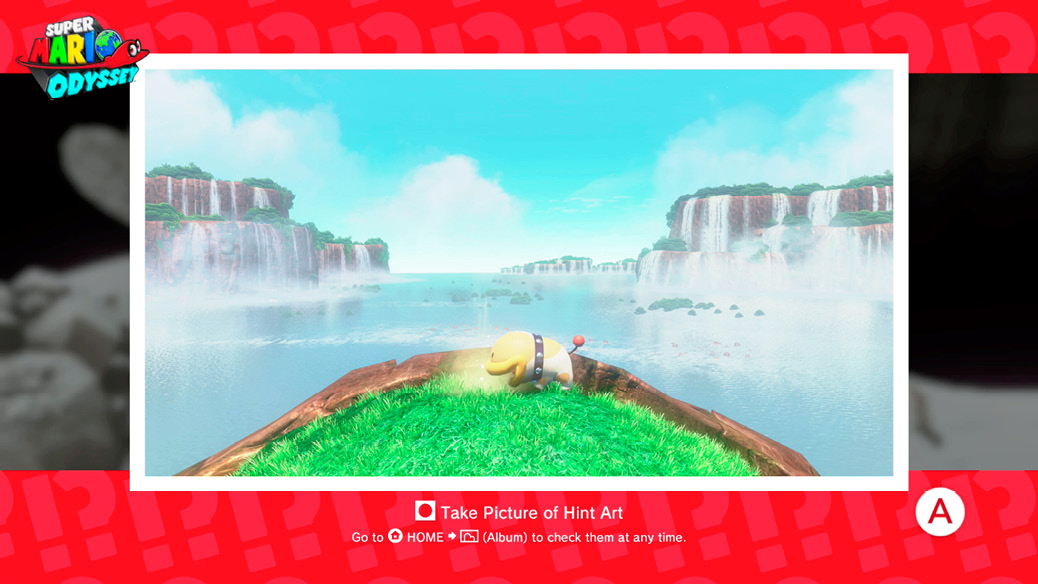
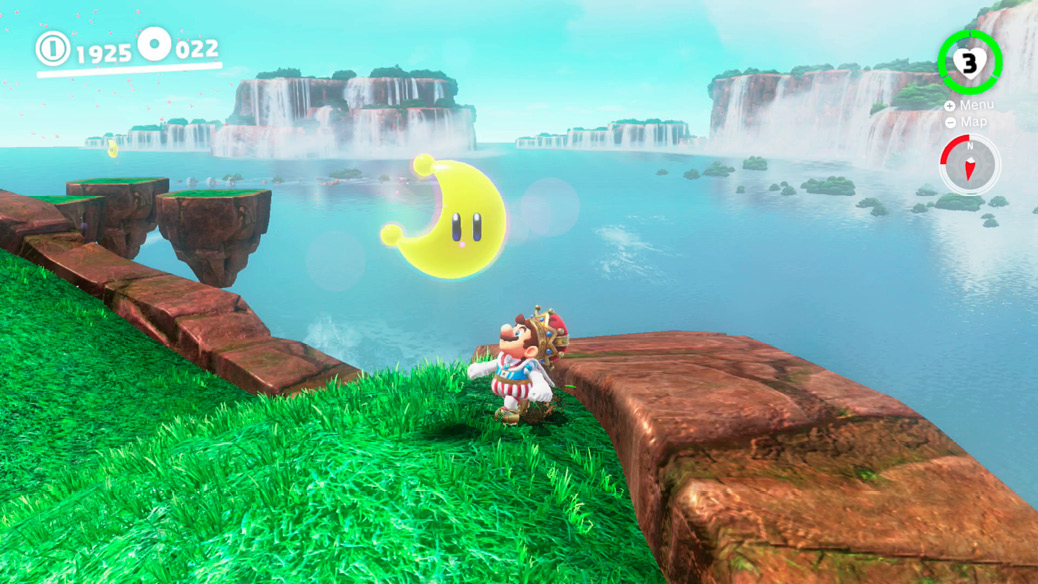
In the south of town, on what looks like a pile of stone tomatoes, you’ll find the first of several new pieces of Hint Art, which take you back all over the world. The image here pictures Poochy burying something in a lush area overlooking waterfalls. Where could that be?
The waterfalls are the giveaway. This is in Cascade Kingdom, high up on the top shelf near the large triple step. Get near an edge with floating platforms visible to the north and ground pound the terrain to find the buried treasure.
 Found with Dark Side Art 2
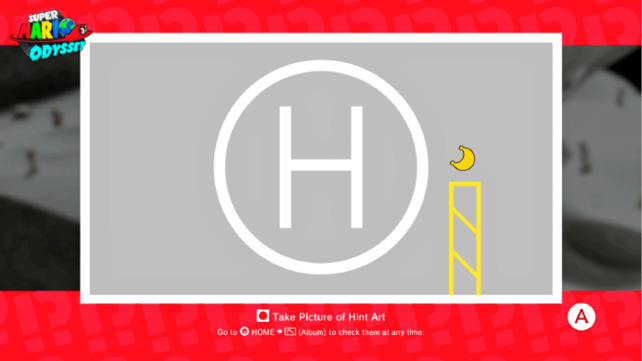
This piece of art is on ground level on a giant stone pumpkin. It’s some kind of diagram with a big letter H. The roadway iconography should be a big clue.
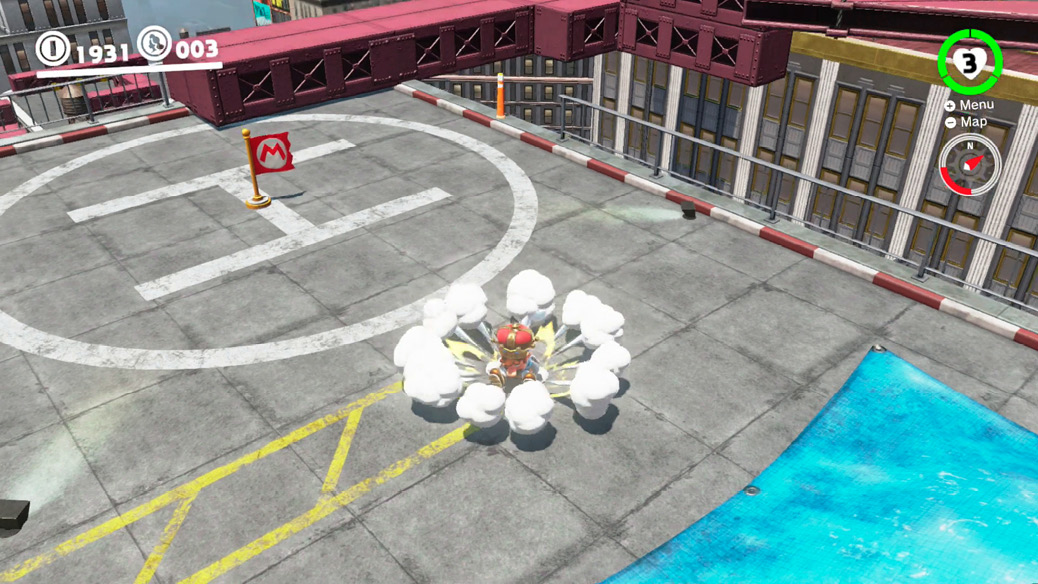
Travel to Metro Kingdom and climb or warp to the Heliport. Slam the ground to dot the “i” on the warning stripes to turn up the hidden moon.
 Found with Dark Side Art 3
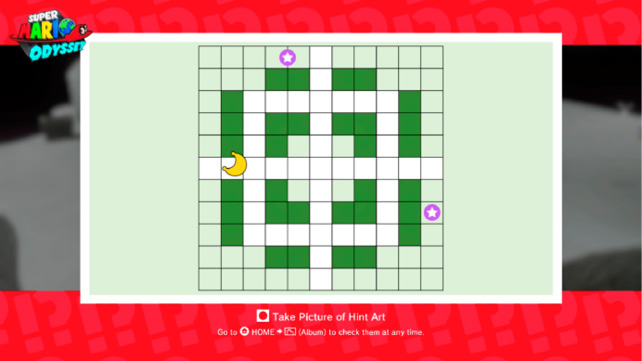
Another ground-level stone pumpkin painting in the first part of Rabbit Ridge displays a grid with what seems to be either a pattern or map on it, a light path threaded through green blocks. At least the pattern looks artificial, not natural, so this points to something potentially man-made. Or Toad-made…
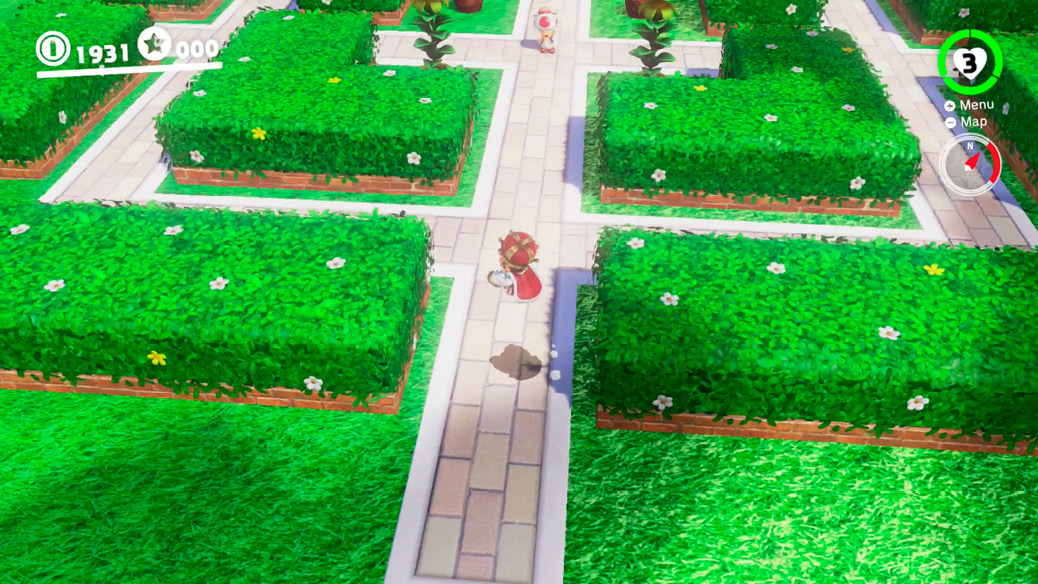
If you’ve explored Mushroom Kingdom much by now, you should recognize the garden found in the northeast corner. The Hint Art indicates which of the entrances to check out. Ground pound the east entrance to the hedge garden to solve the puzzle.
 Found with Dark Side Art 4
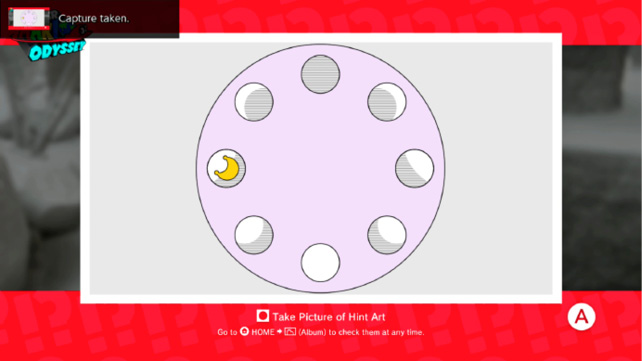
Found hung at ground level on a stone wall before a shelf up to another section of town, this painting depicts the moon phases. The Power Moon icon on the image is placed over the last quarter moon.
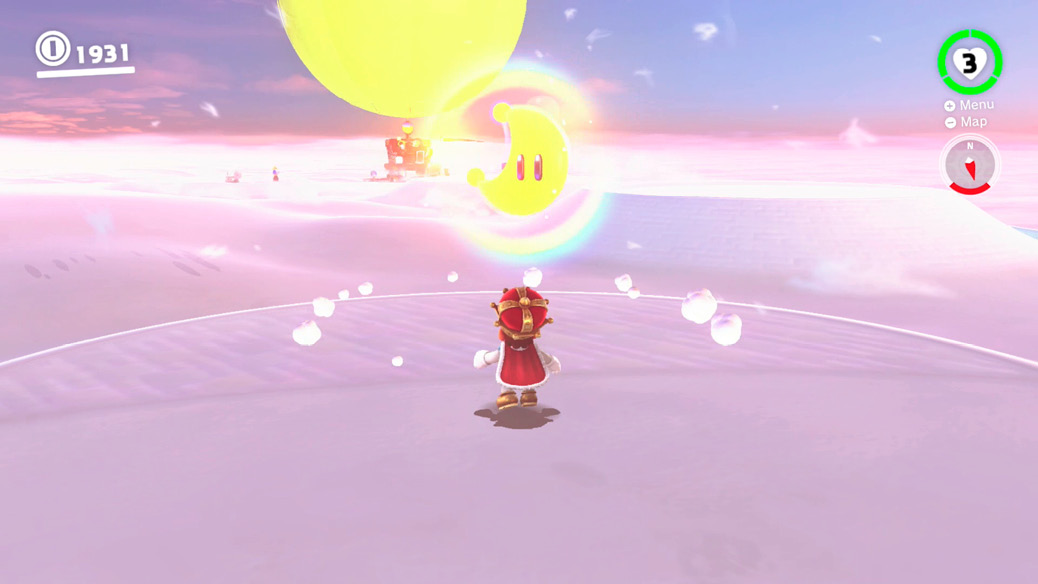
Cloud Kingdom’s main arena is basically a big, bright moon phase calendar. Head to the westernmost of the circular platforms to find a large last quarter moon. Stomp along the margin between night and day on the moon symbol to extract a Power Moon.
 Found with Dark Side Art 5
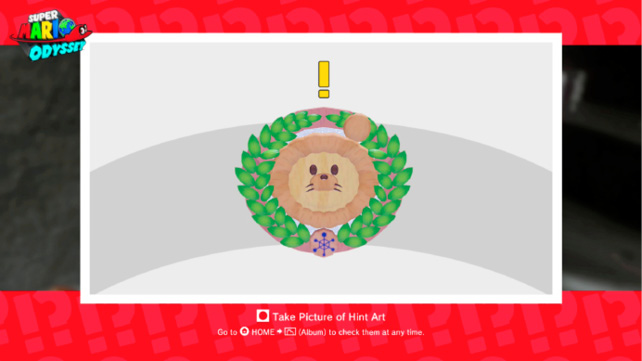
The fifth new piece of Hint Art is tucked away on a small shelf off the eastern edge of Rabbit Ridge. Fall carefully down from above to drift to it and have a look. The face and wreath should tip you off quickly. This is a Shiverian, and it has something to do with racing.
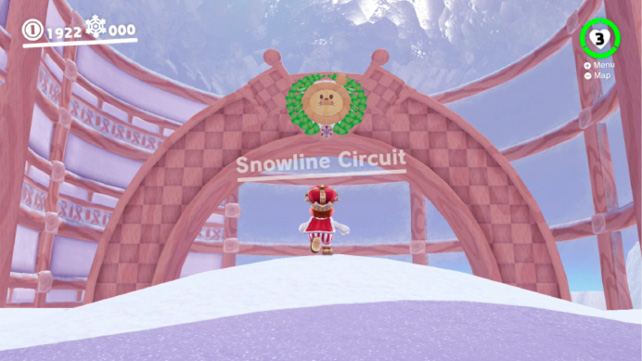
Sail to Snow Kingdom and head down the well into Shiveria Town. From here, go down farther still, to the gem of Shiverian culture, the Snowline Circuit. The arch you step under to watch or enter races looks suspiciously like the Hint Art. Use a high jump like a ground pound jump or dive jump up from one side of the arch to climb atop it. Ground pound the center of the arch above the Shiverian face design to pop free the Power Moon inside.
 Found with Dark Side Art 6
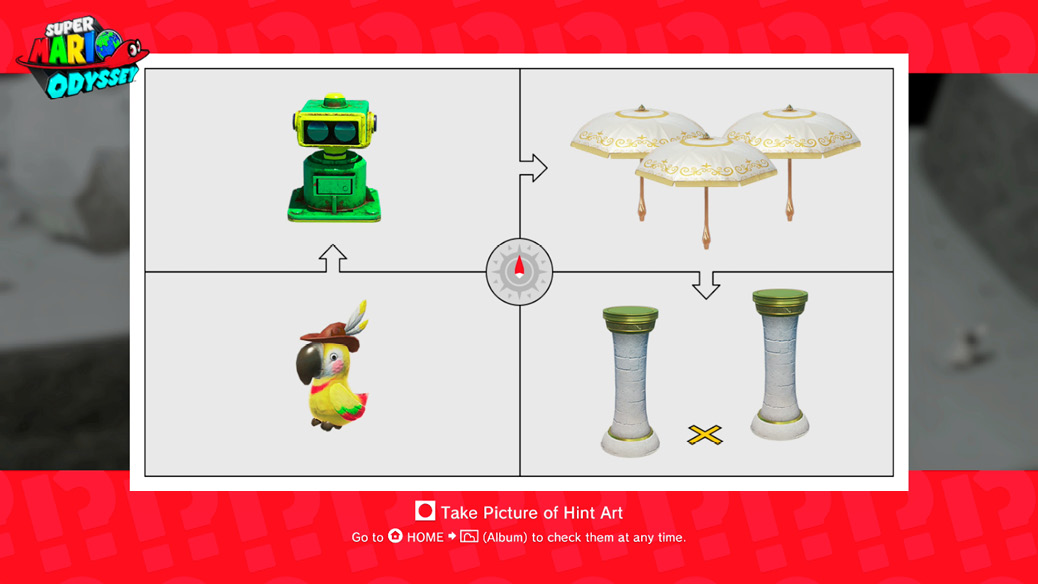
A small stone silo has this Hint Art image mounted on it for viewing. The Hint Art depicts Talkatoo, Binoculars, parasols, and columns. With the arrows between them, perhaps it’s directing you to follow one to another?
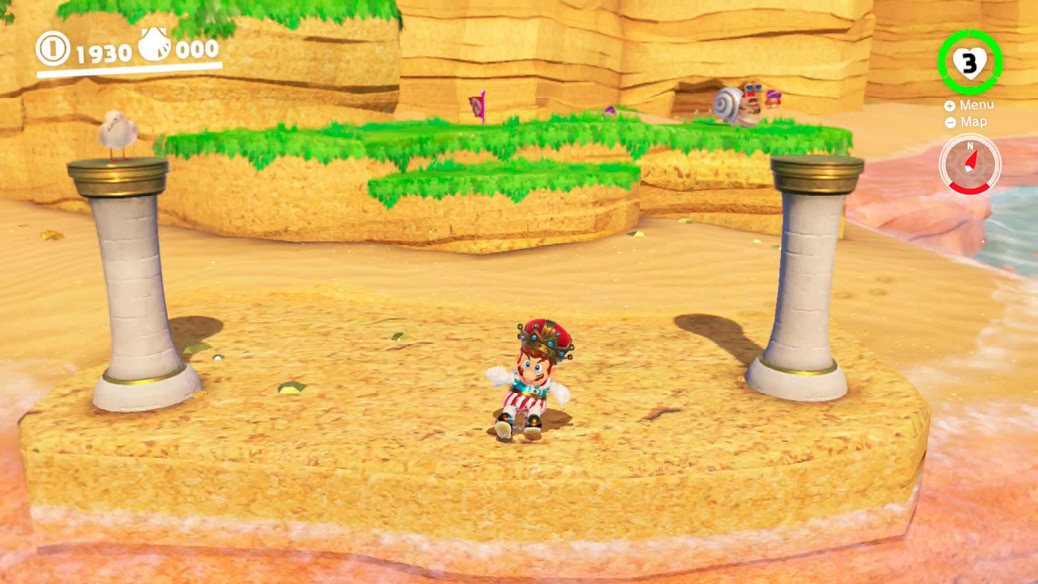
The solution is found in Seaside Kingdom. You don’t have to visit most of the tips in the Hint Art, they’re just there to lure intrepid treasure seekers to the wateriest realm. The Power Moon can be found by slamming the ground between the two columns on the beach toward the eastern shore of the kingdom.
 Found with Dark Side Art 7
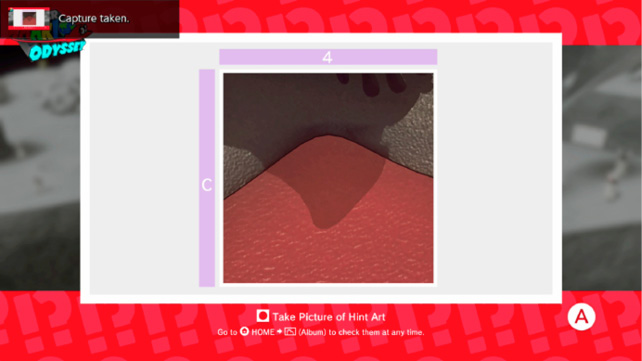
Tip-toe around precarious walkways on the edge to find extra Hint Art paintings. This painting is mounted on a big stone pumpkin just before a small ledge. The clue is shockingly nondescript, the most spartan of all the Hint Art—it’s basically just a shadow. However, luckily, the texture and a tiny swatch of foliage point the way to the right region.
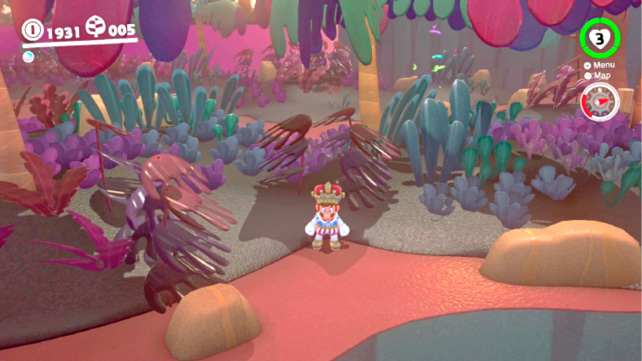
The right spot will be found in Lost Kingdom. The Hint Art has another helpful clue: the Travel Map coordinate. It’s found very near to Hint Toad and Uncle amiibo. Toe around the area looking for a spot of ground that’s just right compared to the tip graphic.
 Found with Dark Side Art 8
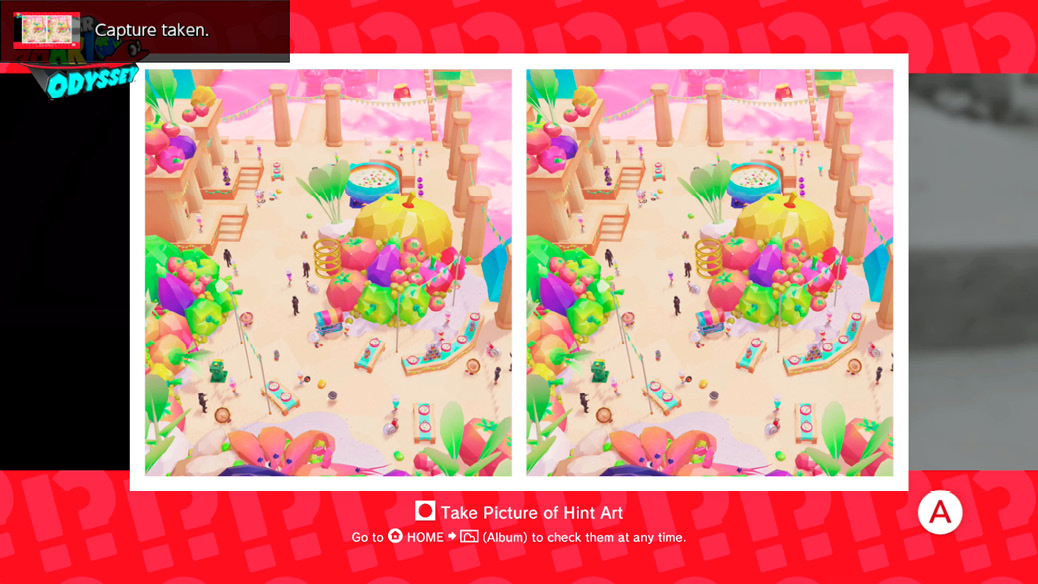
Right out in the open in Rabbit Ridge you find this Hint Art, which presents a fun challenge—spot the single miniscule thing that’s different in the Luncheon Kingdom Cooking Carnival picture. It’s a safe bet that if you can find something off between the two carnival pictures, you’ll probably find something of interest in that actual spot.
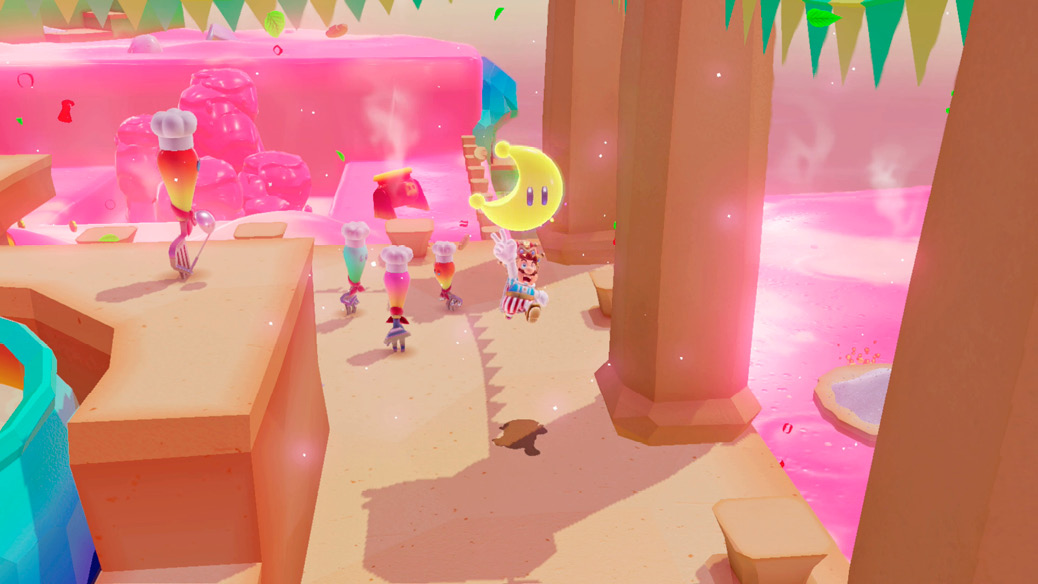
Spot it yet? Look around the main stewpot in the square. The columns behind it are missing a Volbonan cook in one image. Find this spot in Luncheon Kingdom and ground pound for some Power Moon cooking.
 Found with Dark Side Art 9
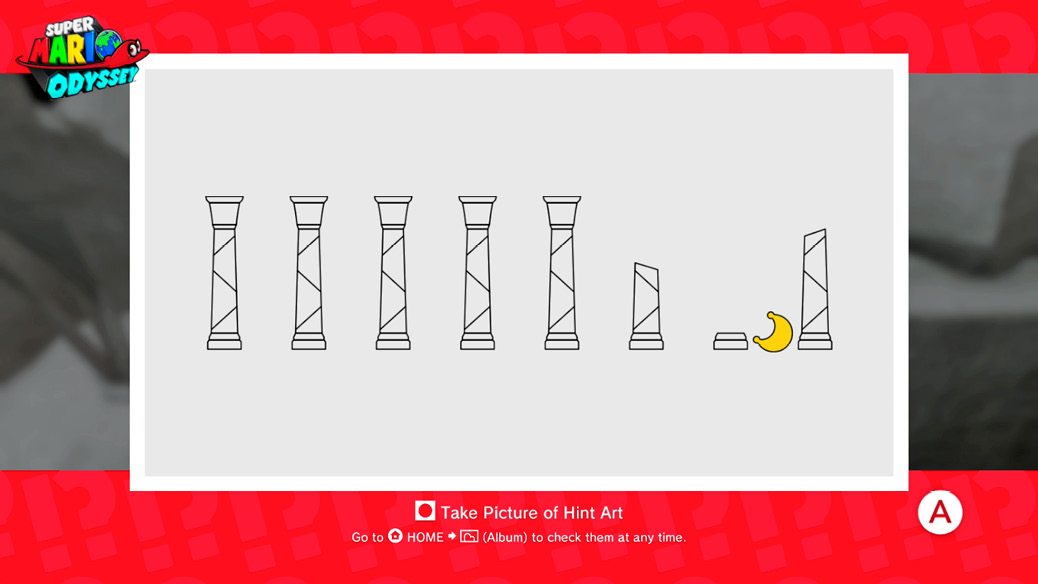
This Hint Art is tucked around a corner on a low wall. A row of columns is shown, with the Power Moon supposedly near a column broken off at the base. Not many kingdoms are bristling with lots of columns of this style, so this should narrow down the search.
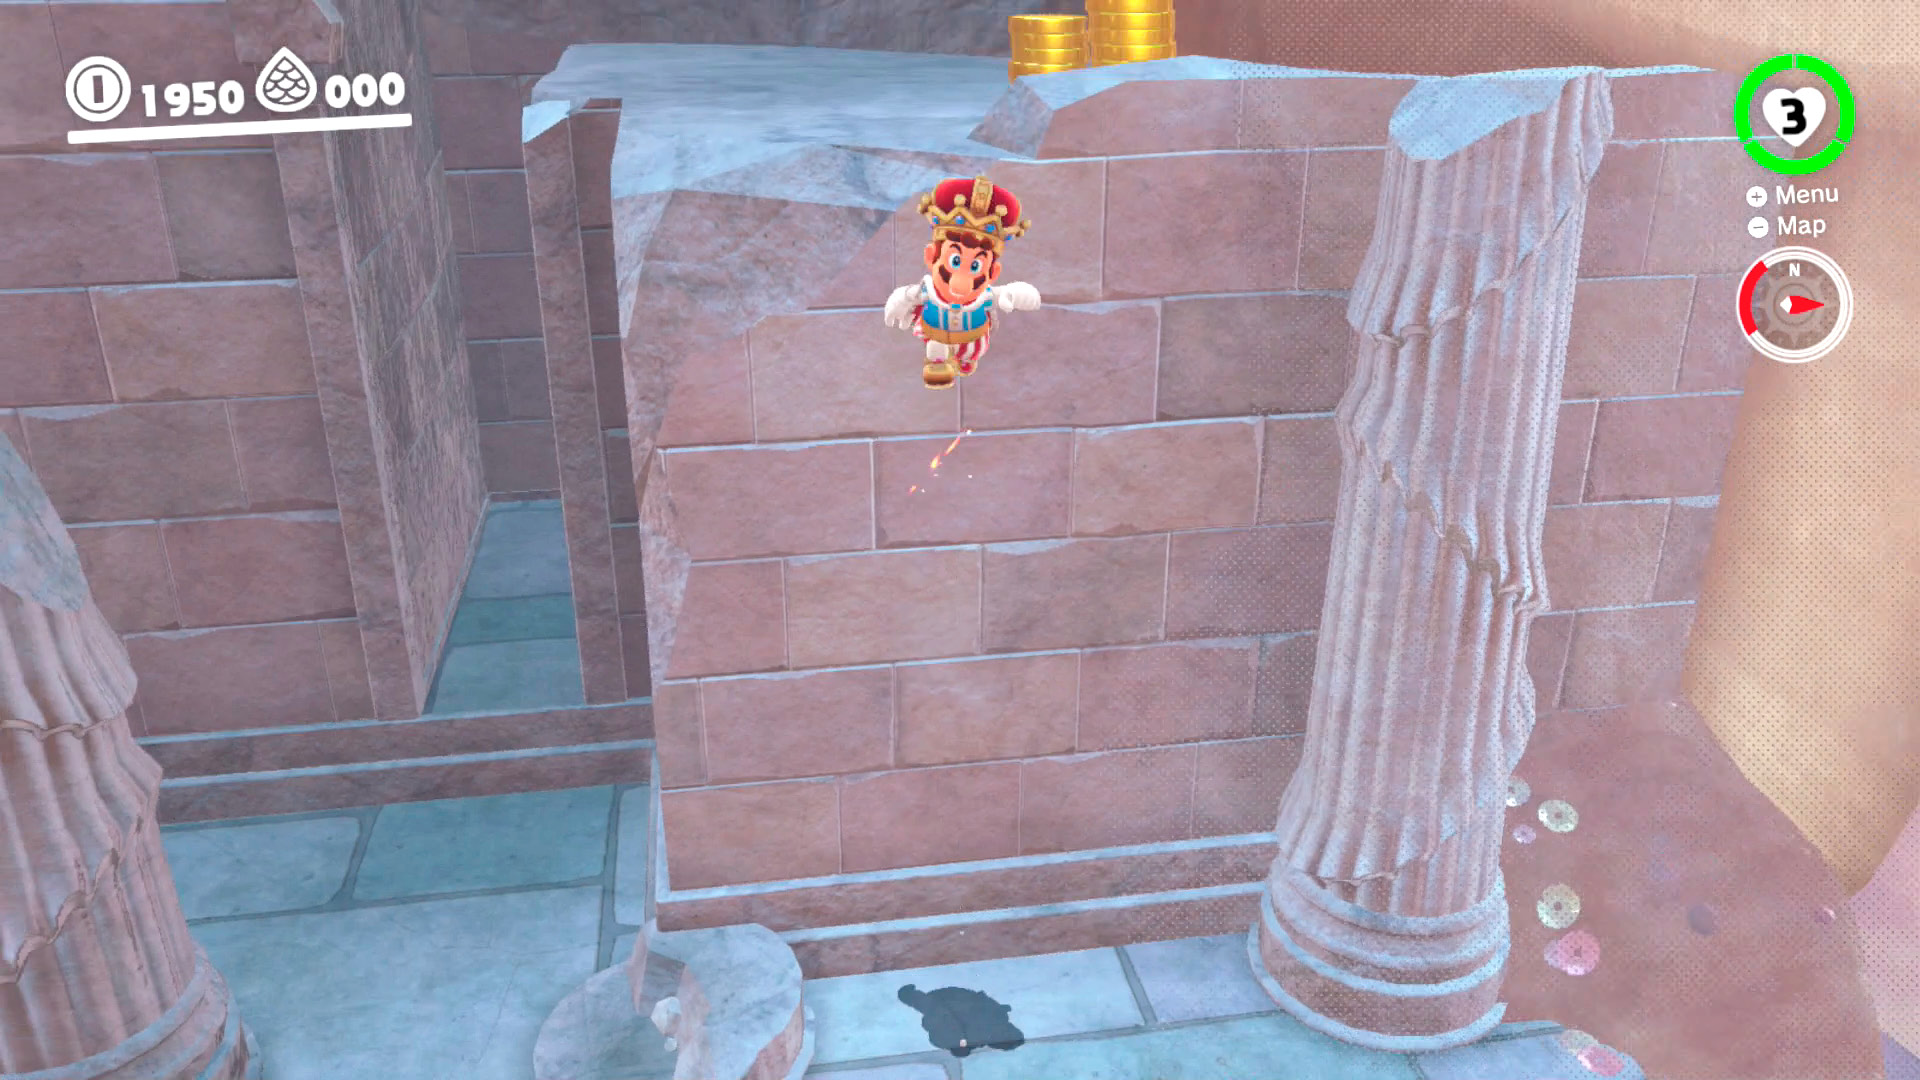
Check out Lake Kingdom, within the town in the aerated dome underwater. Look for the chamber with a row of columns, a couple broken right underneath a ledge holding piles of coins. The Power Moon can be found in the tile just below where the coins are piled up.
 Found with Dark Side Art 10
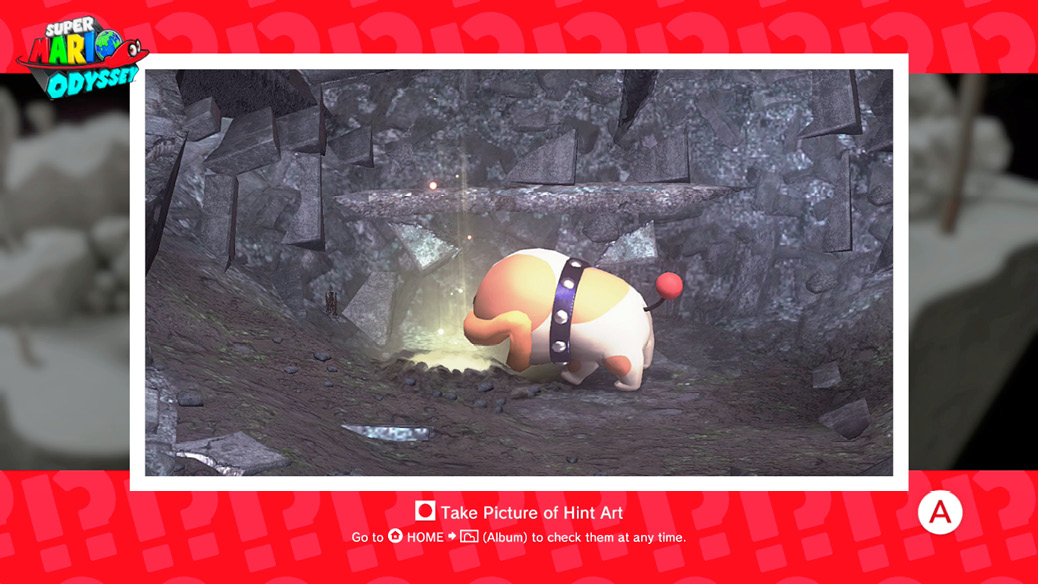
Another painting inconsiderately placed on a precipice near a drop-off, on a giant pumpkin. These rabbits must have some conception of smaller footpaths. What if Mario had New Donkian proportions? Anyway, all that’s shown is desolate rubble, and Poochy keeping himself busy with some sort of errand. There’s no clue here besides the decrepitude of the location.
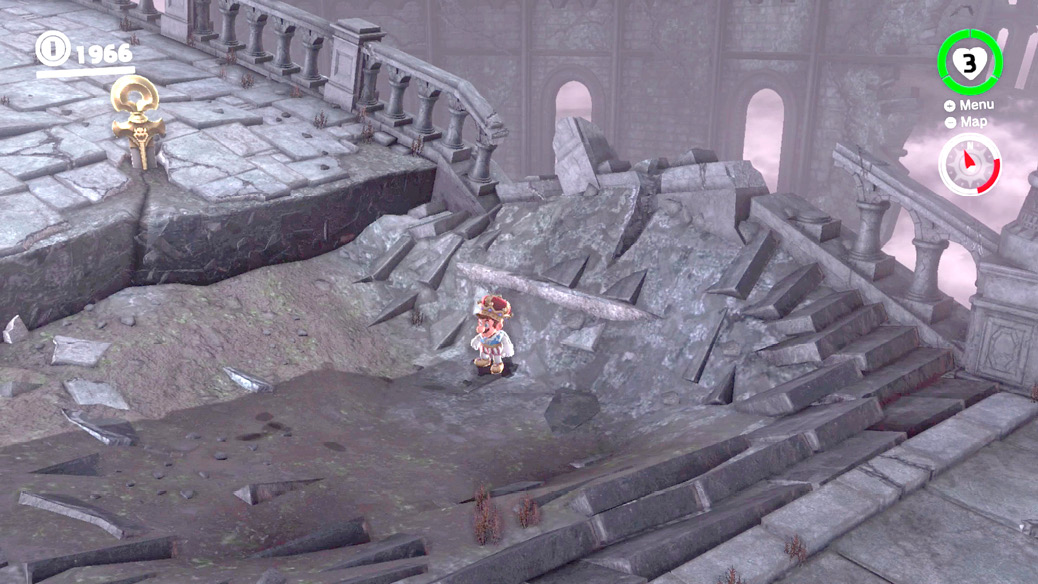
Ruin and rubble describe one place more than any other: Crumbleden. Set out for Ruined Kingdom. The Power Moon’s resting place is actually very close to the Odyssey, in an area eroded free of any evidence of human cobbling. Ground pound the raw stone while wondering how Poochy got out here to bury treats.