
Super Mario Odyssey Guide A Kingdom Traveler’s Guide
Control Schemes
Like most games on Nintendo Switch, Super Mario Odyssey can be played in several different controller configurations.
One Player
Ideally, Super Mario Odyssey is intended to be played with dual controller grip, a separate Joy-Con pad in each hand. Be sure to keep a solid grip on the Joy-Con controllers, and attach the wrist straps if they make the pads more comfortable to hold securely. Of course, playing with handheld mode on the go is great too! The Pro Controller offers the most comfortable configuration for players docked to a TV.
Two Players
Two friends can play together on one console with Joy-Con pads held horizontally, Super NES-style. When using a horizontal Joy-Con, attaching the wrist strap makes the controller more comfortable to hold for most players, along with making it easier to press SL and SR.
Super Mario Odyssey changes a little bit with two players. One player pilots Mario, and the other player pilots Cappy, for a globetrotting cooperative team-up! Mario controls like single player mode as long as he’s wearing Cappy, but Cappy can choose to flit away from Mario’s head and act on his own at any time. Mario without Cappy still has his own full assortment of jumps, rolls, and spins, but he’ll lose ready access to his cap throws and Cappy-aided jumps, the catch, cap, and dive jumps. Also, note that Mario’s camera controls are handled by the horizontal Joy-Con’s w button instead of the right stick and shoulder buttons.
Cappy, as a magical spinning hat, can move much more freely than Mario. Cappy can jump repeatedly in midair, mounting platforms and floors Mario either can’t reach, or can’t reach without some plumber acrobatics. Cappy can simply jump-jump-jump repeatedly in midair to glide up. Cappy can also mount his own offense with his own spin on Mario’s ground pound attack. Cappy should move around gathering coins, demolishing foes, and scouting for Mario.
Most importantly, Cappy flying on his own still serves as a cap jump launchpad for Mario, so players can work together to get Mario wherever he needs to be. Better still, Cappy can literally lift Mario up into a bonafide double-jump by flying over Mario then jumping twice! This unique co-op jump is only possible in two player mode and can only be initiated by the Cappy player.
Motion Controls
Motion control sensitivity when aiming is adjustable at any time in Settings from the Pause menu. Don’t be afraid to try all variations of this setting! If Joy-Con (or Pro Controller) motion controls don’t feel natural to you at first, adjust the sensitivity until it suits you.
Motion controls also feel slightly different when using split Joy-Con, a single sideways Joy-Con, or a Pro Controller. With split Joy-con, Joy-Con (R) feels sort of like a laser pointer when aiming is possible. Pro Controller motion aim feels more like tilting and pitching a steering wheel. Both offer similar motion precision, but get there with a different feel.
Waggle Beats Mashing
Rapid waggle and button-mashing are not equals. In just about every case where you can either press a button rapidly or shake the controller repeatedly, you’ll get better, quicker results from waggle. When rolling, tapping Cap Throw rapidly to pick up speed isn’t nearly as fast as shaking any controller in rhythm to Mario’s forward tumble. It’s quicker to climb trees and poles by shaking a controller rather than just holding up on the stick.
When Capturing a Poison Piranha Plant, you can spit ink faster by shaking than by pressing a button. Paragoombas and Parabones can be made to flap their little wings much more furiously with waggling than with mashing. And so on.
Playing mostly or entirely with buttons is still fine. If you need a straightforward Cappy throw at a target Mario is facing, the Cap Throw buttons will do. Some speed challenges are going to be easier if you’re rolling and climbing faster via motion controls, of course. And some moves are largely limited to motion controls. For the X or Y button to send Cappy spiraling around Mario in a protective spin throw, you must first start a grounded Mario spin by rotating the stick in a 720 motion. With motion controls, you need only tilt the controller(s) suddenly left or right. Cappy spins off in the direction you choose. Without motion controls, the move is simply not immediately at hand.
Plumber Power
The controls are built off the classic basics that trace all the way back to Super Mario Bros. on the NES and Mario Bros. in the arcade. At heart, Mario is still running, jumping, bouncing, and tossing objects in pursuit of Bowser, and his standard moves are enough to get through most of the challenges found throughout the kingdoms of the world. But there are also many variations of his classic movements, some accumulated along the way in classic games like Super Mario 64 and Super Mario Sunshine, and some all-new. Mario was originally named Jumpman in his first appearances, so it’s only proper that our favorite spring-legged hero travels the world with just about every kind of jump he’s ever had, and some new ones too.
Run
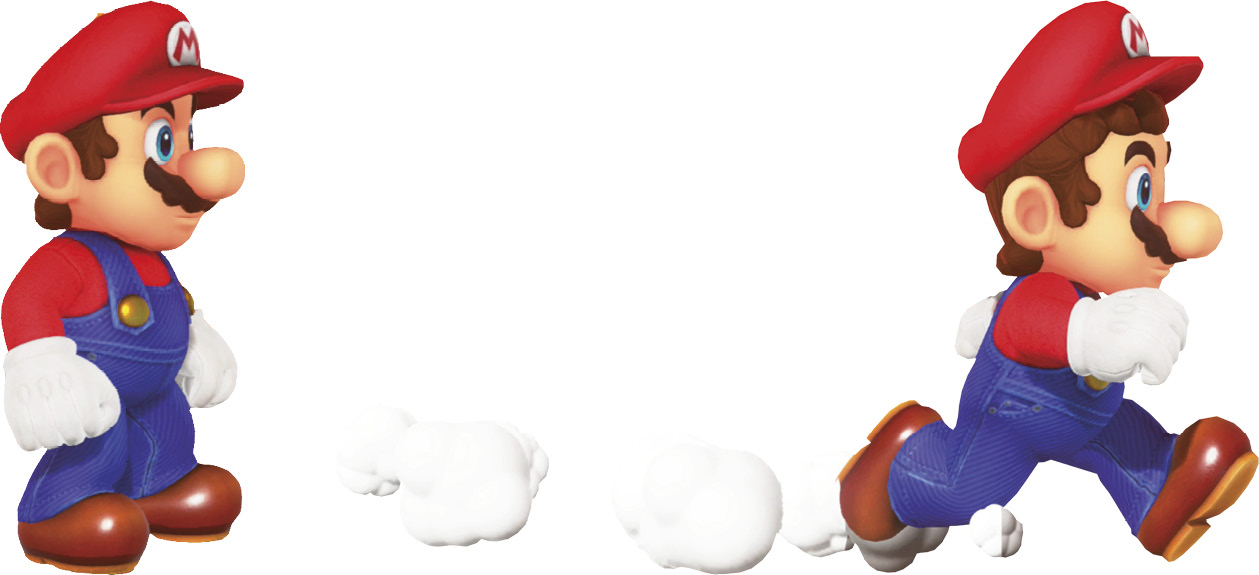
Tried and true, let Mario’s potato-shaped feet carry him to the next destination. Push the stick all the way for a full-speed scamper. When it’s wise to slow down, like crossing a narrow beam above a pit, push the stick slightly to walk.
Mario doesn’t have a Dash button like in 2D Mario games. (Unless you find yourself in an 8-bit pipe…) When you want Mario to move faster than running allows, use rolling, long jumps, triple jumps, and dives.
Jump
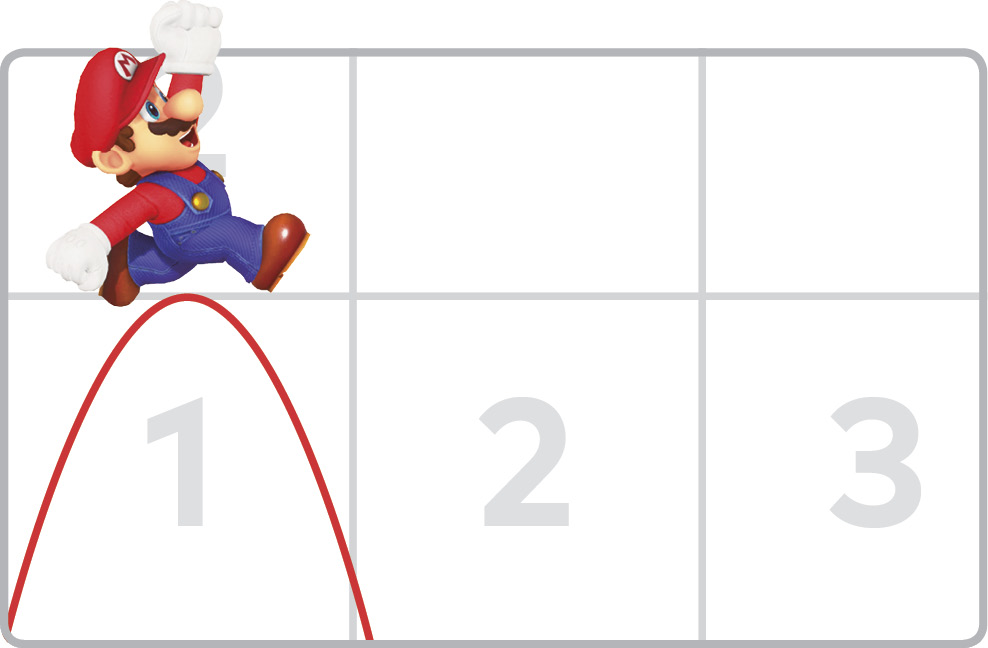
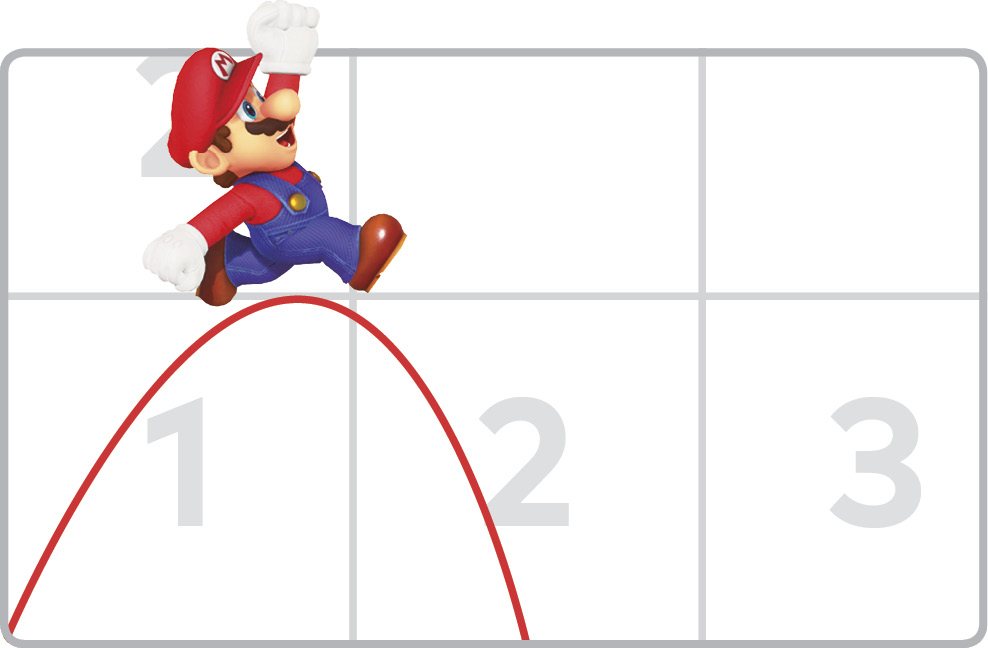
Mario wasn’t originally named Jumpman for nothing! Tap the button quickly for a short hop, or hold the button down for a max-height jump. Run before jumping for a little extra distance and height, and move the stick in midair to control Mario’s trajectory.
Crouch & Crouch Walk
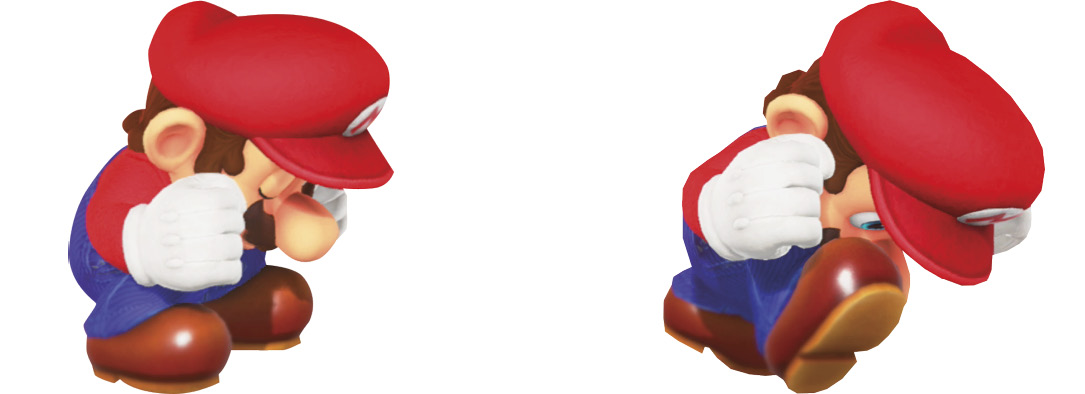
Hold the shoulder button and Mario shrinks down as small as possible, practically hiding under Cappy. Mario is a smaller target while crouching. Move the stick while crouching to crouch-walk. Some openings are so small that Mario can only squeeze through thanks to crouch-walking.
Roll
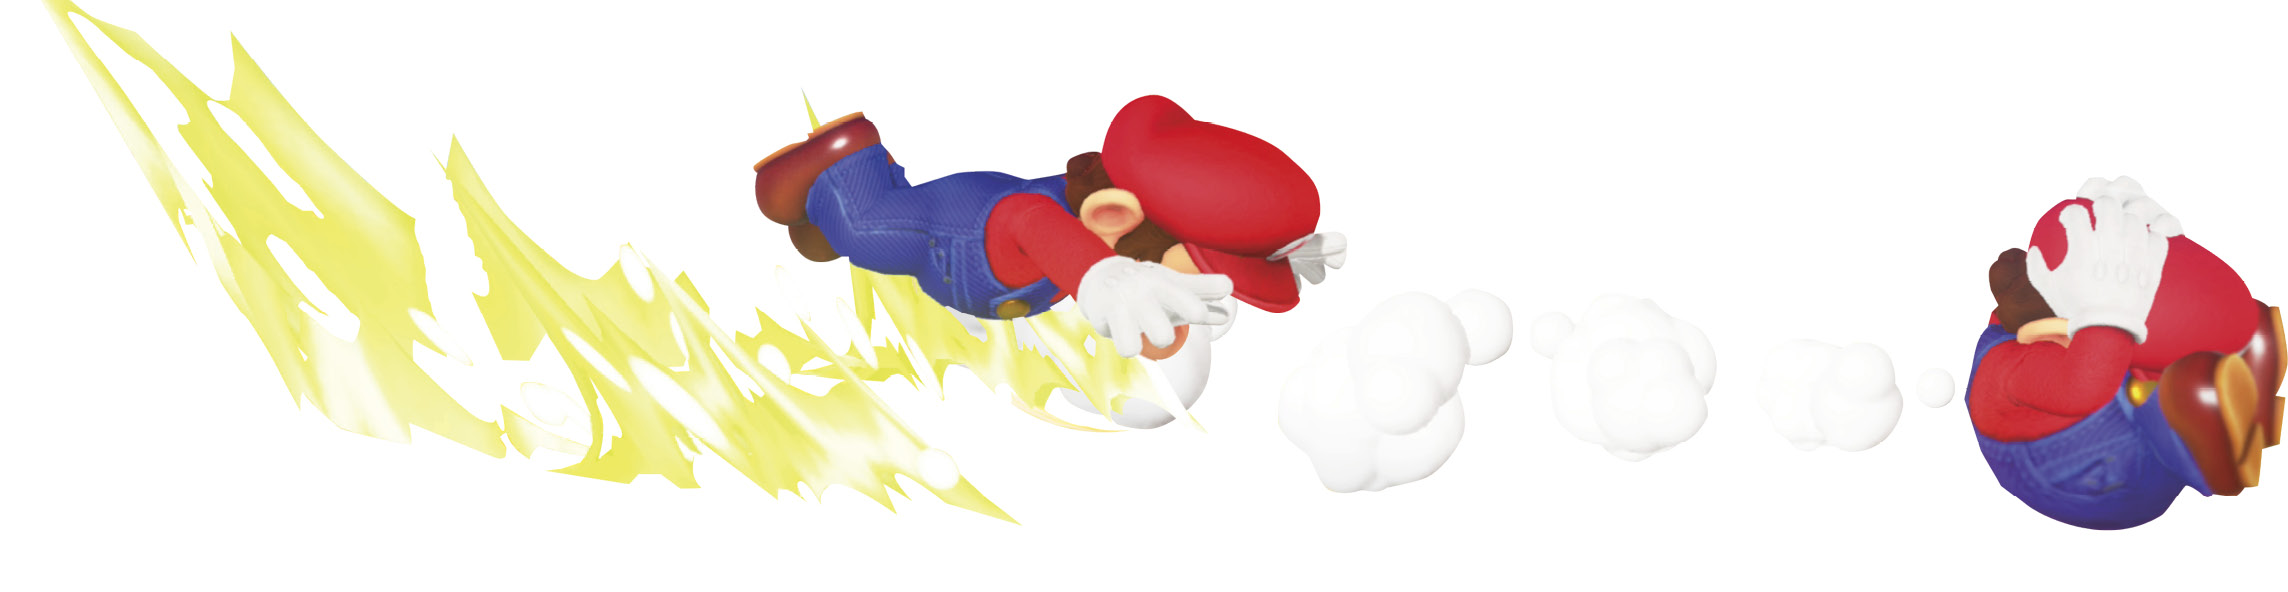
The fastest way for Mario to travel on his own is by rolling across open ground. Start a roll by crouching, then pressing the Cap Throw button or flicking the controller. Mario tumbles forward. To keep rolling, continue holding the Crouch button, while repeatedly pressing the Cap Throw button or shaking the controller. Shaking the controller allows for faster repeat speed boosts than mashing the Cappy button.
Drifting back toward the ground with a running long jump or tackle, hold the Crouch button to automatically roll upon landing. During ground pound touchdown (spinning or normal version), hold the Crouch button on impact and tap a hat throw button (or flick the controller) to skate right out of the ground pound’s dust cloud in a high-speed roll.
Backward Somersault
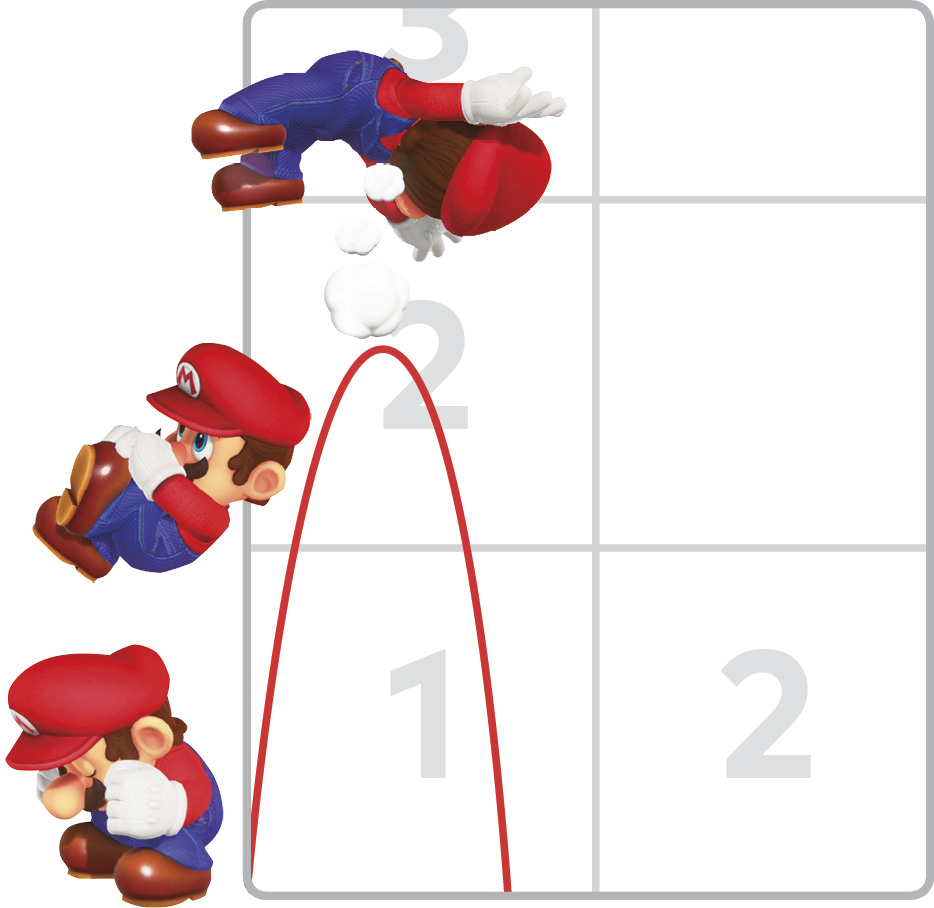
Mario vaults up out of a crouching position into one of his highest-reaching jumps. He lands facing his original crouching direction, a few steps back from where he started. When there’s a ledge too high for a standard jump, it’s often easy to approach the wall, face away, crouch, then backward somersault on up.
If you tackle from a backward somersault, Mario only tackles in the direction he faced when launching from the ground, even if you point the stick in another direction while he’s in midair. If you want to backward somersault and then tackle in a different direction, throw Cappy at the top of the jump first. This flips Mario upright into his hat-throwing posture and frees him up to tackle in any direction.
Side Somersault
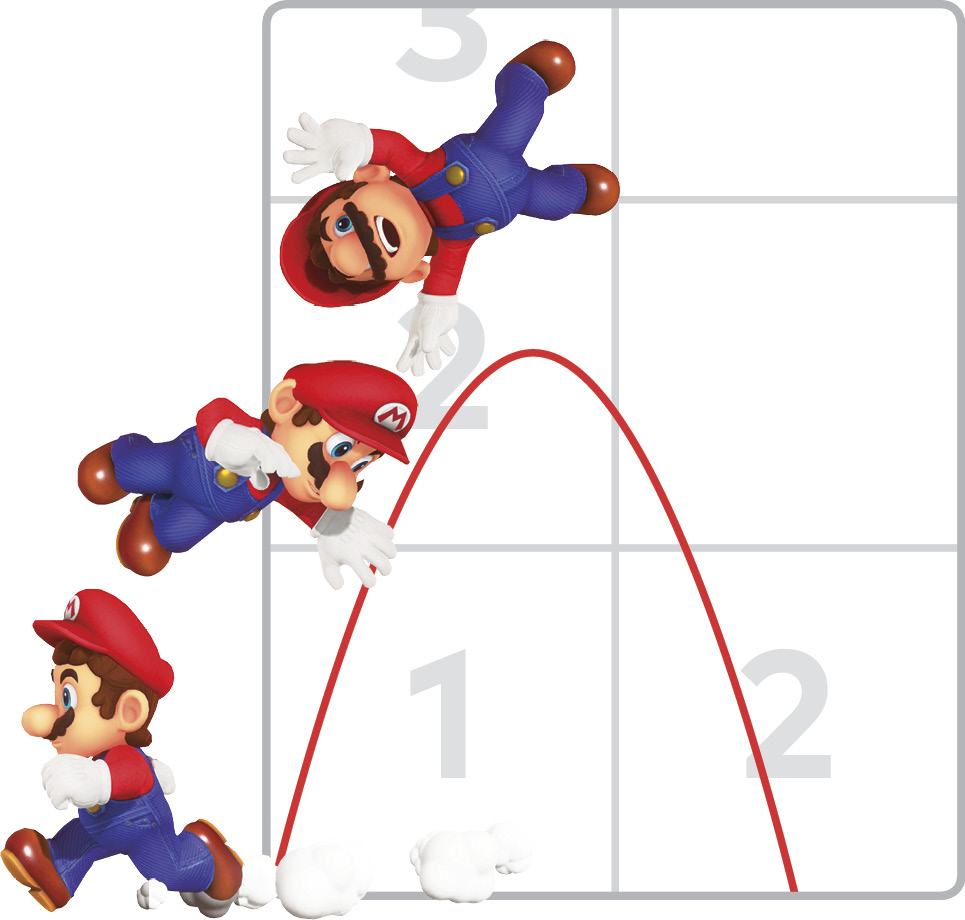
Jump right after reversing direction suddenly for a side somersault. This reaches the same height as a backward somersault, but travels farther, and ends with Mario turned around. To vault quickly onto a ledge with a side somersault, approach a wall, move the stick directly away from it, then move the stick right back toward the wall and jump. Done correctly, Mario pinwheels up and over.
Like a backward somersault, a side somersault restricts the direction Mario can tackle. He’ll only tackle in the direction he’d end up facing naturally after the somersault is done. Again, you can get around this by cap-throwing at the apex of the side somersault, which lets you tackle afterward in any direction you want. This is great for setting up a dive jump onto a high platform.
Running Long Jump
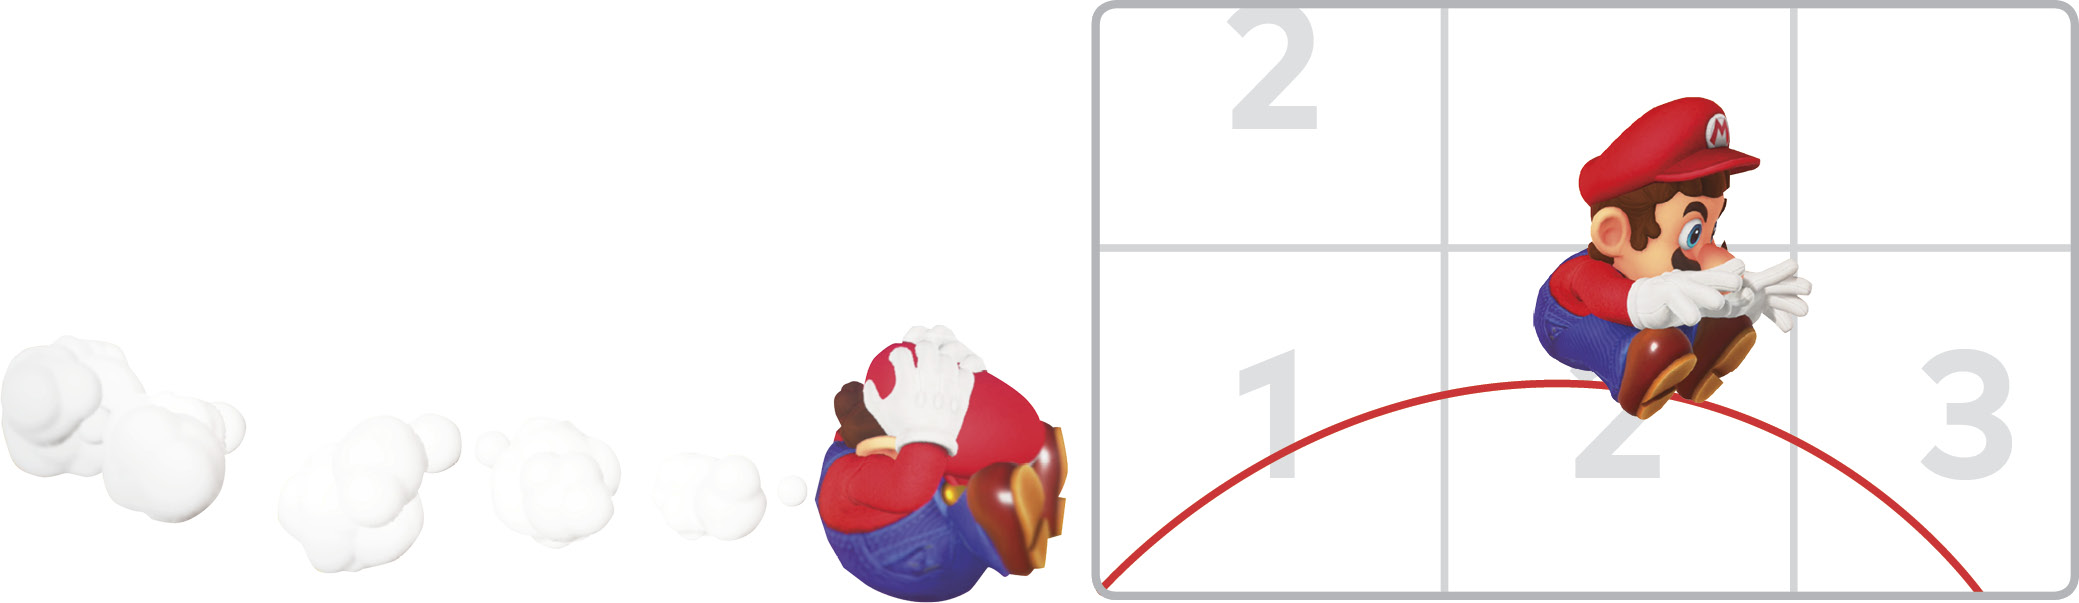
Mario’s farthest-reaching basic jump is done by entering a crouch while running, then jumping right away. When performing this technique, you’re not actually waiting to see Mario enter a crouching position. You just hold the stick in the desired direction, then press Crouch and Jump. Running long jumps can be performed with surprisingly little runway and have great reach, though the worst height of any jump. Perform a running long jump into a wall and Mario bounces off, stunned. Sliding along a wall and wall jumping won’t work after long jumping. Hold the Crouch button while landing from a running long jump to transition into a roll. Jump while rolling and you’ll also get a running long jump. On open terrain, you can bounce across the landscape rolling and long jumping!
Double Jump into Triple Jump
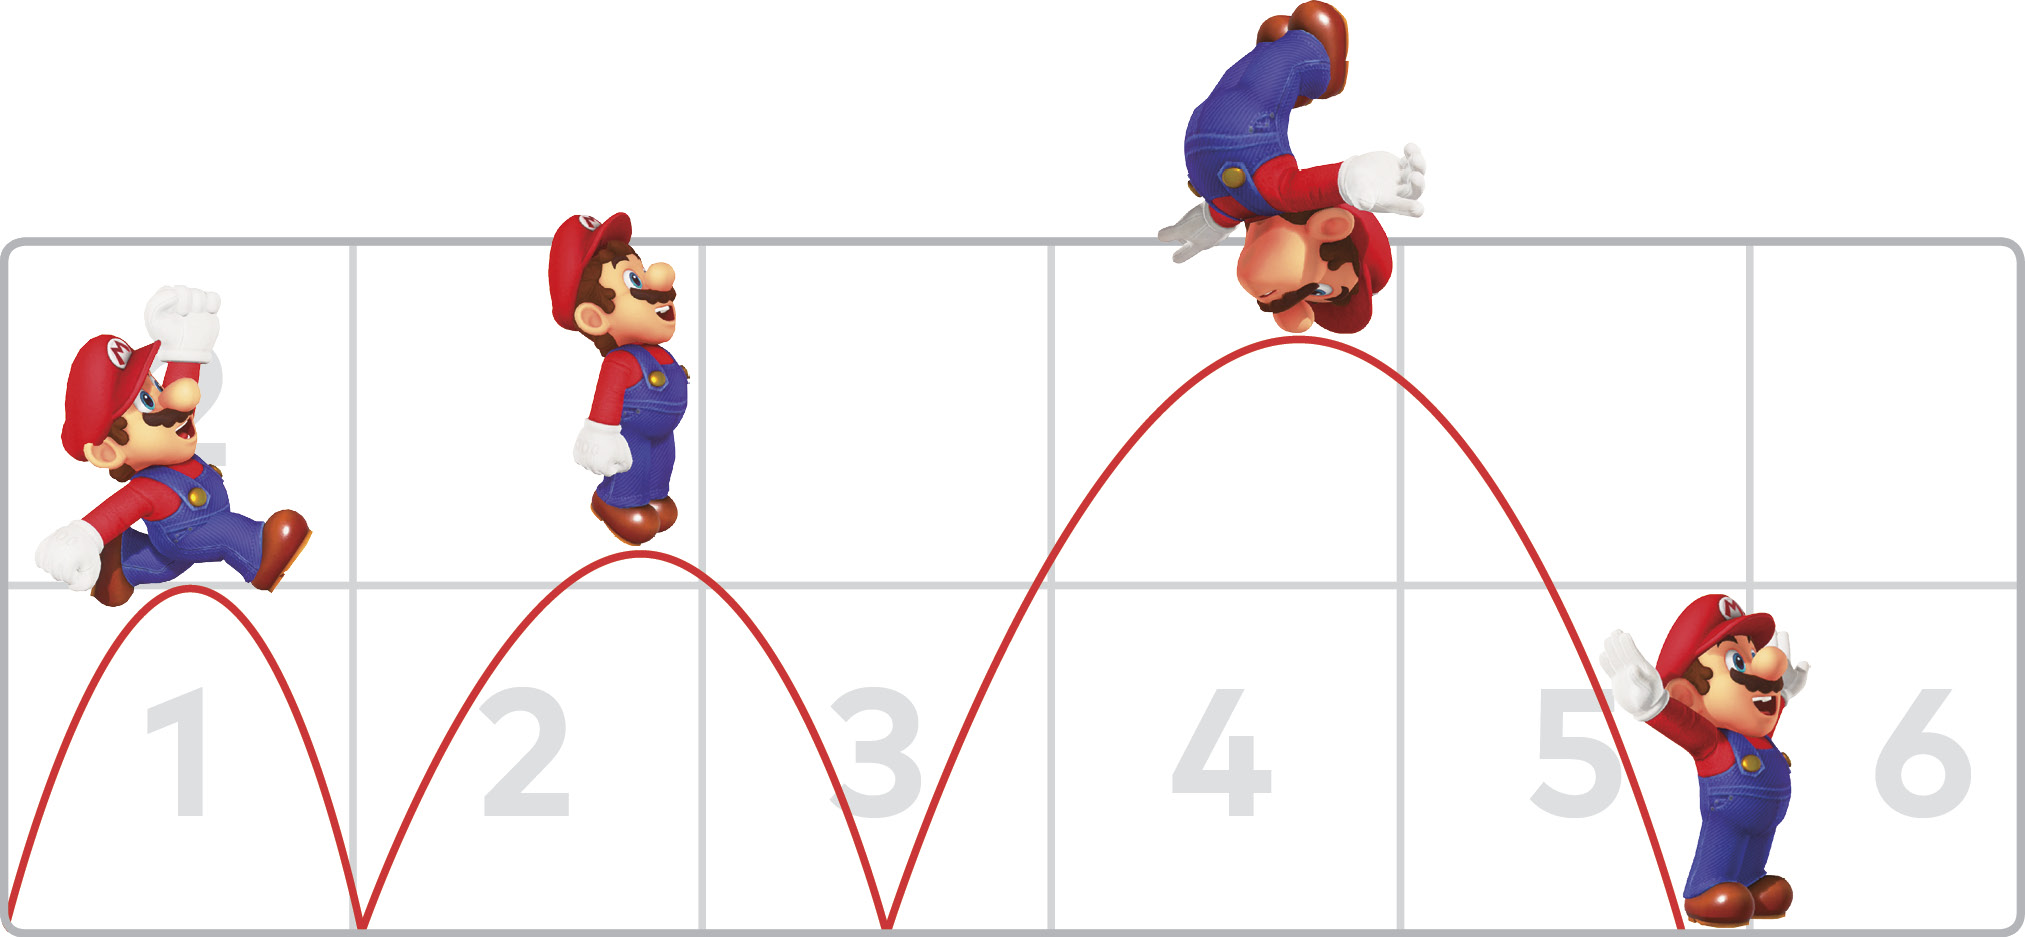
Jump again immediately after landing from a normal jump and Mario performs a slightly better jump, his arms flat down his sides from the momentum. This double jump can be performed anytime, even standing still or drifting backward.
The finishing triple jump—inch-for-inch Mario’s best jump—is also done by jumping again immediately after landing from a double jump, but the requirements are stricter. The first jump can still be straight up and down, but for the second and third jumps hold the stick all the way in one direction and keep it there. You need to pick up enough speed moving forward during the second jump to give Mario momentum for the finale.
Wall Jump
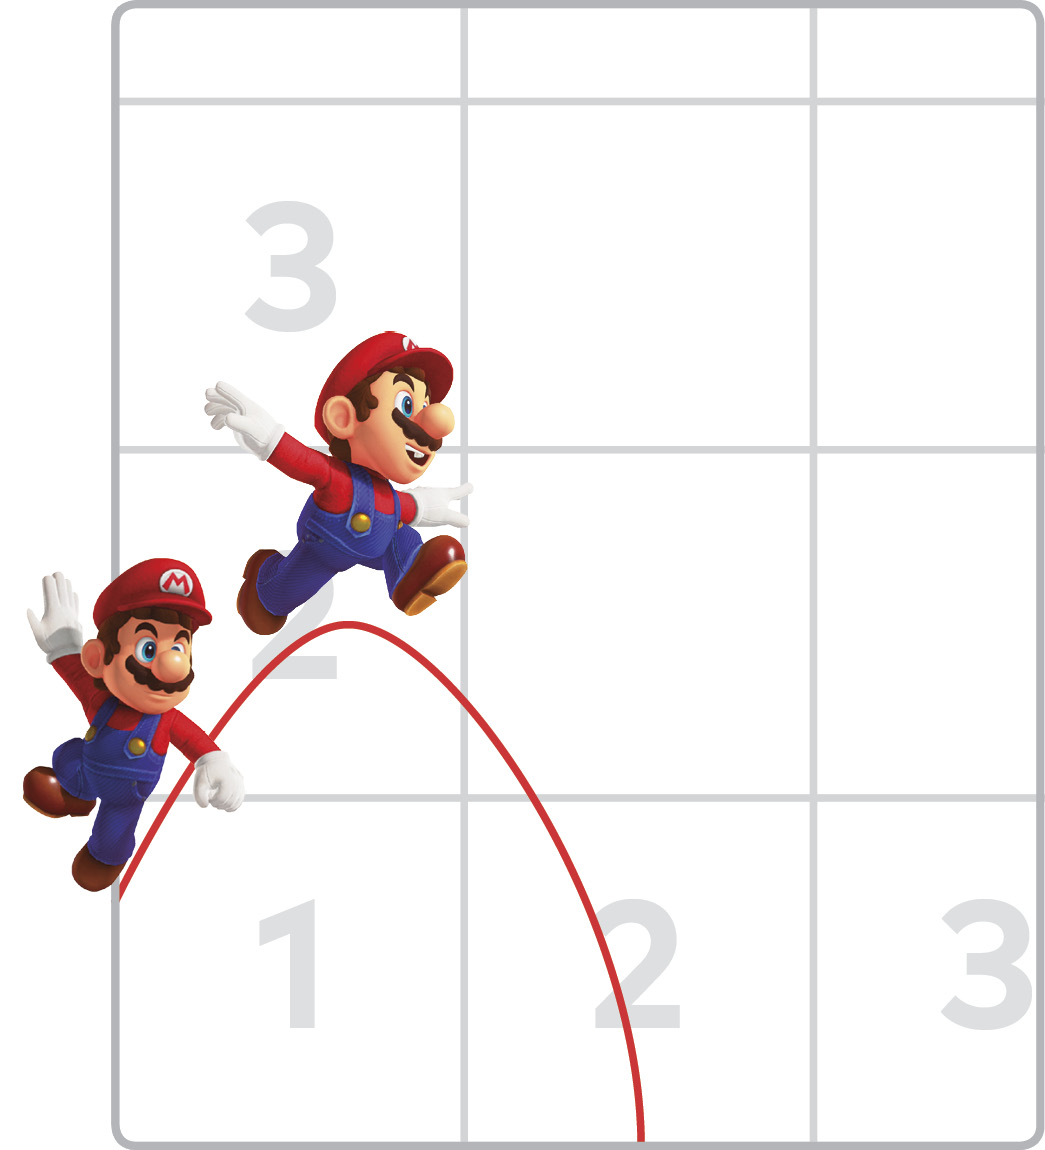
When Mario slides down a vertical surface in midair, he plants one hand and foot to slow his fall just a bit. From here, jumping launches Mario up and away from the wall. Sometimes, two sheer walls will be close enough to each other that Mario can easily wall jump back and forth all the way up the shaft.
After most jumping or airborne actions, Mario can still slide along a wall and wall jump. But if he runs head-first into a wall with a running long jump or tackle, he’ll clobber himself and fall all the way to the ground (or into a pit).
After a wall jump, Mario cannot bounce off Cappy in midair until after he lands again. All other airborne actions are possible after wall jumping, and you can try to dive jump, but if you do, Mario simply passes through Cappy.
If Mario plants a hand and starts sliding down a wall just under a platform above, deft footwork can still see him reach the next floor. Wall jump up and away from the wall, then tackle back toward the next floor from the top of the wall jump’s arc. Don’t tackle too early, or Mario’s inertia will still carry him away from the wall no matter which way you aim. To make sure this doesn’t happen, throw Cappy first, then pounce onto the landing zone.
Ground Pound
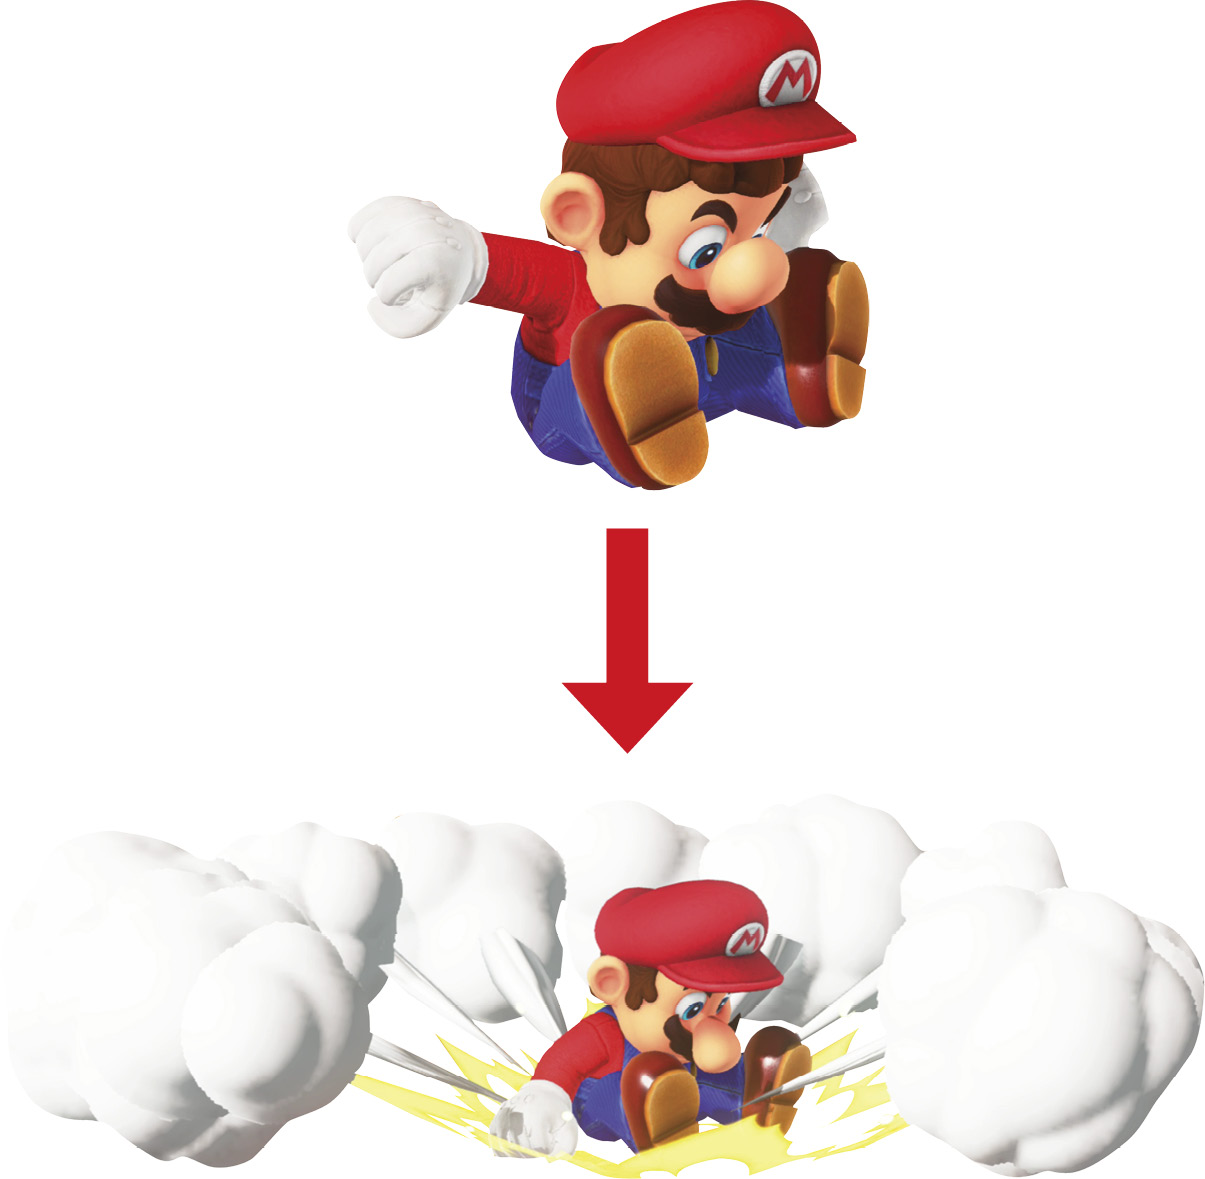
From midair, Mario gathers his squat form and cannonballs straight down, landing with a forceful thud that kicks up dust in all directions. This delivers more force than merely jumping on something. Bricks and boxes can be broken from above, and some enemies can only be defeated with ground pound attacks on their noggins.
Upon impact, you can initiate a downward toss with the Cap Throw button, or a high-speed roll with the Crouch and Cap Throw buttons together.
Ground Pound Jump
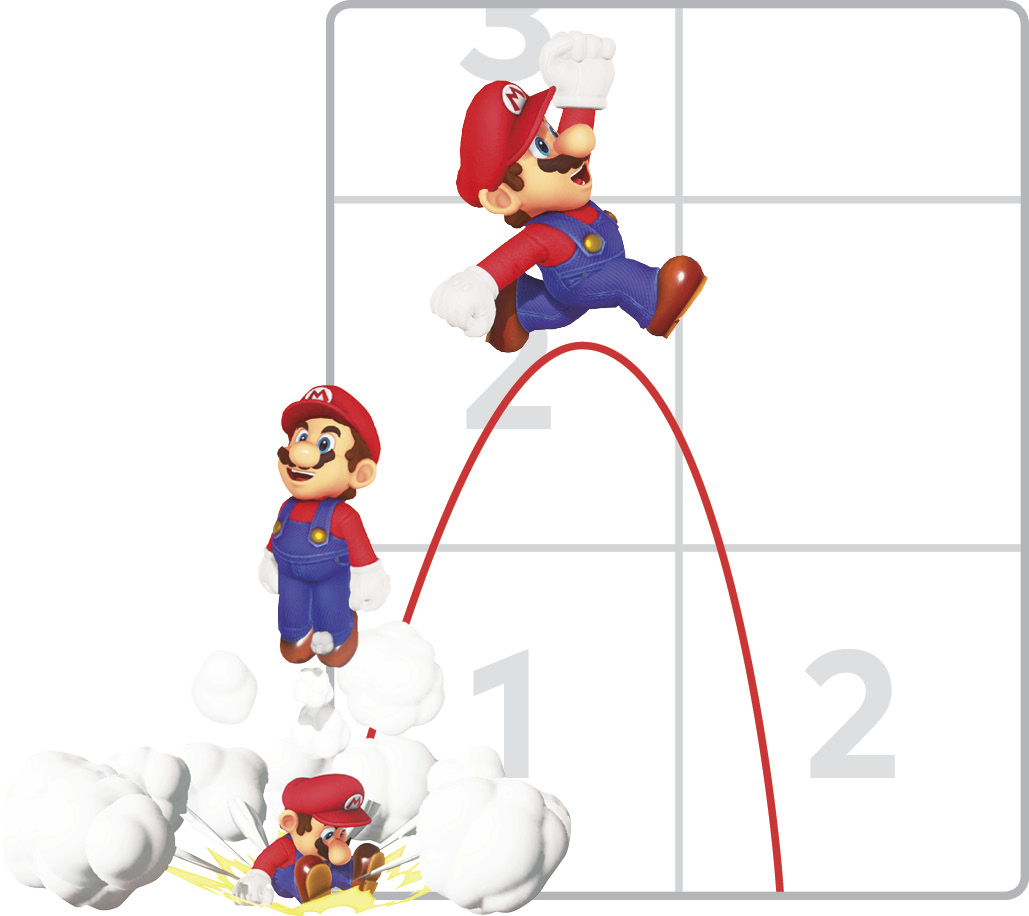
Jump immediately after slamming down with a ground pound, while surrounded by dust, for a ground pound jump. Mario turns the impact force into extra upward springing power, launching higher than a regular jump. The ground pound jump is Mario’s second-highest standard jump after his triple jump, edging out somersaults and cap jumps by just about a plumber’s toe.
Between the ground pound jump, back/side somersault, and cap jump, you have four short-notice high jumps that are not quite as good as a triple jump, but which don’t require as much space to pull off.
Tackle
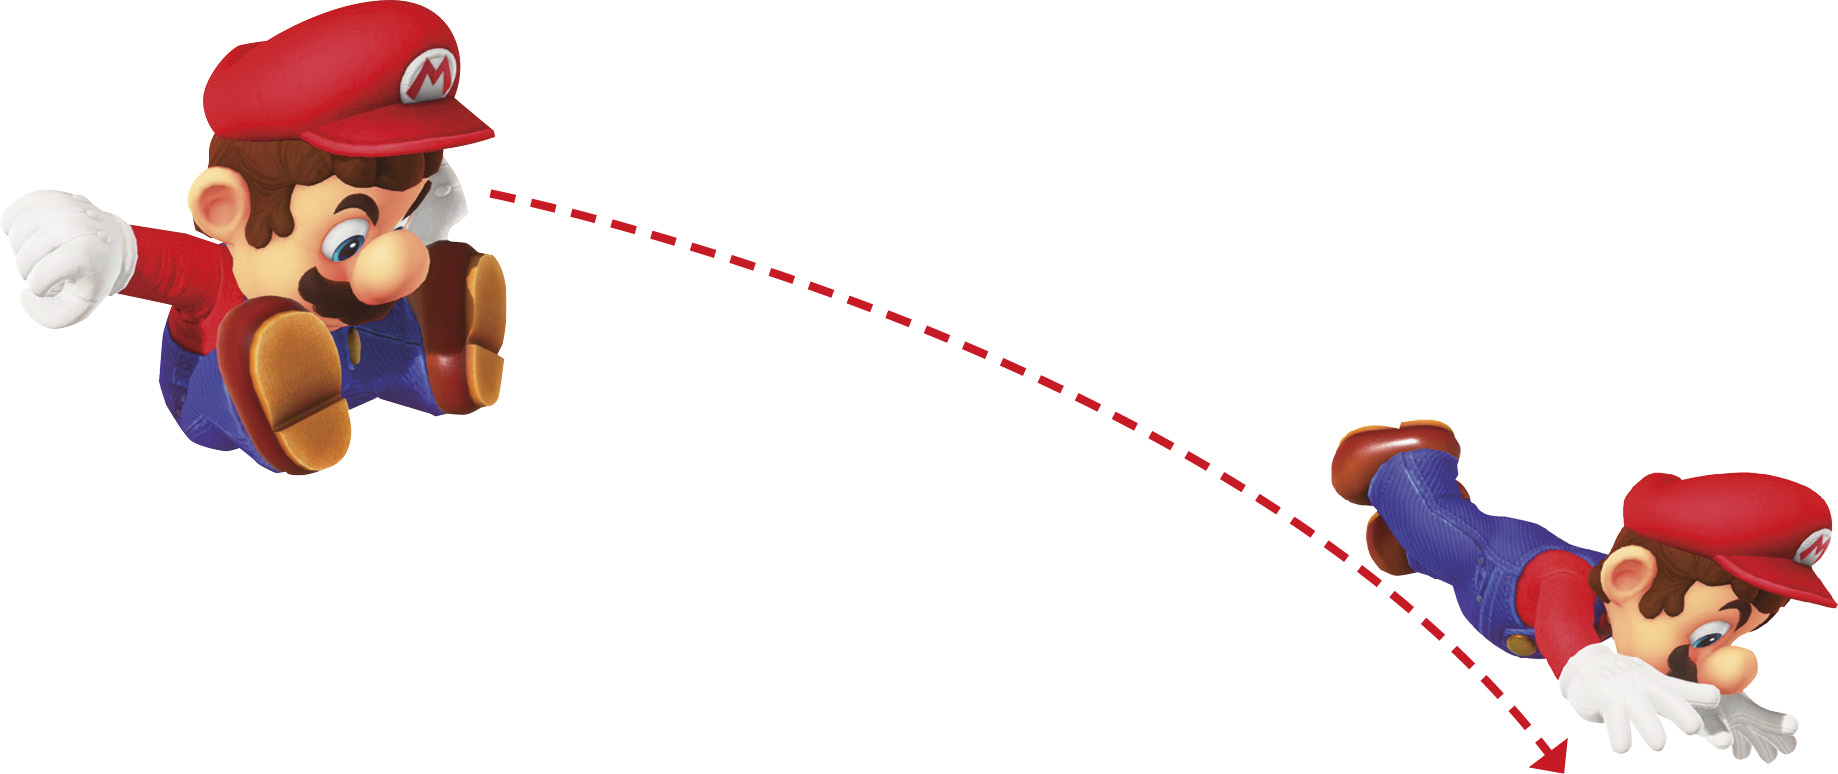
From midair, while Mario gathers himself and descends for a ground pound, press the Cap button or flick the controller for a tackle instead. Like with crouching before a running long jump, you don’t have to visually confirm Mario is winding up his ground pound move, you can just fluidly press the Crouch button then the Cap Throw button in midair.
Mario flops toward the ground quickly during a tackle, but it also adds a fair bit of horizontal distance gained before landing. It’s also the fastest way for Mario to suddenly change directions across a short distance, so hopping and tackling to the side can work as an evasive maneuver. Hold the Crouch button upon landing from a tackle and Mario transitions right into rolling, keeping the momentum going. Tackle into a wall, though, and Mario bounces off, like when long jumping or rolling into a vertical surface. Ouch!
With most airborne moves, you have options afterward, but a tackle means commitment. A tackling Mario is ground-bound for sure. Tackling into the top of a vulnerable creature can hurt them just the same as jumping on them can, but it’s harder to aim. As an attack, it’s probably better for catching rabbits than taking on Bowser’s minions!
Cappy the Bonneter
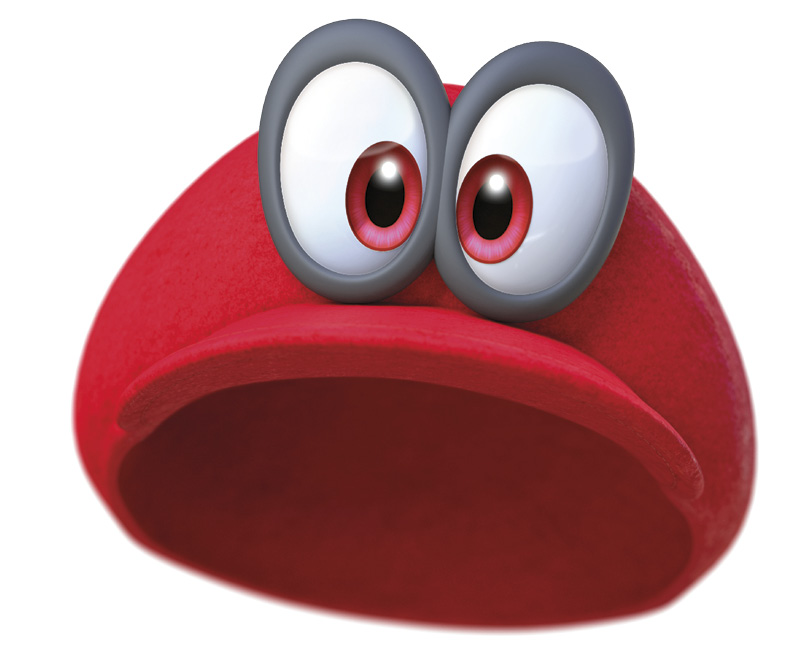
The biggest addition sits atop Mario’s head—his new friend Cappy replaces his trusty old red plumber’s cap, helping him out in many ways. Mario’s travel partner is on an adventure of his own, roused from Bonneton to track down his sister Tiara, who just happens to have been dragged into Bowser’s clutches on the same misadventure as Peach. Cappy the cap can do it all. He slices and dices with throw attacks, and he can become a hovering trampoline for Mario on the ground or in midair. Most startlingly, he allows Mario to “capture” certain other creatures, temporarily inhabiting their bodies through ghostly Cap Kingdom magic, giving Mario all kinds of unique and useful abilities.
Cap Throw
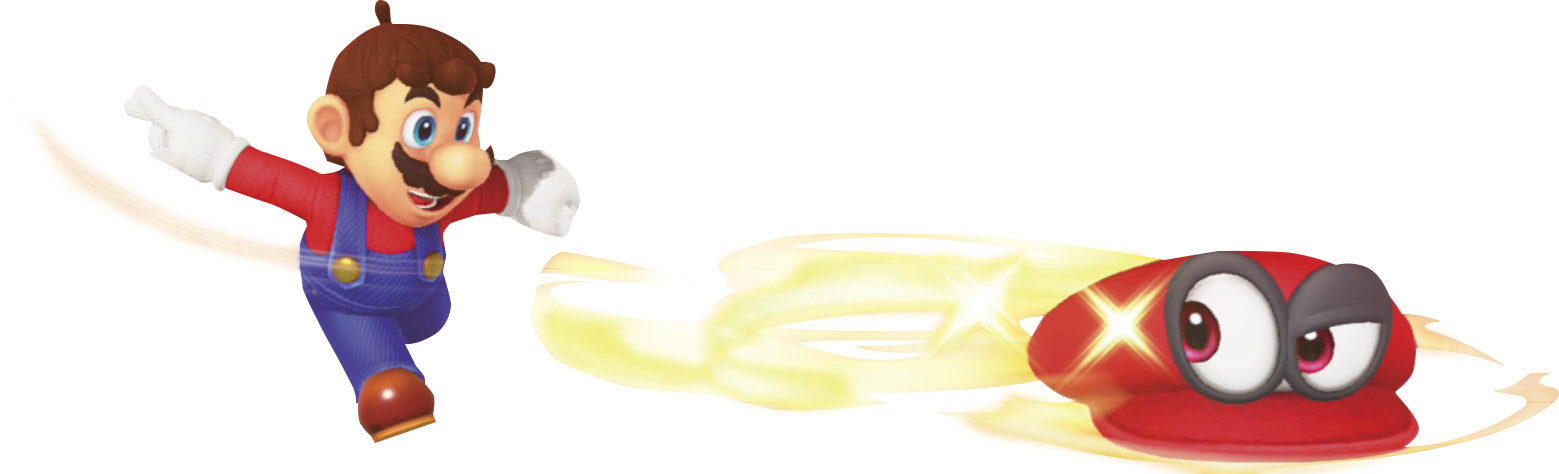
Thanks to Cappy, Mario is more capable as a fighter than ever. Aim Mario with the stick and toss Cappy with either the Cap Throw button or a brief flick of the controller. Cappy can also be thrown in midair and even while swimming.
During normal throws, Cappy flies away from Mario’s hand a little bit farther than the distance of a normal jump. When Cappy strikes a Capture-vulnerable creature, control transfers to the new creature. Cappy striking a non-Capturable target knocks the target back, perhaps defeating them, depending on their durability.
When Cappy returns to Mario, toss the cap again immediately for a slightly quicker toss. This can be done again after the second consecutive throw for a kind of “triple throw,” the fastest Cappy attack. This is most useful against incoming enemies or projectiles that can be knocked back, since Mario can dish out hat deflections very quickly with good timing on repeat throws. Quickly knock back one sturdy foe over and over, or deftly deflect several incoming boss hats back to back.
Putting Cappy on Hold
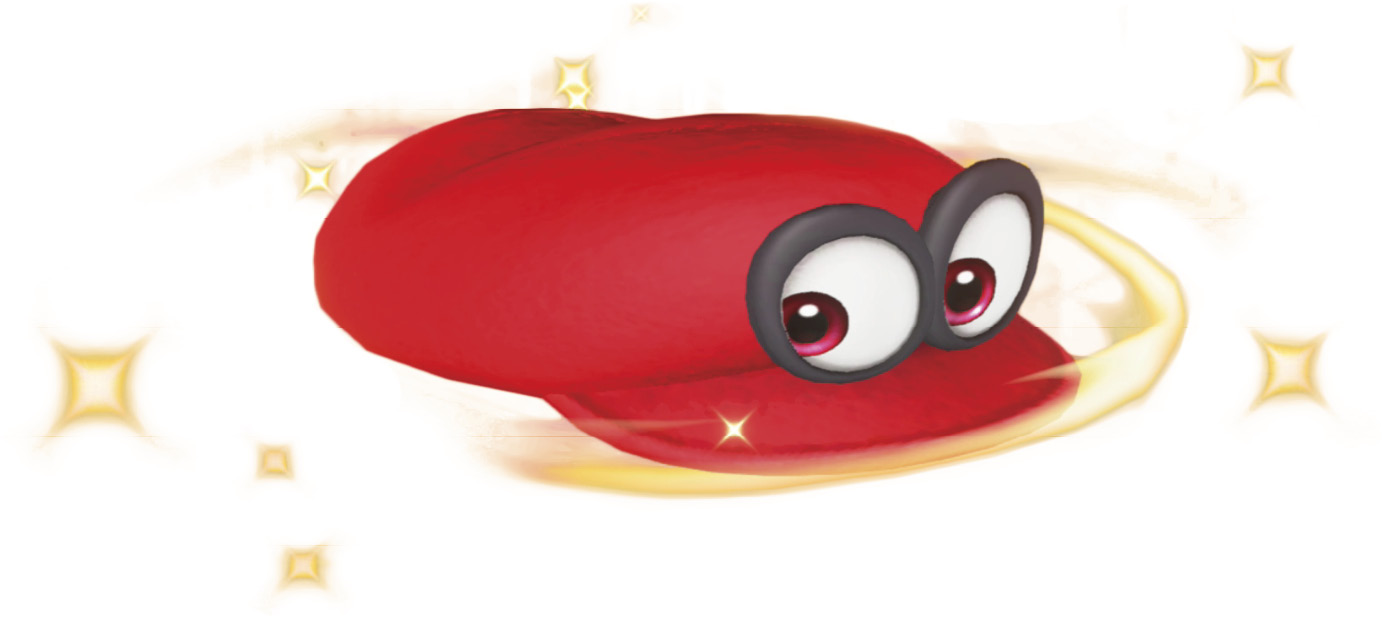
Hold the Cap Throw button during a toss and Cappy continues spinning at max distance for up to two seconds before returning to Mario. During this time, Cappy can still block incoming projectiles and damage things near him. For example, hold Cappy after throwing him into a multi-hit coin block and he’ll rapidly drain the block of all coins by spinning against it.
More importantly, holding Cappy turns the trusty living hat into a temporary platform. Jumping off Cappy from the ground is called a cap jump. Bouncing off Cappy in midair is called a dive jump, where you first toss Cappy while jumping then tackle toward him.
Toss Cappy onto certain knob-like structures and you can keep him spinning indefinitely with the same method, by holding the Cap Throw button. This works atop things like lampposts, flagpoles, and ornate bannisters.
Spin Throw
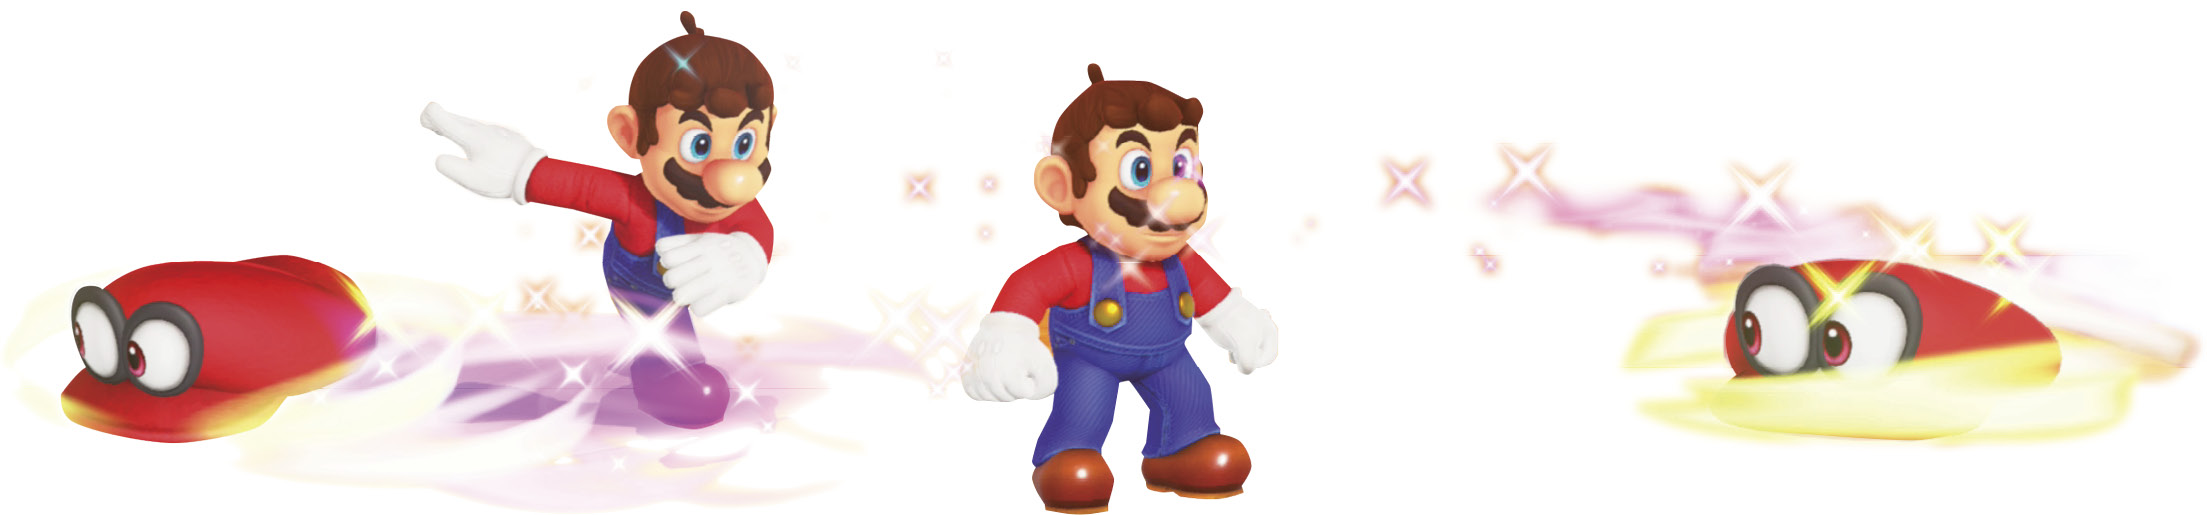
Mario throws Cappy in a protective spiral. Spin throws are immensely useful, so get used to performing them on-demand. If using dual Joy-Con, snap them both to the left or right together. If using a single horizontal Joy-Con or the Pro Controller, snap either to the side like suddenly turning a car’s steering wheel. Done correctly, a spin throw is unmistakable, with Cappy circling Mario repeatedly, picking up coins and bashing baddies along the way.
Aside from using motion controls, a spin throw can also be performed by starting a grounded spin (spin the stick twice quickly) before tossing Cappy. During a spin, grounded or jumping, any cap toss will be a spin throw. (Note that this doesn’t apply to Mario’s spin after launching from a flower-like hat trampoline, though.)
Cappy can still capture creatures during a spin throw, but can’t be held in place.
Upward Throw
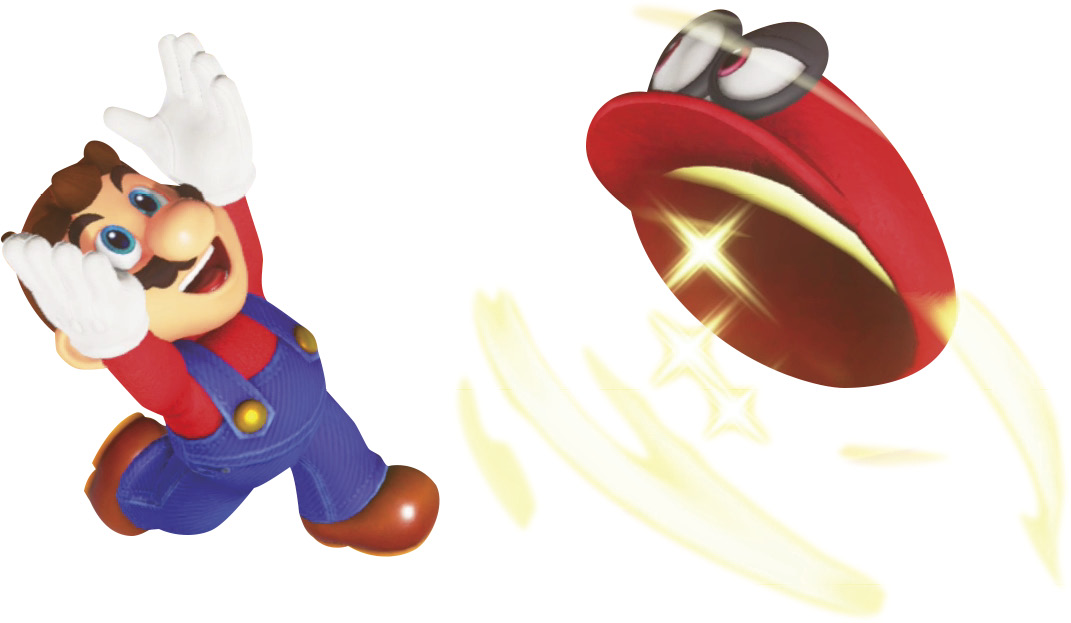
Mario hurls Cappy almost straight up, slicing the air above Mario higher than his standard jump. Naturally, you can throw Cappy even higher still by jumping and performing an upward throw at the apex.
You’ll need motion controls for an upward throw. Thrust the controller up evenly and suddenly, without tilting it. If using split Joy-Con, make sure to raise them both.
Upward throws are most useful for grabbing coins or hearts that are out of Mario’s reach. Upward throws can also reveal invisible blocks. Cappy can be held at the end of an upward throw, though it’s hard to take advantage of this with a cap jump unless you quickly side or backward somersault up into the hat.
Upward throws can also prove quite useful in games of beach volleyball…
Downward Throw
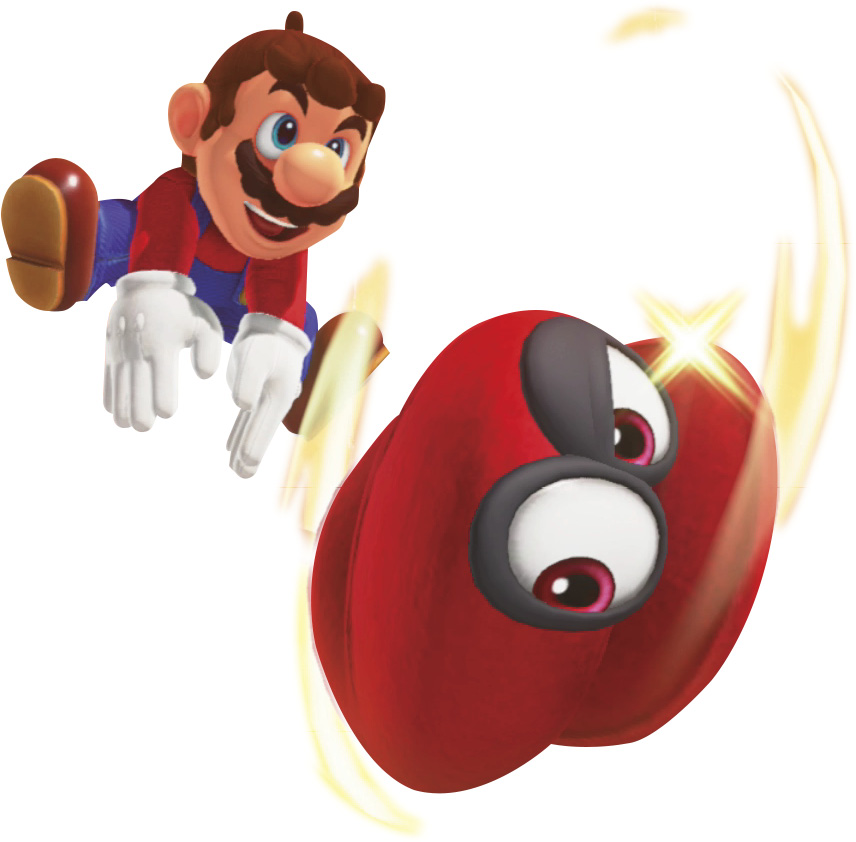
Done in midair or right next to a drop-off, a downward throw is the opposite of an upward throw, with Mario hurling Cappy almost straight down. Like with upward throws, this tends to be most useful for grabbing risky coins or fishing for invisible blocks.
Downward throws on flat ground are different. Cappy rolls away from Mario like a sawblade, striking farther along flat ground than a normal cap throw.
Doing downward throws anytime requires a split Joy-Con grip, thrusting both Joy-Con down at the same time. A downward throw cannot be done with motion controls on a Pro Controller or a horizontal Joy-Con pad. A downward throw can still be done without motion controls by ground pounding first, then tapping Cap Throw during the impact. This just requires a little premeditation. Also, be careful not to hold the Crouch button during the ground pound impact, or Mario will high-speed roll out of the dust cloud instead.
Homing Throw
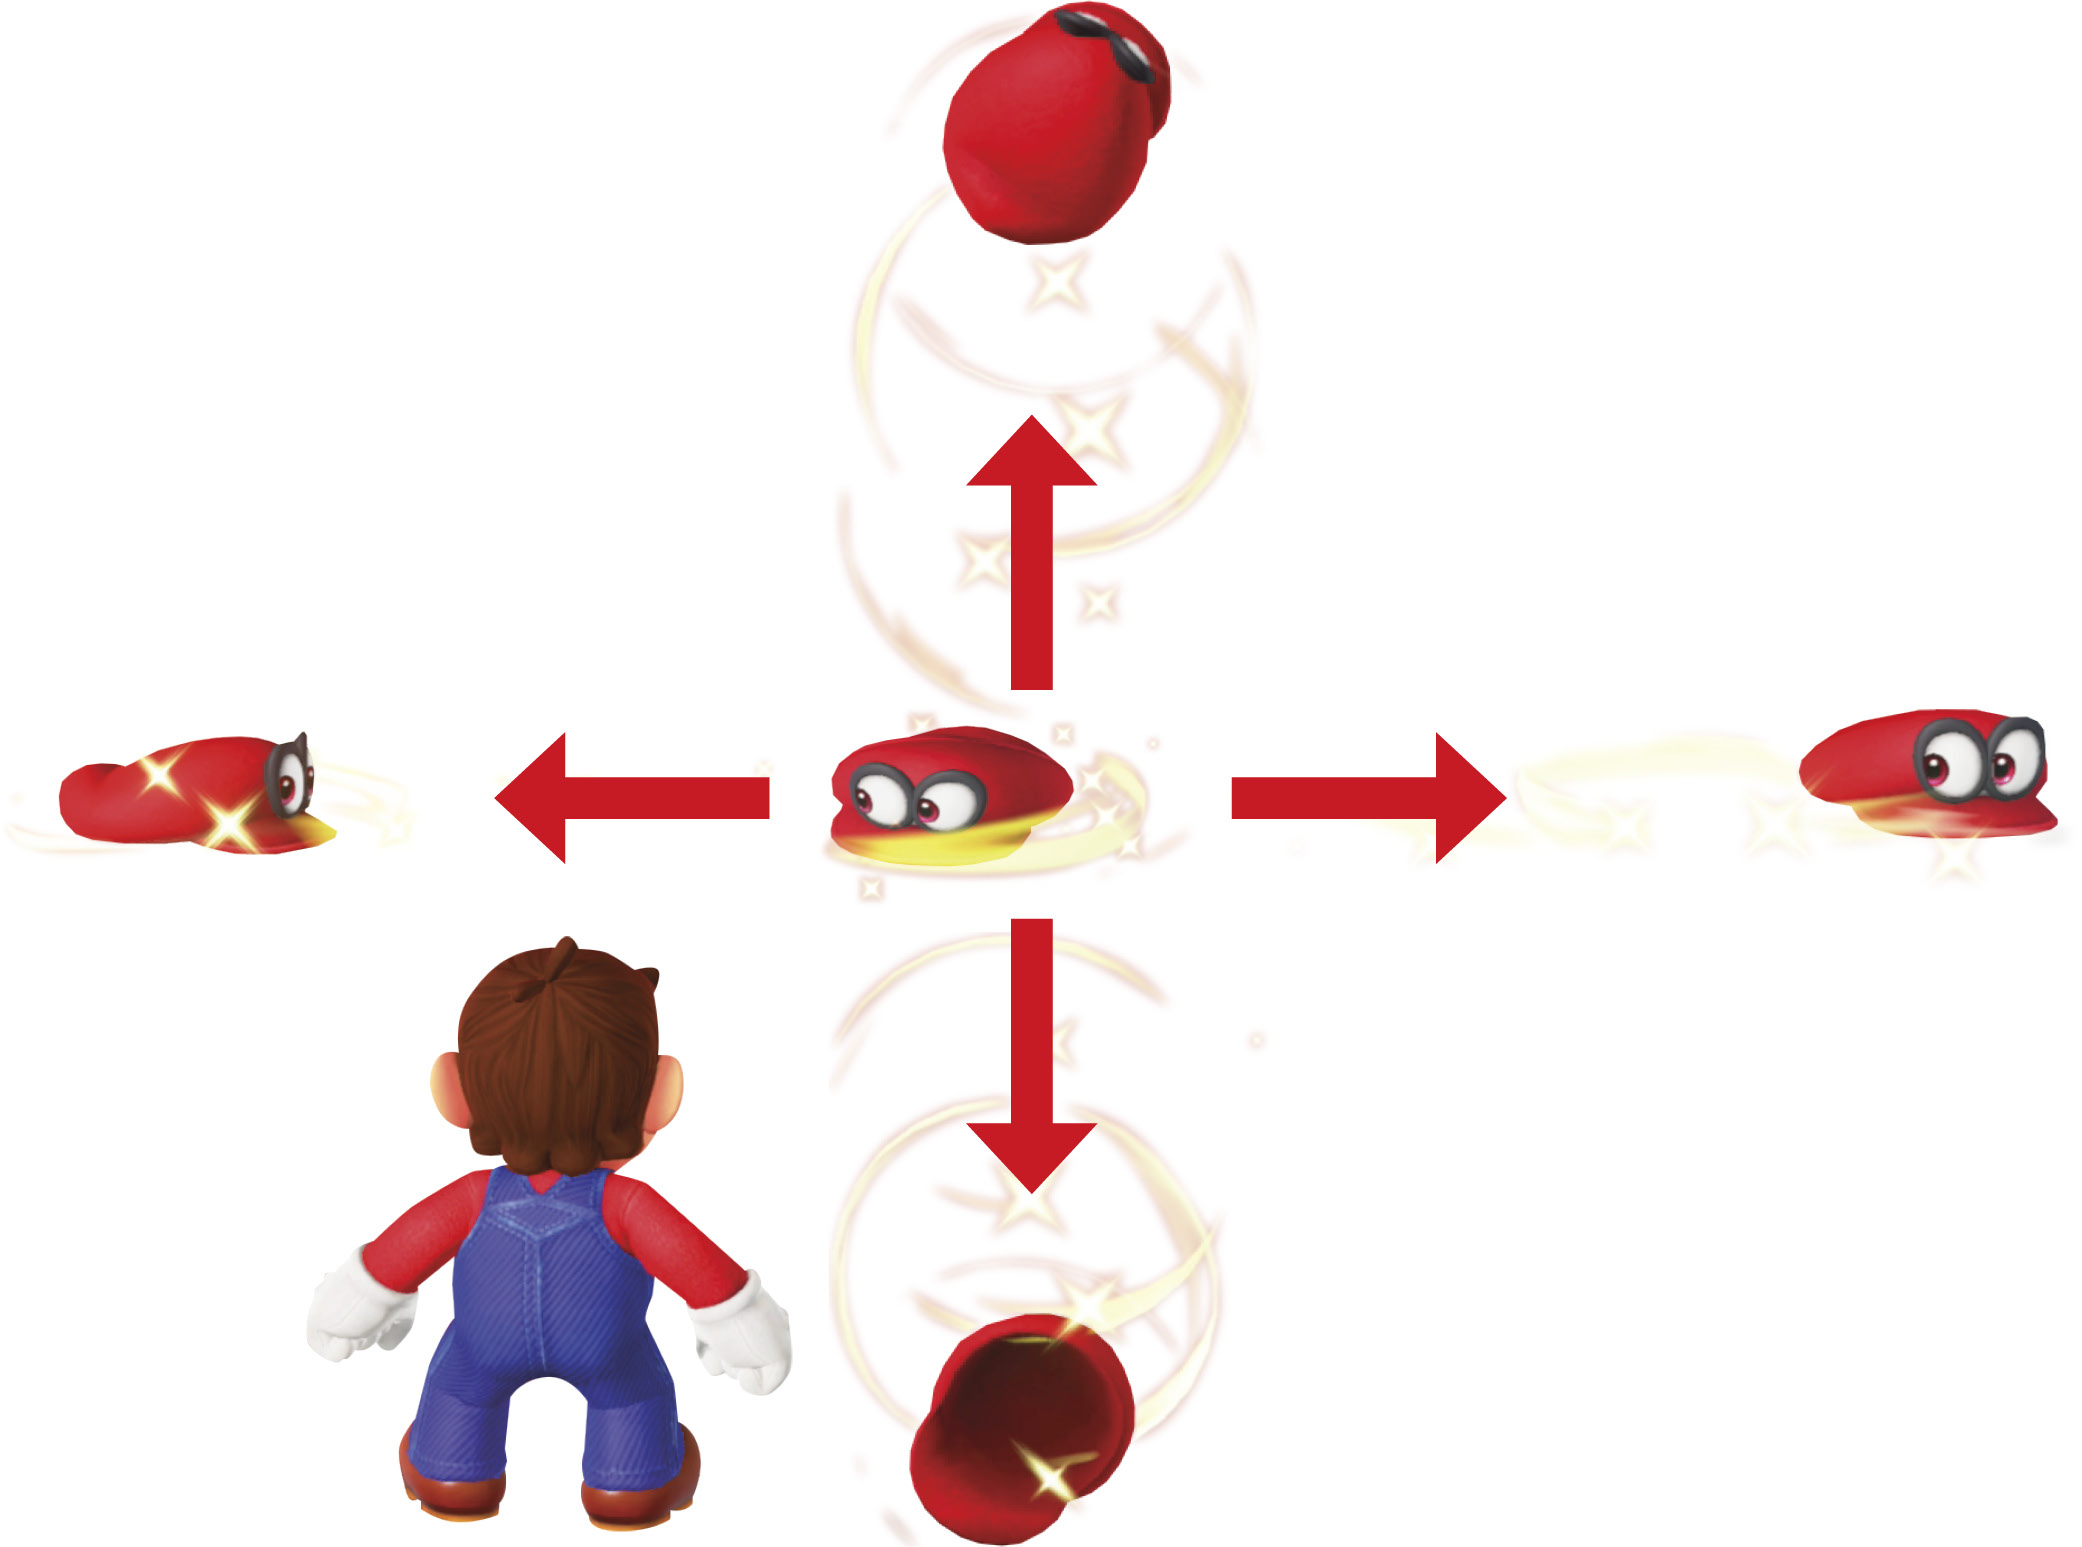
During a cap throw, flicking the controller redirects Cappy’s flight path. If there’s a target nearby, whether an enemy or object, he homes in on it. If there’s no obvious target, Cappy flies in the direction you chose with motion waggle, upward, left, right, or downward. Bending Cappy’s travel path at a right angle can be helpful sometimes to pick up coins or hearts around tricky corners or over precarious drop-offs. This redirection can even trigger some hat launchers and capture out-of-sight creatures from odd angles.
Capture

Maybe the single biggest departure for Mario in this adventure is the ability to control dozens of creatures (and even things) by temporarily taking them over with Cappy. Capturing occurs automatically whenever Cappy strikes a capture-vulnerable target. From controlling a growing stack of Goombas, to taking over a Paragoomba and flying where Mario can’t, to piloting a Lava Bubble through a molten sea, using Cappy to capture creatures opens all kinds of paths and doors.
You can check out a list of capture targets from Lists on the Travel Map, and from the Action Guide at the main Pause screen. This guide also lists which enemies can be captured in the preamble to each kingdom’s walkthrough, and in the Odyssey Ecology chapter toward the back of the book.
Combos: Mario and Cappy
Cap Jump
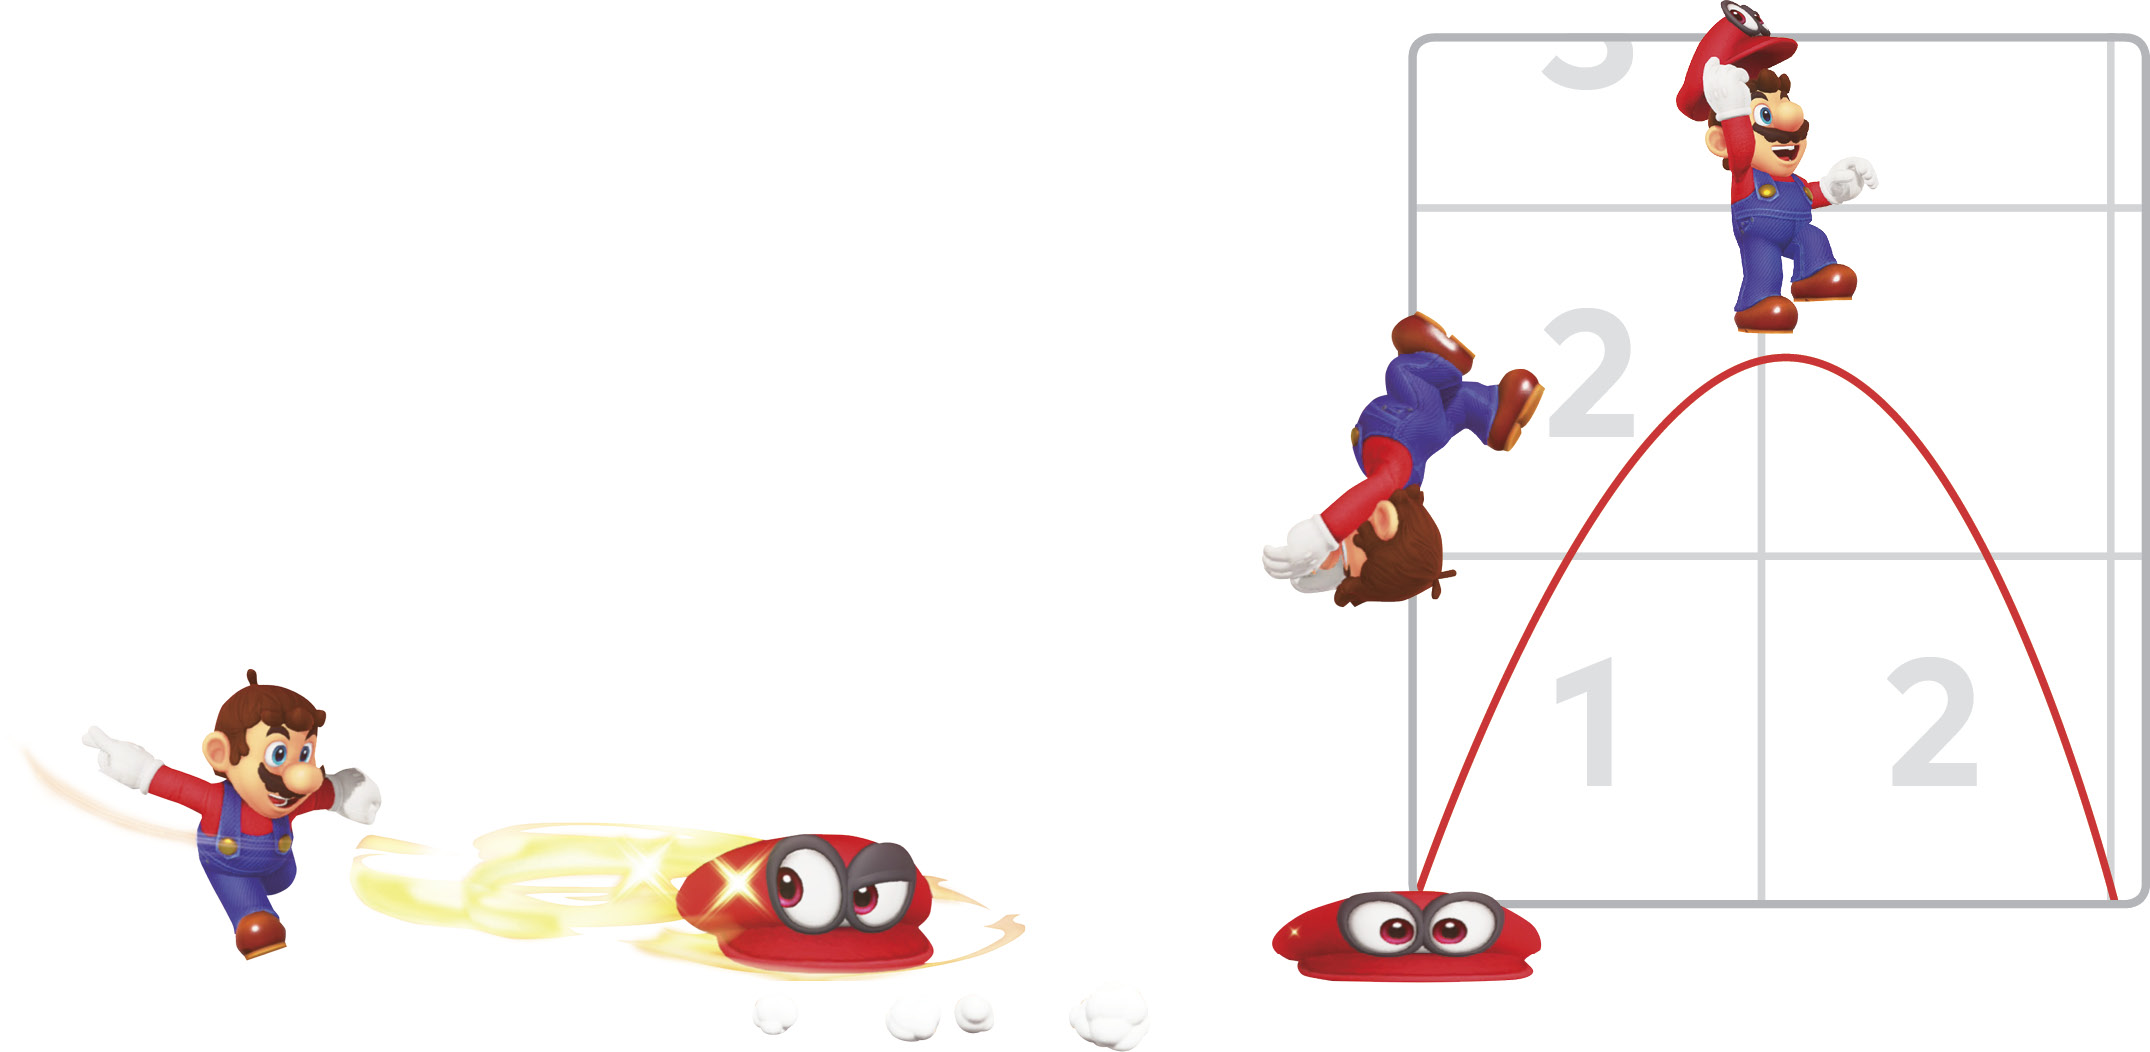
On the ground, you can execute an extra-springy jump simply by tossing and holding Cappy, then running into him. Mario automatically bounces into an extra-high jump.
A cap jump can also be done off the ground, by jumping into Cappy on hold higher up. Using Cappy in this way by throwing him in midair then tackling toward him is called a dive jump, one of Mario’s most advanced and useful maneuvers.
Catch Jump
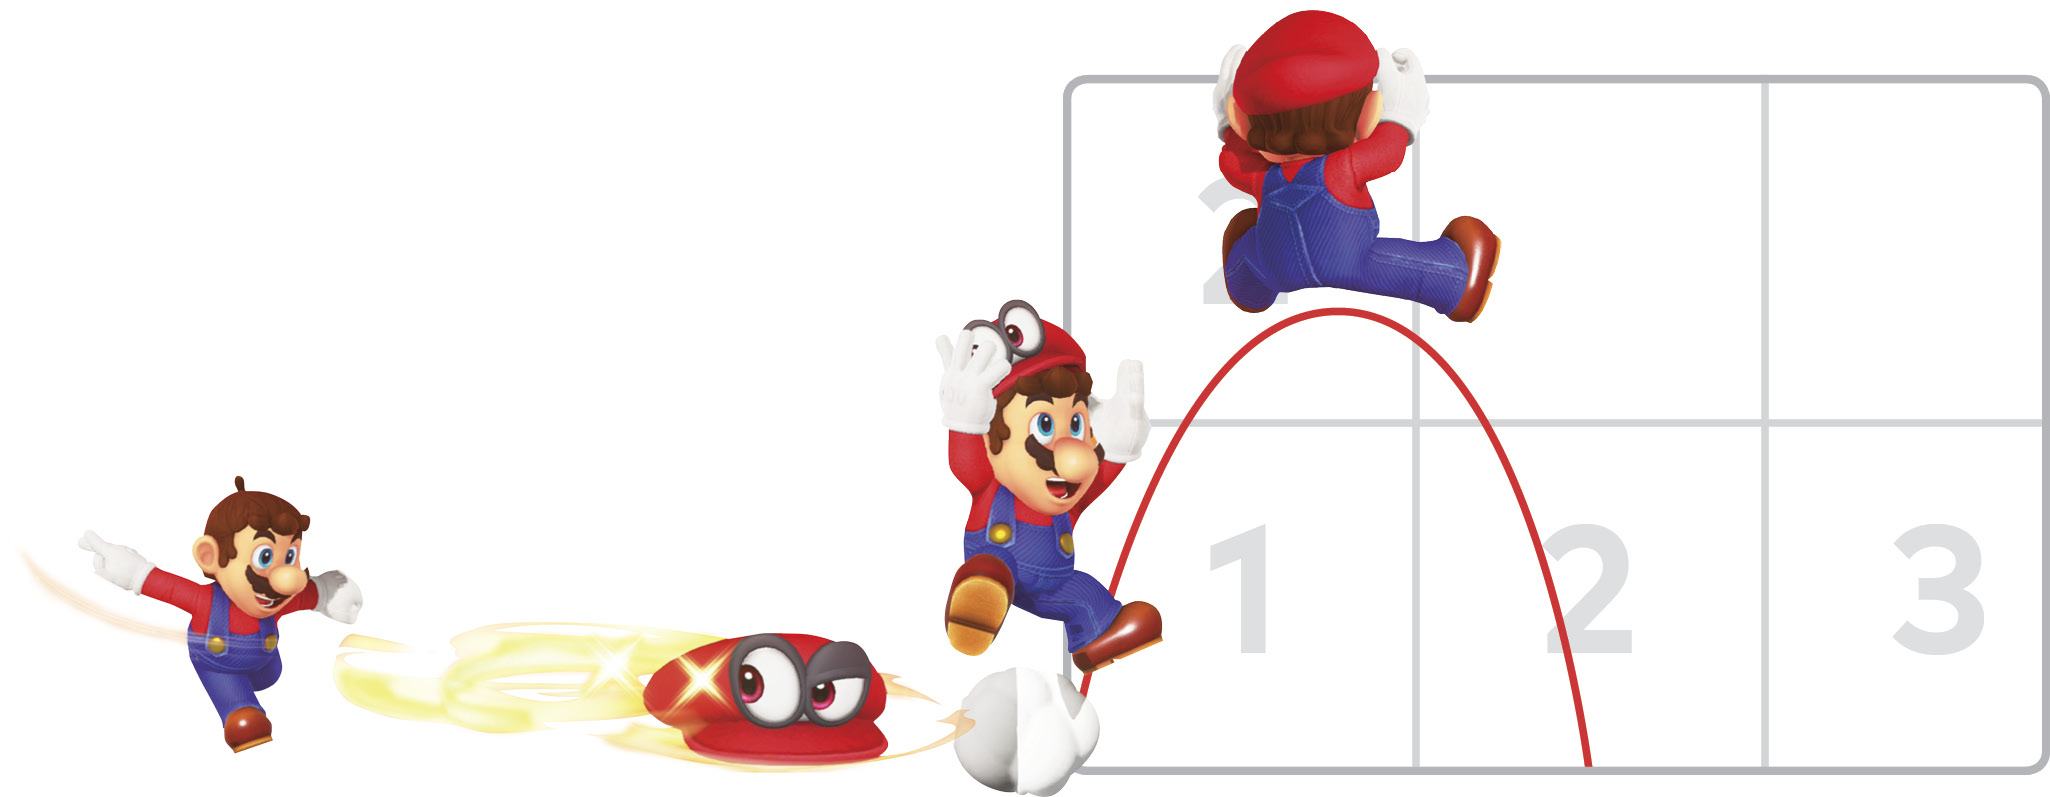
On the ground, jump immediately after catching Cappy for a little extra lift versus a regular jump. A returning Cappy gusts up onto Mario’s head in rhythm with him jumping off the ground. This isn’t crucial, as ground pound jumps, somersaults, cap jumps, and triple jumps are still higher-reaching when a bigger jump is better, but it’s nice when it happens.
Catch Spin
Tapping the Jump button just after a midair catch gives a little flourish twirl and slightly more hangtime, and allows Cappy to be thrown again in the same midair period.
Throwing Cappy in midair gives a little bit of forward loft, if you hold the desired direction on the stick, and so does this catch spin. In tall forward jumps where every bit of distance matters, and height isn’t so important, a homing throw into a catch spin might make the difference.
A homing throw into catch spin only works to “recharge” Mario’s cap toss once per airborne sequence. During long falls, if you keep trying to throw and catch spin, Mario simply whirls without tossing Cappy, and without adjusting his trajectory.
Dive Jump
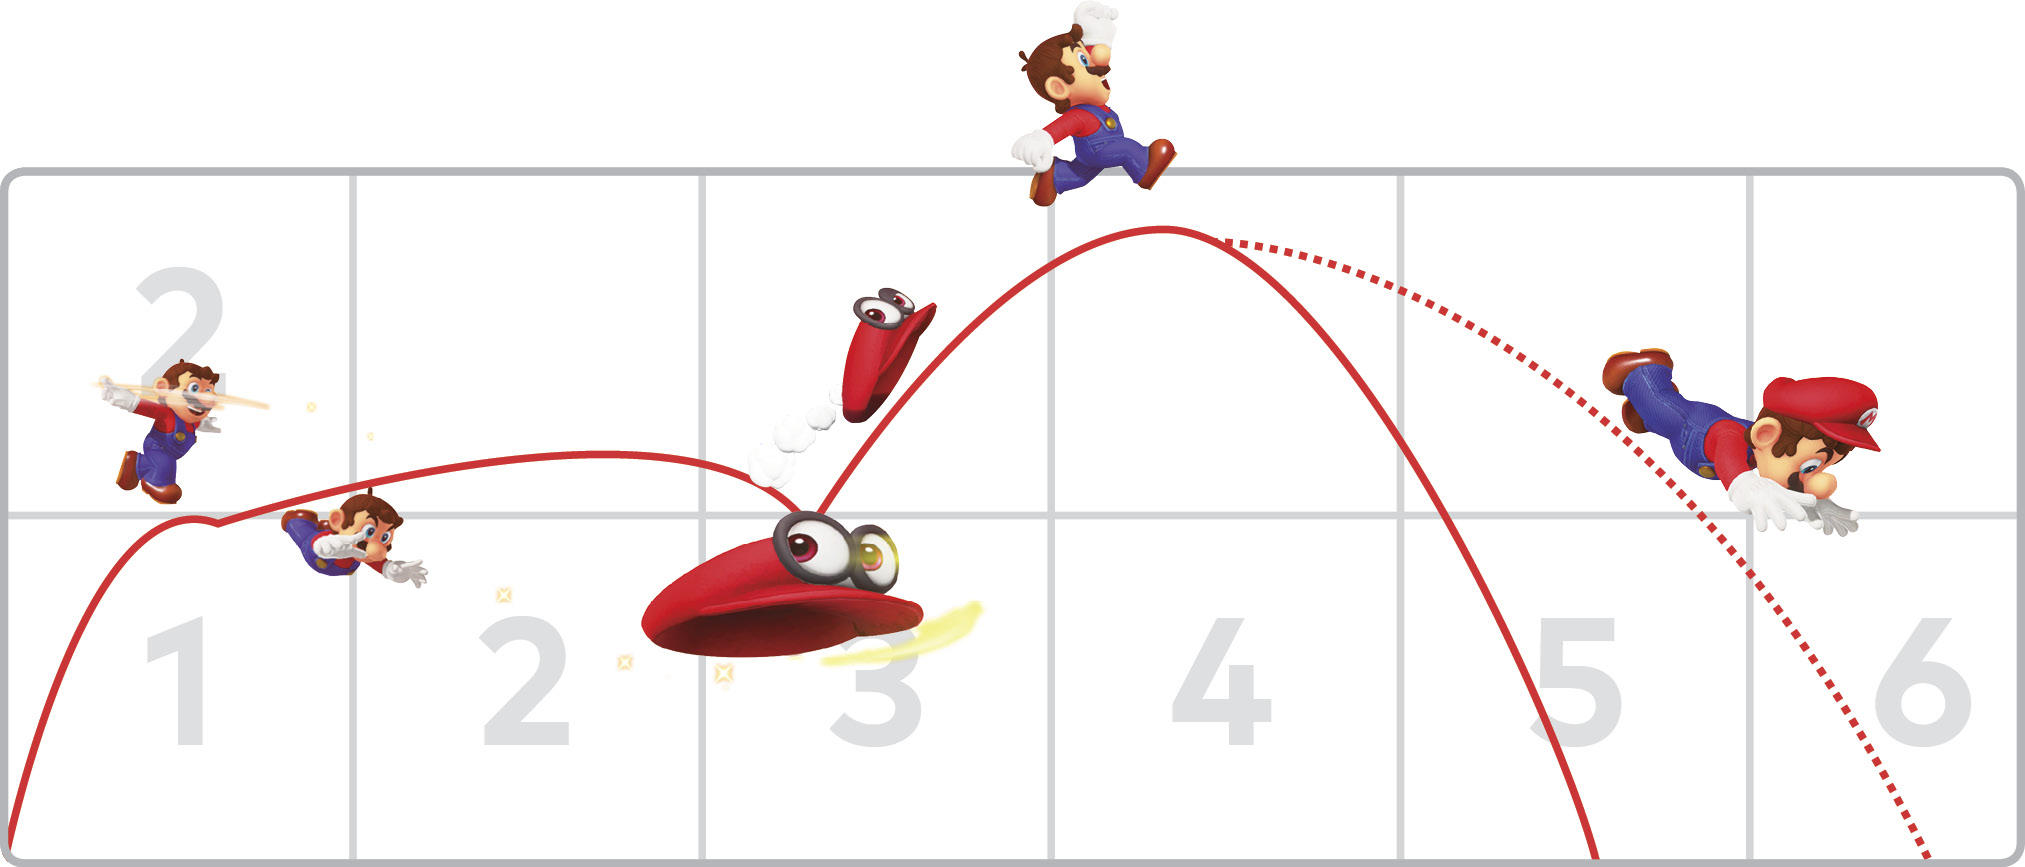
One of Mario’s most advanced jumping techniques requires his plucky athletic tackle and his new friend Cappy used as a floating bouncepad.
Like with bouncing off Cappy on the ground with a cap jump, Mario can also bounce off Cappy in midair with a dive jump. During any kind of jump, first toss the cap in the desired direction, then immediately tackle toward it. Hold down the Cap Throw button used for the tackle—this holds Cappy in place, so Mario has something to bounce off!
After a bounce, direct Mario in midair as usual. You can throw Cappy again if needed, and you can tackle again for more horizontal distance gained. But a dive jump bounce can only be used once per airborne period, the time between when Mario’s feet leave horizontal ground and return. Try to tackle into Cappy again after one dive jump, and Mario just passes through him. Dive jumping also won’t work after a wall jump, or after releasing a captured creature in midair. Dive jumping will work after jumping away from pole structures like a flagpole, beanstalk, or tree trunk, though. It also works after bouncing off a hat trampoline.
Dive jumping adds lots of extra airtime, distance, and control to any jumping sequence. Compared to a standard jump with a running start, a running jump into a dive jump at the apex covers three times more ground… or soars over a gap three times wider.
Dive jumping isn’t just for gap-clearing. A midair cap toss holds height briefly while adding a little momentum in the direction of the throw; tackling and bouncing also allow for midair extension or redirection. Dive jumps can save “missed” jumps, where you realize you’re going to under or overshoot a landing pad.
The Jumpman Cometh
When gauging which jump to use, there’s height to worry about, and there’s distance. Different jump techniques are better for different things. Getting comfortable with Mario’s jump potential leads to clearing wider pits, planting wall jumps farther up sheer surfaces, and mounting higher ledges than normal.
Standard Jumping
When you just want to cross a gap too long for a regular jump, and the other side is about the same height as the takeoff point or lower, then a running long jump is perfect. For a combination of max height and distance with a little runway and time to line it up, the triple jump is king. To get immediate height on short notice reaching for a ledge or platform above, a ground pound jump gives the most lift, followed closely by the back and side somersaults and the cap jump. If there’s not enough spring to loft cleanly up to the next floor, Mario may be high enough to cling to the ledge and climb up.
Wall Jump and Tackle Parkour
If you can’t get quite enough height with a jump to ascend to the next floor even by clinging, but there’s a place to wall slide, you can maybe manage to flip up there with some deft Mario-style gymnastics. Ground pound jump or somersault next to the target wall and start sliding as high as possible. Wall jump, toss Cappy toward the desired ledge at the jump’s apex, then tackle toward Cappy, like during a dive jump. After wall jumping, Mario can’t actually bounce off Cappy for a dive jump bounce, but throwing Cappy in the desired direction moves Mario forward in midair ever so slightly, while helping aim the tackle afterward. With practice, this maneuver gets Mario up over many walls that can’t be surmounted with his normal jumps alone.
Dive Jumping to Higher Heights
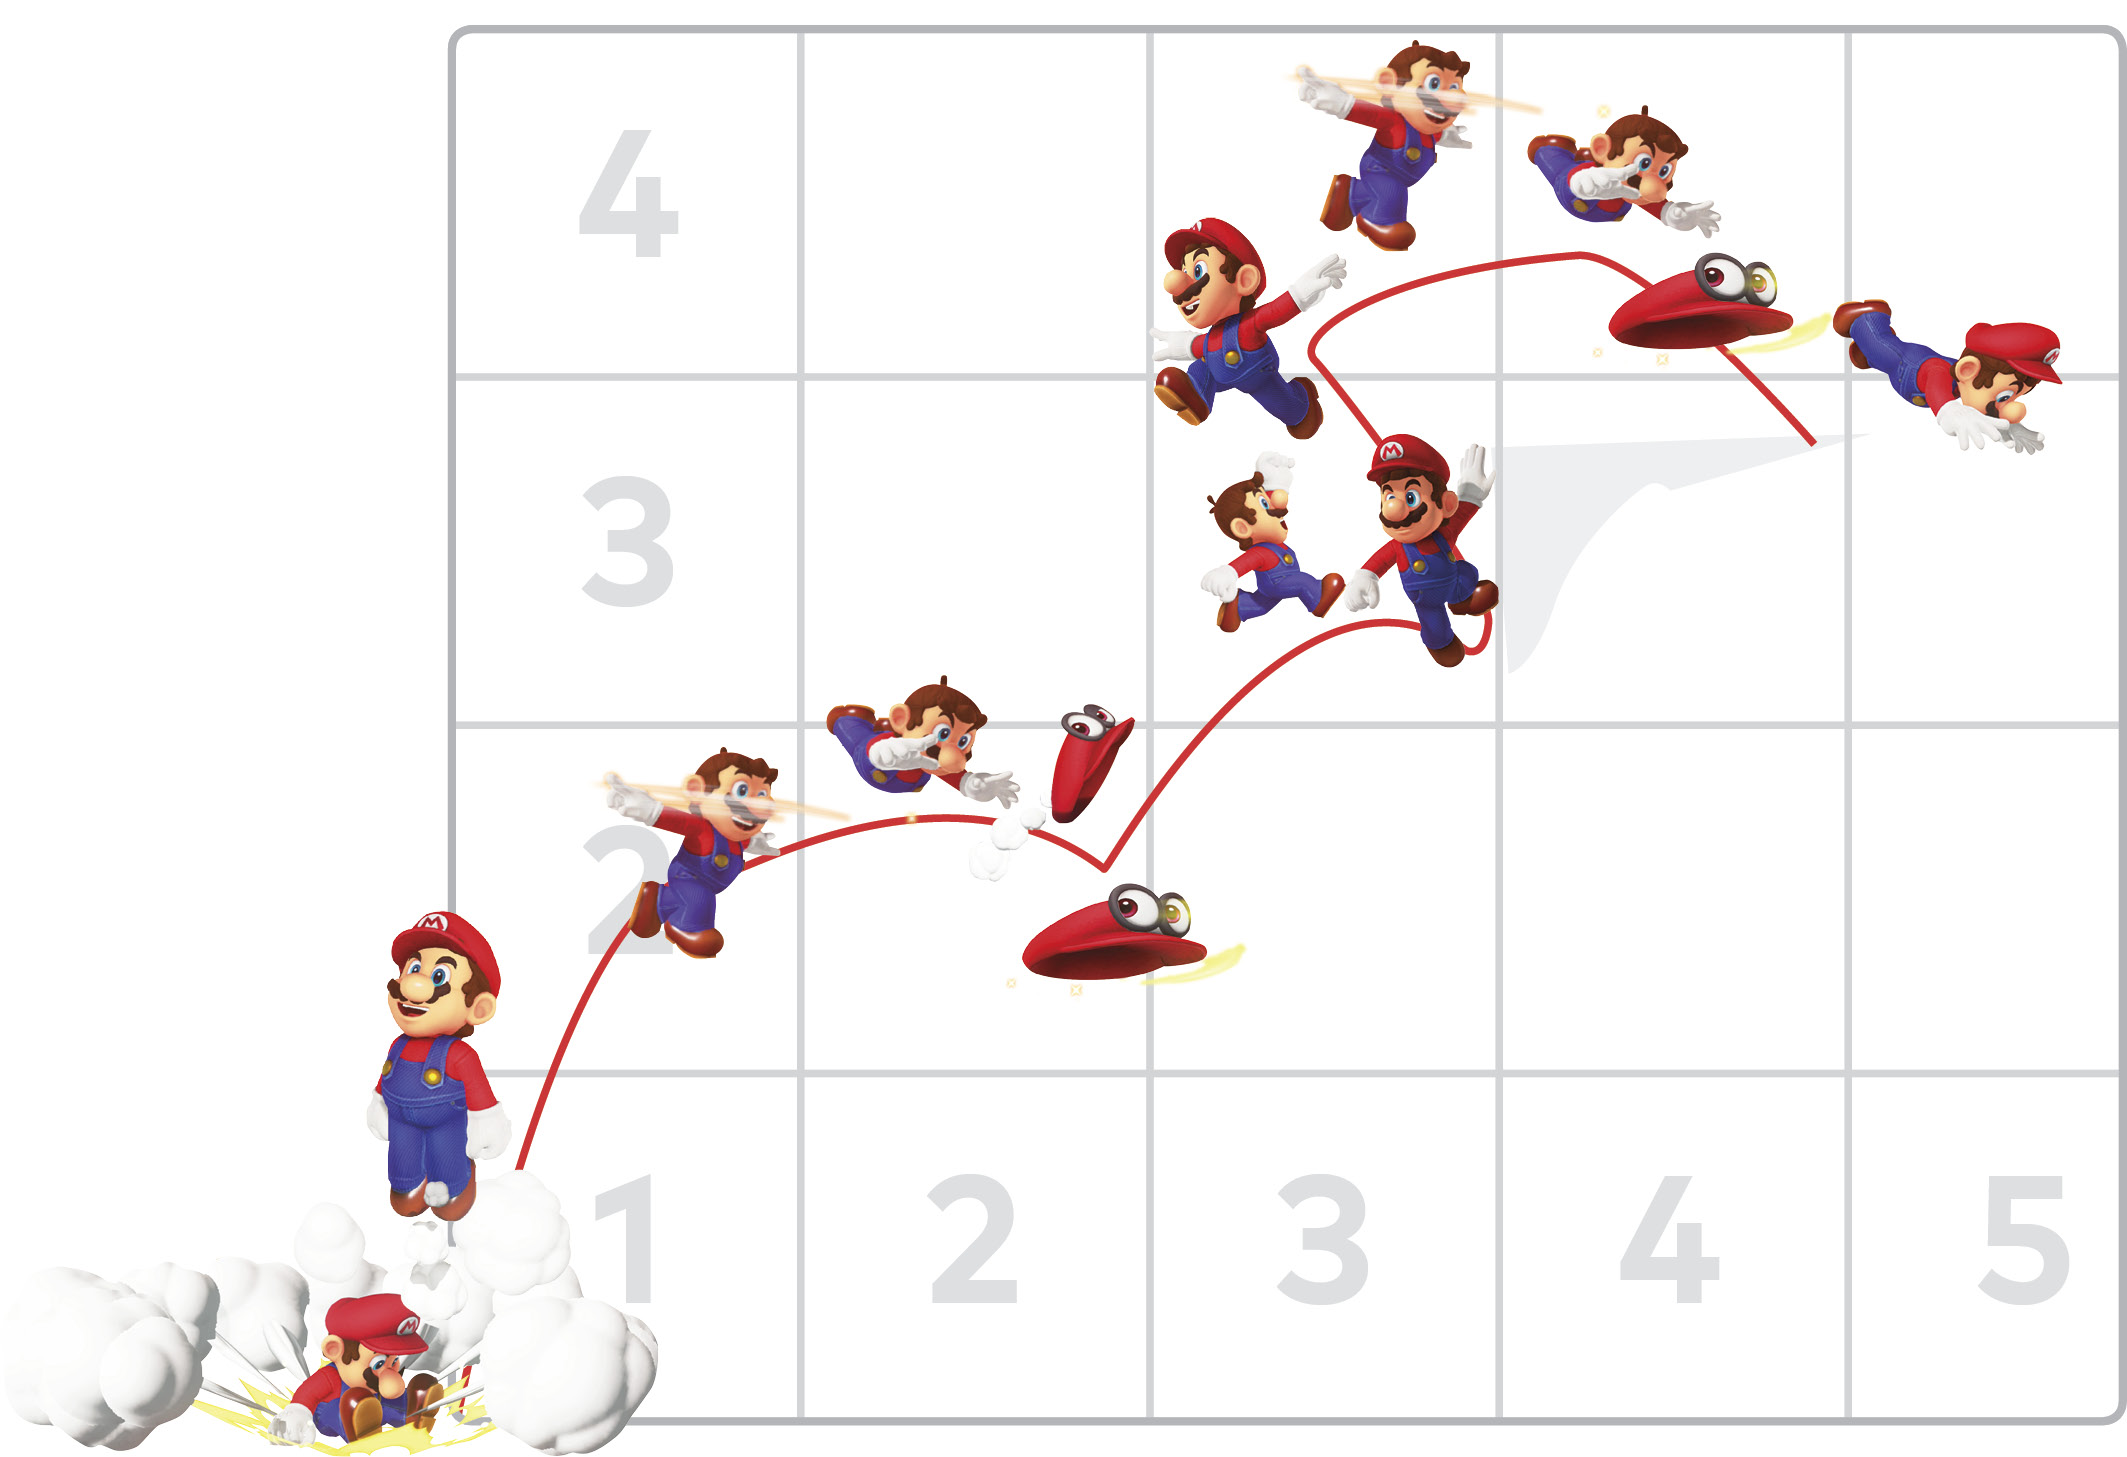
If the next floor or ledge is even higher, above clinging reach, dive jumping can give that last little bit of height to make it up onto a high or tricky platform. Start with the highest possible jump toward the wall you can allow for, depending on the room available, then toss Cappy parallel to the wall and dive jump toward him. Take care not to tackle right into the wall, or Mario bounces off, shaken by the impact! Successfully bounce off Cappy then drift toward the wall to wall jump from much higher than jumping alone. From here, hopefully the target ledge is finally in reach! As before, aim toward the desired platform with a Cappy throw from the wall jump’s apex, then tackle to a (hopefully) safe landing.
Dialing Long Distance
Dive jumping adds quite a bit of horizontal distance cleared to any airborne period. When trying to clear an exceptional chasm, get an ideal start with a triple jump or running long jump right from the edge of one side. For a terrific pit-clearing finish, toss Cappy a little past the jump’s apex, then tackle toward him and hold the Cap button to bounce. Steer the midair cap jump hard forward, tackling from the apex for a little extra oomph to the forward falling arc. Getting comfortable with dive jumps adds quite a bit to Mario’s airborne maneuverability, and this sequence takes him most of the way toward a plumber’s mastery of Mushroom Kingdom gymnastics.
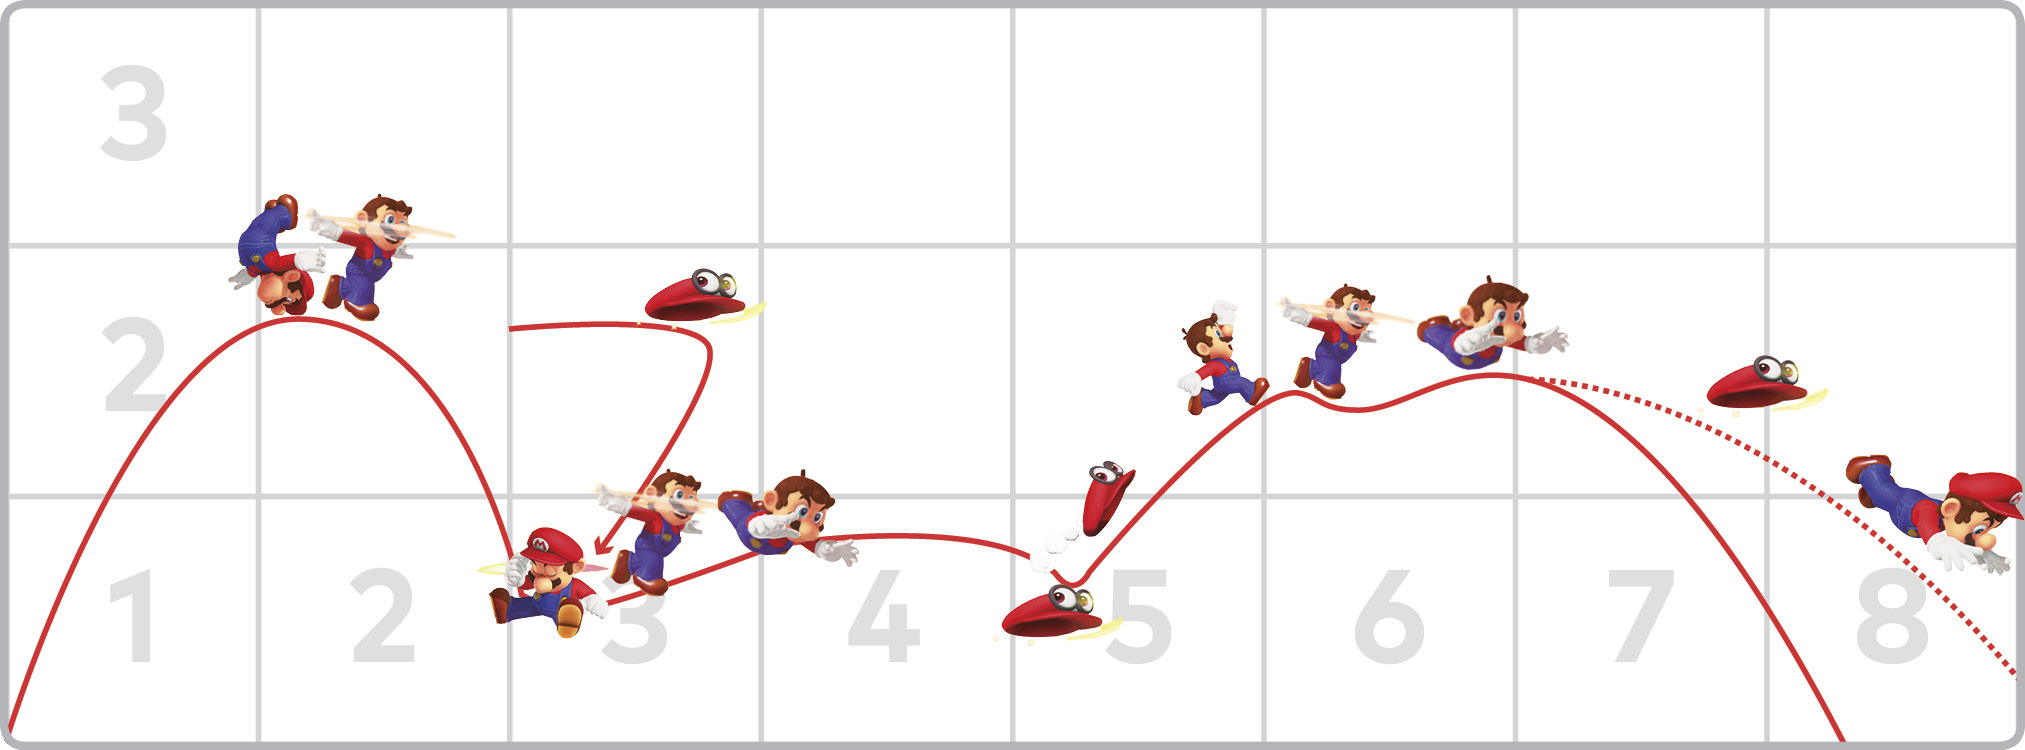
To get max distance on a long jump sequence, Mario has to eke out every bit of possible forward momentum gain, while sacrificing height potential. Launch from the edge of one ledge with a triple jump or running long jump. A bit past the jump’s apex, toss Cappy in the direction of travel. Midair cap throws briefly stop Mario from falling, and they give just a bit of distance, if a direction is held. Now here’s where it gets tricky. Waggle the controller as Cappy flies to change the cap throw into a homing throw, which brings Cappy back to Mario much faster. (It can help to increase the motion sensitivity setting, making it easier to aim a homing throw.) When Mario catches Cappy, press the Jump button for a midair catch spin. This also briefly holds height and gains a little distance, while restocking Mario with another midair cap throw. Immediately after the glowing catch spin flourish ends, throw Cappy forward, tackle toward him, and hold the Cap button. Steer the cap jump bounce forward hard, throwing Cappy forward again at this bounce’s apex; you can’t dive jump again or throw Cappy anymore after this, this throw is purely to hold height and gain a bit of momentum one last time! Fall forward after this toss, tackling anytime if it will improve Mario’s flightpath.
Miscellaneous Actions
Spin & Spin Jump
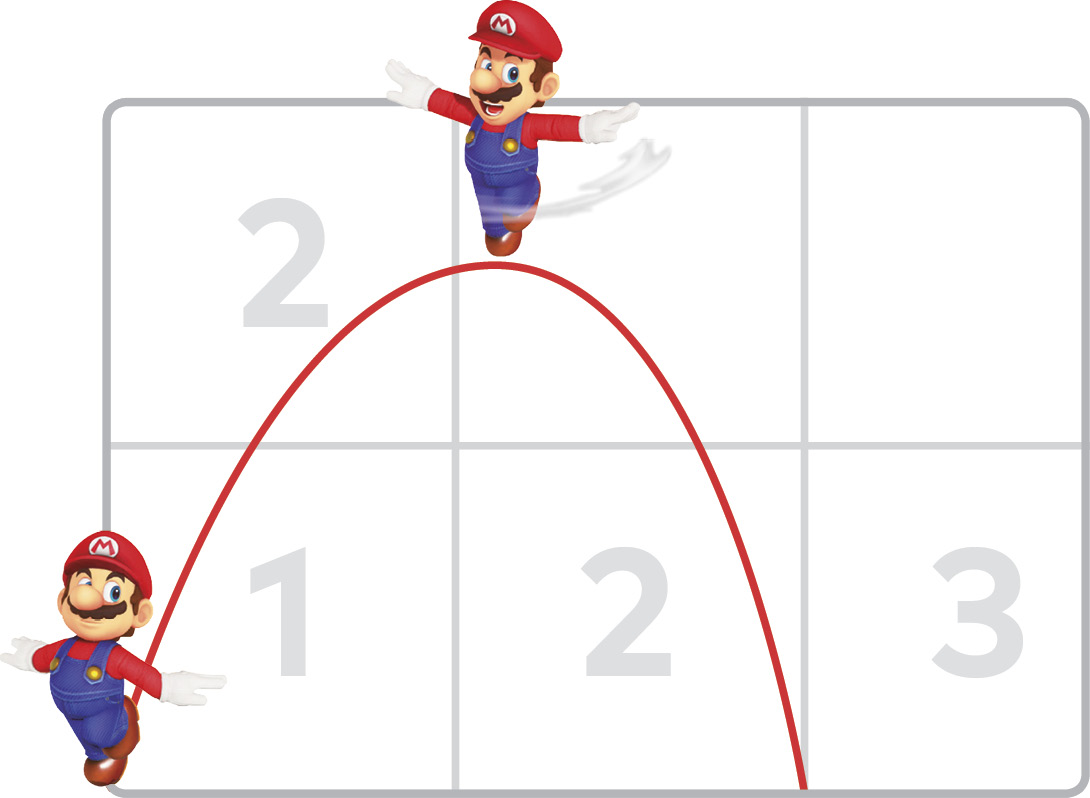
Whirl the stick in two quick, full circles and Mario eases into a dizzying top-like spin. Mario’s spin can be maneuvered on the ground with the stick. To keep the spin going, you’ll have to keep spinning the stick in circles regularly.
A cap throw during a spin automatically becomes a spin throw, whether spinning on the ground or in midair.
Jump while spinning for a unique spin jump. While spinning, airborne Mario descends slower than in other postures, so spin jumping off a high perch gives a bit more time to observe and maneuver during a long descent. To plummet suddenly during a spin jump, hold the Crouch button. Held all the way until landing, this results in a ground pound-like impact.
Holding and Throwing Items
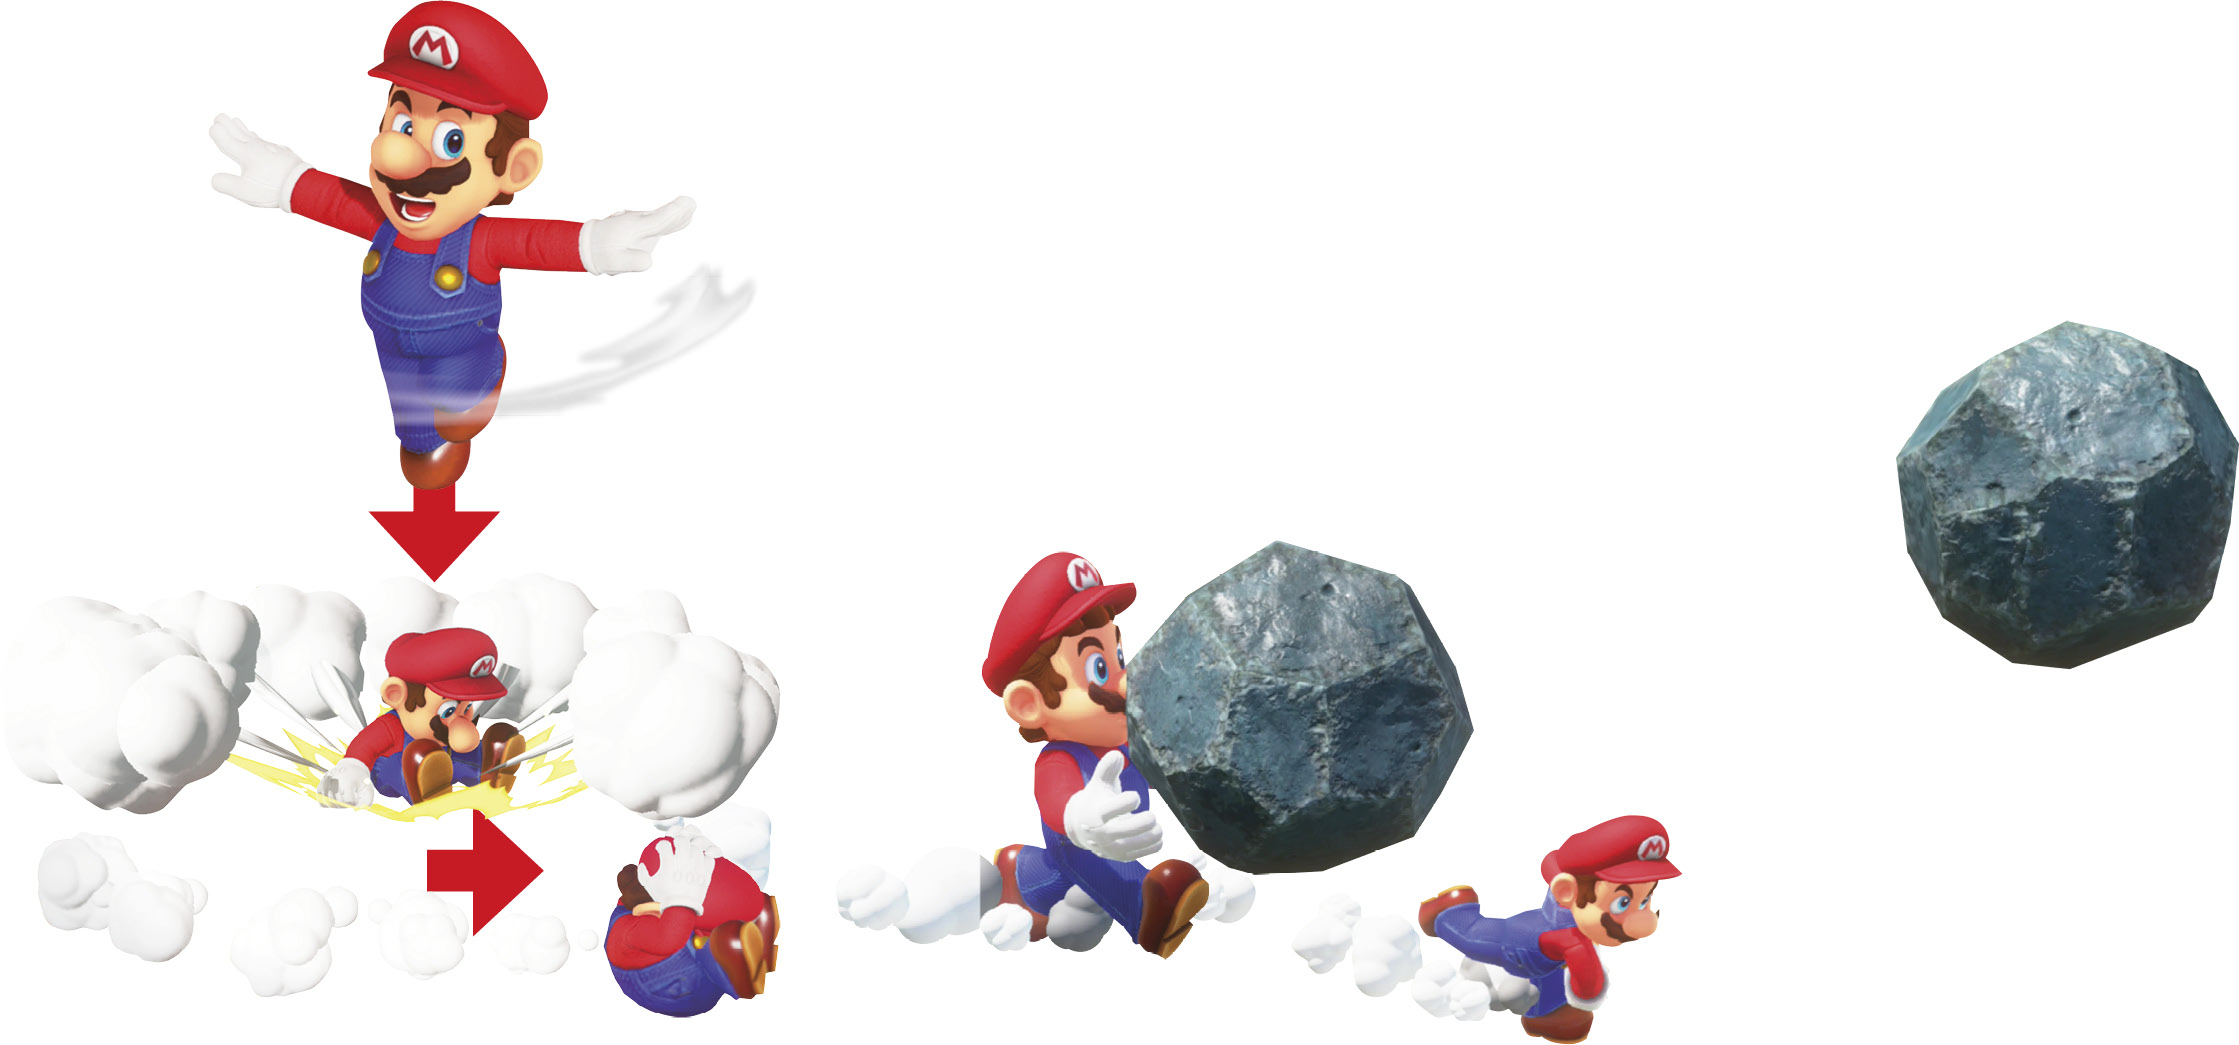
When holding and tossing items like rocks and seeds, Mario is surprisingly nimble, still capable of swimming, triple jumps, side somersaults, ground pounds, and ground pound jumps! Mario holding an item can’t tackle, swim fast, wall slide/jump, long jump, or back somersault, though, and of course he can’t throw Cappy while his hands are occupied. Toss items a short distance with the Cap Throw button, or much farther with a shake of the controller.
Swim
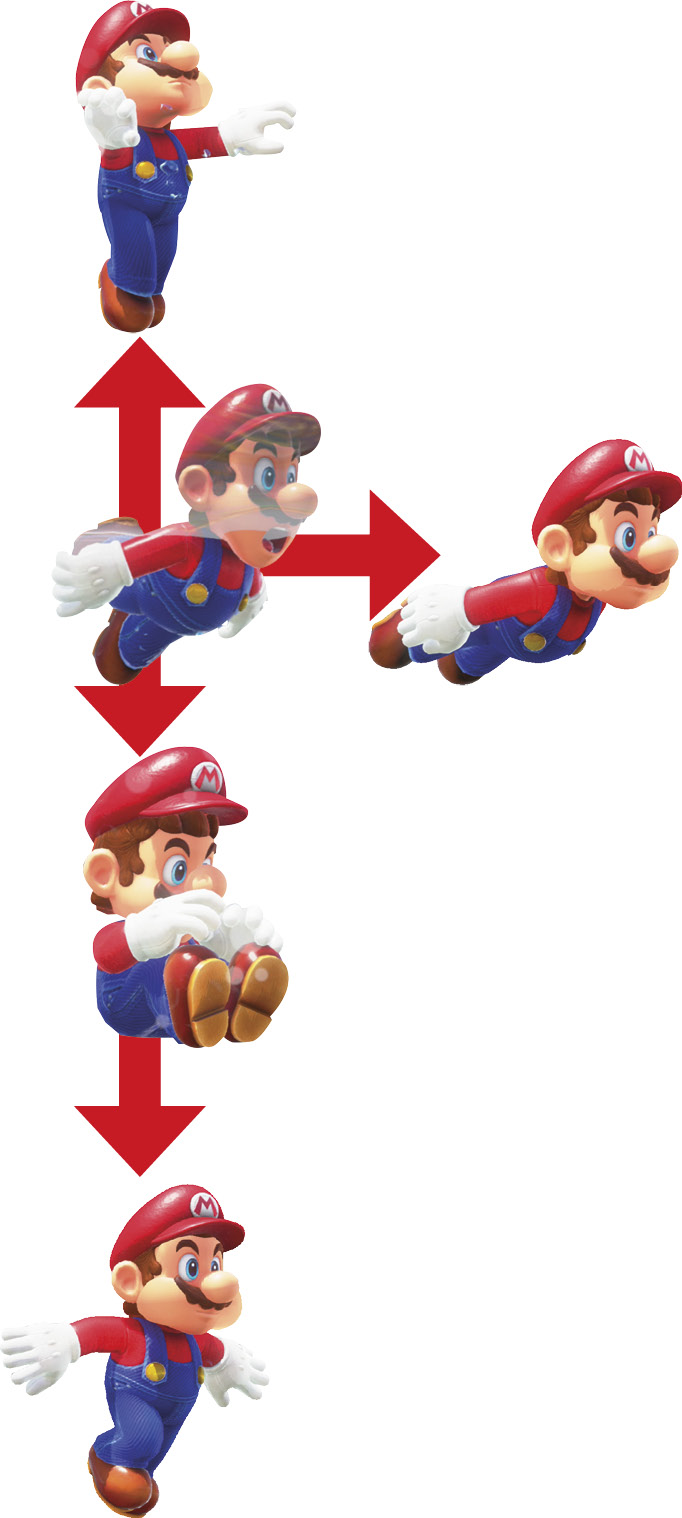
Mario is almost as nimble in the water as he is on land. On the surface, basic swimming is handled by moving the stick. Input a tackle command (Crouch then Cap Throw) for a quick forward speed boost, Mario’s water dash. In water, the Crouch button works like in midair, descending in the liquid with a ground pound cannonball. Descend to the floor of a submerged area and Mario walks slowly on the bottom.
Under the surface, Mario’s oxygen is limited. Return to the surface or find oxygen bubbles underwater before he runs out of air. Swimming submerged, choose direction with the stick, and
Ledge Cling and Shimmy
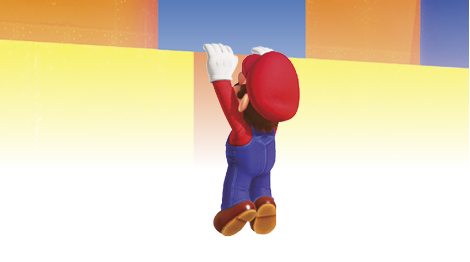
Years of honest work (not to mention saving his friends) have given Mario incredible grip strength, so he can cling and climb almost as well as he can jump! Mario can cling to ledges, hanging from sheer drop-offs, the edges of platforms, and the lips of tall steps. Mario can approach a ledge cling from above or below. To grab a ledge from below, it’s as easy as jumping up to the edge, where Mario grabs automatically, if he’s close enough. (Jump too high and you simply clear the lip, landing on the next floor. Jump too low, and Mario slides down the wall.) To grab a ledge from above, run carefully up to the drop-off, then gingerly use the stick so Mario sort of nudges himself off the stage and begins hanging.
Once hanging, press a Jump button to make Mario climb up to the next floor. It is easier to maneuver if you move the camera behind him first. (Center it with L or R, or use the right stick; when using Mario in two-player mode, tap w to center the camera, or hold w and move the stick to manually reorient it). Move the stick left or right to make Mario shimmy in that direction. There are even some secrets to be found by shimmying along hand-holds that lead where jumps cannot. To drop down to the floor below, move the stick down, which is easier with the camera behind Mario. Of course, mind that you don’t release your grip above a bottomless pit! Pressing up on the stick makes Mario climb up to his feet, like pressing Jump while clinging.
Pole Climb
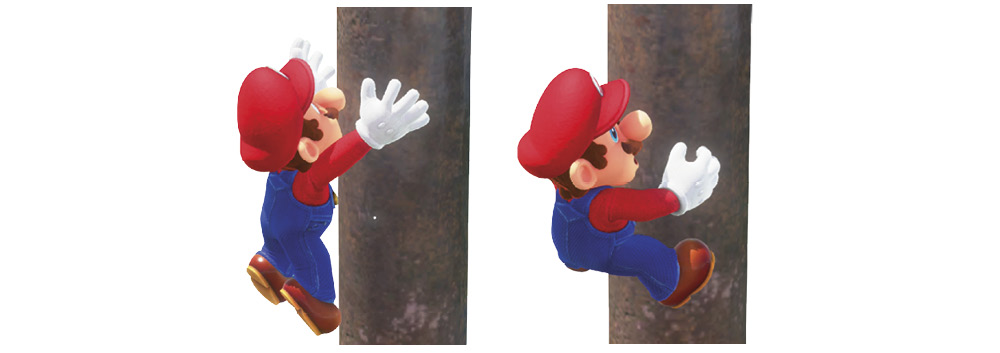
Mario can hug pole-like structures, like flagpoles, tree trunks, beanstalks, and antennas. Hugging and climbing a pole is interesting because Mario can rotate around the structure. Tap left or right on the stick and Mario rotates his position around the pole 90 degrees in the chosen direction. Press Jump and Mario jumps away from the pole, toward his back. Climb up or slide down with up or down on the stick. Climb fast by holding the Cap Throw button repeatedly while climbing; climb even faster by shaking the controller rapidly while climbing! Climb all the way to the top of a pole and Mario does a daring handstand. From here, rotate with left or right to aim, then press Jump to somersault jump off the top of the pole toward Mario’s back.
Vehicles
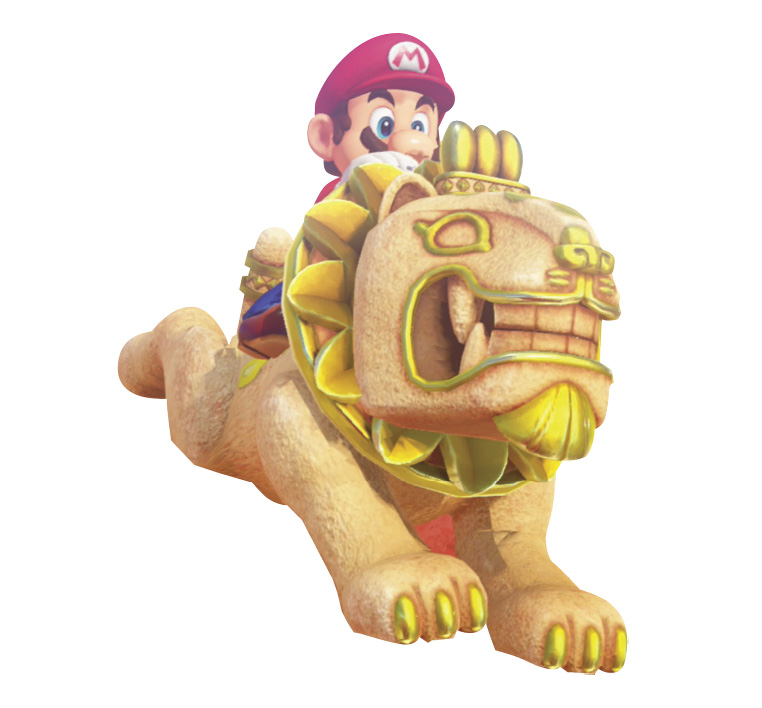
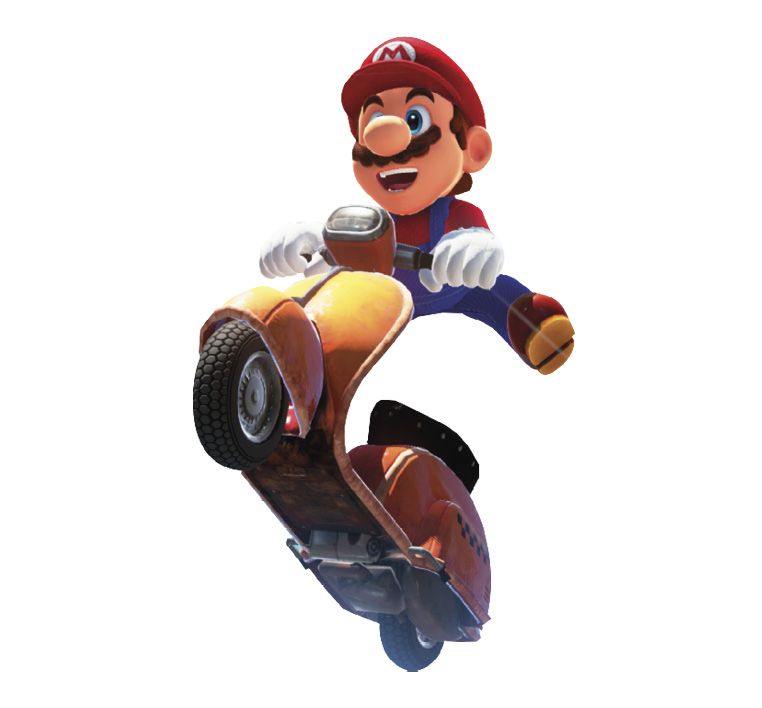
In some locations, Mario can commandeer vehicles and use them to travel faster. Vehicles are not only fast and fun, but also integral to solving some puzzles and uncovering some Power Moons. Besides Motor Scooters and Jaxis, you might also come to think of certain capture targets as vehicles. For example, in aquatic environments, Cheep Cheeps work like agile submarines, and Gushens like speedy hovercraft.
adjust depth with Jump button inputs. Underwater, these strokes move Mario upward slightly. Press Jump rapidly to swim to the surface in a hurry. To descend, simply don’t input Jump button swimming strokes, or plunge quickly with more water-based ground pounds.