
Super Mario Odyssey Guide Sand Kingdom
Power Moon Locations
 Power Moons
 Alcove in the Ruins
Drop into the sand near the three sand geysers (or descend the stairs) and round the corner at the base of the ramp of spilling sand. There’s a narrow alcove in the base of the ruins, beneath the 8-bit level, with a Power Moon.
 On the Leaning Pillar
You’ll probably spot this Power Moon early in your wandering, but it can be tricky to get if you’re down in the desert sands. Instead, head up to the ruins and capture one of the Bullet Bills that are fired nearest the leaning pillar. Guide the Bullet Bill right into the Power Moon to grab it.
 Hidden Room in the Flowing Sands
Return to the Tostarena Ruins and make your way across the flowing sand to the right of the three sand geysers. Locate the slight gap in the wall, at sand level, directly below the round tower. There is a hidden room inside there containing a Power Moon, but the only way to get it is by allowing Mario to sink into the sand. Once fully submerged, have Mario jump continuously to keep from being pulled down any further. Move under the wall to access the hidden room.
 Secret of the Mural
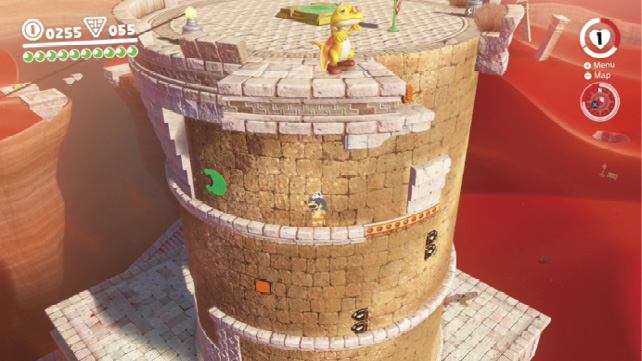
Return to the Tostarena Ruins Round Tower and enter the 8-bit mural via the pipe. Ascend the tower via the 8-bit level to where the two sliding platforms are, but don’t leap out of the puzzle. Instead, slip through the crack in the exterior directly below the Glydon and warp flag to uncover this secret room hidden within the tower’s exterior.
 On the Lone Pillar
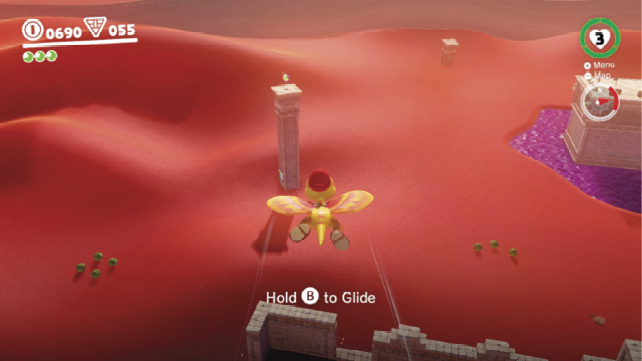
Warp to the top of the round tower and capture the Glydon there. True to its name, the Glydon can glide over great distances. It can’t gain altitude, but it’s possible to extend its flight by following the on-screen controls and tilting up with the controls. Land Glydon on the lone pillar north of the wastes to gain a Power Moon.
 On the Statue’s Tail
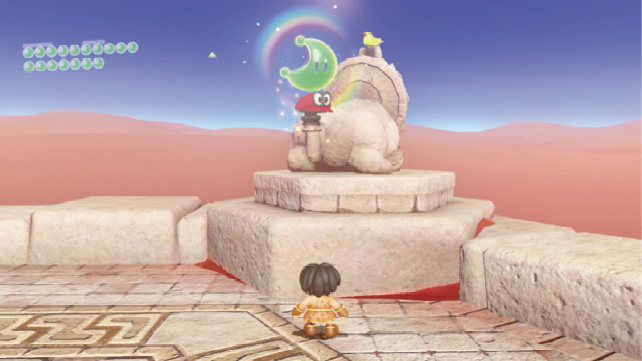
Make your way to the top of the floating Inverted Pyramid and approach the Jaxi statue in the northwest corner of the six-sided structure. Throw Cappy at the glowing tail and hold the throw so Cappy continues to spin until a Power Moon is released.
 Hang Your Hat on the Fountain
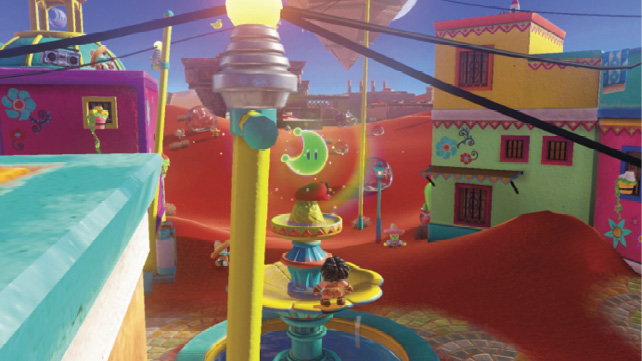
Once the fountain has thawed in Tostarena Town, leap from the middle and throw Cappy at the water spout on top. Hold the throw to make Cappy spin round and round until the Power Moon emerges.
 Where the Birds Gather
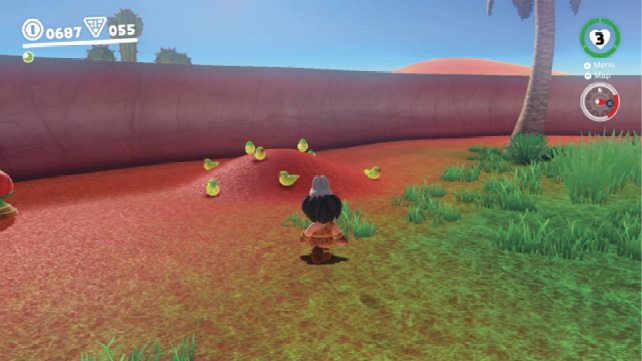
Flocks of migrating birds can be found in many of the kingdoms Mario visits and one such flock has gathered in the Desert Oasis. The birds fly away as Mario approaches, but there’s a reason for them to congregate in that spot. Do you feel that? There’s a rumble. Tiptoe into position where the vibrations are strongest and ground pound to earn a Power Moon. This one is atop the small mound where the yellow birds are.
 Top of a Dune
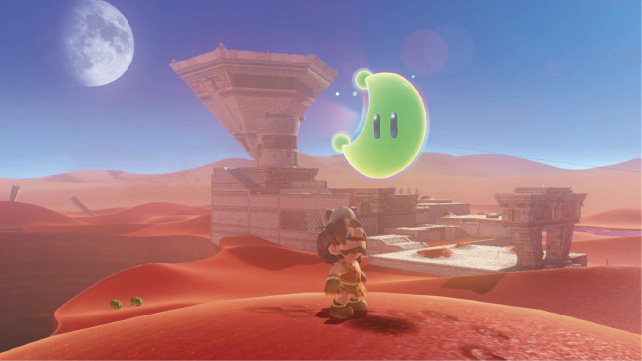
Climb to the top of the tallest dune southwest of Tostarena Town and feel for the rumble in the controller. Ground pound where the vibrations are strongest to unearth this Power Moon.
 Lost in the Luggage
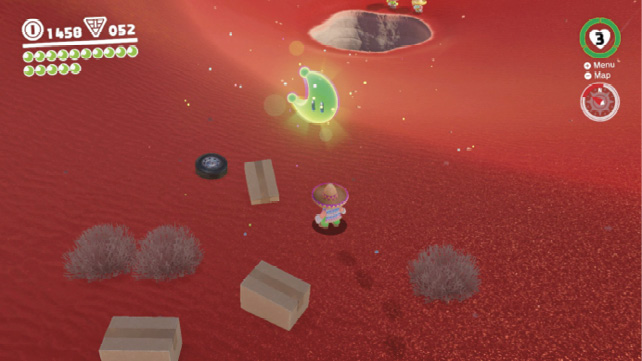
Ground pound the glowing area in the sand where the cardboard boxes and car tire are located. This spot is a bit easier to spot after the ice has melted and the human traveler and his car are gone.
 Bullet Bill Breakthrough
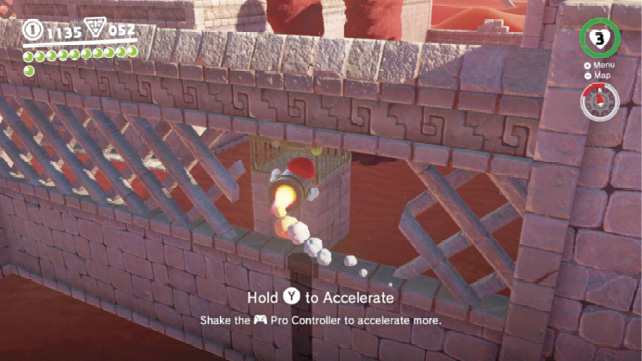
Capture a Bullet Bill in the ruins, just below the Goombette and fly it through the hole in the stone lattice. Accelerate straight into the cage on the column behind the lattice to break the Power Moon free.
 Inside a Block Is a Hard Place
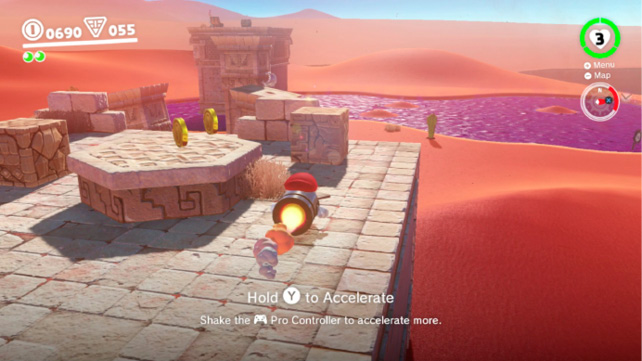
Warp to the Tostarena Ruins Sand Pillar and drop off the ledge toward the Bullet Bills south of the flag. Note the glow emanating from the stone block in the southeast corner of the ruins. Capture a Bullet Bill and guide it around the other obstacles toward this block.
 Bird Traveling the Desert
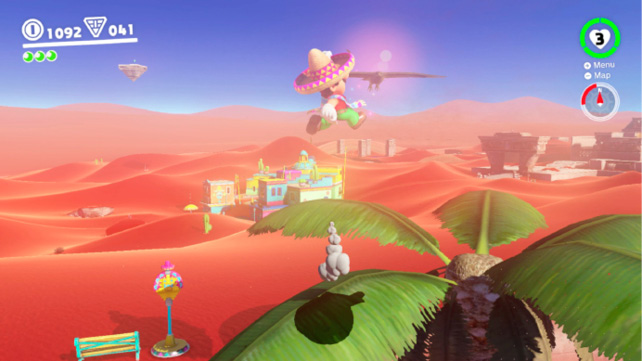
There are two special birds flying throughout the Sand Kingdom, distinguishable by their golden glow and predictable, steady pattern. This one does a lengthy loop around the southern part of the region, soaring past Tostarena Town and Desert Oasis. Hit it with Cappy to earn a Power Moon. Consider waiting atop the rooftop cactus in Tostarena Village, a palm in Desert Oasis, or even just atop a sand dune along its path. Ground pound jump and toss the hat to hit it.
 Bird Traveling the Wastes
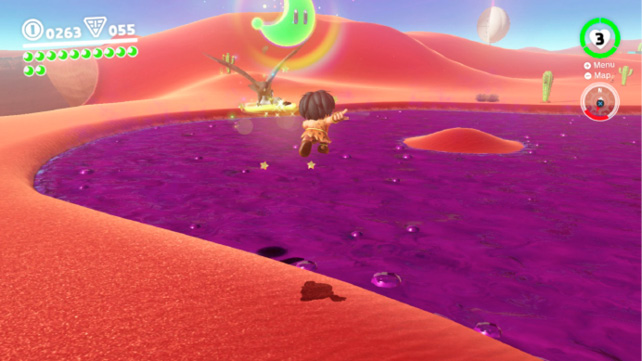
Locate the bird circling the wastes in the northeast part of the Sand Kingdom. Wait for it to circle past then leap up and hit it with Cappy. Unlike the other bird, this one travels at a rather low altitude, so Mario needn’t leap from any tall objects to hit it.
 The Lurker Under the Stone
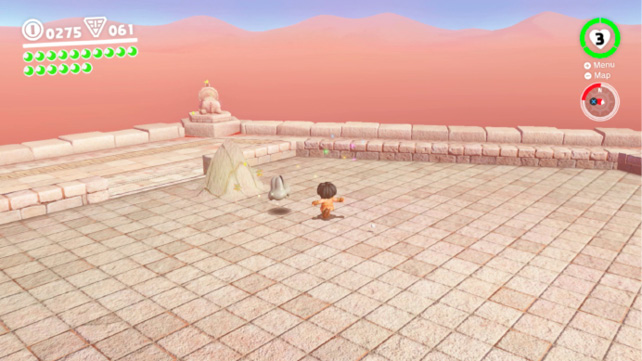
Ride the electrical wire to the top of the Inverted Pyramid (or use the slingshot) and note the moving bump in the top surface. There’s a Power Moon under the stones, and it’s behaving just like one of the rabbits. Chase down the bump by cutting off its escape and stunning it with a hat toss. Ground pound it while it’s stunned to get the Power Moon.
Tackle jumps can be used to close on its position, but it often dives deeper beneath the stone and resurfaces someplace else whenever Mario leaves his feet.
 The Treasure of Jaxi Ruins
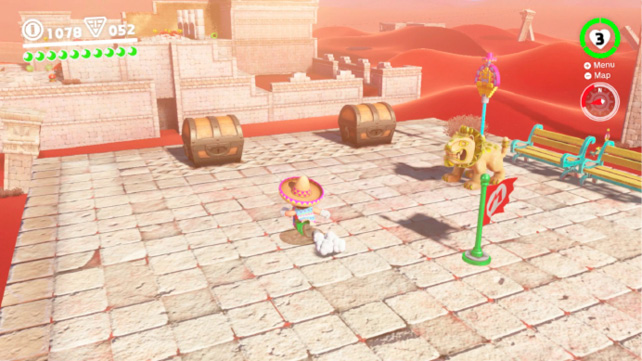
Navigate the frozen pillars of the Ice Cave (Power Moon #50) to exit a pipe atop Jaxi Ruins in the wastes. Open the left-hand Treasure Chest with Cappy to obtain a Power Moon.
 Desert Gardening: Plaza Seed
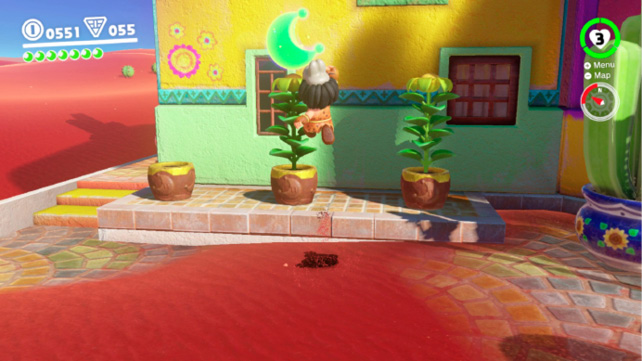
Locate the three pots west of the fountain in Tostarena Town and pick up the seed lying on the ground. Toss it into one of the pots and come back periodically to check on its growth. The plant eventually sprouts a golden, glowing fruit. Hit it with Cappy to release a Power Moon.
 Desert Gardening: Ruins Seed
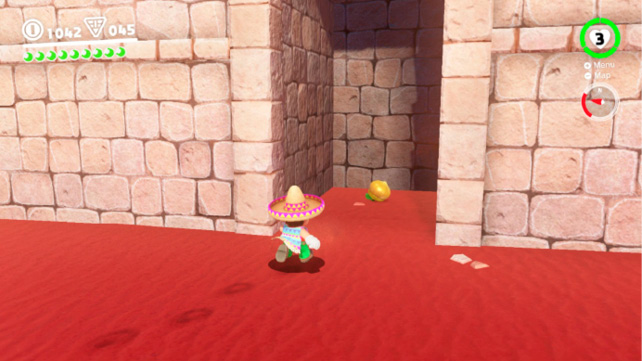
This particular seed is located in an alcove on the eastern side of the ruins, near the leaning pillar (Power Moon #07). Grab the seed and carry it back to the three pots on the south side of Tostarena Town. Toss the seed in and wait for it to sprout a golden fruit. Hit the fruit with Cappy to collect a Power Moon.
 Desert Gardening: Seed on the Cliff
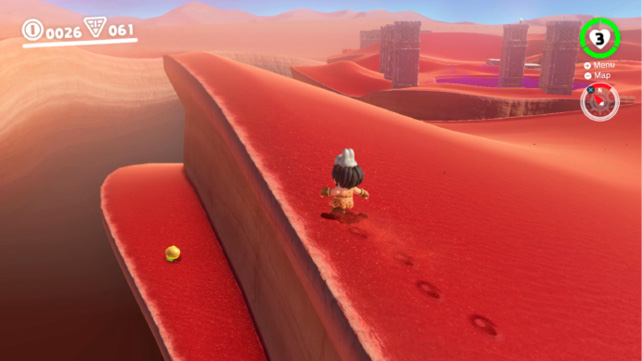
This is the trickiest of the three seeds to find. It’s located on an obscure ledge on the southwest edge of the Sand Kingdom. You need to make your way to the edge of the desert, across the canyon southwest of Moe-Eye Habitat. Drop onto the ledge, grab the seed, and round the corner to the hat trampoline. Set the seed down, hit the flower with Cappy, then grab the seed and bounce back up. Plant the seed in a pot in Tostarena Town (west of the fountain) and check back regularly. Hit the golden fruit with Cappy to get a Power Moon.
 Sand Kingdom Timer Challenge 1
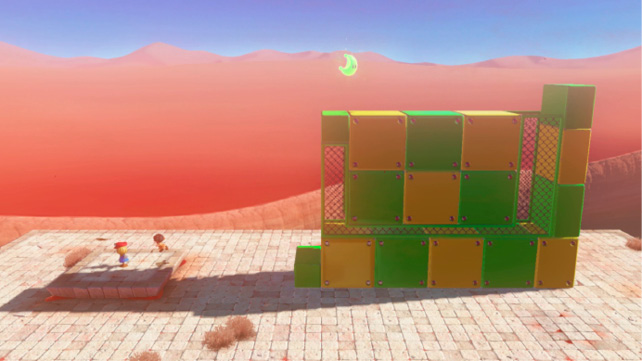
This challenge exists atop the ruins at Tostarena Northwest Reaches. Complete the Bullet Bill Maze (Power Moon #56) to reach it or ride the electrical wires down from the Inverted Pyramid. Toss Cappy at the scarecrow then turn and leap onto the yellow block. Roll along the bottom of the obstacle then wall jump back and forth to the top. Triple jump to reach the Power Moon before time expires.
 Sand Kingdom Timer Challenge 2
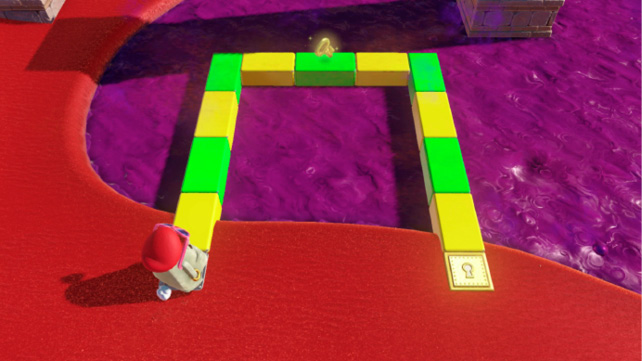
Capture a Moe-Eye and step on the P-Switch in the southwest corner of Moe-Eye Habitat. A short U-shaped path appears briefly leading to a key. Use the Moe-Eye’s shades to line up with the path, then run to the key across the invisible blocks. Use the shades for safety, then sprint to the Power Moon before the timer expires. Toggle the sunglasses on and off so the Moe-Eye can move faster.
 Sand Kingdom Timer Challenge 3
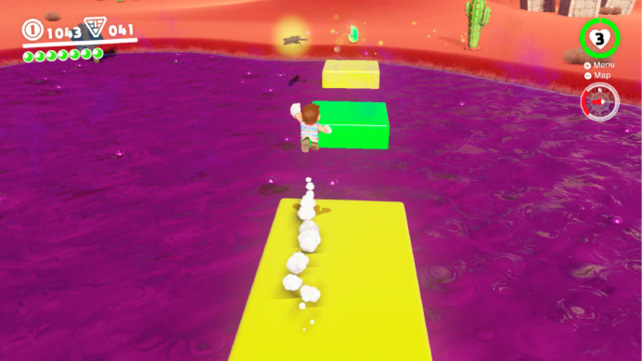
This is the first of the difficult Timer Challenges that you face and it’s important to get off to a fast start. Somersault down the hill toward the platforms to build speed and run and leap across the first two gaps to reach the second yellow platform. Keep a straight line and tackle jump across the last three gaps as the platforms begin to disappear to reach the Power Moon on the other side of the poison waste.
 Found in the Sand! Good Dog!
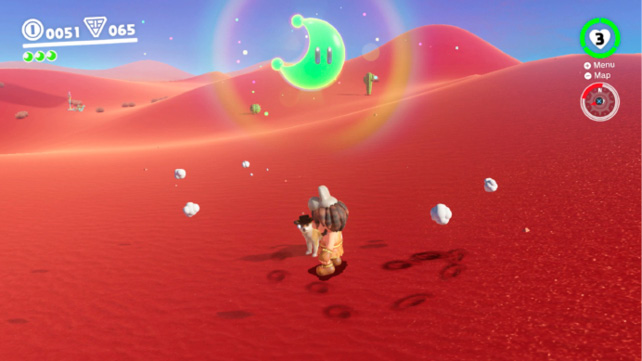
Approach the dog on the south side of Tostarena Town and follow it into the desert. Watch the dog begin to dig, then ground pound the area once the sand begins to glow.
Mario encounters other dogs in his travels, but they don’t all home in on the Power Moon so quickly.
 Taking Notes: Jump on the Palm
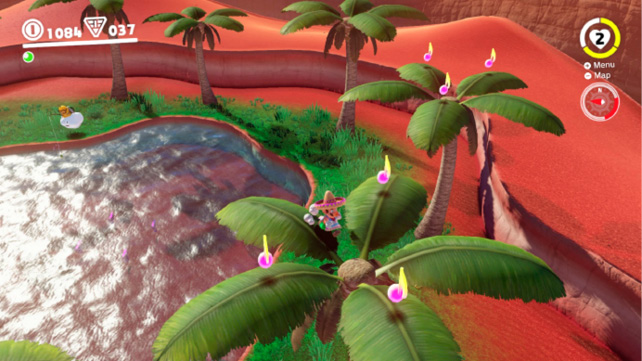
Climb the palm tree in the south end of the Desert Oasis area and grab the Treble Clef to initiate the Taking Notes challenge. Jump from palm frond to frond to collect the six notes atop the two palm trees. Aim for the widest part of each palm frond to avoid falling from the tree.
 Herding Sheep in the Dunes
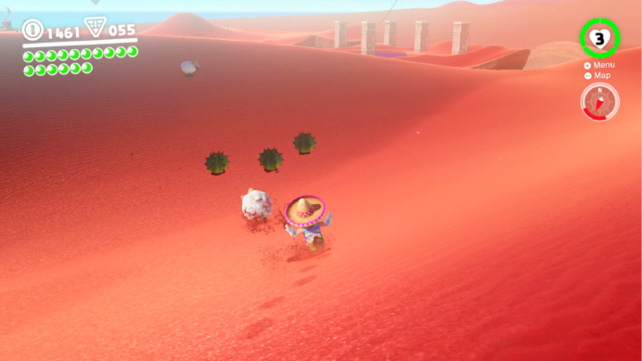
Circle around the ruins in a counter-clockwise direction to the north side. There, across the chasm, is a small circular pen with a Tostarenan shepherd bemoaning the loss of his three sheep. The sheep haven’t gone far, but he needs your help to return them. The sheep are strolling the nearby dunes (and by the lost luggage from the stranded traveler). Toss Cappy at the sheep to buck them in the desired direction and chase after them to herd them back into the corral. Return all three sheep to the pen to receive a Power Moon.
 Fishing in the Oasis
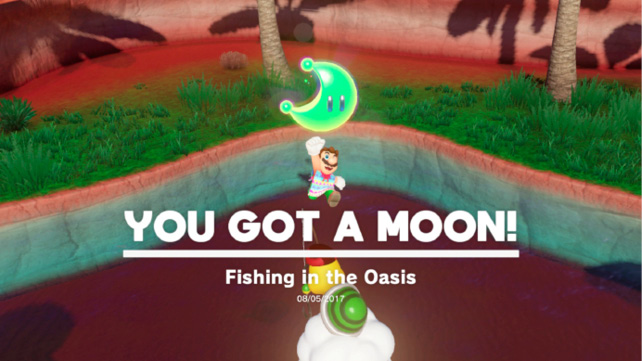
Capture Lakitu in the Desert Oasis area to go fishing. Scan the bottom of the lake for the shadows of fish and lower the fishing line in front of them. The smaller shadows are Cheep Cheeps that yield a Heart or coins when caught, but the biggest shadow belongs to a Cheep Cheep carrying a Power Moon. Tug the rod once the fish has been caught to reel in your prize. Only the Cheep Cheep with the Power Moon puts up a fight. Feel for the vibrations, then set your hook!
 Love in the Heart of the Oasis
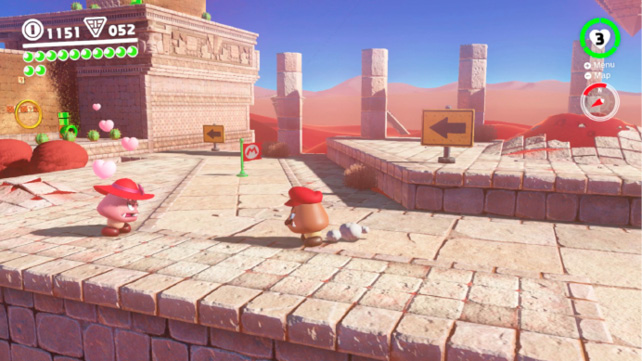
Warp to Tostarena Ruins Sand Pillar to find the Goombette in Sand Kingdom. Goombette flees in a flash at the sight of Mario—it’s a Goomba’s attention she seeks. Capture one of the nearby Goombas (you’ll have to hit their hat off before they can be captured) and make your way across the moving platform while dodging the Bullet Bills. Release the capture near the hat trampoline, quickly hit the flower with Cappy to open it, then re-capture the Goomba. Bounce to the higher ledge and greet the Goombette as a Goomba to earn the Power Moon.
 Among the Five Cactuses
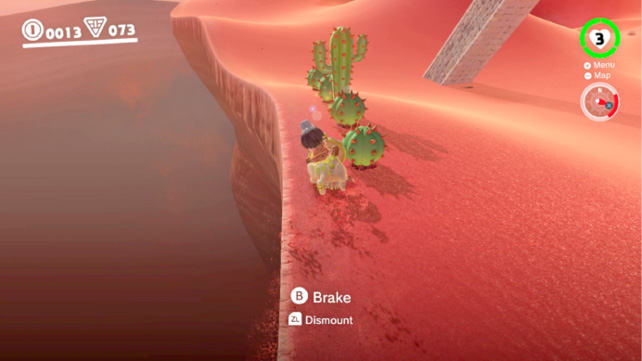
Ride a Jaxi from Tostarena Northwest Reaches east along the northern edge of Sand Kingdom until you find five cactuses in a row. Speed Jaxi through the cactuses while angling away from the canyon. The tall cactus in the middle contains a Power Moon inside it. The only way to get it is by knocking it onto the sand where it can crumble—if you knock it into the canyon, you’ll have no hope of getting it. If this happens, leave the area and return so the cactus can respawn.
 You’re Quite a Catch, Captain Toad!
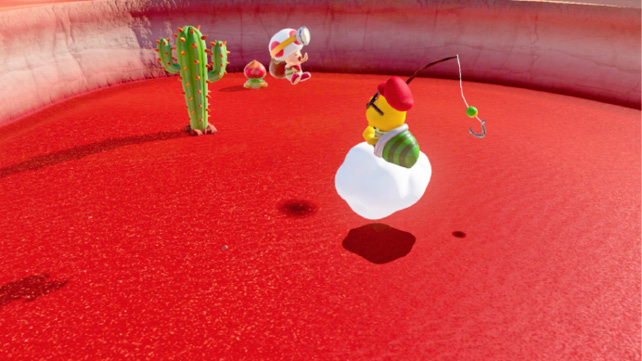
Capture Lakitu at Desert Oasis and float him up the hill to the north end of the oasis. They’re easy to miss, but look for the shadows of several fish swimming through the sand near the cactus. The larger of them is none other than Captain Toad! Reel him in to be rewarded with a Power Moon.
 Jaxi Reunion!
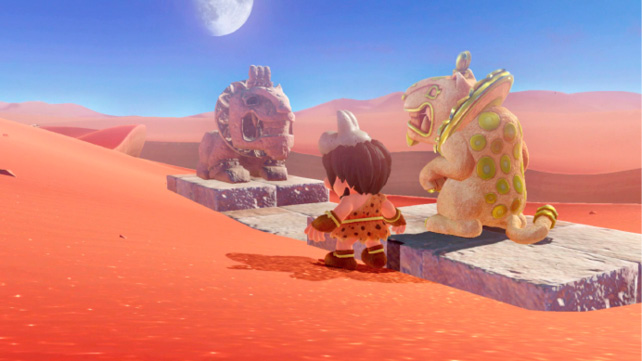
Hop aboard Jaxi and ride him across the desert to the area just northeast of Desert Oasis. There you’ll find a Jaxi statue and an empty platform facing it. Ride Jaxi up onto the empty pedestal so he can see one of his family members (Jaxi used to be a statue too). He’ll give Mario a Power Moon as a token of his appreciation.
 Welcome Back, Jaxi!
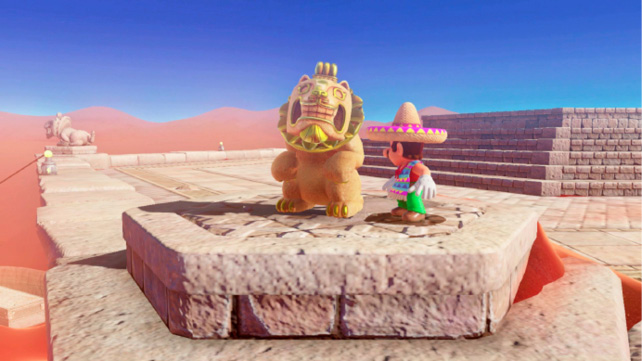
Ride the electrical wire to the top of the Inverted Pyramid and locate the empty plinth, where the Jaxi Statue has gone missing. Use the nearby Jaxi Stand to call for a Jaxi and carefully ride it up the pile of sand and onto the empty pedestal. Jaxi doesn’t want to go back to his life as a statue, but he appreciates the gesture.
 Wandering Cactus
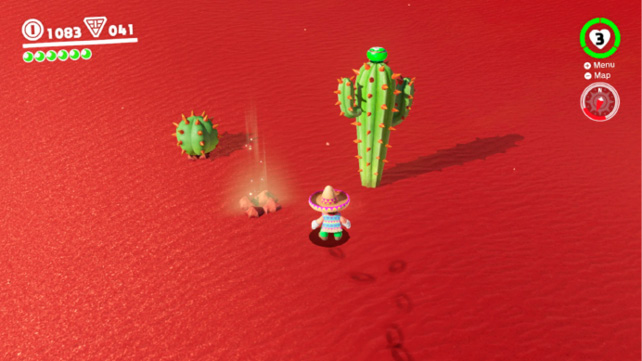
North of Desert Oasis is a tall cactus with a green button atop it. Capture this cactus and walk it several steps out of the way to uncover a glowing hole in the desert. Ground pound this small hole to unearth a Power Moon.
 Sand Quiz: Wonderful!
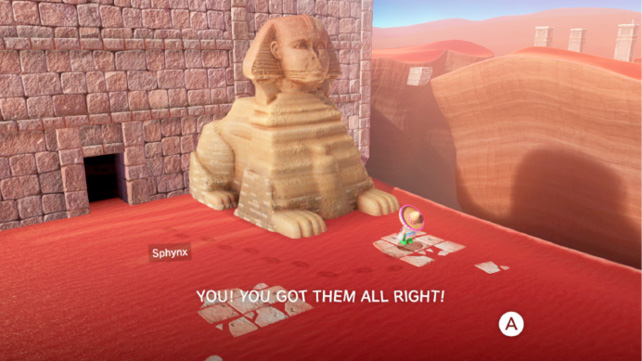
Answer the Sphynx’s first question (Power Moon #51) to have it slide to the right. Now stand in front of the Sphynx and answer four more trivia questions. There’s really no penalty for answering incorrectly, as you can continue guessing until you get it right. But to save you time, here are the correct answers: 30, Ice, 5, and Sphynx.
 Employees Only
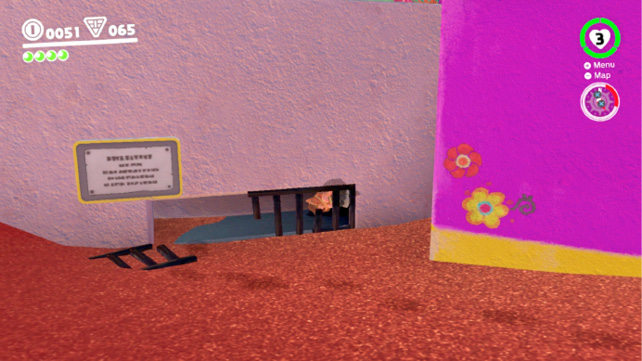
Locate the broken grate on the west side of the gray building in Tostarena Town and crouch down to enter it. Collect the three coins and continue walking to the right, through an unseen passage, to access the area behind the counter inside the Crazy Cap store. Grab the Power Moon and leave the way you entered.
 Walking the Desert!
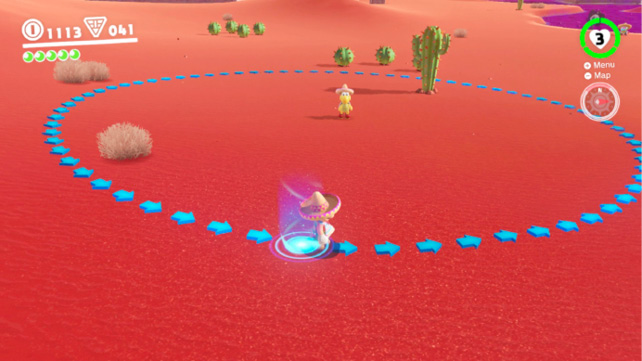
Talk to the Koopa northwest of the Desert Oasis to initiate the first Trace Walking Challenge. Study the arrows that briefly appear, noting their relation to items in the landscape, then start walking. There’s no hurry, your only job is to try and walk the exact path of the arrows. You should be able to follow the arrows to the first cactus before they completely disappear. Keep the tall cactus on your left and try to maintain the same curvature of your walking path. Aim for the three small shrubs, keeping them on your right, and circle back to Koopa, aiming to pass just to the right of the lone shrub near the end. Score above 80 points to win a Power Moon.
 Hidden Room in the Inverted Pyramid
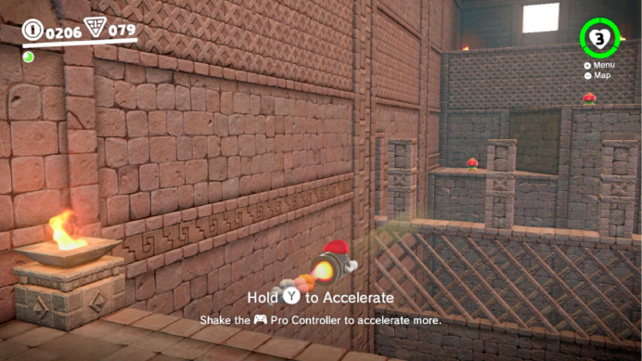
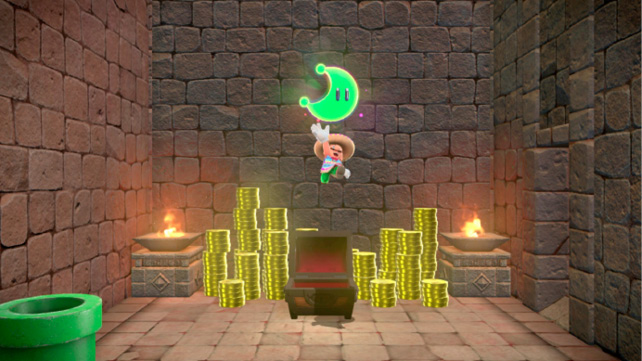
This Power Moon lies off the beaten path on the way through the Inverted Pyramid en route to the battle with Hariet. Complete the interior and exterior 8-bit levels, leap out of the puzzle and capture one of the Bullet Bills. Guide the Bullet Bill across the chasm toward the moving pillars atop the lattice wall. Carefully pilot the Bullet Bill into the gap where the pillars disappear on the left. Another option is to return via the top of the Inverted Pyramid and use the hat trampoline to hover over to the pillars without a Bullet Bill. Either way, Mario slides down a ramp into a hidden treasure room containing a Power Moon and 185 coins.
 Under the Mummy’s Curse
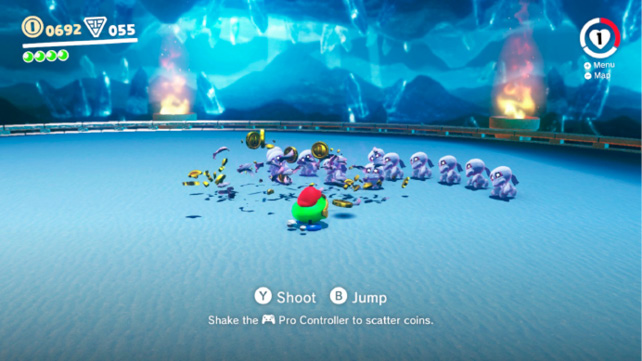
Return to the Deepest Underground, where you fought Knucklotec, via the small hole in the desert near the Inverted Pyramid (two Tostarenans stand nearby). Dozens of Chinchos appear from all directions, but they’re not alone. There’s also a Coin Coffer to the left of the slingshot. Capture it and take off running to gain thirty free coins, then turn and fire coins at the Chinchos. Be careful not to burn through your entire purse. Consider allowing the Chinchos to surround you then shake the controller to scatter coins in all directions. Defeat the Chinchos for a Power Moon.
 Ice Cave Treasure
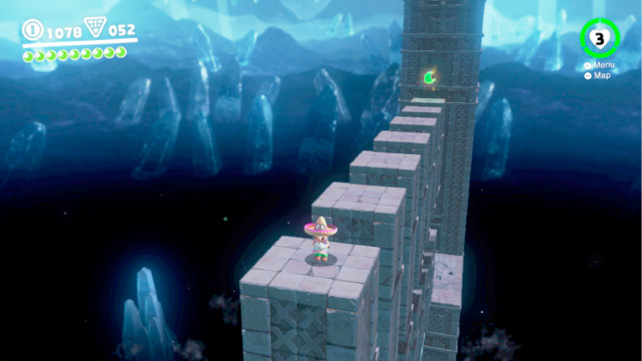
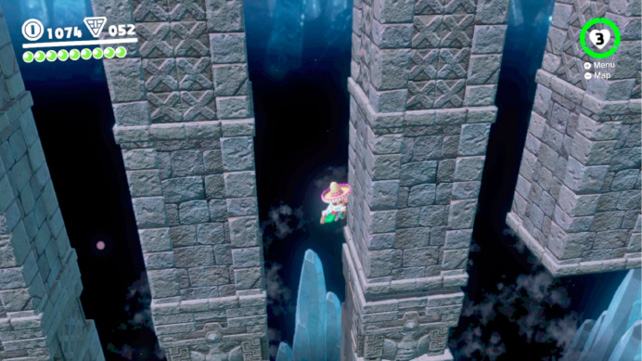
Drop into the whirlpool of sinking sand in the northeast corner of the ruins to enter the ice cave. The ice is extremely slippery so move only a few steps at a time. Collect the purple coins and use the hat trampoline to reach the ledge above. Jump through the rings and continue along the upper ice walkway to the series of rising and falling pillars. Wait for the pillars to start to rise then wall jump back and forth to the top of the upper row of pillars. The upper ones are stationary. Collect the Power Moon and exit the cave via the pipe to access the top of Jaxi Ruins in the center of the wastes. This is one of the very few interior areas that only contains a single Power Moon.
 Sphynx’s Treasure Vault
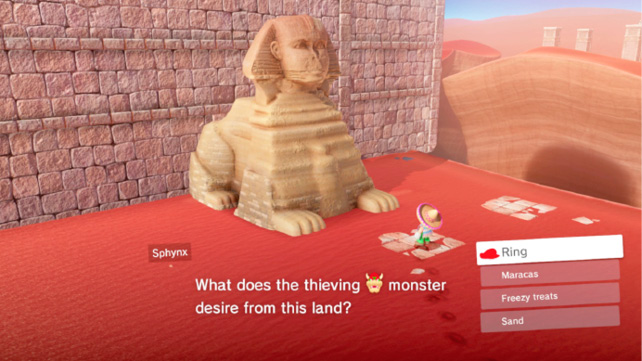
Circle around to the northwest corner of the ruins and stand on the stone platform in front of the Sphynx statue. The Sphynx poses a question to Mario (not necessarily a riddle). The answer is quite easy: Ring. Answer correctly to have the Sphynx move aside, granting you access to the Treasure Vault containing a Power Moon and wealth of coins.
 A Rumble from the Sandy Floor
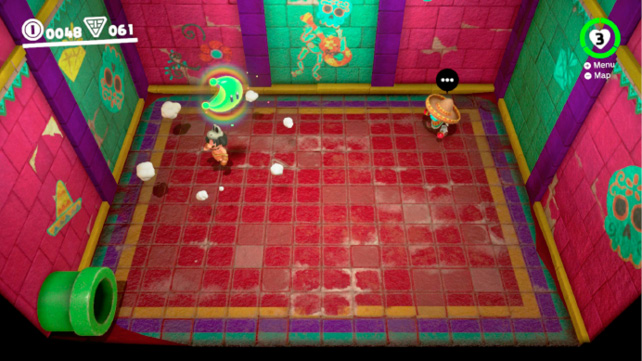
Descend through the warp pipe atop the roof near Talkatoo in Tostarena Town to enter a small room with a single Tostarenan. There’s a Power Moon buried beneath the floor somewhere in this room and the only way to find it is by feeling for it. Ground pound the area where the vibrations are strongest—or just look at the accompanying screenshot.
 Dancing with New Friends
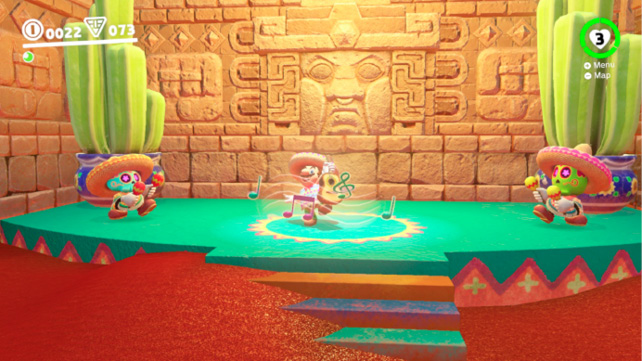
Purchase the Sombrero and Poncho from Crazy Cap using the local Regional Coins and wear this new outfit to the Tostarenan guarding the door in the northwest corner of town. He lets Mario into a private club where the crowd wants Mario to dance. Take the stage and watch as Mario unveils his guitar talents for the crowd. He earns a Power Moon at the end of the song.
 The Invisible Maze
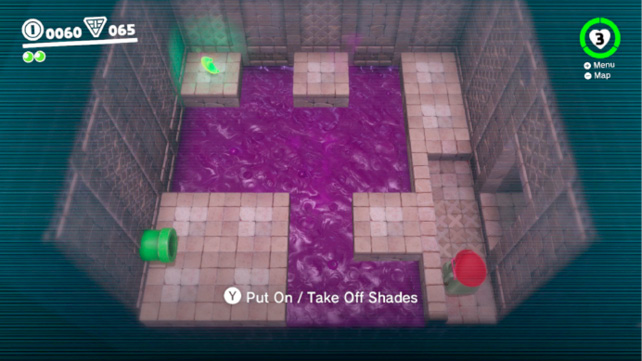
The entrance to this area is on a ledge in the canyon north of Moe-Eye Habitat, east of the sliding platform. Descend the chimney-like gap in the edge of the canyon to find the red door. Once inside, capture the Moe-Eye in each room and use sunglasses to navigate the invisible floor. The Moe-Eye can’t jump so you’ll have to make your way across the invisible floor as Mario. Use the columns on the walls as landmarks to help guide you. Similarly, you can use the Switch’s built-in camera to take screenshots with the Moe-Eye’s glasses on, then refer to them as you move with Mario.
 Skull Sign in the Transparent Maze
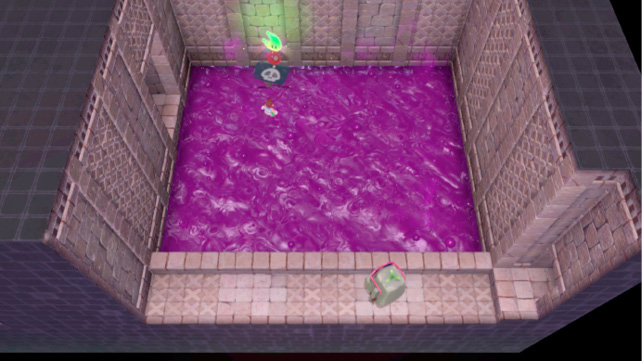
Follow the instructions for Power Moon #54, but don’t leave the first room. Instead, jump and throw Cappy at the danger sign and hold the throw so he continues to spin atop the sign until a Power Moon is released. Leap back across the invisible maze to get it.
 The Bullet Bill Maze: Break Through!
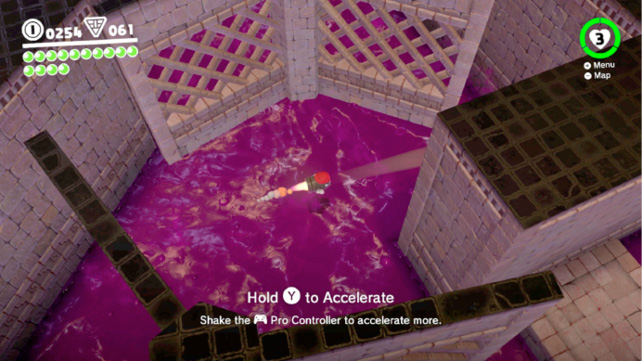
Make your way to the ruins in the Tostarena Northwest Reaches and enter the red door. Capture a Bullet Bill and ride it from one piece of solid ground to the next. There are plenty of Bullet Bill launchers in this maze, so you needn’t worry about being stranded. Accelerate on that first Bullet Bill to reach the platform near the revolving lattice wall. Swap out one Bullet Bill for a fresh one and slowly navigate through the rotating walls to the steps leading to the Power Moon and exit via the pipe to the top of the ruins.
 The Bullet Bill Maze: Side Path
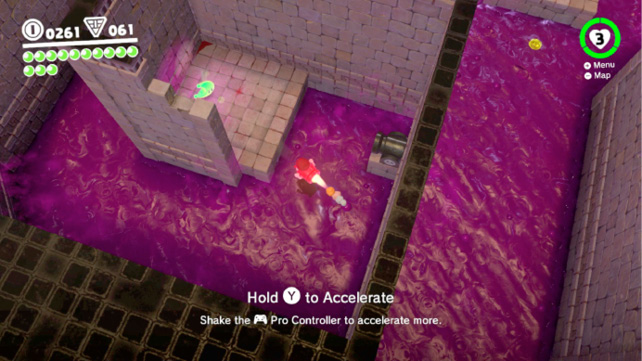
Follow instructions for Power Moon #56 and swap out the first Bullet Bill for a fresh one near the first revolving lattice wall. Return the way you came and enter the side path on the left. Carefully navigate the spiral path to reach the Power Moon.
 Jaxi Driver
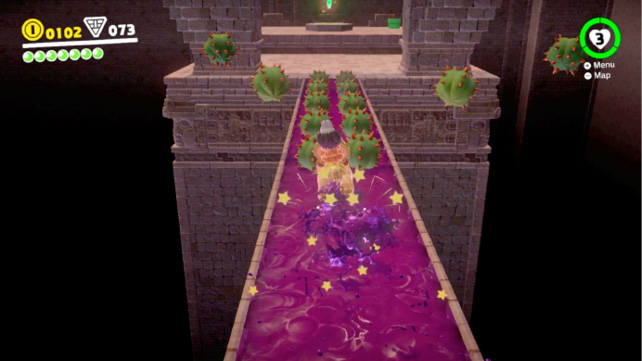
Warp to the top of Jaxi Ruins, hop aboard the Jaxi located there and leap off the ruins. Steer Jaxi across the wastes into the doorway of Jaxi Ruins at ground level (where the two small cacti are). This earns Mario access to a Jaxi obstacle course filled with moving platforms, eight Regional Coins, rings, and Power Moons. Anticipate the upcoming turns and use the brake to turn Jaxi accordingly. Though it might be tempting to avoid the narrower paths in favor of the moving platforms, the narrow paths are actually easier to navigate, provided Jaxi is lined up properly. Use the wider areas on the course to turn Jaxi around and align him in the direction you wish to take.
 Jaxi Stunt Driving
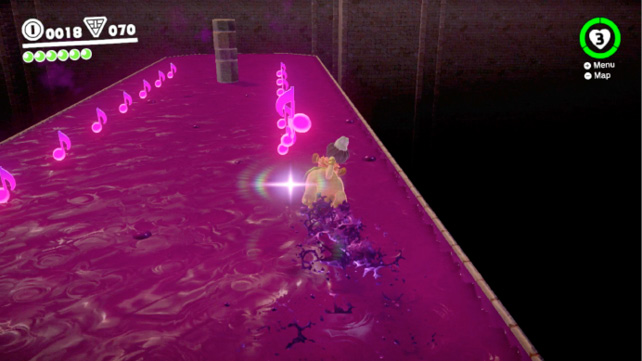
Follow the instructions for Power Moon #58 and ride Jaxi to the large central area in the course. Line him up with the Treble Clef on the left and sprint through it in a straight line. Ease Jaxi to the left to collect the notes on one side, then use the brakes to power-slide around the column. Sprint back through the other row of notes on the return trip without falling or missing any notes to get the Power Moon.
 Strange Neighborhood
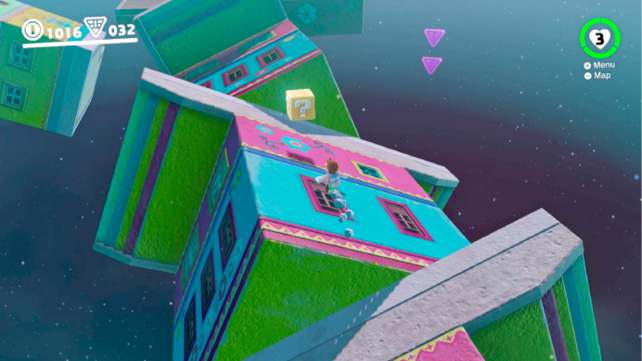
Capture the rocket atop the building in Tostarena Town to reach this special area. Roll down the curved hill to build speed then long jump through the rings to reach the first turn. Triple jump your way across the rotating buildings to the Goomba tower. Wait near the block on the right for the buildings to line up then cross to the Power Moon.
 Above a Strange Neighborhood
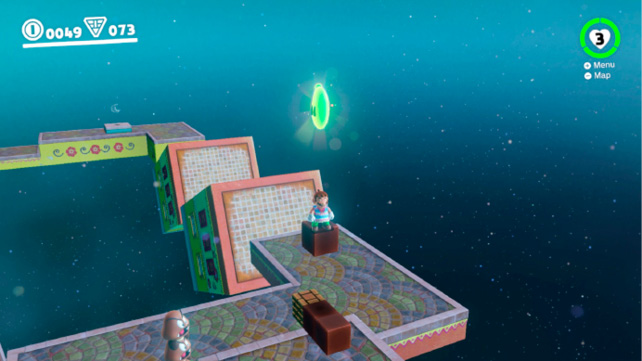
Follow instructions for Power Moon #60 and make your way to the part of the level with the three Goombas in a tower. Leap onto the platform with the three blocks and climb onto them. Uncover the invisible block above the ? Block and jump and climb onto it to reach the Power Moon high above.
 Secret Path to Tostarena!
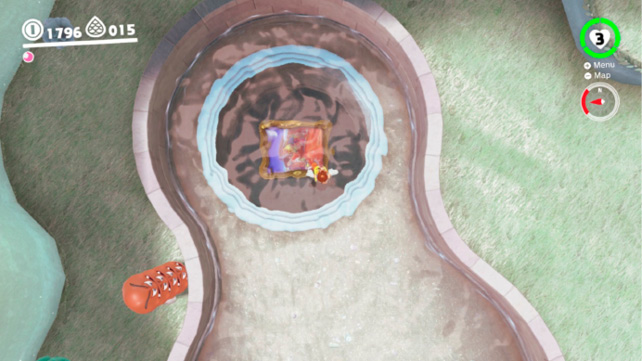
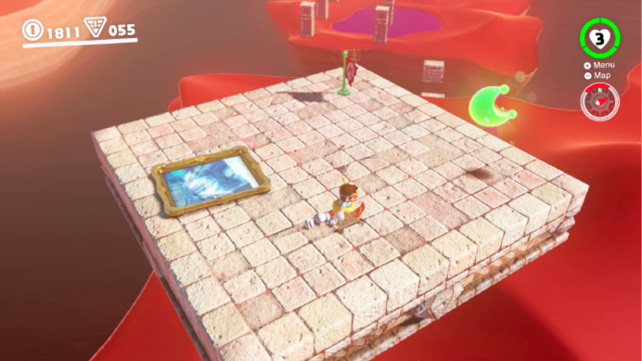
Provided you chose to visit Lake Kingdom after Sand Kingdom, the secret path to this Power Moon originates where Lakitu is fishing in Lake Kingdom. Head to the Courtyard area at Lake Kingdom and locate the painting in the pool where Lakitu is. Use the painting to warp to Southwestern Floating Island in Sand Kingdom, high above the desert. There you find a Power Moon.
 Found with Sand Kingdom Art
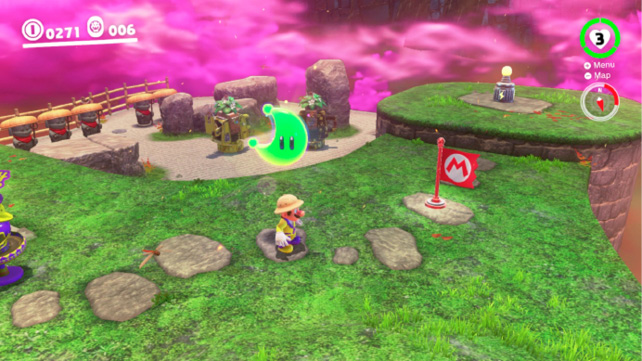
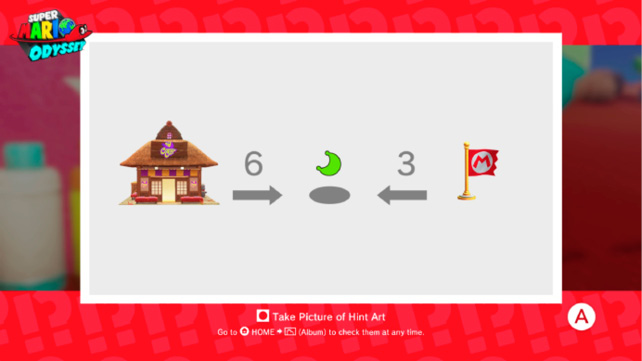
Locate the Hint Art on the side of the southeastern building in Tostarena Town. You can tell from the architecture in the diagram that the hint lies in Bowser’s Kingdom. Travel there, then warp to the Souvenir Shop location. The art hinted at something being 6 from the shop and 3 from the flag—the hint was referring to the walking stones in the garden path.
Count six steps from Crazy Cap and ground pound the stone to get a Power Moon.
 Jammin’ in the Sand Kingdom
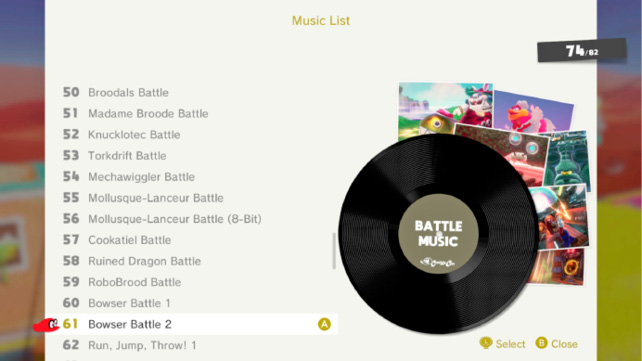
Climb onto the roof of the southeastern building in Tostarena Town to find Toad listening to music. Toad wants to hear music that fits a certain theme. Here in Sand Kingdom he wants to hear a track that goes with “memories of a tough battle.” Any of the songs with the word “Battle” in their title will suffice (look for the Battle Music description on the vinyl record in the Music List). Play the right tune, get a Power Moon.
 Hat-and-Seek: In the Sand
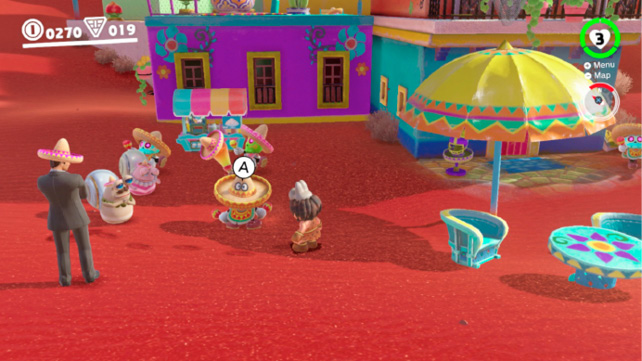
One of the Bonneters has snuck off on vacation to Sand Kingdom and can be found in Tostarena Town. He’s trying to blend in by looking like a local, and he’s willing to fork over a Power Moon if you promise to keep his identity secret. Look for the pair of eyes poking out from the Sombrero near the shaved ice stand to the left of Crazy Cap.
 Sand Kingdom Regular Cup
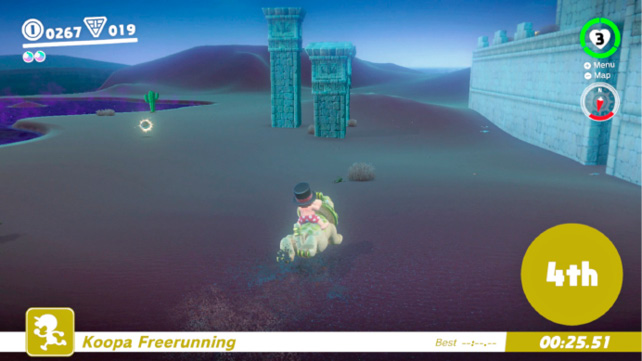
Warp to the Tostarena Northwest Reaches and talk to the Koopa about the Freerunning Races.
This course is quite a bit different than the others in that the fastest way to the finish line isn’t by running and jumping, but by taking a Jaxi! Long jump from the start and roll up the dune to Jaxi and hop aboard. Pilot Jaxi to the left of the ruins (but to the right of the three leaning pillars) and toward Tostarena Town. The finish line is on the south edge of town, near Crazy Cap. It’s easiest to cut through town, but can be faster to round the southeastern corner of town, provided you don’t hit the Jaxi Stand.
 Binding Band Returned
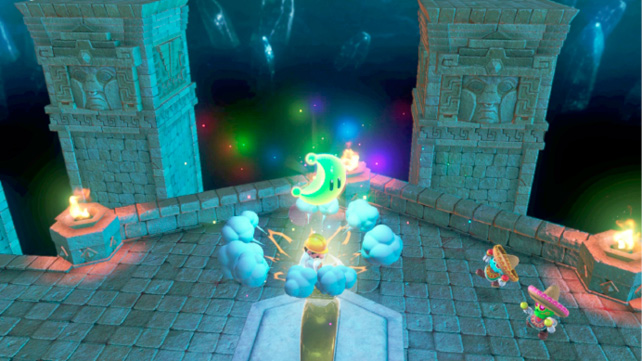
Dive into the hole west of the Inverted Pyramid to return to the Deepest Underground and use the slingshot to reach the temple above. Numerous Tostarenans and tourists have gathered to marvel at the return of the Binding Band. Leap up and ground pound the fancy ring to pry a Power Moon from it.
 Round-the-World Tourist
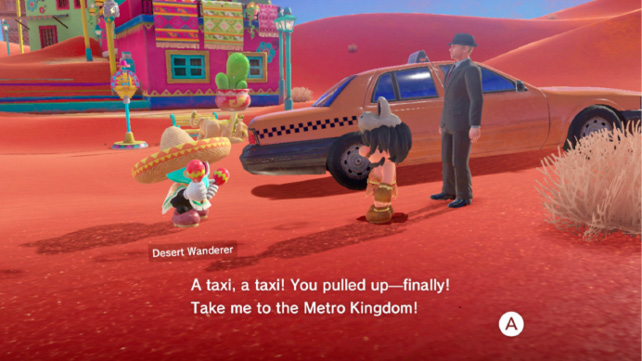
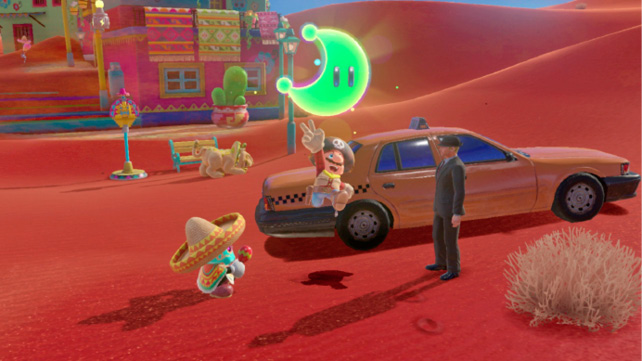
Talk to the Tostarenan near the taxi (after defeating Bowser) to initiate this somewhat lengthy quest for a Power Moon. The Tostarenan is known as the Desert Wanderer and he’s very excited to finally have a taxi at his disposal. He wants to be taken to the Metro Kingdom, but that’s not all. Mario must meet the Desert Wanderer (and his taxi) in a series of kingdoms to earn a Power Moon from each location. Complete the Desert Wanderer’s adventure and meet him back in Sand Kingdom to receive this Power Moon. Meet him in the following locations, in order: Metro Kingdom, Cascade Kingdom, Luncheon Kingdom, Moon Kingdom, Mushroom Kingdom, and then home to the Sand Kingdom where it all began.
 Peach in the Sand Kingdom
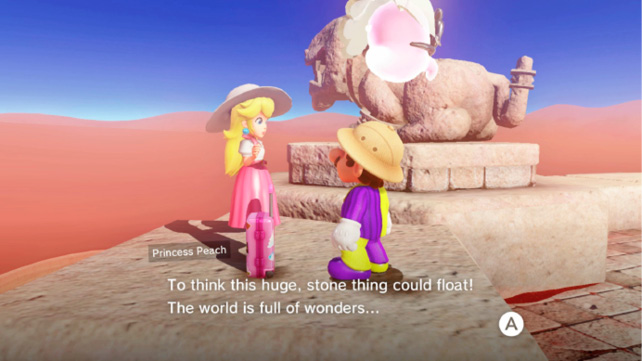
Make your way to the top of the Inverted Tower via the electrical wire and look for Princess Peach and Tiara looking out over the southwestern edge. Speak to Princess Peach to receive a Power Moon she found in her travels.
Moons from the Moon Rock
 Mighty Leap from the Palm Tree!
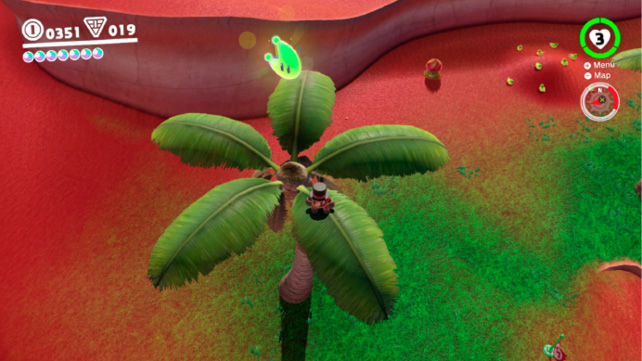
Head to Desert Oasis and climb the palm tree north of the water. There’s a Power Moon floating above the tree. Ground pound from the tree trunk or back somersault from one of the palm fronds to get it.
 On the North Pillar
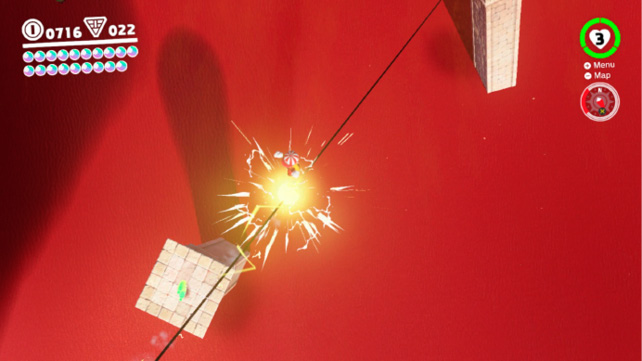
Use the electrical line atop the Tostarena Ruins Round Tower to reach the top of the Inverted Pyramid. Ride the electrical line down toward the ruins in the northwest corner of the desert, but leap off as you pass the lone tower with the Power Moon atop it. It’s easy to leap too early given the perspective so be ready to tackle jump at the Power Moon if necessary. Better still, wait to jump off until it looks as if Mario has already passed it.
 Into the Flowing Sands
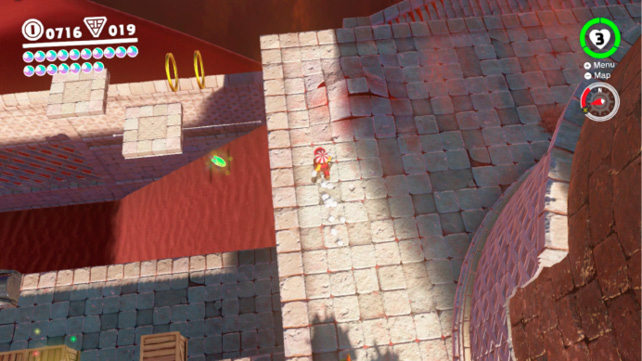
This Power Moon is hovering just above the slope of flowing sand inside the ruins, at the base of the stairs. It’s below the two moving platforms near the rings. Leap into the sand to snag it.
 In the Skies Above the Canyon
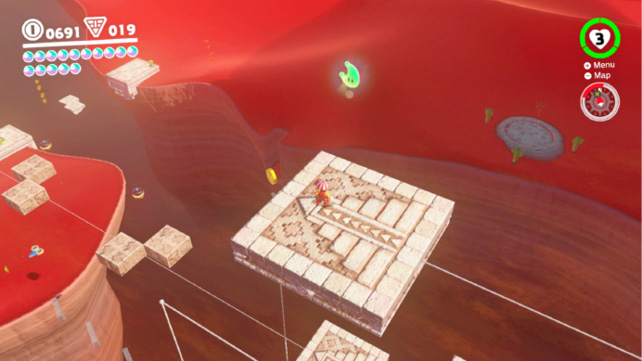
Make your way to the top of the round tower and board the moving platform. Use Cappy to trigger the radiating explosions that burst through the stone blocks that would otherwise knock Mario off. Stay on the right-hand platform as it nears the Power Moon. Leap for the Power Moon before the platform descends then guide Mario safely onto the platform far below.
 Island in the Poison Swamp
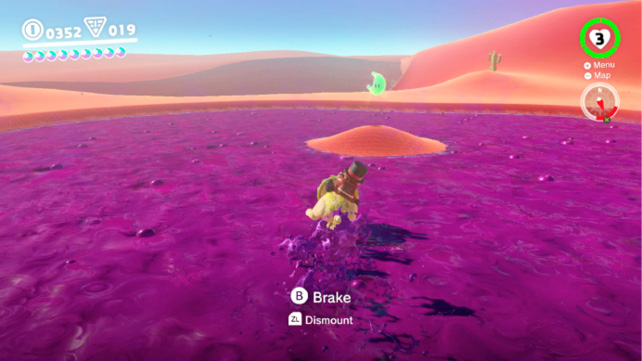
Hop aboard a Jaxi and ride it toward the wastes near Jaxi Ruins. There’s a Power Moon on an island in the swamp, south of Jaxi Ruins. Ride the Jaxi across the poison to get it. You won’t even need to release the capture.
 An Invisible Gleam
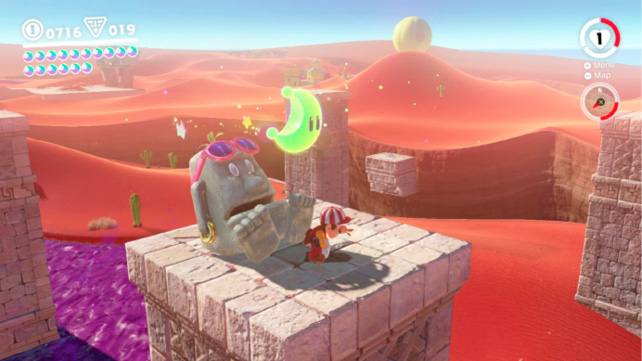
Return to Moe-Eye Habitat and capture a Moe-Eye. Ride it up the lift to the top of the pillars as before, when collecting Moon Shards. Use the sunglasses to spot the glowing beacon on the north-central pillar. Release the capture and ground pound the pillar to uncover the Power Moon.
 On the Eastern Pillar
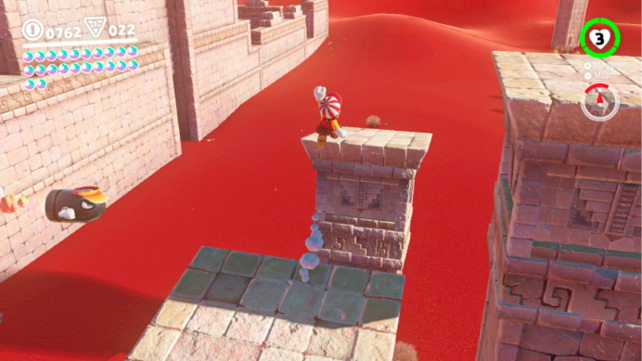
This is one of the most deceptively tricky Power Moons to find in Sand Kingdom, if not the entire game. Though the stone block sitting atop a pillar east of Jaxi Ruins clearly has a Power Moon within it—and Mario can leap onto it from the dunes—there’s no simple way to break it free. Of course, you may remember from Power Moon #20, that Bullet Bills can break these stones. But getting a Bullet Bill this far east takes effort, and there’s very little margin for error.
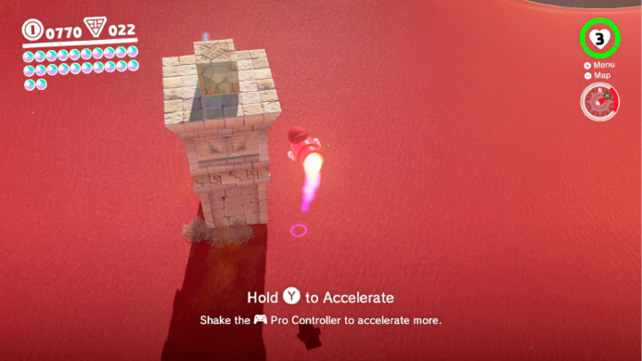
Warp to the Tostarena Ruins Sand Pillar and capture a Bullet Bill. Ride it toward the right-most of the leaning pillars and leap off. Stand here to lure the next Bullet Bill around the barrier then tackle jump to the other leaning tower. Wait for the Bullet Bill to get as close as possible before you capture it.
Now the Bullet Bill’s timer is reset and you have it as close as you can get it to the stone block with the Power Moon (another option is to hit it once to knock its visor off, then leap over it, let it pass under Mario, then turn and capture it while it’s a little closer to the target). But the hard work isn’t done yet! Now you must shake the controller to get small speed bursts the whole way there or the capture expires before you reach the Power Moon.
 Caught Hopping in the Desert!
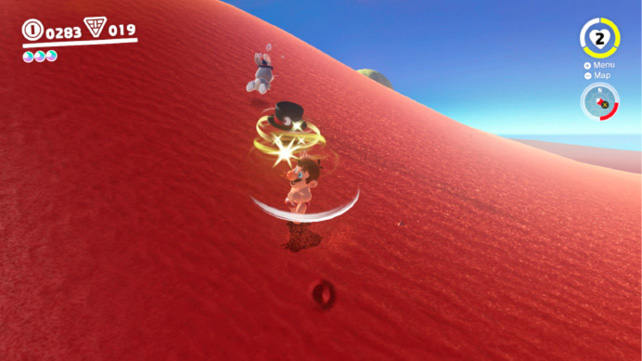
Unlike at Cascade Kingdom, there are three rabbits in Sand Kingdom. Don’t allow yourself to be pulled in multiple directions. Pick a rabbit and keep after it. Use tackle jumps to cut it off and close off its escape, then pelt it with the hat to stun it. The rabbit will tire out, as evidenced by the sweat pouring from it. Keep after it and don’t let up until it releases a Power Moon.
 Poster Cleanup
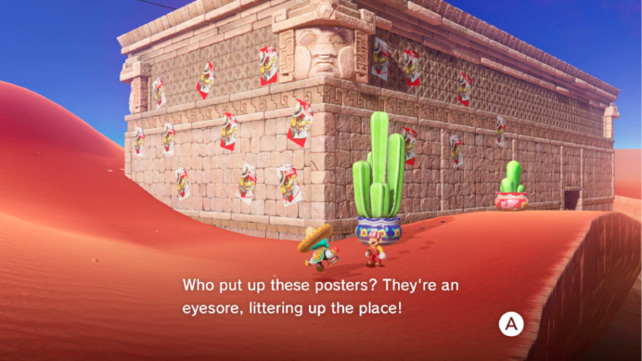
Meet the Tostarenan on the northeast side of the ruins at Tostarena Northwest Reaches. He needs someone to clean the posters off the ruins. Mario can accomplish this with Cappy. Toss Cappy at the posters to knock them off. Back somersault from atop the cactus to reach the higher ones on the back wall. The upper ones on the side wall will be more difficult. To reach them, Mario must leap from atop the dune, dive jump, then toss the hat again before falling. It takes some practice, but all of the posters are within reach from ground level. If this proves too difficult, ride the electrical line to the roof of the ruins and drop off, ready to throw the cap.
 Taking Notes: Running Down
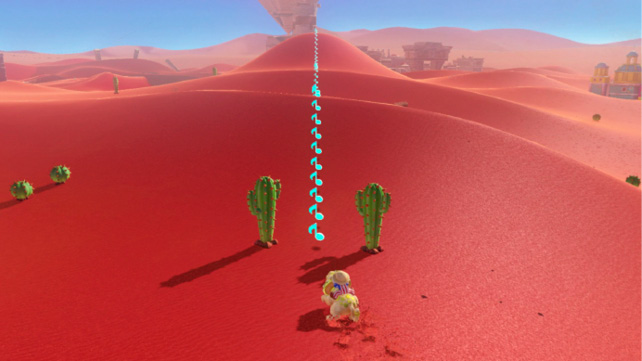
Locate the Jaxi Stand in the southwest corner of the desert and ride a Jaxi to the Treble Clef where this challenge begins. Ride the Jaxi straight through the Treble Clef from the south and hold an arrow-straight line up and over the dunes to collect the many, many notes before time expires. Though it’s possible to roll very quickly through the notes, the slope of the dunes makes this very difficult. It’s far easier to use Jaxi.
 Taking Notes: In the Wall Painting
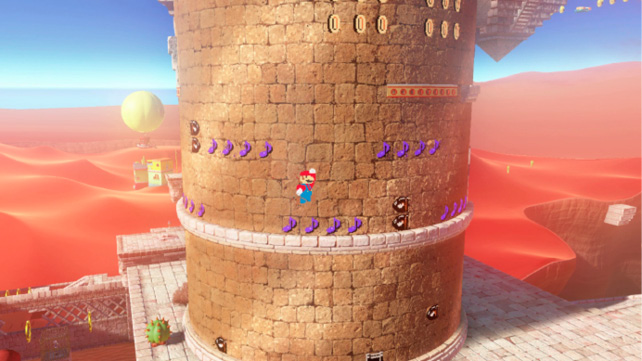
Enter the 8-bit pipe on the side of the Tostarena Ruins Round Tower and ascend to the Treble Clef on the second level of the puzzle. Turn and run back to the left, avoiding the Bullet Bills as you collect the notes there. Now hurry back to the right, leaping and dashing to gather up the notes.
 Love at the Edge of the Desert
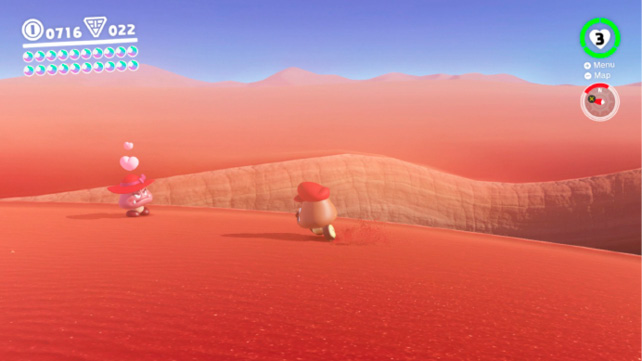
Another Goombette has arrived in Sand Kingdom looking for love. This one is located far on the northern edge of the desert, east of the ruins at Tostarena Northwest Reaches. Return to the ruins, capture a Goomba and carefully guide him in a counter-clockwise loop around the ruins and across the desert to the Gambetta.
 More Walking in the Desert
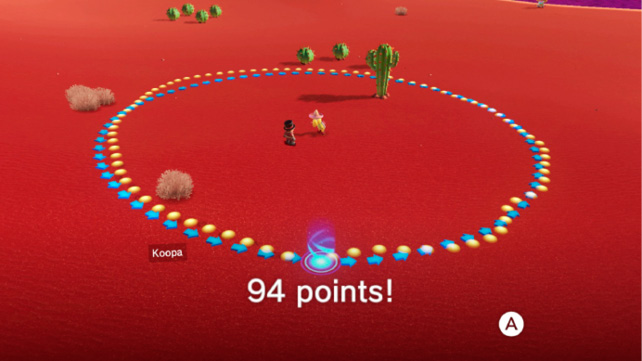
Return to the Koopa north of the Desert Oasis to try your skill at the trace walking challenge again. This time, you must score over 90 points in order to earn the Power Moon! Remember to keep the three smaller cactuses to your right, the small shrubs on your right, and then the lone shrub on your left.
 Sand Kingdom Master Cup
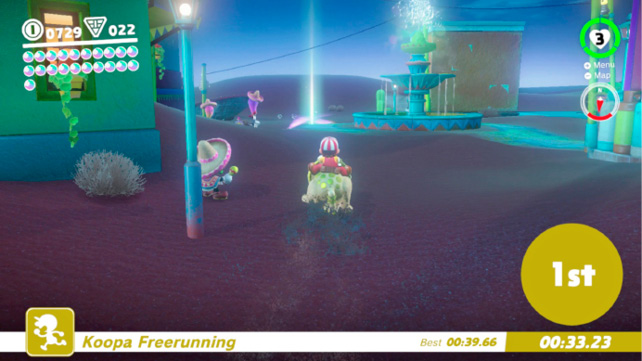
This race is just like the Regular Cup in that you’ll be riding a Jaxi to victory. The difference is that there’s little margin for error or sloppy driving. The Golden Koopa typically has some trouble getting past the leaning pillars so don’t follow right behind him. Keep to the right of the pillars, then cut right toward the road leading into Tostarena Town. Pass to the left of the fountain for the straightest path to the finish.
 Where the Transparent Platforms End
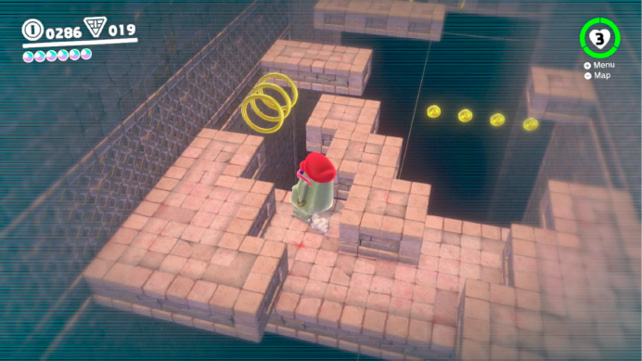
Descend the Moon Pipe south of Tostarena Town and capture the Moe-Eye inside the temple. The Power Moon lies across a lengthy platform puzzle that requires you to toggle the sunglasses on and off very quickly to peek at the locations of the moving invisible platforms, then run around obstacles without the help of seeing them. Fortunately, the rings near the start ensure you never run out of coins should you struggle with this. The difficulty begins when you near the second set of rings. Keep to the front of the moving platform and walk toward the rings on an angle. Run behind the lengthy sliding obstacles and sprint through the zigzag section that follows to avoid being knocked off.
 Jump Onto the Transparent Lift
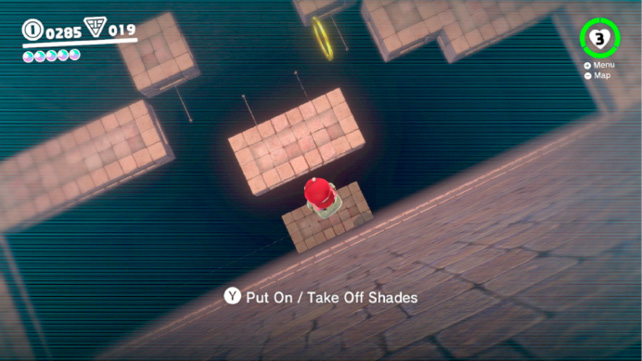
Use the Moon Pipe south of Tostarena Town and ride a Moe-Eye to the second moving platform near the start. Drop onto the ledge further down on the right and ride it to the key. The invisible platform rises up on the other side so you can collect the Power Moon.
 Colossal Ruins: Dash! Jump!
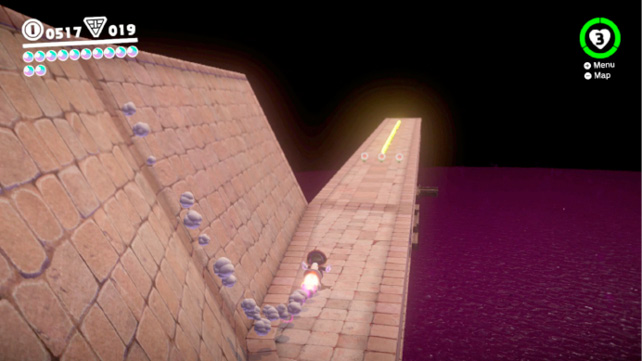
Warp to the Tostarena Ruins and enter the Moon Pipe near the Goombas. Note the location of the Power Moon in the distance and the locked Power Moon container in the floor (Power Moon #87). Capture the Spark Pylon on the left then capture the Rocket Flowers to send Mario speeding toward the rings. Leap the gaps, grab more flowers and head up the angled, sinking wall on the left. Steer Mario as he sprints along the tilted, sinking wall. Let the rings guide you to safety then grab another flower and leap for the Power Moon in the distance.
 Sinking Colossal Ruins: Hurry!
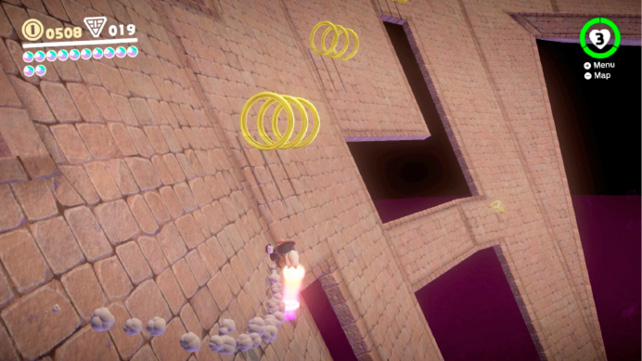
Follow instructions for Power Moon #86 but dare to descend along the sinking wall after the third set of rings so that Mario can grab the key. Turn hard to the left after grabbing the key to ascend to higher—safer—ground. Reach the end of the Colossal Ruins level and a stone bridge appears, leading Mario back to the Moon Pipe and the Power Moon he unlocked.
 Through the Freezing Waterway
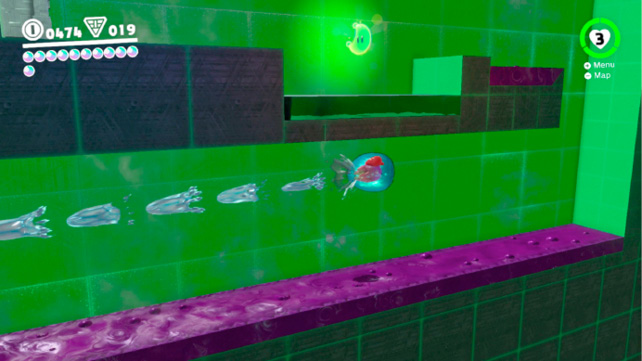
Descend the Moon Pipe east of the Inverted Pyramid to enter this frigid watery challenge level. Capture the Gushen and familiarize yourself with how it controls. Remember that the Gushen runs out of water to propel itself upward and forward so you need to land back in water to replenish its propulsion system. Much of the level is filled with poison so landing in the near-freezing water is vital. But watch out for the other Gushen, as they don’t take kindly to captured Gushen! Use the blue moving platforms to reset the Gushen’s takeoff point, allowing it to travel higher. This also allows the Gushen to travel without expending water. Ascend the two moving platforms then make it over the small barrier and past the poison tank. Ascend again in a burst, then propel the Gushen to the left to reach the Power Moon safely.
 Freezing Waterway: Hidden Room
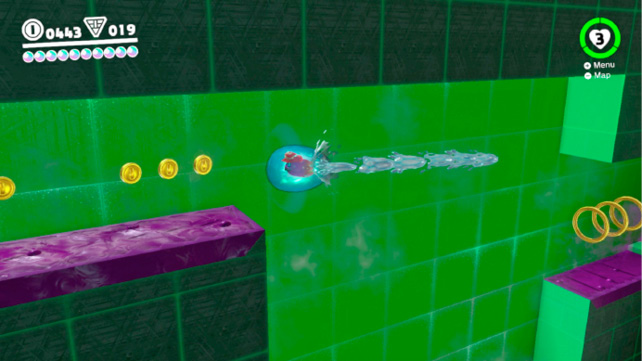
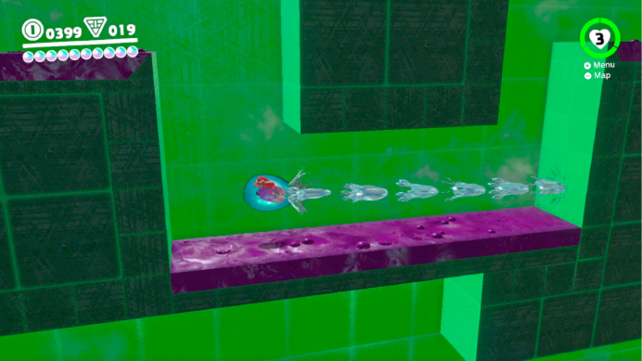
Follow the instructions for Power Moon #88 and make it to the lengthy water section with the first moving platform above it. Stay to the left, wait for the platform to approach and burst upwards. Land briefly, then propel the Gushen up even higher and to the left. Clear the poison and drop, but don’t touch the bottom. There’s poison there. Stay aloft and continue left and up to continue past the poison to reach the hidden Power Moon.