
Little Big Planet 3 Signature Series Strategy Guide Create Tools Quick Reference: The Tools Bag
Tools
Objects
Popit Cursor
 The ethereal element that is at the core of Create Mode, the Popit Cursor manages object selection, placement, resizing, expanding and contracting, copying, and deleting. It’s definitely a powerful tool.
Corner Editor
 Select an object, and adjust the outline by selecting a point along the edge, then pulling it in or out. Despite this tool’s name, you can use it to manipulate any point along the edge of an object, not just corners.
Advanced Glue Tool
 Holding down
  at length to stick objects together can be time-consuming, not to mention tiring on your thumb. The Advanced Glue Tool simplifies things by letting you join multiple objects by simply slapping this down upon them.
Material Changer
 When it comes to construction, it’s important to have the proper material for the job—just ask the three little pigs. Suppose you make a house out of cardboard and then realize it’s better off made of brick. With the Material Changer, you don’t need to start over from scratch. Simply select the new material, and then select the object to be changed.
UV Tool
 With so many patterns, it is often the case that making the perfect shape and having the perfect look do not always go hand in hand. Using the UV Tool, you can move a pattern about without changing the object it is on, which is a surprisingly handy utility.
Capture Object
 Care to save your creations for posterity? Use the Capture Object tool to take a snapshot that you can name and even gift in a Prize Bubble. The right stick lets you adjust the size of the highlighted area to be captured, and your captured objects appear under My Objects in the Goodies bag.
Slice ‘N Dice
 After plopping down a big chunk of material, it might become necessary to break it down a little without reducing any of its mass. Use the Slice ‘N Dice tool to select points on a material to cut between. The two parts are now separate, although they are still conjoined by Glue.
Dephysicalize
 This ghostly apparition of a tool removes all physical properties of an object. It can help reduce the load of your level, and it’s also great for special effects. Do be careful, though: once dephysicalized, not even the level floor can stop the effects of gravity.
Rail Editor
 Whenever you feel the need to put a few more bends in a Bendy Rail, the Rail Editor is the tool for you. Select a laid Bendy Rail, and you can extend, retract, or add pivots to your heart’s delight.
Stickers and Decorations
Sticker & Decoration Edit Tool
 It’s astoundingly easy to get carried away with slapping stickers and Decorations willy-nilly. Use the Sticker & Decoration Edit Tool to take a step back in order to lift, move, and delete such accouterments.
Sticker Cutter
 Sometimes, you just want to add some depth and volume to a sticker. The Sticker Cutter is a huge timesaver, automatically trimming away all the excess material of an object and leaving only the shape of the stickers placed on it.
Paint
 There are definitely a lot of stickers to collect in LittleBigPlanet 3, but they all have one thing in common: you did not make them. That oversight ends now. Use Paint to make your own masterworks that can be slapped onto levels forevermore.
Once in the canvas, use  to select a color,
  to toggle between the brush and scatter application options,
  to select a brush,
  to pick your color, and when you’re finally ready to put pigment to paper. Saving and exiting this mode (as well as many advanced options) are done in the Options menu.
Sticker Scrubber
 When you are looking for a bottle of bleach rather than a pair of tweezers, upgrade from the Sticker & Decoration Edit Tool to the Sticker Scrubber. With this tool, a tap of over anything removes all stickers and Decorations in one go.
Hazards
The Danger Tools





Add a little peril to your levels using an assortment of Danger Tools. Choose from Electricity, Fire, Plasma, or Horrible Gas. Then, select the object you want to turn hazardous. Realize you’ve crafted an elaborate death trap with no escape? Not to worry: the Unlethalize tool restores the selected object to its original harmless state.
Cameras
Game Camera
 Beauty is said to be in the eye of the beholder, so give beholding players a nice view. Place a Game Camera where players can trigger it to alter their native Game Camera’s perspective. Adjust the angle and zoom to frame the perfect picture of your level layout.
Game Camera Adjustments
Adjustment Type |
Adjustment Action |
Effect |
|
Basic Settings |
Angle & Zoom |
Set how close the Game Camera is to the action and from which angle it’s aimed. |
|
Zone |
Use the left stick to adjust the position and the right stick to change the size of the area players must be in to activate the Game Camera. The shoulder buttons function as they would with a material. |
|
|
Movement |
Adjust Player Tracking |
Determines how closely the Game Camera follows a player. Set tracking between 0% and 100%. 0% locks the camera to the view set when active, whereas 100% gives full priority to player tracking. |
|
Local Space |
Yes/No When active, camera effects are relative to the object it is attached to. |
|
|
Camera Shake |
Determines how shaky the camera is when active. Set between 0% (no shake) and 100% (maximum shake). |
|
|
Trigger |
Require All Players |
Determines whether or not all players must be in the camera’s zone to trigger it. |
|
Input Action |
Determines what effect a connected input has on the Game Camera (On/Off, Stay On, Activation Scale). |
|
|
Focus |
Depth of Field (Back) |
Set the level of background focus from 0% (full clarity) to 100% (background fully blurred). |
|
Depth of Field (Front) |
Set the level of foreground focus from 0% (full clarity) to 100% (foreground fully blurred). |
|
|
Focus on Players |
Set the level of character focus from 0% (full clarity) to 100% (characters fully blurred). This effect supersedes other Focus Tweaks. |
|
|
Depth |
Use Z Relative Camera |
Yes/No When active, the camera tracks players against depth. |
|
Visuals |
Visible in Play Mode |
Determines whether or not the Game Camera can be seen in Play Mode. |
Movie Camera
 Spice up parts of your level with some cinematic pizzazz to punctuate the most epic moments. Have players trigger the Movie Camera to add a dramatic movie moment in the midst of a level.
Movie Camera Adjustments
Adjustment Type |
Adjustment Action |
Effect |
|
Basic Settings |
Angle & Zoom |
Set how close the Movie Camera is to the action and from which angle it’s aimed. |
|
Zone |
Use the left stick to adjust the position and the right stick to change the size of the area players must be in to activate the Movie Camera. The shoulder buttons function as they would with a material. |
|
|
Transition |
Transition Type |
Select between Cut, Hard Pan, Soft Pan, Fade, Zoom Fade, and Cross Fade. |
|
Add Transition Key Frame |
Available on Soft and Hard Pans. Set a number of transition points as part of the pan. |
|
|
Fade Audio |
Yes/No Available on Fade and Zoom Fade. |
|
|
Fade Color |
Adjust color of fade. Available on Fade and Zoom Fade. |
|
|
Brightness |
Brightness |
Determines the brightness of the transition. Toggle between 0% and 200%. Available on Fade and Zoom Fade. |
|
Movement |
Track Player |
Yes/No Determines if the Movie Camera follows the player. |
|
Local Space |
Yes/No When active, camera effects are relative to the object it is attached to. |
|
|
Camera Shake |
Determines how shaky the camera is when active. Set between 0% (no shake) and 100% (maximum shake). |
|
|
Timing |
Transition Timing |
Set, in seconds, the time your transition takes. |
|
Use Hold Time |
Yes/No |
|
|
Hold Time |
Set the Hold Time for a shot while the camera is active. Available only when Use Hold Time is set to Yes. |
|
|
Focus |
Depth of Field (Back) |
Set the level of background focus from 0% (full clarity) to 100% (background fully blurred). |
|
Depth of Field (Front) |
Set the level of foreground focus from 0% (full clarity) to 100% (foreground fully blurred). |
|
|
Disable Controllers |
Toggle whether or not players can control their sack people while the Movie Camera is active. |
|
|
Flatness |
Determines how much or little the level appears to protrude. Toggle between 5 and 90. |
|
|
Trigger |
Require All Players |
Yes/No Determines whether or not all players must be in the Movie Camera’s zone to trigger it. |
|
Skippable |
Yes/No Determines whether or not players can skip the Movie Camera after it’s been activated. |
|
|
Depth |
Use Z Relative Camera |
Yes/No When active, the camera tracks players through different depths. |
|
Visuals |
Visible in Play Mode |
Determines whether or not the Movie Camera can be seen in Play Mode. |
Snapshot Camera
 Give players a chance to capture moments for posterity as they frolic through your level. A sack person entering trigger range starts the countdown before a picture-perfect memory is taken and deposited under My Pictures.
Snapshot Camera Adjustments
Adjustment Type |
Adjustment Action |
Effect |
|
Basic Settings |
Angle & Zoom |
Set how close the Snapshot Camera is to the action and from which angle it’s aimed. |
|
Zone |
Use the right stick to adjust the position and size of the area players must be in to activate the Snapshot Camera. |
|
|
Trigger |
Require All Players |
Yes/No Determines whether or not all players must be in the Snapshot Camera’s zone to trigger it. |
|
Countdown |
Set the amount of time in seconds players have before the picture is taken. |
|
|
Depth |
Use Z Relative Camera |
Yes/No When active, the camera tracks players against depth. |
|
Visuals |
Visible in Play Mode |
Determines whether or not the Snapshot Camera can be seen in Play Mode. |
Adventuring
Object Saver
 For levels with multiple parts or staged progression, this tool is invaluable. Slap it on anything, and that object’s location and state are saved between plays.
Object Saver Adjustments
Adjustment Type |
Adjustment Action |
Effect |
|
Properties |
Visible in Play Mode |
Yes/No. |
Quest Tweaker
 As the primary questing tool, the Quest Tweaker is responsible for all state changes, activation, completion, or deactivation of a quest or its objectives in the Organizertron. Be sure to use the Global Stuff menu to create a quest in order to use this and the other Adventure tools.
Quest Tweaker Adjustments
Adjustment Type |
Adjustment Action |
Effect |
|
Select Quest |
Quest Title |
Select available quests created in the Global Stuff menu. |
|
Objective Title |
Select an objective under the main quest selected above (can be left as No Label to affect the overall quest but not an objective). |
|
|
Action |
Input Action |
Select between Active, Complete, and Deactivate. |
|
Trigger Via Prompt |
Yes/No. |
|
|
Layer Detection Range |
Set between 1 and 16. |
|
|
Visuals |
Electronics and Cables Visibility |
No/Switch Visible/Switch and Cables Visible. |
Quest Sensor
 The Quest Sensor senses the current state of a quest and activates when set progression is met.
Quest Sensor Adjustments
Adjustment Type |
Adjustment Action |
Effect |
|
Select Quest |
Quest Title |
Select for available quests created in the Global Stuff menu. |
|
Objective Title |
Select an objective under the main quest selected above (can be left as No Label to affect the overall quest but not an objective). |
|
|
Trigger |
State |
Select between: Active, Complete, and Inactive. |
|
Tracked Quests Only |
Yes / No. |
|
|
Output |
Invert Output |
Yes / No. |
|
Visuals |
Electronics and Cables Visibility |
No / Switch Visible / Switch and Cables Visible. |
|
Color |
Adjust Sensor Color. |
Quest Marker
 Create waypoints associated with individual quests and/or objectives that are visible when using the “Guide Me” option of the Organizertron.
Quest Marker Adjustments
Adjustment Type |
Adjustment Action |
Effect |
|
Select Quest |
Quest Title |
Select from available quests created in the Global Stuff menu. |
|
Objective Title |
Select an objective under the main quest selected above. |
|
|
Visuals |
Electronics and Cables Visibility |
No/Switch Visible/Switch and Cables Visible. |
Dynamic Thermometer
Load Linker
 The Load Linker works very much like the Advanced Glue Tool, except that rather than affixing things physically, it groups items together within a loadable area. This becomes most important when you begin working with several timed elements.
Preloader
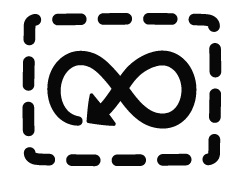 Ever wish you had a little more warning before people just showed up at your house—don’t they know it takes time to put pants on?!? The Preloader gives just the kind of warning to your levels. When one of these is activated, it loads in a preset portion of your level, ensuring that it is ready to go when players arrive. This is very helpful in moving players via the Player Teleporter or another instantaneous travel tool.
The Preloader can be triggered by a Sensor. When none is attached, then it functions like a Player Sensor.
Preloader Adjustments
Adjustment Type |
Adjustment Action |
Effect |
|
Preload Zone |
Place Zone |
Use basic material controls to set the preload target area. |
|
Load Type |
Preload or Full Load. |
|
|
Trigger (Available only when no other input is attached.) |
Minimum Detection Range |
0-∞. |
|
Maximum Detection Range |
0-∞. |
|
|
Trigger Angle Range |
0°-360° |
|
|
Layer Range |
0-16. |
|
|
Behavior |
Require All Players |
Yes/No. |
|
Visuals |
Electronics and Cables Visibility |
No/Switch Visible/Switch and Cables Visible. |
|
Color |
Adjust Sensor Color. |
Permanency Tweaker
 Any object sporting this Tweaker is loaded in no matter what.
Permanancy Tweaker Adjustments
Adjustment Type |
Adjustment Action |
Effect |
|
Visuals |
Visible in Play Mode |
Yes/No. |
|
Color |
Adjust Sensor Color. |