
Little Big Planet 3 Signature Series Strategy Guide Create Tools Quick Reference: The Tools Bag
Gadgets
Sensors
Primary Sensor Adjustments
Adjustment Type |
Adjustment Name |
Effect |
|
Basic Settings |
Item |
Set the specific sticker players must place on the object to activate the Sticker Sensor. |
|
Range |
Minimum Detection Range |
Establishes the minimum distance away a sack person must be to activate the Sensor. |
|
Maximum Detection Range |
Establishes the maximum distance away a sack person can be to activate the Sensor. |
|
|
Trigger Angle Range |
Establishes the angular range a sack person must be within to activate the Sensor. Set the range from 0º to 360º. |
|
|
Layer Range |
Establishes how many layers away from the Sensor a player can be and still activate it. Set between 0–16 |
|
|
Count |
Number of Players Required |
Set the number of players necessary to trigger the Player Sensor. Set the required number between 1 and 4. |
|
Requires All Players |
Determines whether or not the Player Sensor requires all players to activate. |
|
|
Detects unspawned players |
Establishes whether or not the Player Sensor detects unspawned players. |
|
|
Number of Keys Required |
Set the number of Tags necessary to trigger the Tag Sensor. Set the required number between 1 and 100. |
|
|
Tag Type |
Tag Color |
Set the Tag Color that triggers the Tag Sensor. |
|
Select or Tweak a Tag Label |
Keep track of your Tags by labeling them. |
|
|
Trigger |
Target Score |
Set the score a player must achieve in order to trigger the Score Sensor. |
|
Include Rigid Connections |
Determines whether or not material glued or connected to the object also triggers its Sensor. |
|
|
Include Touching |
Determines whether or not simply touching the object triggers the Impact Sensor. |
|
|
Require Tag |
Establishes whether or not the object striking the Impact Sensor must also have the specified Tag to trigger it. |
|
|
Output |
Invert Output |
Inverts the default output state of the Sensor from off to on. |
|
Output Value |
Decides whether the Tag Sensor’s output is either on/off based on Tag signal strength, or whether it varies depending on the closeness of the Tag. |
|
|
Visuals |
Length |
— |
|
Electronics and Cable Visibility |
Establishes which parts of the Sensor are visible. (No, Switch Visible, Switch and Cables Visible.) |
|
|
Visible in Play Mode |
Determines whether or not the Sensor is visible in Play Mode. |
|
|
Color |
Set the color of the Sensor to help keep track of it. |
Tag
 The other half of the Tag equation is the labeling system. Tags come in eight different colors and can also be provided with a Tag Label to allow near-unlimited triggering possibilities.
Tag Adjustments
|
Tag Color |
|
Select or Tweak a Tag Label |
|
Visible in Play Mode |
Tag Sensor
 Like the scanner at the grocery store, the Tag Sensor is designed to detect very particular Tags. This gadget activates only when it detects a Tag of the corresponding color or Tag Label within its radius.
Impact Sensor
 This tough gadget knows how to take a hit. Attach the Impact Sensor to an object, and it activates whenever anything makes contact with it. You can tweak it so that the slightest touch activates it, or adjust it to require a hit from an object with a particular Tag.
Water Sensor
 This Sensor activates the moment the object it’s attached to gets the slightest bit wet. It’s designed for occasions when you expect players to douse particular objects or the level itself in H2O.
Tag Sensor Adjustments
|
Minimum Detection Range |
|
Maximum Detection Range |
|
Trigger Angle Range |
|
Layer Range |
|
Detect Tags in Same Microchip |
|
Number of Keys Required |
|
Tag Color |
|
Select or Tweak a Tag Label |
|
Invert Output |
|
Output Value |
|
Show Radii in Play Mode |
|
Electronics and Cable Visibility |
.
Impact Sensor Adjustments
|
Character to Detect |
|
Include Rigid Connections |
|
Trigger Angle Range |
|
Include Touching |
|
Require Tag |
|
Tag Color |
|
Select a Tag Label |
|
Invert Output |
|
Electronics and Cable Visibility |
|
Color |
Water Sensor Adjustments
|
Invert Output |
|
Electronics and Cable Visibility |
|
Color |
Remote Tag Sensor
 Like two lost lovers, this senses when a Tag is active, even when that Tag is far-flung.
Remote Tag Sensor Adjustments
|
Tag Type |
|
Select a Tag Label |
|
Invert Output |
|
Electronics and Cable Visibility |
Speed Sensor
 This senses the velocity of an object.
Speed Sensor Adjustments
|
Maximum Speed |
|
Directions (Up, Down, Left, Right, In, Out, and all combinations thereof) |
|
Local Space |
|
Invert Output |
|
Electronics and Cable Visibility |
|
Color |
Rotation Sensor
 When it’s dizzying, twirling, and, yes, sometimes nauseating spirals that you’re looking for, this is the Sensor for you. The Rotation Sensor detects the rotational speed of an object.
Rotation Sensor Adjustments
|
Rotational Speed |
|
Directions (Clockwise, Anti-Clockwise, Both Directions) |
|
Invert Output |
|
Electronics and Cable Visibility |
|
Color |
Angle Sensor
 Whether you are looking to detect when something is topsy or turvy, the Angle Sensor has the situation covered. It senses the exact angle of an object.
Angle Sensor Adjustments
|
Trigger Angle Range |
|
Invert Output |
|
Electronics and Cable Visibility |
|
Color |
Interactive Live Stream Sensor
 Do you ever get the feeling you’re being watched? In LittleBigPlanet 3, it just might be that you are! As long as the denizens of the Craftverse are peeking in, you might as well let them contribute. This Sensor detects when your game is being livestreamed and allows up to five key phrases to be used as triggers for individual outputs.
Interactive Live Stream Sensor Adjustments
|
Chat Sample time (represents the window for data collection) |
|
Key Phrase (one-five) |
|
Behavior (Output all of the time or After Sample time) |
|
Electronics and Cable Visibility |
|
Color |
Logic
Basic Logic Adjustments
Adjustment Type |
Adjustment Name |
Effect |
|
Ports |
Number of Ports |
Determines the number of inputs for the Logic gadget. |
|
Output |
Invert Output |
Inverts the default output state of the Logic gadget from off to on. |
|
Visuals |
Electronics and Cable Visibility |
Establishes which parts of the Logic gadget are visible (No, Switch Visible, Switch and Cables Visible). |
|
Color |
Set the color of the Logic gadget to help keep track of it. |
AND Gate
 This gadget activates when both of the inputs attached to it are active.
AND Gate Adjustments
|
Number of Ports |
|
Invert Output |
|
Output Value |
|
Electronics and Cable Visibility |
|
Color |
OR Gate
 This gadget activates when either of the two inputs attached to it is active.
OR Gate Adjustments
|
Number of Ports |
|
Invert Output |
|
Output Value |
|
Electronics and Cable Visibility |
|
Color |
XOR Gate
 This gadget activates when one and only one of the inputs attached to it is active.
XOR Gate Adjustments
|
Number of Ports |
|
Invert Output |
|
Electronics and Cable Visibility |
|
Color |
Timer
 A particular variety of Counter, the Timer looks identical and passes time regardless of input. When the specified amount of time elapses and the Timer is full, the connected output is triggered.
Timer Adjustments
Adjustment Type |
Adjustment Name |
Effect |
|
Timing |
Target Time |
Set the target time that must be reached to trigger an attached output. |
|
Current Time |
Set or view the current time. |
|
|
Input Action |
Determines what effect a connected input has on the Timer (Start/Stop, Forwards/Backwards, Start Count Up, Start Count Down, Speed Scale). |
|
|
Output |
Invert Output |
Inverts the default output state of the Counter from off to on. |
|
Visuals |
Length |
Set the length of the Timer. Toggle between 1.0X and 100.0X. |
|
Electronics and Cable Visibility |
Determines which parts of the Timer are visible (No, Switch Visible, Switch and Cables Visible). |
|
|
Color |
Set the color of the Timer to help keep track of it. |
Counter
 It’s important to have clearly defined goals, and there’s nothing clearer than a quantified objective. Counters are extremely useful for tracking player progress by increments. These tools can keep track of how many times a sponge has been grabbed or a button has been pressed, and then activate an output once the threshold has been reached.
Counter Adjustments
Adjustment Type |
Adjustment Name |
Effect |
|
Count |
Target Count |
Set the target count that must be reached to trigger an attached output. |
|
Current Count |
Set or view the current count. |
|
|
Output |
Invert Output |
Inverts the default output state of the Counter from off to on. |
|
Visuals |
Length |
Set the length of the Counter. Toggle between 1.0X and 100.0X. |
|
Electronics and Cable Visibility |
Determines which parts of the Counter are visible (No, Switch Visible, Switch and Cables Visible). |
|
|
Color |
Set the color of the Counter to help keep track of it. |
NOT Gate
 This gadget activates only when the attached input is inactive.
NOT Gate Adjustments
|
Invert Output |
|
Electronics and Cable Visibility |
|
Color |
Direction Splitter
 In a feat that some might call a miracle and others might call witchcraft, this gadget takes a single input and turns it into two outputs. This voodoo may seem strange at first, but when combined with a 3-Way Switch, two different outputs can be triggered individually from a single input source.
Direction Combiner
 The not-so-evil twin of the Direction Splitter, the Direction Combiner takes two inputs and combines them into one output. The catch is that this gadget only activates its output when one of the two inputs is activated, but never both.
Direction Splitter/Combiner Adjustments
Adjustment Type |
Adjustment Name |
Effect |
|
Output |
Invert Output |
Inverts the default output state of the gadget from off to on. |
|
Visuals |
Electronics and Cable Visibility |
Determines which parts of the gadget are visible. (No, Switch Visible, Switch and Cables Visible). |
|
Color |
Set the color of the gadget to help keep track of it. |
Toggle
 Toggle is one gadget that can’t seem to make up its mind. Each time its input is triggered, it cycles between being active and being inactive. Just don’t ask it whether the chicken or the egg came first.
Toggle Adjustments
Adjustment Type |
Adjustment Name |
Effect |
|
Output |
Current State |
Set the current state of the Toggle (Yes/No). |
|
Visuals |
Electronics and Cable Visibility |
Determines which parts of the Toggle are visible (No, Switch Visible, Switch and Cables Visible). |
|
Color |
Set the color of the Toggle to help keep track of it. |
Selector
 The Selector is a handy hub where an equal number of inputs and outputs can be routed through the same place to reduce clutter. Alternatively, a single input can be used with the Selector to cycle through all the connected outputs.
Selector Adjustments
Adjustment Type |
Adjustment Name |
Effect |
|
Ports |
Number of Ports |
Determines how many inputs/outputs the Selector has. |
|
Current State |
View or select which output is currently active. |
|
|
Output |
Invert Output |
Inverts the default output state of the Selector from off to on. |
|
Visuals |
Electronics and Cable Visibility |
Determines which parts of the Selector are visible (No, Switch Visible, Switch and Cables Visible). |
|
Color |
Set the color of the Selector to help keep track of it. |
Battery
 Sends a constant input signal to trigger whatever it’s attached to.
Battery Adjustments
|
Output |
|
Invert Output |
|
Electronics and Cable Visibility |
|
Color |
Randomizer
 Random chance can be wonderful or it can be cruel, depending largely on which gadgets you attach your Randomizer to. When active, it activates one (or none) of the connected outputs at random.
Randomizer Adjustments
Adjustment Type |
Adjustment Name |
Effect |
|
Pattern |
Pattern |
Choose the pattern the Randomizer uses to select an output (One at a Time, Add, Add and Reset When Full, Toggle). |
|
New pick each time |
Yes/No Determines if the new random output chosen must differ from the previously selected output. |
|
|
Input Action |
Determines whether or not a connected input toggles the Randomizer on/off or overrides the time settings with the default pattern (On/Off, Override Pattern). |
|
|
On Time |
Minimum On Time |
Set the minimum amount of time the Randomizer stays on. |
|
Maximum On Time |
Set the maximum amount of time the Randomizer stays on. |
|
|
Off Time |
Minimum Off Time |
Set the minimum amount of time the Randomizer stays off. |
|
Maximum Off Time |
Set the maximum amount of time the Randomizer stays off. |
|
|
Output |
Invert Output |
Inverts the default output state of the gadget from off to on. |
|
Visuals |
Electronics and Cable Visibility |
Determines which parts of the Randomizer are visible (No, Switch Visible, Switch and Cables Visible). |
|
Color |
Set the color of the Randomizer to help keep track of it. |
Wave Generator
 Anyone who has used a TI-85 knows all about sine waves. They are the most mesmerizing alternative to any given task in math class. Here, the power of that regular pattern is packed into a nifty gadget that arcs its output against the wave pattern.
Wave Generator Adjustments
Adjustment Type |
Adjustment Name |
Effect |
|
Timing |
Time |
Set, in seconds, the time it takes to transition between outputs. |
|
Pause |
Set, in seconds, the hold time between transitions. |
|
|
Sync |
Input the sync timer to match the outputs of other synced tools. |
|
|
Input Action |
Input Action |
Shift between Speed Scale, Positional, and Stop/Start. |
|
Output |
Max Output Value |
Set between 1.00 and -1.00. |
|
Min Output Value |
Set between 1.00 and -1.00. |
|
|
Invert Output |
Inverts the default output state of the gadget from off to on. |
|
|
Visuals |
Electronics and Cable Visibility |
Determines which parts of the Randomizer are visible (No, Switch Visible, Switch and Cables Visible). |
|
Color |
Set the color. |
Logic Containers/Controllers
Microchip
 The Microchip takes up only a tiny part of your object’s surface to allow an impressive amount of gadget placement upon its almost boundlessly large Circuitboard. Use the left stick to reposition the protruding Circuitboard and the right stick to expand its size. Anything attached to a Microchip behaves as though it were directly attached to the object the Microchip is sitting on.
Microchip Adjustments
Adjustment Type |
Adjustment Name |
Effect |
|
Basic Settings |
Name |
Enter a name for the Microchip. |
|
Display |
Show Circuitboard |
Determines whether or not the Circuitboard is visible. |
|
Stabilize Circuitboard |
Yes/No. |
|
|
Visuals |
Hide Outgoing Wires when Circuitboard is Closed |
Determines whether or not the wired connections to the Microchip are still visible when the Circuitboard is closed. |
|
Electronics and Cable Visibility |
Establishes which parts of the Microchip are visible (No, Switch Visible, Switch and Cables Visible). |
|
|
Color |
Set the color of the Microchip to help keep track of it. |
Broadcast Microchip
 Groupthinking is a thing in the real world, and so too in LittleBigPlanet 3. The difference is that here, it is managed by Broadcast Microchips rather than catchy pop songs. Once an appropriate object or character enters its range, the Broadcast Microchip’s programming is projected into the target while it remains in area of effect.
Broadcast Microchip Adjustments
Adjustment Type |
Adjustment Name |
Effect |
|
Basic Settings |
Name |
Enter a name for the Broadcast Microchip. |
|
Broadcast Target |
Tags, Objects, and Creatures. |
|
|
Tag Type |
Set target Tag type (only when Tags are selected as the target). |
|
|
Character to detect |
Set target character type (only when Creatures are selected as the target). |
|
|
Range |
Broadcast to |
Closest in Range, All in Range, or All in Contact. |
|
Minimum Detection Range |
0-∞. |
|
|
Maximum Detection Range |
0-∞. |
|
|
Trigger Angle Range |
0-360. |
|
|
Layer Range |
0-16. |
|
|
Display |
Show Circuitboard |
Determines whether or not the Circuitboard is visible. |
|
Stabilize Circuitboard |
Yes/No. |
|
|
Visuals |
Hide Outgoing Wires when Circuitboard is Closed |
Determines whether or not the wired connections to the Broadcast Microchip are still visible when the Circuitboard is closed. |
|
Electronics and Cable Visibility |
Establishes which parts of the Broadcast Microchip are visible (No, Switch Visible, Switch and Cables Visible). |
|
|
Color |
Set the color. |
Sequencer
 Similar to the Microchip, the Sequencer is more than just an expandable drawing board for your gadgets. Gadgets attached to the sequencer trigger in the order they are laid out from left to right, based on the amount of time you decide each vertical stripe represents. Overlapping attachments like cameras can automatically transition, allowing for smooth changes from one action to the next.
Sequencer Adjustments
Adjustment Type |
Adjustment Name |
Effect |
|
Basic Settings |
Sequencer Name |
Name your Sequencers to help keep track of them. |
|
Trigger |
Trigger Radius |
Establishes the radius a sack person must be in to activate the Sequencer. |
|
Layer Detection Range |
Establishes the maximum layer distance a sack person may be from the sequencer in order to activate it. Toggle between 0 and 16. |
|
|
Input Action |
Input Action |
Determines what effect a connected input has on the Sequencer (Start playing forwards!, Start playing backwards!, Speed Scale, Positional, Start/Stop). |
|
Behavior |
Seconds per Stripe |
Set the number of seconds represented by each vertical stripe on the Sequencer. Toggle between 0.1 and 100.0. |
|
Loop |
Toggle whether or not the Sequencer loops after it finishes. |
|
|
Visuals |
Show Circuitboard |
Determines whether or not the Circuitboard is visible. |
|
Visible in Play Mode |
Determines whether or not the Sequencer can be seen in Play Mode. |
|
|
Color |
Set the color of the Sequencer to help keep track of it. |
Controlinator
 Now this is a real humdinger of a gadget. A player’s sack person can enter one by pressing
  . Then, quite magically, their controller’s many buttons and sticks now function as dictated by the Controlinator. Reassign button actions, analog sticks, and even motion controls to your heart’s content. Connect the different parts of Controlinator’s controller mock-up to your bolts, gadgets, or whatever.
Controlinator Adjustments
Adjustment Type |
Adjustment Name |
Effect |
|
Basic Settings |
Name |
Name your Controlinators to help keep track of them. |
|
Control |
Remote Control |
Toggle whether or not the Controlinator operates an object remotely (No, Transmitter, Receiver). |
|
Controlinator Frequency Color |
Set the frequency used by the Controlinator to one of eight colors (when set to Transmitter or Receiver only). |
|
|
Controlled by Nearest Player |
An alternative option to the frequency colors (when set to Receiver only). |
|
|
Disable Popit |
Determines whether or not players can access their Popits while using the Controlinator. |
|
|
Trigger |
Set Trigger Radius |
Establishes the radius a sack person must be within to enter the Controlinator. |
|
Layer detection range |
Establishes the maximum layer distance a sack person may be from the Controlinator in order to activate it. Toggle between 0 and 16. |
|
|
automatically enter |
Determines whether or not the sack person automatically enters the Controlinator upon entering the Trigger Radius. |
|
|
Players |
Players |
Determines if all or only the lead player can interact with the Controlinator. |
|
Display |
Show Circuitboard |
Determines whether or not the Circuit Board is visible. |
|
Stabilize Circuitboard |
Determines if the Circuitboard orientation stays the same regardless of the object it is attached to. |
|
|
Visuals |
Side-Mounted |
Toggles whether or not the player is seated on top of or perpendicular to the Controlinator. |
|
Visible in Play Mode |
Determines whether or not the Sequencer can be seen in Play Mode. |
Movers
Mover Adjustments
Adjustment Type |
Adjustment Name |
Effect |
|
Speed |
Left/Right Speed |
Determines the Mover’s horizontal speed. Set the speed between 0 and 100. |
|
Up/Down Speed |
Determines the Mover’s vertical speed. Set the speed between 0 and 100. |
|
|
Maximum Speed |
Determines the Mover’s maximum speed. Set maximum speed between 0 and 100. |
|
|
Local Space |
Determines whether the Mover continues to move in the same initial direction or whether its trajectory changes based on the object’s orientation. |
|
|
Allow Up-Down Movement |
Determines whether or not the Mover tracks its target’s vertical motion. |
|
|
Allow In-Out Movement |
Determines whether or not the Mover tracks its target’s movement between layers. |
|
|
Flee Rather Than Follow |
Establishes whether or not the Mover flees or follows its target. |
|
|
Strength |
Acceleration |
Determines the rate at which the Mover increases its speed. Set acceleration between 0% and 100%. |
|
Deceleration |
Determines the rate at which the Mover decreases its speed. Set deceleration between 0% and 100%. |
|
|
Allow Pushing |
Allows the Mover to push other objects out of its way. |
|
|
Stay On |
Determines whether or not the Mover stays on. |
|
|
Maximum Weight that Can Be Pushed |
Determines the maximum weight the Mover can push out of its way. Set the maximum weight between 0.1 and ∞. |
|
|
Trigger |
Minimum Detection Range |
Establishes the minimum distance a sack person must be to activate the Mover. |
|
Maximum Detection Range |
Establishes the maximum distance a sack person can be to activate the Mover. |
|
|
Trigger Angle Range |
Establishes the angular range a sack person must be within to activate the Mover. Set the angular range between 0º and 360º. |
|
|
Follow Tag Instead |
Changes the Mover’s behavior to track a particular Tag instead of the player. |
|
|
Visual |
Visible in Play Mode |
Determines whether or not the Mover appears in Play Mode. |
Mover
 Have all the fun of moving without a truck rental. An object with a Mover attached to it zips along in one direction (and one direction only), propelled by an invisible force. Normally, Movers travel to the right or straight up depending on their values, but negative values allow them to travel left or down.
Mover Adjustments
|
Left/Right Speed |
|
Up/Down Speed |
|
Local Space |
|
Acceleration |
|
Deceleration |
|
Input Action |
|
Visible in Play Mode |
Advanced Mover
 Whenever you feel like you’re only going in one direction, the Advanced Mover has got you covered. This gadget gives objects free rein to move up, down, left, and right, and it also works quite well with the Controlinator.
Advanced Mover Adjustments
|
Maximum Speed |
|
Local Space |
|
Acceleration |
|
Deceleration |
|
Input Action |
|
Visible in Play Mode |
Follower
 With this gadget, pet rocks aren’t the only inanimate objects that can be your best friend. Objects with the Follower attached keep up with either your sack person or a Tag of your choice.
Follower Adjustments
|
Maximum Speed |
|
In Out Speed |
|
Acceleration |
|
Stabilizer |
|
Minimum Detection Range |
|
Maximum Detection Range |
|
Trigger Angle Range |
|
Layer Detection Range |
|
Input Action |
|
Allow Up-Down Movement |
|
Flee Rather Than Follow |
|
Follow Tag or Character |
|
Character to Detect |
|
Tag Color |
|
Select or Tweak a Tag Label |
|
Visible in Play Mode |
In/Out Mover
 Add some depth to your level layout’s personality with an In/Out Mover. Objects equipped with one can travel between each of the many planes. Hook it up to an input to dictate when and how it moves back and forth.
In/Out Mover Adjustments
|
Maximum Speed |
|
Allow Pushing |
|
Maximum Weight that Can Be Pushed |
|
Current Weight |
|
Input Action |
|
Visible in Play Mode |
Advanced In/Out Mover
 It’s more than the addition of a plus sign that makes this Mover advanced. With 16 layers to work with, this little guy gives you a lot more control over layer transitions.
Advanced In/Out Mover Adjustments
Adjustment Type |
Adjustment Name |
Effect |
|
Speed |
Maximum Speed |
Set movement speed between 0.0 and 100.00. |
|
Strength |
Allow Pushing |
Yes/No. |
|
Maximum Weight that Can Be Pushed |
0-∞. |
|
|
Current Weight |
Displays Weight of the object the Mover is attached to. |
|
|
Layer Boundaries |
Front Layer |
Set between 1 and 16. |
|
Back Layer |
Set between 1 and 16. |
|
|
Input Action |
Movement Type |
Directional Speed or Positional. |
|
Input Action |
On/Off, Strength Scale, or Speed Scale. |
|
|
Visuals |
Visible in Play Mode |
Yes/No. |
Motion Recorder
 The Motion Recorder lets you record complex motions with, well, motion. Use the touch pad of the DualShock®4 or a PlayStation® Motion Controller to record the desired movements.
Motion Recorder Adjustments
Adjustment Type |
Adjustment Name |
Effect |
|
Basic Settings |
Record |
Once active, use your controller to map complex movements to the Mover. |
|
Playback |
Loop |
Yes/No. |
|
Playback |
Set between Start playing forwards!, Start playing backwards!, or Forwards/Backwards. |
|
|
Speed |
Set movement speed between 0.0 and 100.00. |
|
|
Input Action |
On/Off, Strength Scale, or Speed Scale. |
|
|
Visuals |
Visible in Play Mode |
Yes/No. |
Force Chip
 Like the most powerful magnet in the world, the Force Chip has the power to attract or repel.
Force Chip Adjustments
Adjustment Type |
Adjustment Name |
Effect |
|
Strength |
Strength |
Set the forcefulness of the chip between 100% and -100%. |
|
Range |
Range |
Set the area of effect between 0.0 and ∞. |
|
Layer Detection Range |
0-16. |
|
|
Affect |
Affect Sack Things |
Yes/No. |
|
Tagged Objects |
No, Ignore Tagged Objects, or Affect Tagged Objects. |
|
|
Tag Type (Only available when Tags are affected) |
Select Tag Color. |
|
|
Select or Tweak a Tag Label |
Choose or adjust the target Tag name. |
|
|
Visuals |
Visible in Play Mode |
Yes/No. |
Rotators
Rotator Adjustments
Adjustment Type |
Adjustment Name |
Effect |
|
Speed |
Rotation Speed |
Determines the speed at which the Rotator spins. |
|
Strength |
Acceleration |
Acceleration Determines the rate at which the object increases its speed. Set acceleration between 0% and 100%. |
|
Deceleration |
Determines the rate at which the object decreases its speed. Set deceleration between 0% and 100%. |
|
|
Input Action |
Determines what effect a connected input has on the Rotator (On/Off, Strength Scale, Speed Scale). |
|
|
Trigger |
Minimum Detection Range |
Establishes the minimum distance a sack person must be to activate the Rotator. |
|
Maximum Detection Range |
Establishes the maximum distance a sack person must be to activate the Rotator. |
|
|
Trigger Angle Range |
Establishes the angular range a sack person must be within to activate the Rotator. Set the range between 0º and 360º. |
|
|
Follow Tag Instead |
Changes the Rotator’s behavior to track a particular Tag instead of the player. |
|
|
Visuals |
Visible in Play Mode |
Determines whether or not the Rotator appears in Play Mode. |
Rotator
 Attach the Rotator to an object to have it spin in one direction. It’s perfect for windmills and vehicles used for one-way trips.
Rotator Adjustments
|
Rotation Speed |
|
Acceleration |
|
Deceleration |
|
Input Action |
|
Visible in Play Mode |
Advanced Rotator
 The Advanced Rotator is for the true rolling enthusiast. These gadgets can turn in either direction when connected to an input like the 3-Way Switch.
Advanced Rotator Adjustments
|
Rotation Speed |
|
Acceleration |
|
Deceleration |
|
Input Action |
|
Visible in Play Mode |
Look At Rotator
 When your creation must keep a bead on something at all times, the Look At Rotator fits the bill. The object it’s attached to turns to always face the specified target, whether it’s a sack person or a Tag.
Look At Rotator Adjustments
|
Rotation Speed |
|
Acceleration |
|
Minimum Detection Range |
|
Maximum Detection Range |
|
Trigger Angle Range |
|
Layer Detection Range |
|
Input Action |
|
Follow Tag or Character |
|
Character to Detect |
|
Tag Color |
|
Select or Tweak a Tag Label |
|
Visible in Play Mode |
Gyroscope
 Things are always looking up when there’s a Gyroscope involved. Attach this gadget to an object to make sure it’s always pointed up, down, or whichever direction you choose. When tipped over, objects with a Gyroscope attached find their way back to equilibrium with the speed and strength that you determine.
Gyroscope Adjustments
|
Rotation Speed |
|
Direction of Rotation |
|
Acceleration |
|
Input Action |
|
Visible in Play Mode |
Rocket Rotator
 Rocket Rotators combine the tireless directional push of a rocket with the angular control of a rotation tool, just as the name implies.
Rocket Rotator Adjustments
|
Rotation Speed |
|
Acceleration |
|
Input Action |
|
Visible in Play Mode |
Joystick Rotator
 Use the Joystick Rotator in conjunction with the Controlinator to give players direct control over the angle of your creation. Connect the Controlinator’s analog sticks to its vertical and horizontal controls. Once a sack person enters the creation’s Controlinator, the stick input you define controls the precise angle it’s oriented at.
Joystick Rotator Adjustments
|
Rotation Speed |
|
Acceleration |
|
Input Action |
|
Visible in Play Mode |
Emitters
Emitter
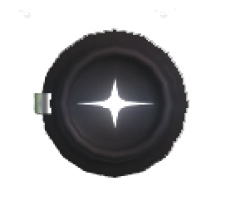 Conjuring out of thin air isn’t just for wizards anymore. You can tweak Emitters to produce any object of your choosing (or creation). Play around with where the emitted objects manifest, how many are produced, and how long they stick around (among other tweakable properties).
Emitter Adjustments
Adjustment Type |
Adjustment Name |
Effect |
|
Object |
Choose Object |
Set the item you want to emit and its emitted location. |
|
Reference in Play Mode |
Choose whether or not to reference the Emitter in Play Mode. |
|
|
Speed |
Linear Velocity |
Determines the speed at which the item is emitted. Items begin traveling as soon as they are created. |
|
Angular Velocity |
Set spin rotation on emitted items. |
|
|
Ignore Parent Velocity |
Toggles whether or not the item’s velocity is affected by the speed of the object the Emitter is attached to. |
|
|
Input Action |
Input Action |
Determines what effect a connected input has on the Emitter (On/Off, Emit Once, Speed Scale). |
|
Timing |
Frequency |
Set the amount of time between emitted items. |
|
Lifetime |
Establishes the amount of time before an emitted item is destroyed. |
|
|
Sync |
Use this value to synchronize the movement of your Emitter with other objects in your level that support it. |
|
|
Quantity |
Max Emitted |
Set the total number of items the Emitter can create. |
|
Max Emitted At Once |
Set the maximum number of items emitted during a set Frequency period. |
|
|
Destroy Oldest when Max Emitted Reached |
Toggle whether or not the oldest emitted item is destroyed once the maximum number has been emitted. |
|
|
Effects |
Create Effect |
Determines the visual effect when the item is created (Appear, Expand, Fade). |
|
Destroy Effect |
Determines the visual effect when the item is destroyed (Fall Apart, Disappear, Dissolve, Shrink, Explode, Fade, Splat). |
|
|
Visuals |
Visible in Play Mode |
Determines whether or not the Emitter can be seen in Play Mode. |
|
Audio |
Enable Sounds |
Toggle sounds on/off. |
Smoke Machine
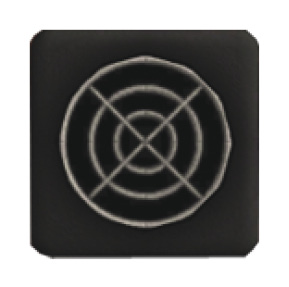 Whether it’s a haunted house or a sauna, Smoke Machines add atmosphere. Just don’t overdo it at the rock & roll show, or the fans might not be able to see the musicians.
Smoke Machine Adjustments
Adjustment Type |
Adjustment Name |
Effect |
|
Speed |
Left/Right Speed |
Establishes the horizontal speed of the smoke’s movement. |
|
Up/Down Speed |
Establishes the vertical speed of the smoke’s movement. |
|
|
Size |
Smoke Size |
Determines the size of the smoke produced. |
|
Color |
Color |
Determines the color of the smoke. |
|
Brightness |
Determines how bright the colored smoke appears. Set the brightness between 0% and 200%. |
|
|
Visuals |
Visible in Play Mode |
Determines whether or not the Smoke Machine can be seen in Play Mode. |
Note
 Notes are handy ways of leaving a message for players to let them know you finished off the milk. Tweak it to keep it hidden from view during Play Mode when you only want to explain how you put your wondrous level together to those exploring it in Create Mode. Notes are especially handy within complex Microchips, helping remind both you and any fellow creators you gift your machinations to what a particular linked set of objects does.
Note Adjustments
Adjustment Type |
Adjustment Name |
Effect |
|
Text |
Note |
Enter the text of the note. |
|
Visuals |
Show |
Determines whether or not the text of the note is visible. |
|
Visible in Play Mode |
Determines whether or not the note can be seen in Play Mode. |
|
|
Colors |
Color |
Determines the color of the note. |
Bubble Machine
 Ever find yourself under water, without scuba gear, short of breath, only to be saved by some bubbles floating up? No? Well, that’s probably because you are not a sack person. Bubble Machines distribute air to any soggy knit swimmer that stops by.
Bubble Machine Adjustments
Adjustment Type |
Adjustment Name |
Effect |
|
Visuals |
Visible in Play Mode |
Determines whether or not the Bubble Machine can be seen in Play Mode. |
Object Tweakers
Anti-Gravity Tweaker
 Gravity doesn’t have to be a cruel mistress to objects you’ve attached the Anti-Gravity Tweaker to. You can change how diminished the pull of gravity is upon the objects, whether the objects stay fixed in place when nudged, and whether they actively resist gravity rather than just defying it.
Anti-Gravity Tweaker Adjustments
Adjustment Type |
Adjustment Name |
Effect |
|
Effect |
Anti-Gravity |
Determines the degree to which the object resists gravity. Set gravity resistance between 0% and 100%. |
|
Damping |
Determines how quickly the object slows down. Set dampening between 0% and 100%. |
|
|
Zero Buoyancy |
Determines how much the object floats in water. Set buoyancy between 0% and 100%. |
|
|
Input Action |
Input Action |
Determines what effect a connected input has on the Anti-Gravity Tweaker (On/Off, Strength Scale). |
|
Visuals |
Visible in Play Mode |
Determines whether or not the Anti-Gravity Tweaker is visible in Play Mode. |
Opacity Tweaker
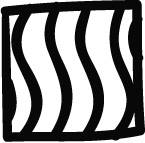 It’s not always easy to see things clearly, especially when there’s something blocking your view. Now, rather than build objects out of glass or move them out of the way altogether, you can attach an Opacity Tweaker and make them as see-through as you like.
Opacity Tweaker Adjustments
Adjustment Type |
Adjustment Name |
Effect |
|
Basic Settings |
Opacity |
Set between 0% and 100%. |
|
Fade Time |
0.00-∞ in seconds. |
|
|
Behavior |
Dim Lights |
Yes/No. |
|
Include Rigid Connections |
Yes/No. |
|
|
Input Action |
On/Off or Strength Scale. |
|
|
Visuals |
Visible in Play Mode |
Yes/No. |
Material Tweaker
 Material properties aren’t set in stone, not even for the rockiest material! Attach the Material Tweaker to add or adjust characteristics, such as bounce, friction, stickiness, grabbability, and indestructibility.
Material Tweaker Adjustments
Adjustment Type |
Adjustment Name |
Effect |
|
Grabbability |
Set whether the material can be grabbed by default, by one player, by no one, or by all players. |
|
|
Grabbable by |
Set if the material can be grabbed by the player, their Popit Cursor, or both. Choose between Player and Cursor, Player Only, and Cursor Only. |
|
|
Climbable |
Toggle whether or not players can climb the material. |
|
|
Behavior |
Bouncy |
Determines the how much the material bounces. Set the bounce property between 0% and 100%. |
|
Friction |
Determines how much resistance from friction the material is subject to. Set the friction property between 0% and 100%. |
|
|
Stickiness |
Determines whether other objects stick to the material being tweaked or whether it resists being stuck to other sticky objects (Normal, Sticky, Non-Stick). |
|
|
Indestructible |
Determines whether or not the material is immune to destruction. |
|
|
Effects |
Remove Bevel |
Enable to remove the beveled edge from the material. |
|
Cast Shadows |
Determine if the material casts shadows on the level. |
|
|
Visuals |
Visible in Play Mode |
Determines whether or not the Material Tweaker is visible in Play Mode. |
|
Audio |
Physics Sounds |
Toggles whether or not the sounds of the object’s physics interactions are audible. |
Physics Tweaker
 Bending the laws of reality (as loose as they are in LittleBigPlanet 3) is what the Physics Tweaker is all about. Change the weight and collision properties of any material. A sponge block that weighs a ton? Sure, why not?
Physics Tweaker Adjustments
Adjustment Type |
Adjustment Name |
Effect |
|
Collisions |
Collisions |
Change between On, Off, Tagged Objects, and Ignore Tagged Objects. |
|
Tag Type (Only when selected in Collisions) |
Tag Color |
Set the Tag Color. |
|
Select or Tweak a Tag Label |
Choose or adjust the target Tag name. |
|
|
Sackboy |
Set the object to collide with only Sackboy. |
|
|
Untweaked Weight |
Displays the native weight of the object the Tweaker is attached to. |
|
|
Current Weight |
Change Weight |
Yes/No. |
|
New Weight |
0.0-∞. |
|
|
Behavior |
Include Rigid Connections |
Yes/No. |
|
Visuals |
Visible in Play Mode |
Yes/No. |
Destroyer
 Customize the manner in which things are obliterated with the Destroyer. Attaching it to an object allows its destruction to spread to rigid Connectors, and you can also select the visual effect used when it’s destroyed.
Destroyer Adjustments
Adjustment Type |
Adjustment Name |
Effect |
|
Behavior |
Include Rigid Connections |
Determines whether or not material glued or connected to the object is also destroyed. |
|
Visuals |
Destroy Effect |
Determines the visual effect when the Destroyer is triggered (Fall Apart, Disappear, Dissolve, Shrink, Explode, Fade, Splat). |
|
Visible in Play Mode |
Determines whether or not the Destroyer is visible in Play Mode. |
Shardinator
 Less a Tweaker and more of a WMD (Weapon of Material Disintegration), the Shardinator does one thing well: it makes big things into small things. Slap one of these onto any material, and when activated, that material is broken apart.
Shardinator Adjustments
Adjustment Type |
Adjustment Name |
Effect |
|
Density |
Edge Cracks |
Determines the disintegrating force of the blast. Set between 0.0 and 100.0. |
|
Face Cracks |
Determines the remaining fractals. Set between 0.0 and 100.0. |
|
|
Speed |
Random Linear Velocity |
Affects the outward blast of debris. Set between 0.0 and 100.0. |
|
Random Angular Velocity |
Affects the spin of outgoing particulates. Set between 0 and 1500. |
|
|
Timing |
Trigger Delay |
Set, in seconds, the delay between trigger and blast. |
|
Lifespan |
Set, in seconds, the amount of time post initial blast that the shards remain. |
|
|
Effects |
Shard Effect |
Sets the effect on an object when the Shardinator is triggered. Set between Explode, Fade, Splat, Vaporise, Confetti, Disappear, Dissolve, and Shrink. |
|
Destroy Effect |
Sets the effect on an object when the Shardinator’s lifespan is up. Set between Explode, Fade, Splat, Vaporise, Confetti, Disappear, Dissolve, and Shrink. |
|
|
Shards |
Dephysicalized Shards |
Yes/No. |
|
Physics Audio |
Yes/No. |
|
|
Assign Tag to Shards |
Yes/No. |
|
|
Tag Type |
Tag Color |
Set the Tag Color (only when Assign Tag is set to Yes). |
|
Visuals |
Visible in Play Mode |
Yes/No. |
World Tweakers
Global Anti-Gravity Tweaker
 When your level takes players to different planets, it probably makes sense to change the gravity along with the setting. Have it increase or decrease as needed when a sack person enters this gadget’s trigger range, or connect it to the input of your choice.
Global Anti-Gravity Tweaker Adjustments
Adjustment Type |
Adjustment Name |
Effect |
|
Gravity |
Gravity |
Set Between 0% and 400%. |
|
Trigger |
Trigger Radius |
0.0-∞. |
|
Layer Detection Range |
0-16. |
|
|
Only Activate Once |
Yes/No. |
|
|
Transition Time |
Transition Time |
Set, in seconds, the about of time it takes for the new gravity to take hold once triggered. |
|
Visuals |
Visible in Play Mode |
Yes/No. |
Global Lighting Tweaker
 Whether the power’s just gone out or a sack person has just exited a dank cave into the bright sunlight, level lighting must change to fit the circumstances. Using the proximity trigger or another input, this gadget can adjust any aspect of the level’s global lighting.
Global Lighting Tweaker Adjustments
Adjustment Type |
Adjustment Name |
Effect |
|
Lighting |
Lighting |
Adjust brightness slider. |
|
Darkness |
Adjust visibility slider. |
|
|
Fogginess |
Set between 0% and 100%. |
|
|
Fog Color |
Adjust color slider. |
|
|
Color Correction |
Adjust color correction slider. |
|
|
Trigger |
Trigger Radius |
0.0-∞. |
|
Layer Detection Range |
0-16. |
|
|
Only Activate Once |
Yes/No. |
|
|
Transition Time |
Transition Time |
Set, in seconds, the about of time it takes for the new lighting to take hold once triggered. |
|
Visuals |
Visible in Play Mode |
Yes/No. |
Global Audio Tweaker
 Sometimes a cave is really just a big room without the correct echo. When your level needs to not just look but also sound right, the Global Audio Tweaker can change up the audio mix and adjust reverb levels to provide the perfect soundtrack for your creation.
Global Audio Tweaker Adjustments
Adjustment Type |
Adjustment Name |
Effect |
|
Audio |
Choose Ambience |
Select ambient audio from the list. |
|
SFX Volume |
0%-100%. |
|
|
Background Volume |
0%-100% |
|
|
Music Volume |
0%-100%. |
|
|
Dialogue Volume |
0%-100%. |
|
|
Reverb Settings |
Reverb Settings |
Select ambient audio from the list. |
|
SFX Reverb Send |
0%-100%. |
|
|
Music Reverb Send |
0%-100%. |
|
|
Dialogue Reverb Send |
0%-100%. |
|
|
Low Pass Filter Settings |
SFX Filter Amount |
0%-100%. |
|
Music Filter Amount |
0%-100%. |
|
|
Dialogue Filter Amount |
0%-100%. |
|
|
High Pass Filter Amount SFX Filter Amount |
0%-100%. |
|
|
Music Filter Amount |
0%-100%. |
|
|
Dialogue Filter Amount |
0%- 100%. |
|
|
Trigger |
Trigger Radius |
0.0-∞. |
|
Layer Detection Range |
0-16. |
|
|
Only Activate Once |
Yes/No. |
|
|
Transition Time |
Transition Time |
Set, in seconds, the about of time it takes for the new audio to take hold once triggered. |
|
Visuals |
Visible in Play Mode |
Yes/No. |
Global Water Tweaker
 The Global Water Tweaker is a great way to cool players down when the heat is on. When a sack person comes within trigger range of this gadget, the water level rises to a height of your choosing.
Global Water Tweaker Adjustments
Adjustment Type |
Adjustment Name |
Effect |
|
Water |
Water Level |
Set water level between 0 and 192.3. |
|
Wave Height |
0.00-2.00. |
|
|
Water Color |
Set color slider. |
|
|
Water Murkiness |
0%-100%. |
|
|
Water Bits |
0%-100%. |
|
|
Water Drain Sound |
Yes/No. |
|
|
Light Patterns |
Yes/No. |
|
|
Trigger |
Trigger Radius |
0.0-∞. |
|
Layer Detection Range |
0-16. |
|
|
Only Activate Once |
Yes/No. |
|
|
Transition Time |
Transition Time |
Set, in seconds, the about of time it takes for the new water levels to take hold once triggered. |
|
Visuals |
Visible in Play Mode |
Yes/No. |