
Call of Duty: WWII Guide Multiplayer Maps and Modes Pointe du Hoc
Hardpoint Tactics
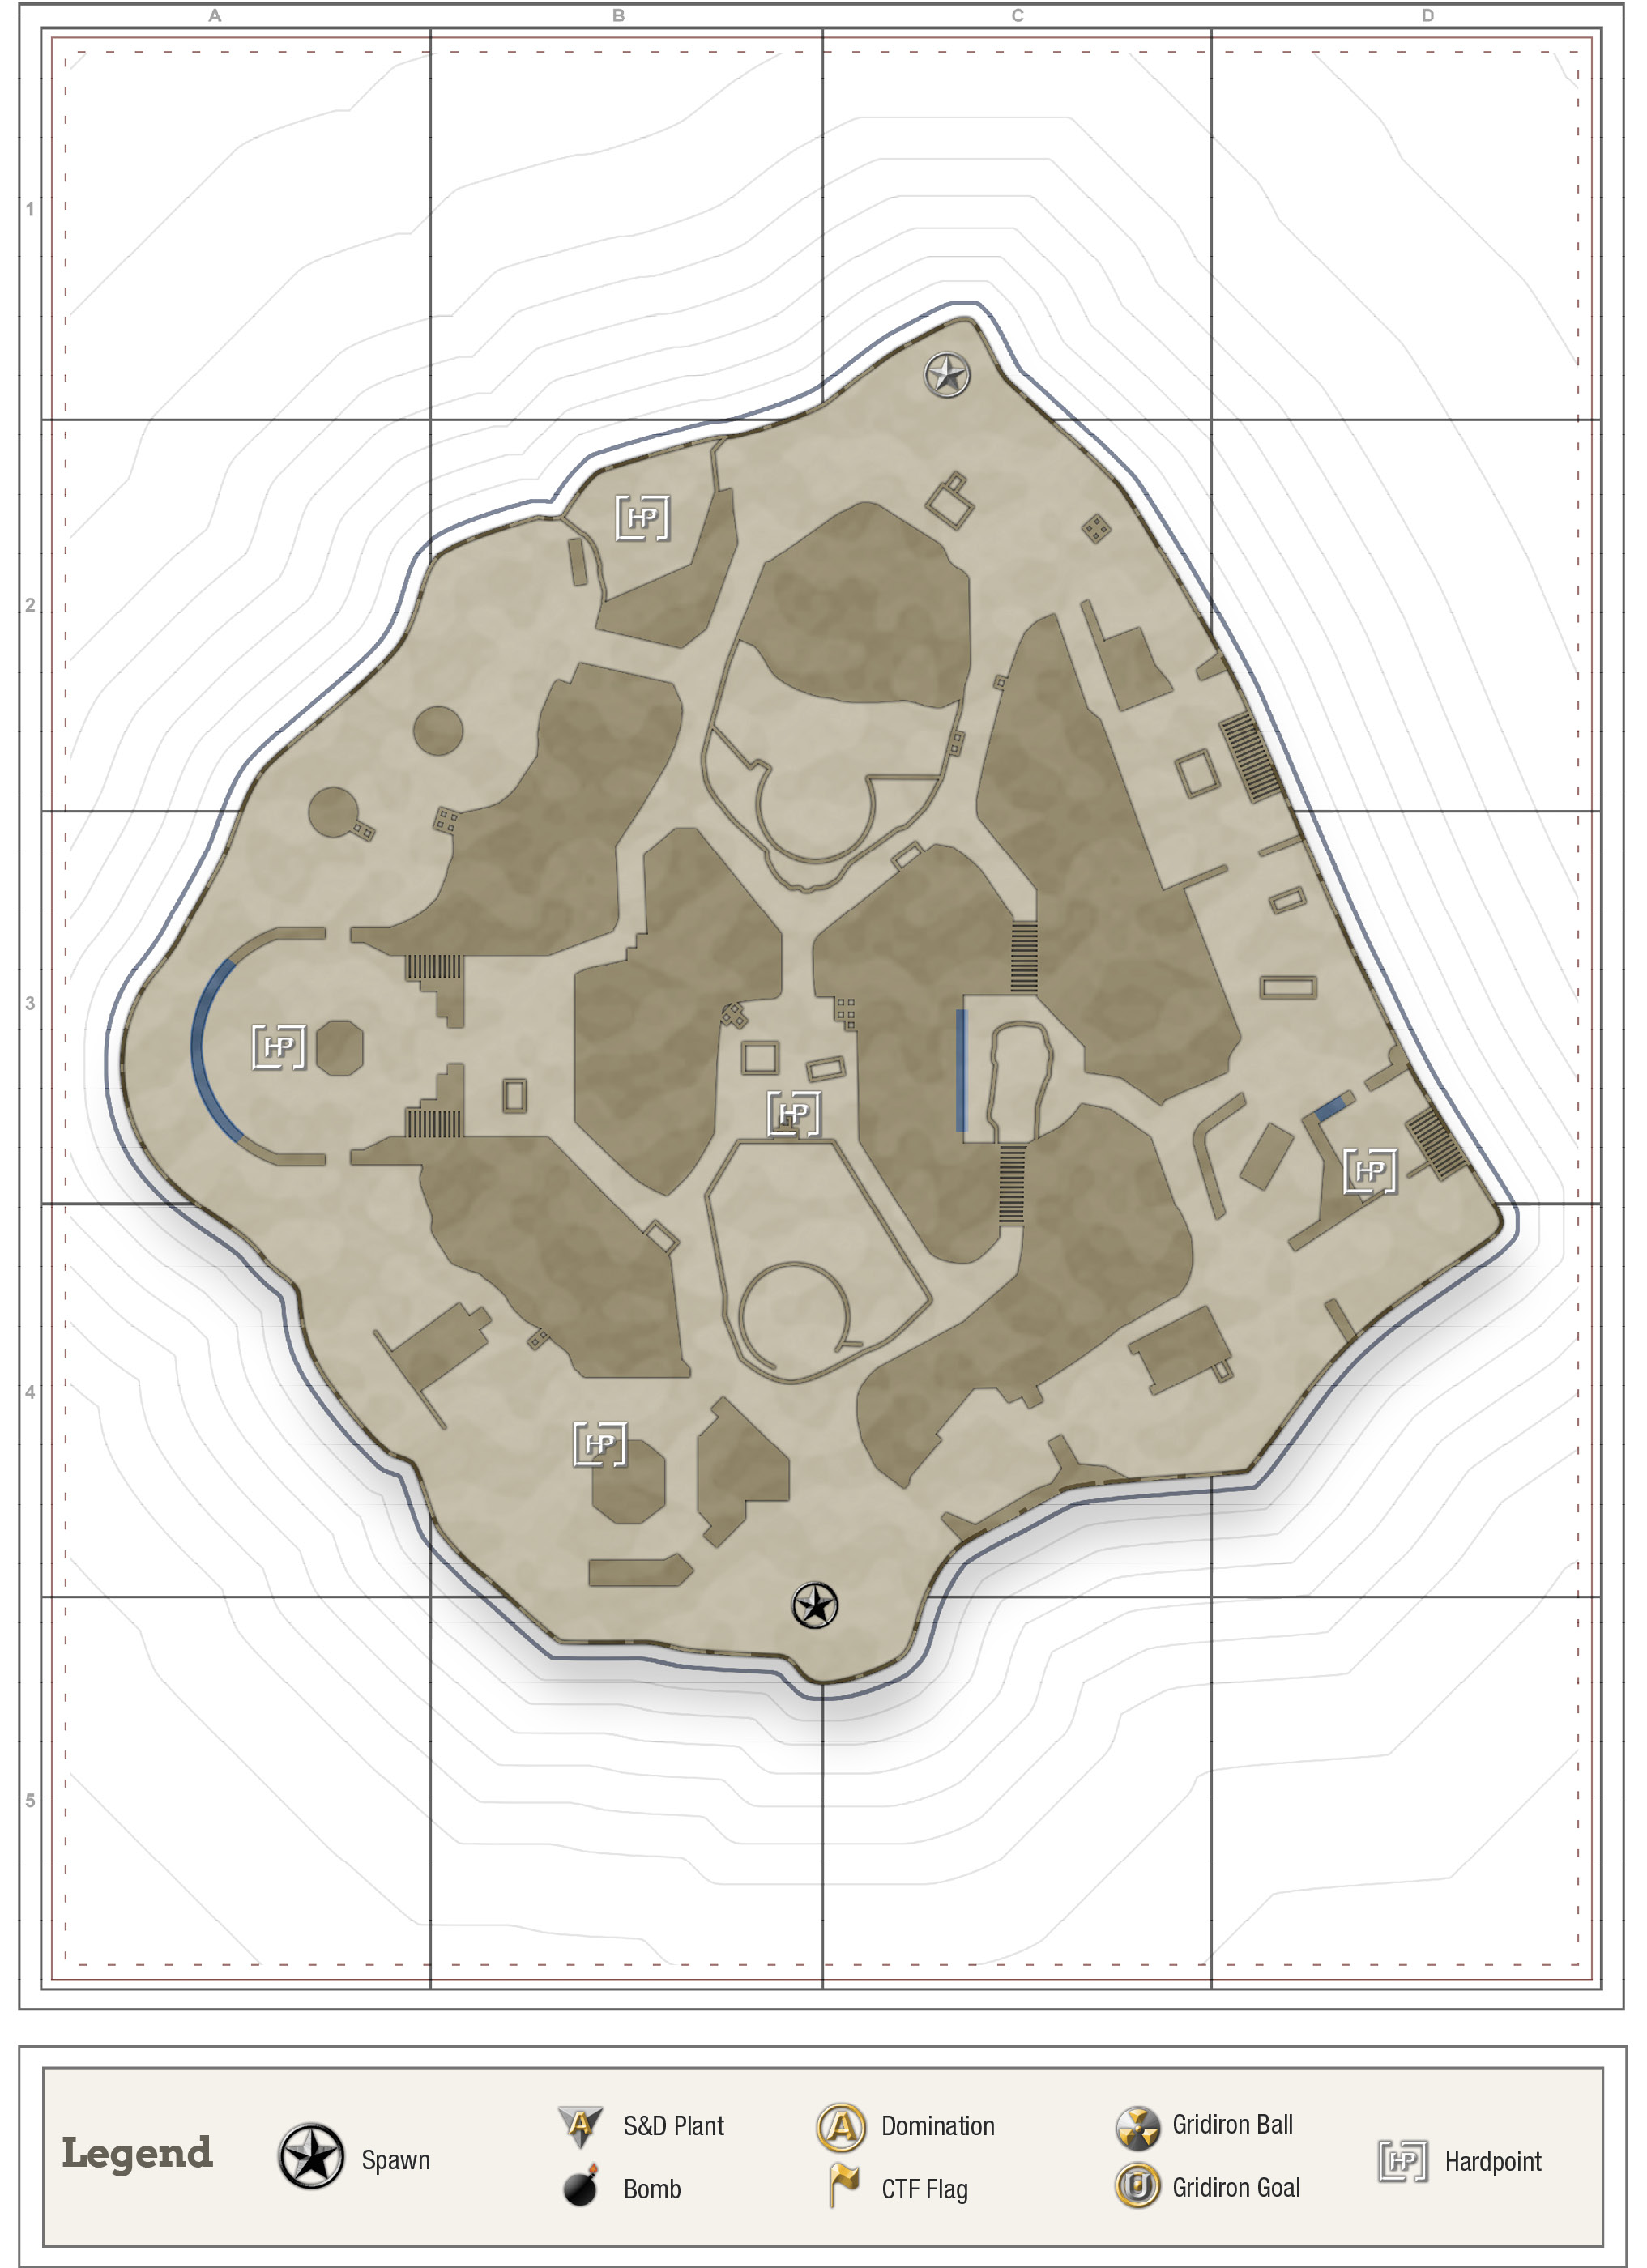
Trench Center Hardpoint

The entirety of Trench Center is a Hardpoint and it’s one that’s excruciating to defend. There are so many points of entry, holding this point becomes an exercise in pain. One strategy to try is to hug a corner, keep an eye on the entryways, watch the bunker, and say a prayer.
If the enemy team has this point, however, dislodging them is a breeze. Use the bunkers on the north and south sides of the trenches to get a good view into Trench Center. Then go prone on top of East Trench Battery to get a clear view into the heart of the point. West Trench Battery allows for some easy flanks onto the point.
You’re better off knowing that you likely won’t hold this point for long chunks of time, so focus on efficiently removing defenders, then hopping on the point. You’ll likely die frequently, but as long as you can get defenders out of the point quickly, you can still gain more overall points.
Main Bunker Hardpoint

The entire first floor of this rather large structure is a Hardpoint, an incredibly defensible one at that. There are only three points of entry and all of them are small doorways. There’s plenty of space to avoid potential grenade spam, especially if you’re up against the bunker’s northern wall. As a team, cover each door with a soldier and you’ll have a good chance of holding down the fort.
As an attacker, this point is likely the hardest one to dislodge defenders from. A hard push with multiple teammates will likely end in disaster, so approach this point more conservatively. Attacking from the east and west entries will provide a bit more cover than the south entrance, but not much. Smoke grenades will help tremendously, too. Getting up to the second story of the bunker won’t allow you to contest the point, but it will give you a better position from which to attack. Of all the Hardpoints on the map, this is the one you want. Whoever gets here first will undoubtedly have the advantage.
Farmhouse Hardpoint

The entire Farmhouse is a Hardpoint, including the second floor. There are three points of entry: one on either end of the first floor and on the ruined, northwest side of the building. The northwest side is far and away the hardest side to defend. The second floor entry is exposed and lacking in cover. The best place to defend it from is just behind the corner in the bend at the center of the room.
The northwest entry on the first floor is arguably harder to defend than the second floor. There is an incredibly limited view of the area just outside the door due, in large part, to the tank wreckage directly in front of the building.
The eastern side of the building is much easier to defend, especially if you’re using the second-floor window. There’s a clear view of the path leading to Farmhouse, so any potential attackers can be seen coming well before they get anywhere near the building. Because of the more favorable conditions, defenders should worry more about defending the northwest entries and have one teammate looking over the eastern, second-floor window.
If you’re on the attack, the obvious route to attack is the northwest side. If they’ve gone light on the eastern side, you can approach Farmhouse’s northwestern end, then wrap around to the building’s lower east entry and try for a flank. This is a very easy point to contest, so even if the enemy team is on it, getting inside the building and preventing them from getting points is a breeze. If you can contest it, sit and wait for more teammates to arrive before trying to completely remove the enemy threat. Getting killed needlessly before you have the support to make a full sweep of the building will only benefit the enemy team.
West Bunker Hardpoint

There are three points of entry to this Hardpoint, but perhaps the most important one is on the east end. While the other two entries are small doorways that are easily defendable, the east entry is a massive rupture in the bunker’s walls. You’ll need to stay west of the pillar to avoid attacks coming from that direction.
If you’re attacking this point, this is definitely a good spot to hit. Although with the wall forcing defenders to the west side of the pillar, you’ll have a much easier time dislodging them with some well placed grenades.
East Bunker Hardpoint

This is a very defensible Hardpoint, which is great for whoever reaches and stabilizes it first. If you’re one of the late ones, use Tunnel and East Trench to attack the point. Avoid using East Beach Lookout as your point of attack, however; there’s a machine gun emplacement there and snipers will have little trouble using the bunker as an overlook.
As a defender, huddle up in the corner of the small overhang on the west end of the bunker. You’ll be covered from potential attacks from East Beach Lookout and you can watch for attacks coming from Tunnel. As an added bonus, any enemies coming from the other end of the bunker won’t immediately have line of sight and you’ll be protected from grenade attacks.