
Call of Duty: WWII Guide Multiplayer Maps and Modes Carentan
Capture the Flag Tactics
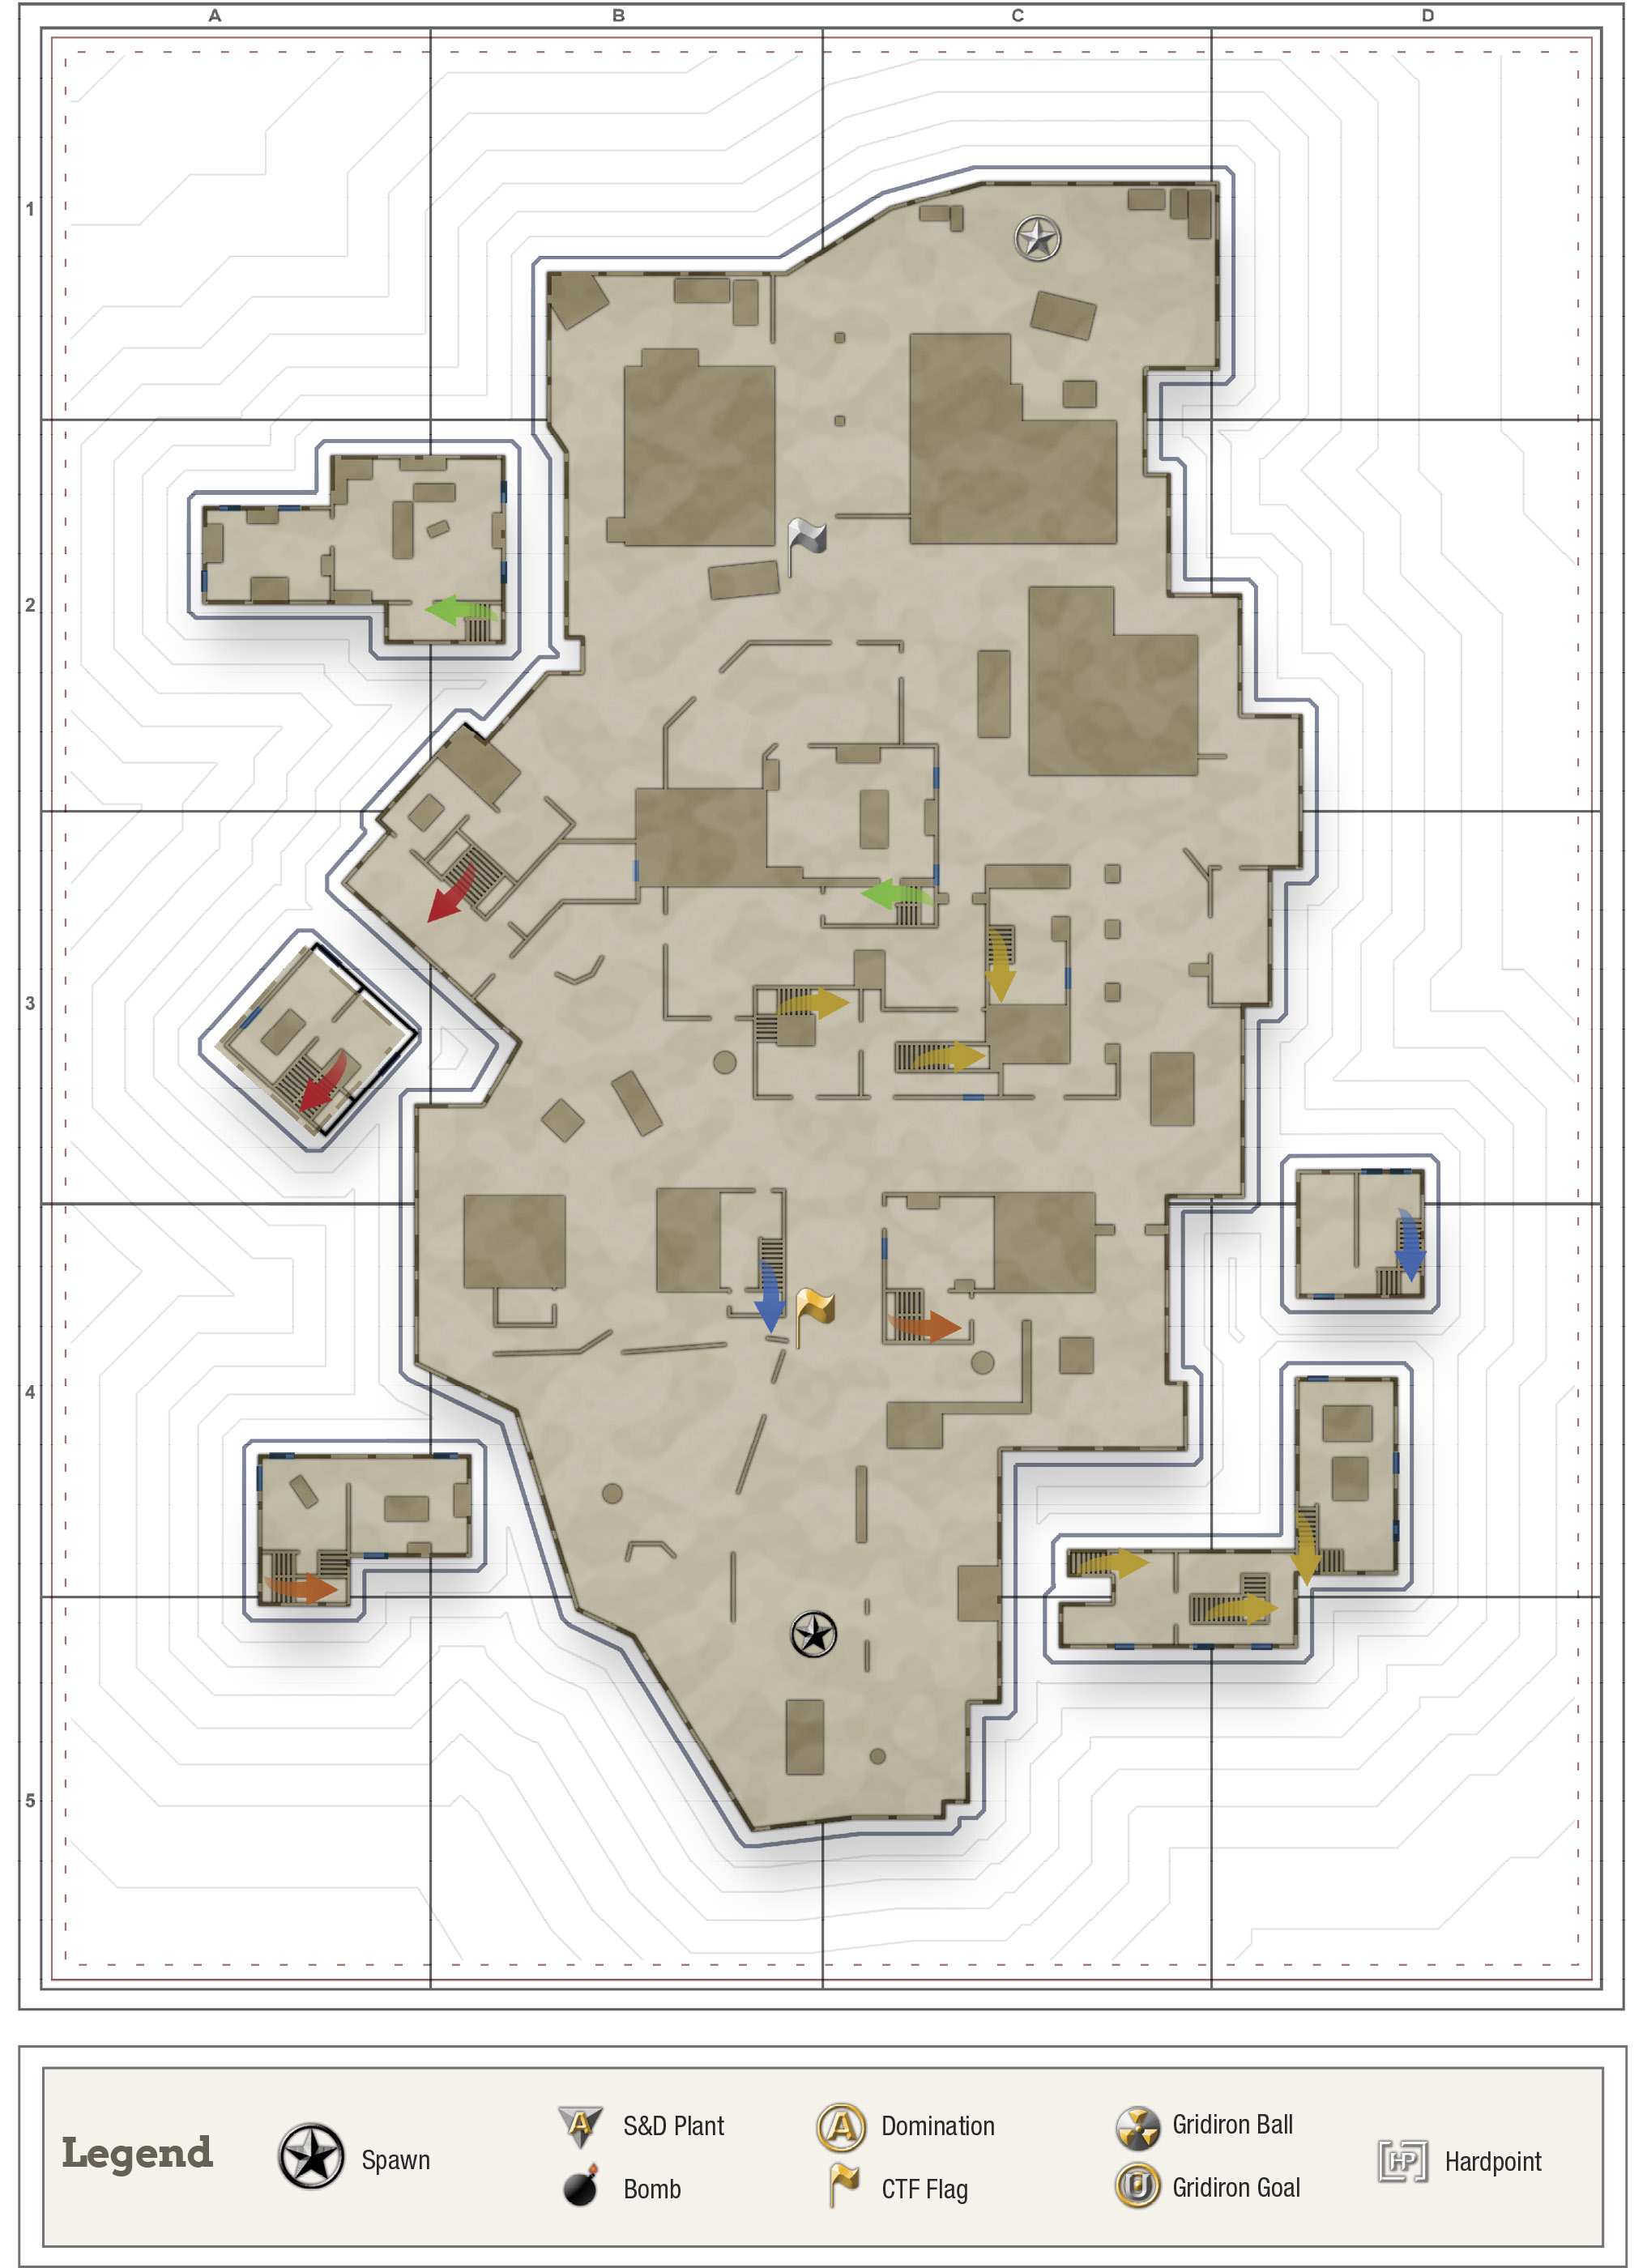


Flag A is on the Access Road. It’s a hard take compared to Flag B. Trying to take it by running straight down the Access Road is a great way to get killed, so stick to flanking positions. Coming from the Store, Archway Lot or the east Alley is a much better option. Plus, you’ll have a better chance of holding onto it if you use these same routes to escape.
You can make a rush for the Apartment to quickly get the flag back to your base, but you’ll be thoroughly exposed until you enter the building. Once inside, there’s a good chance to get that flag home, but getting into the Apartment is a whole different story. Running through the Archway Lot, then taking Cratered
Road while hugging its northern walls is a long trip, but a relatively safe one. Duck into the Foyer, then up the northern Alley for a good shot at bringing one home for the team.
Flag B is in the middle of Main Street and it’s much easier to take and harder to defend. If can get your hands on it, you can rush back to Headquarters or the Apartment and you’ll have a great shot at getting it home. The key to victory is to break the enemy line of sight as soon as you have the flag. With Flag B, it’s pretty easy to accomplish that task. That’s not to say that you won’t have a frenzied fight back to your base, but it’s a lot easier than running a straight path with zero cover after taking Flag A.
You can also use the Headquarters’ upstairs windows to help support your team’s flag push. You can use the Apartment’s upstairs windows in a similar fashion, but it really only helps if a teammate is running the enemy flag toward the Apartment.
If you want to properly defend Flag B, it’s best to hold both Headquarters and the Apartment. If you can disable the easiest escape routes for the enemy team, you’ll have a much better shot at keeping them from getting far once they have the flag in hand. It also has the duel benefit of making it harder for the enemy team to chase down an ally flag carrier. Sitting on Main Street isn’t the wisest move, since there are several overlooks onto the flag. Therefore, if you block off one potential enemy angle, you’ll have at least one other that will favor the enemy.