
Call of Duty: WWII Guide Multiplayer Maps and Modes Flak Tower
Domination Tactics
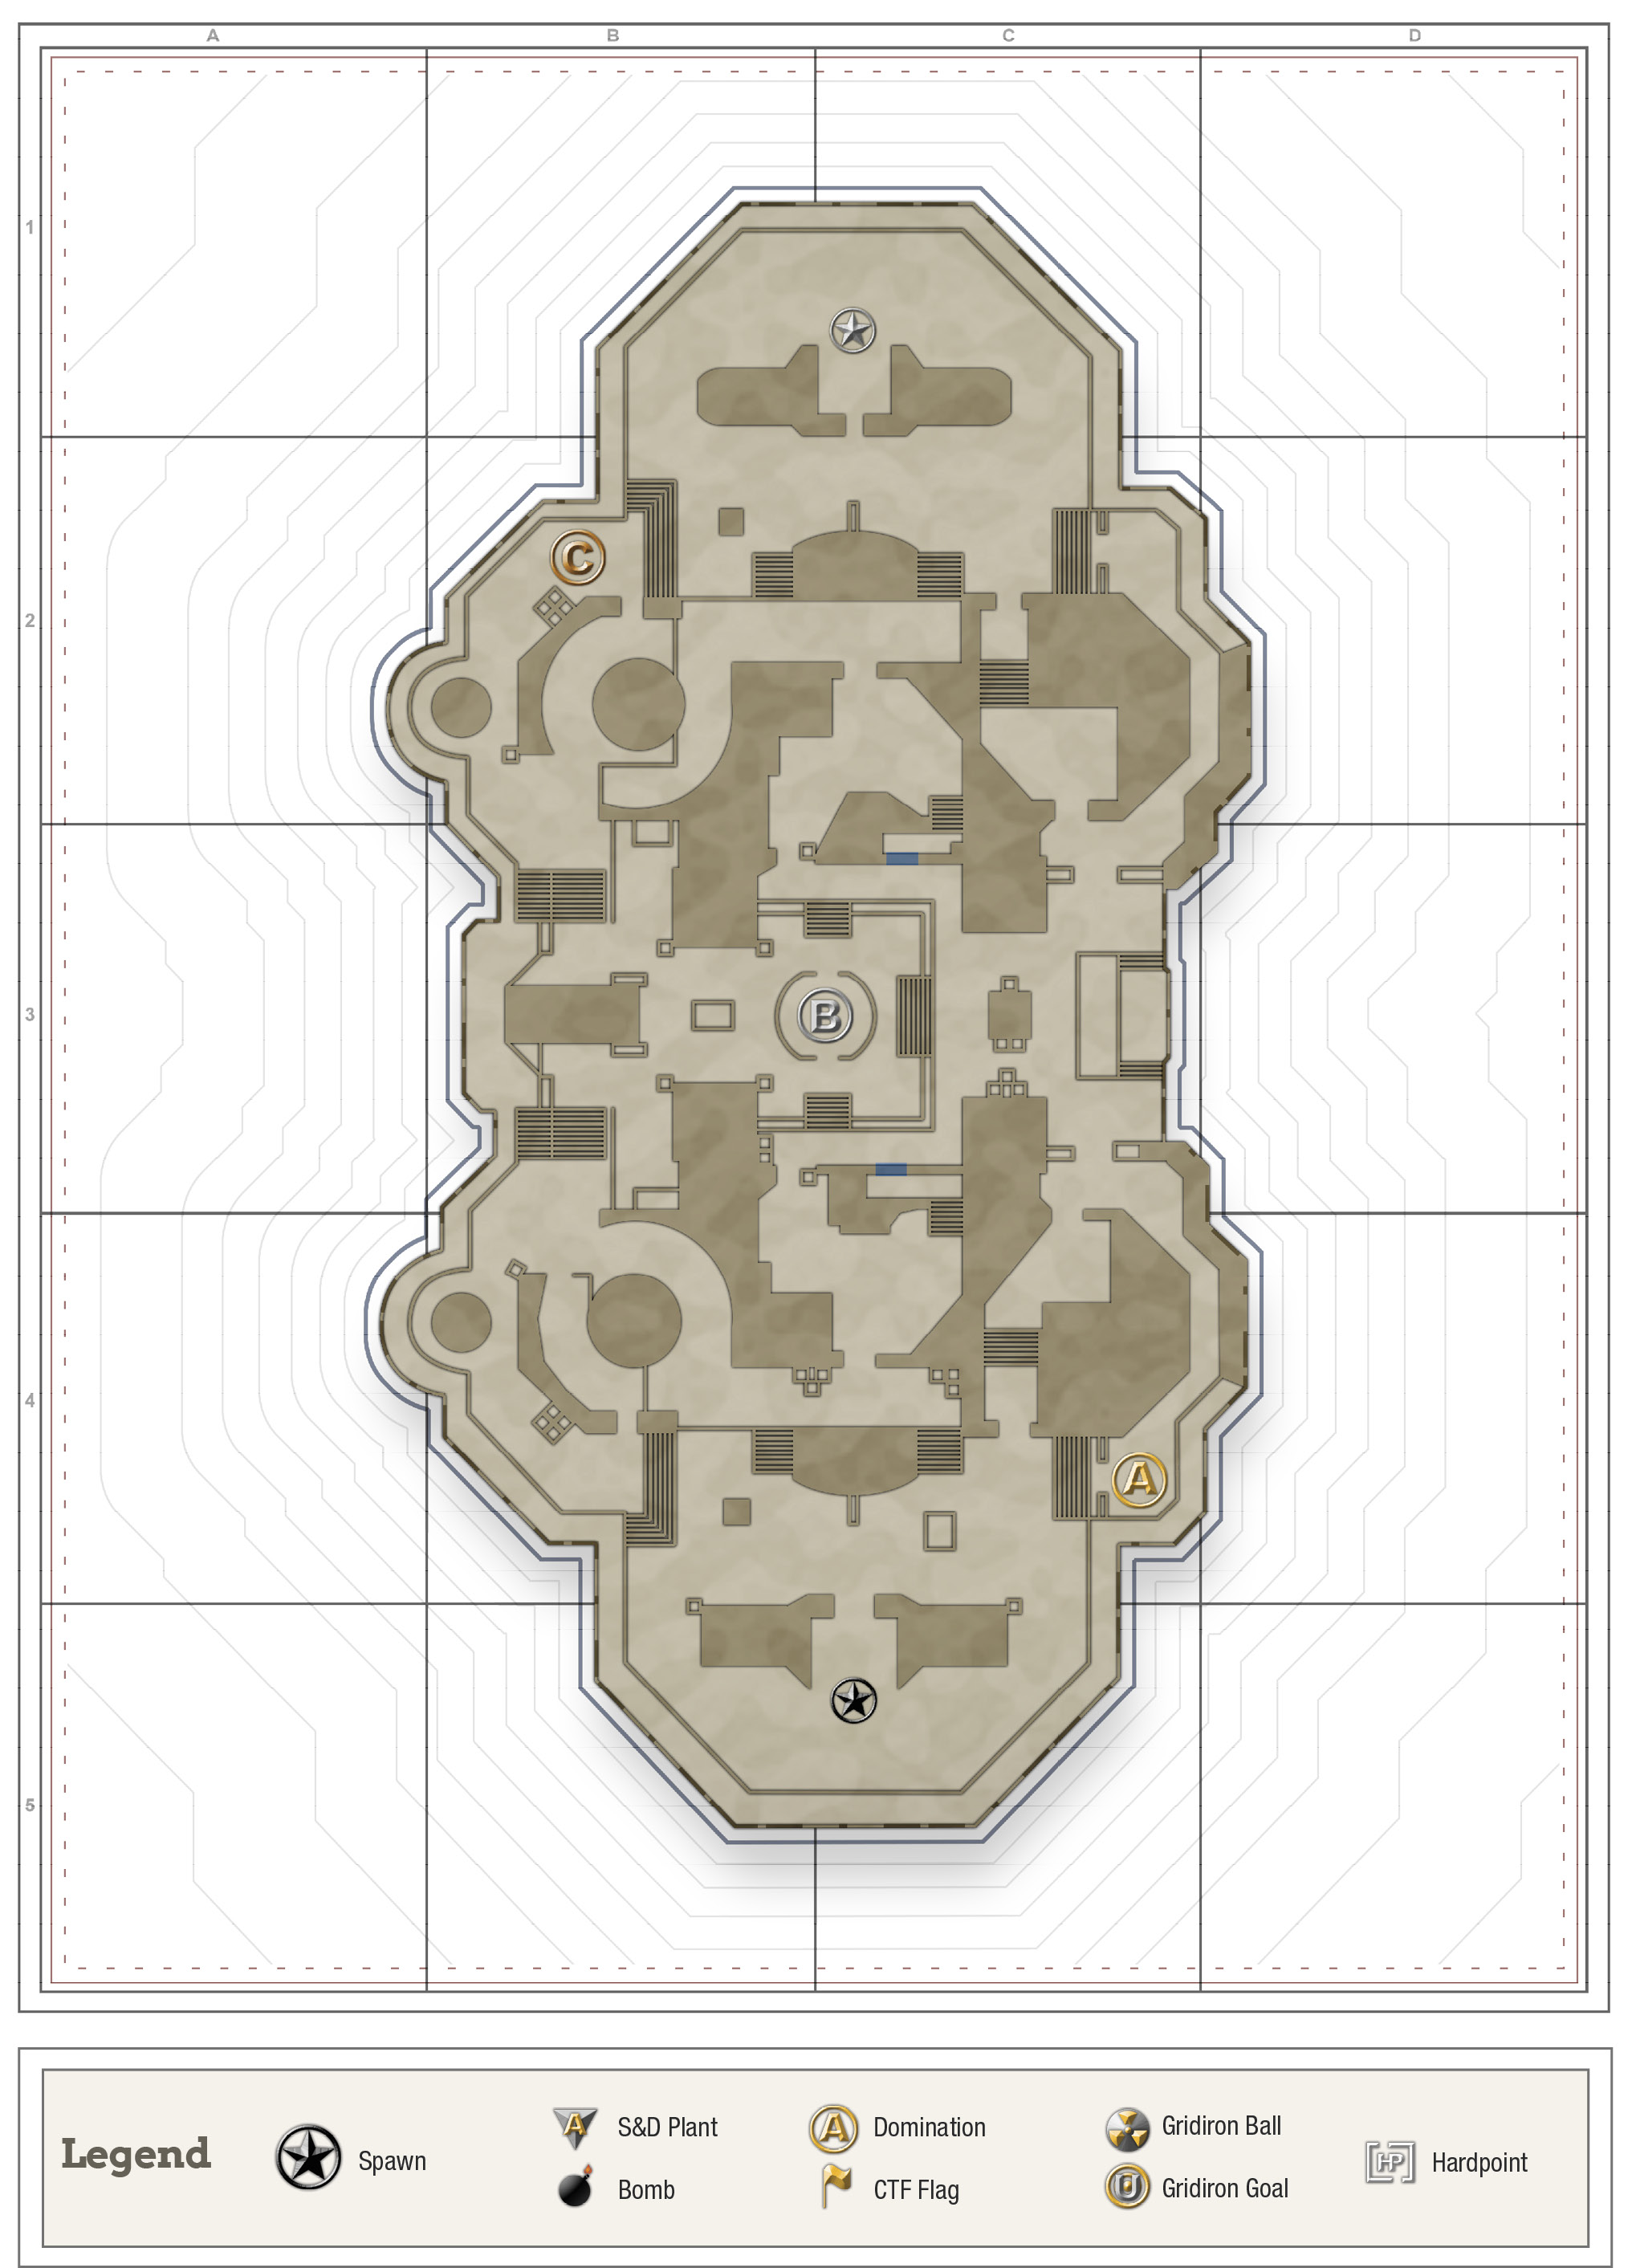
Point A

Domination on this map doesn’t have any particular tricks or flanking paths that you should use over others. Its open-ended design means as long as you’re moving and trying to find your way around and behind enemies, you’ll have a good time. However, there are a few tricks to use to capture and defend certain points.
Point A (located at SE Lookout) is fairly boxed in. Sandbags block off the path into the southern end of the map, while it rests perfectly at the end of the narrow, east side of the map. If you’re on the attack and sneak in from the north, you can go prone and set up shop with a sniper rifle or LMG to lay down some nice suppressive fire while capturing the point. It’d be unwise to stay for too long after capturing the point under these conditions, though; it will only be a matter of time before an avalanche of grenades fall on your head, or a sneaky flank comes in from behind.
Point B

Point B at the map’s center (appropriately titled Center) can be captured inside the small bunker or on top. You’ll be exposed to a lot more potential fire than if you’re inside, but you won’t have to worry about grenades rolling at your feet. Gauge the current combat situation and make the call on which part of the point would be the best place to capture from at that moment.
Point C

You can hold Point C at the NW Lookout by heading off slightly south from the point and using the defunct AA cannon as cover. You’ll have a nice view of the greater surrounding area, which is perfect for snipers, LMGs or rifles.