
Call of Duty: WWII Guide Multiplayer Maps and Modes London Docks
Hardpoint Tactics
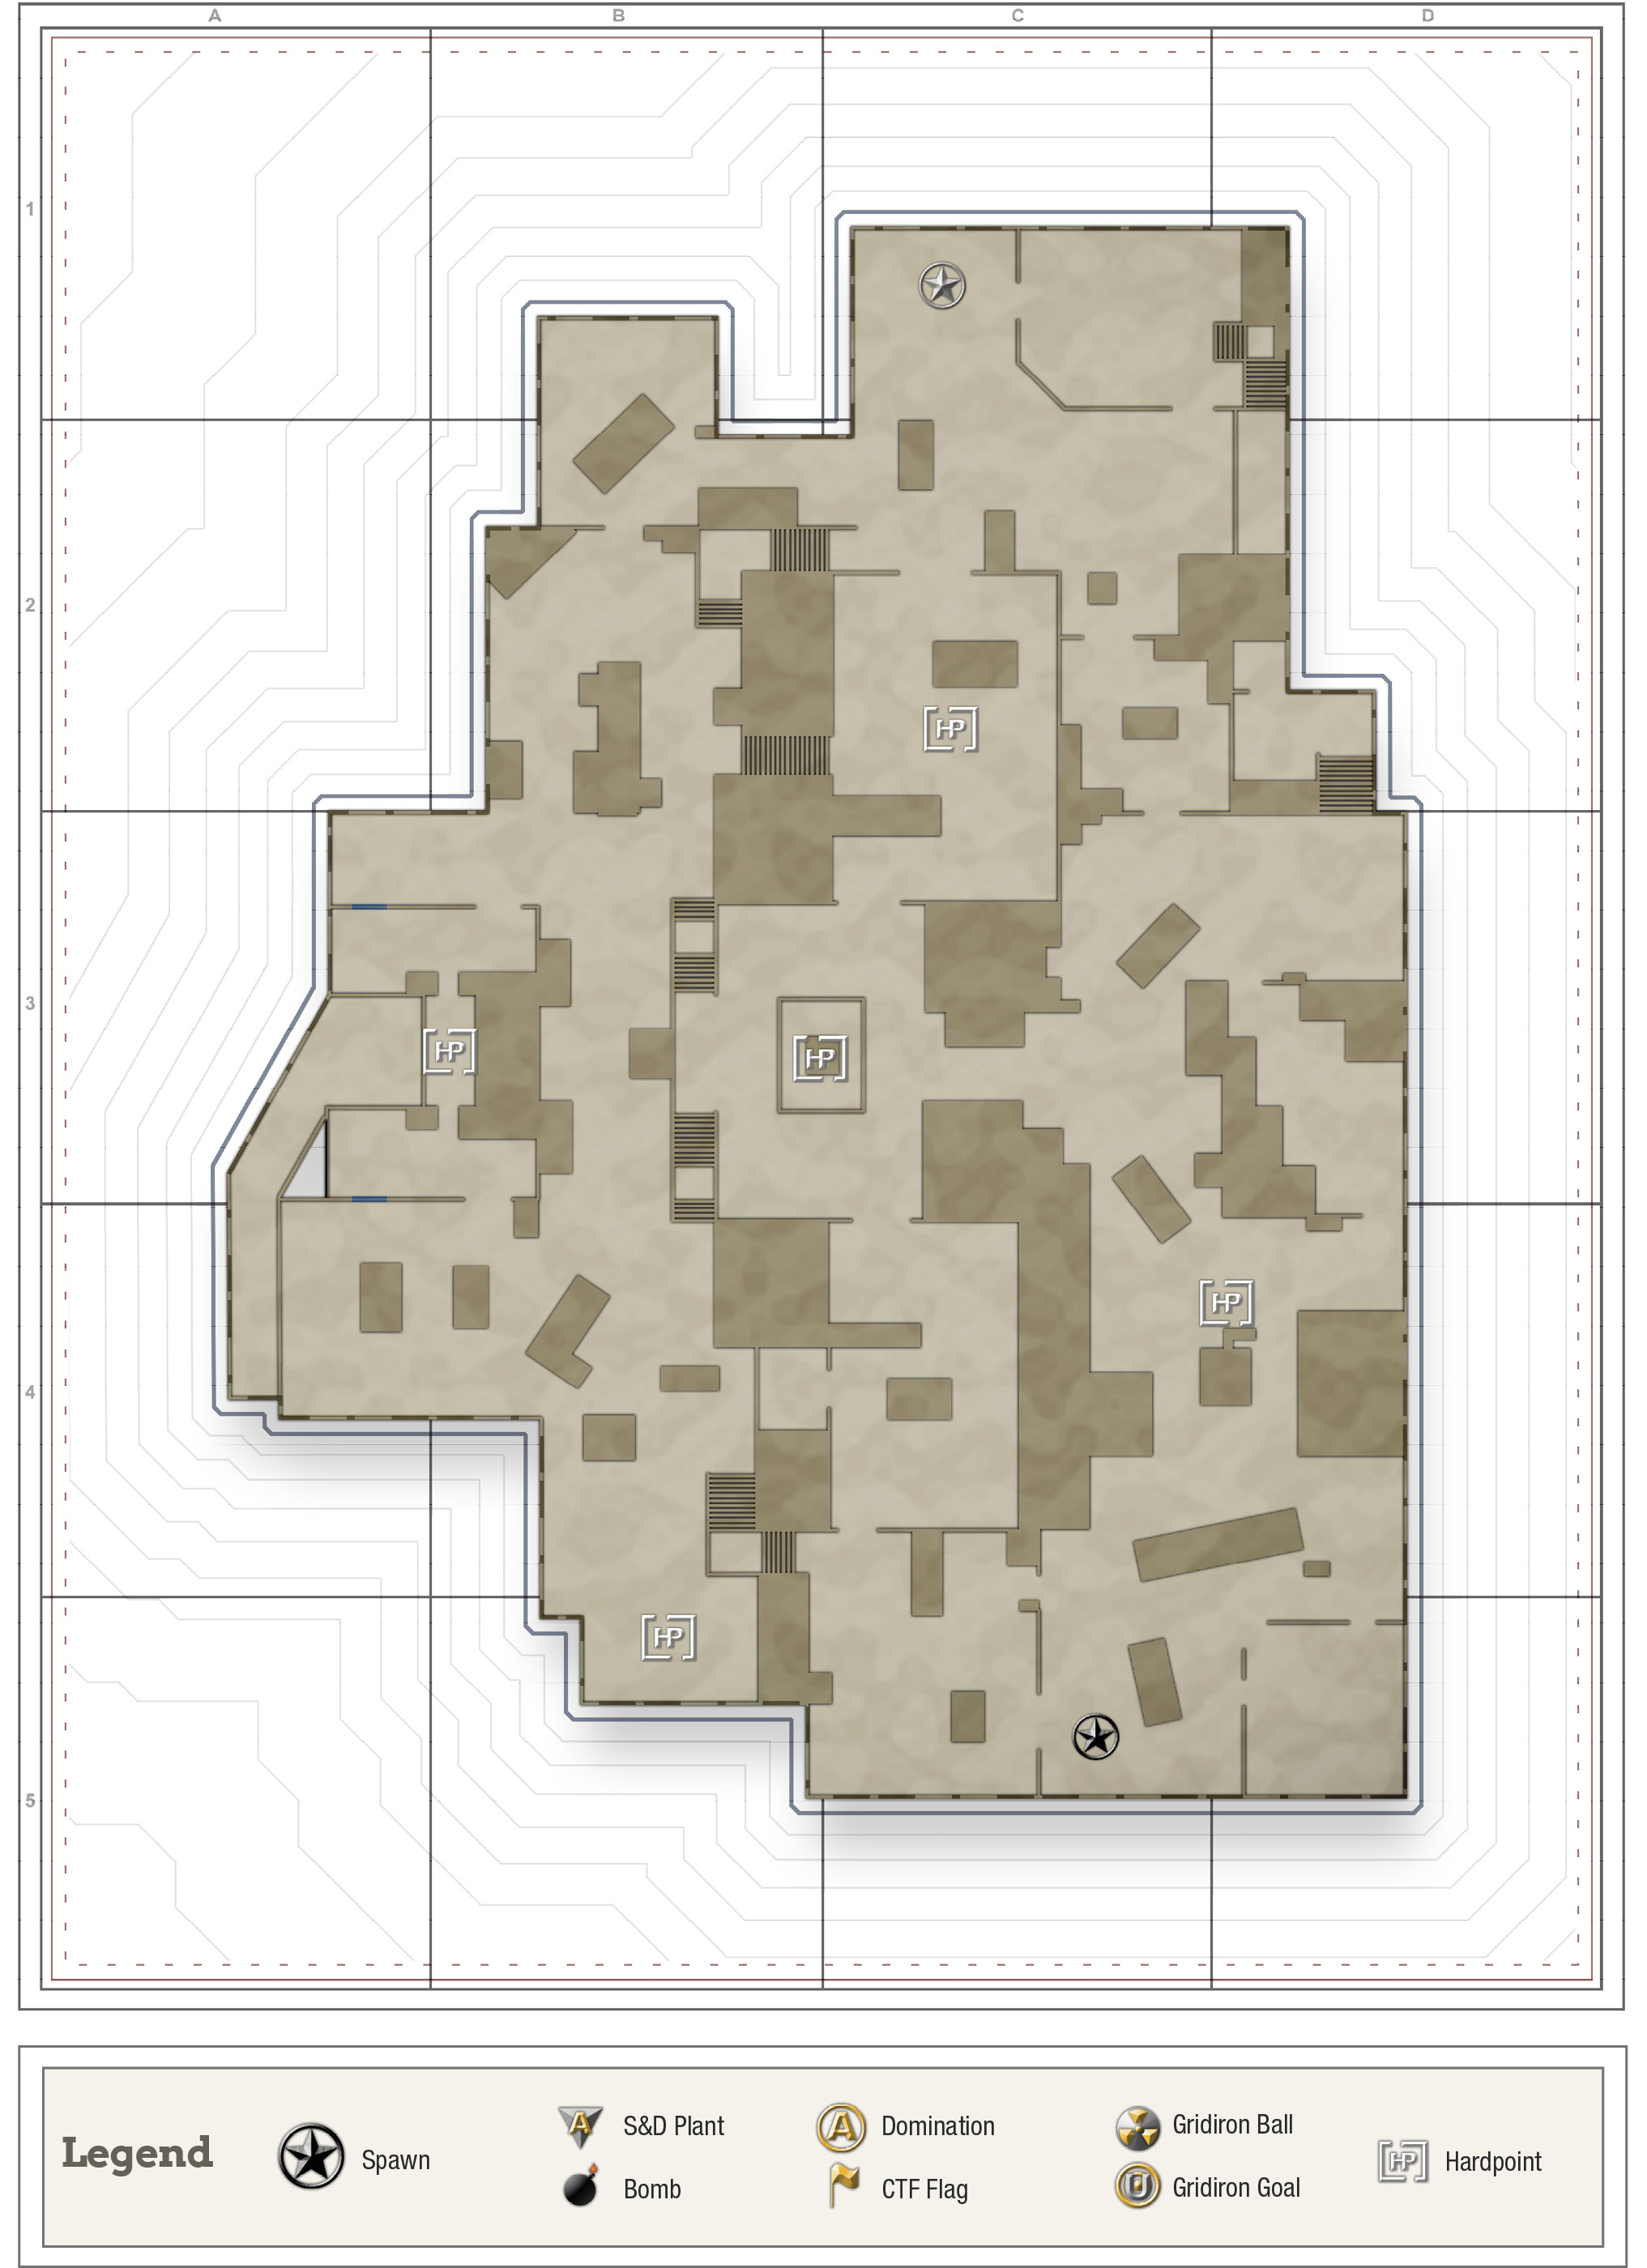
Statue Hardpoint

This is a Hardpoint that is sure to be heavily contested due to extremely limited cover and plenty of ways to get around defenders. Use the statue for cover, rotating around it as needed. Don’t expect to “win” this point. Instead, focus on keeping the enemy from scoring points on it by constantly contesting it. The Artillery Barrage, Glide Bomb, and Molotov Cocktail Scorestreaks work well for quickly clearing enemies. Grenades are also a viable option for forcing enemies off the Hardpoint.
Main Street Hardpoint

This is a very small Hardpoint with limited but serviceable cover. Expect attacks to come from the Fenced Backlot and through the Clocktower Building.
If you’re on the attack, a pincer strike with teammates will leave the defenders with nowhere to hide. Coming from either side forces them to the opposite side of their cover, which will leave them completely exposed to a teammate’s attacks from behind. Get some explosives on the Hardpoint before your strike and they’ll be scattered with little effort.
Docks Warehouse Hardpoint

This is a very defensible Hardpoint given its location. You’ll have a clear line of sight from the windows on either side of the warehouse, so utilize them if you’re playing with a mid or long-range weapon.
Some of the platforms lining the water below the Docks Warehouse are part of the Hardpoint and they make for a great defense or contest location. Expect flanks from here, so pay close attention to it. If you’re the one on the attack, hide down on the lower platform to contest the point. You don’t always need to score points to win this game mode; sometimes simply preventing the enemy team from scoring points is all you need to seal the deal.
Barrel Building Hardpoint

The Barrel Building is an extremely defensible point with plenty of cover. If your team is holding the Hardpoint, use the corners for defense. You’ll have little issue gunning down enemies as they enter the building while camping the corners. You won’t have a difficult time avoiding grenades, provided they aren’t specifically targeting your corner.
Make a point to watch the stairs leading up from the Docks. Players will use them to throw grenades directly into the room, generally causing enough chaos to throw your team out of balance.
If you’re attacking, use those same stairs to get grenades into the room. Whether you’re using Tactical or Lethal Equipment, any explosives that can break up an enemy formation is well worth the effort. However, don’t try to take the point from these stairs. There’s no cover anywhere near them, while your enemies will have plenty of protected places. Just stick to creating chaos to give your teammates attacking the other doors a fighting chance; that or make a play on those doors yourself.
Docks Crane Hardpoint

This Hardpoint is particularly small and is one of the most fortified—and least fortified—locations on this map. While you’ll be largely protected from long-range attacks coming from the Docks, you’ll be completely exposed to attacks coming from the opening in the Fenced Backlot’s fence. If you have at least one teammate on the Hardpoint, consider climbing up to the Fenced Backlot and making a defensive stand there. If you can prevent enemies from reaching that opening in the fence your teammates will stay safe.
On the other side of the coin, hit the opening hard when attacking the Fenced Backlot. Get grenades in there with reckless abandon and serve up your own special brand of chaos.