
Call of Duty: WWII Guide Multiplayer Maps and Modes Gibraltar
Domination Tactics
Point A

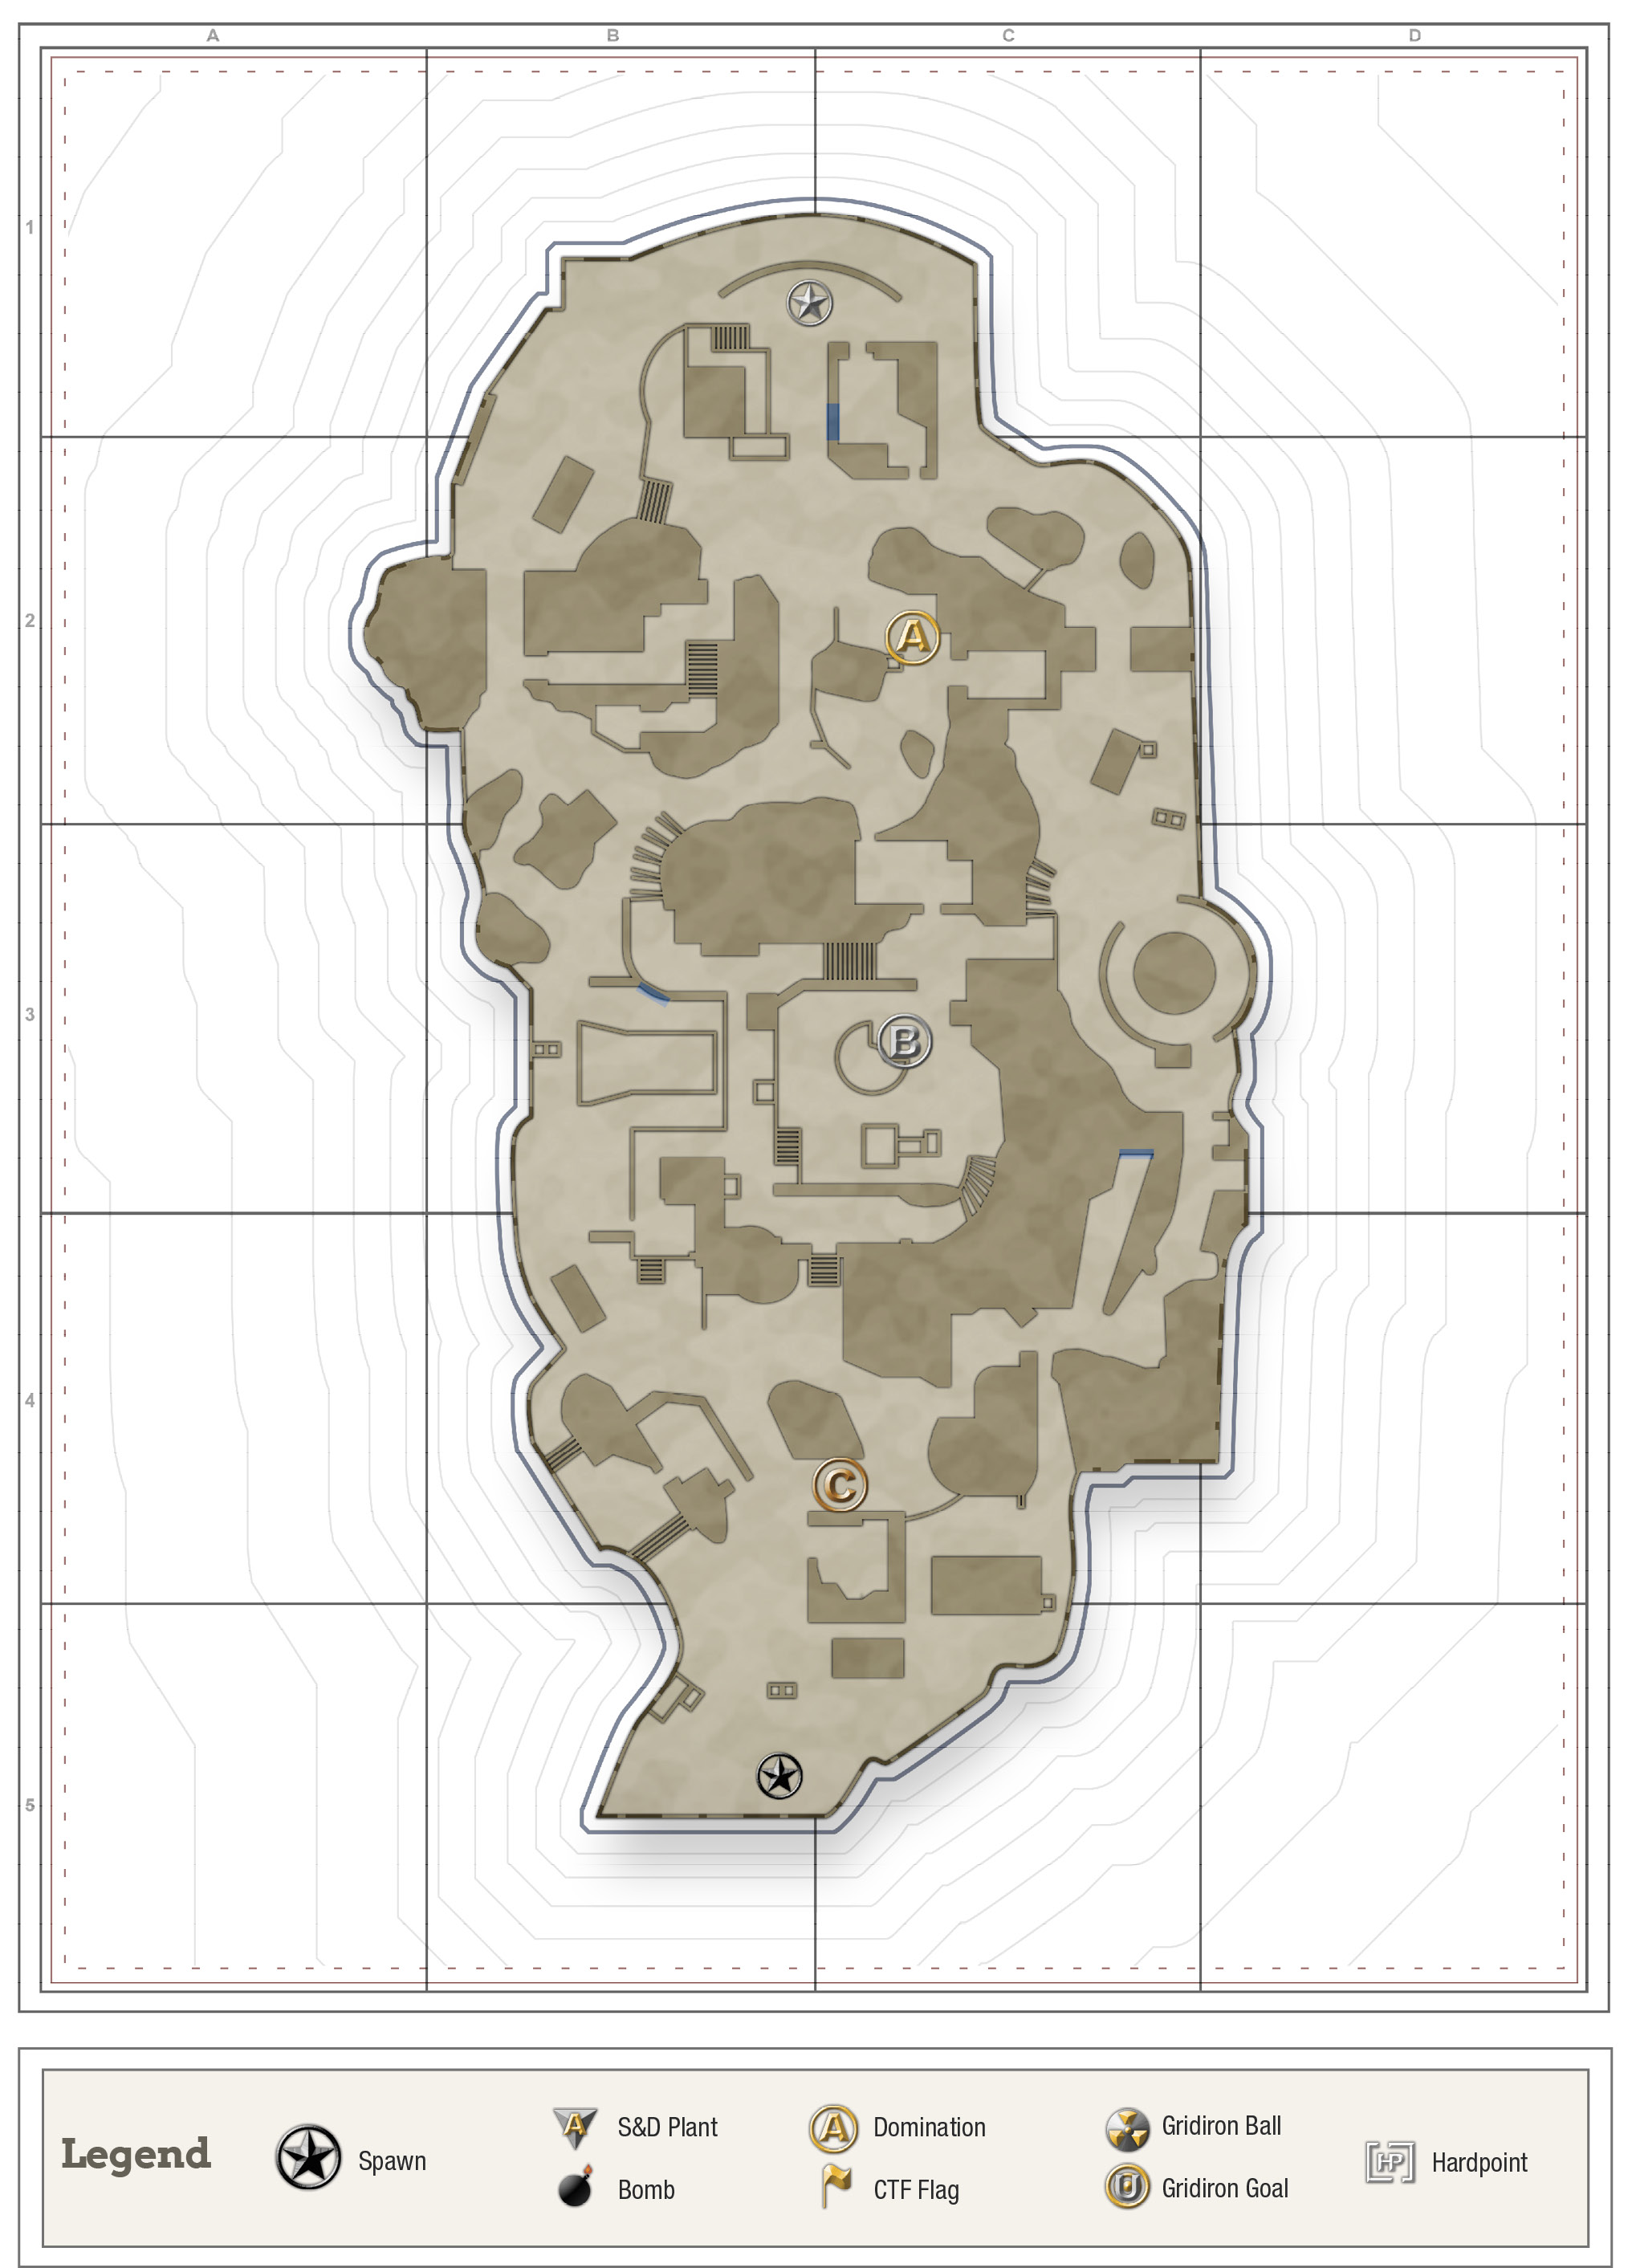
This is a difficult Domination map. Each point has plenty of different attack routes and limited cover. M18 Smoke Grenades can help provide a break from attacks and Artillery Barrages can be used to cut off enemy routes to a specific point, which will allow you to better gauge impending attacks.
The yellow barrel in Point A makes for good cover no matter what side of the map you’re coming from. Watch for flanks emerging from the Fort Comms building and use that same building if you’re coming from the Point C side to take Point A. If you’re on Point A and it is being taken from your team, wrap around the stone wall and flank instead of trying to charge in blindly.
Point B

Point B is a dangerous beast. There are plenty of places to attack and be attacked from overhead or from the flank. There’s not much that can be done about that. If you’re coming from Point C, hug the cover to the right of the flag. If you’re coming from Point A, stay close to the ladder on the flag platform in the middle of Pit Center.
This point can also be captured from on top of the flag platform, which might catch enemies approaching from Point A, but you’ll be at a disadvantage if you are coming from Point A.
Point C

Point C is easily the hardest point to take on this map. If you’re trying to capture it, odds are it’s in the enemy’s spawn. There’s very little cover, plenty of areas to get attacked from, and enemies will continuously spawn. Dropping an M18 Smoke Grenade on the point will give you a fighting chance to capture it, but even then it will be tough. Stay close to the western building and stay alert.