
Disney Epic Mickey 2: The Power of Two Guide Walkthrough Optional Quests
Optional Quests
Coming into this project, I knew that co-op was going to be HUGE and that the fans were really eager to have these two working together. As an animator I knew that I needed to really help “sell” co-op so that Mickey and Oswald’s combined abilities wouldn’t merely be just a rudimentary game mechanic, but that it would also have all of the dynamic punch needed to make seeing these two working together so rewarding. –Christian S.
The Bunny Wranglers
OVERVIEW
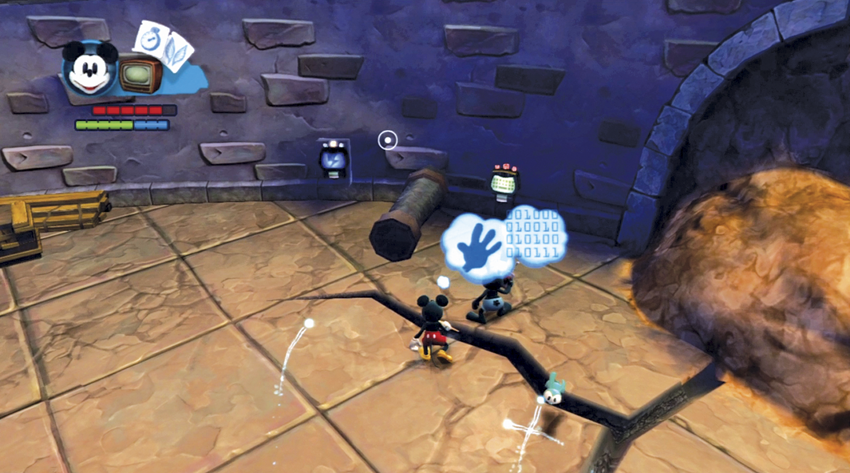
Bunny Children are scattered all around Wasteland. Paulie at the Ice Cream Parlor has installed special pipes that suck in the Bunny Children and transport them to his shop for ice cream. Ortensia in OsTown wants you to have Oswald reprogram these pipes so they will transport the Bunny Children home instead.
- Available: Episode 2
- Starting Zone: OsTown or Mean Street North
- Main Quest NPC(s): Ortensia, Paulie
- Associated Zones: Disney Gulch, Blot Alley, Train Tunnels, Fort Wasteland, Floatyard, Mean Street South
MEAN STREET SOUTH
DISNEY GULCH
BLOT ALLEY
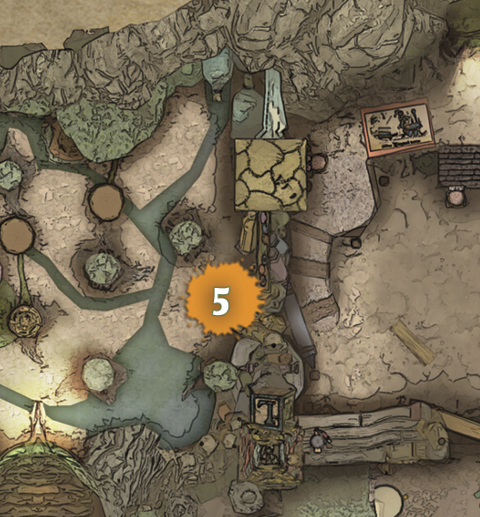
FORT WASTELAND
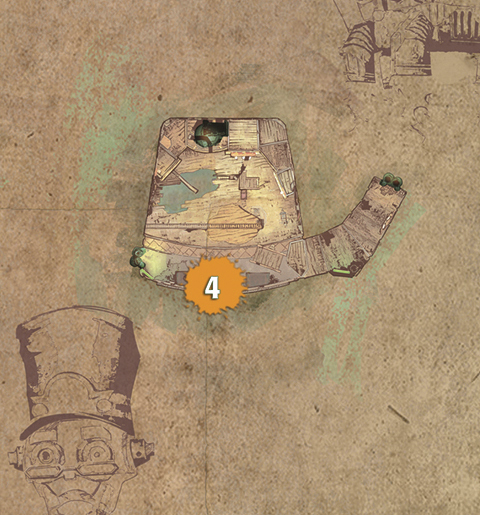
TRAIN TUNNELS
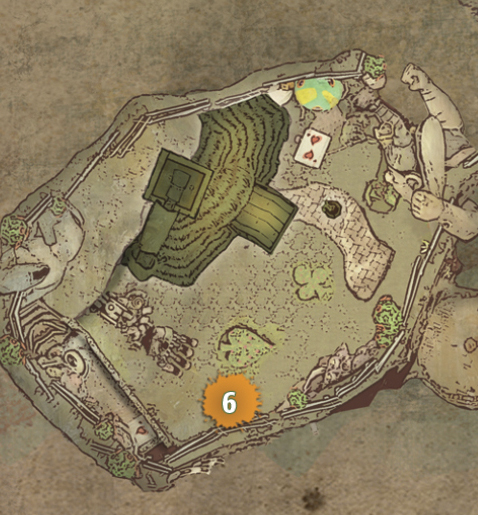
FLOATYARD
TASK
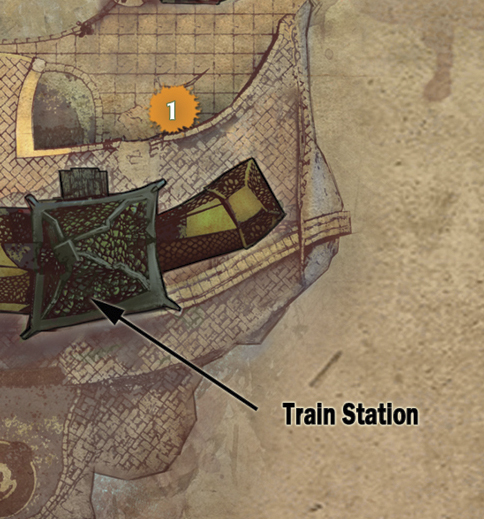
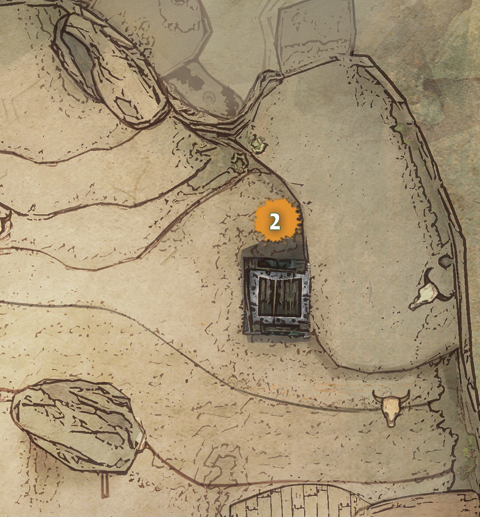
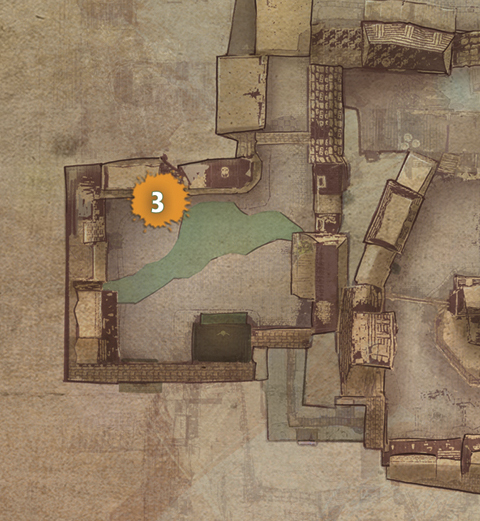
The Bunny Children start appearing in the second visit to certain levels. You need to get them to follow you over to the pipe and then decide where to send them.Thin the cover over the console so Oswald can shock it if you want to send the Bunny Children to Paulie’s Ice Cream Parlor. If you want to send them to Ortensia, you can paint in the console and have Oswald reprogram it. The following areas have five Bunnies appear on the second visit, and pipes appear at the following locations:
- Waypoint 1: Mean Street South
- Waypoint 2: Disney Gulch
- Waypoint 3: Blot Alley
- Waypoint 4: Train Tunnels
- Waypoint 5: Fort Wasteland
- Waypoint 6: Floatyard
CHOICE 1
Send the Bunnies to Ortensia.
Rewards:
- 5 Bunnies: Ortensia says to bring back more Bunny Children and she’ll find a reward.
- 10 Bunnies: The Bunnies start showing up outside Ortensia’s house for the Thanks for the Memories quest.
- 15 Bunnies: Bronze Pin
- 20 Bunnies: 2 Bronze Pins
- 25 Bunnies: 3 Bronze Pins
- 30 Bunnies: 3 Bronze Pins
Complete the quest for Ortensia: Not Quite 101 Pin
CHOICE 2
Send the Bunnies to Paulie.
Rewards:
- 5 Bunnies: 100 E-tickets
- 10 Bunnies: 100 E-tickets
- 15 Bunnies: 200 E-tickets
- 20 Bunnies: 200 E-tickets
- 25 Bunnies: 500 E-tickets
- 30 Bunnies: 1,000 E-tickets
- 30 Bunnies: I Scream, You Scream Pin (for completing the quest for Paulie)
A Captain’s Life for Me
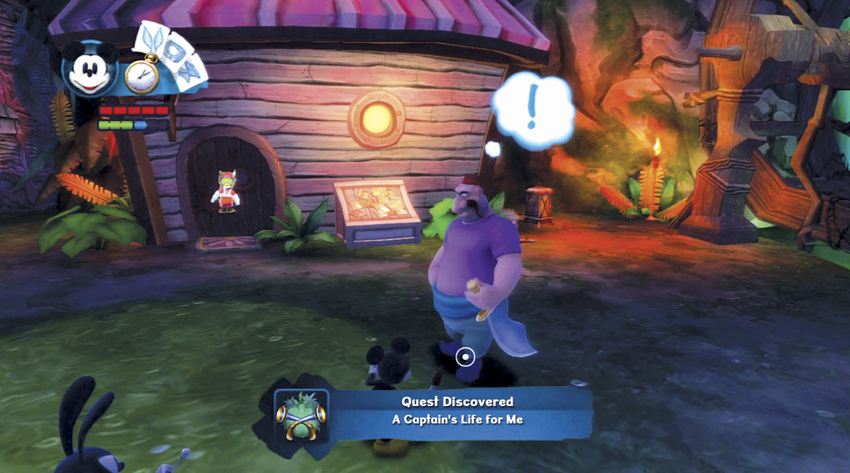
OVERVIEW
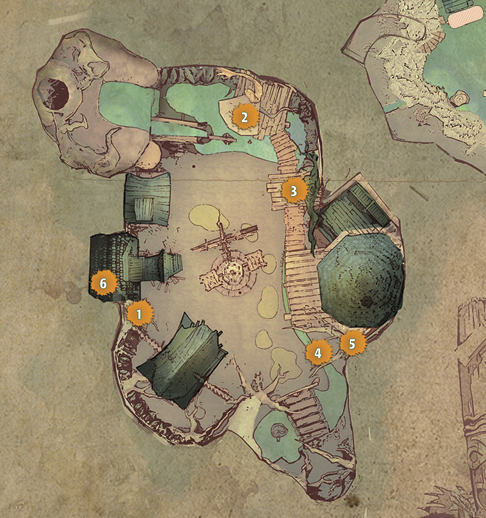
The Animatronic Captain Hook has disappeared and two pirates, Damien Salt and Beluga Billy, are both eager to become his replacement. Each pirate needs your help to take over the role as captain of the pirates. Damien wants to become captain so that he can win the heart of his true love. Billy wants to lead the pirates back to their old home of Tortuga.
- Available: Episode 2
- Starting Zone: Ventureland
- Main Quest NPC(s): Damien Salt (near DNN building), Beluga Billy (in front of train station)
- Associated Zones: Autotopia
PART 1
Both pirates are looking for a hidden item that requires the Giant Pearl to find. There are several ways to acquire the Giant Pearl:
- Buy the Giant Pearl from Tiki Sam for E-tickets
- Trade the Pearl of Wisdom (from Autotopia) to Tiki Sam for the Giant Pearl
- Sneak into the back of Tiki Sam’s shop and borrow the Giant Pearl (you’ll lose access to Tiki Sam’s shop)
PART 2
After you have the Giant Pearl, choose between helping Damien Salt or Beluga Billy.
CHOICE 1
Help Damien Salt by finding Captain Hook’s Treasure.
Step A
Take the Giant Pearl up to the Tiki Head on top of the Thinner falls and place it there.
Step B
Paint in the three mirrors in the Ventureland area:
- Waypoint 1: On the tree next to the train station roof
- Waypoint 2: Above the elevator
- Waypoint 3: On the toon tree above the door leading to the Thinner Cruise ride.
Step C
Return to the Tiki Head and get Captain Hook’s Treasure from the red chest.
Step D
Return the treasure to Damien.
- Reward: Love Conquers All Pin; Booty to the Head Pin from secret thinnable side wall entrance to the Captain's quarters
CHOICE 2
Find the Map of Tortuga for Beluga Billy.
Step A
Place the Giant Pearl on the desk inside the Captain’s quarters.
Step B
Find and activate three switches in the Ventureland area:
- Waypoint 4: Between the Crow’s Nest and the tree in front of the Captain’s quarters
- Waypoint 5: Inside the tree in front of the Captain’s quarters
- Waypoint 6: On the train station roof
Step C
Go to the secret door under the bridge at the Ventureland entrance for the Map of Tortuga.
Step D
Return the Map of Tortuga to Billy.
- Reward: Careful Planning Pin; Booty to the Head Pin from secret thinnable side wall entrance to the Captain’s quarters
Clothes Make the Spatter
Overview
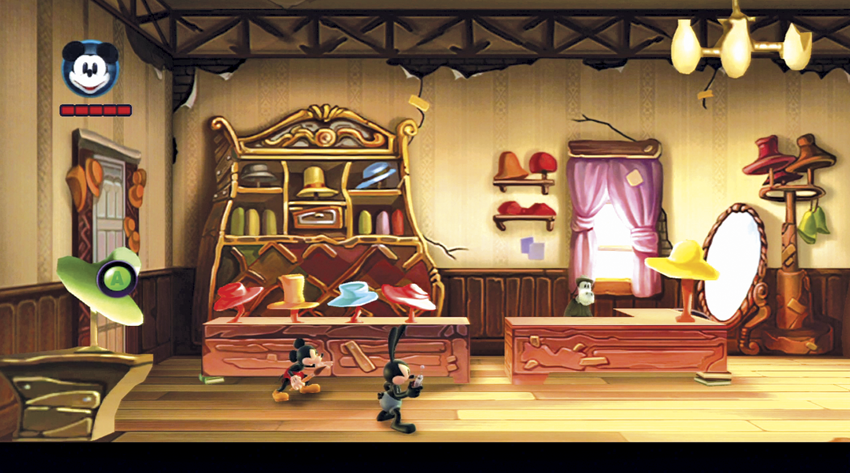
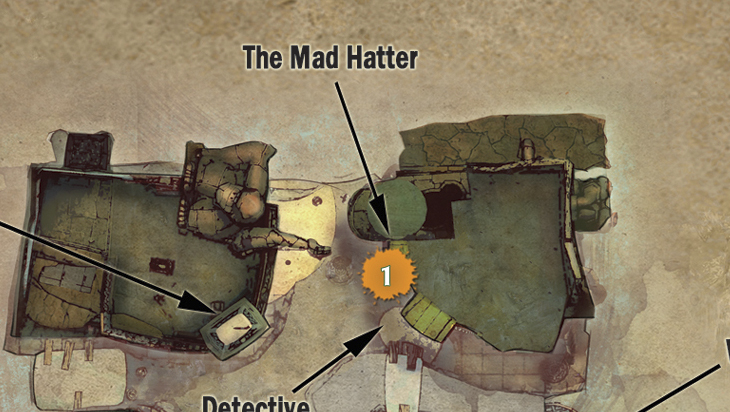
If you take a friendly route through Blot Alley, on the second visit Ian asks you to help make clothes for all the friendly Blotlings. He needs you to go to the Mad Hatter shop on Mean Street and have the Haberdasher make the clothes. Clarabelle in OsTown also would like you to make some Flower Costumes to repopulate her garden. You can collect cloth all over Wasteland, which can then be spent on making the costumes. Note that you can only do Clarabelle’s side of the quest if you help her with her Flower Spatter part of the Horace’s Assistant Assistance quest.
- Available: Episode 2 (second visit)
- Starting Zone: Blot Alley or OsTown
- Main Quest NPC(s): IIan, Clarabelle, the Haberdasher
- Associated Zones: Mean Street South, OsTown
Choice 1
You can help Ian by going to the Mad Hatter shop (Waypoint 1) and spending cloth to make four costumes for his Blotlings.
- Reward: Spatter Stylist Pin
Choice 2
Clarabelle would like you to instead use your cloth to make Flower Costumes at the Mad Hatter (Waypoint 1). Each Flower Costume you return to her gets you a discount coupon at one of the shops in Wasteland.
- Reward: The Green Thumb Pin, if you return all five Flower Costumes to Clarabelle
Creative Threedom
OVERVIEW
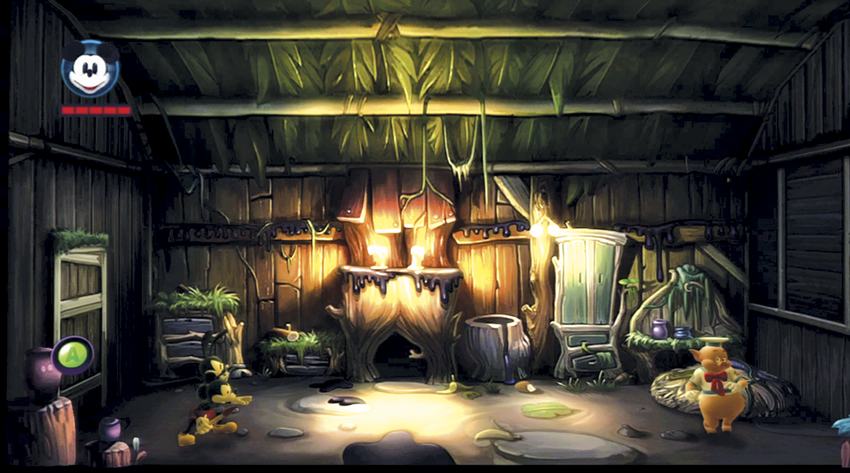
The Three Little Pigs have built a recording studio and need to pay off the debt from building it. Fifer Pig at the Cinema in Mean Street North has a deal in place, but he needs you to find his brothers so they can sign off on the deal. If you find either of the lost brothers before talking to Fifer Pig, they will start the quest instead.
- Available: Episode 1
- Starting Zone: Mean Street North, OsTown or Fort Wasteland
- Main Quest NPC(s): Fifer Pig, Fiddler Pig, Practical Pig
- Associated Zones: OsTown, Fort Wasteland, Ventureland, Bog Easy, Mean Street North, Mean Street South, Disney Gulch
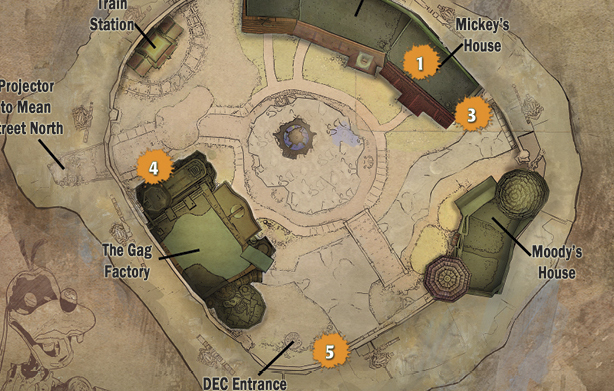
OSTOWN
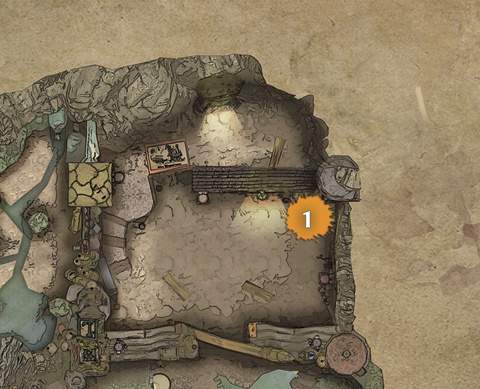
FORT WASTELAND
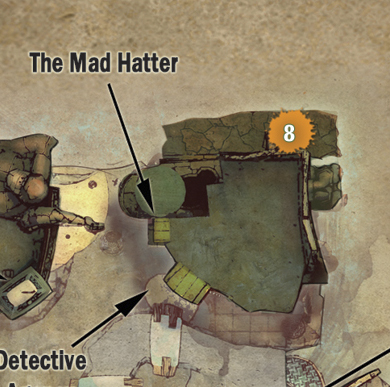
MEAN STREET SOUTH
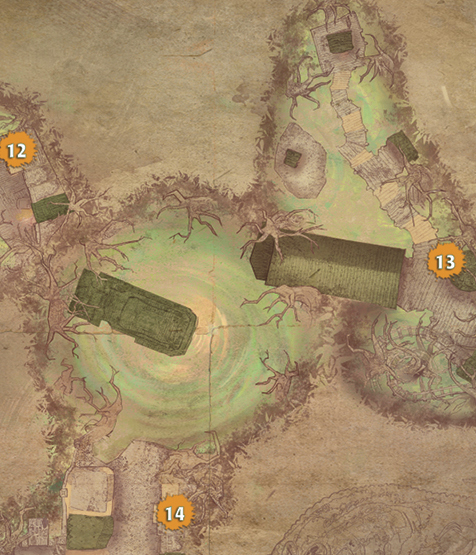
BOG EASY
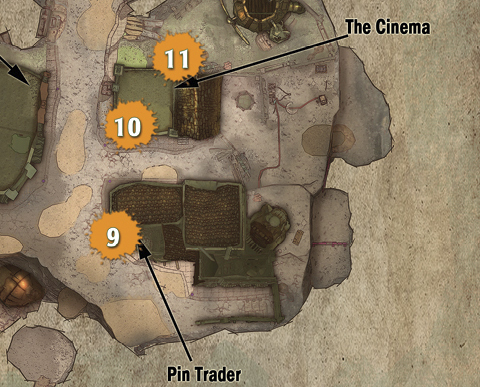
MEAN STREET NORTH
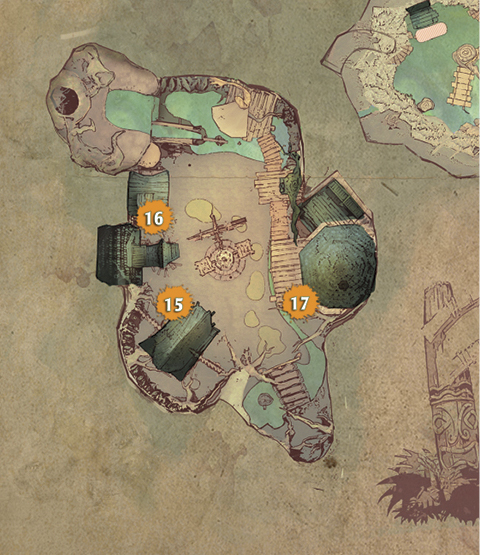
VENTURELAND
PART 1
Track down the missing pigs.
- Waypoint 1: Practical Pig is in Mickey’s House in OsTown if you complete “Goofy’s Fountain Mishap” quest in OsTown (visit 2).
- Waypoint 2: Fiddler Pig is in the jail at the end of Fort Wasteland.
PART 2
The reunited pigs return to their recording studio and need help paying off their 5,000 E-ticket debt.
CHOICE 1
Pay off the whole debt yourself for 5,000 E-tickets.
- Reward: All Ears Pin and a cut of the recording sales each time you return to their studio
CHOICE 2
Go to the Usher in the Mean Street North Cinema and ask him to pay off the debt in exchange for the pigs making music for his movies.
- Reward: 3 Bronze Pins and 50 E-tickets
CHOICE 3
Help the pigs put out a record to raise the money.
Step A
Find a replacement fiddle for Fiddler Pig from Tiki Sam’s shop in Ventureland or the bottom of the sinkhole in OsTown.
Step B
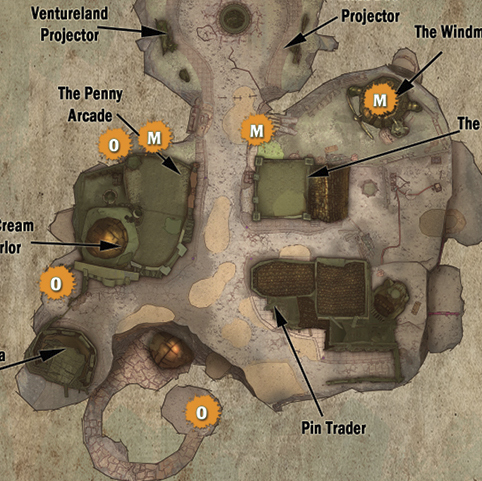
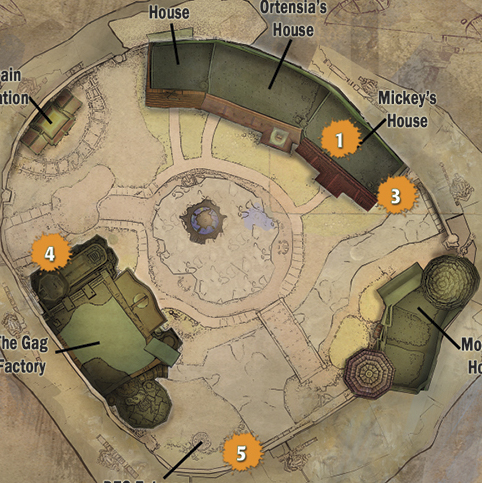
Paint the phone boxes in the towns around Wasteland. There are three each in OsTown, Mean Street North, Mean Street South, Bog Easy, and Ventureland.
- Waypoint 3: OsTown – On the side wall of Mickey’s House
- Waypoint 4: OsTown - On the Gag Factory wall near the projector entrance
- Waypoint 5: OsTown - Near the D.E.C. entrance
- Waypoint 6: Mean Street South – On the wall next to the Observatory elevator
- Waypoint 7: Mean Street South – On the right wall of the flower garden area
- Waypoint 8: Mean Street South - On the outer wall next to the large hat over the Mad Hatter shop.
- Waypoint 9: Mean Street North - On the wall just to the left of the tunnel to lower area
- Waypoint 10: Mean Street North - On the wall on the roof of the Cinema
- Waypoint 11: Mean Street North - On the northern wall of the Cinema, opposite the Windmill entrance
- Waypoint 12: Bog Easy – On a wall in Shanty Town
- Waypoint 13: Bog Easy – Near the forge in the Docks
- Waypoint 14: Bog Easy – On the rooftop in Old Town
- Waypoint 15: Ventureland – On the right wall of Tiki Sam’s shop
- Waypoint 16: Ventureland – On the left wall of the DNN building
- Waypoint 17: Ventureland – On the wall of the pigs’ recording studio
Step C
Bring back the missing pigs. Fiddler is in OsTown, and Fifer is in Disney Gulch.
- Reward: All Ears Pin
Donald’s Date
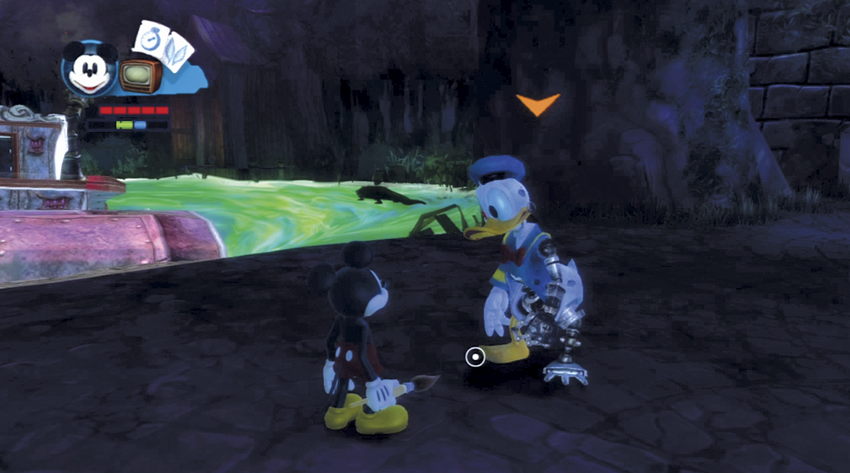
OVERVIEW
Animatronic Donald (Waypoint 1) is late for a date with Animatronic Daisy and his boat is broken. Donald needs you to ask Gremlin Sparks (Waypoint 2) to fix his boat. On the second visit to Bog Easy, Sparks can help to repair the boat, but he needs some help of his own first.
- Available: Episode 2 (second visit)
- Starting Zone: Bog Easy
- Main Quest NPC(s): Donald Duck (Waypoint 1), Sparks (Waypoint 2)
- Associated Zones: Ventureland
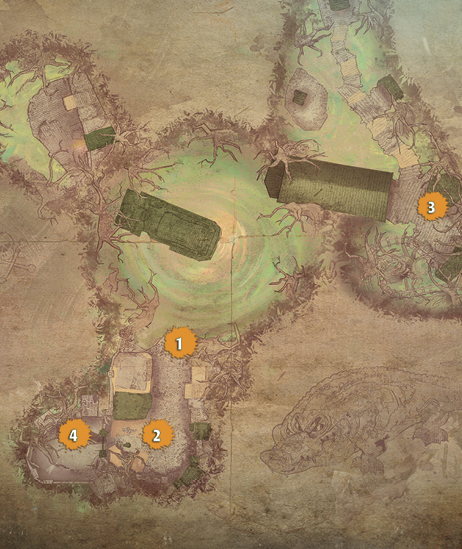
bog easy
PART 1
Before Sparks can fix Donald’s boat, his forge (Waypoint 3) must be repaired. Go to Sparks’s forge at the Docks in Bog Easy. Oswald can enable a temporary generator to get you on the forge roof.
CHOICE 1
Pay Scrap Metal to Sparks and have him repair it.
CHOICE 2
Fix the broken hatch on the roof with Paint or Thinner.
- Reward: Jumpstart Pin (If you used Thinner, you must pay Scrap Metal or miss out on the pin.)
PART 2
Once the forge is repaired, Sparks needs you to get a gear from Ghost Gilbert at the graveyard (Waypoint 4) in Old Town. The choice in this quest will influence the game ending.
CHOICE 1
Gilbert offers a fake gear to give to Sparks instead of the real one.
- Reward: Gotcha Pin and Scrap Metal, more concept art for sale at Le Bat En Rouge (However, Donald’s repaired boat is nothing special and he’s late for his date, so Daisy will be upset.)
CHOICE 2
Solve the statue puzzle in the graveyard to get the real gear, but Gilbert offers to buy it from you for E-tickets and gives you the fake gear.
- Reward: Same as above plus 1,000 E-tickets
CHOICE 3
Solve the statue puzzle and return the real gear.
- Reward: 20,000 Leagues Under the Thinner Pin and Donald’s boat is upgraded to a submarine; Donald and Daisy happy at the end (Daisy also awards the Diving Miss Daisy Pin when you meet her in Episode 3.)
The Encyclopaedia Wastelandica
OVERVIEW
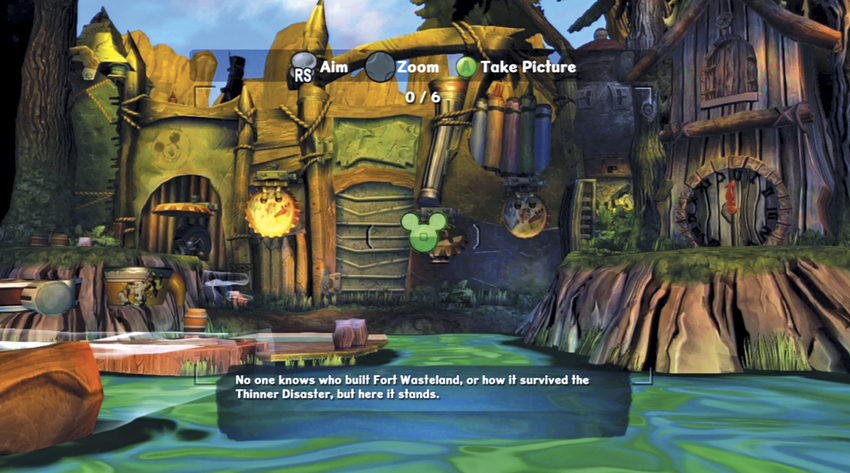
Adelle in the Camera Shop wants to catalog the changes made to Wasteland by the quakes. She needs you to explore Wasteland and take pictures of major landmarks.
- Available: Episode 1
- Starting Zone: Mean Street North
- Main Quest NPC(s): Adelle
- Associated Zones: Rainbow Falls, Rainbow Caverns, Disney Gulch, Blot Alley, Fort Wasteland, Train Tunnels, Floatyard, Autotopia
RAINBOW FALLS
FORT WASTELAND
RAINBOW CAVERNS
TRAIN TUNNELS
DISNEY GULCH
FLOATYARD
BLOT ALLEY
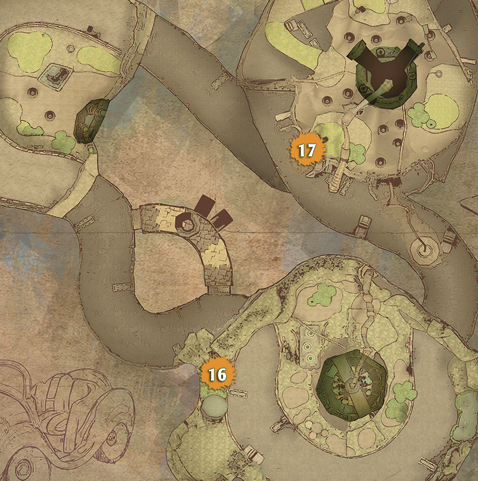
PART 1
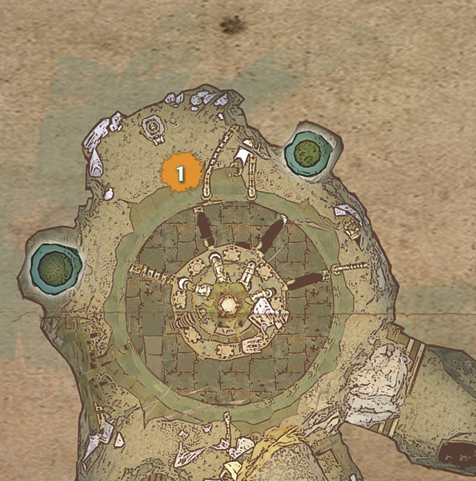
RAINBOW FALLS:
- Waypoint 1: A shot of the falls
- Picture Spot is near the edge of the main room, overlooking the Falls.
- Gus’s comments reflect whether the pipes were restored or thinned.
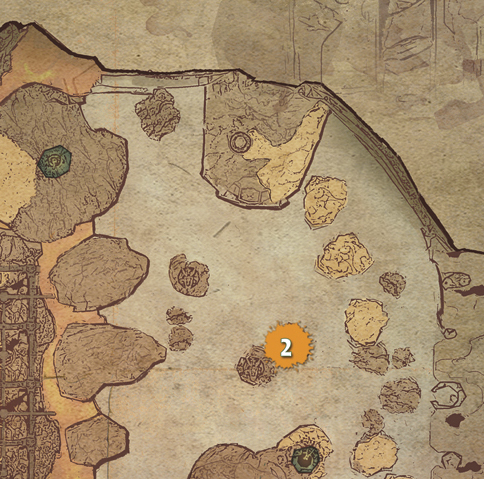
Rainbow Caverns:
- Waypoints 2 and 3: A shot of the angel
- There are two Picture Spots in the level:
- One in the small cave on the Devil Side (by red chest)
- Another is on one of the stone pillars to the right of the Angel’s Sword.
- Gus comments on whether the Angel was restored, and from which side the picture was taken.
DISNEY GULCH:
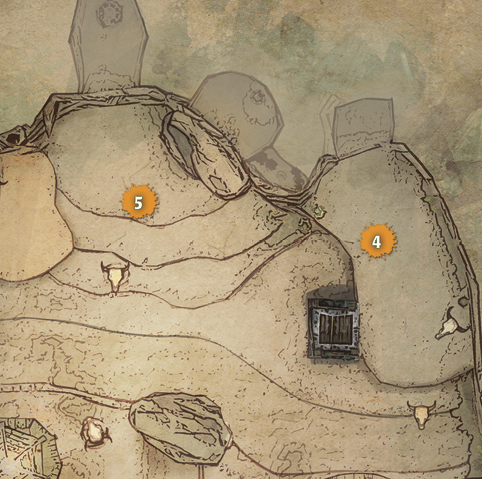
- Waypoint 4: A shot of the main Guardian Pool that runs through the zone
- Picture Spot is at the Angel Side entrance to the Gulch right next to the elevator.
- Gus comments on the state of the pools when the picture was taken.
- Waypoint 5: A shot of the Saloon
- Picture Spot is right in the front of the zone, near the D.E.C. entrance.
- Gus comments on whether the Battery was retrieved, and whether the Saloon is repaired or not.
BLOT ALLEY:
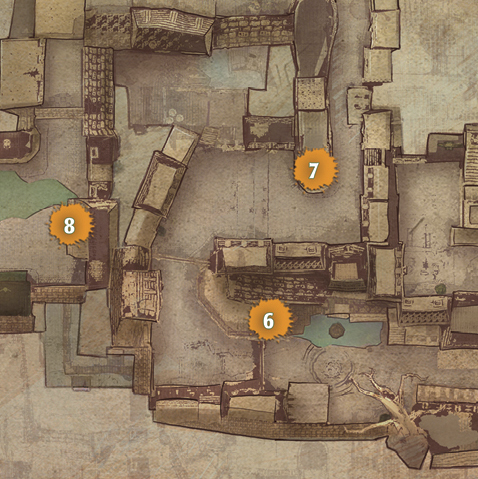
- Waypoint 6: A shot of the Ink Well and fountain
- Picture Spot is on the raised platform (by blue chest).
- Gus comments on state of the Ink Well and presence or absence of Spatters and state (painted or not) of Spatters.
- Waypoint 7: A shot of the square and laundry
- Picture Spot is on the raised platform near Oswald shock point.
- Gus comments on whether the central square was dropped into the Thinner.
- Waypoint 8: A shot of Club 13 and alley
- Picture Spot is on the platform near the Gremlin.
- Gus comments on state of area and presence or lack of Petetronic.
FORT WASTELAND:
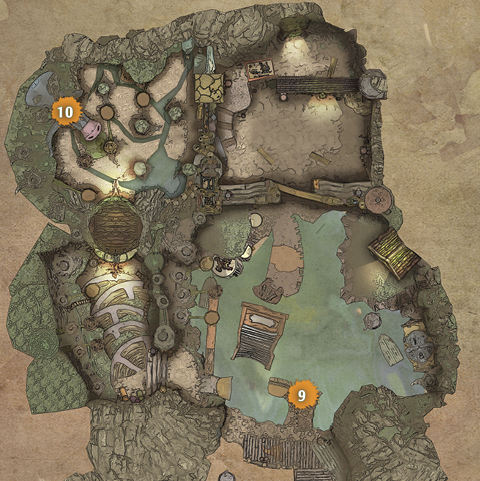
- Waypoint 9: A shot of the front of the fort
- Picture Spot is on the middle boot-shaped island.
- Gus comments on whether picture was taken with cannons active or not.
- Waypoint 10: A shot of the forest with the fort in the background
- Picture Spot is on the top of Babe the Ox’s head.
- Gus comments on whether trees were knocked down or still standing.
TRAIN TUNNELS:
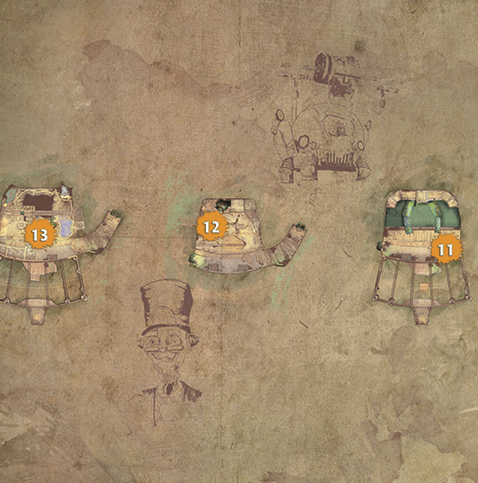
- Waypoint 11: A shot of the Clock Tower
- Picture Spot is on the center suspended platform.
- Gus comments on state of Clock Tower.
- Waypoint 12: A shot of the Mad Doctor’s Snowglobe
- Picture Spot is on the steam-covered platform (thinning the red strap on the wall above blocks the steam).
- Gus comments on state of the ship and area.
- Waypoint 13: A shot of the Blot
- Picture Spot is on the high platform.
- Gus comments on state of Blot and area.
FLOATYARD:
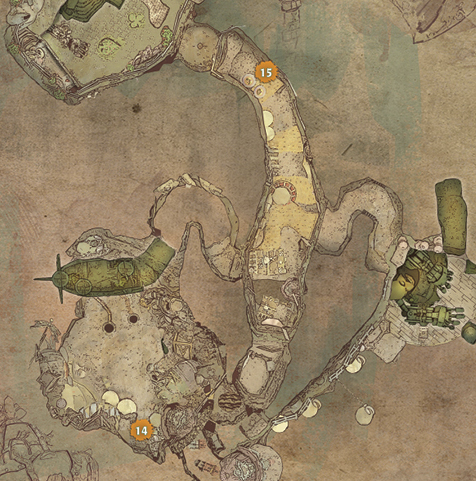
- Waypoint 14: A shot of toon legs (or lack thereof), Beetleworx Replicator, and doorway
- Picture Spot is on the cliff above toon drums.
- Gus comments on whether or not door is open, state of the Replicator, and whether the legs are there.
- Waypoint 15: A shot of “Toon chasm”; the central hallway from the highest vantage point near the entrance to the Alice Area
- Picture Spot is at the far end of the chasm on the platform (by Gremlin).
- Gus comments on state of chasm.
AUTOTOPIA:
- Waypoint 16: A shot of the control tower
- Picture Spot is on a ledge to the left of the starting projector, behind a toon tree.
- Gus comments on state of the tower and zone.
- Waypoint 17: A shot of the largest Guardian Pool in the zone
- Picture Spot is on the high alcove.
- Gus comments on Guardian Pool’s state.
PART 2
Bring back the photos to Adelle.
Rewards:
- 50 E-tickets for every photo turned in
- When all pictures are turned in, get the Research Assistant Pin
- Never Too Thinned Pin is available at Pin Trader after quest is assigned
- Staff Photographer Challenge is earned after all pictures are turned in
Finding the Hidden Heroes
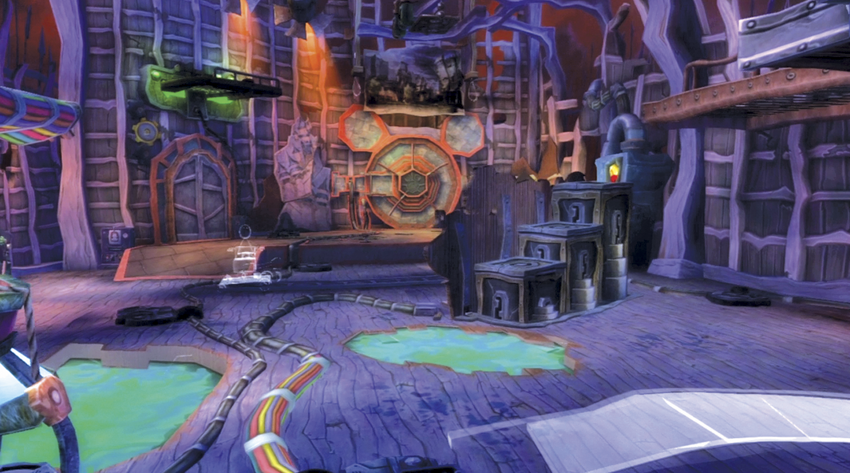
OVERVIEW
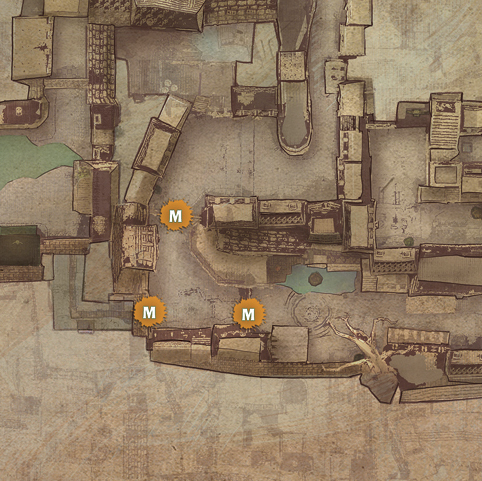
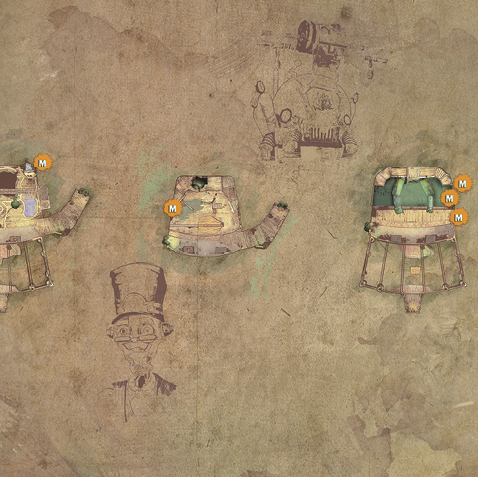
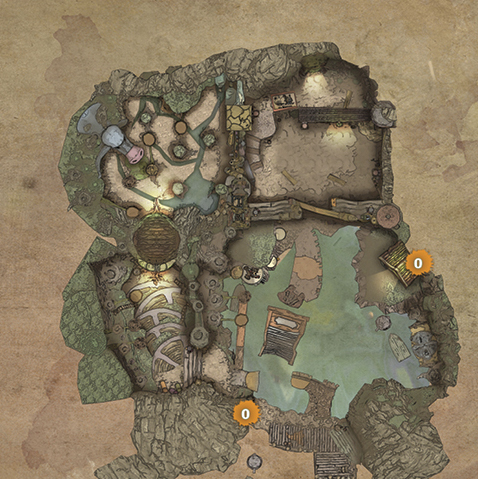
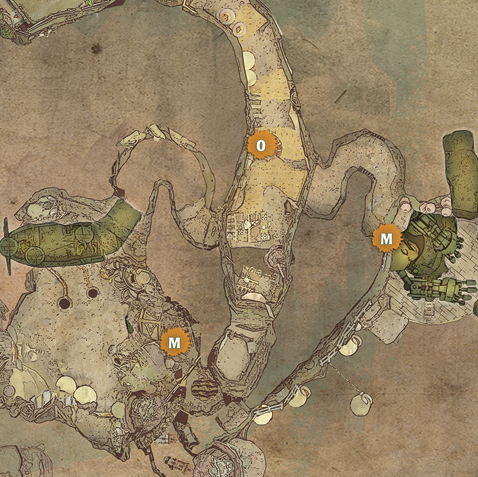
Seth is making a flower garden in Mean Street South and is looking for inspiration. He would like to pattern his garden after Mickey or Oswald and asks you to take photographs of their likenesses around Wasteland. Seth gives you goals for the number of pictures to take, and he rewards you when you hit each goal. He will complete the garden after three goals have been reached.
- Available: Episode 1
- Starting Zone: Mean Street South
- Main Quest NPC(s): Seth
- Associated Zones: All levels
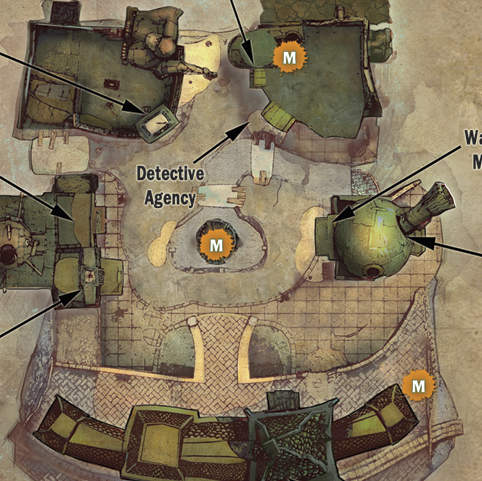
RAINBOW FALLS
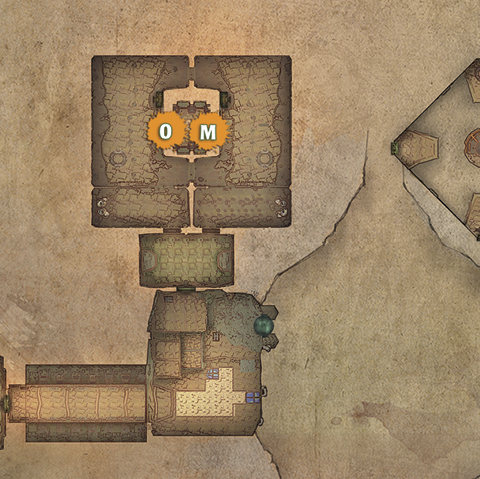
The Underground
Mean Street North
Ostown
Rainbow Falls
Rainbow Caverns
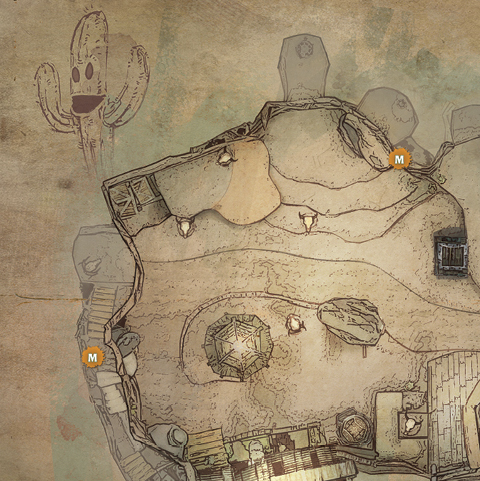
Disney Gulch
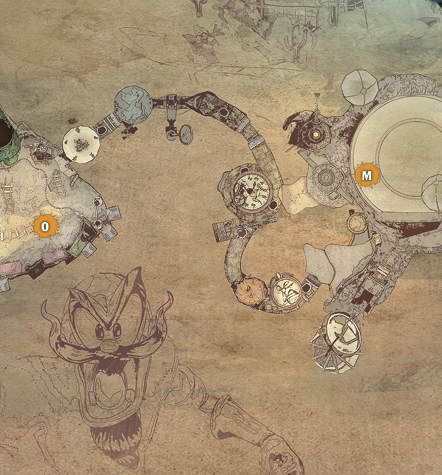
Disney Gulch
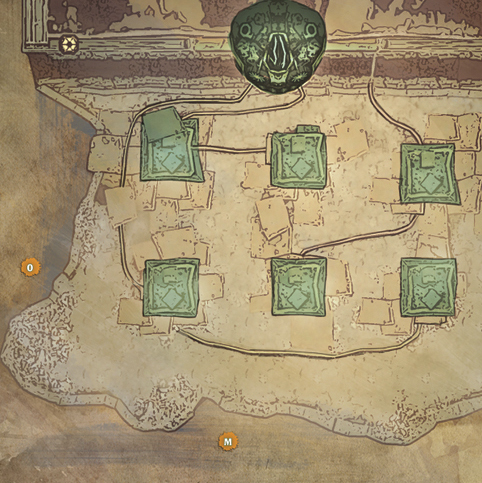
Prescott’s Arena
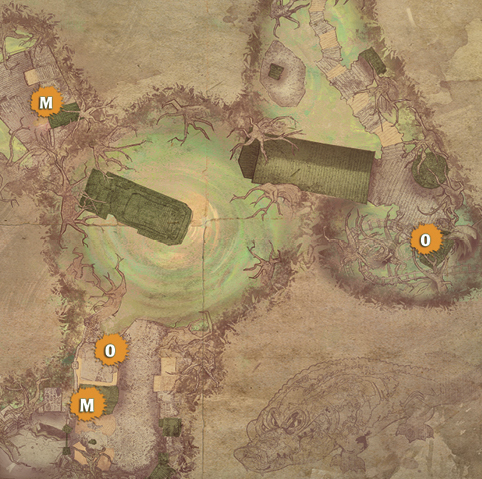
Bog Easy
Blot Alley
Train Tunnels
Fort Wasteland
Floatyard
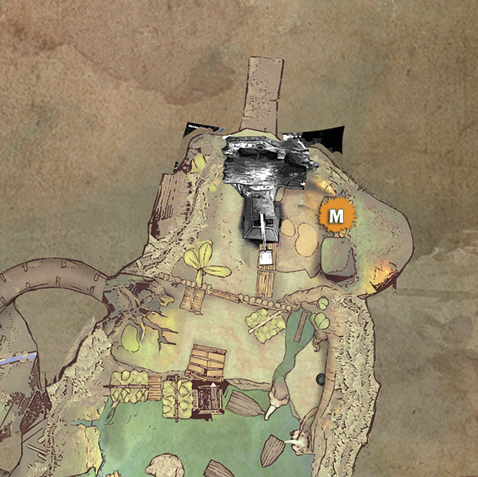
Ventureland
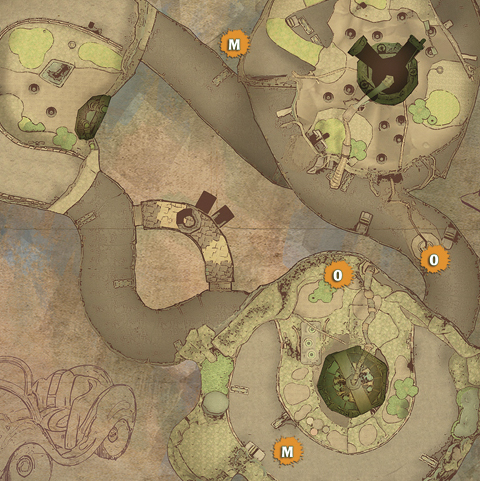
Autotopia
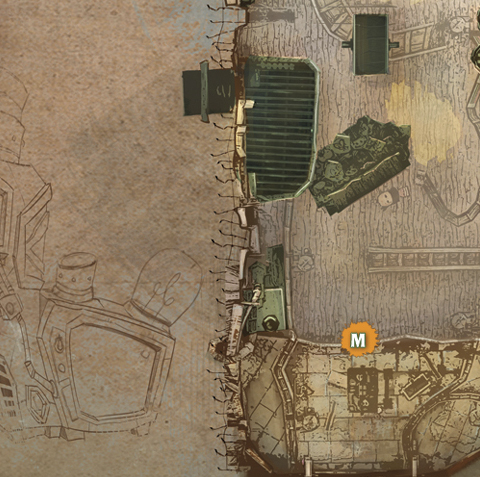
Mad Doc’s Attic
CHOICE 1
Turn in more Mickey pictures and receive the first piece of the Firefighter Costume.
CHOICE 2
Turn in more Oswald pictures and receive the first piece of the Mad Doctor Costume.
- Bonus Reward: If the garden image matches the head you chose for the statue in Goofy’s Fountain Mishap, you will complete the Heads Up Challenge when you bring a photo of the statue back to Seth in Mean Street South..
- Reward: Seth awards E-tickets based on what pictures are turned in after you take the following numbers of pictures:
Mickeys:
- 10 = 50 E-tickets
- 20 = 100 E-tickets
- 30 = 250 E-tickets
Oswalds:
- 7 = 100 E-tickets
- 14 = 250 E-tickets
- 21 = 500 E-tickets
A Friend in Deed
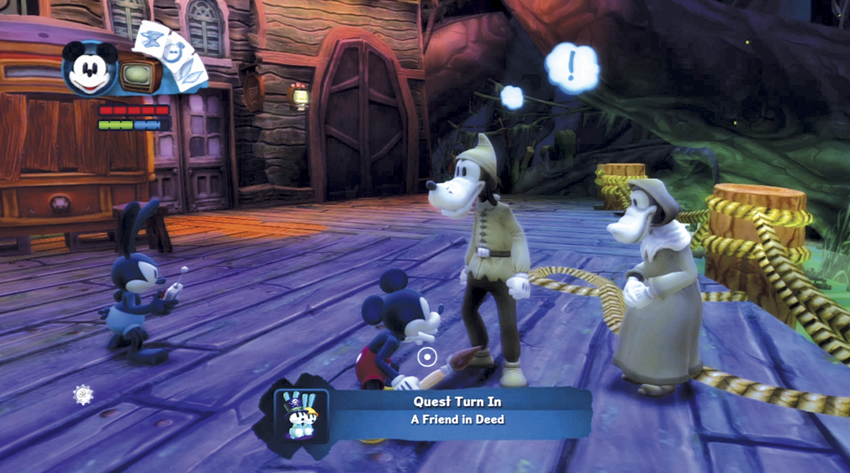
OVERVIEW
Gremlin Sparks is undertaking a project to refurbish an abandoned building in Bog Easy’s Old Town. Two locals, Bertrand and Metairie, are arguing over who deserves the building when it’s finished. Bertrand wants to rebuild his Magic Shop and Metairie needs to replace her house, which was destroyed in the quakes.
- Available: Episode 2 (second visit)
- Starting Zone: Bog Easy
- Main Quest NPC(s): Sparks (Old Town), Metairie (Shanty Town), Bertrand (Shanty Town)
- Associated Zones: OsTown, Fort Wasteland, Floatyard, Autotopia
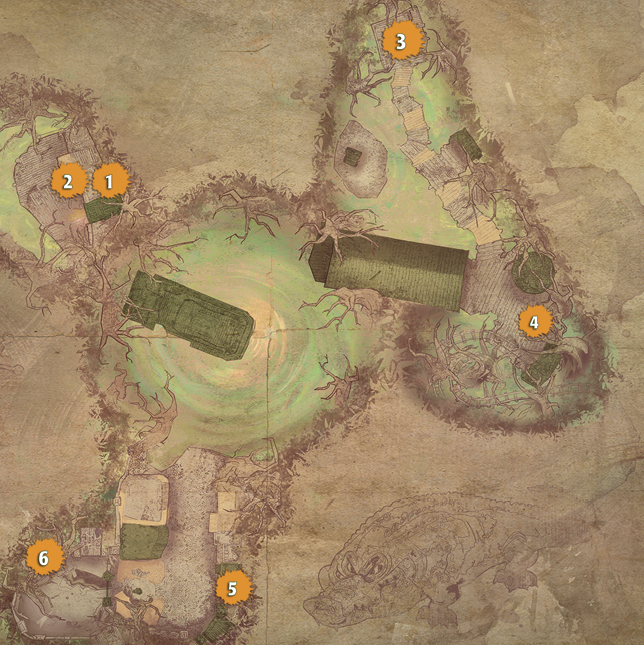
BOG EASY
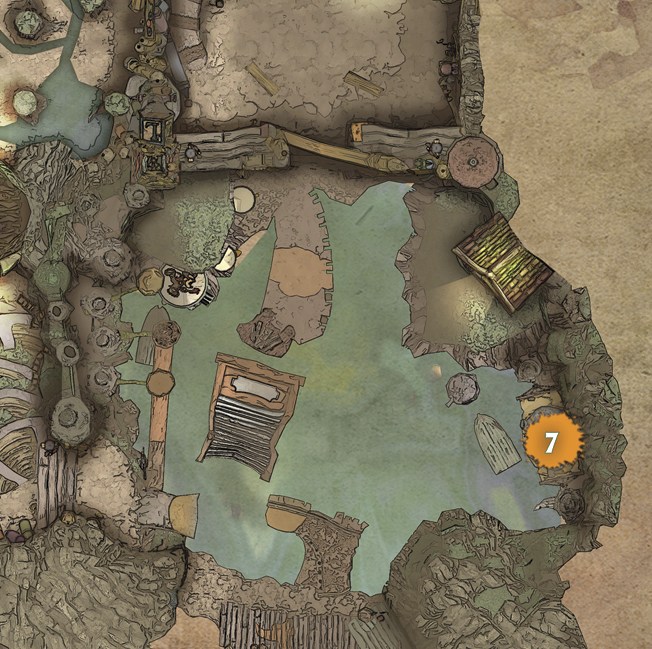
FORT WASTELAND
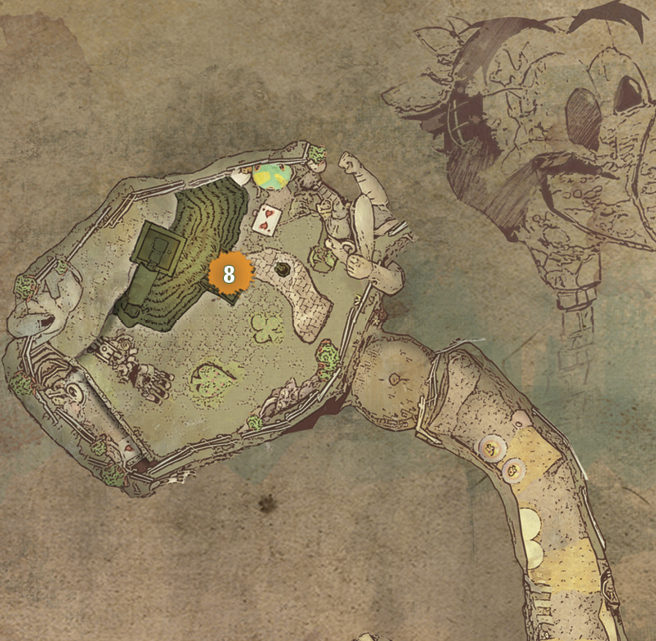
FLOATYARD
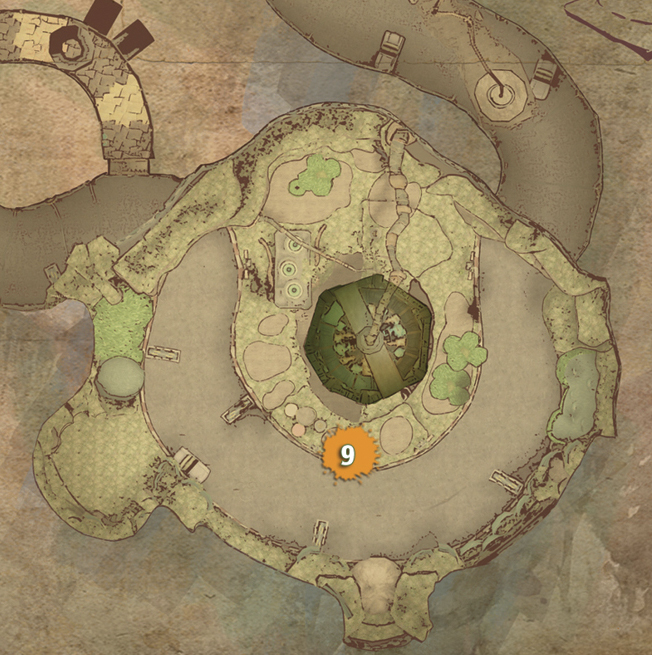
AUTOTOPIA
PART 1
Sparks can repair the abandoned building in Old Town with your help. If you reprogrammed all three Beetleworx Replicators in your first visit to Bog Easy, the building is finished for free. If you didn’t reprogram some of the Beetleworx, you have to pay extra Scrap Metal for each one you didn’t reprogram.
PART 2
Sparks gives you the deed to the new building and you must decide whether to give it to Bertrand or Metairie.
CHOICE 1
Bertrand will rebuild his Magic Shop if you give him the deed.
Step A
Bertrand moves into the new Magic Shop, but he asks you to break all the magic hats he left around town so that the Bunny Child who works for him will return.
- Waypoint 1: On top of the rooftop in Shanty Town
- Waypoint 2: Inside a thinnable wall of the middle building in Shanty Town
- Waypoint 3: On top of the shack on the outskirts of the Docks
- Waypoint 4: Near the train station on the Docks
- Waypoint 5: To the right of the fireworks dispenser on the rooftops in Old Town
- Waypoint 6: Inside a crypt in the graveyard in Old Town; use Invisible Ink to sneak in
There are two hats in each of the three areas of Bog Easy. Find all six hats and break them with Spin Attacks.
- Reward: The Magic Shop will let you play a game of chance. You can pay 50 E-tickets for a chance to win more E-tickets. You can win the following:
- 5 E-tickets (30%)
- 25 E-tickets (30%)
- 50 E-tickets (20%)
- 100 E-tickets (10%)
- 250 E-tickets (5%)
- 1,000 E-tickets (3%; +1% after you win each of the pins)
- Bibidi Bobbidi Boo Pin (1%; can only win once)
- Hockety Pockety Wockety Wack Pin (1%; can only win once)
CHOICE 2
Metairie moves in and asks for help replacing a precious keepsake.
Task
Metairie has an empty picture frame that she needs you to fill. There are three choices of where to take a picture.
- Waypoint 7: Fort Wasteland: The sleeping bear (Reward: 50 E-tickets)
- Waypoint 8: Floatyard – The eye in the Alice Area spying you (Reward: Silver Pin)
- Waypoint 9: Autotopia: Gilda driving over the bridge (Reward: Second piece of the Firefighter Costume)
- Reward: If you take one picture, you get the reward listed for the spot above. If you return with all three pictures, you complete the Picture Perfect challenge.
Horace’s Assistant Assistance
OVERVIEW
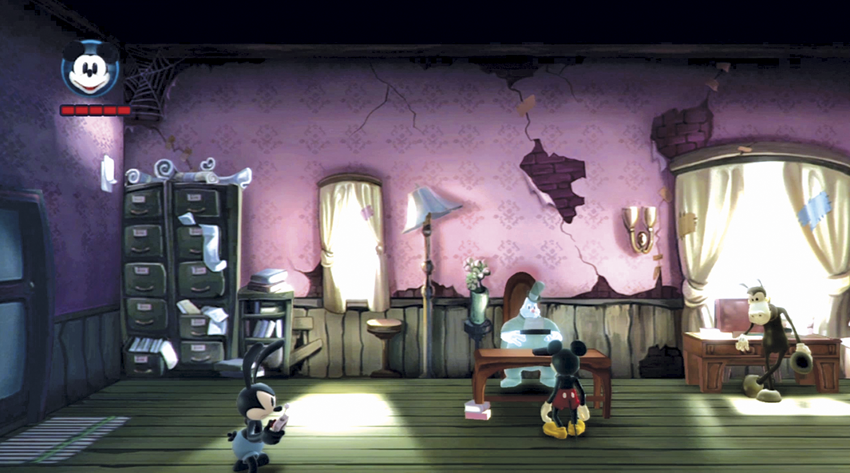
Horace is swamped with work because of the quakes and needs a new assistant to help carry the load. For now, he has a ghost named Tedworth helping, but he’s too annoying and Horace wants to be rid of him. You need to get rid of Tedworth and find a new assistant for Horace.
- Available: Episode 2
- Starting Zone: Mean Street South
- Main Quest NPC(s): Horace, Tedworth, Barnacle Jones, Clarabelle
- Associated Zones: Blot Alley, Ventureland, OsTown
Blot Alley
PART 1
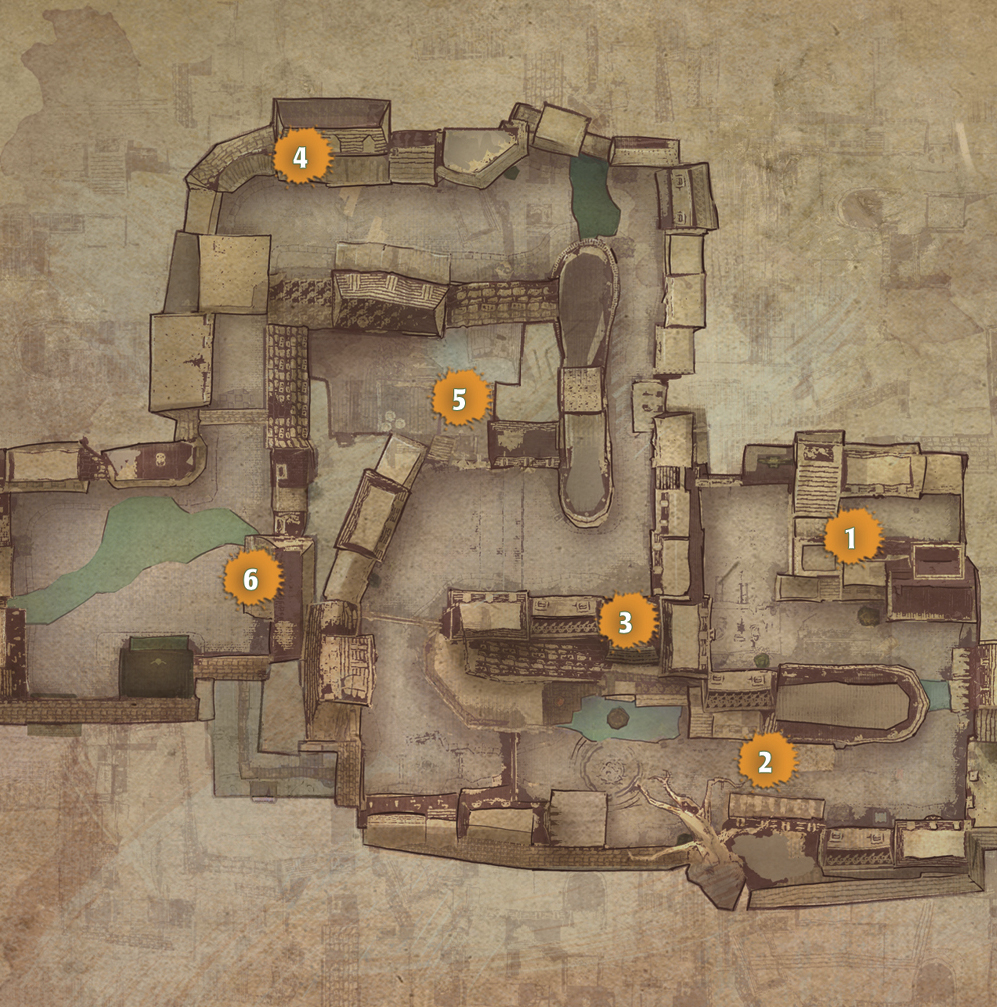
Get rid of Tedworth by finding his lost teddy bear in Blot Alley. There are six pieces to the teddy bear, all scattered about in Blot Alley.
- Waypoint 1: Teddy bear body in the alley behind a thinnable wall to the left of the starting projector.
- Waypoint 2: Teddy bear head on the upper platform along the right wall before the fountain.
- Waypoint 3: Teddy bear arm on a platform in the market square.
- Waypoint 4: Teddy bear leg in a room at the top of the winding staircase at the end of the alley.
- Waypoint 5: Teddy bear arm behind the gate past the destructible door.
- Waypoint 6: Teddy bear leg on a platform next to Club 13.
- Reward: Exorcised Pin
PART 2
With Tedworth gone, you need to find a new assistant for Horace.
CHOICE 1
Barnacle Jones in Ventureland can be persuaded to join Horace, but he needs to get his special compass back from another pirate, Scurvy Pat.
Step A
You can take a picture of Scurvy Pat while he’s holding the compass. If you photograph him with the compass, he admits he stole it and returns the compass. From then on, he’ll be in Disney Gulch. Each time you visit, he’ll give you special pins that he finds in his mom’s collection. You can also thin out Scurvy Pat as Barnacle Jones suggests, but he will not travel to Disney Gulch and you won’t be able to get the special pins from him.
Step B
Return the compass to Barnacle Jones, and he’ll become Horace’s assistant. Or give the compass to Horace in order to eliminate Barnacle Jones and clear the way for Clarabelle.
- Reward: Lost and Found Pin and 100 E-tickets. You can also get extra pins from Scurvy Pat in Disney Gulch if you gave the compass to Horace but didn’t thin out Scurvy Pat.
CHOICE 2
Clarabelle in OsTown is the preferred choice for Horace’s assistant, but Horace must be convinced she is right for the job first.
Step A
Clarabelle has an adopted Spatter that won’t stop crying. If you return the Flower Costume from finishing Fort Wasteland, the Spatter will stop crying. If you used the Thinner path to finish Fort Wasteland, you have to take the costume to the Mad Hatter shop for repairs first.
- Reward: Gold Pin and the Very Messy Thank You Note from the Spatter
Step B
Return to Horace with the Very Messy Thank You Note to show how Clarabelle has cared for the Spatter. The note impresses Horace, and he agrees to hire Clarabelle as his assistant.
- Reward: Beautiful Friendship Pin
- Ending: The choice made during this quest will be reflected in the game ending. If you choose Clarabelle, she’s with Horace at the end. Otherwise, Horace is by himself (and sad) at the end.
Goofy’s Fountain Mishap
ostown
OVERVIEW
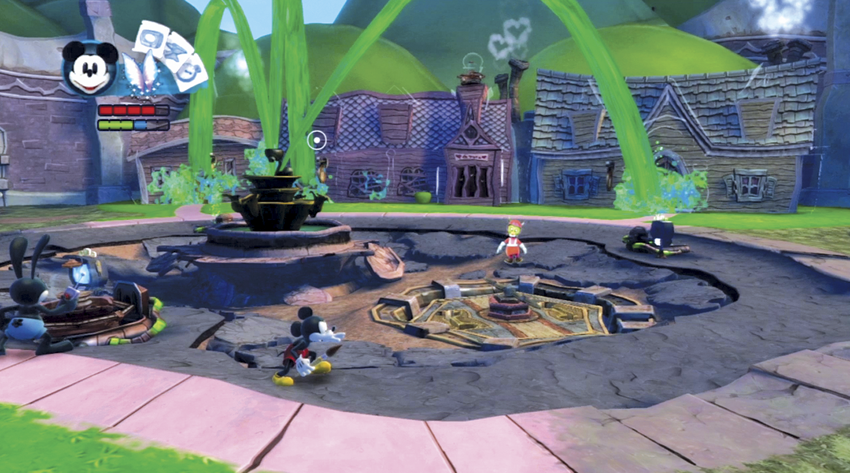
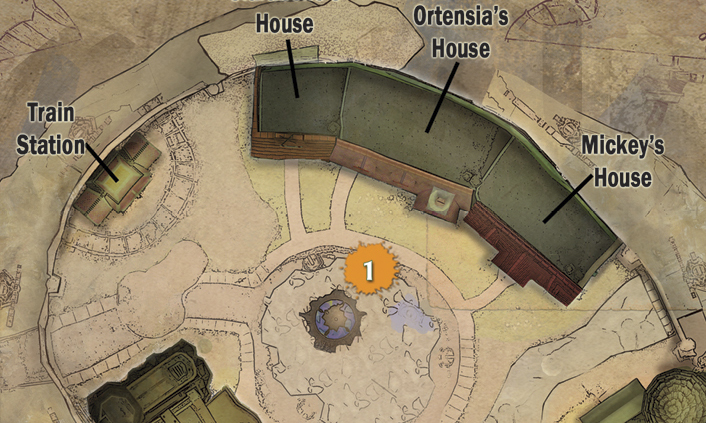
During the first visit to OsTown, you helped Goofy clean up a mess of Thinner in the sinkhole of OsTown. Goofy is still at work cleaning up the mess and needs your help again. Some pieces of the broken Oswald statue fell into the sinkhole, and he needs you to recover them. Explore the sinkhole and recover the statue pieces by moving them to Transport Tubes. At the bottom of the sinkhole, you find two paths: one leads to a Mickey head and the other (opened by Oswald only) leads to the original Oswald head.
CHOICE 1
Bring back the Mickey Head to use on the statue.
- Reward: Heads, I Win Pin
CHOICE 2
Use either the Mickey head or the Oswald head on the town statue.
- Reward: Good Head on His Shoulders Pin and, in Episode 3, you can visit the Gag Factory to have Gremlin Maroon build a Mickey Statue for Scrap Metal; this earns you the Heroes of Wasteland Pin.
Much Ado about Blotlings
OVERVIEW
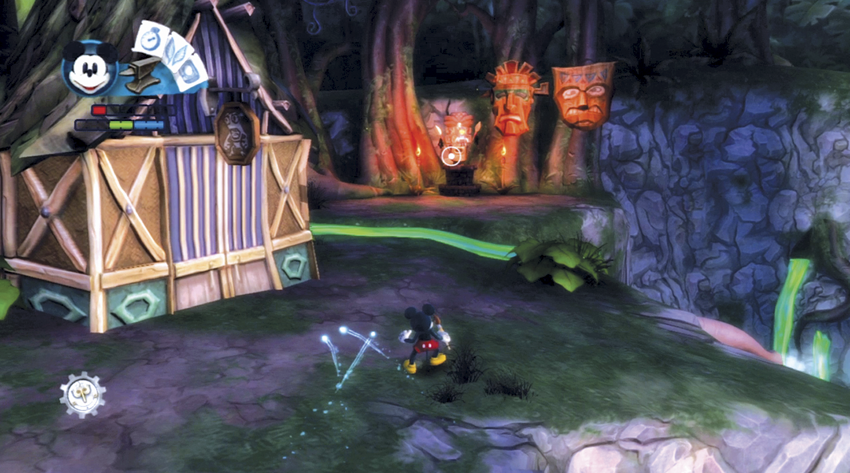
During the first visit to Ventureland, you had to choose whether to repair or destroy the crane in the construction area at the end of Ventureland. If you repaired the crane, you’ll be able to get the Blotyguard Pin from Daisy and buy the Recycler Pin from Tiki Sam on your return to Ventureland after Episode 3. Also, the repaired crane allows an apartment for the Blotlings to be built in the Construction Area.If you destroyed the crane, Starkey gives you the Taking Out The Trash Pin and Tiki Samsells you the On The House Pin on your return to Ventureland after Episode 3. Also, a Pirate Cantina is built near the ruins of the crane.
- Available: Episode 3 (2nd Visit)
- Ends: Episode 4
- Starting Zone: Ventureland
- Main Quest NPC(s): Daisy, Starkey
One Toon’s Trash
Mean Street South
OVERVIEW
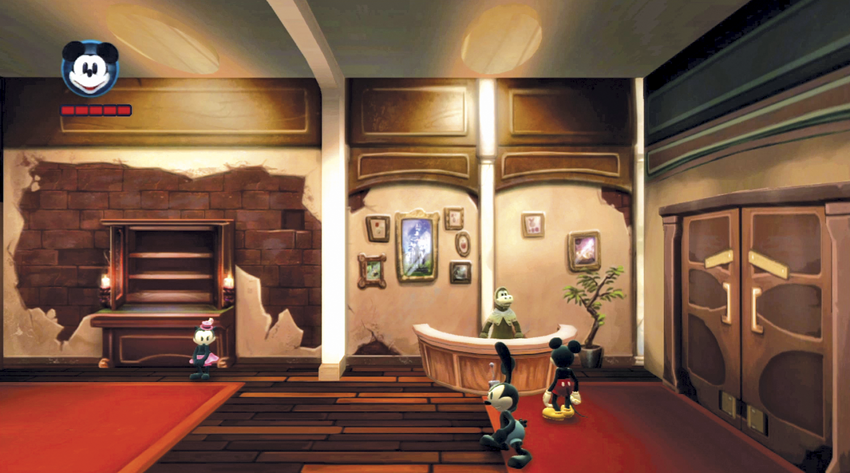
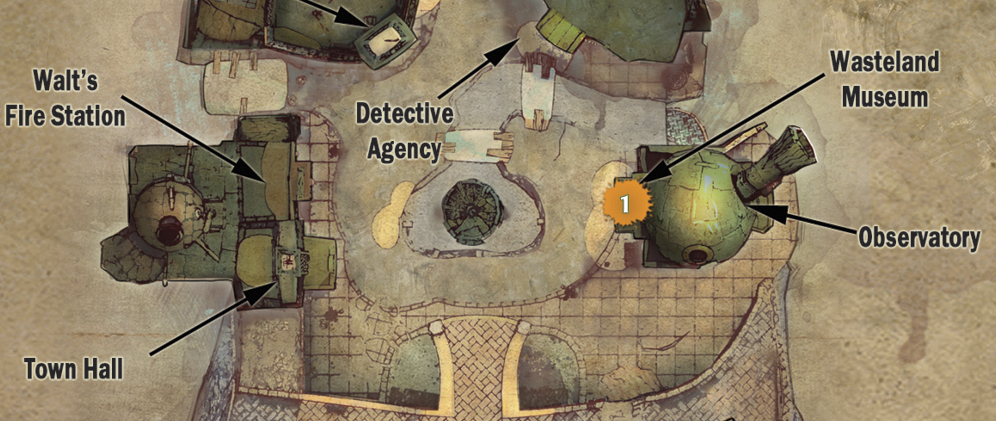
Laralee in the Museum is interested in items of all kinds to display at the Museum. She will purchase any quest items that you want to sell. This gives you an alternate choice for most quests in the game, as you can sell to the Museum instead of doing the quest. Any items you sell can be bought back from her store if you change your mind.
- Available: Episode 1
- Starting Zone: Mean Street South
- Main Quest NPC(s): Laralee (Waypoint 1)
- Rewards: In addition to the E-tickets you get for selling items, there are additional rewards as you turn in more items to the Museum.
- Sell 5 items: Bronze Pin
- Sell 10 items: Silver Pin
- Sell 20 items: Gold Pin
Operation Gremlin Drop
OVERVIEW
Gremlins are disappearing throughout Wasteland and being imprisoned by some nefarious force. Trapped Gremlins appear in cages with electric force fields that can be disabled by Oswald. After Oswald disables the force field of a cage, you can hit it to free the Gremlin. When you meet the first trapped Gremlin, Gus gives you this quest.
- Available: Episode 1
- Starting Zone: The Underground
- Main Quest NPC(s): Gus, Gremlin Jamface
- Associated Zones: Rainbow Falls, Disney Gulch, Bog Easy, Blot Alley, Train Tunnels, Fort Wasteland, Floatyard, Ventureland, Autotopia, Mad Doctor’s Attic
The Underground
Rainbow Falls
Disney Gulch
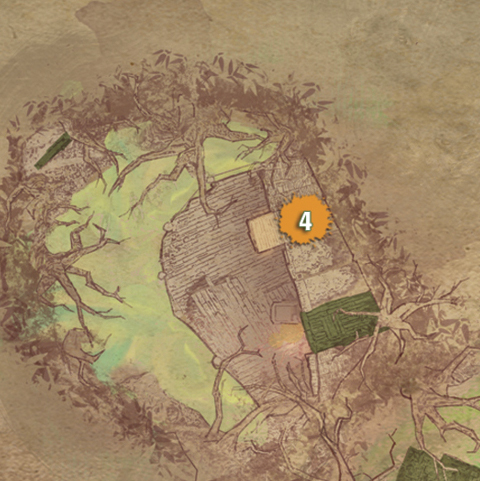
Bog Easy
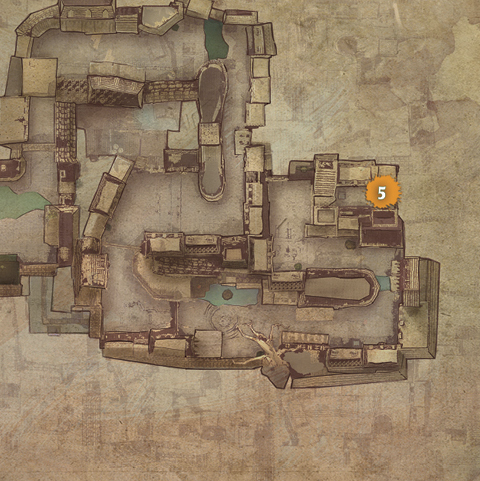
Blot Alley
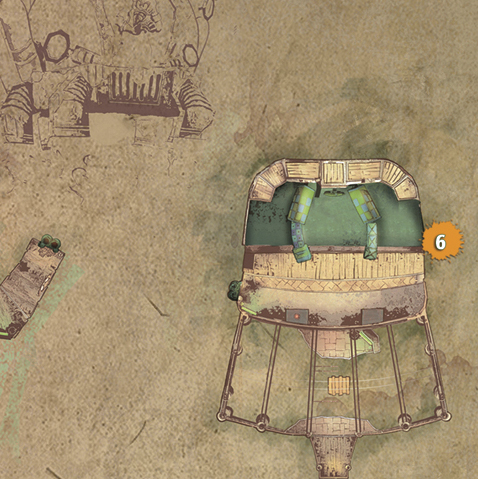
Train Tunnels
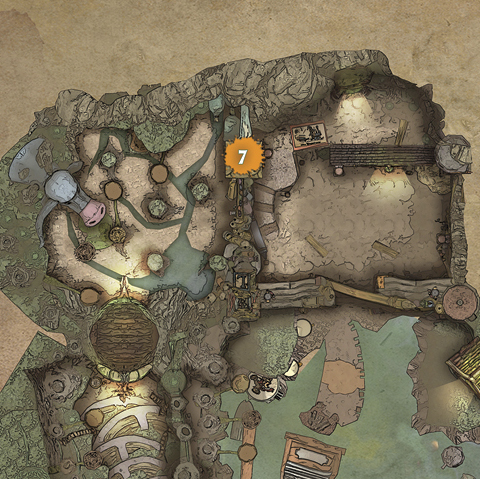
Fort Wasteland
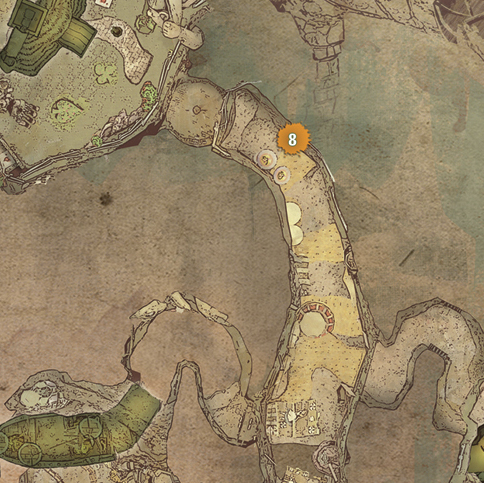
Floatyard
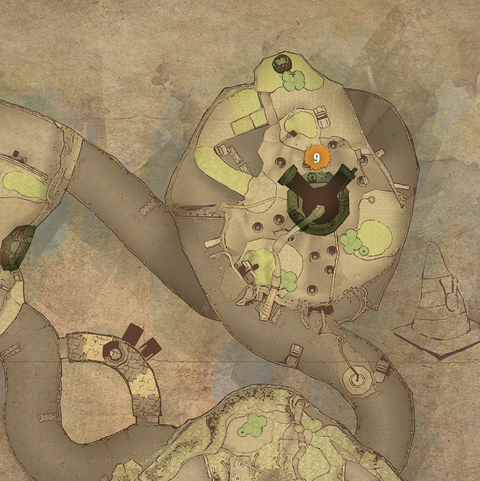
Autotopia
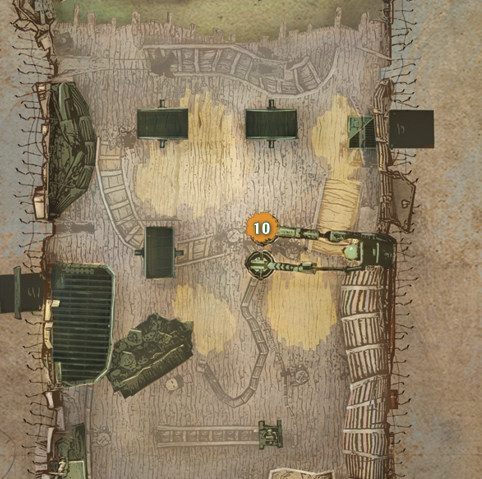
Mad Doctor’s Attic
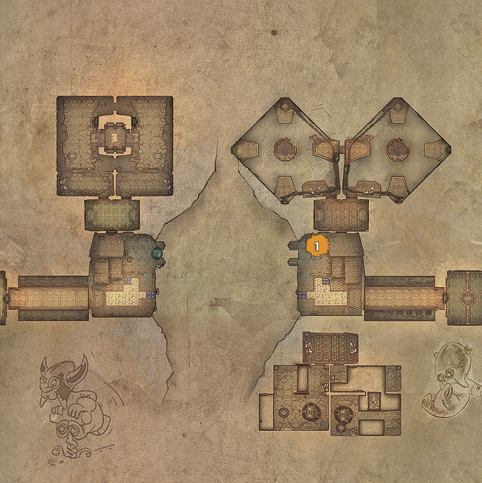
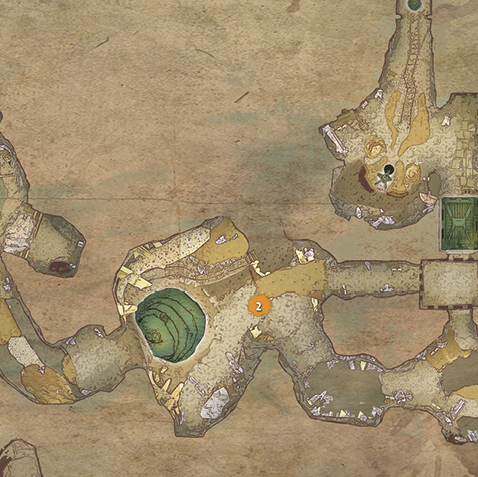
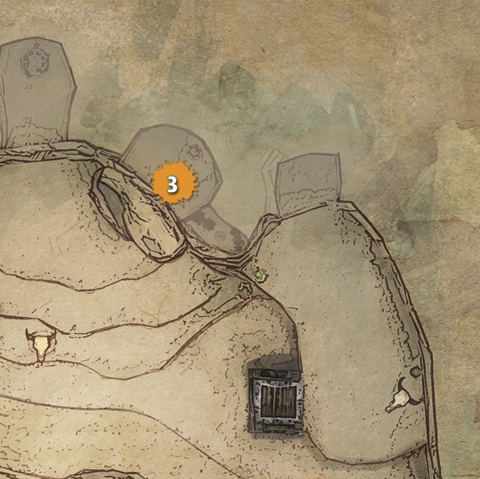
- Waypoint 1: The Underground – On the north side of the Underground
- Waypoint 2: Rainbow Falls – In a toon rock after the first water spout lift
- Waypoint 3: Disney Gulch – In a cave near the D.E.C. entrance
- Waypoint 4: Bog Easy – On the rooftop of Shanty Town
- Waypoint 5: Blot Alley – Behind a toon wall directly left of the starting projector
- Waypoint 6: Train Tunnels – Behind a toon wall on the right wall of the Clock Diorama
- Waypoint 7: Fort Wasteland – On a ledge at the top of the forest area
- Waypoint 8: Floatyard – On a ledge at the top of the canyon
- Waypoint 9: Autotopia – Inside the garage
- Waypoint 10: Mad Doctor’s Attic – Inside the bubble hanging in the middle of the attic
- Reward: Each rescued Gremlin will help with tasks in the level they are rescued. The costs of repairing buildings in Mean Street will also be reduced for each Gremlin rescued if you talk to Gremlin Jamface in Mean Street North first.
The Other Side of the Screen
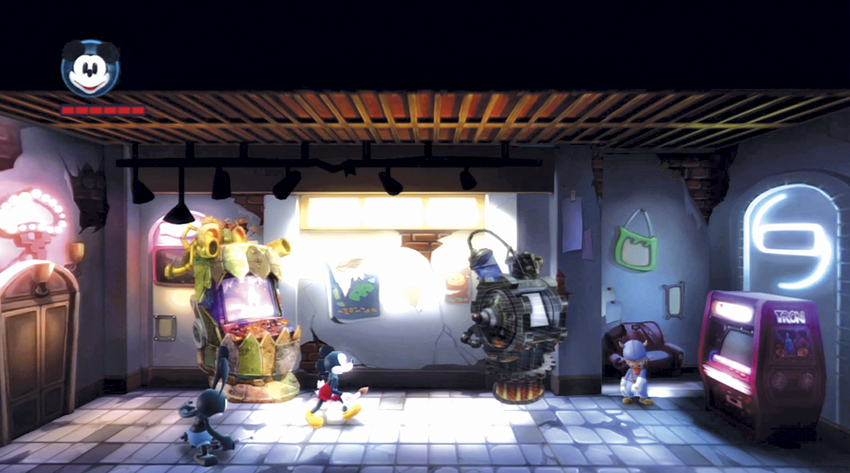
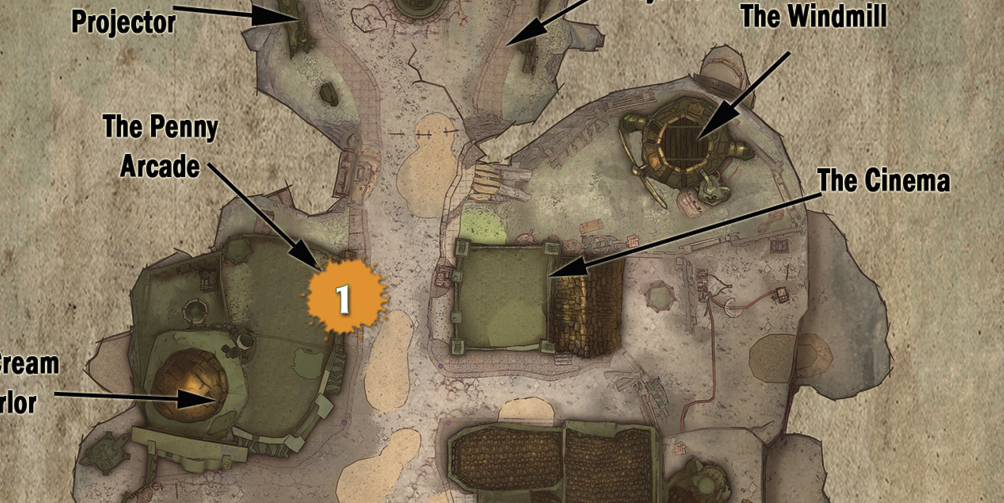
Mean Street North
OVERVIEW
The machines in the arcade have been broken by the earthquakes. To get them working again, Flynn needs pins from boss battles so he can reprogram the games after the boss fights.
- Available: Episode 1
- Ends: Episode 4
- Starting Zone: Mean Street North
- Main Quest NPC(s): Gremlin Flynn (Waypoint 1)
- Associated Zones: Mad Doctor’s Lab, Prescott’s Arena, Mad Doctor’s New Ride
PART 1
Each boss will reward a pin depending on how you defeat it. The pins are as follows:
- Blotworx Dragon: Friendly Dragon Pin (Paint)/Ring of Fire Pin (Thinner)
- Prescott’s Mech: Second Chance Pin (Paint)/Napoleon Complex Pin (Thinner)
- Mad Doctor: Trust the Mad Doctor Pin (Paint)/ Down With the Mad Doctor Pin (Thinner)
PART 2
After you return to Mean Street after a boss fight, the Pin Trader will sell the second pin for the boss you defeated. Buy the second pin and take them both to Flynn.
- Reward: golden E-ticket for every machine you fix, plus the Game Grid Pin.
Out of Toon
Bog Easy
OVERVIEW
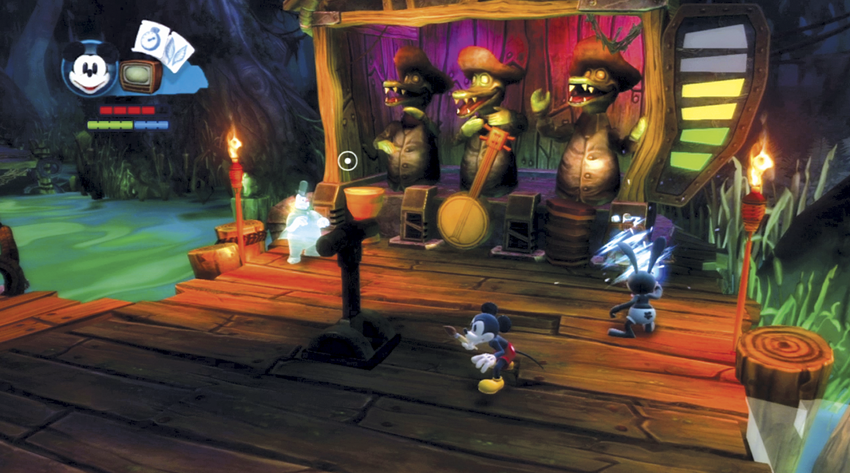
The Jugband in Bog Easy is making shrieking noises that have lured in Ghost Fineas. Fineas’s friend Rolly wants you to repair the band machine so that Fineas can be freed. A local named Louis wants you to sabotage the band machine so that the ghosts will leave Bog Easy instead.
- Available: Episode 1
- Available: Episode 2 (second visit)
- Starting Zone: Bog Easy
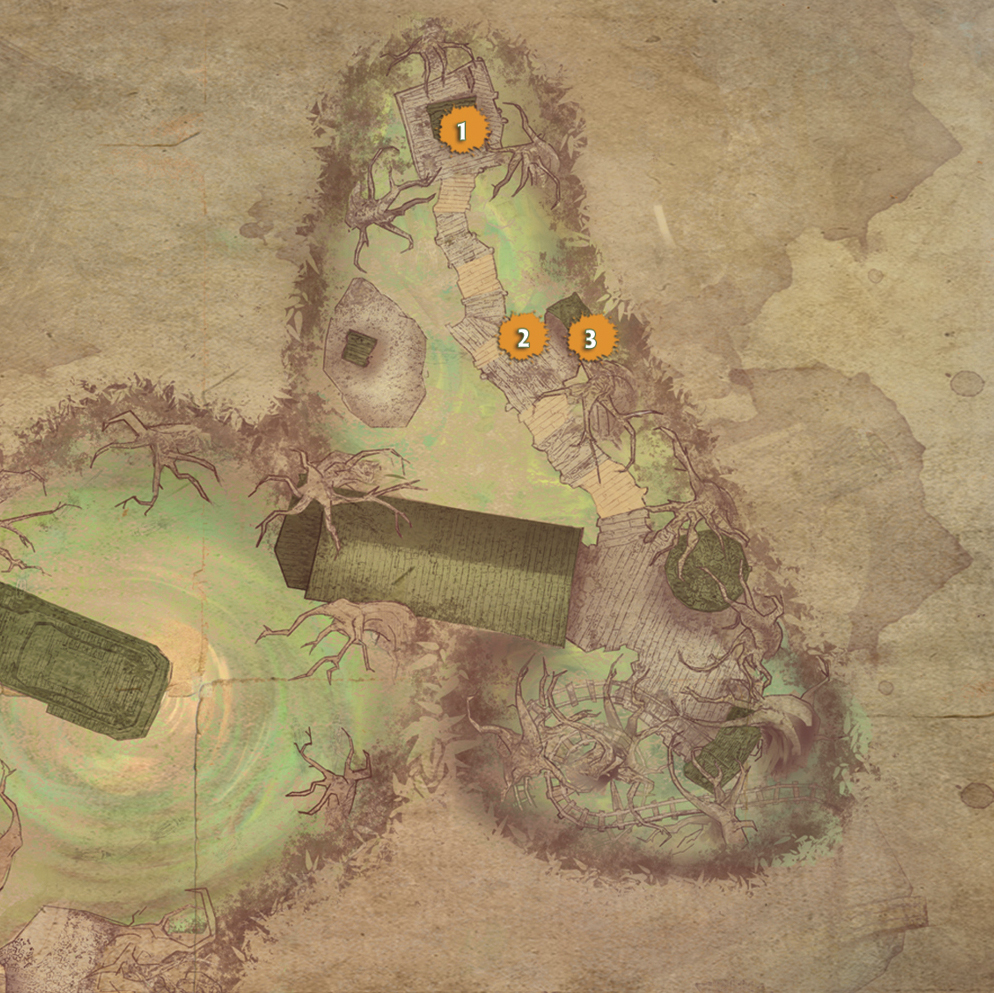
- Main Quest NPC(s): Louis (Waypoint 1), Rolly (Waypoint 2), Fineas (Waypoint 3)
PART 1
Decide whether to repair the Jugband or sabotage it.
CHOICE 1
Sabotage the Jugband for Louis by spraying Thinner into the funnel at the top of the Jugband.
- Reward: Music to my Ears Pin and Scrap Metal from the destroyed Jugband
CHOICE 2
Repair the Jugband for Rolly.
Step A
Paint the missing instruments.
Step B
Match the band members with the correct instruments using the lever on the floor. The band member with his hands low plays the drums, the one with hands spread far apart plays the banjo, and the one with his hands clapping high plays the accordion.
Step C
Once the band members are back in position, Oswald can activate the machine to fix it.
- Reward: Silly Symphony Pin and access to second part of quest
PART 2
With Fineas back, Rolly wants to remind him what things were like before the quake. They ask you to paint in all the missing toon around town to restore Bog Easy to the way it used to be.
- Reward: Perfect Harmony Pin
Thanks for the Memories
OVERVIEW
Moody has lost his memory and wants you to take some photos to help him remember why he was happy in OsTown. Moody gives you clues about what pictures would remind him of the past. Moody’s cousin, Rigger Greene, wants to help Moody by taking him on an adventure instead and needs you to take photographs of exotic places they could potentially visit.
- Available: Episode 1
- Starting Zone: OsTown
- Main Quest NPC(s): Moody, Rigger Greene
- Associated Zones: OsTown, Rainbow Falls, Disney Gulch, Fort Wasteland, Floatyard, Autotopia
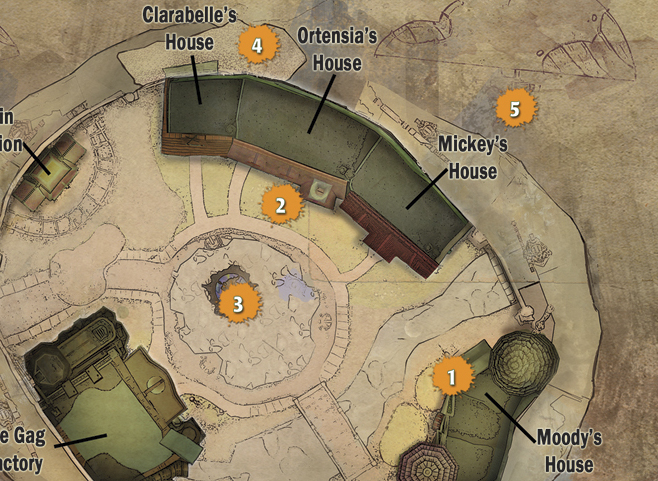
Ostown
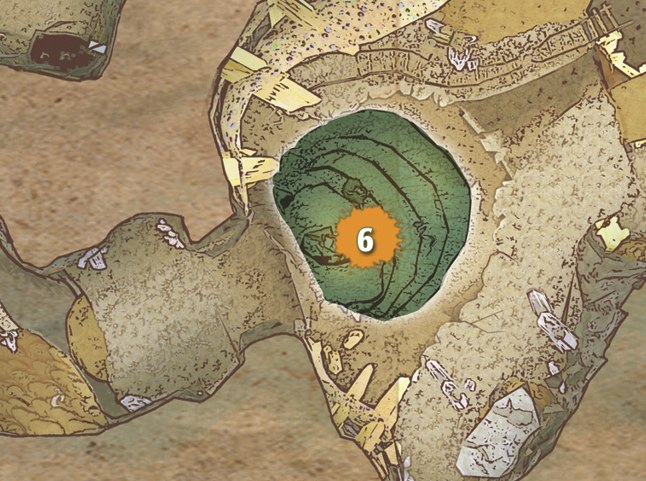
Rainbow Falls
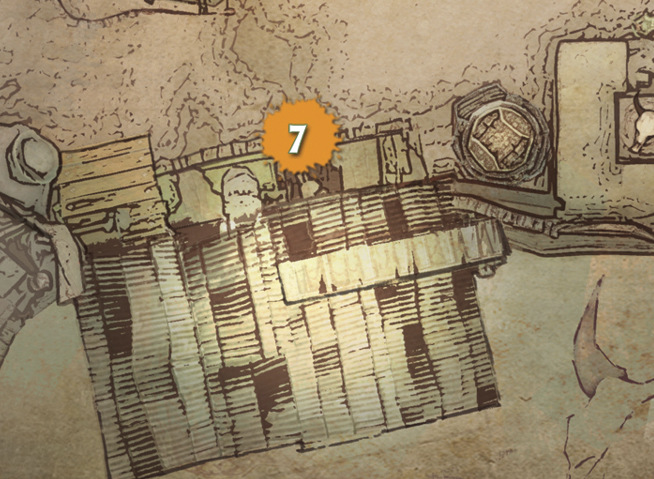
Disney Gulch
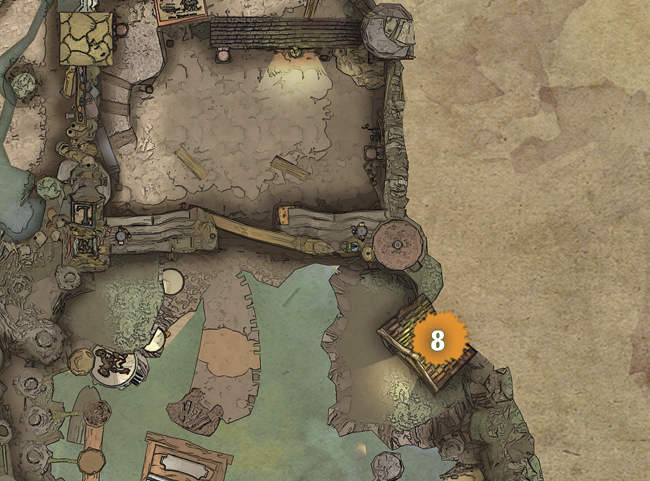
Fort Wasteland
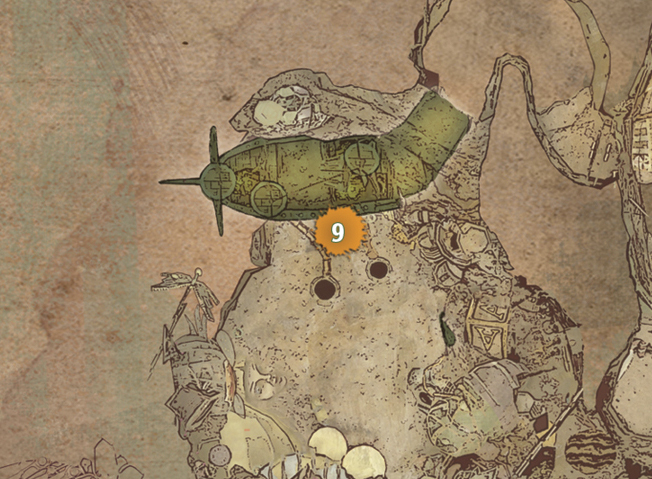
Floatyard
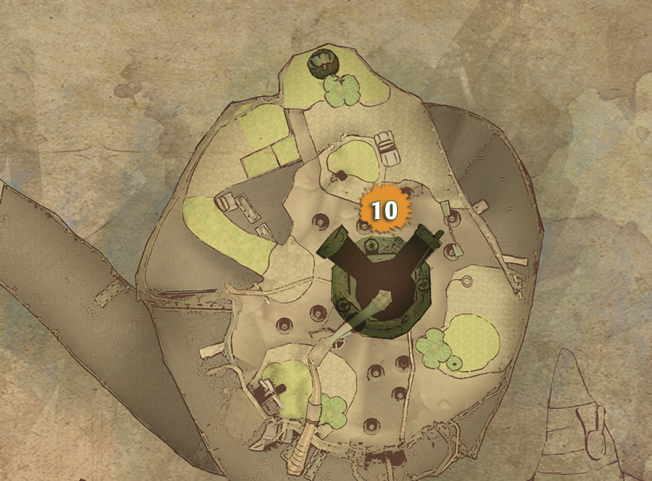
Autotopia
CHOICE 1
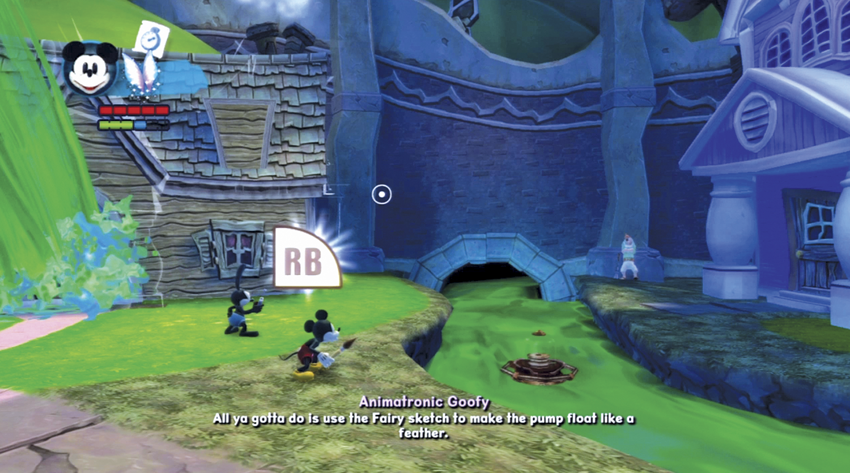
Take pictures of restored places in OsTown to help Moody remember the good times. The pictures you can take are:
- Waypoint 1: Moody’s painted house
- Waypoint 2: Bunny children gathered outside Ortensia’s house
- Waypoint 3: The OsTown fountain after it is restored
- Waypoint 5: The OsTown sign with a restored sky
- Rewards: For each turn-in, the rewards increase as follows:
- 1: 50 E-tickets
- 2: Bronze Pin
- 3: 250 E-tickets
- 4: Gold Pin
- 5: The Simple Life Pin; Rigger Greene leaves OsTown to go explore Disney Gulch on his own. You can rescue him from Spatters if you go back there and he will reward you with the Wild Frontier Pin.
CHOICE 2
Take pictures of exciting locales for Rigger Greene so he can convince Moody to go on a trip. As you hand in pictures, Rigger Greene will ask if they should go to that location. The location order is:
- Waypoint 6: The Thinner falls and Indelible Ink Well in Rainbow Falls
- Waypoint 7: The train in Disney Gulch
- Waypoint 8: The bell inside the cuckoo clock in Fort Wasteland
- Waypoint 9: A Beetleworx Basher in front of the pirate ship float in Floatyard
- Waypoint 10: The Autotopia garage
If you say yes, the quest ends and they will travel to that location, where you can meet up with them and buy pins depending on the location. They will then travel to the previous location on the list and you can meet them there. Thus, to get the most rewards you’ll want to send them to Autotopia as they will visit every location and you’ll have an opportunity to buy all their pins.
- Rewards: If you meet up with them on their travels as explained above, they will sell items as follows:
- Rainbow Falls - 2 Gold Pins
- Disney Gulch - 2 Silver Pins and 2 Gold Pins
- Fort Wasteland - The Adventurous Life Pin
- Floatyard - Everyone Loves a Parade Pin
- Autotopia - Road Rally Pin
- The Pin Trader will also sell an extra pin for each location Rigger Greene and Moody visit and more pins once they end their trip from Rainbow Falls
The Spirit of Wasteland
OVERVIEW
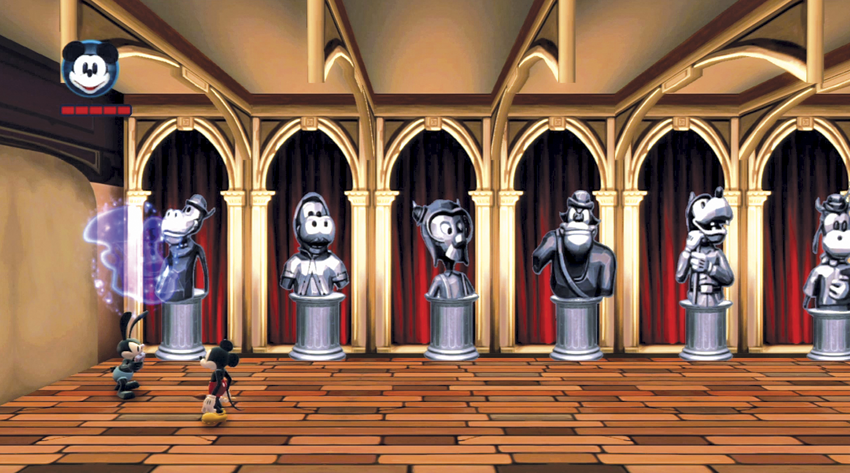
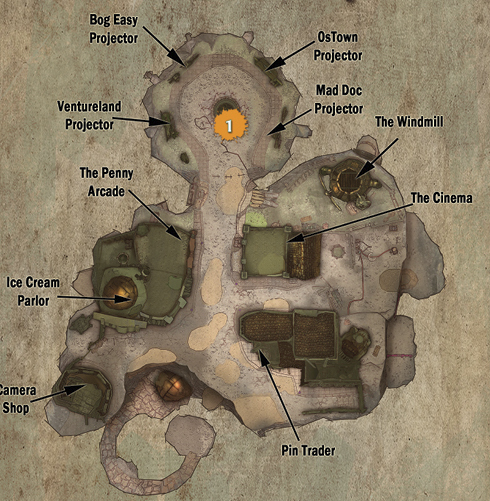
The Spirit of Wasteland will greet you at the Museum or projector area of Mean Street North. The essence of Wasteland is embodied in twelve qualities that are each represented by a Spirit. Collecting certain pin combinations will awaken these Spirits and provide bonuses. Statues for each of the Spirits can be viewed at the Museum.
- Available: Episode 1
- Ends: Episode 3
- Starting Zone: Mean Street North
- Main Quest NPC(s): The Spirit of Wasteland (Waypoint 1)
- Associated Zones: OsTown
PART 1
There are two Spirits that can be awakened easily, Heritage and Individualism. By completing the pump task in OsTown, you were awarded either the Pump It Up Pin or the Don’t Know My Own Strength Pin.
PART 2
Once you receive this quest, you can buy the second pin to awaken a Spirit from Becca at the Pin Trader.
CHOICE 1
If you helped Goofy drain the Thinner in OsTown to get the Pump It Up Pin, buy Oswald the Lucky Rabbit Pin from the Pin Trader.
- Reward: The Spirit of Heritage awakens
CHOICE 2
If you helped Prescott drain the Thinner in OsTown to get the Don’t Know My Own Strength Pin, buy the Big Bad Pete Pin from the Pin Trader.
- Reward: The Spirit of Individualism awakens
PART 3
Many of the Spirits require pins that may not be acquired by normal means because of choices you’ve made. These missing pins can be gained from the black grab bags at the Pin Trader. The Spirits and the bonuses they provide are:
- Heritage: Boosts Paint regeneration speed and allows Oswald to lock on to an extra target with his Boomarmerang.
- Individualism: Boosts Thinner regeneration speed and allows Oswald to lock-on to an extra target with his Boomarmerang.
- Pioneering: Raises the cap on how much Paint Mickey regenerates by one cell and increases invisibility time.
- Self-Reliance: Raises the cap on how much Thinner Mickey regenerates by one cell and increases indelibility time.
- Adventure: Boosts Electricity regeneration speed and gives Mickey and Oswald some health regeneration.
- Knowledge: Increases the number of Guardians Mickey can hold by one and allows Oswald to lock on to an extra target with his Boomarmerang.
- Compassion: Boosts Paint regeneration speed and raises the cap on how much Paint Mickey regenerates by one cell.
- Independence: Boosts Thinner regeneration speed and raises the cap on how much Thinner Mickey regenerates by one cell.
- Freedom: Raises the cap on how much Electricity Oswald regenerates by one cell and increases indelibility time
- Discovery: Allows Oswald to lock on to an extra target with his Boomarmerang and increases invisibility time.
- Innovation: Boosts Electricity regeneration speed and gives Mickey and Oswald some health regeneration.
- Tomorrow: Increases the number of Guardians Mickey can hold by one and raises the cap on how much Electricity Oswald regenerates by one cell.
- Bonus Reward: If you awaken all the Spirits, you unlock the Statue Garden Challenge. Also, each awakened spirit awards you a Gold Pin.
The Wasteland Limited
OVERVIEW
The earthquakes have damaged the train stations around Wasteland and the Train Conductors need your help to repair them. When the stations are repaired, you can use them to travel quickly to another repaired station.
- Available: Episode 1
- Ends: Episode 3
- Starting Zone: Mean Street South
- Main Quest NPC(s): Train Conductor
- Associated Zones: OsTown, Bog Easy, Ventureland
Mean Street South
Ostown
Bog Easy
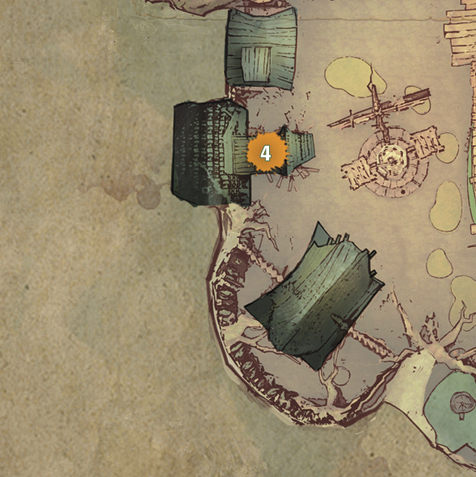
Ventureland
CHOICE 1
Repair the stations.
STEP 1 (WAYPOINT 1)
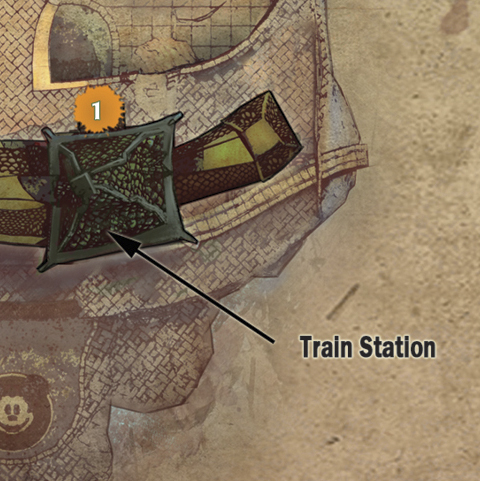
Repair the Mean Street Station. Use the Watch Sketch to slow the fan above the Station and then toss up Oswald to fix the clock.
- Reward: Mean Street Train Conductor Pin
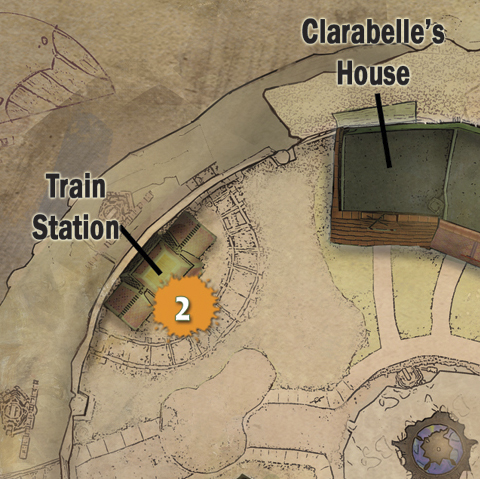
STEP 2 (WAYPOINT 2)
Repair the OsTown Station. Use the Fairy Sketch to raise the broken pieces of the station, then paint them.
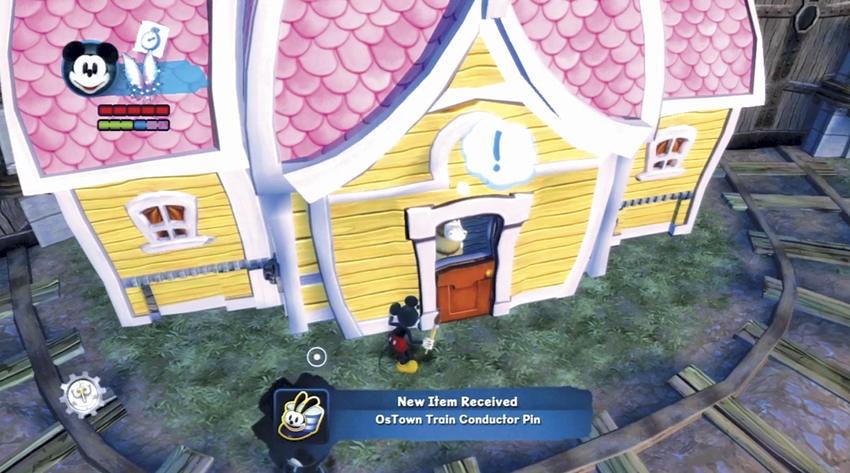
- Reward: OsTown Train Conductor Pin
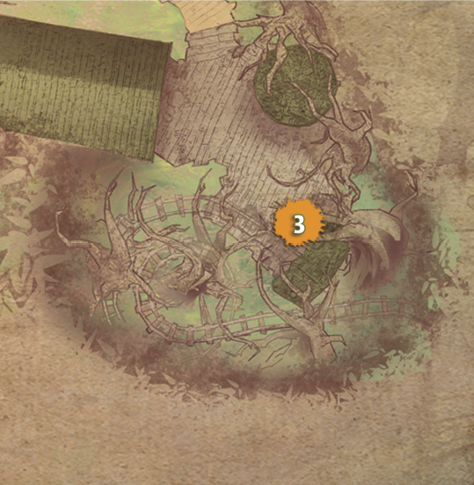
STEP 3 (WAYPOINT 3)
Repair the Bog Easy Station. Use the TV Sketch to power the station and lure the Conductor back to work.
- Reward: Bog Easy Train Conductor Pin
STEP 4 (WAYPOINT 4)
Repair the Ventureland Station. Use the Anvil Sketch to crush the collapsed roof blocking the station.
- Reward: Ventureland Train Conductor Pin
STEP 5 (WAYPOINT 1)
After repairing all the stations, if you return to the Mean Street Station you will get an extra reward.
- Reward: All Aboard Wasteland Conductor Pin
CHOICE 2
Ignore the stations and allow the quakes to destroy them.
- Reward: Off-Track Challenge and Scrap Metal at the destroyed stations
Watch the Skies
Overview
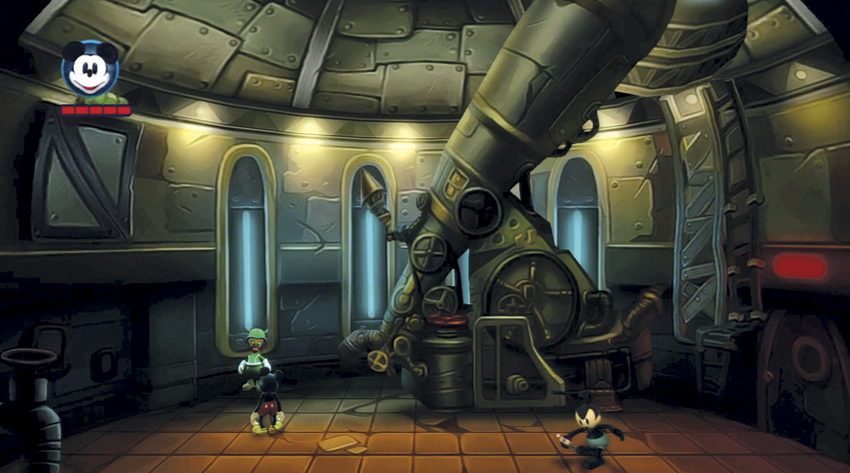
Gremlin Copernicus at the Observatory is interested in collecting “Real World” items that are falling around Wasteland. He asks that you return any of these strange objects that you may find during your travels. Laralee at the Museum is also interested in displaying such items at the Museum.
- Available: Episode 1
- Starting Zone: Mean Street South
- Main Quest NPC(s): Gremlin Copernicus
- Associated Zones: Rainbow Caverns, Disney Gulch, Mad Doctor’s Lab, Blot Alley, Fort Wasteland, Floatyard, Autotopia, Mad Doc’s New Ride
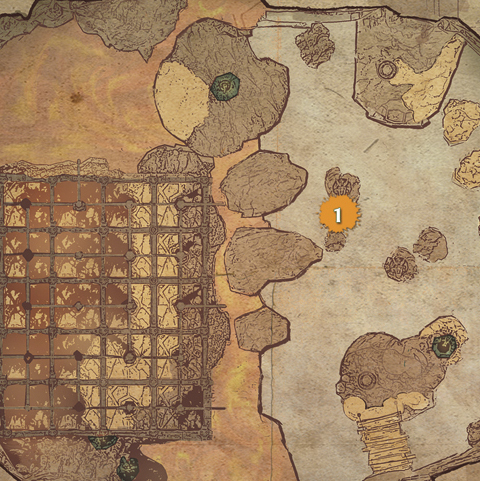
Rainbow Caverns
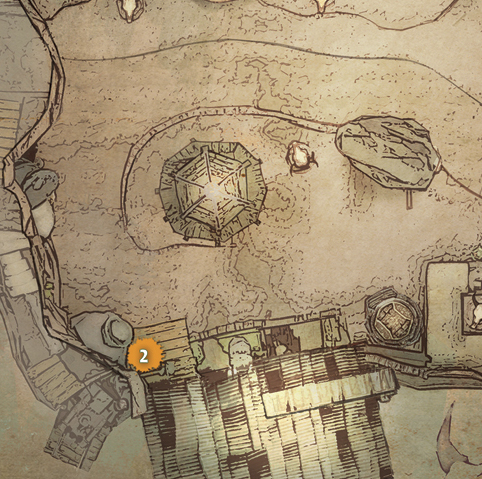
Disney Gulch
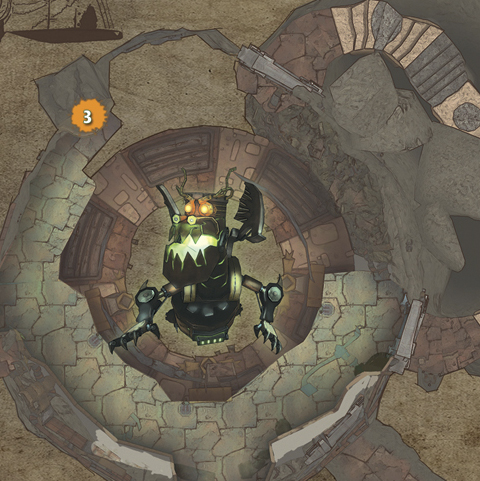
Mad Doctor’s Lab
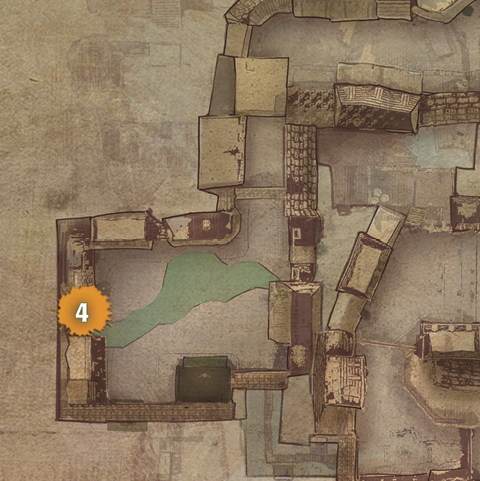
Blot Alley
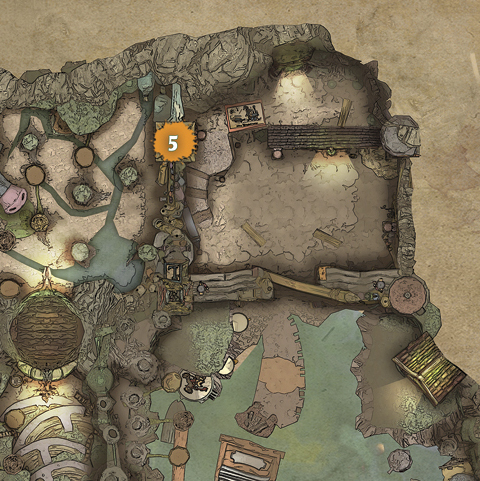
Fort Wasteland
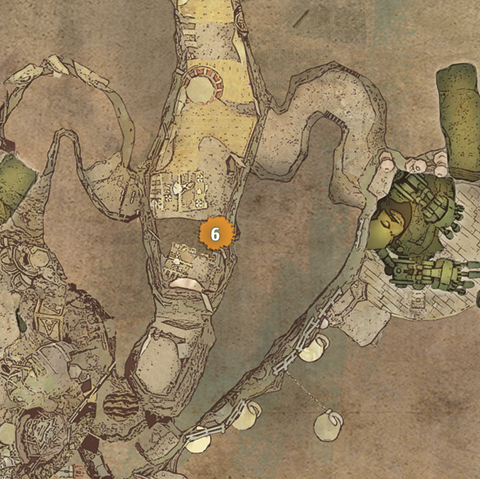
Floatyard
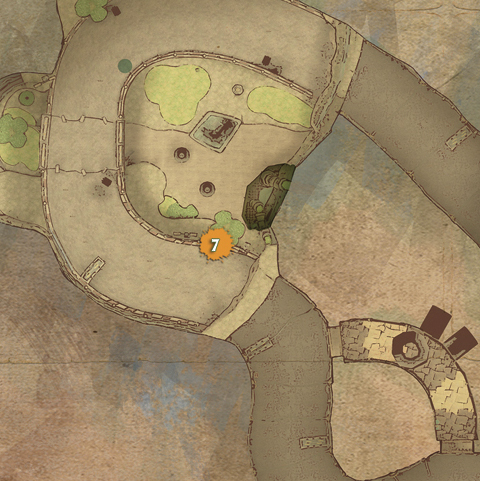
Autotopia
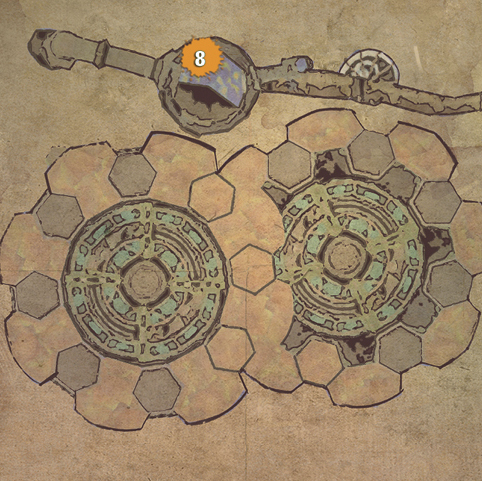
Mad Doc’s New Ride
PART 1
Collect the “real world” items at the following areas:
- Waypoint 1: Angel Side of Rainbow Caverns – Silly Symphony Fan
- Waypoint 2: Disney Gulch – Donald Soda Cap
- Waypoint 3: Mad Doctor’s Lab – Pete’s Dragon Lunchbox
- Waypoint 4: Blot Alley – Pirate Sugar Bowl
- Waypoint 5: Fort Wasteland – Donald Duck Milk Bottle
- Waypoint 6: Floatyard – Three Little Pigs Pocket Watch
- Waypoint 7: Autotopia – Goofy Race Car
- Waypoint 8: Mad Doc’s New Ride – Disney Snow Globe
PART 2
Return the items to either Copernicus or Laralee. The more items you give to a single person, the more rewards you’ll get, so give all the items to the same person.
CHOICE 1
Turn in the items to Copernicus at the Observatory.
Rewards:
- 1st item: 1 Bronze Pin
- 2nd item: 2 Bronze Pins
- 3rd item: 3 Bronze Pins
- 4th item: 4 Bronze Pins
- 5th item: 5 Bronze Pins
- 6th item: 6 Bronze Pins
- 7th item: 7 Bronze Pins
- 8th item: Looking at the Stars Pin (turning in the majority of items to Copernicus)
CHOICE 2
Turn in the items to Laralee at the Museum.
Rewards:
- 1st item: 25 Scrap Metal
- 2nd item: 50 Scrap Metal
- 3rd item: 65 Scrap Metal
- 4th item: 75 Scrap Metal
- 5th item: 100 Scrap Metal
- 6th item: 125 Scrap Metal
- 7th item: 150 Scrap Metal
- 8th item: Consummate Collector Pin (turning in the majority of items to Laralee)