
Assassin's Creed IV: Black Flag Guide Walkthrough
Sequence 11
PREVIOUSLY...
In a partnership that ostensibly respects the curious whims and caveats of Roberts alone, Kenway bides his time – and, for the most part, his tongue – as the pair boldly infiltrate a channel occupied by a Portuguese fleet to acquire a very particular cargo. Though exasperated with the Sage’s propensity for casual murder, he assists his strange bedfellow in appropriating a cache of the mysterious crystal vials, as previously encountered in Havana and Tulum, accumulated by the Templars and each containing a measure of blood. This chain of events also leads to the capture of a Portuguese flagship: a redoubtable vessel that Roberts claims as his own.
Kenway and Roberts later reconvene to travel to the Observatory, but discover Benjamin Hornigold not far from their wake. At the behest of Roberts, Kenway engages his former pirate ally – now fully committed to the Templar cause – in a short but explosive battle, where Hornigold’s manoeuvrable schooner is no match for a Jackdaw increasingly honed to match the pride of any crown fleet. Forced to run aground on Santanillas, Hornigold orders his men to fortify the area – but his warnings and threats count for naught, as Kenway effortlessly infiltrates the improvised perimeter to assassinate his former friend.
Roberts leads the Jackdaw and his Royal Fortune to Long Bay, where an indigenous tribe – which he names the Guardians – lie in wait to slaughter incautious explorers and aspirant settlers alike. With Kenway clearing the path, and Roberts and a small cadre of his crewmen trailing behind, they arrive at a ruined, overgrown, yet utterly fantastical structure… where Roberts almost nonchalantly guns down every man but Kenway at its threshold.
Inside, he at long last reveals the prize that the Observatory holds: a crystal skull that, with but a small measure of blood from any living man or woman, can project an audiovisual representation of their world as they experience it with their own senses. Kenway is astonished by this vision of a technology far beyond his comprehension… but his wonderment is his undoing, as Roberts bludgeons him to the water far below with a surprise blow.
Sealed inside the imposing structure by the departing Roberts, Kenway fashions an amazing escape, but suffers a grievous wound during a frantic slide back to the beach, where Roberts and his men await, and with the Jackdaw and its crew nowhere to be seen. Roberts regards him without sympathy, and announces his intentions to claim a bounty on the stricken pirate on his return to Kingston…
Memory 01 “To Suffer Without Dying”
Mission Overview
Optional Objectives
- Sabotage three alarm bells.
- Visit two old friends.
Notes & Further Reading
- Though stealth isn’t necessary for this Memory, it’s certainly advisable: enemies can attack in large numbers if the alarm is raised. Our walkthrough covers the two Optional Objectives, but the route it takes is broadly the least dangerous path to the waypoint. You should feel free to skip steps concerning nonessential tasks if you wish.
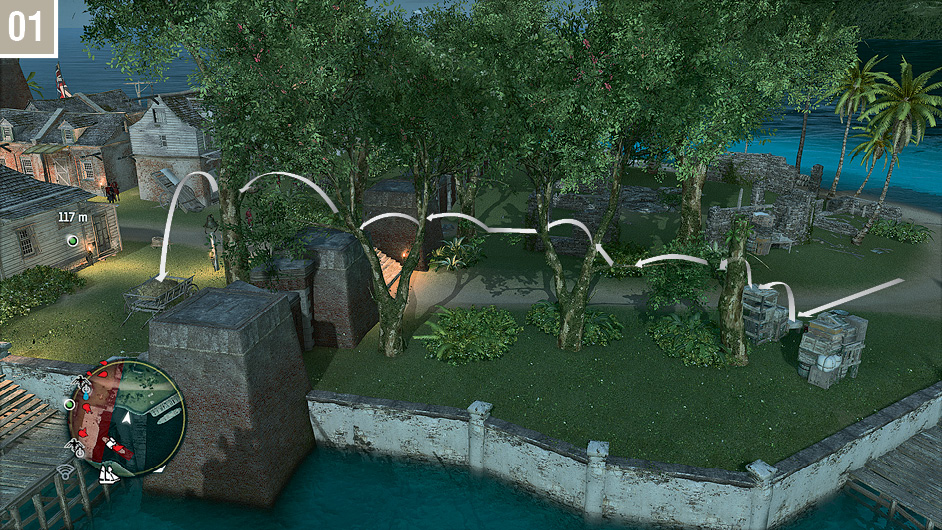
You have the option of making Kenway rattle his cage to assist in his rescue, but this isn’t obligatory if you would prefer to watch events unfold naturally. Once you have full control, free run through the trees in the route shown in the accompanying screenshot to reach a cart full of hay.
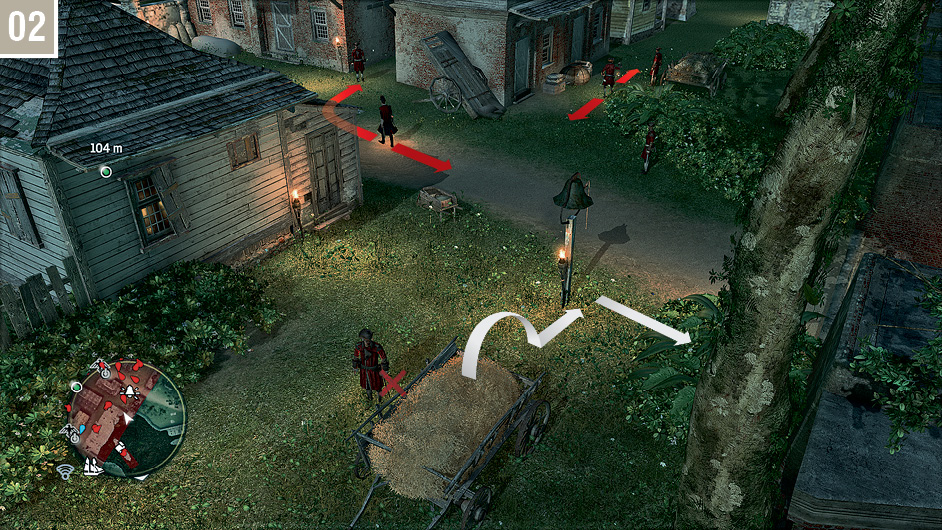
Assassinate the guard when he moves close, then watch the Captain and the patrolling soldier. When both of them turn away, emerge and sabotage the alarm bell, then immediately move into the Stalking Zone. The stationary soldier may move to investigate; if so, assassinate him when he moves within range. If not, leave him be.
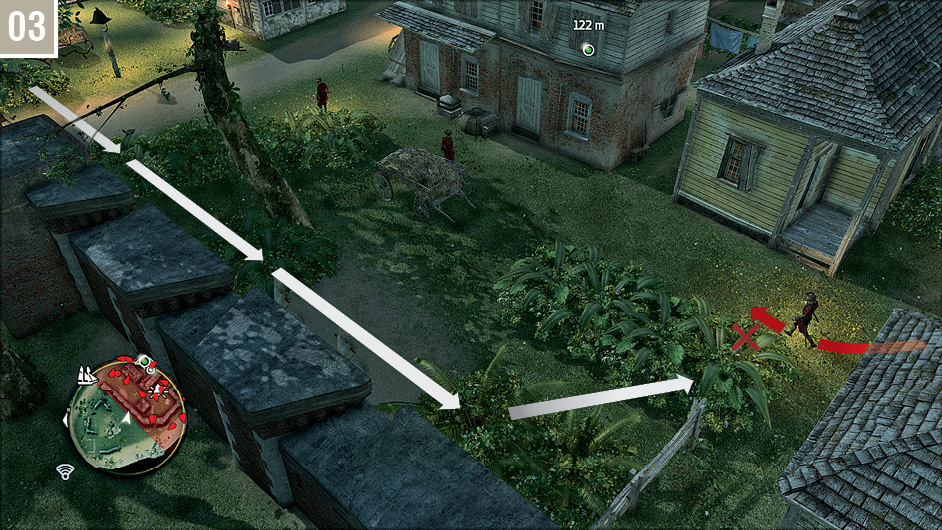
Move through the Stalking Zones close to the outer wall until you reach the position shown above. Wait until a guard approaches, then assassinate him.
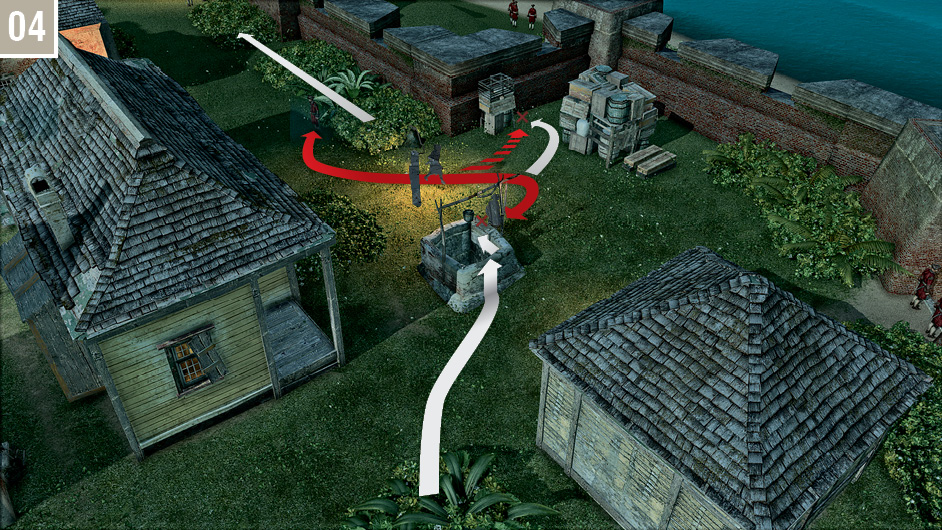
Wait until the patrolling soldier walks away from the well, then move out of hiding and jump inside it. Carefully traverse around the inner ledge until you are just behind the stationary soldier then, after ensuring that his patrolling colleague isn’t watching, tap  to assassinate him. You can then leap out when it is safe to do so and position Kenway behind the crates. When the soldier returns, whistle to entice him to an ignominious end. Sabotage the alarm bell, then proceed via the Stalking Zones to reach the next position of note to the southeast.
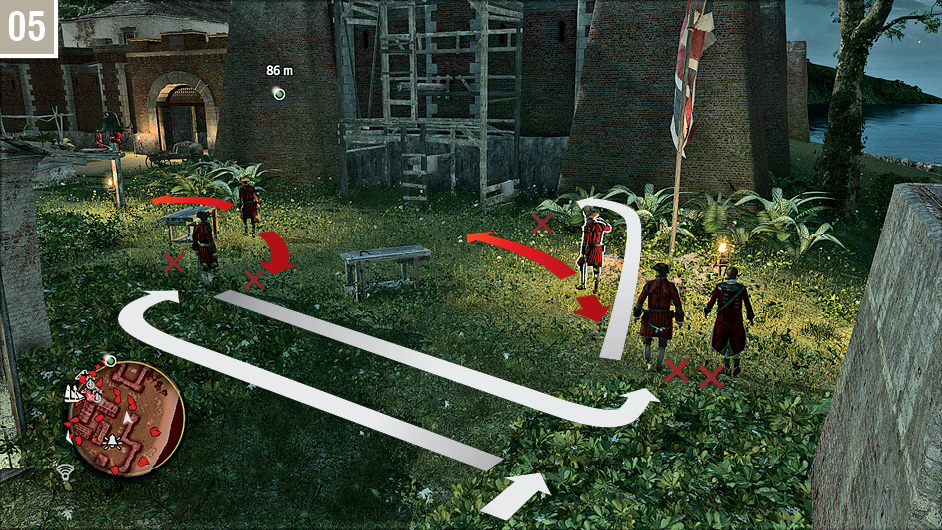
The configuration of guards here lends itself to a very specific solution, though you are free to simply knock everyone out with the aid of Sleep Darts if you wish. Start by transferring to the Stalking Zone to the left, then assassinate the stationary guard there. Wait until the patrolling soldier reaches your position, then whistle to attract him for an easy kill. Return to your original Stalking Zone. When the second patrolling soldier turns away, wait until he begins to walk, then double assassinate the stationary pair. You can then sprint over and eliminate the final soldier before he turns.
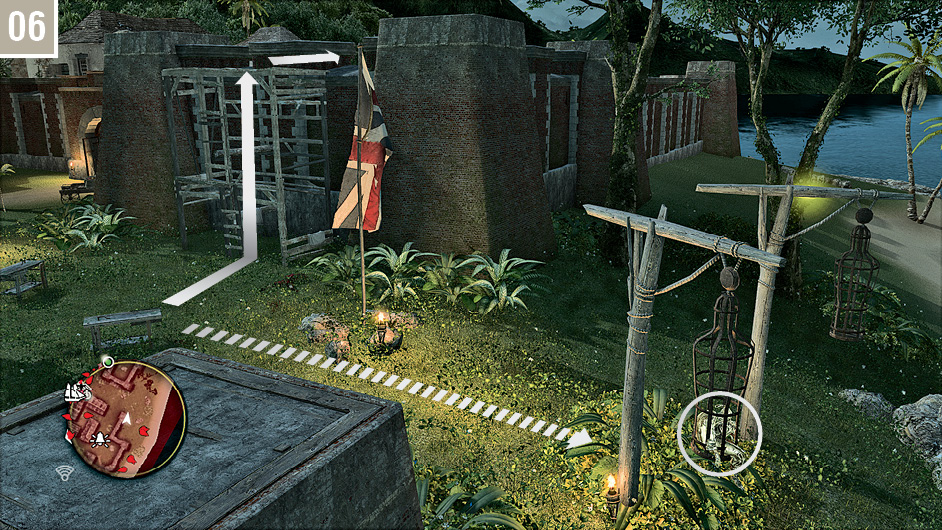
If you have no desire to complete the Optional Objectives, you can climb straight up the scaffold to the east and skip to step  . Otherwise, approach the cage marked on the screenshot and press
  when the prompt appears to hear Kenway deliver an elegiac farewell to the first of two “old friends” in this Memory.
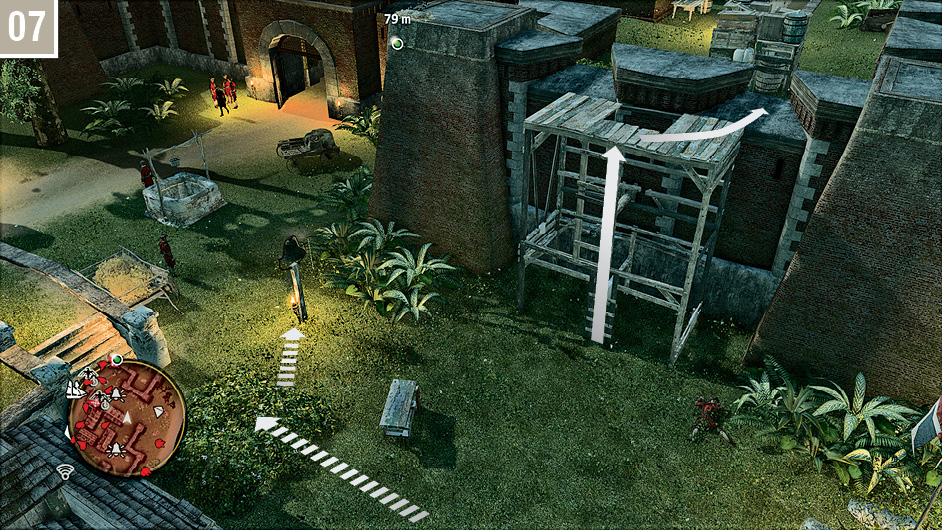
You don’t actually need to eliminate the guard standing in front of the hay-filled cart to sabotage the third bell: simply approach it carefully, just outside his field of vision, then tap  and move back into the Stalking Zone. If he sees Kenway, simply wait until he approaches before you quietly assassinate him. Either way, you are now free to climb the scaffold for the final approach to the prison.
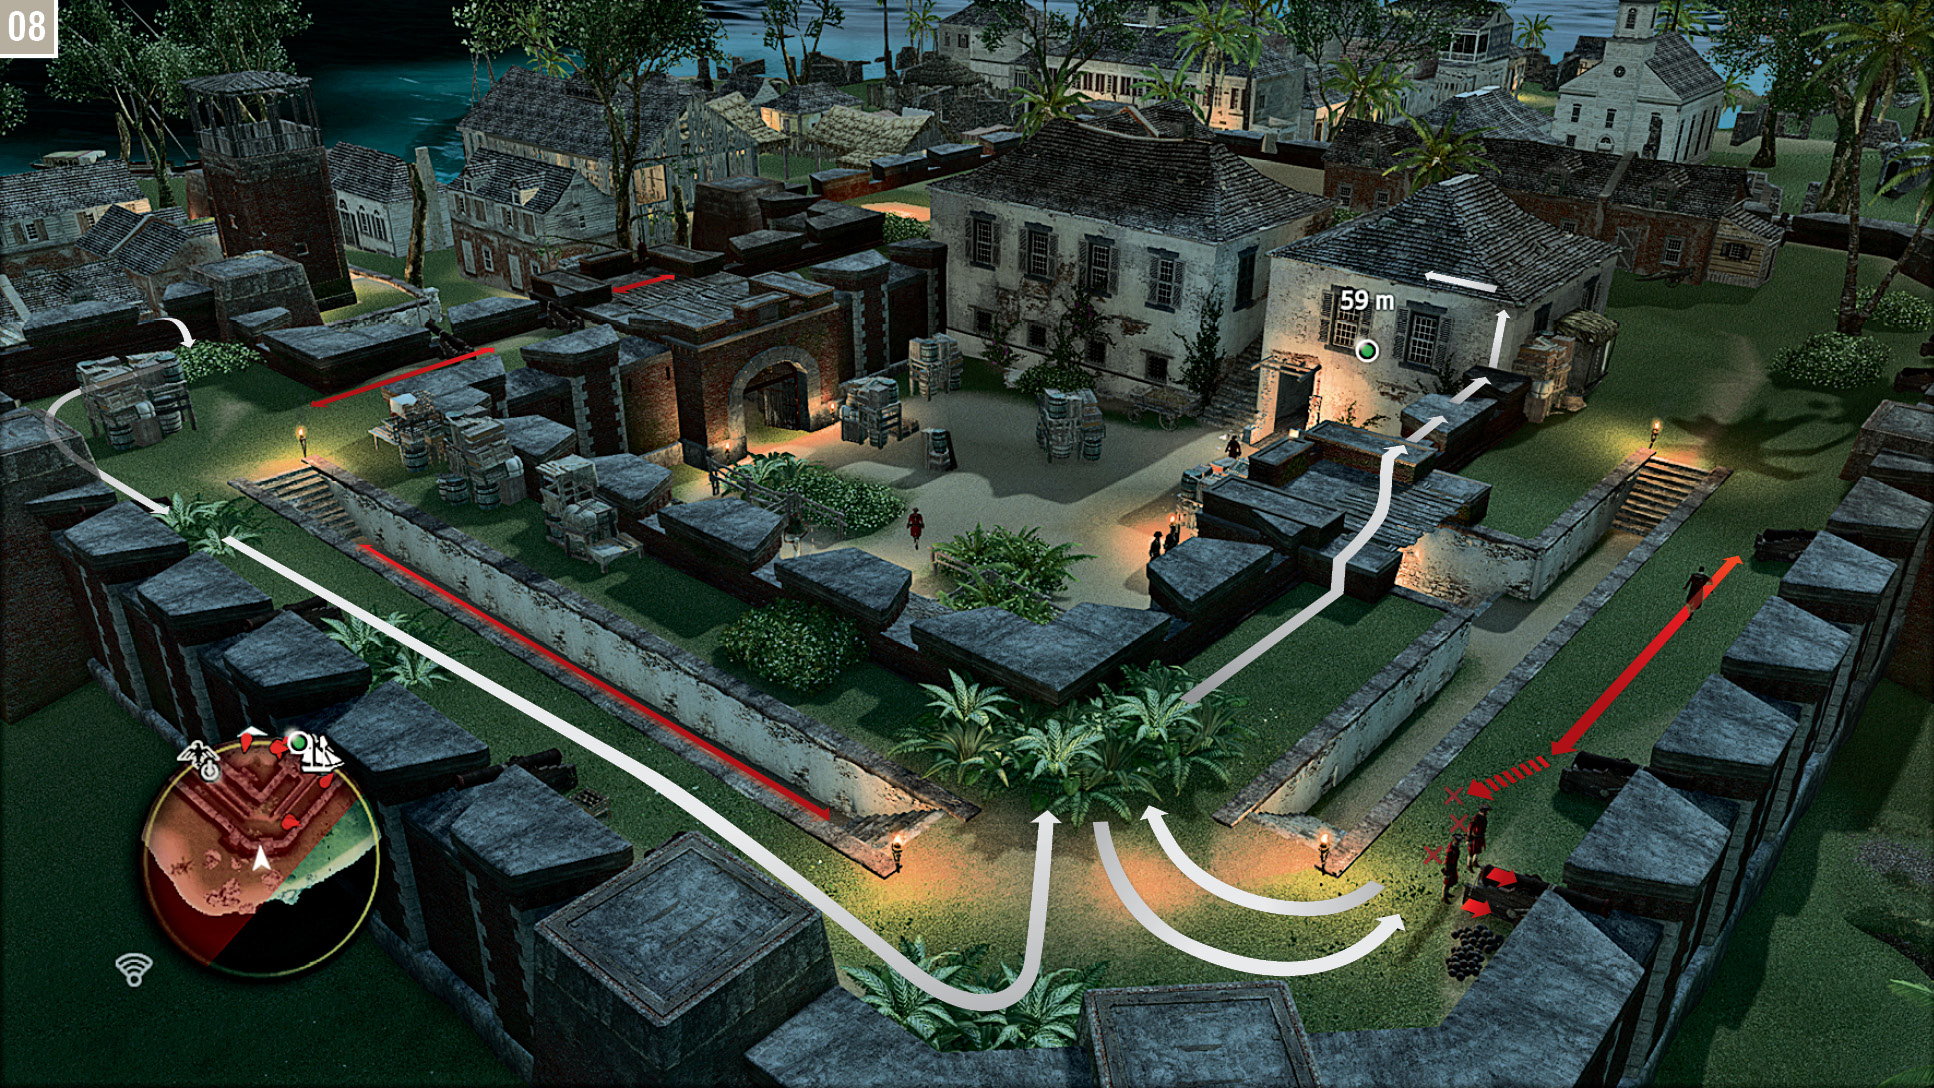
There is a troublesome Gunner with a hair-trigger above the main gate, so stay out of sight by the crates, and wait for the two soldiers to set off on their patrols. Though you can technically bypass him, it’s prudent to disable the soldier walking along the sunken path towards the far end of his patrol to avoid later complications. At the corner, wait until the soldier walking the next wall section turns away, then double assassinate the two sentries and go back to the Stalking Zone. When their patrolling colleague returns to investigate, assassinate him as well. You should then follow the highlighted path to reach a rooftop. You may need to quickly move away from the edge to allay suspicion if a soldier spots Kenway during the approach.
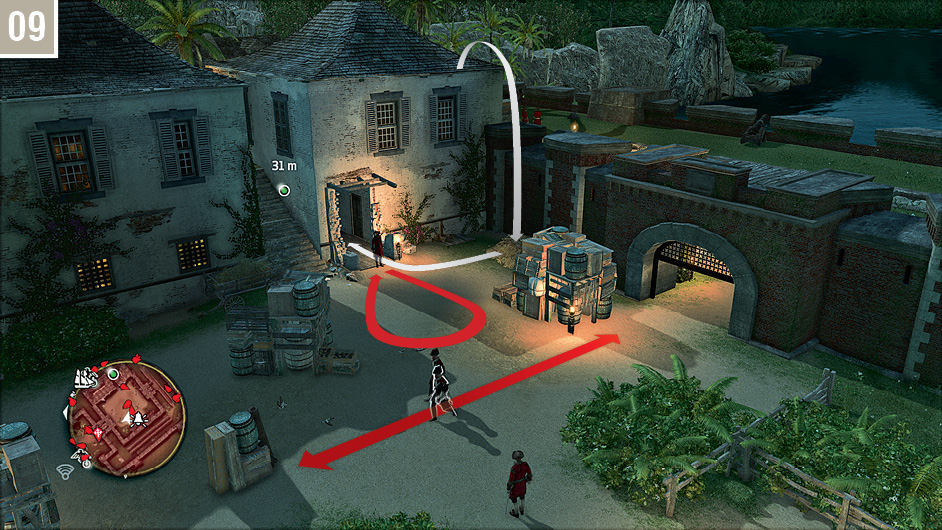
Watch the guard below. When he moves away from the open doorway, perform a Leap of Faith into the pile of hay, then dash in through the entrance. When you reach the glowing door, quickly press  to transfer to the prison interior before Kenway is detected. You can only open this door if he is anonymous: if you have an active alert, or a guard moving to investigate, you must deal with the situation before you can proceed.
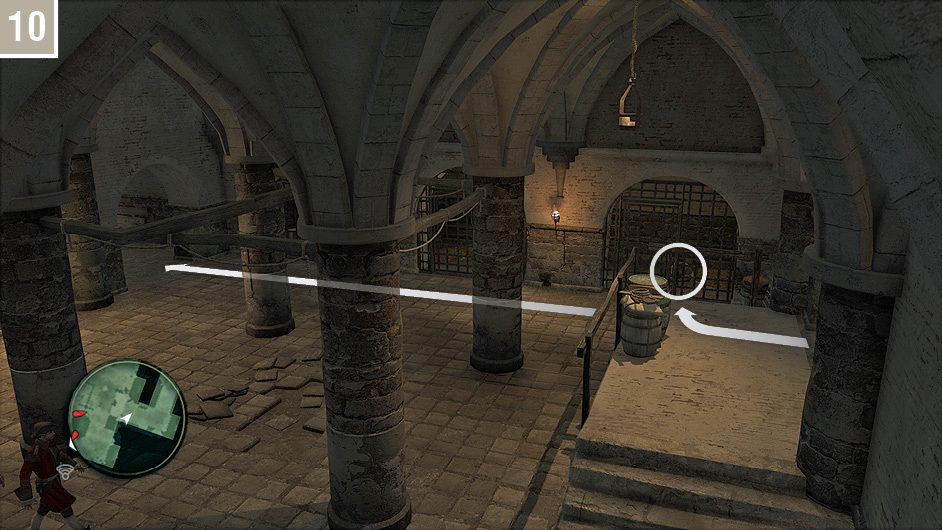
Walk along the corridor until it turns to the right; press against the wall and lure the nearby guard over for a corner assassination. The large room beyond has three soldiers walking patrols. As there’s no penalty for combat, it’s more convenient just to dive in and defeat them. Before you continue, approach the cell highlighted here (directly to your right as you enter the room) and press  to interact with a second “old friend” to complete the related Optional Objective.
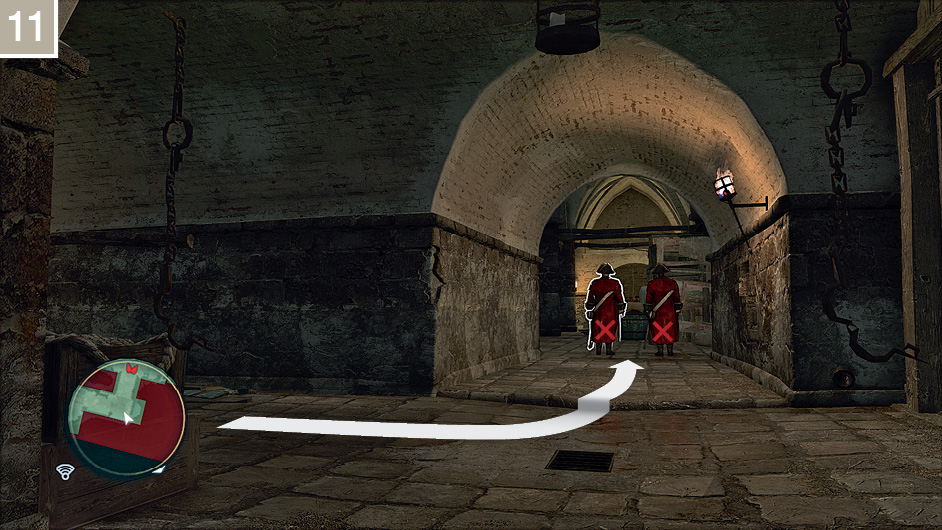
Follow the linear path, dispatching guards as you reach them, until you reach the cells where Anne and Mary are held captive. Combat is inevitable here, but you can start by double assassinating the two Brutes. Ah Tabai will arrive to assist as you approach the cells. Interact with the door to trigger a cinematic. The final moments of this Memory are entirely story-focused. To avoid spoilers, we’ll hold our peace.
Memory 02 “Delirium”
Mission Overview
This begins immediately after “To Suffer Without Dying”. There are no Optional Objectives or noteworthy challenges for this narrative-focused Memory, and it’s far more enjoyable to play it without any advance warning of what occurs.
Memory 03 “…Everything Is Permitted”
Mission Overview
Optional Objectives
- Use the Rope Dart to hang two guards.
- Use the Rope Dart to pull three guards.
Notes & Further Reading
- You regain the Jackdaw and the ability to explore the Caribbean after “Delirium” ends, so there’s no grand hurry to continue the main storyline if you would prefer to attend to other activities for a time.
- This mission unlocks the Rope Dart – the final major addition to Kenway’s arsenal of attacking options. With crocodile leather and black jaguar pelts, you can expand Kenway’s carrying capacity to 15 via crafting. This removes the one drawback to this powerful weapon.
- Note that you can also craft ammunition at any time by using bones collected while hunting. If you wish to complete the two Optional Objectives, it’s a good idea to ensure that you have several bones in your inventory before you begin. As Rope Darts are an entirely uncommon spoil of looting, this gives you a little more flexibility to meet the requirements.
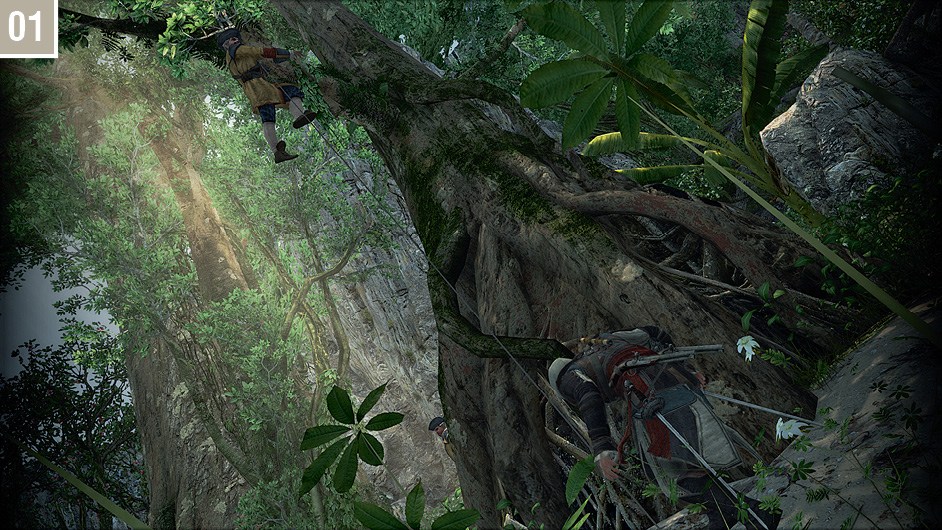
Once you are ready to begin, Fast Travel or set sail for Tulum on the west side of the map. Approach Adewalé at the waypoint and interact with him to start the Memory. When play resumes after the introduction, follow Ah Tabai until the conversation ends. Kenway must then assist the Assassins in repelling an attack on their settlement. Run through the waypoints until you reach a highlighted position in the trees. From here, use  to highlight an enemy soldier below, then hold
  and
and  in the opposite direction to hang them from the tree.
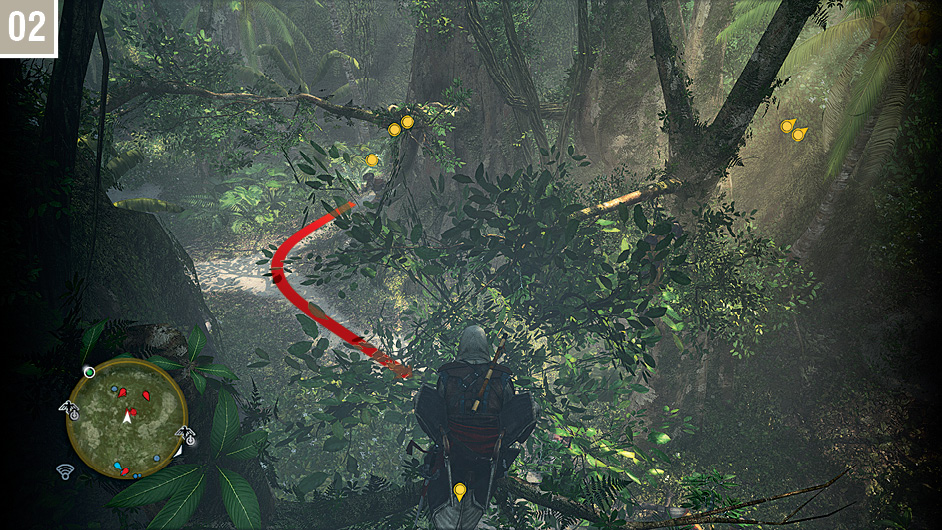
This is a short and action-packed mission once the fighting begins, with the primary challenge being to meet the Optional Objective requirements before you run out of targets. A second battle takes place when you reach the next waypoint. If you position Kenway in the trees above before the soldiers run in to attack, you can score another hanging kill. If you need more, you can simply sprint back to the upper area and repeat the same trick.
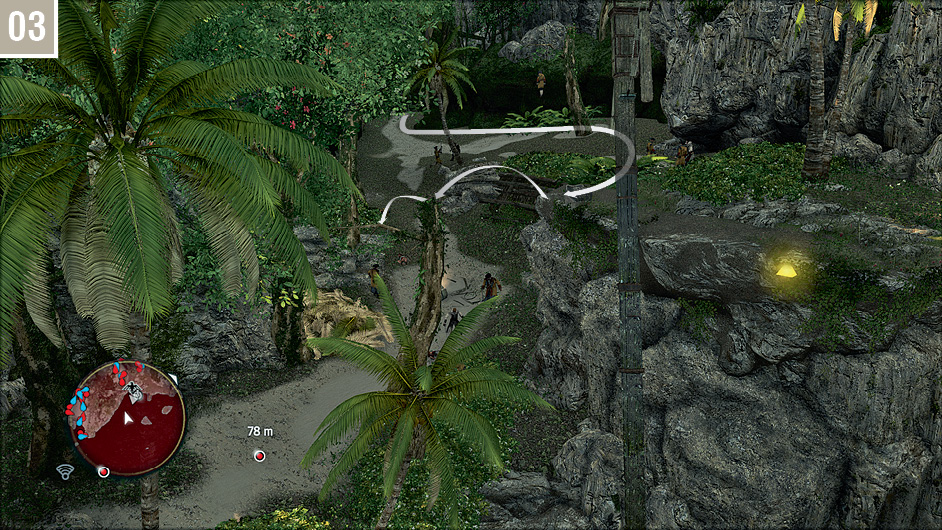
For the remaining section of the battle on the beach, you now only need focus on the “pull” Rope Dart attack. It’s particularly efficient at knocking Captains and Brutes from their feet for quick kills. If you are missing a hanging kill to meet the other requirement, the branch shown here may lead to suitable opportunities.
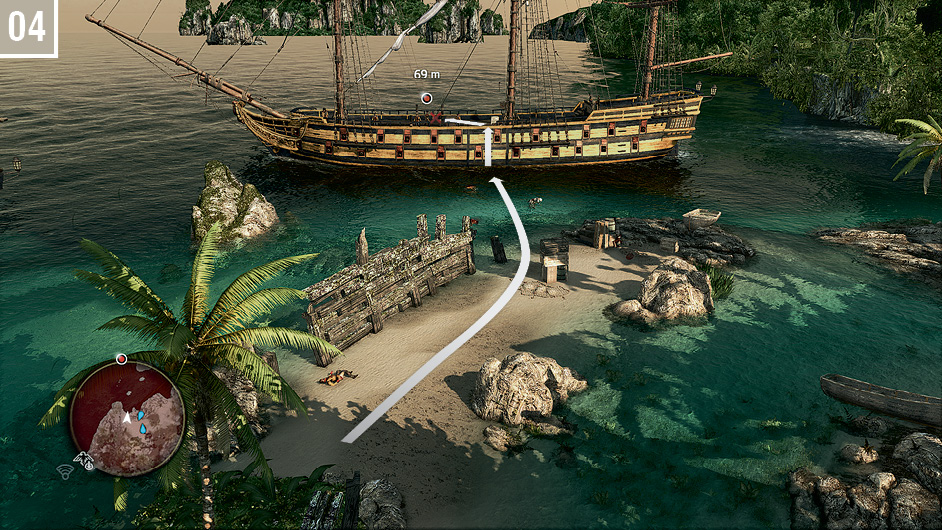
Finally, make your way to the enemy ship. The Gunners on board may fire on Edward during the approach: be sure to hold  to stealth swim if you see the distinctive target icon appear. Once you have hit the allotted total of 20 enemy soldier deaths, you only need to defeat the Captain to end the Memory. A Smoke Bomb in close proximity is sufficient to set up a quick and easy assassination finish.