
Assassin's Creed IV: Black Flag Guide Side Quests
Warehouses
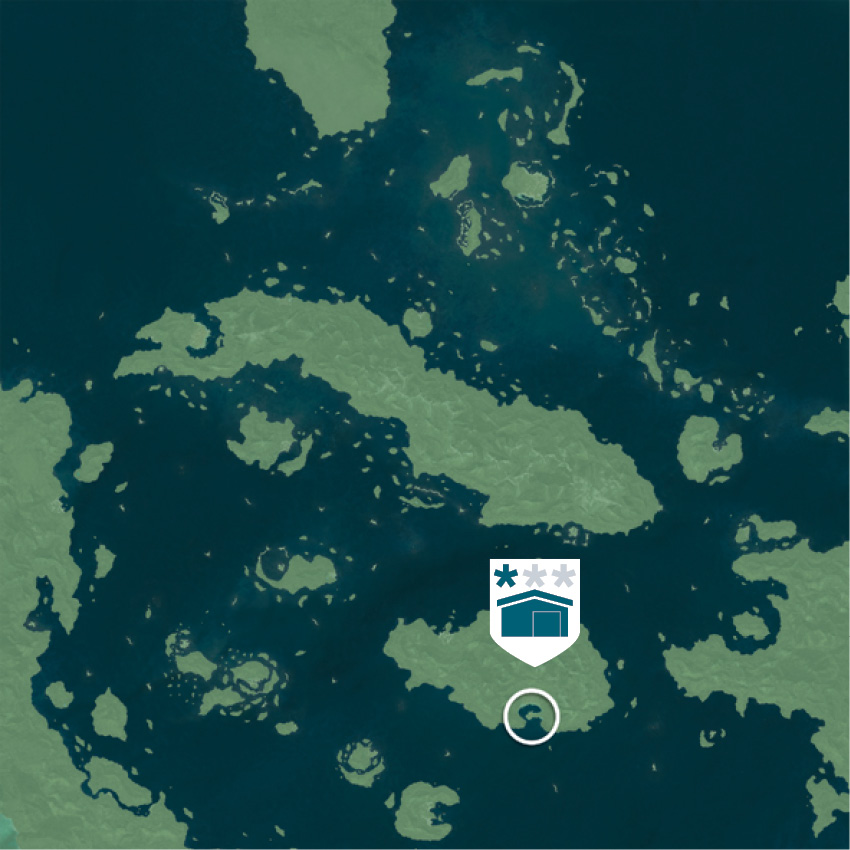
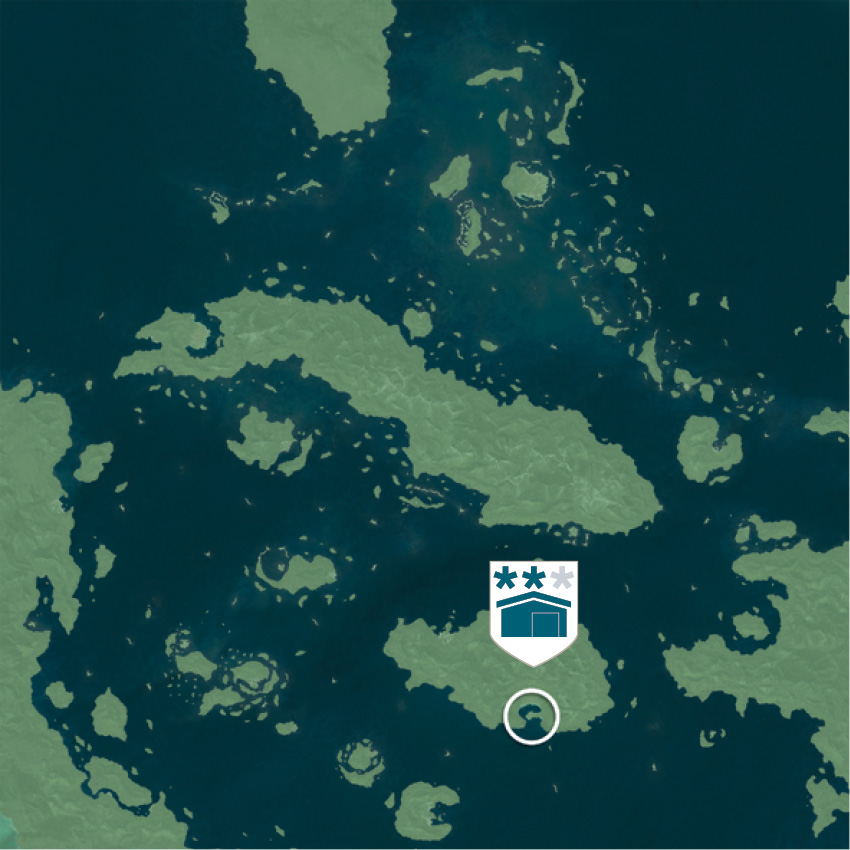
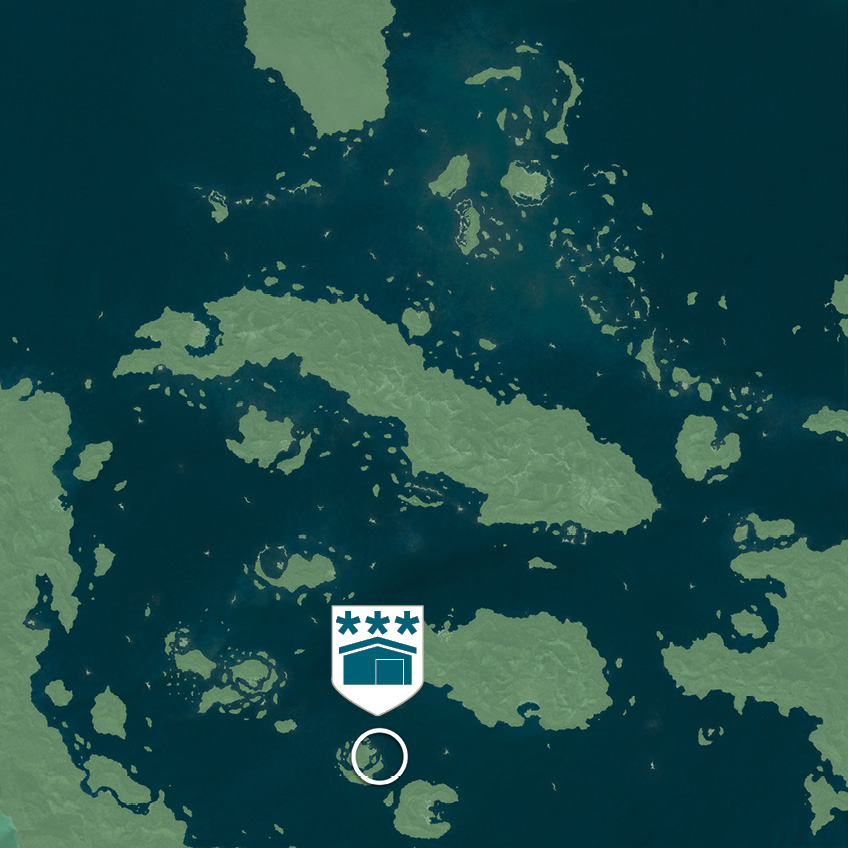
Plundering warehouses will net you small amounts of various types of cargo, as well as a financial bonus if you complete the challenge without a guard ringing an alarm bell: 400R, 750R or 1,000R, depending on the warehouse’s difficulty level ( ,
,  ,
,  ). This feature is unlocked (and, moreover, demonstrated) during “Sugarcane And Its Yields” in Sequence 03. Warehouses are much easier to raid successfully once you obtain the Blowpipe at the conclusion of Sequence 04.
A maximum of three warehouses (chosen at random from the total eight) are available to raid at any given time. Once you complete a warehouse, a site from the remaining pool of five will be filled with cargo after a five minute “cooldown” period. This makes it a little harder to aggressively grind these sites for cargo rewards, but it’s still a viable strategy once you have unlocked all nearby Viewpoints.
A large stock of Sleep Darts (plus capacity and duration upgrades) and Smoke Bombs are valuable tools during stealth infiltrations. Our walkthroughs here focus on approachable and proven strategies that involve a minimal level of bloodshed. If you prefer a direct approach, or trigger a combat situation after an unfortunate misstep, note that a Smoke Bomb deployed at the site of an alarm bell will prevent guards from sounding a general alert.
Nassau (633,784)
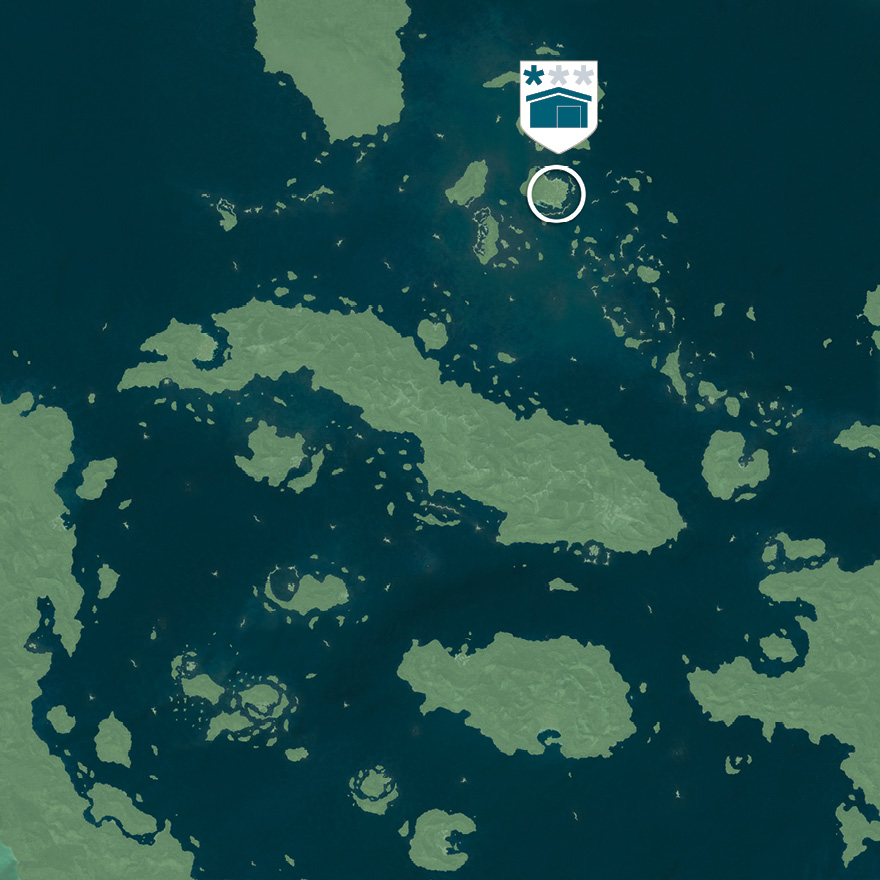
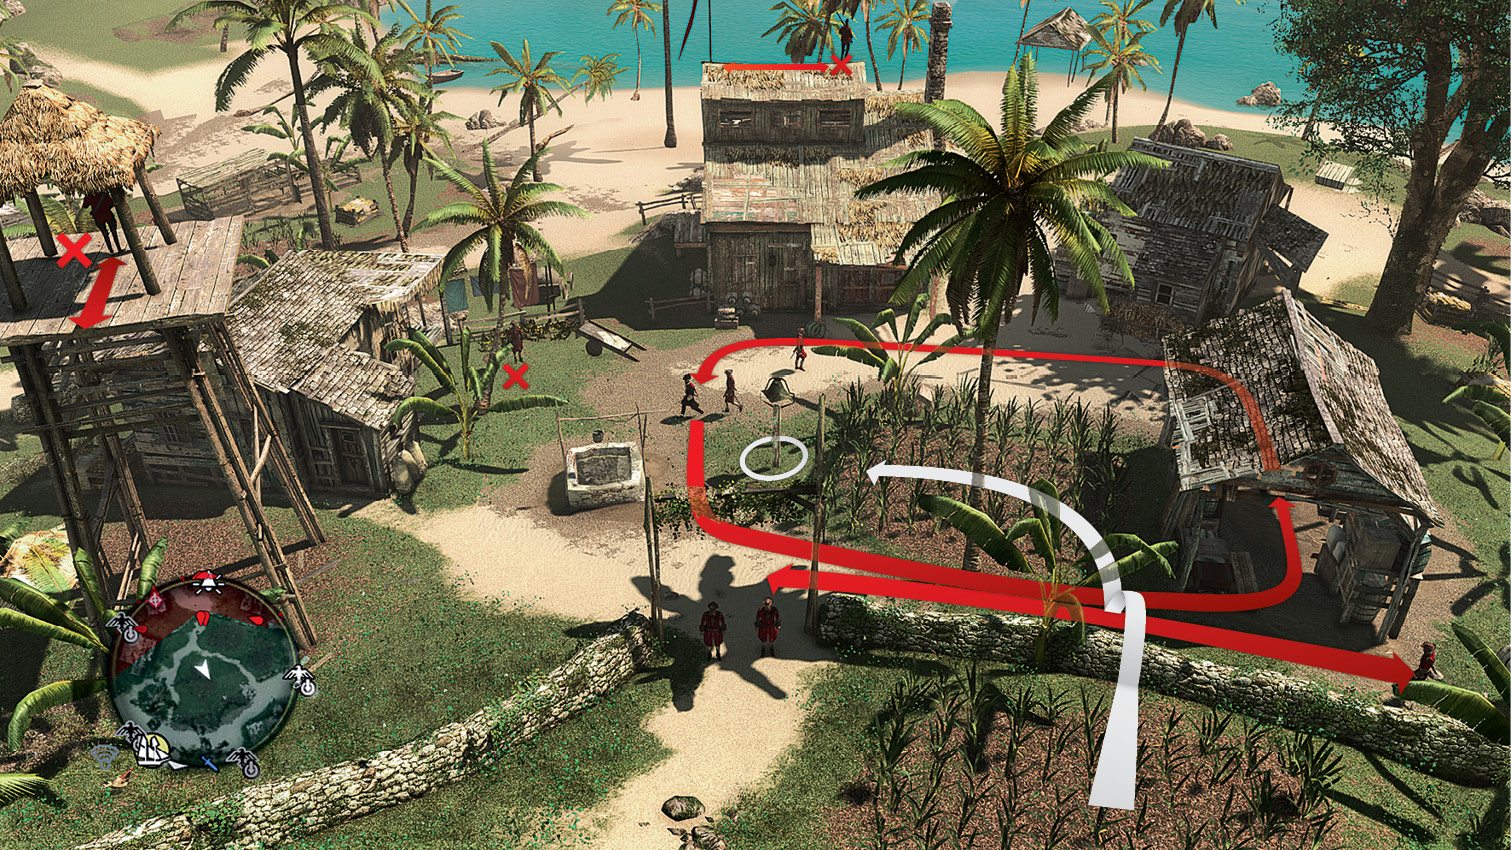
The quickest way to start this raid is to Fast Travel to the Viewpoint in the southwest of the town, which conveniently overlooks the warehouse; otherwise, simply approach it from the north and enter the Stalking Zone provided by the crops outside the stone wall. Entice the nearby guard with a whistle, punish his rank stupidity with the vigor you deem appropriate, then activate Eagle Vision to identify the key holder. This Captain walks an anticlockwise patrol in the area directly ahead, which also brings him past your position. A well-timed whistle that doesn’t also alert his soldier companion is perfect, though you can incapacitate both with Sleep Darts if they vault the barrier to investigate. Transfer to the Stalking Zone inside the Restricted Area, then hit both Gunners and the stationary guard to the left of the warehouse door (highlighted with an X above) with Sleep Darts. Once you are sure that no one else is looking, make a short sprint to grab your reward.
Havana (240,607)
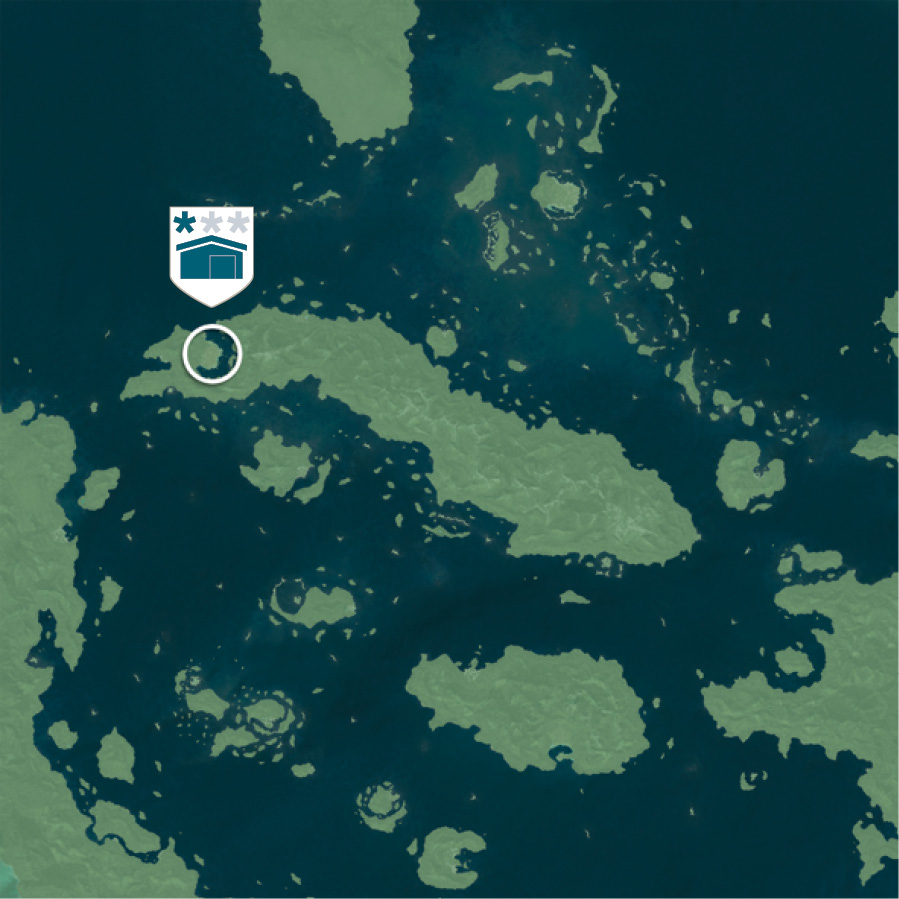
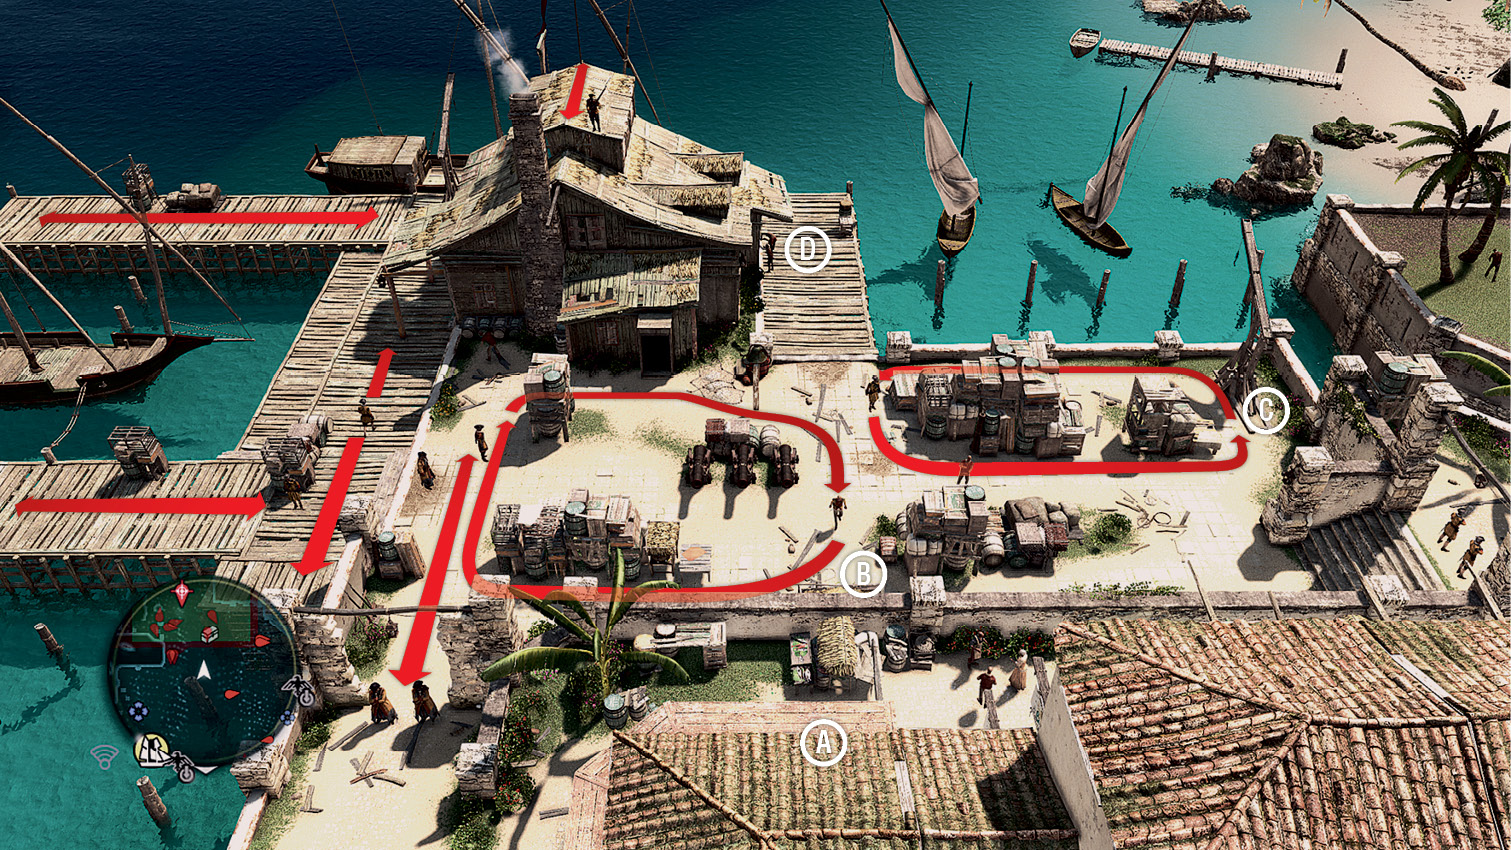
Climb the building to the north of this warehouse and use Eagle Vision to identify the key holder: a Captain walking a short patrol between the Brutes guarding the entrance and another Brute closer to the dock. From the wooden beam (position  ), perform a Leap of Faith into the hay cart below (position
  ). The Captain will now do a curious thing: he leaves the Restricted Area and walks an anticlockwise circuit of the block to the north. After two loops, he will return to his original position and stand watch – so speed is of the essence here. From your position in the hay cart, whistle to entice the patrolling Scout when he approaches your position, then eliminate him. While being mindful of the Gunner on the roof of the warehouse, assassinate the patrolling soldier to the right at position
  . You can then tranquilize the Gunner and disable the alarm bell. Now climb back over the wall and intercept the Captain on his patrol: he should have completed no more than a single circuit so far. It’s wise to take him by surprise – either with an assassination from behind, or a Sleep Dart. You can then re-enter the Restricted Area (just jump over the wall close to the hay cart) and move to position
  . Either wait until the soldiers patrolling the dock face away before you dash for the door, or hit them with Sleep Darts.
Kingston North (623,172)
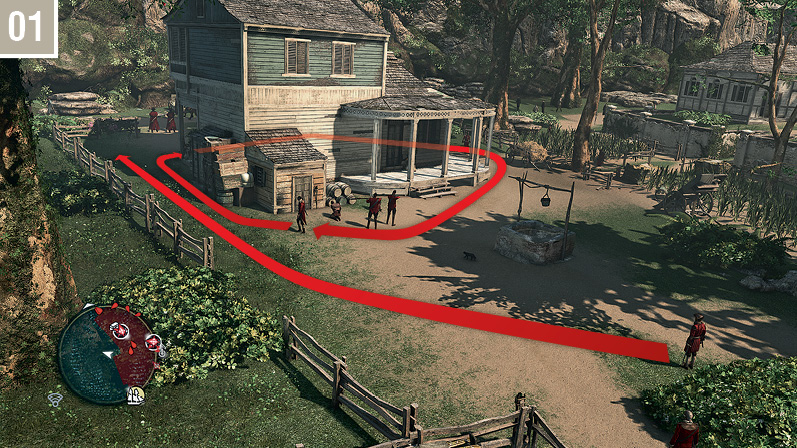
Approach the northwest corner of the Restricted Area surrounding the warehouse, then wait in the Stalking Zone close to the fence. The key holder, a Scout, walks a clockwise route around the house. Though a soldier who patrols close to the fence is a slight complication, it’s no great challenge to whistle and lure the key holder to your position.
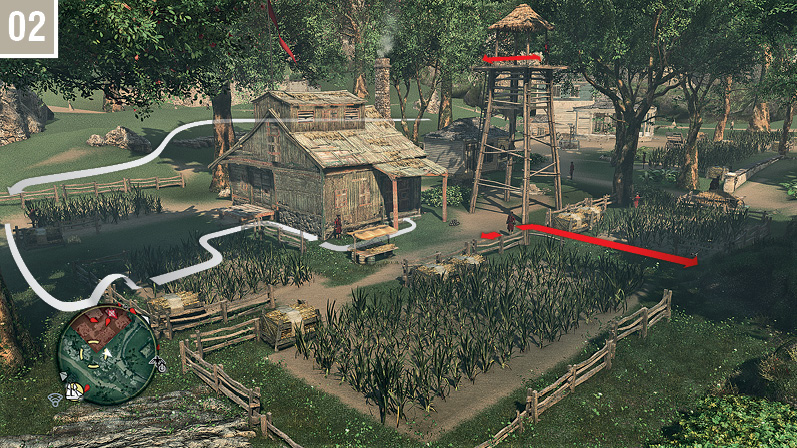
Move to the south of the Restricted Area, then enter the Stalking Zone. Hit the Gunner in the tower with a Sleep Dart, then do the same with the soldier patrolling to the right of the tower. You can then either perform a corner assassination on the stationary guard, or incapacitate him from behind if he moves to investigate his sleeping colleague. Approach the unattended door to complete the raid.
Kingston South (623,172)
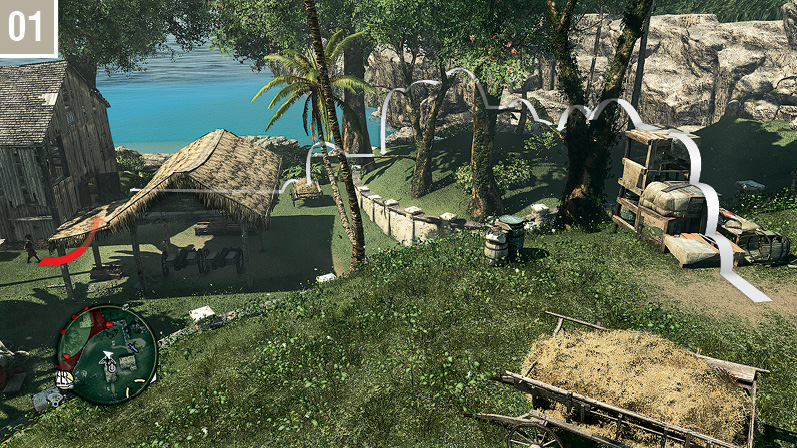
Starting at the nearby Viewpoint, begin your raid by free running through the trees to reach a hay cart just inside the Restricted Area. From the hay cart, wait and watch. Use Eagle Vision to mark all enemies in the vicinity. When all guards are facing away, transfer into the Stalking Zone just outside the door of the barn. When the key holder (a Captain) arrives, whistle to entice him over. Sometimes, you may find that a patrol is too close for a safe assassination; this is unfortunate, and necessitates that you wait until the Captain completes another circuit of his patrol.
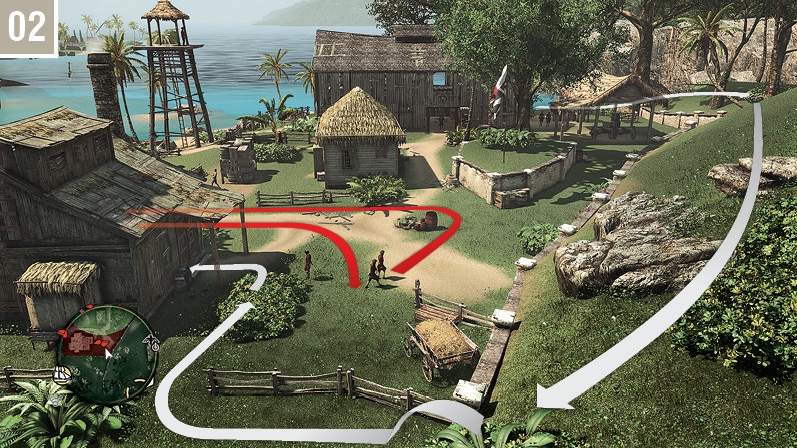
When all patrols are conveniently placed, run out of the Restricted Area and approach the warehouse from the east. There is a two-man patrol that can potentially spot Kenway here, but their route to the south takes them completely out of sight for a significant amount of time. Ignore the stationary guard, and simply walk to the marked door to end the raid successfully.
Cat Island (985,626)
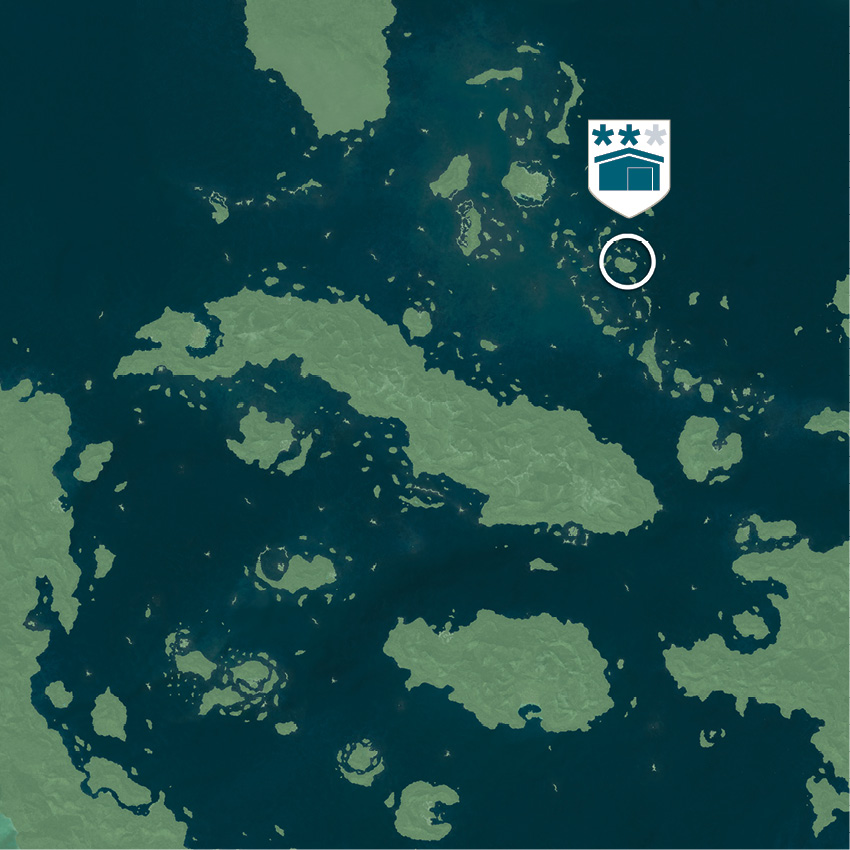
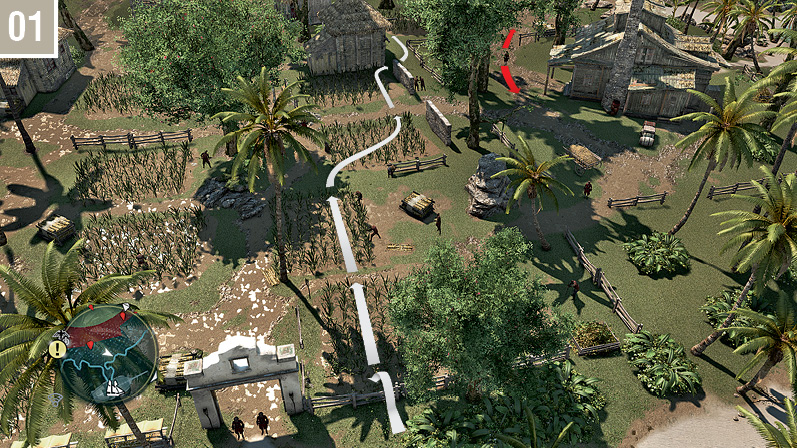
Though the guard patrols on Cat Island are functionally identical to those you encountered in your visit during the “Sugarcane And Its Yields” Memory, there is one big difference: the key holder has an alternative patrol route. Your initial infiltration should be broadly the same, but without the circuitous route necessitated by the story-related eavesdrop. Make your way through the Stalking Zones, then eliminate the guard patrolling close to the warehouse.
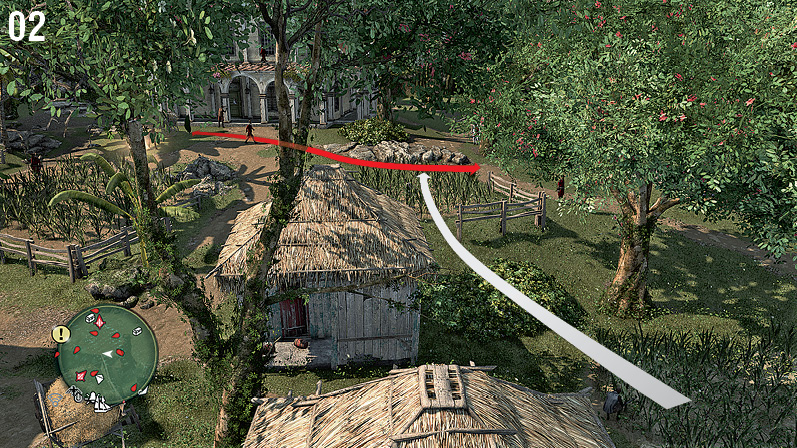
From the Stalking Zone opposite the warehouse, make your way to the position marked on the accompanying screenshot. The key holder (a Scout) walks directly past every minute or so, which makes for an easy assassination. You can now retrace your steps to return to the warehouse.
Matanzas (333,650)
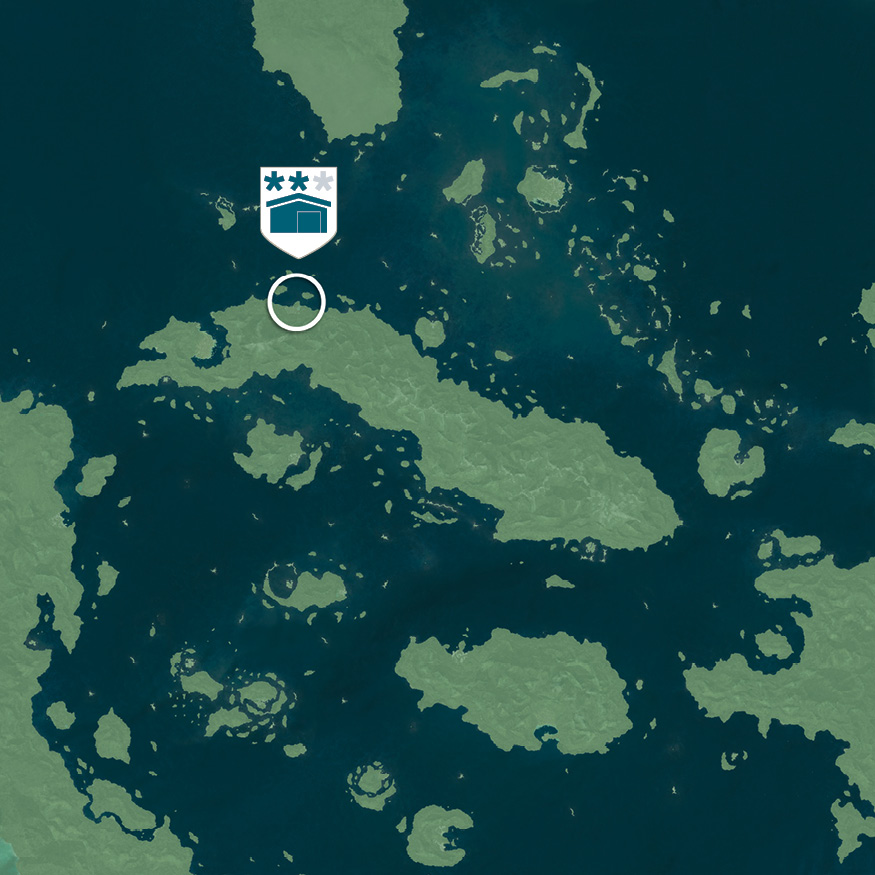
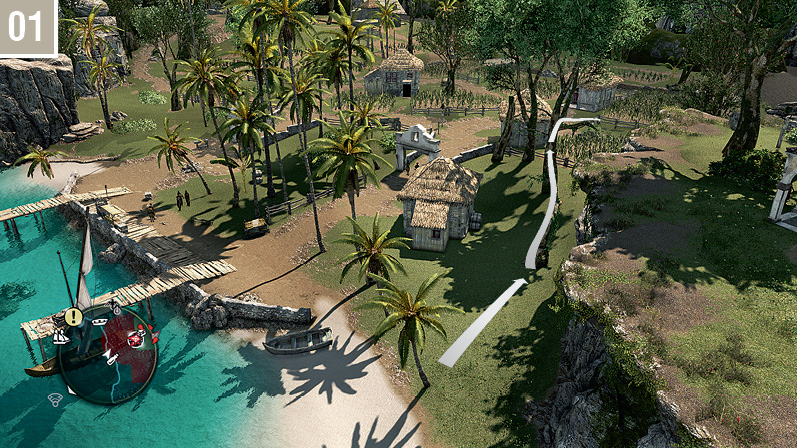
Make your way to the dock at the south of the map. From the dock, reach the specific tree (indeed, individual branch) shown in the accompanying screenshot. This offers a good view of the house where the key holder can be found, but is just outside the detection range of all hostiles in the area. Use Eagle Vision to mark targets.
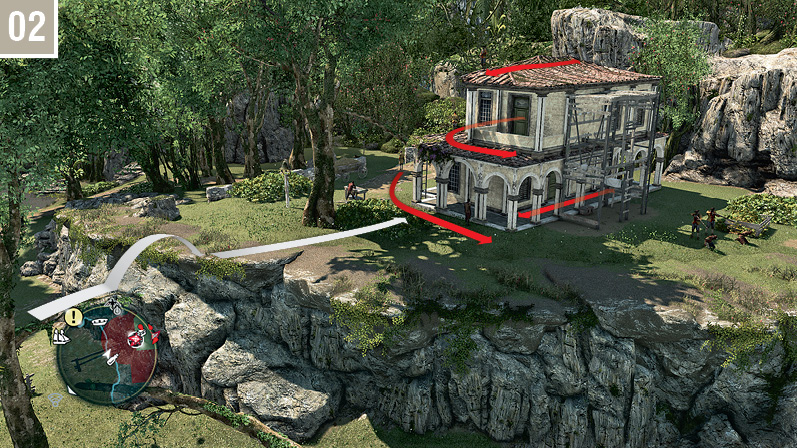
When the guards (particularly the Scout on the lower roof, and the Gunner above him) are looking away, make a quick dash into the Stalking Zone. The key holder is a standard soldier, and walks a regular anticlockwise patrol around the house. Whistle to attract his attention as he strides by, then perform the necessary deeds.
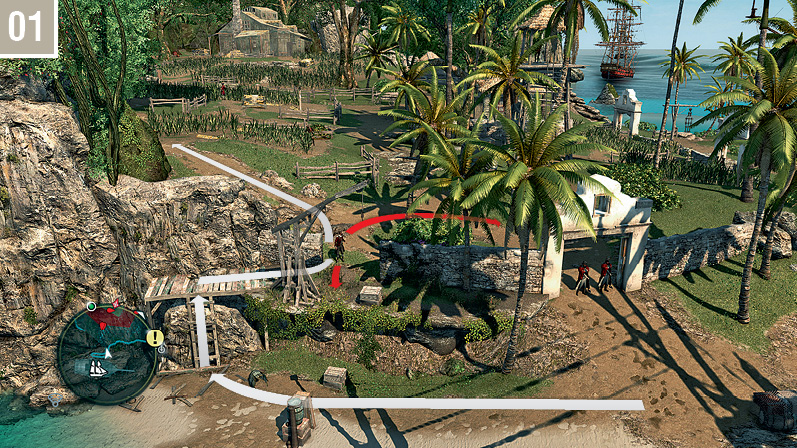
Retrace your steps, then run to the east side of the dock. A Brute and a Scout walk a regular patrol along a path here. It’s possible to vault the nearby fence and sprint up the path to the safety of the campsite when they approach the westernmost extent of their route (marked with an X).
From the campsite at the end of the path, head south into the Stalking Zone and study the area around the warehouse. If you eliminate the patrolling Scout (an easy task from your concealed position), there is usually a huge window where all nearby guards are facing away from the marked door. All you need do is wait for that opportunity.
New Bone (442,118)
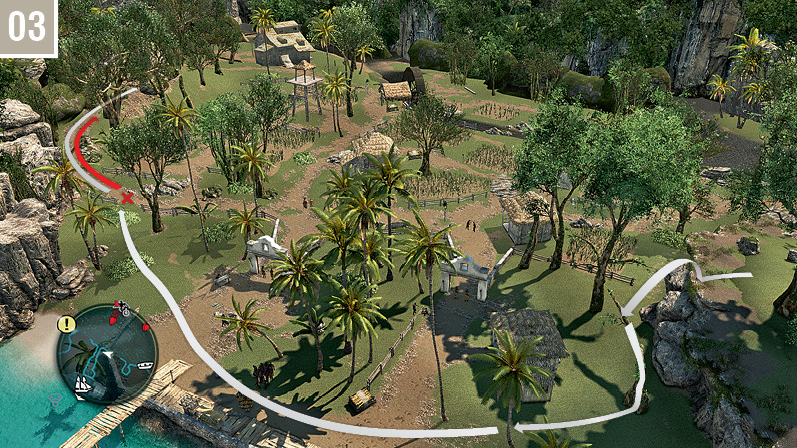
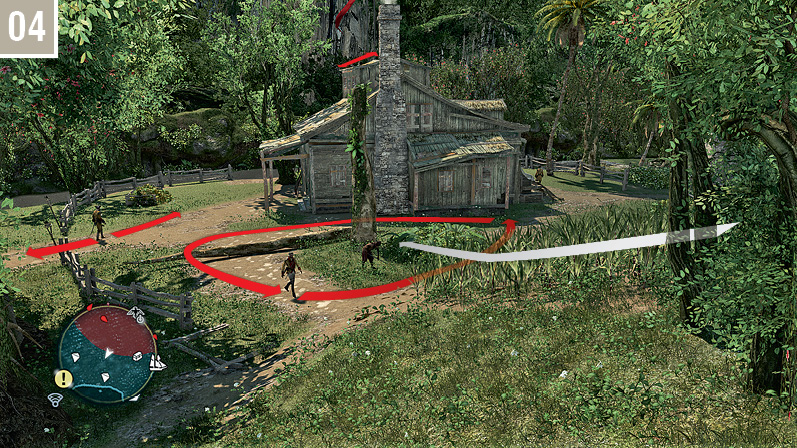
Start at the southeast edge of the beach. Press up against the wall beside the small “doorway” and, when the Scout moves into position, perform a corner assassination. You can then make a dash for the Stalking Zones to the northwest.
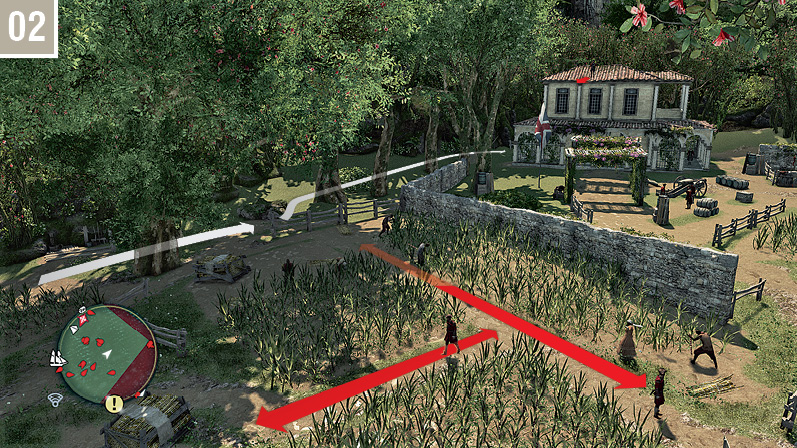
When the two soldiers in the nearby field face away, sprint for the Stalking Zone close to the outer wall of the garden. From here, hit the Gunner on the roof with a Sleeping Dart, then continue to the house itself.
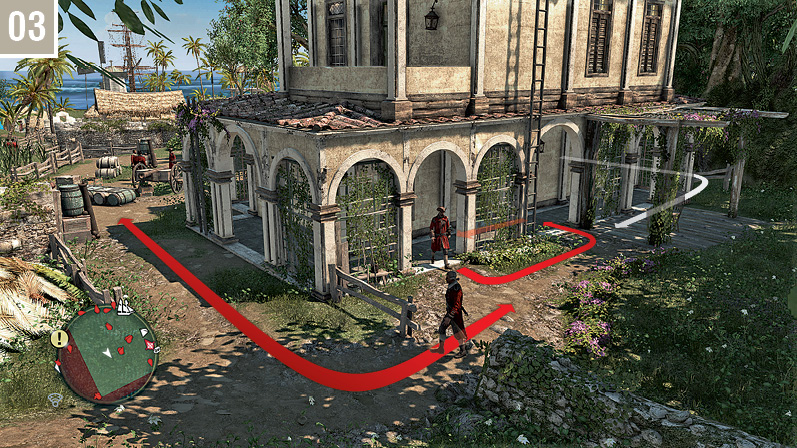
The key holder is a Scout who walks a long patrol route between sites in the garden in front of the house, before making a brief trip to the rear. Eliminate the soldier stationed here before he appears, then hide (perhaps on the lower roof section above) to stealthily subdue your primary target when he arrives.
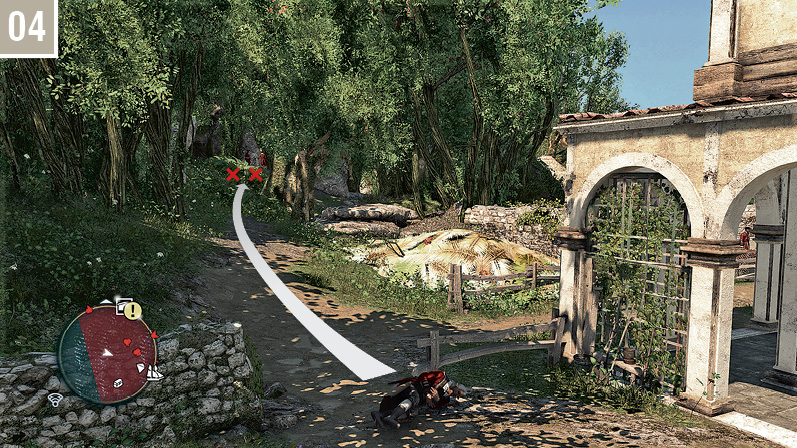
Run along the path to the north until you reach two guards facing away from Kenway. You can hit them both with Sleep Darts for an assured result, though a double assassination works just fine if you are brimming with confidence. Approach an opening to the east to set eyes on the warehouse itself.
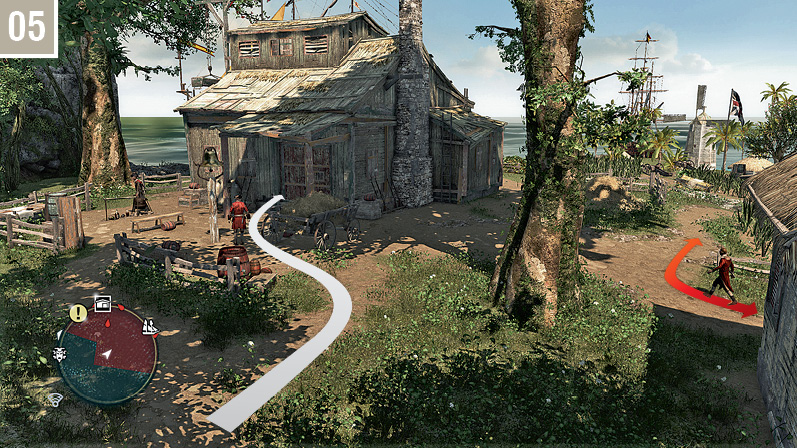
The only remaining hurdle is to hit the patrolling Captain and a stationary soldier with Sleep Darts before you make a run for the door. Wait until the Scout (right-hand side of the screenshot) walks to the south, then make your move.
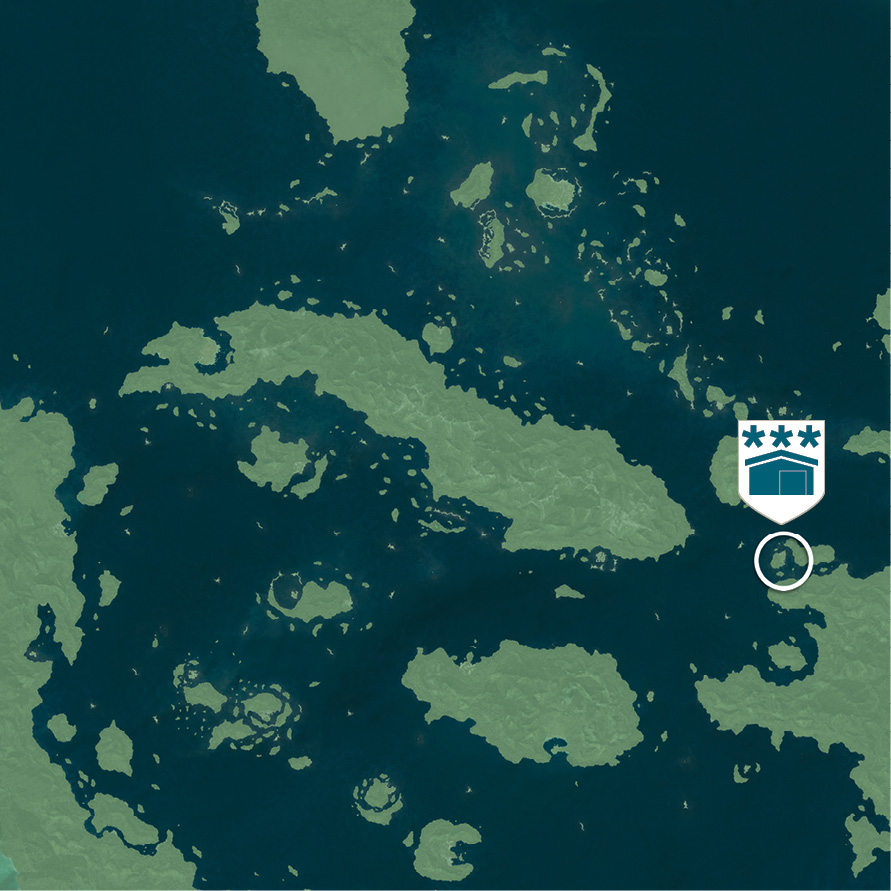
Tortuga (882,370)
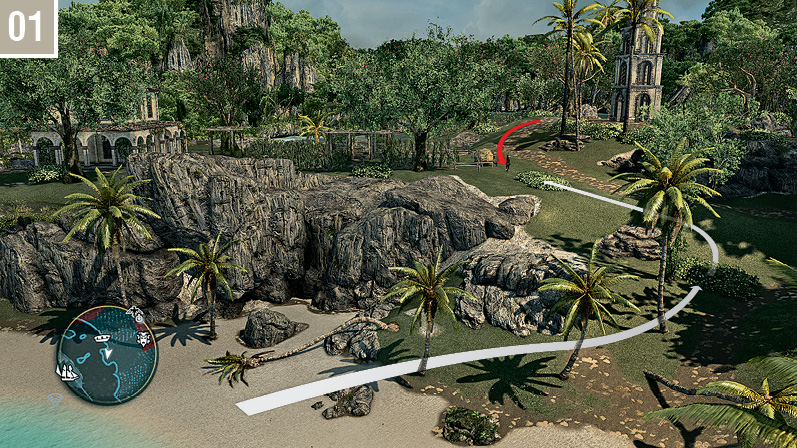
For the best possible start on a first visit to Tortuga, start from the east dock after a swim and circle around the outer edge of the coast to reach the north beach. From here, run up the slope to the Stalking Zone and eliminate a patrolling Brute, as pictured here. There is often a “save pirates” scenario close to the Viewpoint, so the presence of two Gunners complicates matters somewhat – but purposeful movement will still suffice. Hit the (permanent) Gunner in the tower with a Sleep Dart, then transfer to the Stalking Zone near the top of the hill.
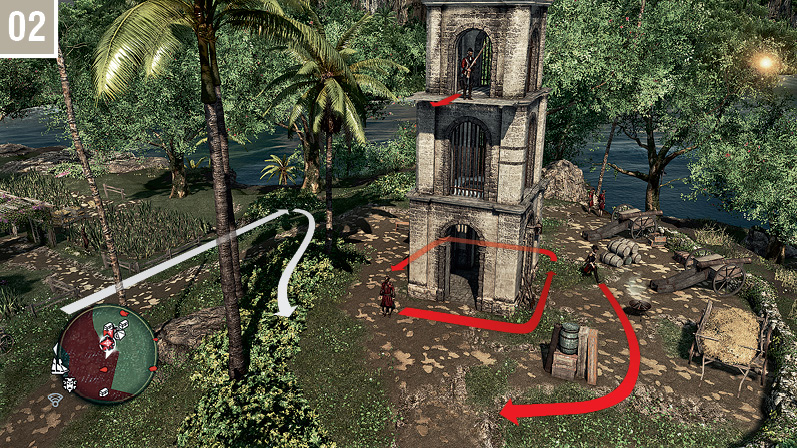
The key holder is a Captain, and he walks a clockwise patrol that takes him through the arches beneath the tower before he swings around to the west. There is also a soldier that circles the tower. From the Stalking Zone, wait for the Captain to approach, then whistle. If there are Gunners holding pirates hostage here, perform this from the very edge of the Captain’s detection range (approximately 10m) to ensure that you do not disturb them, then lead the Captain to the far end of the Stalking Zone with a second whistle to avoid detection. These additional steps are not required if the ambient crew recruitment opportunity isn’t active. Once you have the key, hit the Gunner in the tower with another Sleeping Dart (unless he’s still out cold), then backtrack to the dock.
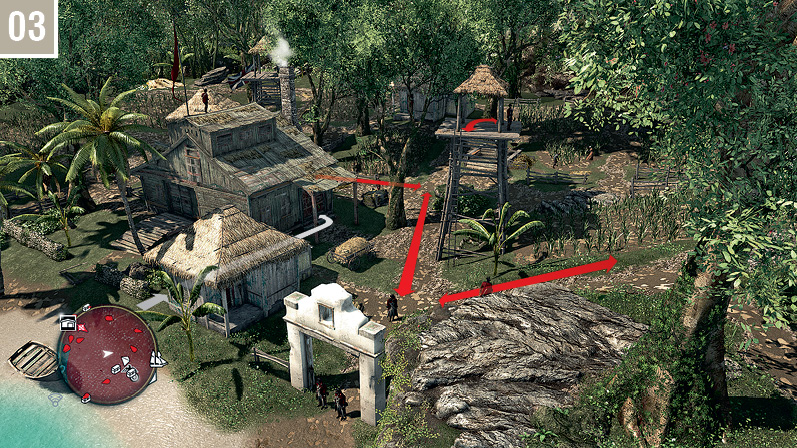
Move into the Stalking Zone to the left of the hut. There are four potential complications in the approach to the warehouse entrance: two Brutes walking short patrols on the north side to the door, a soldier to the west who views the doorway at one extent of his fairly long patrol, and a Gunner in the tower. Hit the Gunner with a Sleep Dart first, then emerge from the Stalking Zone and peer around the corner. Wait until the two Brutes are at the positions where their patrols (almost) converge, east of the tower. Now tranquilize them in quick succession. As long as you don’t make a break for the door while the soldier to the west is nearby (check your mini-map!), you can sprint to claim your sizable reward.