
Assassin's Creed IV: Black Flag Guide Walkthrough
Sequence 08
PREVIOUSLY...
With the notoriety of the “pirate democracy” firmly established, and perhaps augmented by the recent actions of Kenway and Blackbeard, Woodes Rogers arrives in Nassau with Commodore Peter Chamberlaine and a sizable detachment of British soldiers. After calling known pirates to a parlay, he offers an ultimatum: either agree to an immediate cessation of piratical activities, and accept the King’s Pardon, or face execution without trial. While some (particularly Benjamin Hornigold) favor surrender, believing Nassau to be a lost cause, others – including Kenway, Charles Vane and Calico Jack – are less than enamored with the prospect.
When Vane and Kenway discover that the uncompromising Chamberlaine intends to willfully disregard the orders of Rogers and scuttle all ships within the surrounding naval blockade, they resolve to escape. After assassinating the Commodore, they load a vessel – a “fireship” – with stolen gunpowder, set it alight, and steer it at the British vessels to punch a hole in the blockade. Following the successful escape from Nassau, Kenway returns to his secret cove to consider his next move…
Memory 01 “Do Not Go Gently”
Mission Overview
Optional Objectives
- Kill four guards.
- Use heavy shot to incapacitate the man o’ war.
Notes & Further Reading
- Sequence 08 begins at Kenway’s Great Inagua hideout. Though you might look wistfully at the cove upgrade locations, these are still best left until you have the Jackdaw and Kenway himself outfitted with the best possible upgrades. Until then, hideout improvements are naught but expensive luxuries that confer precious little in the way of practical benefits.
- Stock up on naval ammunition (particularly heavy shot for the Optional Objective) and ensure that the Jackdaw is in a perfect state of repair before you begin. Smoke Bombs are also useful, but not strictly essential.
- The location where this Memory takes place is exclusive to this part of the story, and does not feature any collectibles.
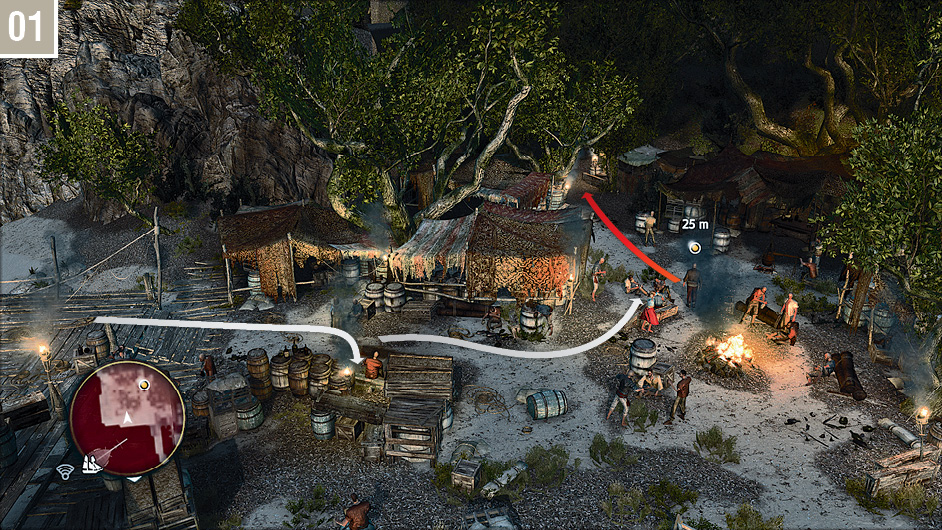
The  marker for this mission can be found at the very north of the Caribbean map; Fast Travel to Abaco Island to reduce the journey to a few minutes. After Kenway notices the suspicious man at the close of the opening cinematic, begin the tail by sitting on the bench to your right, then approaching the campfire to blend with the revelers. This will enable you to avoid detection when your target turns to observe the path behind him.
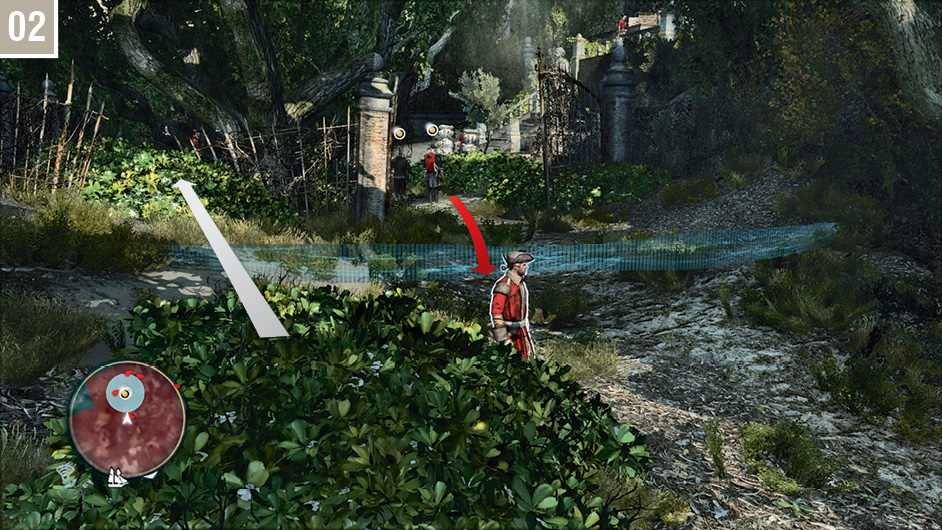
Once safely away from the party, the stranger will break into a run. Sprint after him until you reach the gate shown here, and wait in the Stalking Zone. After a brief conversation, a guard will approach your position, and an eavesdrop will begin. Assassinate the unfortunate and decidedly incautious Stephens (he’s named by his commander just before he presents his back to Kenway, but don’t let that personal detail stay your blade) to begin working towards the Optional Objective quota. You can then run into the Stalking Zone to the left.
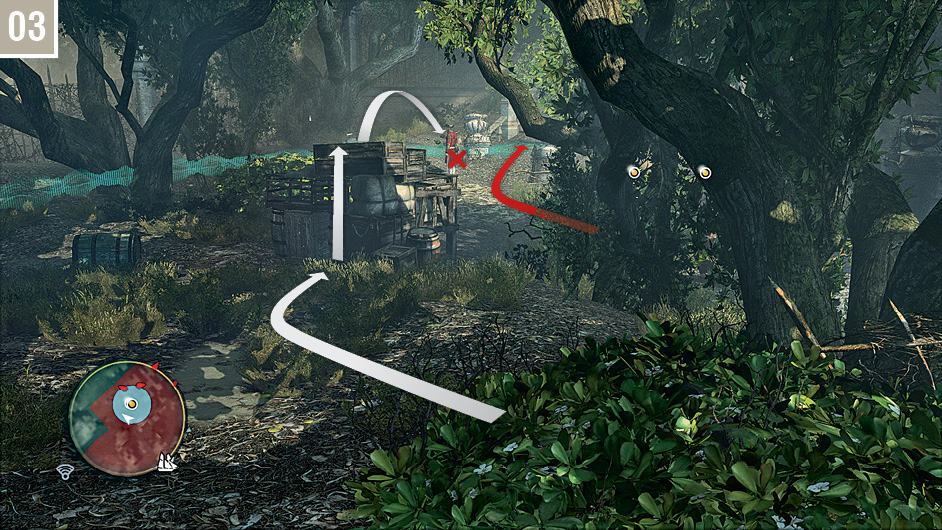
Once the two targets begin moving, make a swift dash from the Stalking Zone to a position behind the crates. Wait until your two targets resume their stroll and then climb on top of the crates to perform an immediate air assassination on the guard on the other side. It’s unorthodox, under the circumstances, but it’s the quickest and cleanest solution. You can then run over to the slope, to the left of the steps, to reach another Stalking Zone.
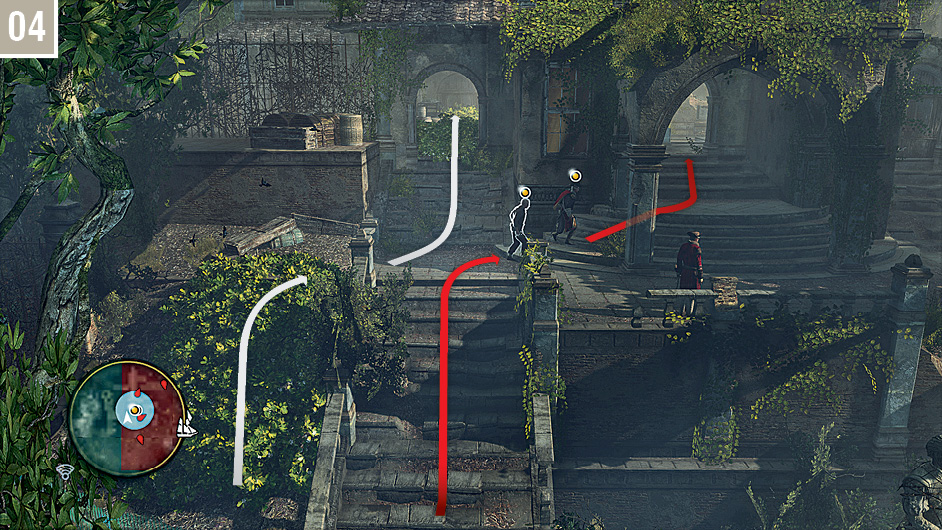
Your targets will head to the right; take the left-hand opening into the next Stalking Zone. There is another opportunity to assassinate a guard to your right for the Optional Objective here, but we advise that you pass this chance up – it’s an awkward kill to perform while remaining in the eavesdrop circle.
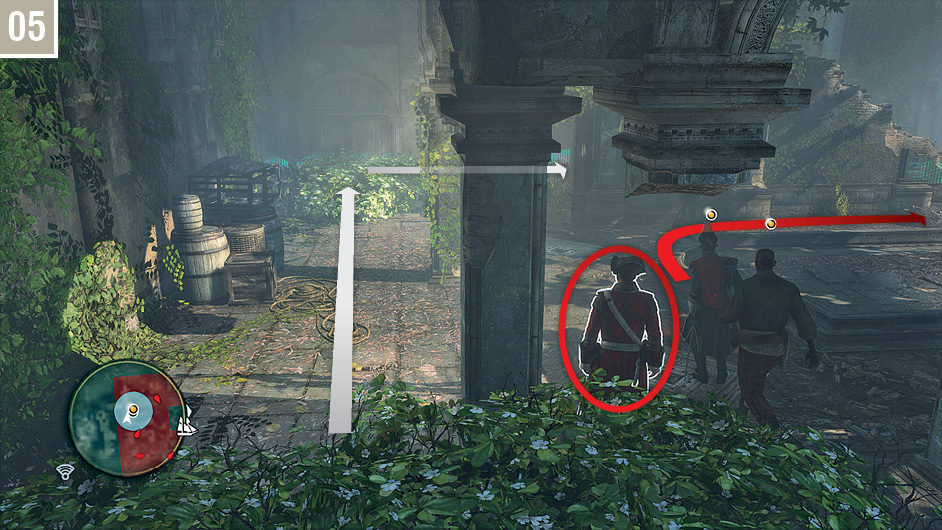
Wait while the two targets pause to converse, then quickly assassinate the soldier directly ahead. You can then sprint to the Stalking Zone on the opposite side of the room. Turn right and follow the secluded “corridor” until you reach another Stalking Zone.
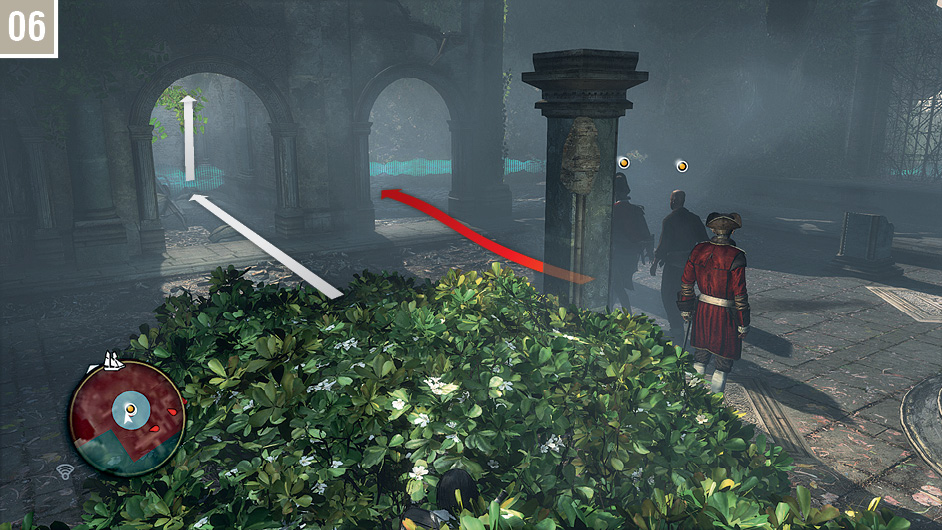
When the targets continue their journey, assassinate the guard – completing the first Optional Objective of this Memory – then take the left-hand opening to climb to a balcony.
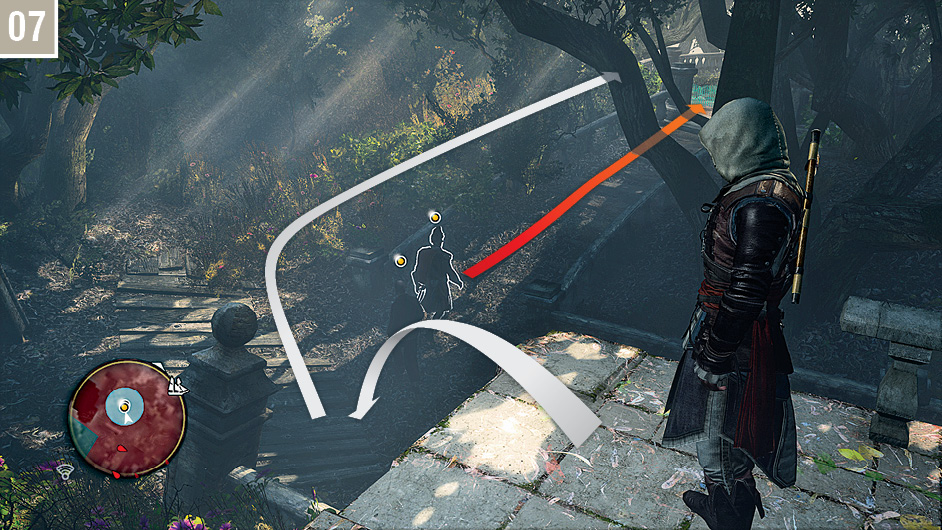
To end the eavesdrop, climb the slope to the left of the path and wait in the Stalking Zone to watch events unfold.
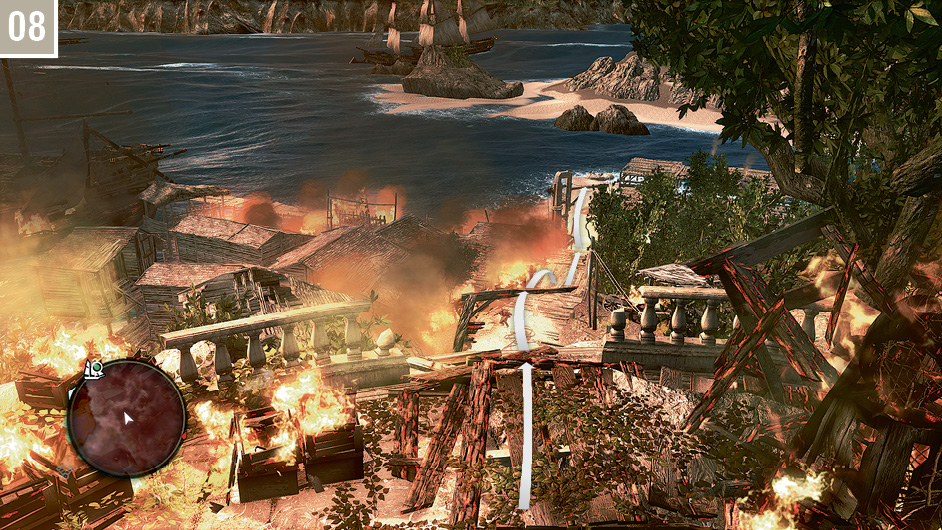
You must now reach the Jackdaw within the time limit. Jump through the gap in the balustrade to reach the lower level, then leap over to the winch to swing around to the left.
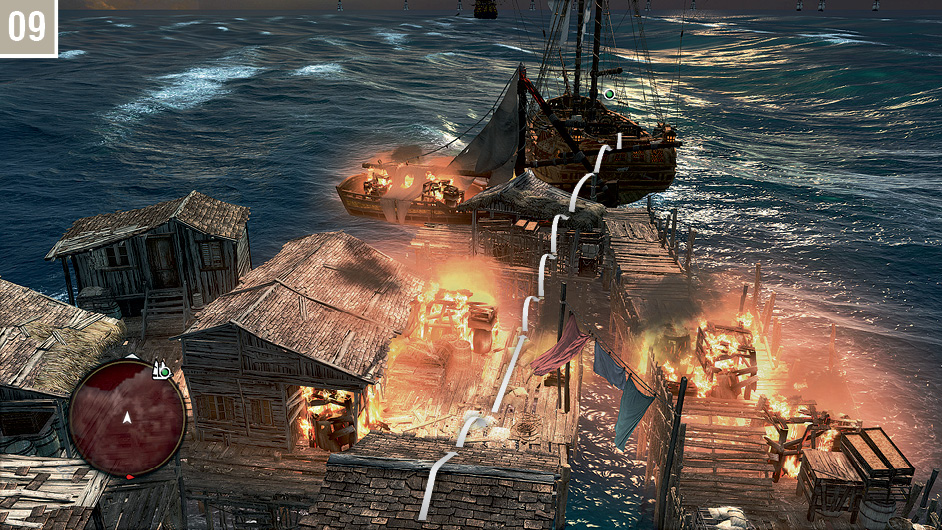
As Kenway lands, it’s a near-direct free run straight to the deck of the Jackdaw. Grab the wheel and sail straight for the man o’ war. In this short but intense battle, you must incapacitate the mighty vessel with heavy shot to complete the final Optional Objective. If you have yet to complete this task once the vessel’s masts have been cracked, a glancing blow will suffice. Don’t unleash a full broadside: this may sink the ship. Once you are ready, move in close and initiate boarding. If you would like to avoid any hint of a spoiler, we suggest that you attempt the fight on deck yourself, referring to entry  only if you encounter difficulties.
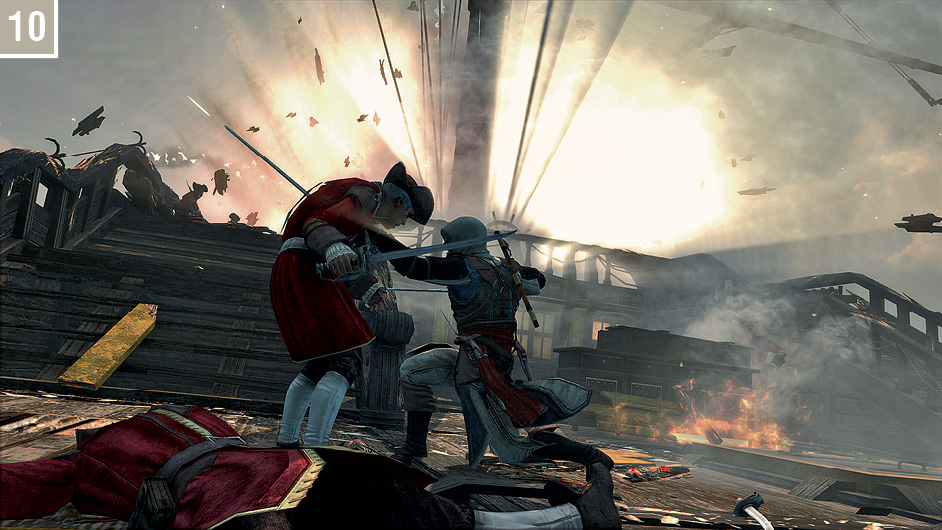
You are given three separate objectives here to complete once boarding begins – but the simple fact is, survival is your only goal. Be content with fighting enemy soldiers. If you lack confidence in your use of Counter Kills and Kill Streaks in pitched battles against multiple opponents, Smoke Bombs can be deployed to turn the odds heavily in Kenway’s favor. After a period of time has elapsed, irrespective of your overall progress with the stated objectives, a cinematic will begin.
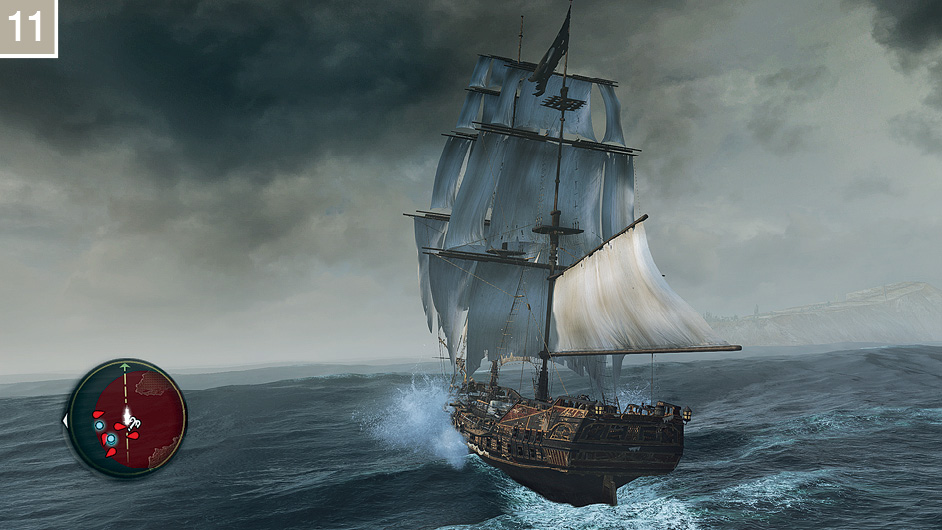
Swim directly to the Jackdaw, climb on board, then take up position behind the wheel before the timer expires. Your final task is to set sail to escape the battle.
Memory 02 “Vainglorious Bastards”
Mission Overview
Optional Objectives
- Use the fort’s defenses to sink a ship.
- Damage the Royal African Pearl with an upgraded ram.
Notes & Further Reading
- This Memory and the one that follows are played in succession – there is no opportunity to free roam between them.
- Completing the first Optional Objective broadly requires that you conquer the Naval Fort at Cabo de Cruz beforehand. While it’s possible to satisfy the requirements with a hostile fort, this complicates matters unnecessarily. As it stands, any player seeking to master Assassin’s Creed IV should be conquering all Level 2 forts at this stage.
- The second Optional Objective in this Memory actively requires that you use the ram. Be sure to purchase at least the first available upgrade before you begin.
- Try to replenish all forms of ammunition for Kenway: there is a demanding boarding sequence where you may benefit from this advantage.
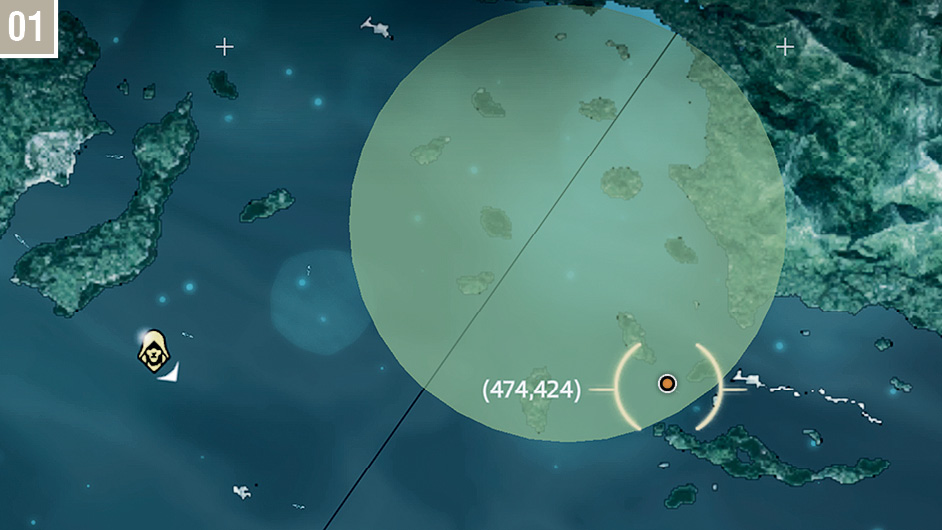
Sail to Charles Vane’s ship to begin this Memory; if you are far afield, there are several potential Fast Travel positions in the vicinity. Once you are underway, sail behind Vane’s ship, the Ranger, until you reach the green search zone. As long as you remain in the Ranger’s wake, you can avoid patrolling vessels. When the Ranger slows, turn to the right and use the spyglass to identify the Royal African Pearl.
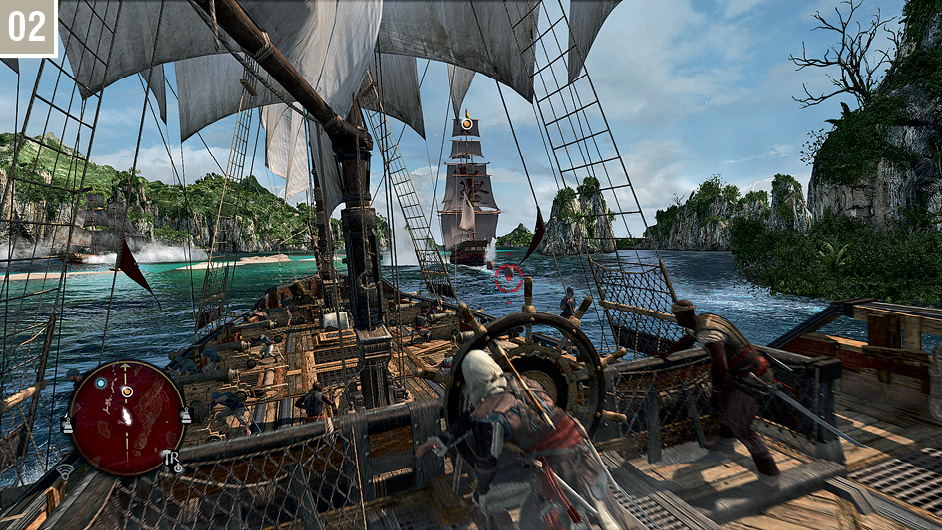
When the Pearl sets off, you can sail to the left of its course to avoid the fire barrels that it drops to deter pursuit. Alternate between mortar fire and the chase cannons to damage the vessel, pausing your barrage to use the swivel guns to destroy fire barrels only when they pose a direct threat. You should actually find that mortar fire aimed for the center of the ship will have the side effect of destroying the barrels as they are deployed. When the Ranger is crippled, quickly sail in close before the timer elapses to rescue Vane.
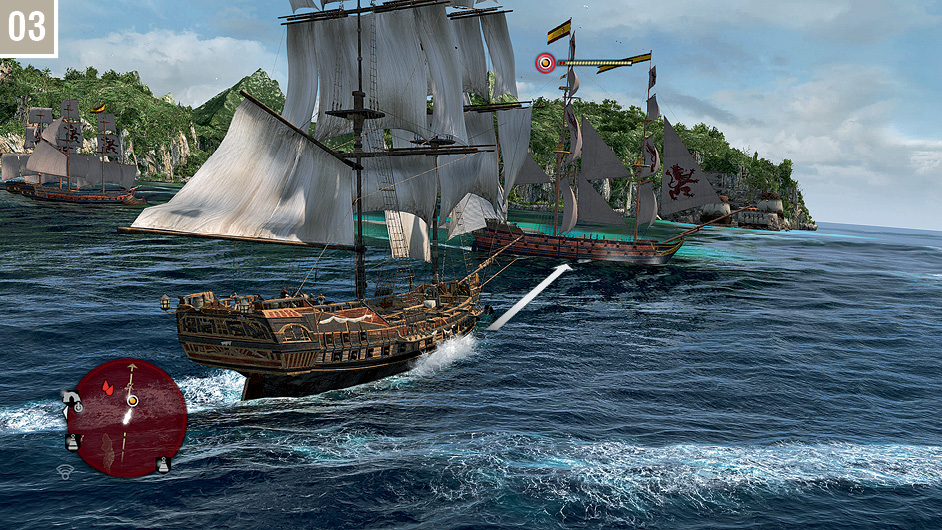
After the brief cutscene, steer the Jackdaw towards the Pearl and ram it, satisfying the first Optional Objective; don’t forget to brace during the charge. Ignoring the other vessels for now, concentrate your fire on the slave ship. If you are feeling bold, and have the upgrades to justify such ambition, circling at close range to deliver broadsides with heavy shot will enable you to strip the vessel’s structural integrity down to the final red slivers of its health bar. Be very careful to avoid inflicting further damage once it has been incapacitated.
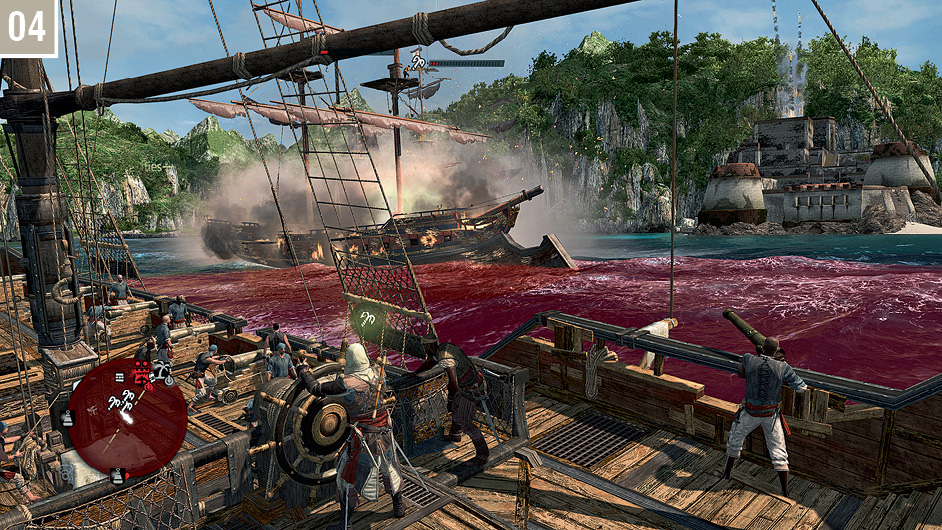
Optional Objective: Feel free to skip this step if you wish. With the Pearl dead in the water, engage the Spanish ships. Sink all but one, then weaken that final vessel and lead it towards the Cabo de Cruz fort. When the stronghold brings its weapons to bear (particularly its mortars), it should take no more than a single barrage to sink the enemy ship if it is following the Jackdaw closely.
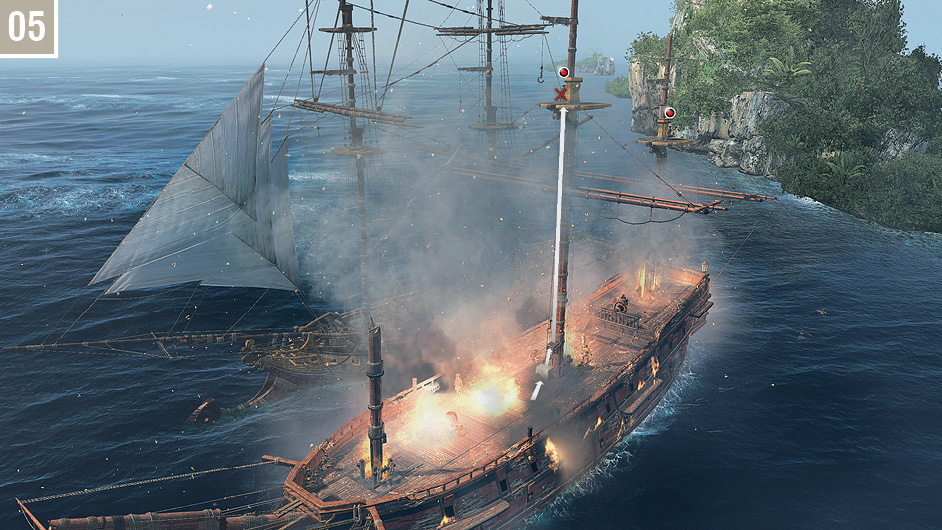
You will find a Captain and a handful of Brutes on board the Pearl, so use Smoke Bombs to incapacitate groups for quick kills. Once you have slain the specified number of enemy seamen, ride the lift on the mainmast to rapidly ascend to the platform above. Kill the Gunner here without fuss or fanfare (sprint into him and tap  to knock him to the deck below), then climb to the very top of the mainmast and press
  to cut down the sail.
Memory 03 “Marooned”
Mission Overview
Optional Objectives
- Skin three animals.
- Air assassinate Vane.
Notes & Further Reading
- Kenway is equipped with his hidden blades alone for the entirety of this Memory.
- This is your first visit to Isla Providencia. You may return here at any point after the Memory is complete.
- You can find the rare red howler monkey and black jaguar on this island. Black jaguar pelts are used to craft the Sleep Dart I upgrade, and a further upgrade for a weapon unlocked in a later Sequence. Though you cannot hunt red howler monkeys until a later visit (Kenway lacking the necessary projectile weapons during this stay), you actually need to collect black jaguar pelts to complete the first Optional Objective.
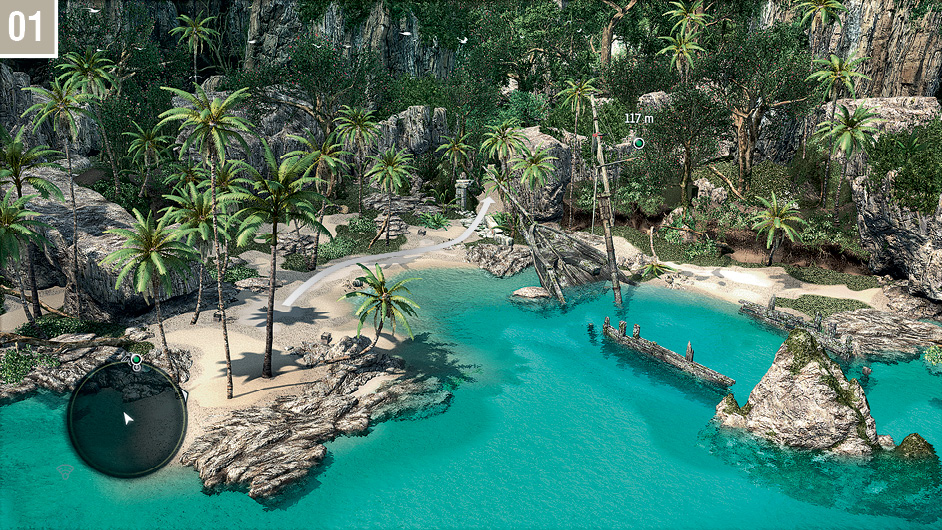
Head to the Viewpoint at the north end of the beach and Synchronize before you enter the jungle via the path shown here.
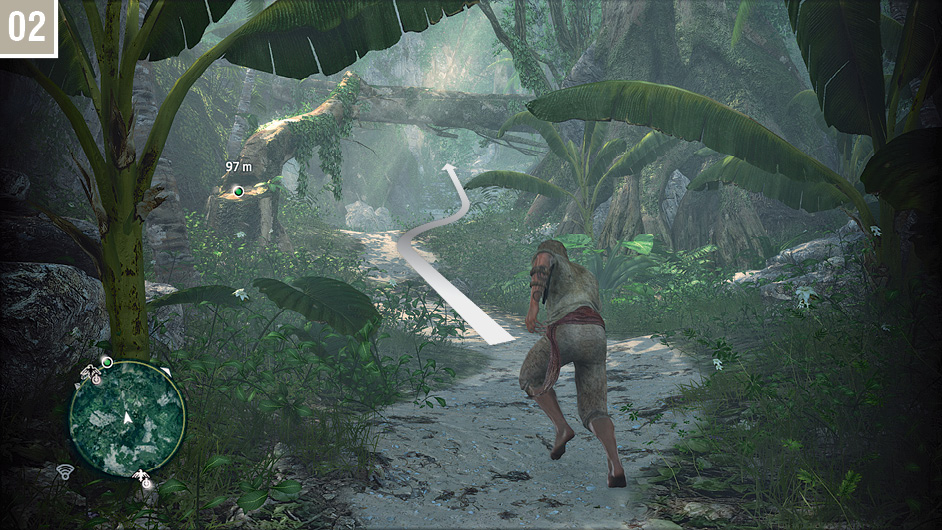
When you arrive at this position, follow the path underneath the fallen tree and run up the ancient stone steps.
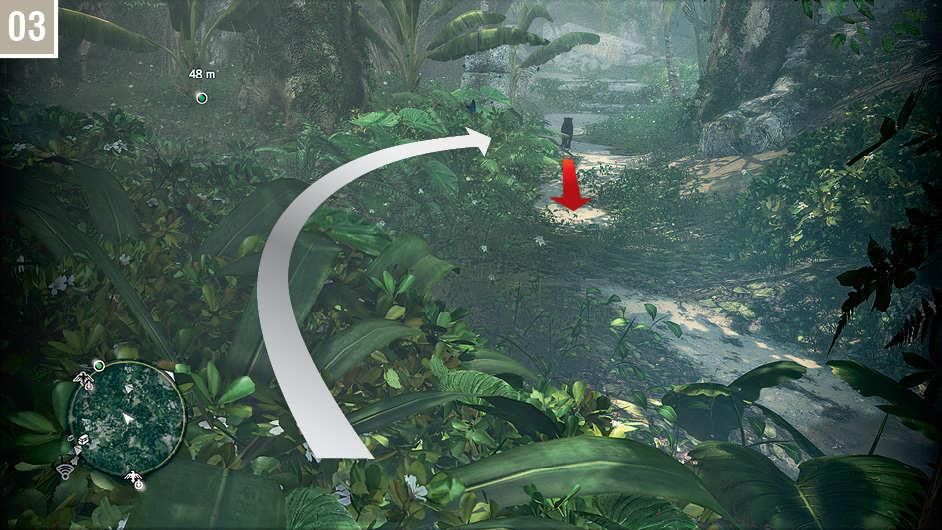
You can find the first of three black jaguars required for the initial Optional Objective in this area. Move into the first Stalking Zone at the top of the steps and use Eagle Vision to identify the creature on the path ahead. As a predator, it will attack Kenway if it sees him, which triggers a button press challenge. Win this, and Kenway kills the creature; fail, and the jaguar will flee. For an easy kill, move through the Stalking Zones on the left-hand side of the path and strike with an assassination when the creature is within range.
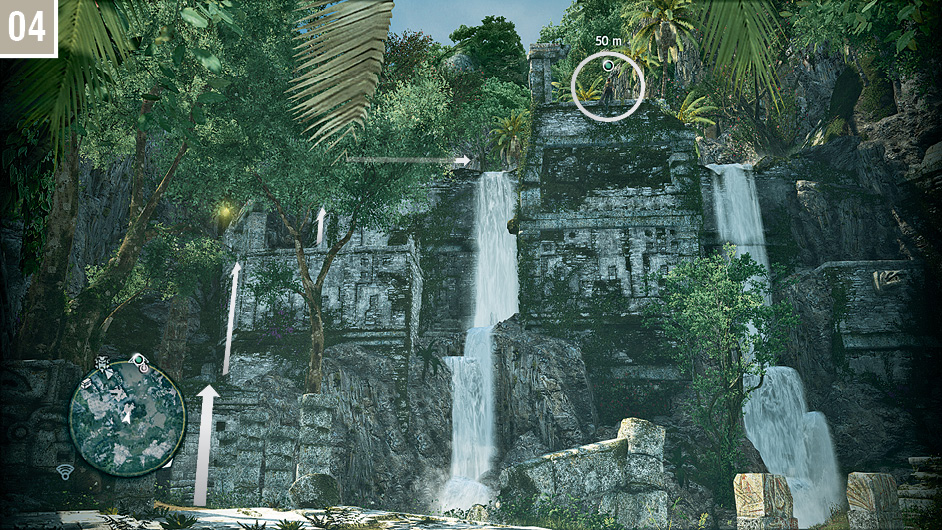
After skinning the jaguar, follow the path to the west to reach the next waypoint. In the center of the ruins, follow the easy climbing route shown here to reach the upper area and a Viewpoint.
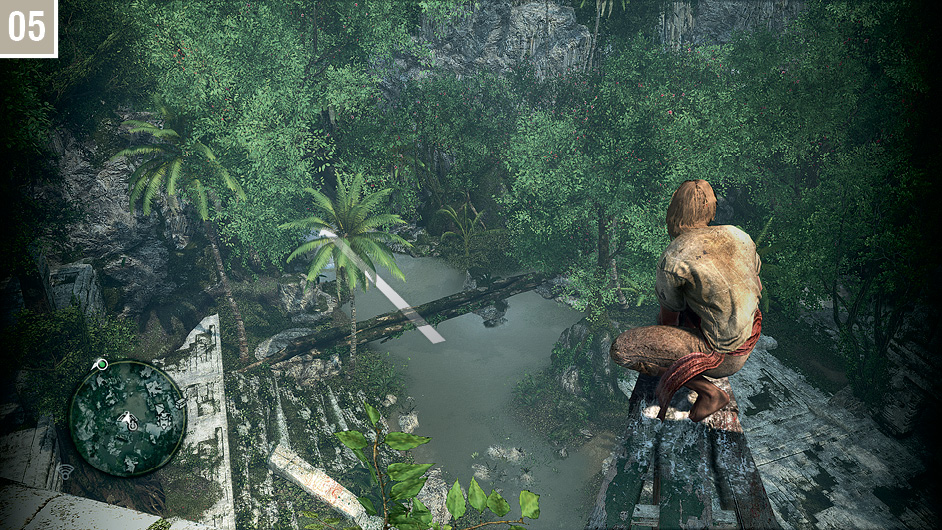
Synchronize at the Viewpoint before you perform a Leap of Faith and continue your pursuit on the path shown here.
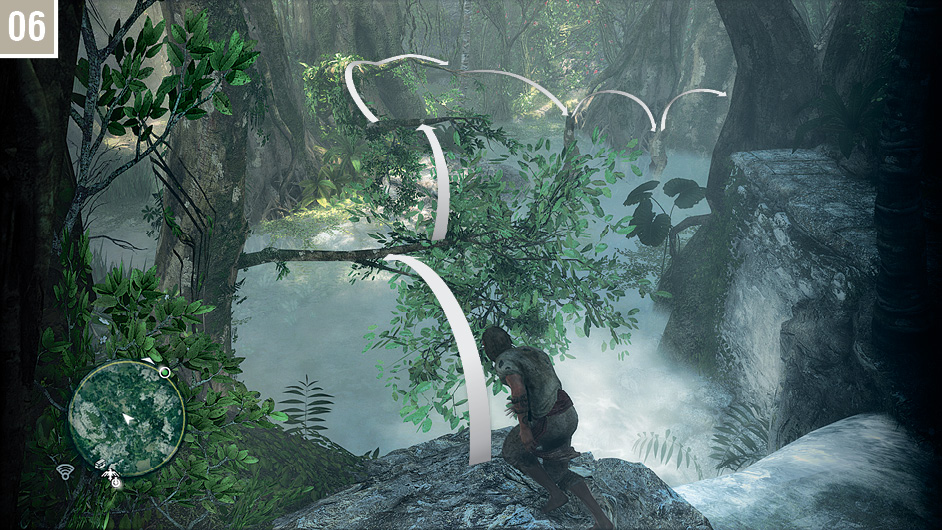
There is a crocodile in the pool, so be cautious. Free run via the branches and two dead trees to reach solid ground to the north. The next waypoint is a short jog away.
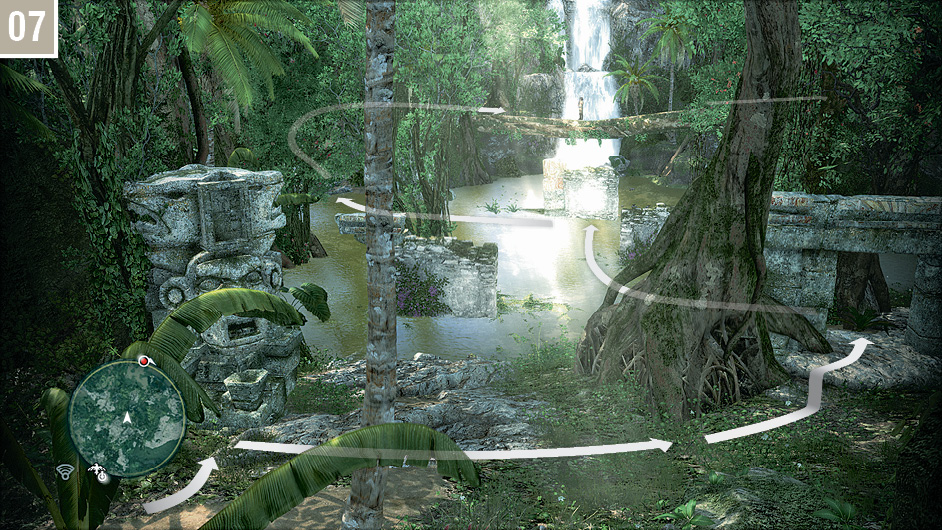
After the cinematic, Vane will assail Kenway with an unrelenting fury until you can bypass him. Watch carefully the icons that appear above his head: these mirror those that appear above familiar enemy archetypes. Try to hide when he is poised to shoot the pistol, and run when he favors a grenade. Sprint between the cover elements shown here during breaks in fire. When you flank Vane to the left and reach the log, an explosive device left by him will break it in two. Climb the far half to resume the chase.
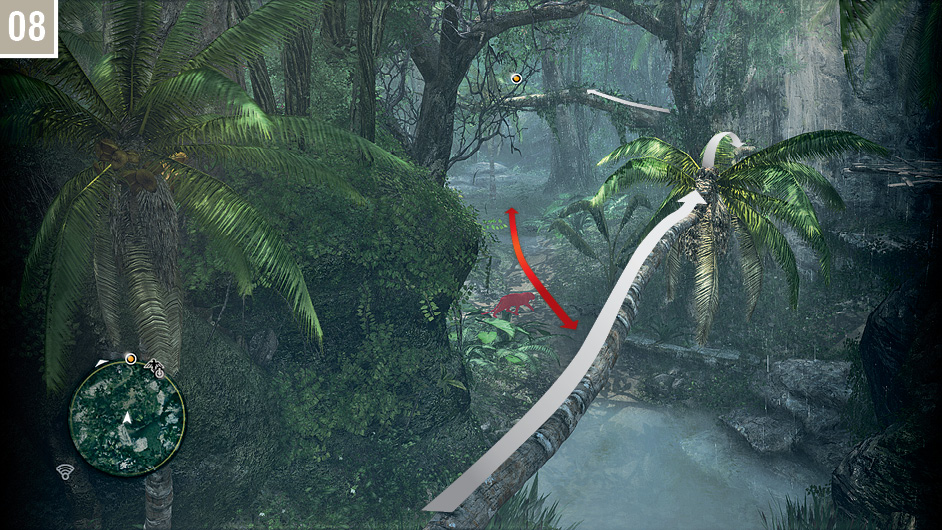
Follow the path until you reach the distinctive palm tree shown here. Free run to the tree at the end of it, and activate Eagle Vision: there is a black jaguar in the area below. Wait until it moves within range, then air assassinate and skin it.
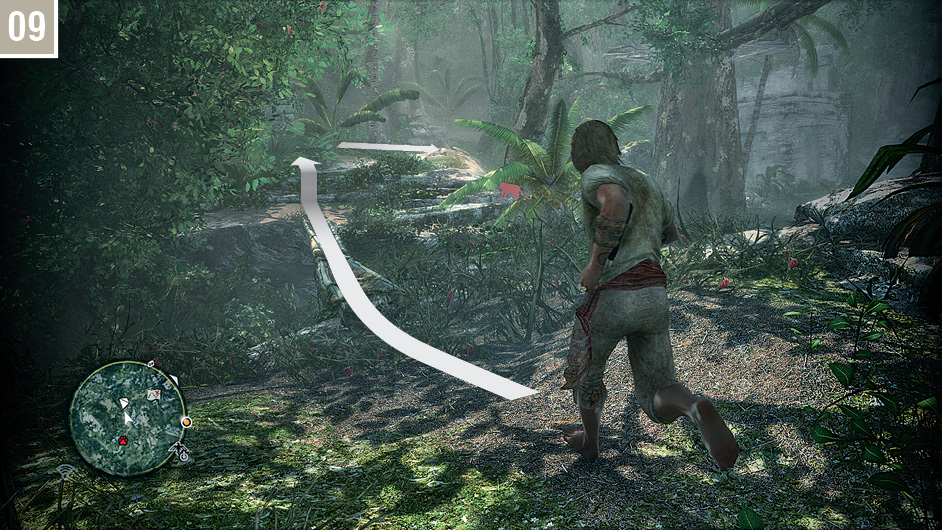
Continue until you reach a crude log bridge. On the opposite side, quickly move into the Stalking Zone: the third and final black jaguar is found here. Kill and skin it, then head towards the waterfall. When you near it, cross the water and follow the path that begins to the east.
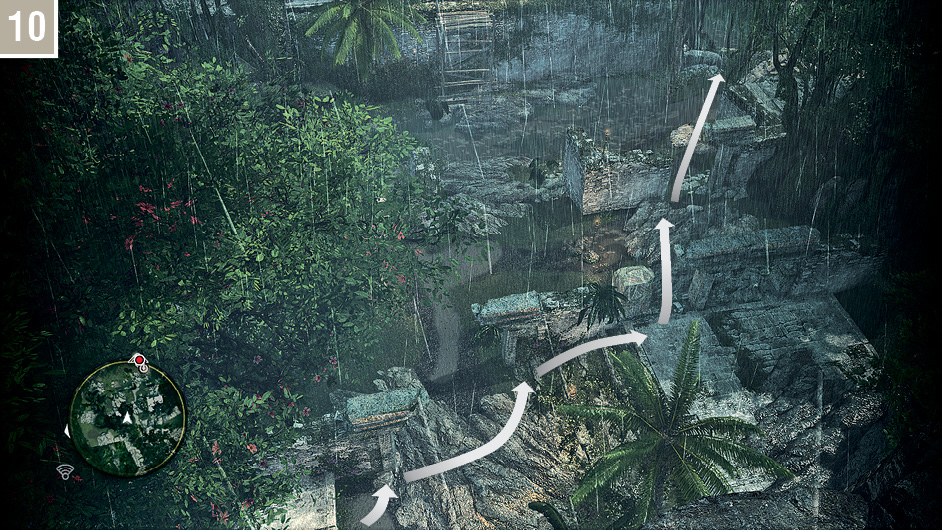
After the cutscene, Vane will attack Kenway in the same manner as before. From your starting position, use the walls to avoid his assault until you can make a spirited sprint for safety on the right-hand side of the ruins.
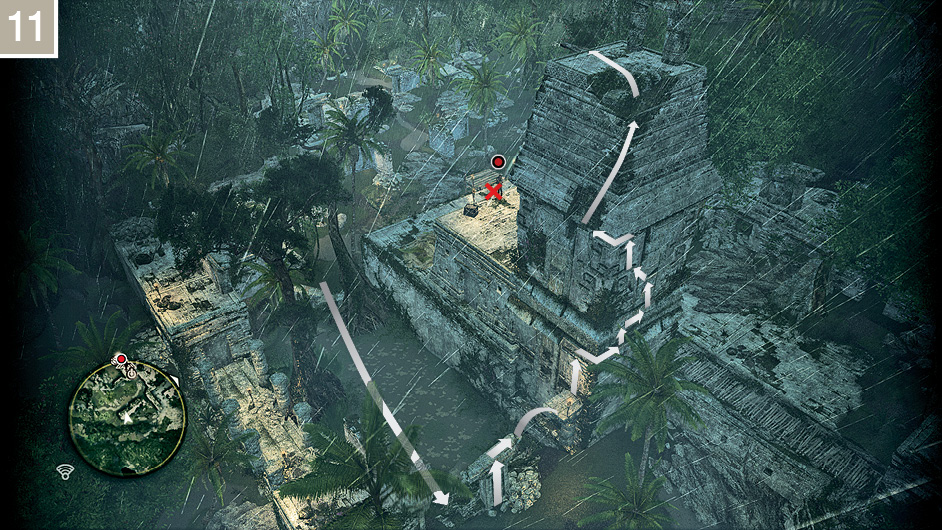
To complete the second Optional Objective – and avoid a needlessly perilous approach to the insanely furious Vane – follow the very specific climbing route shown here to reach the Viewpoint above his position. As soon as you move onto the wooden perch, press  to Synchronize, then immediately look down and press
  to air assassinate Vane – and bring the Memory to a close.