Uncharted 4: A Thief's End Guide Story Walkthrough
Chapter 9: Those Who Prove Worthy
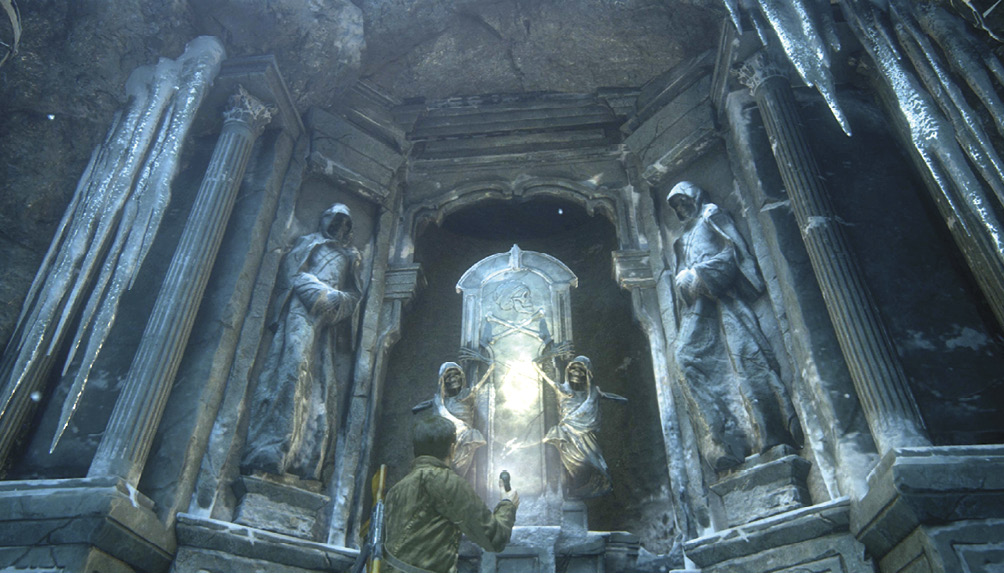
The Scottish adventure continues. The strange shrine in the cavern is part invitation, part warning. Tew’s sigil marks the sign, and Avery’s sigil is engraved on the display. What challenges lie ahead?
CollectiblesTreasures: 6 Chapter Specific Trophies: “Trials And Tribulations” Optional Conversations: 1 Optional Journal Notes: 1 Optional Journal Entries: 2 NewWeapons: Turret, Mazur LDR |
Find the Challenges
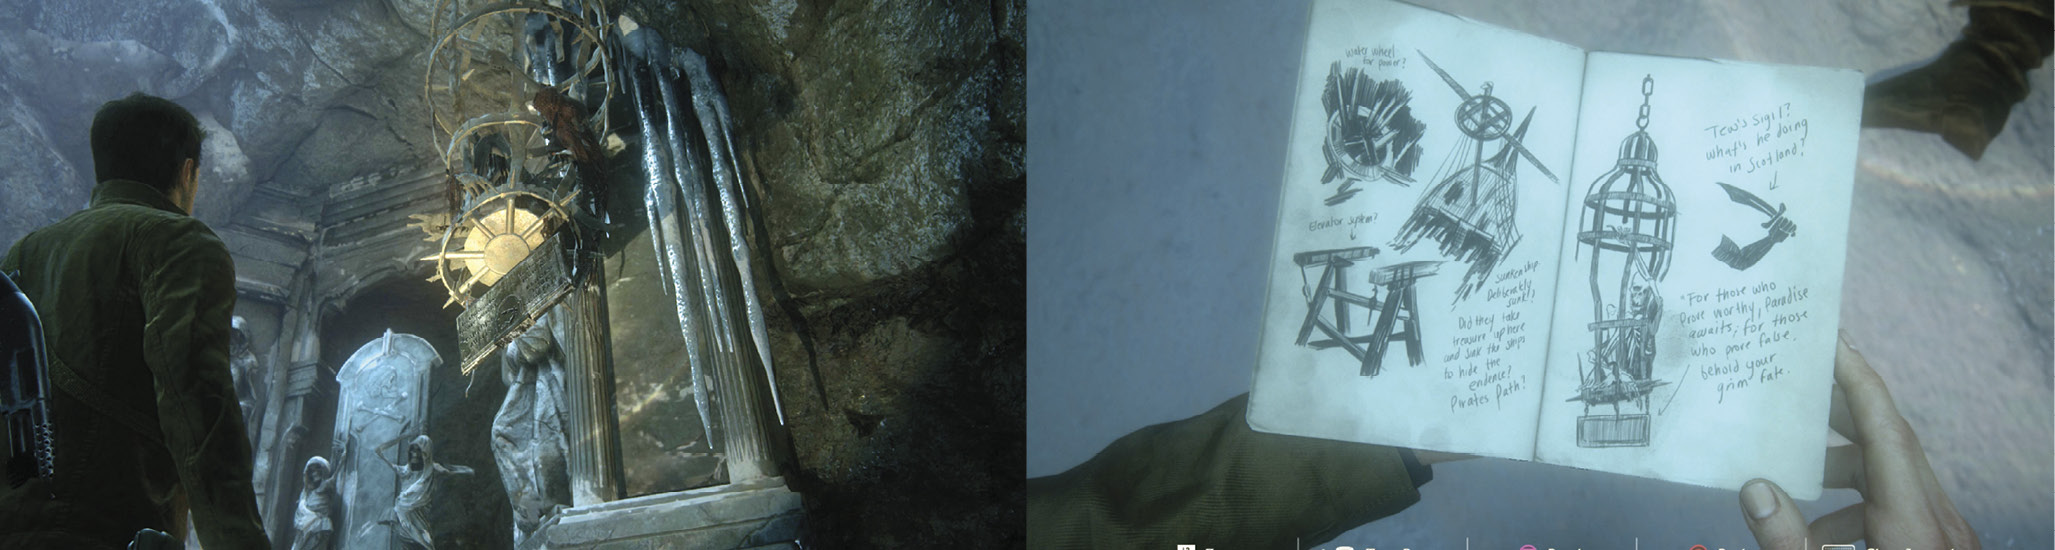
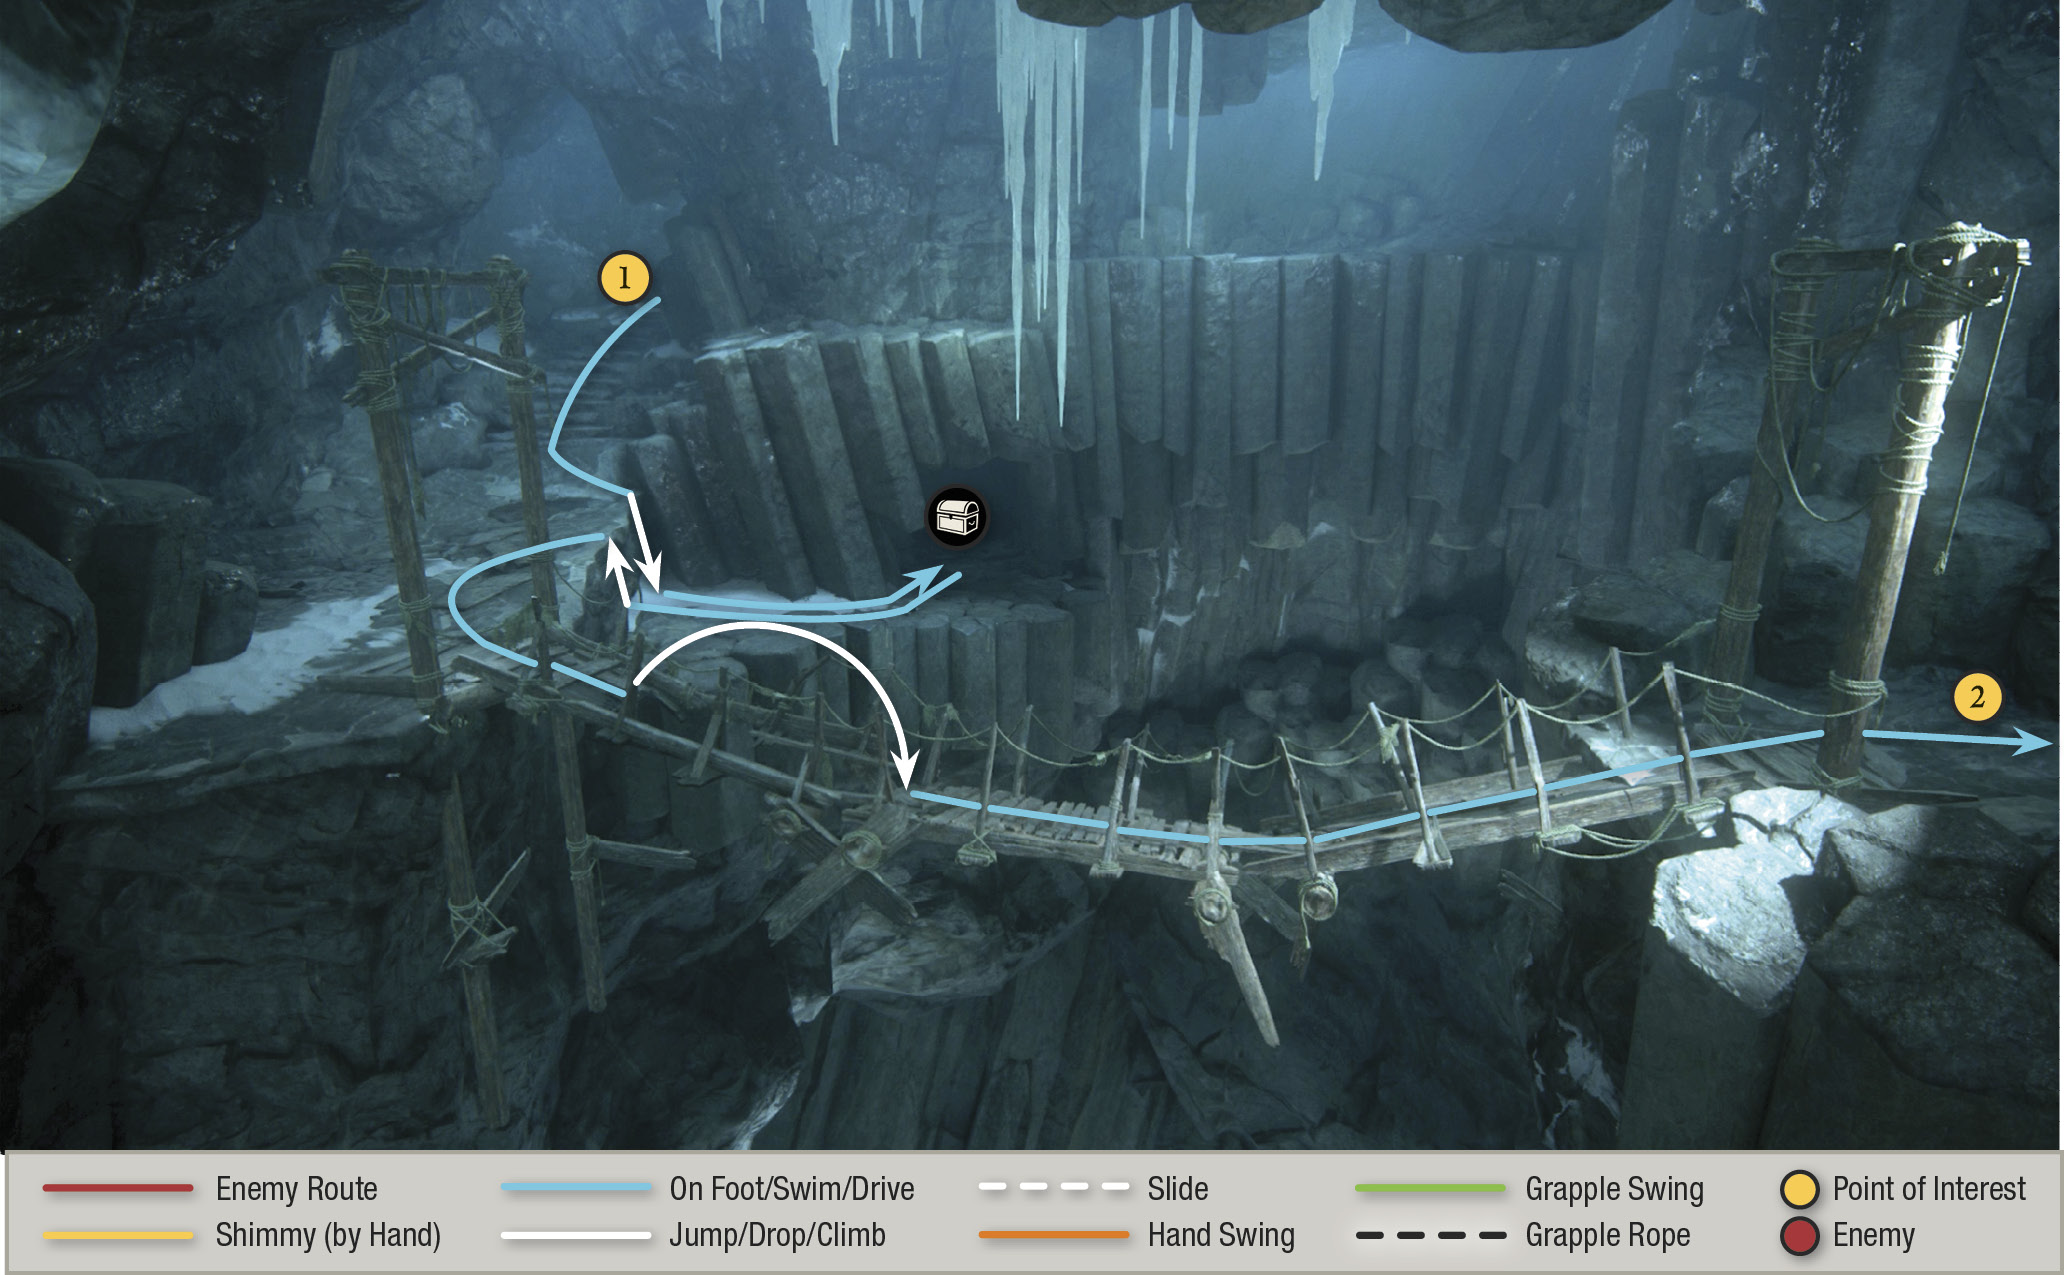
Approach the shrine and examine the gibbet on the right to add an Optional Journal Entry: The brothers muse on the unfortunates—“those who prove false”—whose remains litter the area while Nathan makes note of Tew’s sigil.

Lantern Mounted Flintlock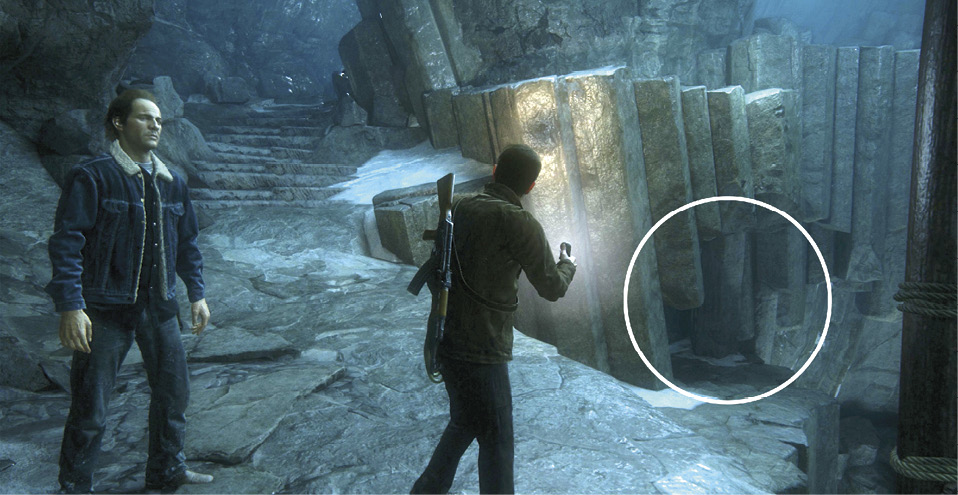
Before you cross the rickety bridge, hop down to your left and find the Lantern Mounted Flintlock in a small cave. Once you leap across the bridge’s gap, you can’t get back! |
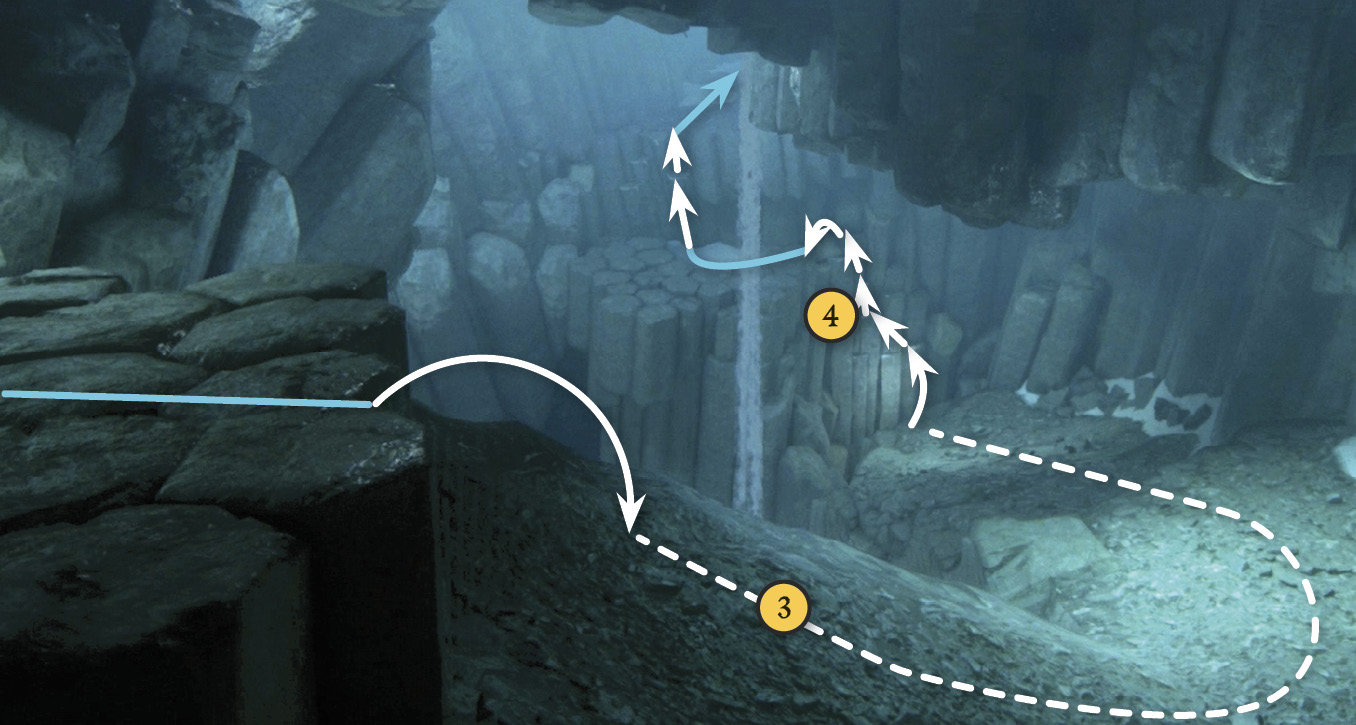
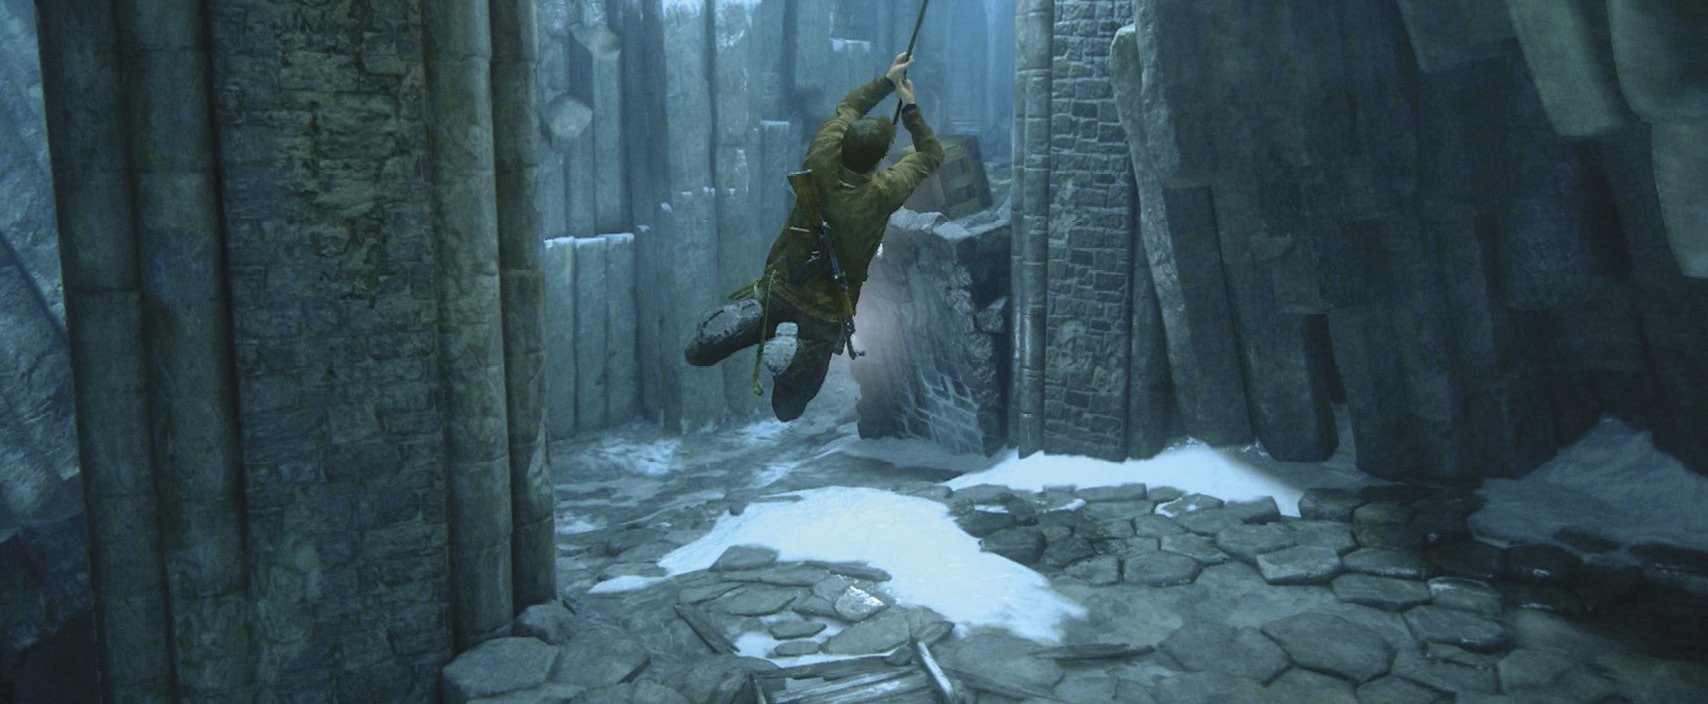
Exit via the passage (1) to the shrine’s right to see a rickety, unstable bridge. Before you cross it, find a treasure in a small cave down to your left. Then leap across the broken bridge gap and continue up the slope on the opposite side (2). Veer right and follow the passage to a rockslide (3). Ride it down and jump to the wall at the bottom (4). Climb the rocks to find a staircase, then follow the passage to the puzzle room.
Complete the First Challenge
Entering the puzzle room triggers a short scene: Nathan trips a mechanism that blocks the exit doorway. Then go to the exit door and examine the last guy who tried to unlock it. This triggers another quick scene: The puzzle mechanism activates. Nathan also adds an automatic journal entry with a sketch of the cross order.
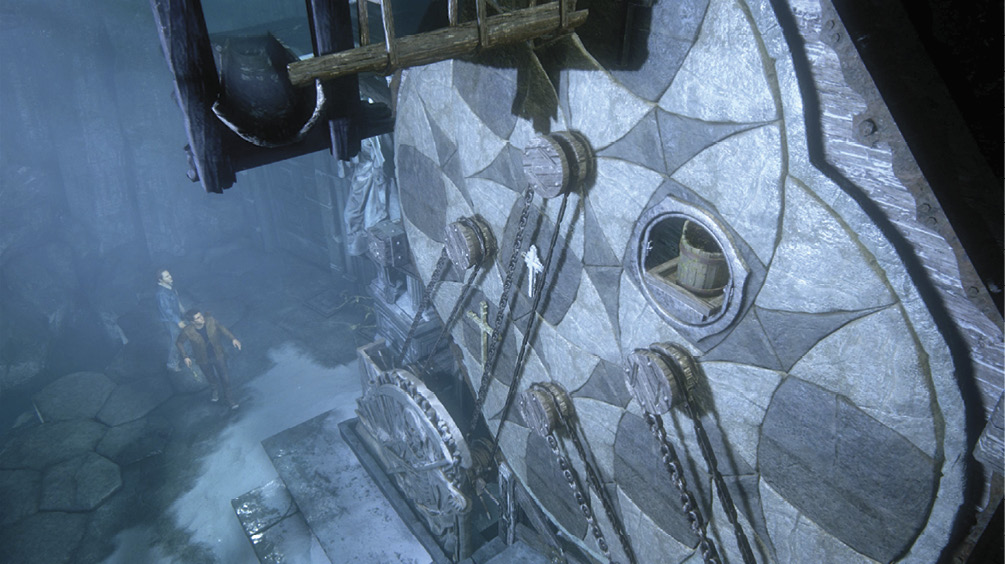
Here’s how to set up the puzzle:
- First, examine the center receptacle to acquire the bucket.
- Next, take the bucket into the pond on the lower level of the cavern. Press
 to fill the bucket with water.
 - Approach the spot where Sam stands at the top of the ledge and press to hand up the bucket. Then climb to join him. He replaces the full bucket in the center receptacle, which reveals the four crank handles that turn the wheels above. Spotlights cast four circles of light on the puzzle face as well.
- Press the touchpad to bring up the journal page that shows the correct alignment of the crosses and bucket.
The central object of the puzzle is to turn the wall’s four overlapping disks so that the three crosses are aligned correctly in the three lower spotlights, and the bucket of water is in the top spotlight where it dumps onto a trough—this action activates the door mechanism so you can unlock it.
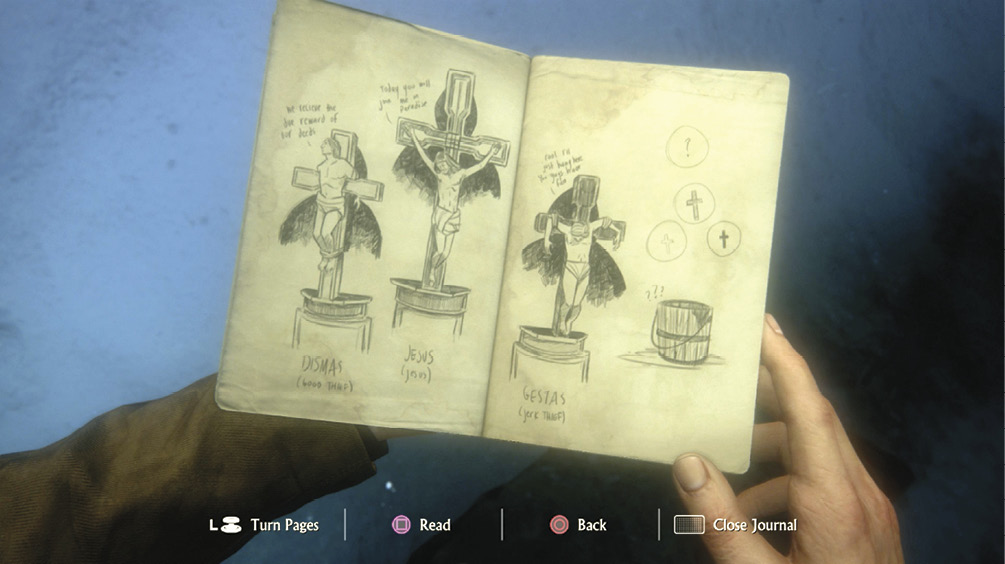
The correct cross alignment matches that of the biblical Crucifixion: the cross of Jesus (bigger cross) in the center; the cross of St. Dismas the Penitent Thief (white cross) on the left; and the cross of Gestas the not-so-penitent thief (black cross) on the right. Once the crosses and bucket are correctly aligned, you can unlock the exit door. Note, however, that if you try to unlock the door when the puzzle is incorrectly aligned, a set of razor-sharp blades shoots from the wall at the lock.
Let’s number the crank handles 1 to 4, from left to right. Here’s a solution sequence:
- Turn crank 1 clockwise one time.
- Turn crank 3 clockwise one time.
- Turn crank 1 clockwise two times. This moves the bucket up to the top disk.
- Turn crank 3 clockwise one time.
- Turn crank 2 clockwise one time. This moves the bucket into the top slot and slides the black cross onto the bottom disk.
- Turn crank 3 clockwise one time.
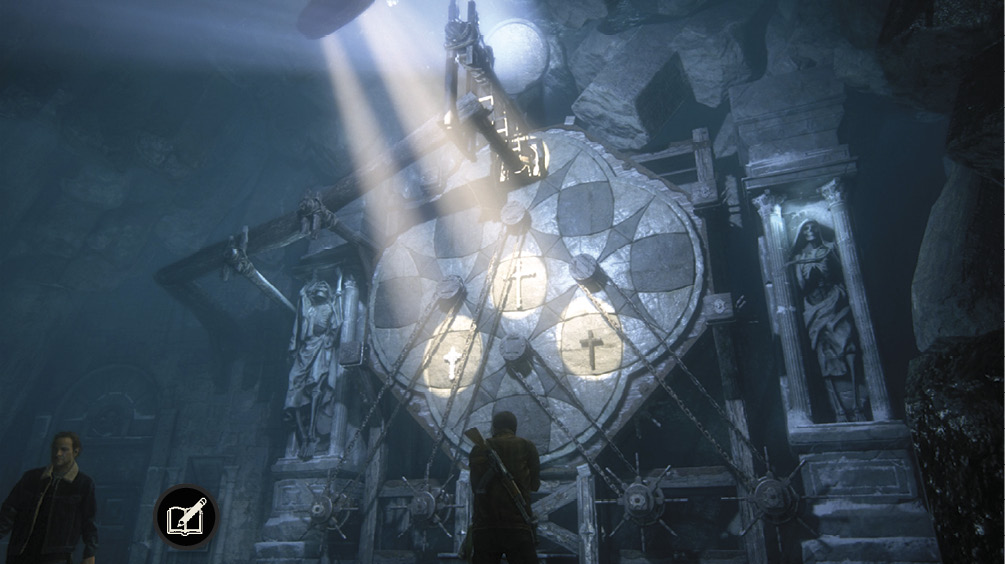
Now you can safely use the lock mechanism at the exit door to open the passage. After the door opens, don’t forget to add the Optional Journal Entry at the Lock Mechanism. It’s an amusing depiction of what Nathan felt when reaching into the lock hole.
Optional: Well-Hidden Treasure
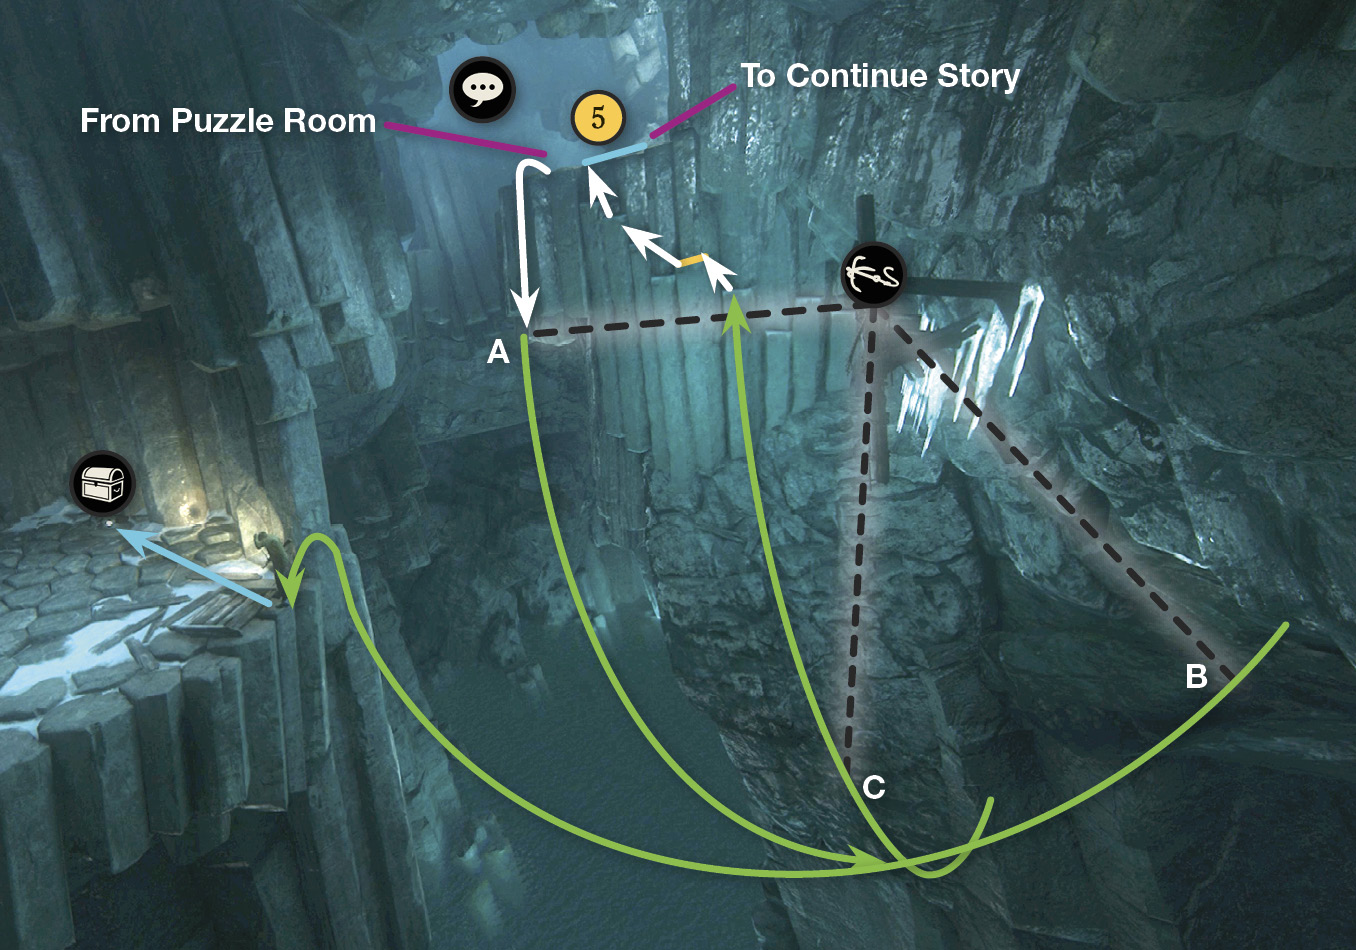
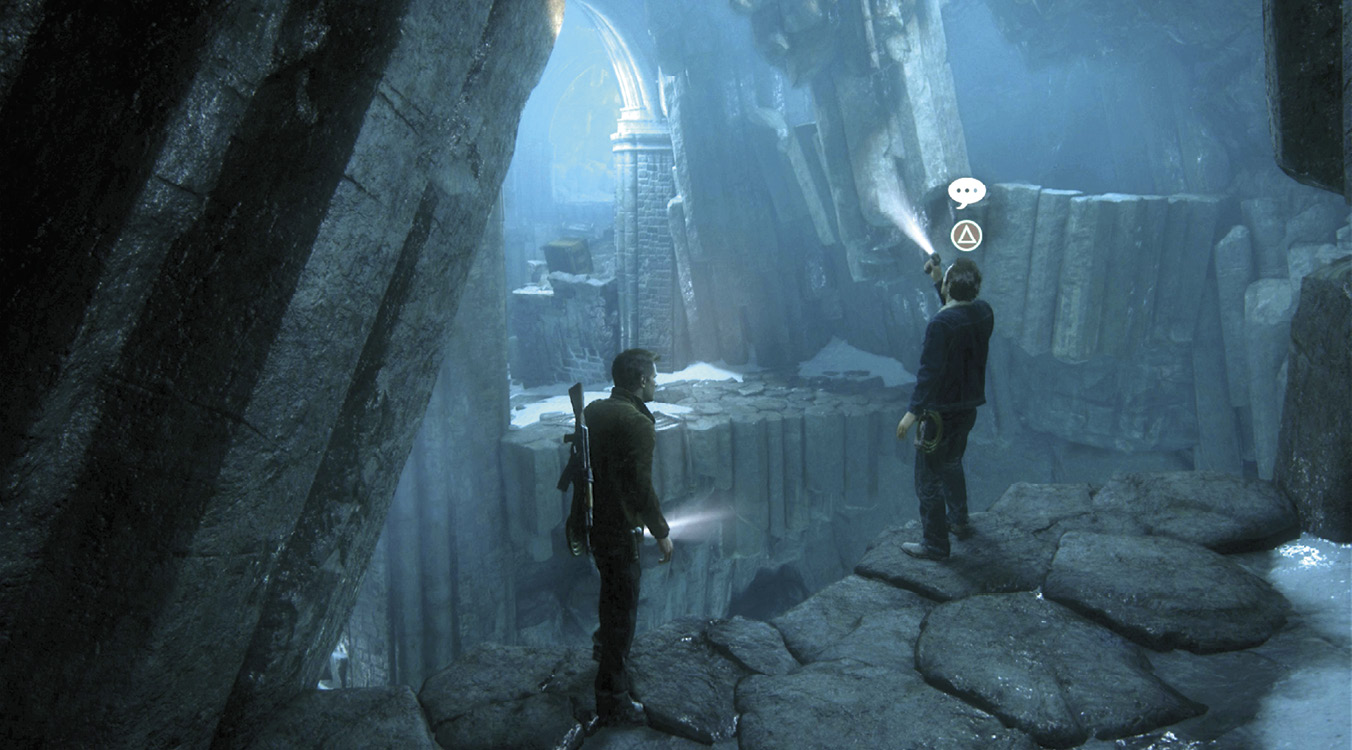
Exit the puzzle room and veer through the left tunnel to the cliff’s edge. When the Talk icon appears above Sam, trigger the Optional Conversation, “As I Live And Breathe”: The brothers note that this vast cavern complex is directly underneath the cathedral. You can see a treasure on a far cavern wall from this viewpoint. From here, go back down the stairs and approach the next drop-off on the right (5). Here you can swing down (A) to find a different treasure on a lower ledge inside a cave (see our nearby Treasure box), and then swing (C) back up to the path.

Strange Pendant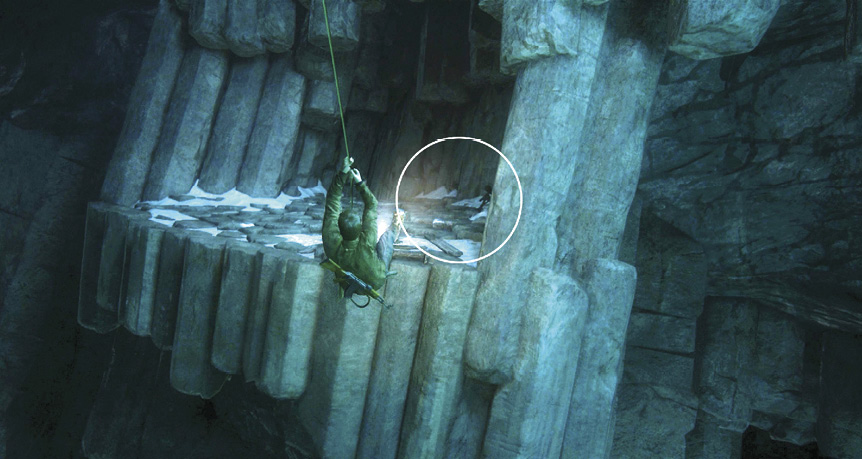
After you leave the three-crosses puzzle room, follow the path to the drop-off (5) on the right and spot the grapple icon on the post below you. Leap toward the post and quickly sling your grapple hook, then drop down (A). Now swing (B) over to the ledge where you can collect the Strange Pendant from the ground by the skeleton. It’s a Fireflies Pendant from The Last Of Us. Use the same grapple point to swing back (C ) over to the cliff wall under Sam, and then climb up to the main path again. |
Navigate the Caverns
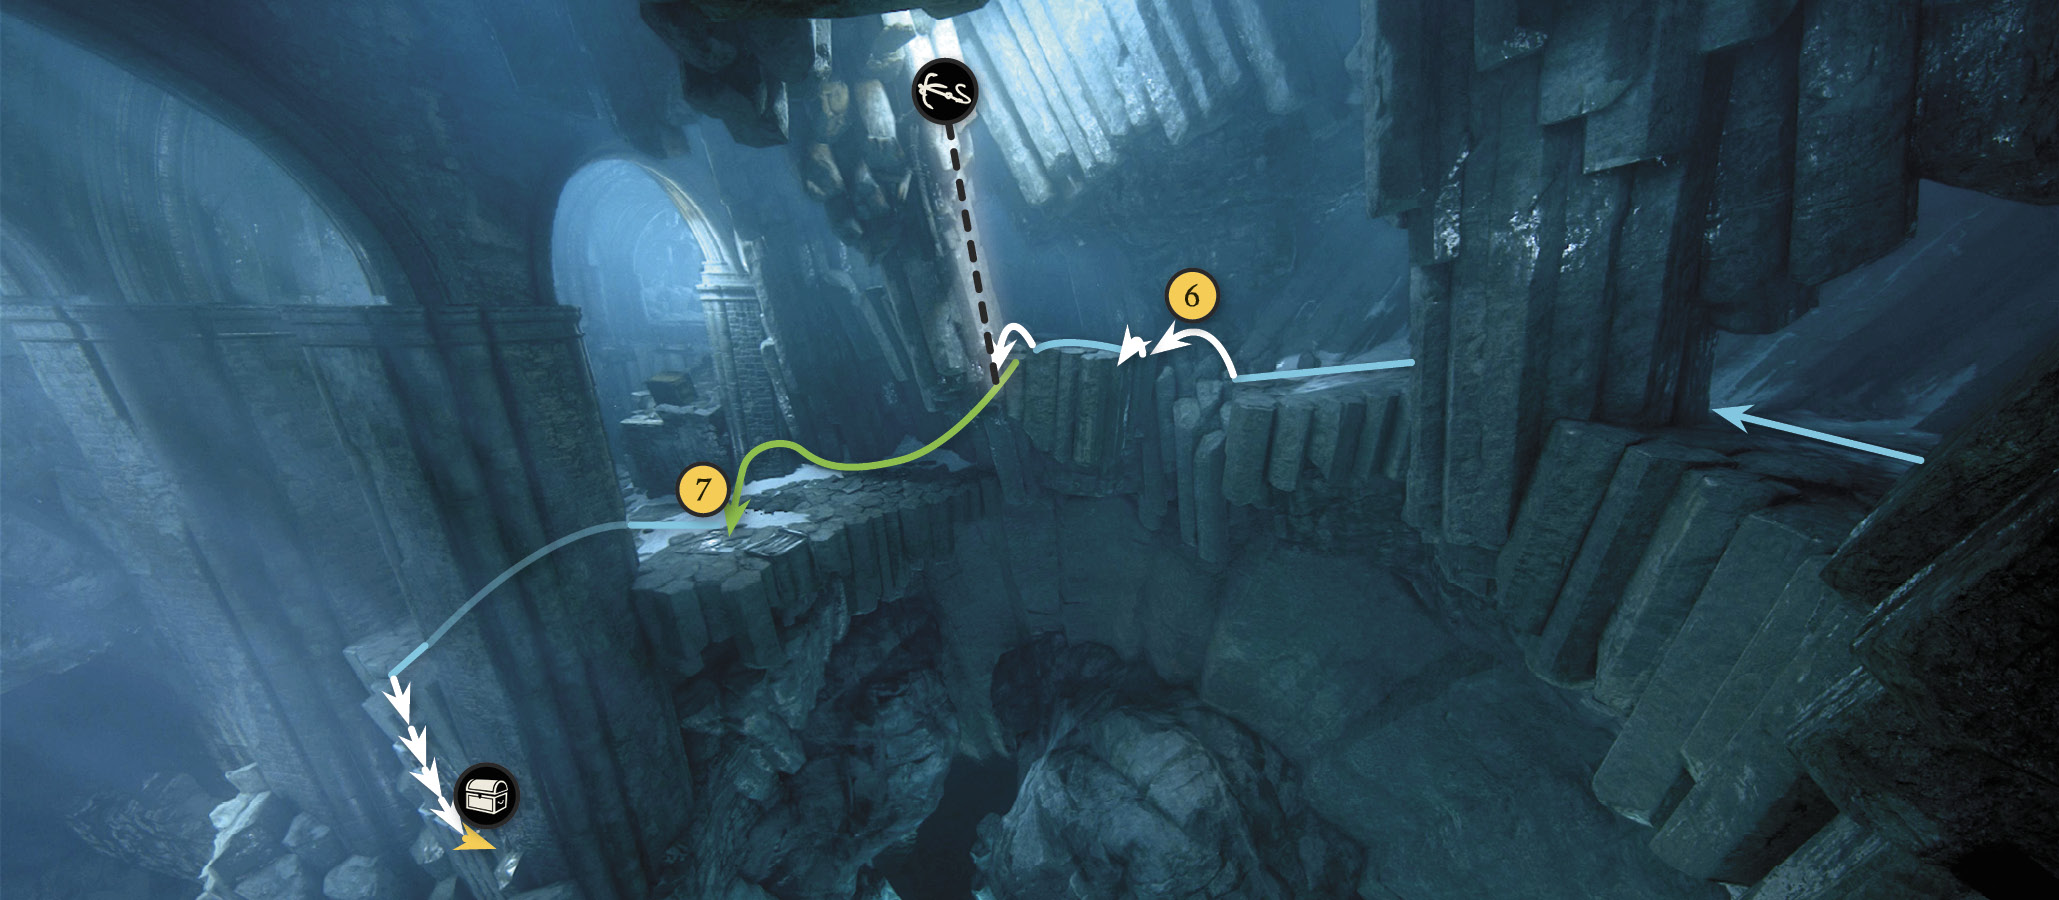
From (5) follow the path upstairs to the gap (6) and jump across. Use the high grapple point to swing around the big stone pillar and land on the other side (7). You can circle around the column to your left and find a treasure down the cliff handholds between the two columns.

Amatory Box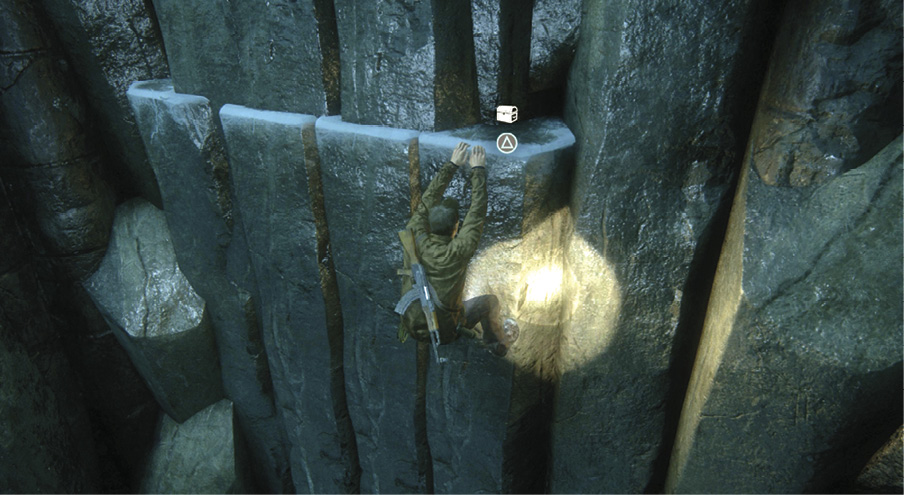
After you grapple across to the platform under the great arches, hang down from the narrow section of floor between the two columns. Drop down the series of handholds to find the Amatory Box at the right end of the bottommost ledge. Then climb back up. |
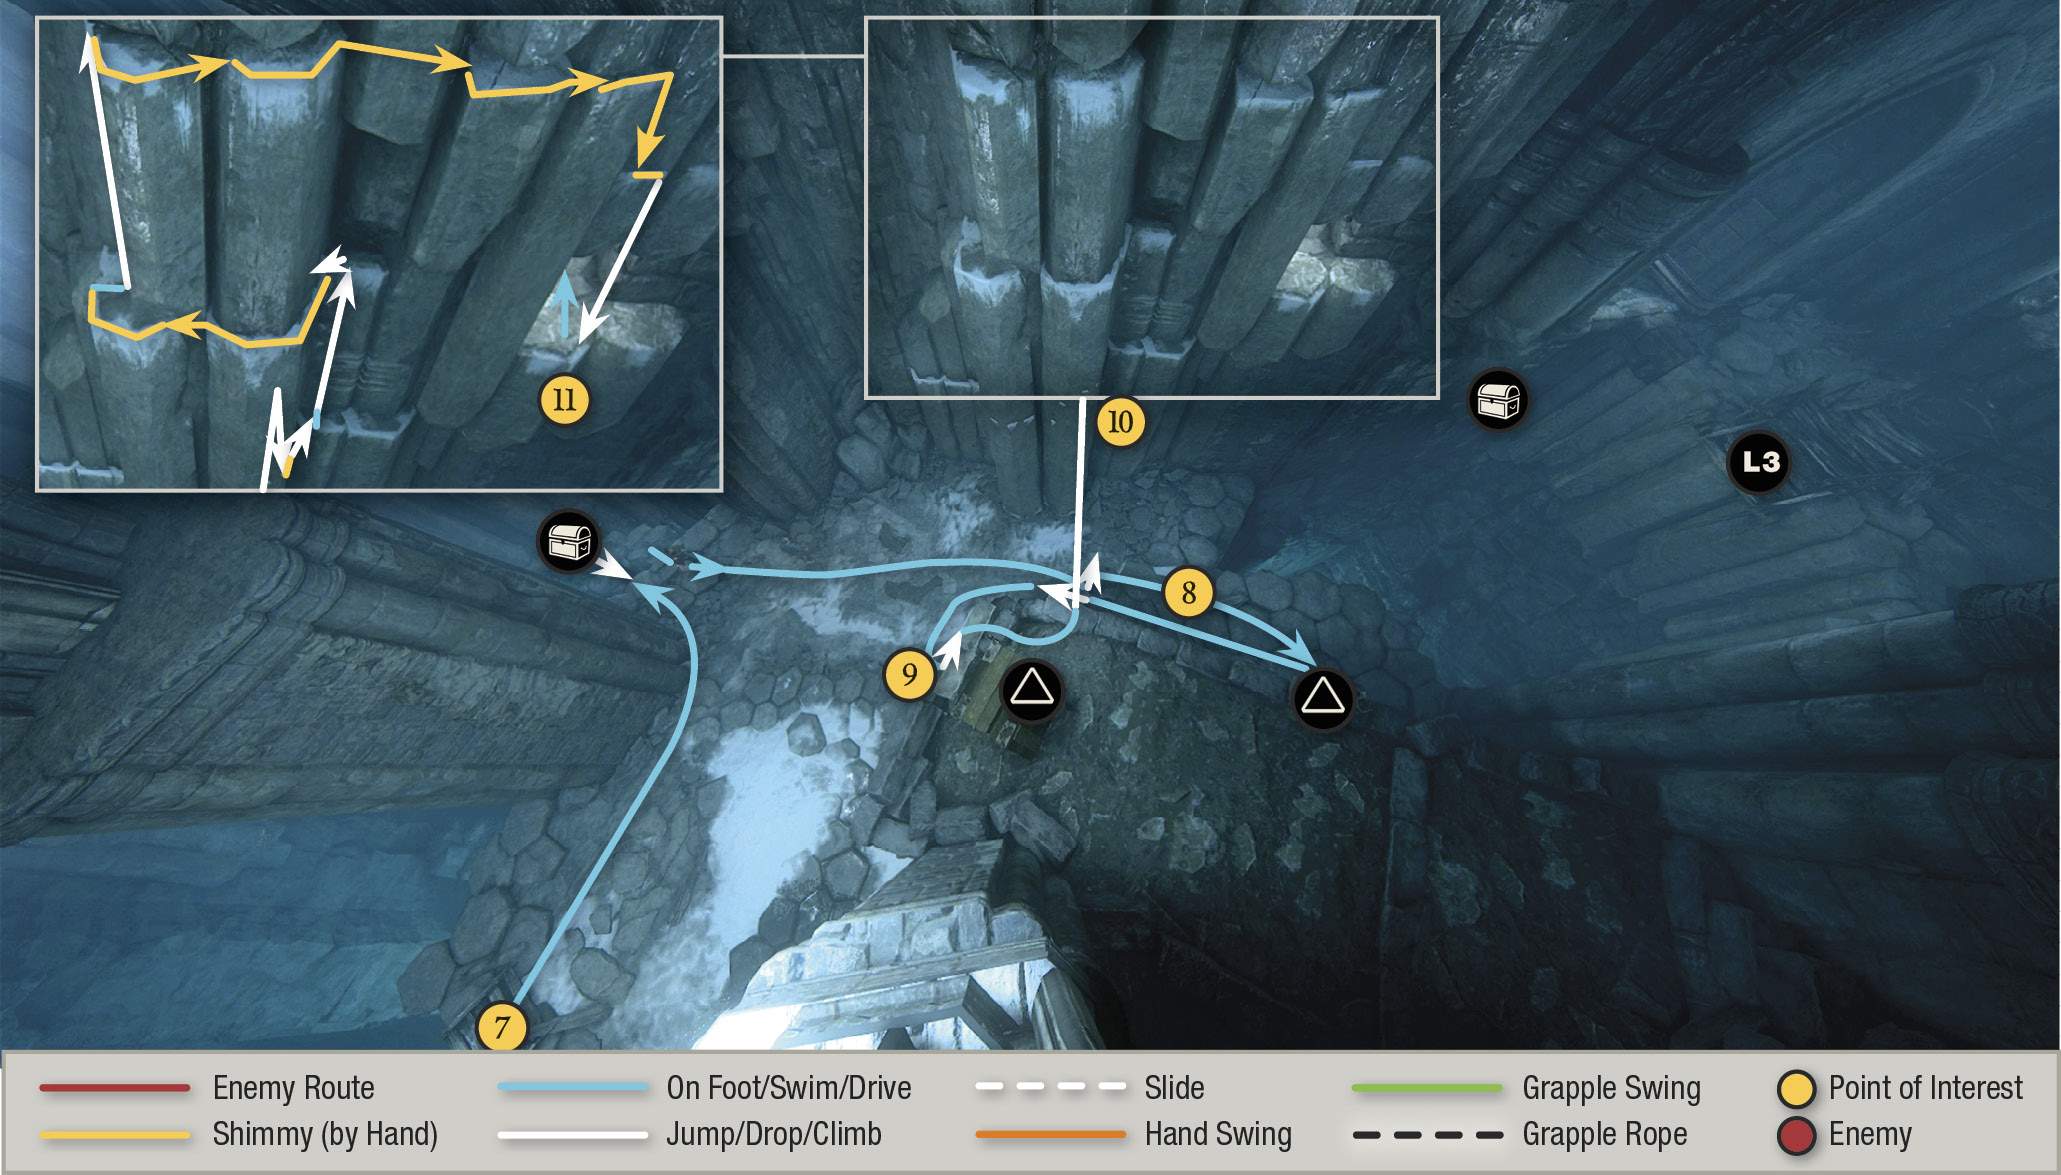
Proceed through the tall arch and climb under the broken rope ladder (8). Press to boost Sam up; he pushes a rolling crate off the terrace (9). Use it to climb to the platform, then jump across (like Sam just did) to the opposite cliff (10). Follow our map’s climbing route to a low tunnel entrance (11).
Eavesdrop on Rafe and Nadine
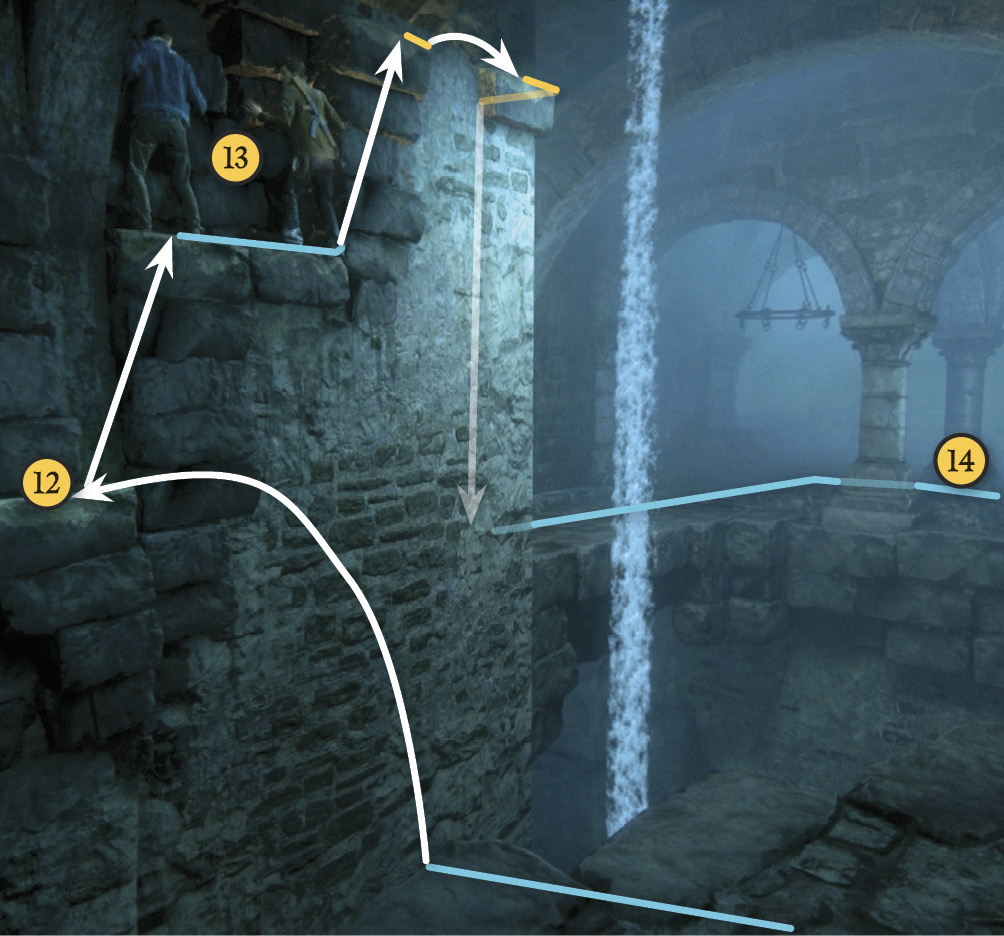
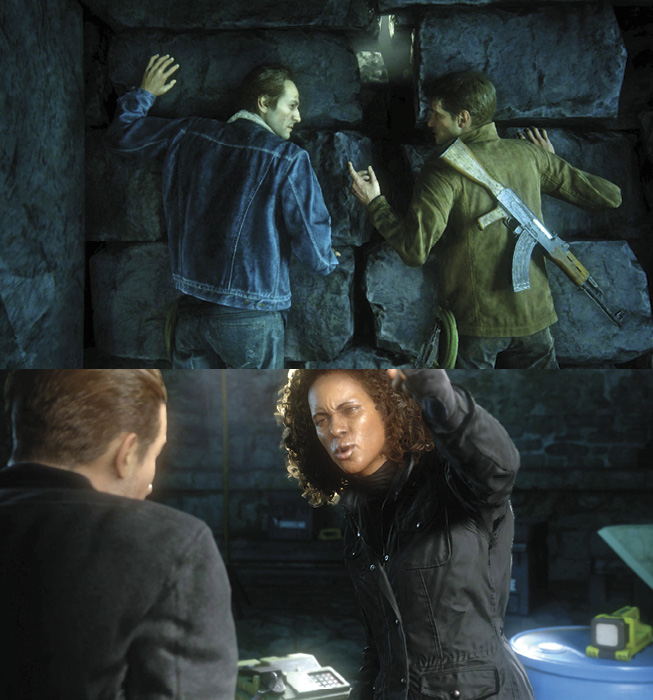
Follow the low passage to a tomb-filled catacomb, move through the broken hole in the wall, then jump up to crawl through a low rectangular passage and emerge back into the cavern. Turn left and jump across to the next wall (12) and climb onto the ledge (13) to trigger a long scene: Sam and Nathan eavesdrop on Rafe and Nadine. You learn that Shoreline’s blasting has revealed a new annexed area under the cathedral.
Continue Through the Caverns
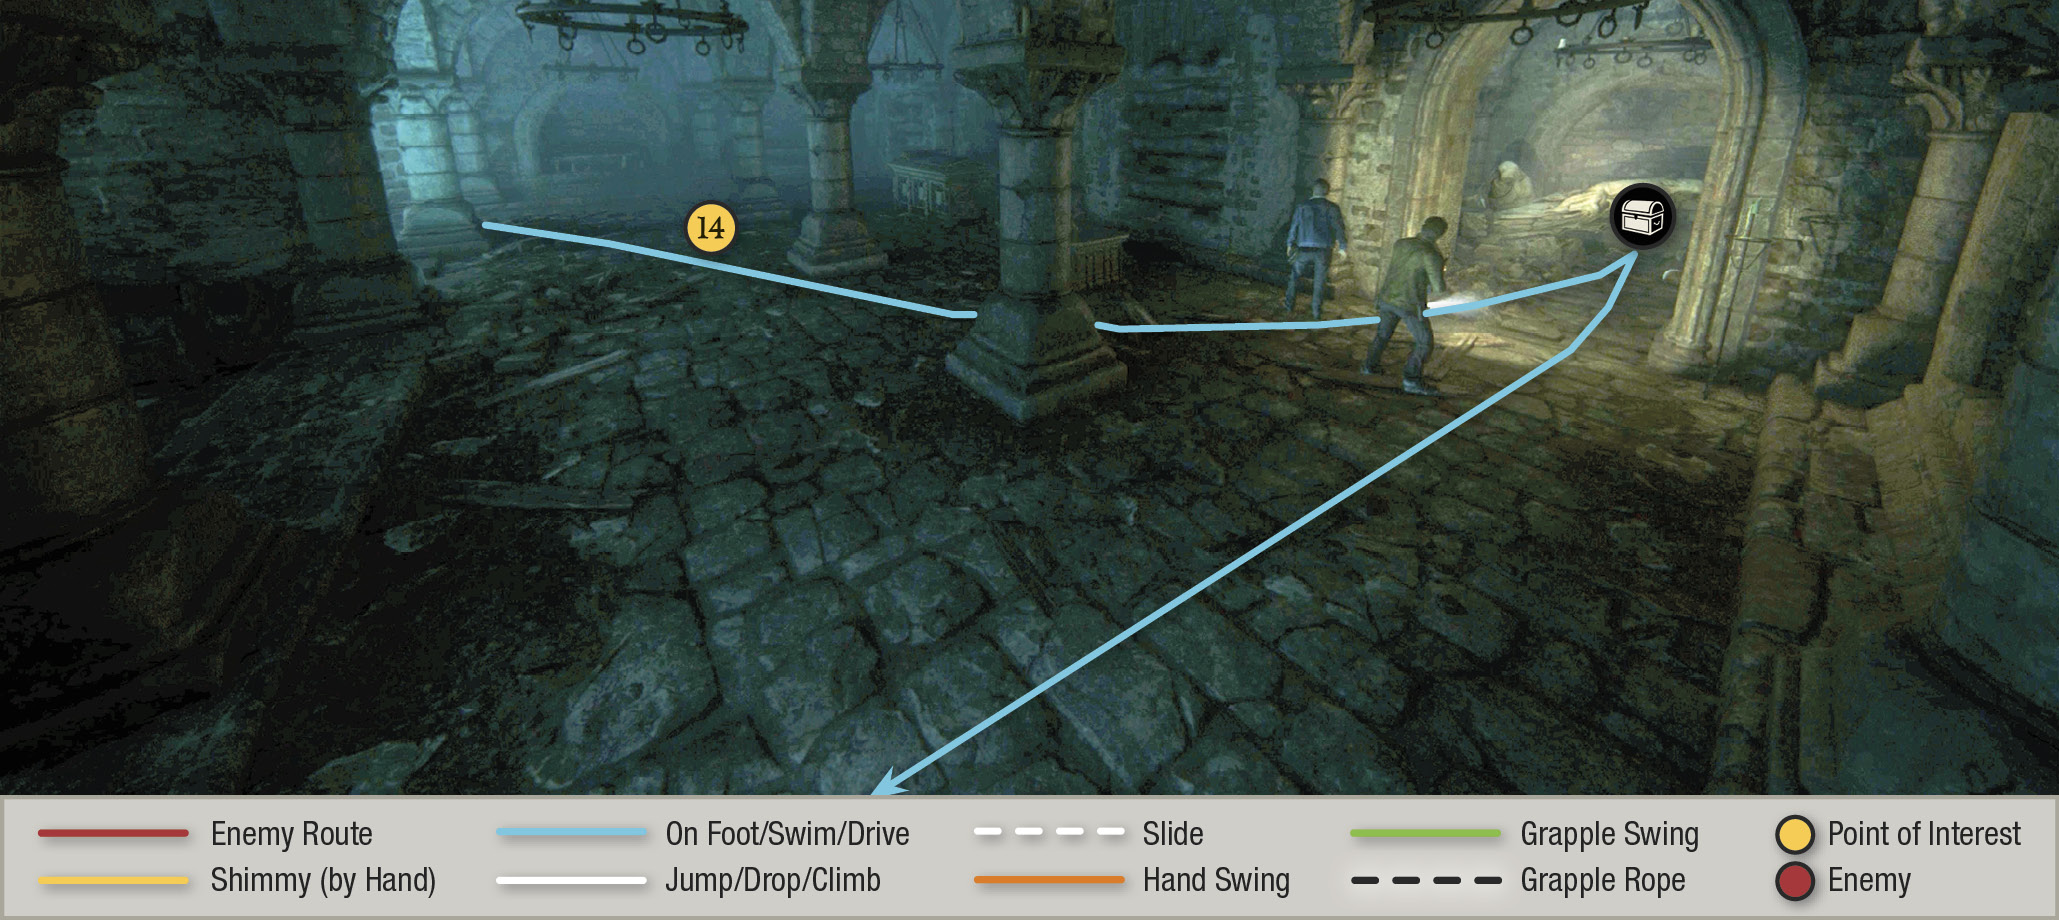
When the scene ends, climb rightward around the corner, drop to the floor, and follow the walkway (14) around the corner to the drop-off. (Don’t miss the treasure in the side room on the way.)

Pewter Box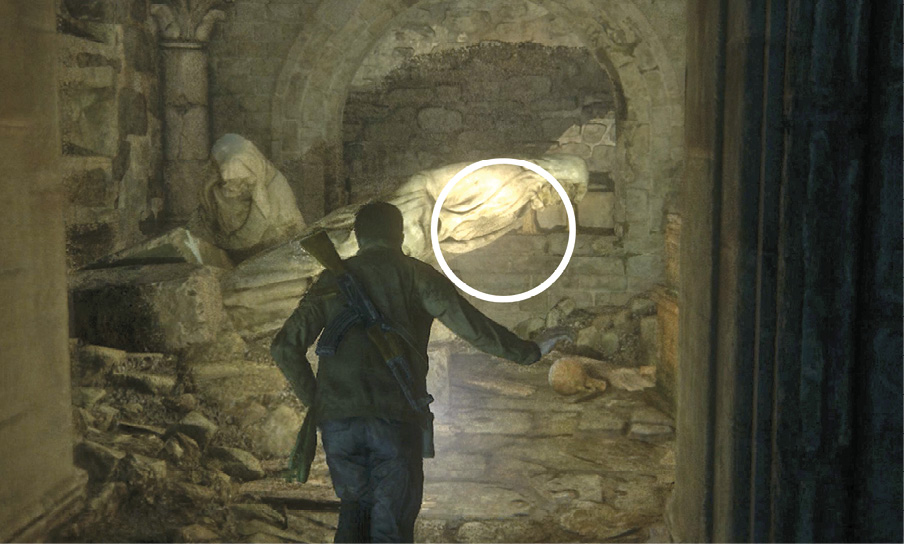
After you eavesdrop on Rafe and Nadine and move to the next walkway, look for the Pewter Box in the side room with the fallen statue. Note: You must roll under the statue to reach the item. |
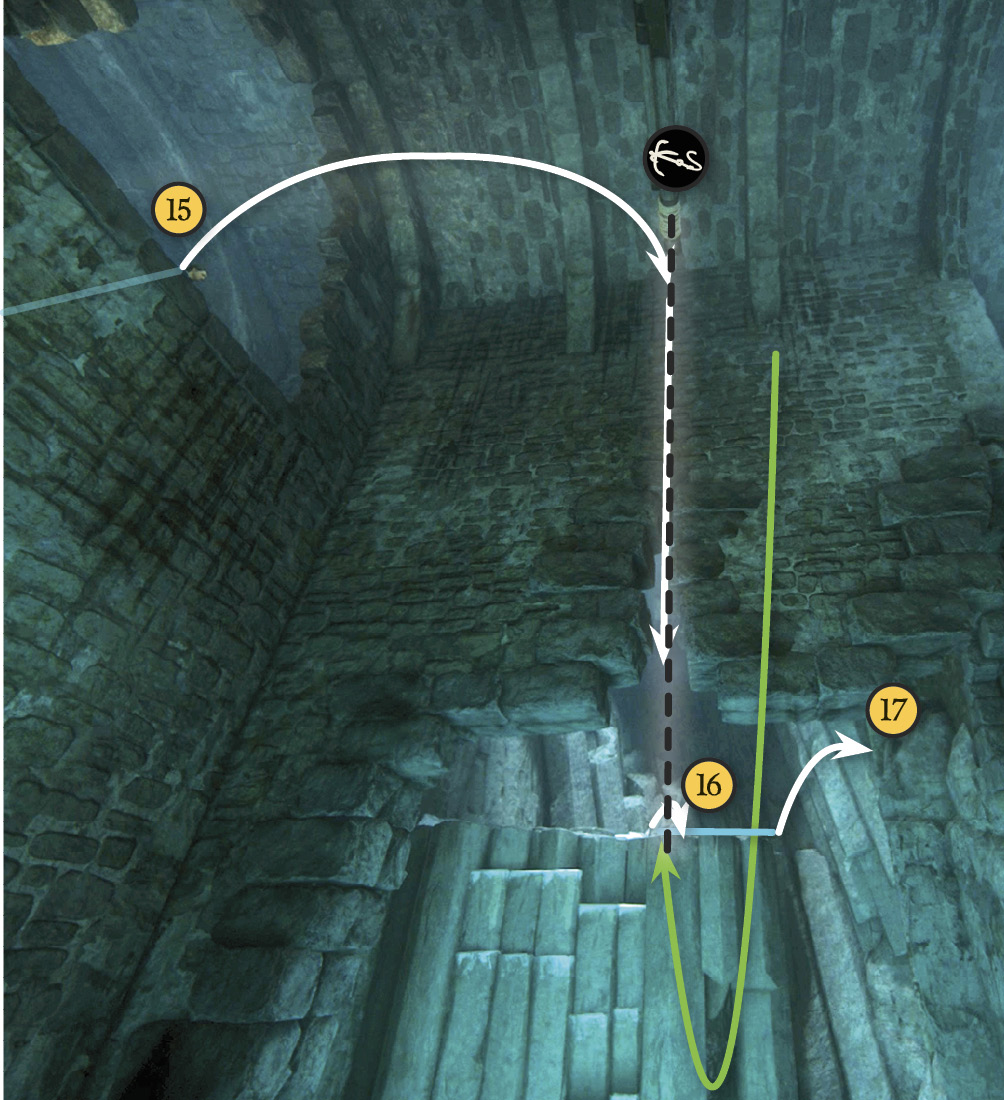
Follow the walkway to the drop-off (15) and sling your hook over at the grapple point, but don’t swing across to the next terrace. (If you do, you learn that it’s a dead end for now.) Instead, hold L1 and slide down to the end of the grapple rope. Now you can see underneath the broken wall to your left, and spot a platform beyond (see Fig 9-15).
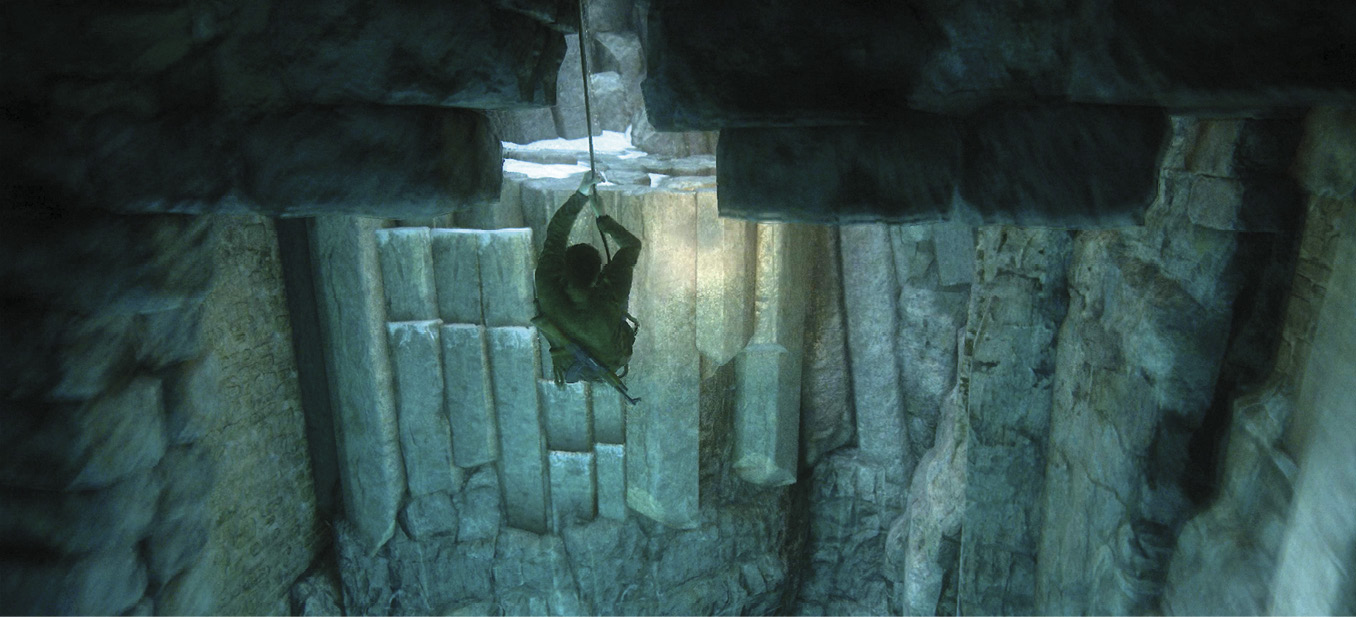
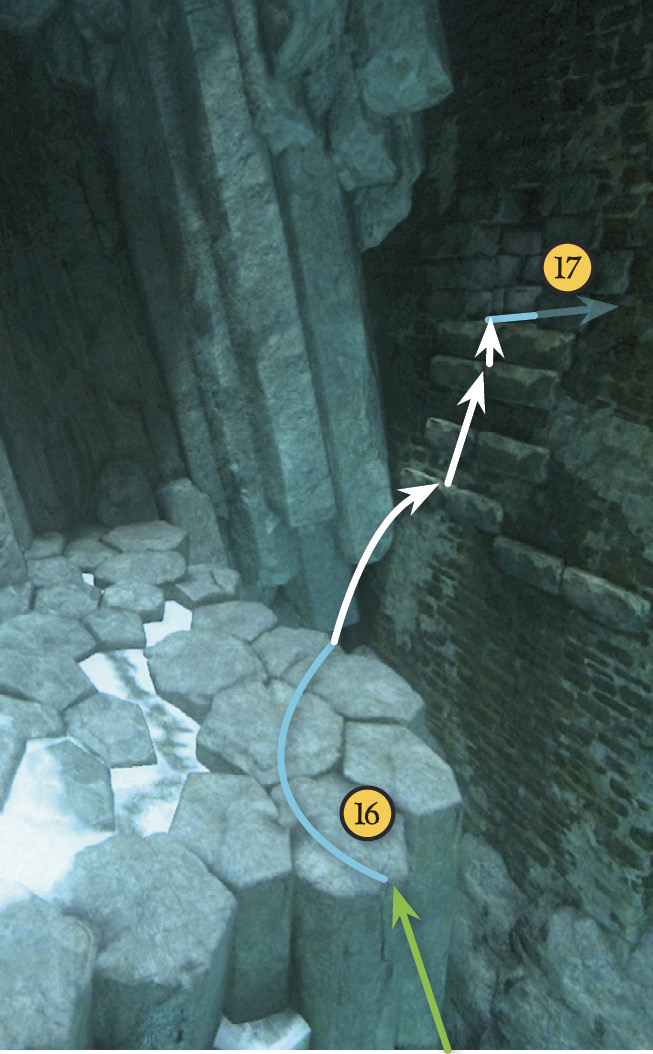
Swing to the handholds on the side of that platform and climb up (16). Turn right and jump across to the stone handholds on the brick wall. Then climb up into the low, narrow tunnel (17).
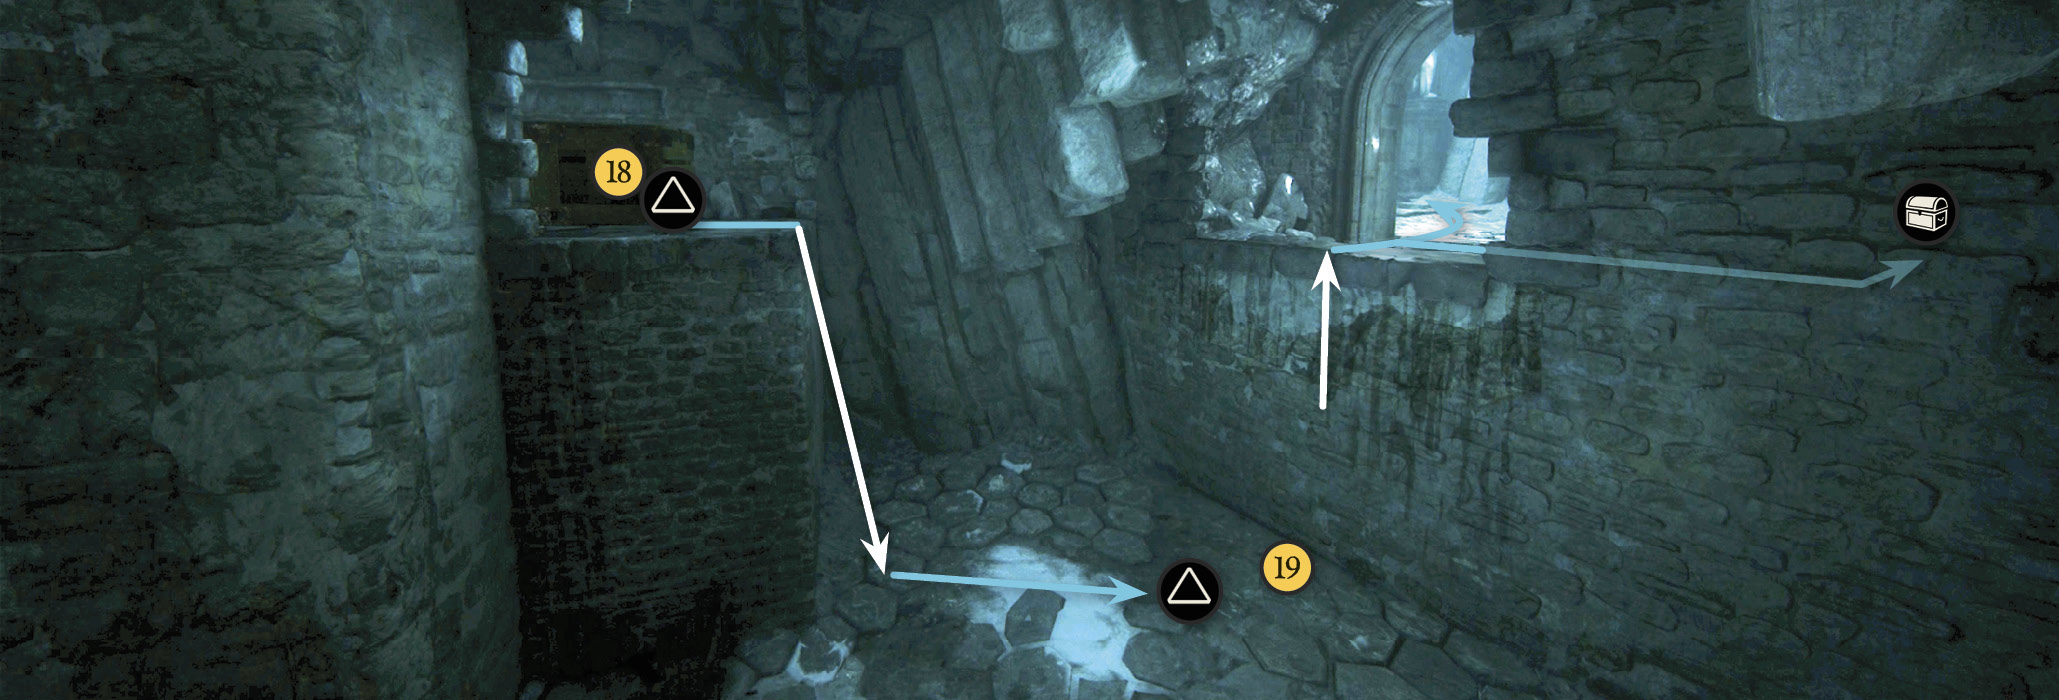
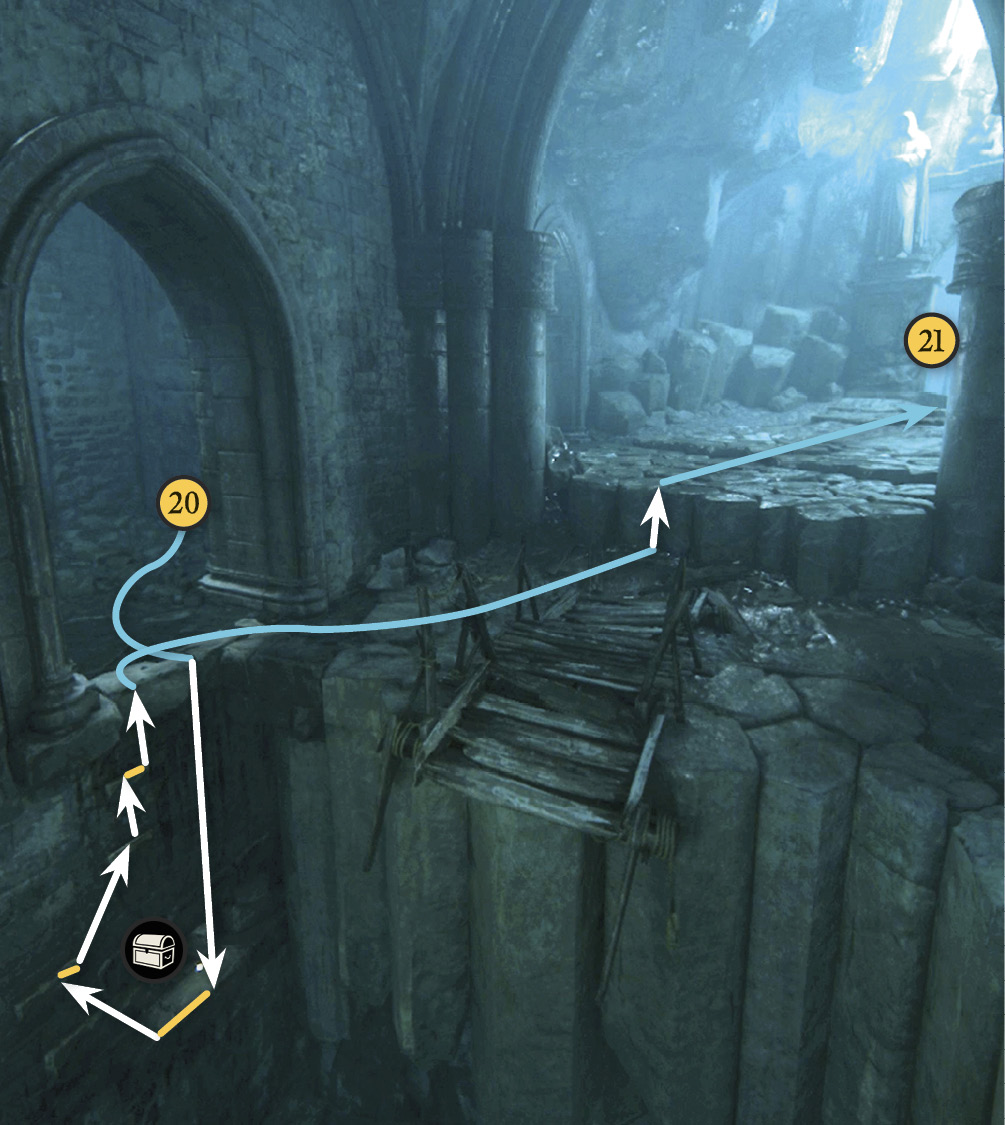
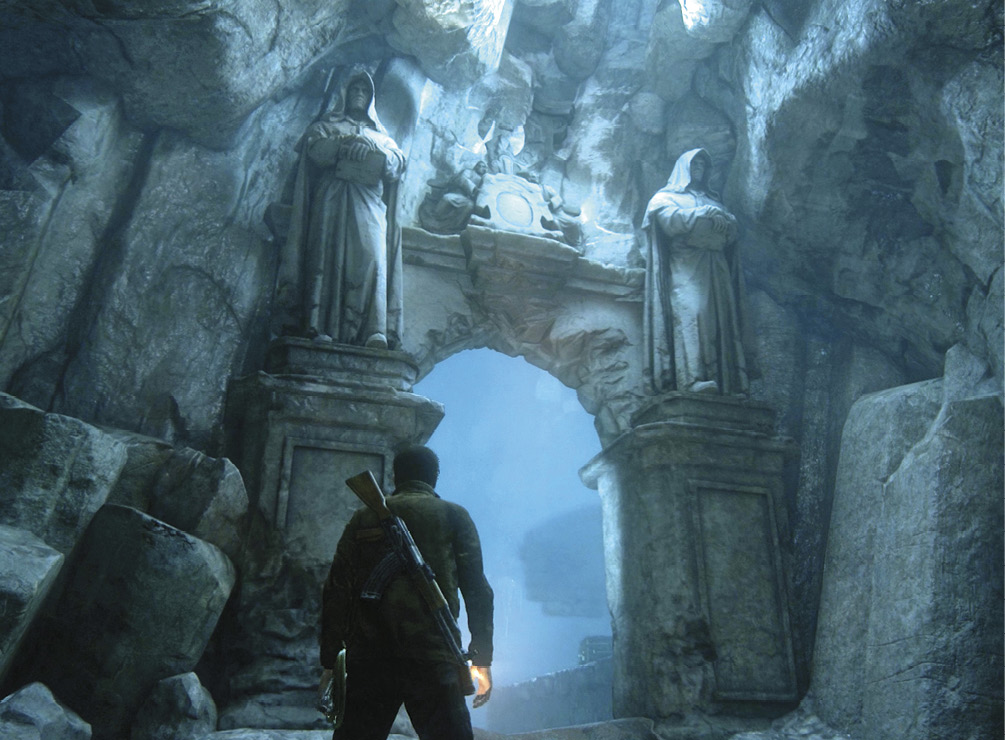
Crawl through the tunnel to find a rolling crate (18) on a ledge. Push it off the ledge, then drag it over to the wall (19) and use it to climb to the next hallway. At the top, you can turn right and move through the hole (20) to find a treasure after a climb down the wall. Then climb back up, walk past the bridge remnant and move through the arches (21) past the massive hooded statues.

Memento Mori Skull Watch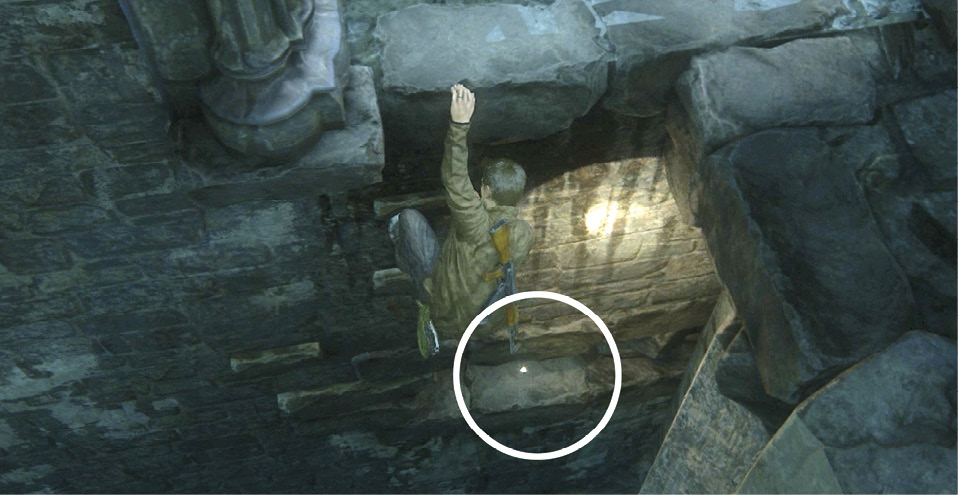
After you use the rolling crate to climb up the wall, veer rightward through the jagged hole in the wall and hang down from the edge of the drop-off to see the Memento Mori Skull Watch glowing in a tiny alcove just below you. Drop down the handholds to the alcove, grab the treasure, and climb back up. |
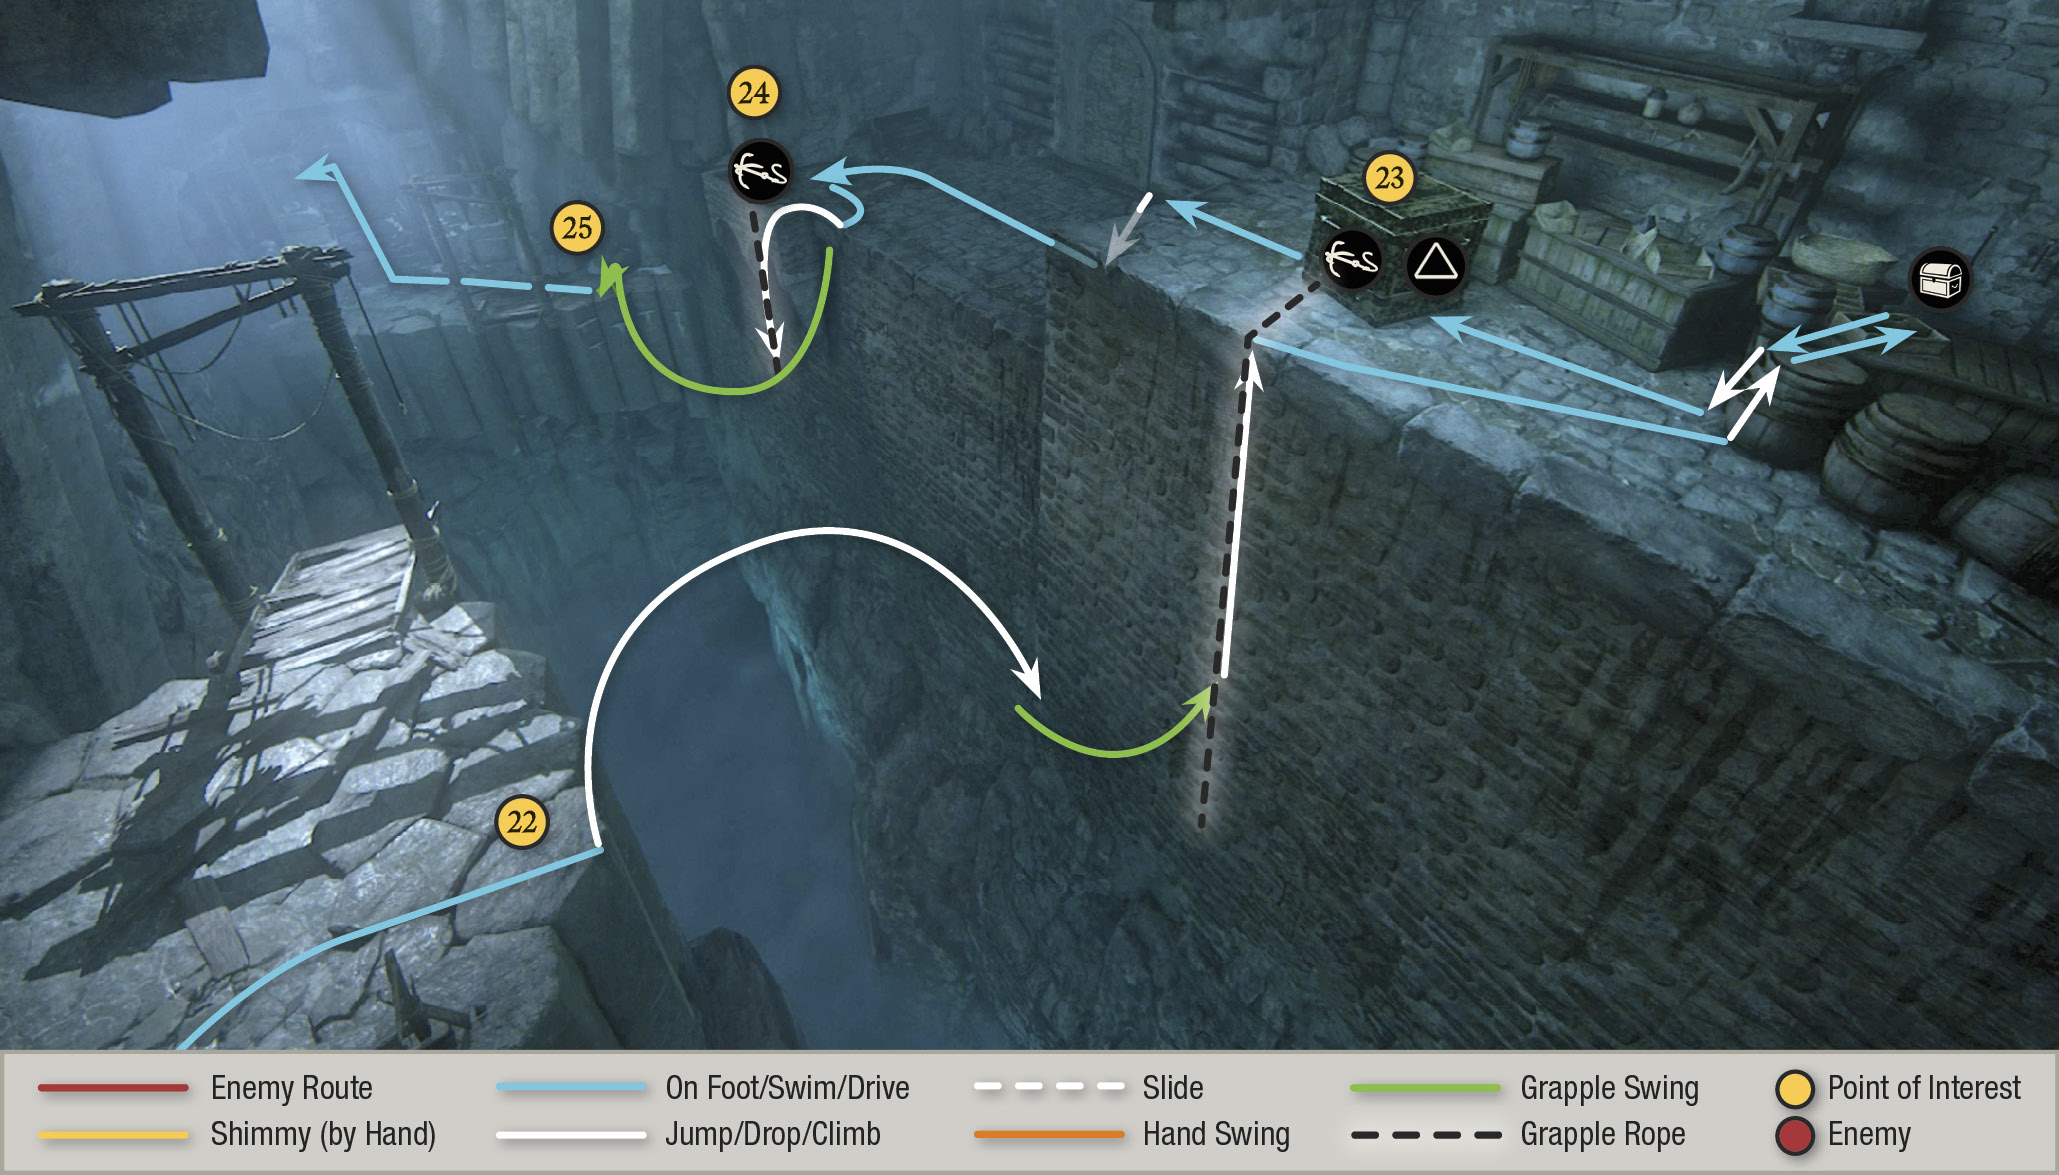
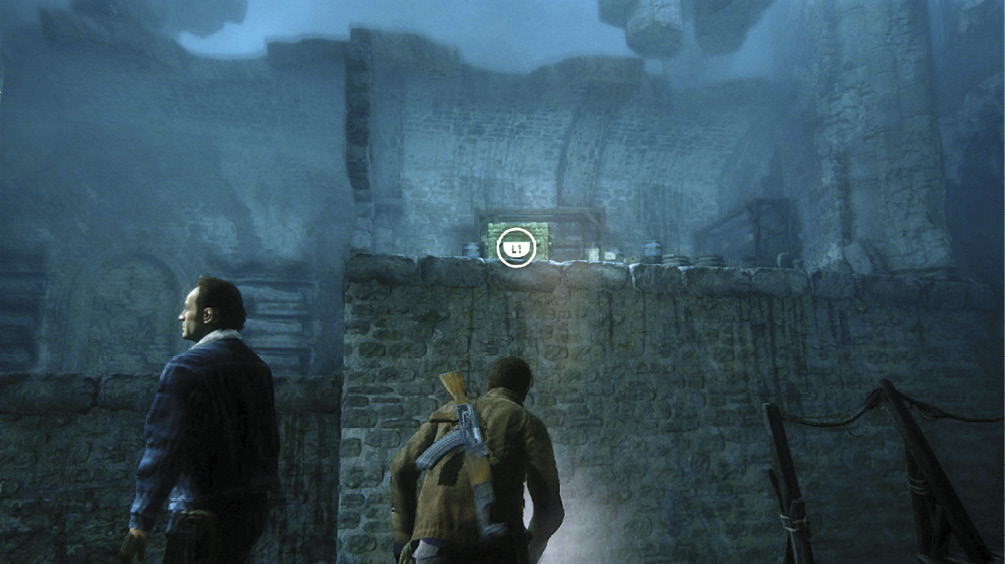
Follow the path across the old bridge section, then step to the edge (22) and toss your grapple hook at the crate (23) across the gap. Step off the edge to swing across, then pull yourself up the rope and onto the platform. When you arrive, find the treasure stashed amongst the items nearby.

Scottish Tipstaff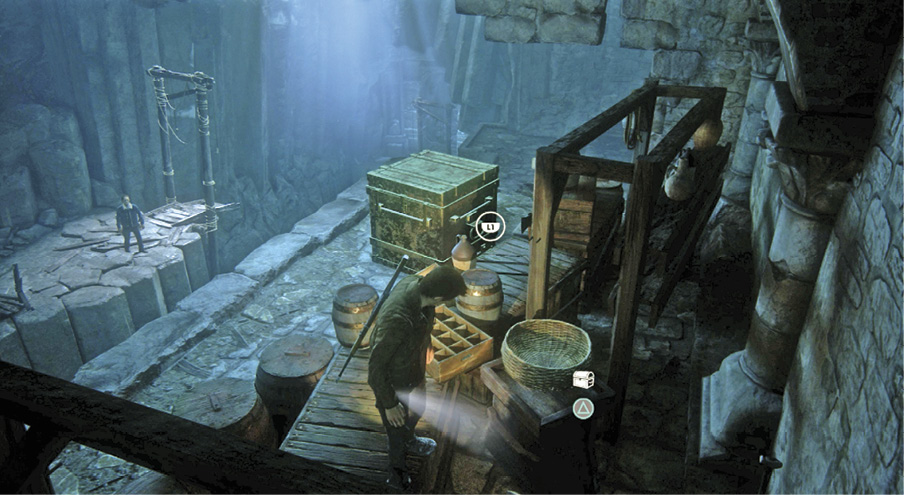
After you hook the crate and use it to grapple onto the platform, veer right and find the Scottish Tipstaff tucked behind a wicker basket on a crate near the corner. |
Now push the crate onto the lower platform. Then jump down and push it over to the corner (24). Attach your grapple hook to the crate and drop off the edge, then wall-run and swing across to the next ledge (25). Go through the arched doorway to see the passage ahead blocked by a cave-in. Turn left at the cave-in and follow the path to another low tunnel. Crouch through that tunnel into the next cavern.
Complete the Broken Bridge Challenge
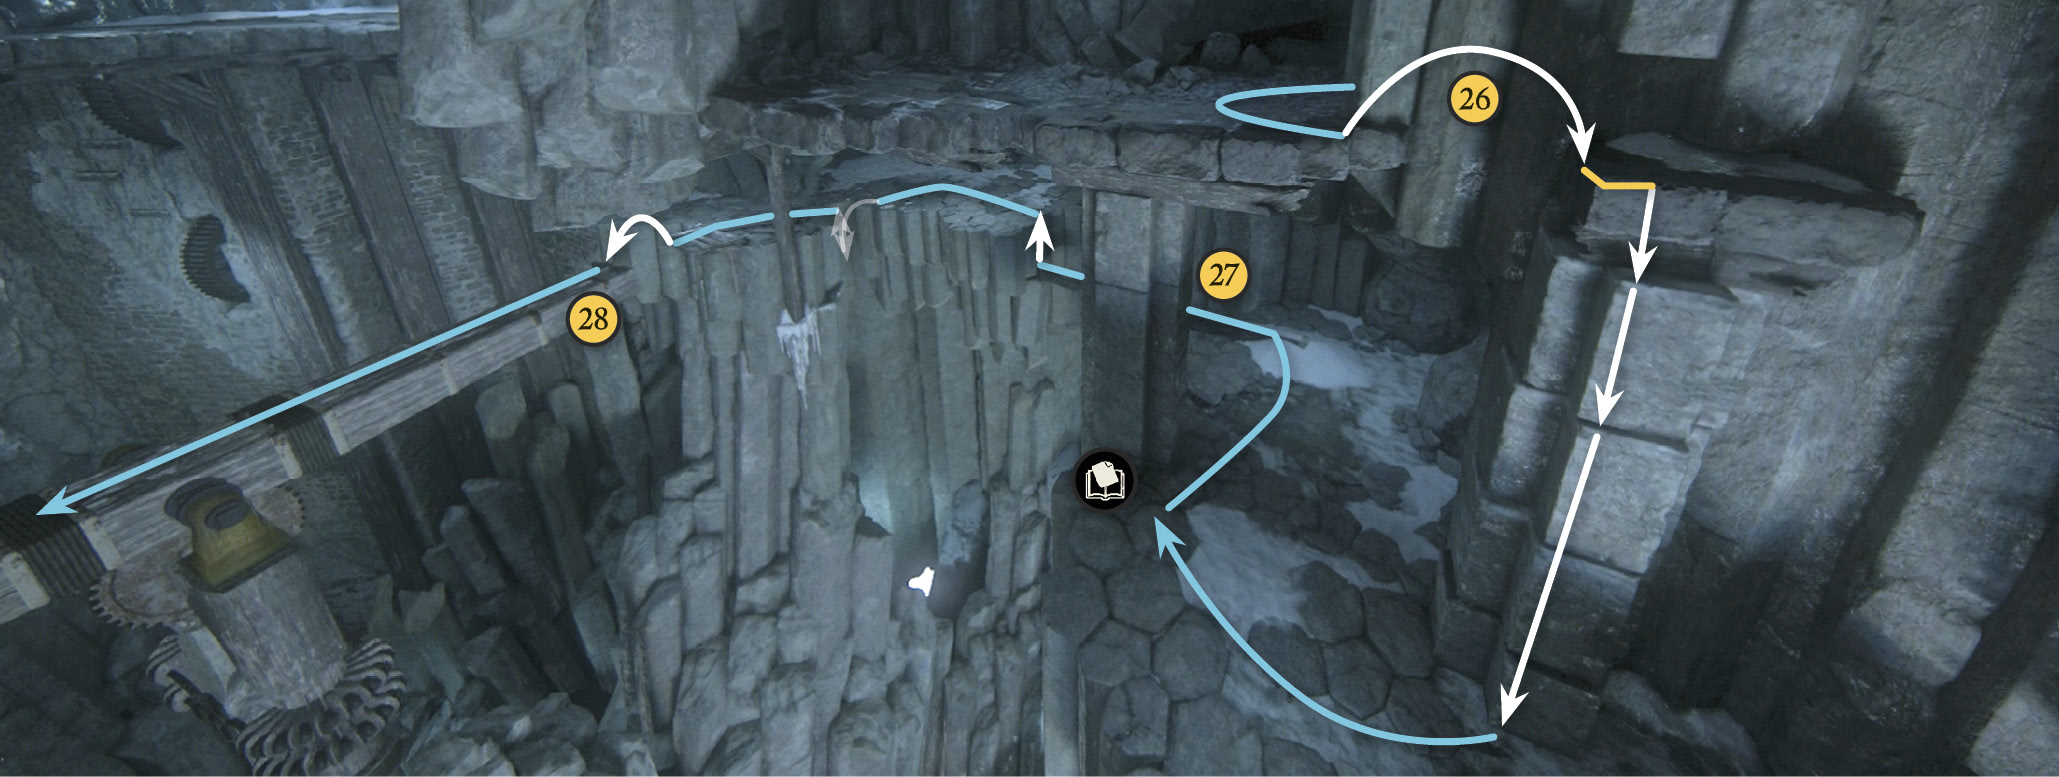
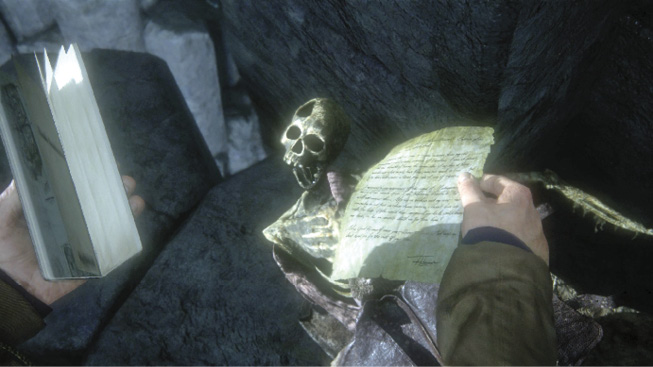
Sam points out that this next crevasse looks like the broken remnants of another test. Turn left at the corner and hop across the gap (26) to grab the pillar. Shimmy around the corner, then climb down the pillar, dropping from handhold to handhold to descend. Find the Optional Journal Note on the ground: a final note from the unfortunate pirate captain, Thomas Howard.
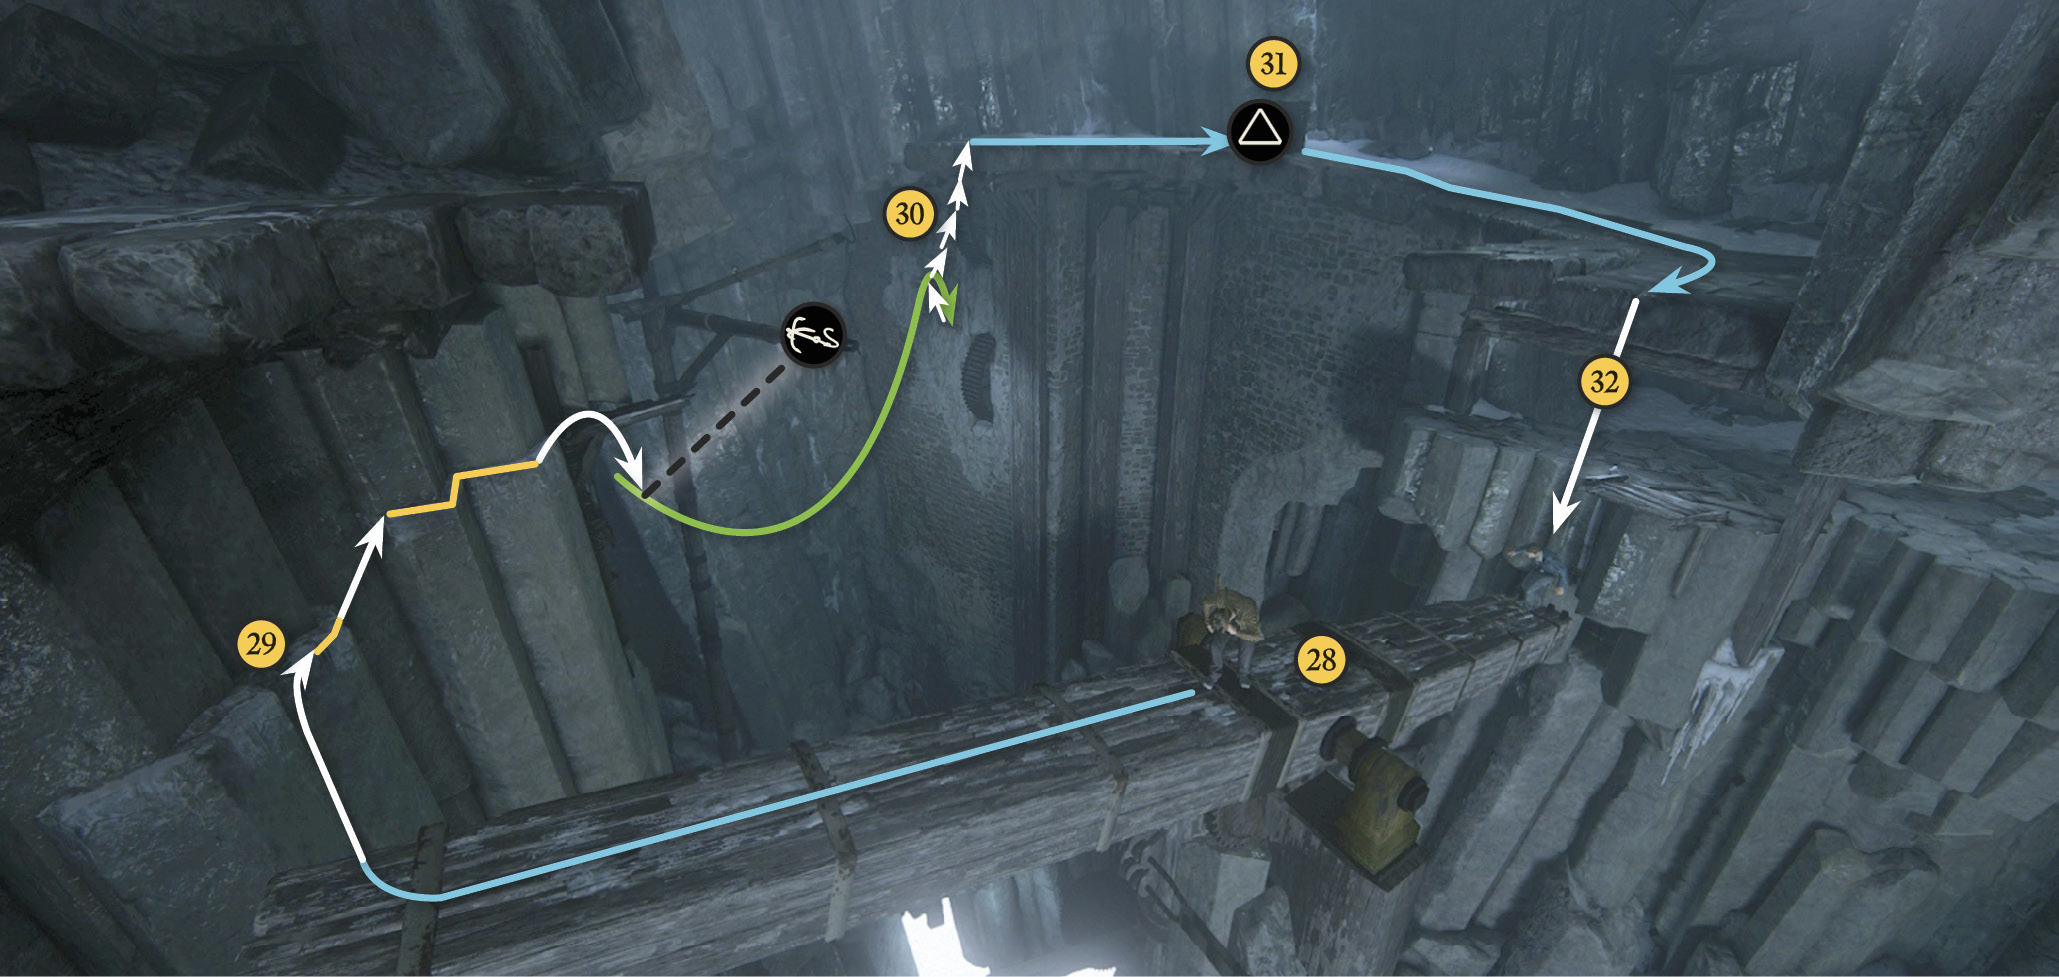
Walk carefully across the narrow beam (27), then jump to the platform and hop onto the seesaw bridge (28). When you get aboard, the structure on the far side collapses! Now you can’t make the jump up to that side. Walk forward across the bridge until Sam calls you back toward him; turn around and walk back as he hops onto the bridge to weigh down his end. Now turn back again, walk to the far end of the bridge, and leap off the right side to grab the handhold (29) on the wall.
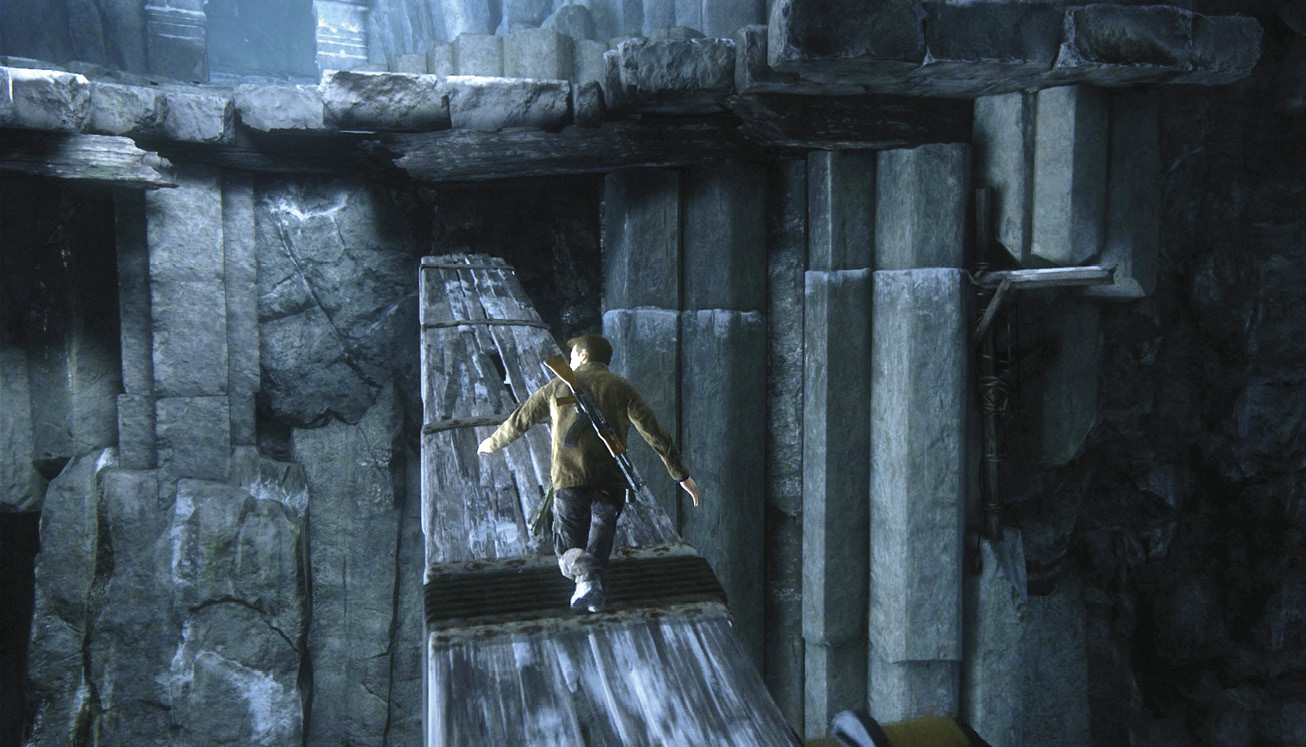
Climb rightward until you spot the grapple point on the pole. Use it to swing across to the handholds (30) on the wall between the two huge gears. Climb to the upper gear, then scramble upward quickly—the gear starts turning! Use the plank handholds and another gear to reach the platform above.
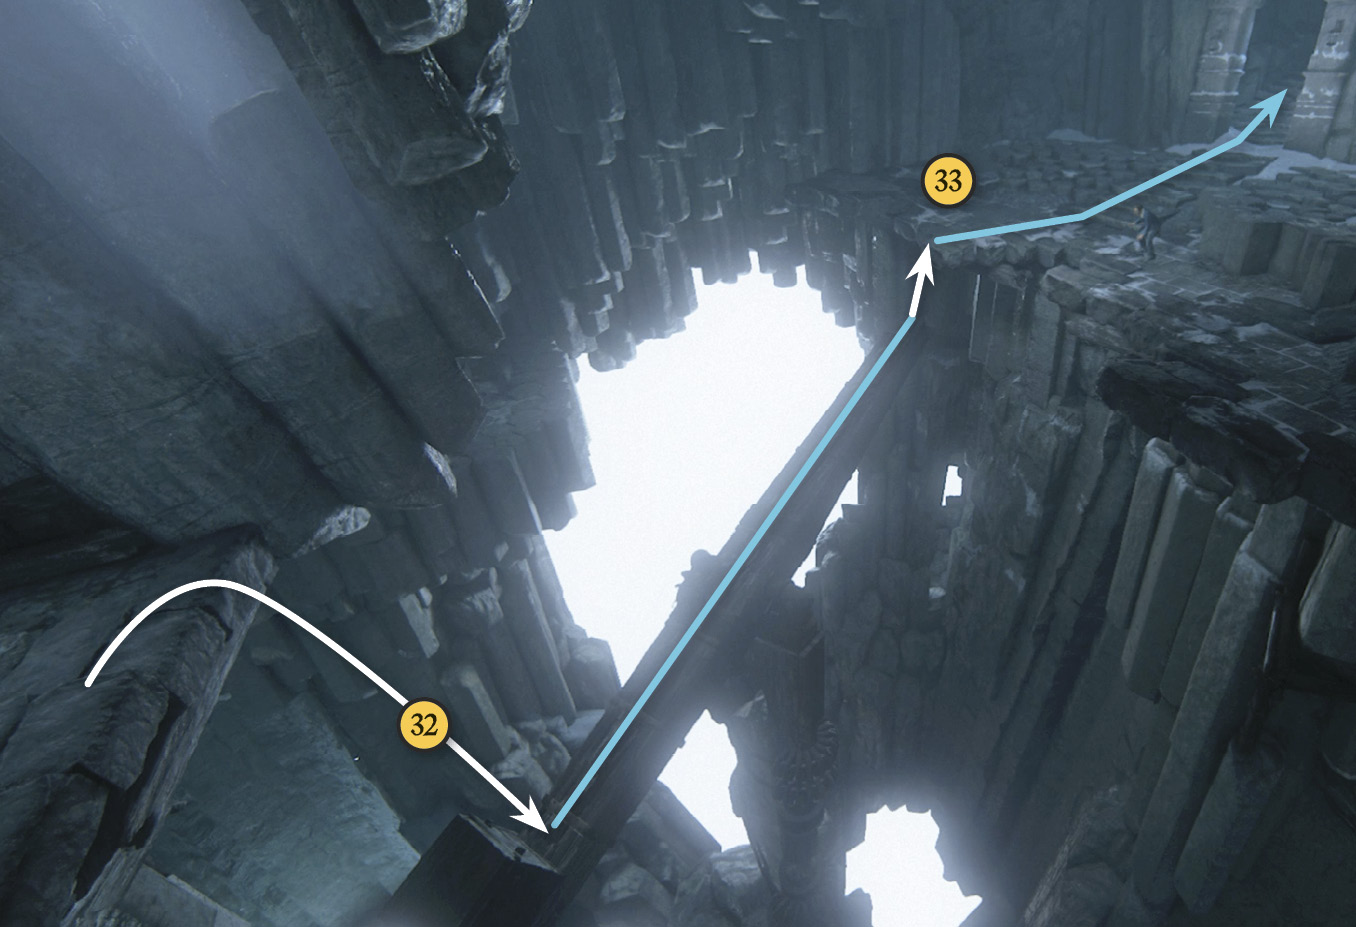
Push the crate (31) down the slope until it drops (32) onto the end of the seesaw bridge. This whips Sam up onto the far platform. Now jump down onto the bridge—it starts swiveling to the left! Run across the bridge and jump from the far end toward Sam (33); Sam grabs Nathan and pulls him onto the platform.
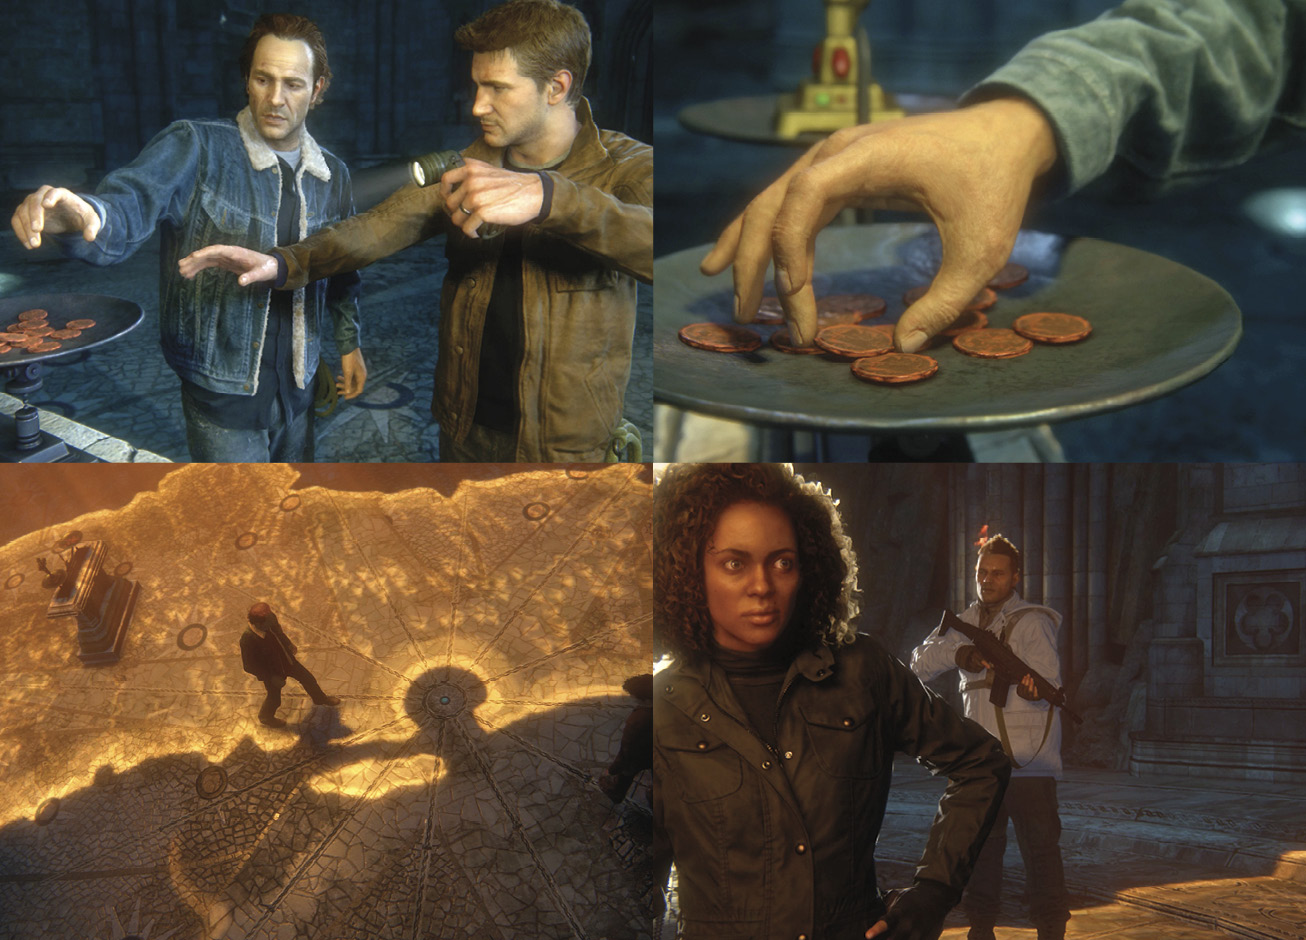
Climb the long staircase, then descend to the door. Use the mechanism at right to unlock the door and trigger a long scene: The brothers enter the next challenge room, and find a clue to a new destination. Unfortunately, they also run into Nadine and crew. Nadine makes a hasty move…and the cavern starts to collapse!
Escape the Map Room
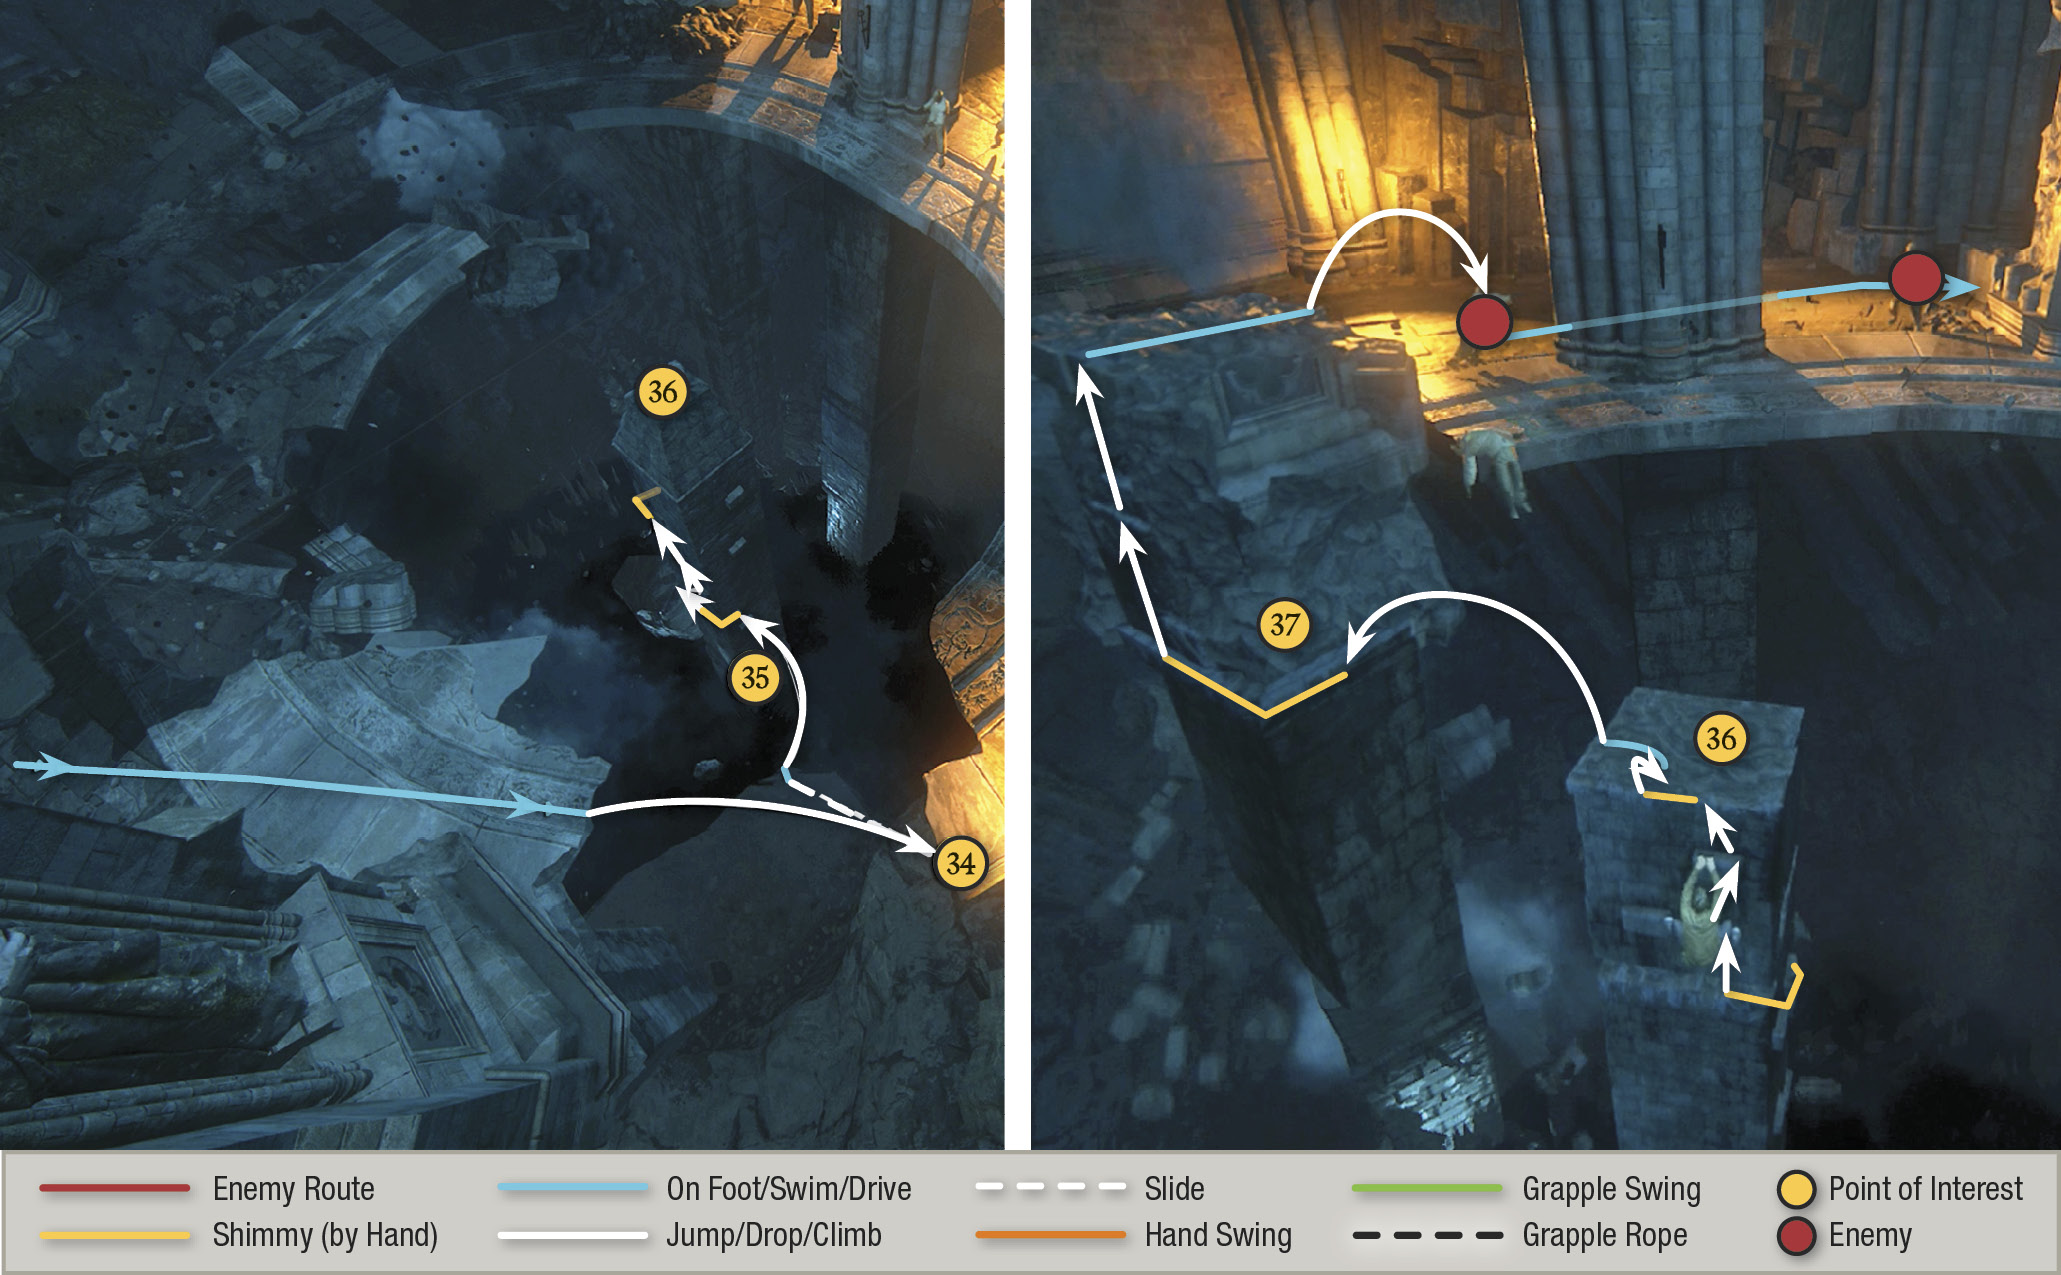
Hurry! Nadine’s men open fire on the Drakes. Follow Sam through the falling rubble and jump across the gap to grab the collapsing floor (34). Sam tries to help but Nathan falls and slides to the edge of a lower platform. Jump across (35) to the center pillar and climb the handholds upward and leftward until you reach the top (36).
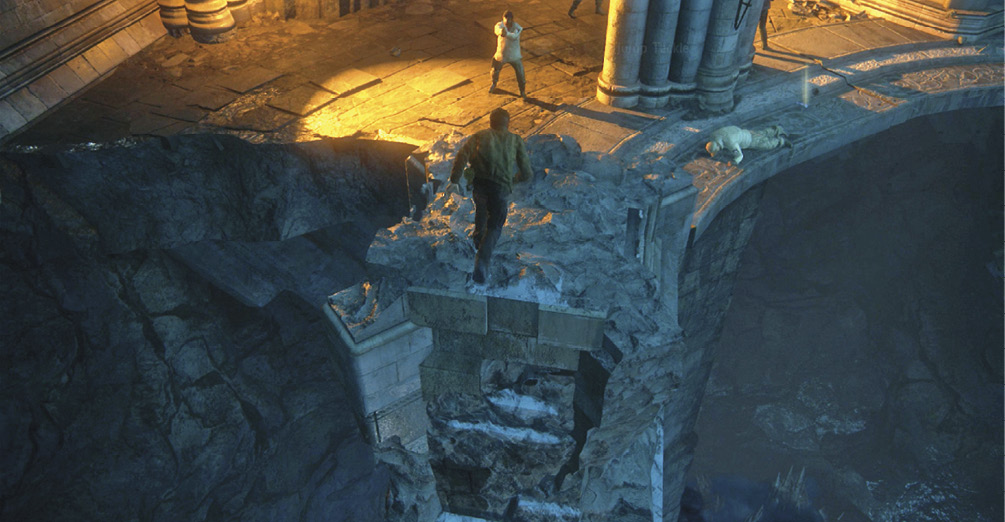
After part of the next pillar collapses, jump across to it and slide around the corner (37) to the left to cut off the shooters’ angles. Climb to the top of the second pillar; as it teeters toward the platform, make a jump tackle directly onto the closest mercenary soldier for a quick vertical takedown. Nathan automatically snatches his gun. Start gunning down the other hostile shooters.
Get Up Through the Ceiling Hole
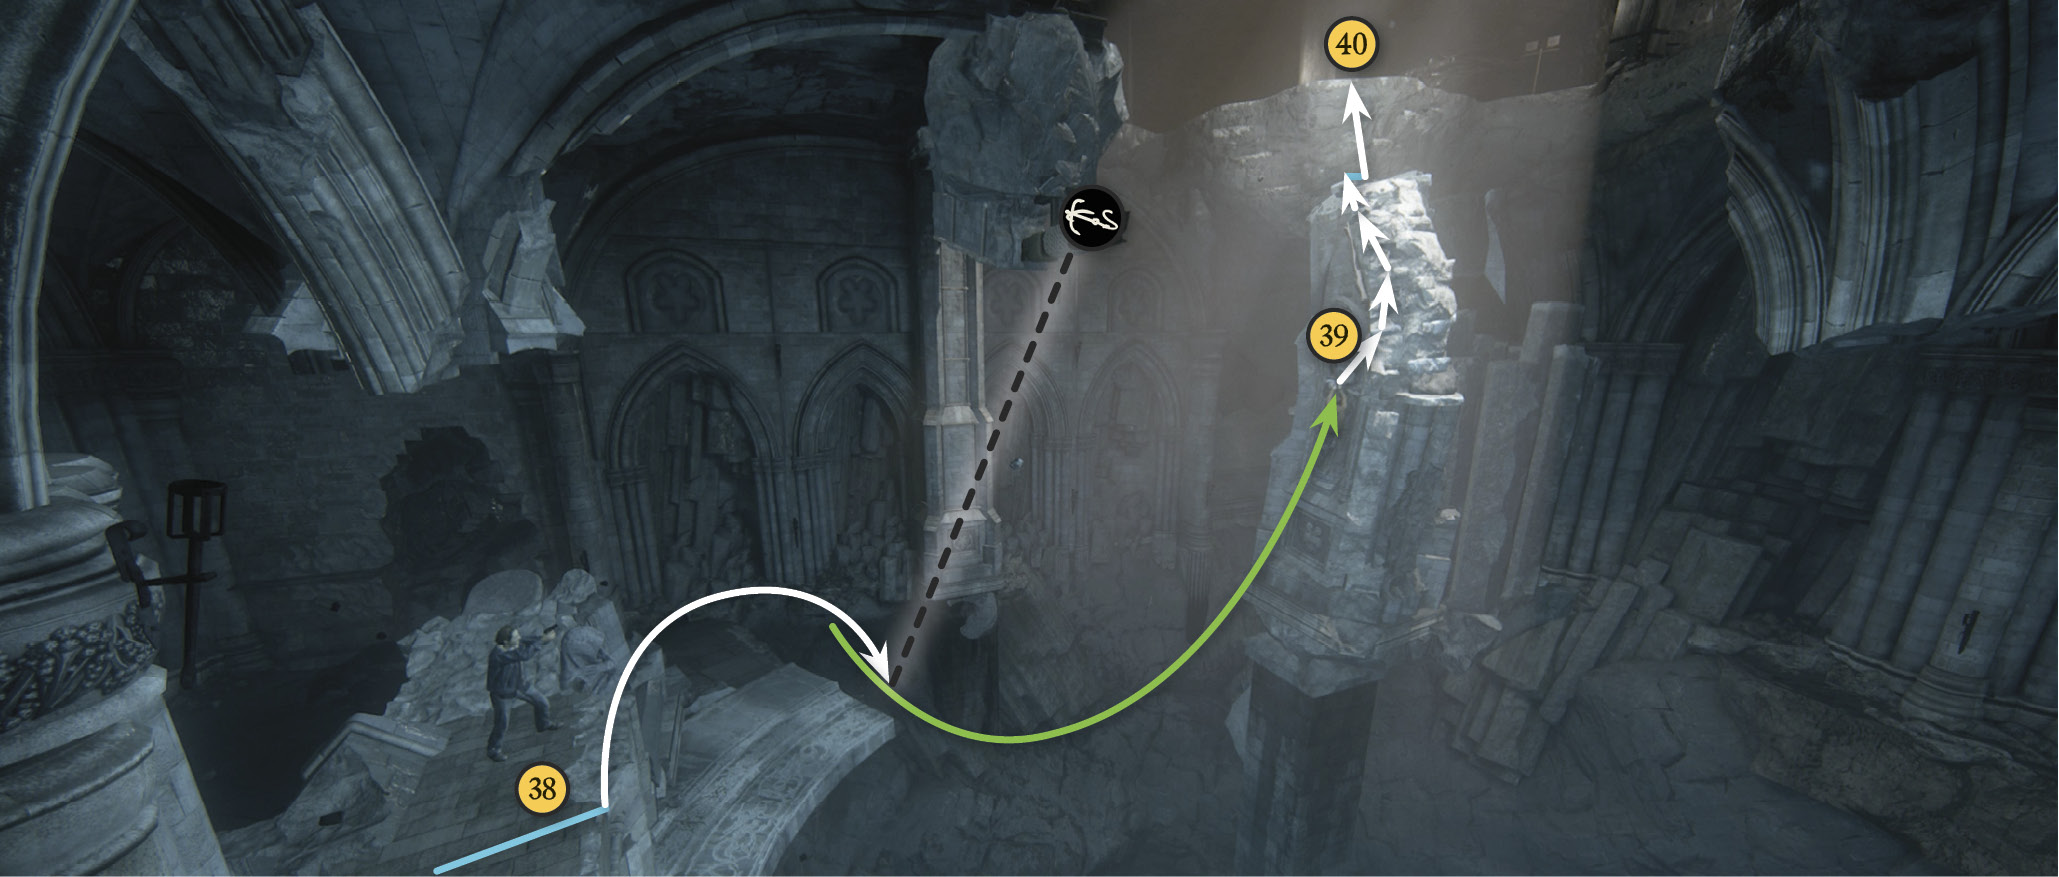
After another shower of debris falls, look up to see a hole in the cavern’s ceiling on the far side—that’s your escape route! Several Shoreline gunmen are posted up there, however. Try to pick some off from here. It’s a long-distance shot with your pistol, but if you can nail a few bad guys now, your upcoming swing and climb is much easier.
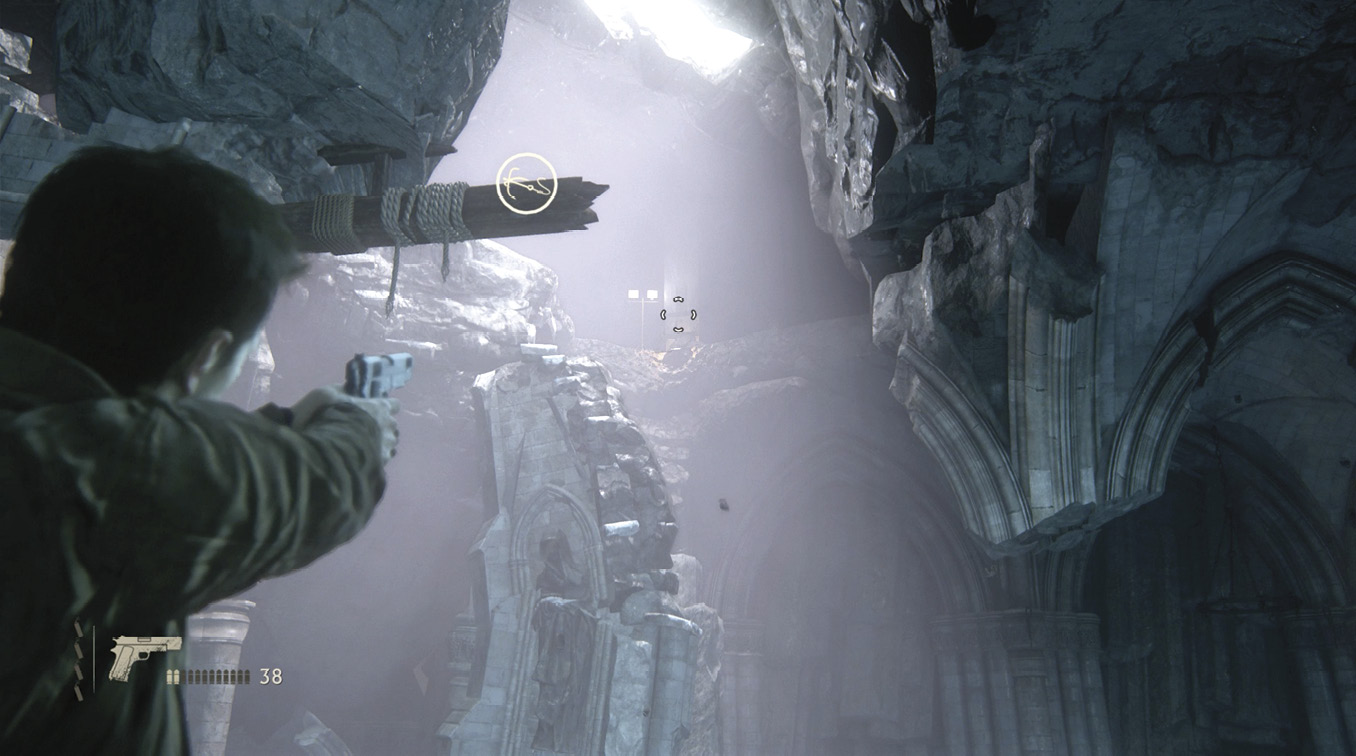
Once you’ve nailed a few gunmen, jump onto the nearby block (38) and toss your grapple hook at the broken beam. Swing across the cavern to the pillar with a statue (39) and climb upward. As you reach the top, the pillar topples…and, fortunately for Nathan, slams against the cavern’s far wall.
Now you can scramble up to hang on the platform (40). Be ready: as many as four
tough mercenaries can be waiting on the platform if you didn’t pick them off from below. A good trick is to just hang on the platform’s edge to cut off enemy shooting angles; let goons come to you and then try to pull each one over the edge. Note that these toughs don’t go over easily; when you grab them, they resist. Quickly tap to win any struggle and pull them down.
Fight Your Way to the Cathedral
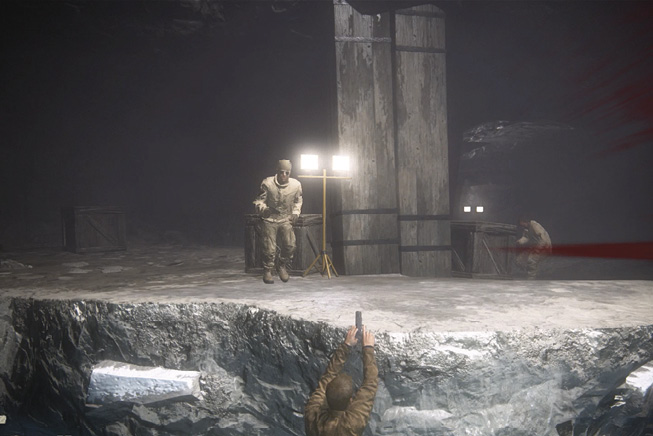
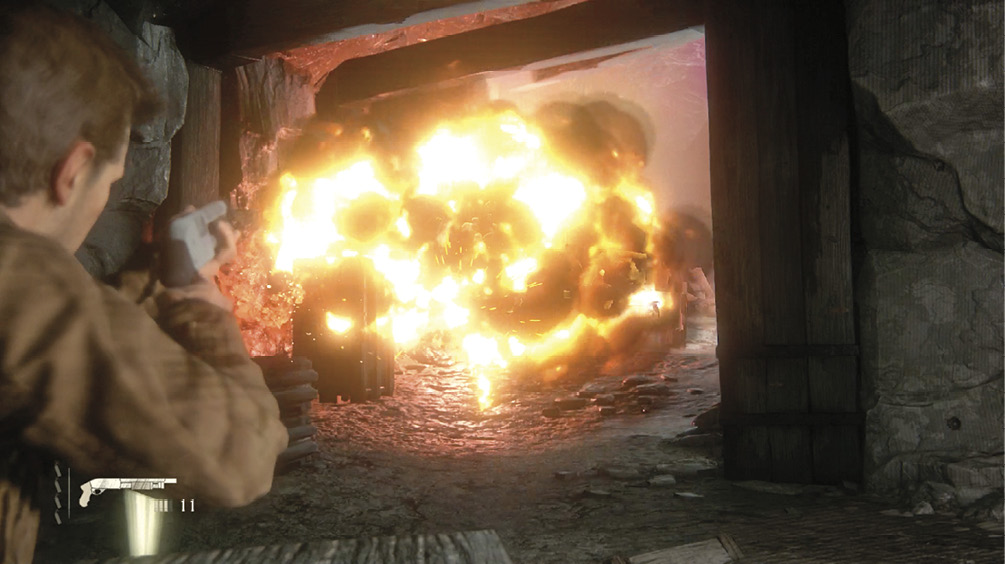
Now fight your way down the exit tunnel. The resistance is stiff, so use the plentiful cover and toss dynamite ahead of you down the passage. Target the red explosive barrels marked by an “X” when enemies are near them for big damage and easy kills. (You find these barrels placed at regular intervals in the tunnel.) Be sure to pick up ammo and a rifle or the Spezzotti 12 Gauge shotgun as you advance. Eventually you emerge into the daylight.
Take Out the Turret!
The sprawling cathedral ruins are filled with equipment crates and mercenaries with bad attitudes. The space is more wide open now, so switch to a weapon with better range, like an AK-47, if you can find one.
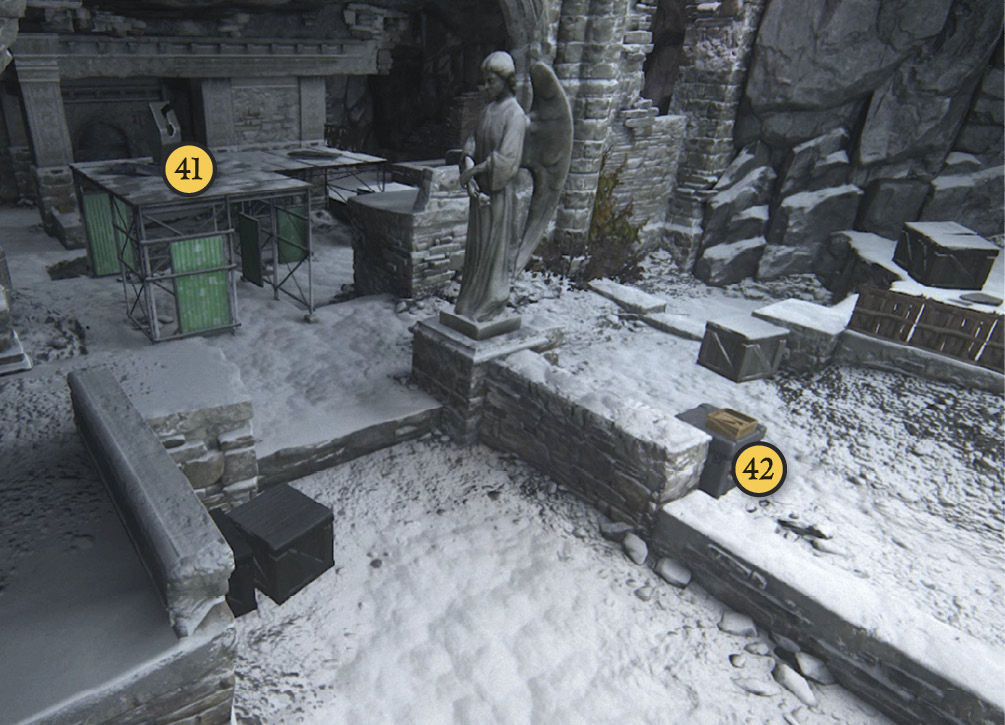
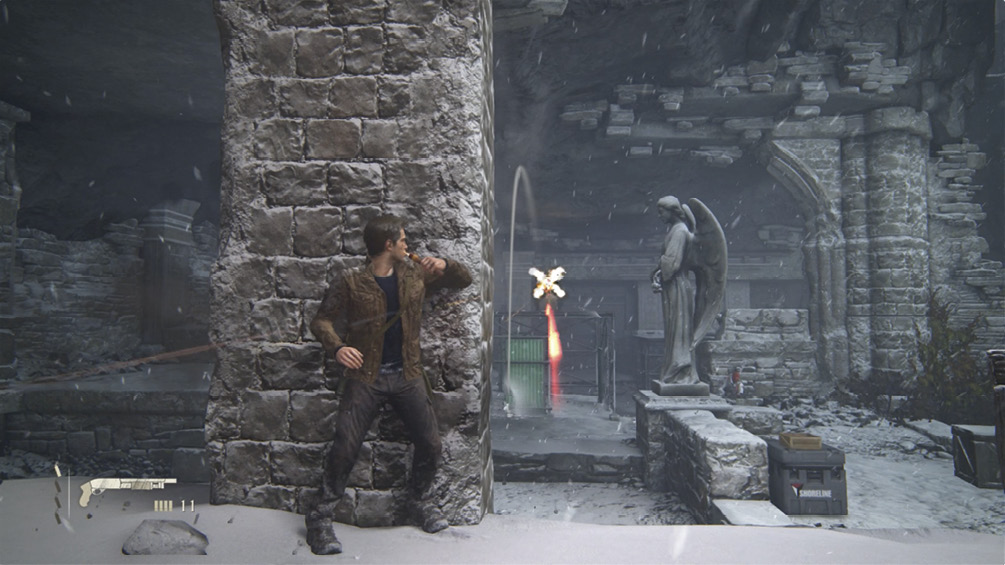
You start at the subfloor level where a New Weapon, the Machinegun Turret, (41) opens fire from a raised platform, quickly tearing apart any wooden crate you might use for cover. Hustle to one of the basement’s stone pillars for better cover, and then return fire. Target that turret first! Use dynamite if you’ve got it. (Look for a box of dynamite (42) down on a low wall near the big angel statue.) Once the gunner is down, stop others from manning it, and hop onto the platform and use the machinegun to decimate the remaining goons below to your left. (If you don’t use the turret, other Shoreline goons will try.)
Get to the Top Level of the Excavation Site
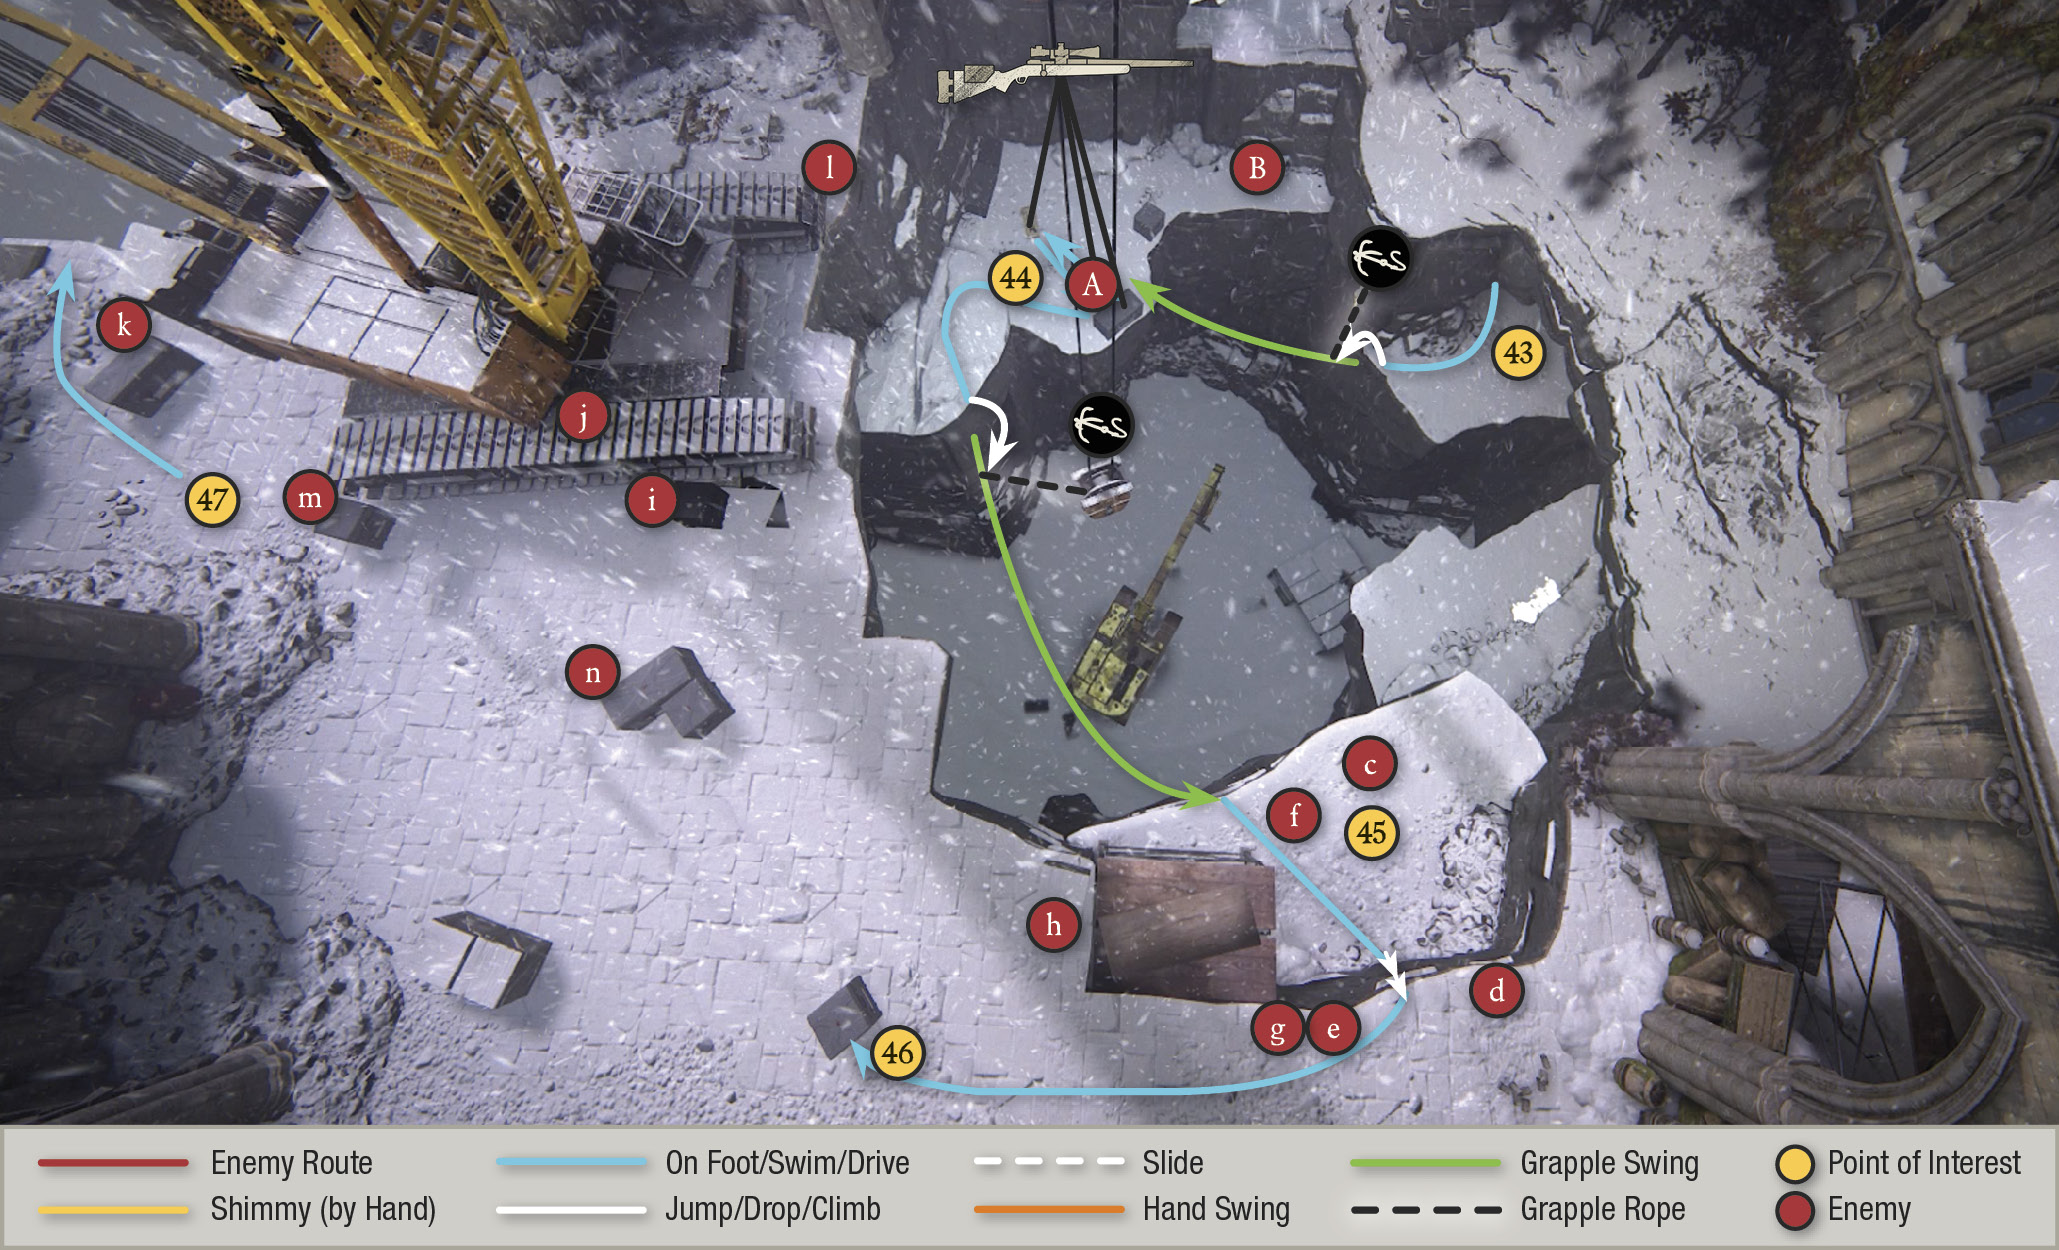
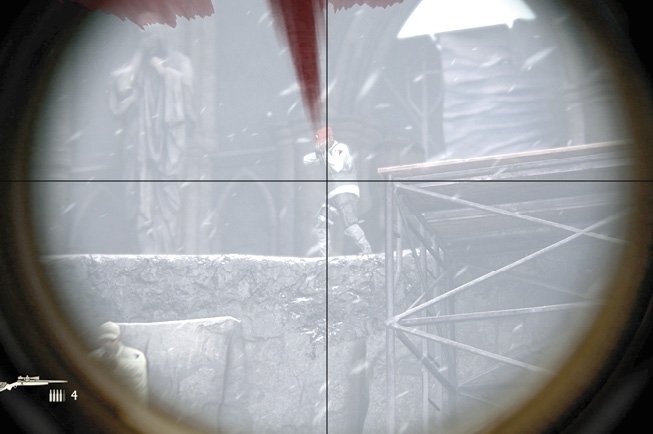
After you clear out the big basement room, use the passage hewn through rock to reach the central excavation site. Rafe’s men have dug open a large pit. You emerge onto a platform (43) where you can see a digger on the site floor far below, and a massive crane above you on the top level. You also see a red targeting laser flashing around Nathan. Sniper! Quickly target the sniper (A) on the platform to your right (44) and then nail the other gunman (B) over there too. When both are down, the shooting stops until you use the grapple point to swing over to that platform. Alternatively, you could grapple to the ledge, perform a vertical takedown from the rope, and then rush the second guard using a melee attack to take him down too.
Get ready: When you land on that platform, two more shooters (C, D) drop onto the ledges across the pit (45) and open fire. Grab the New Weapon, the Mazur LDR rifle that the sniper dropped on your ledge, and pick them off. Quickly find more sniper ammo on the crate nearby, and stay in cover as another squad of shooters (E, F ,G, H) deploys onto the far ledges. This squad includes a pair of snipers and two grenadiers. Patiently pick them off, one by one.
When the far ledges are silenced, use the high grapple point—the big crane hook above the pit—to swing across to the far side. The moment you land, two more goons (I, J) advance at you. Climb the scaffold and find immediate cover behind any Shoreline crate (46), which is sturdier than the wooden crates.
As soon as you drop the two attackers, four last mercenaries (K, L, M, N) move into position over by the crane. Look out: Guard (L) hops on the crane tread to get a better shooting angle at you. Pick them off, then proceed past the crane (47). Sully flies overhead and checks in with the boys, then lands down in the water below.
Escape the Cathedral!
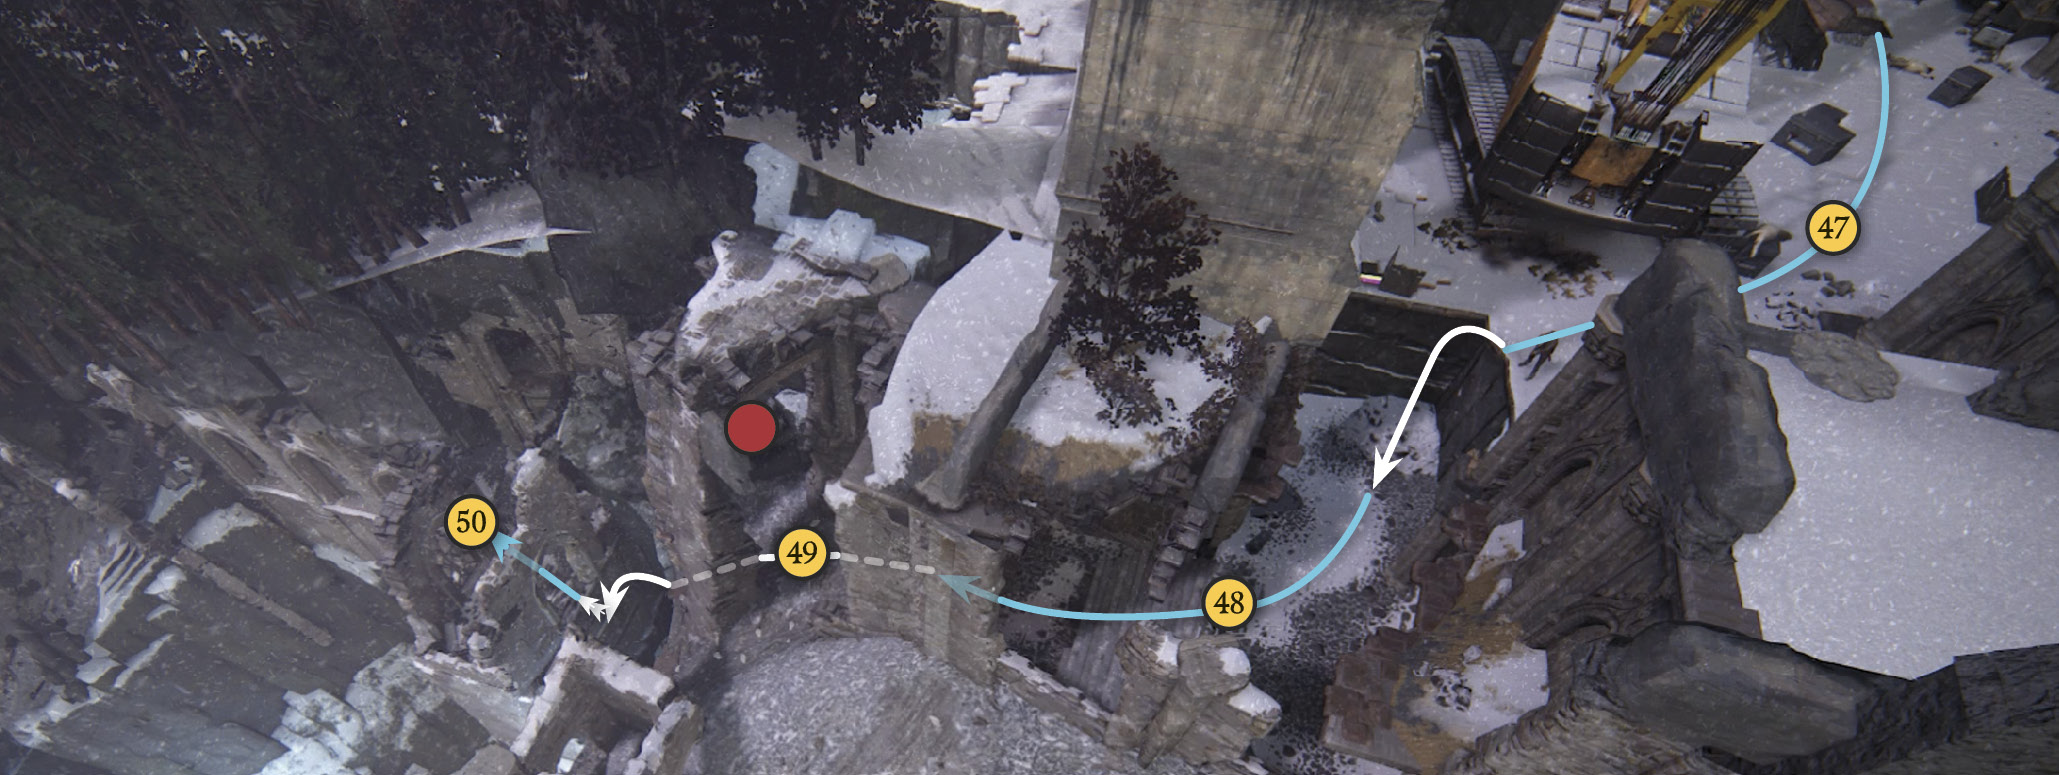
Get ready for a tough slog through the cathedral to reach Sully’s seaplane. After you pass the big Shoreline crane, hop down the wall and move around the corner. As you descend the stairs (48), pick off the lone gunman who appears across the gap. If you don’t kill him now, he’ll come back to haunt you when you reach the next area. Then hop onto the rockslide (49) and ride it down; as you reach the bottom, quickly jump across to the next platform (50).
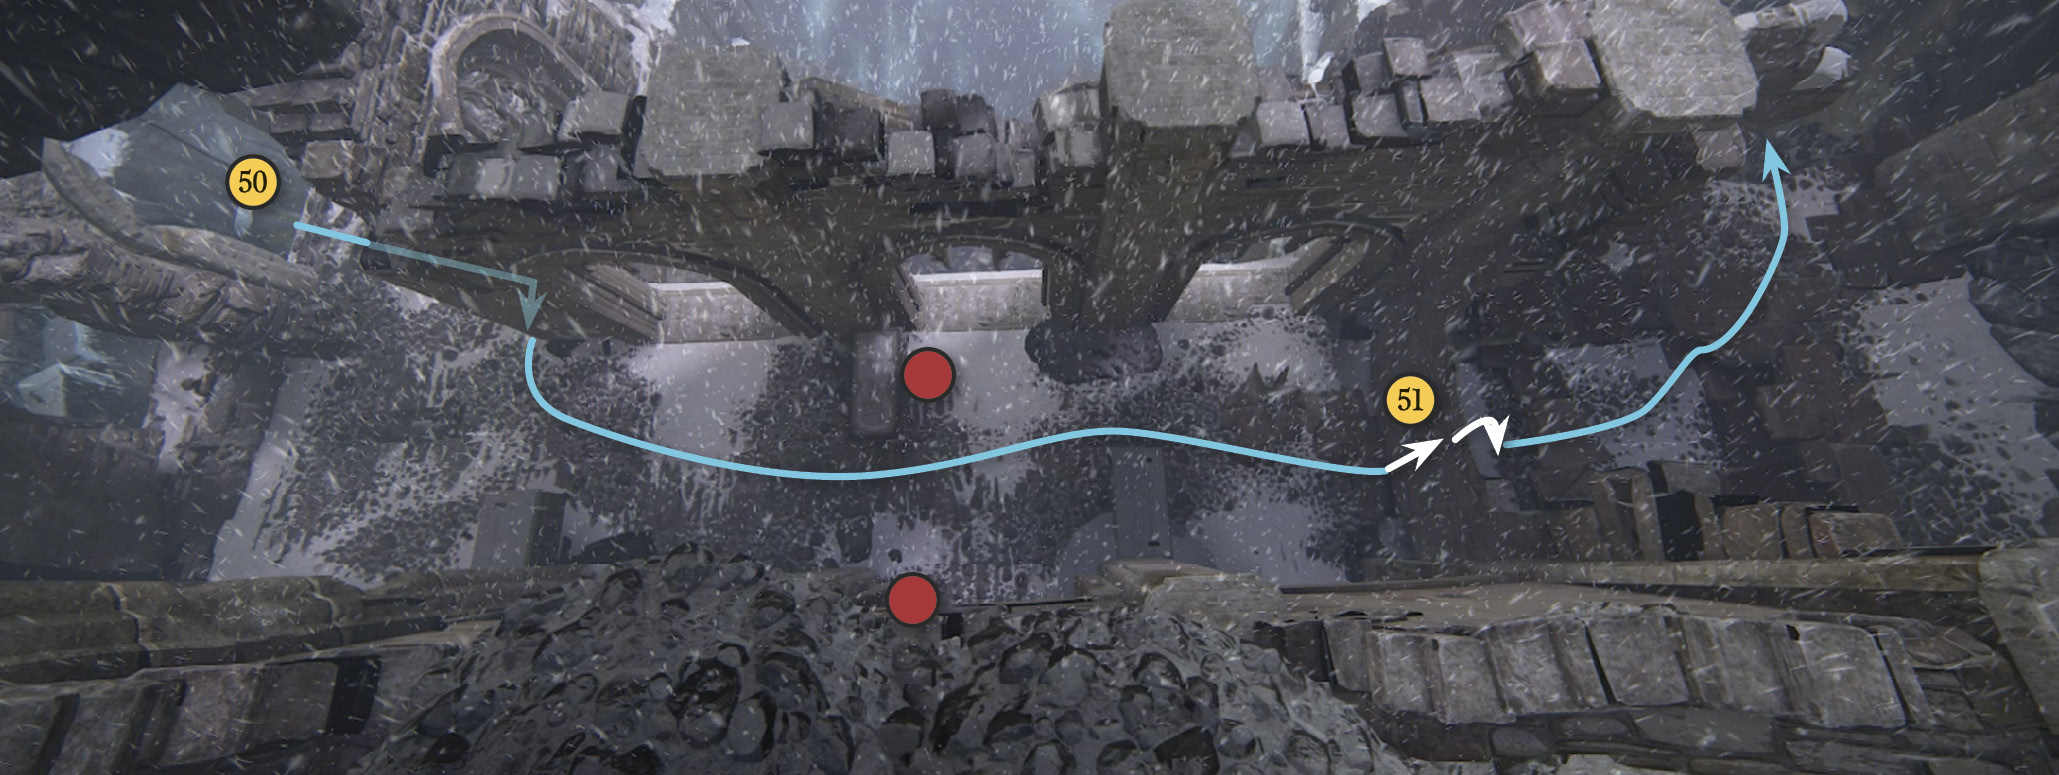
Fight past the two gunmen in the next corridor—a grenade works well here—then climb up the handholds on the next brick wall (51). Follow the passage to the left…and get ready for some more rockslide action.
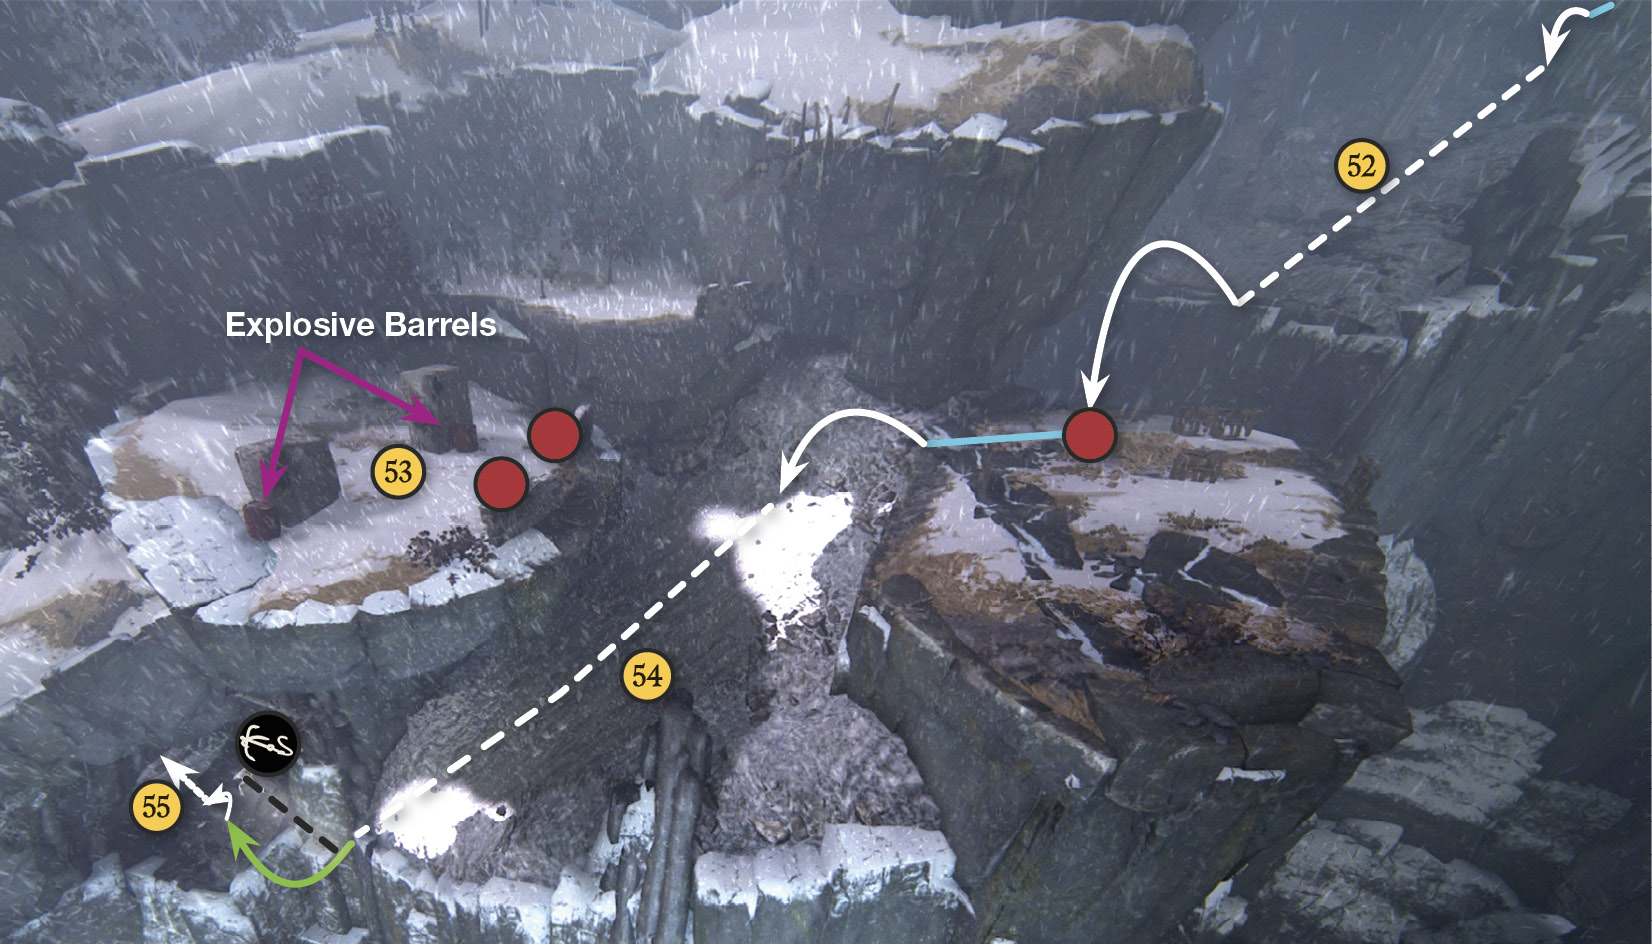
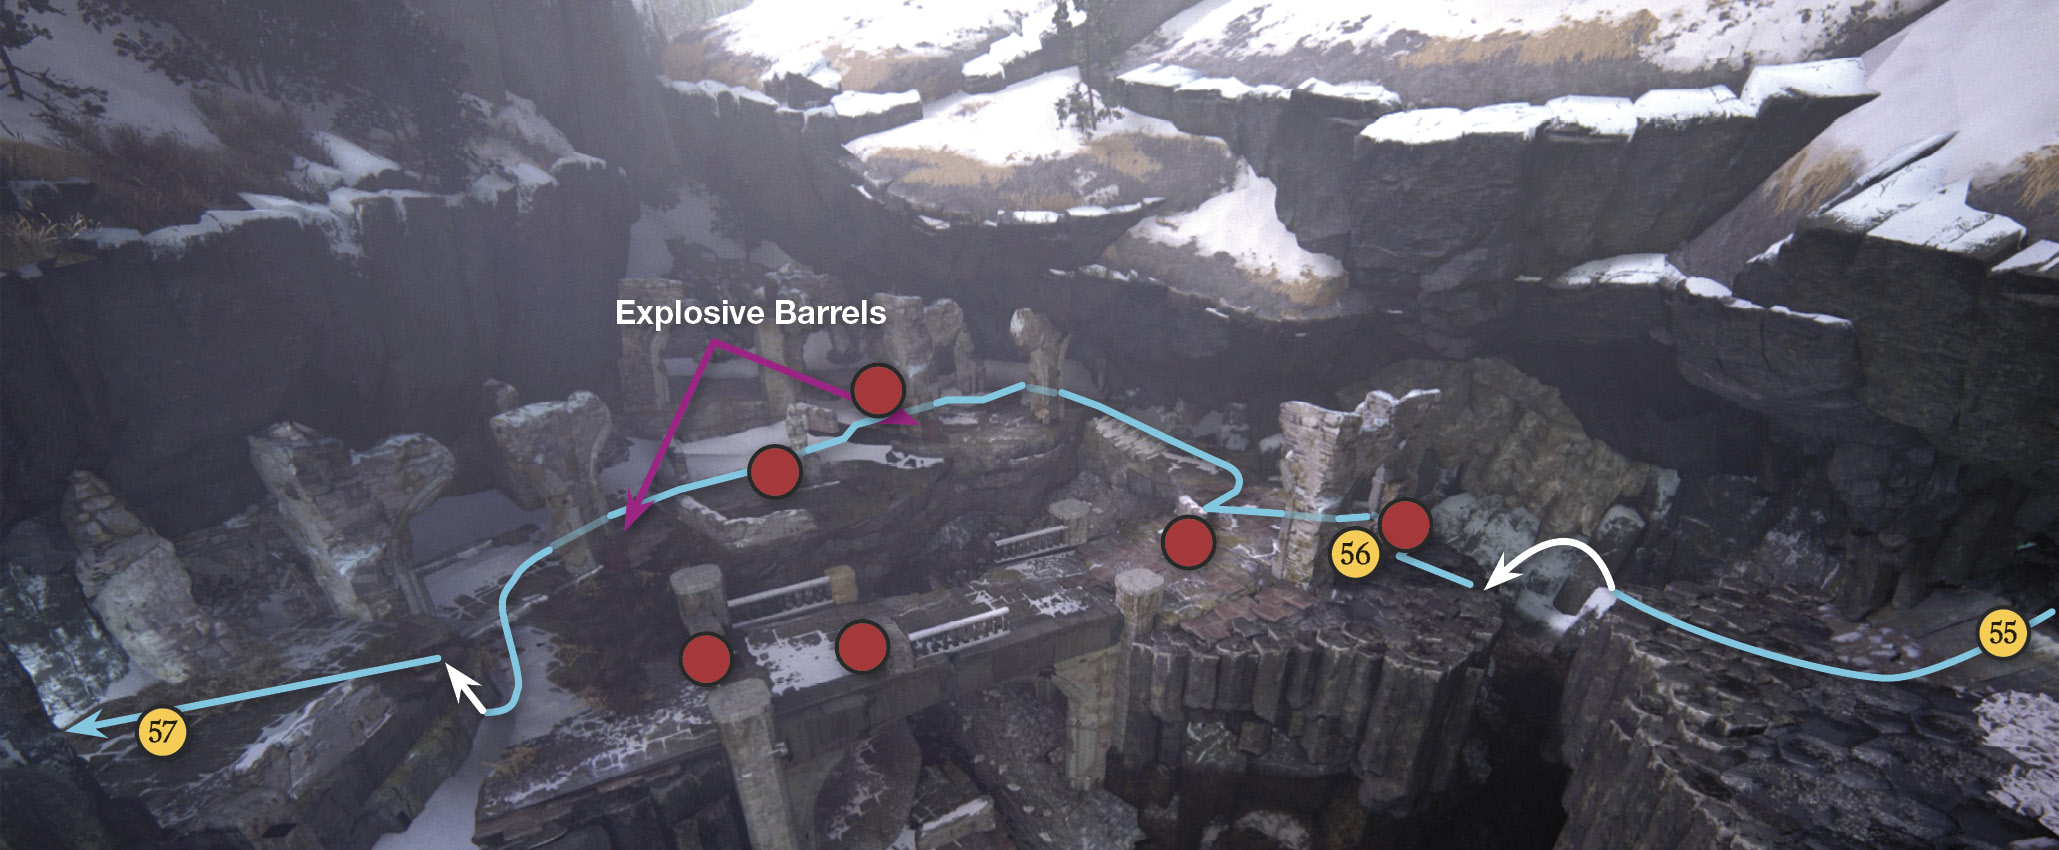
Drop onto the next rockslide (52). At the bottom, leap across the gap and land directly on the Shoreline goon for a sweet jump attack. Move quickly to the fence section for cover as gunmen open fire from the platform on the right. Target the two X-marked explosive barrels (53) near the big stone blocks to clear that platform fast!
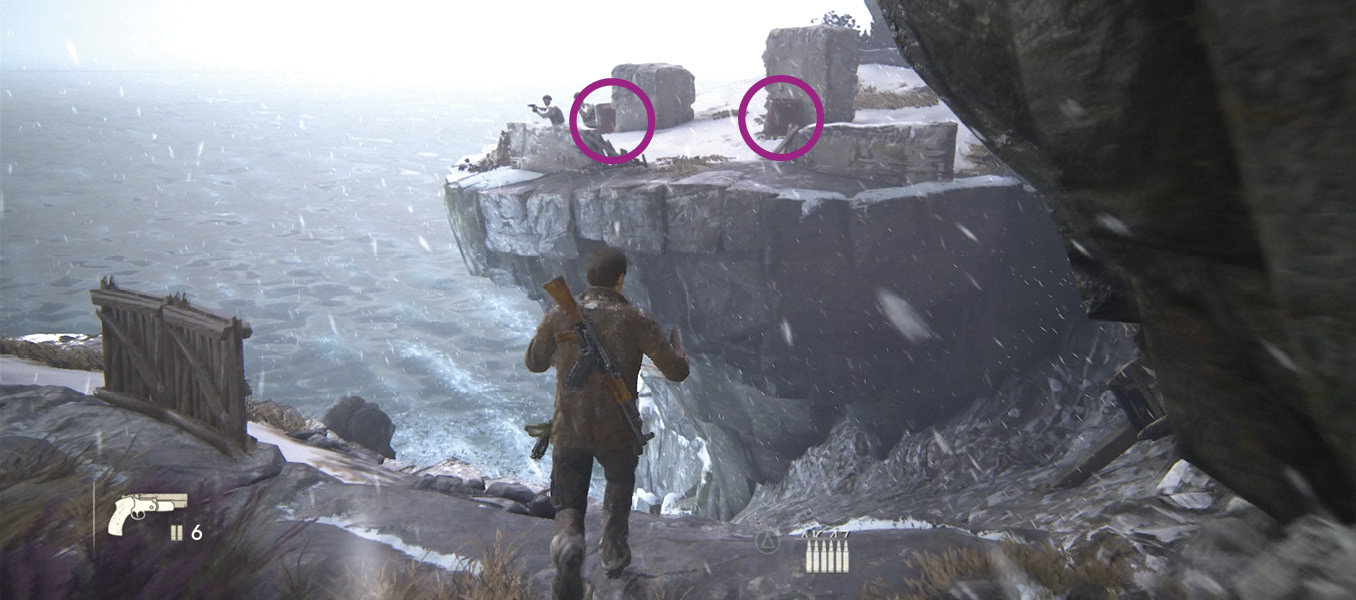
Then jump onto the next rockslide (54) and ride. As you slide off the end, toss your grapple hook at the jutting beam above and swing over onto yet another rockslide (55). This time you can just ride to the bottom without jumping. But be ready for a hornet’s nest of combat when you arrive.
Cross the Ruined Bridge
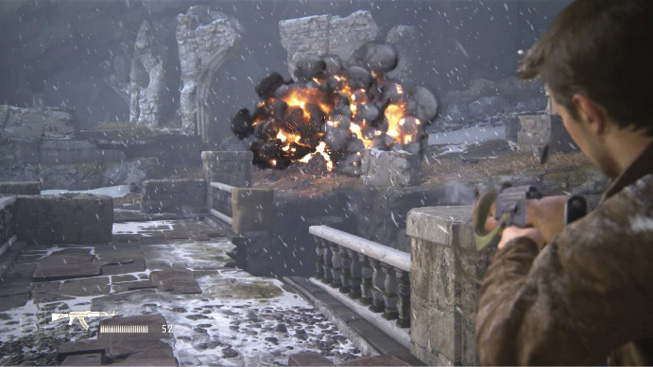
A Shoreline squad is deployed in the ruins of a great stone bridge ahead, but you have no cover on the platform where you land. So quickly hop across the gap to the stone arch (56). One gunman is behind the arch, so eliminate him first. Then use the arch for cover as you target the other gunmen firing at you. As always, keep a sharp eye out for explosive barrels you can target.
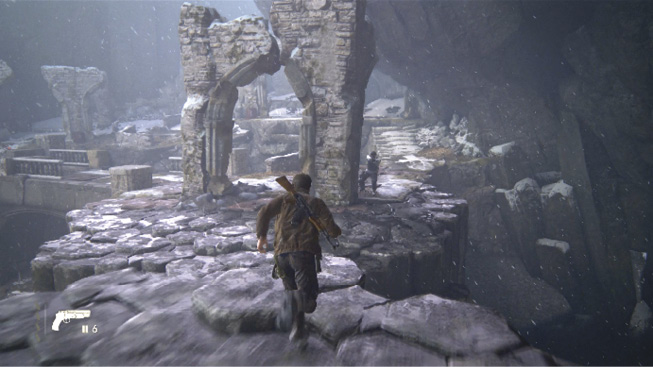
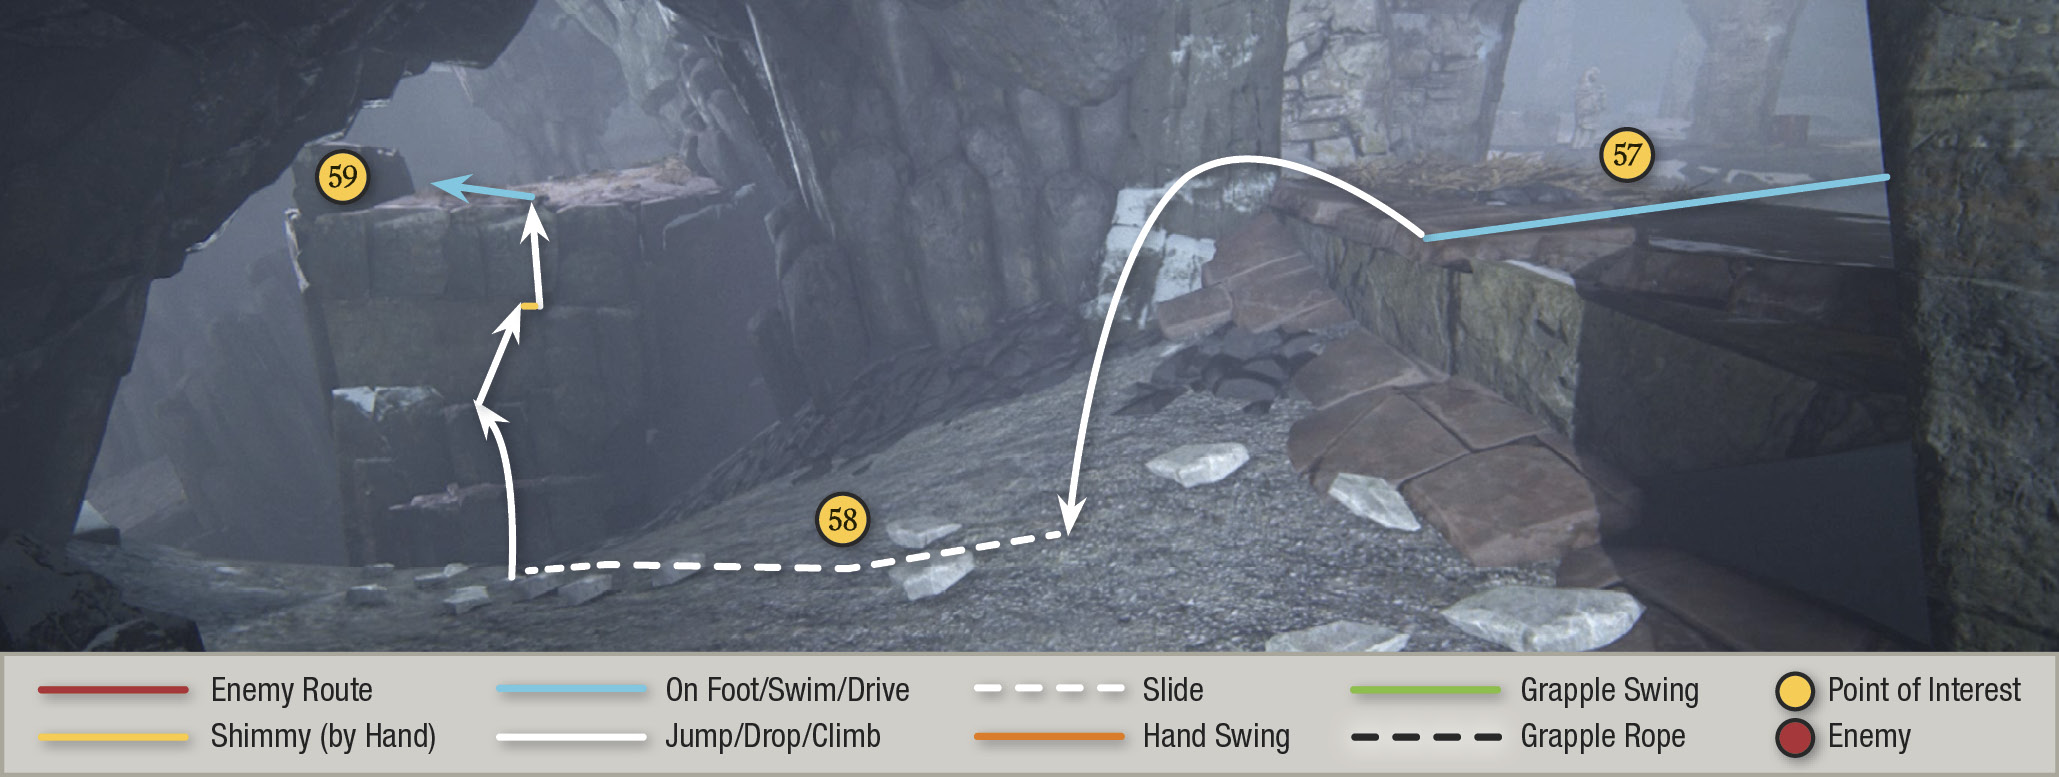
When the coast is clear, climb the stairs to the right and work your way through the ruins until you climb onto the small platform (57) overlooking another rockslide. Hop onto the slide, ride to the bottom, and leap across the gap to grab the rock ledge (58). Climb onto the platform and take cover behind the low black rock wall (59) on the left.
Get to the Seaplane
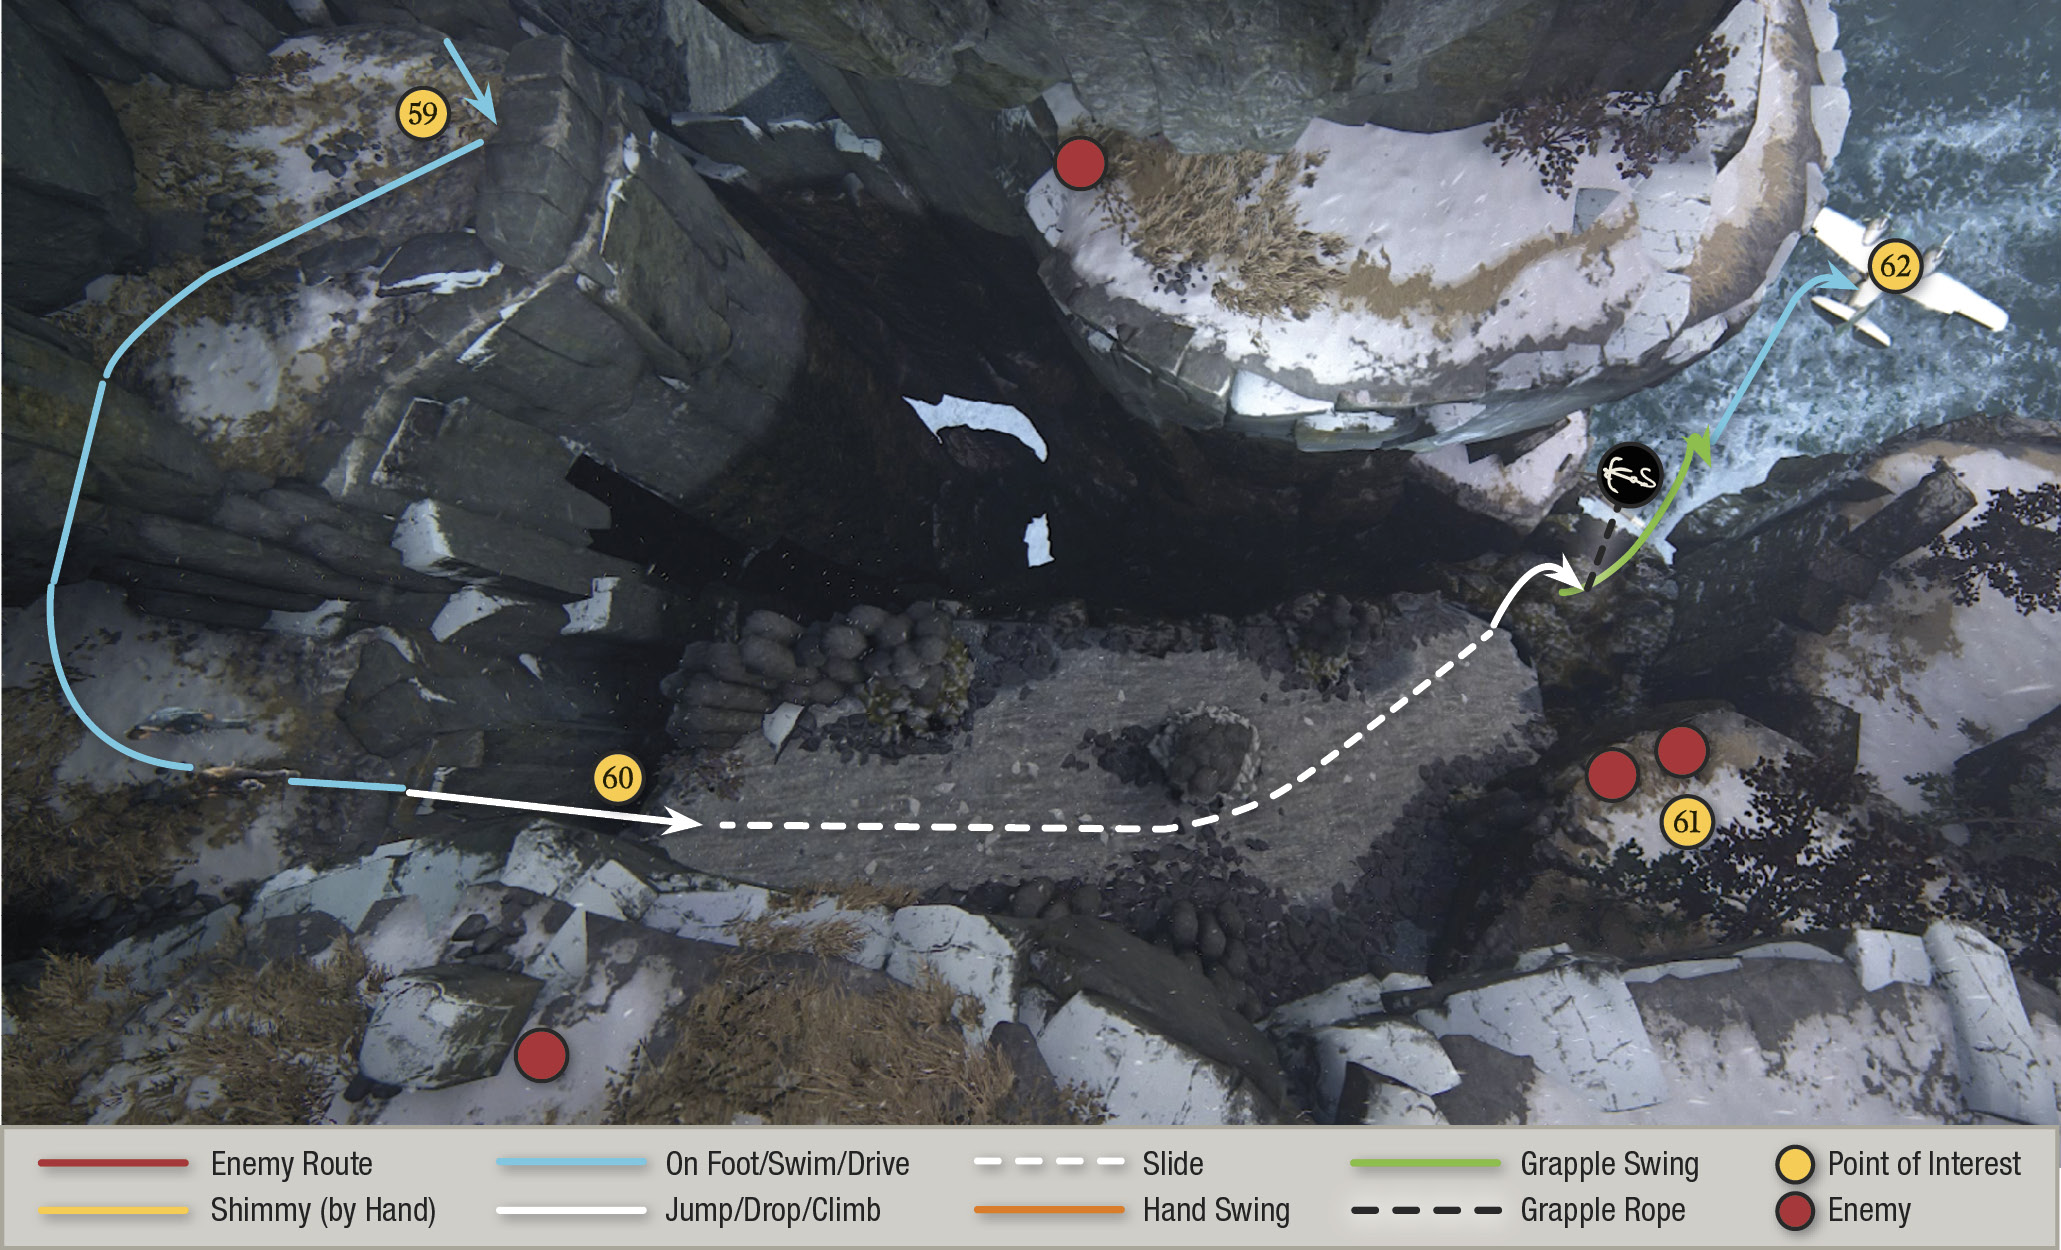
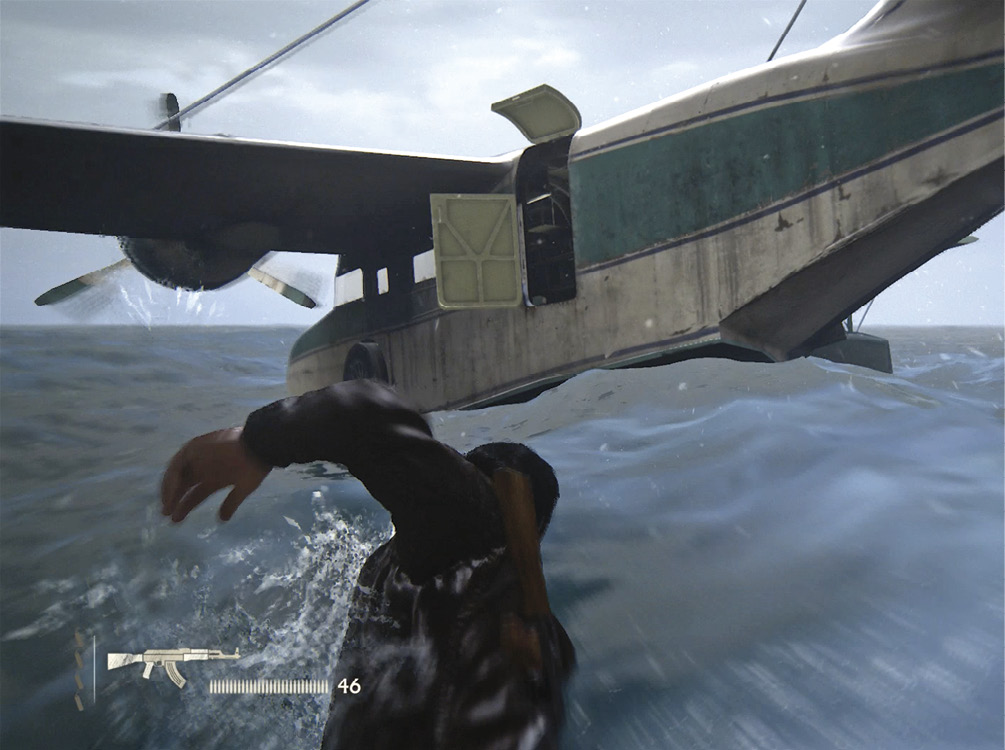
Pick off the two shooters on the opposite platforms. Then move through the rock arch and leap across the gap onto the final rockslide (60). As you ride down, watch out for a pair of gunmen who emerge on a platform above to your right (61). Be ready at the rockslide’s bottom to fling your grapple hook at the wooden beam above. Then swing out to a splash landing in the water. Here you can target the final attackers, if you want.
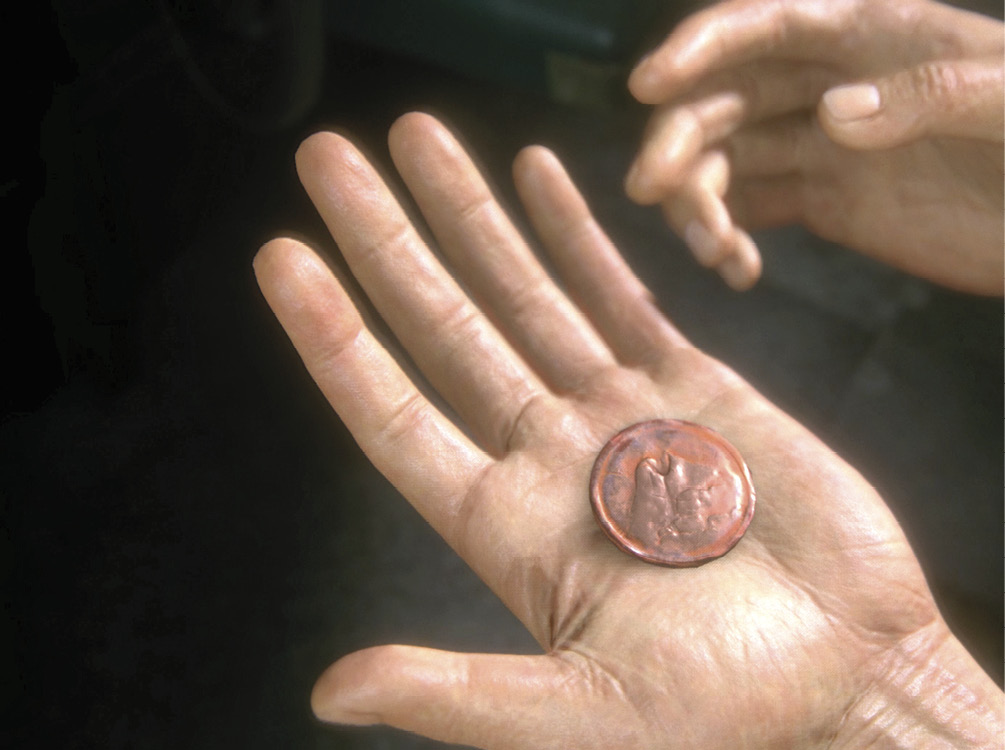
Swim to the door on the seaplane’s left side (62) to trigger the chapter-ending cutscene: After Nathan figures out Avery’s subtle coin clue, the trio sets off for Madagascar. This forces Nate to make an uncomfortable phone call to Elena.