Uncharted 4: A Thief's End Guide Story Walkthrough
Chapter 8: The Grave of Henry Avery
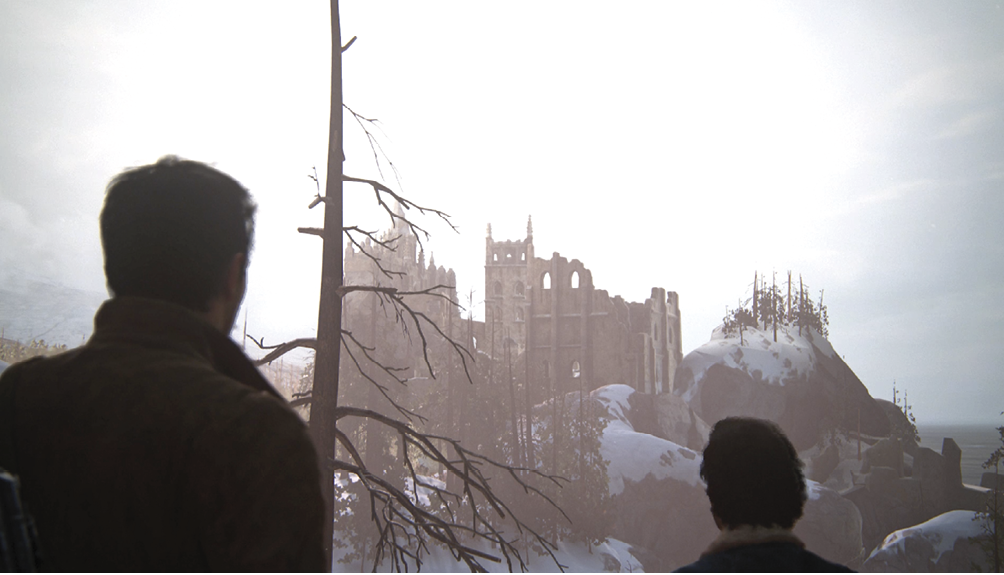
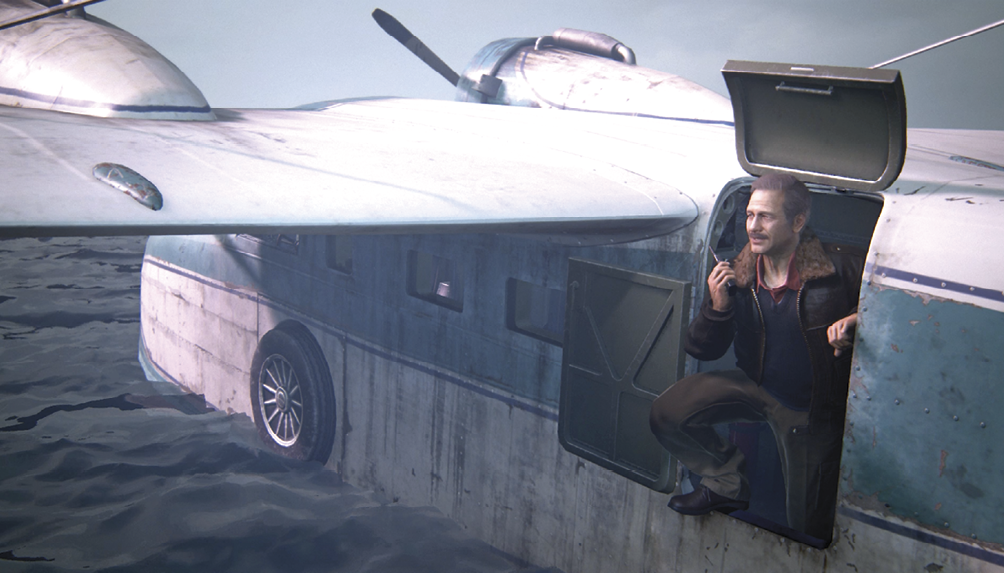
Sam and Nathan Drake arrive in the rugged Scottish coastal hills near St. Dismas Cathedral, where Rafe Adler’s demolition crews are making a mess of the ancient grounds with the help of Nadine Ross’s mercenary army. Your destination is the cemetery in the old monks’ dormitory compound. Sully waits for the Drake brothers in his seaplane just off the coast.
CollectiblesTreasures: 11 Trophies: “Jot This Down,” “Take a Note,” and “Ghost in the Cemetery” Optional Conversations: 2 Journal Notes: 1 Journal Entries: 2 New Weapons: Dynamite, Ak-47, Mettler M-30, Propane Tank, Barok .44, Turret (Crushing Only), Flintlock, Pistole |
Find a Way to the Cemetery
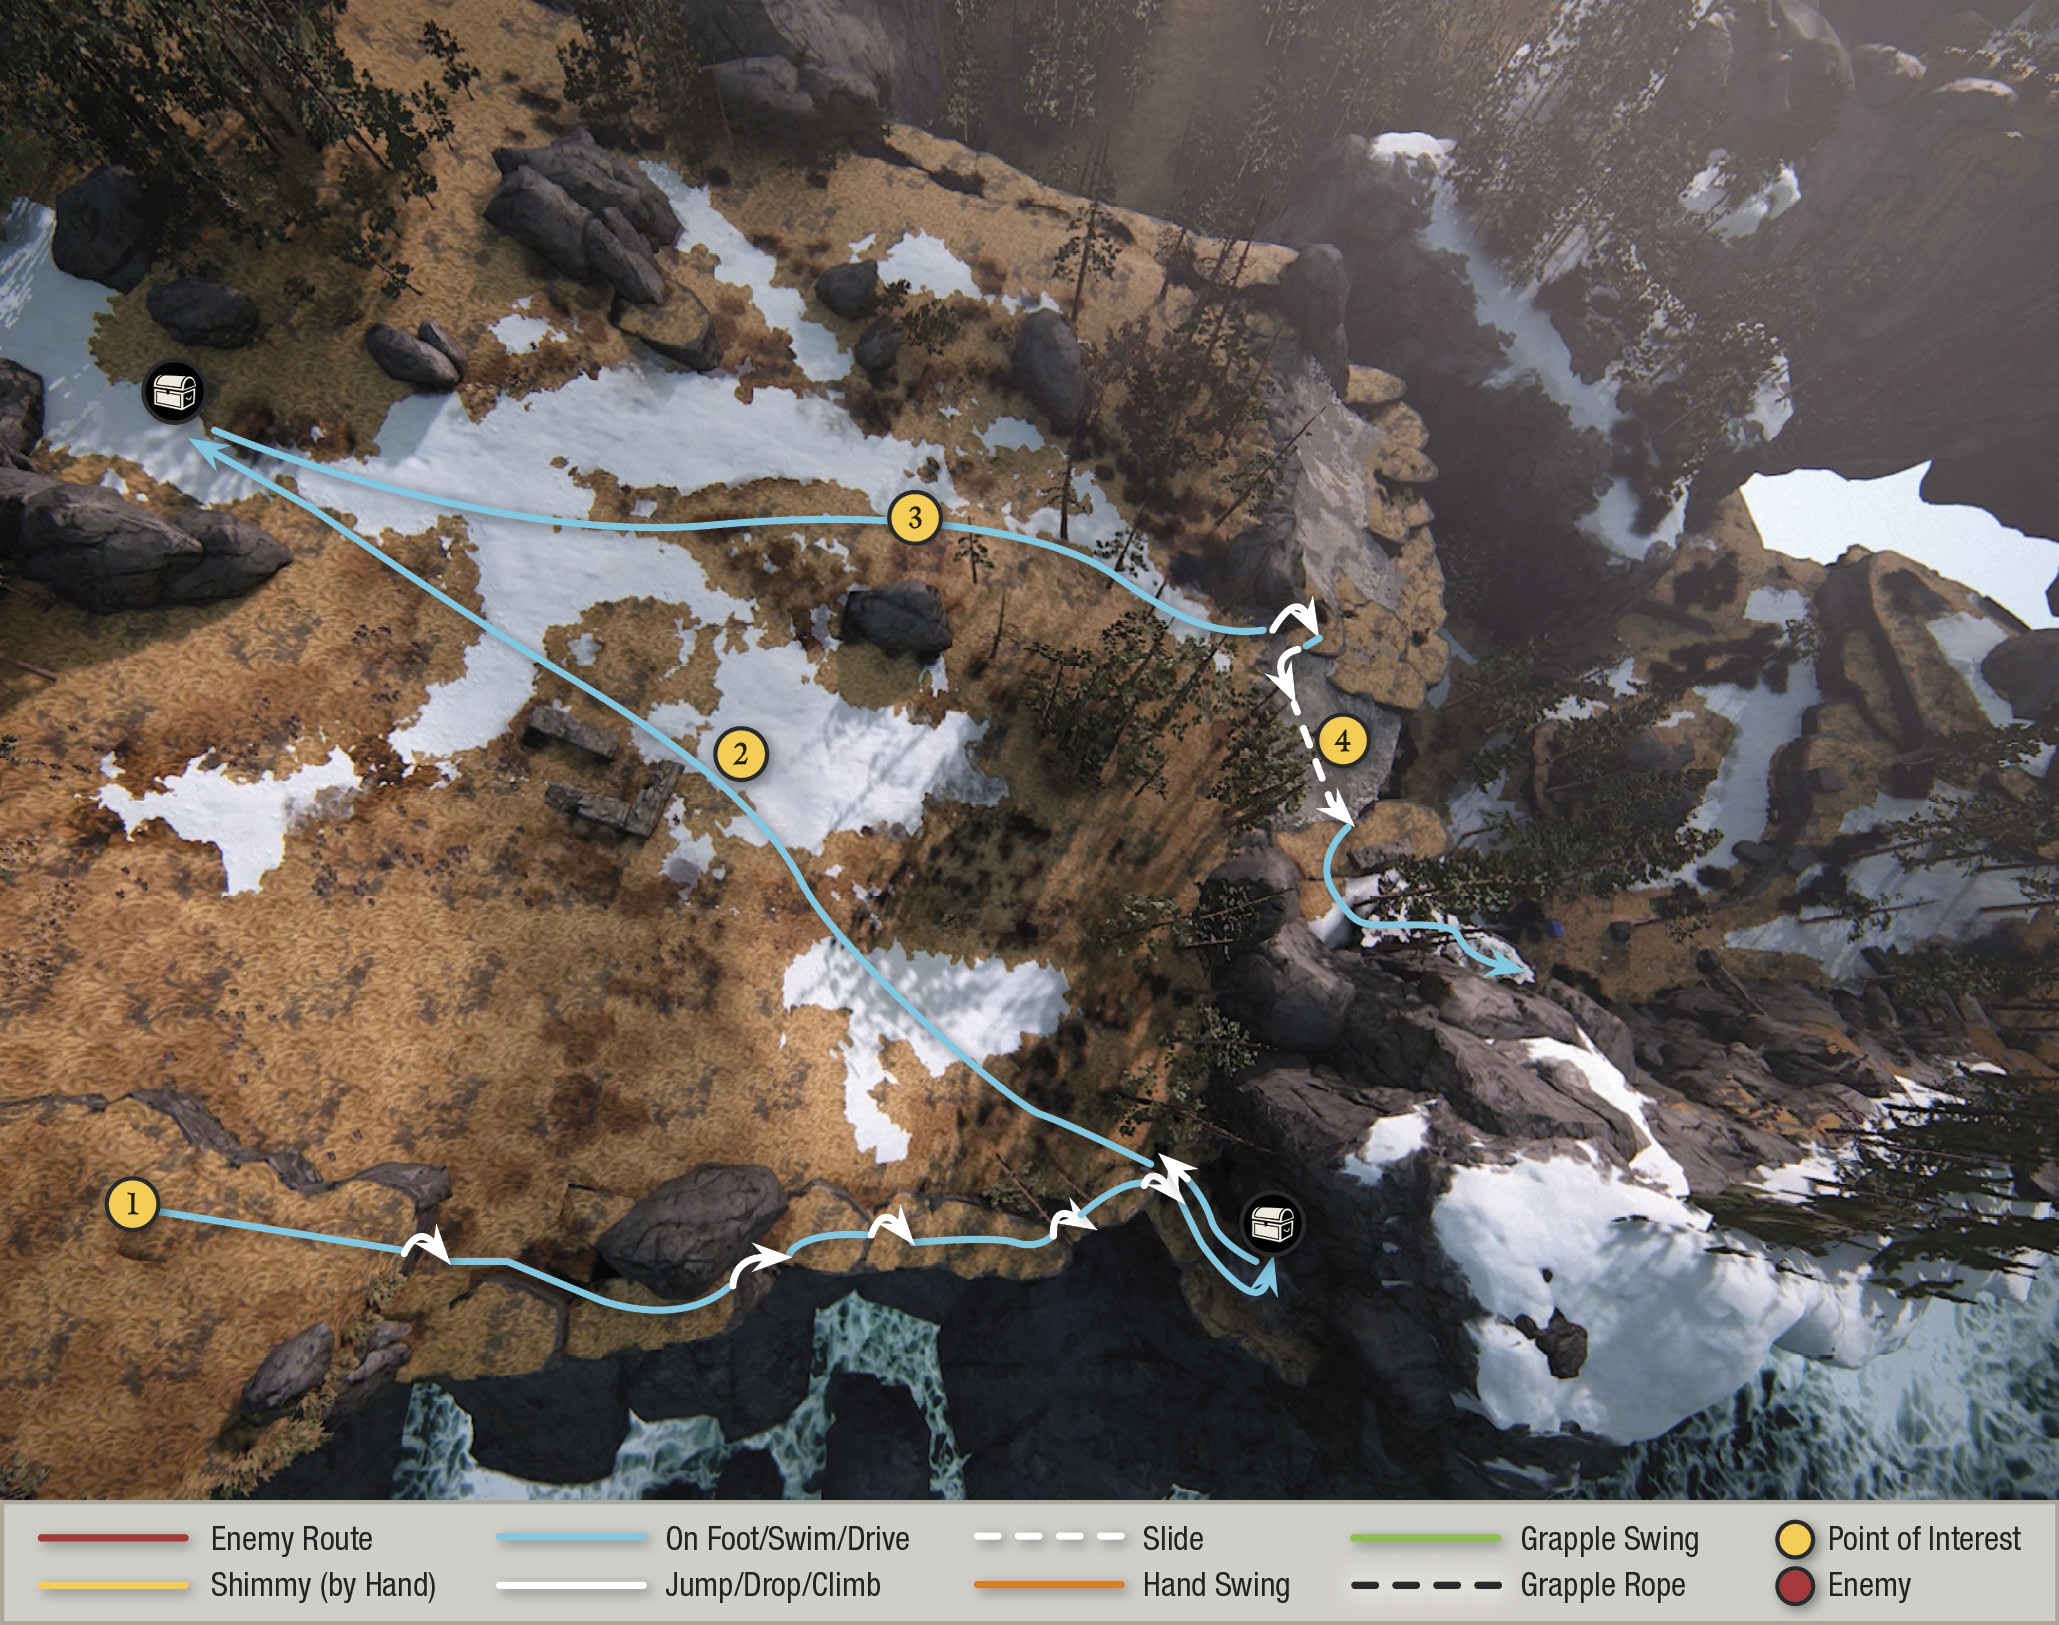
From the start (1) you could just follow Sam across the hillside and down the slope. But our route takes you to two treasures, so start by moving along the edge of the sea cliff to one treasure in a cave, and then follow the snowpack uphill (2) to a second treasure.

Bronze Boar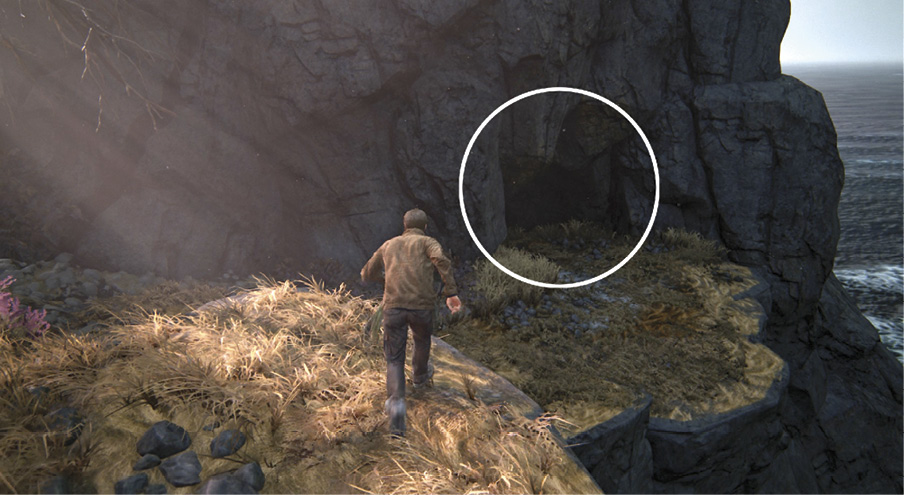
From the start, turn right and follow the cliff on your right, hopping down terraces until you reach a cave. Find the Bronze Boar inside. |

Redware and Silver Jug Flask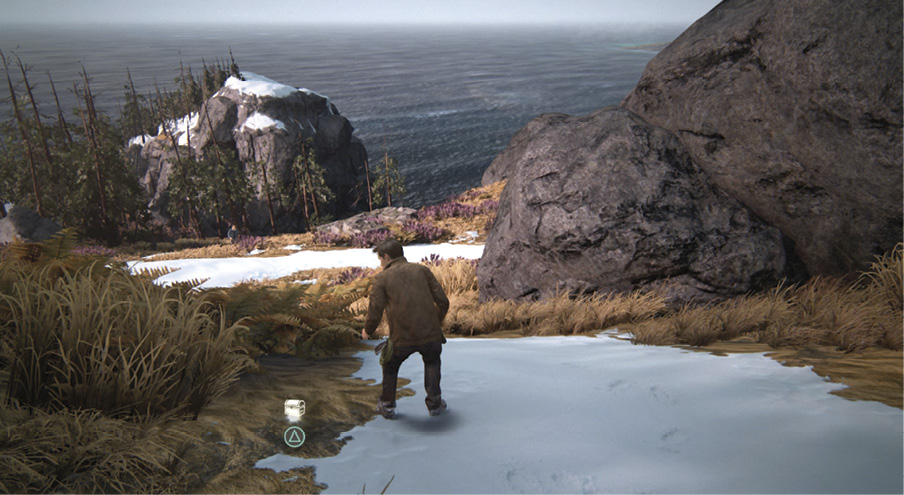
In the start area, follow the snowpack uphill to the big rock formations. Look for the Redware and Silver Jug Flask on the ground at the edge of the snow where the grass begins. |
Now head downhill, veering slightly left (3) until you reach the rockslide (4). Leap onto the slide at its highest point and steer hard to the right, aiming toward the rock wall on the slide’s far side. Jump when you reach the wall, then pull yourself up.
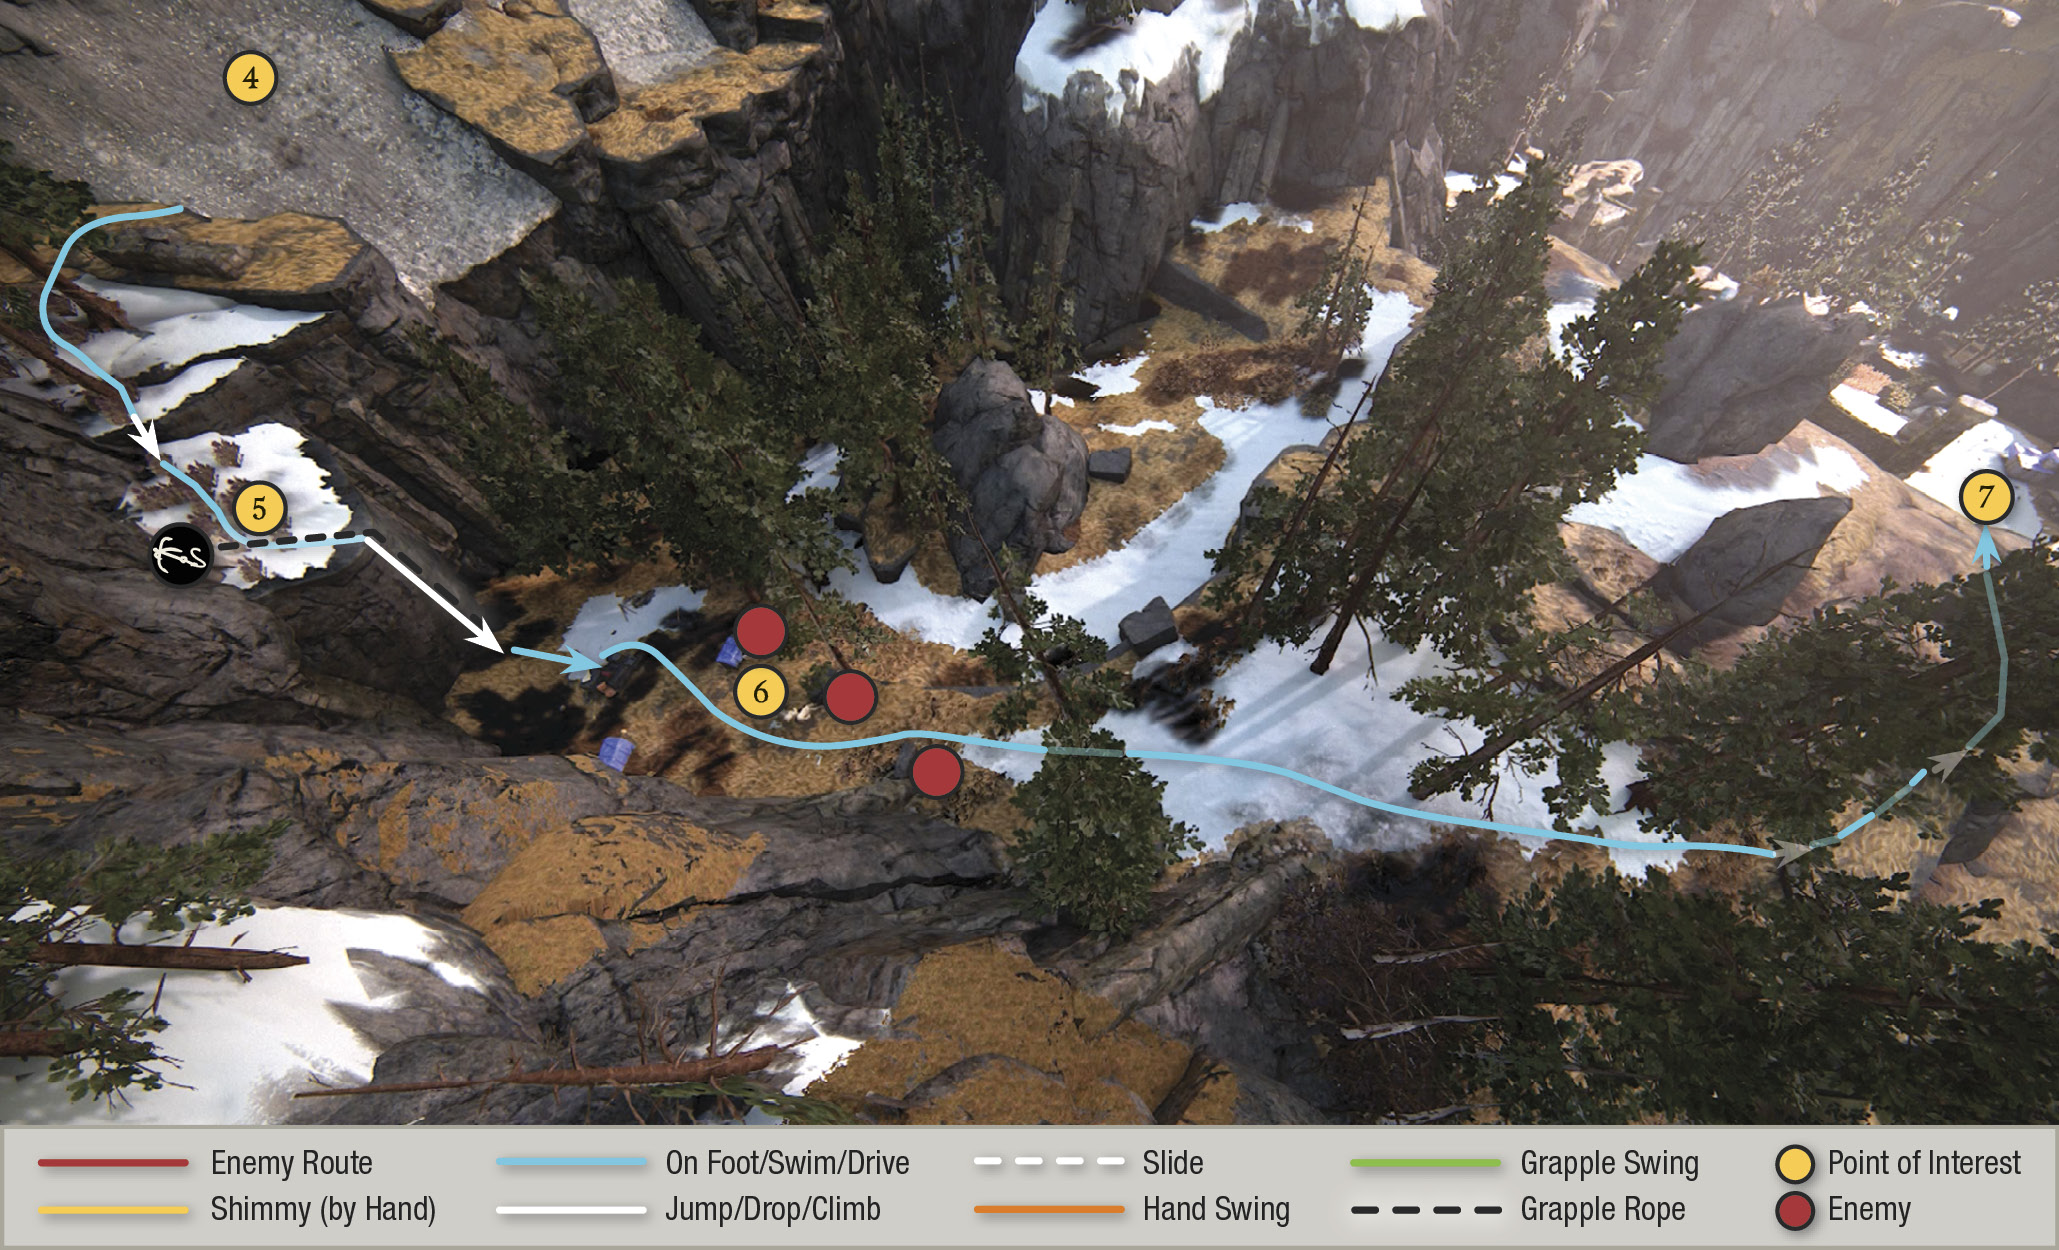
Hop down the rocky terraces until you reach the tree stump (5) with rope tied around it. Press L1 to attach your grapple hook to the stump, and then step off the cliff and rappel to the ground. Watch the short scene as the brothers discover a Shoreline supply dump filled with excavation equipment…and mercenaries suddenly open fire! Dive behind the nearby stack and pick off the three attackers (6).
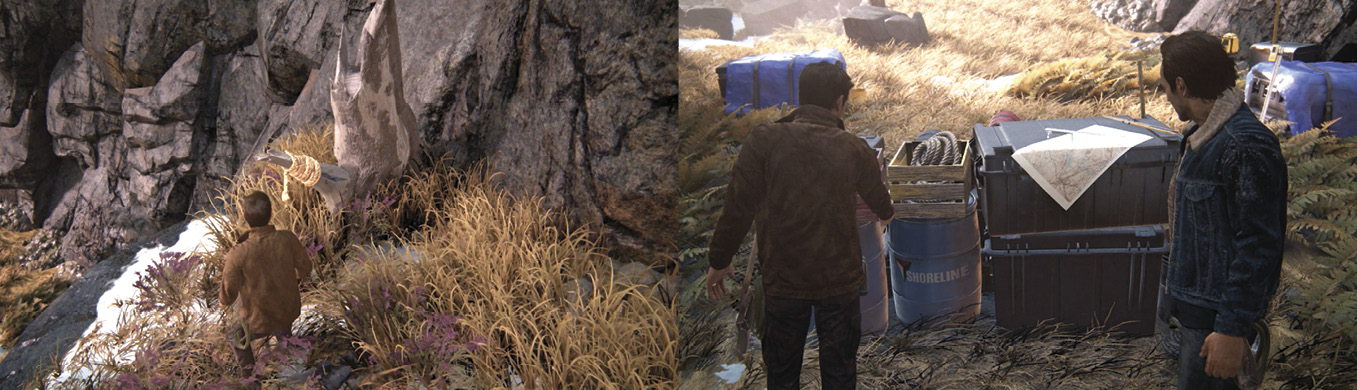
After the fight, proceed to the perimeter of a mercenary camp (7) set amongst the ruins of an ancient Scottish outpost.
Get Past the Mercenary Camp
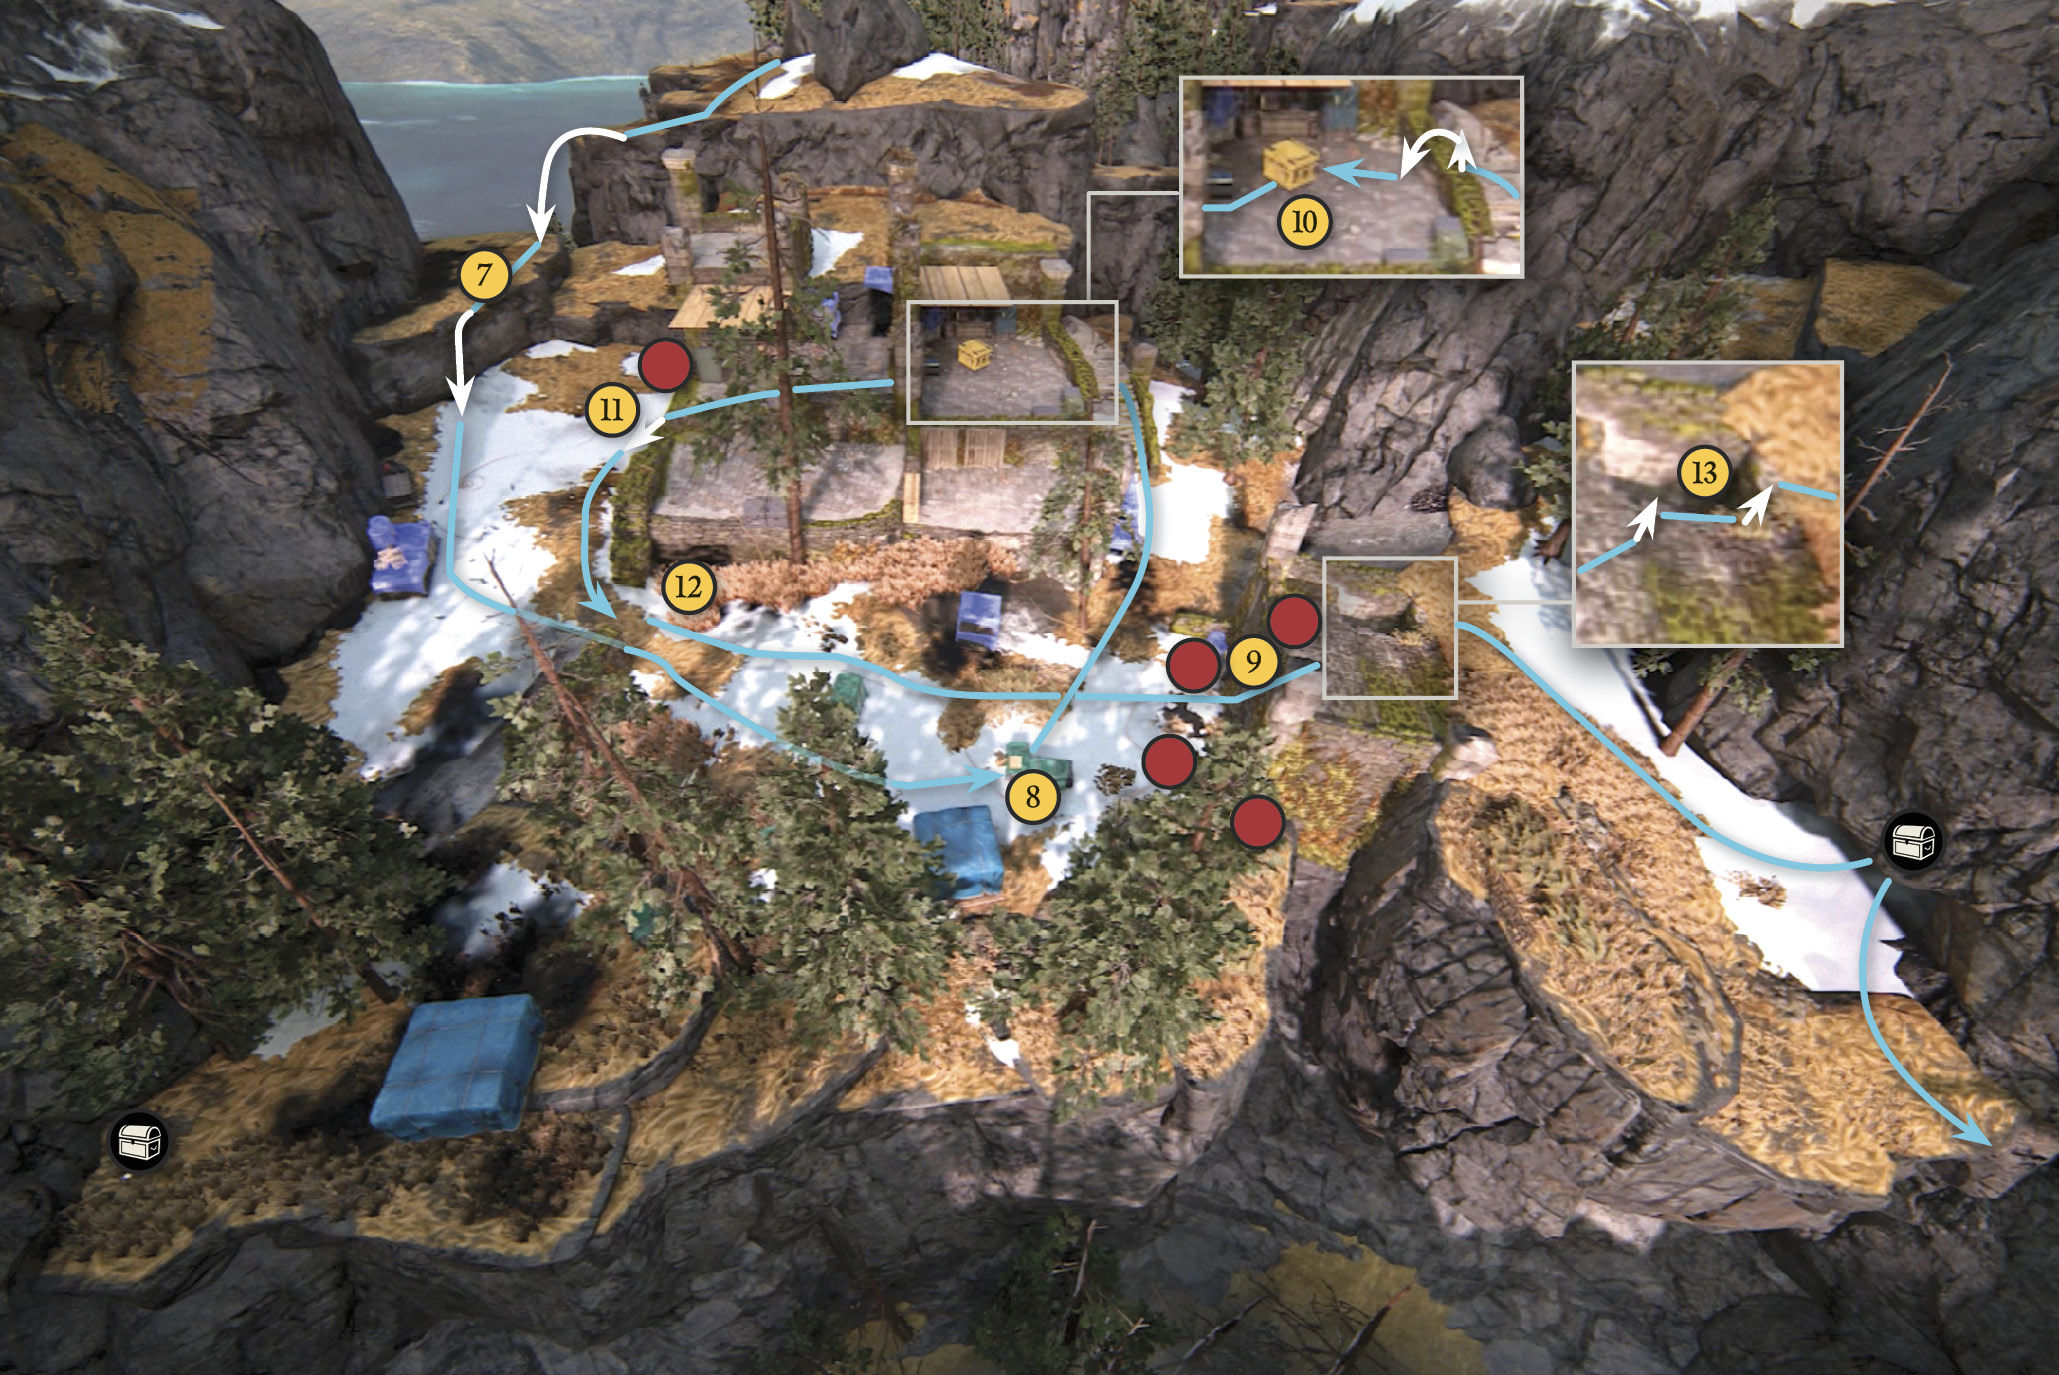
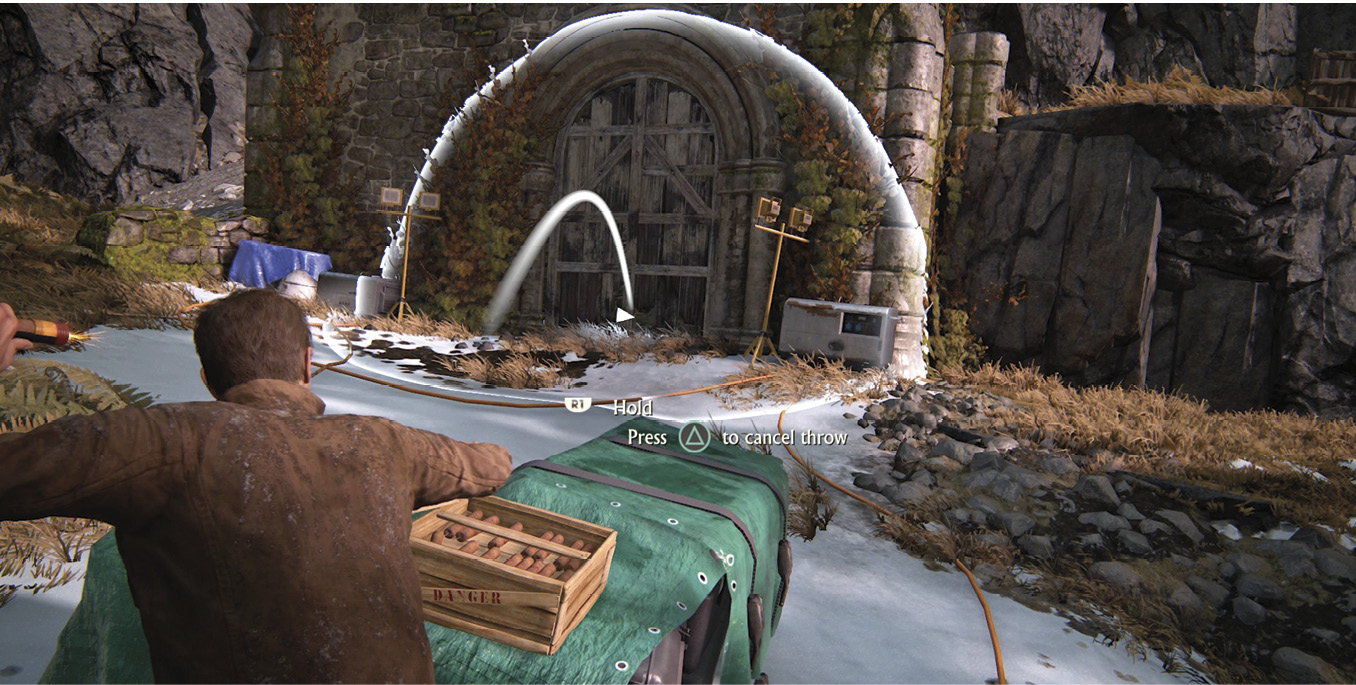
You can find a treasure on the camp’s right side. Then examine the New Weapon, a box of Dynamite(8), on the green supply pallet to take a stick. Toss it at the nearby wooden doors (9) to blast them open. Grab some more dynamite to fill your projectile weapon slots, and then enter the storeroom to see a big hole in the ceiling. To advance any further toward the cemetery you must get through that hole.

Carved Wood Kashkul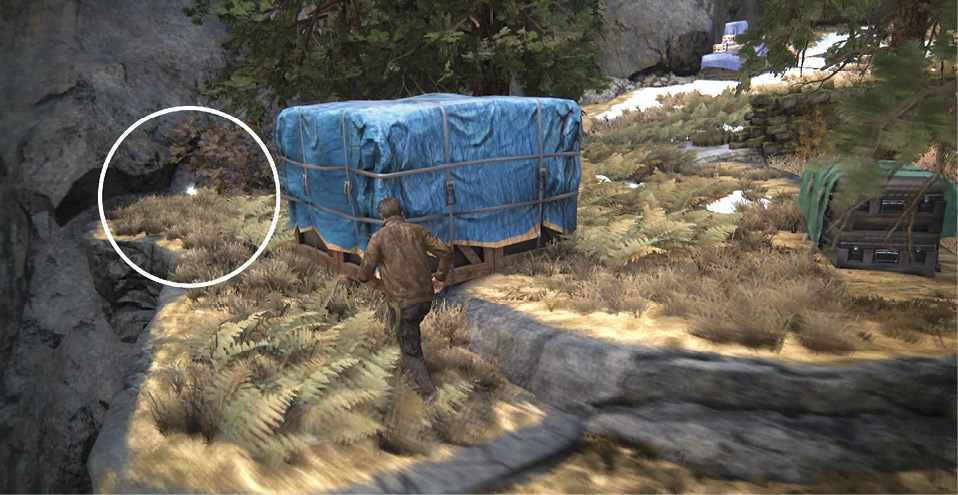
Move along the rock wall on the rightmost edge of the outpost and look behind the supply stack covered with a blue tarp. You’ll find the Carved Wood Kashkul on the ground near the tree. |
Find a Way Through the Ceiling Hole
Exit the structure, turn right, and work your way uphill through the camp until you reach a stone terrace with a yellow rolling cart (10). This cart will make a nice climbing platform for climbing through the ceiling. But first you need to do some work to get it downhill to the storeroom.
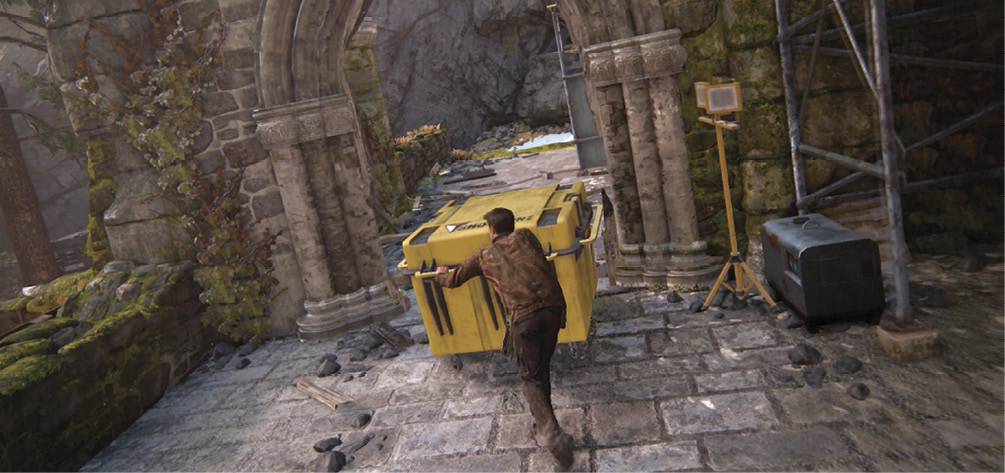
Toss a stick of dynamite at the door behind the rolling cart to blast it open. Grab the cart and push it through the doorway. Keep pushing until the cart drops off the low ledge (11). Now push it downhill to the gap in the wall, then release the cart and take cover quickly. Spot the approaching mercenaries ahead! They’re rappelling down the cliffs to the camp.
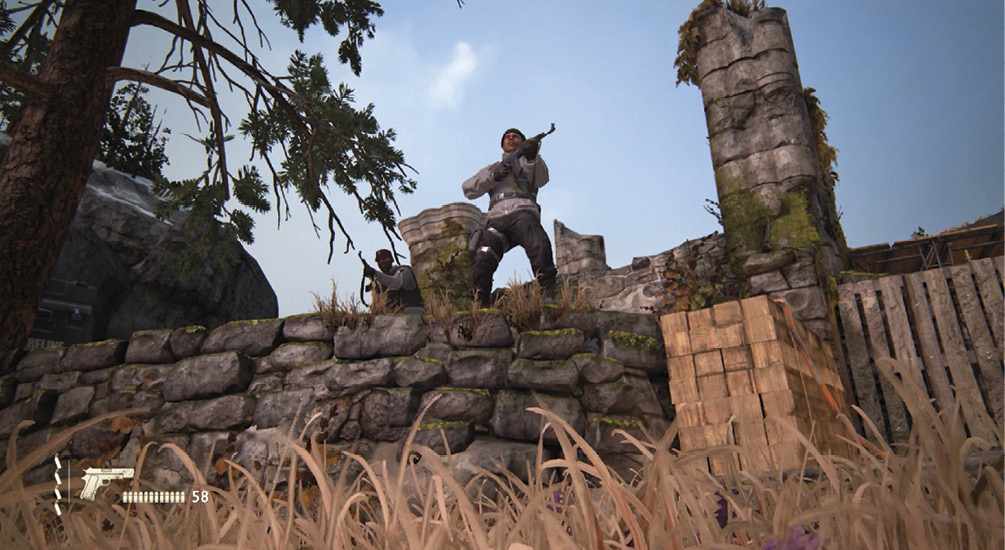
Creep into the nearby tall grass (12). Wait for the guards to get close, and then perform some stealth takedowns. Keep moving between stands of tall grass, taking out foes stealthily if you can, until the area is clear. If you do not take the first wave of enemies out stealthily, you must battle a second wave of equal size. In this case, we suggest using dynamite on soldiers and make sure to fire one of the New Weapons they carry, the AK-47s—if you are a trophy hunter (“I Accidentally All The Guns” requires you to shoot all the weapons in the game). Go back to the rolling cart once the battle is over. Push it all the way into the storeroom (the one you blasted open earlier) and against the wall under the ceiling hole (13). Climb through and look for a treasure in a debris-clogged cave nearby.
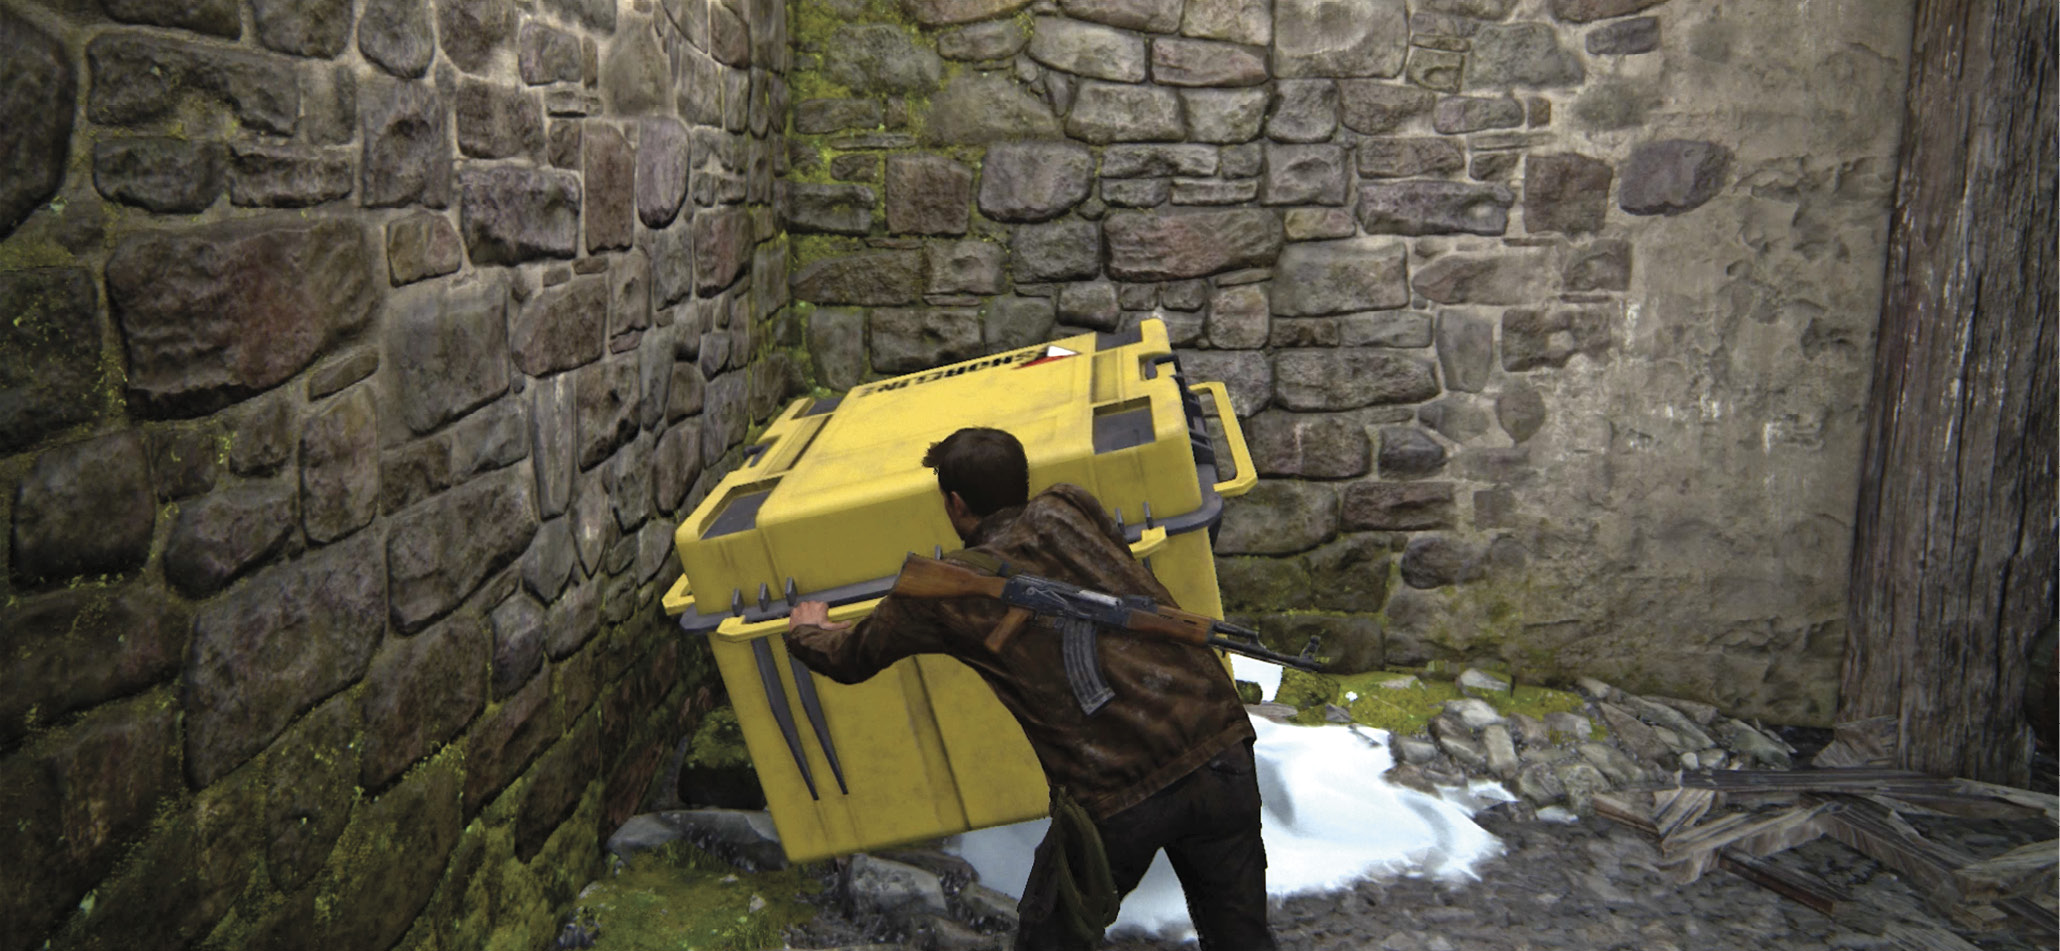

Carved Nut Bottle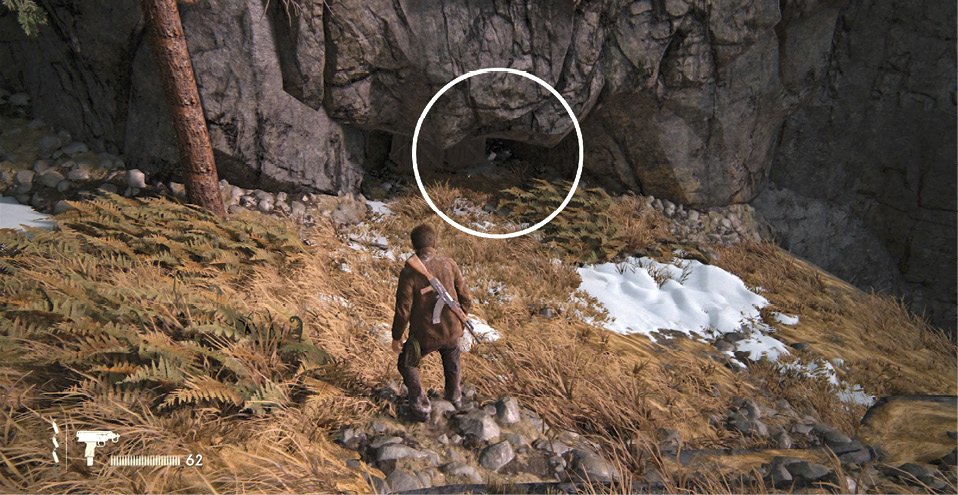
After you use the rolling cart to climb through the storeroom ceiling, find the low cave blocked by debris on the left cliff wall. Toss a stick of dynamite to blast it open, and then enter to find the Carved Nut Bottle. |
Swing Across the Cliffs
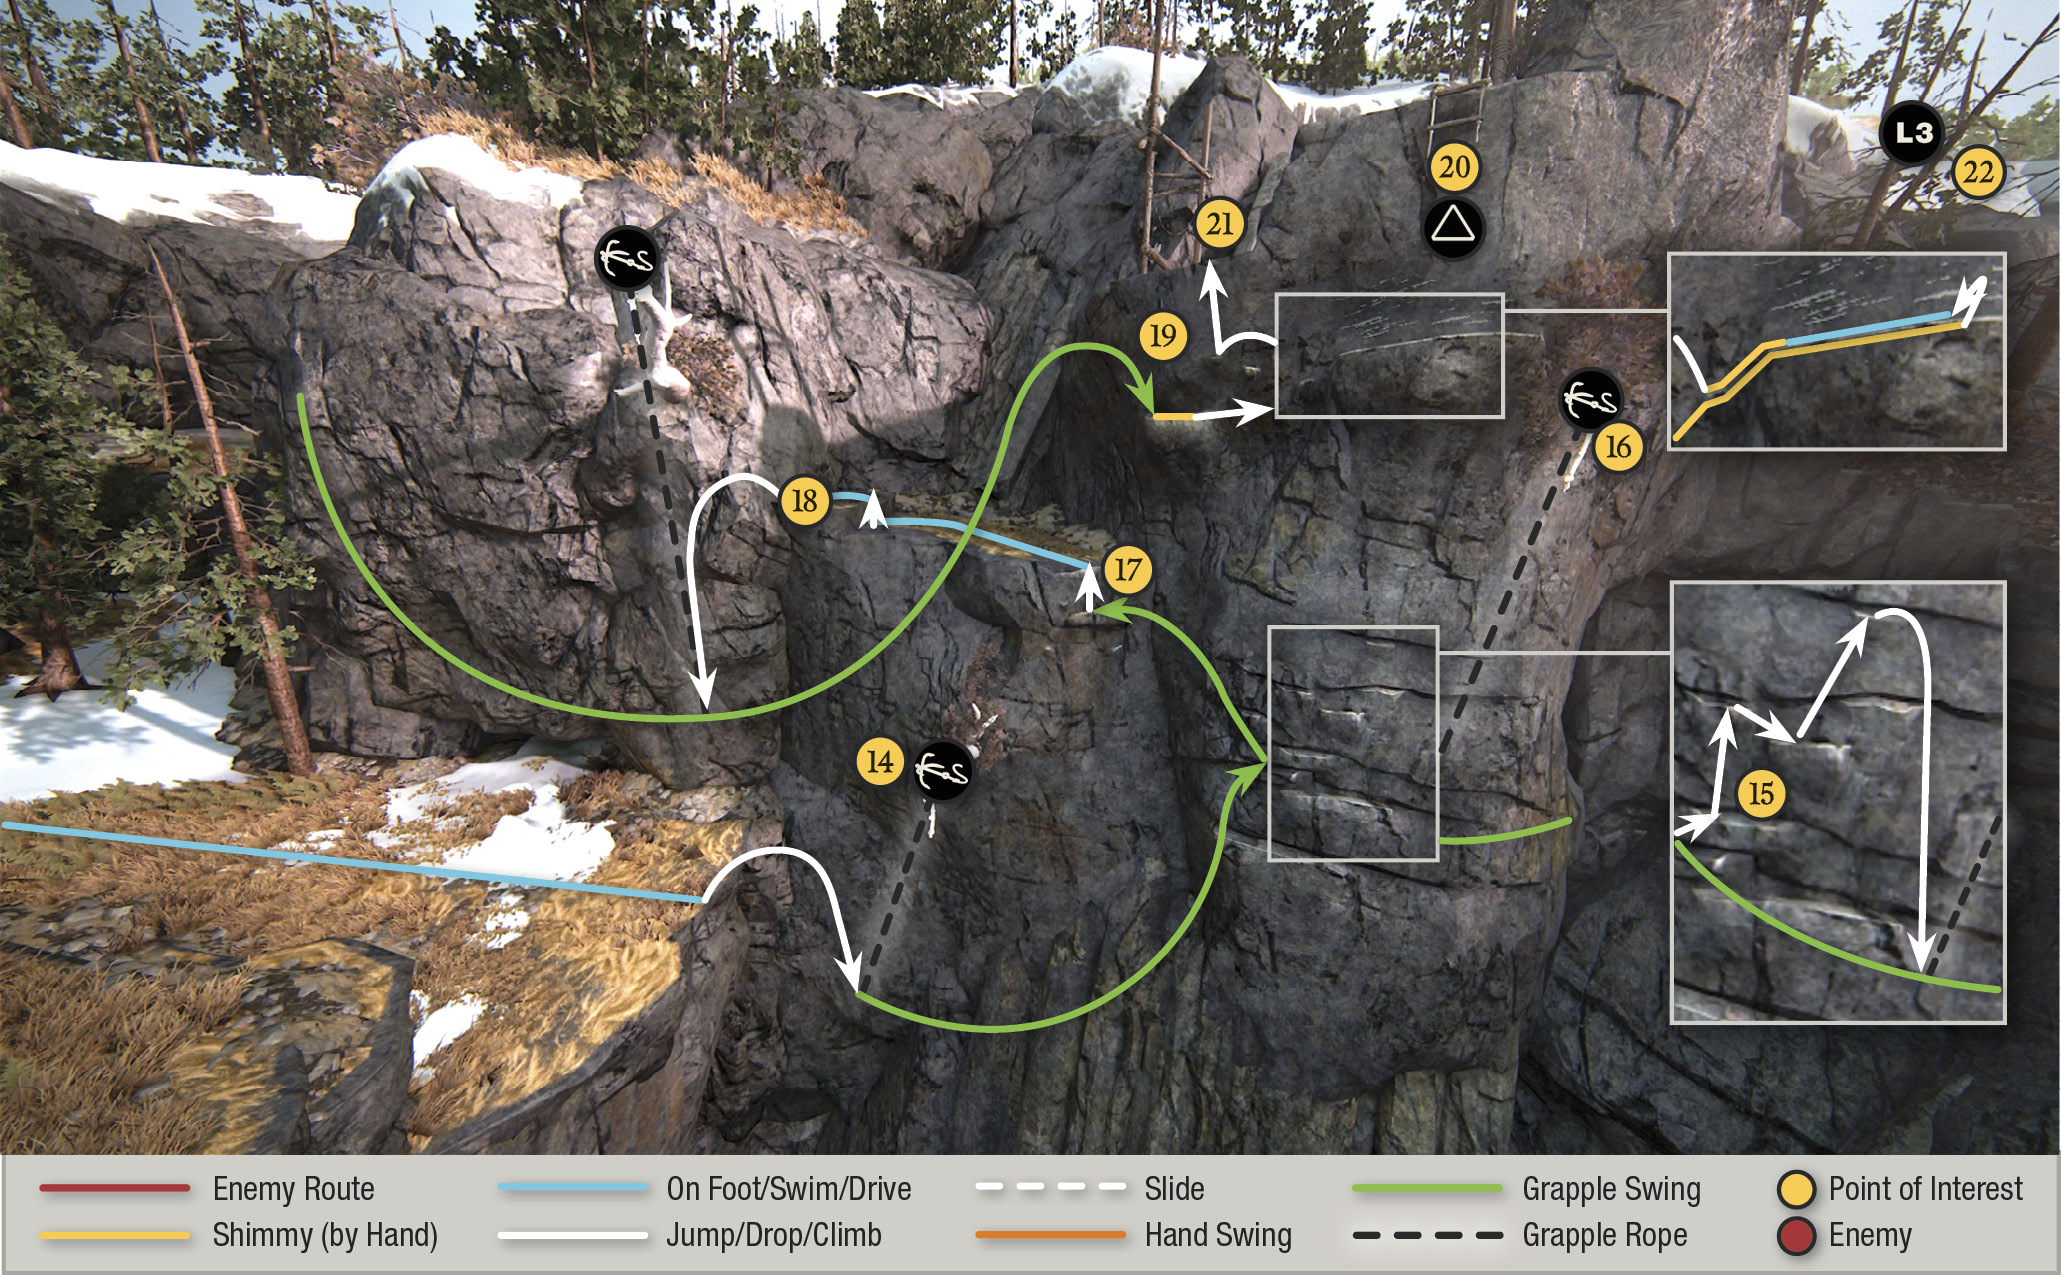
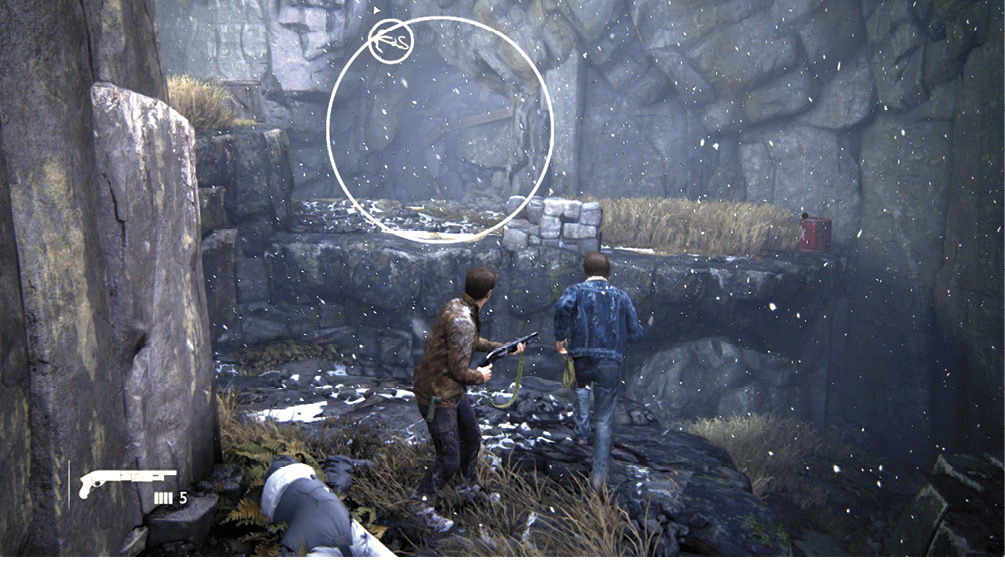
Now get ready for some crazy swinging. Walk to the drop-off, look at the pole jutting from the cliff wall just ahead (14), and sling your grapple hook to it. Swing and jump left to the grooves on the cliff face (15).
Climb as high as you can and then look upward to spot another grapple point (16). Sling your hook at it, wall-run rightward to build momentum, and then wall-run back left in the direction you came, leaping to grab the small groove etched into the cliff wall (17).
Climb onto the grassy ledge (18) and spot another grapple point. Use it to swing out and then back to another handhold (19). Then climb rightward until you can stand on the ledge underneath the remnant of a rope ladder (20). Here, Sam automatically joins you on the ledge.
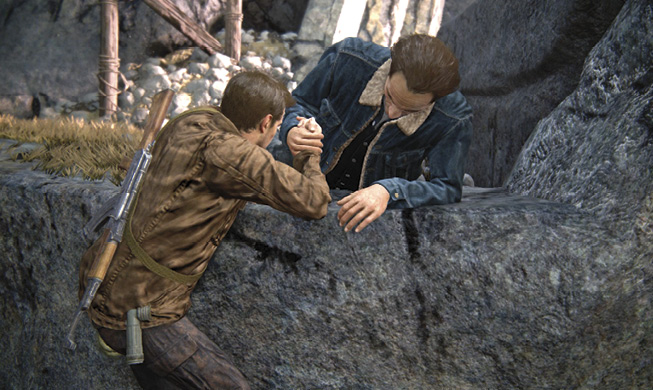
Look at the ladder and press  when the icon appears onscreen; Nathan boosts Sam up to the ladder. Sam climbs and moves leftward to a spot (21) where he can reach down and grab Nathan’s hand. Climb leftward toward Sam until he pulls you up. Follow the path downhill to where you can press L3 and Nathan points out the monks’ dorm. Then ride the rockslide (22) to the bottom.
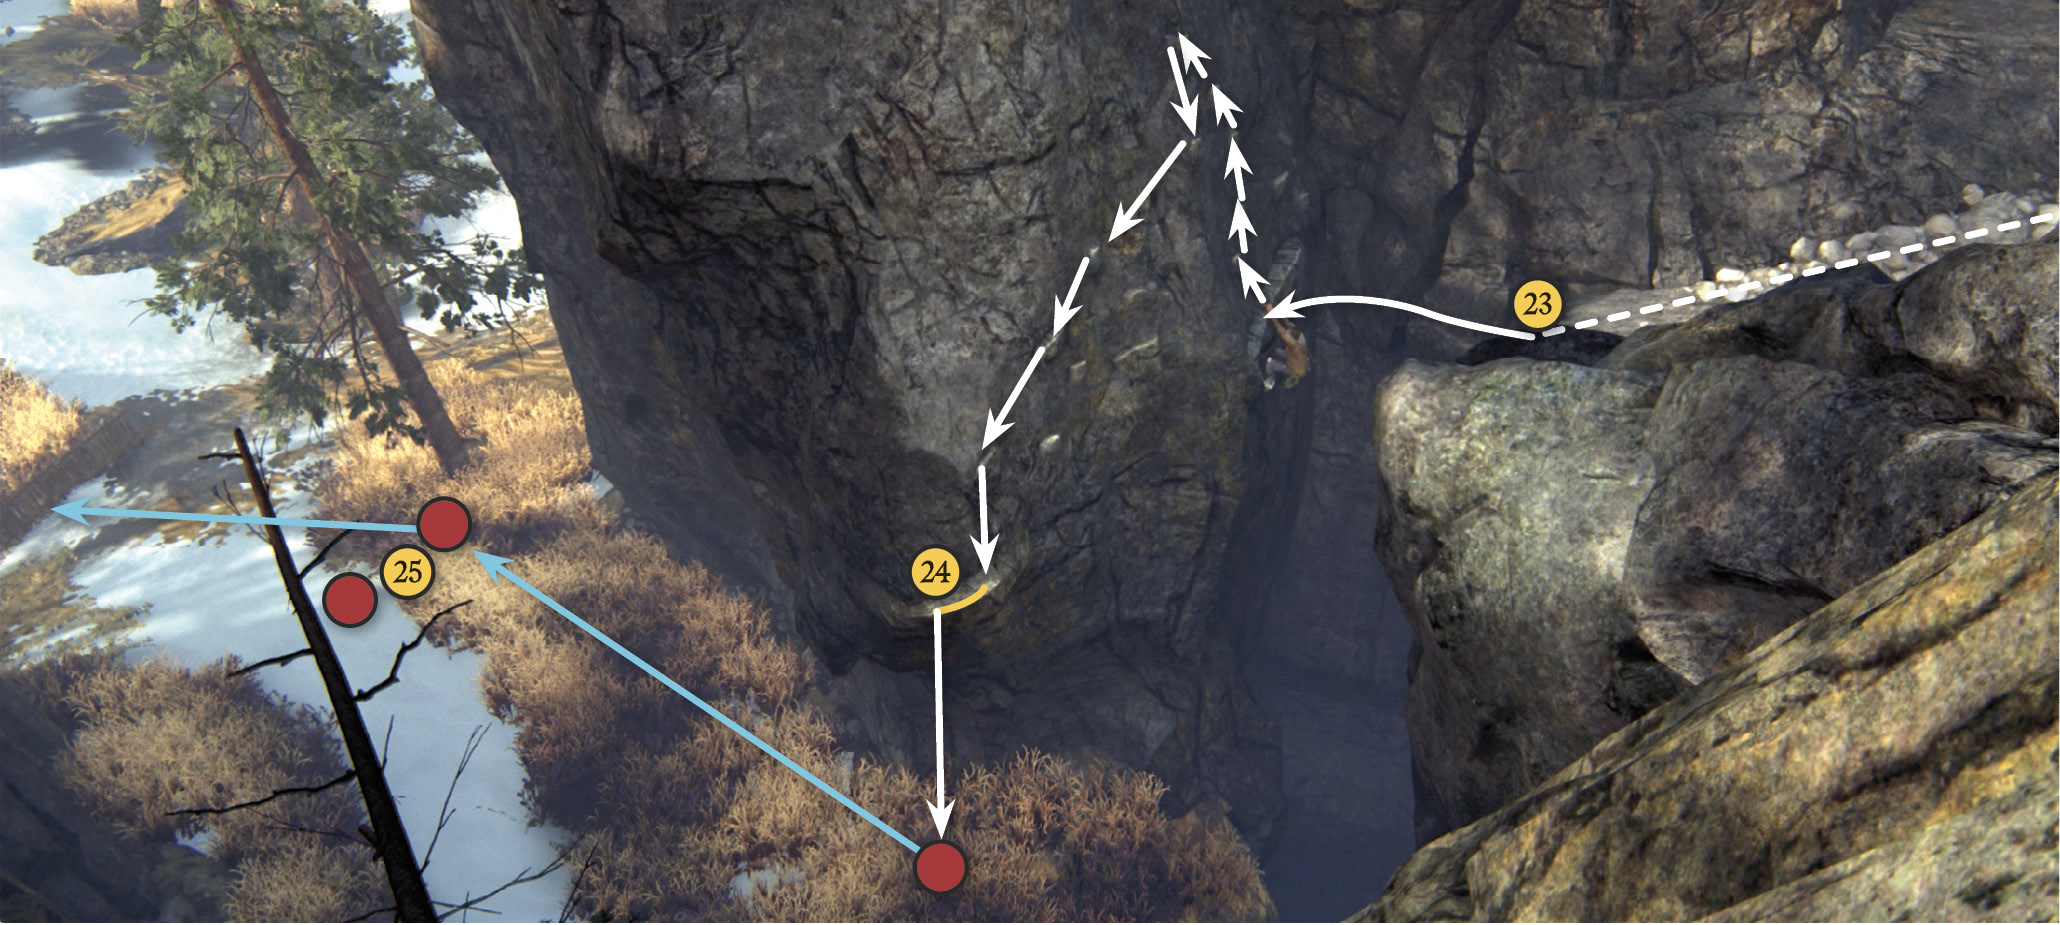
Continue to the second slide and ride it down too, but this time you must tap  to jump the moment you reach the bottom of the chute (23) to leap and grab the narrow ledge in the opposite cliff wall. Climb up then left—you hear and see three Shoreline troopers moving down the path to your left. One stops as the two other gunmen continue along the path. Climb leftward to the last ledge (24) and drop directly on top of the lone guy to knock him out using a vertical takedown.
You land in tall grass. Creep up behind the rifleman in the grass ahead (25) for a stealth takedown; Sam takes down his partner. Now you can scan ahead to see the ruins of an old bridge that you’ll need to get across. Note that many armed guards are posted on it.
Cross the Heavily Guarded Bridge
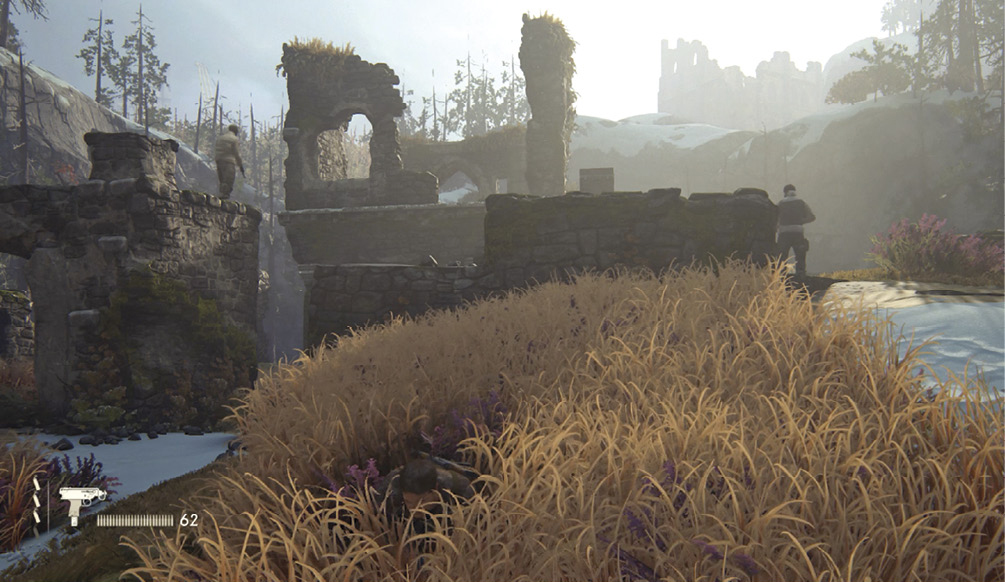
You can fight your way across the structure if you want. If you choose that approach, take notice of a couple New Weapons: the Propane Tanks (only available in Scotland), which can be targeted to take out nearby targets; and a scoped rifle, the Mettler M-30, which is near a propane tank on the far right side as you enter the area. But it’s entirely possible to work your way across the span using only stealth takedowns. If you prefer this more elegant approach, sneak over to the rightmost end of the bridge, using patches of tall grass to stay out of sight.
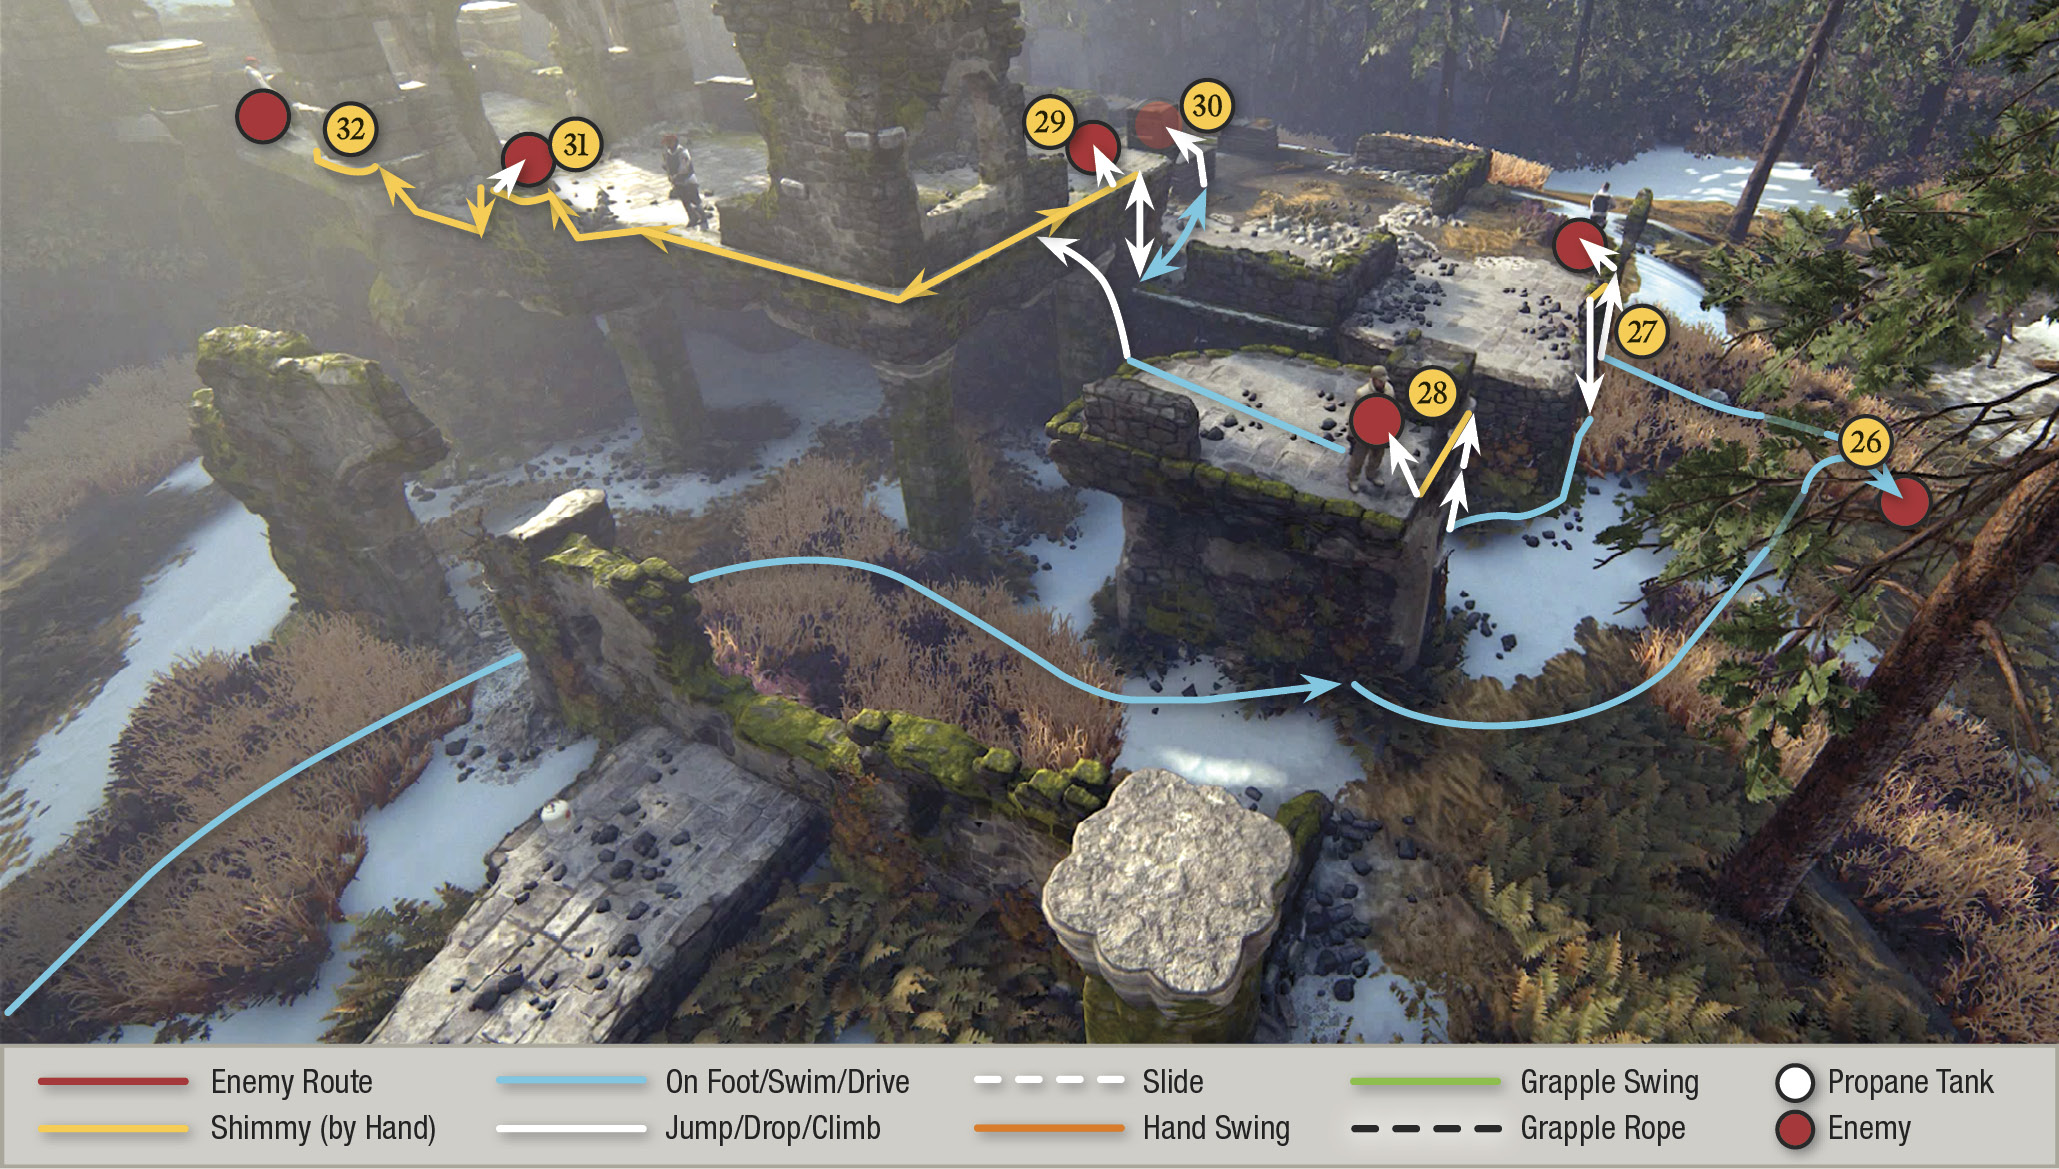
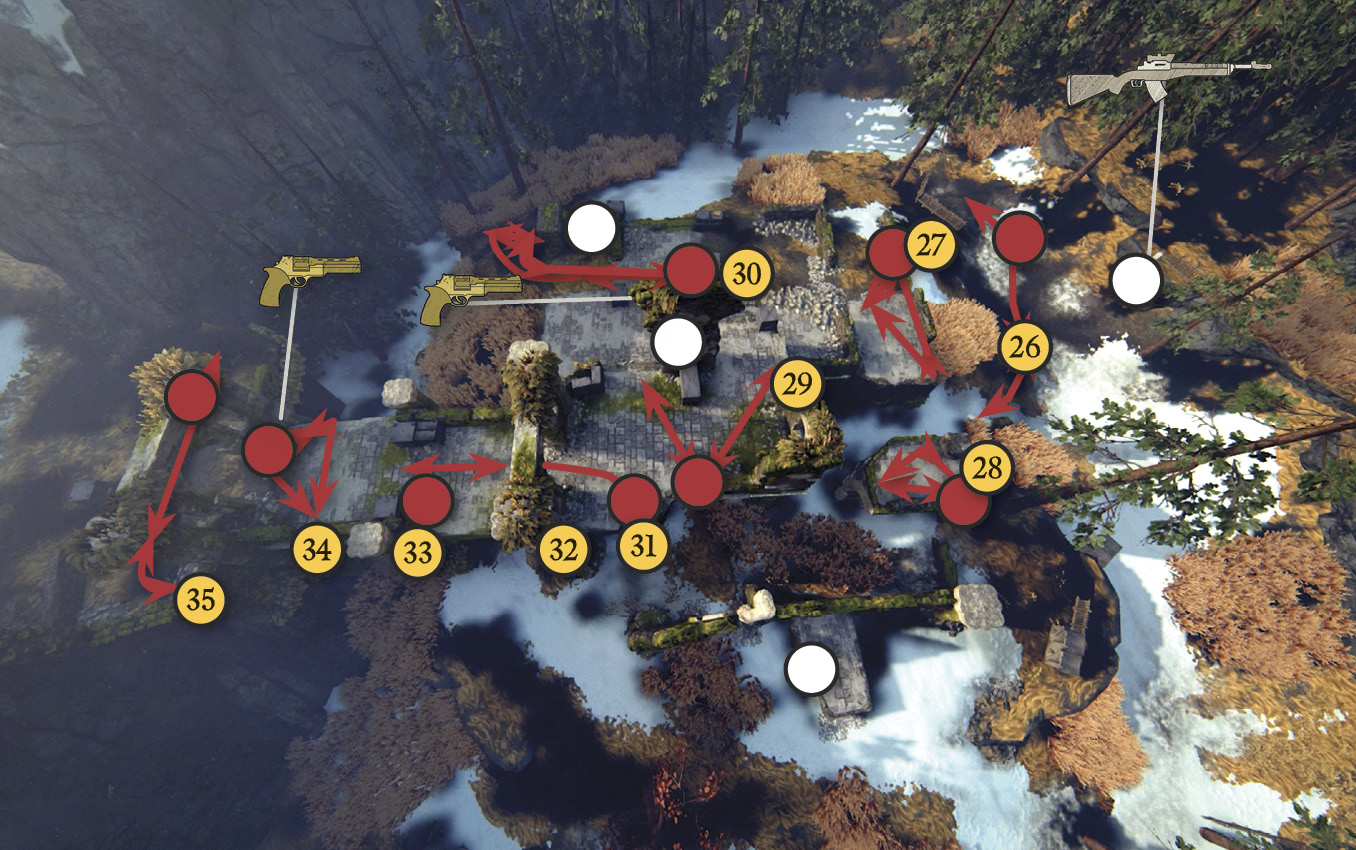
Refer to our maps as you move stealthily from guard to guard across the bridge. Observe the first guard pacing beyond the bridge; hide in the grass at the closest spot to where he passes while patrolling (26). When he returns, make sure no other nearby guards are looking your direction, then perform a quick stealth takedown.
To take down this soldier (27) stealthily, hang off of the higher wall (not the lower platform level part of the wall present on the left corner). Taking him down over the high wall is the opportune time in local patrol patterns. KO the next two (28, 29) guards by hanging below the edge of the platforms where each patrols and then pulling them over as they approach—again, while no other guard is looking your way. (If any of the other bridge guards go on alert, just hang from the bridge and wait until they go back to their patrols.) Sneak up behind the next guy (30) when he’s out of site or walking away from you. Hide behind the crate and pull him over it when he stops on the other side. There’s a New Weapon, the Barok .44, on a crate just ahead of the one you cover behind. If you think it’s too risky to grab right now, you can find another before leaving the area. Come back around the bridgehead to hang and shimmy along the outside edge of the bridge until you’re under the guard there (31). Pull him down!
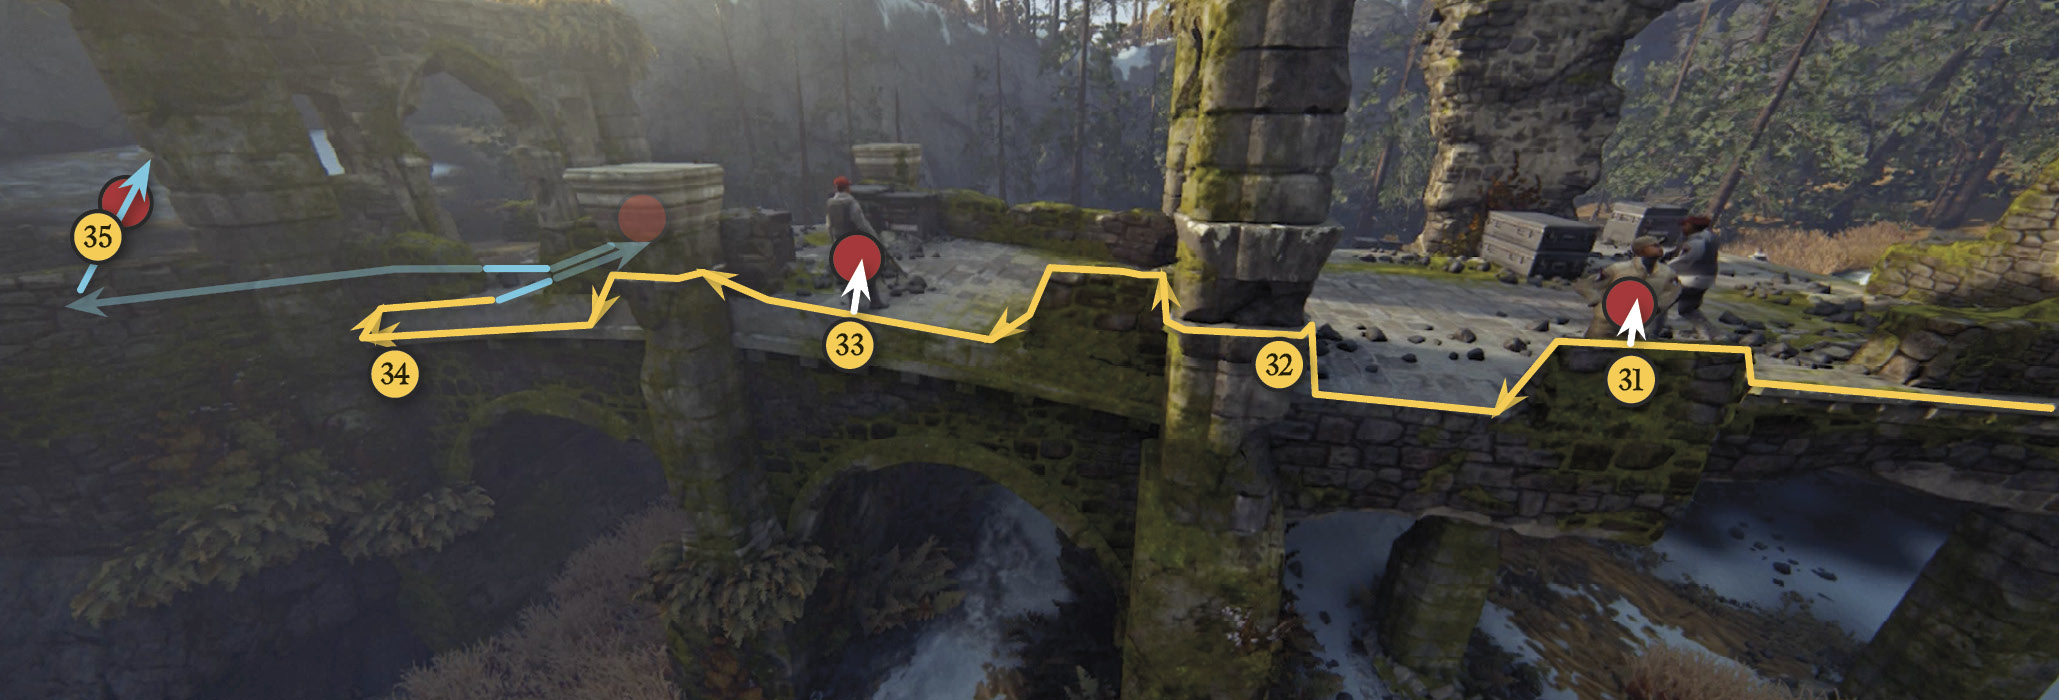
Now it gets trickier. Shimmy carefully leftward until you reach the bridge support column at the arch (32), then stop and swing your camera to look left. Don’t shimmy around the column until the guard at (33) tilts his head away from you and the guard further down the bridge at (35) is not visible. When the coast is clear, shimmy quickly around the arch, get under that next guard (33), and pull him off the bridge!
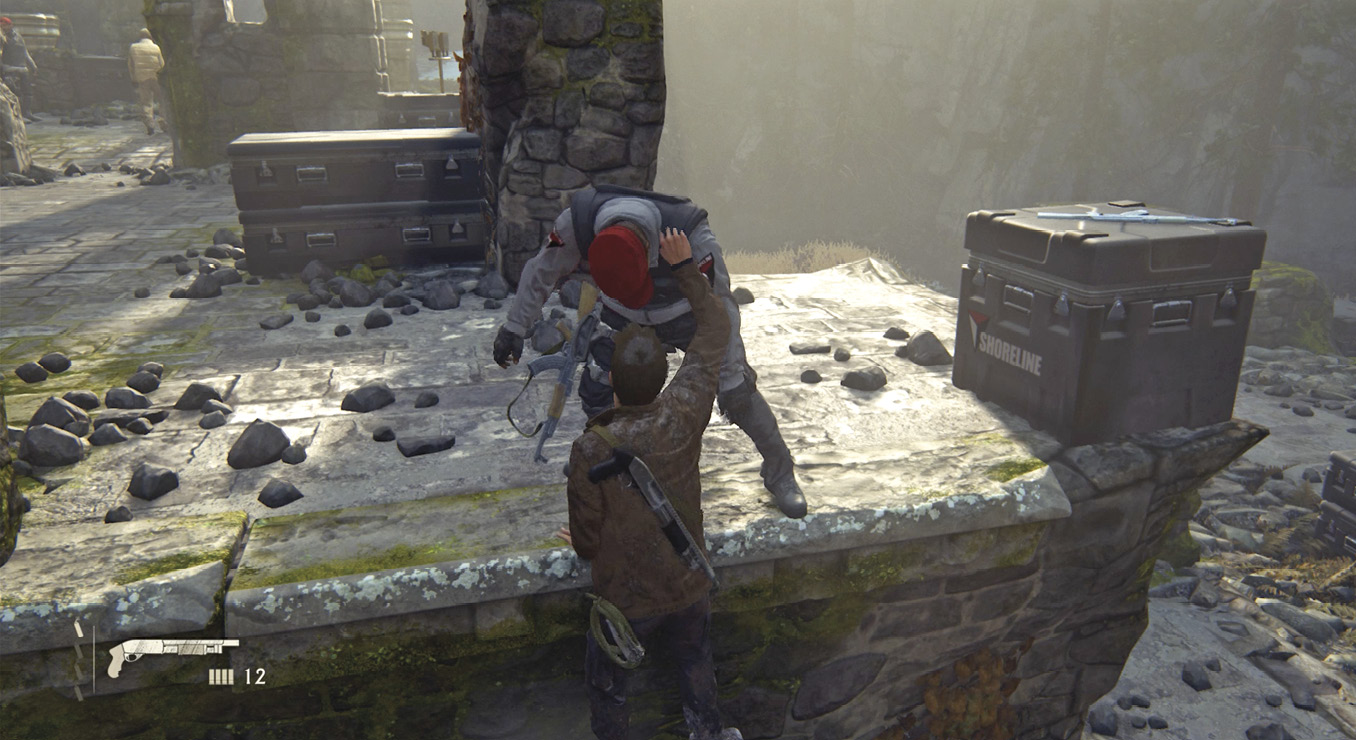
Now shimmy further along the bridge’s edge and stop at the next pillar. Make sure neither one of the last two fellows (34, 35) are looking your way, then quickly shimmy around the pillar. Hang directly under where (34) stops and turns around, make sure (35) is walking away too, and then pull up onto the bridge and take down (34). This guy drops a New Weapon, the Barok .44. Pick it up. Then take cover at the arch and wait for a good moment to sneak up behind the last guy. You could kill him with one of the first occurrence weapons from this area and no additional forces will arrive by breaking your stealth—he’s the last guard in this area. Or you could just fire these weapons up in the air to count toward the “I Accidentally All The Weapons” trophy.
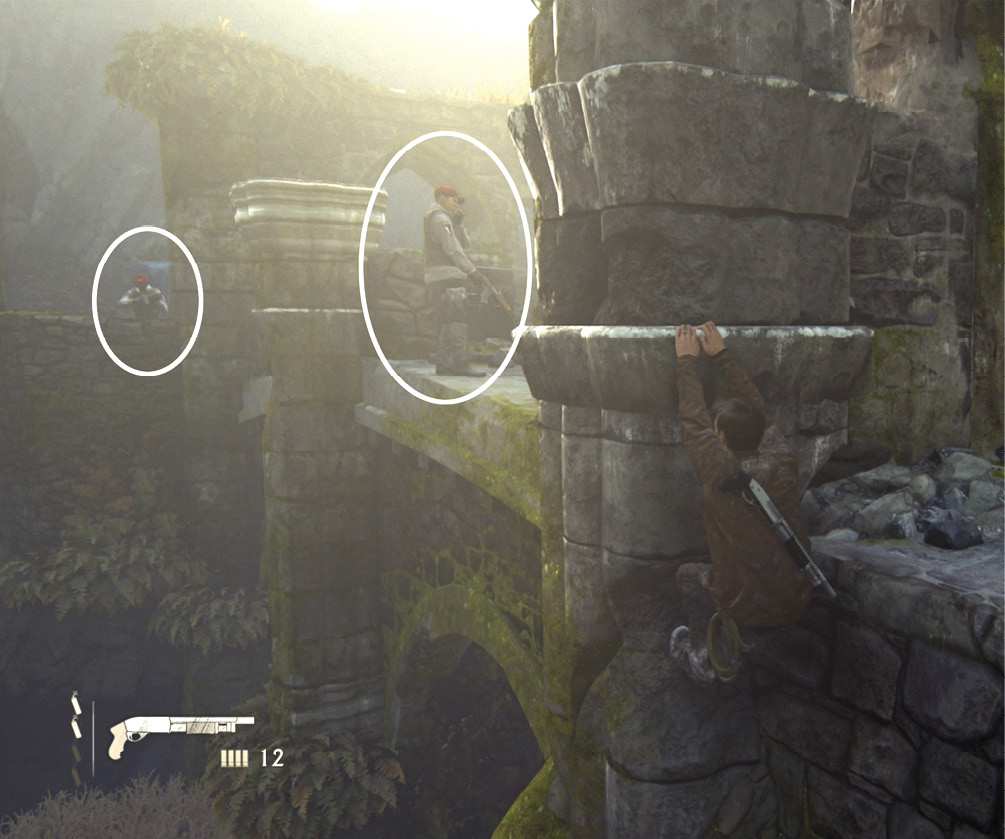
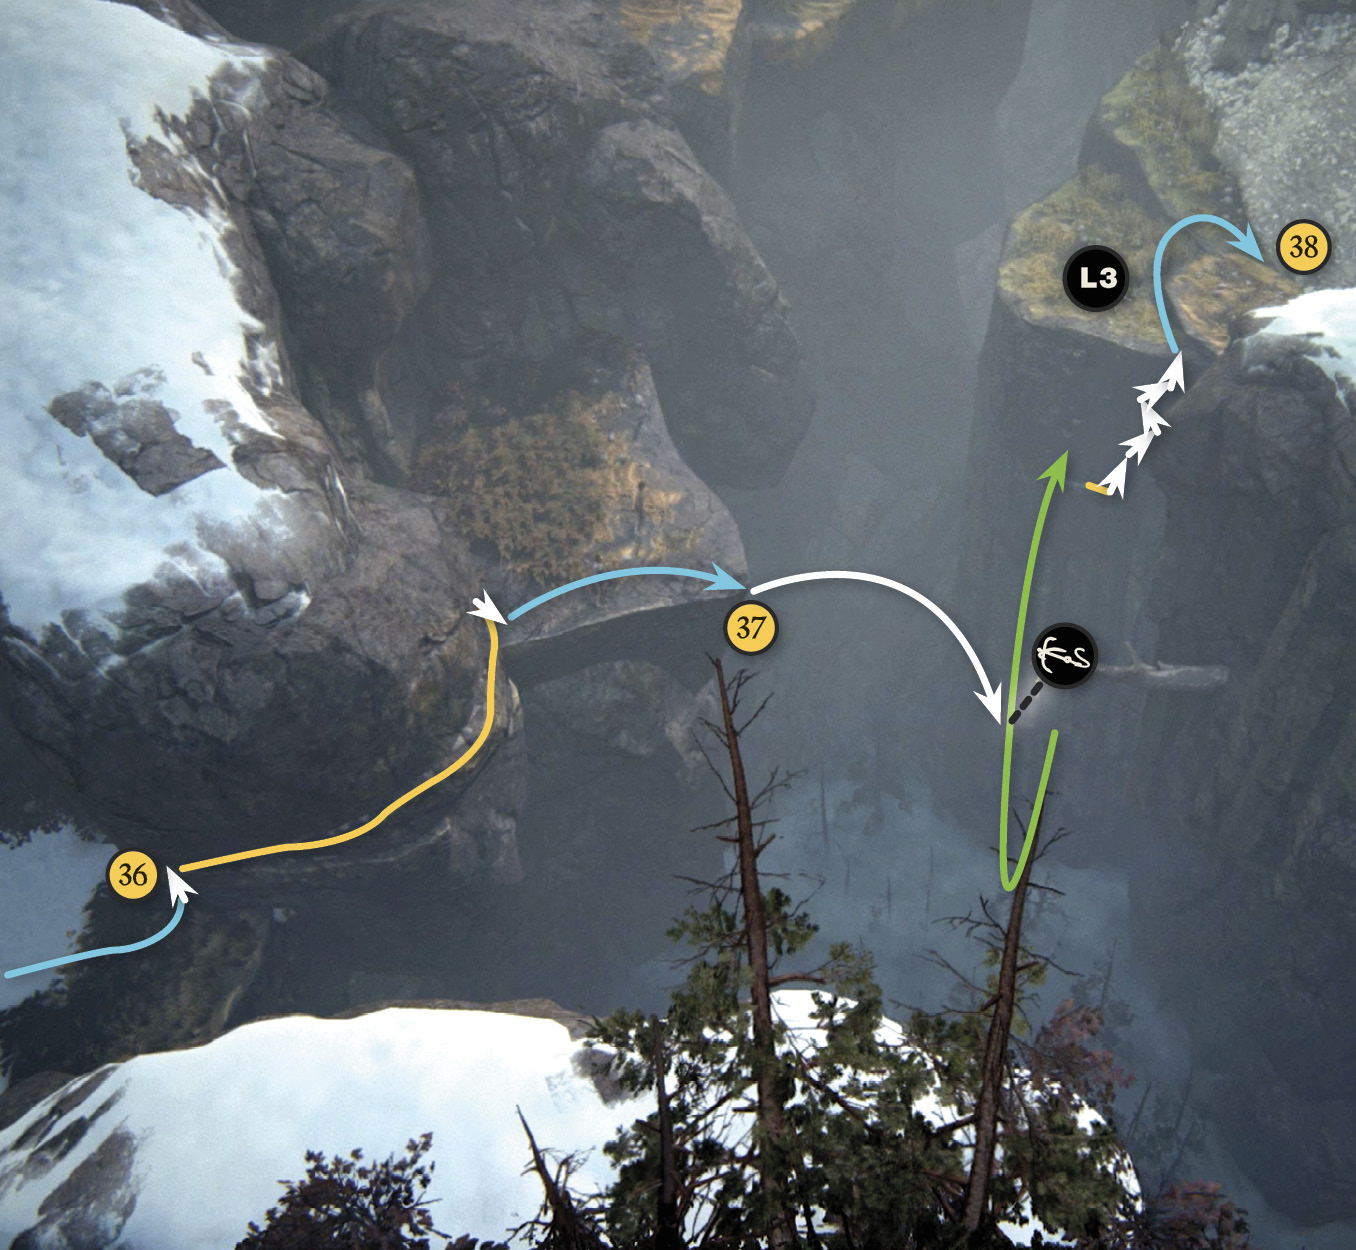
Finally, the bridge is cleared. Continue down the path. Jump up and grab the ledge (36) and then slide rightward until you can hop onto the terrace. Walk to the terrace’s edge (37) and toss your grapple hook at the branch jutting from the opposite cliff. Swing toward the left, jump to the ledge, and climb the cliff to reach the first of several rockslides (38). Press L3 here—Nathan notes the monks’ dormitory on the ridge. But a wide chasm still separates you from it. You’ll have to work your way around, moving across a series of dangerous rockslides.
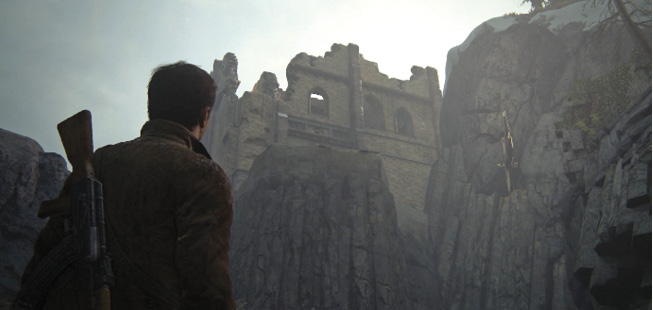
Navigate the Rockslides
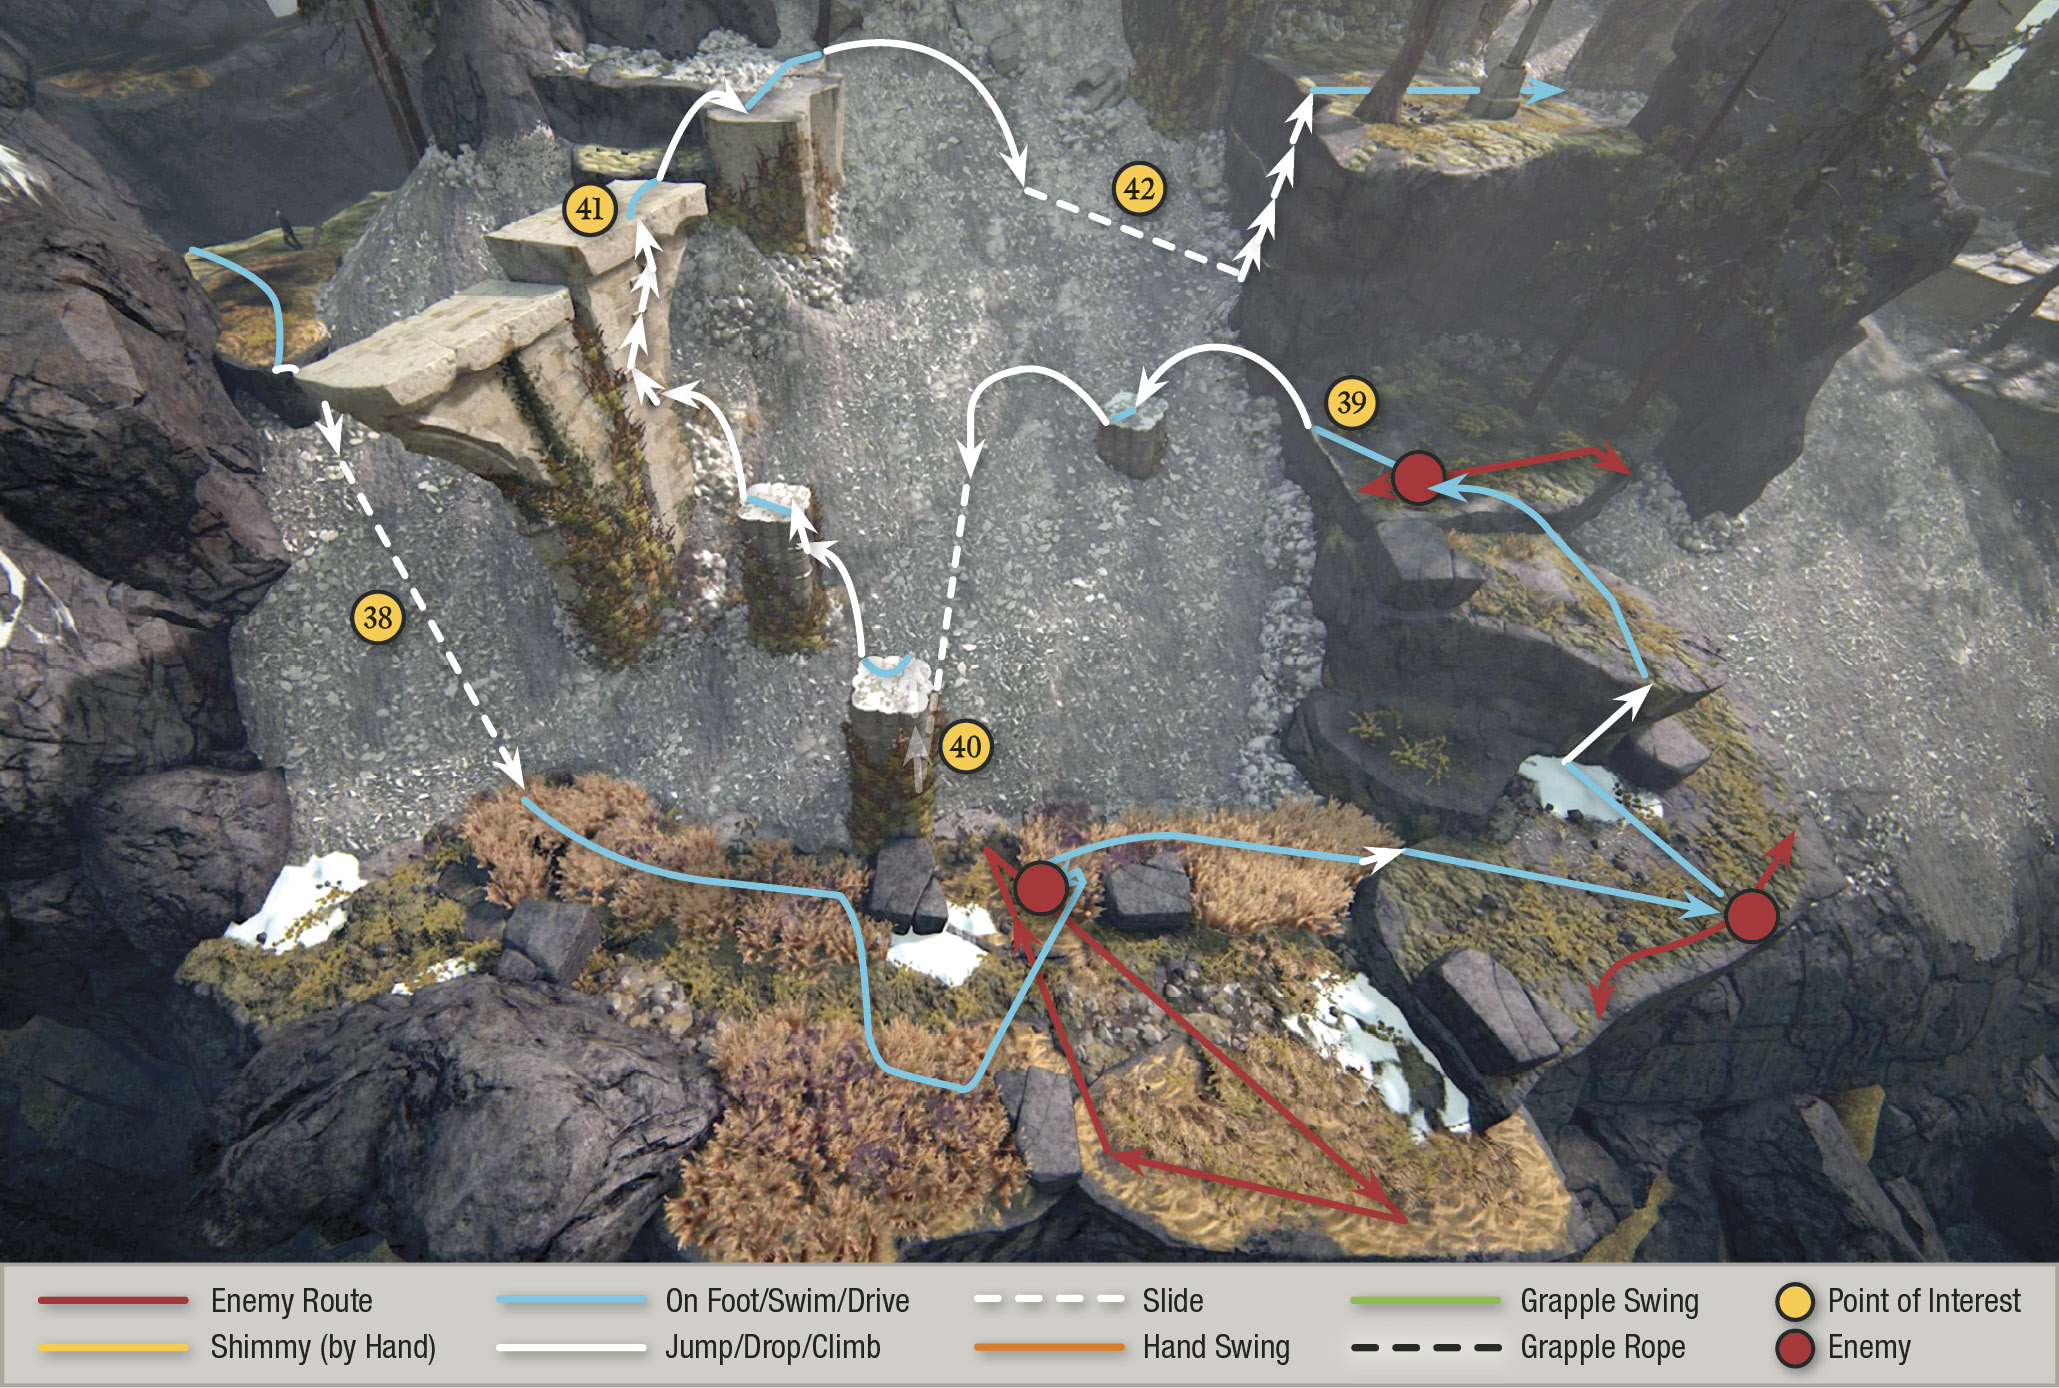
Slide down the first slide (38) into the tall grass at the bottom. Three mercenaries patrol ahead; use the grass for stealth takedowns (see our map) or just gun them down. Move as far as you can up the rock ledges (39) and then turn to the rockslide on the left. (Don’t try riding the slide on the right! You’ll slide right off the cliff.) Hop onto the low pillar first. From there, leap onto the slide and steer toward the leftmost pillar below (40), jumping just as you reach it to grab one of its grooves. Climb to the top of the pillar.
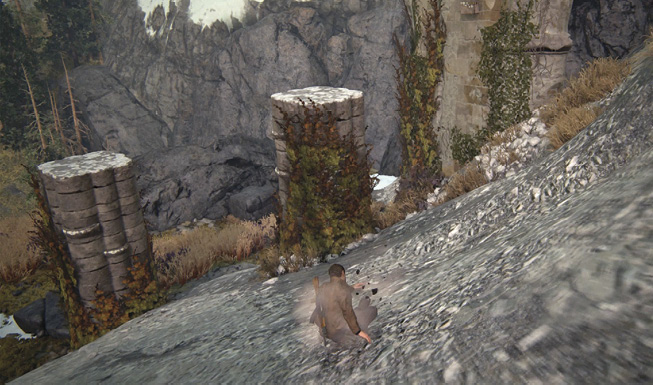
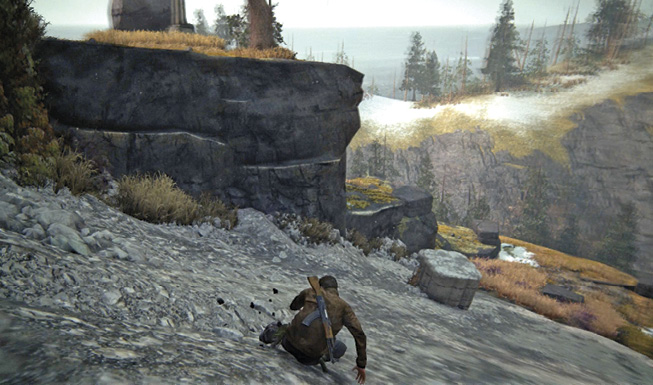
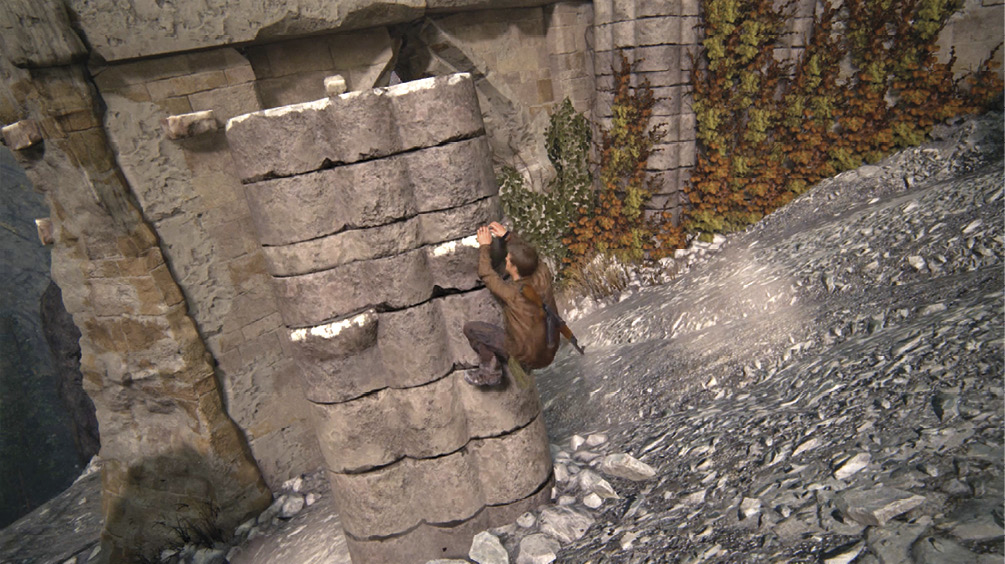
Jump across to the next pillar and pull yourself on top again. Then jump to grab outcroppings on the wall beyond (41). Follow the wall uphill, hopping over the gap. At the top, leap onto the rockslide and steer across it toward the far wall (42), where you can jump to grab a ledge (see Fig. 8-13). Pull yourself up the wall and move past the stone cross at the top.
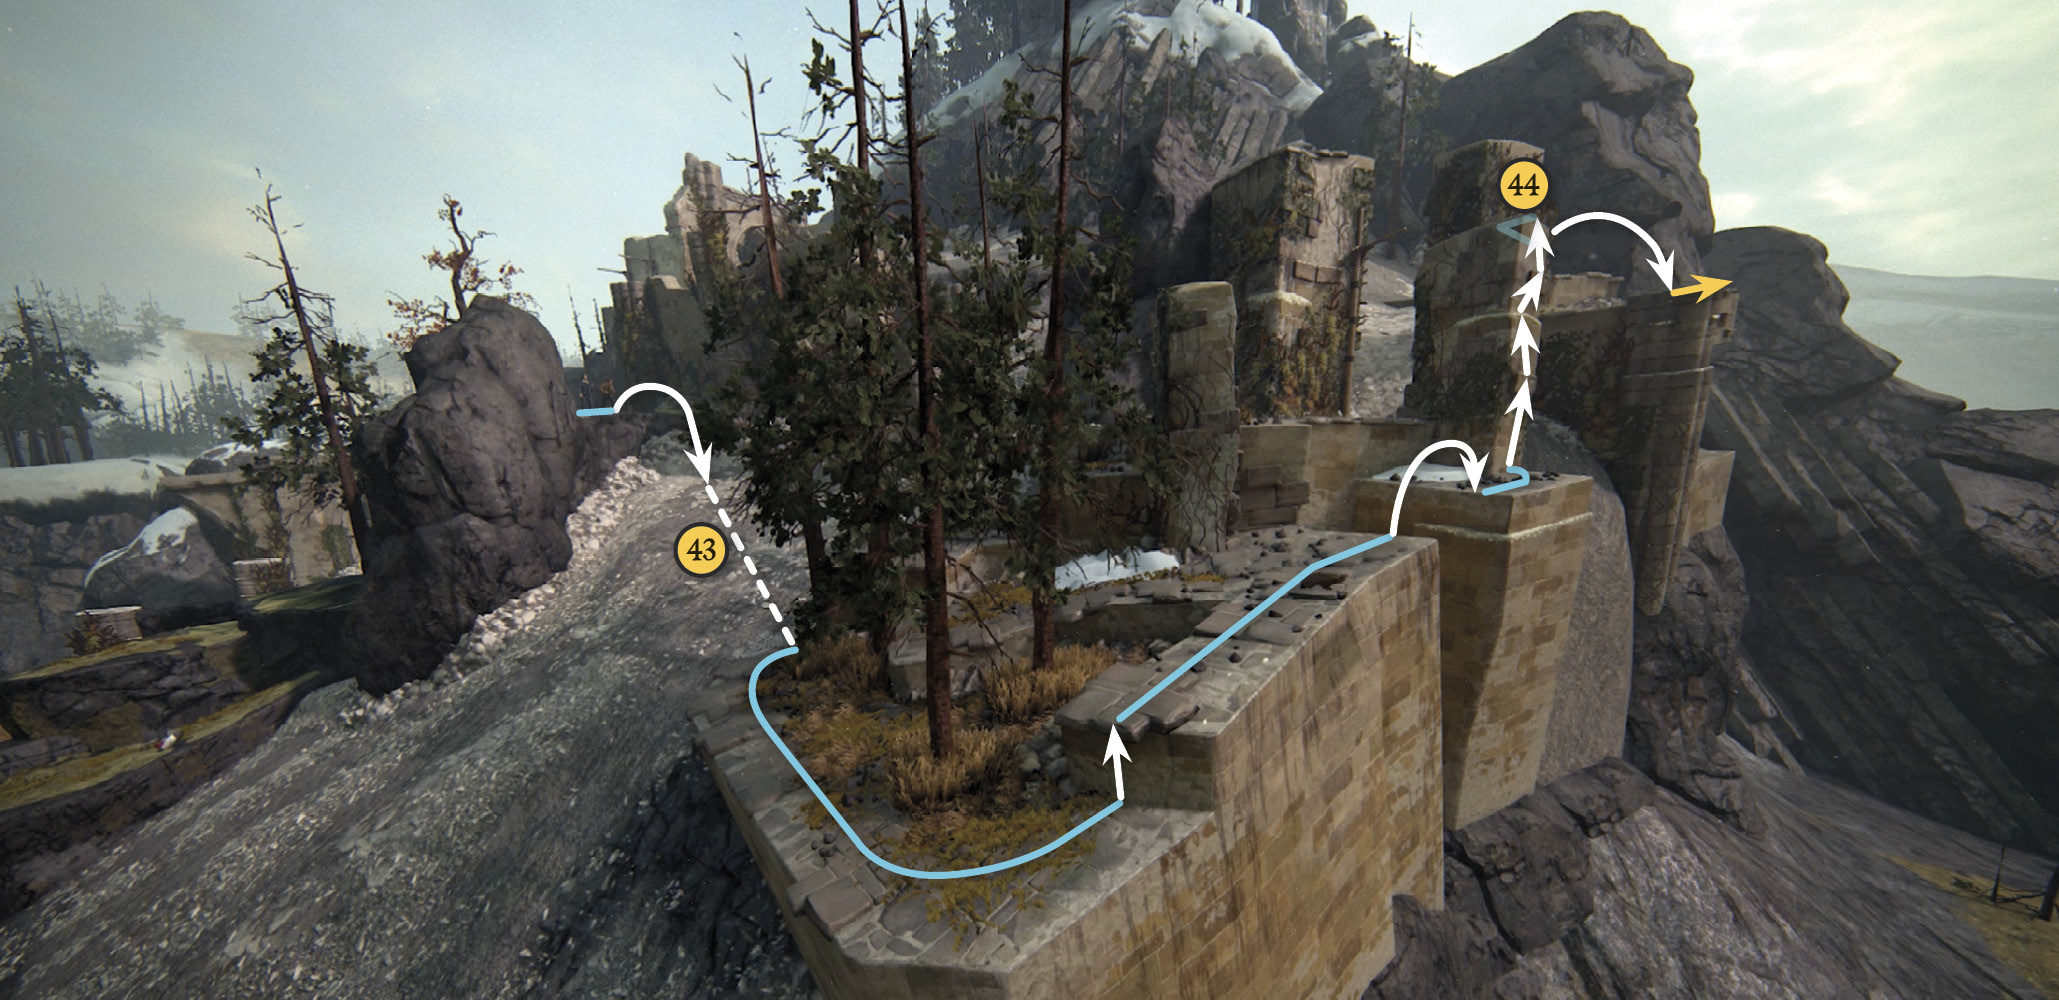
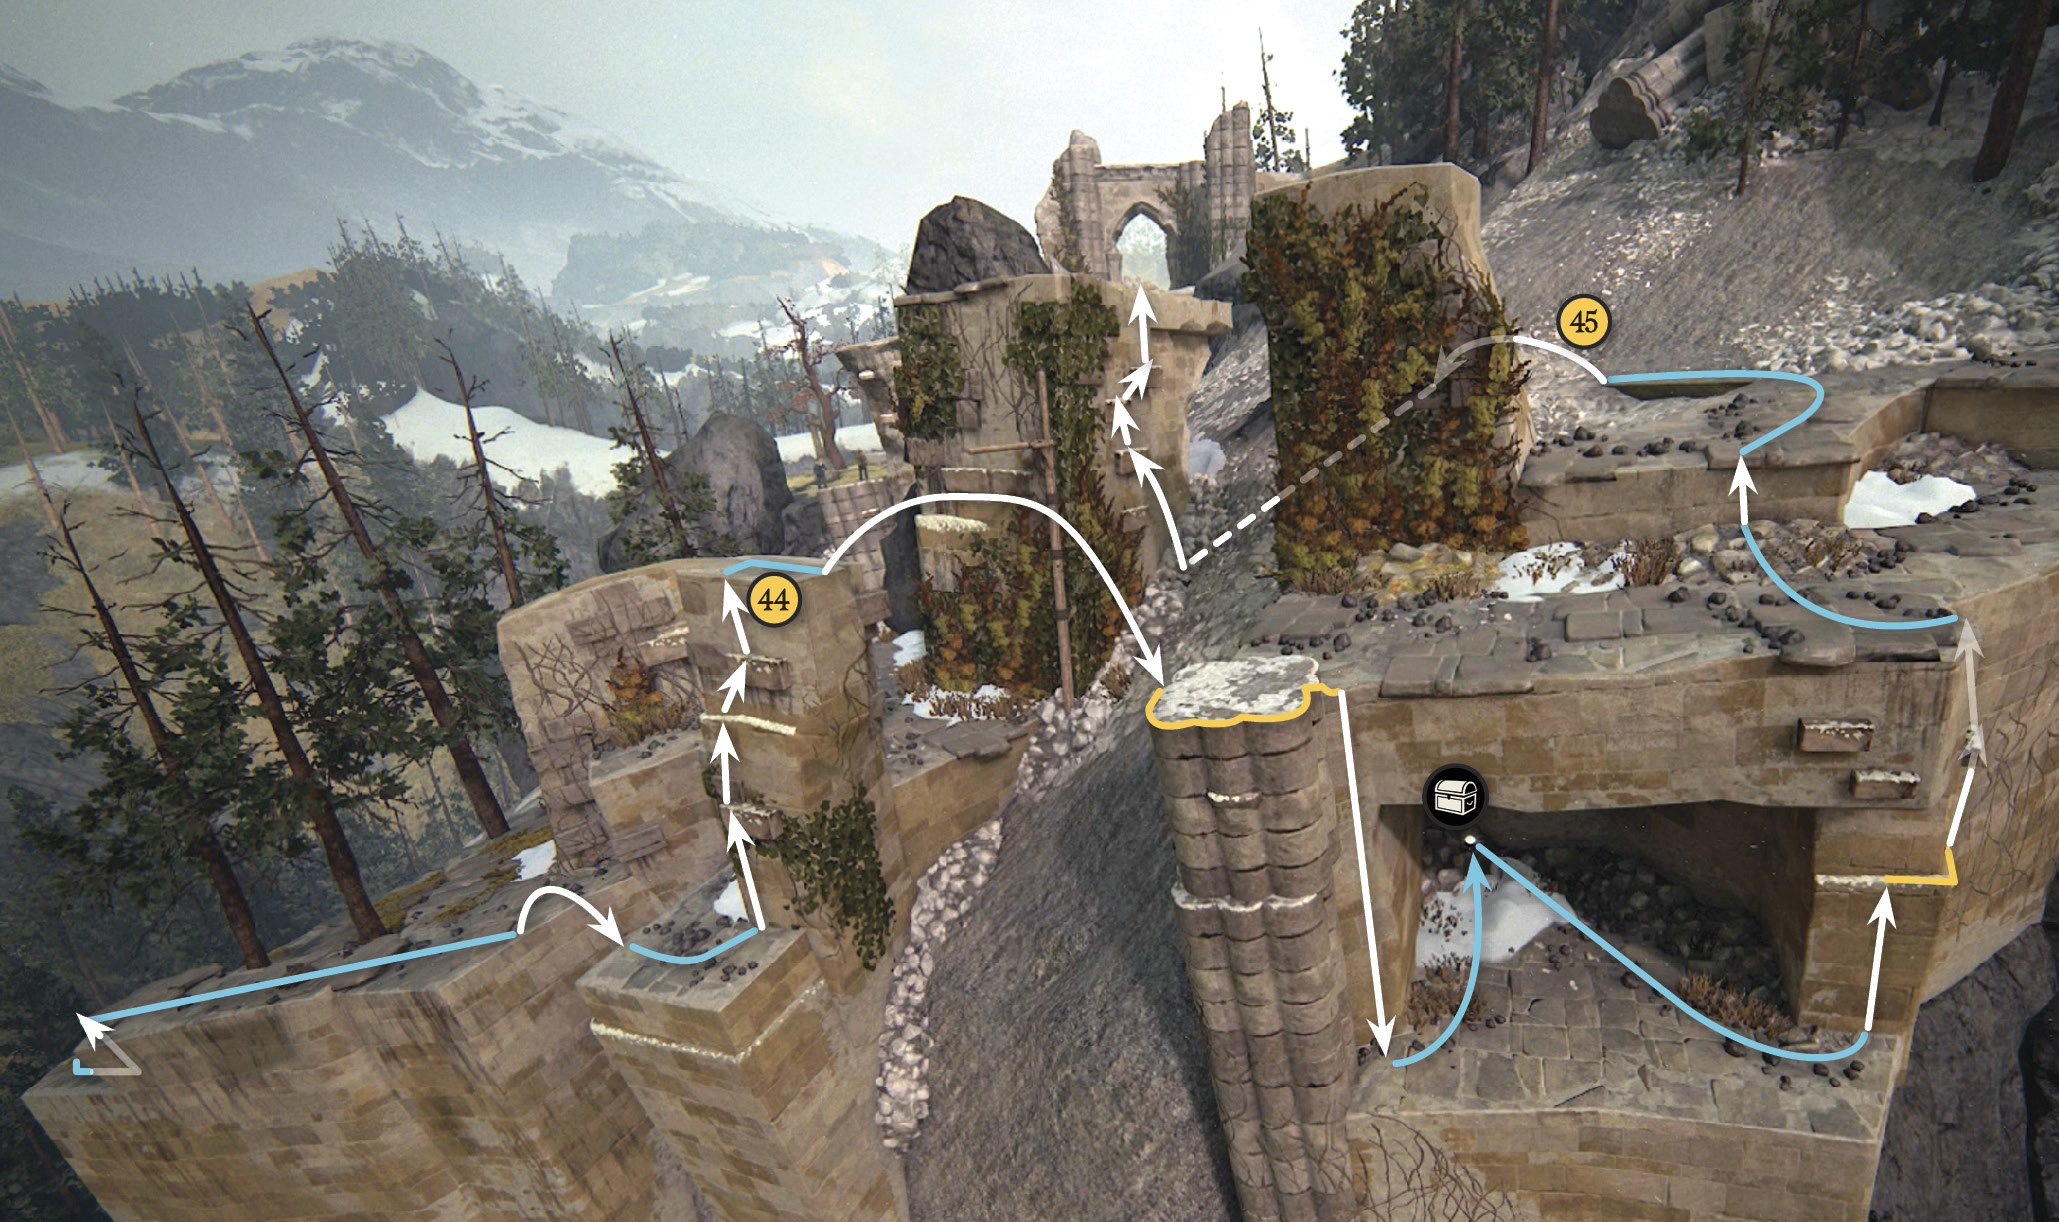
Hop onto the next rockslide (43) and steer across at an angle to the low terrace on the opposite side. Follow the wall around the corner, hop over the first gap and climb the pillar (44). From the top, jump across the second gap (a rockslide) to the next platform. (Here you can drop down to find a treasure and then climb back up.) Climb to the next rockslide (45) and hop on, steering toward the wall that has a series of outcroppings. Jump as you reach it to grab the lowest outcropping and climb to the top.

Traveling Inkwell with Seal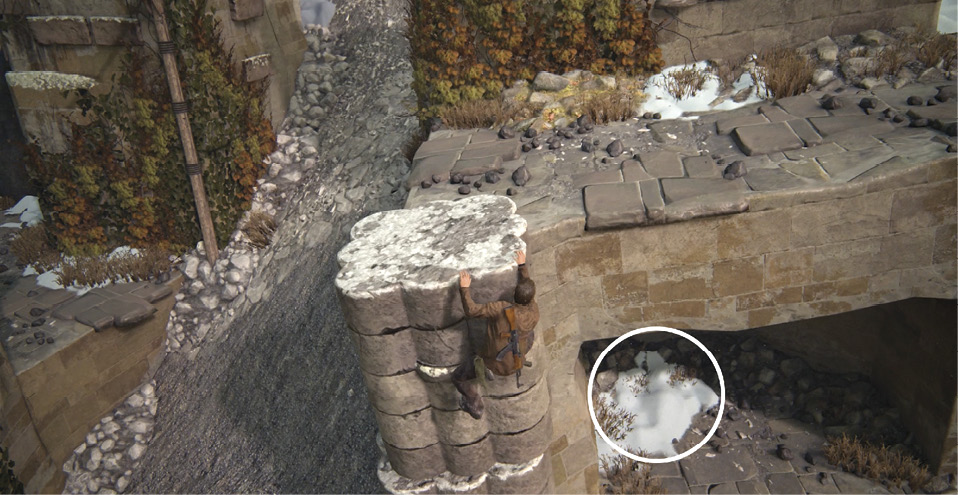
After you jump from (44) across the rockslide, hang from the platform to find an alcove below. Drop to it and enter. The Traveling Inkwell with Seal is in the back left corner. You can climb easily back to the upper platform. |
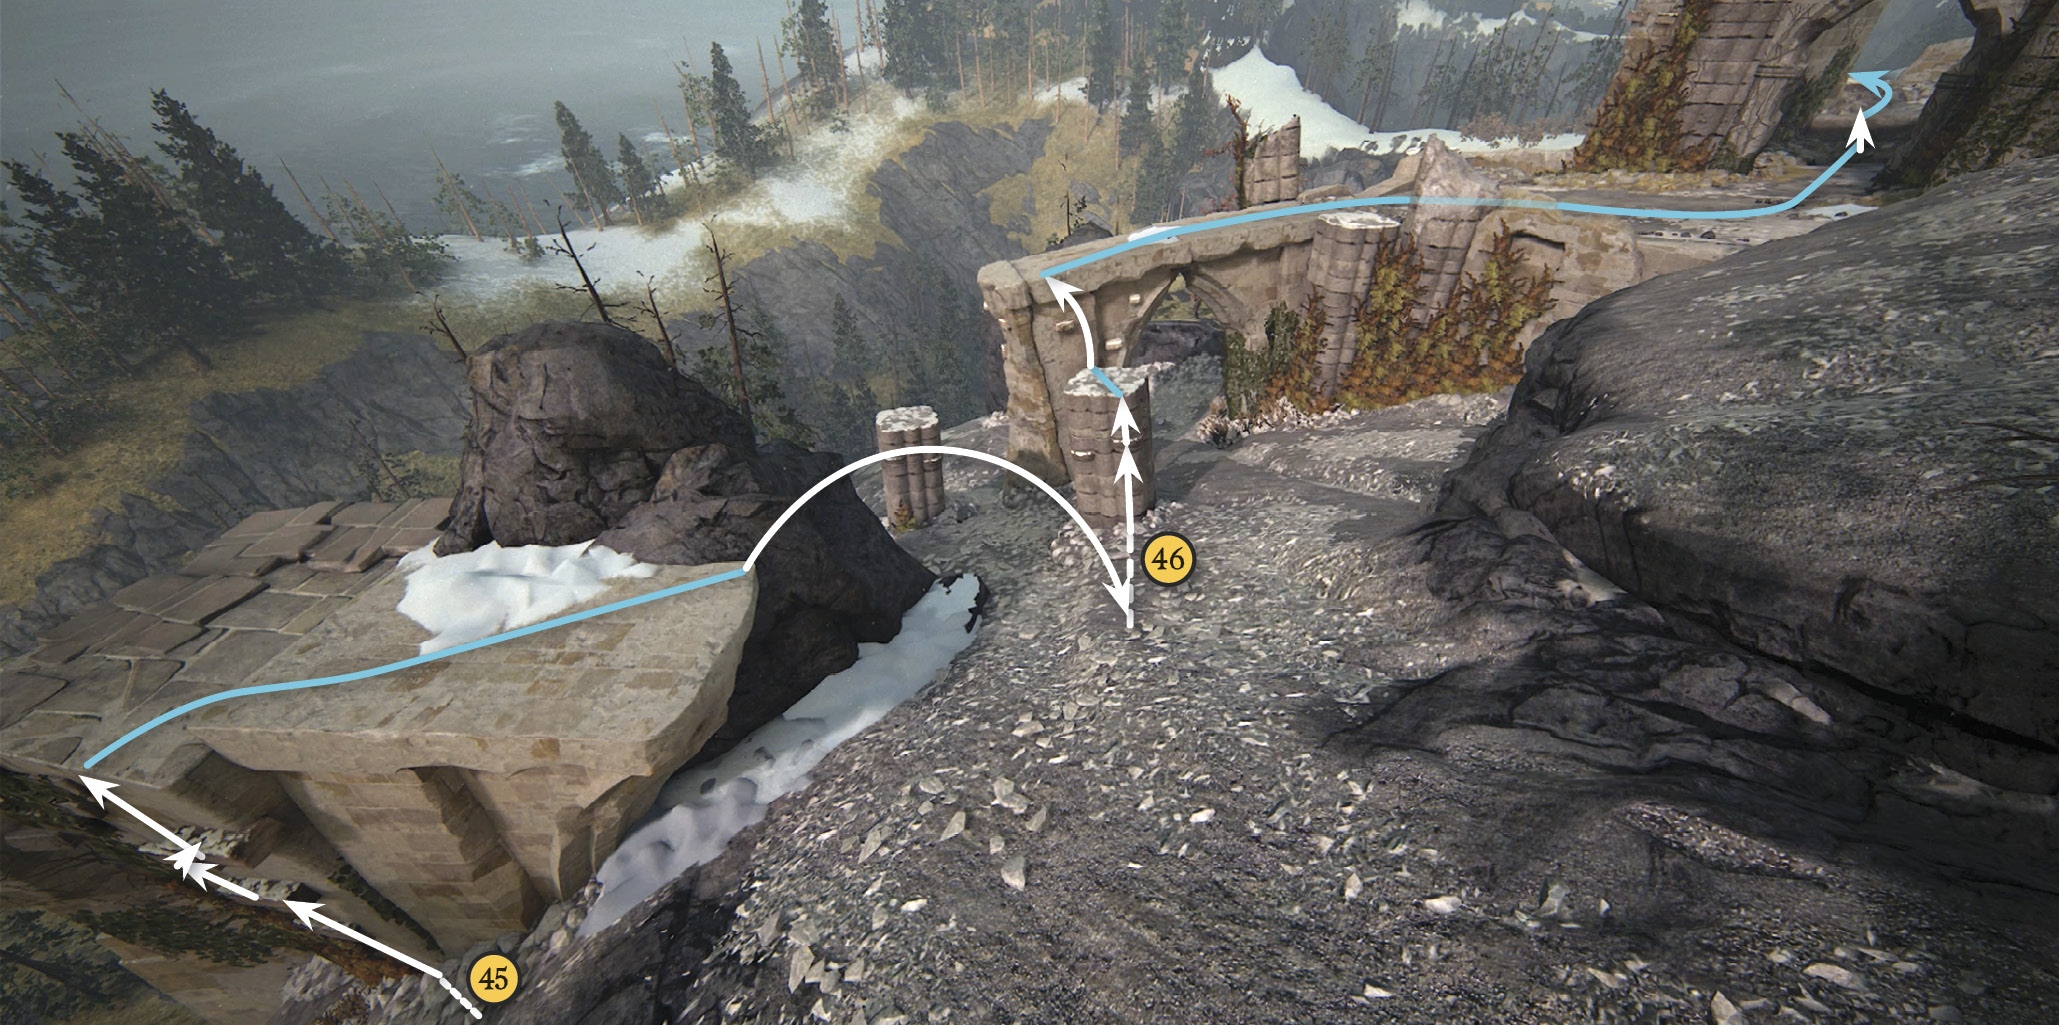
Move across the ruin and take a running leap onto the next rockslide (46); steer across the slide toward the rightmost pillar and jump as you reach it to grab a handhold. (If you miss this first pillar, you can snag a handhold on the second pillar too.)
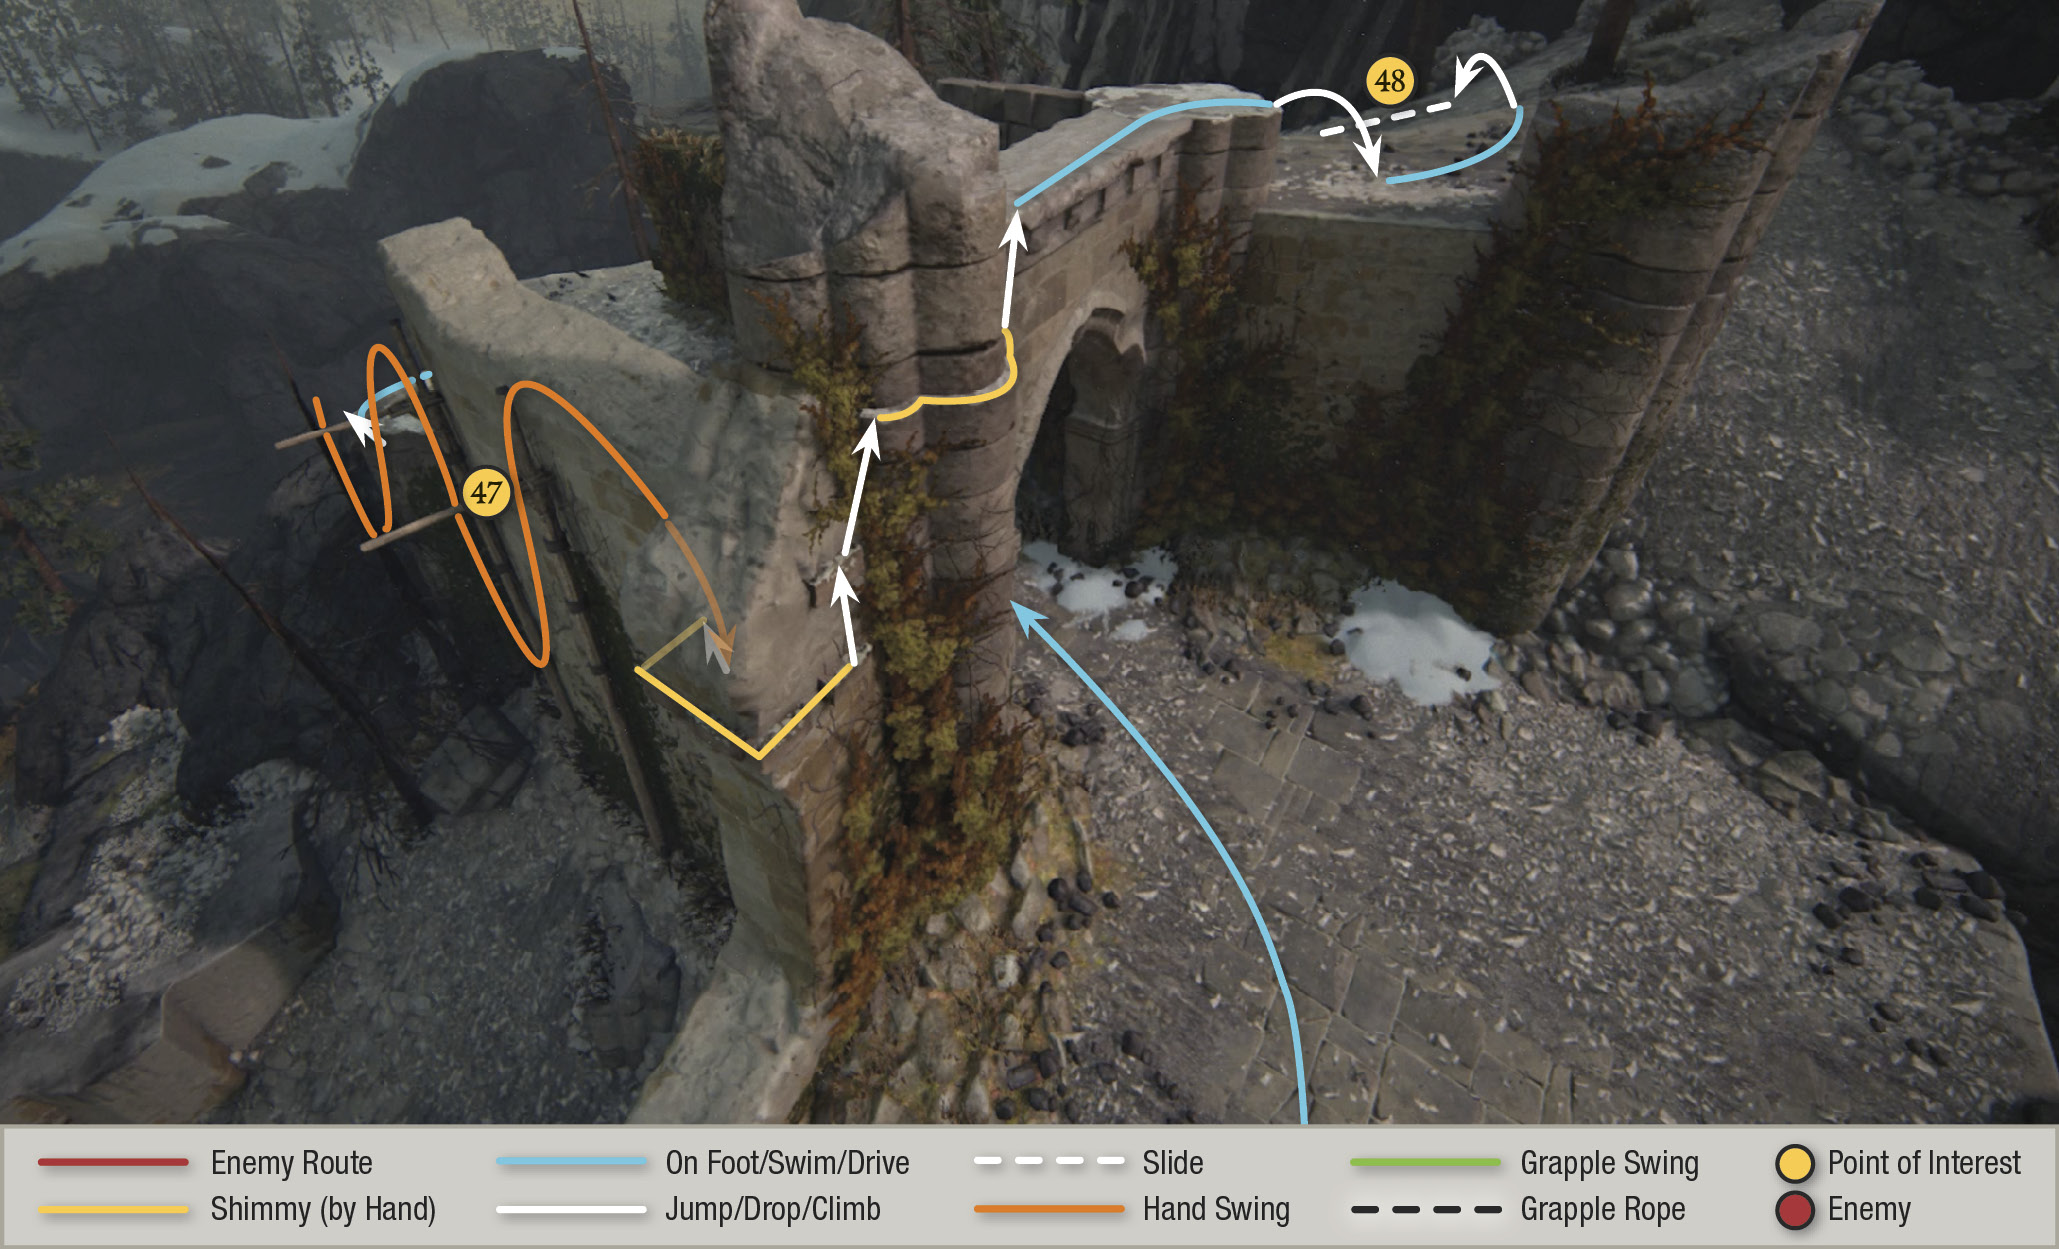
Climb the pillar, jump onto the rock arch, and then follow the path through another arch and around the wall on the left. Jump and swing across two poles (47) to grab the handholds on the pillar. Shimmy rightward around to the pillar’s far side to find outcroppings that let you climb to the top of the arch.
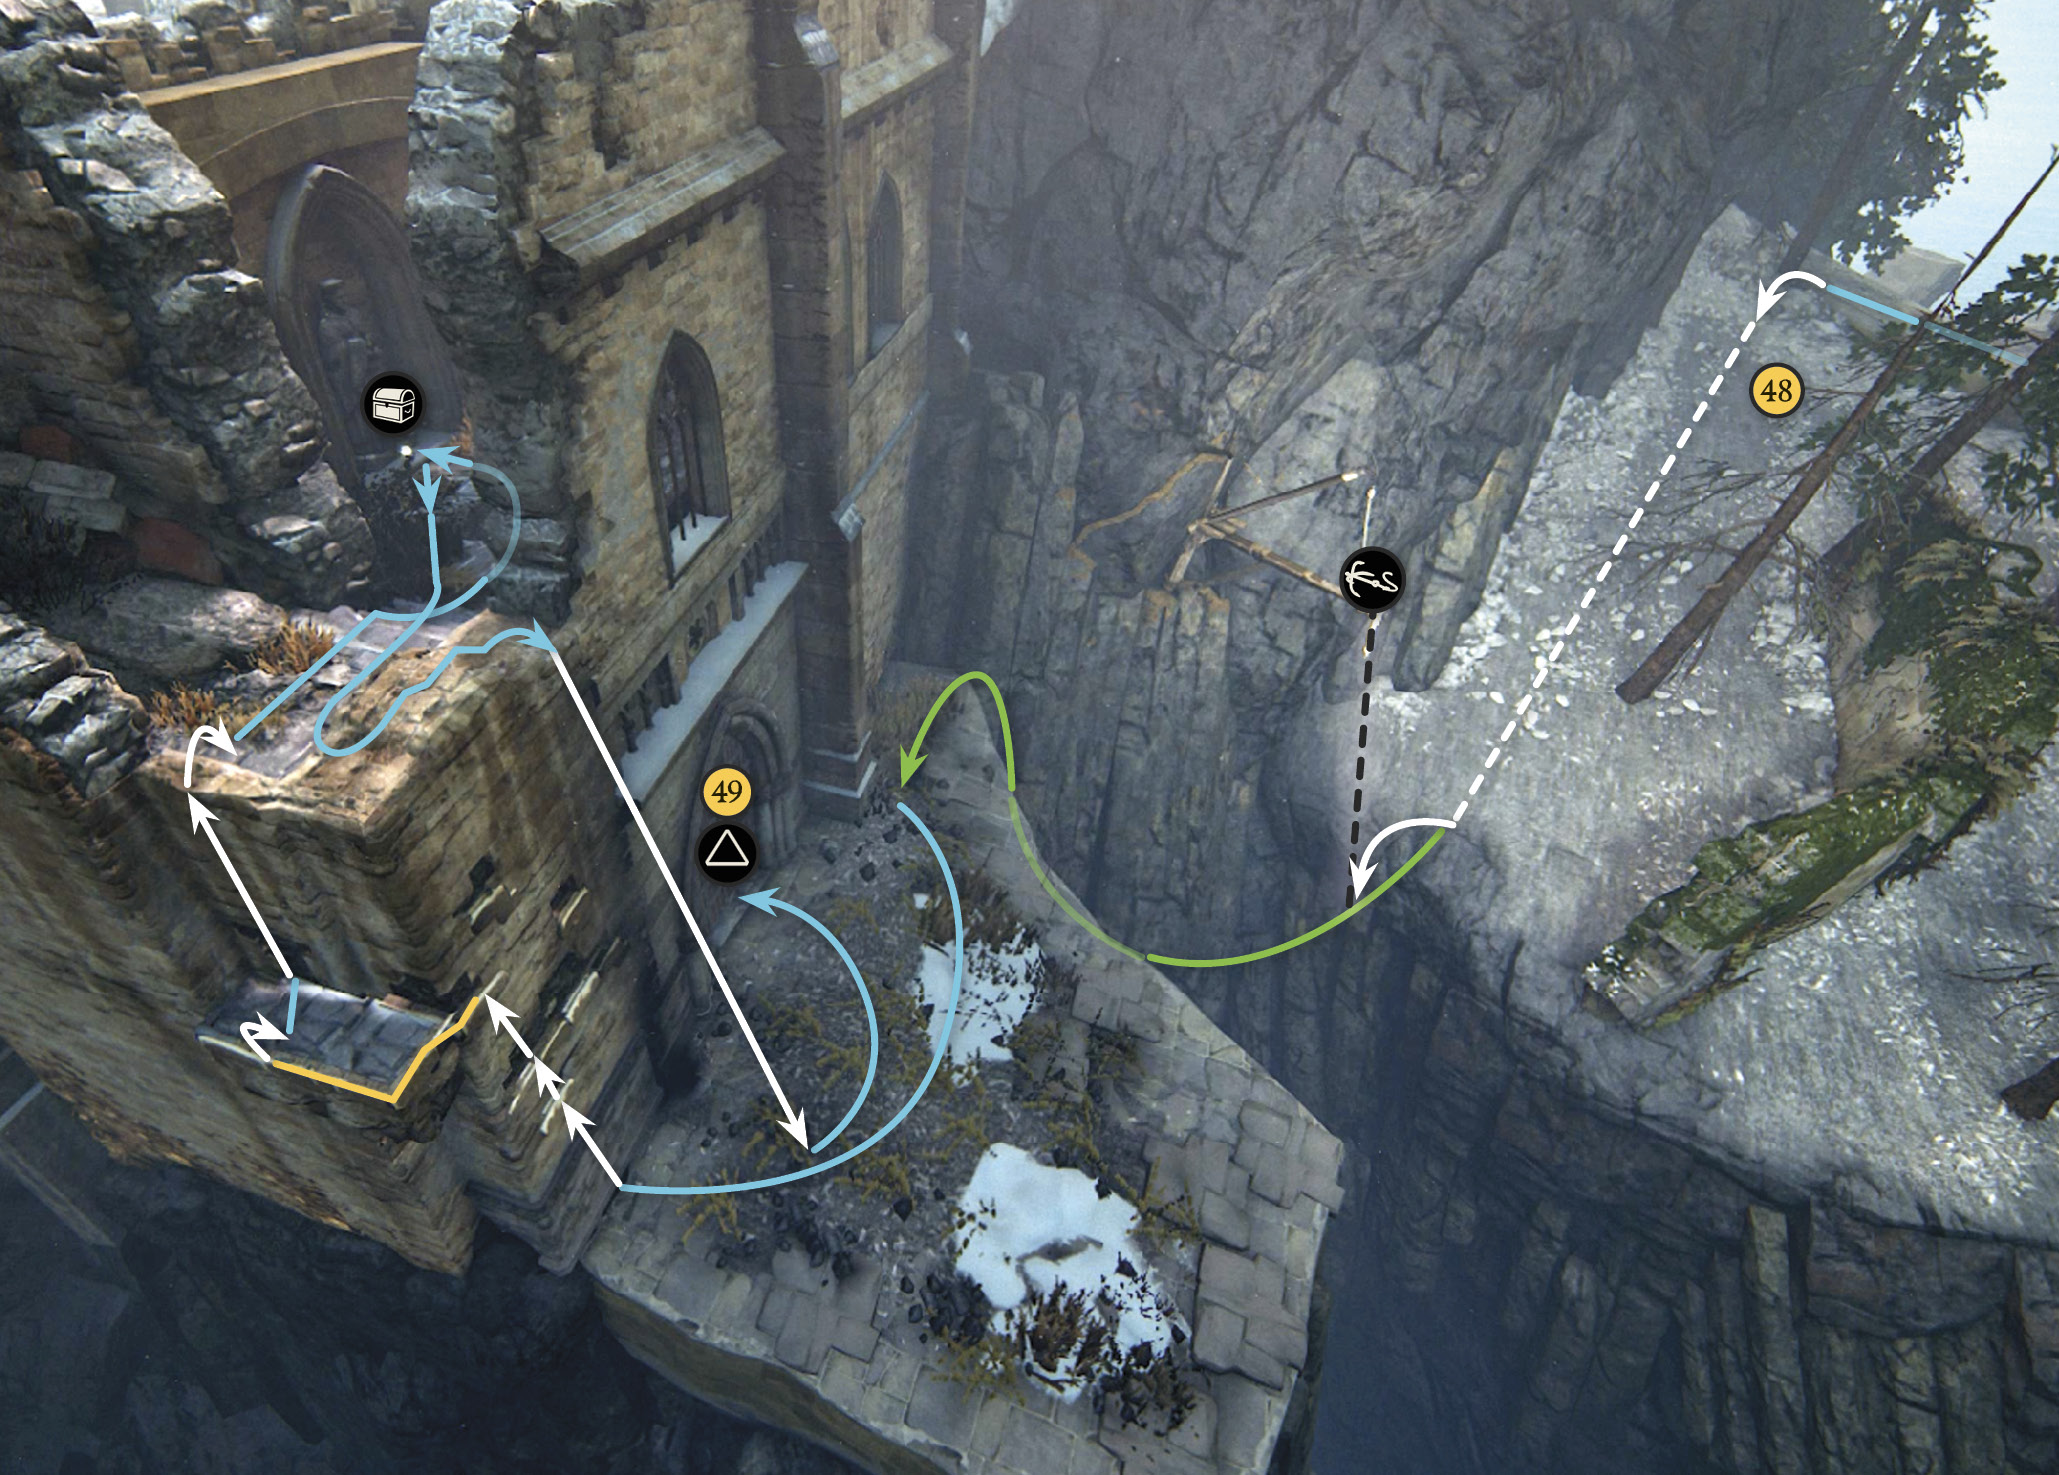
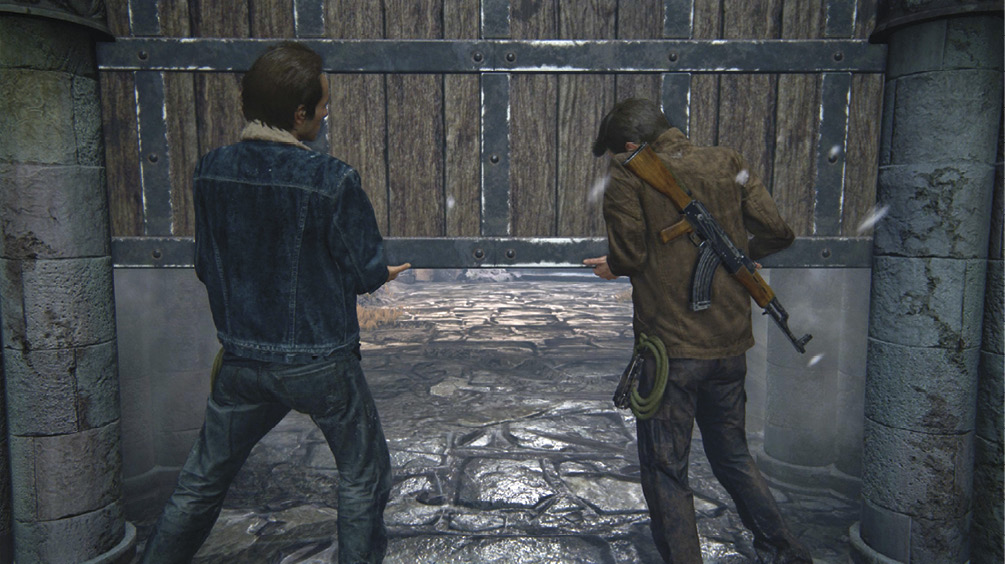
Here you reach one last tricky rockslide (48). As you slide down, look upward at the pole jutting from the cliff above. The moment the L1 icon appears, punch that button to toss your grapple hook at the pole. Swing across to the far platform. Before you approach the dormitory entry gate (49), climb the wall to its left to find a treasure. Then drop back down and try the gate; Sam helps Nathan pull it open. Keep tapping until the gate is open.

Carved Ivory Vanitas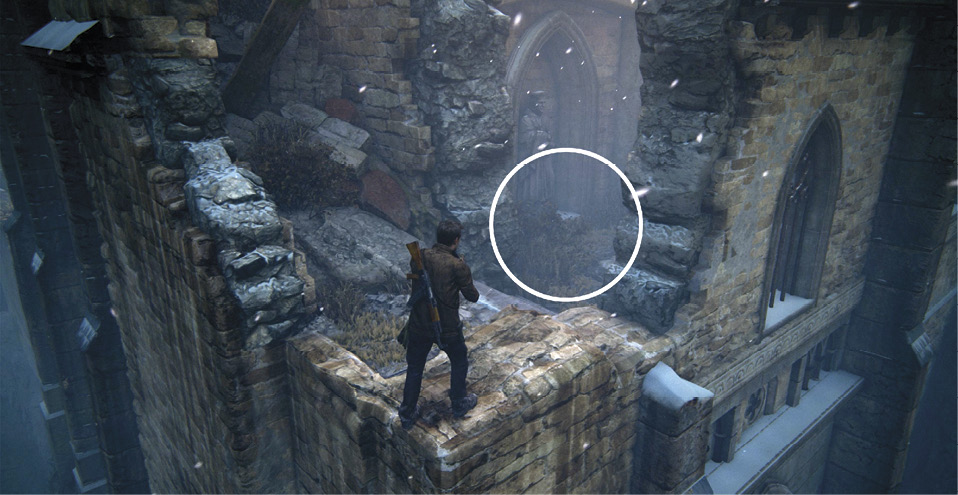
Before you open the dorm gate, climb the wall on the gate’s left side to discover a small hidden alcove with a statue. Find the Carved Ivory Vanitas stashed at the foot of the statue. |
Find Avery’s Grave
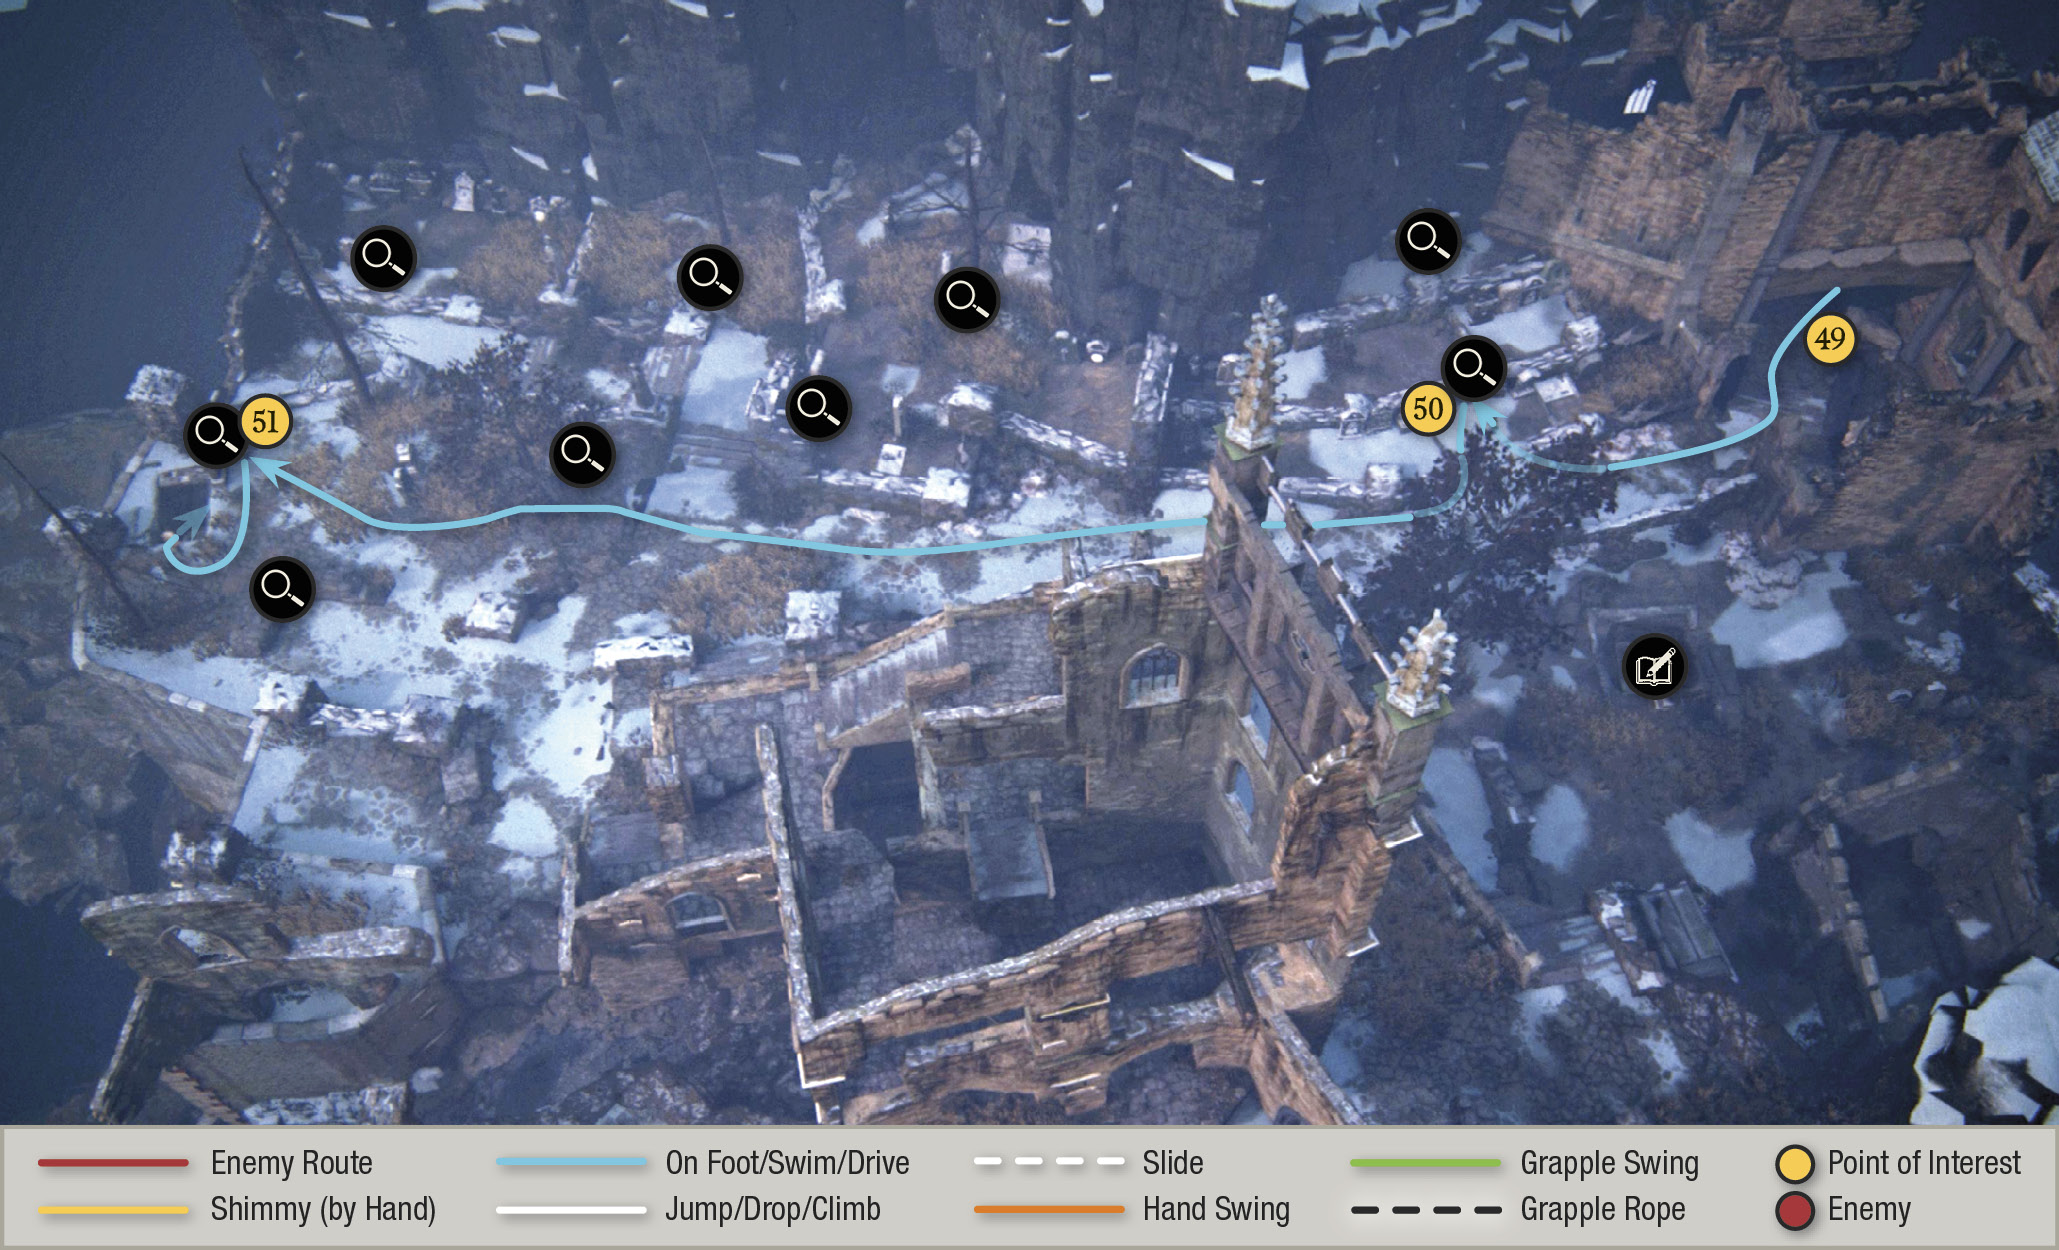
Now you’re in the cemetery grounds. Your objective here is to find Avery’s grave. Upon entering the cemetery, you receive an automatic journal entry. Nate sketches the Dormitories seen in the distance.
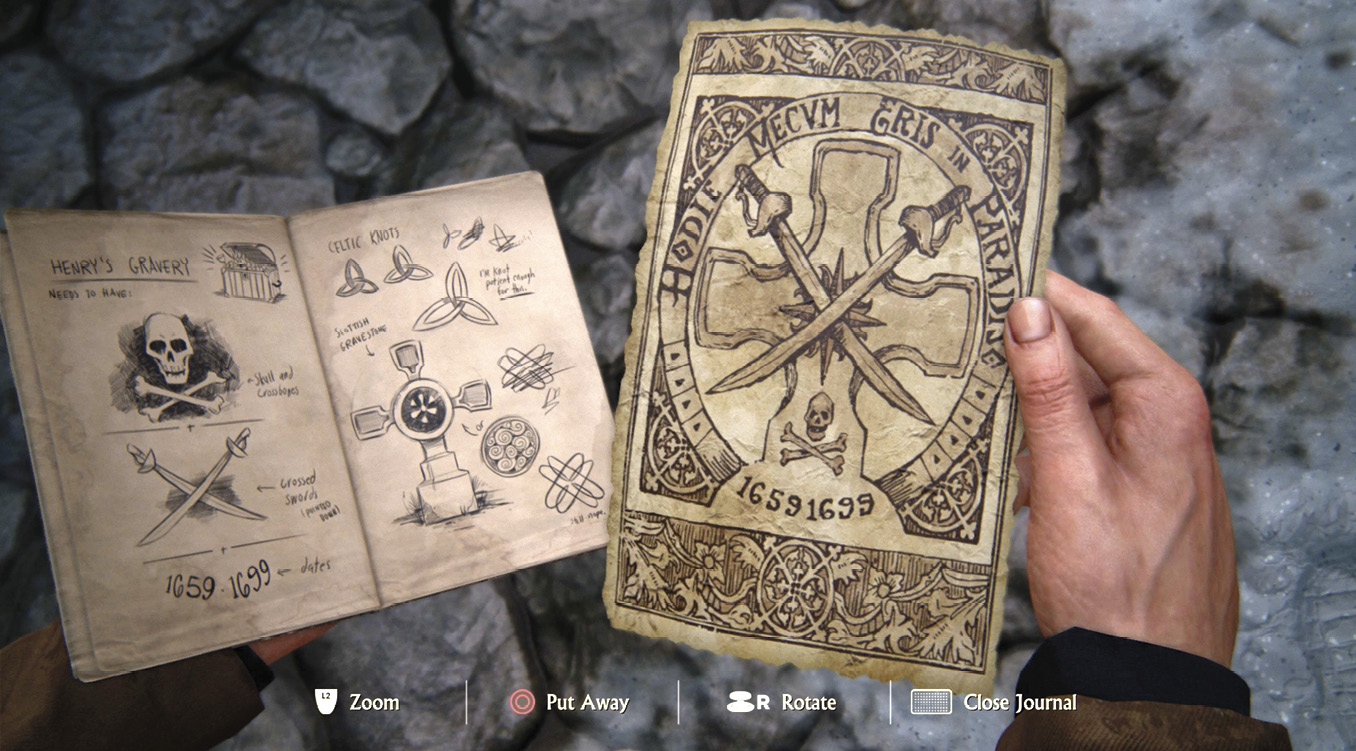
You can examine several tombstones in the cemetery; in fact, Sam finds one right away (50). But you seek a stone with features that exactly match the scroll in your journal: Avery’s skull-and-crossbones sigil; distinctive crossed swords pointed down; and his dates, 1659-1699. Check out the excavated grave nearby to make another Optional Journal Entry; Nathan sketches the excavated grave. Rafe’s been digging around the cemetery already, not a good sign.
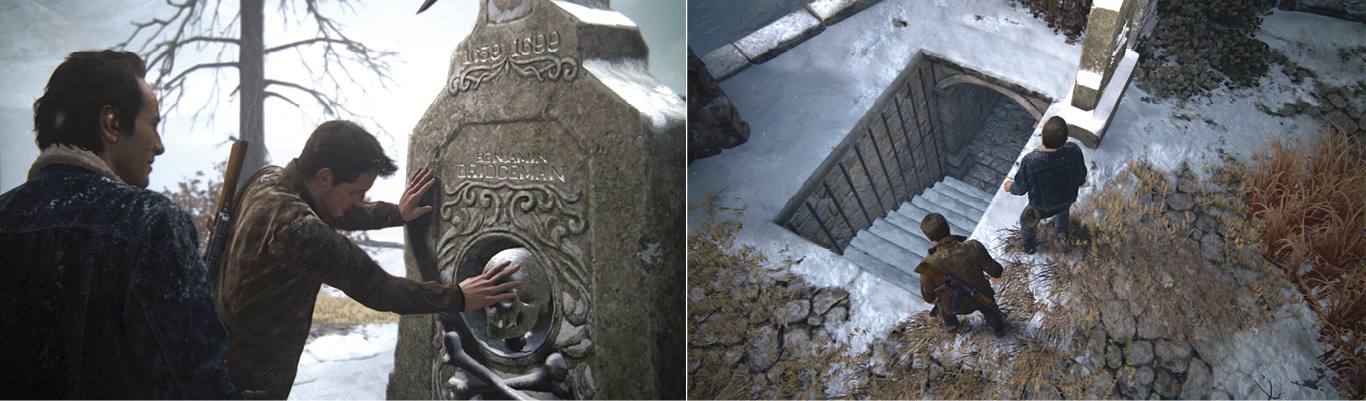
Look for the gravestone marked with the name “Benjamin Bridgeman” on the far side of the cemetery (51). Examining this opens a secret passage directly behind it. Enter and descend into the underground catacombs.
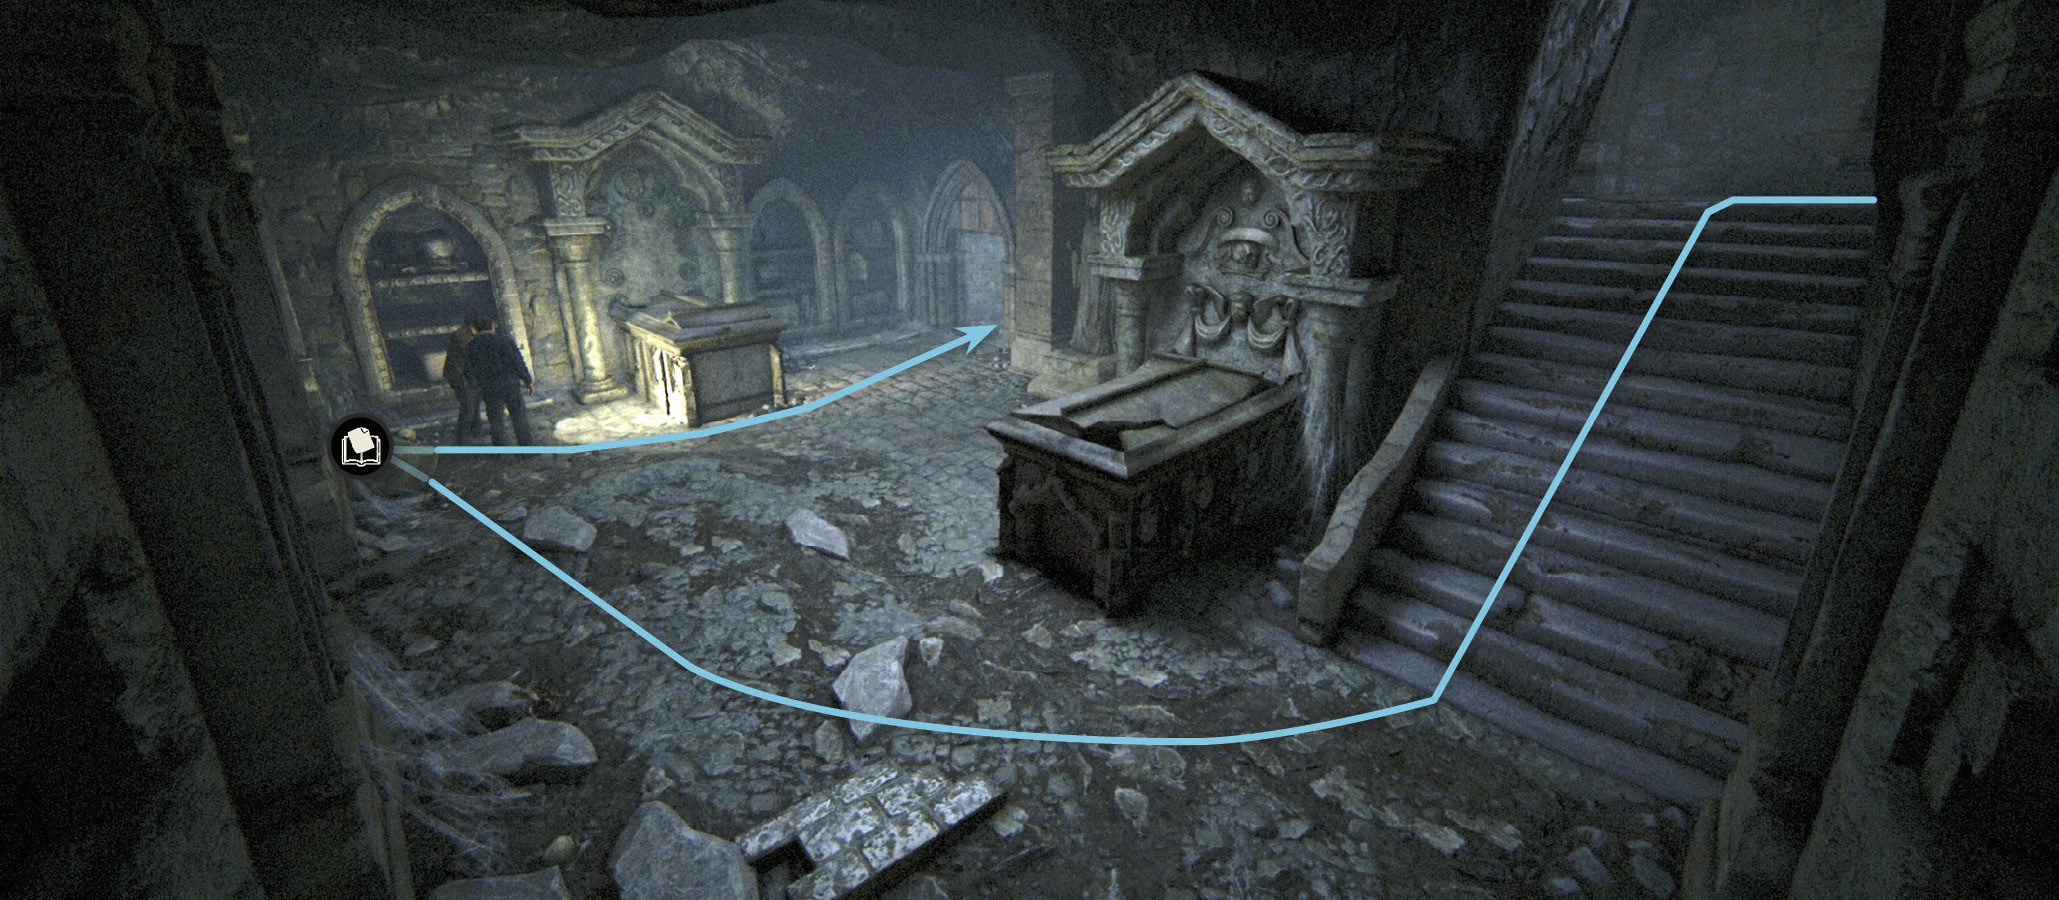
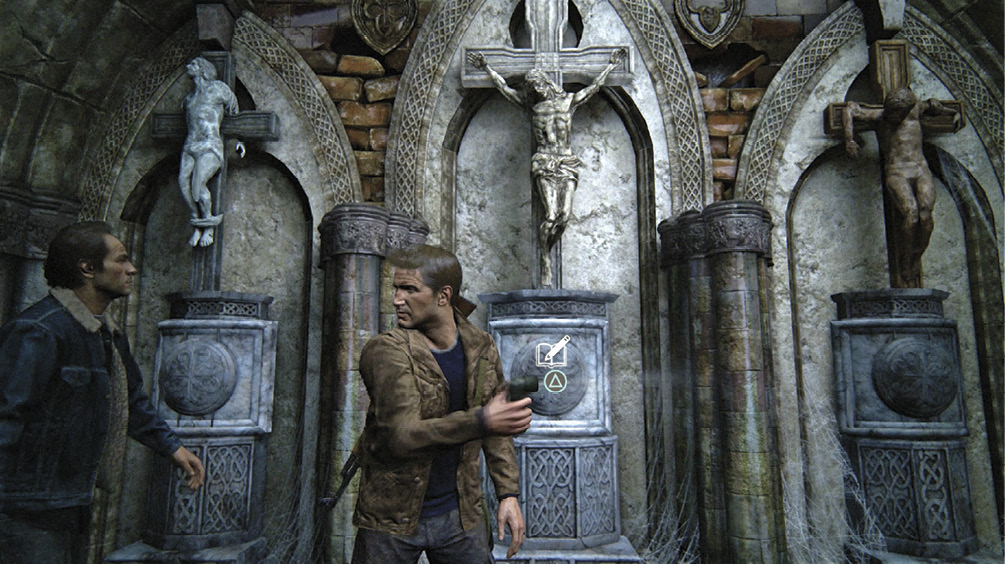
Descend the stairs to the first chamber and find the Optional Journal Note in the corner: a monk’s letter from 1697. Continue past the crypts and downstairs to an open room with statues on the wall depicting the Crucifixion of Christ. The depiction includes the two thieves, Dismas and Gestas, one hung on either side of Christ. Before you examine them, check out the alcove to the left to find a treasure. Then go make a journal entry at the three-cross display and speak to Sam when the Talk icon appears to trigger an Optional Conversation.
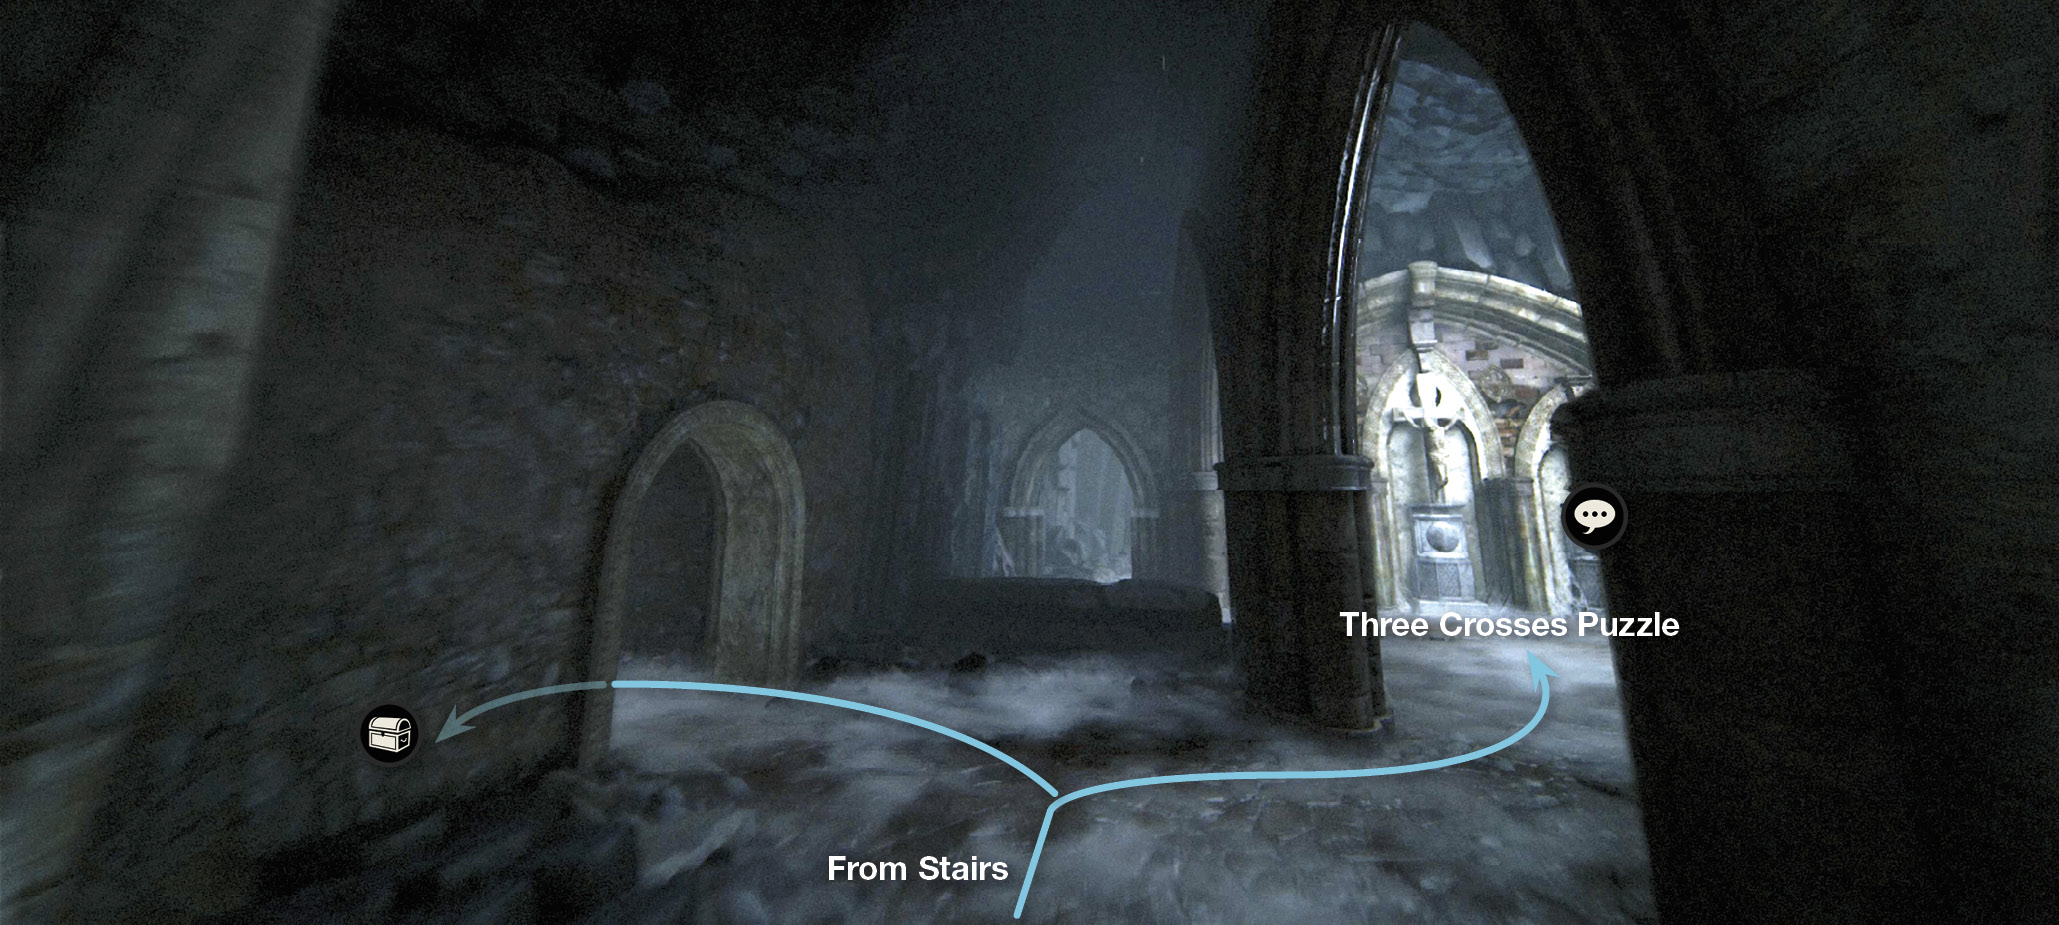

Scottish Ha’penny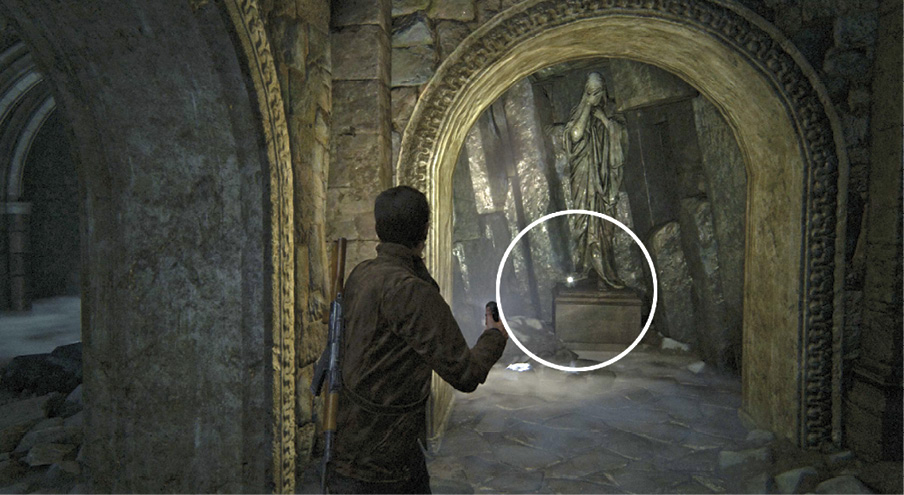
As you enter the Three Crosses Puzzle chamber from the stairs, turn left and find the Scottish Ha’penny at the foot of the statue in the first alcove.. |
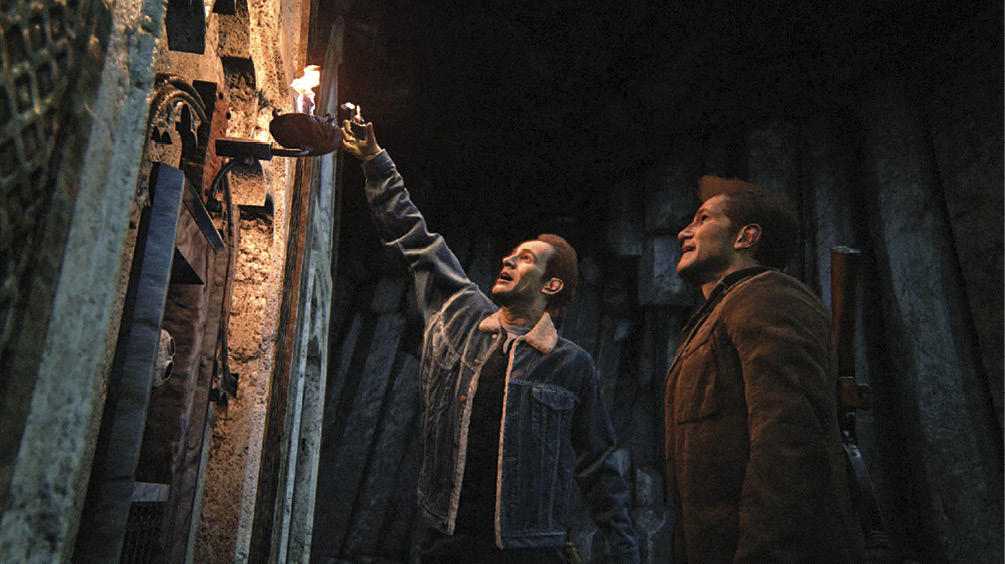
Now go through either doorway leading into the room behind the crosses. Examine the far wall and its pattern of star symbols embedded in stone; Nathan thinks it’s a door. Across from it, the wall directly behind the crosses features three panels. Examine the lantern above the center panel; Sam ignites its flame with his lighter. This in turn ignites receptacles behind the panels. Each receptacle’s flames are reflected through glass scopes in the panel that cast light beams onto the opposite wall.
Solve the Puzzle of the Three Crosses
Now go back out to face the three crosses. Your task here is to align the two light beams from each cross so they strike the correct stars on the back wall. When properly aligned, the beams illuminate six stars that form the pattern of the constellation Libra. Select a cross, then use your controller sticks to move and rotate the light beams.
Here’s the solution sequence, arranging the beams of the crosses in order from left to right:
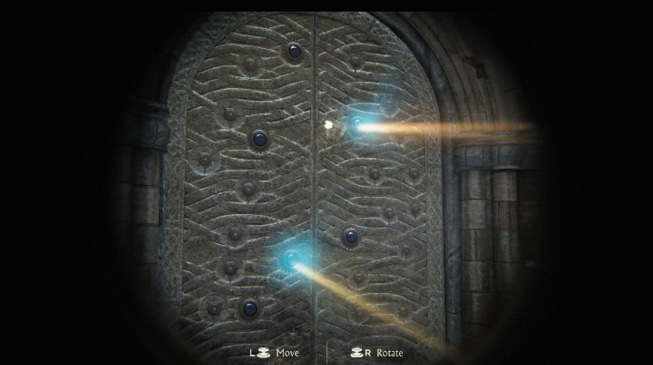
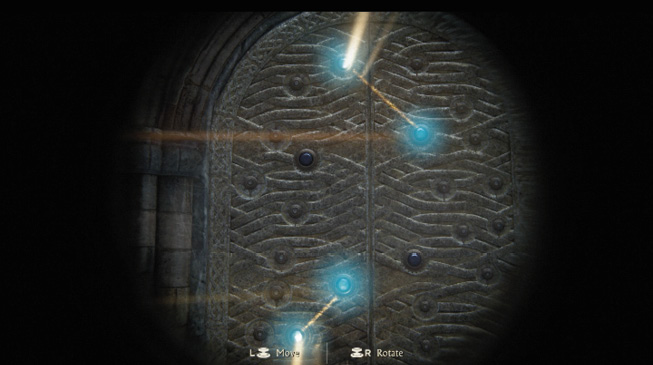
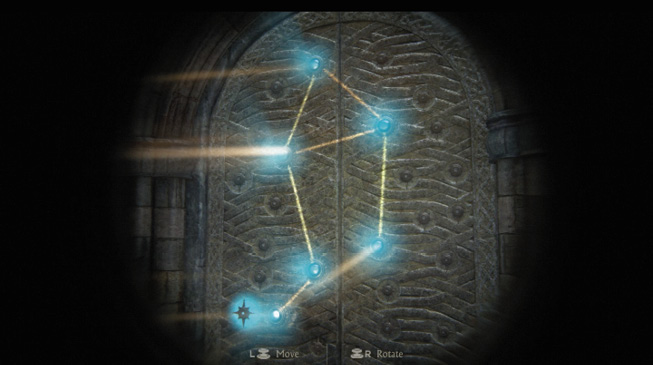
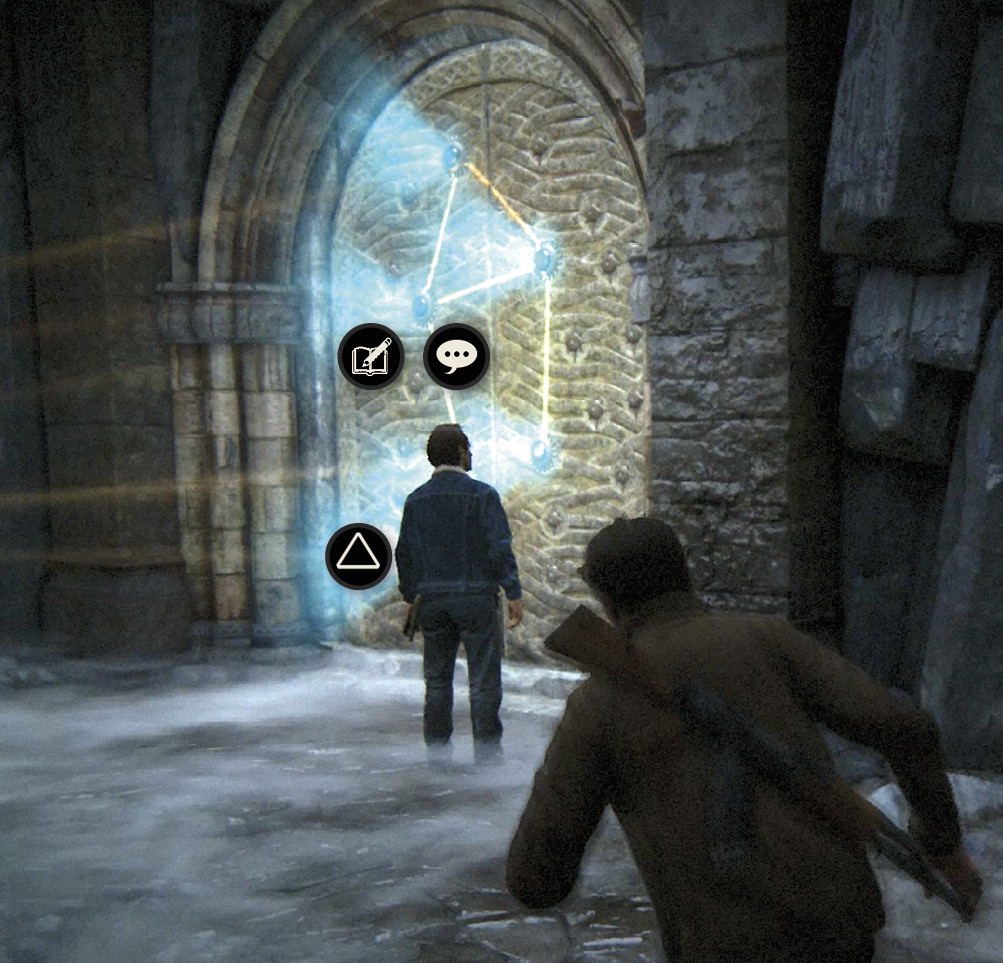
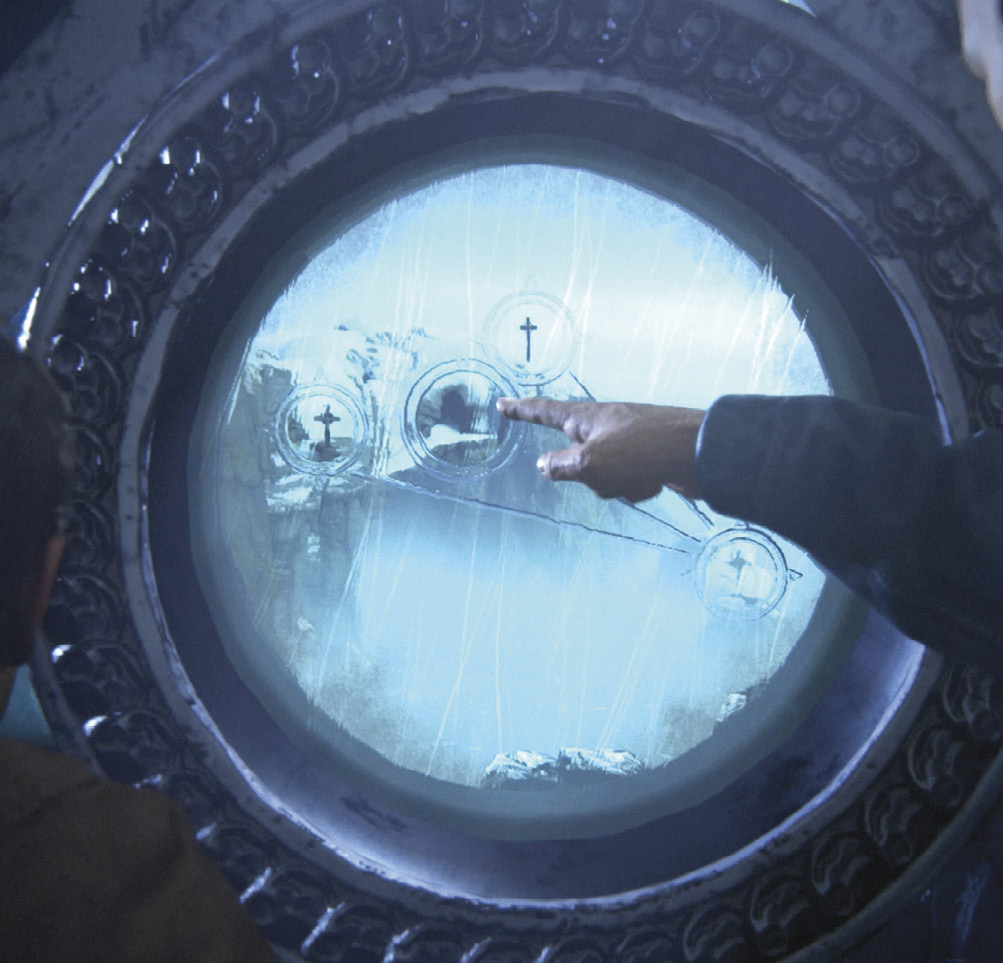
When correctly lit, the pattern activates an unlocking mechanism that pops out. Sam runs in to examine the Libra wall, and a Talk icon appears above him. Before you talk to Sam, stand back and look at the door so you can see the entire door and light puzzle to receive the Optional Journal Entry on Libra. Speak to Sam for another Optional Conversation then examine the marked spot to unlock the door panels. This reveals a window that frames a view of a cave opening on a ridge across the bay. This is your next destination.
Escape the Cemetery Grounds
Ghost In The Cemetery
Stage 1
The following optional strategy is to help you get to the exit gate following the rules of the “Ghost In The Cemetery” trophy challenge. You must get through the cemetery combat encounter without killing or being seen. This means no enemy should be killed—stealthily included. And no enemy should be brought to a full white awareness meter, and certainly not orange. Here is how it is done:
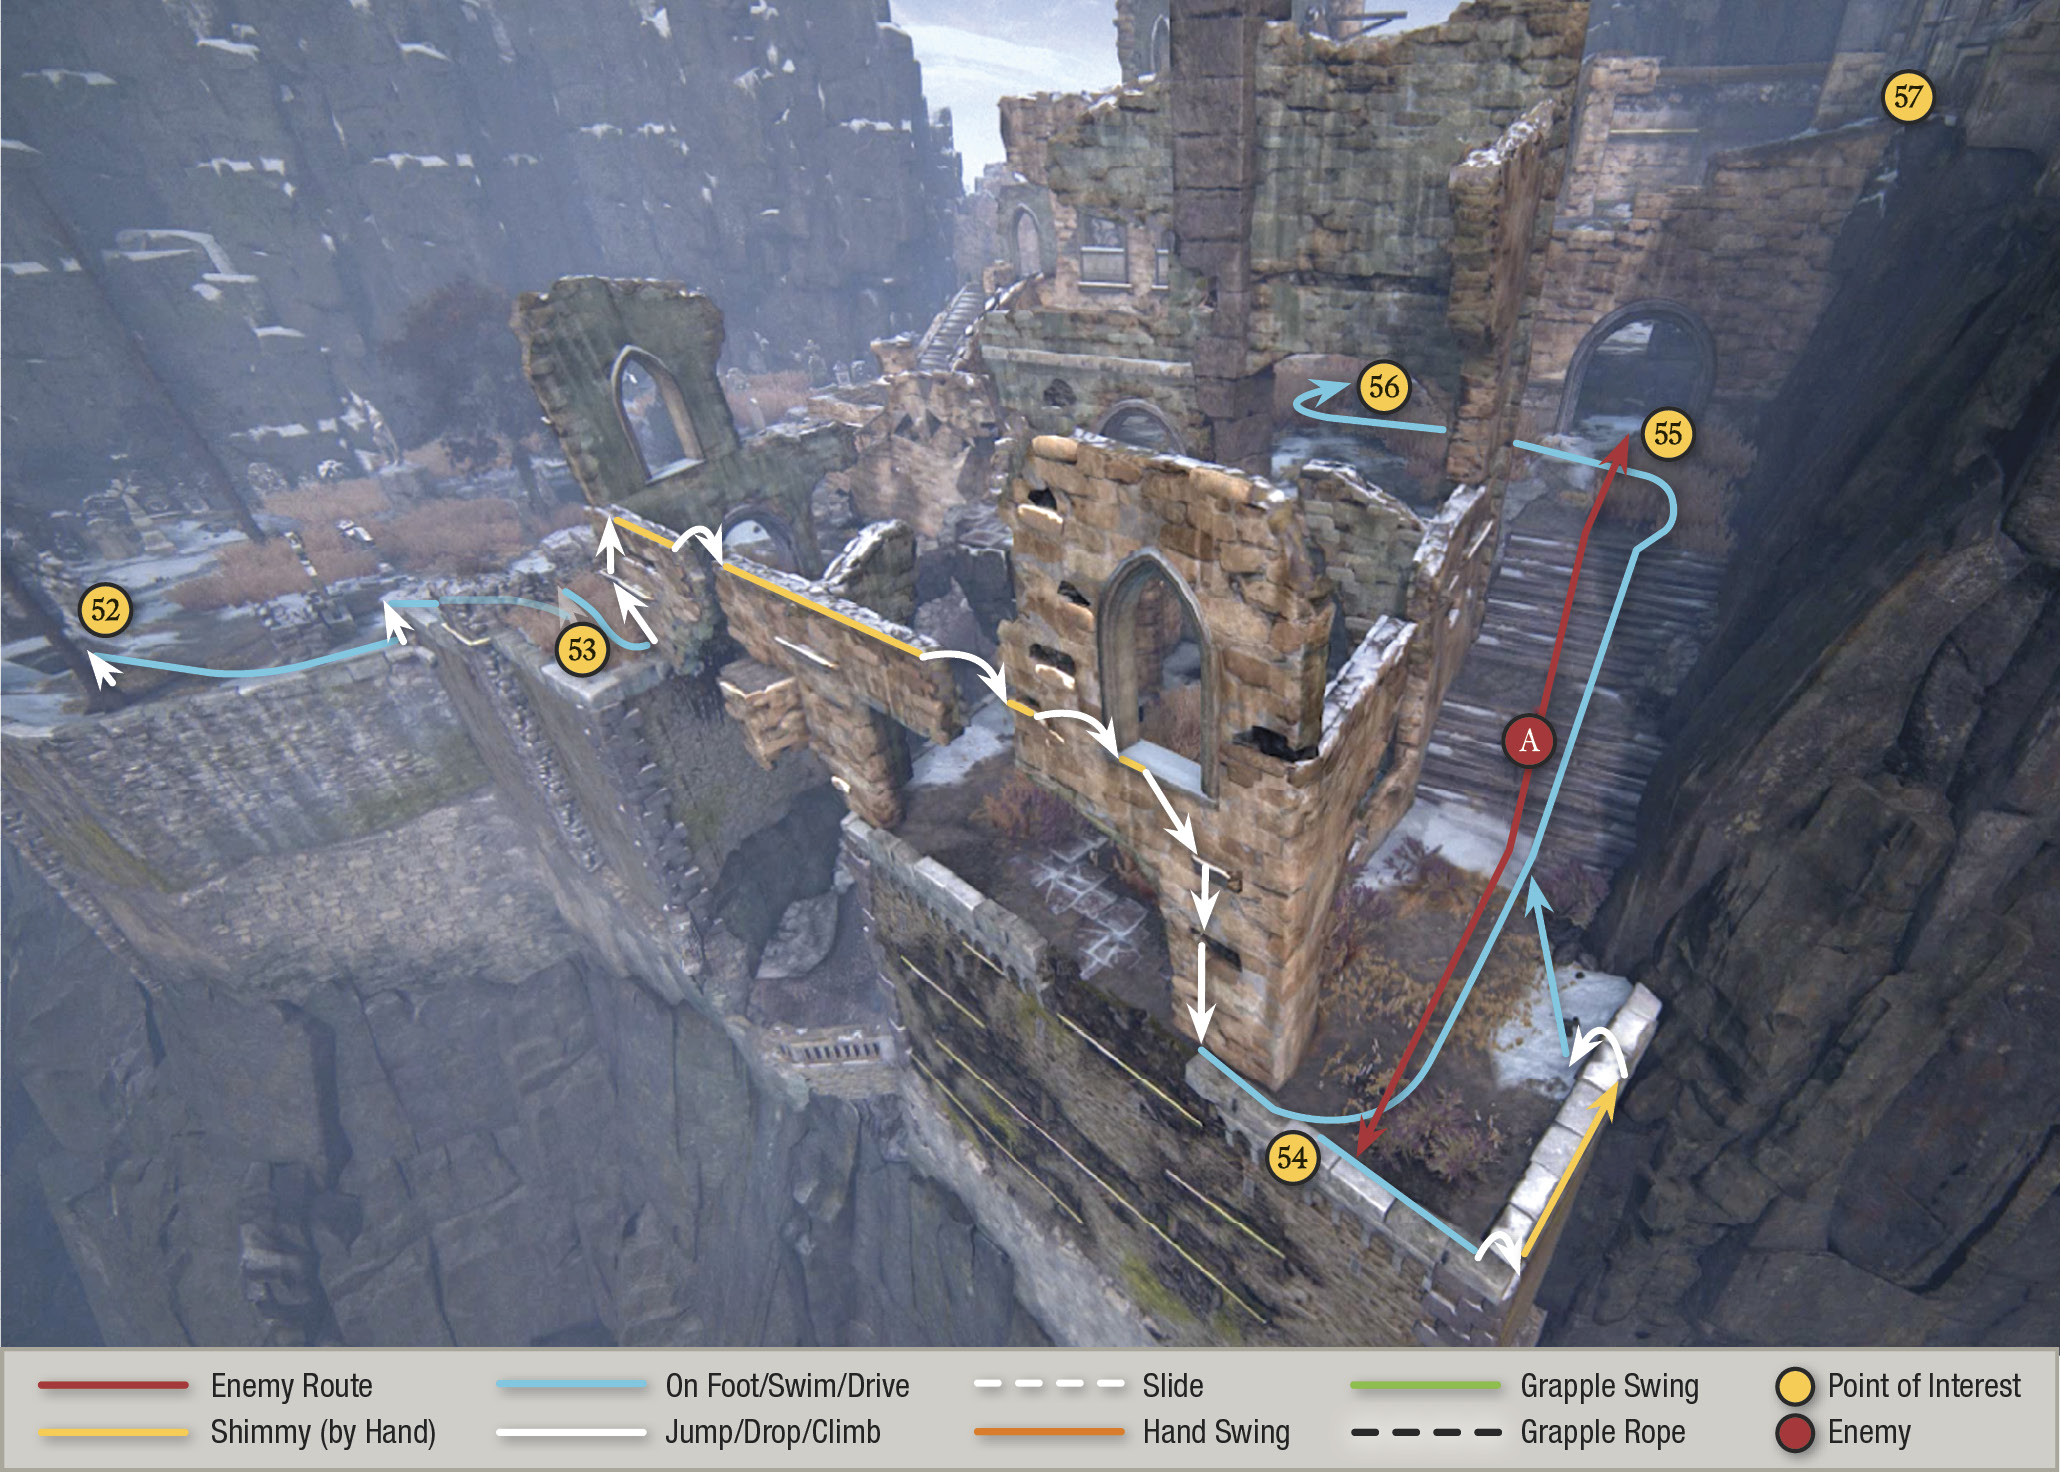
For speed and to sync perfectly with the enemies’ patrol pattern, it’s imperative that you start this route quickly and the moment you have control exiting the crypt (52) below the cemetery. However, if you do miss the patrol pattern sweet spot, we have worked in an area where you can hide safely to wait for the next opening in the patrol pattern.
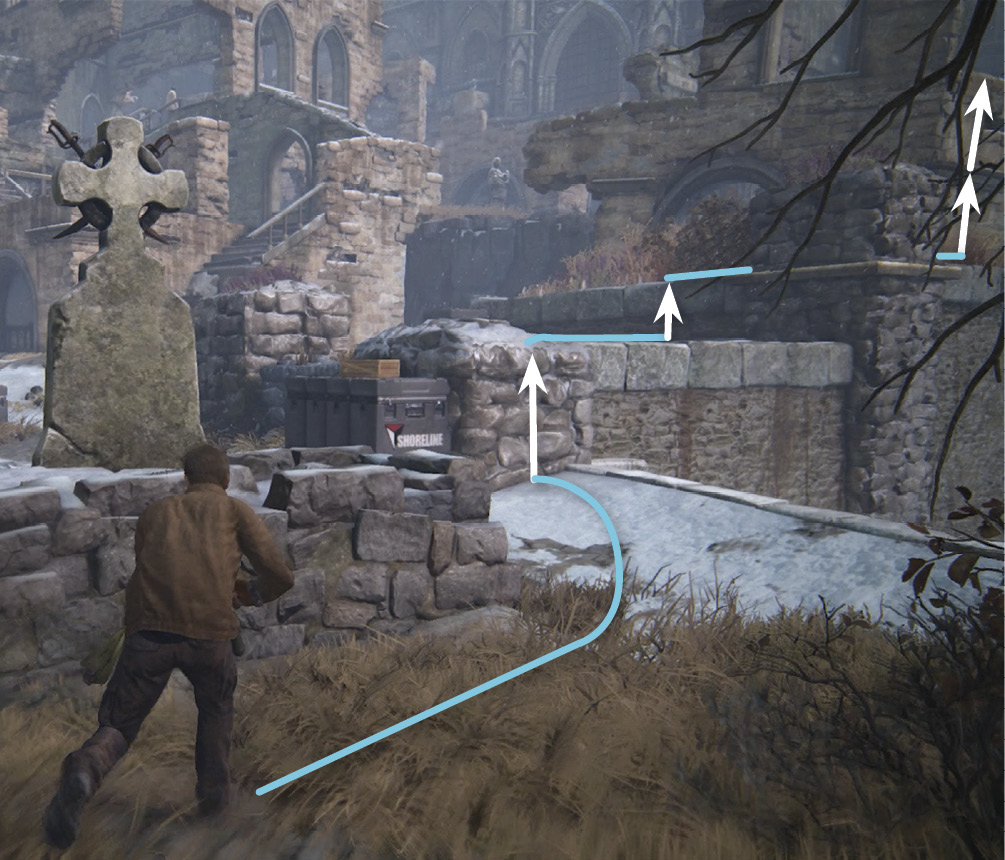
Follow our route on the first map straight out of the crypt stairwell to the short wall near the Shoreline crate and the edge of the mountain. Hop on the first short ledge step heading for the next ledge step that has the thick vegetation (53). Avoid climbing the taller corner column on this second ledge; instead shoot straight for the step where you have a clear view of the vegetation. Continue to the outside wall to your right, flush with the edge of the mountain.
Without slowing your pace, traverse the outer wall as we have indicated on the map. Don’t stop; there is no risk of being seen during this acrobatic feat. Notice while shimmying along the middle wall section that you can see door (55) through the crumbled building you are climbing on. If you do not see guard (A) at doorway (55), you are in sync with the patrol routes. He will be heading that way but not at the door yet. This is good. If you see him at the door already, you probably have to see our alternative waiting area described next.
Climb all the way to the right corner of the building and then drop on the narrow ledge (54) below. This is the waiting area if you need it. If guard (A) is just getting to the door (55) you can see in the distance up the stairs, then you can run toward him. If you saw him at that door while you were moving across the wall, you should jump over the ledge’s edge and shimmy around the corner to the right. This guard will look over the ledge’s edge, so make sure you are on the right side of the corner.
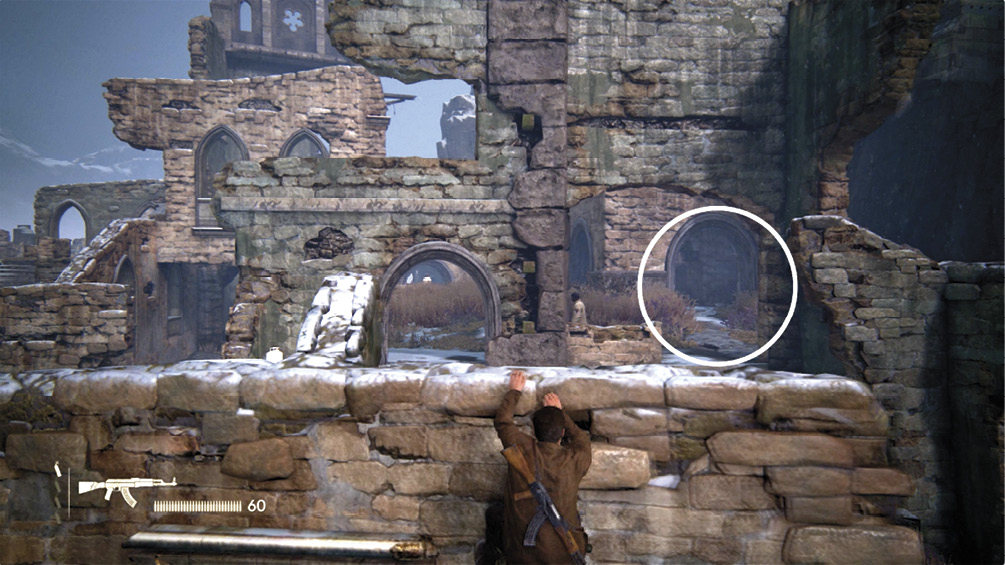
If you are in sync with guard (A)’s patrol route, run up the stairs as soon as your feet hit the ground and aim for the camouflaging foliage all around this doorway (55).
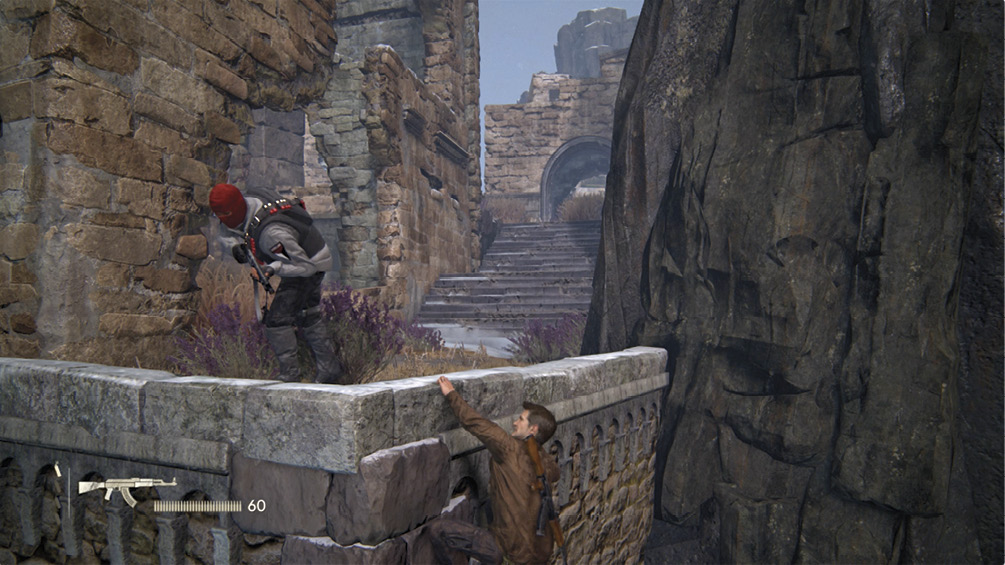
Stage 2
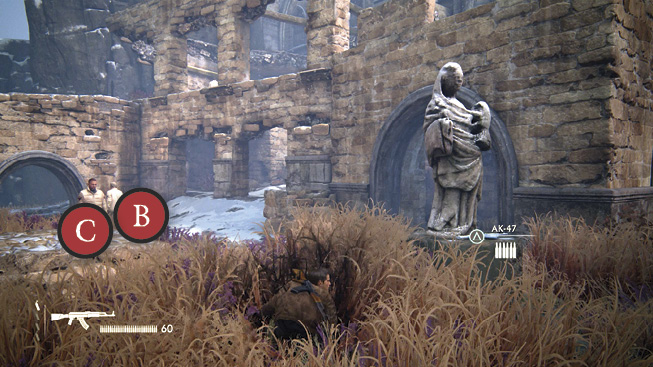
Roll through the pathway clearing from one patch of vegetation to the next near the statue (56). Stop in the grass on the far side of the statue and watch guards (B & C). Make your move as indicated on the map the moment guard (C) turns to follow guard (B) who just started walking away from you.
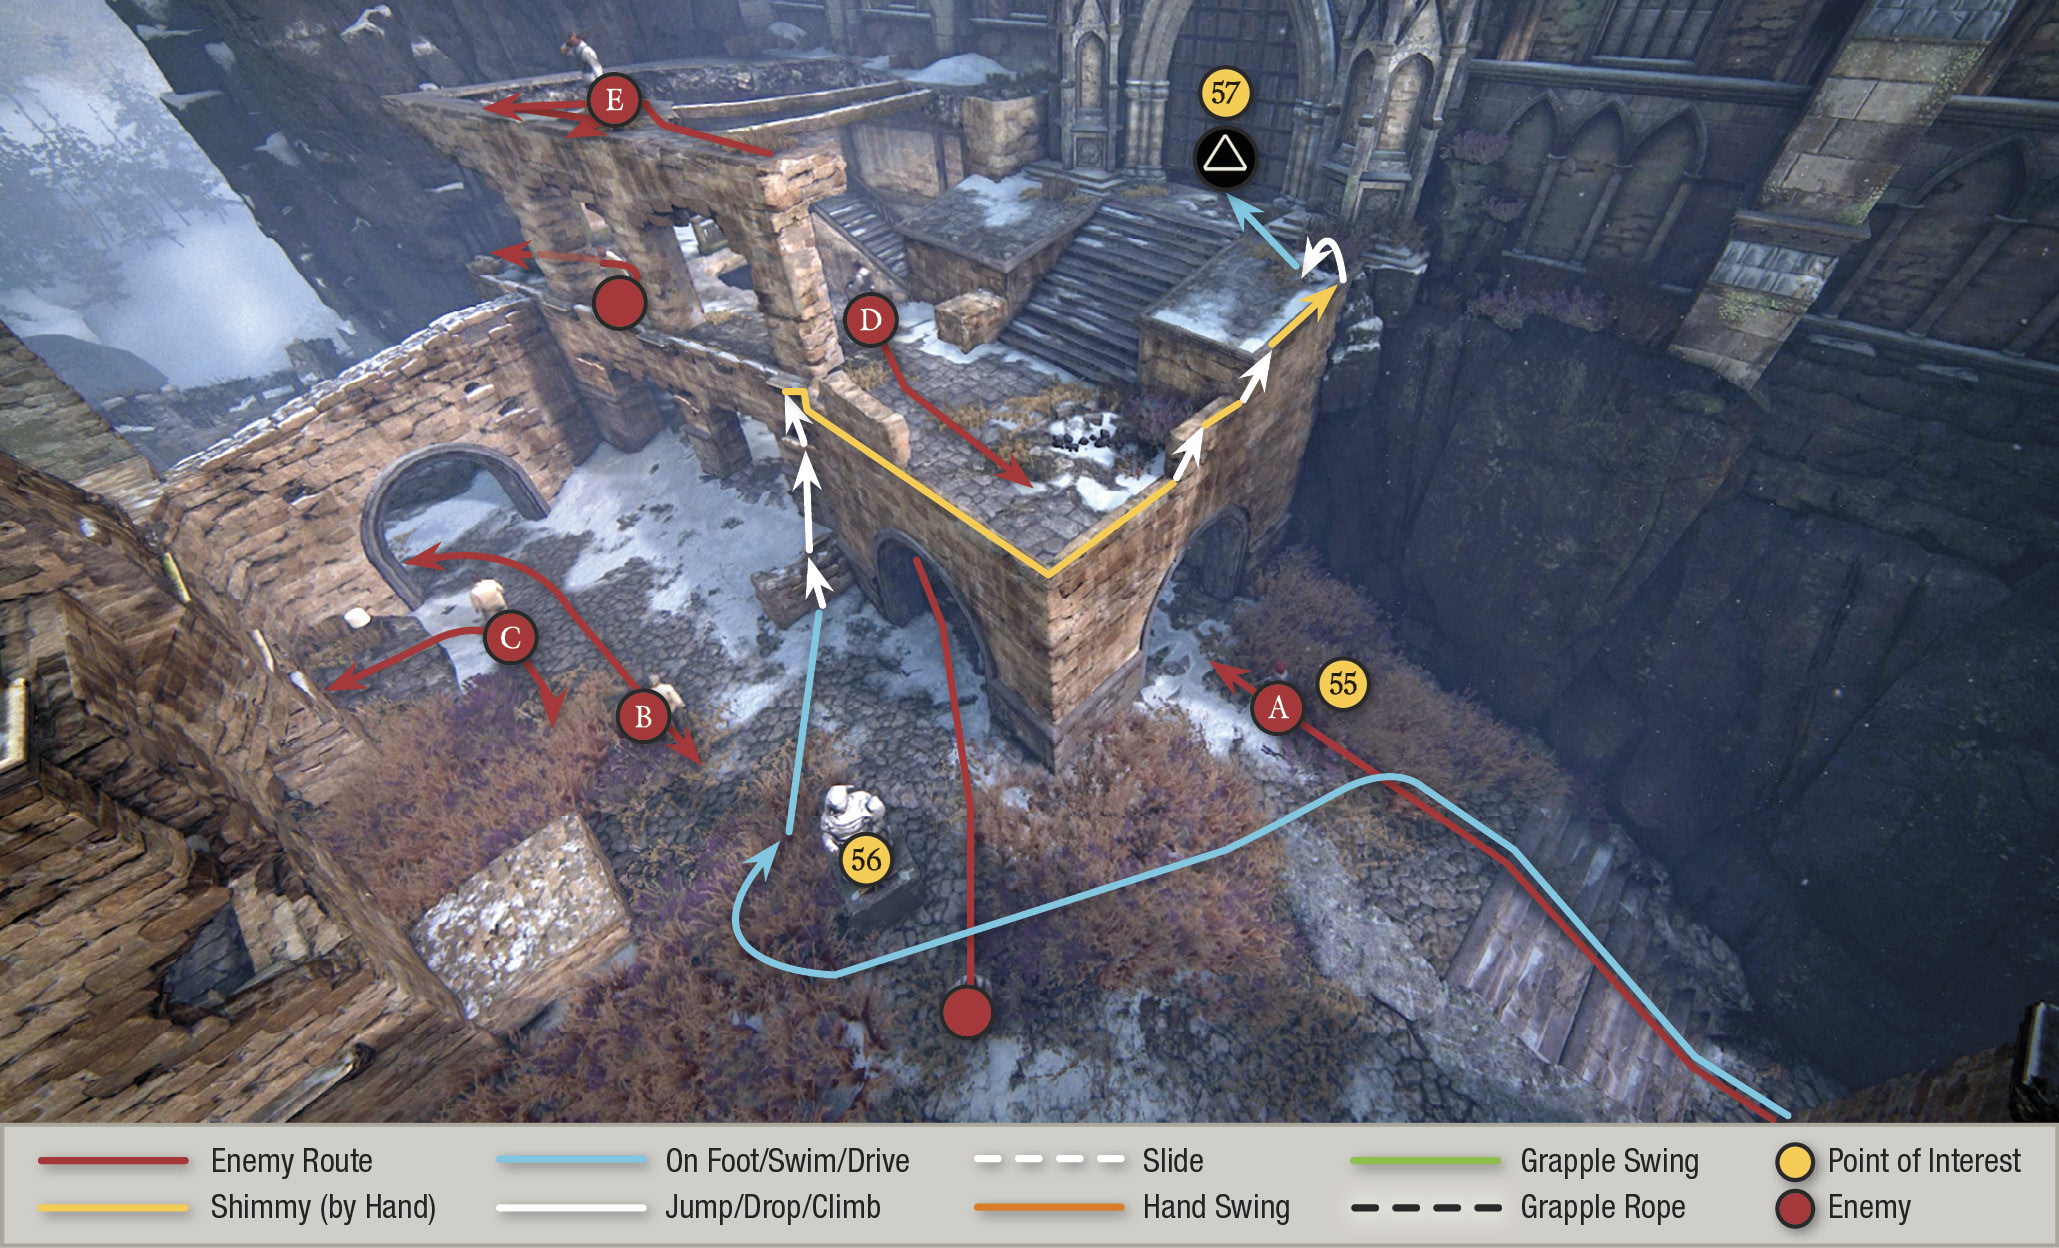
Run to the short wall to the left of the archway, and jump to the handhold to the left. Climb so that you are hanging from the top ledge by your hands. Immediately start shimmying right all the way around the corner until you can go no further (a couple hand jumps are required to shimmy along the ledges lining the steps to the exit). You hear guards (D & E) talking about when Nadine tossed you out the five-story window at the auction. They face each other during this conversation. Guard (A) on his patrol route is your main concern, but things will sync up and you will have an opportunity to move before he enters sight range.
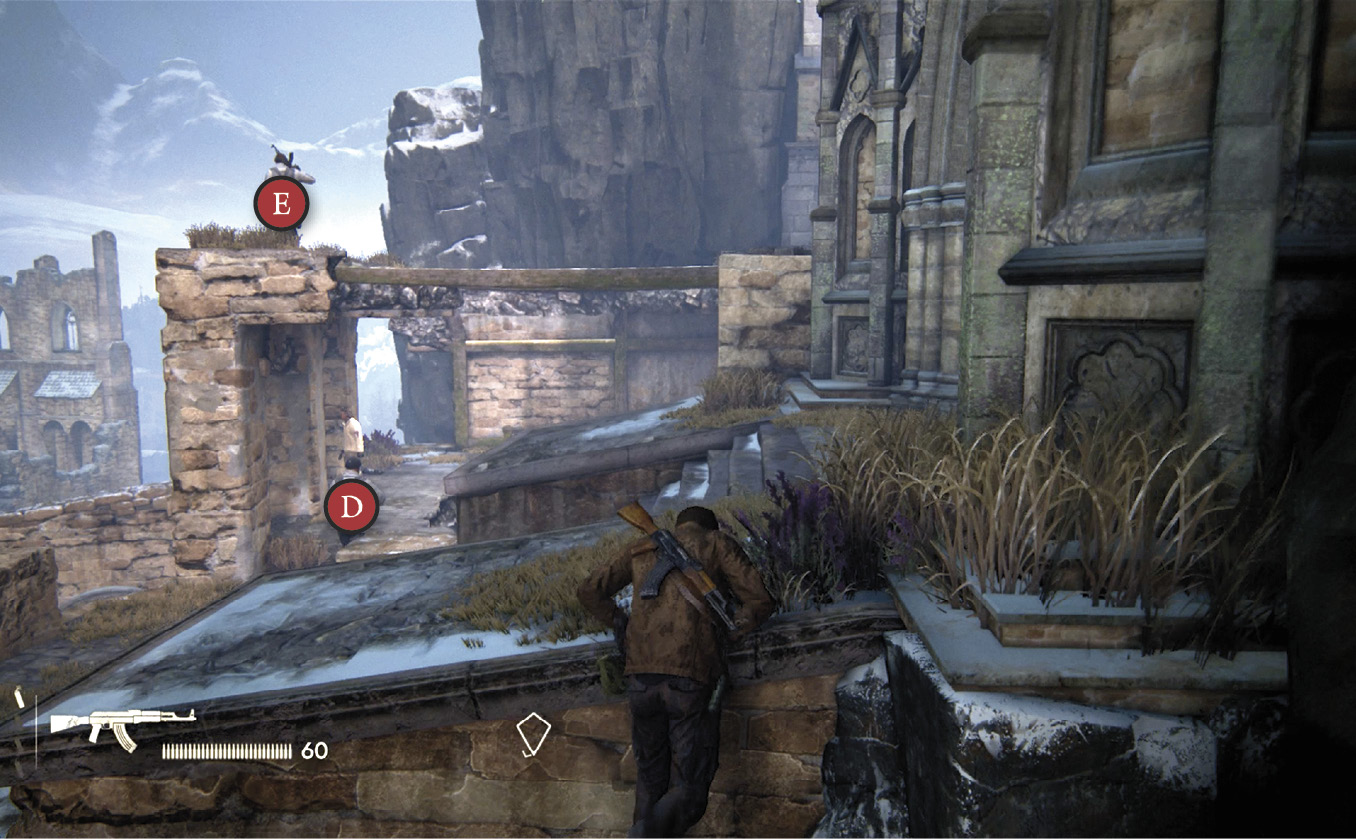
As soon as guard (E) turns away from you at the end of this conversation, pull up and dash to the cathedral exit (57) and start mashing like there’s no tomorrow. Once the door is at shoulder height, you become invisible to the enemy and you are home free. Walk through the door and receive your trophy!
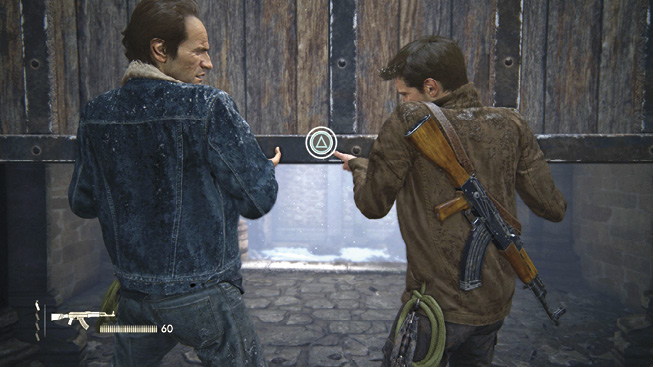 like a woodpecker on a fruit tree. Once the door is up to your shoulders you’ve made it!
Just Fight Your Way
Retrace your route out of the catacombs (or just follow Sam). When you reach the top of the exit stairs (52), get ready: A large squad of heavily armed mercenaries in body armor has now deployed into the cemetery grounds. Observe the guards patrolling ahead at the first ruin. Then use the tall grass to advance to the grass patches (53, 54) near the ruins doorway.
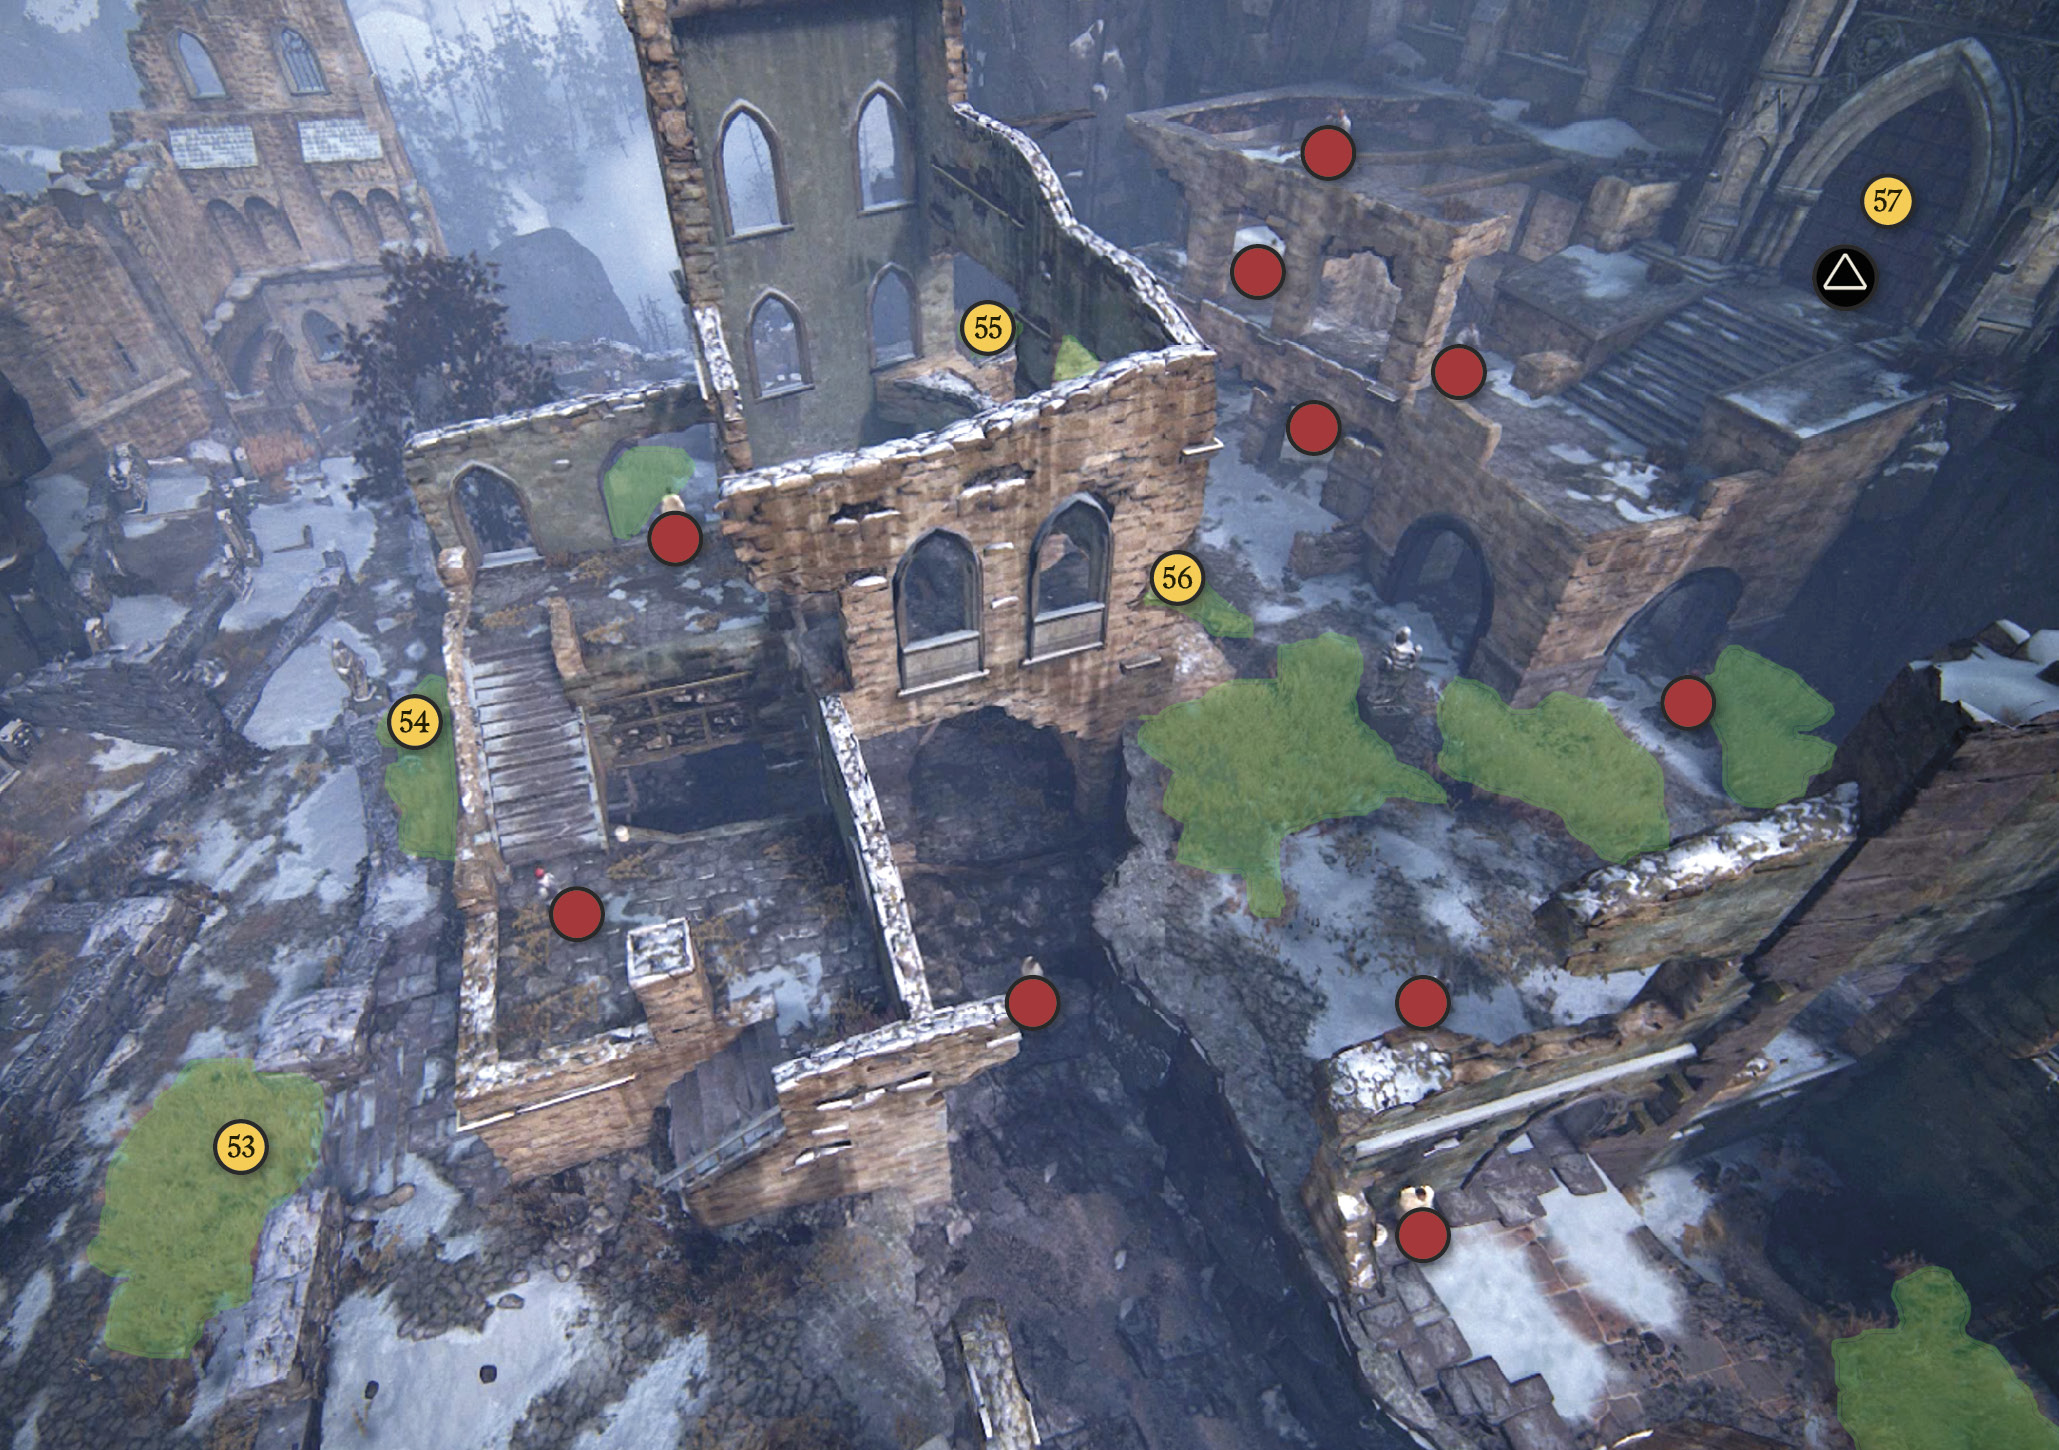
From here, you can take cover next to the door and wait for the guard to return for a stealth takedown. Climb the wall face and hang above the door to pull down the guard on the upper level. Then move to the grassy areas (55, 56) to take out other guards. When the area is clear, one guard remains near the exit doorway (57). Take him out, then open the exit gate with Sam.
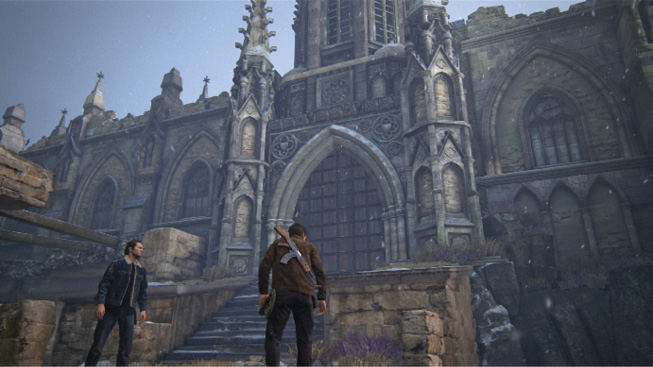
Climb to the Cave Entrance
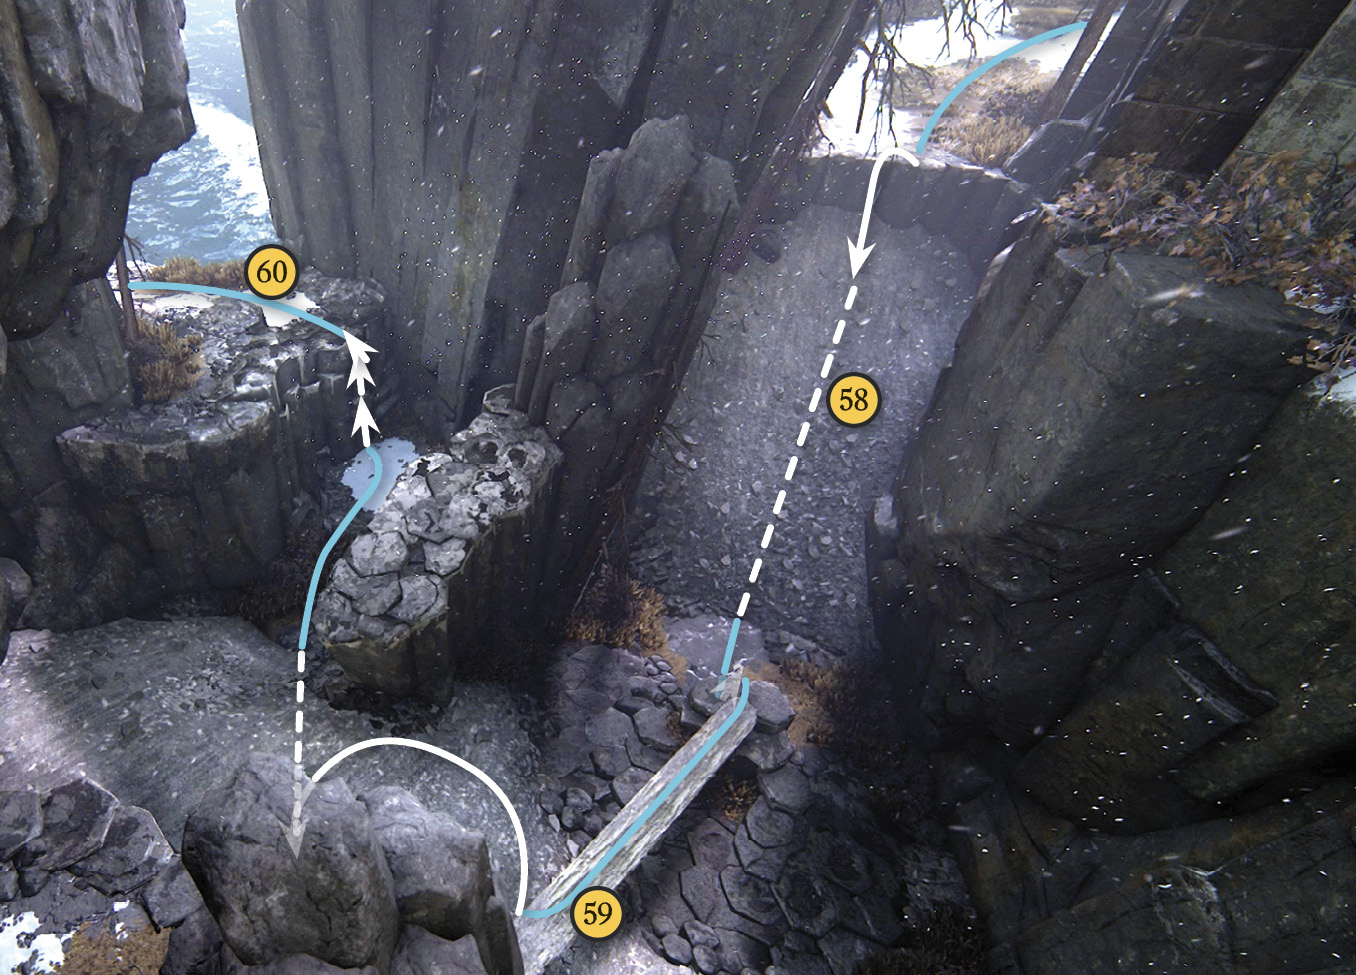
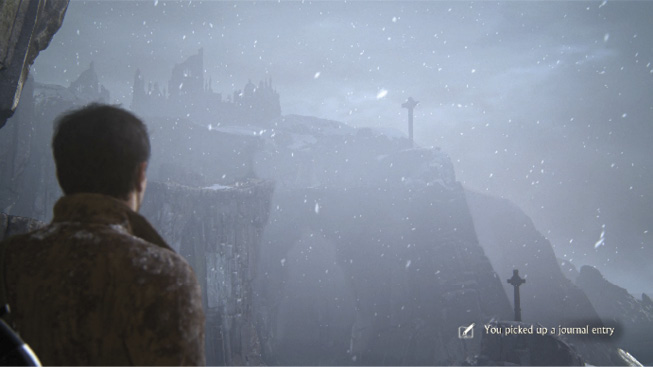
Beyond the cathedral exit gate, turn left and slide down the rockslide (58). At the bottom, hop onto the narrow wall and walk to the top (59). Then hop across to the ledge, walk around the boulder, and drop onto the next rockslide. Proceed to the low cliff and scale it (60). At the top, you can press L3 to see your destination on the distant ridge and add an automatic journal entry, a sketch of the cliff-side view of the three crosses.
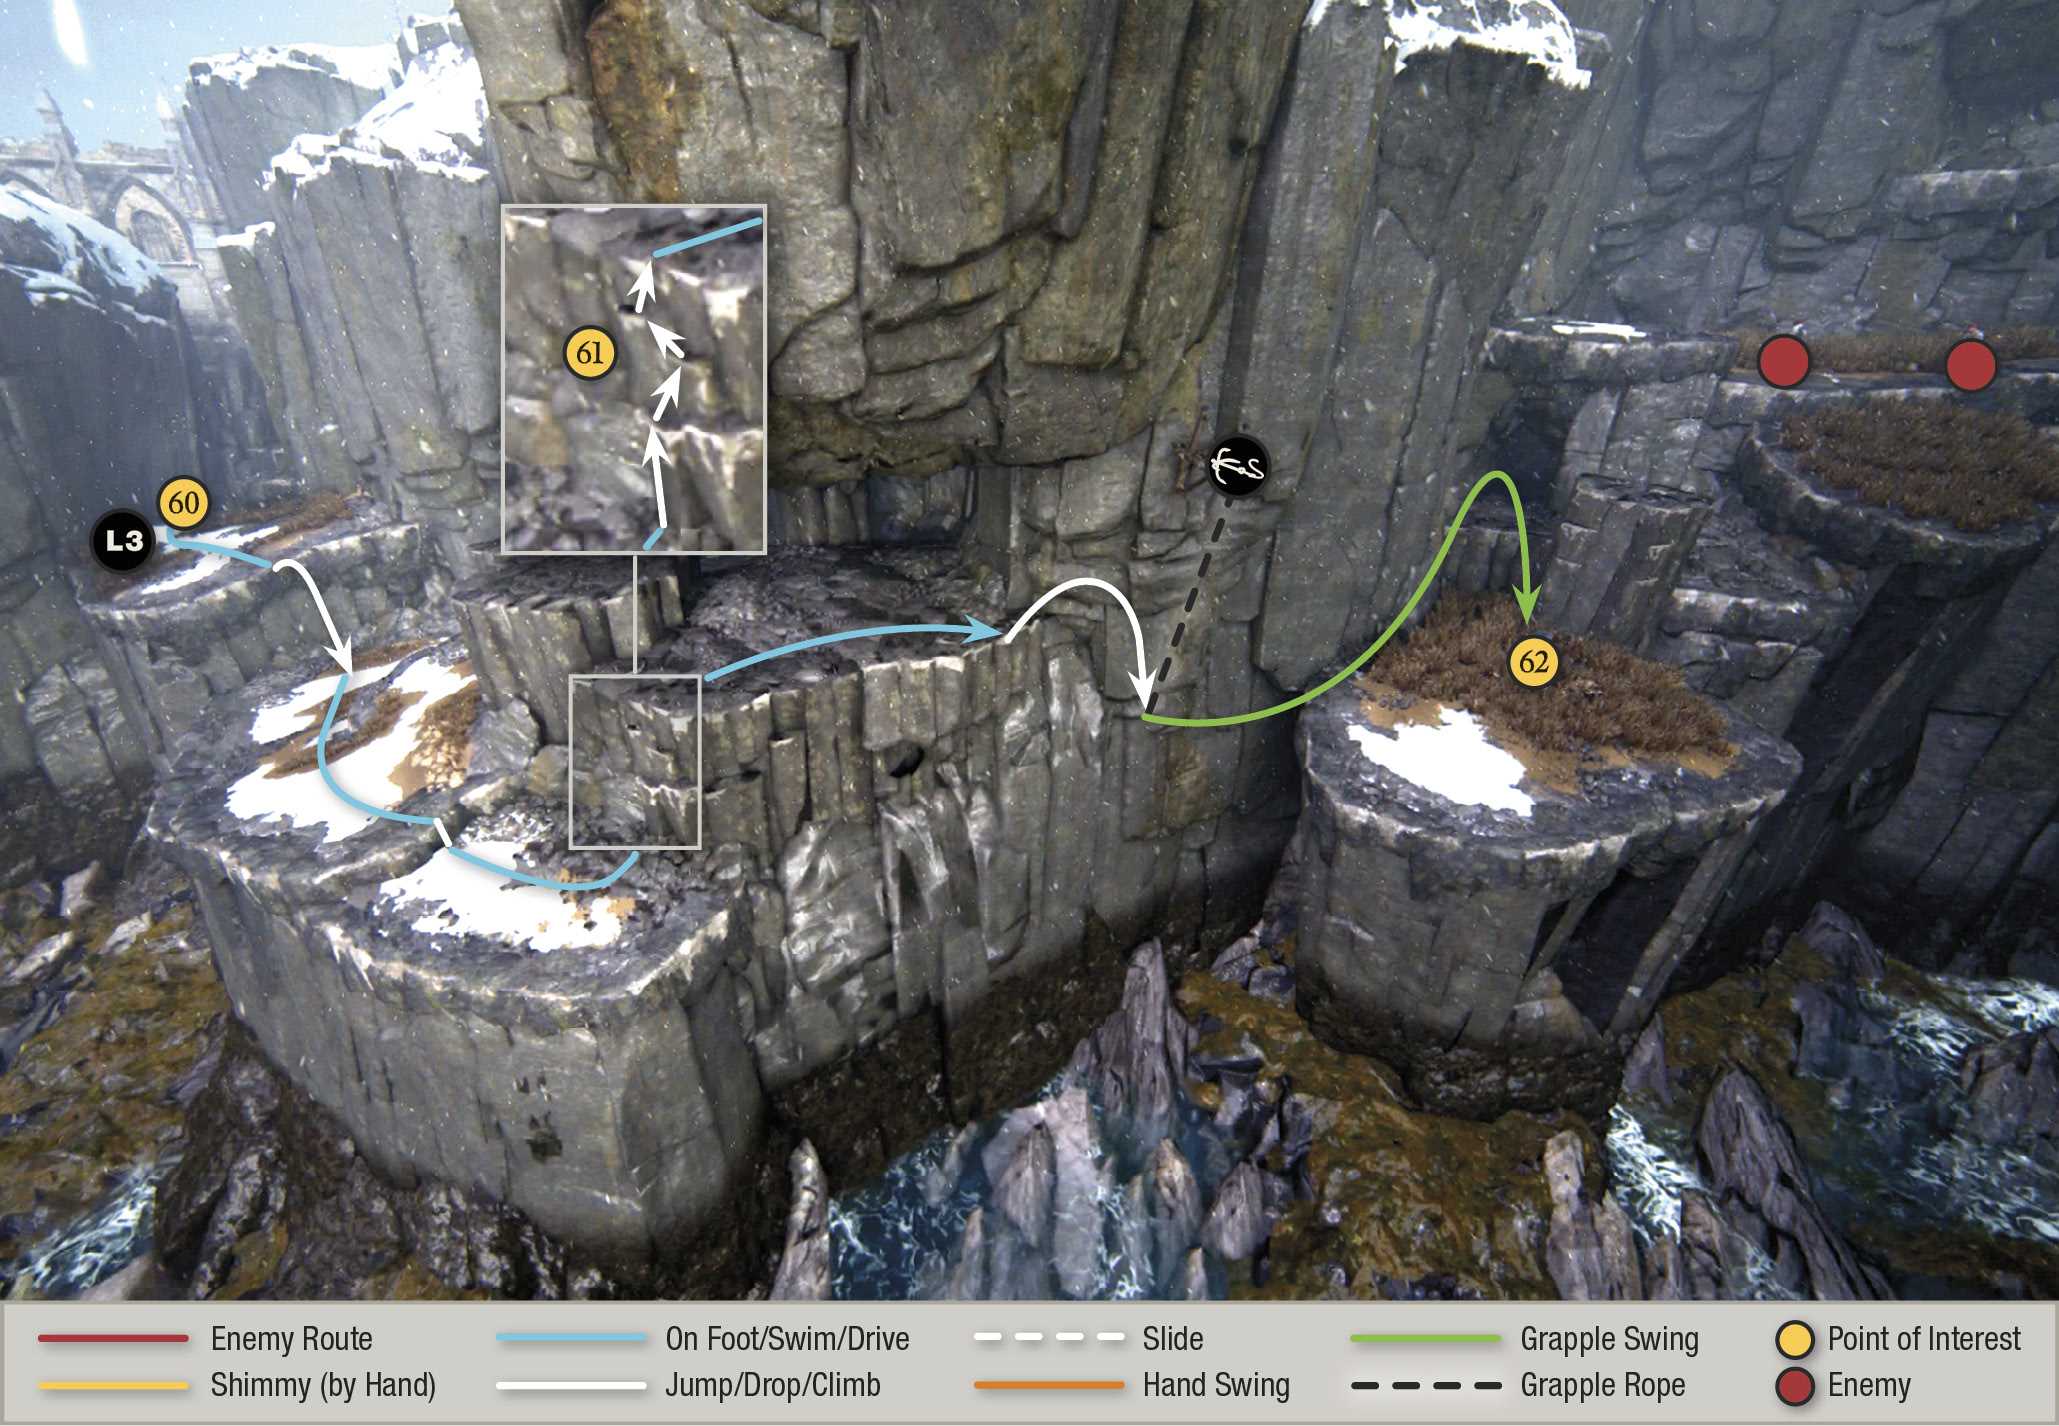
Now start moving along the coastal cliffs; Nate checks in with Sully via radio. After a big drop, continue across the headlands to the cliff (61) and climb it. Soon you reach a gap; spot the grapple point above on the cliff. Use it to swing across to a grassy plateau (62). Your landing there triggers the deployment of a Shoreline squad ahead!
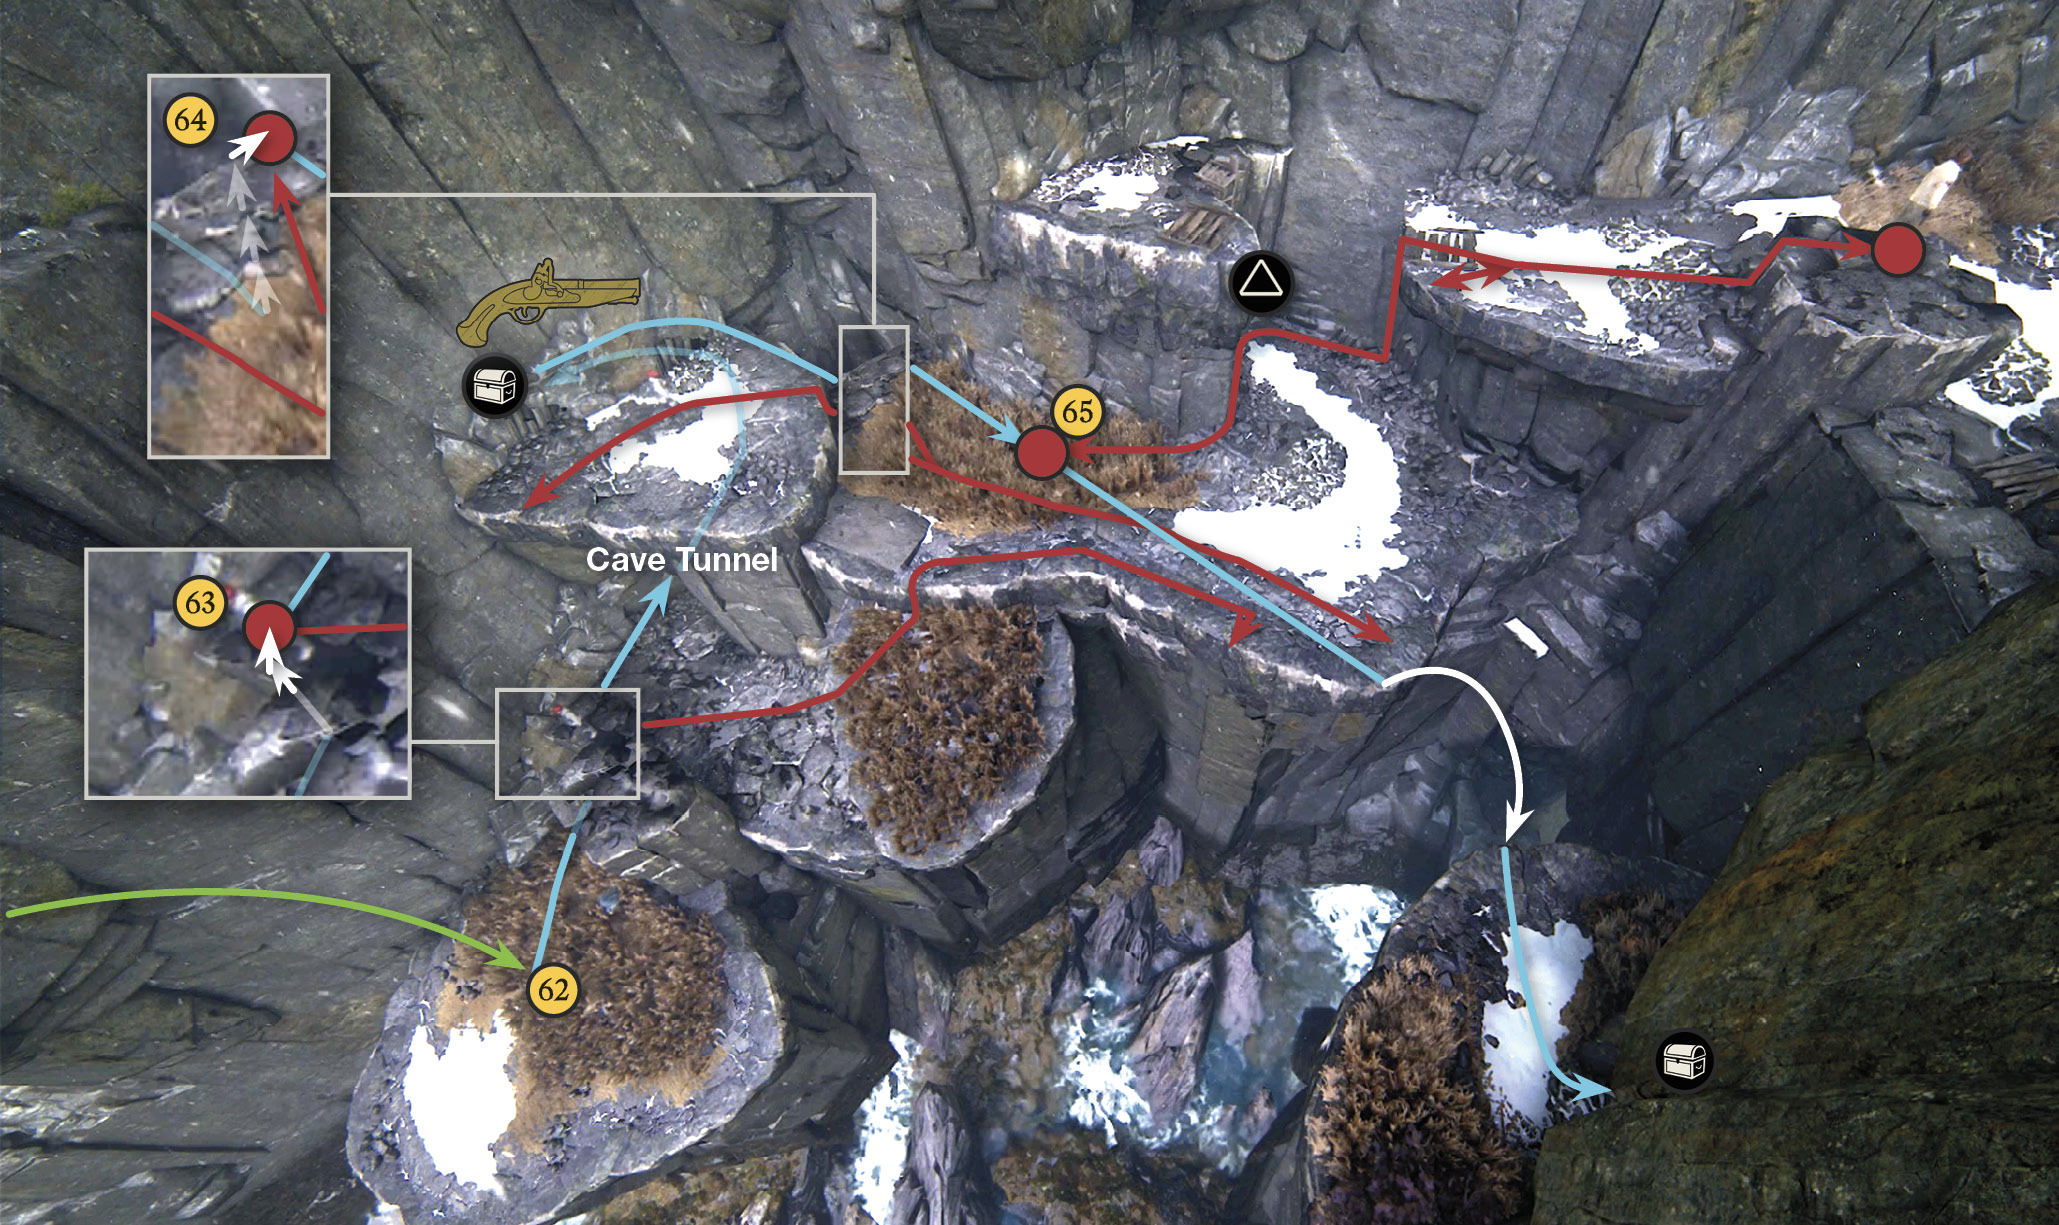
Jump to grab the next ledge (63) and hang there until the guard approaches. Make sure no other guard above is watching, and then pull him over the ledge. Hustle into the cave just ahead, take the first right turn into the low tunnel, and follow it to a treasure. (You can also find a New Weapon, a “very pirate-y” Flintlock pistol next to a pirate skeleton.)
When you exit the low tunnel with the treasure, turn right and climb the wall grooves to hang on the edge of the next terrace (64). Wait there until the next guard approaches, then pull him down. Climb up into the tall grass and creep forward to the spot where the last guard approaches after he jumps down (65). Take him down in the grass! Jump across to the far platform and explore the cave to find another treasure.

Slipjoint Clasp Knife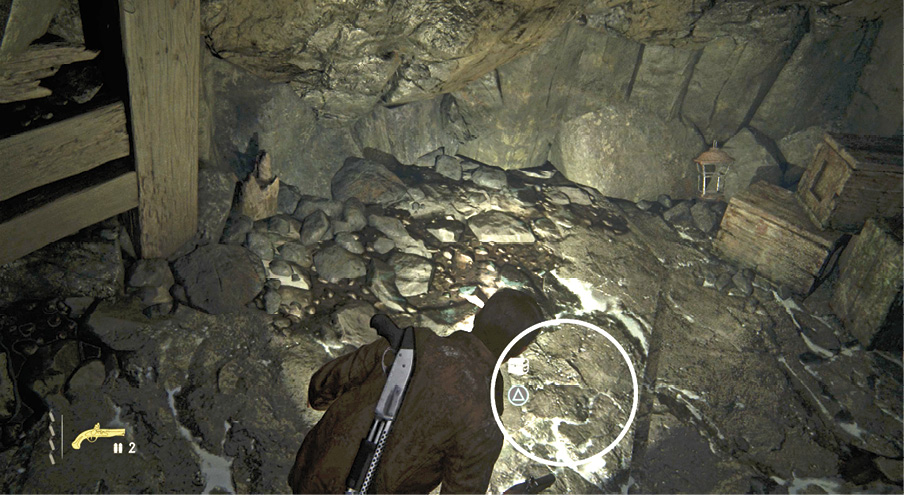
After you get through the cathedral gate and grapple-swing across to the coastal terraces, enter the cave on the first terrace. Inside, take the first right turn into the low tunnel and follow it to the Slipjoint Clasp Knife at the end. |

Pewter Singing Bird Box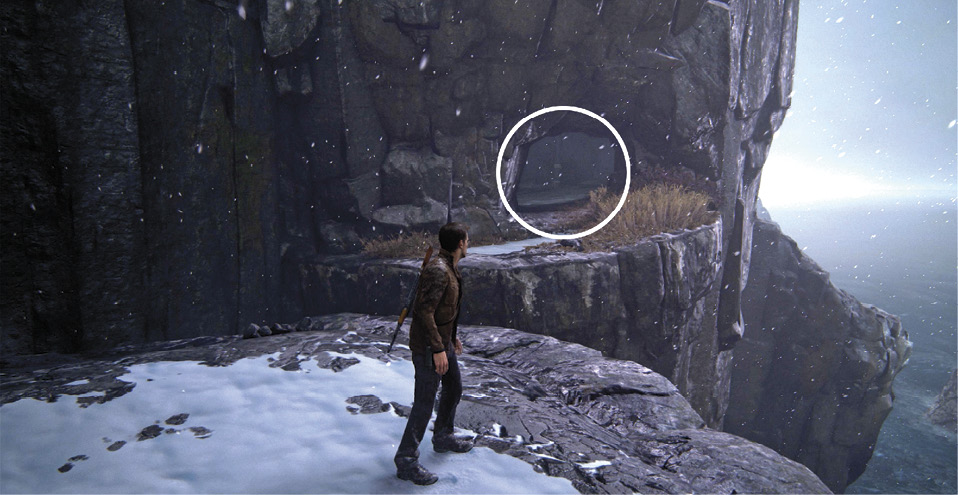
From the broken rope ladder, turn around and make a running leap across the gap to the opposite ledge. Enter the cave and find the Pewter Singing Bird Box inside. |
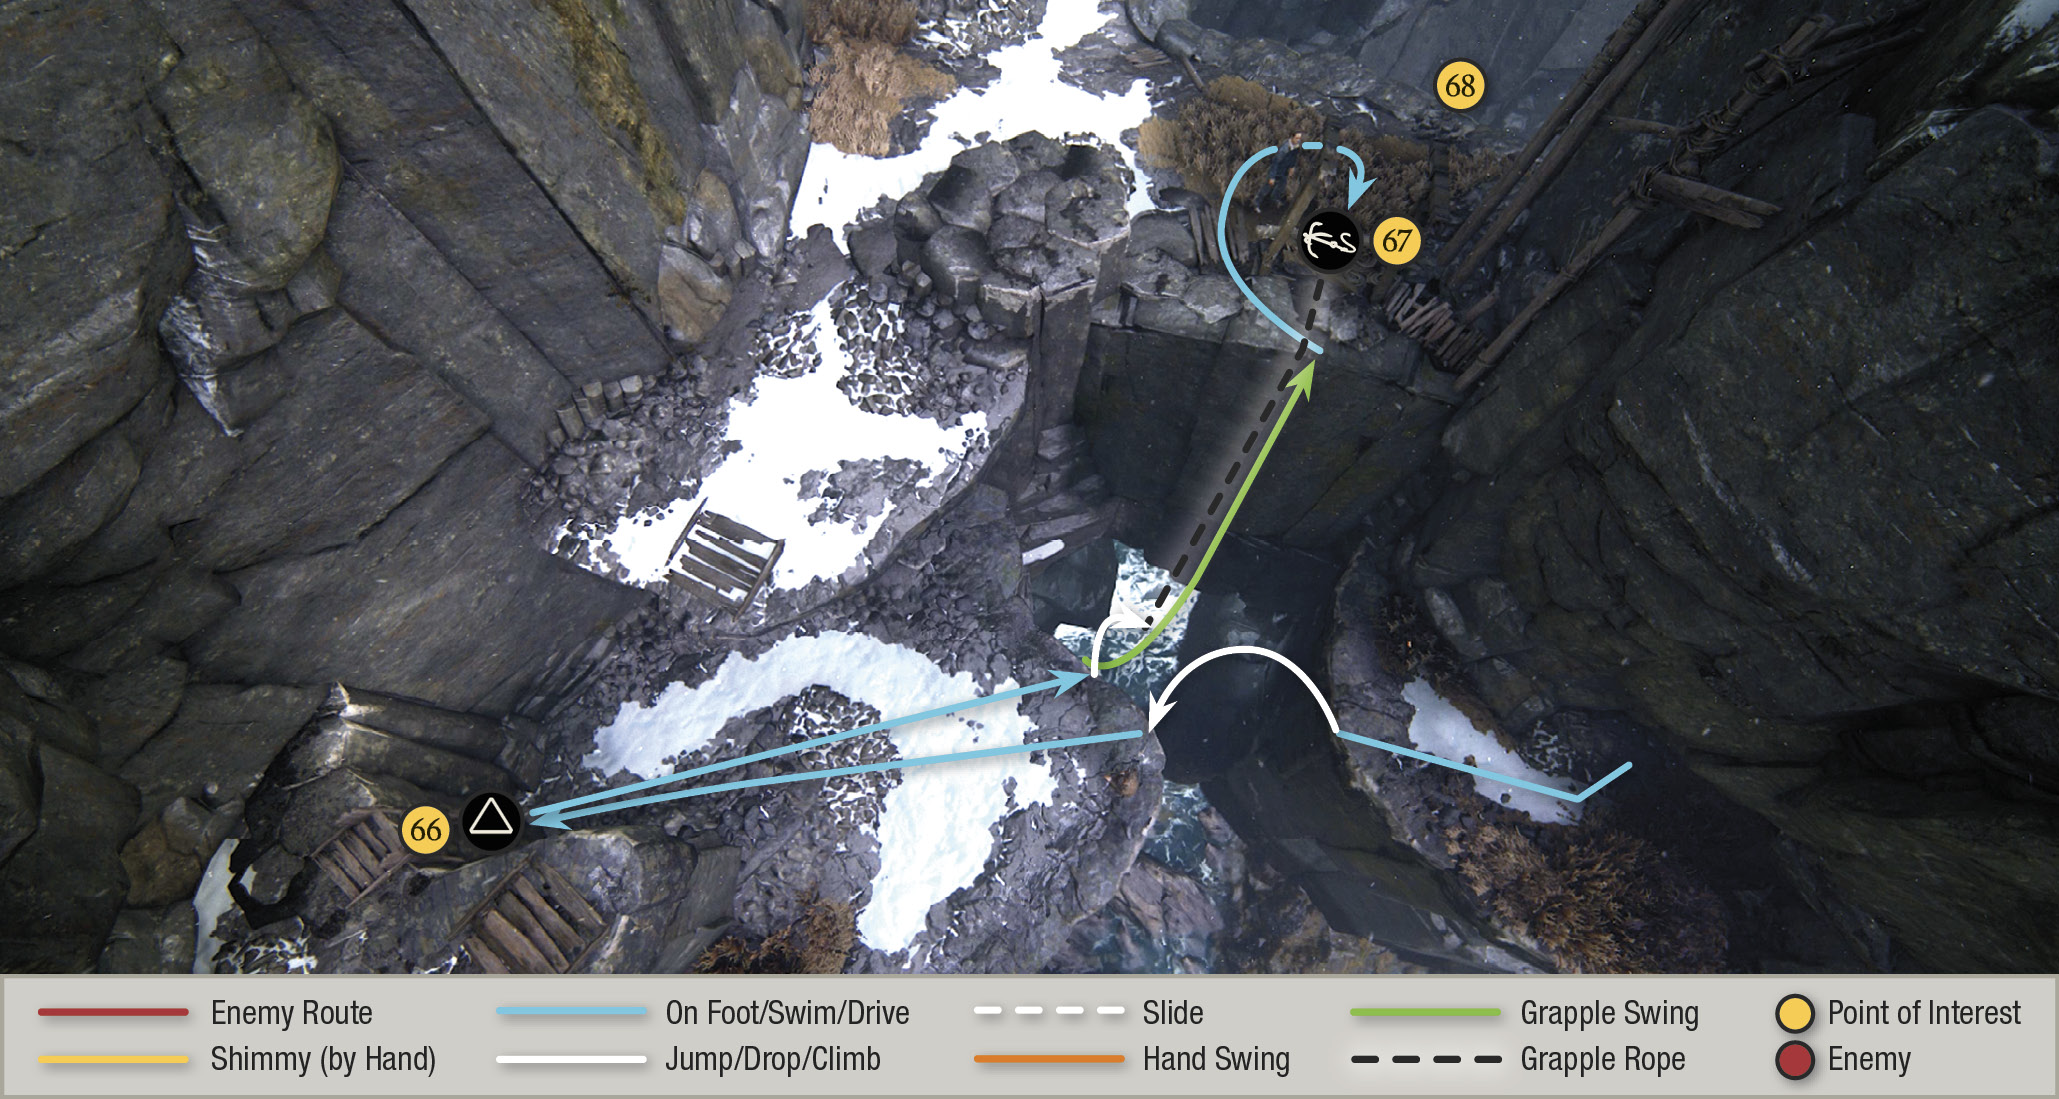
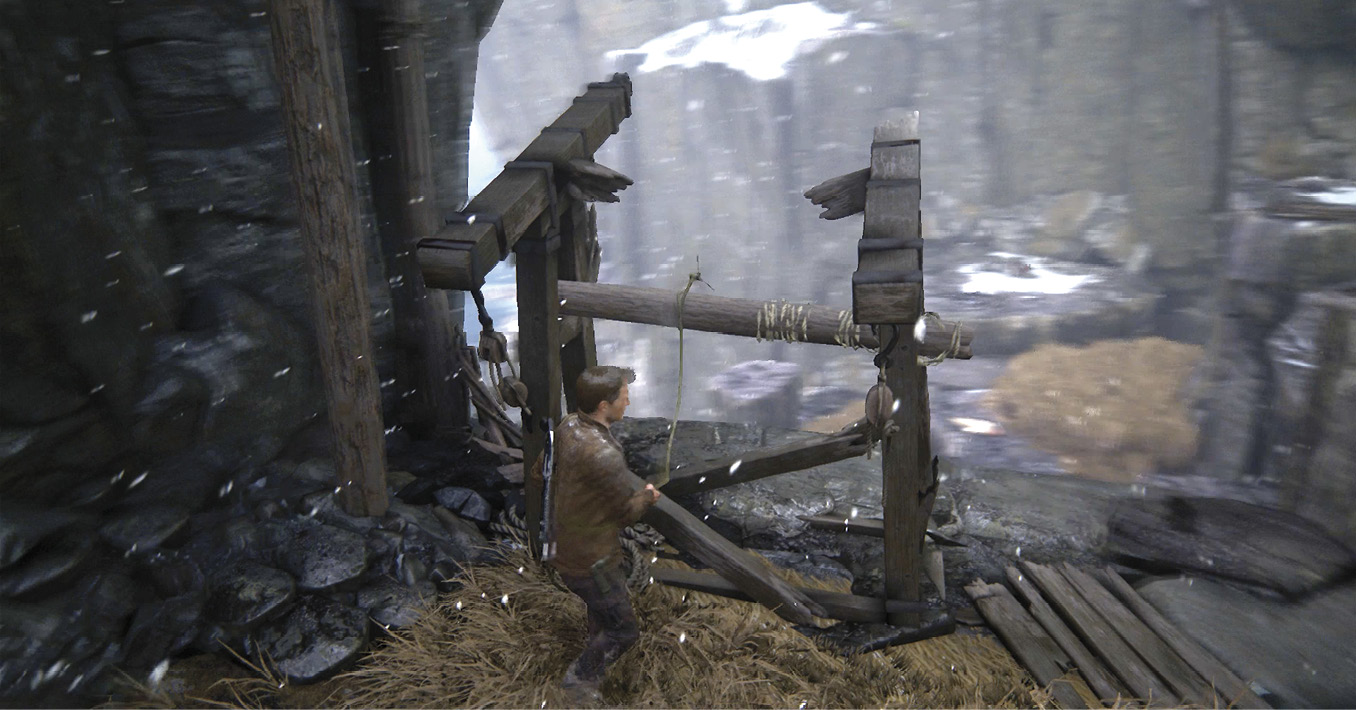
Now move to the spot underneath the broken rope ladder (66). Sam joins you and the icon appears onscreen. Press that button to boost Sam up to the ladder. Sam slides a wooden beam onto the frame atop the next cliff (67). Sling your grapple hook to the beam and climb to the top. Reattach your hook to the same beam and walk off the opposite ledge (68) to drop down and hang from the rope.
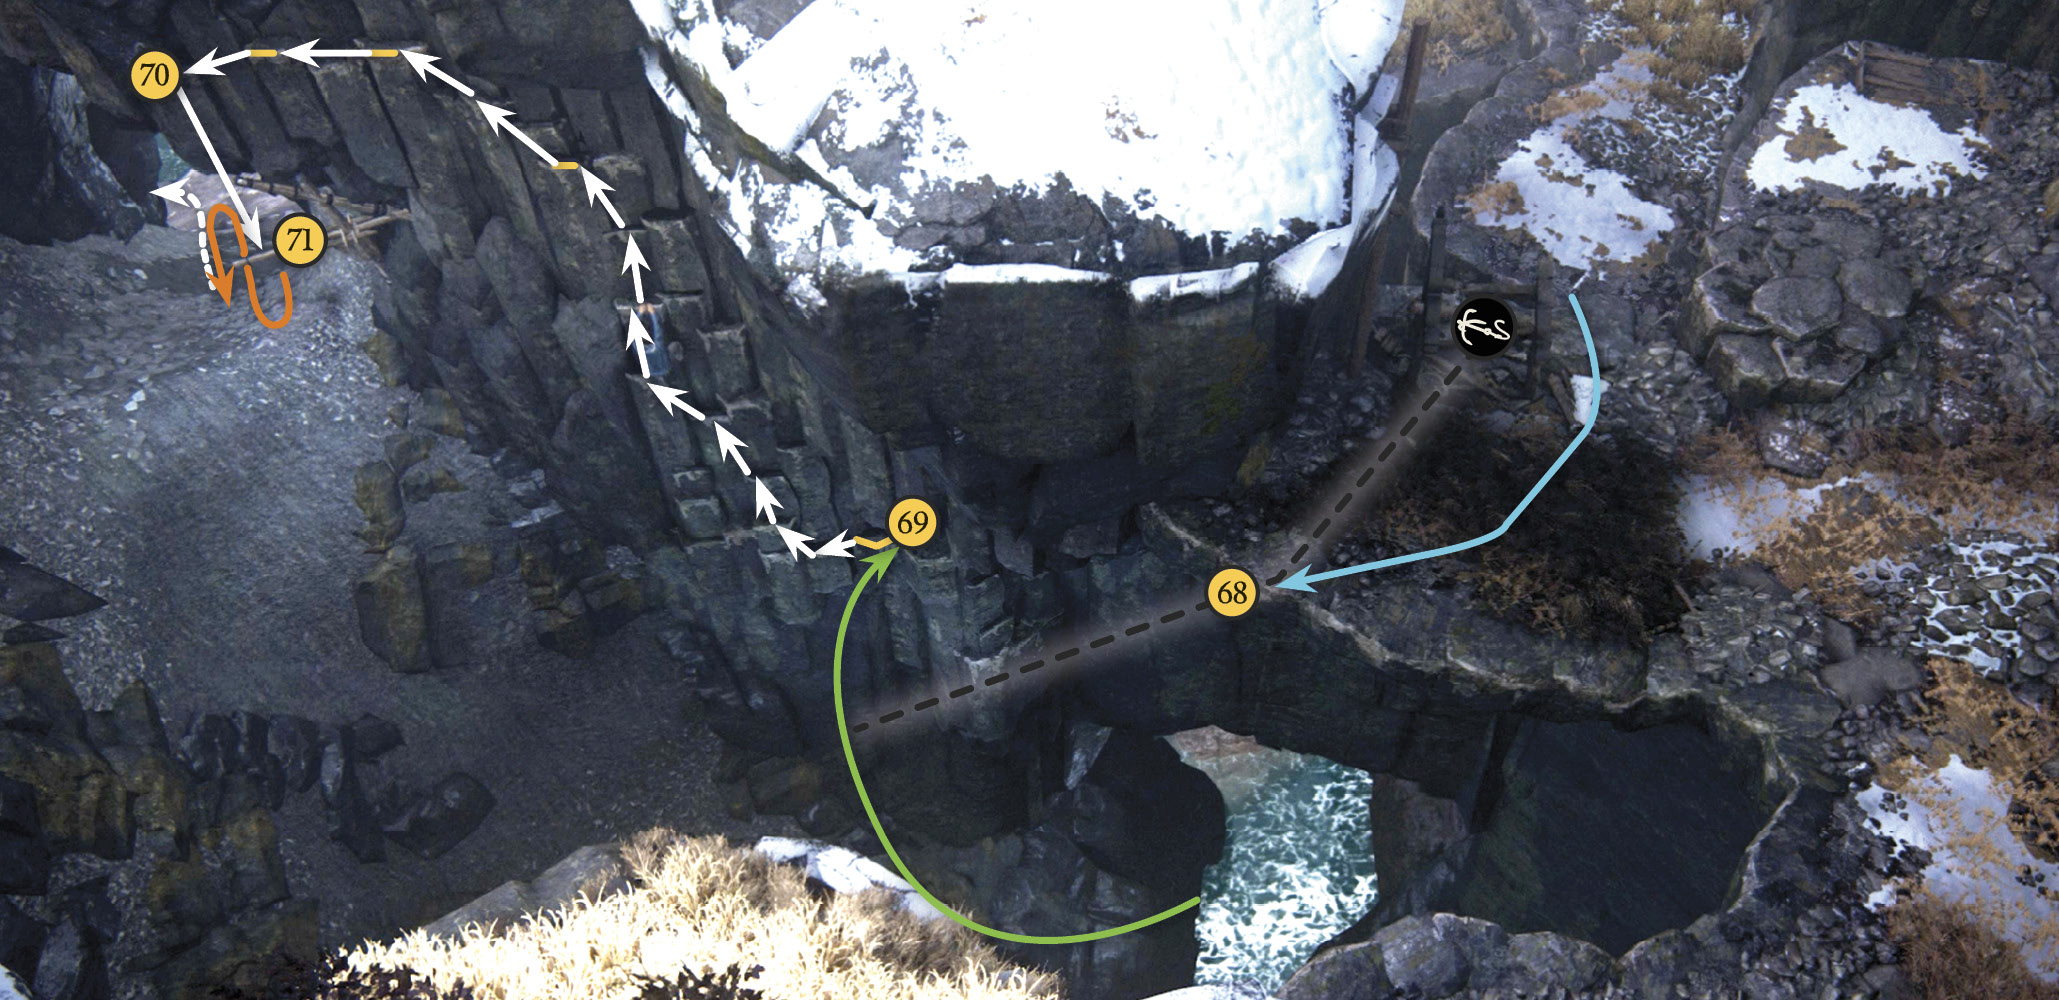
Then swing leftward and jump to the handholds in the cliff (69). Climb as far left as possible (70); you end up hanging directly over a pole jutting from the cliff. Drop to the pole (71); Nathan automatically grabs it as he falls.
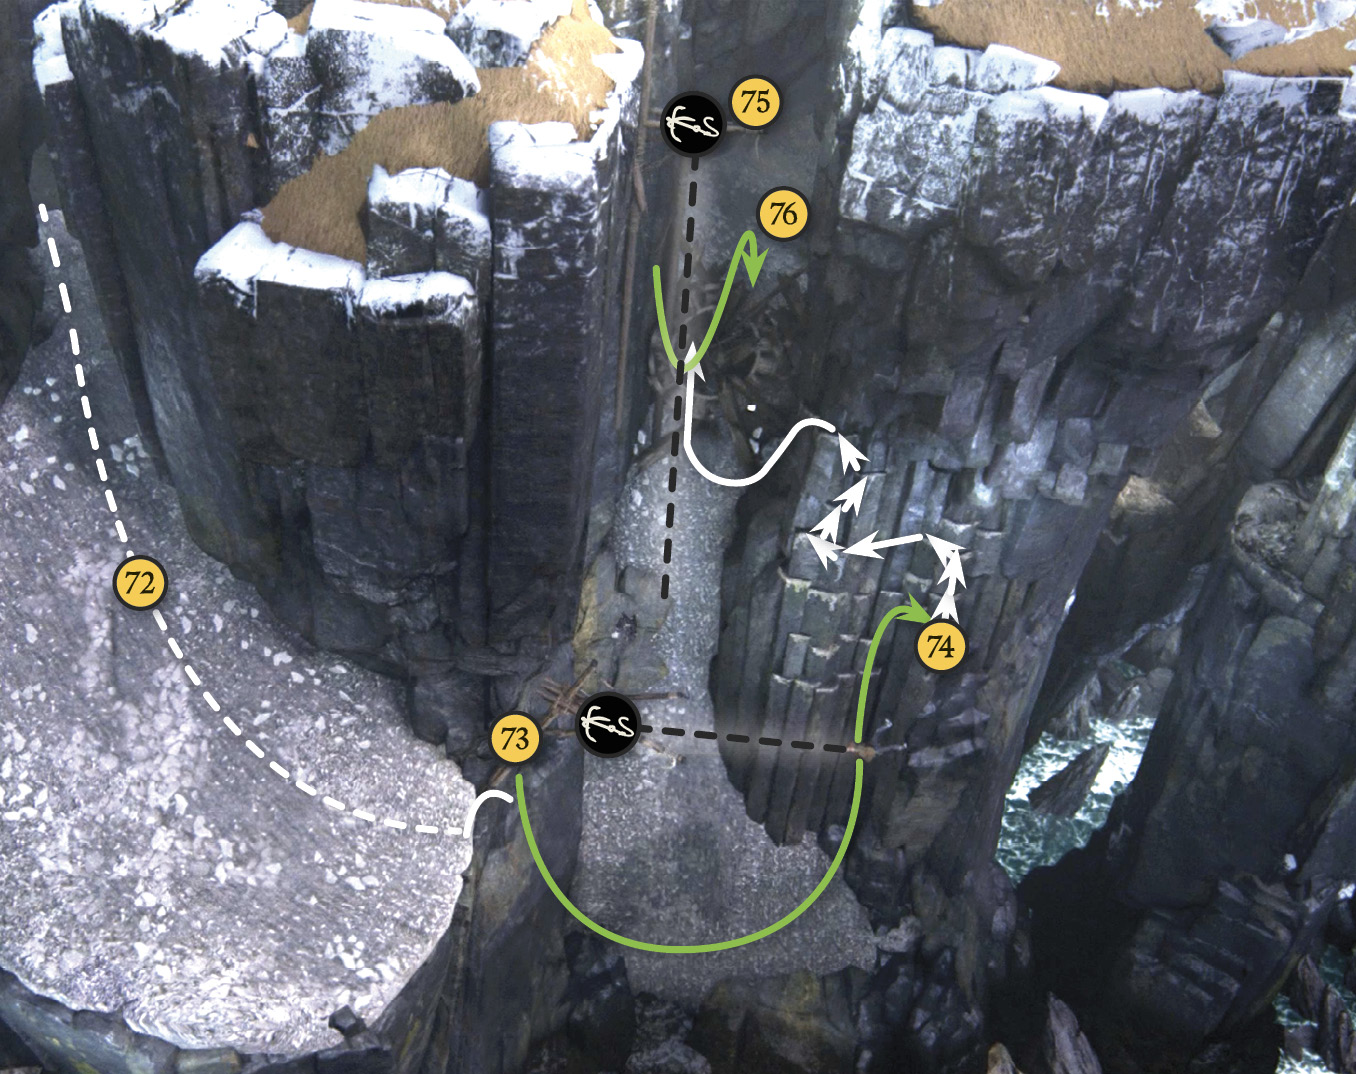
Swing from the pole across to the rockslide (72). As you ride down, veer leftward and look up to spot another pole (73) and then sling your grapple hook to snag it. Swing across to the next cliff wall (74) and climb up and left along the handholds (see our map) until you can toss your hook again to another pole (75). Important: Climb up the grapple rope as far as you can before swinging. Then swing over the fallen debris (the ruins of an old waterwheel) in the canyon onto another rockslide (76).
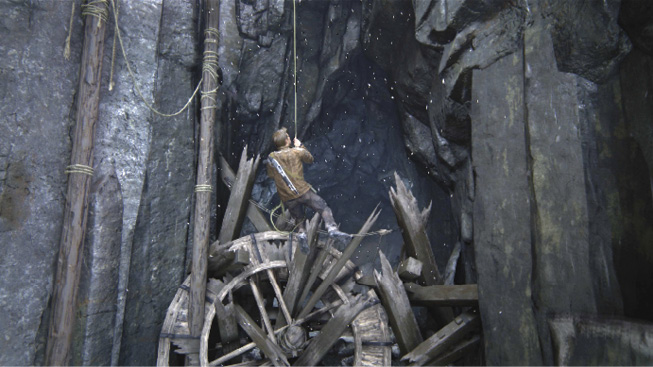
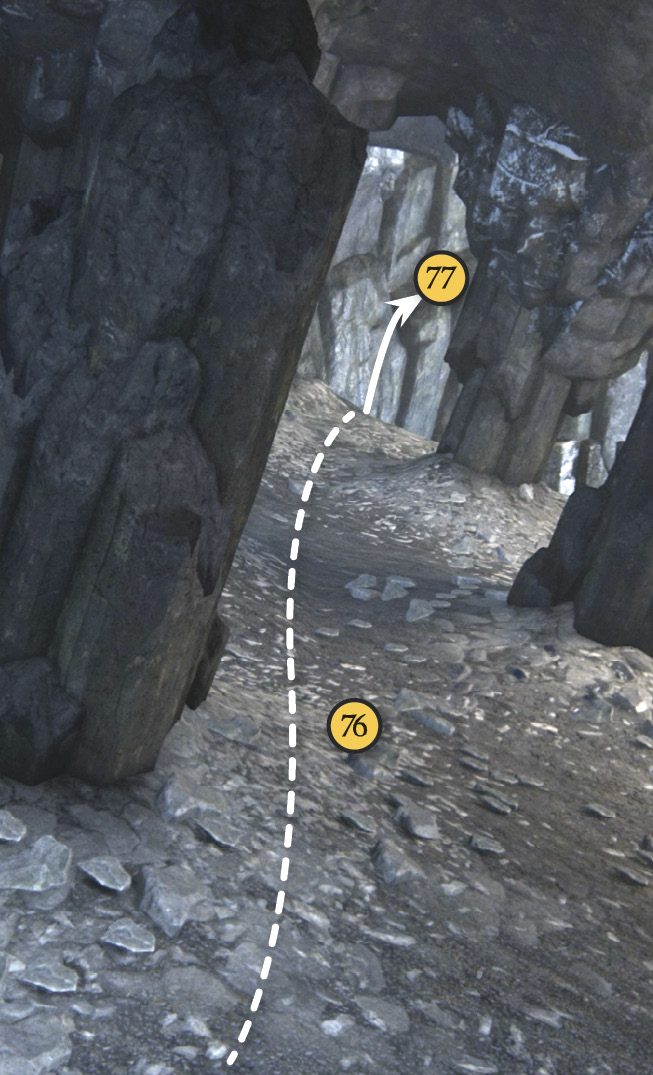
This is a tricky slide. Steer between the first two rock pillars, then veer as hard as you can to the left. When you reach the end, leap to a rock ledge in the far cliff face (77).
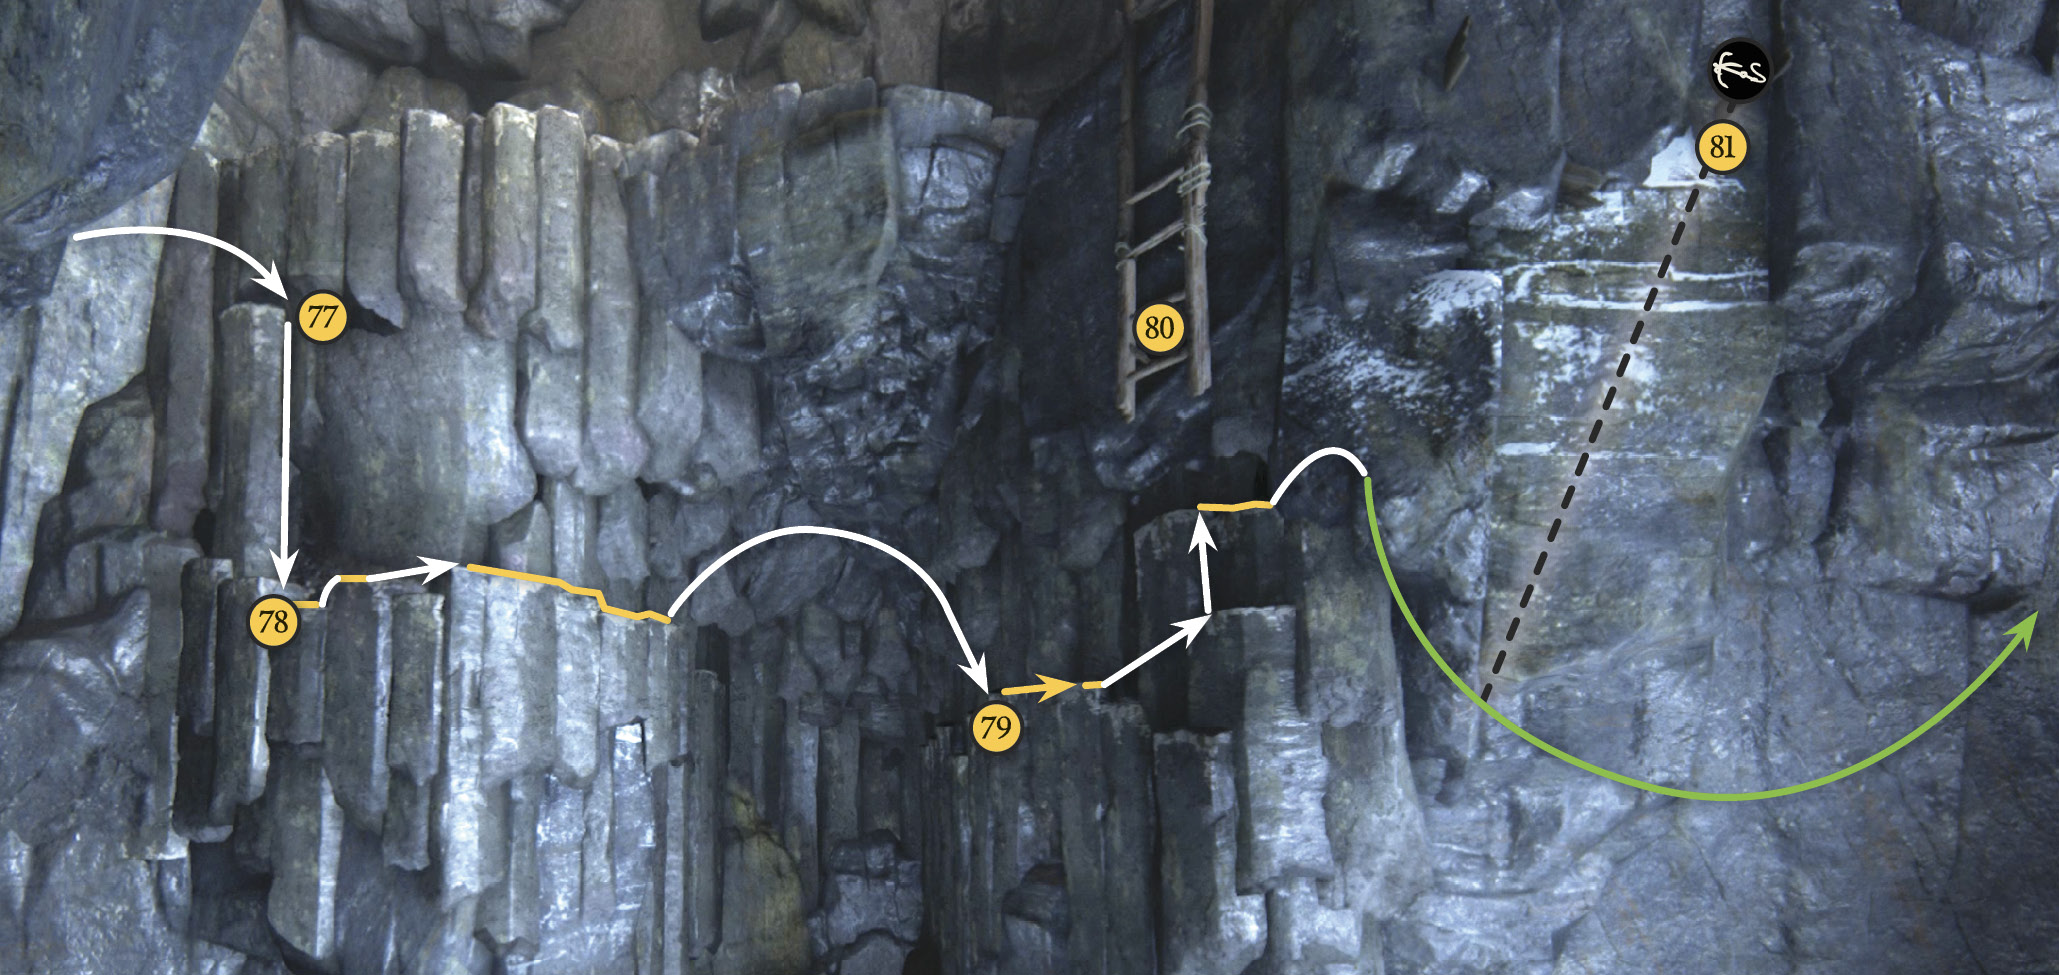
When Nathan grabs the ledge it collapses, and he barely snags another ledge below (78). Climb rightward as far as you can, and then leap across to the next handhold (79). Continue to a ladder (80) that also collapses when you grab it. (Just above you, Sam crosses a bridge that collapses beneath him!) Climb a little further rightward and toss your grapple hook up at the wooden post (81). Swing to grab the wooden frame on the cliff, and then climb the handholds to the top (82) where Sam pulls you up. Here you can head to the left to find another treasure, and then return to this spot.
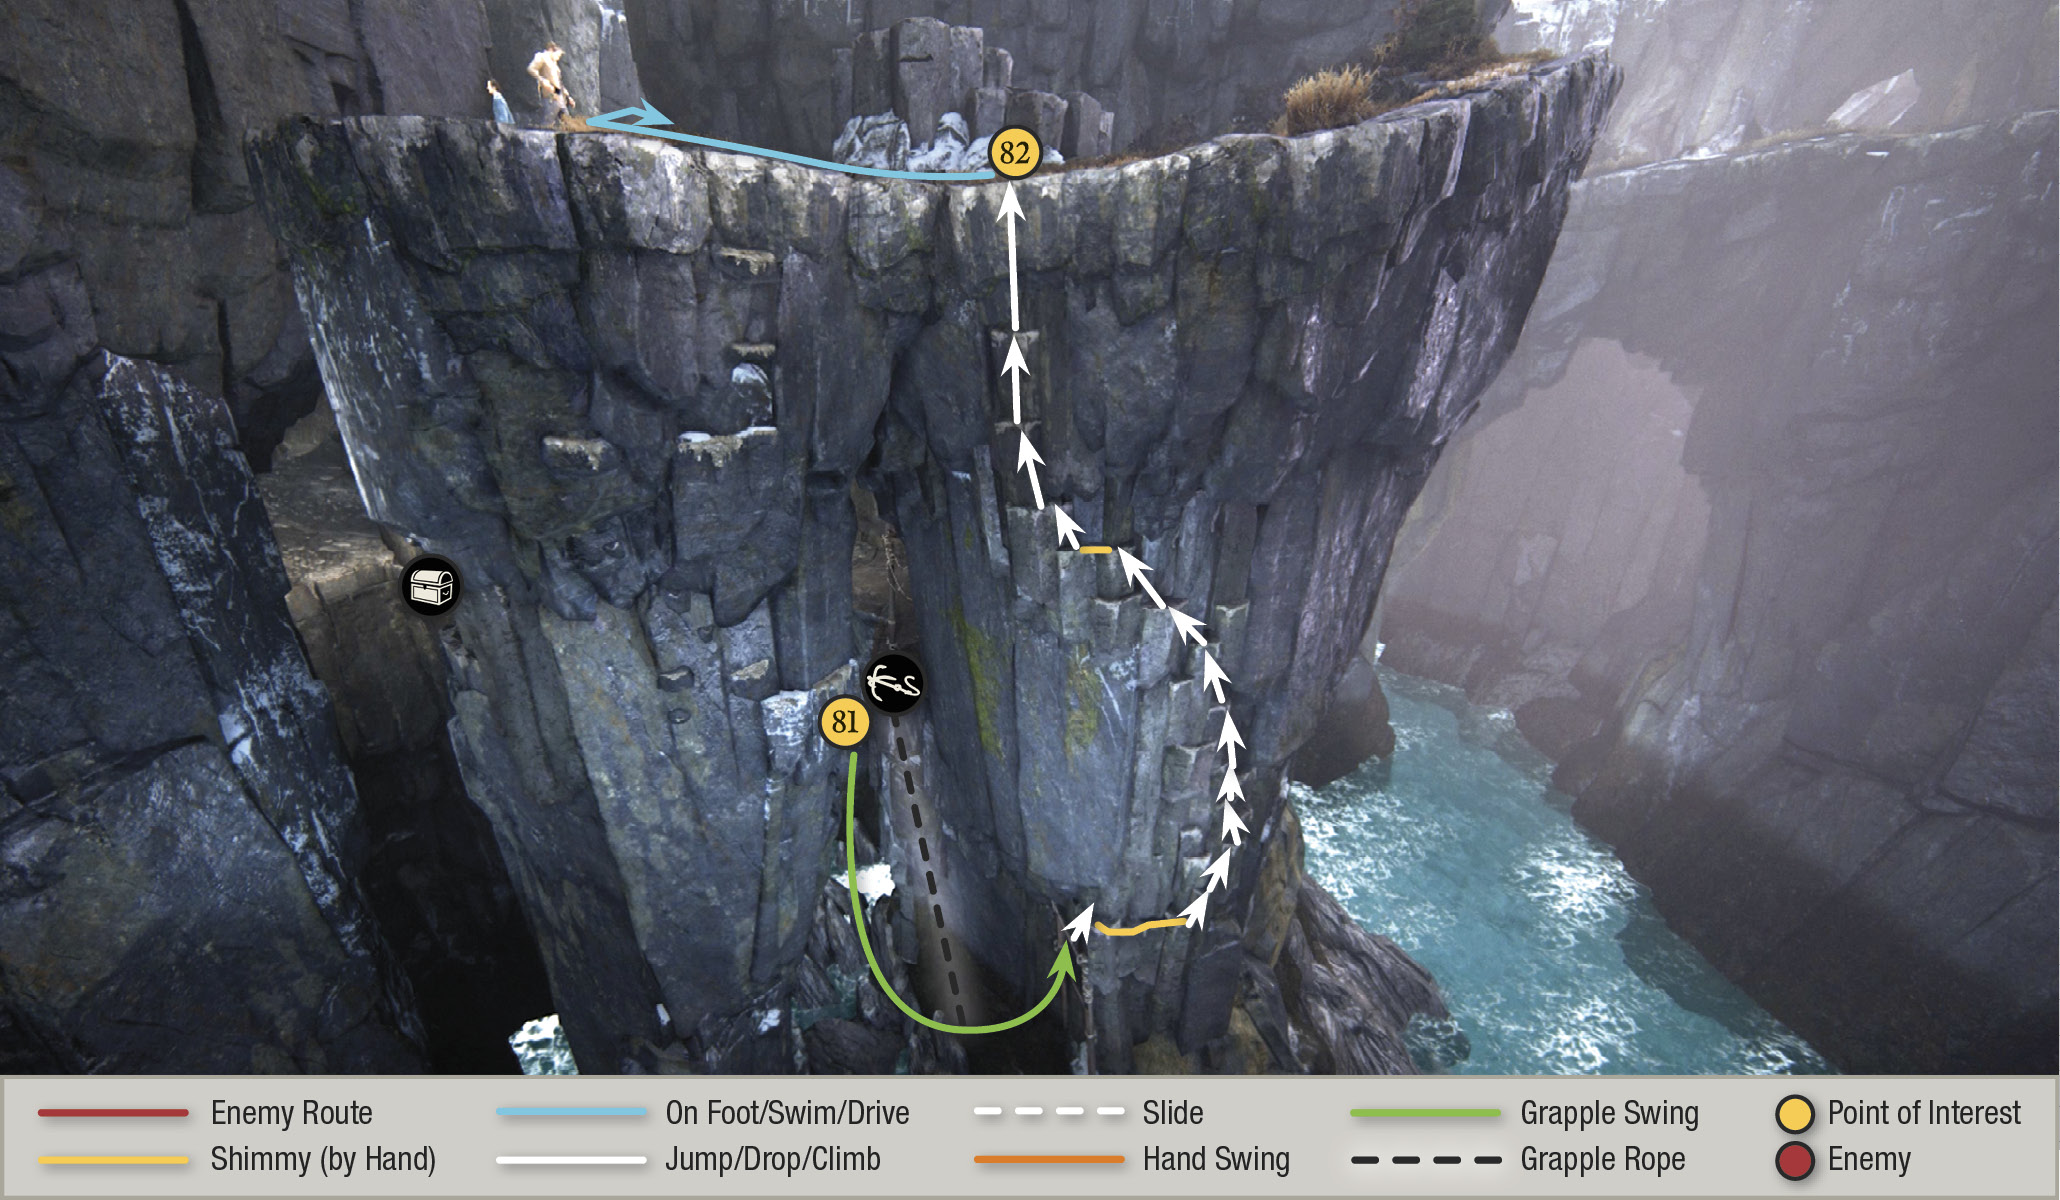
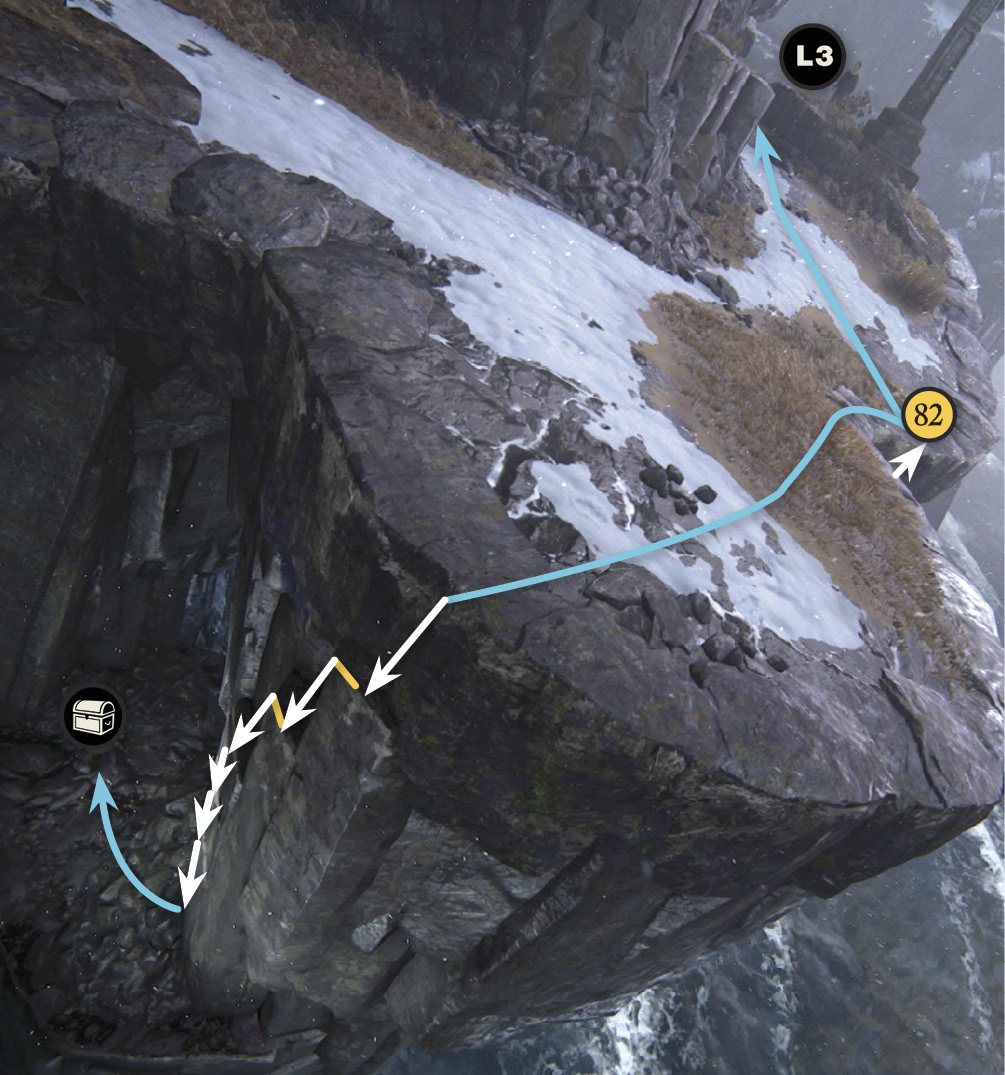

Tortoise Shell Snuff Box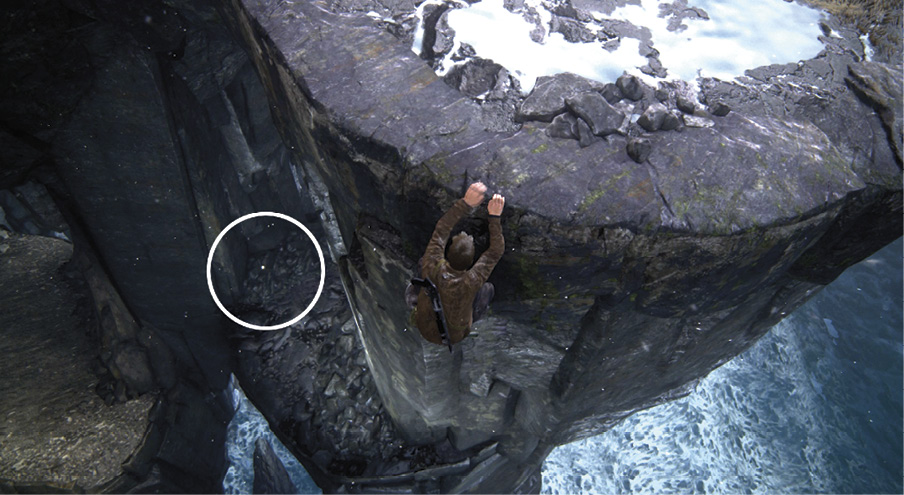
After Sam pulls you up, move left along the cliff’s edge until you can look down and see a rounded gray ledge jutting out below. Hang and drop down the series of handholds to the ledge. Then grab the Tortoise Shell Snuff Box in an alcove. Climb the handholds on the opening’s right side to get back up onto the plateau. |
Sneak/Fight Up the Heavily Guarded Terraces
Veer leftward (away from the cross) into the ravine. When you reach the drop-off, jump leftward to the ledges (83), climb rightward to the corner, and then drop down the series of handholds to the grassy terrace below. Note the mercenaries deployed up the rocky slope on the other side.
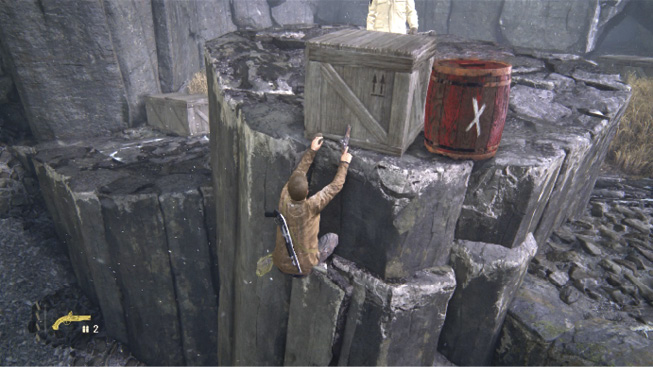
Note: As always, the following sequence is just one of many ways you can work past the guards in this area. Feel free to try all or some of our tactics, or just improvise. And if your stealth maneuvers break down…well, start shooting everything that moves. When spotted, two additional, aggressive Shoreline guards (H, I) appear on a high cave ledge on the back cliff face.
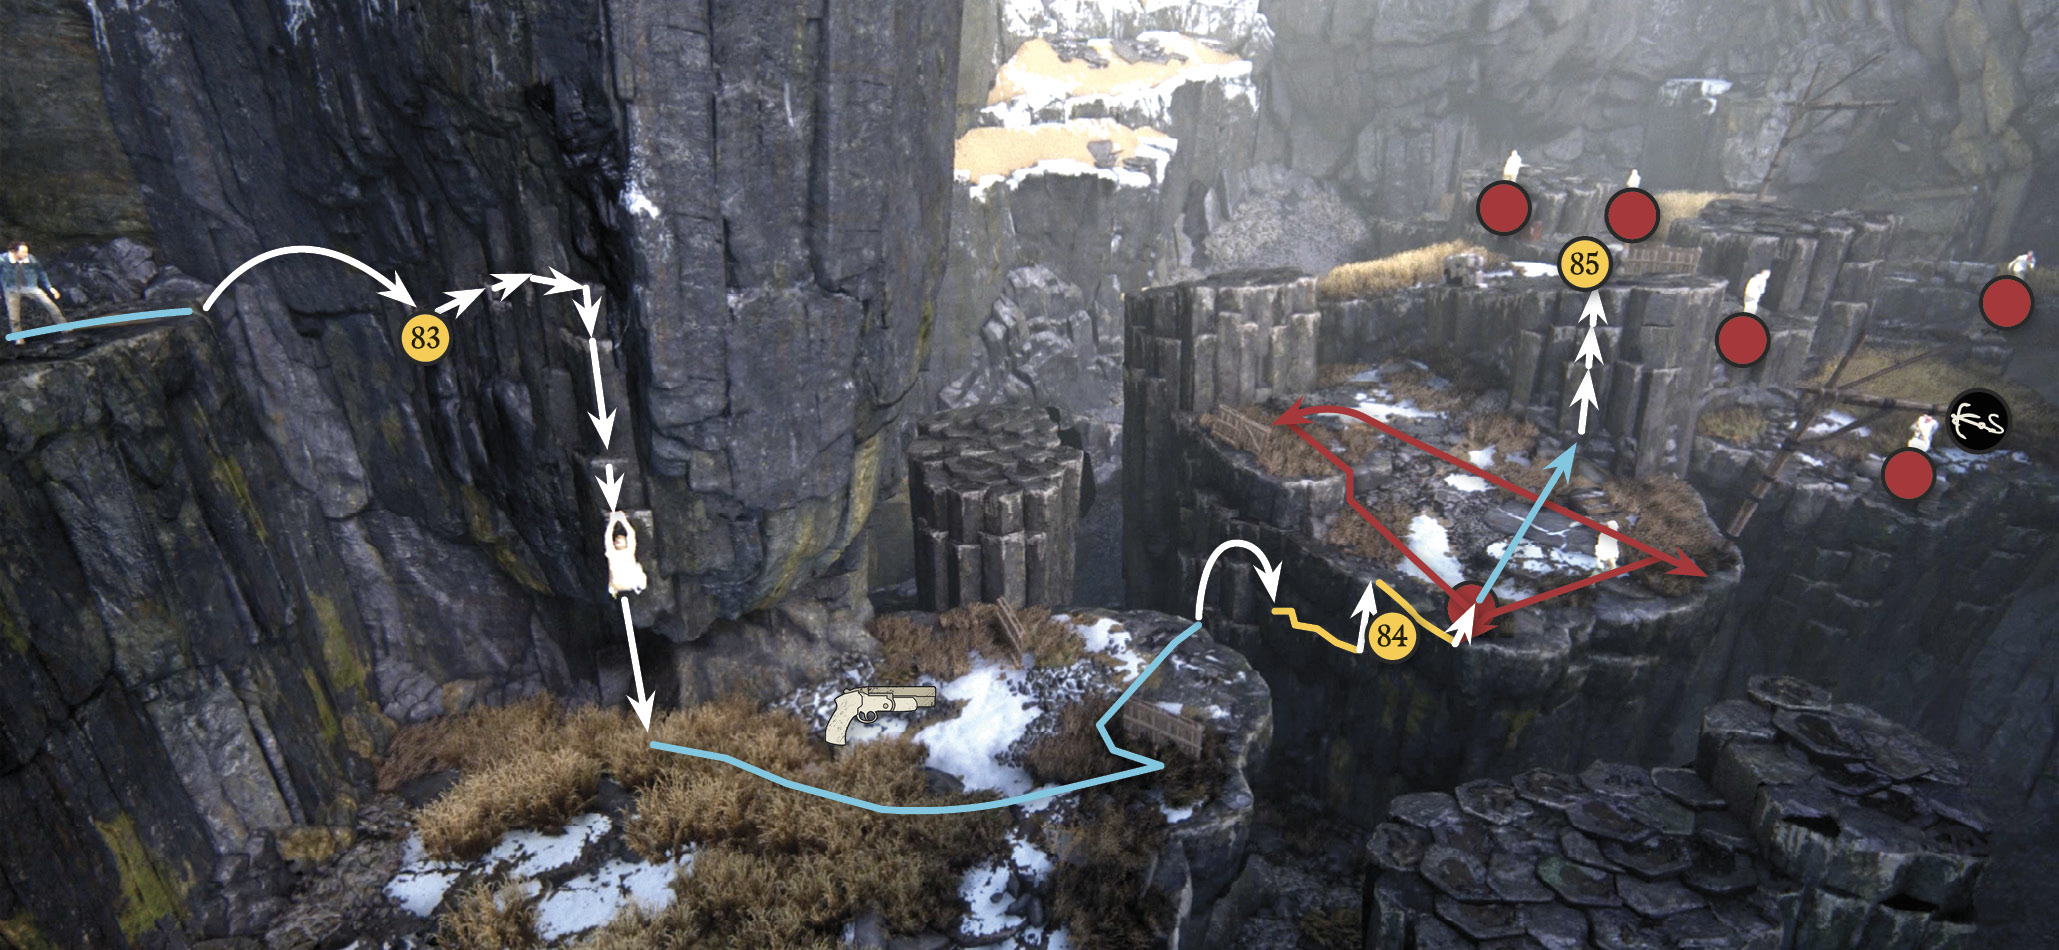
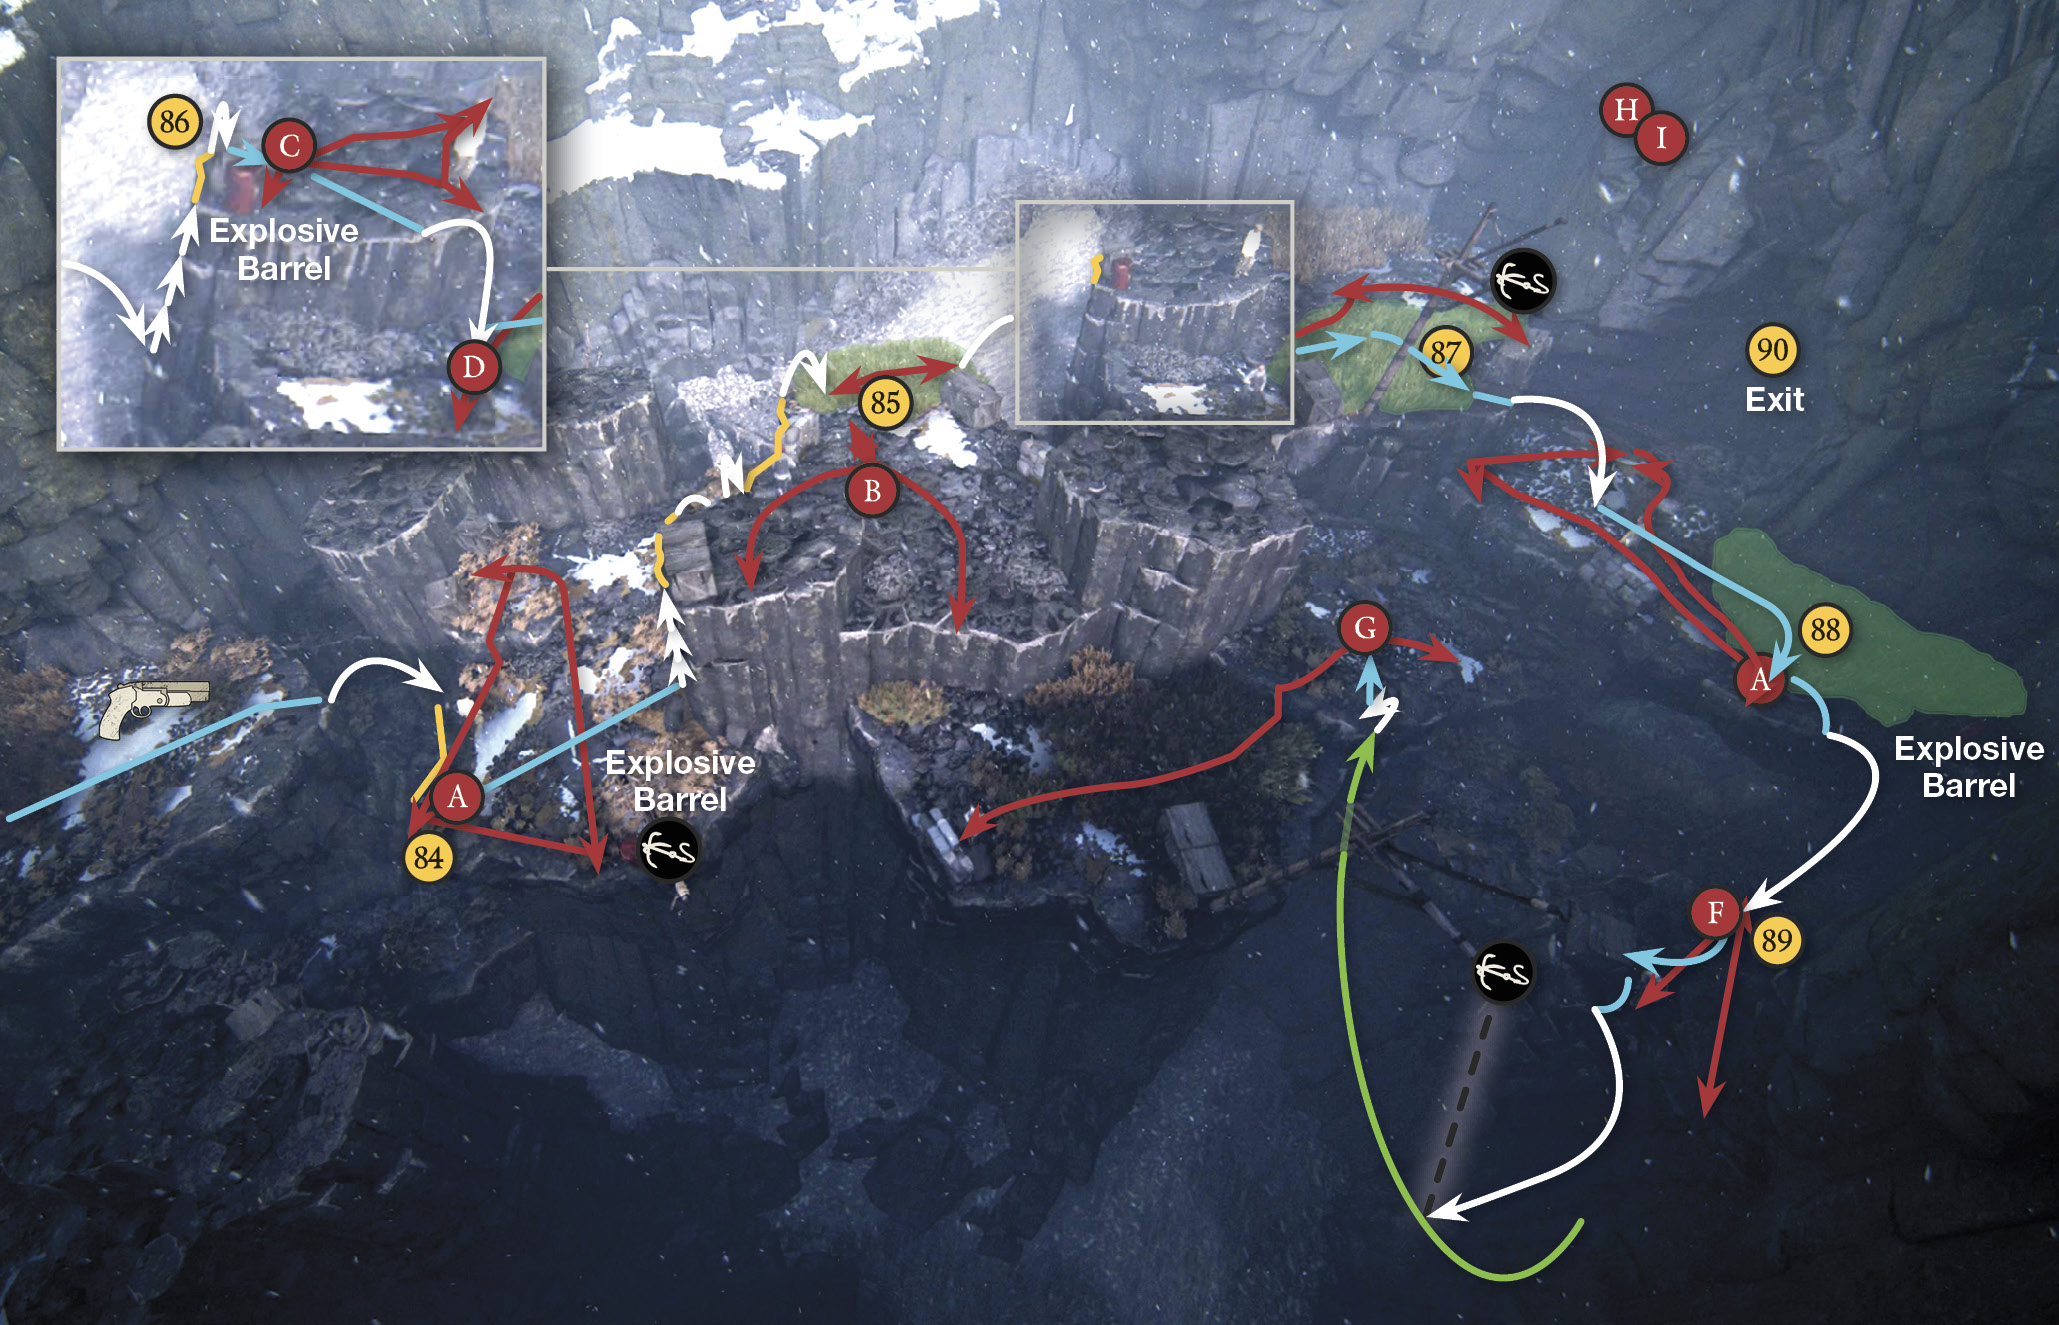
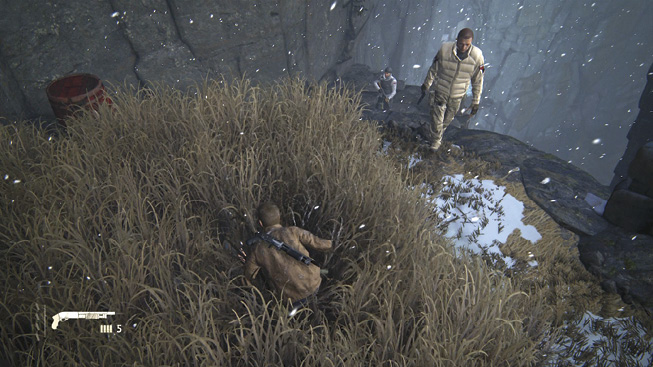
Observe the patrol patterns. When no guards are facing you, jump across the next gap to hang on the edge (84). Shimmy rightward to where the first guard (A) approaches the edge and pull him over! Make sure the guard to your right on the next terrace is facing away, then run across the plateau and pull yourself up the handholds below the next guard (B). You can’t pull him over the crate where he stands, so shimmy leftward and pull up into the long grass (85) to hide. Wait until the two other nearby guards (C, D) both turn away, hustle out for a stealth takedown on (B), then hustle right back to the grass to evade detection.
Jump to the spire under the next guard (C) (who carries a Barok .44) and climb up to hang on the platform’s edge (86). Wait until he’s close and pull him down; then immediately drop back down because the nearby guard (D) may come to investigate. If he does, take him out too. If not, wait until he patrols under the ledge and make a drop-kill. Then hustle over to the next patch of tall grass (87).
Below you, the next guard (E) is patrolling. When he moves away, and the other two guards (F, G) are looking away, jump down and run to the tall grass behind him (88). From here, you can perform a takedown on (E), leaving only two guards remaining (89). Here, you can simply avoid them and head into the exit cave (90). Or you can shoot them both from your ledge. Or you can try nailing (F) with a drop-kill and then quickly ducking behind the crate to hide from the guard (G) across the gap. Finally, use your grapple hook to swing across to KO the last guy.
Maneuver Through the Cave Tunnels
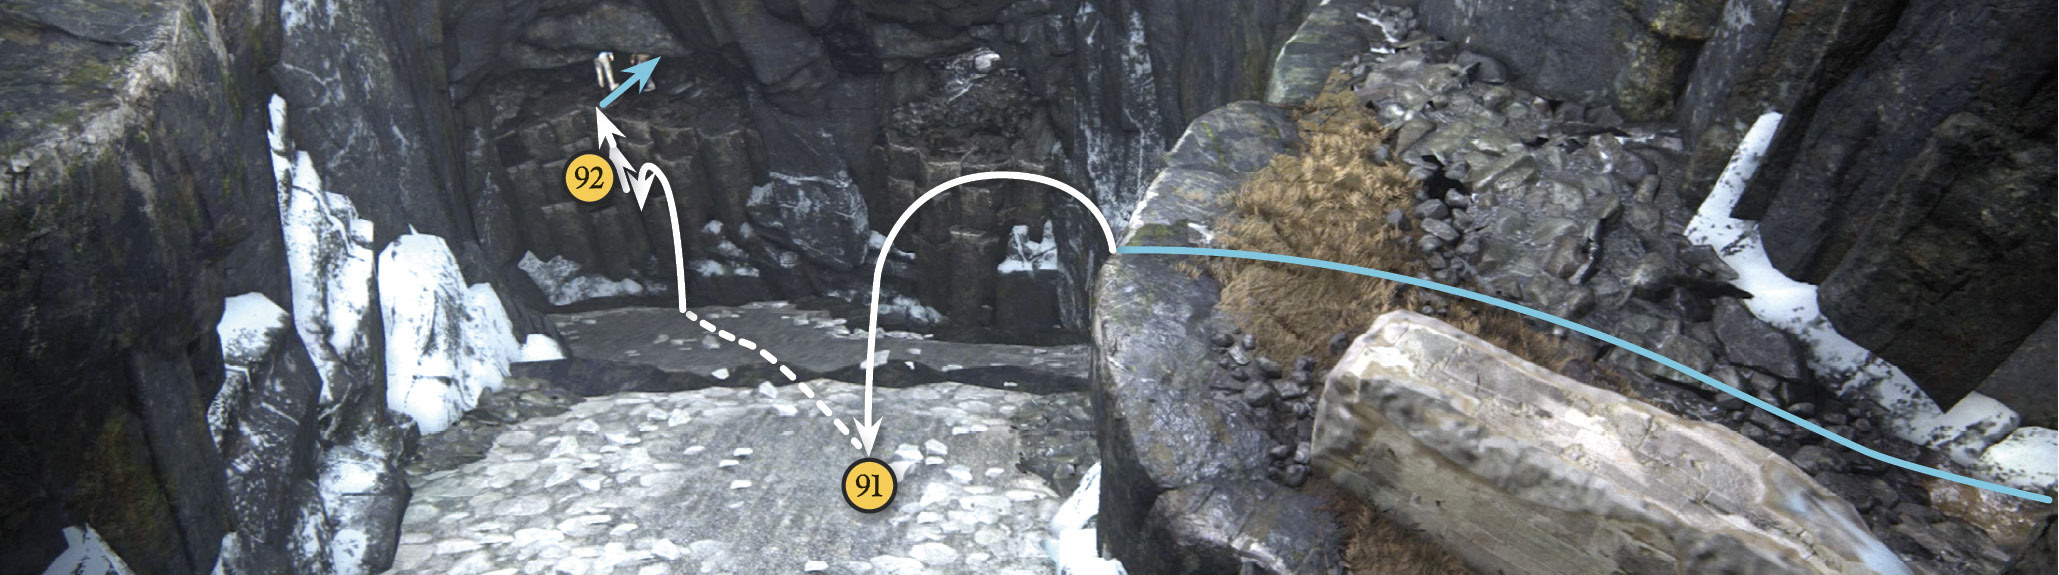
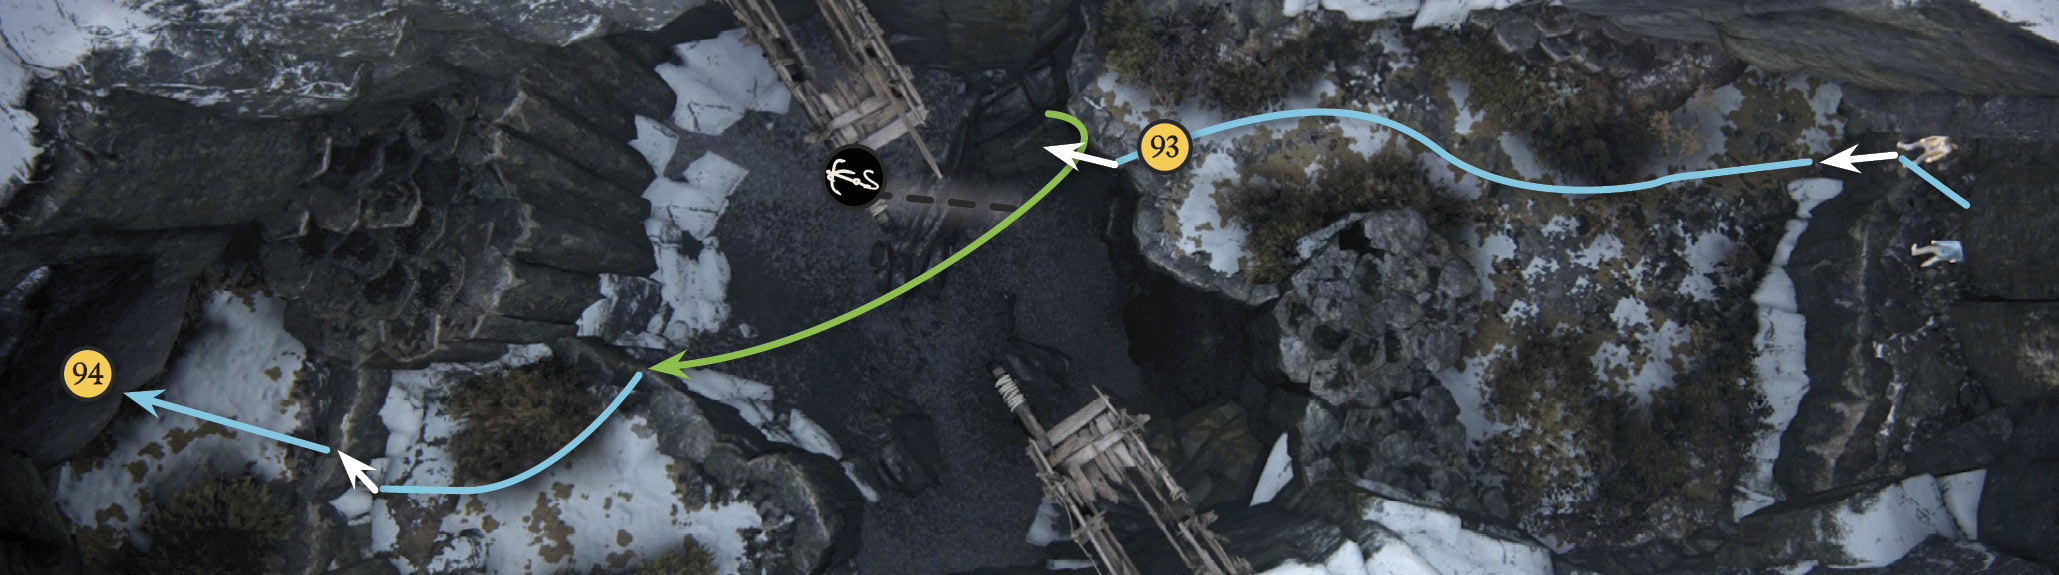
Climb into the cave entrance (90), move through the tunnel to the fallen beam, and examine it to get Sam’s help lifting it. Once you get through, jump down onto the rockslide (91) and, just before you reach the bottom, jump to the wall (92) and climb up. Exit via the cave opening. Move down the ravine to the next grapple point (93) and swing up to the opposite terrace. Proceed through the next archway (94) into a canyon filled with sagging staircases.
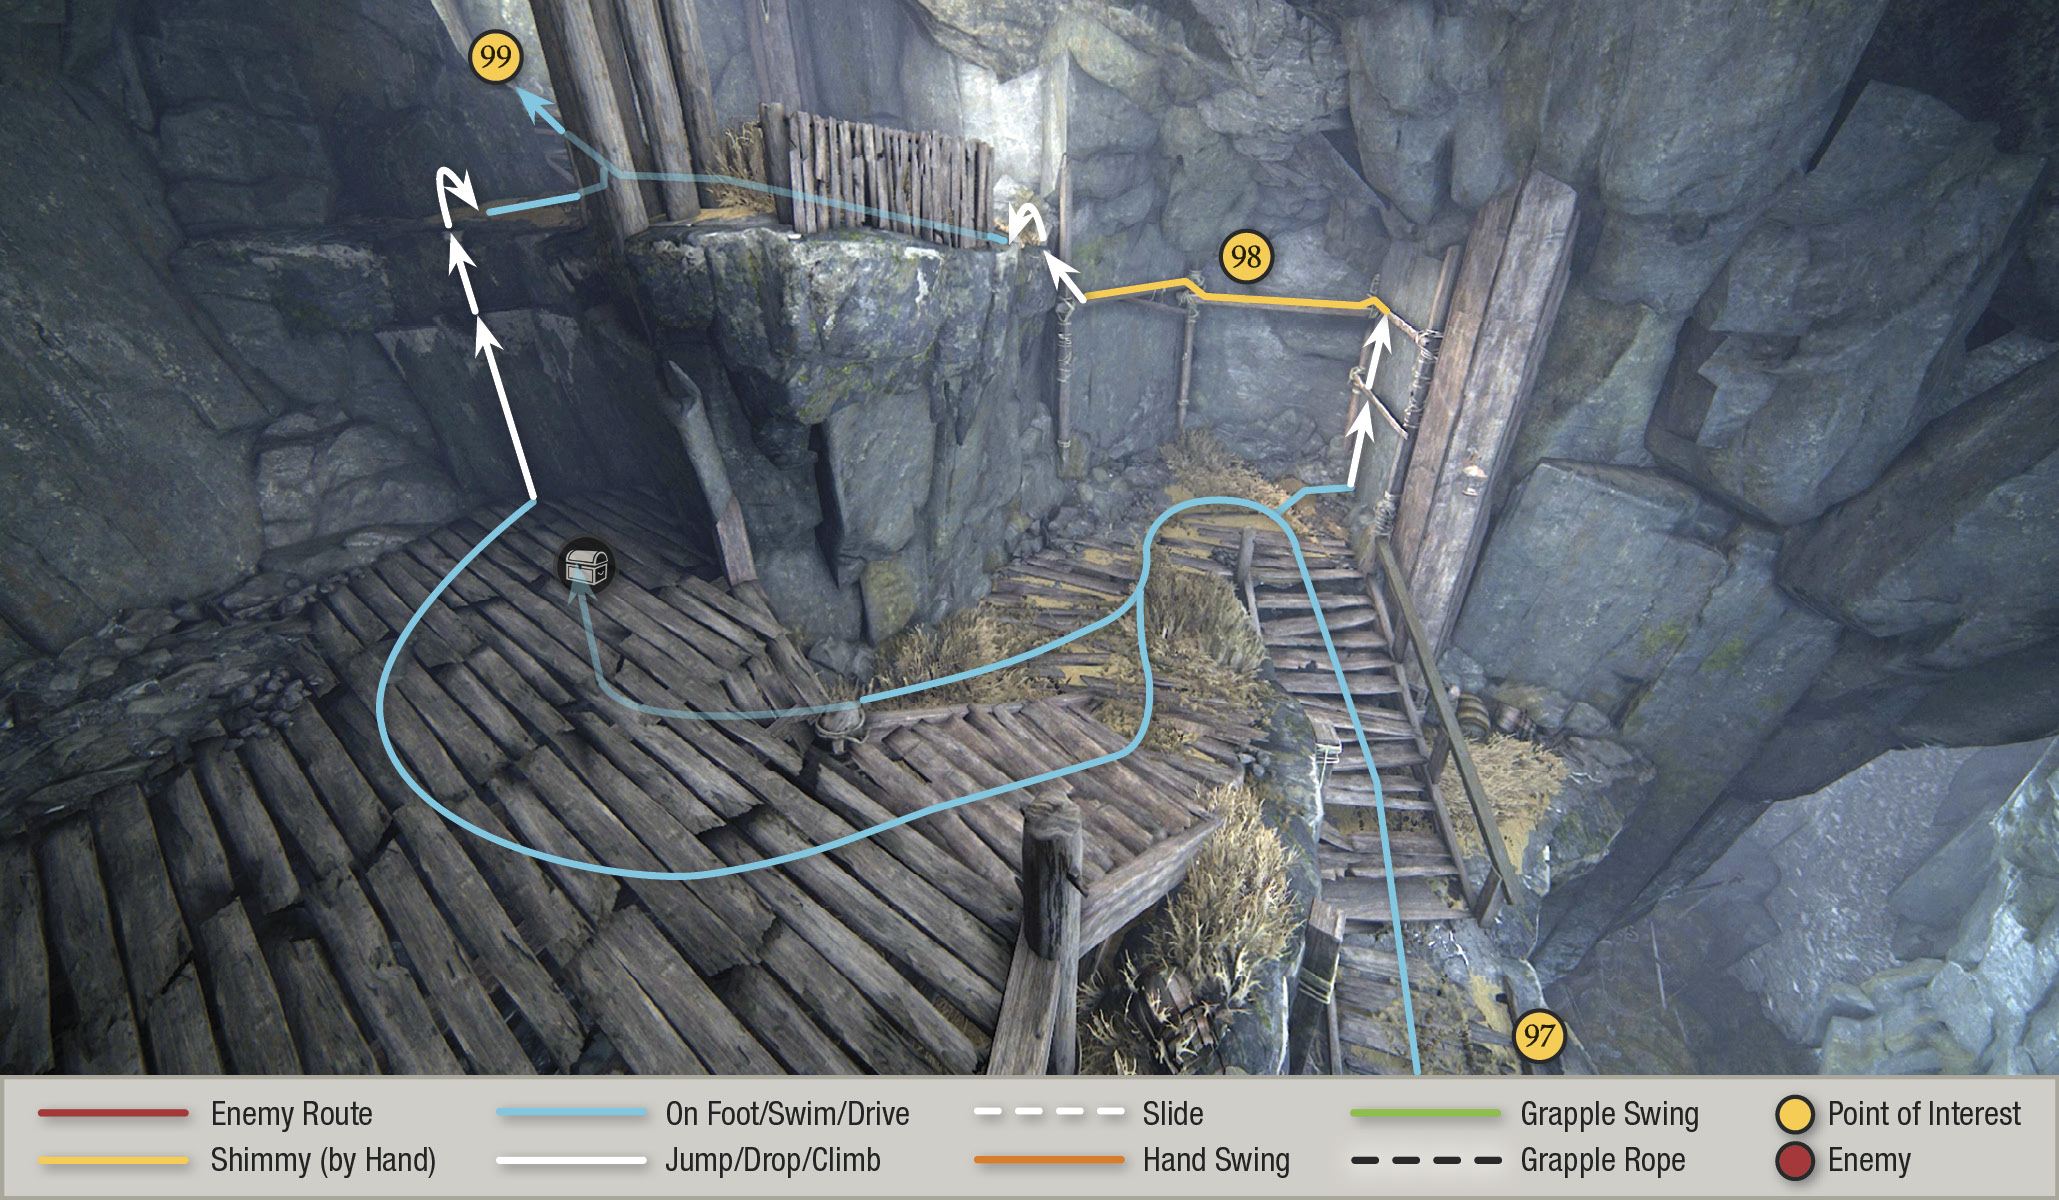
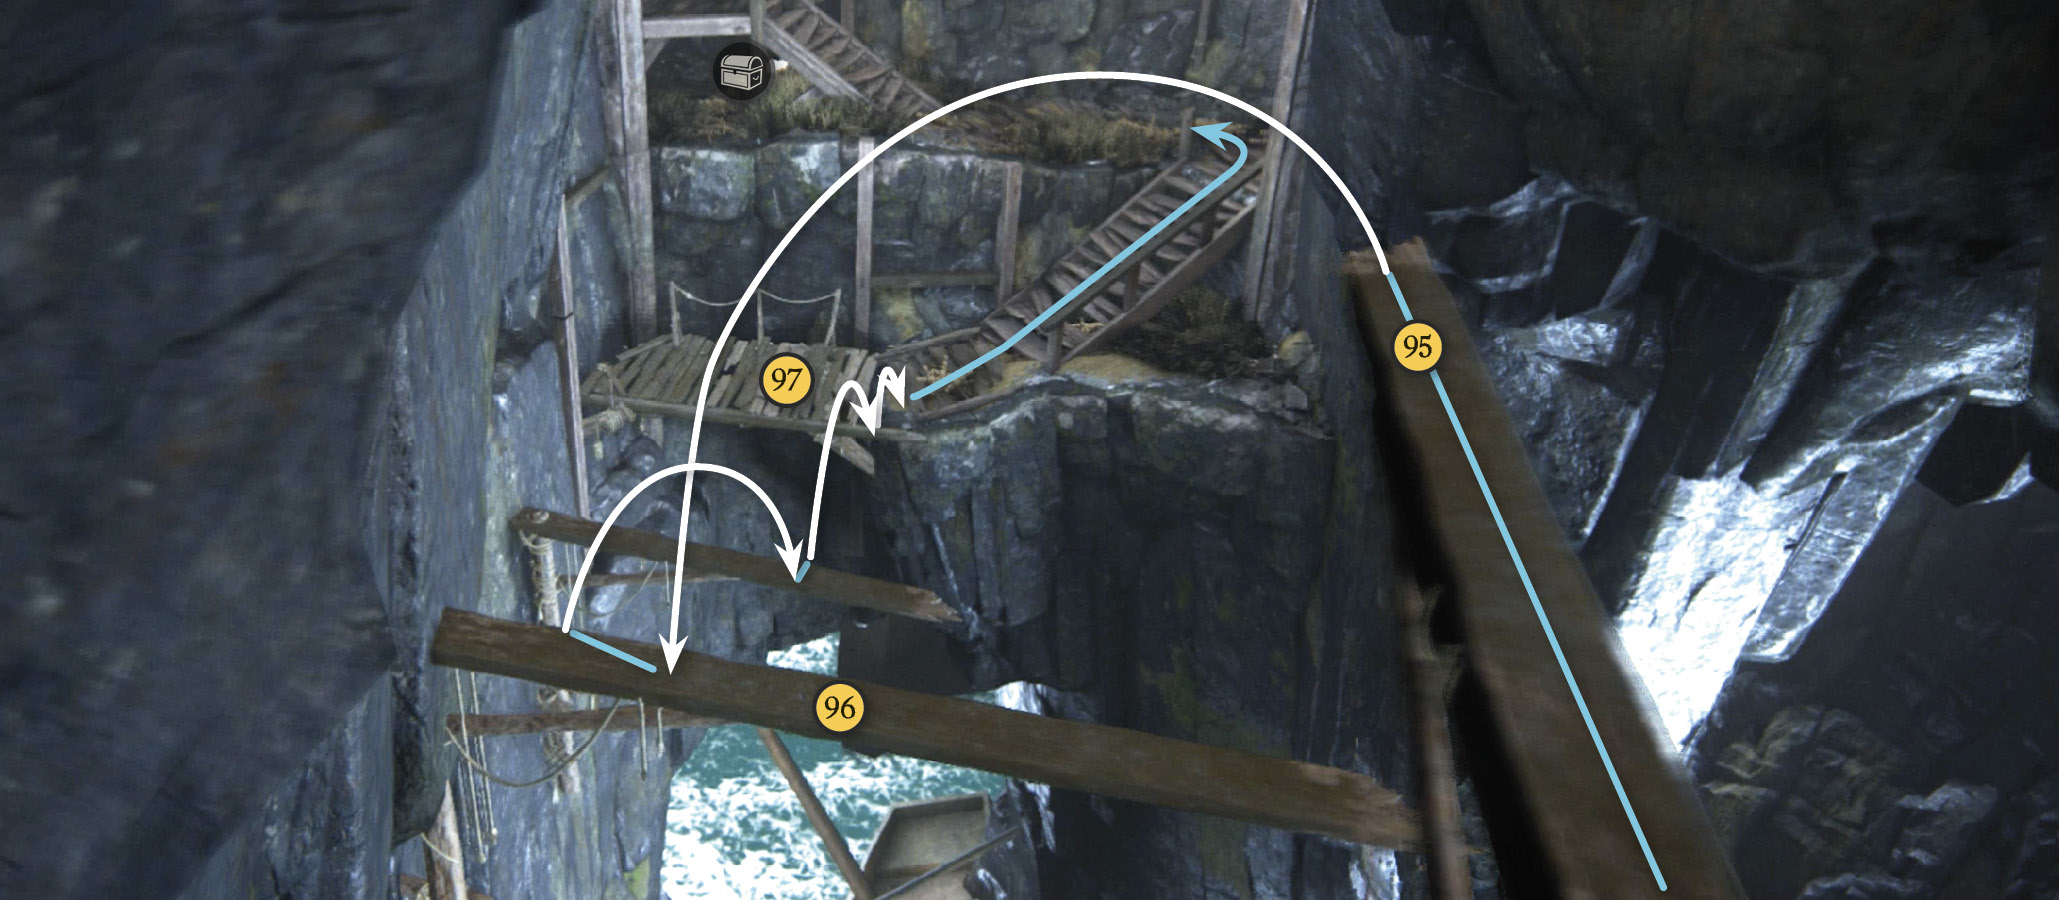
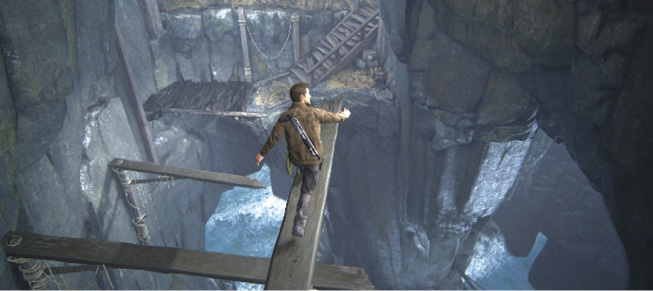
Walk out along the narrow plank (95); Sam notes all the old “pirate-y looking ships” in the cove far below. Jump down to a lower plank (96), then leap to the next lower plank, and finally jump the gap to reach the landing (97) where you pick up another automatic journal entry on pirate construction methods. Climb the stairs to the right. Here you can turn left and find a treasure under the staircase ahead. Then either climb the stairs and scale the wall, or climb up the beams on the nearby wall and shimmy (98) to where you can pull yourself up onto the ledge. Proceed down the passage (99).

Persian Tailoring Scissors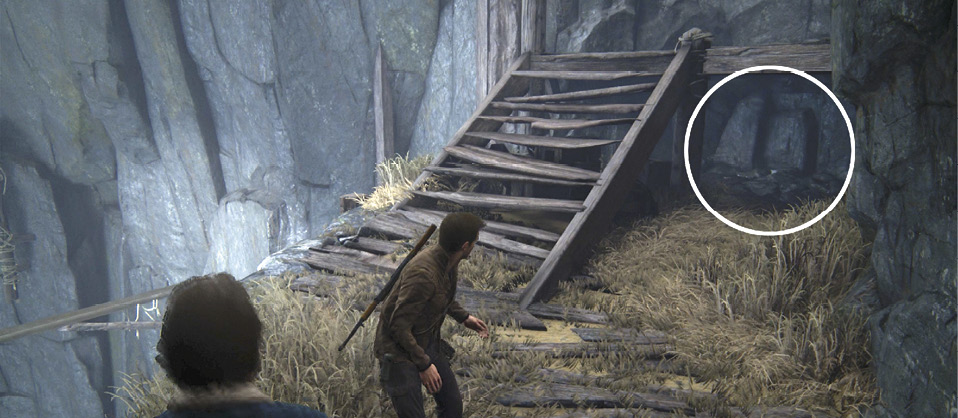
In the canyon with the old crumbling staircases, find the Persian Tailoring Scissors in an alcove behind the stairs’ middle landing. |
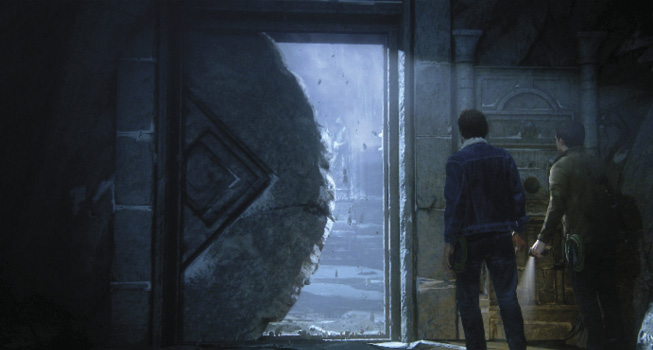
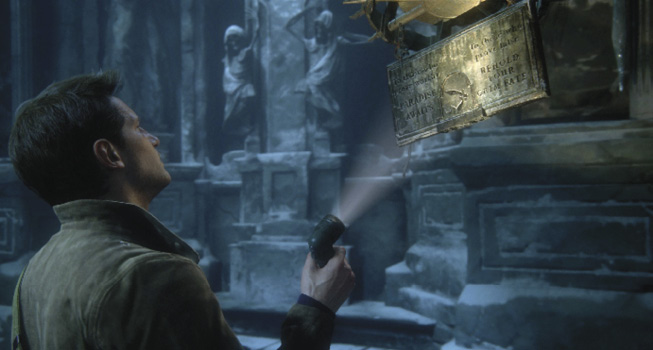
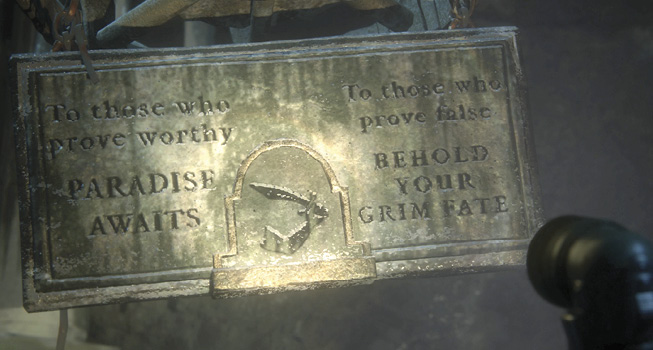
You emerge from a narrow tunnel onto a stunning vista point, looking back at where you started. Enjoy it for a second…then turn left and enter the next cave mouth. Follow the cave passage through the blue-lit area and squeeze through the narrow wall opening. Head down the stairs and use the lock mechanism to trigger a cutscene: The Drake brothers enter a room with a grim-looking display and a challenge issued to the “worthy” from a surprising source.