
Uncharted 4: A Thief's End Guide Story Walkthrough
Chapter 20: No Escape
The sounds of gunfire and the sight of a magnificent, square-rigged, 17th-century galleon moored below quicken the pace. If Sam is still alive, Nathan and Elena need to move fast because he’s no doubt seriously outgunned. You must get down to the ships and rescue Sam.
CollectiblesTreasures: 5 Optional Journal Notes: 1 New Weapons: RPG |
Get Down to the Ships
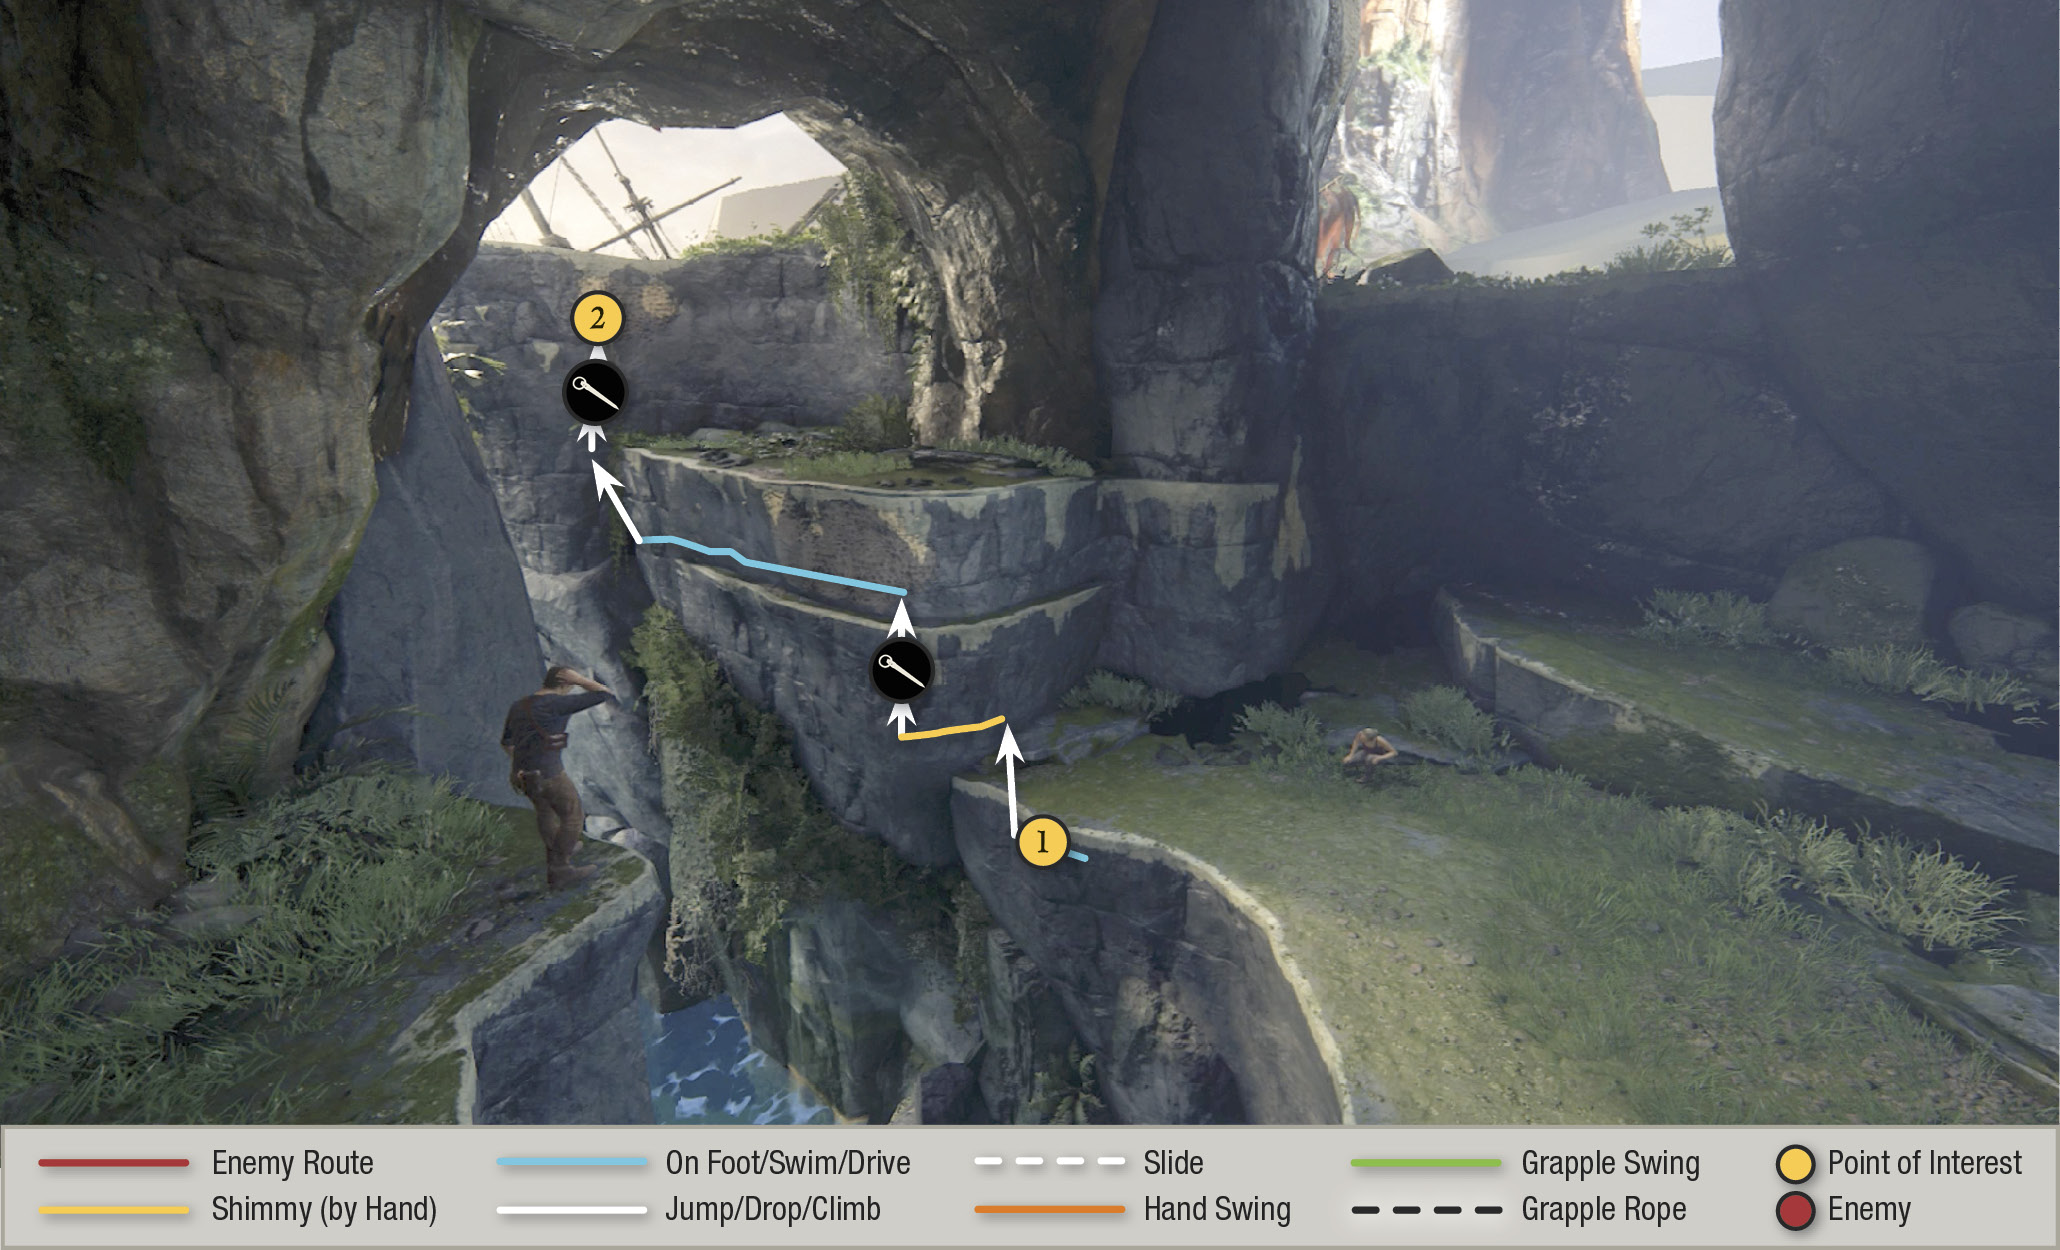
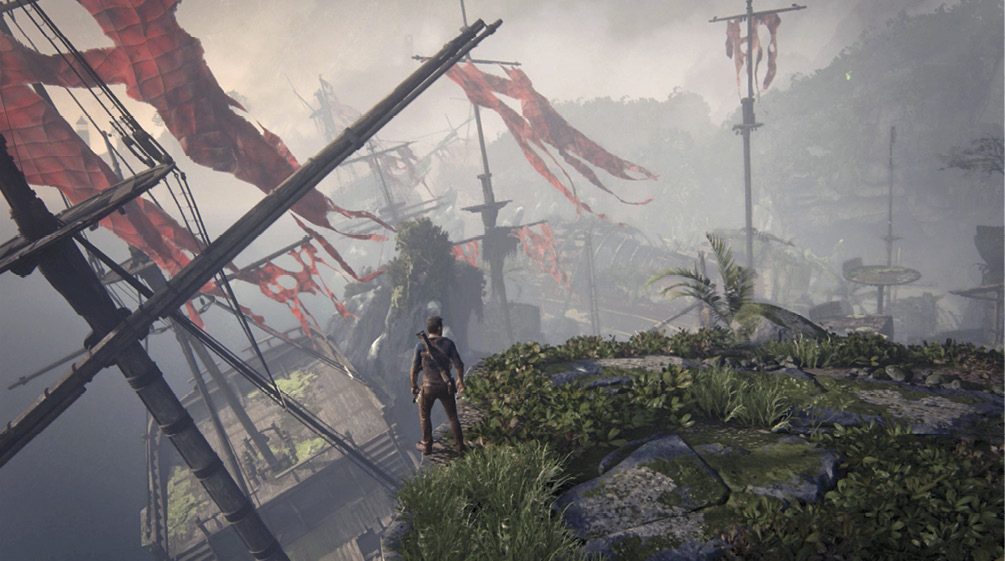
From where you start in the cave, walk toward the opening with the view of the galleon. Jump to the handholds on the ledge (1), shimmy left and use the piton to reach the top. Perform a similar task to overcome the next ledge and climb to the overlook (2) using your piton on the porous section. (You could also avoid the second piton task by using the handholds to the left.) Nathan gazes down on the ship graveyard. To progress, you will work your way from terrace to terrace across the face of the cliff. However, before you go far, a treasure can be found near the second terrace.

Jade Flower Pendant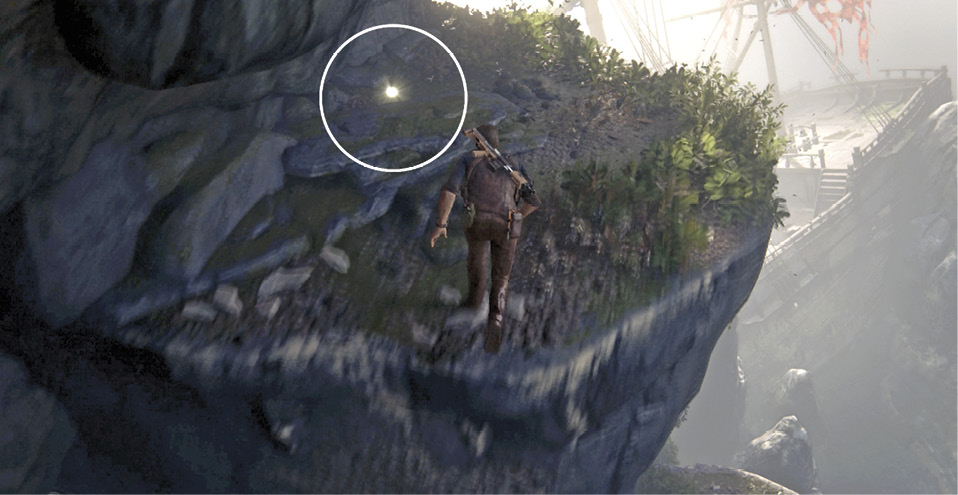
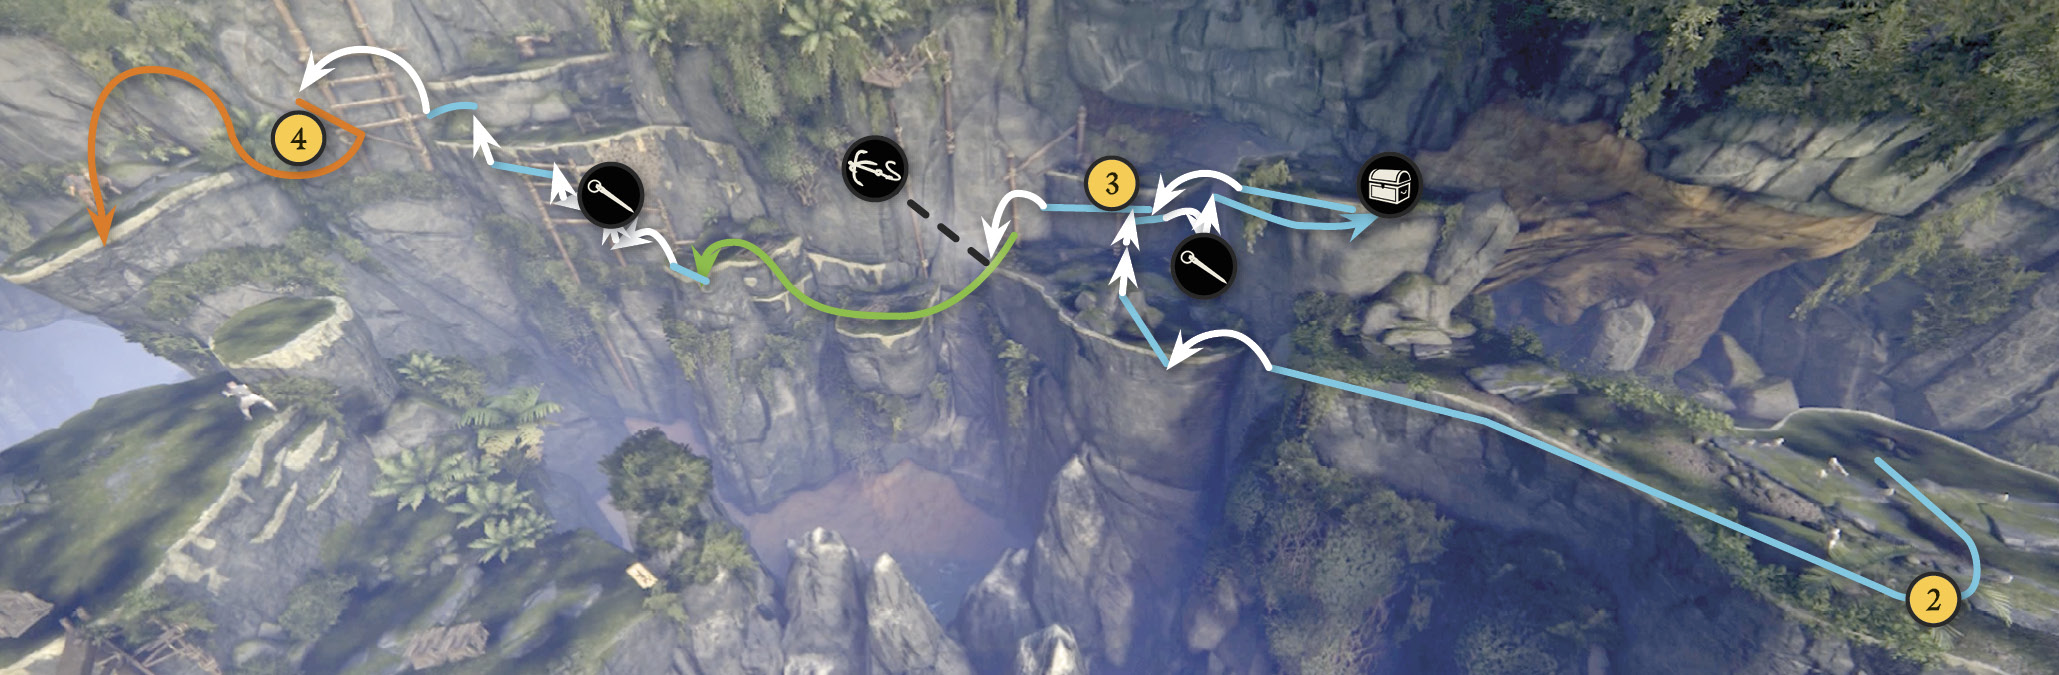
Jump from the first overlook (2) to the next terrace and then climb up the nearby ledge (3). You must get the longest running jump this short ledge allows and then leap and stab the porous wall with your piton. Climb to the high terrace to find the Jade Flower Pendant. |
From the treasure’s ledge, jump back to the previous ledge (3) and then leap off the left side and throw the grapple hook to the wooden scaffold post above. Swing across to the next terrace, and jump to the wood scaffold below the piton wall. Use this to reach the ledges above and ultimately the swing-pole (4). Use it to swing across to a platform and trigger a quick cutscene: Nathan and Elena spot Sam running from pursuing Shoreline gunmen across the beach below.
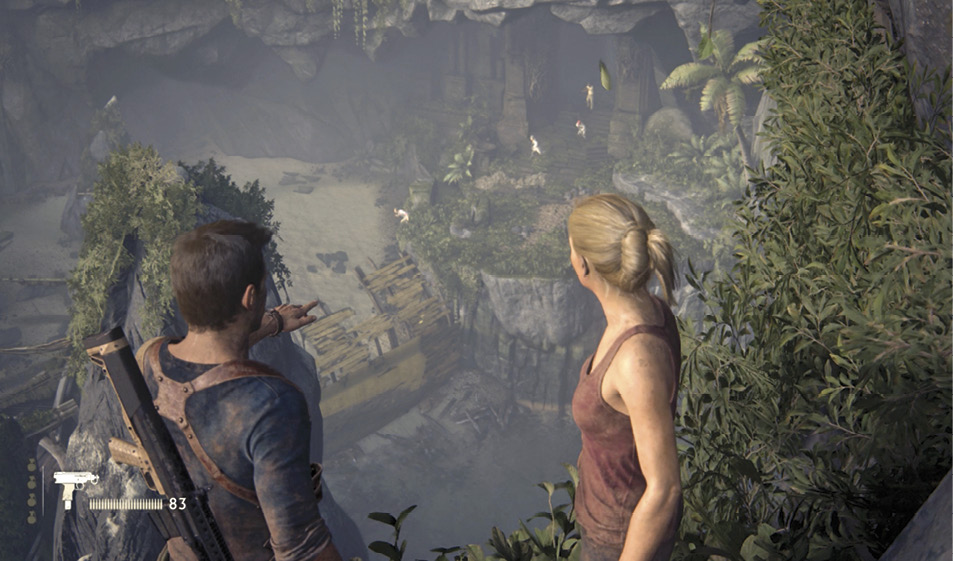
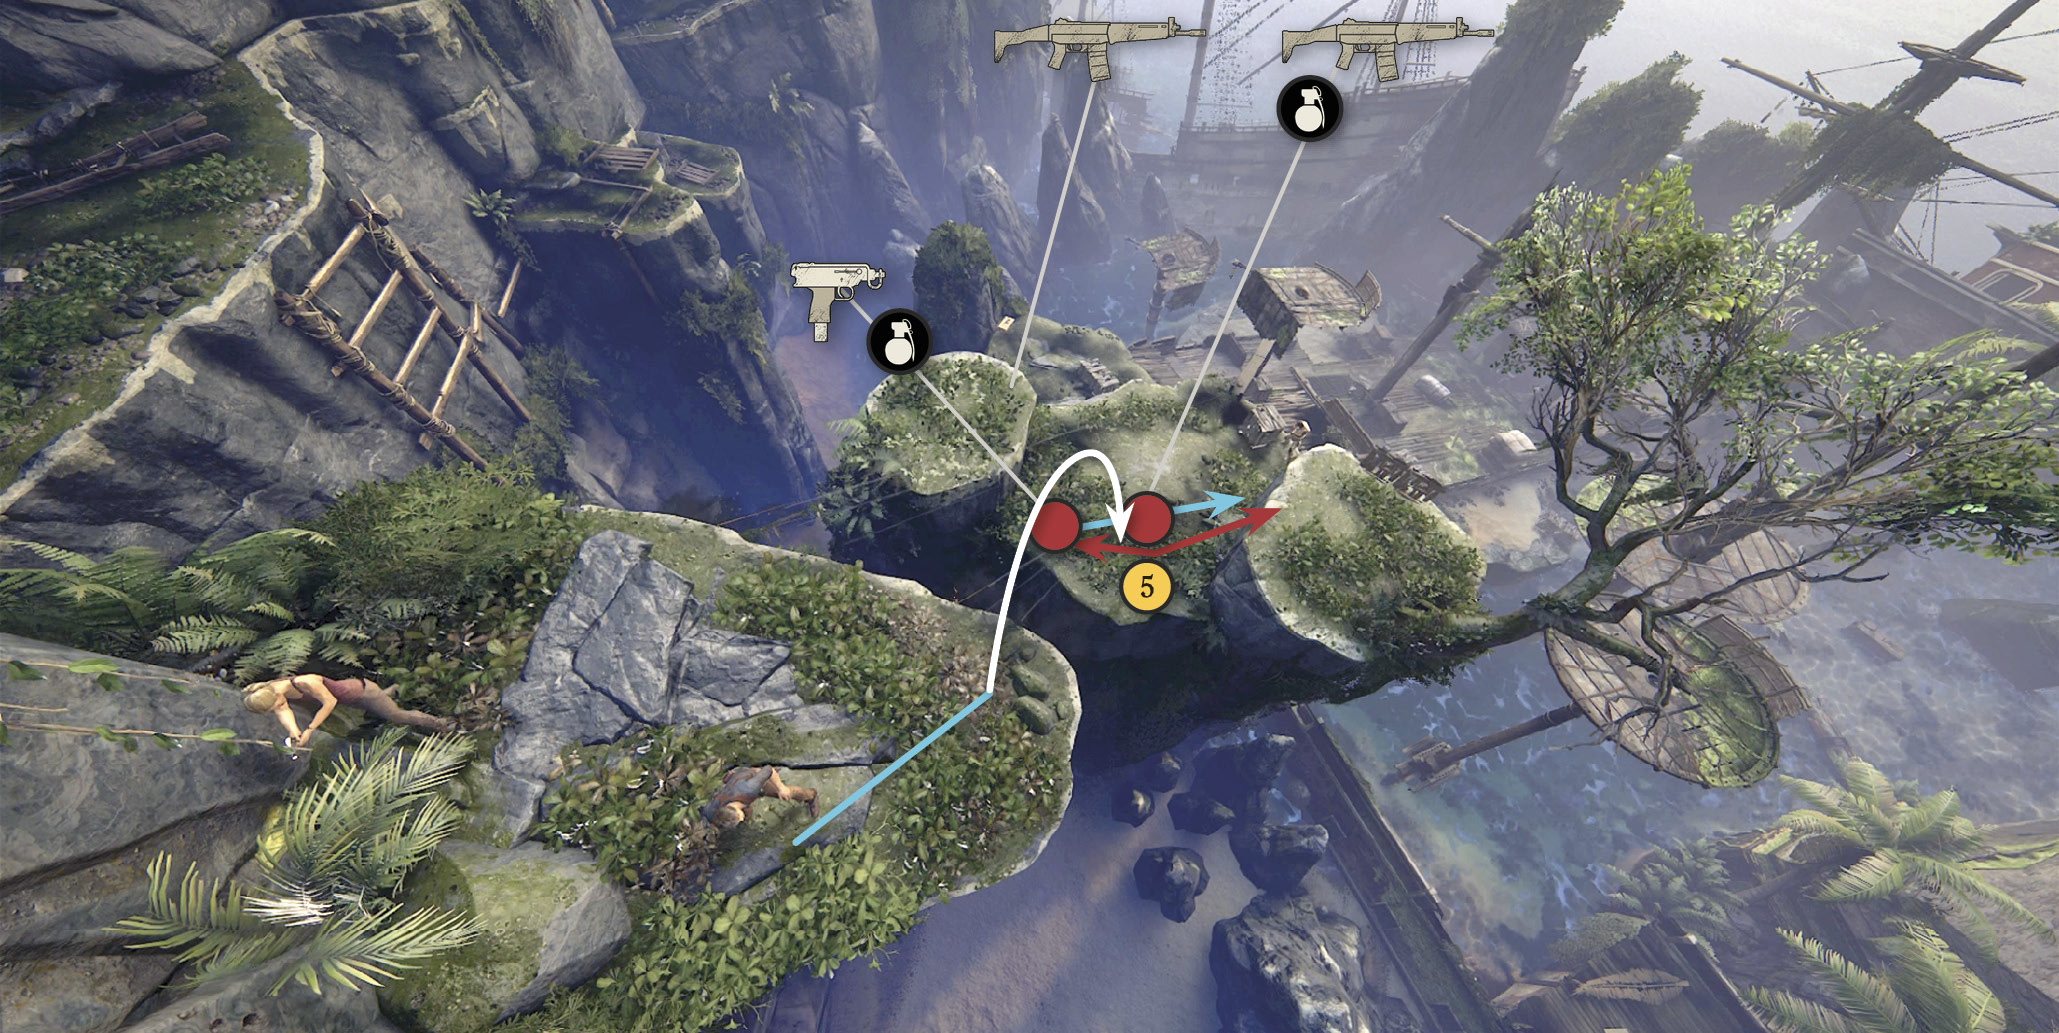
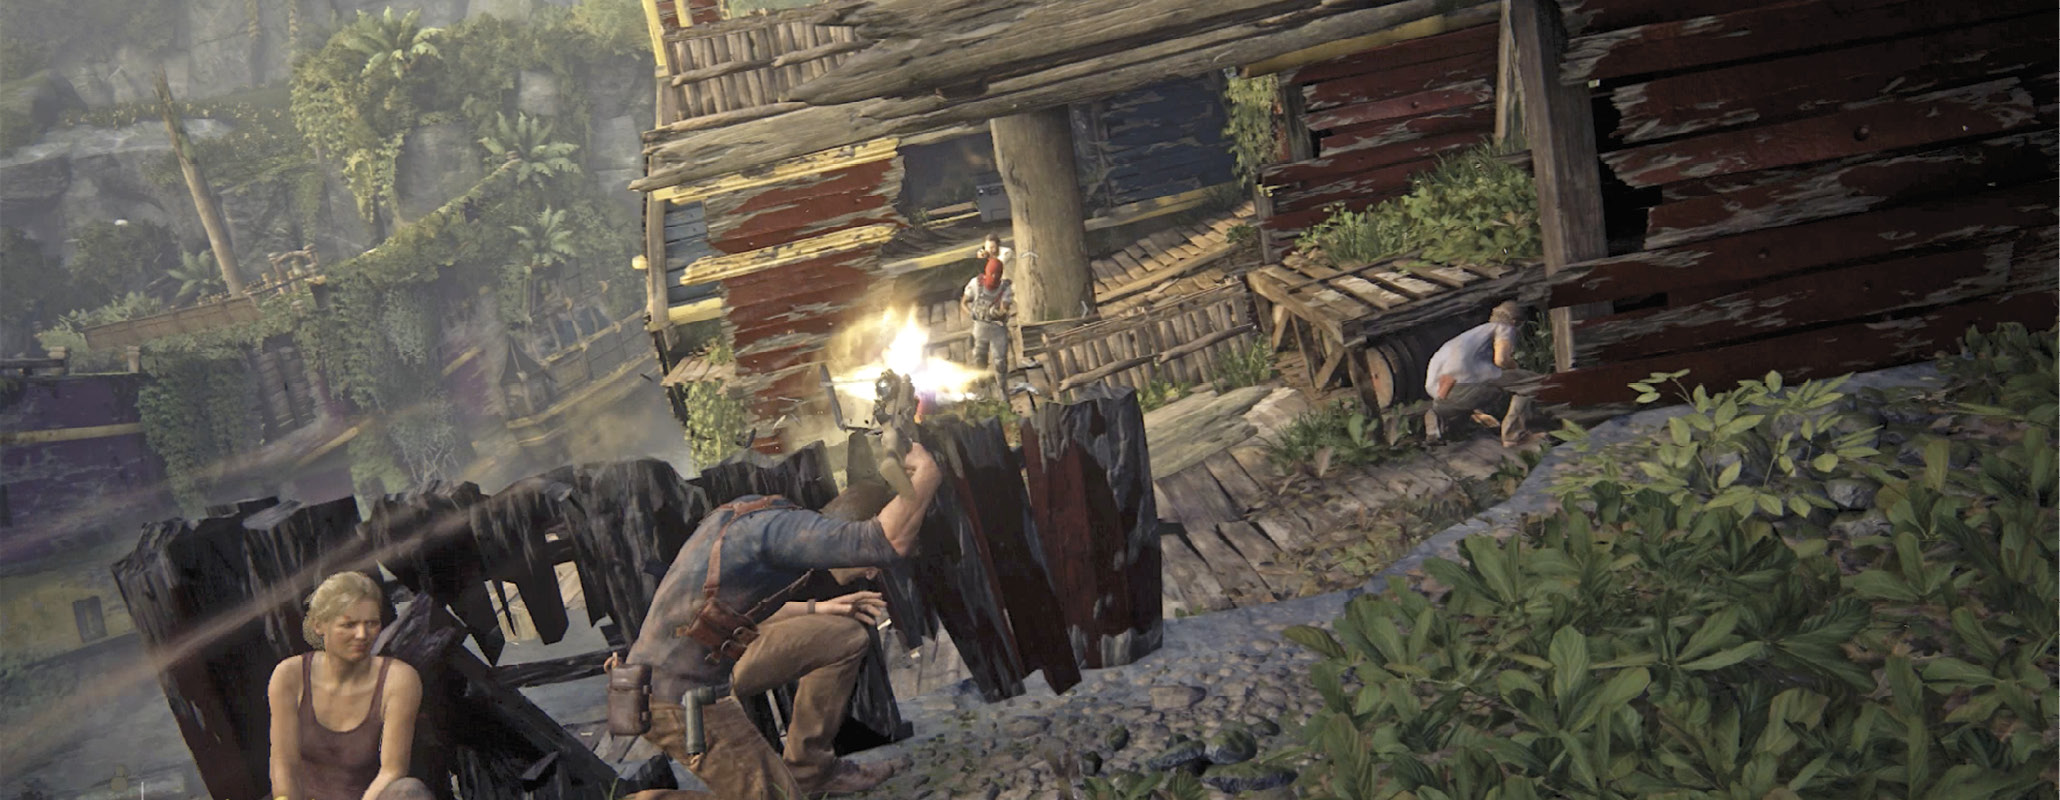
The moment you regain control, two gunmen emerge on a terrace just below (5) and open fire. Immediately leap directly down for an instant drop-kill (and rifle disarm) on the nearest shooter, then launch a melee attack to take out the other guy. (You can also just try to shoot them from your terrace, but the jump attack is much quicker and safer.) As you engage these first two men, a wave of Shoreline mercenaries suddenly fans out on the galleon deck below.
Clear the Galleon
Defeat the First Wave
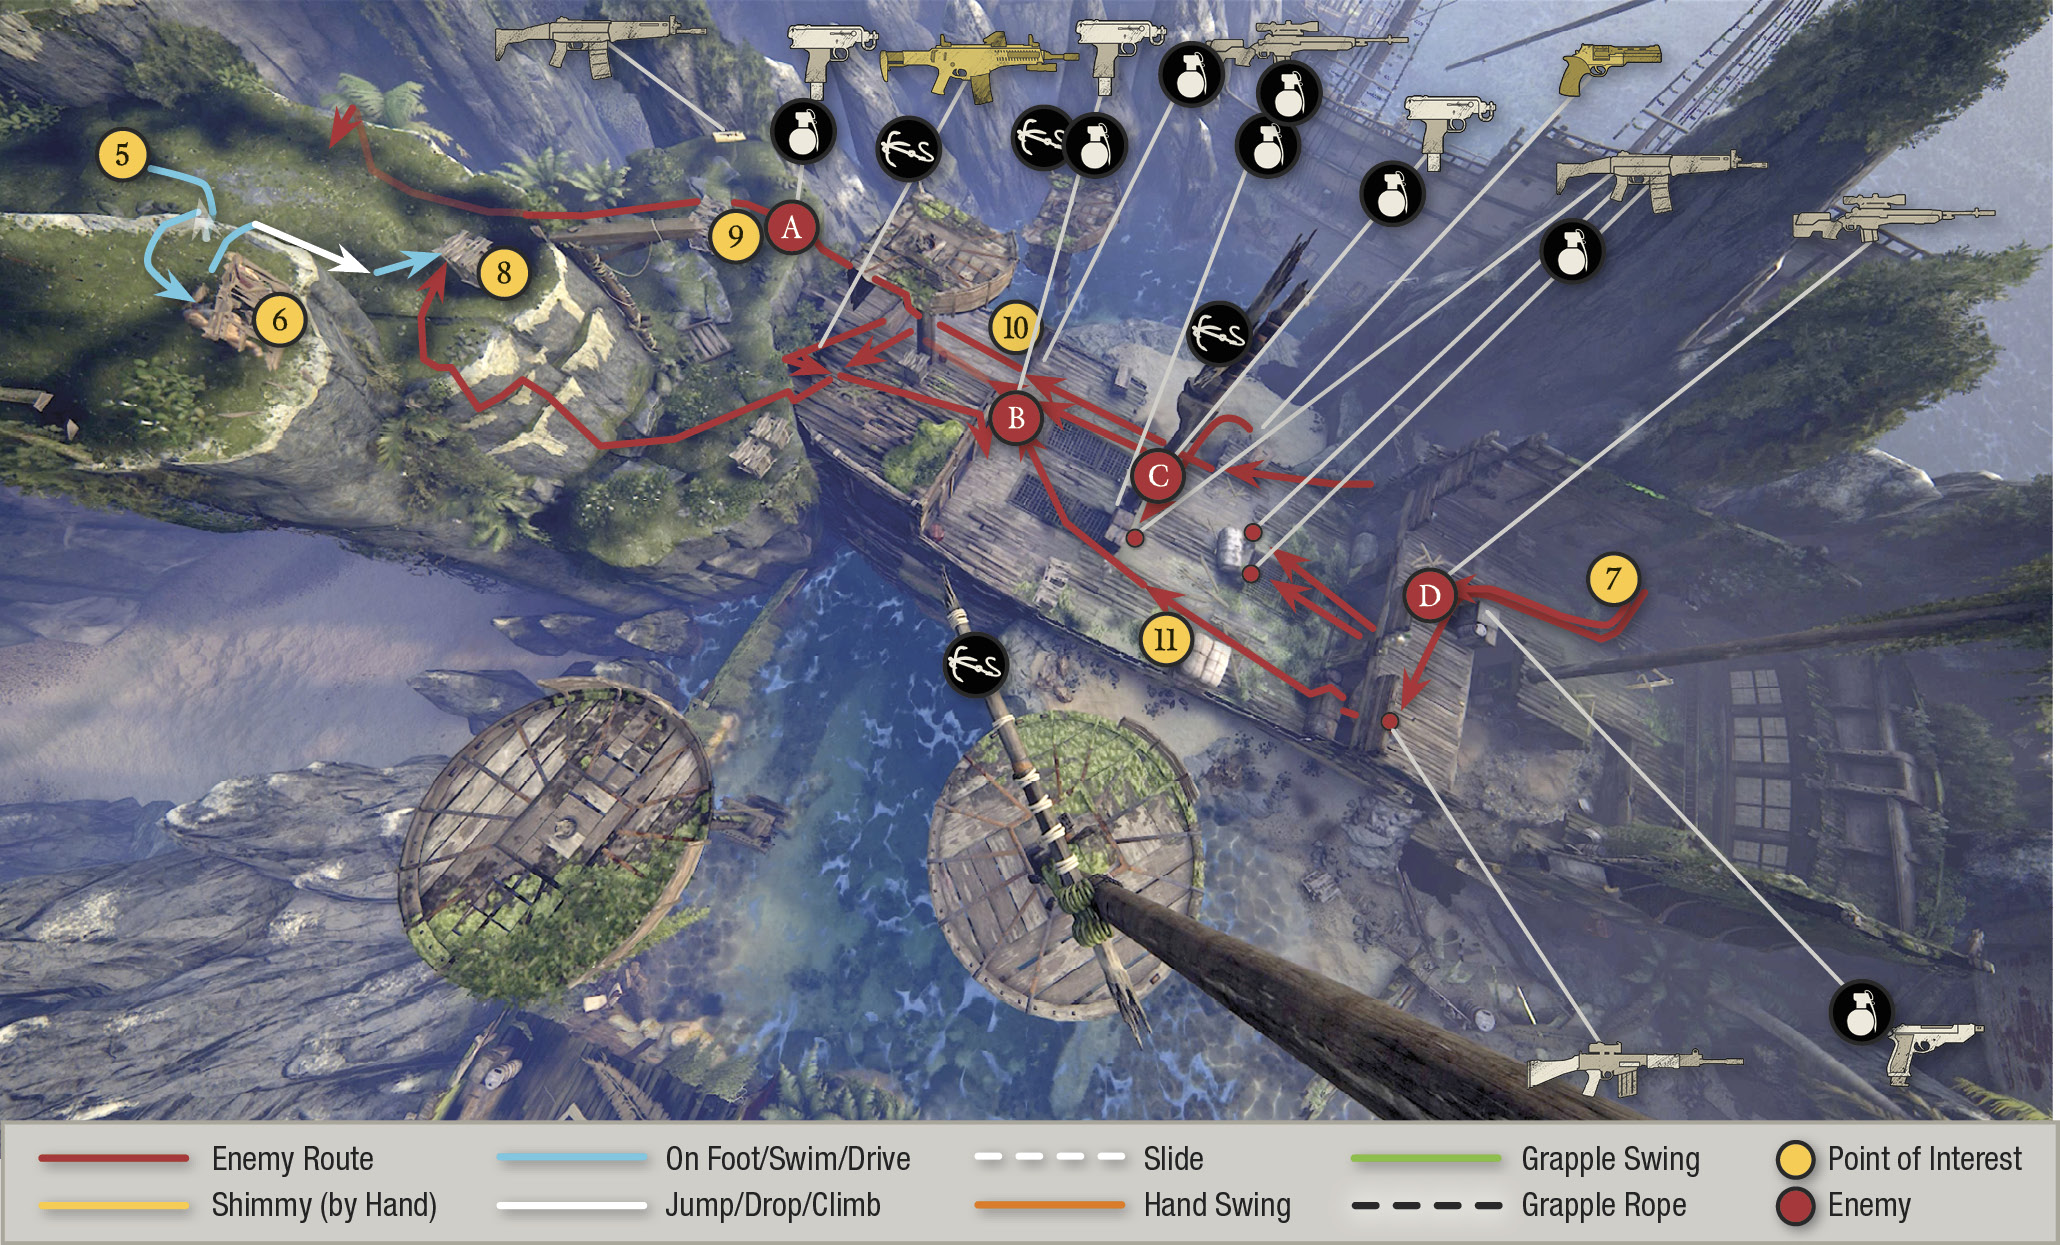
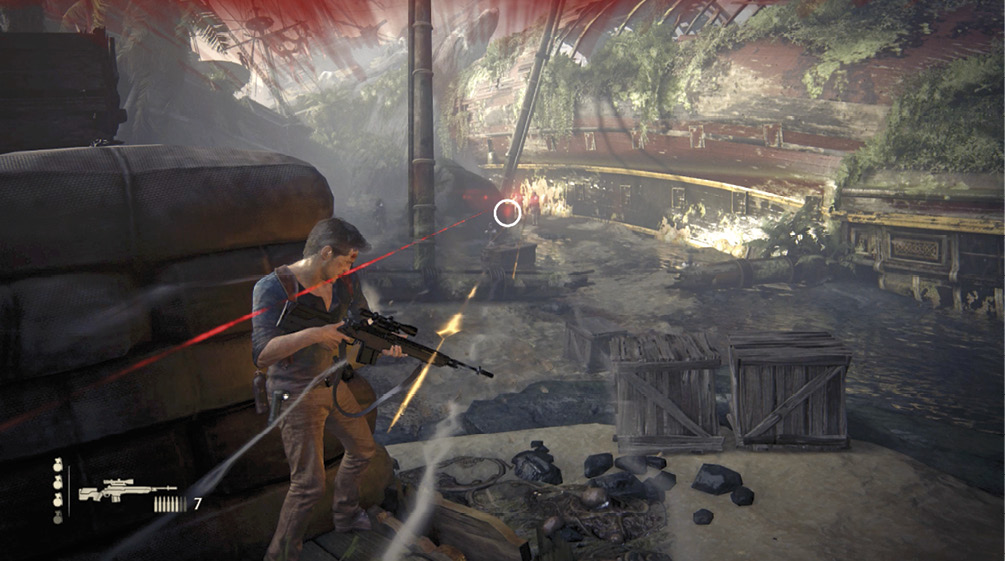
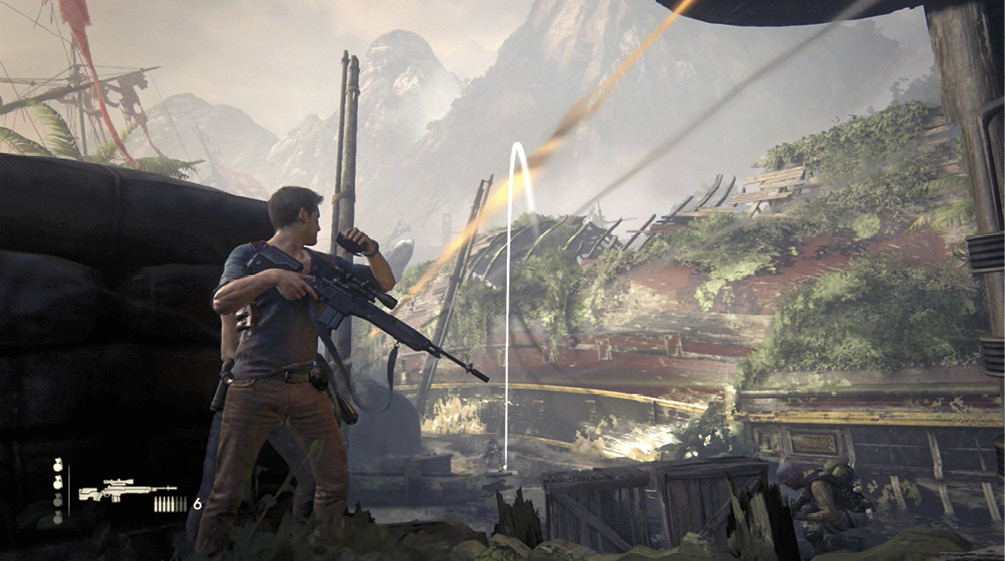
Take cover at the fence (7) on the highest ledge and watch for three gunmen (A, B, C) who advance directly toward you while the others, including a deadly sniper (D), take up positions behind cover on the deck. Try to take out the sniper first; he is the number one threat right now. If you have a grenade, you can throw it directly at him by aiming your weapon (L2) at the sniper and then throwing the grenade (R1). This is quicker and faster than using the lobbing projectile aiming feature. If you don’t get rid of the sniper quickly, switch your focus to the three aggressors working their way up to you and use cover or rolling as much as possible to avoid the sniper’s laser aim.
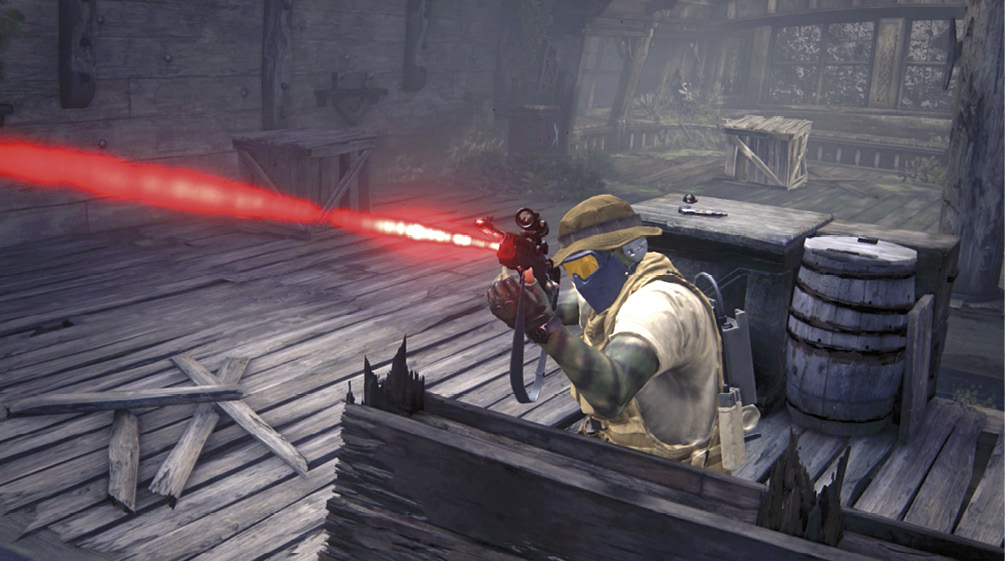
If you stay put too long, incoming fire will shred your fence cover. Drop behind boxes (8 & 9) on terraces just below. Find the HS39 on the lowest terrace. Also note four crow’s nest platforms with protective railings rising above the deck. You can reach the closest nest with a running leap from ledge (6), or the one on the main galleon’s back from the extended beam from ledge (8). Getting to a crow’s nest gives you the height advantage and puts the sniper at closer range. Swing to other nests using the various grapple points available.
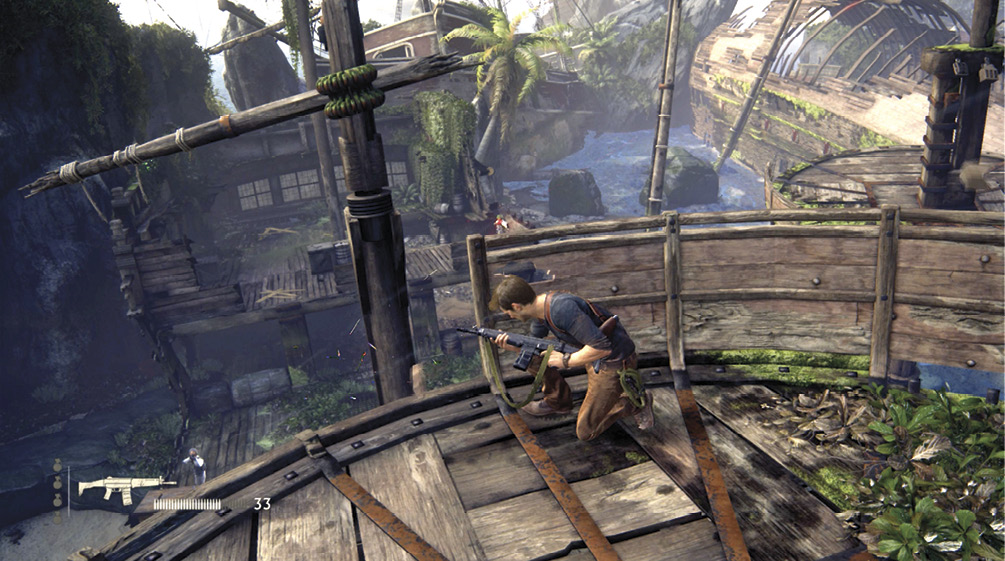
The best plan of action is to work your way to the ship’s deck, taking out the advancing troops while picking up dropped grenades along the way. Lob grenades forward as you move to disrupt attacks or kill entrenched guards. Take cover behind the short wall on the starboard side of the galleon (10). From here you can lob more grenades forward or pick off more soldiers taking cover ahead. Inside the open cabin to your right sits an ARX-160 if you need another powerful rifle. Keep moving. Don’t stay in one spot or you will be forced to move as the grenades start sailing your way.
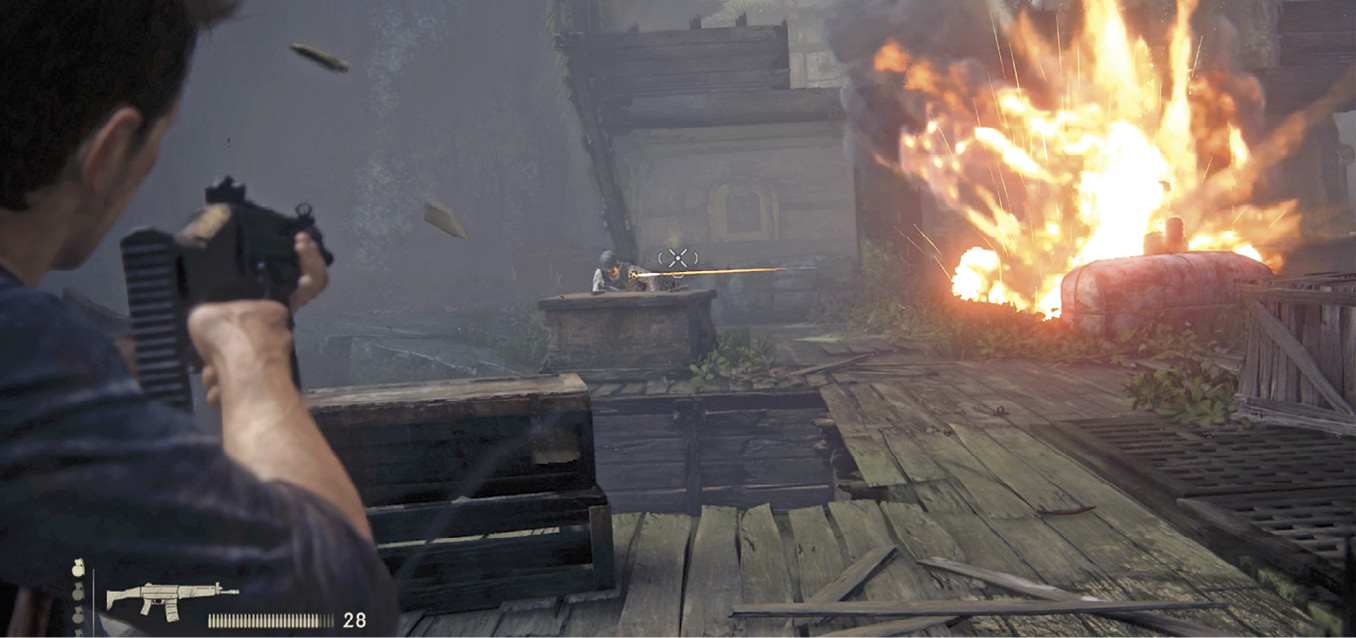
Your first wave goal is to get to the sniper rifle and grenades on the crates near the main mast in the ship’s center. Take cover at these crates and swap out your rifle with the M14 Custom sniper rifle. Grab the grenades and make sure everyone in the first wave is dead before moving forward to the indestructible, sandbag pallet (11).
Defeat the Brutal Second Wave
As you finish up on the galleon, the L3 icon appears to draw your attention to a second wave of attackers advancing across the beach from a hole (12) that just blew open in the side of the next galleon.
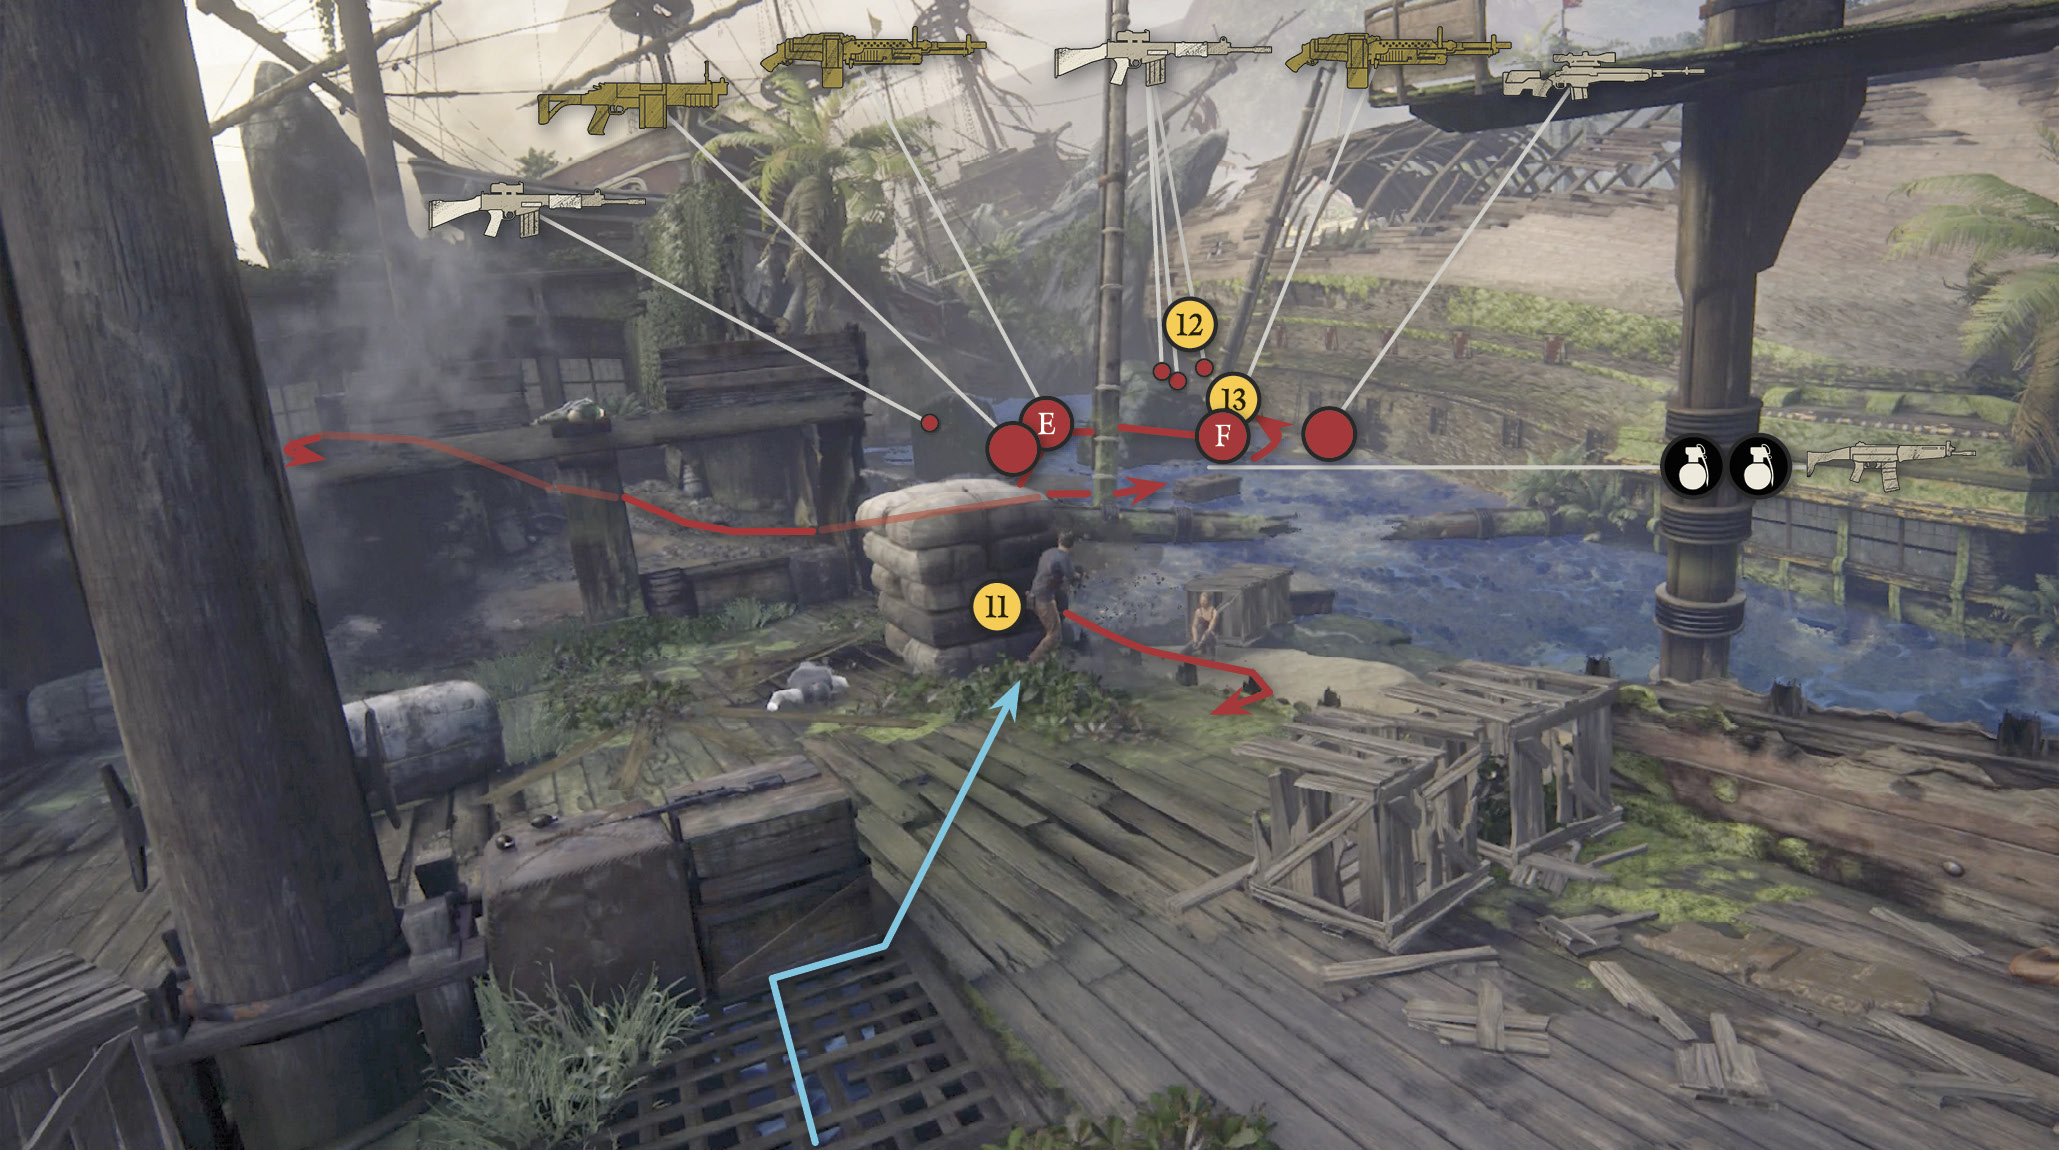
Try to be full on grenades going into this wave of the battle. Grab grenades and the M14 Custom sniper rifle sitting on a crate at the base of the main mast. Then take cover at the sandbag stack (11) to start targeting the new attackers. Snipe the lighter, quicker foes first and save your grenades for the heavies when they emerge from behind the big boulder. It’s important to snipe as many of the guards as you can to avoid being forced from cover from thrown grenades or grenade launcher attacks.
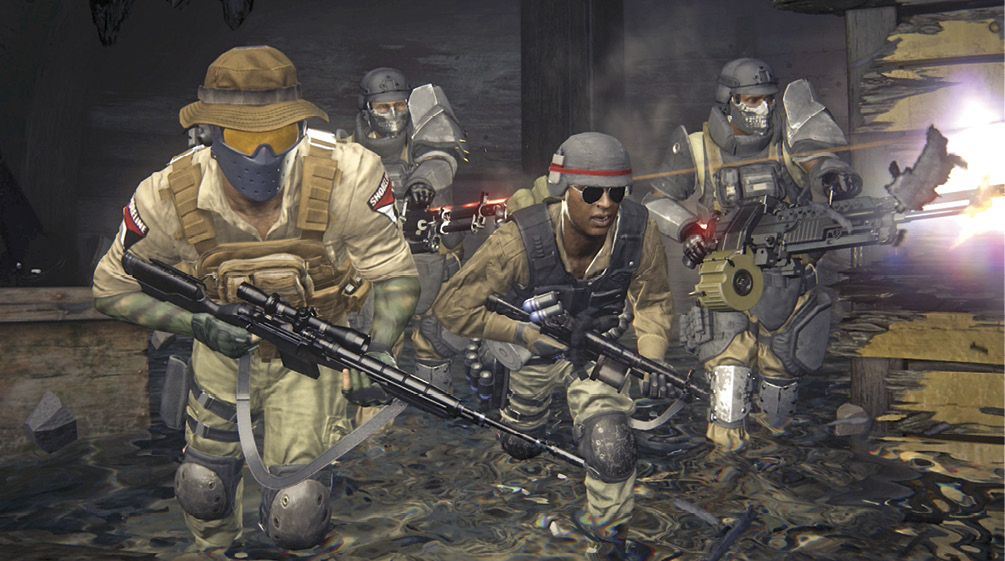
If you run out of grenades or just prefer to shoot the mini-gunners, remember that despite their heavy armor, one headshot knocks off their helmet, and a second headshot kills them. So you can take them out with two shots apiece…if you’re a good enough marksman.
The lumbering armored troopers (E & F) advance on the routes shown on our map; they split courses near the explosive barrel (13). The explosion from shooting this barrel doesn’t kill them but certainly damages them a great deal. If undefeated, one moves directly onto the deck from the beach and the other tries to flank you by heading up a ramp to the upper deck. Immediately after shooting the explosive barrel, throw all your grenades at their feet. For best results try using the quick, aiming-throw L2 + R1. If they separate before you throw grenades, just know it’ll take two grenades to kill one heavy soldier.
Clear Out the Capsized Galleon
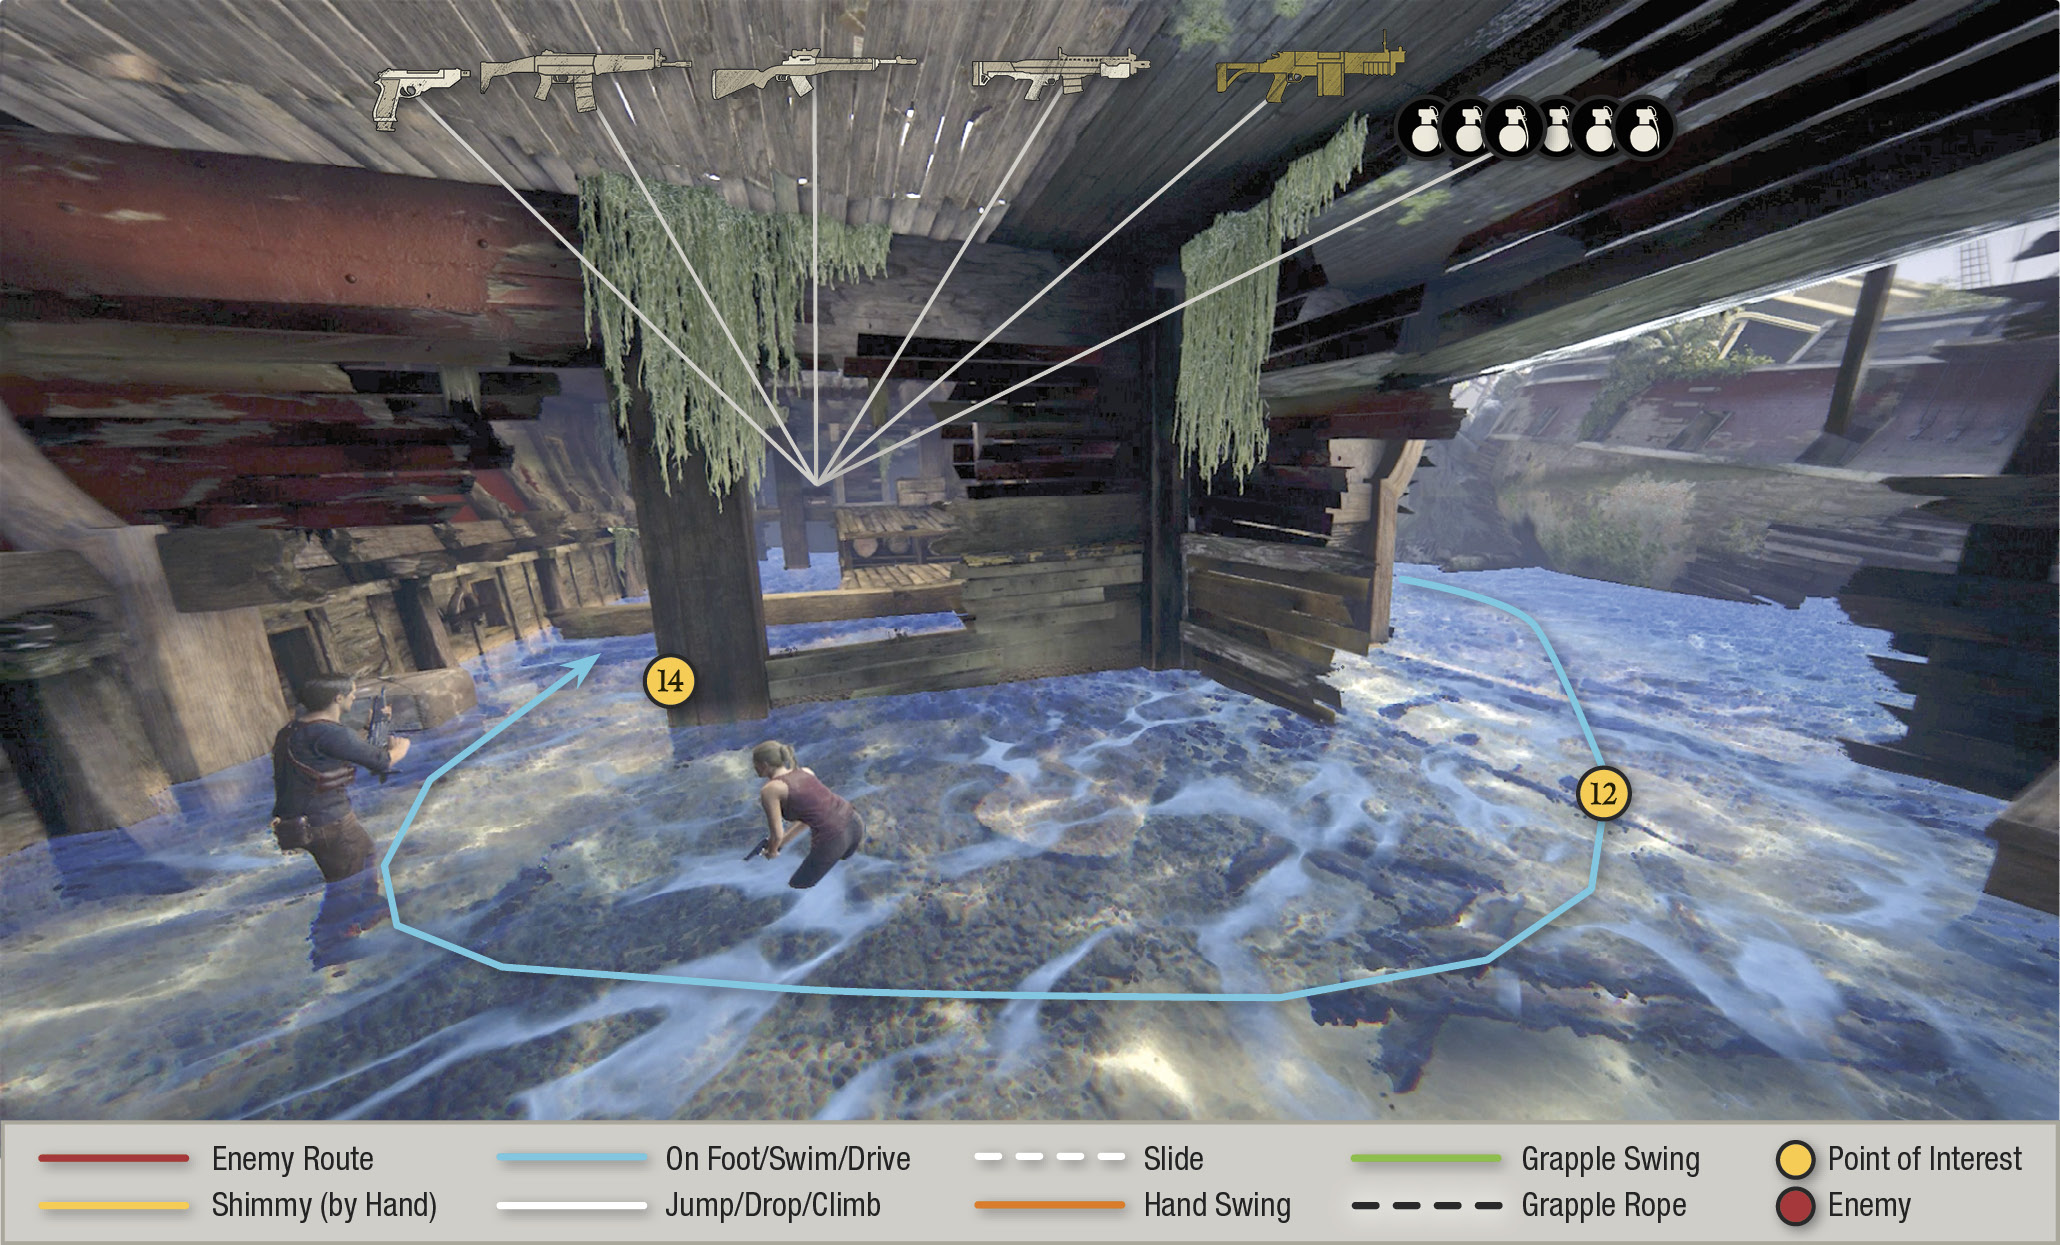
When the last of the advancing wave is down, you get a breather. Grab a Golden DShK mini-gun from one of the fallen heavy troopers, then wade through the water to the big hole (12) at the capsized galleon’s far end. Inside, do not move beyond the first pillar (14)—when you move beyond it, debris suddenly collapses behind you, closing off any retreat. But hey, who wants to retreat? You’ve got a mini-gun.
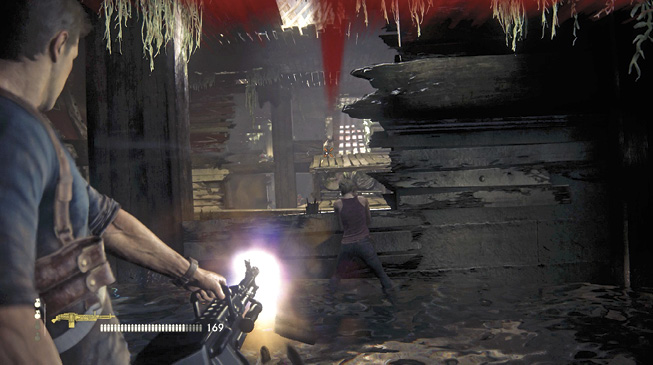
Entering the ship triggers the appearance of another Shoreline squad. Shoot them while strafing from side to side behind the doorway (14) and the window to the doorway’s right. Look for enemies to show themselves on both upper and lower levels ahead. There are a couple heavily armed enemies inside, but you can cut them down quickly with the Golden DShK. Exhaust the mini-gun ammo on them before moving beyond the collapsing doorway.
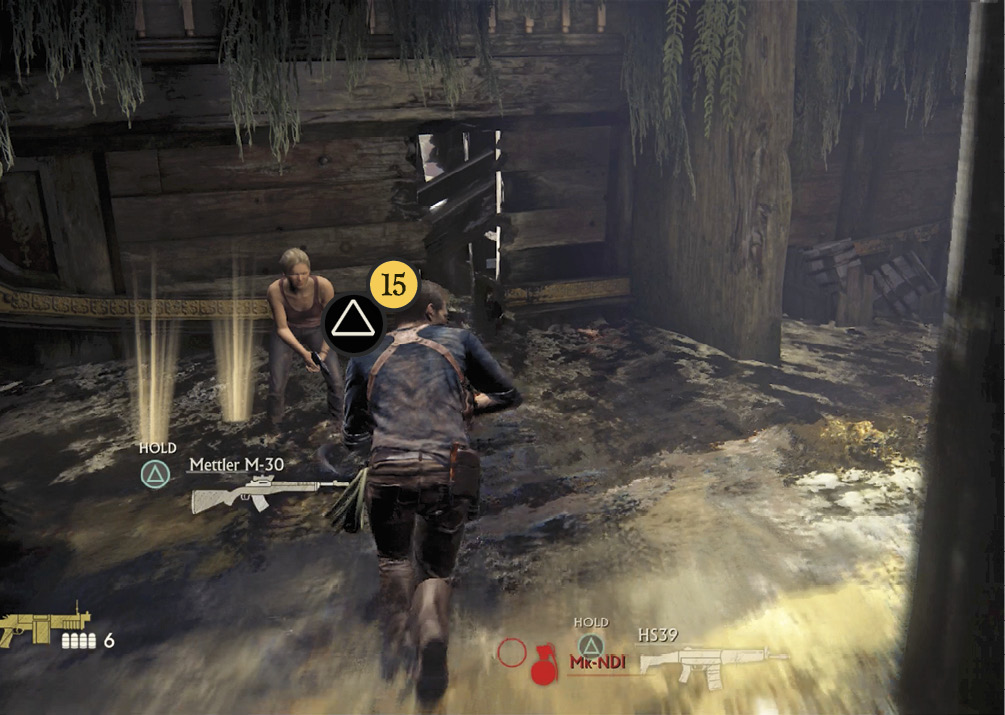
When the room is secured—and in preparation for the next beach battle—swap the mini-gun for the Golden China Lake GL, carried by one of the more heavily armed Shoreline guards inside. (You can’t carry the mini-gun through the exit.) Fill up on grenades and find a decent handgun, like the Raffica on a crate on the top level. Head to the far exit (15) and lift the beam that blocks the doorway to trigger a quick scene: Nathan and Elena squeeze through to find mercenary troops rushing down the beach to the left, guns firing. Who are they chasing? You get one guess.
As soon as you exit the capsized galleon (15) you see three guards running away from you on a nearby beach. No matter what you do, one red-hooded, shotgun-toting Shoreliner (G) stops and looks in your direction. Fire a grenade from the Golden China Lake at his feet. Continue to fire more grenades in the direction of the other two running soldiers as you move to the nearest crate (16) for cover.
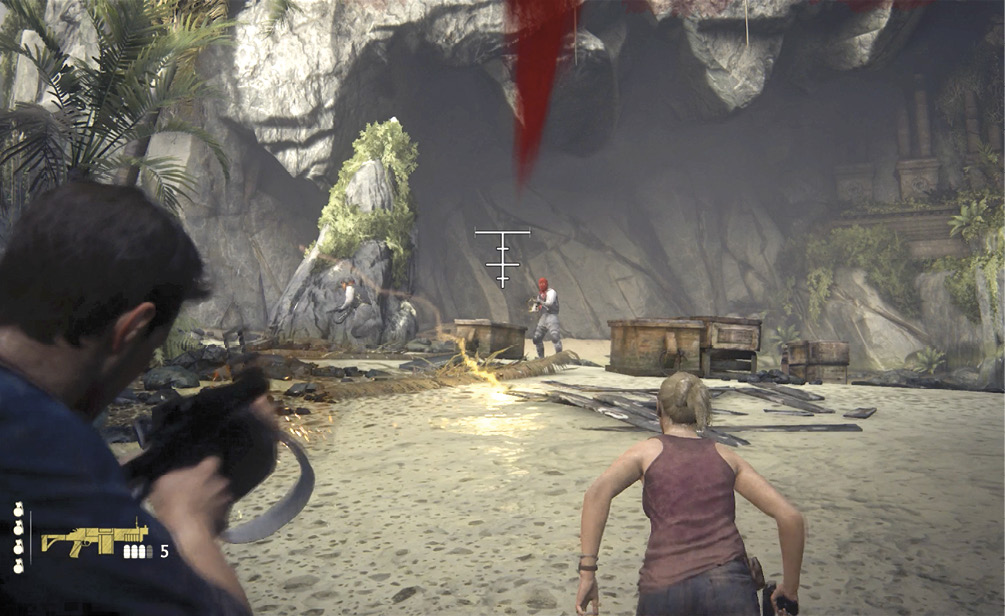
From cover, watch as four soldiers drop from the galleon (17) onto the beach and start advancing toward you. Launch a few grenades into the group while they are still bunched up together. This is the easiest and quickest way to deal with the two helmet-wearing, heavy-hitters who are both toting Condor shotguns (H & I) and bringing up the rear. Pick up either one of the Condors or the Copperhead SR7 and a Raffica handgun from the fallen foes to prepare for the next challenge area.
Beach Battle
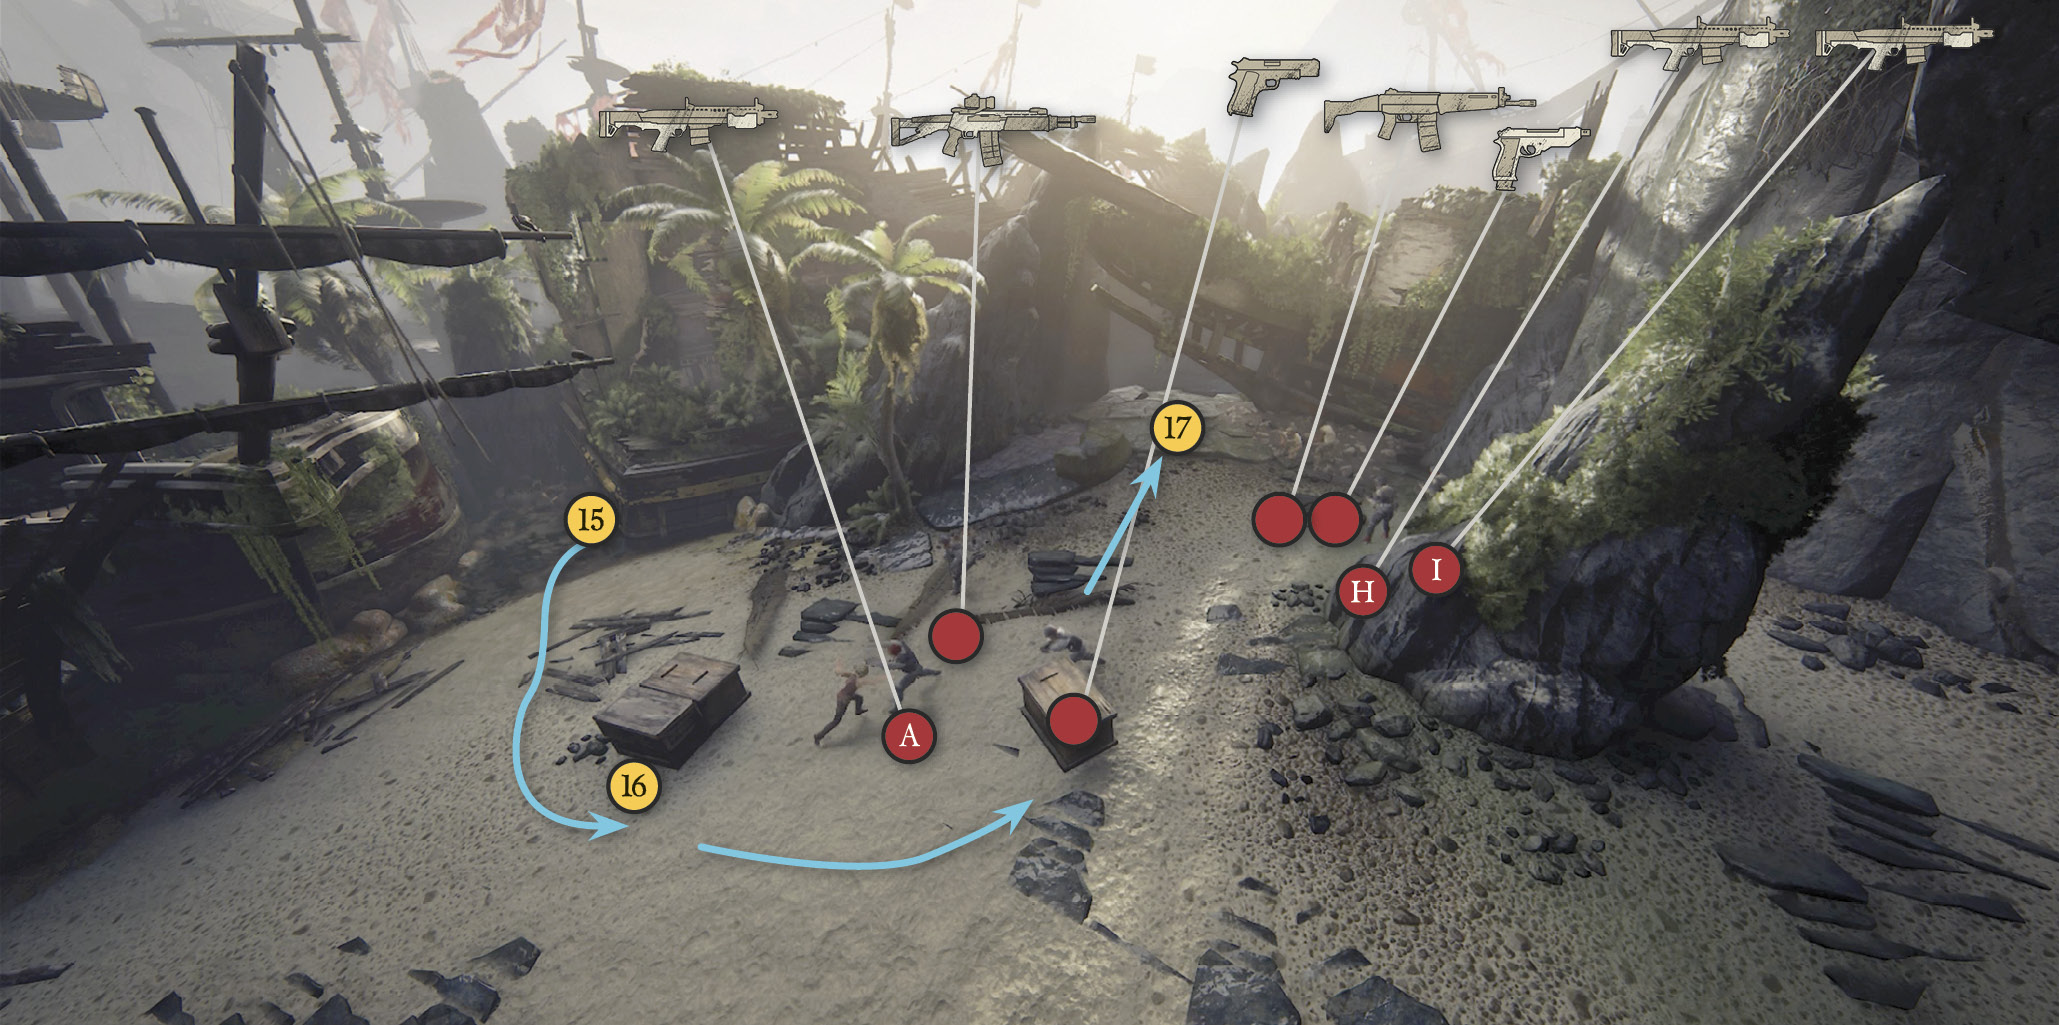
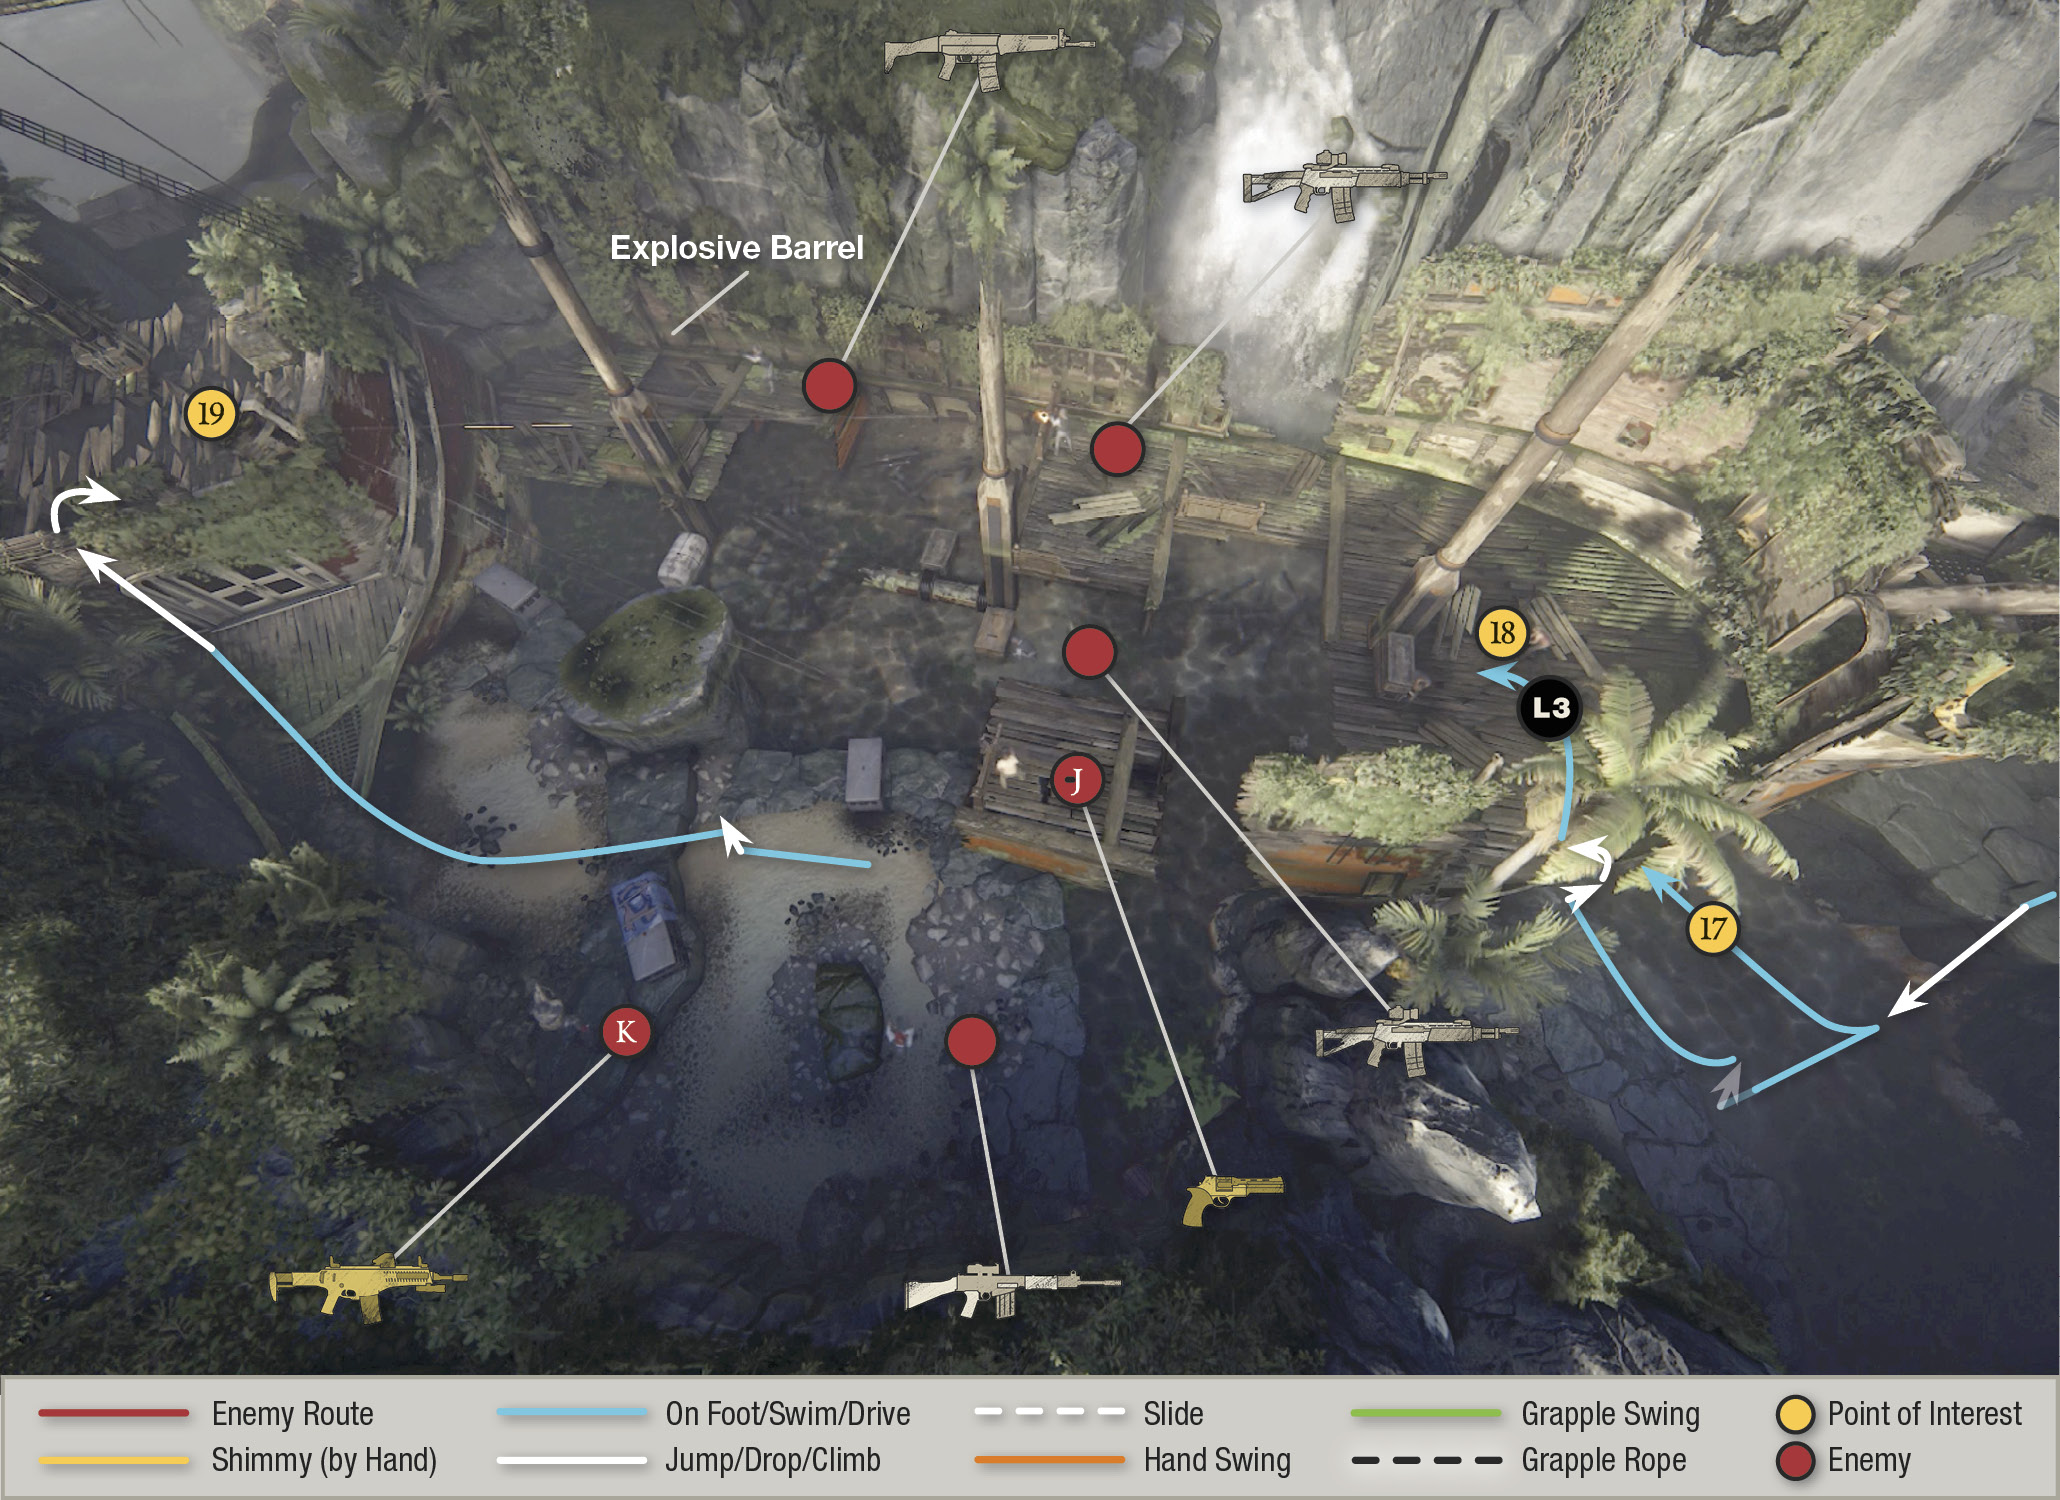
Cross the beach and jump into the water (17). Here you will find a galleon with an entrance hole in the side of its hull or you can clamber to a top deck using the ledge on the stream’s other side. The Shoreline squad in this area is focused on Sam on the next shipwreck (19), but they quickly turn their attention to you if you make yourself seen or heard.
You have two tactical options here: Enter the hole in the ship’s hull and fight from the bottom up; or climb the ledge onto the foredeck and work from there starting from the crate (18) for cover.
If you take the low road, you can actually sneak up and stealthily choke a few guards as their attention is still with Sam. Do this without attracting any attention and you can thin their numbers before you need to draw your firearms.
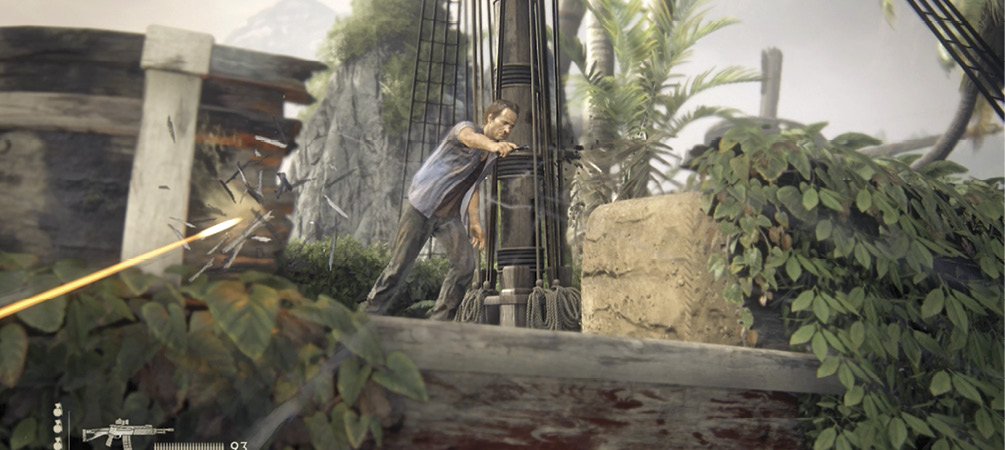
Watch out for the tough heavy trooper (K) near the exit wielding a Golden ARX-160. Before you leave the area, prepare for the following battle by collecting the Golden ARX-160 and the Golden Barok.44 from the white-shirt enemy (J).
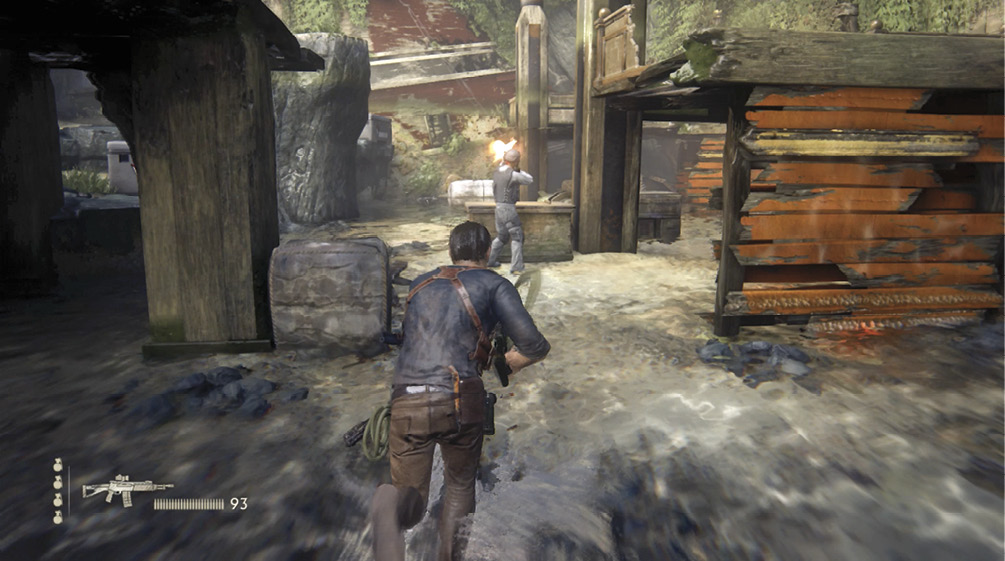
Once you’ve cleared the area, jump to grab the ladder on the red cabin of the next ship section and climb onto the deck (19) to trigger a quick cutscene: Nathan reunites with Sam…but a rocket launcher explosion tears open the floor and they fall through to a lower deck.
Now things really start to get intense. This is definitely the Shoreline “A” team—lots of body armor and heavy weaponry. In particular, you start seeing a trooper (L) firing an RPG that launches rocket-propelled grenades.
Clear the Rocketeers
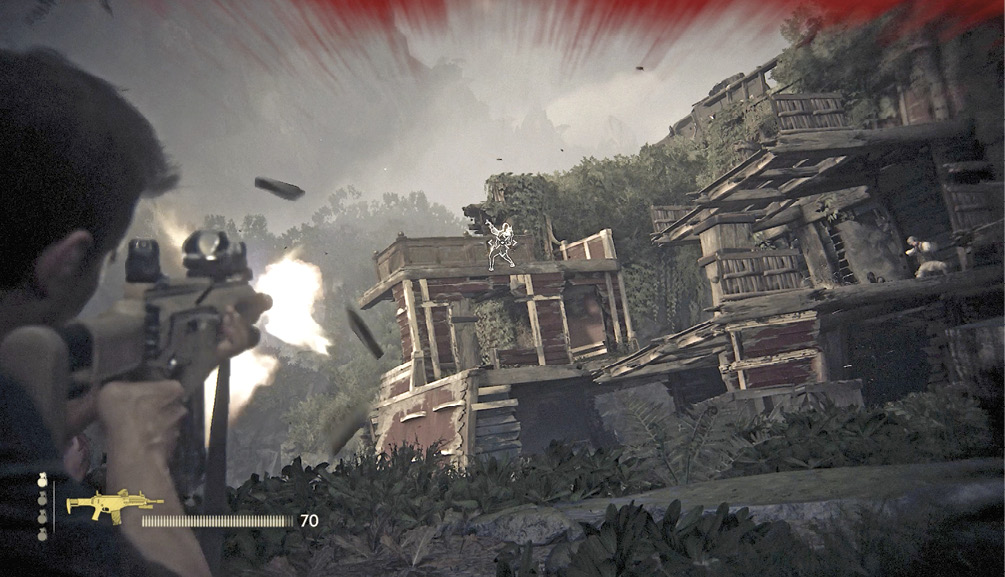
As soon as you get off your butt from the rocket explosion, select the Gold ARX-160 or, even better, the Golden Barok .44, take aim and shoot the rocket-launching soldier (L) in the distant high ship deck. One shot from the golden pistol will take him out. You hardly have time to cover. The time it takes to get to cover and aim and shoot would be better spent shooting and killing this enemy who launches attack after attack into the small cabin where you are located.
Once the rocket launcher is out you can exit the cabin and take cover behind the ledge just outside the cabin (20) and start picking off the advancing enemies. One enemy (M) drops from the top of the cliff onto the galleon to join the remaining four soldiers. As you advance, or as enemies are picked off, an additional four enemies appear from behind the rocket launcher’s post.
Fight across the Dock
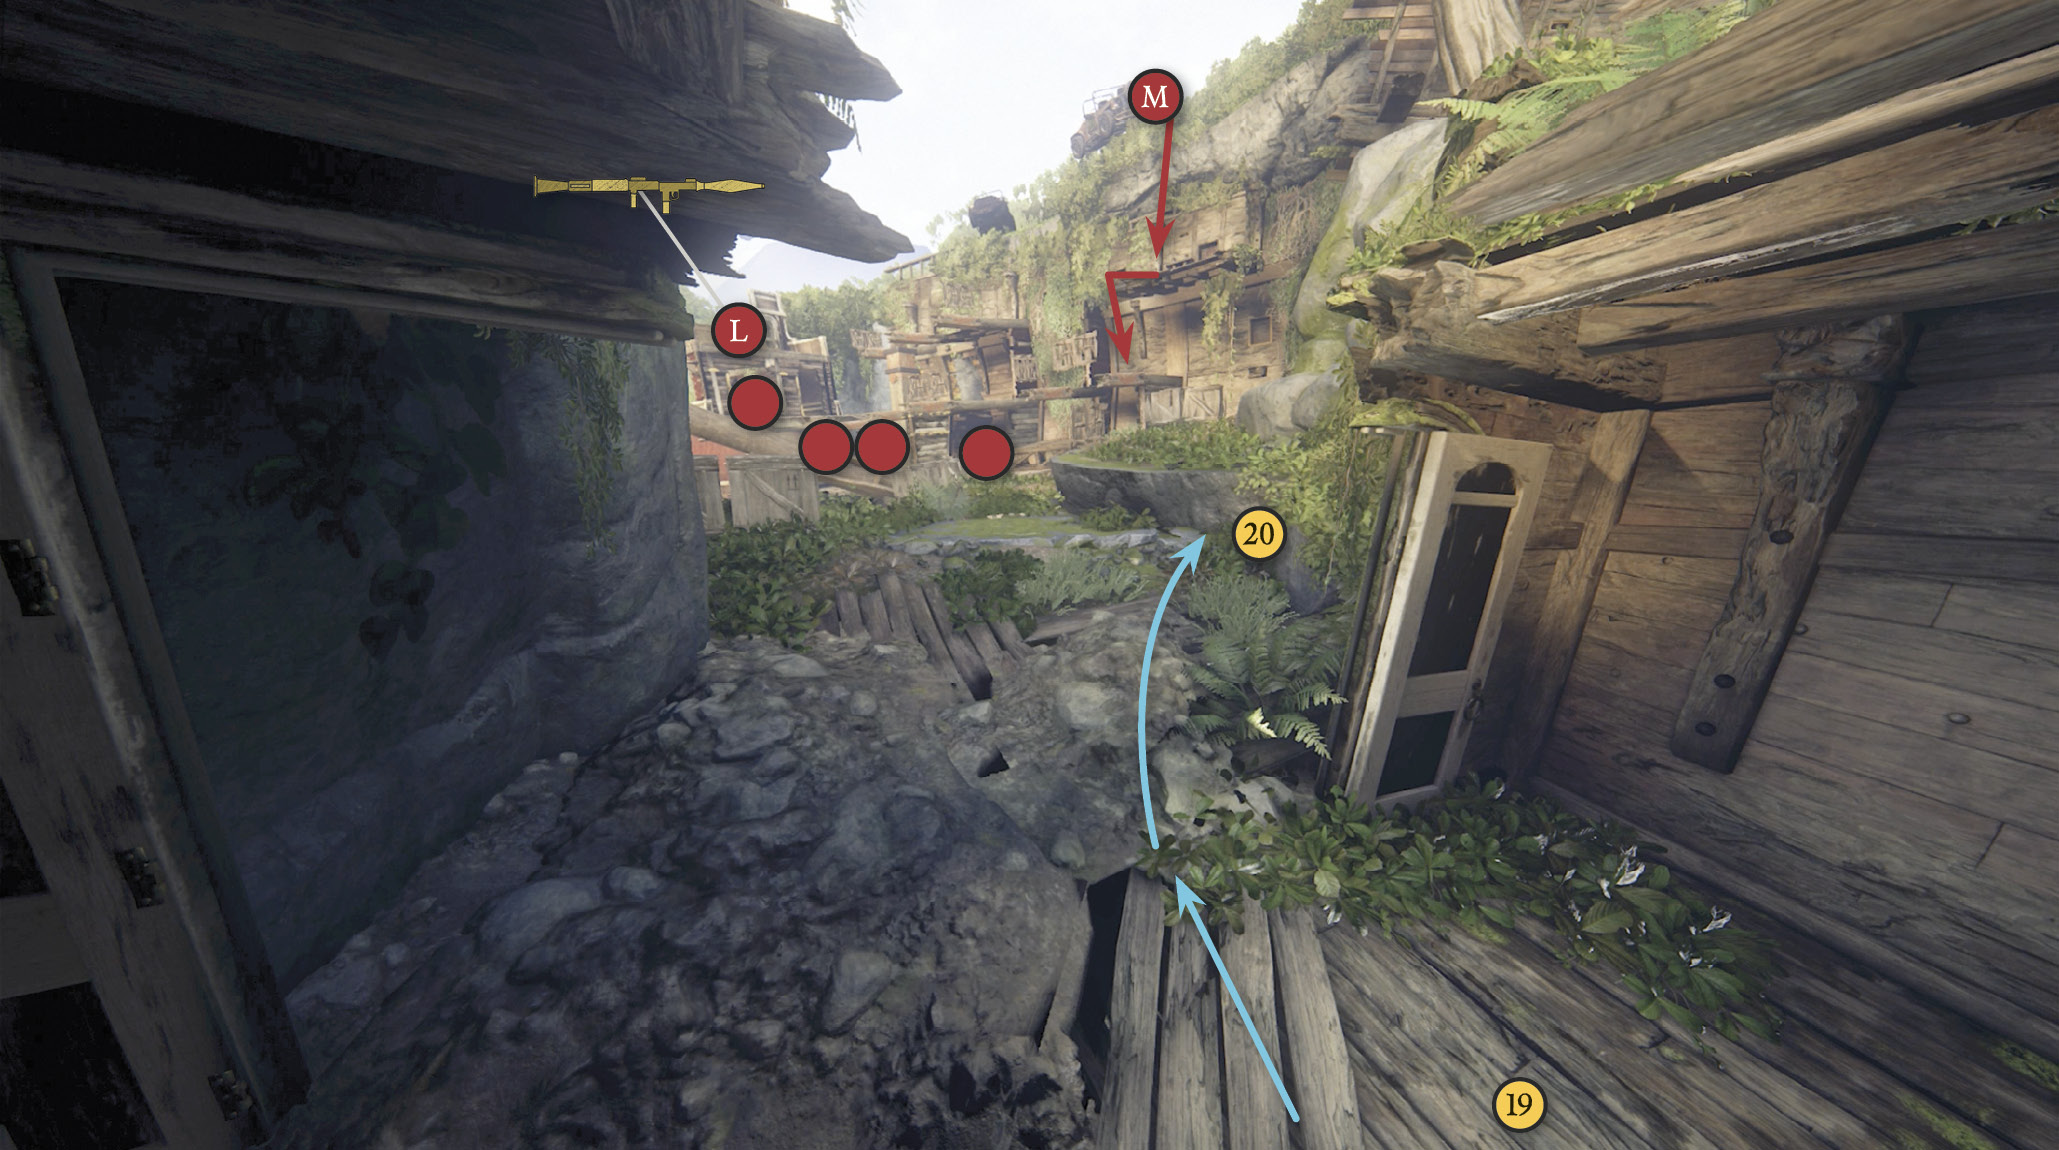
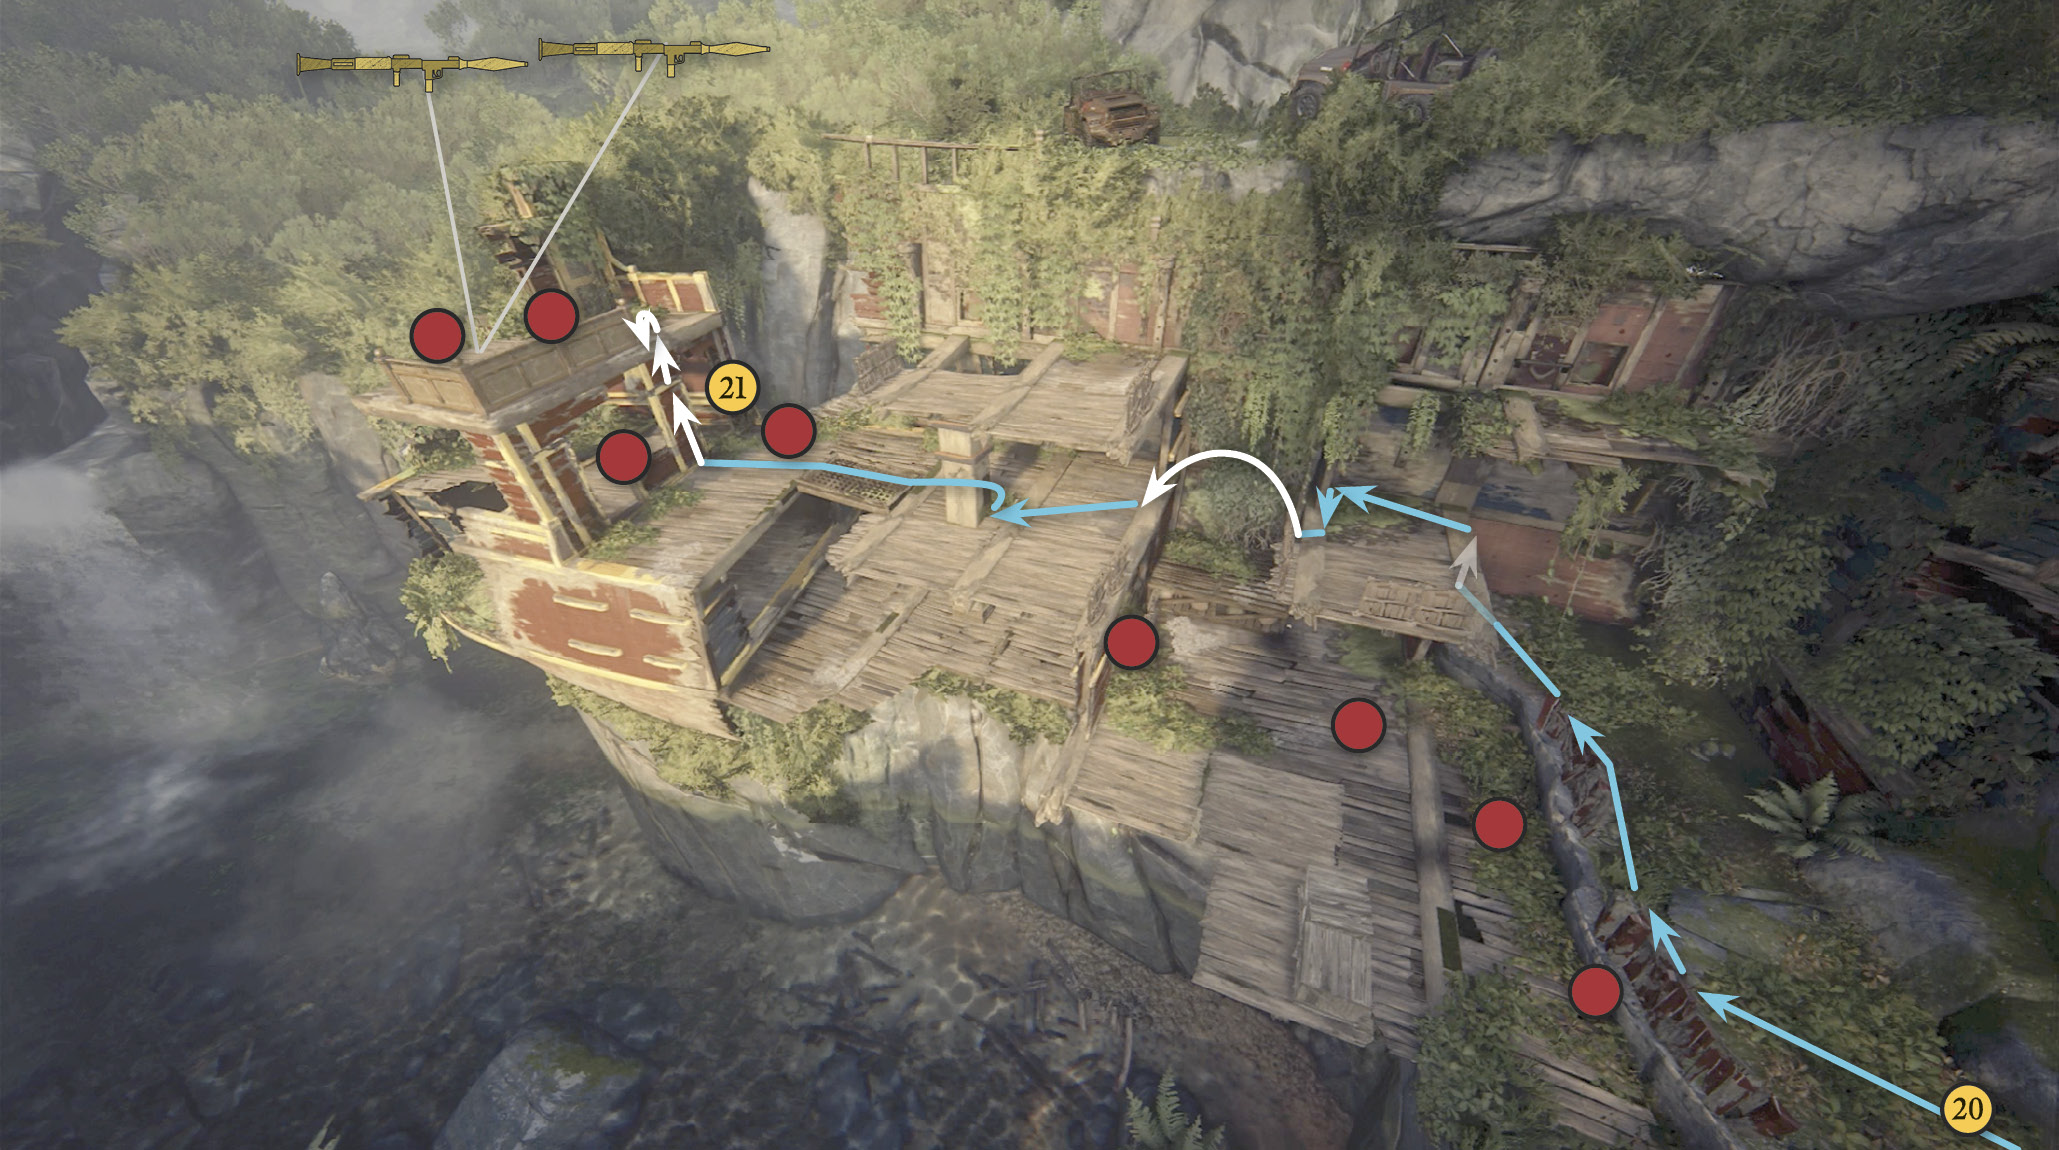
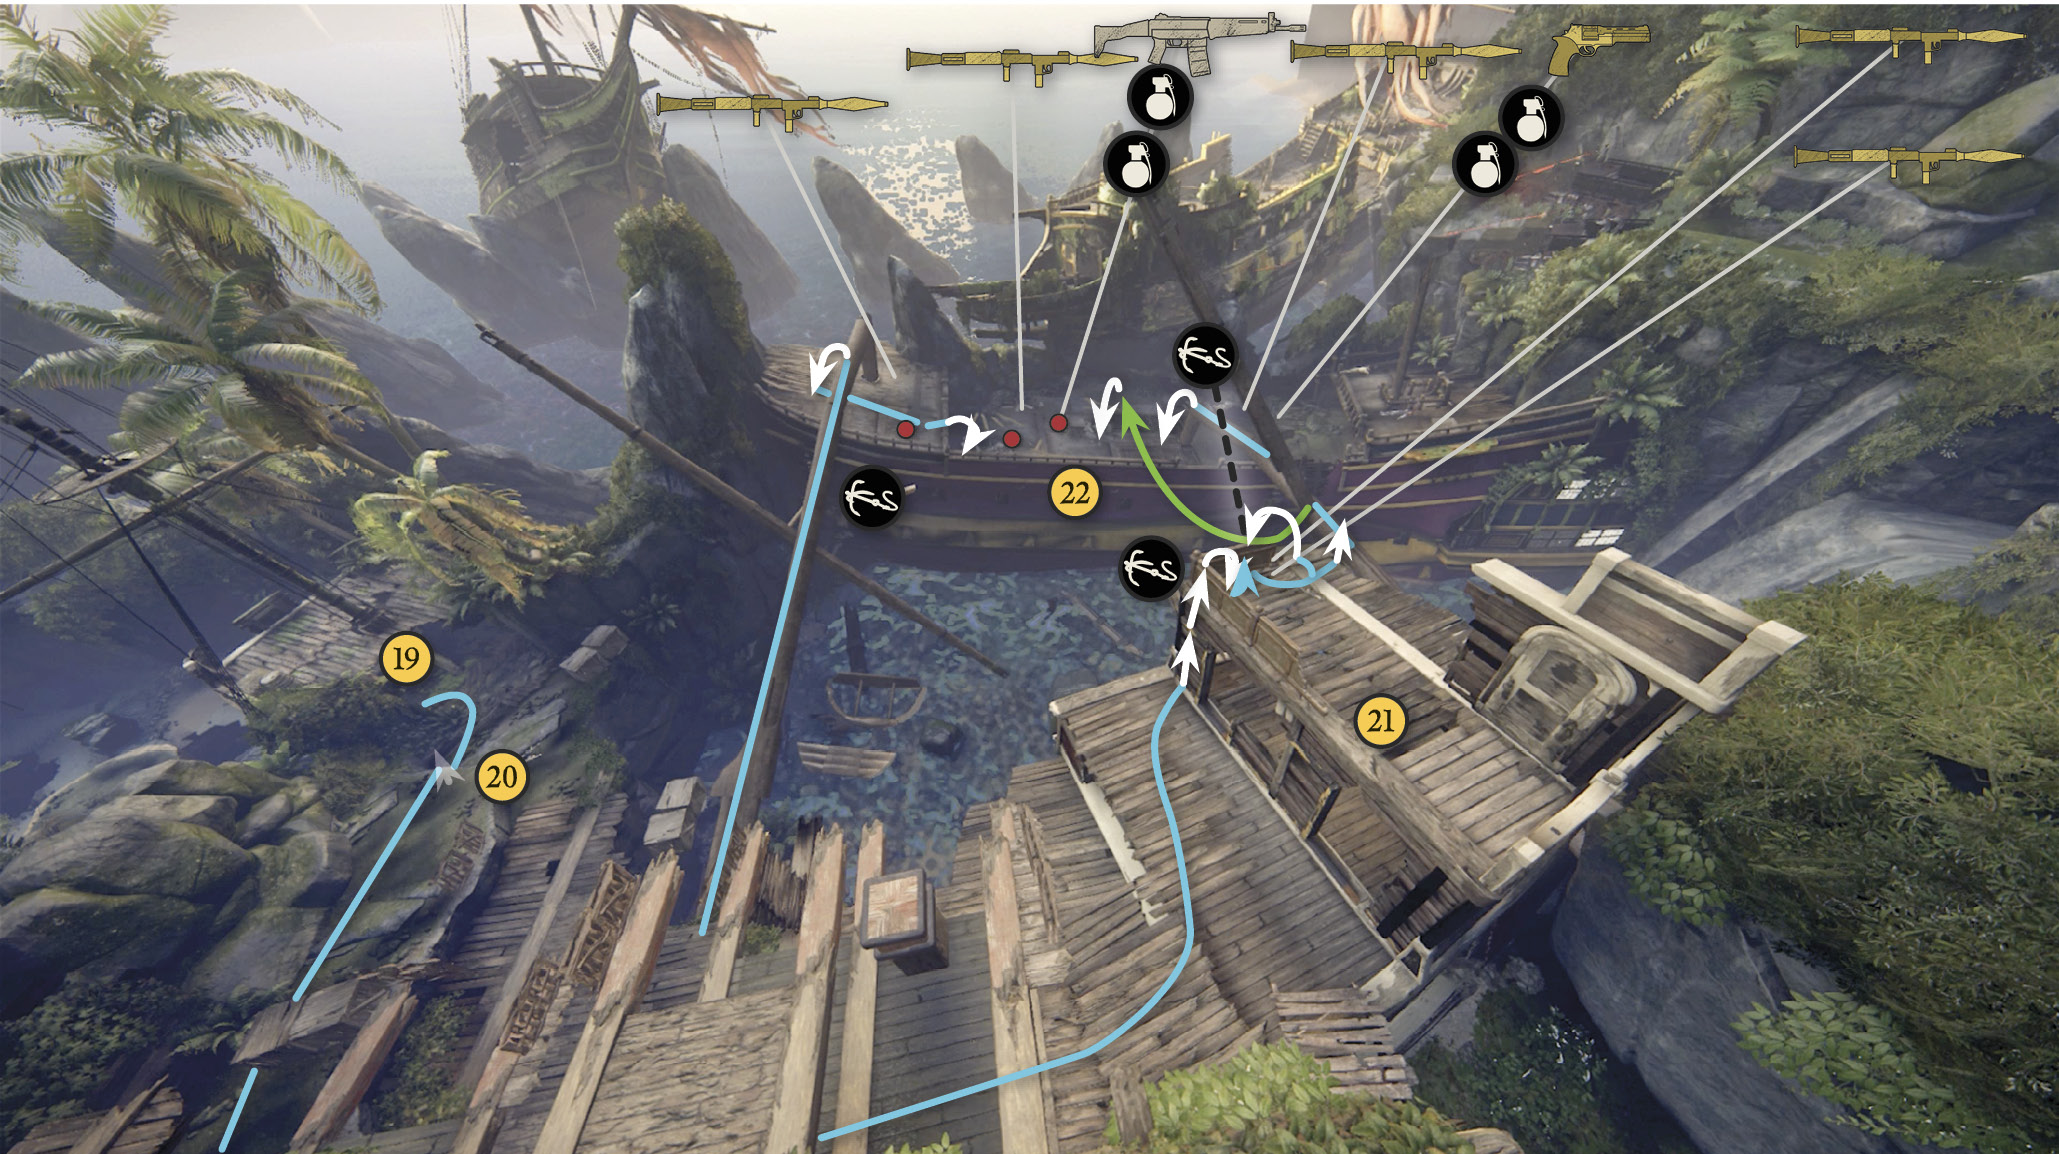
Push forward along the ship’s right side, taking advantage of the many cover opportunities while gunning down the soldiers aboard. After clearing most of the enemies on this galleon, grenades start rocketing at you from three rocketeers on the next ship to your left. Push on to the stern and climb the cabin (21) to pick up the New Weapon: the RPG dropped by the fallen rocketeer. Another can be found near the dropped one and can be used for more ammo. Use three rockets to nail the rocketeers on the opposite ship (22), and then turn your fire on the less threatening enemies that rush to support them. If the rocketeers get a shot off, they will likely destroy the deck you are standing on. This drops you to the floor below. Continue your attack from below until all enemies on that next ship are dead. Try to save at least one rocket (ammo) for the battle that occurs when you step foot on the next ship.
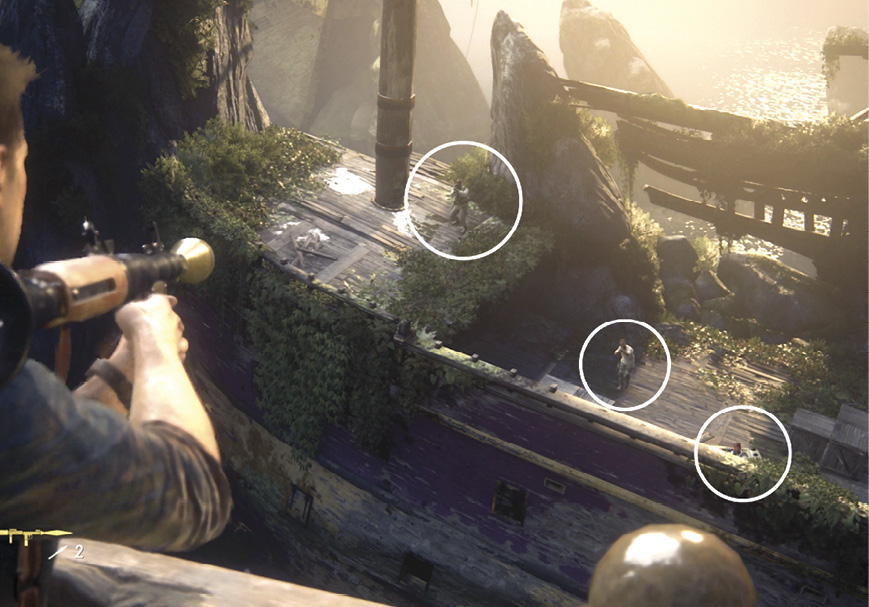
Clear the Mini-Gunners
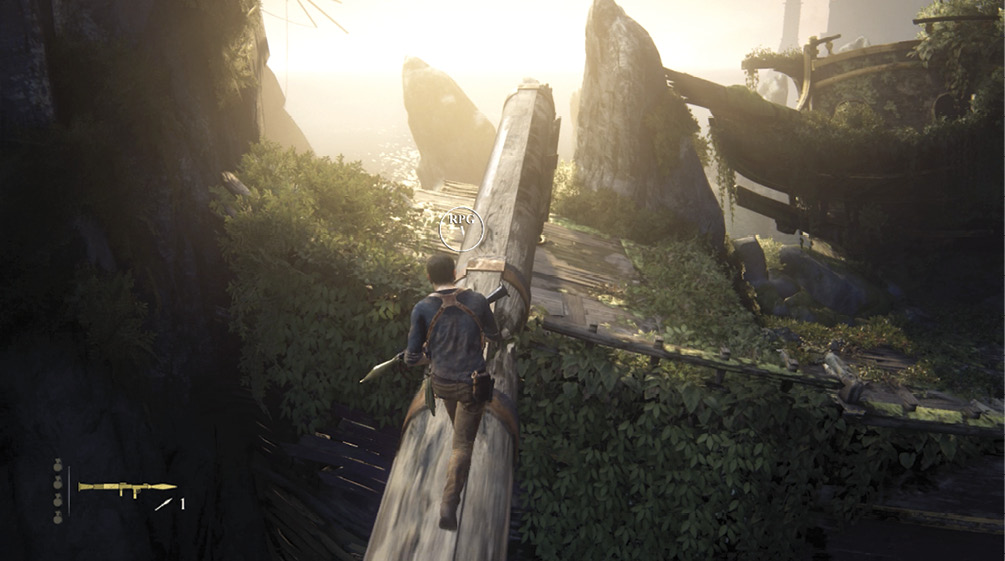
Once everyone on the next ship is dead, the next step is to board that ship. There are two fallen masts that you can run across, or you can swing over using one of the two grapple points. We highly suggest walking across the left mast so you can jump down to the left and reach the RPG that the enemy on the bow of the ship was using (this is the only way to reach this RPG; you cannot reach the bow from the main deck of the ship). If you carried at least one rocket ammo over with you, this makes two rounds in your RPG. There are two more dropped RPGs with one round each in them on the main deck. If you are quick enough, you can get both and then get to cover.
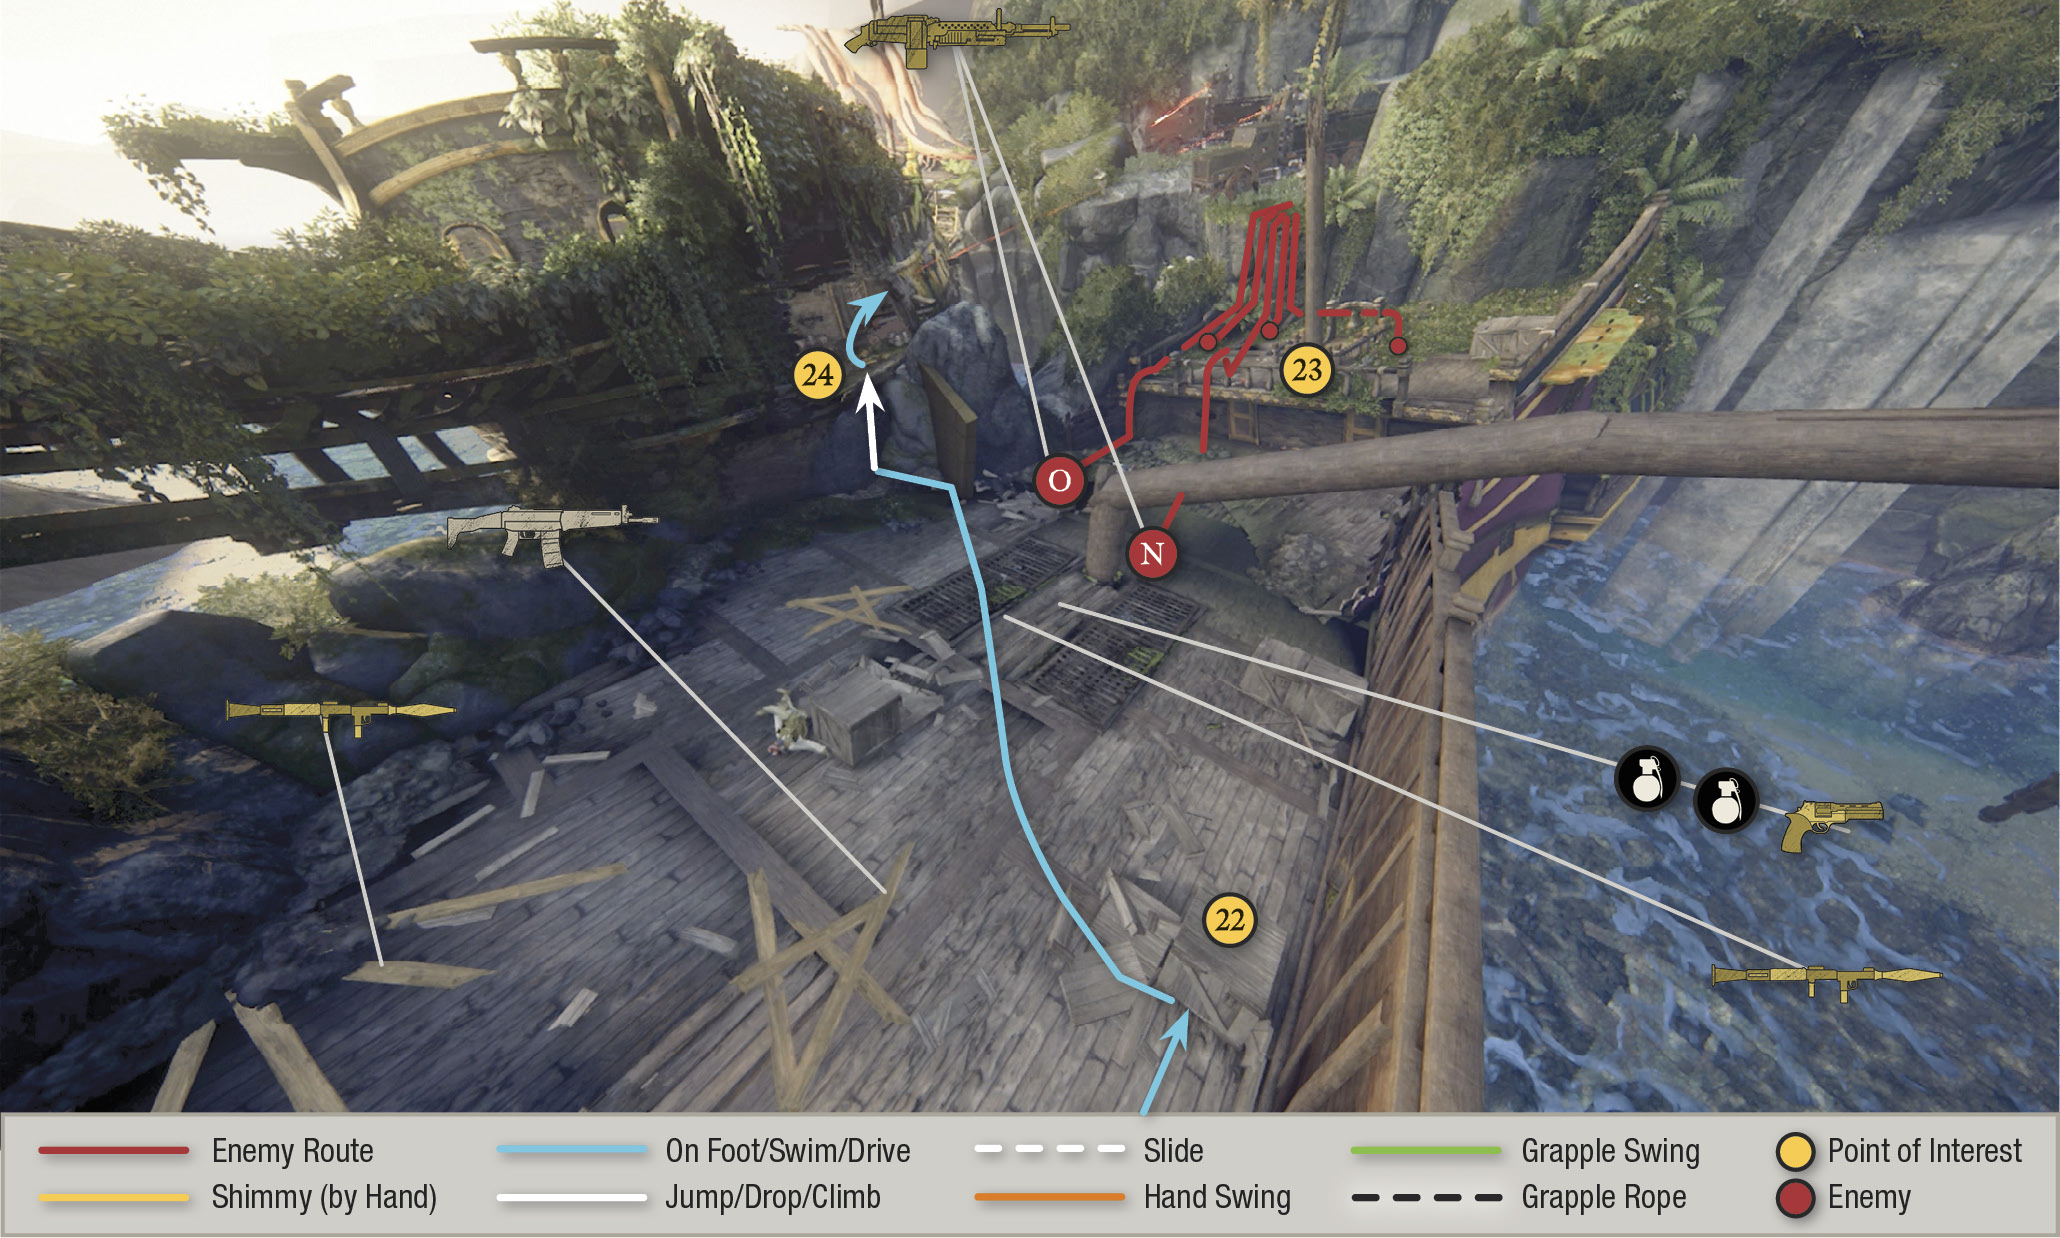
The moment you step aboard the new ship, another Shoreline squad drops from the cliff ledge onto the aft deck (23). This includes two heavily armored troopers (N, O) with DShK mini-guns. With as many as four rounds in your RPG, set up in cover behind the short wall on the ship’s right side and first use a handgun on the faster enemies dropping down onto the deck, and then switch to the rocket launcher and use the rockets to take out the two mini-gunners. Aim for direct hits on these enemies, and then finish off the remaining enemies.
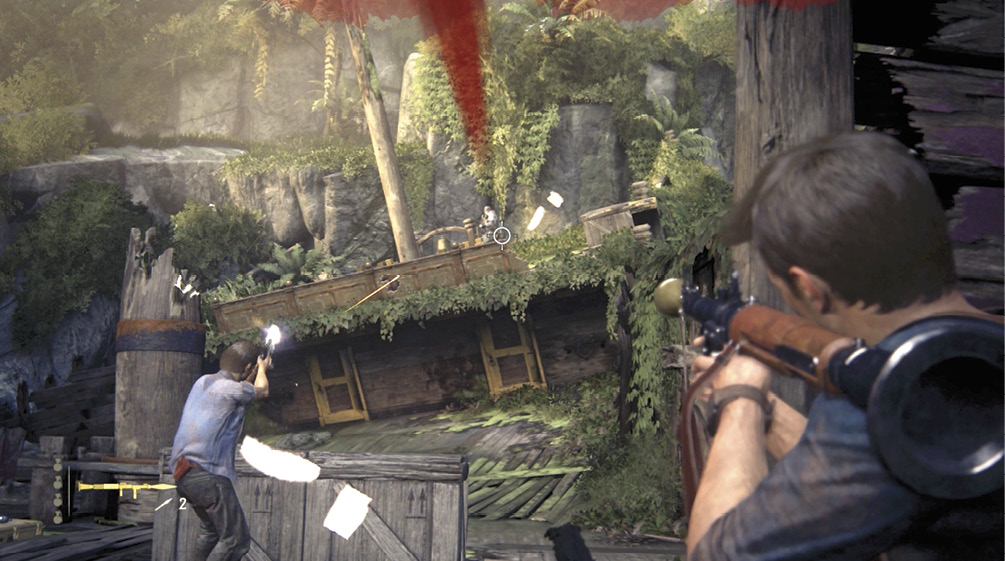
Here you can dash out and pick up one of the DShK mini-guns and use it to tear apart any remaining attackers up on the aft deck. But be ready: When the last foe falls, two Shoreline turret trucks appear on the road above the cliff ledge. You can’t destroy these trucks or their mounted guns, so best to search for a good rifle to prepare for the next battle and then get moving. Sprint over to the ledge (24) left of the ship’s stern and jump to grab Elena’s outstretched hand.
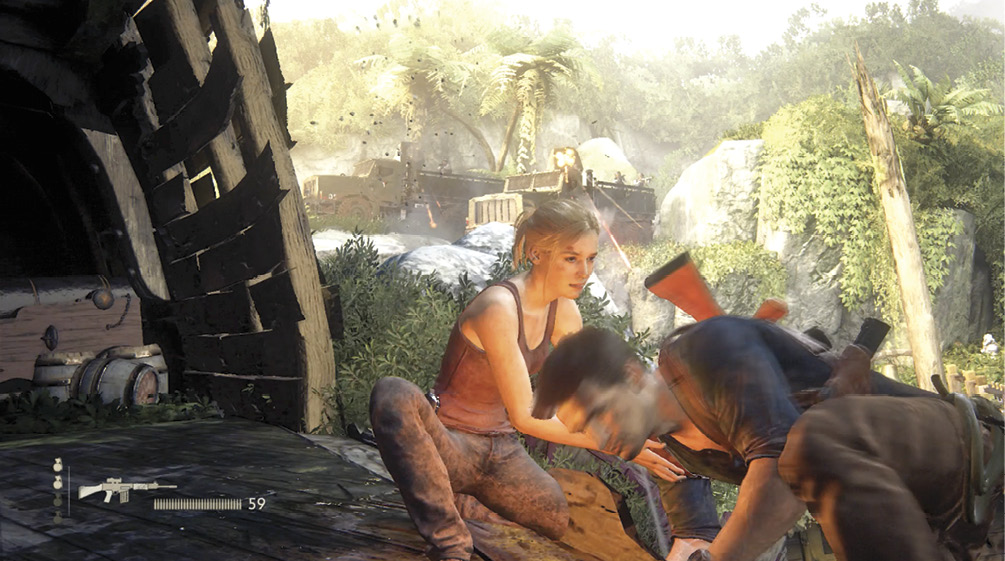
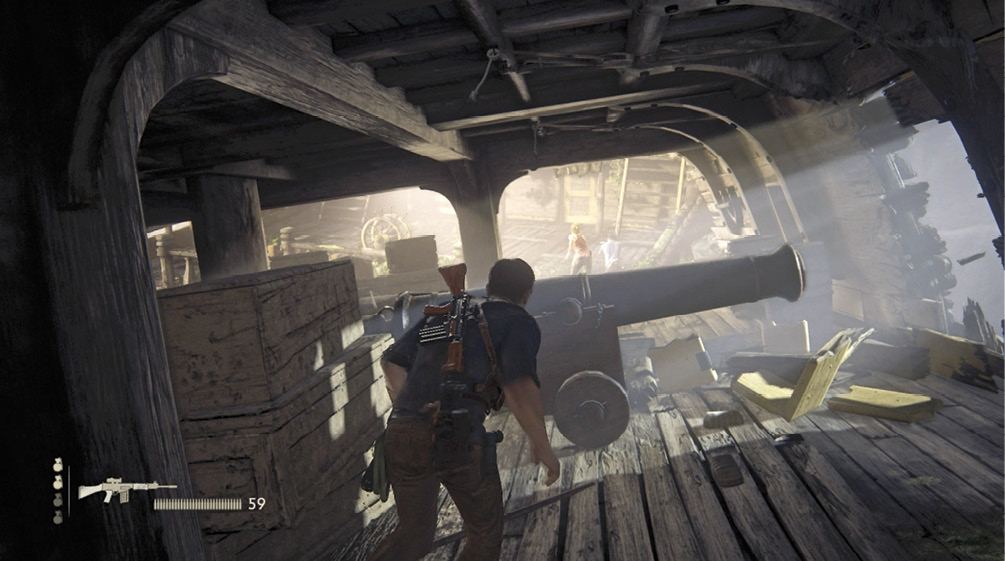
After she pulls you up, sprint after her and Sam down the gunnery deck corridor. The Shoreline truck attack knocks a cannon out of a gunport and into your path. Jump over it and a second explosion sinks the ship with you in it. Nathan tumbles into the water below.
Swim Out of the Wreck
First Breath
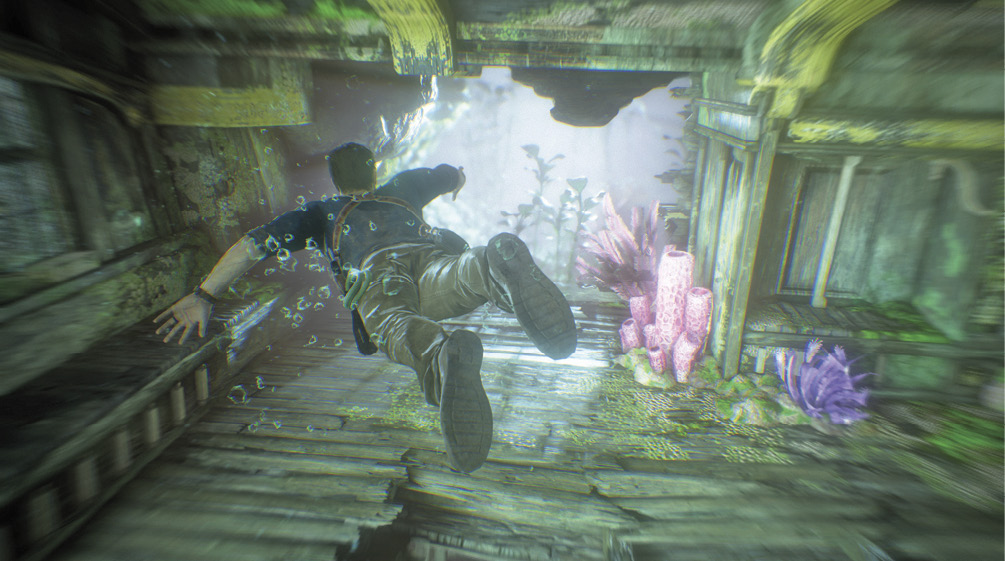
When you regain control, swim through the hole in the hull directly in front of you, then up to the surface for a breath. The situation is not good; the explosions knocked the ship off its mooring and it’s sinking further. The water is rising inside so you have no choice but to move fast.
Second Breath
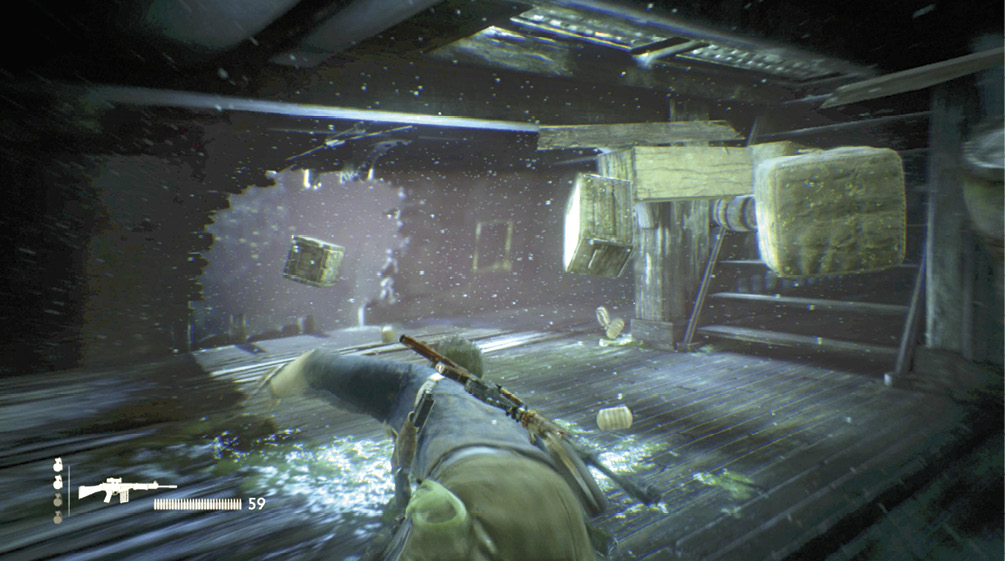
Dive back down and swim through the hole in the side wall one floor down and to the left (see Fig. 20-24). (Look for the broken yellow door on the floor in front of the hole.) Just after you get through the hole, swim straight up through a ceiling hole and continue upward to the next floor’s ceiling to a rapidly closing air pocket. Nathan takes a breath as the water rises to the top.
Final Passage
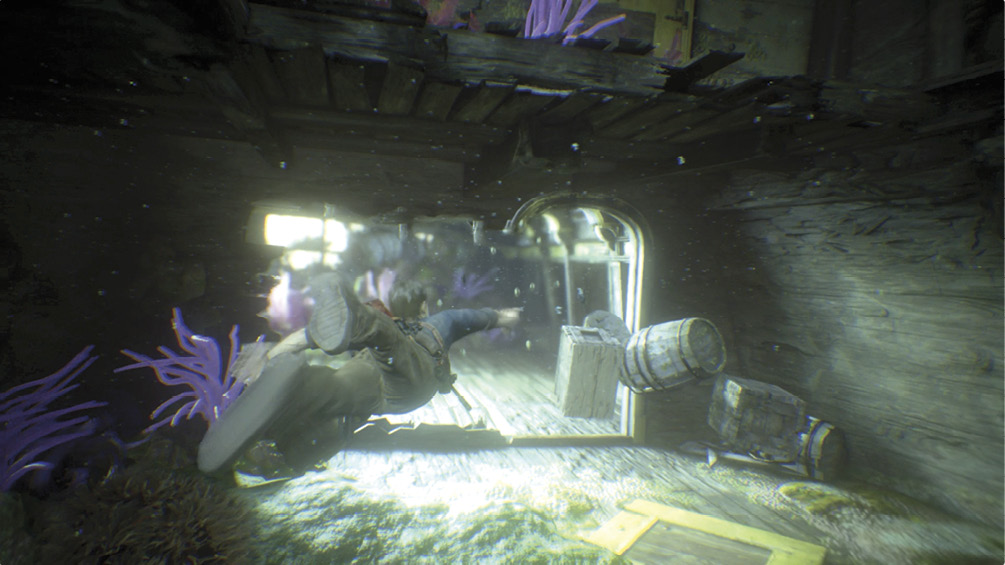
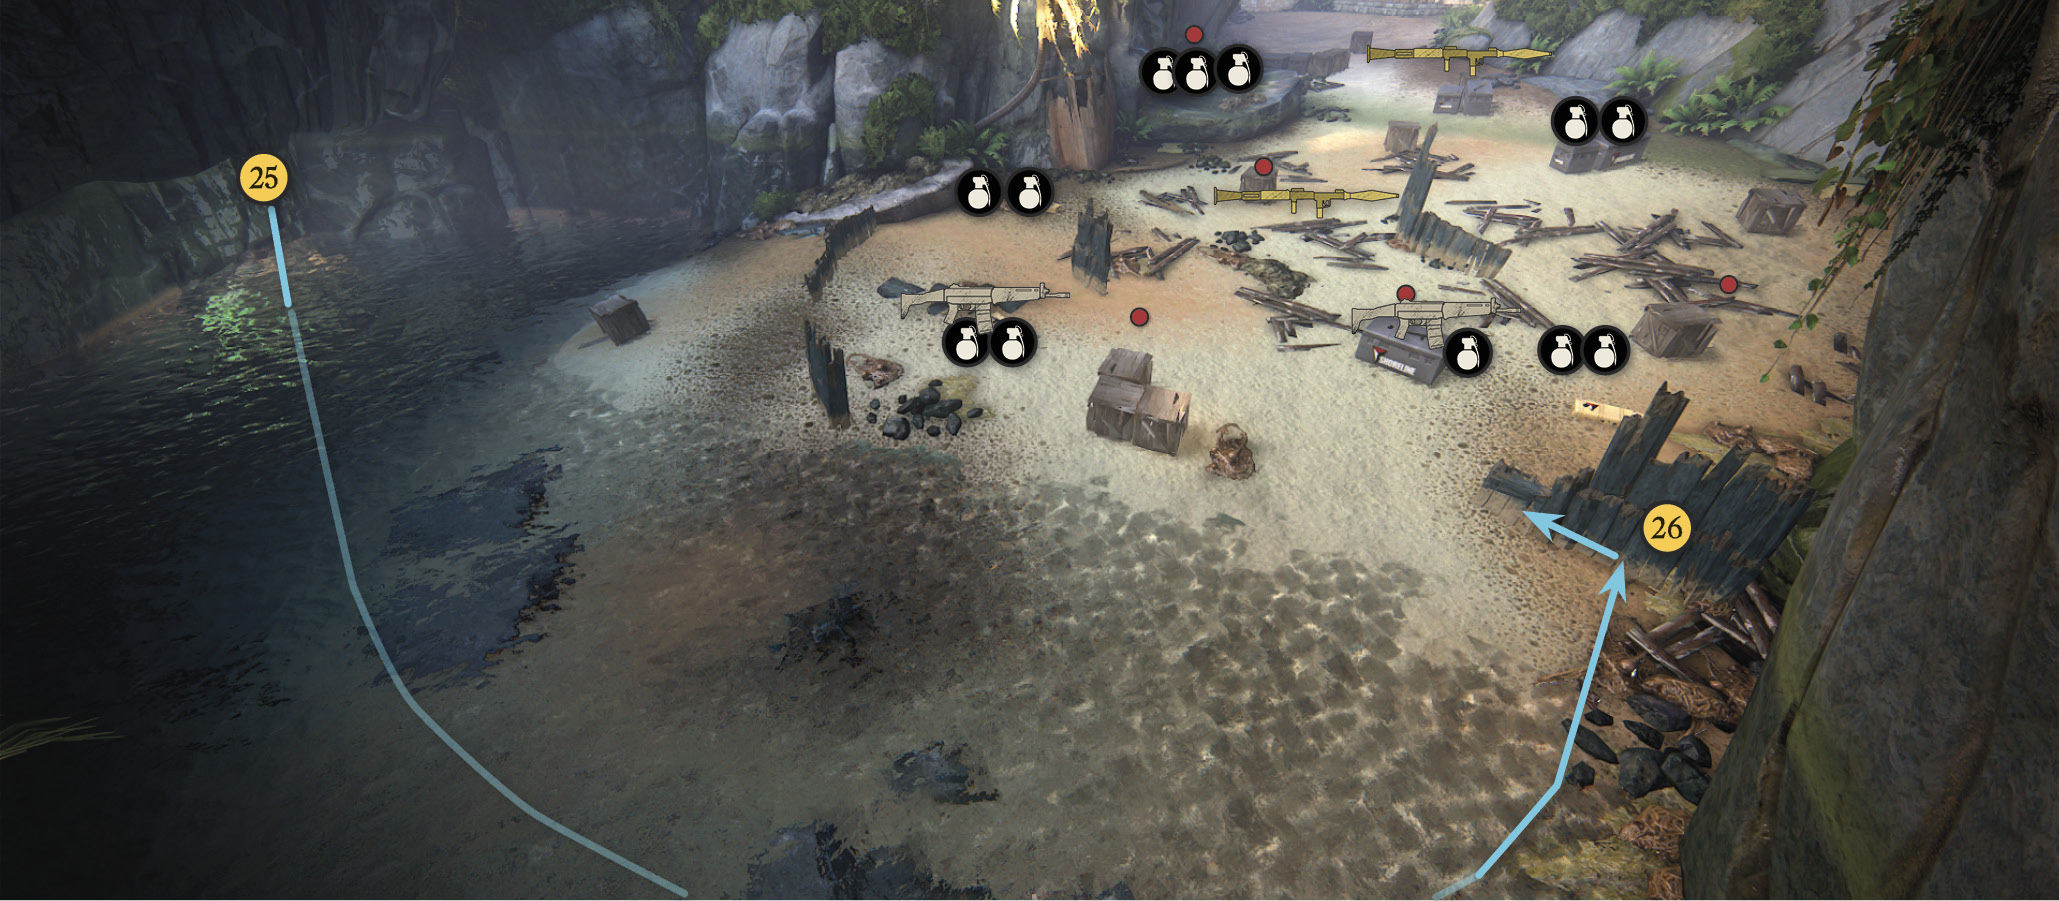
Dive downward and swim for the hole on this level where you can see green seaweed (see Fig. 20-25) waving in the passage beyond. Follow the passage until you see sunlight on the surface above and swim up. You surface in a lagoon not far from a beach.
Take the Beach!
First Wave
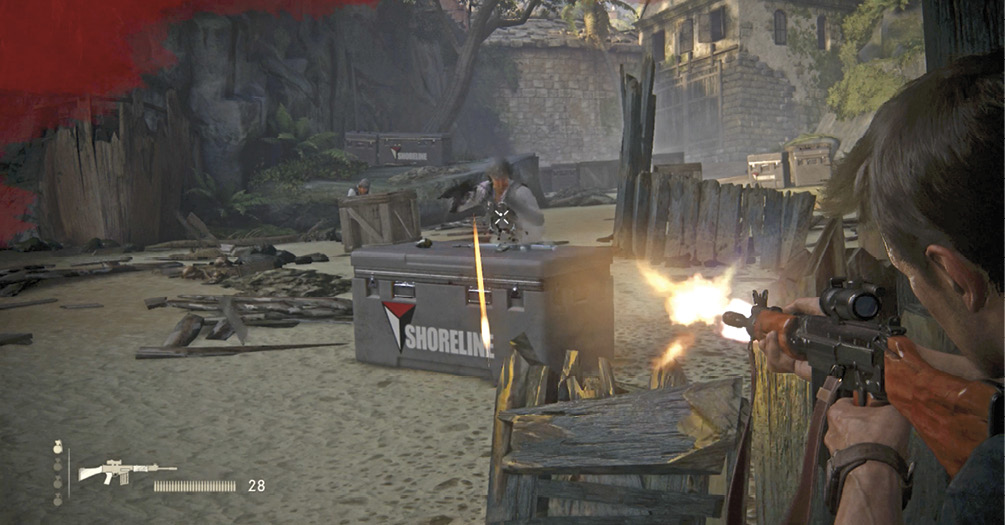
Five Shoreline troopers scramble down the beach when you surface in the new area. We suggest quickly diving back down in the water and swimming directly across the lagoon to find cover and to avoid bullets. It’s likely the enemy will become unaware again until you resurface. Come ashore to the cover fence (26) and start fighting. Look for multiple MK-NDI grenade pickups on crates around the beach.
Second Wave
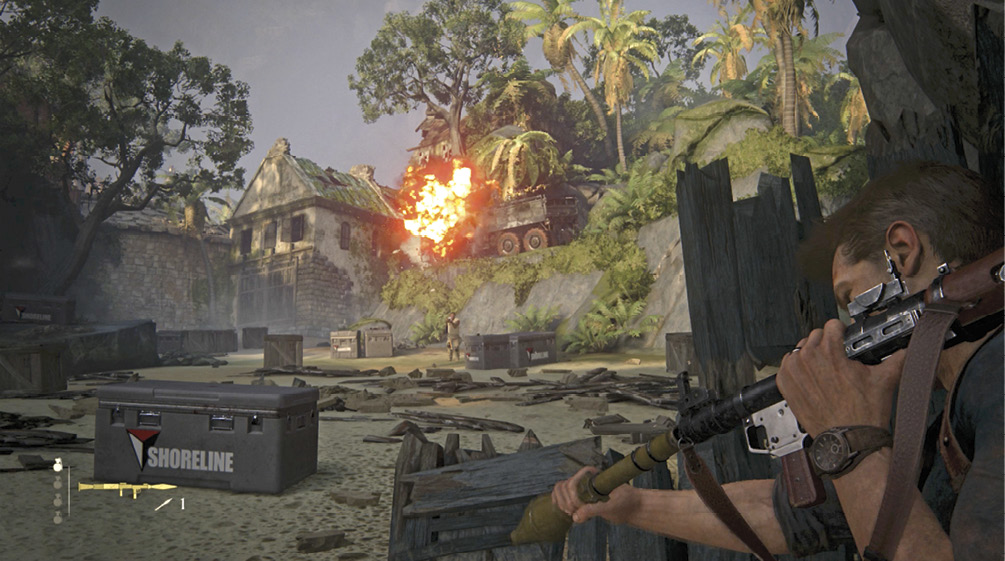
As you thin the numbers of the first wave, a Shoreline turret truck pulls up on the cliff above and opens fire (27). Your goal is to nail the truck two times with RPG fire to disable it and create an exit. (Tossing grenades won’t damage the vehicle or its mounted gun.)
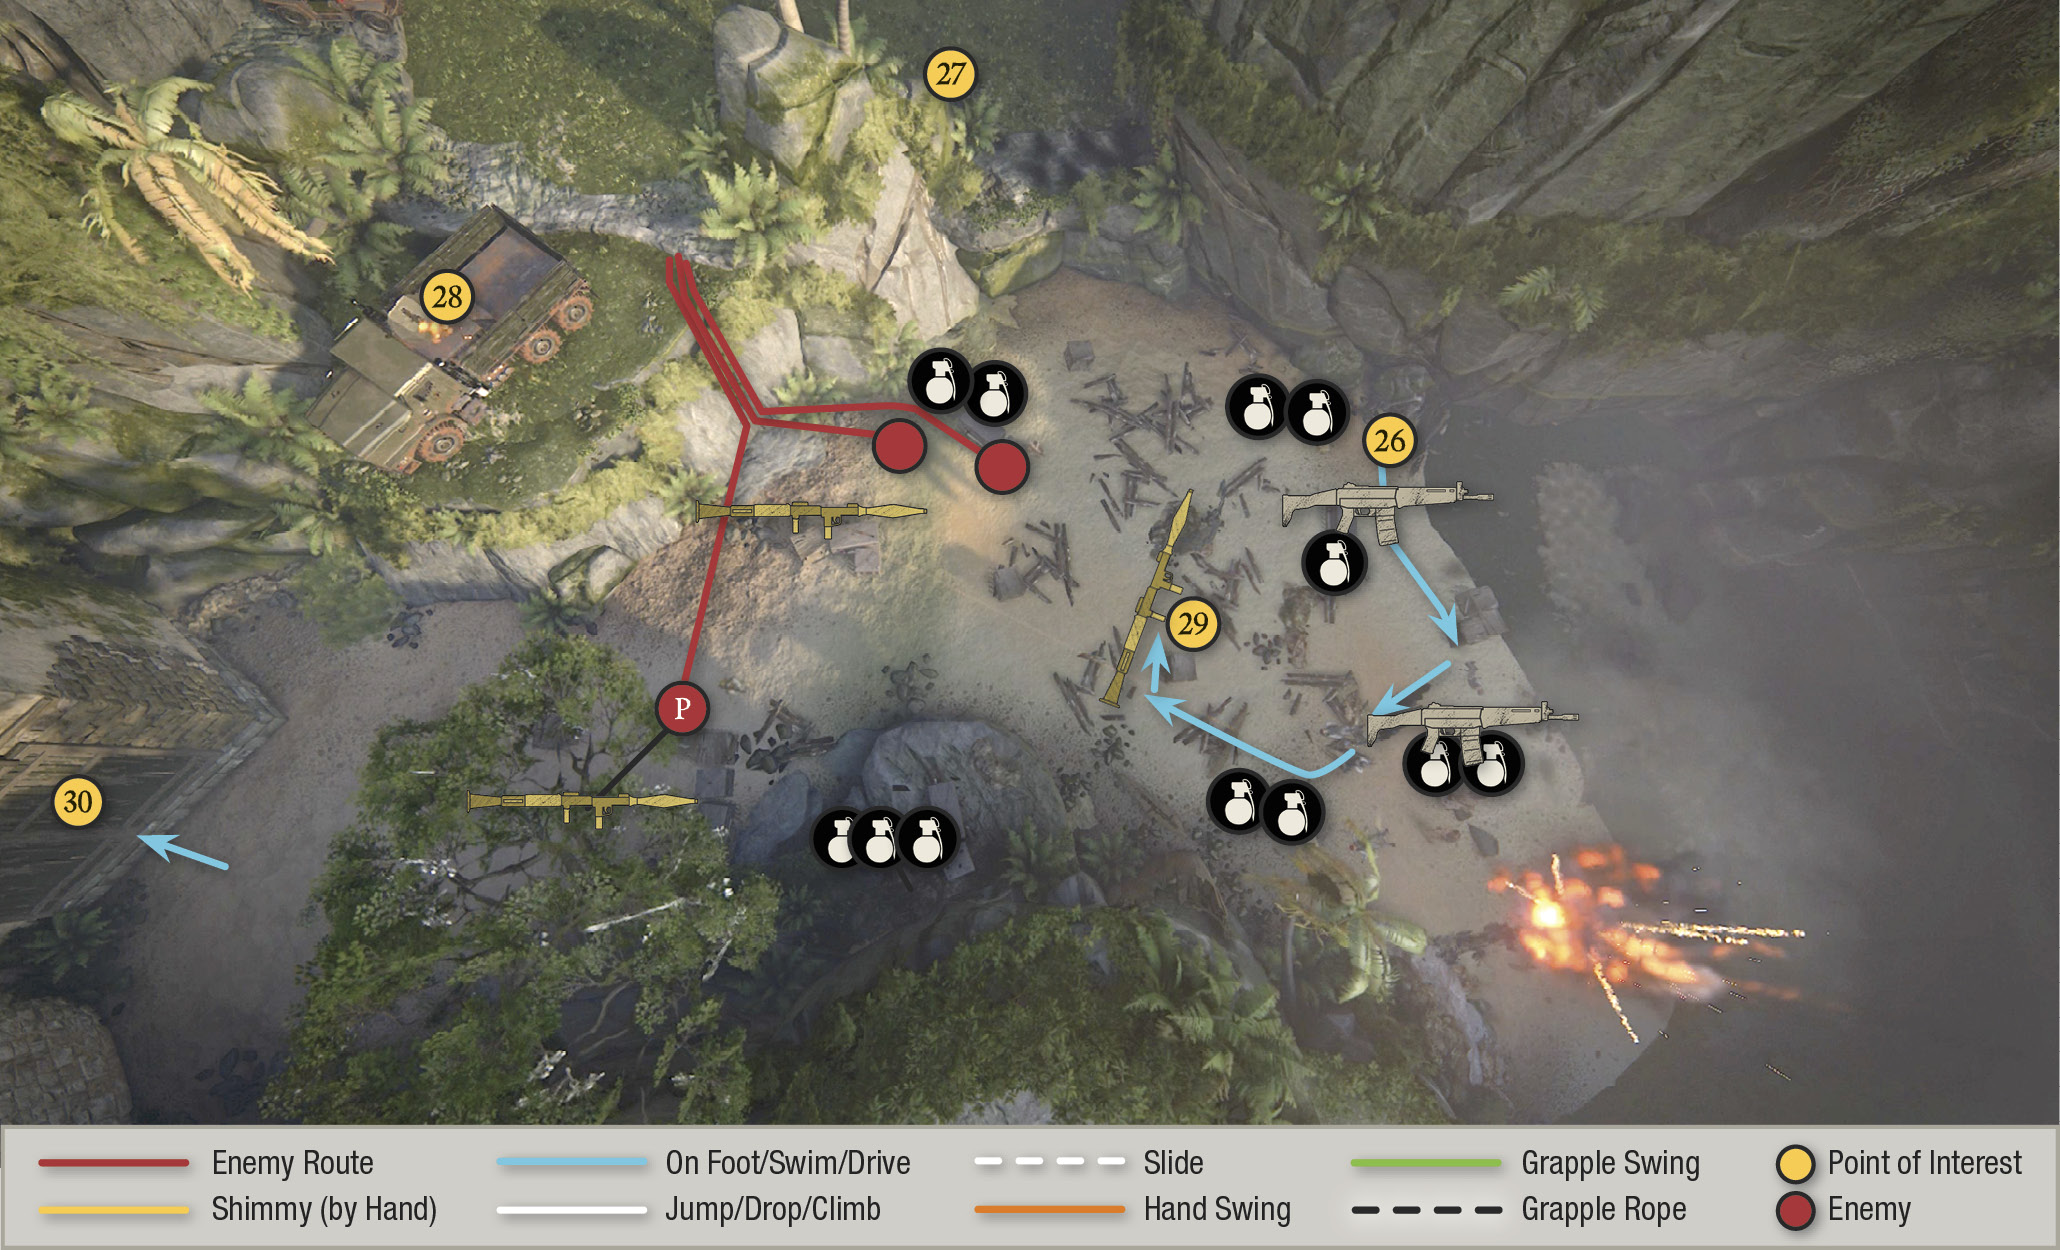
After you clear the first five goons on the beach, the turret truck moves further along the cliff road (28) and another mercenary squad arrives, including a trooper (P) with an RPG. Nail that rocketeer first, or he makes your life miserable and short. Make use of the many grenades lying around to make short work of the foot troops.
Defeat all the gunmen and then get yourself a rocket launcher! Either retrieve the one from the fallen gunner (P) or find another RPG atop the crates near the truck. The closest one to your original cover is the RPG (29) on the sand on the beach. Get in cover and start slinging rockets at the damn truck. Two good hits disables the vehicle and it rolls off the cliff into a house, tearing open a hole in the wall (30).
Evade the Second Turret truck
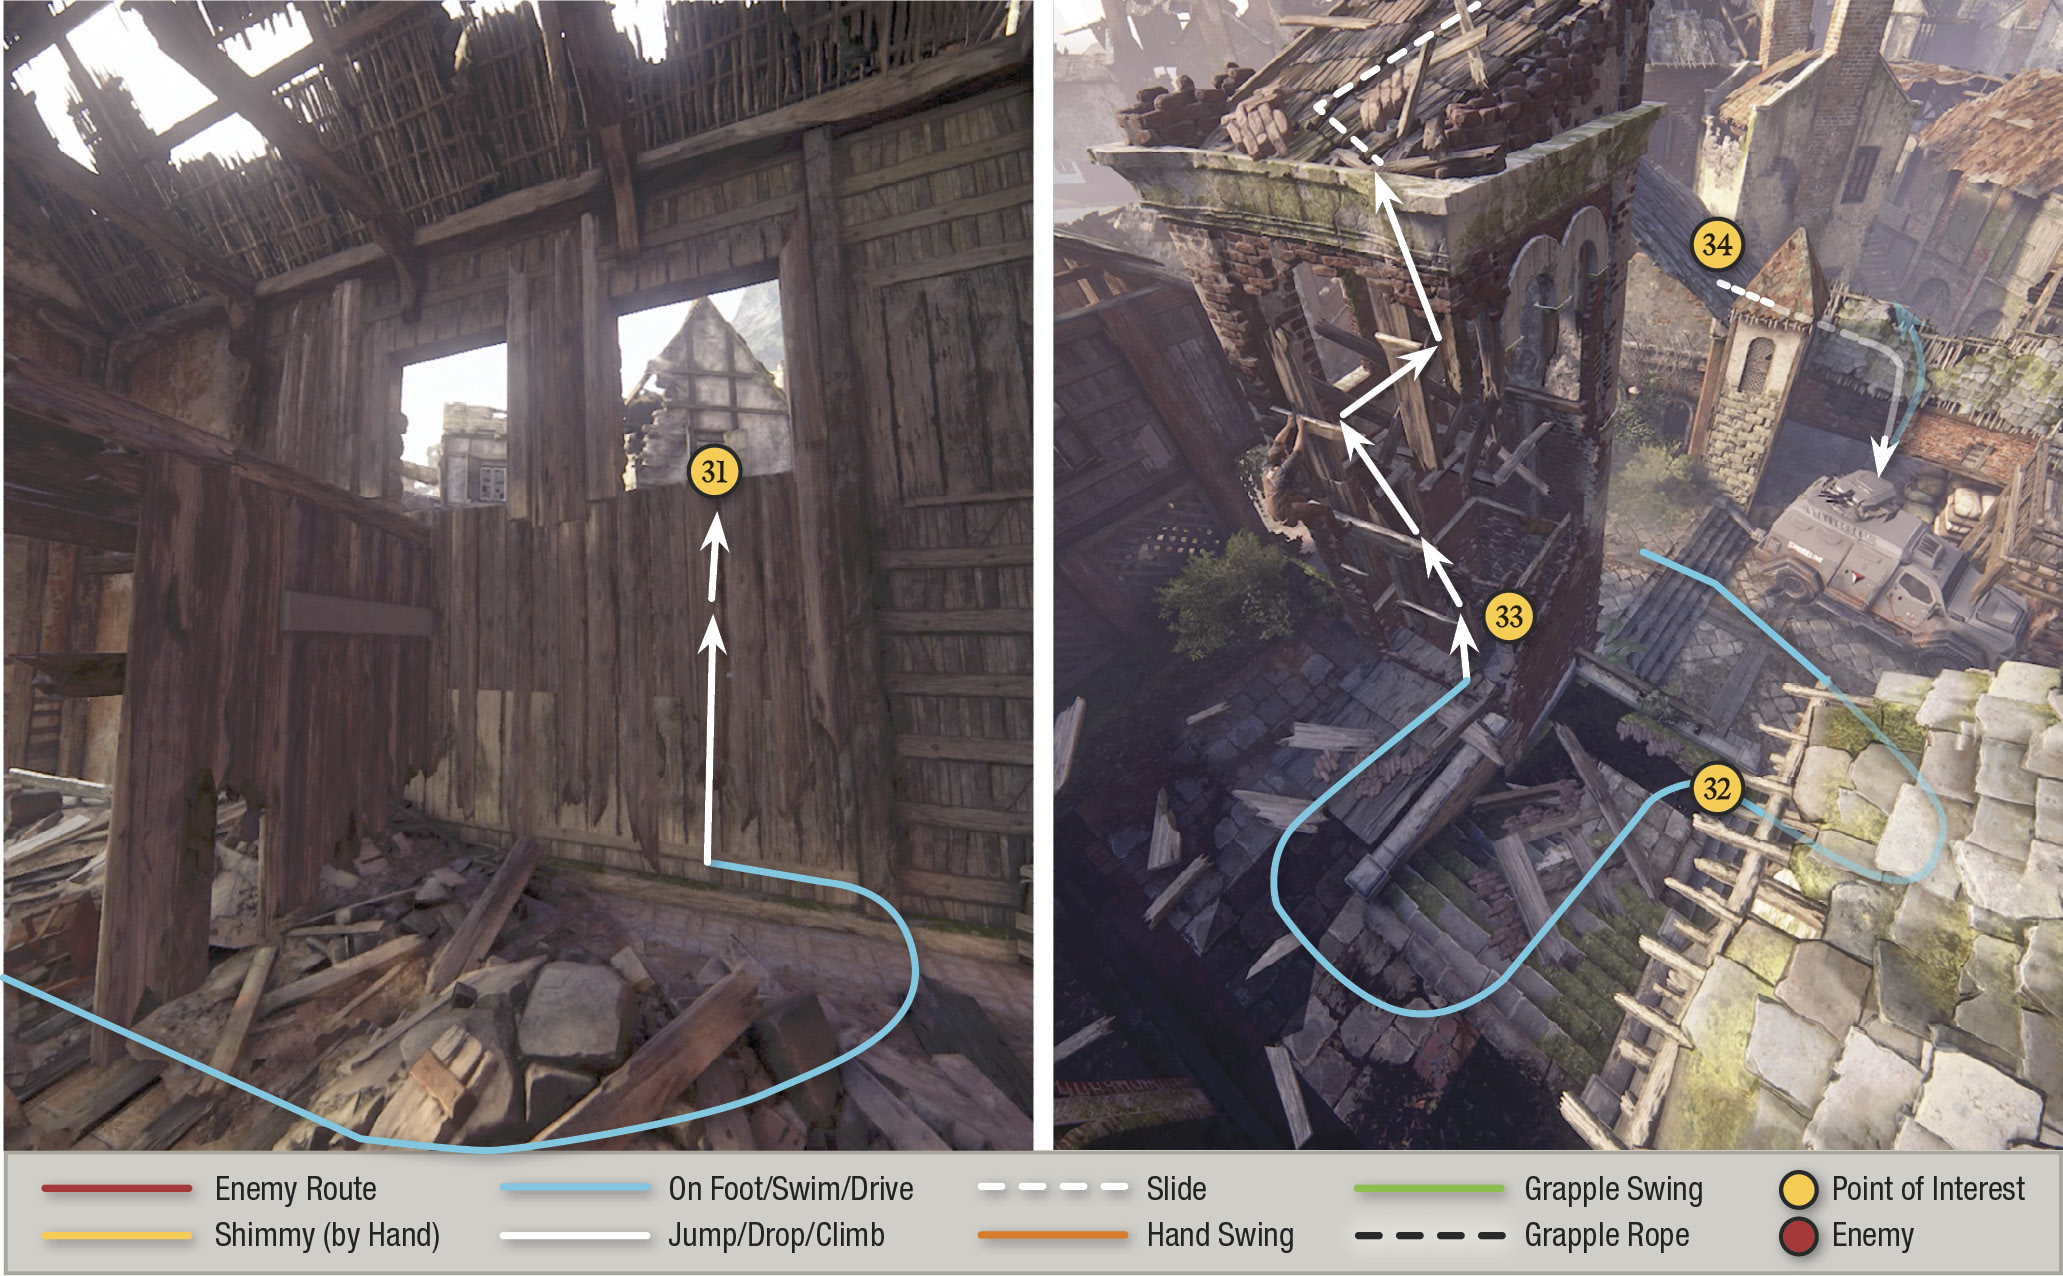
There’s always another turret truck, isn’t there? As you run toward the newly ripped hole in the house, the other turret truck (remember you saw two earlier) careens onto the beach behind you and opens fire. Sprint inside the house and climb onto the floor platform (31). This triggers a quick scene: The Shoreline turret truck rams into the house, collapsing the platform. Nathan rolls off the truck’s hood onto the street beyond.
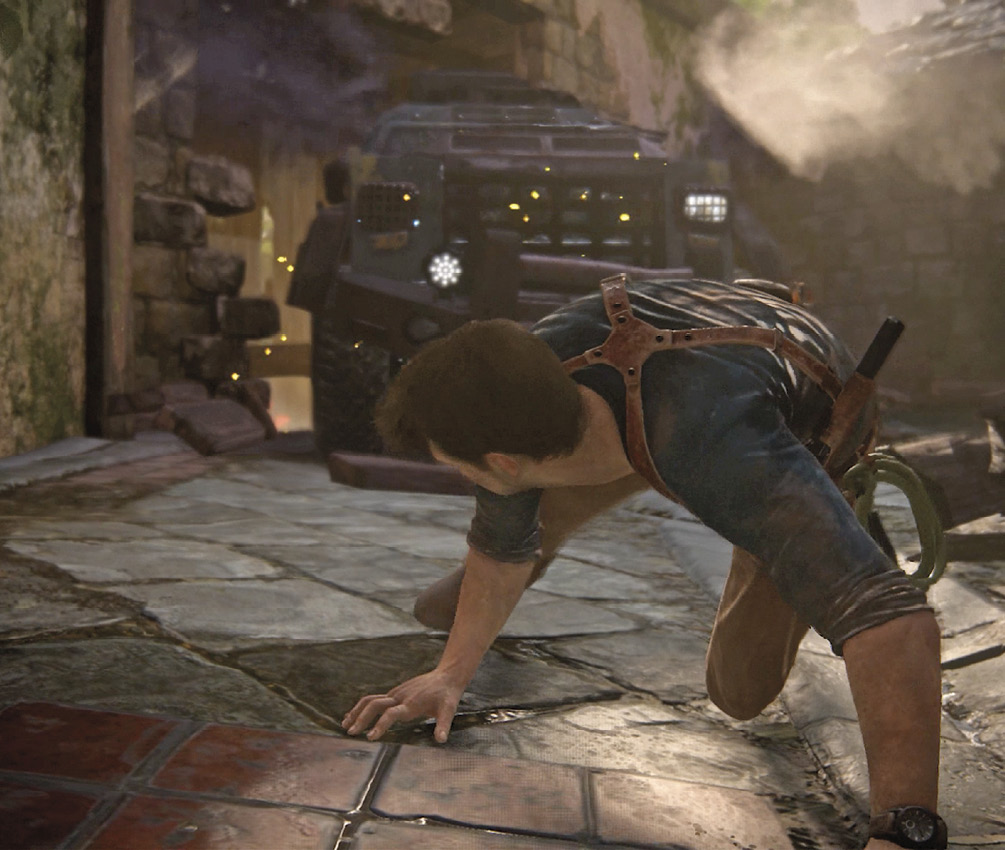
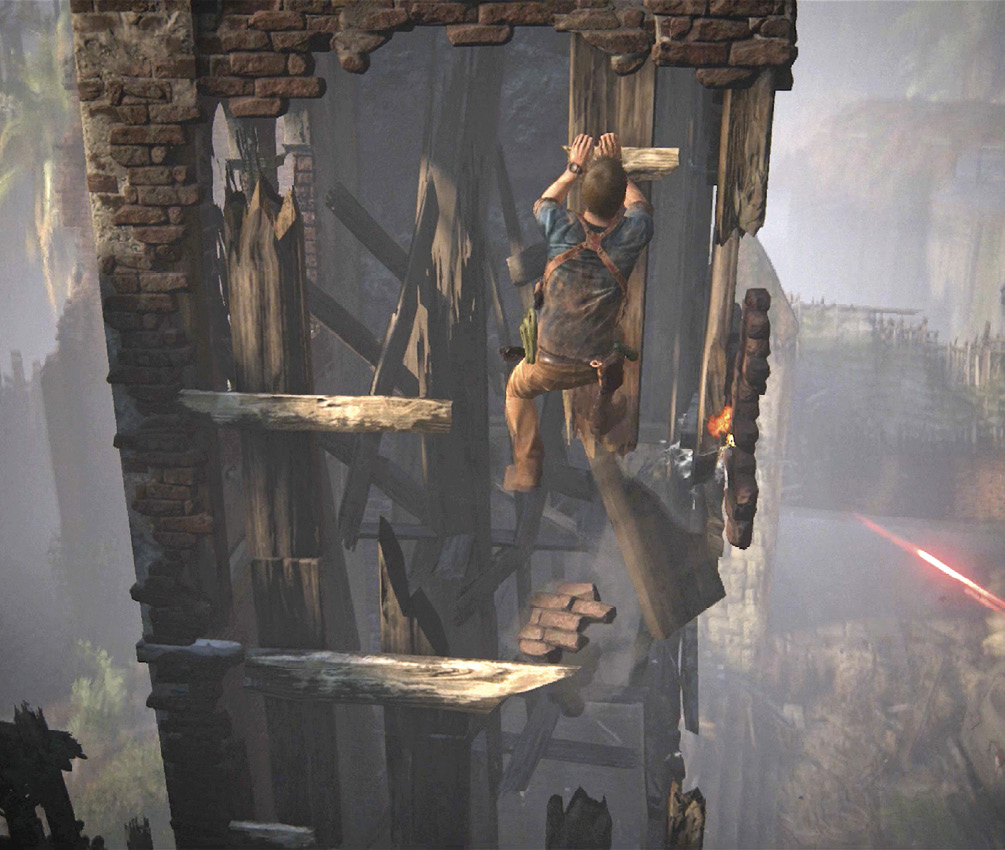
Run! Just pull the left stick in the direction you want to go. Sprint down the street, then veer up the stairs to the left (32). (Move fast or the truck’s mounted gun will mow down Nathan.) At the top, turn right and climb the beams of the tower’s exposed frame (33). When you reach the roof, the tower teeters and falls into the building (34) across the street. Nathan ends up hopping down into the street beyond and the chase continues, with the relentless truck right on his six.
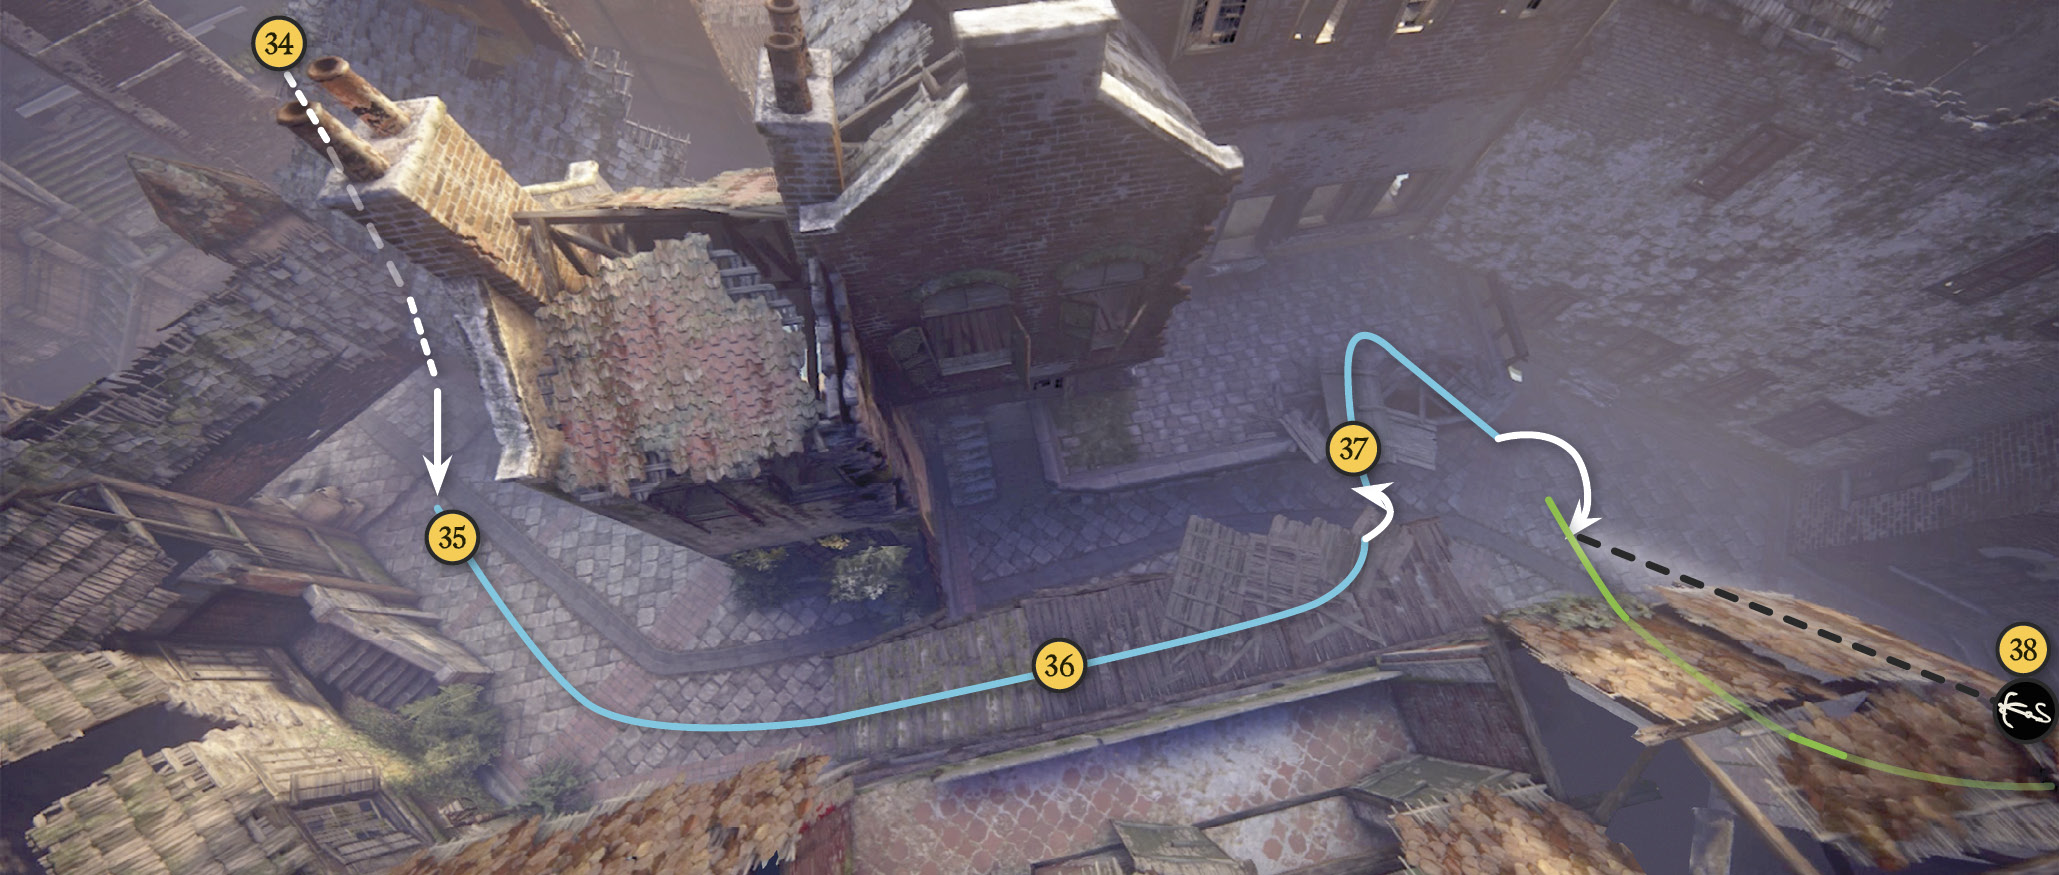
Sprint down the street (35) and up the stairs onto the raised wooden walkway (36). The truck smashes the walkway from under Nathan so leap rightward onto the cobblestone balcony (37). The truck parks up ahead, trying to block your progress down the street. As the camera whirls around behind Nathan, sling your grapple hook up at the wall beam (38) across the street from the turret truck and swing onto the next balcony down the street.
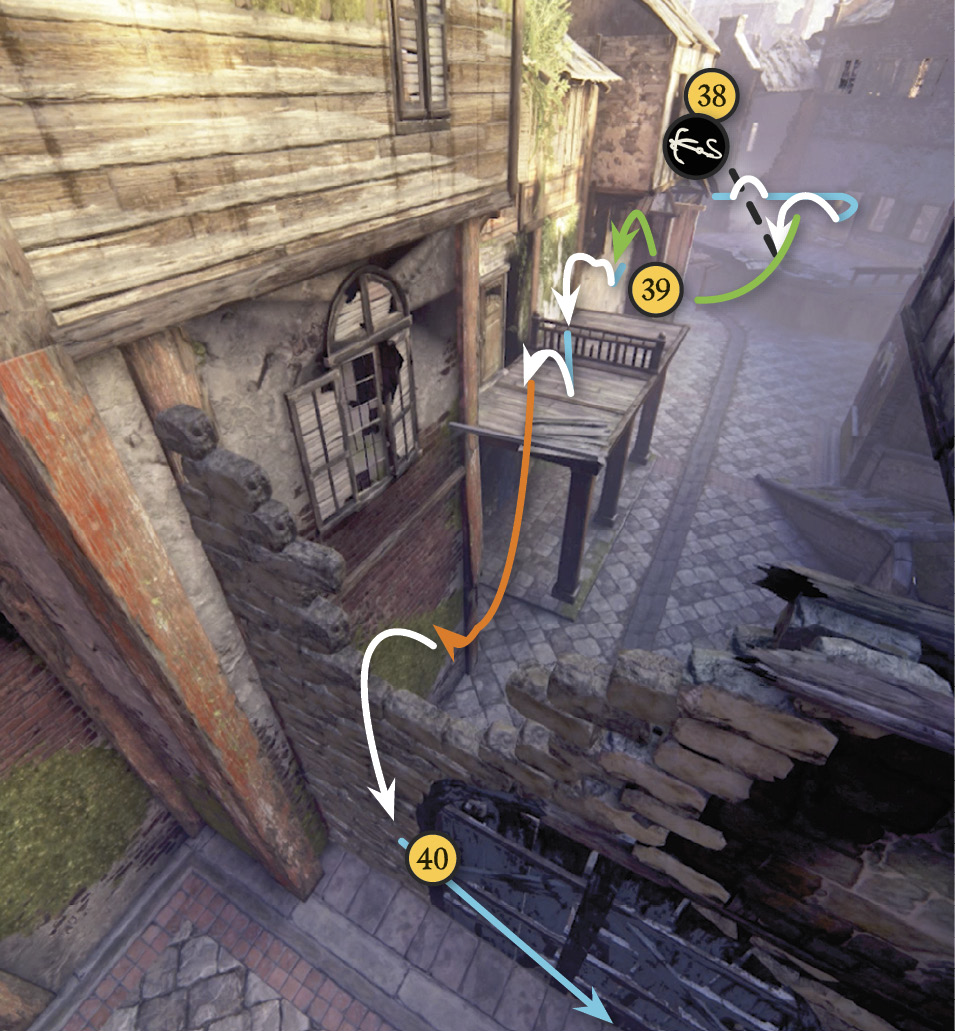
Hop over the railing and jump to grab the pole (39) jutting from the wall. Swing from the pole to the broken gap in the brick wall ahead. As you grab it, the Shoreline truck smashes through the gate and wall too, shattering it. Nathan falls with the debris and lands on the street below (40).
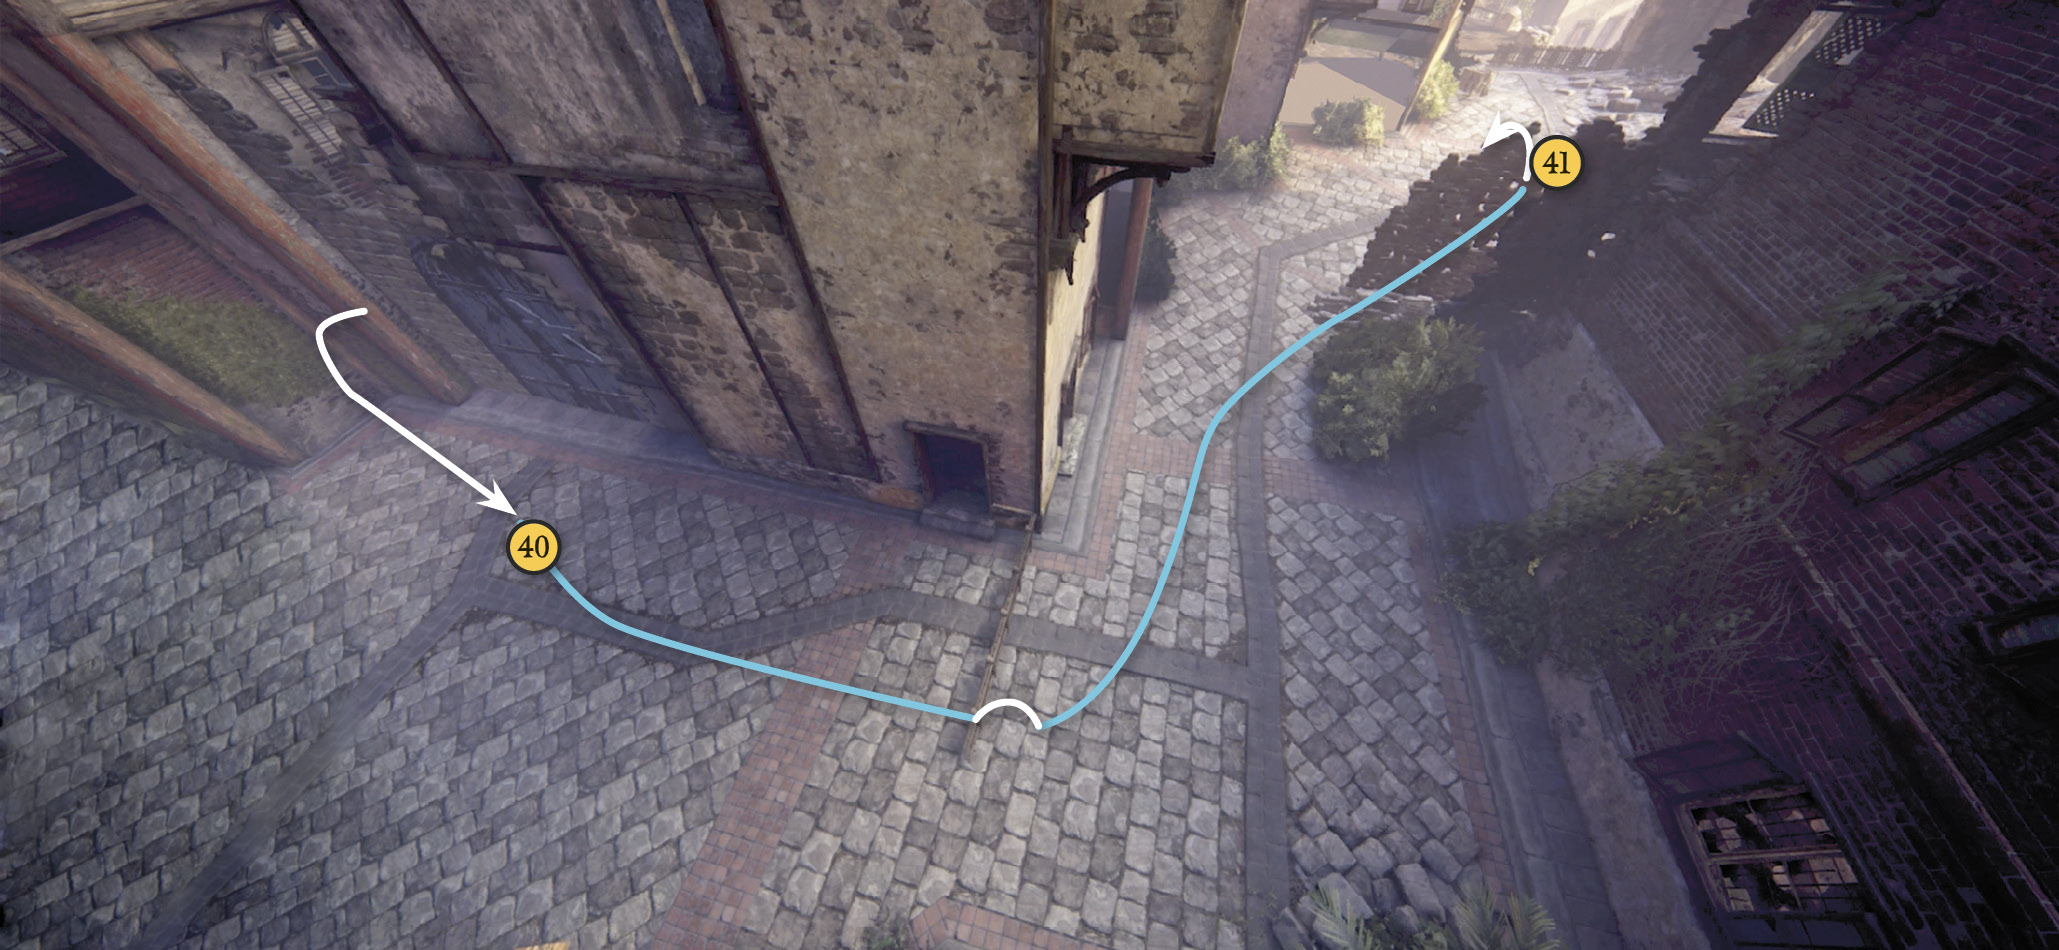
Now Nathan is running toward the camera again. Vault over the low fence, then keep running down the lane until you reach the next fence (41). Hopping over it triggers yet another structural collapse: Nathan ends up sliding down a mudbank to a big plaza below. Keep running!
Destroy the Turret truck!
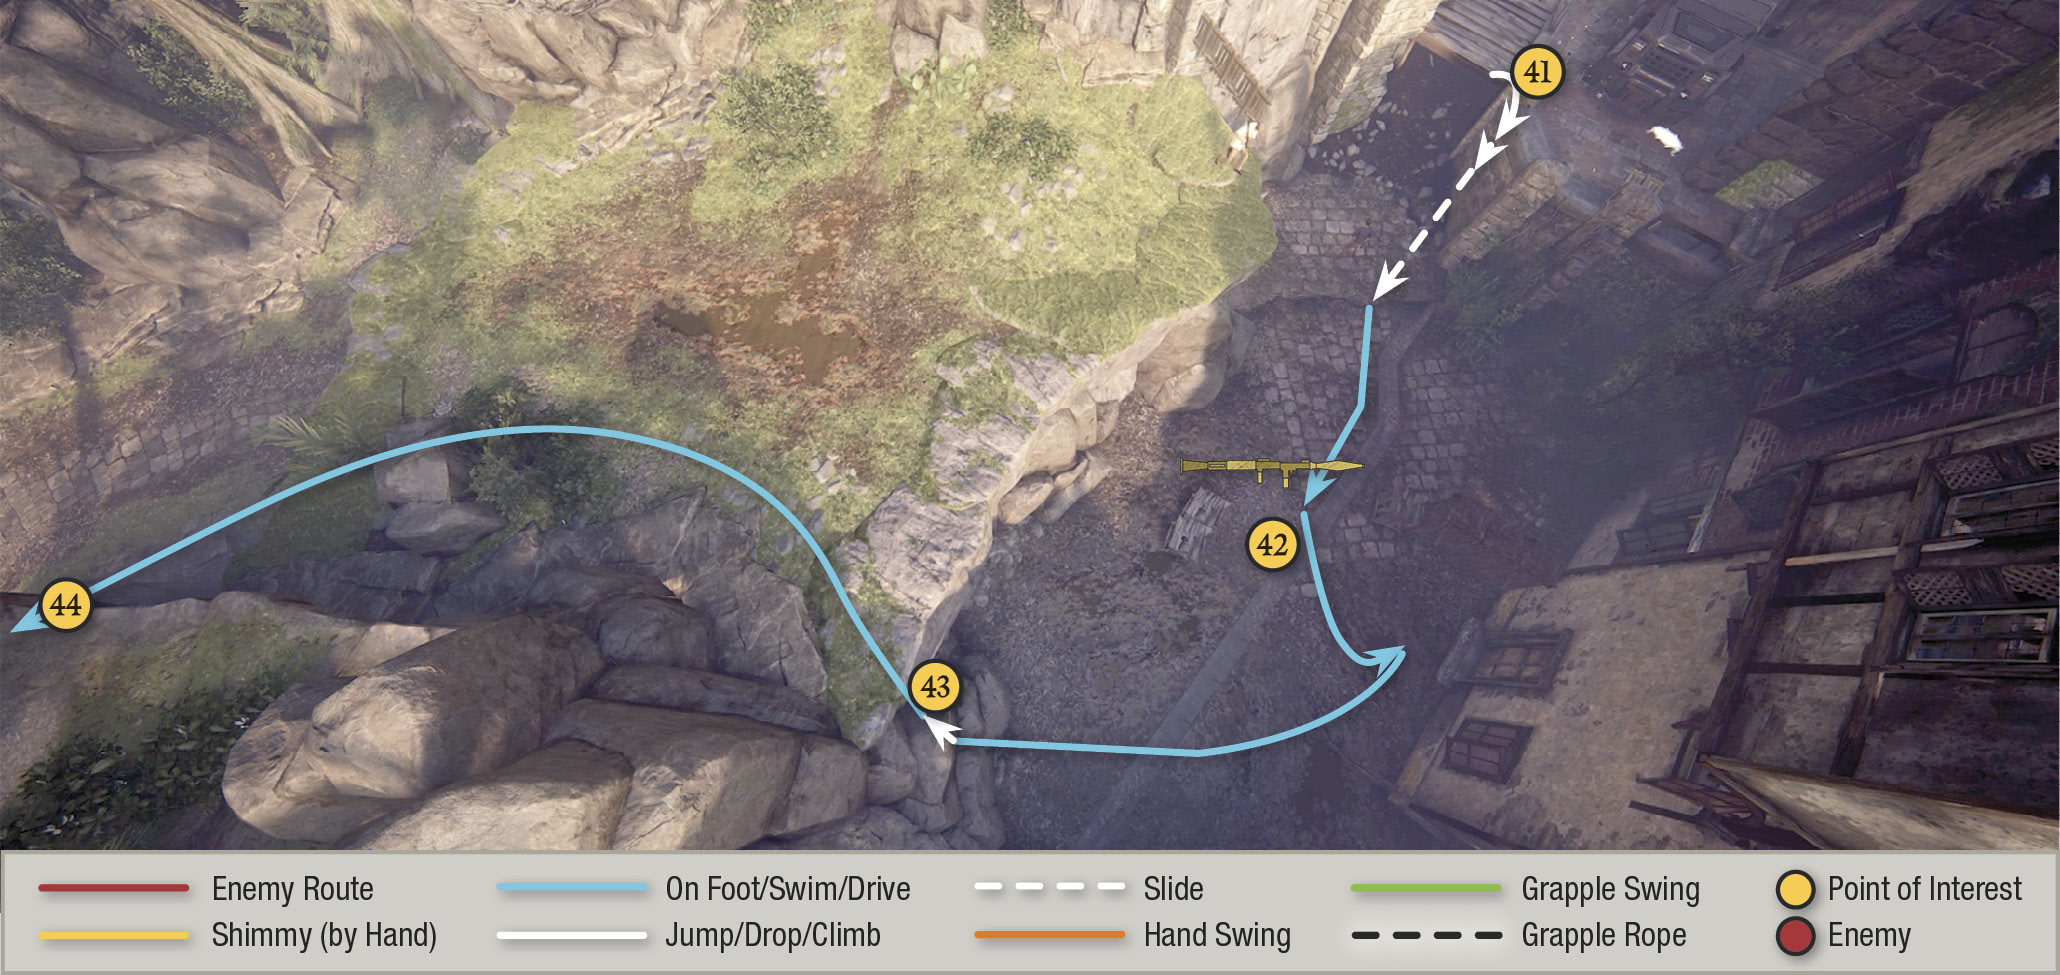
As you run away from the truck, Sully appears with an RPG on the ledge above Nathan to the left and fires a rocket into the truck over you. The blast immobilizes the truck, but its mounted gun keeps firing! Sully tosses down the weapon to Nathan (42). Run to pick it up, hustle behind nearby cover, and then fire two rockets into the truck to kill it, at last.
Head over to where Sully waits (43) on the ledge. Jump to grab his hand and trigger a long cutscene: The full team is finally together—physically, anyway. But the ultimate team objective remains up for debate.
Head Toward Sully’s Seaplane
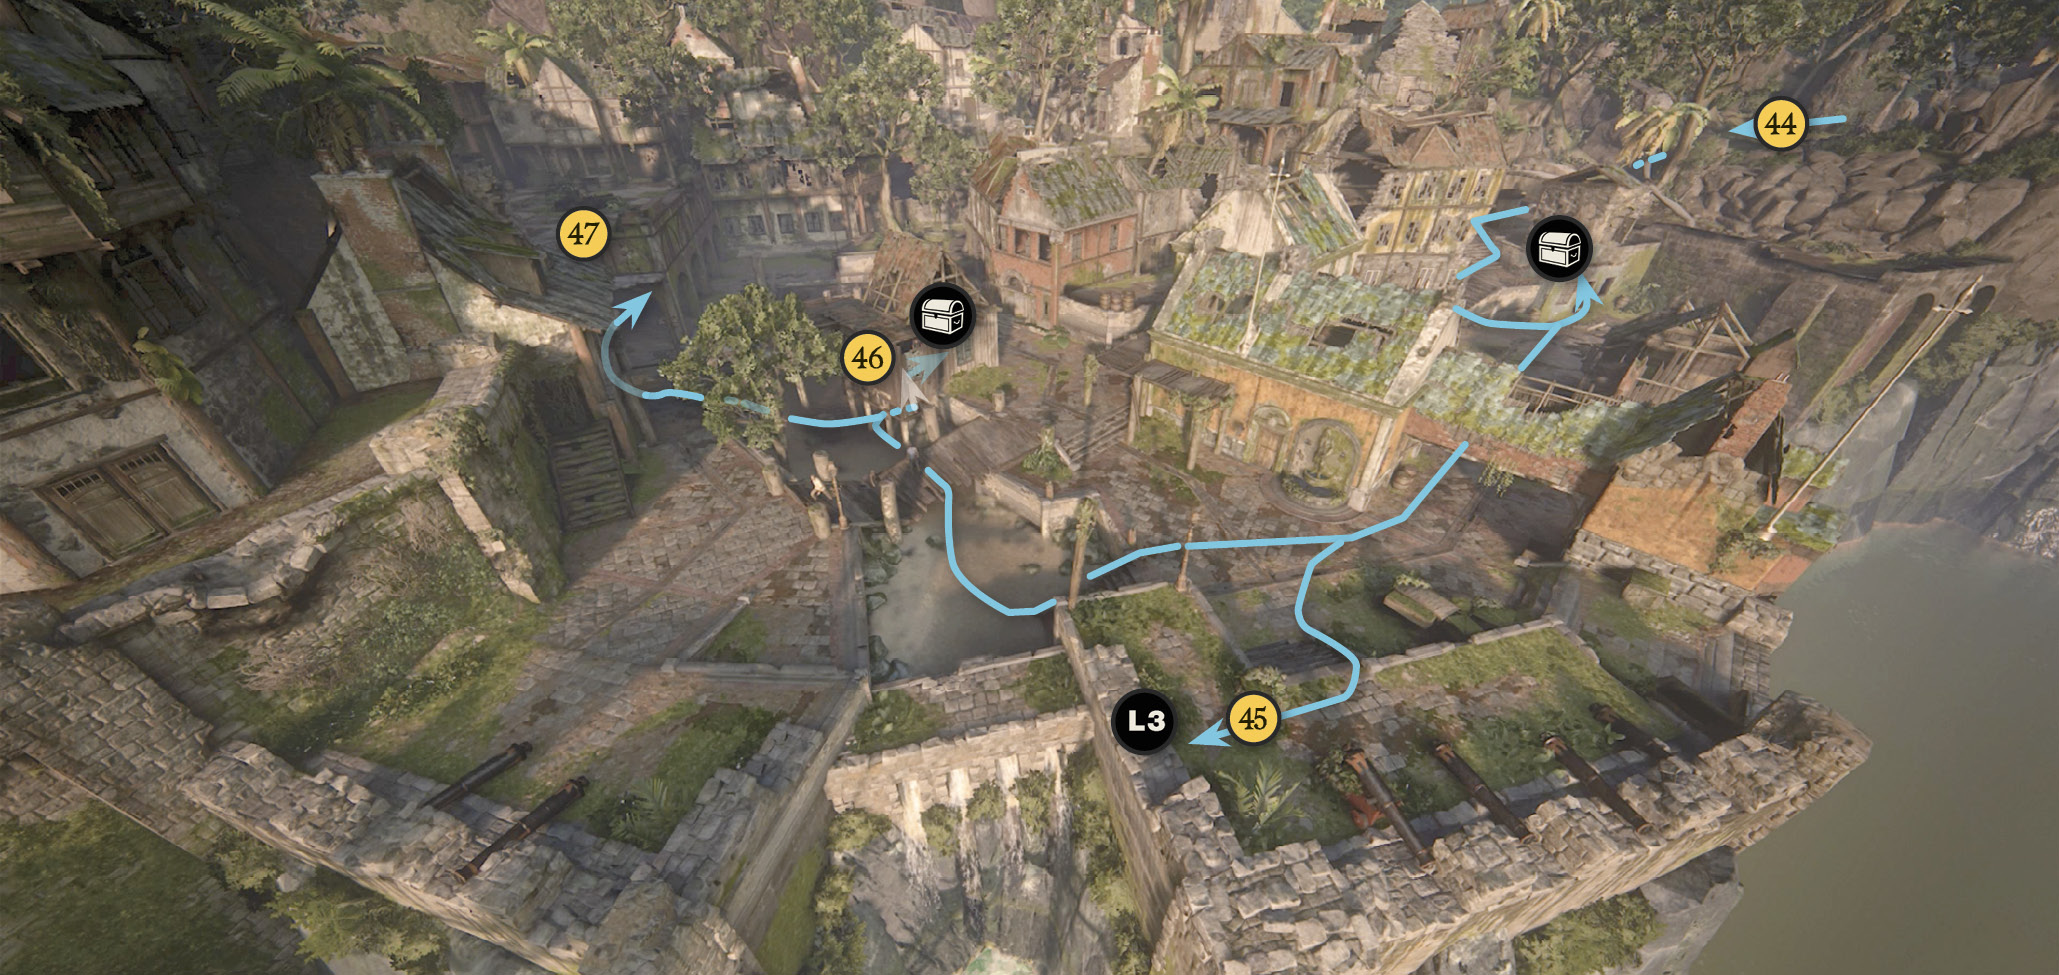
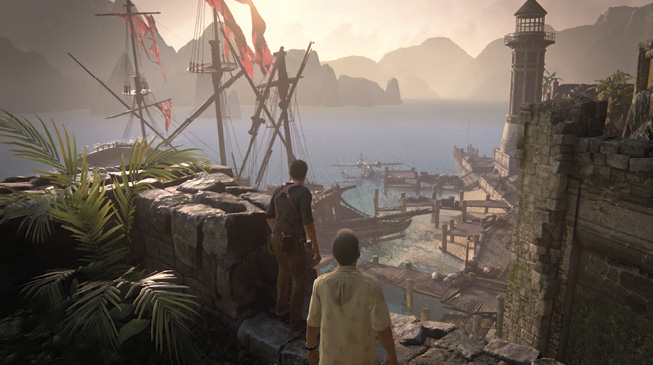
Follow Sully down the path (44) that leads to the waterfront district. Go through the arch and down the stairs. You can turn left and find a treasure in the first building. Continue through the town, following Sully to the overlook (45) next to the fortified cannon emplacement where you can spot the seaplane far below on the water.

Stoneware Bearded Jug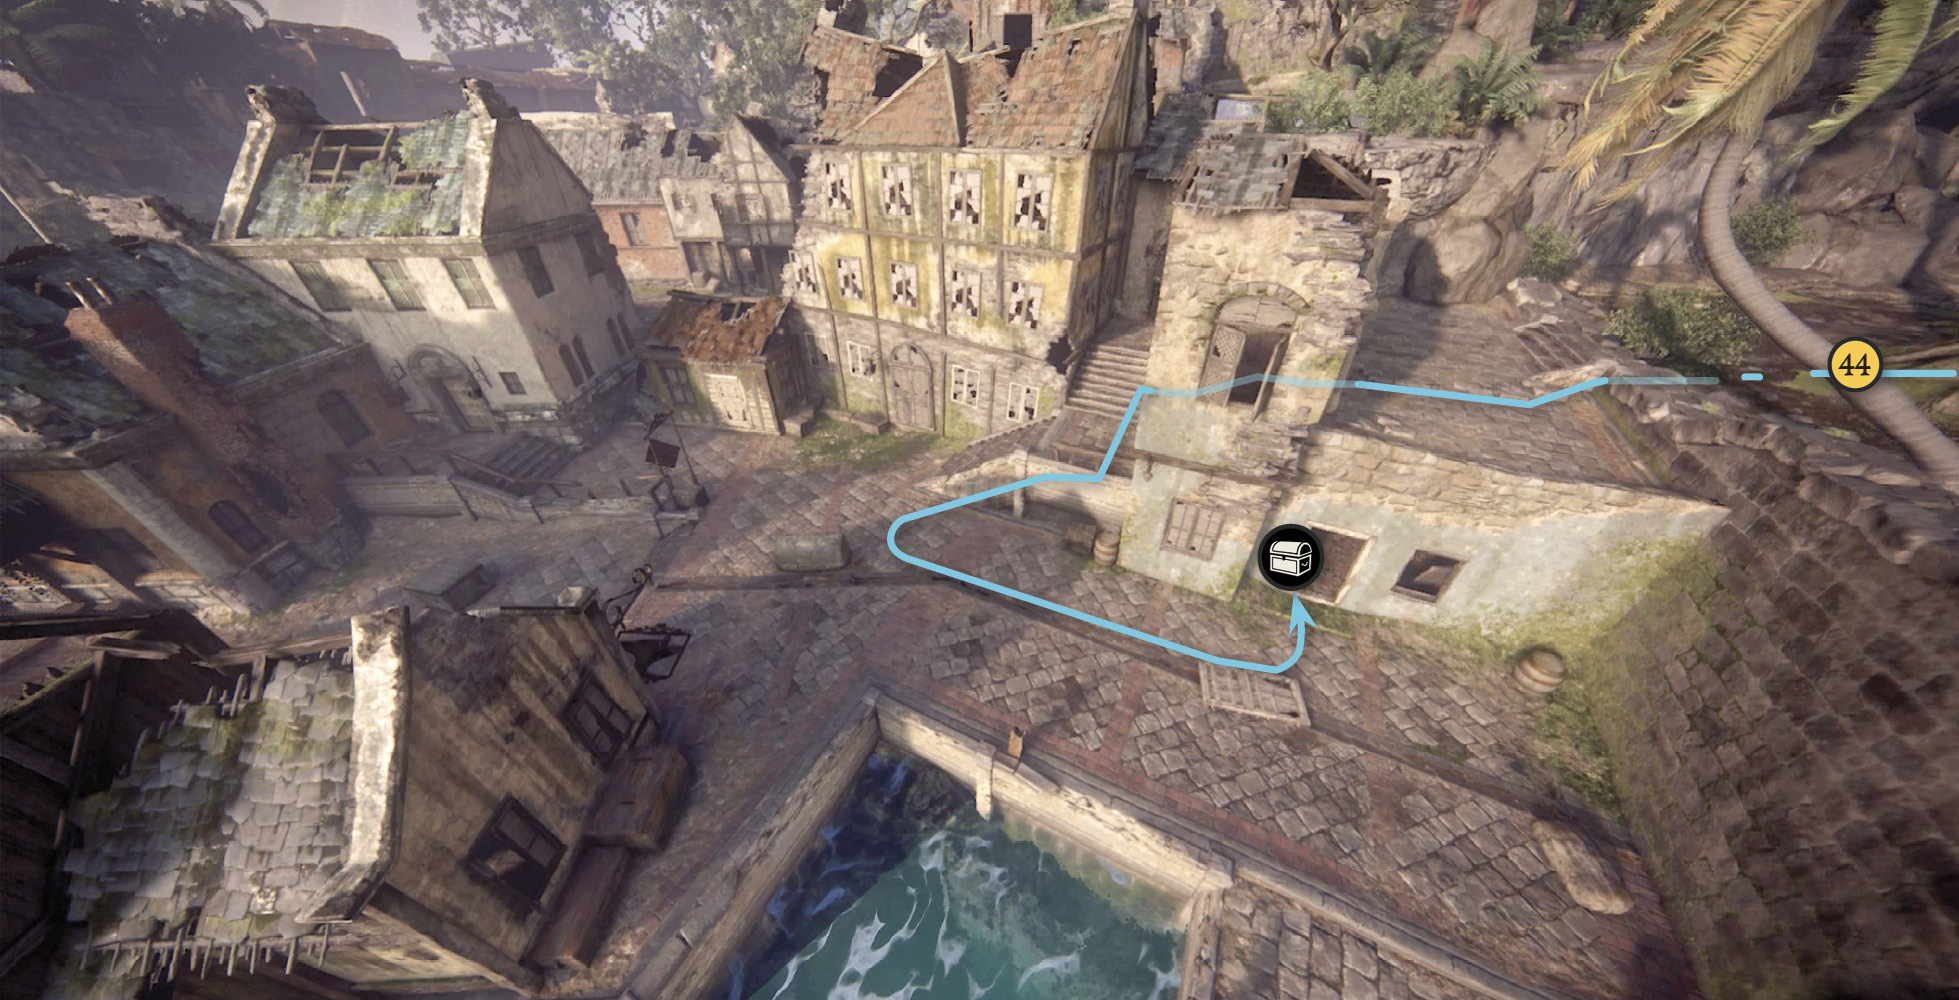
After you descend the stairs into the waterfront district, turn left and enter the first building. The Stoneware Bearded Jug is sitting on a cabinet to the left. |
Again, follow Sully from the overlook as he runs to the wall (47) where he says he jumped down. Jump into the canal that everyone else crosses using the nearby damaged bridge. Just beyond the bridge is a house (46) with a back porch that hangs over the canal. From the canal, walk under the tall porch and find the missing floor panel above that allows access into the house. There is a treasure inside.

Stout Jade Vase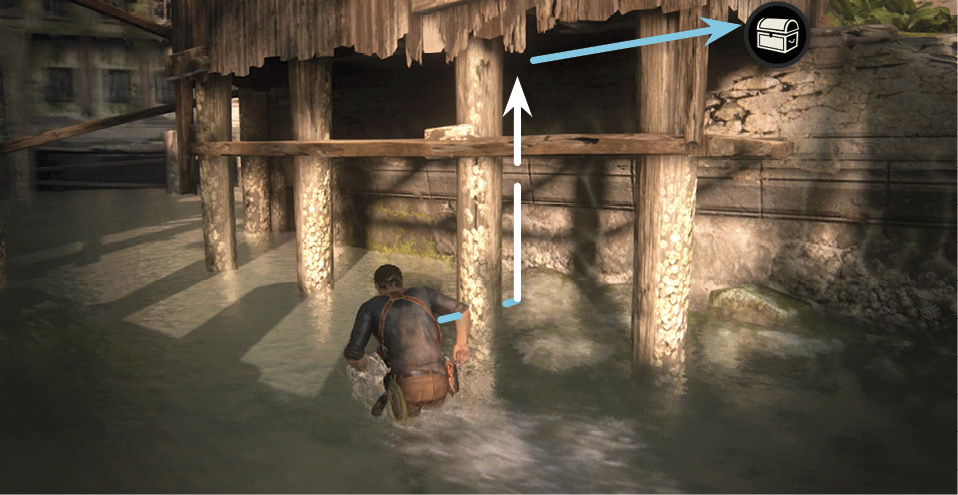
Enter the canal beyond the broken bridge, walk under the porch overhanging the canal, and climb into the house through the missing floor panel. Find the Stout Jade Vase sitting on a table inside. |
Catch up with the gang near the dead-end wall (47). Walk around to the opposite side of the cart (48) under the shelter and push it all the way to the wall. Follow the team as they use the cart as a step to reach a ledge that allows you to reach a patio. Go through the open door (49) into the old storage warehouse.
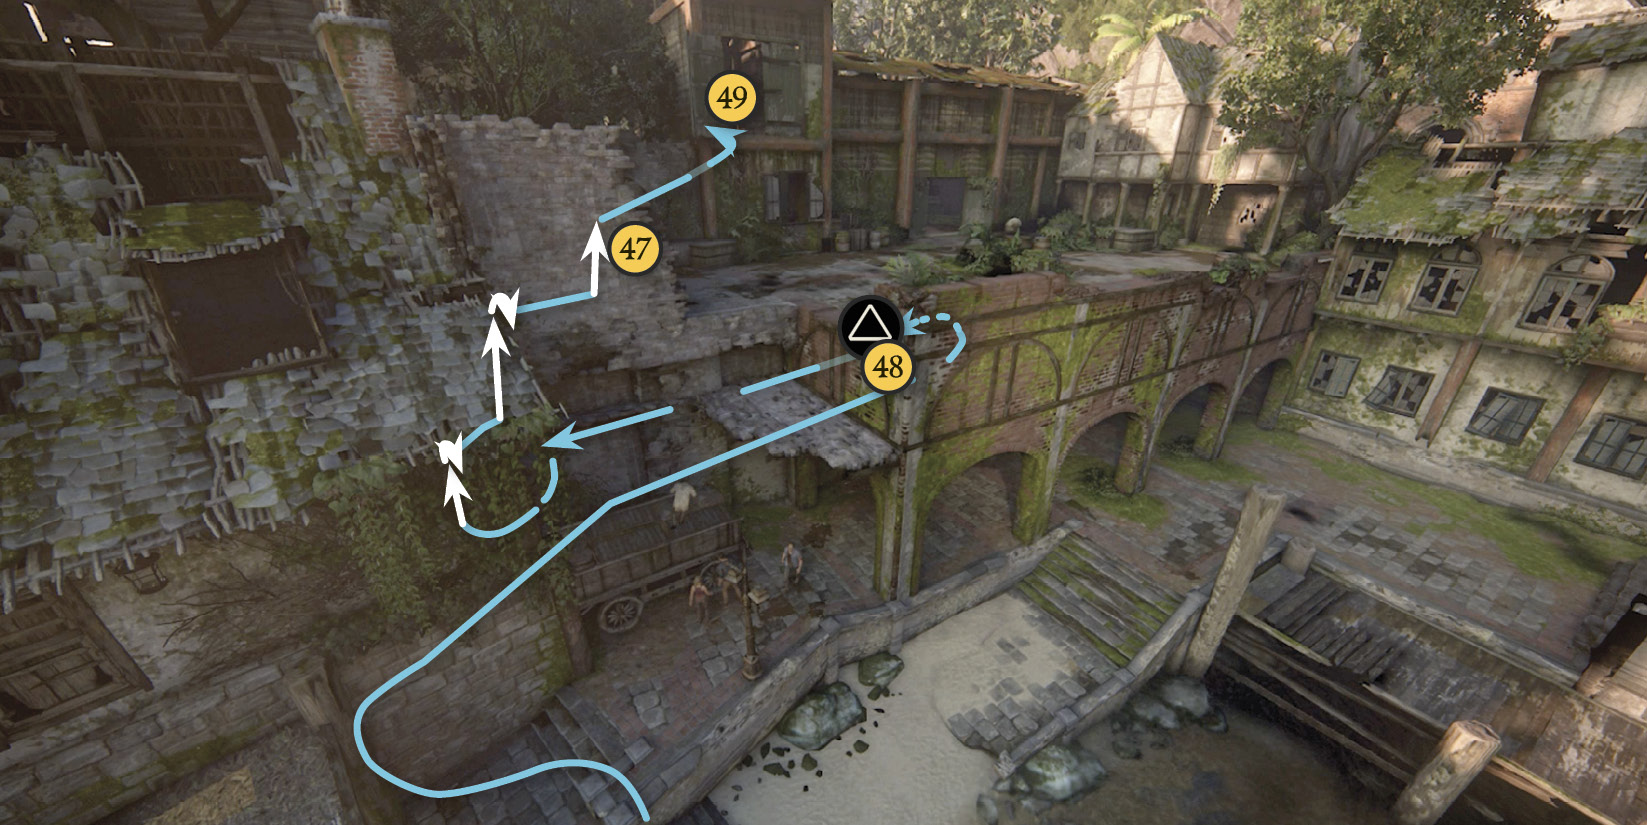
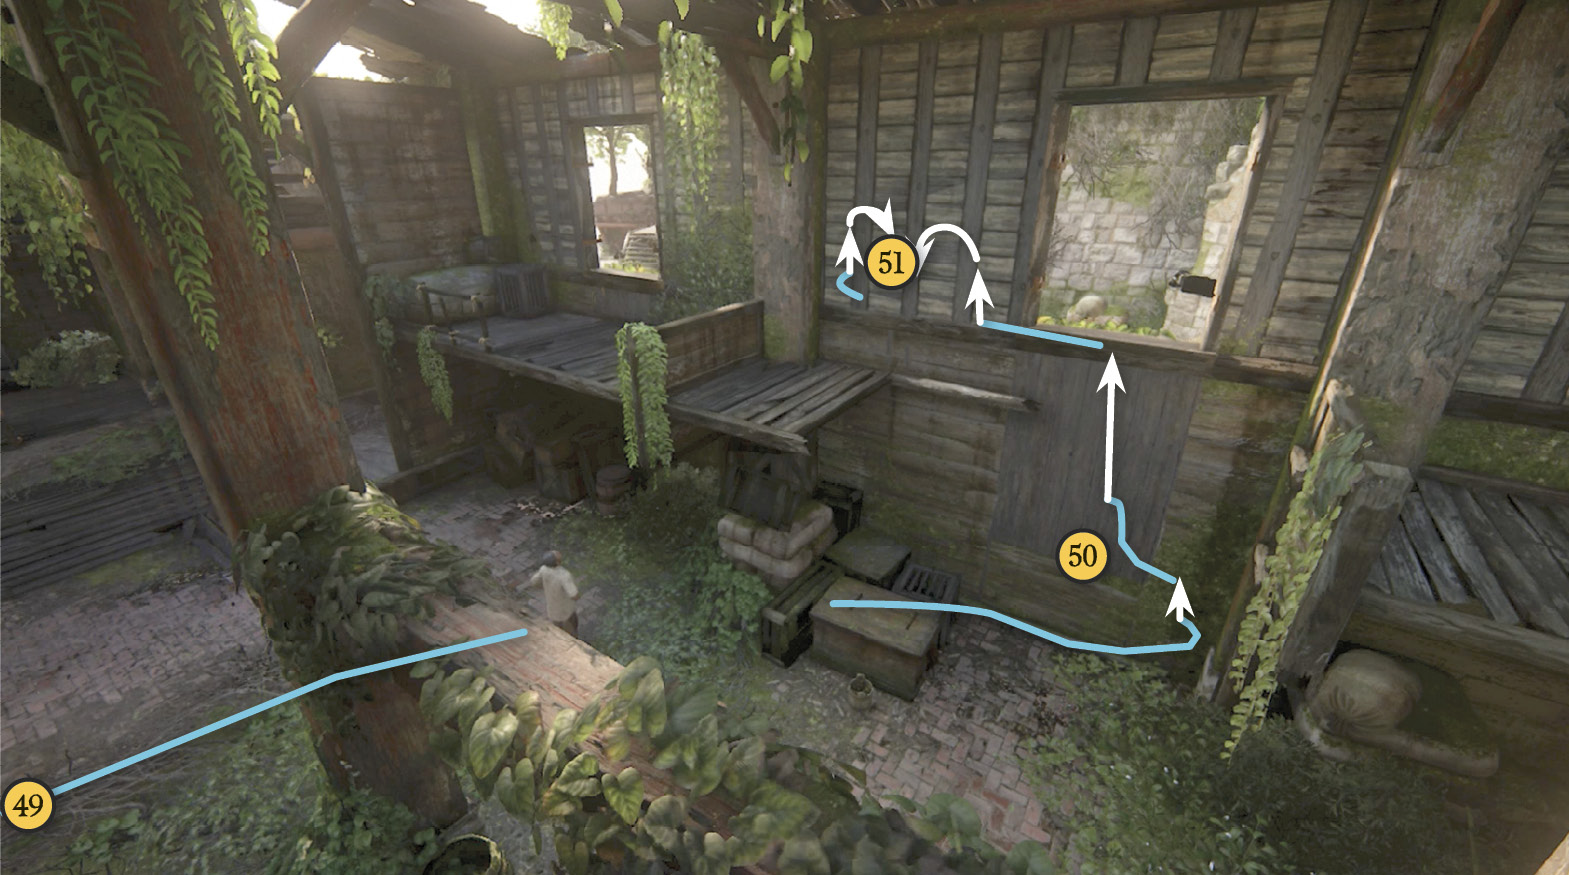
Veer right and climb onto some crates (50) that allow you to reach the edge of a loft with a simple jump. Pull up, vault over a short wall, and exit the warehouse through an open window (51) that grants access to a cobblestone plaza.
Use the Lift
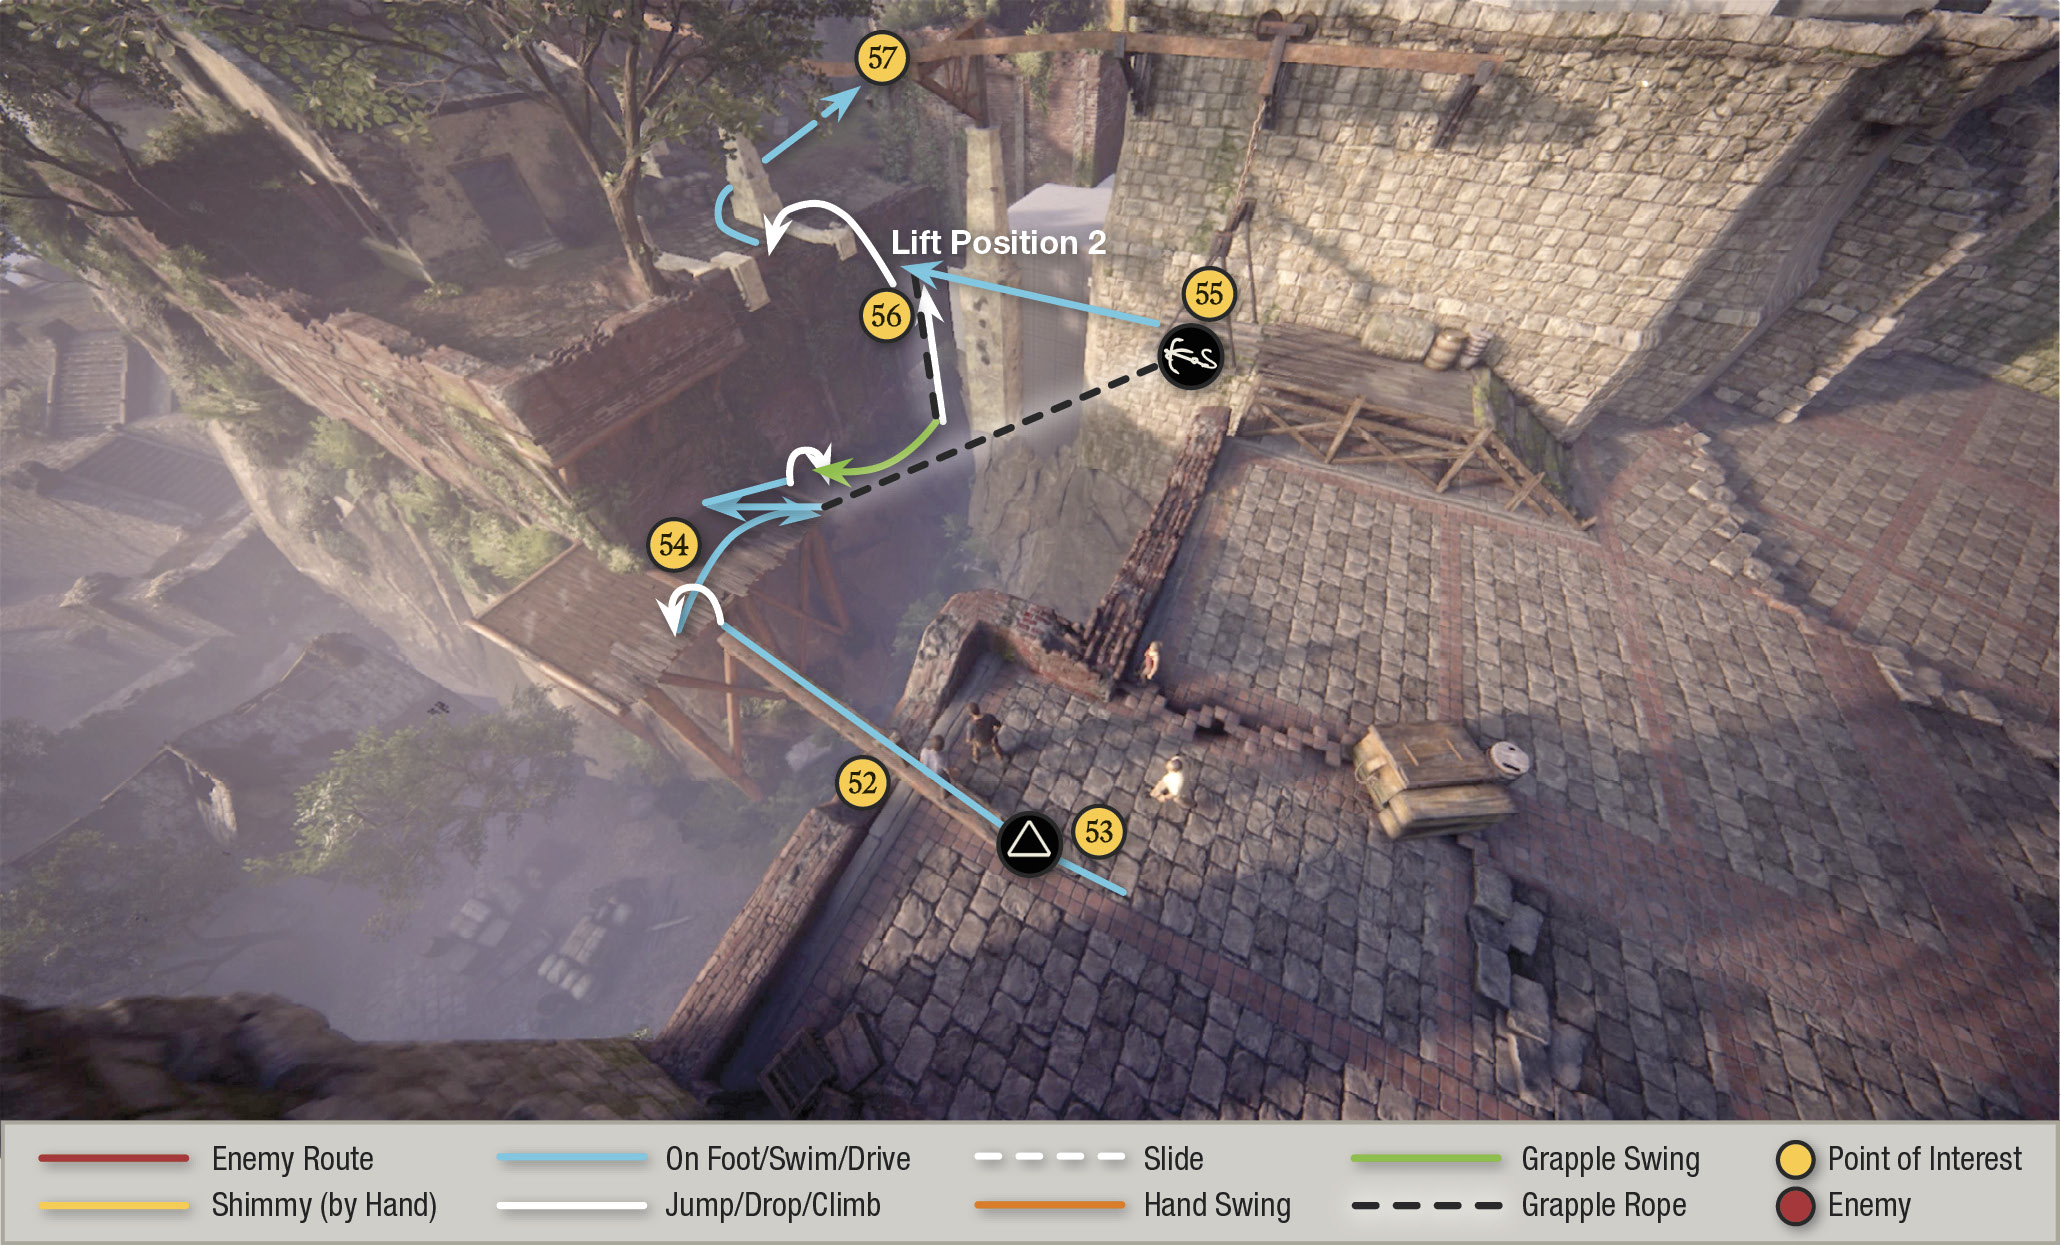
Cross the plaza to the broken bridge; you’ll need another way to get across this gap. First, step up to and examine the gap between the plaza’s edge (52) and the ledge across the gap. Attach your rope to the platform and wait about 30 seconds. As soon as Sam says, “I got an idea, Nathan give me a hand,” follow him to the end of the broken support beam (53) and move it out over the gap. Walk onto the beam and to the end, and jump to the lower platform (54) across the gap. Move to the front corner of the platform facing the cargo lift back across the gap. Sam, Elena, and Sully all step onto the lift (55). Now it’s grapple time:
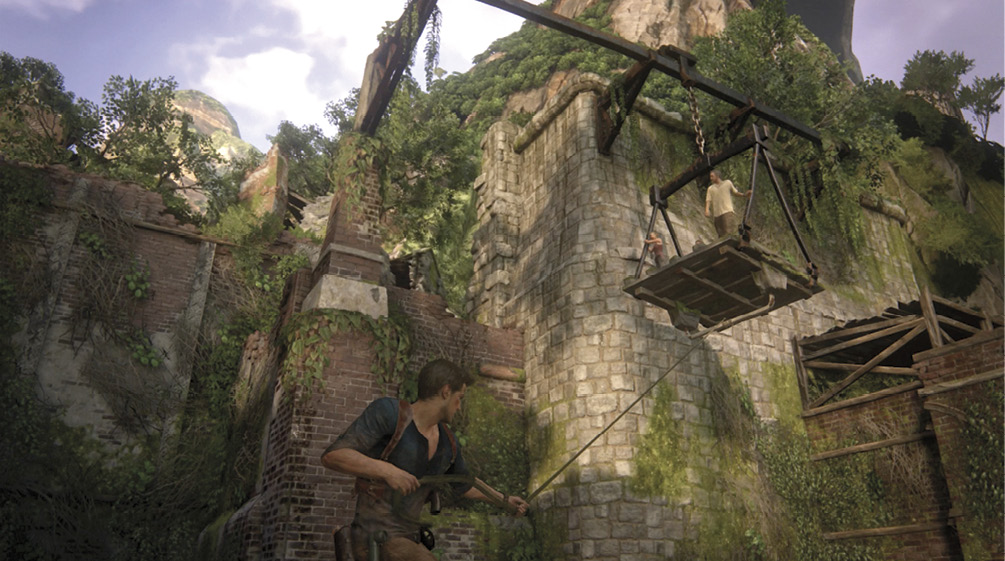
Toss your grapple hook at the cargo lift. Pull the grapple rope (hold in L2) to yank the lift platform across the gap. Elena and Sully hop off once it reaches your side (56). Sam moves to the edge and reaches out his hand.
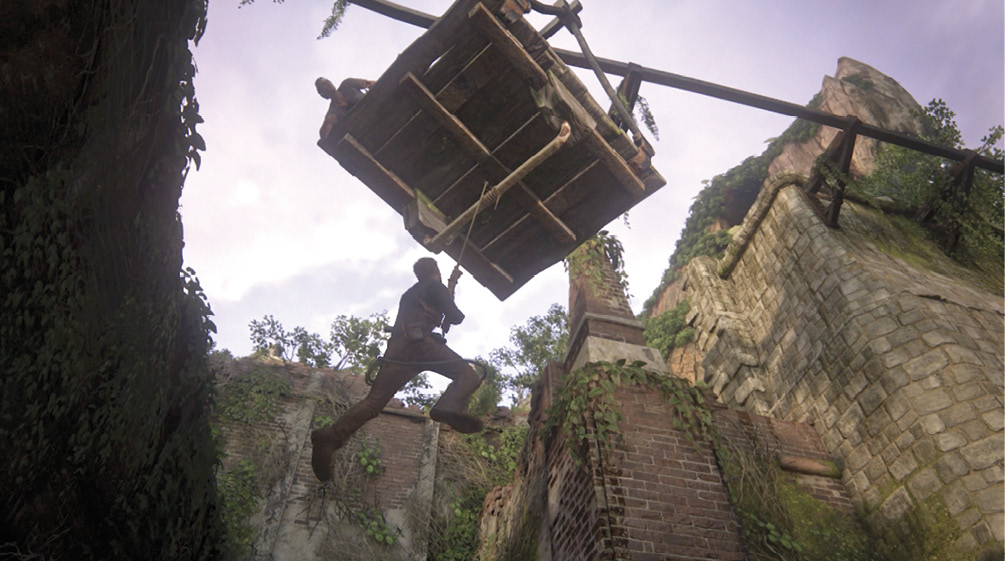
Step off your platform and let yourself swing underneath the lift platform. Then climb the rope as high as you can go until you reach the bar the grapple is hooked onto. Turn yourself around on the bar and then swing to Sam, who has his hand reaching out to you. He pulls you aboard.
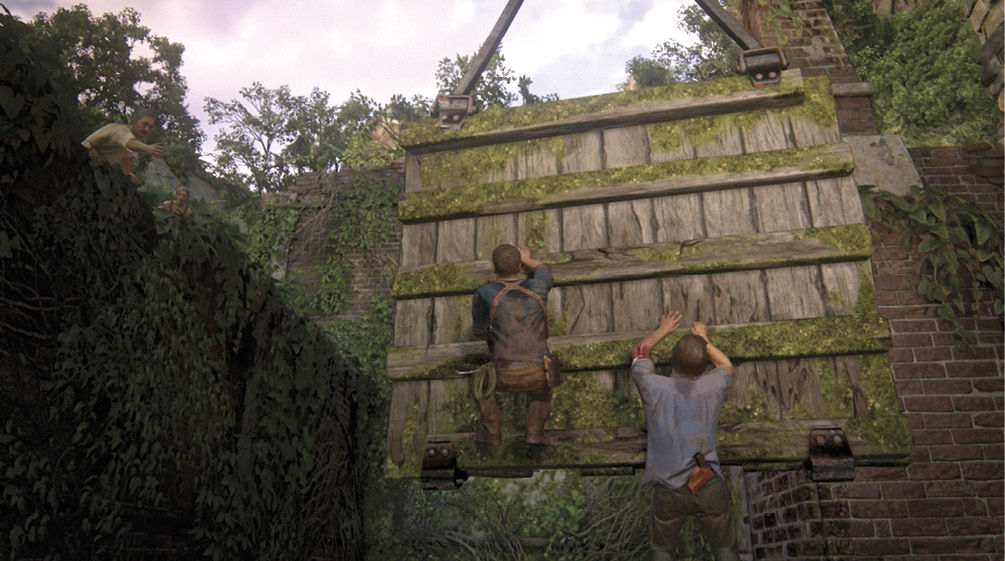
When a cable breaks and sends you and Sam clinking to the bottom of the lift, climb the platform boards to the upper left corner and then jump toward Sully, who pulls Nathan onto the terrace.
This triggers a cutscene: As the rest of the lift cables snap, Sam manages to jump back over to the opposite platform. When Nathan urges him to jump across the gap, Sam succumbs to his desire to pursue Avery’s treasure. And off he goes. Follow Elena as she takes off in pursuit (57).
Get on Sam’s Trail
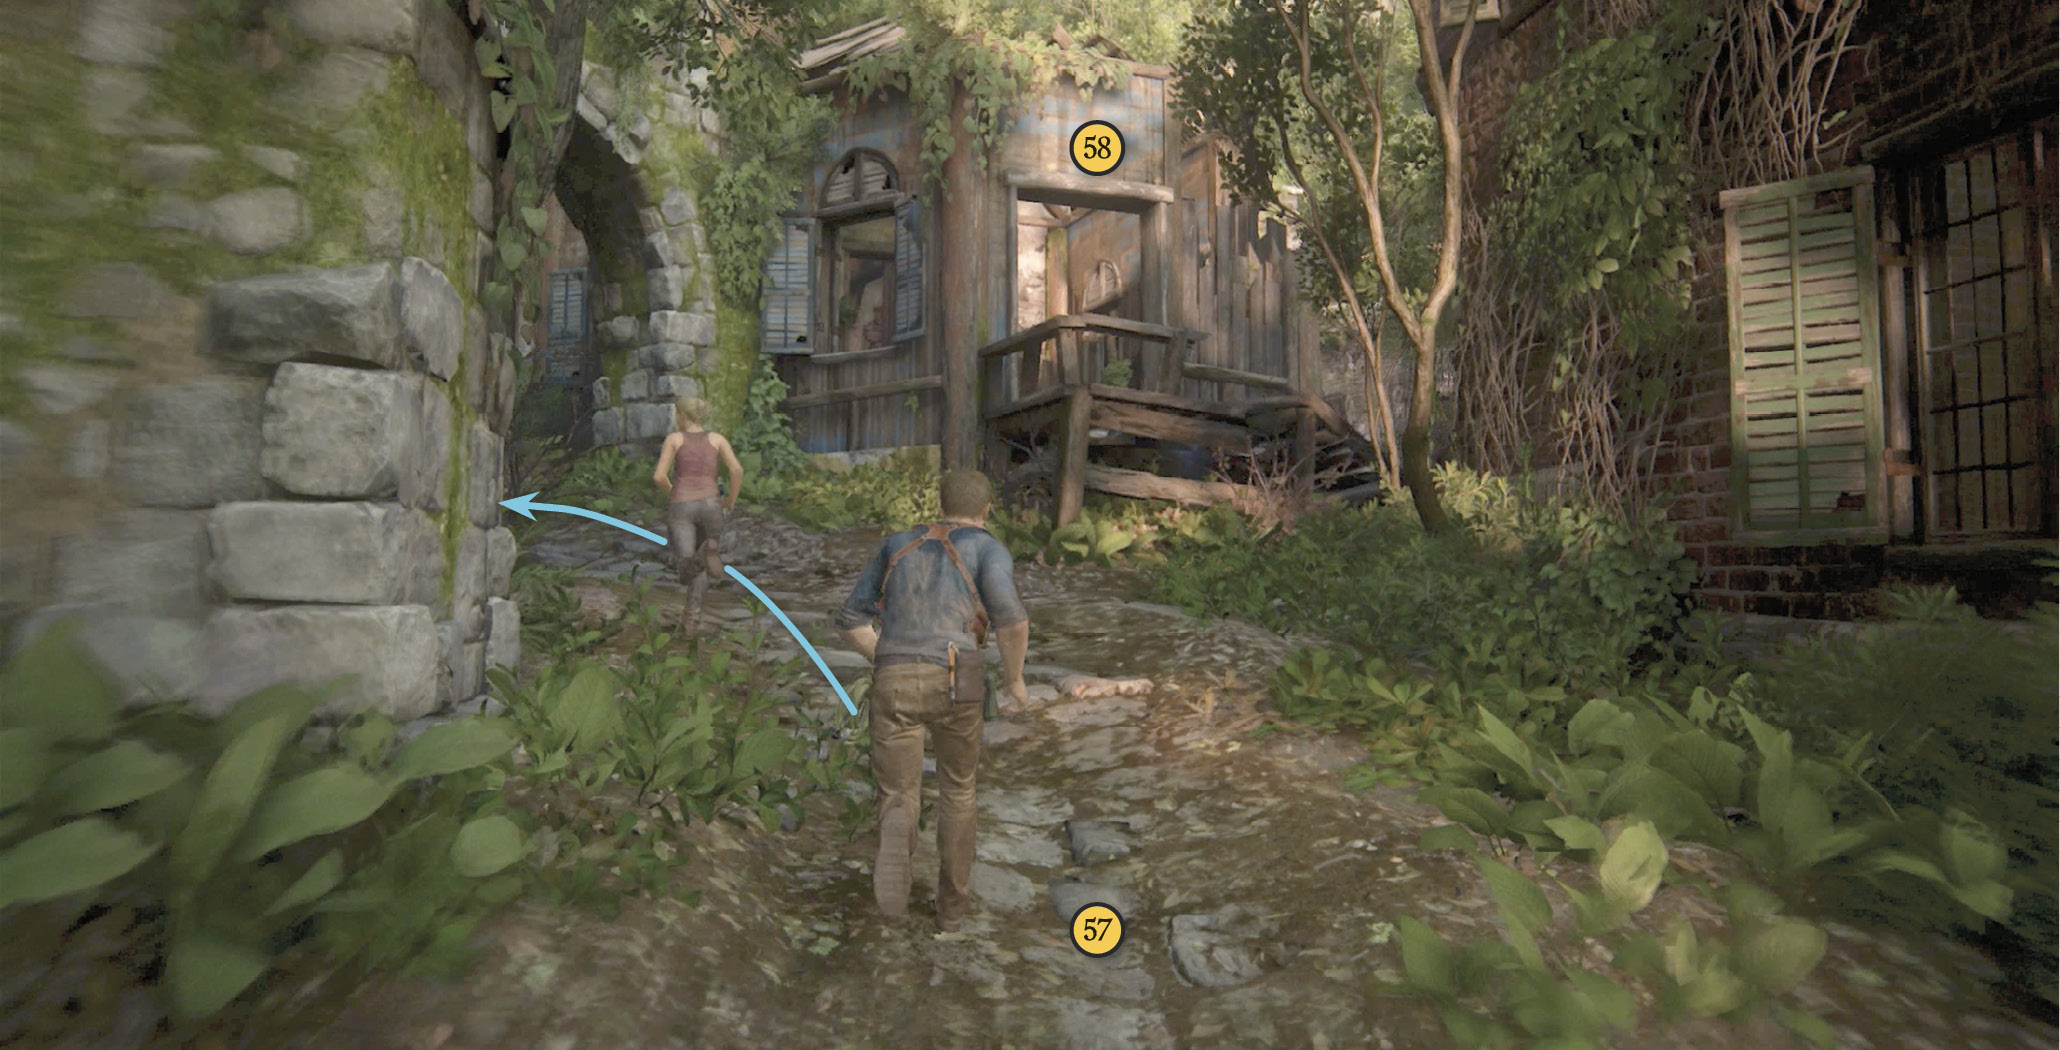
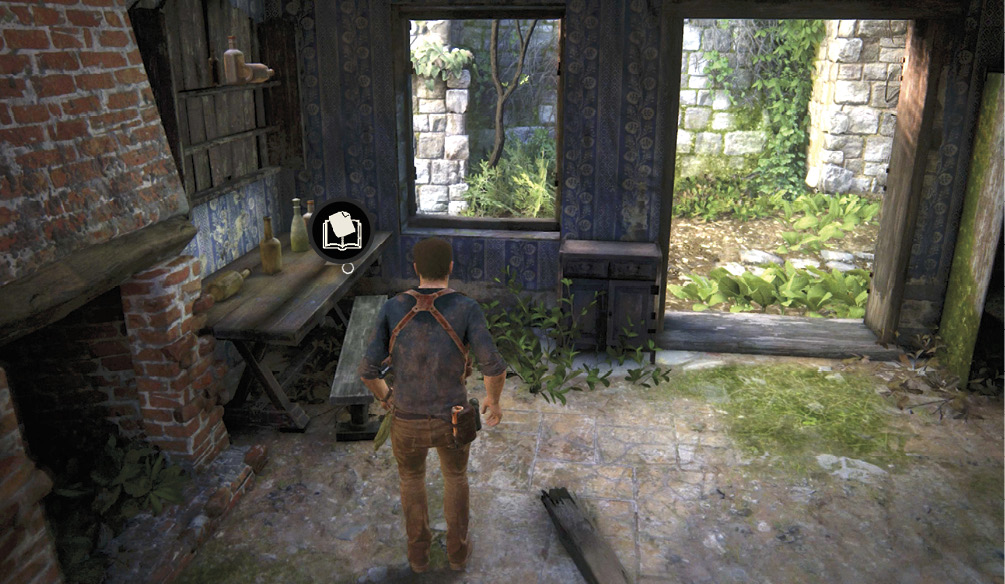
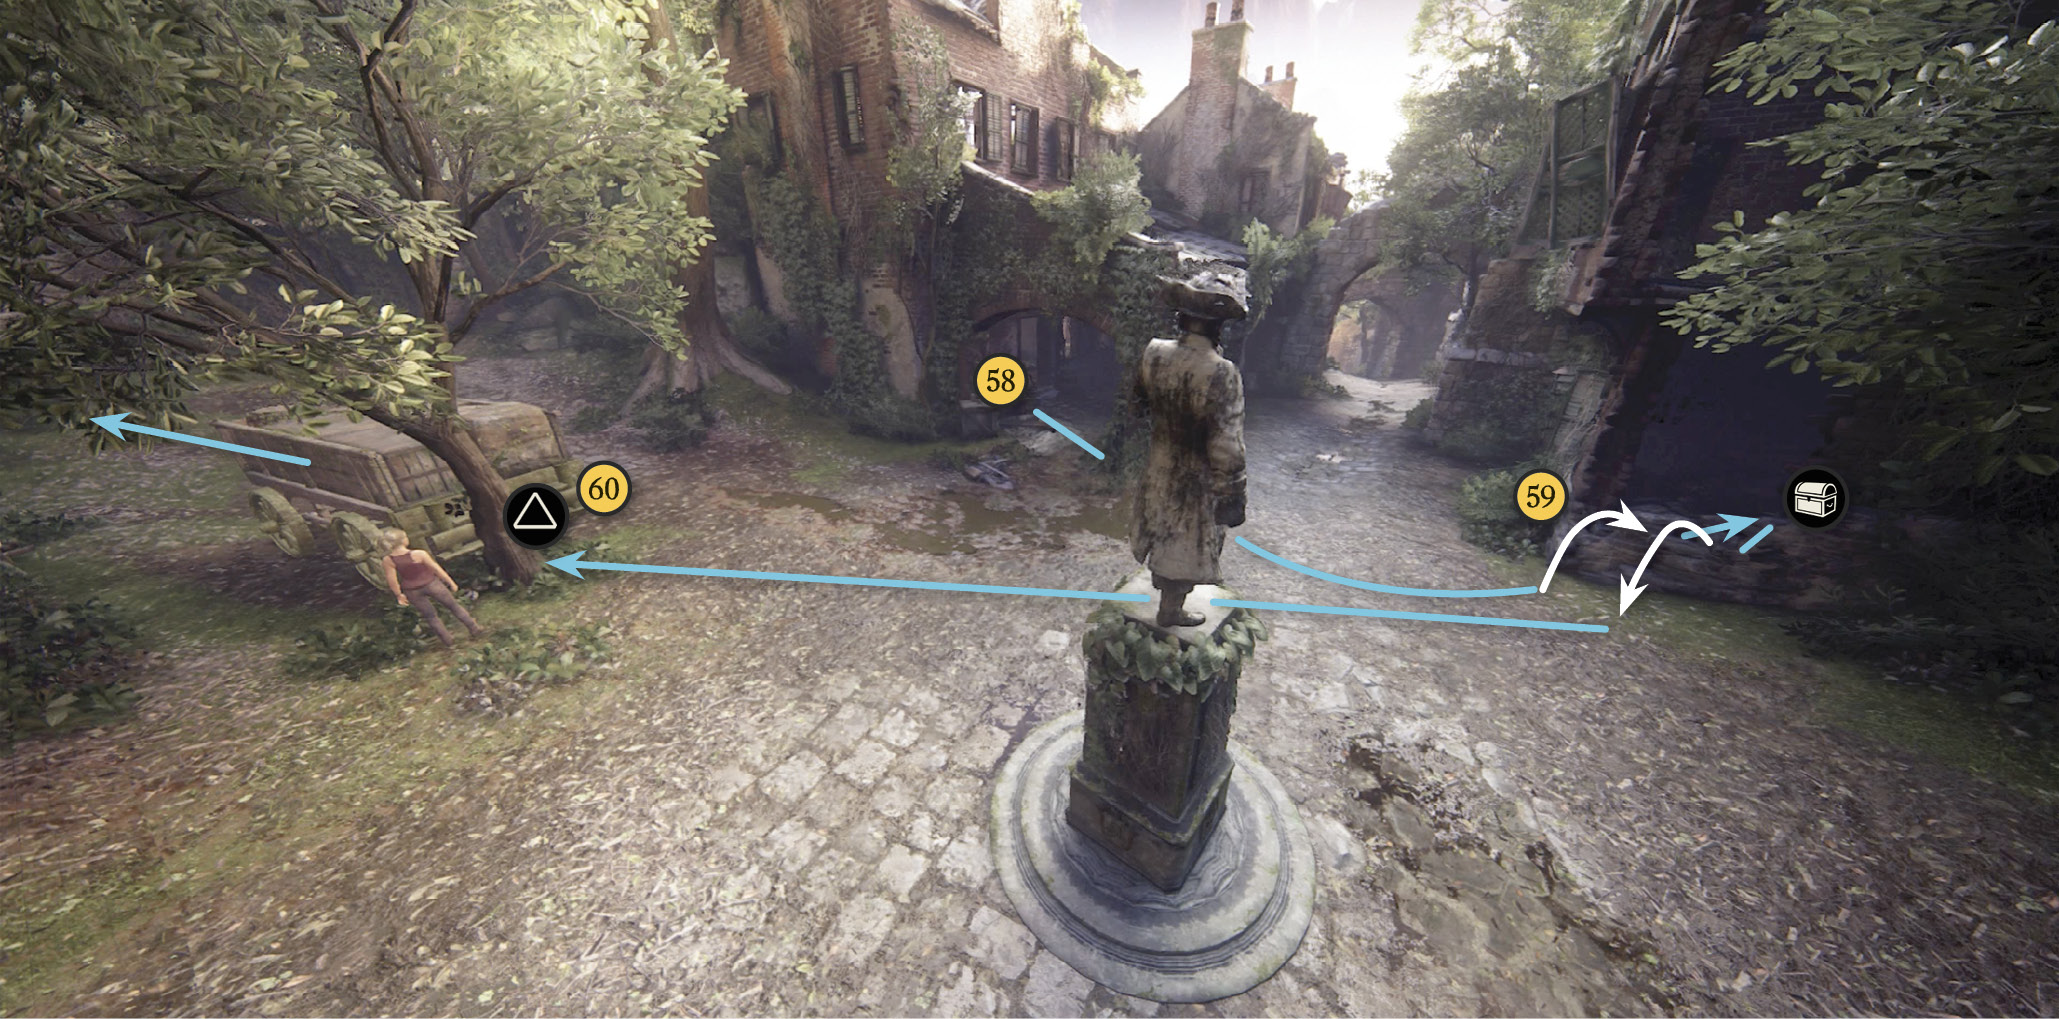
Head through the arch and follow the path. You can enter the second house (58) past the arch to find an Optional Journal Note on the first floor (second room on the left) on a table near a window and a treasure on the second floor. Continue up the path through two more arches until you reach a small plaza with a statue in the center. You can find another treasure inside the house (59) with a hole torn open in the corner.
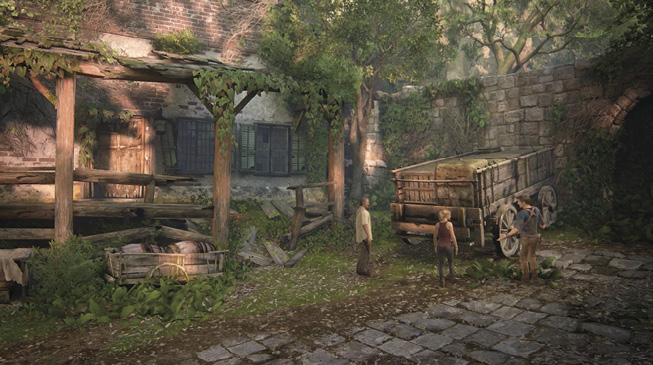
Elena and Sully wait by a wagon (60) in the plaza. Push the wagon with their help all the way to the wall to trigger a cutscene: Nathan sets the brake, but it’s too old and snaps. Sully and Elena join Nathan in stabilizing the wagon, and urge him to get over the wall. When he does, the wagon’s weight proves too much for the others. Nathan must continue the pursuit alone.

Mughal Perfume Bottle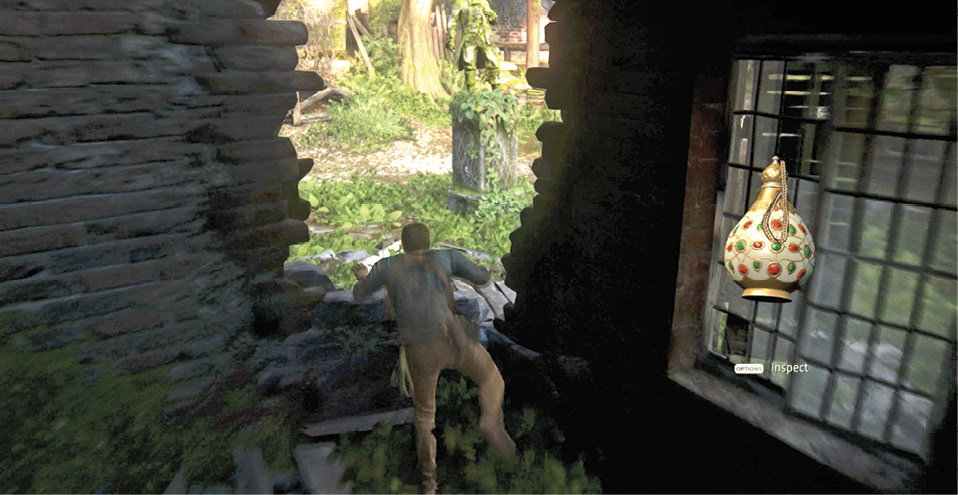
While pursuing Sam, turn left when you step into the Avery statue plaza. Hop through the hole in the corner of the house there. Go to the opposite corner of the dark room. The Mughal Perfume Bottle is in a pile of debris. |

Painted Spouted Vase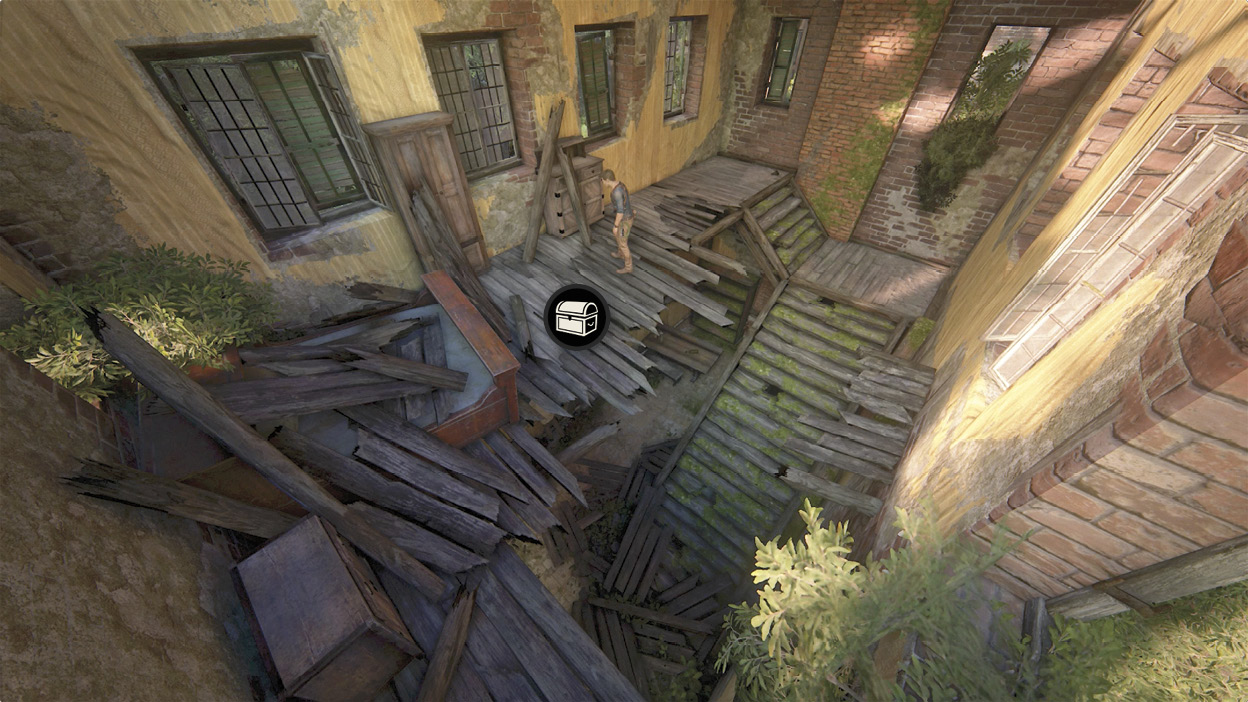
When you start after Sam, go into the second house after the first arch on the path. Climb the crumbling staircase in the backroom. The Painted Spouted Vase is atop a cabinet on the second floor. |