Uncharted 4: A Thief's End Guide Story Walkthrough
Chapter 12: At Sea
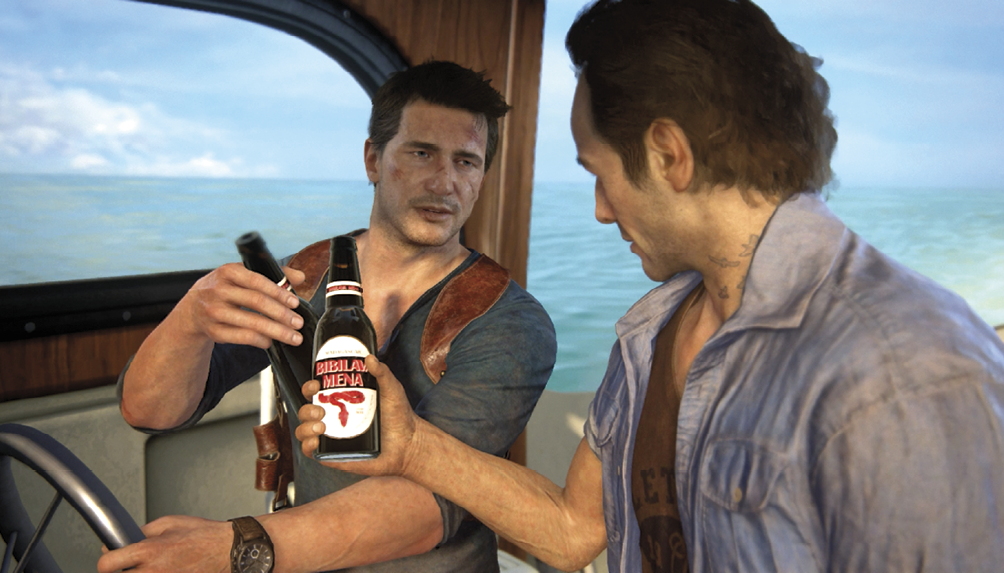
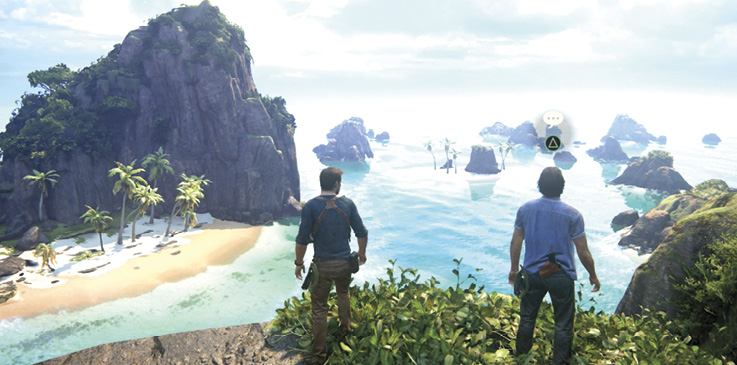
Cruising in a small fishing boat northeast of King’s Bay, Sam and Nathan Drake spot the island indicated in the tower map clues. Nathan is still unsettled by his encounter with Elena, so Sam tries to raise his brother’s spirits by toasting with the famous motto of Sir Francis Drake, Sic Parvis Magna—“greatness from small beginnings.” Note that this chapter is treasure-rich, so keep your eyes peeled for the glint of special items.
CollectiblesTreasures: 13 Chapter Specific Trophy: “On Porpoise” and “Marco Polo Returns!” Optional Conversations: 2 Optional Journal Notes: 2 Optional Journal Entries: 6 Optional: Treasures, Trophies & Journaling |
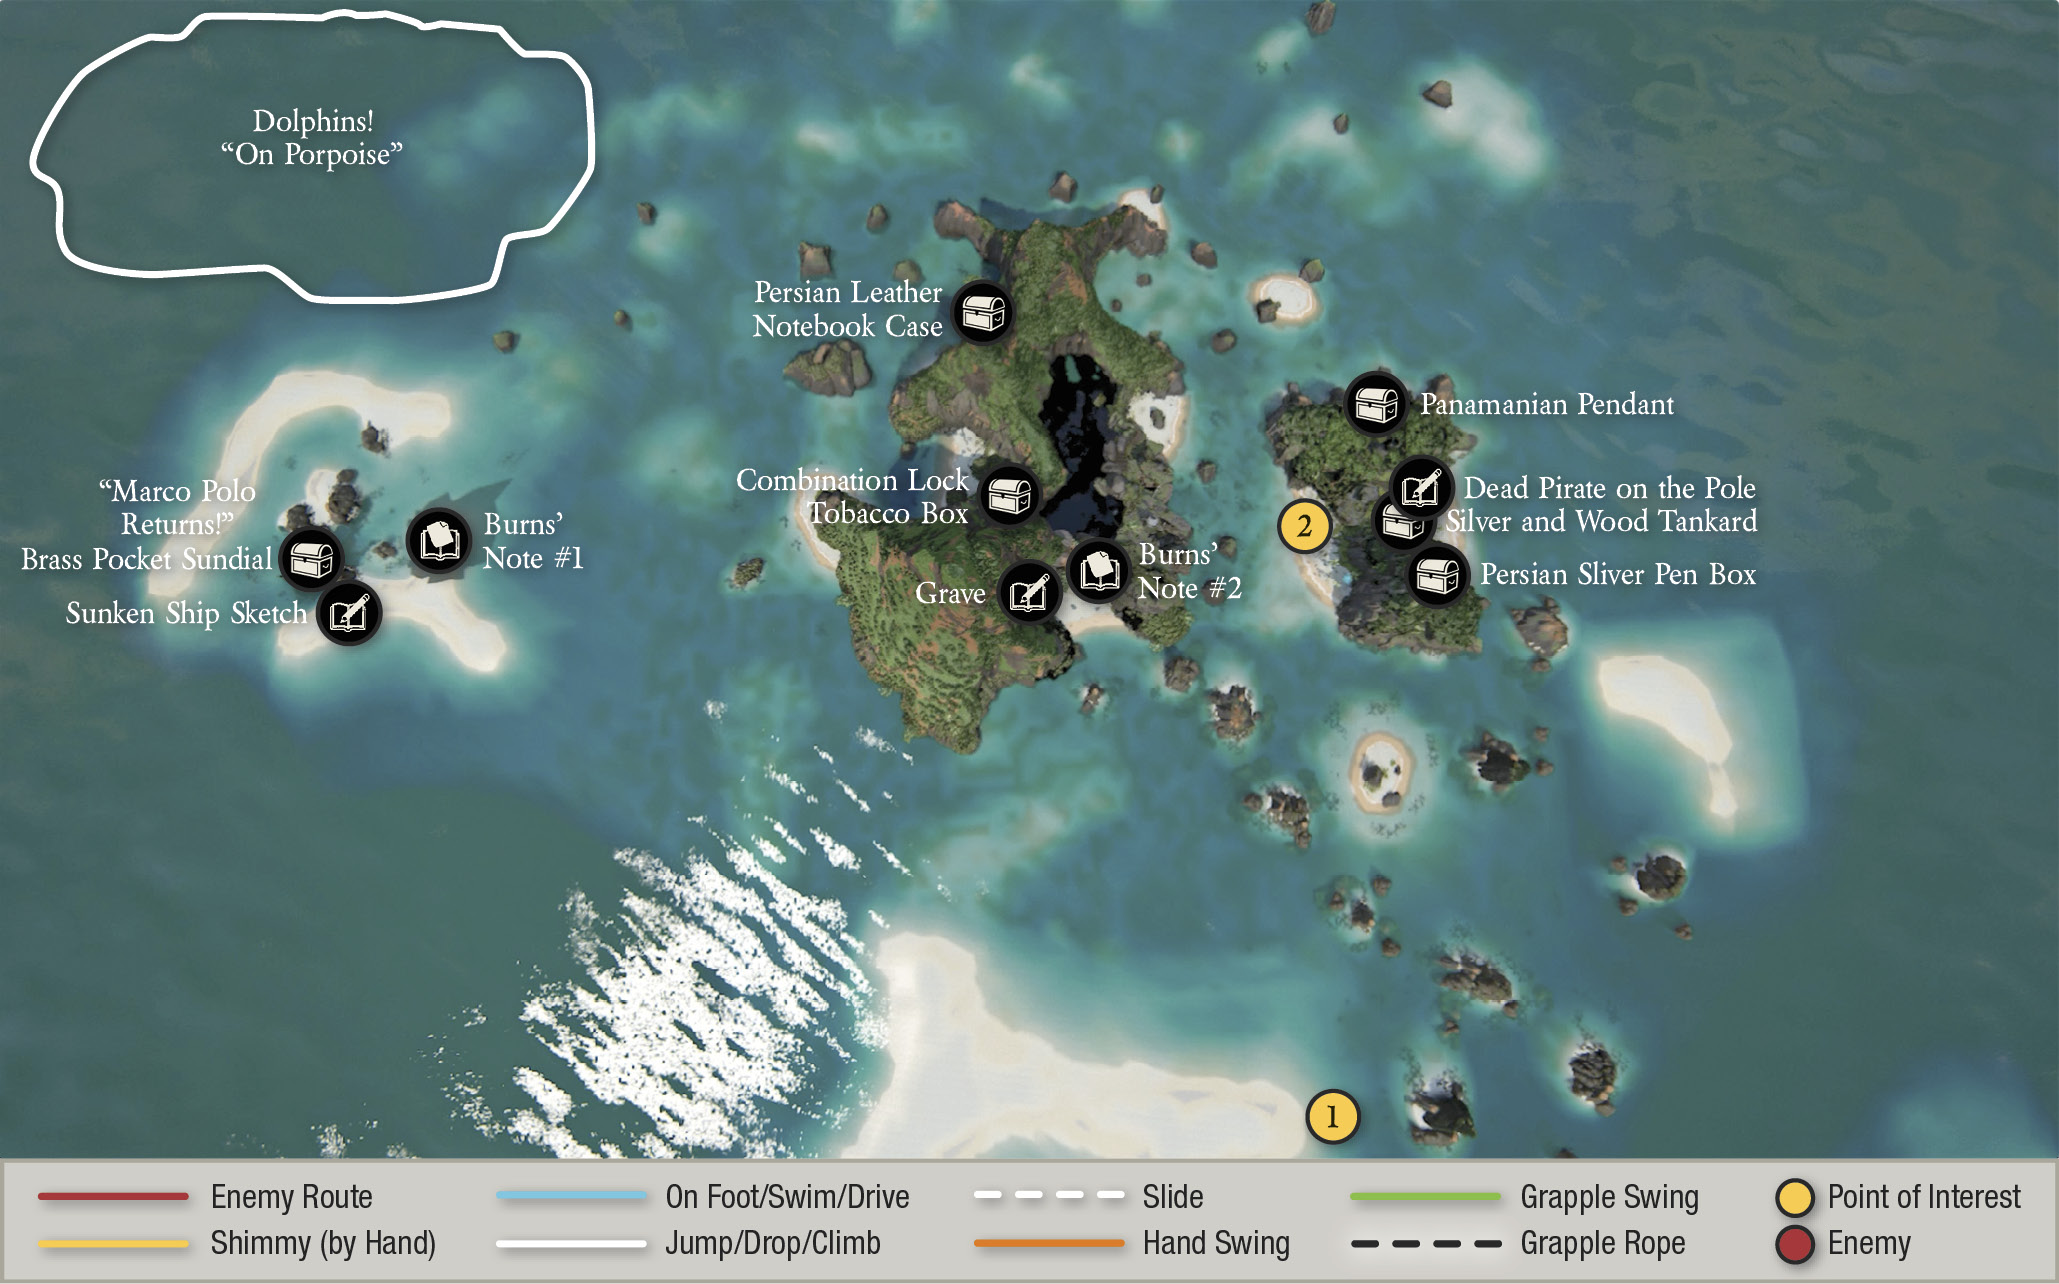
Before going ashore, you can explore the water and beaches around the islands to find a handful of treasures, journal notes and entries, plus a couple of very cool trophy discoveries. The special boxes in this chapter give detailed instructions for finding each item; we placed each box where the item is most accessible during the walkthrough’s path. But you can cruise around the islands looking for all the good stuff right away if you want. Start by finding the small sand beach on the near side of the leftmost island.
Optional Journal Entry & Optional Journal Note:
|
 Brass Pocket Sundial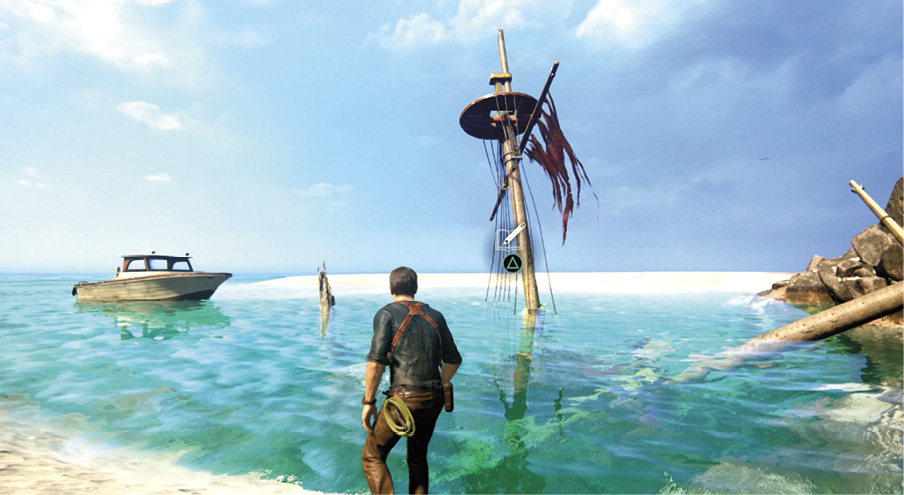 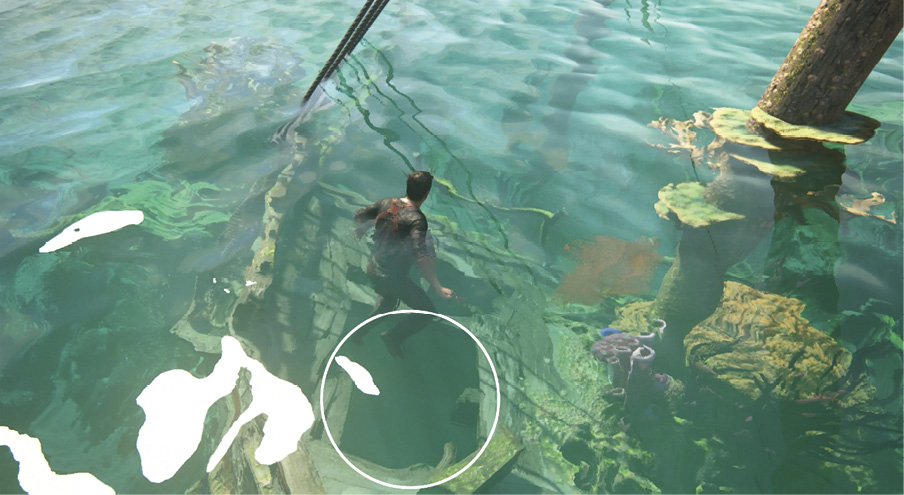 Motor to the left of the islands to find the sunken mast jutting from the water. Dive underwater at the mast and swim through the hole in the sunken ship’s foredeck to enter the hold and find the Brass Pocket Sundial. When you surface, swim over to the nearby sand beach and look back at the mast to add an Optional Journal Entry: Nate sketches the Sunken Ship. |
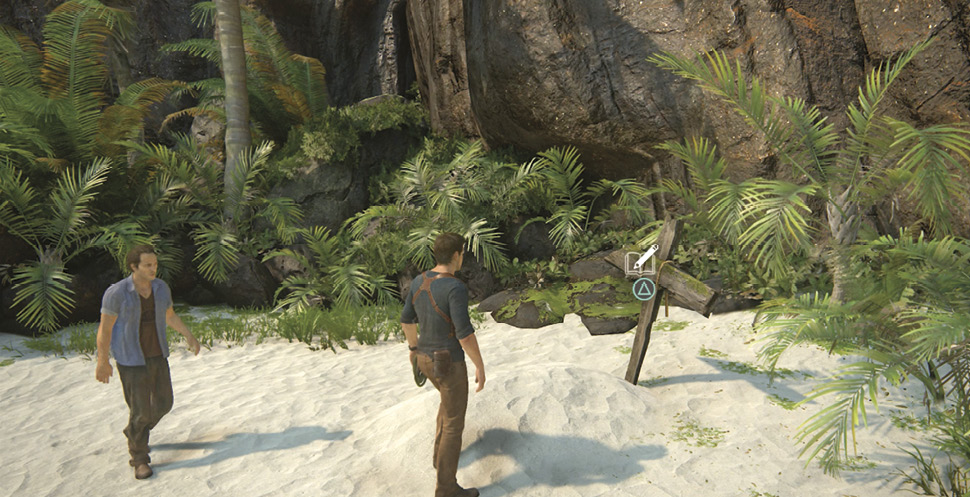
Optional Journal Note: Burnes Note #1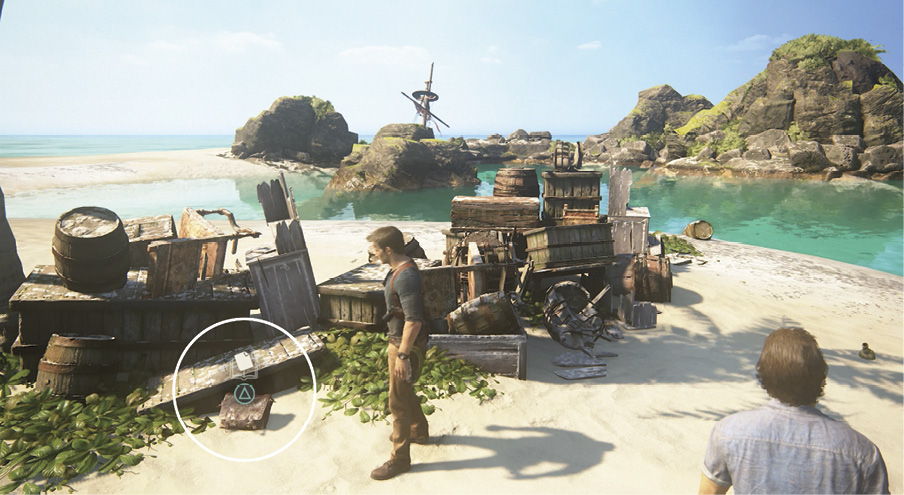 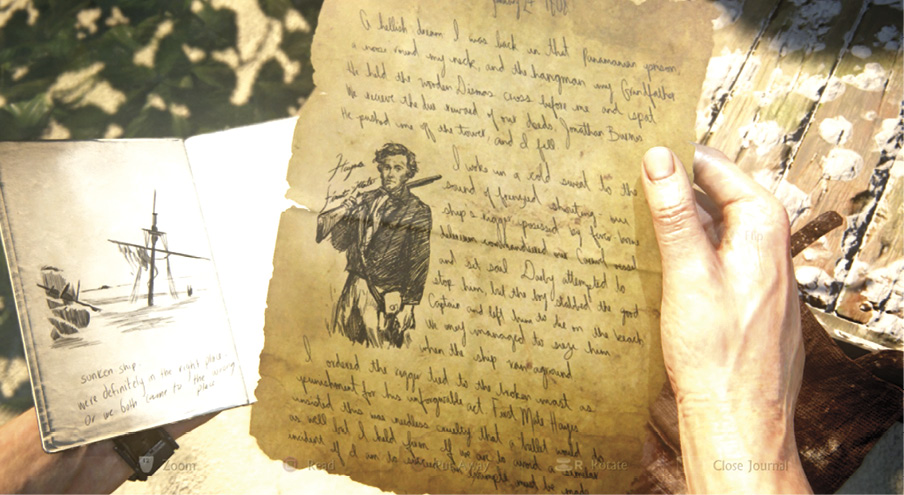 After you explore around the sunken mast, go to the other end of the small beach atoll to examine an old leather pouch amongst a pile of old supply crates and barrels (from the shipwreck, no doubt). Inside, Nathan finds another Optional Journal Note from Jonathan Burnes. In the note, you learn that the cross back on the first beach is the grave marker of Captain Darby. |
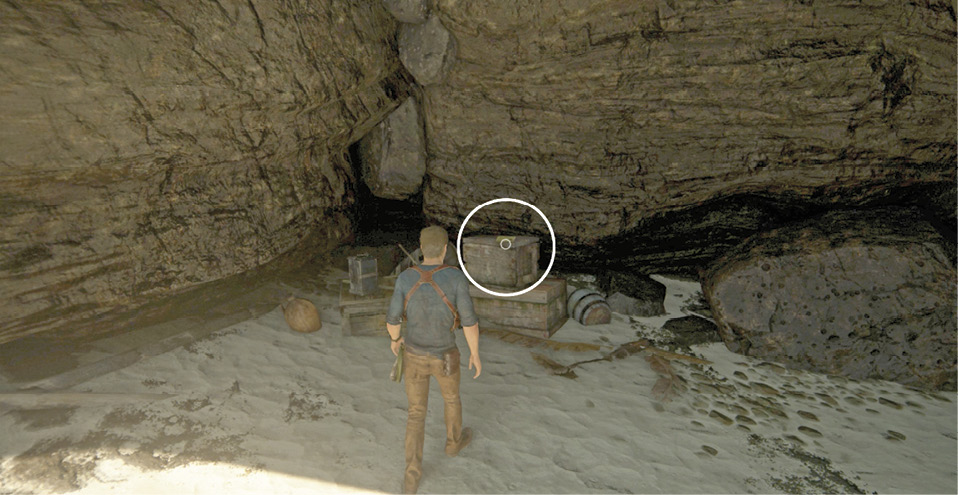
 Combination Lock Tobacco Box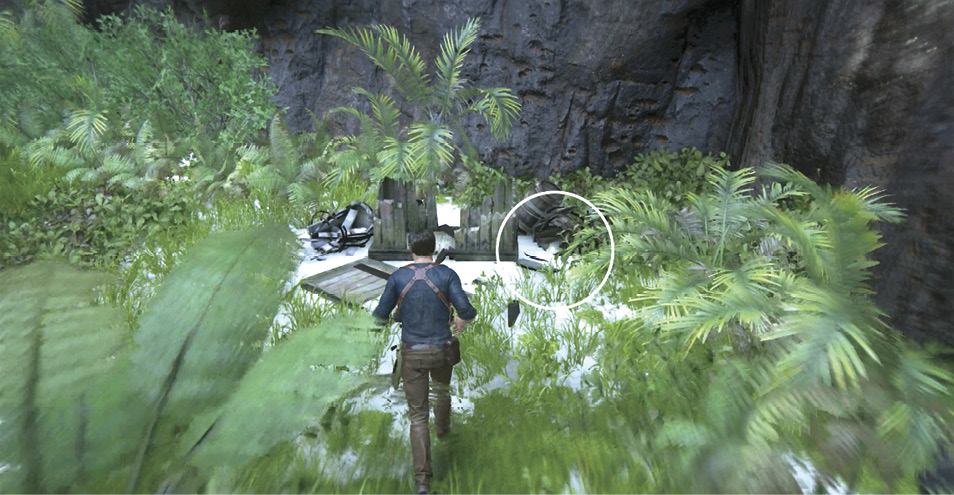 Cruise to the big sandy beach area on the left side of the larger island and wade ashore. Veer rightward around the rock formation into the jungle area. The Combination Lock Tobacco Box is tucked into a pile of broken crates and barrels. |
Land on the Tower Island
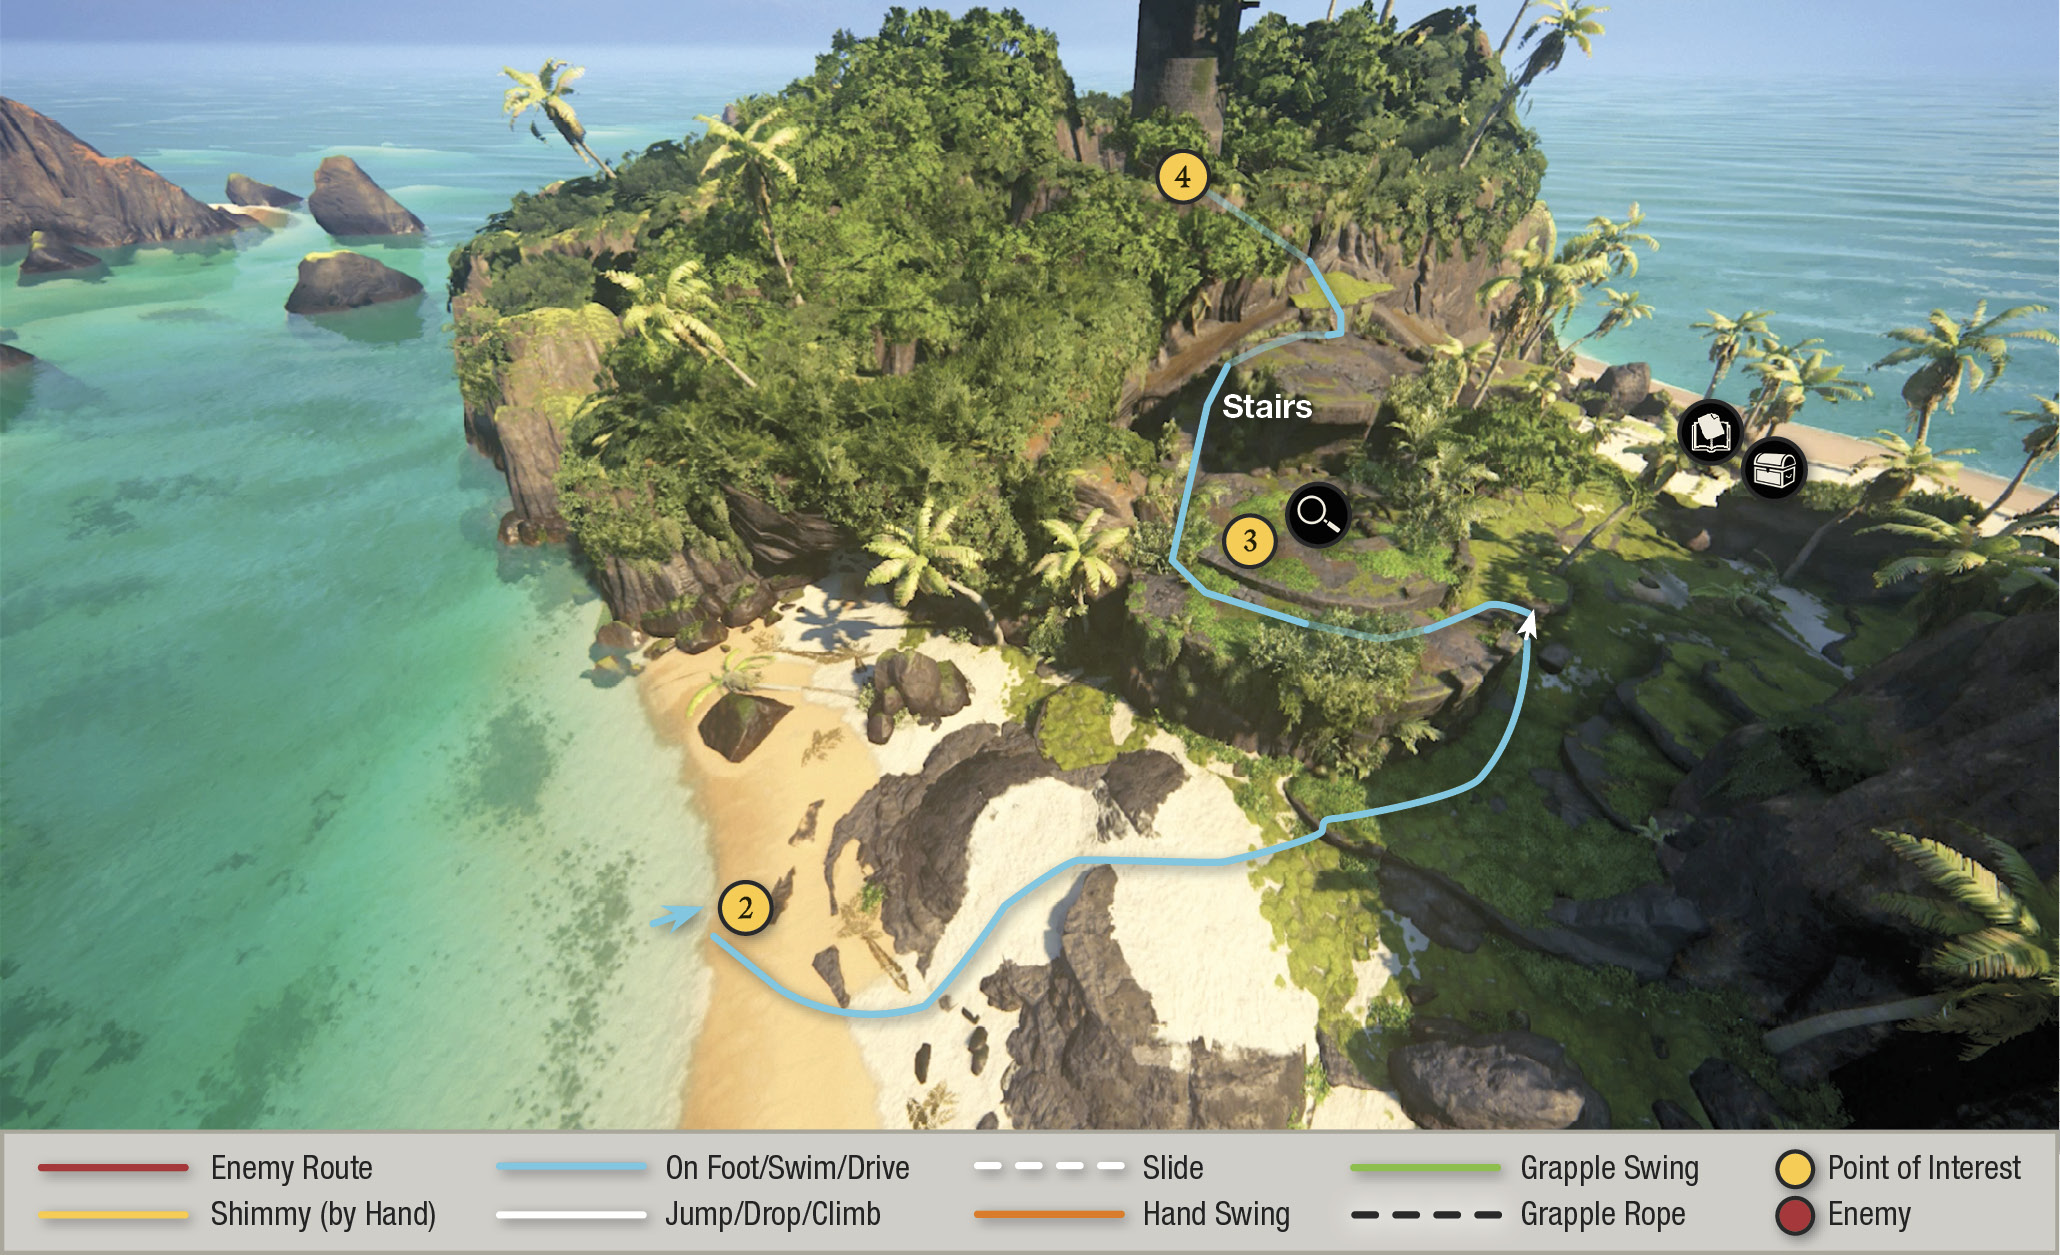
From the start, cruise around the right side of the big sandbar (1), then angle through the rocks into the cove between the two islands. Steer rightward toward the smaller island—it has a tower up on a high promontory—and beach the boat on the sand (2). Before you start climbing to the tower, you can cross the island to a beach on the opposite side and find a pair of treasures. Then come back through the gap to a stone staircase on the right.
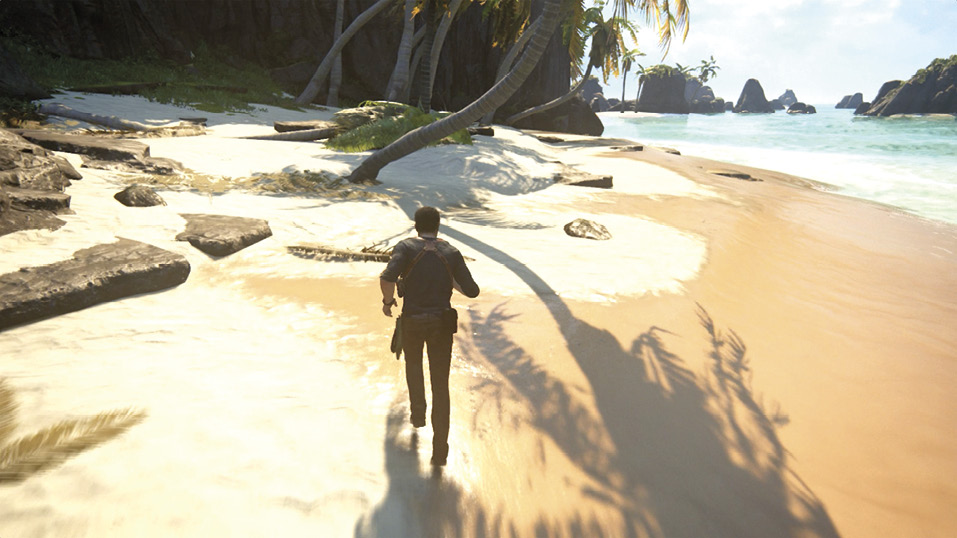
 Silver and Wood Tankard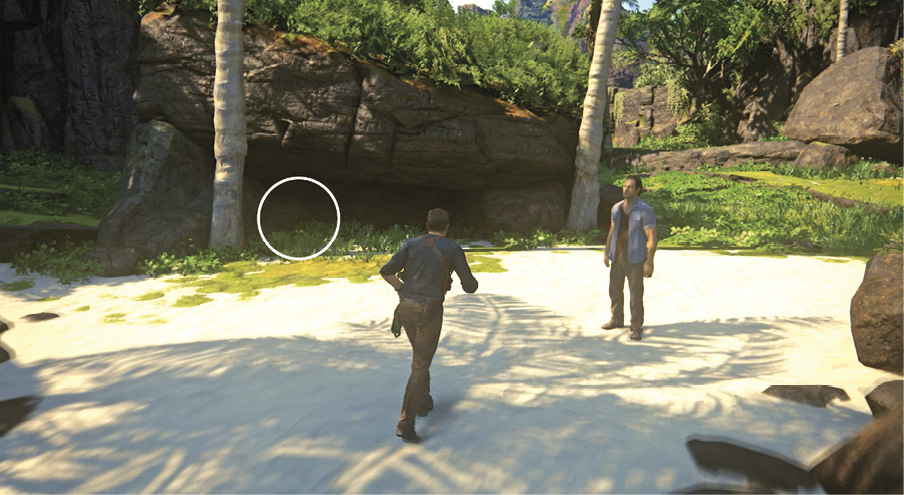 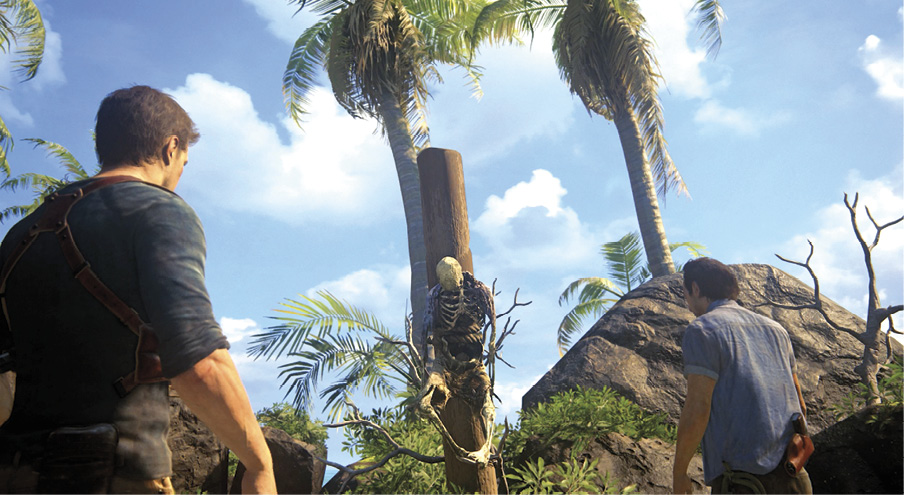 Before you climb to the tower, cross the island toward the beach on the opposite side. Examine the skeleton tied to a beam directly ahead to add an Optional Journal Entry. Then turn sharply right to find the Silver and Wood Tankard on the ground inside a small rock alcove. |
 Persian Silver Pen Box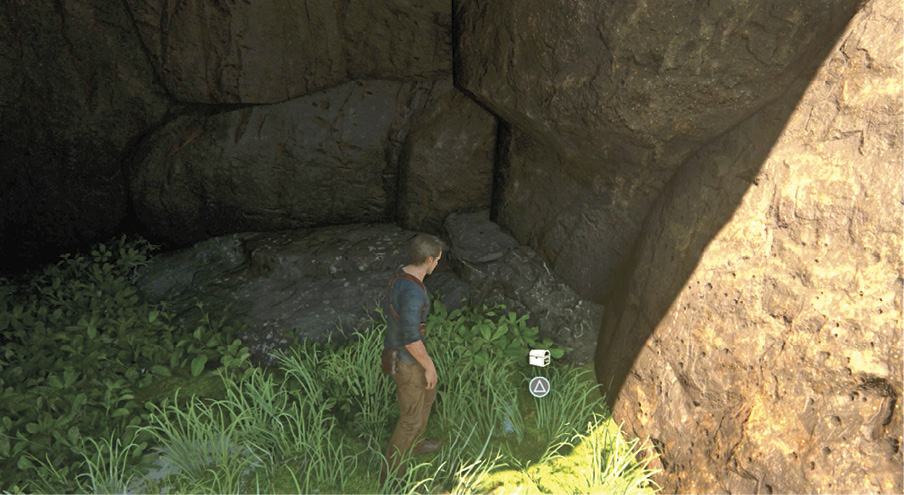 Find the small cave at the end of the beach. Inside, look for the Persian Silver Pen Box in the grass near the cave’s right wall. |
Climb Up to the Tower
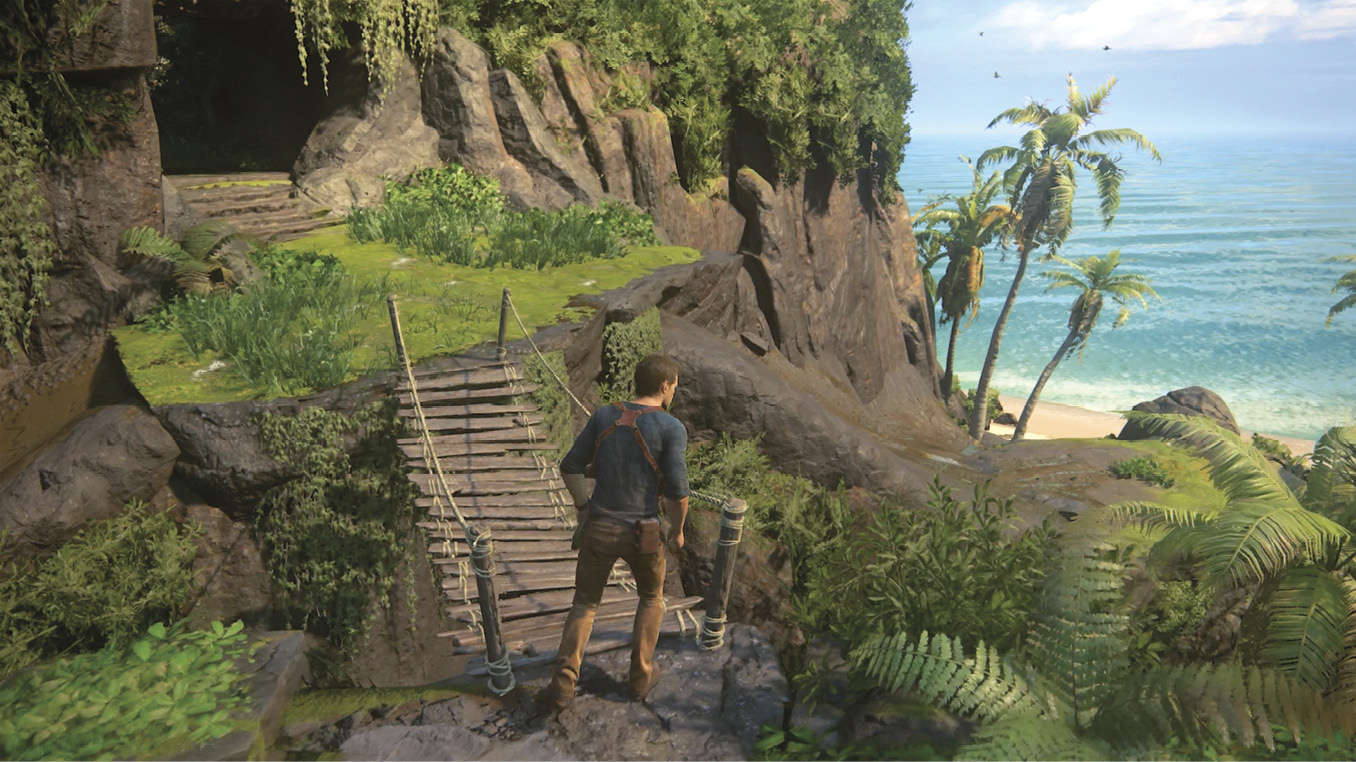
Climb the stairs and turn right to find a spot to examine (3). Nathan uncovers a big door in the ground. Continue up the next set of stairs and across the sagging footbridge to a rock arch. Proceed through the arch to the tower entrance (4).
Climb the Tower
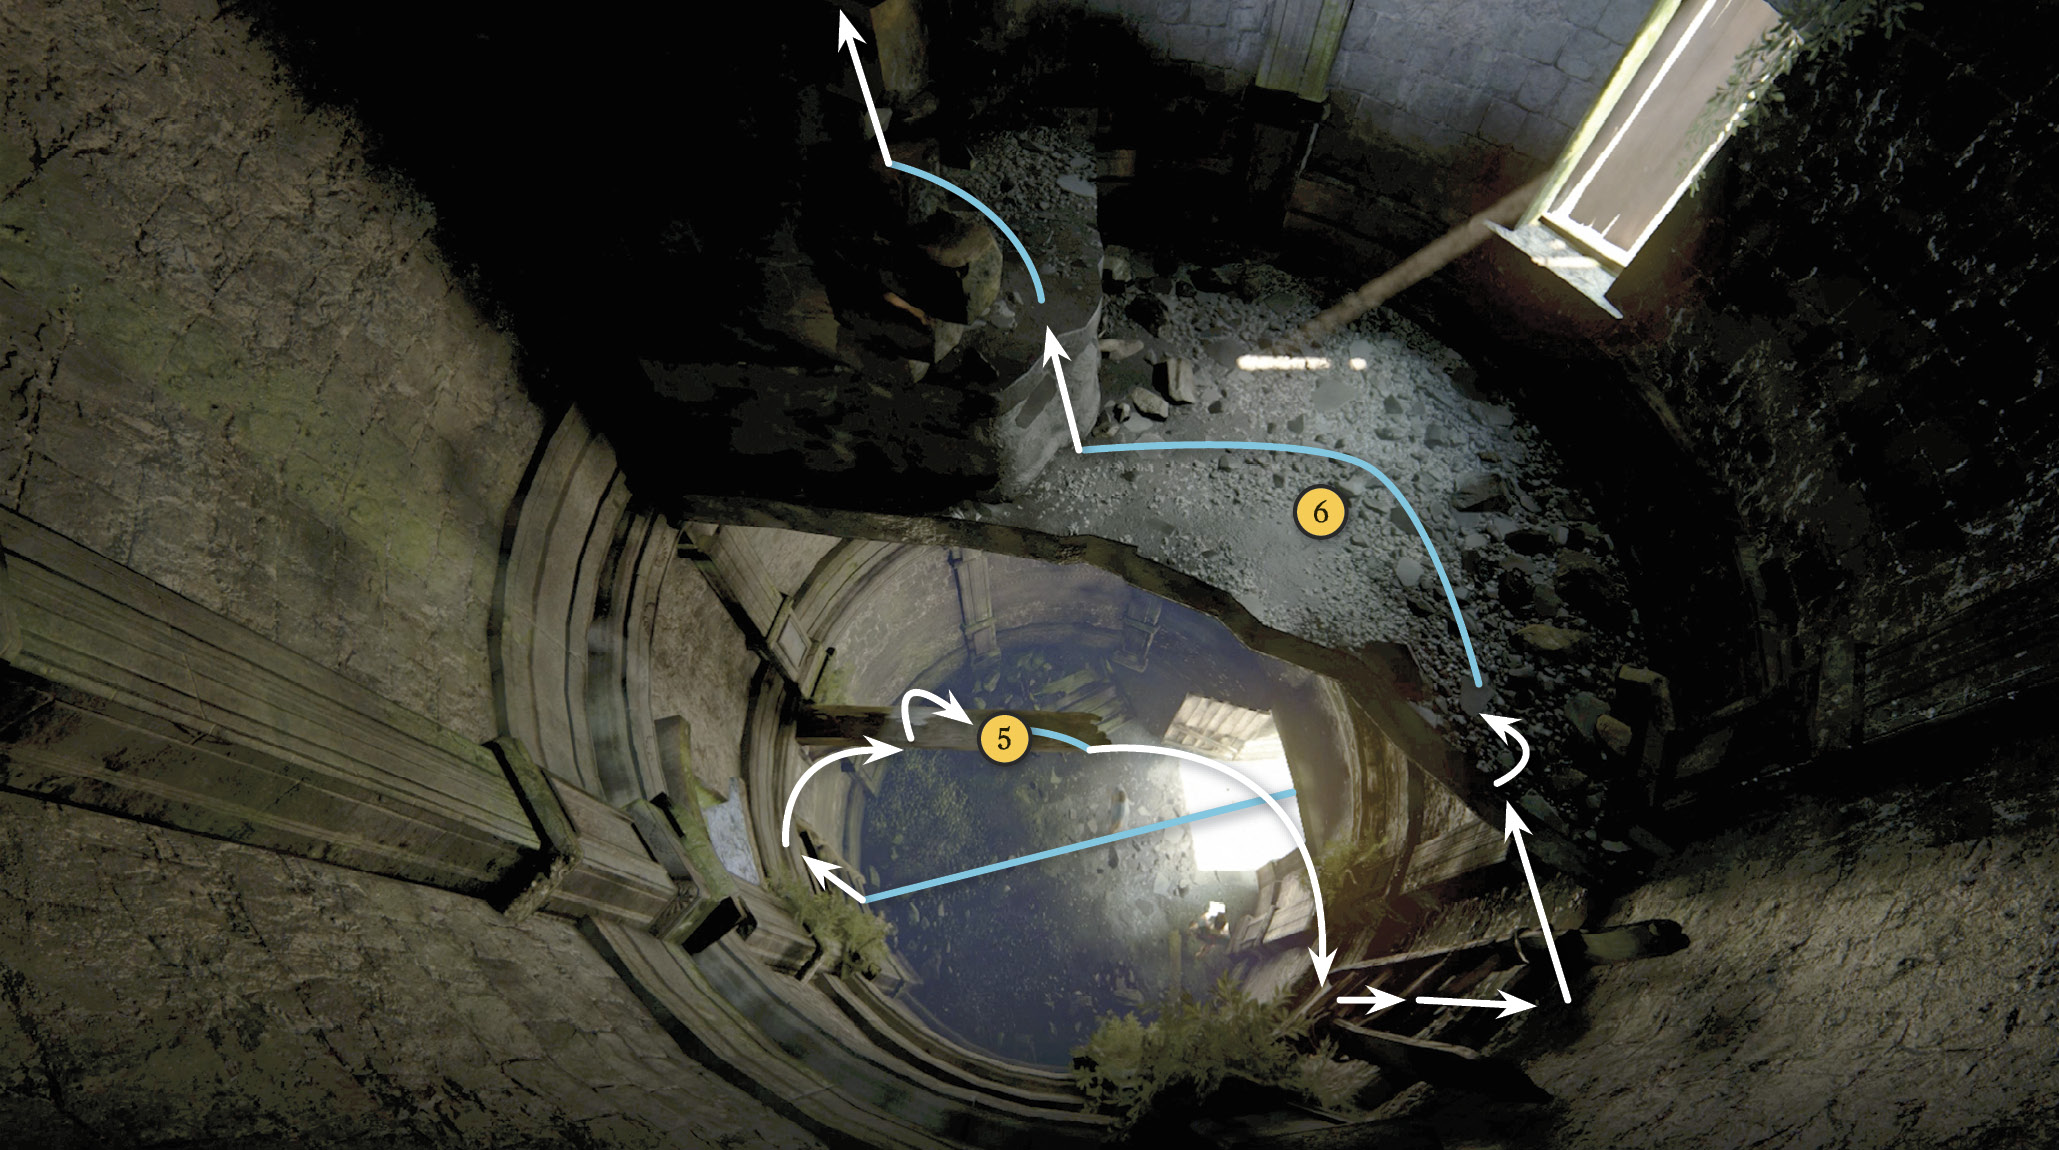
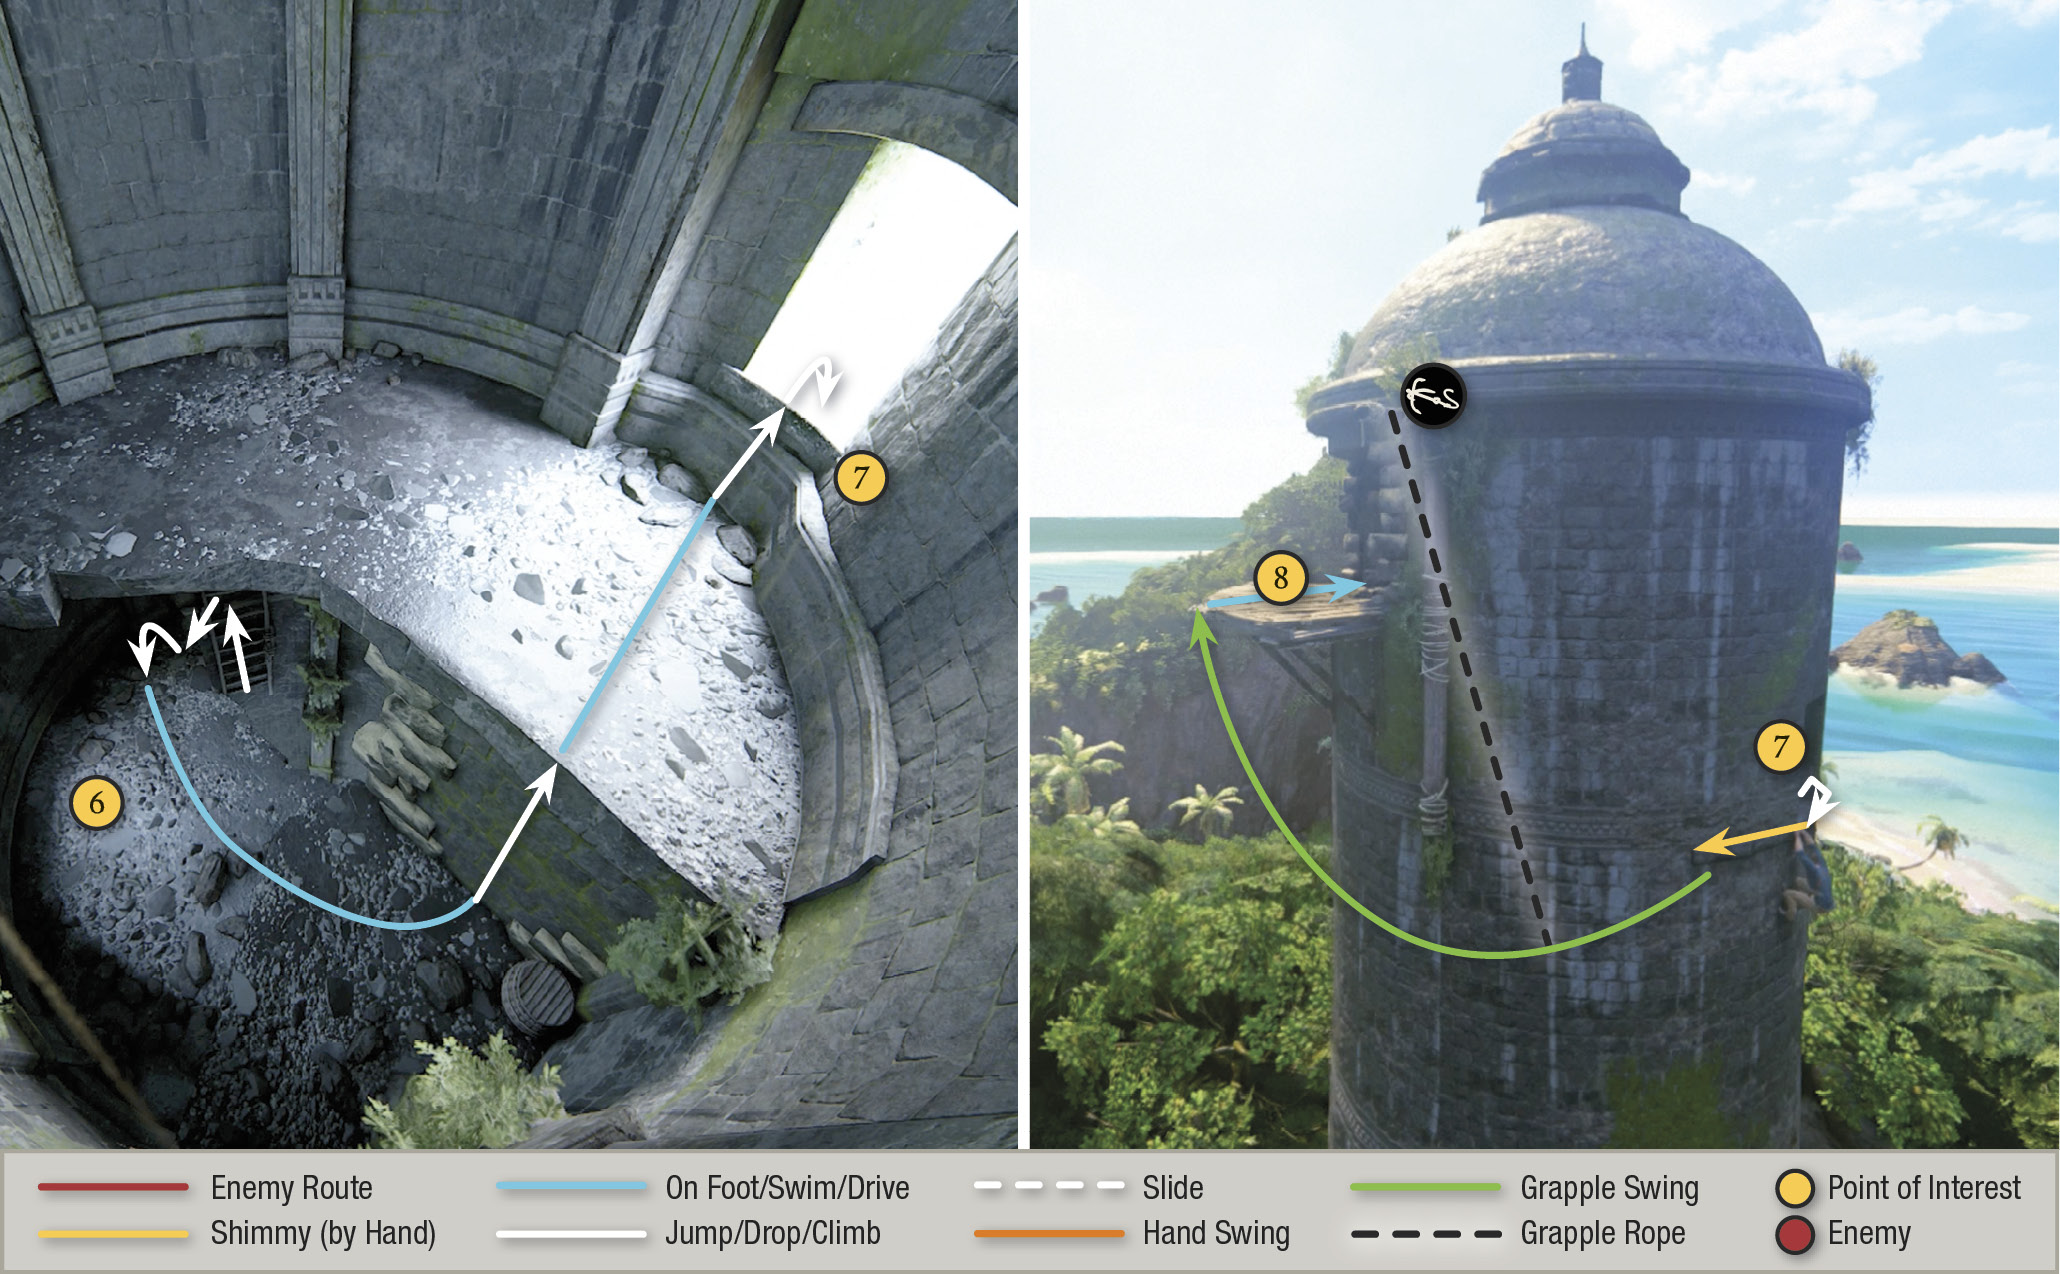
Go inside, climb the ladder, and hop to grab the beam (5). Climb atop the beam and jump to the next ladder. Climb to the platform (6), then climb to the open window (7). Hang outside the window and shimmy to the left. Toss your hook at the grapple point, climb the rope, and swing over to the platform (8). Enter and examine the marked, arrow-like symbol on the wall; Nathan jots it into his journal. Then Sam discovers a mechanism that opens a viewing bay and raises a large stone disk on the beach near your boat. The disk has the same yellow arrow symbol etched on it!
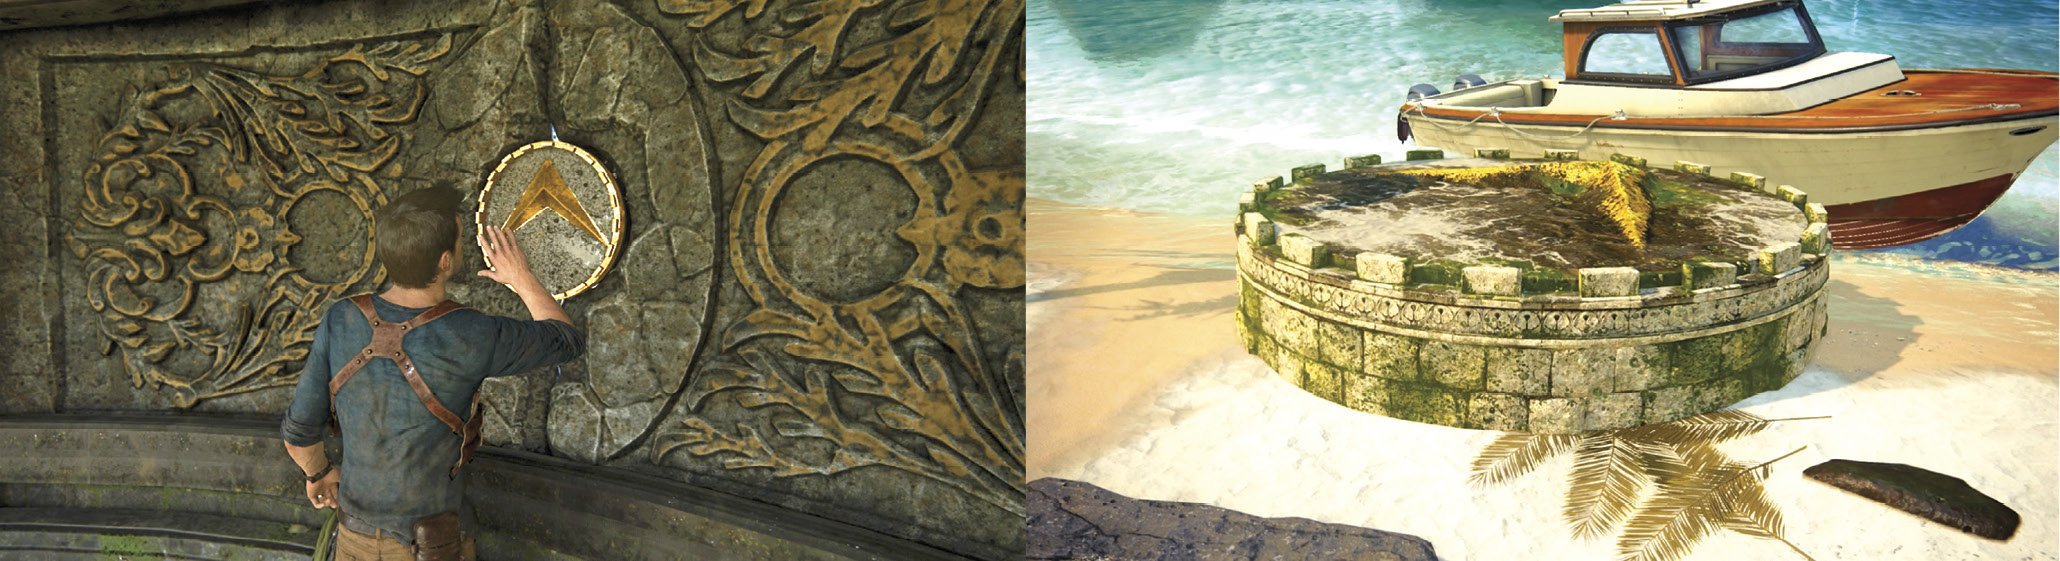
Follow the Stone Arrows
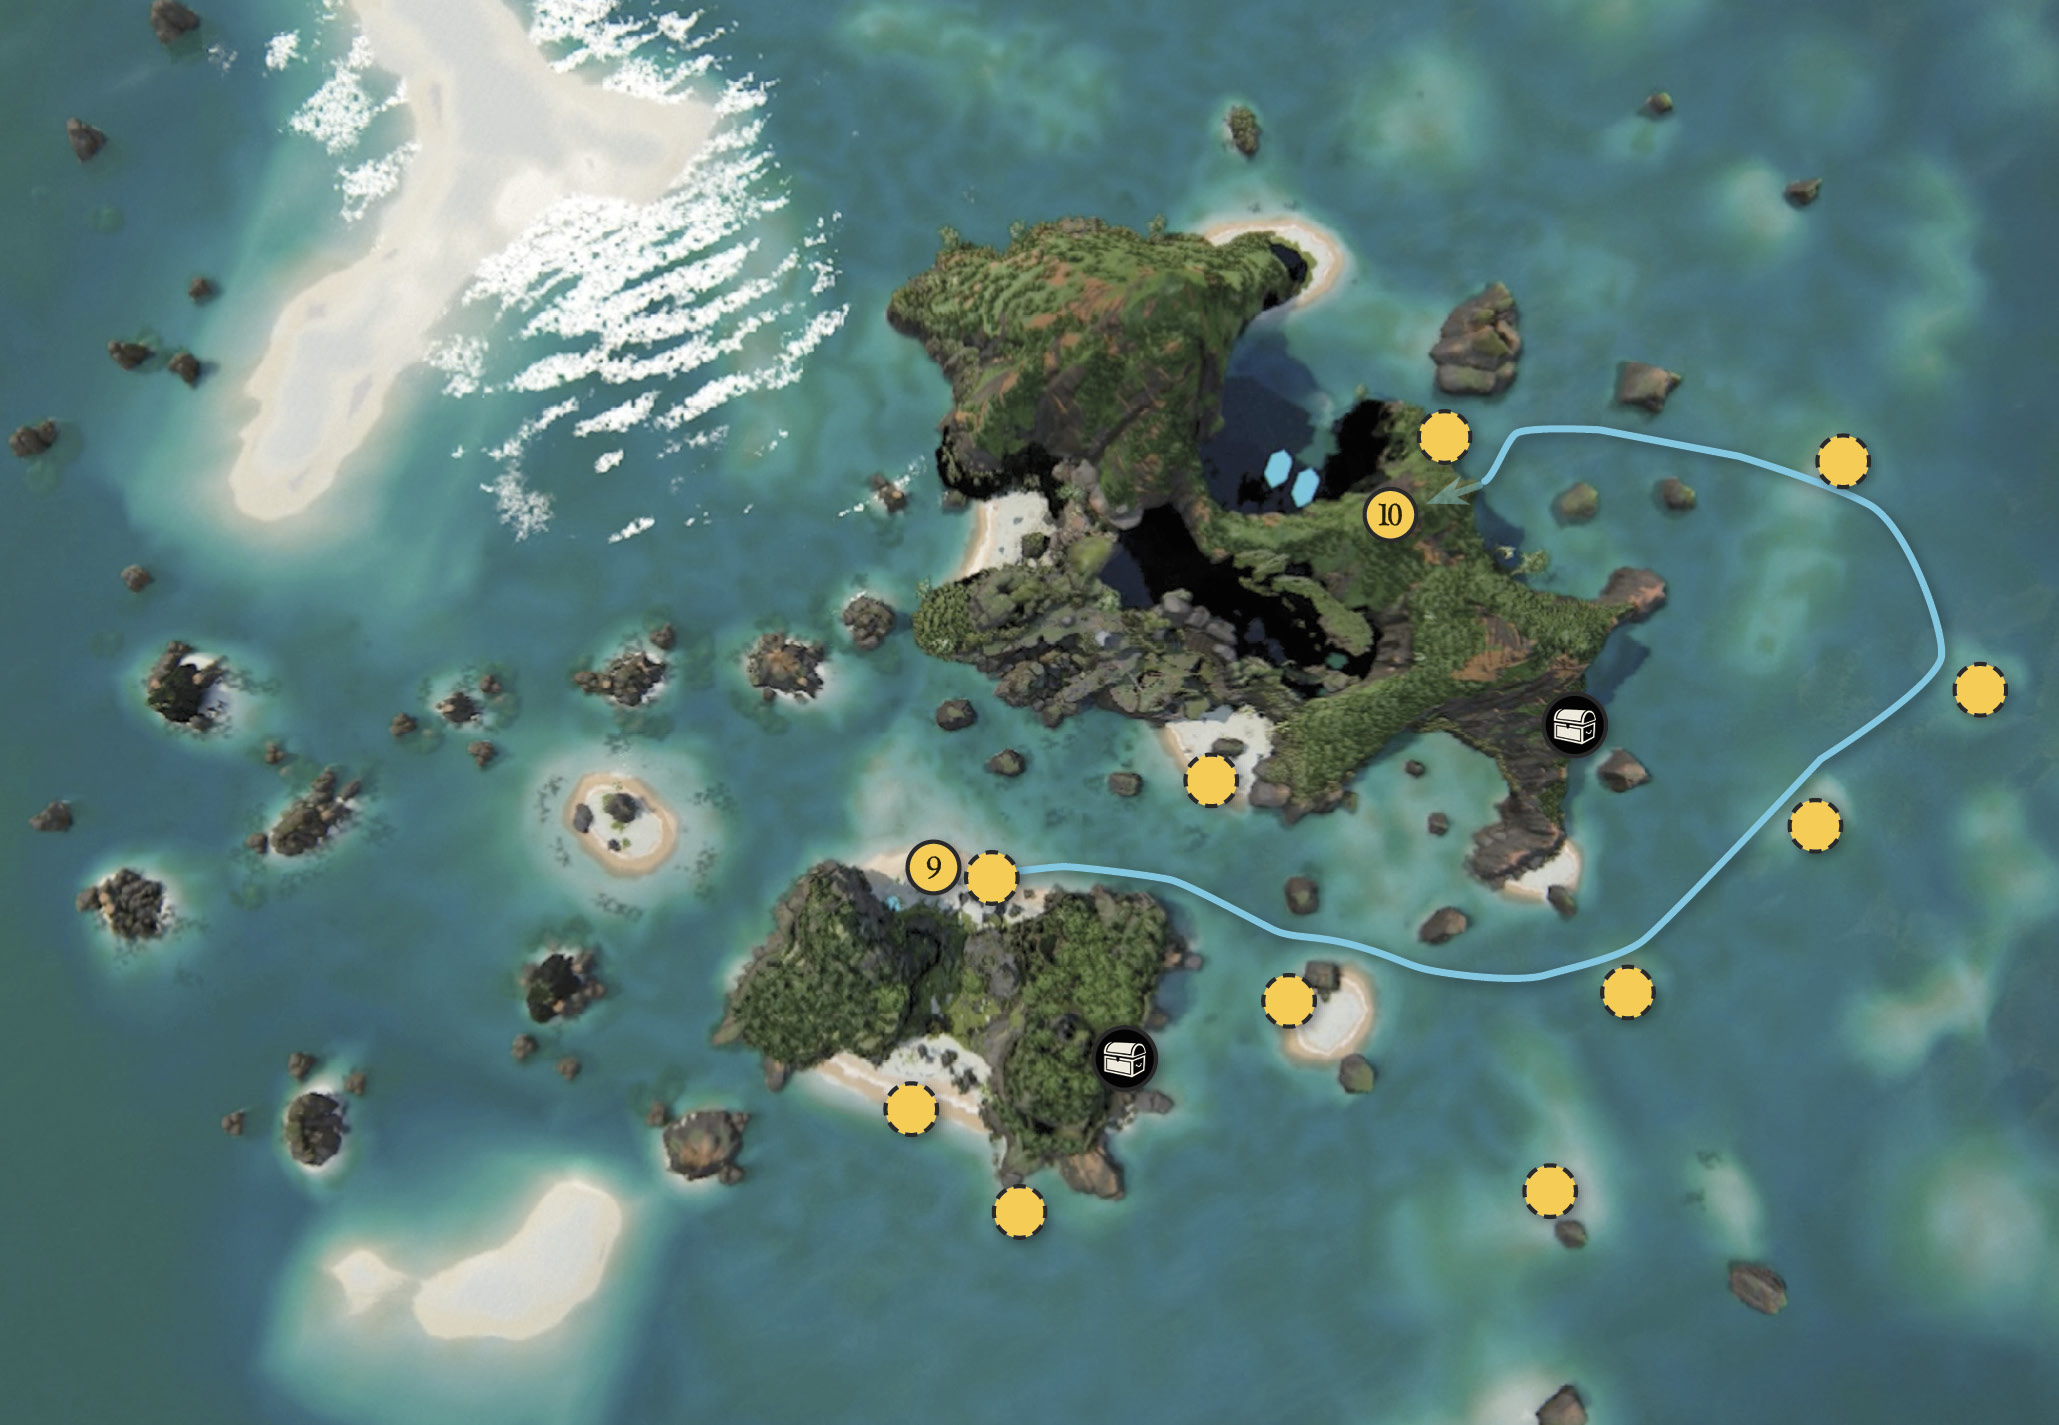
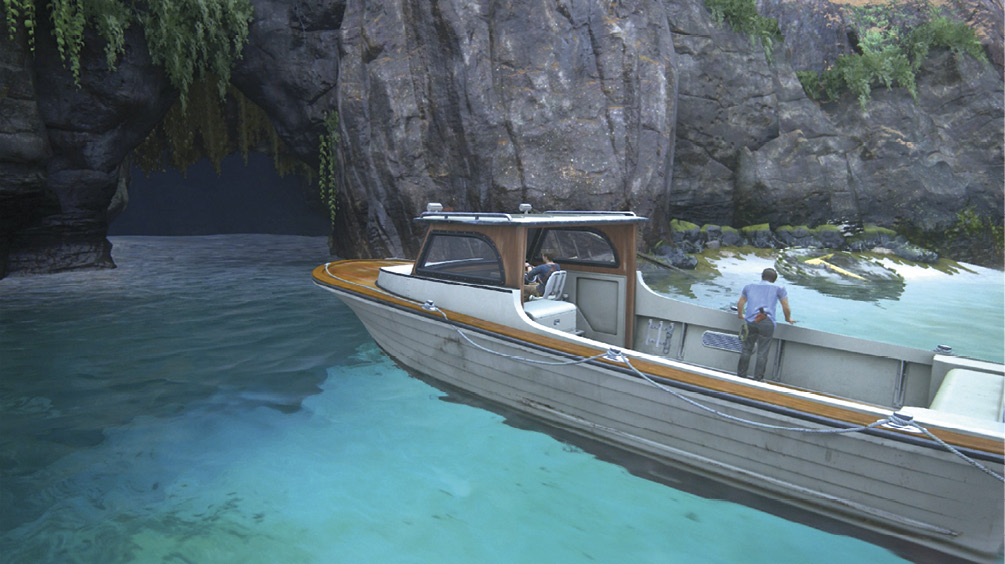
Step onto the balcony and use the grapple point to rappel to the ground. Retrace your route back down to the beach. You can also use the mudslide to the right of the footbridge for a fast trip down. Get back in your boat and, starting with the first stone arrow (9), follow the arrows around the other island into a big water cavern (10). (Note that you can also find a couple more treasures along the arrow route, if you haven’t found them already.)
 Panamanian Pendant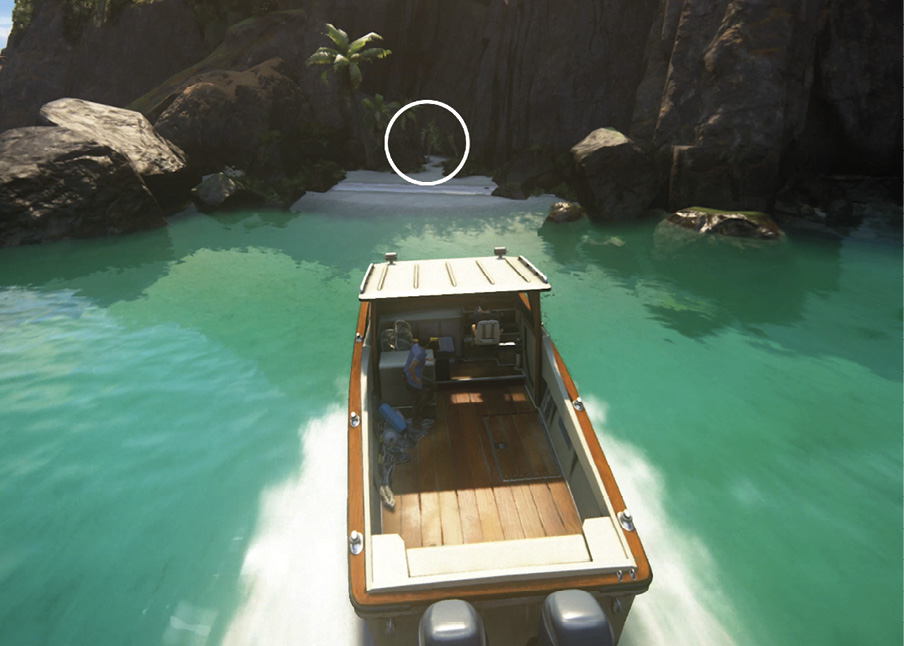 Look for a small beach on the far end of the tower island between the two main beaches. Follow the curving sandy path on the right to find the Panamanian Pendant on the ground at the end.. |
 Persian Leather Notebook Case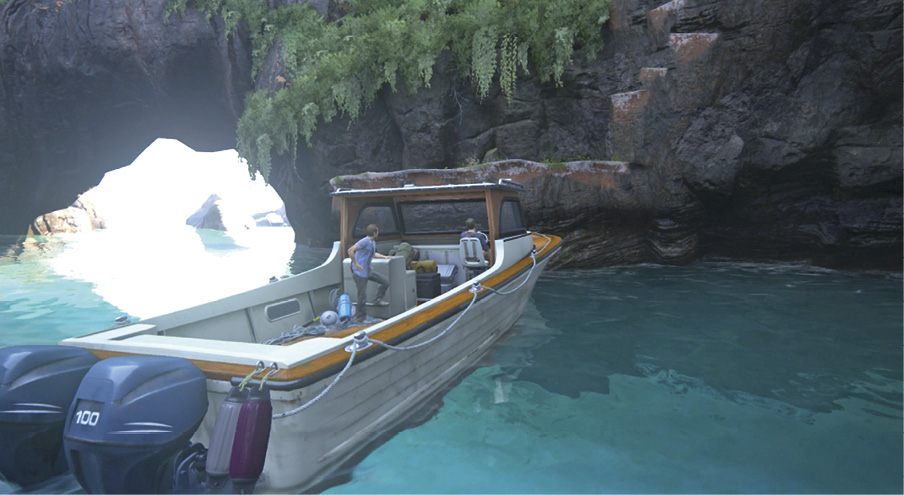 As you follow the arrow route around the far end of the large island, cruise between the two rock arches to find a ledge. Jump to the ledge from the top of your boat’s cabin. Then climb the handholds to a small terrace where you find the Persian Leather Notebook Case. Tip: You don’t have to climb all the way back down to the boat; just jump off the ledge into the water below. |
Use the Center Pillar to Reach the Path
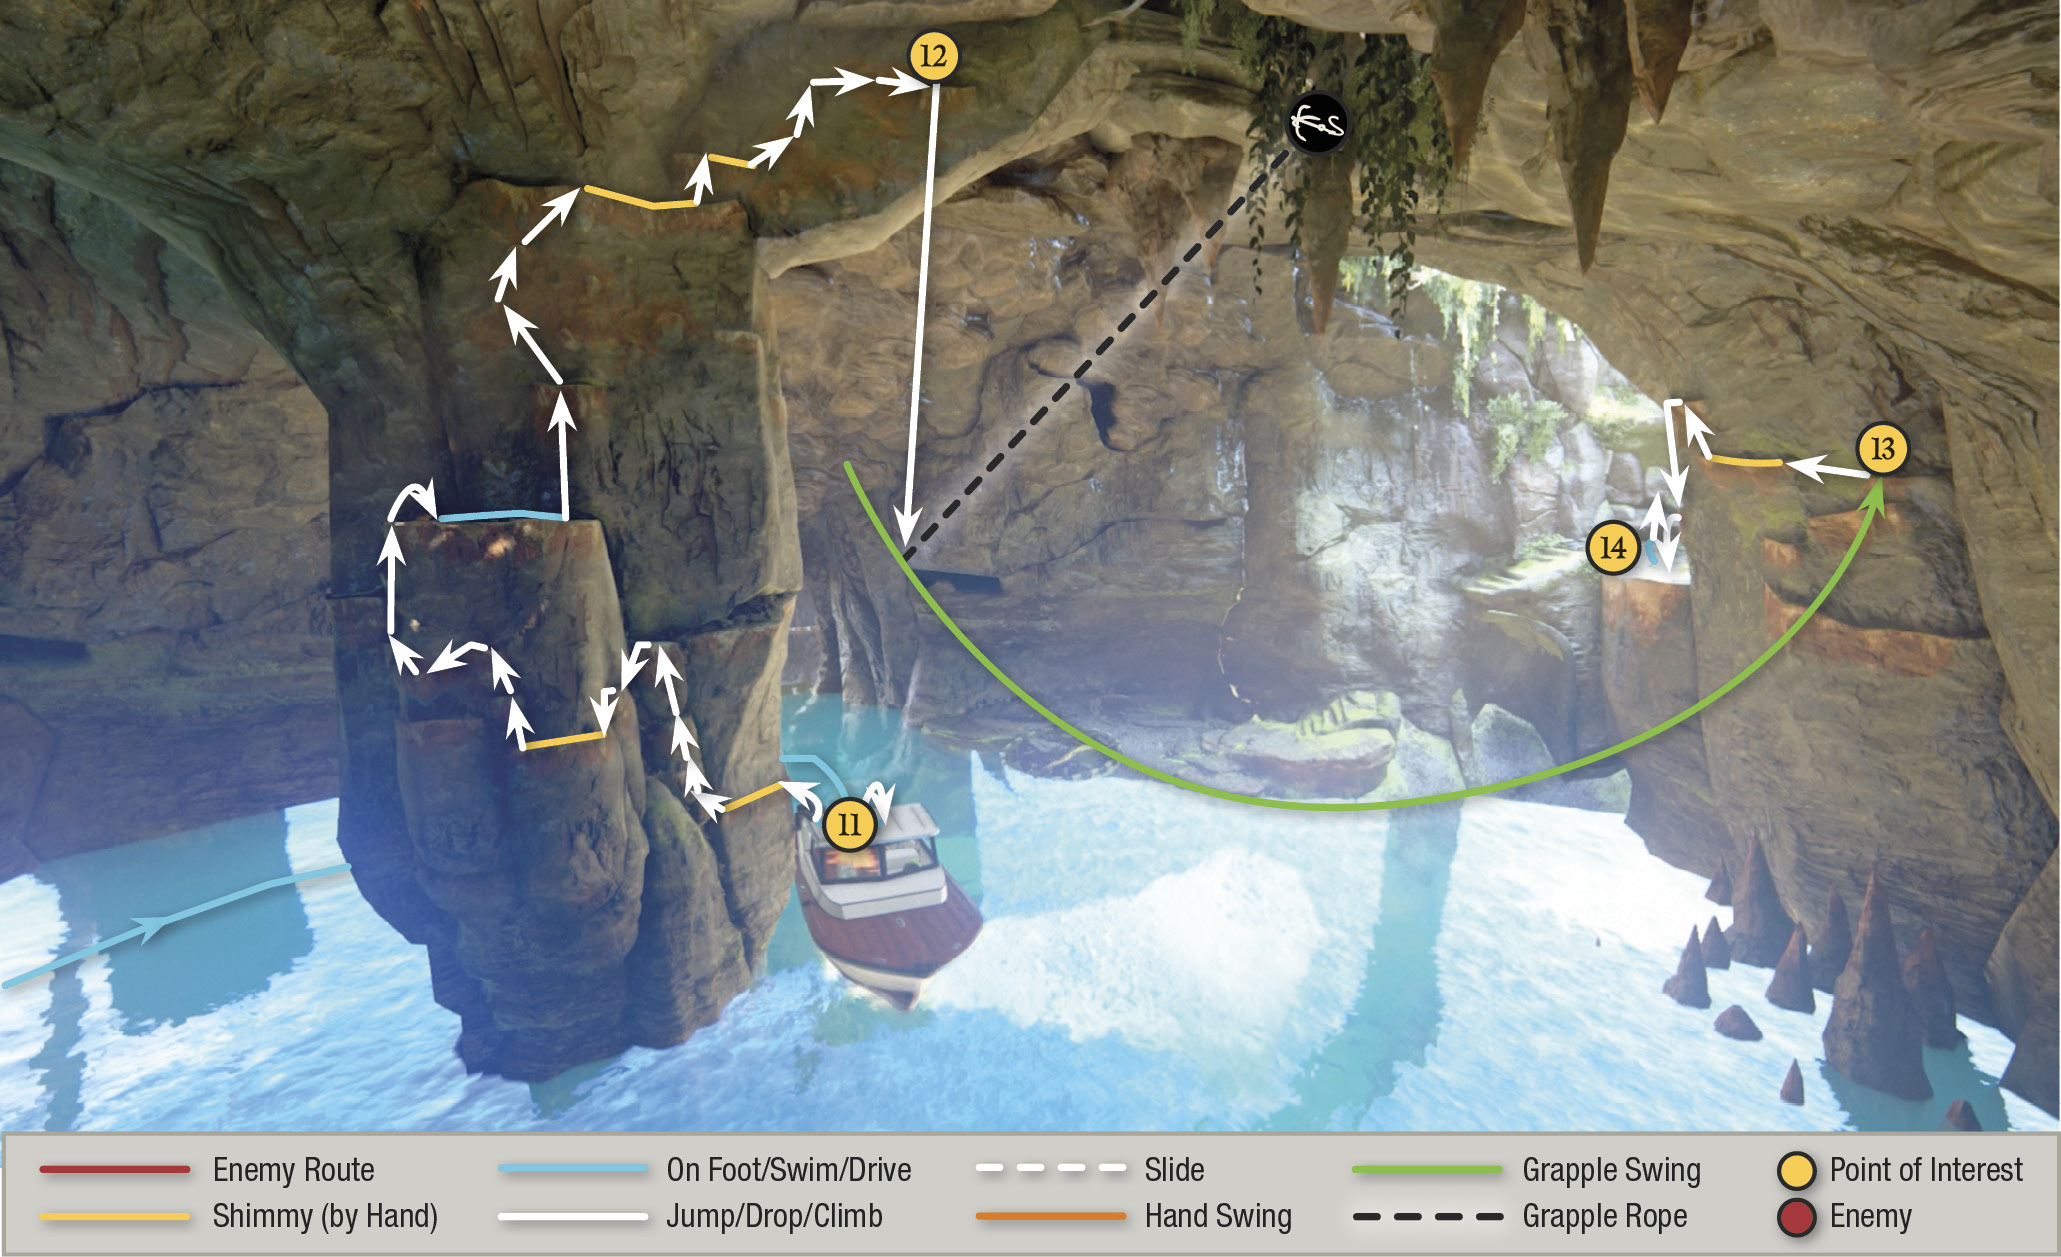
The last yellow arrow, which is located inside the cavern, points to a set of stairs. Unfortunately, the top of the staircase has collapsed, leaving no way up. Steer your boat over to the rock pillar in the center of the cavern (11) and jump from the boat to the pillar handholds. Follow our map’s climbing route all the way to a handhold (12) directly over the boat, then use the nearby tree root to grapple swing across to a handhold on the far wall (13). Then climb leftward until you can drop onto the rock platform (14).
Find a Way into the Citadel
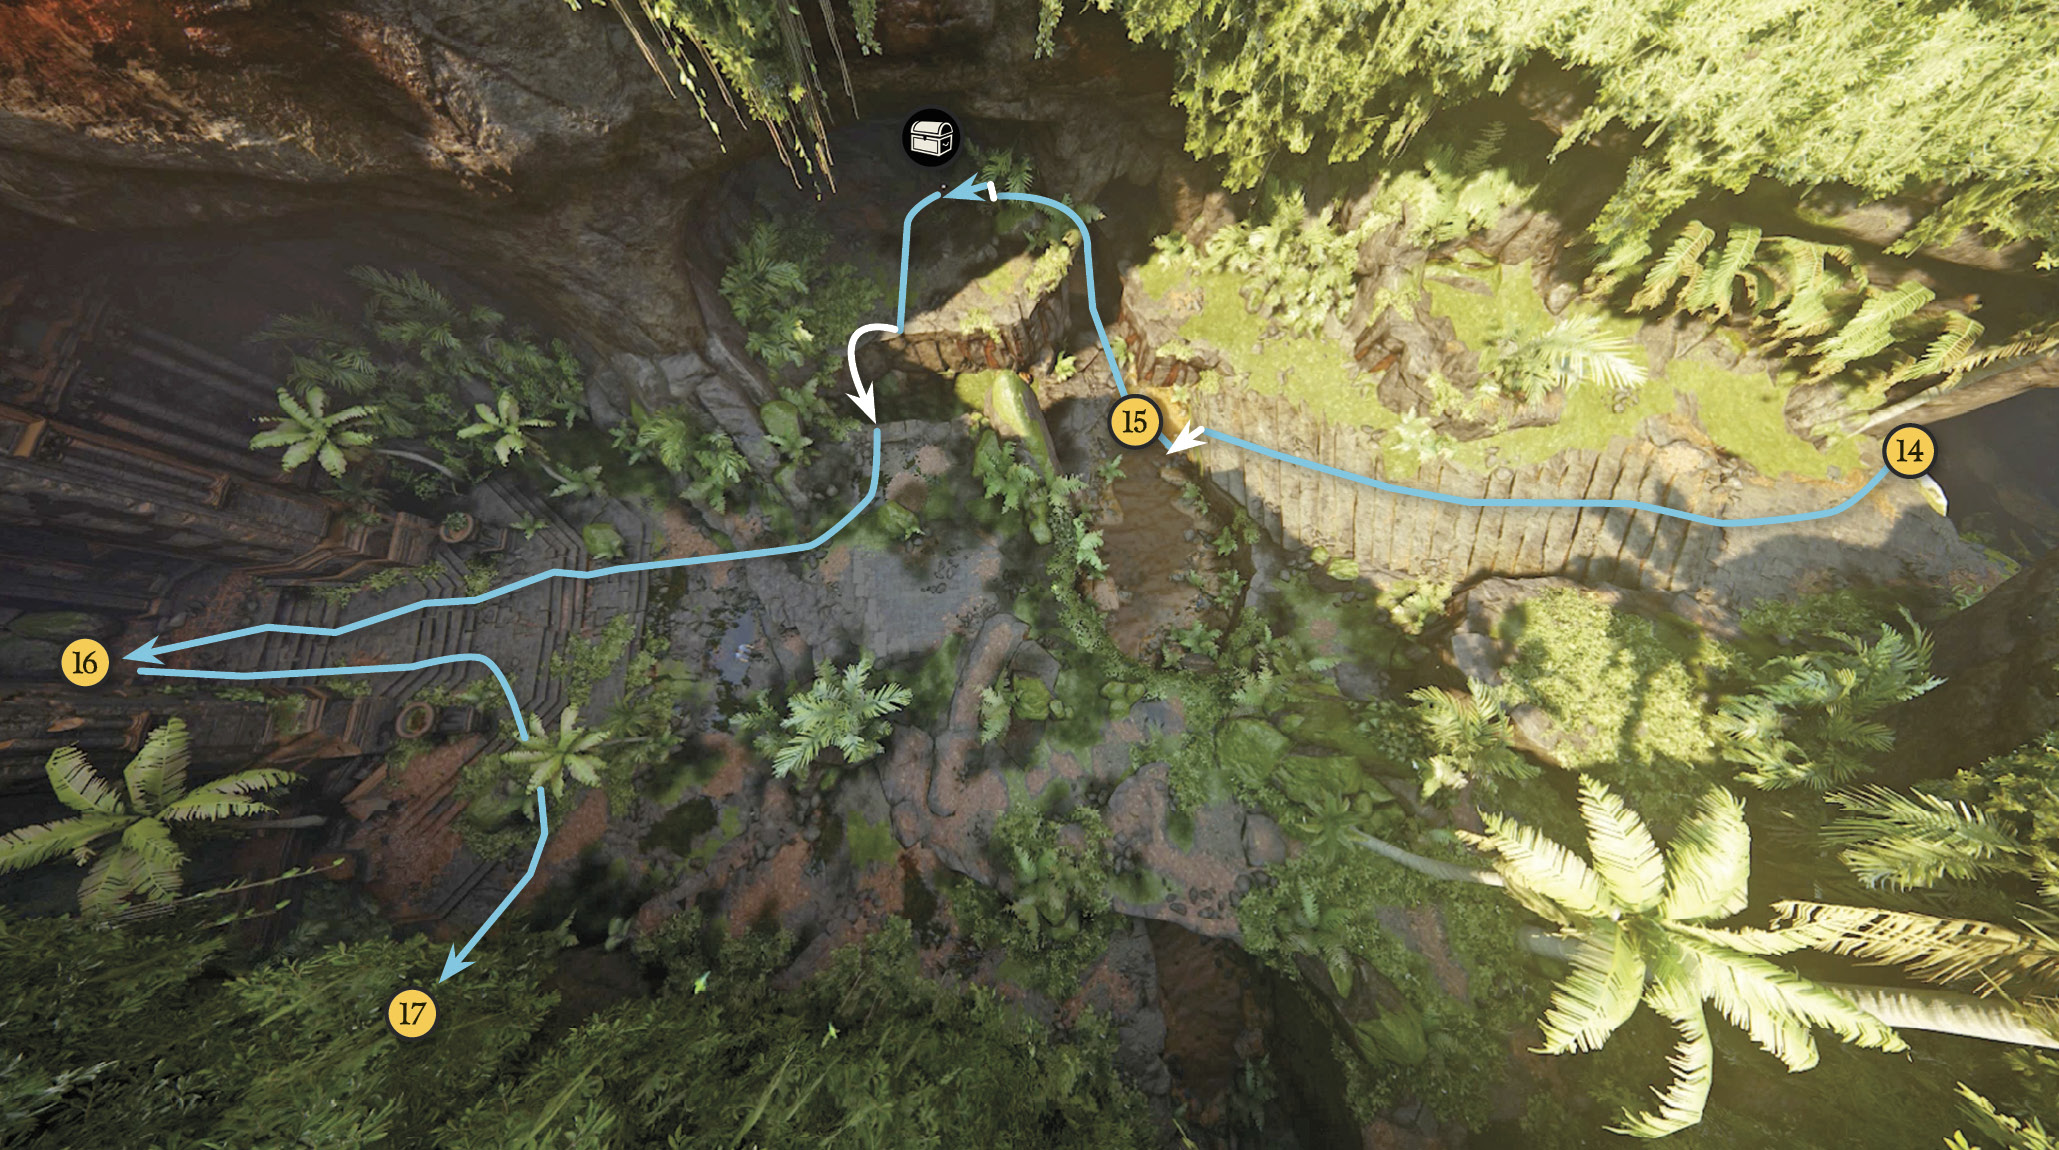
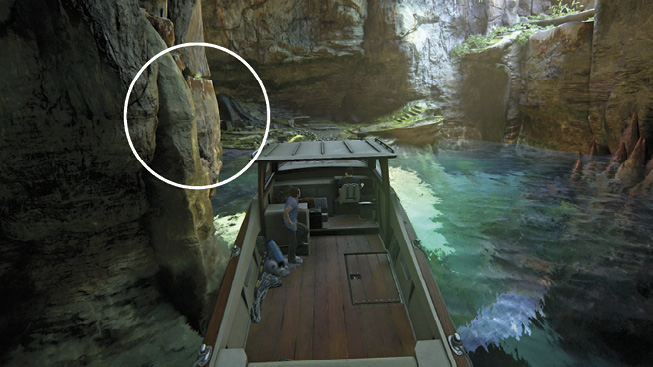
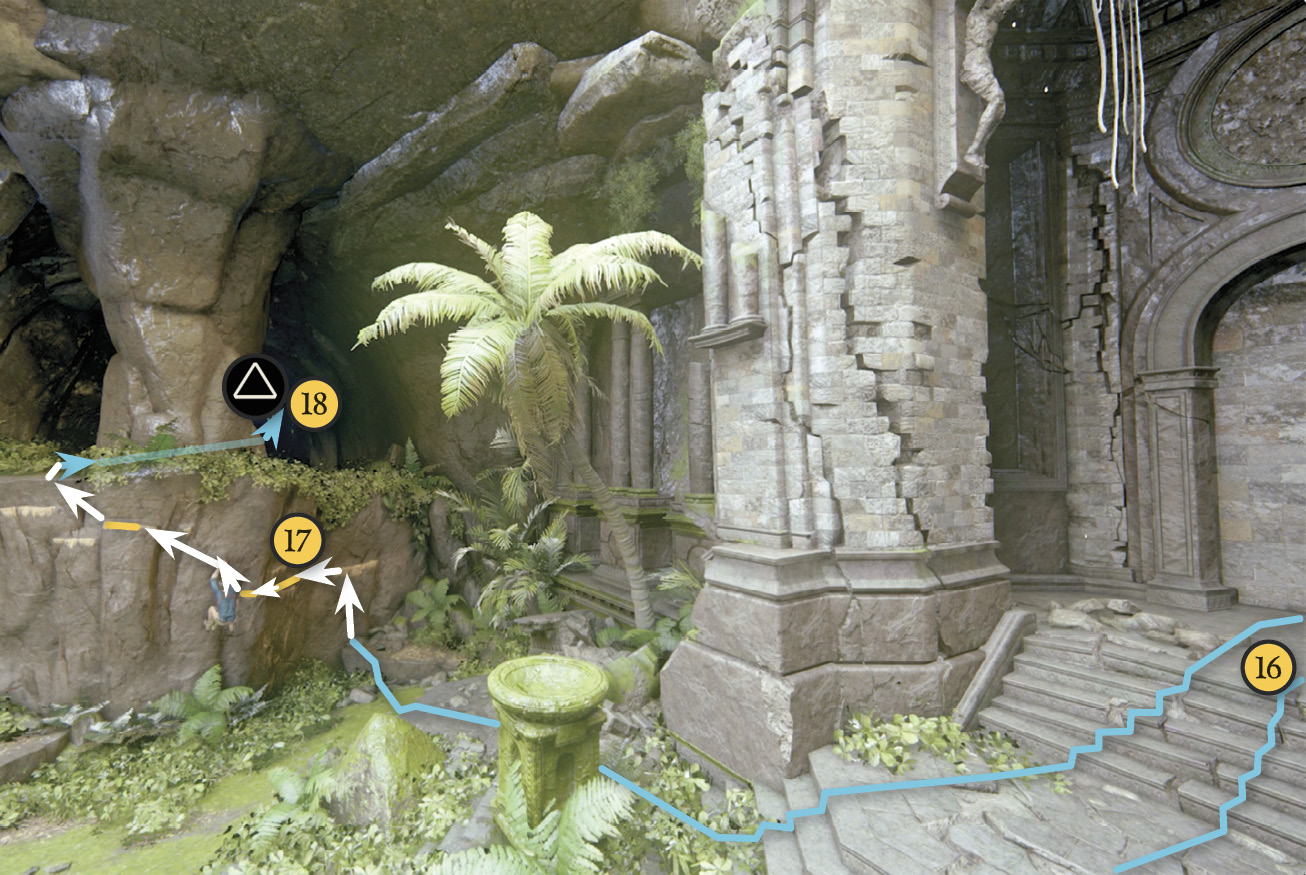
Step out of the water cavern to see the spectacular citadel doors across the ravine. Descend the stairs and drop into the wet gulley (15). Turn right and proceed through the tunnel. (Look for a treasure en route.) Jump across the gulley and join Sam at the debris-clogged front entrance (16). Head left and use the handholds (17) on the wall to climb into the cave. Get Sam’s help to lift up the debris at the cave’s other end (18).
 Deccani Bronze Spouted Bowl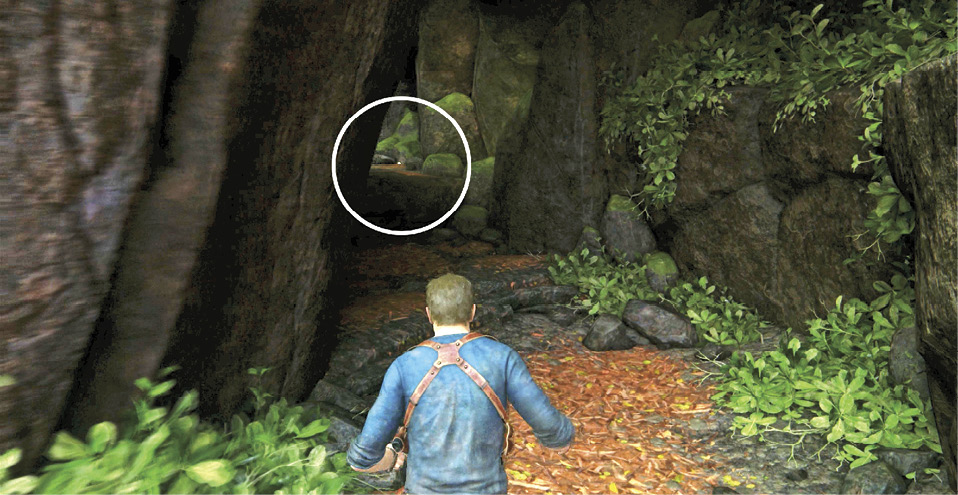 Find the Deccani Bronze Spouted Bowl on the floor of the cave tunnel leading to the citadel doors. |
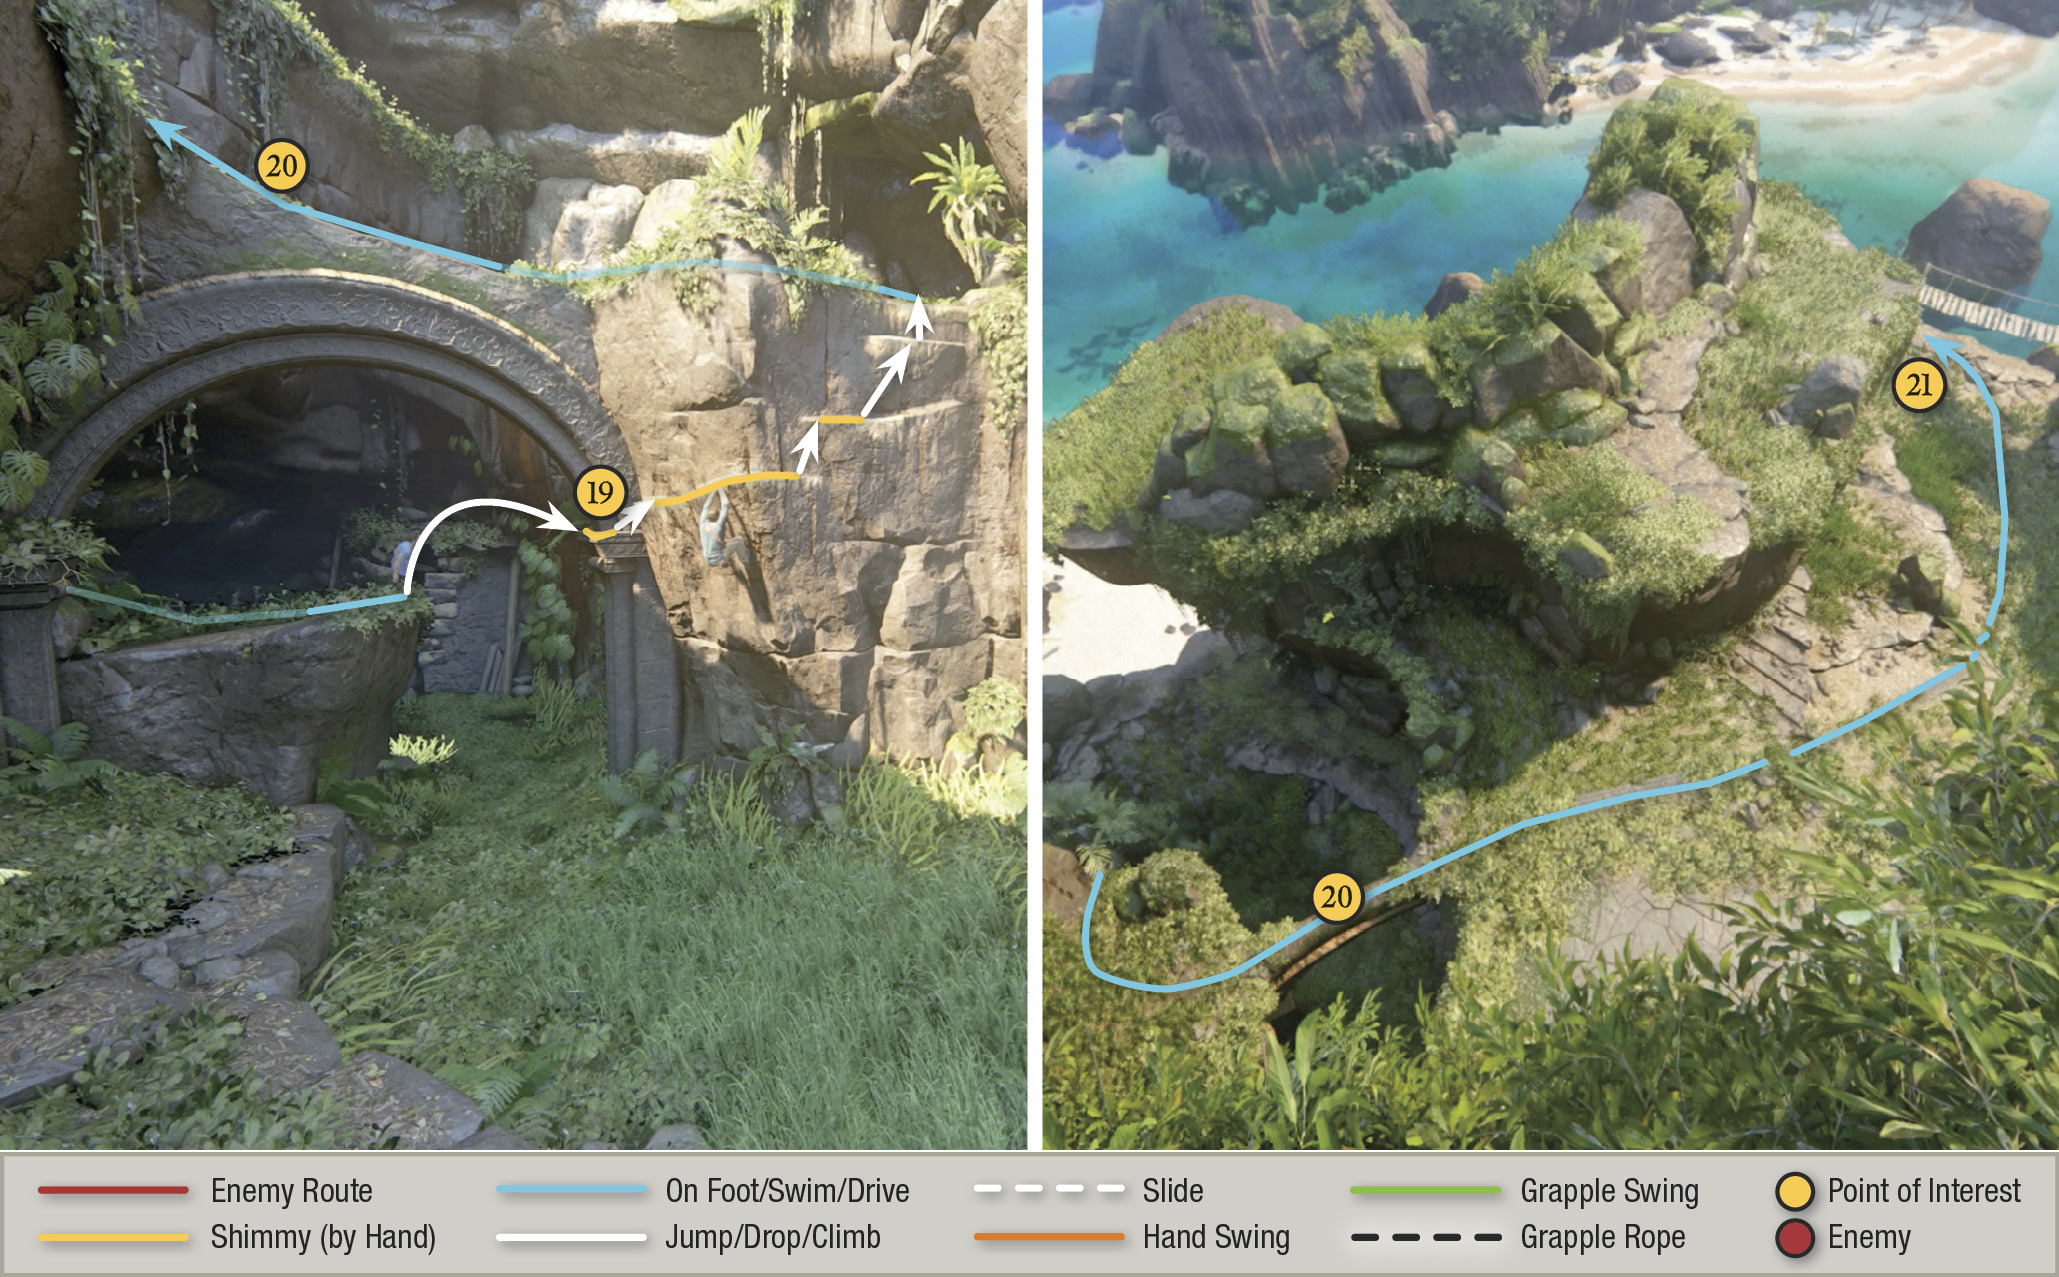
Move onto the overgrown terrace and jump across the gap to ledges on the rock face (19). Climb rightward around the corner until you can scramble to the next level and walk across the top of the arch (20). Follow the path under the footbridge then approach the broken rope ladder (21) on the left wall.
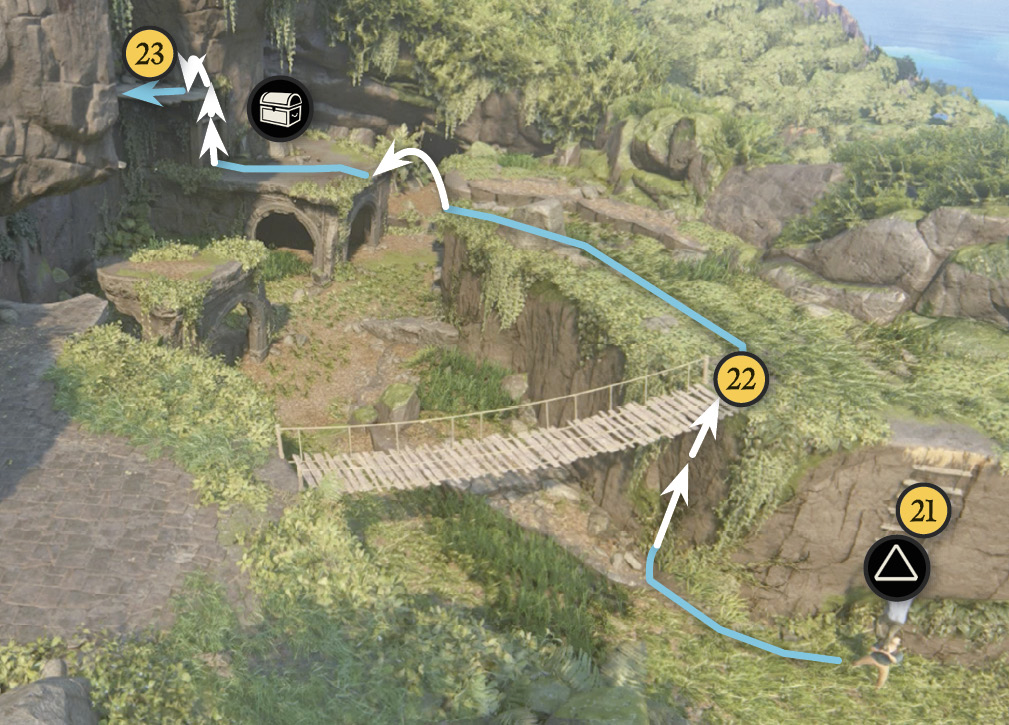
Press  to boost Sam up the ladder, then watch as he crosses the rope bridge and it collapses. Climb up the broken half to the top (22), and then jump across the next gap. (After the jump, look for a treasure just around the corner.)
 Mughal Elephant Carving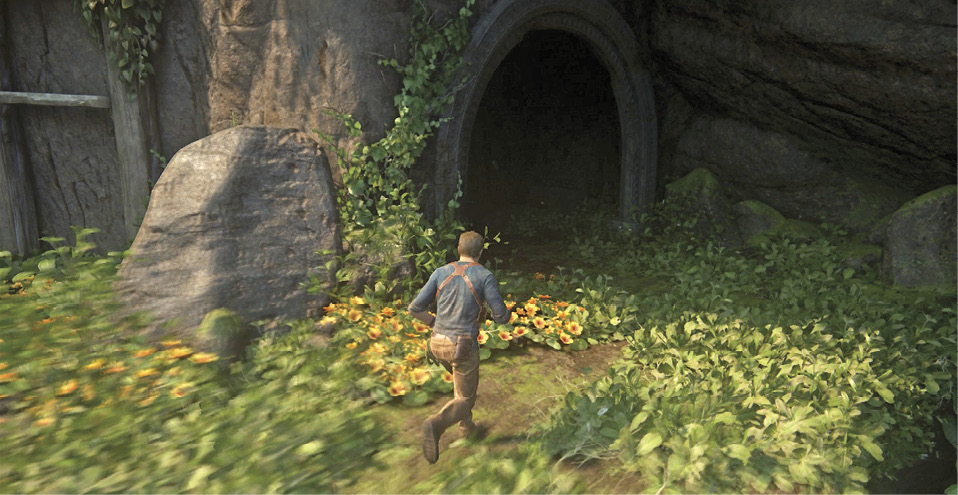 After you climb the broken rope ladder and hop across the next gap, go through the arched opening into a dark alcove. Find the Mughal Elephant Carving on the floor. |
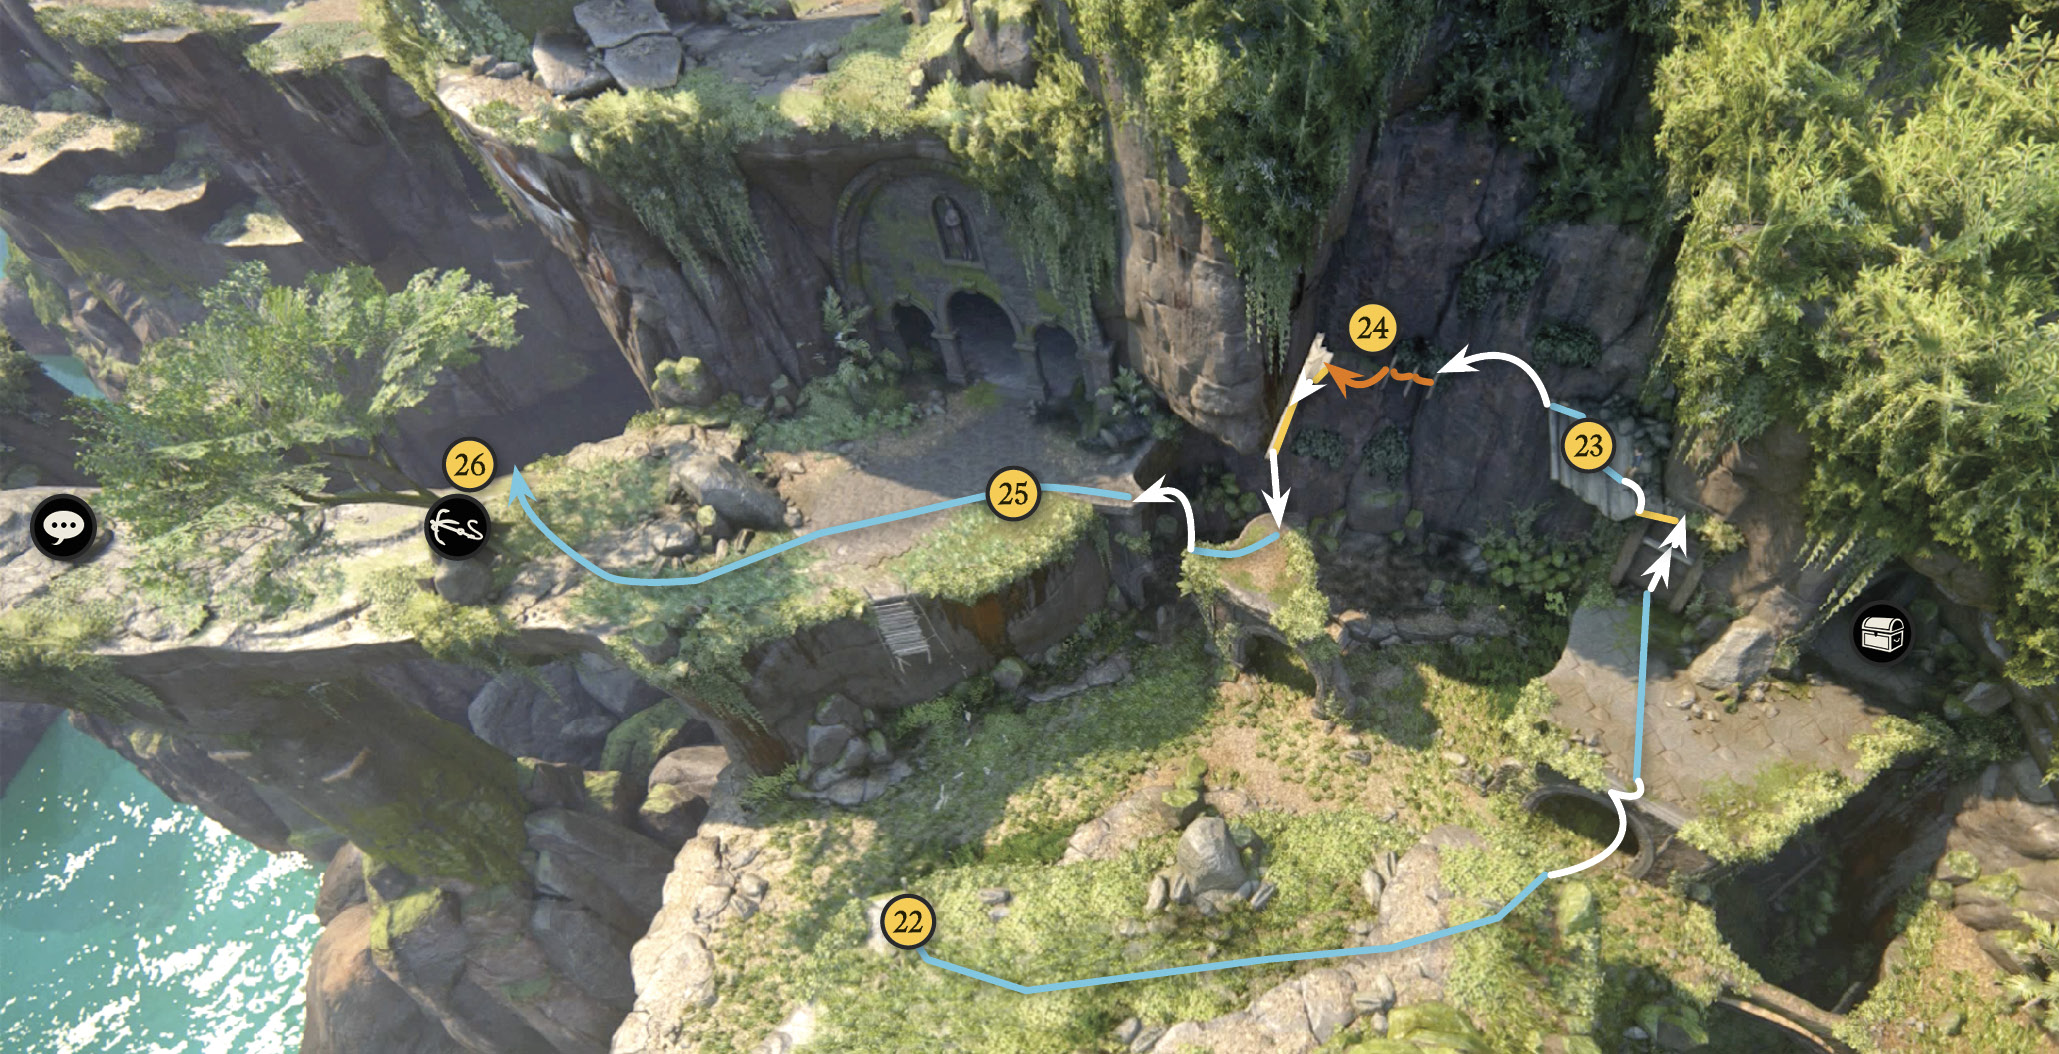
Climb the exposed wall beam onto the broken platform (23). Then leap to swing across a series of three posts jutting from the wall (24). Swing from the last post across to the decrepit beam that nearly breaks. Shimmy to the left end and drop onto the platform below. Then jump across to Sam (25). Follow him to the overlook for the Optional Conversation, “Nice View.”
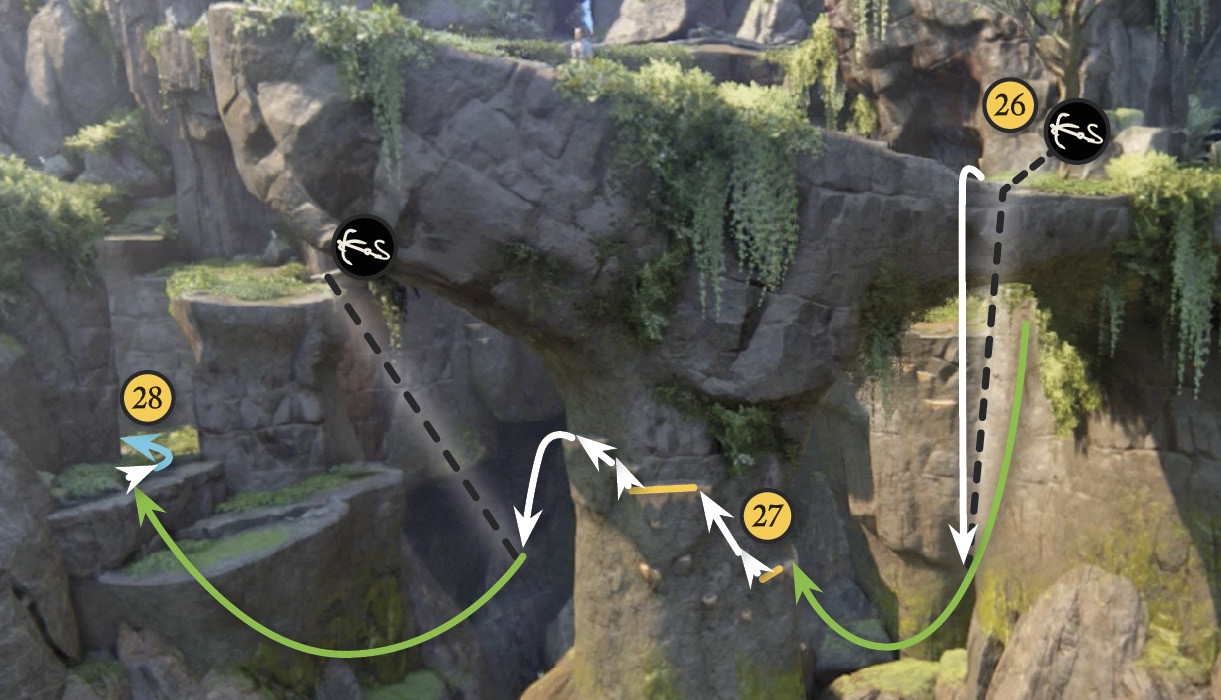
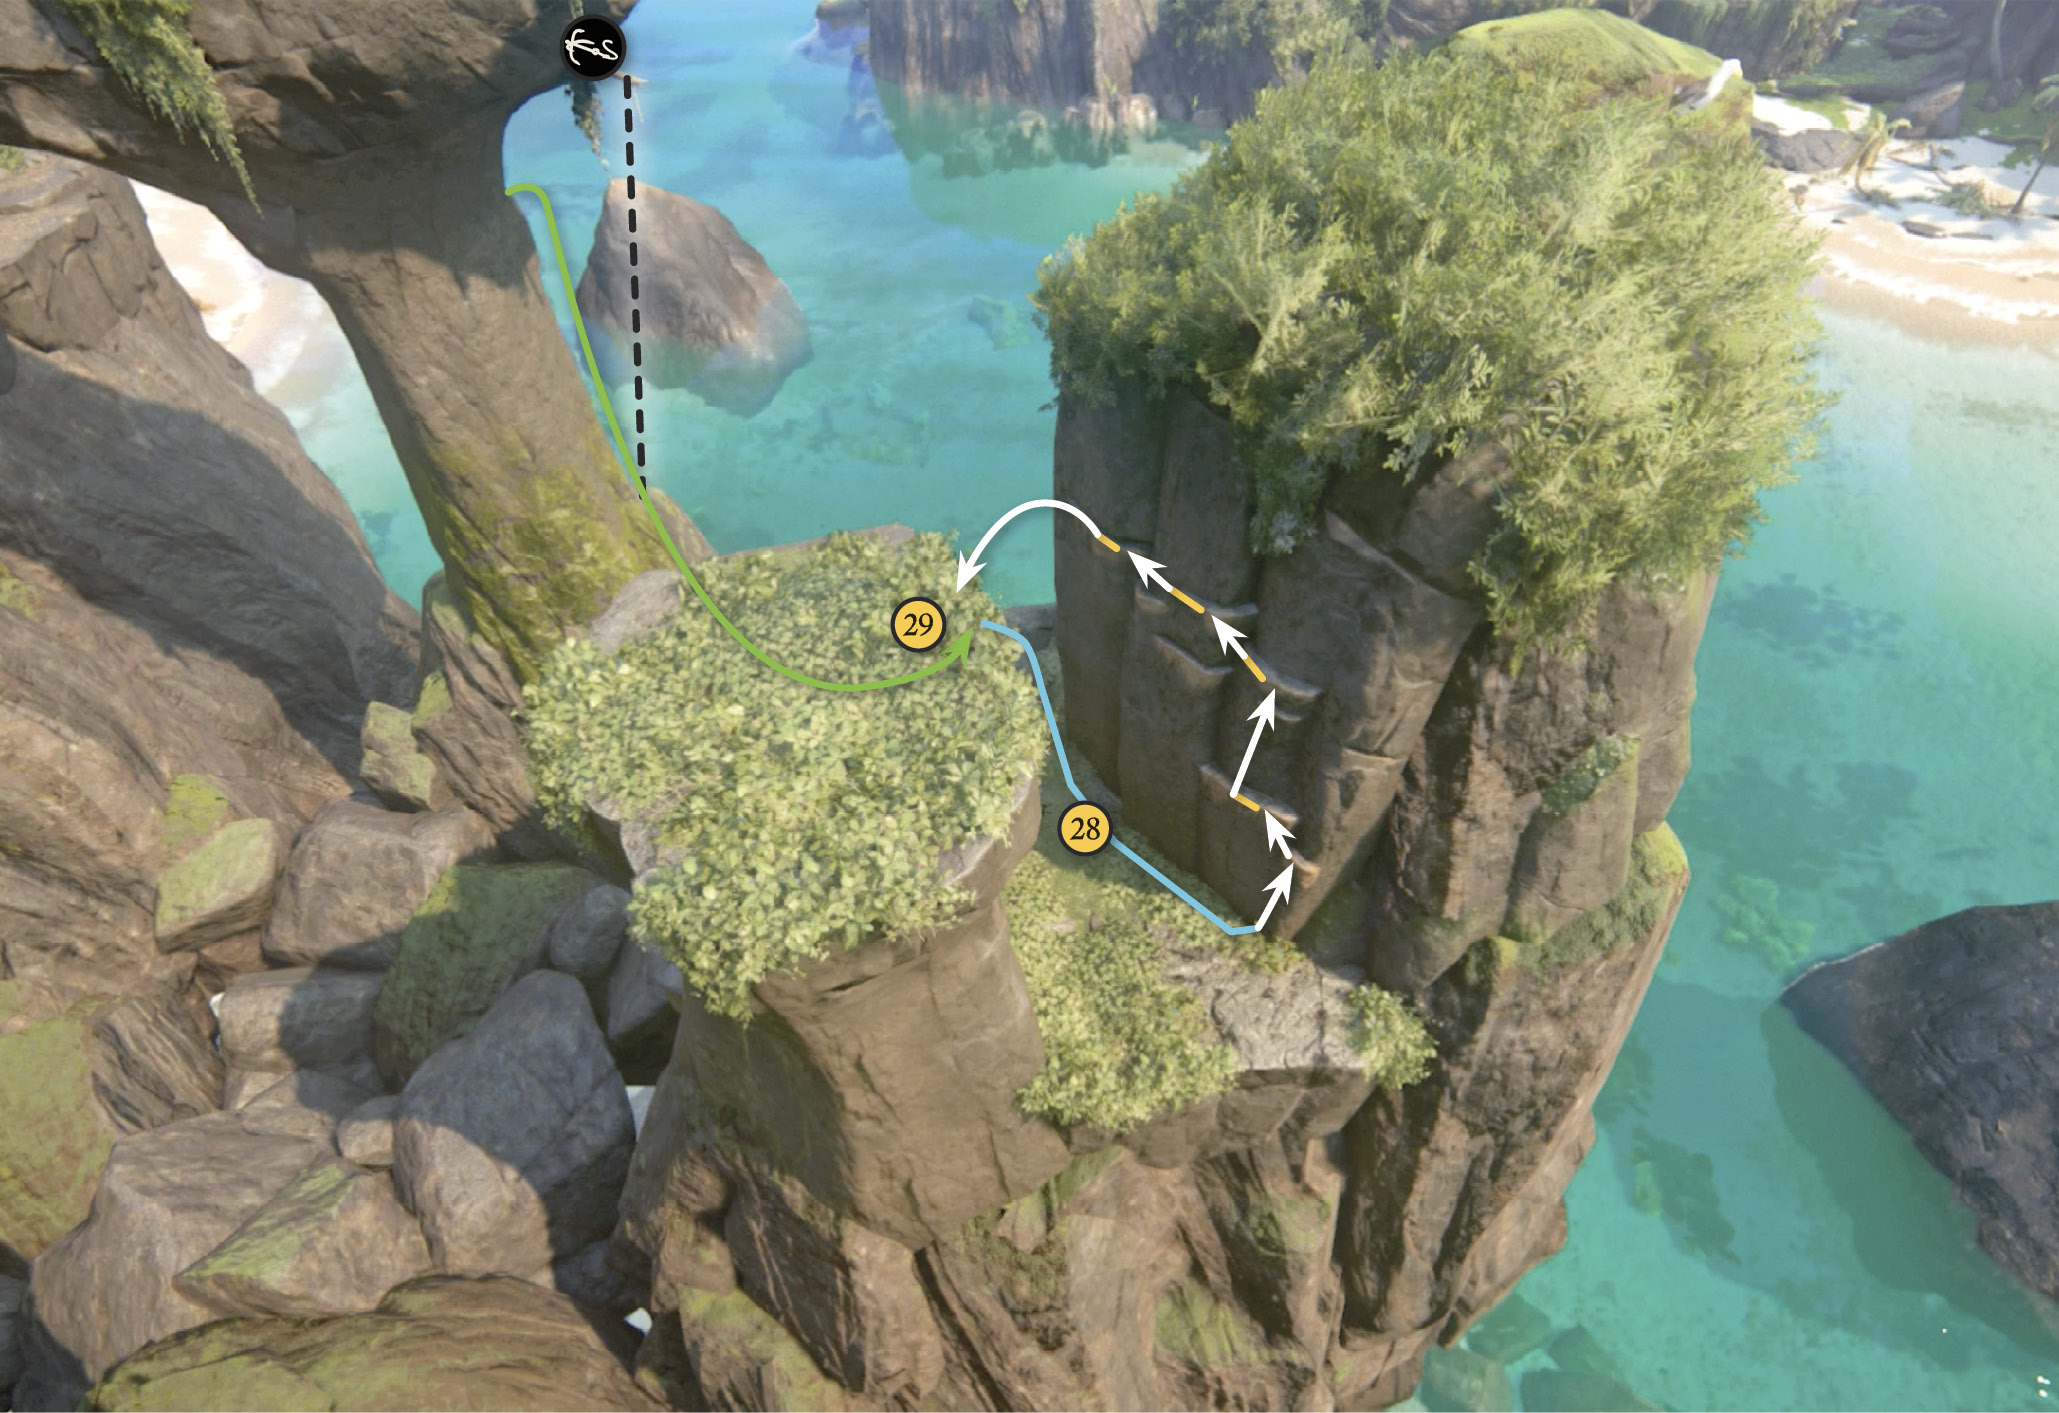
Then go back to the tree with the grapple point on its branch (26). Attach your grapple hook to the branch, drop off the edge, and swing to the handhold on the pillar (27). Climb up and around the pillar, then use the next grapple point to make the big swing across the gap to the terraces. Move through the crevice (28), climb the handholds on the other side, and jump across to the small platform (29).
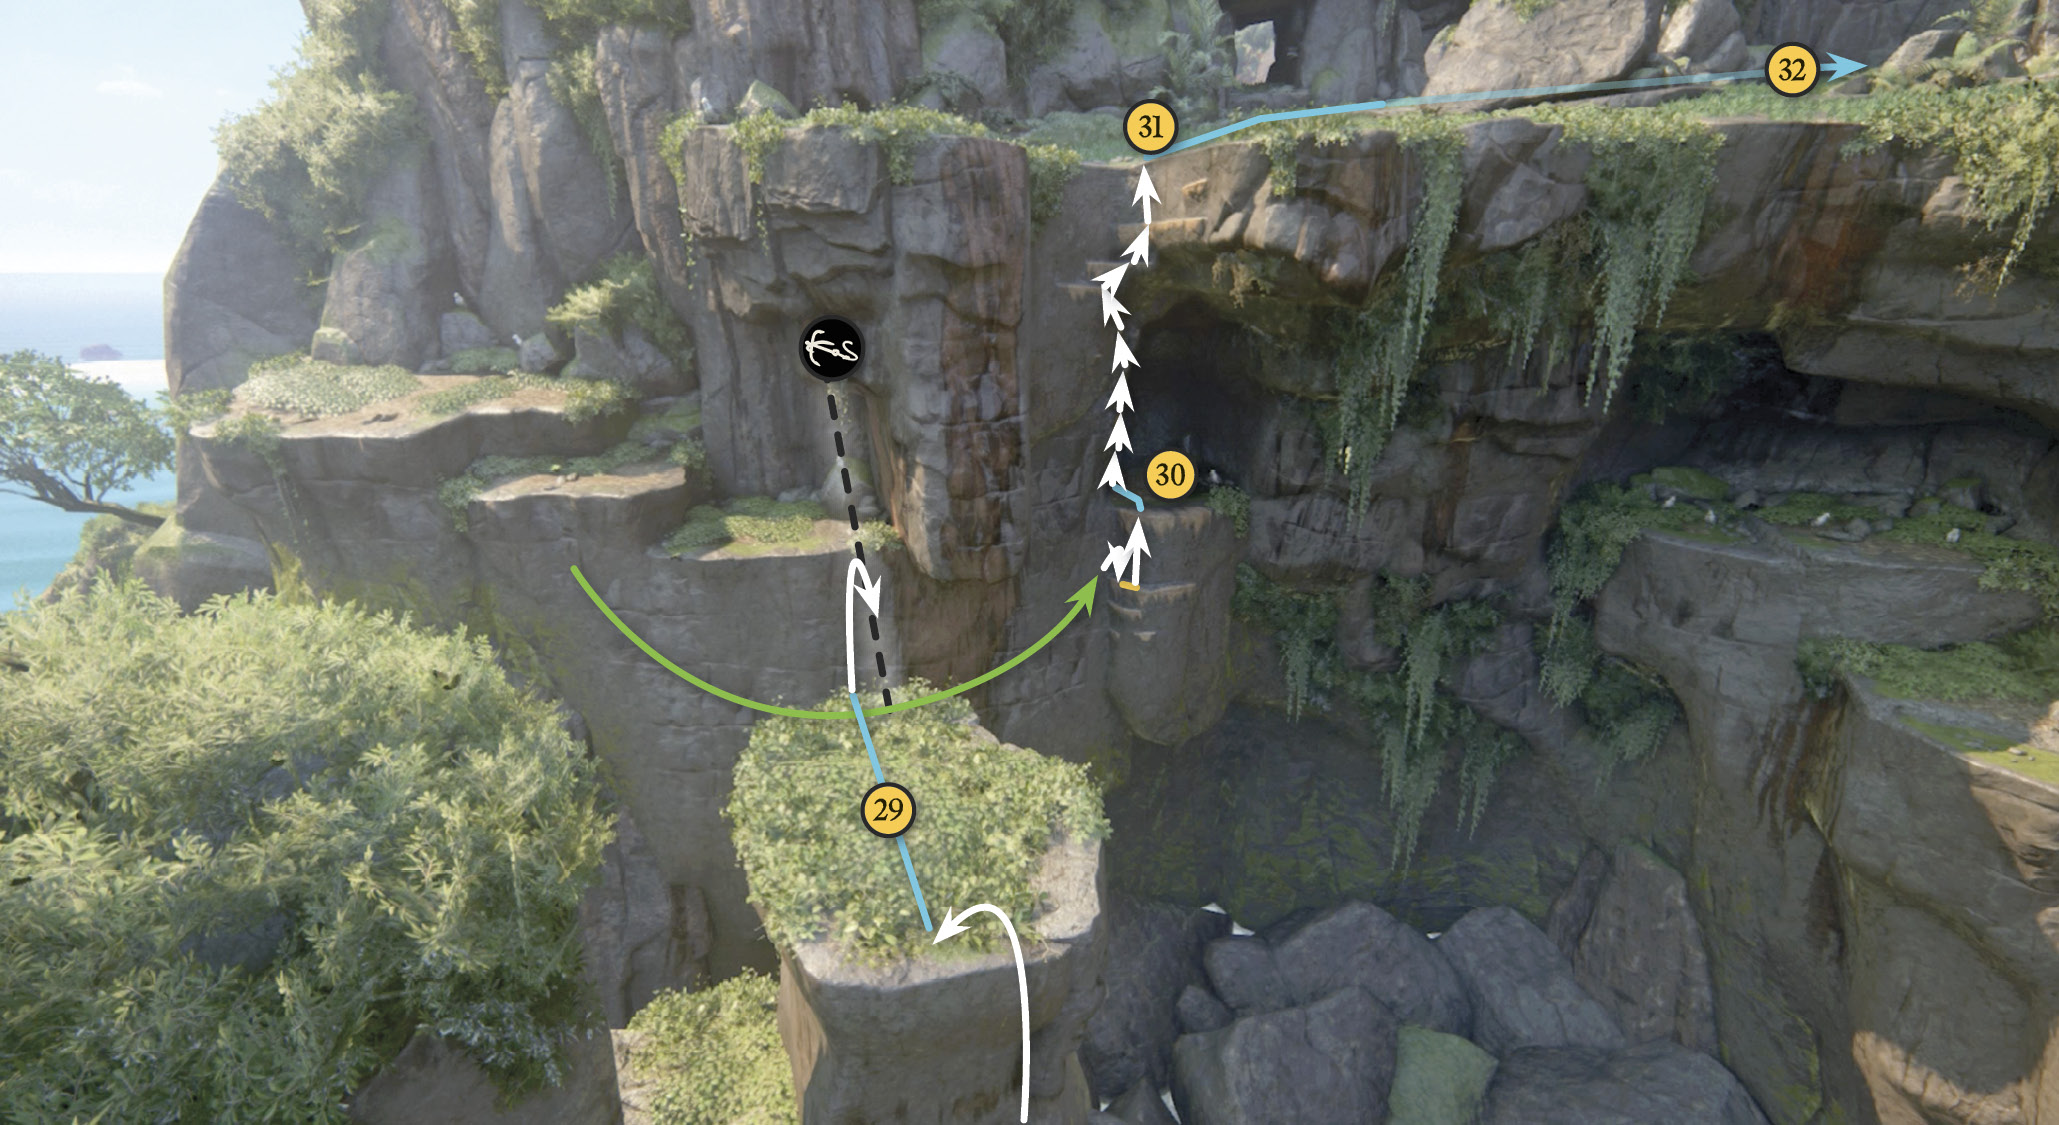
Sling your grapple hook over the branch on the far wall, then swing and wall-run across the wet cliff face toward the right. When you get enough momentum, jump to the handholds and climb them to the next ledge (30). Then climb the next set of handholds to the plateau above (31). Proceed up the staircase (32) to the tower ruin.
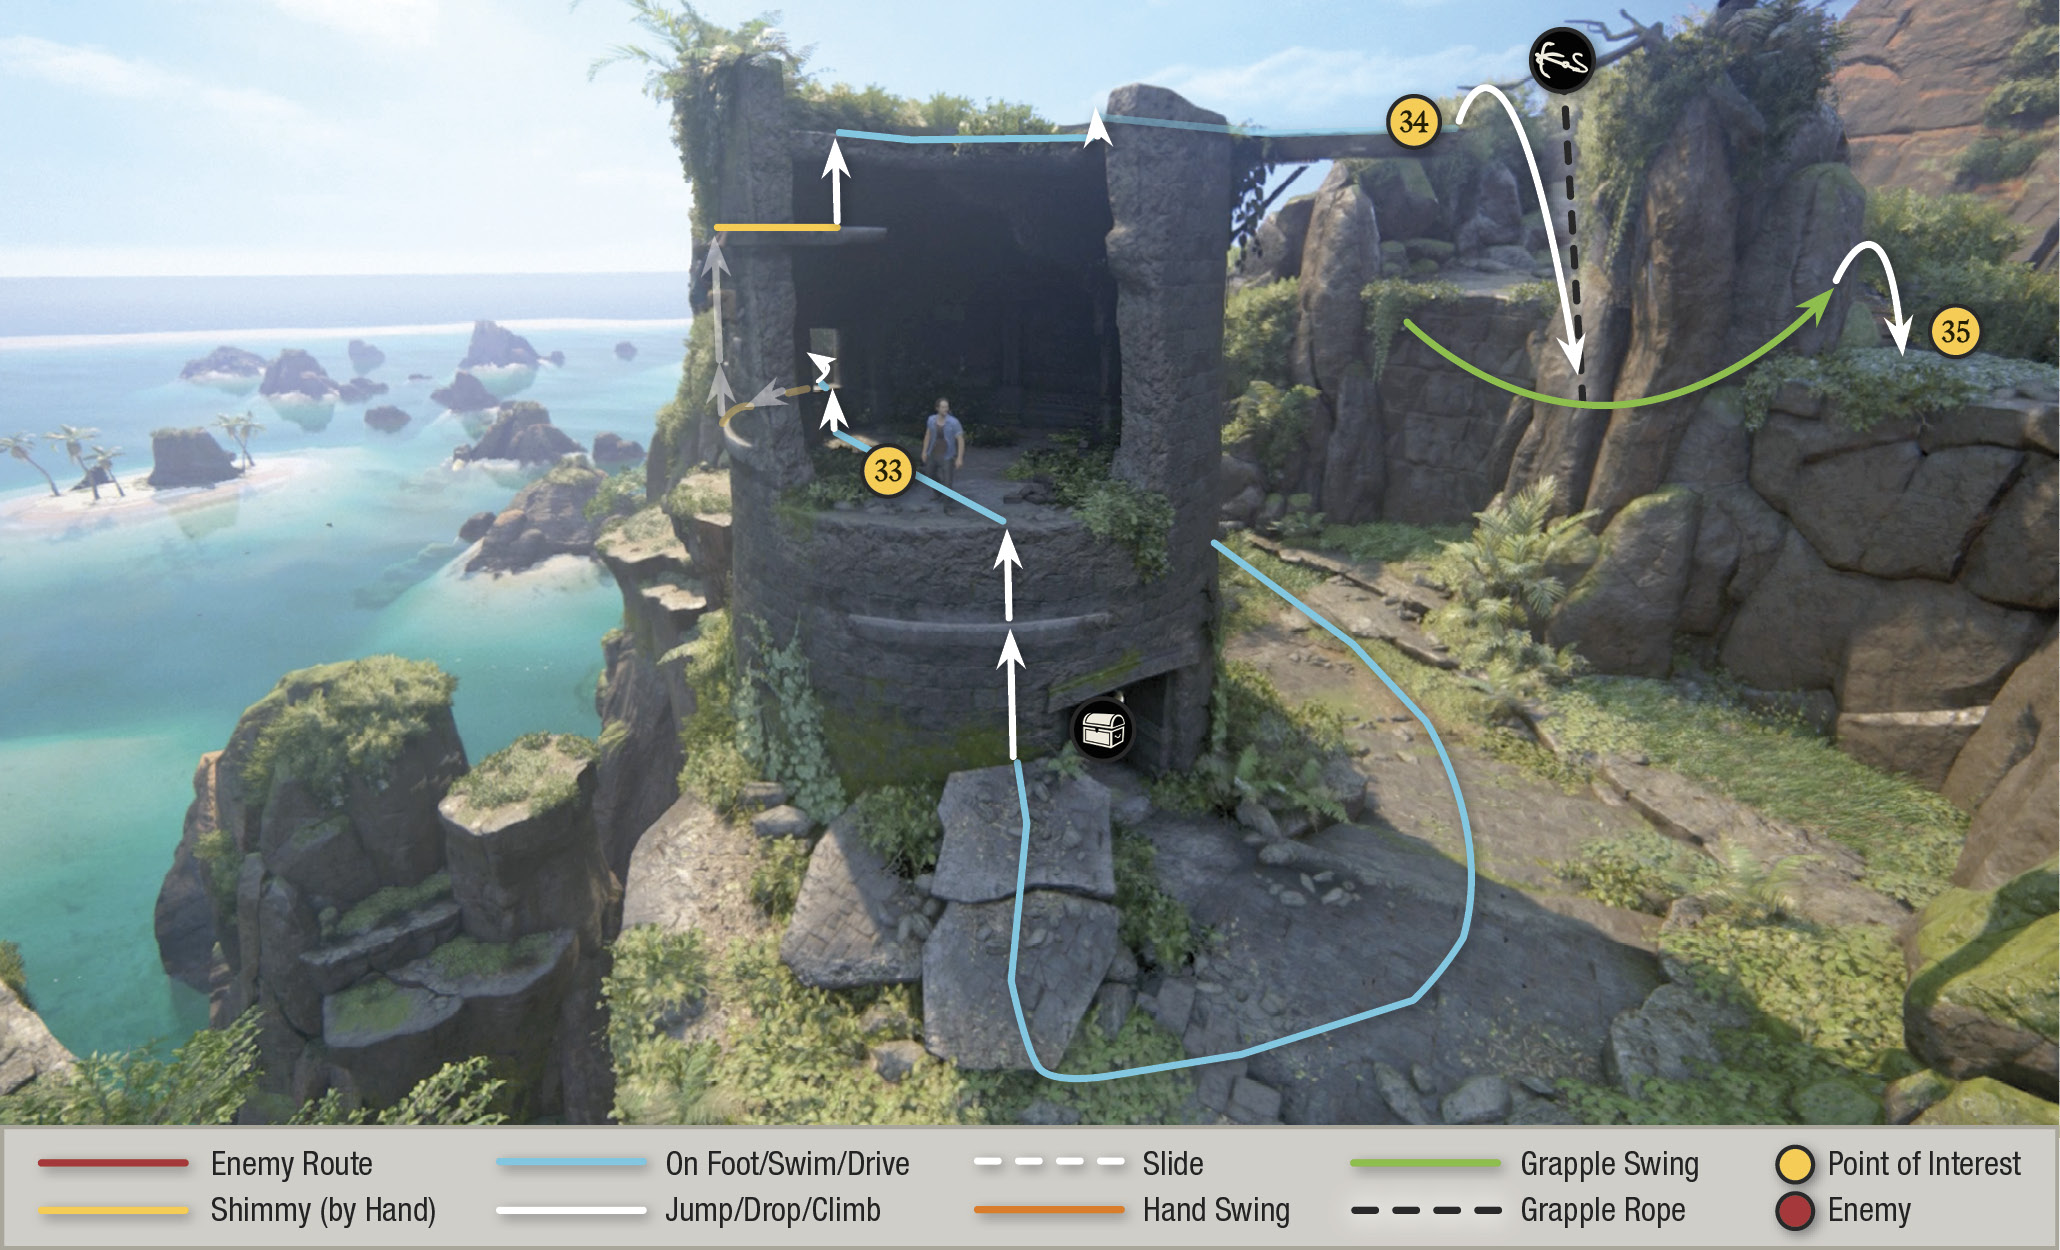
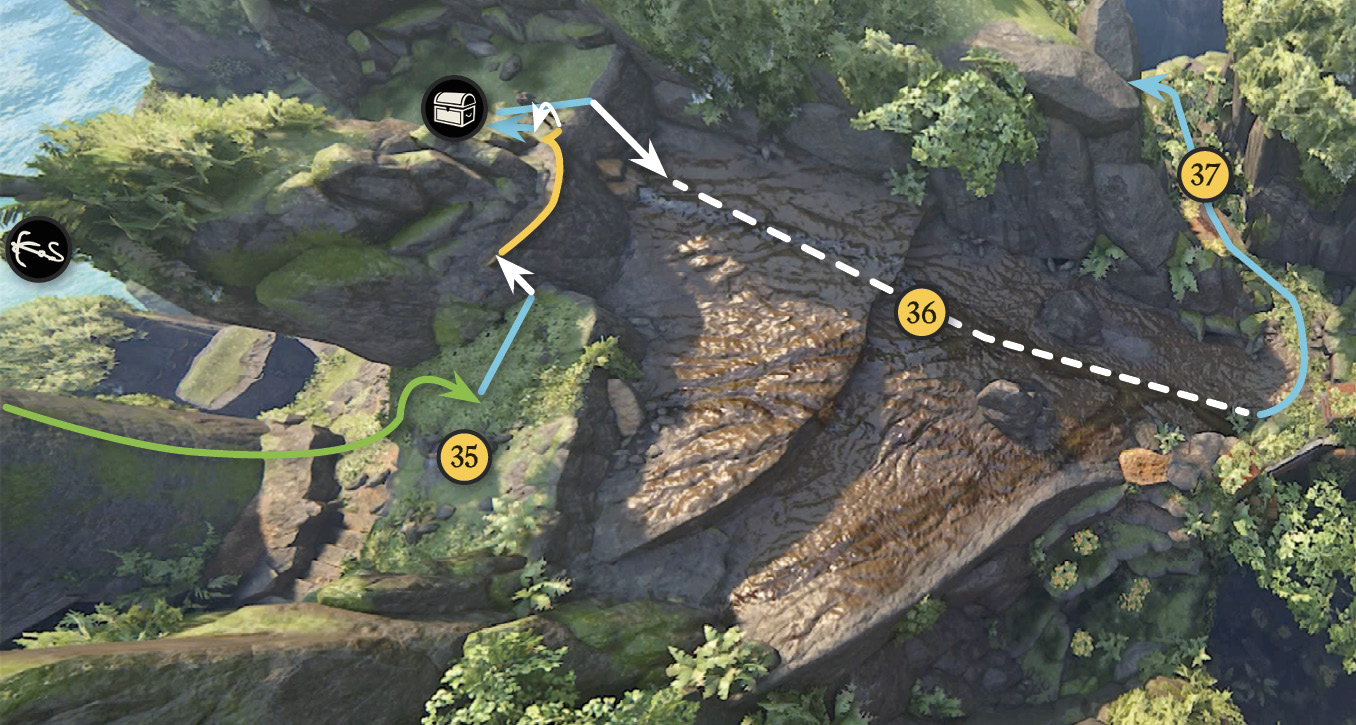
Find the treasure stashed inside the tower, then climb onto the tower’s second floor (33). Crawl out the nearby window, then climb rightward and up to the tower roof. Walk to the end of the extended beam (34). Now you can use the tree branch to grapple across to the ledge (35) overlooking a mudslide (36). Before you use the mudslide, shimmy across the rock formation to find a treasure on the next ledge over. Ride the mudslide to the bottom. Here you can head left through the narrow ravine (37) to find a treasure (see the “Treasure: Strange Relic” box for details), then return to the bottom of the mudslide.
 Ottoman Helmet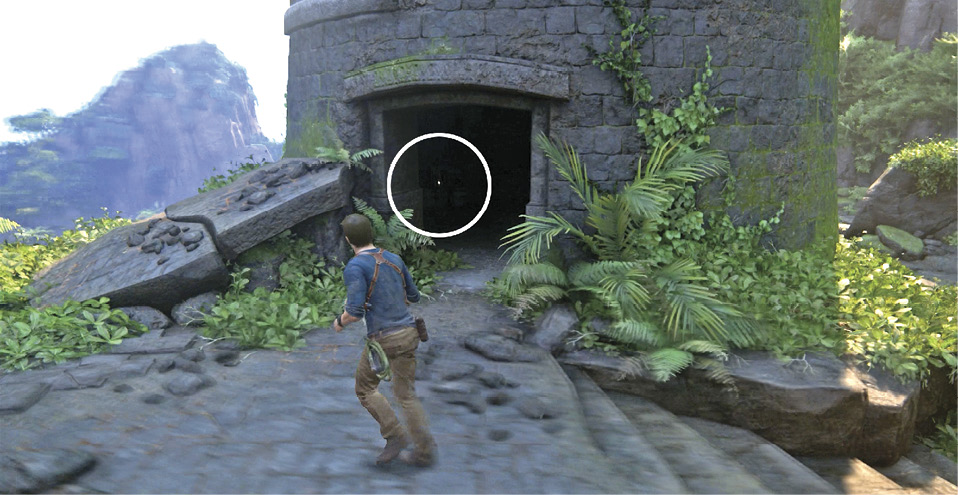 Look in the dark room on the ruined tower’s lower level to find the Ottoman Helmet. |
 Deccani Bronze Vase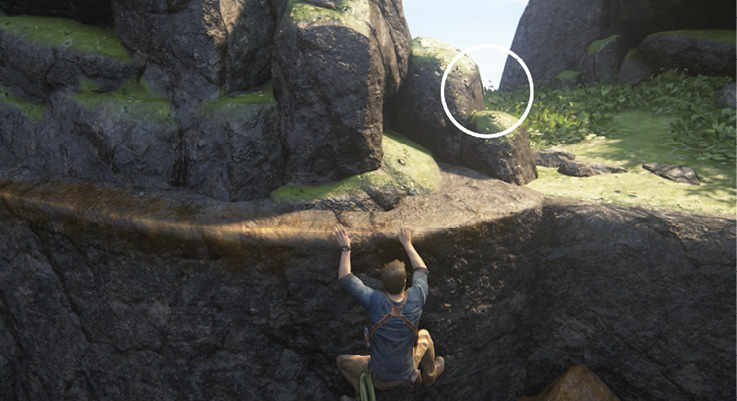 After you swing from the tower beam to the ledge above the mudslide, shimmy around the rock formation to find the Deccani Bronze Vase. |
 Strange Relic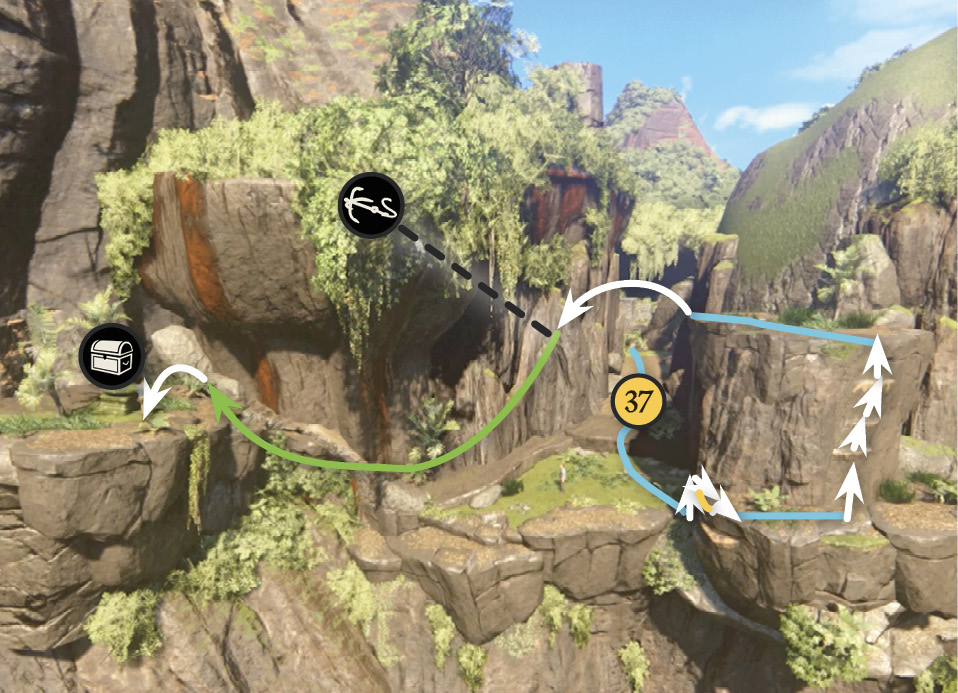 After you ride the first mudslide (36) to the bottom, head left through the narrow pass (37) and climb the rock wall on the left. At the top, you must make a leap of faith to make the L1 icon appear on the tree branch then quickly toss your grapple hook at it. Swing across to the far terrace to find the Strange Relic sitting on the lip of a water basin. Then hop carefully down and return to the bottom of the mudslide. |
Explore the Staging Areas
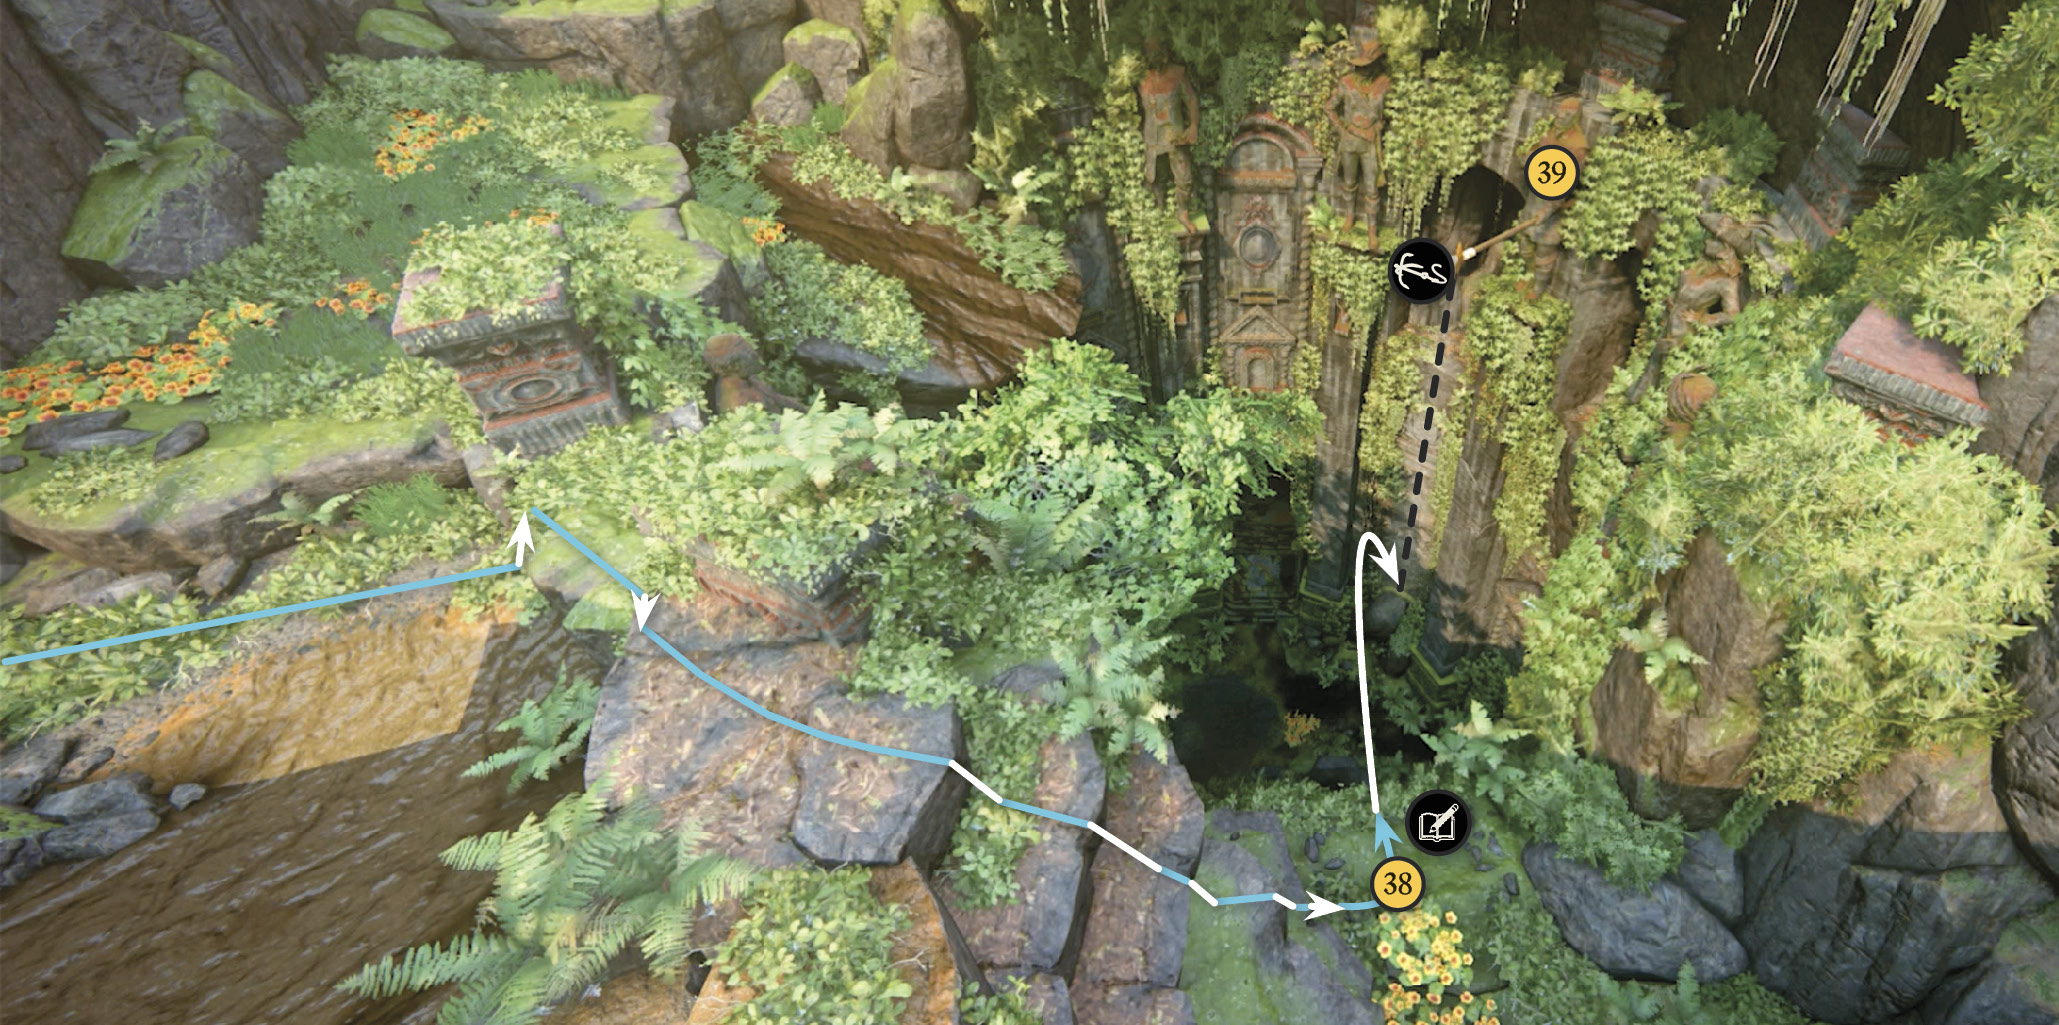
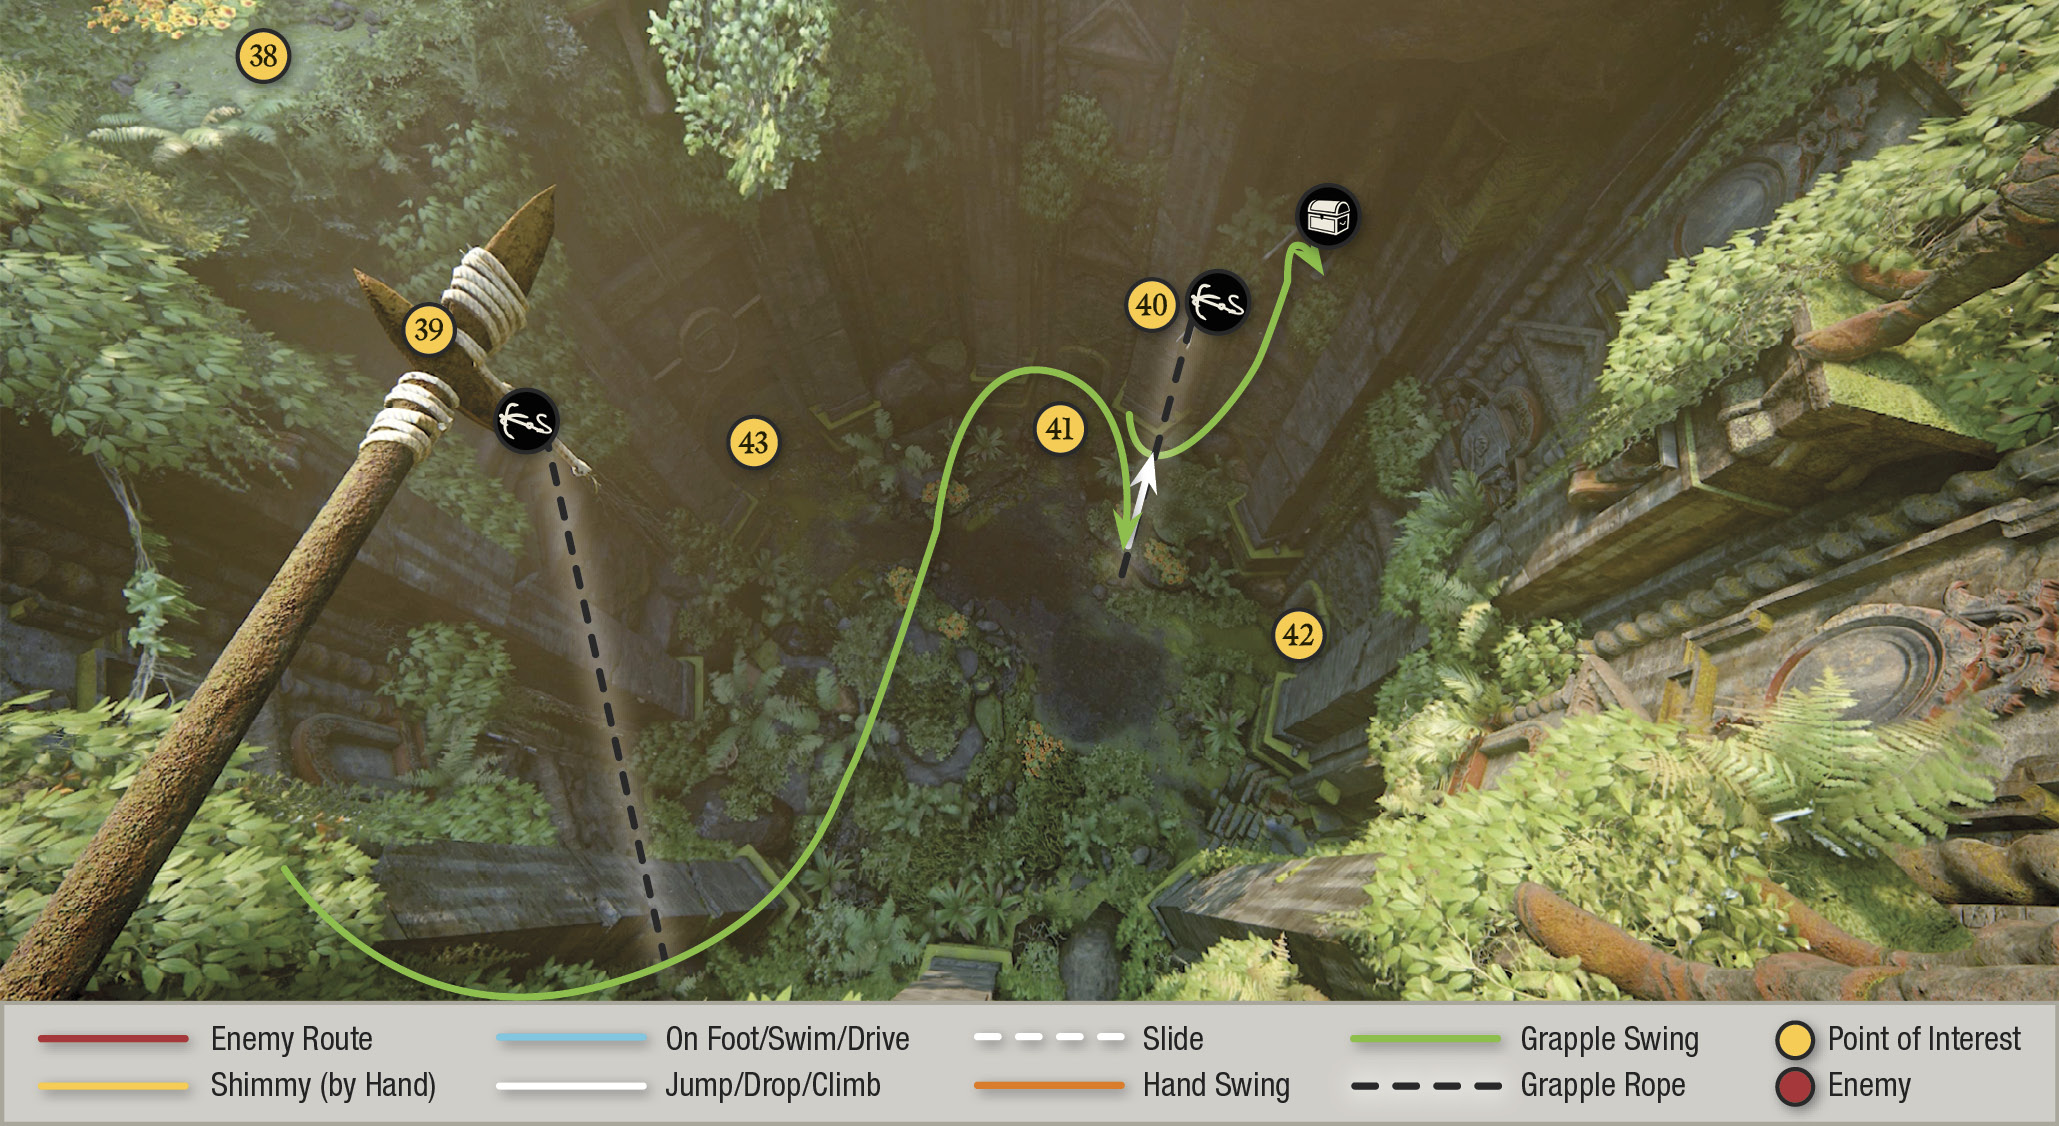
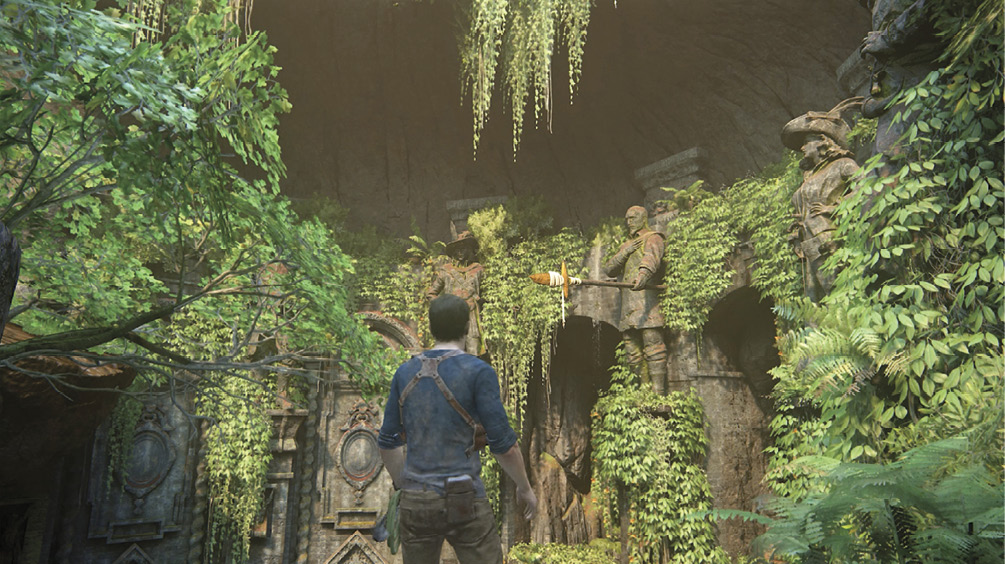
Climb onto the rock ledge to the right of the short pillar and hop down the series of ledges to the bottom (38). Look up at the huge statue with the spear to add a Optional Journal Entry on the lavish construction below. Then make a running leap of faith toward the spear and sling your grapple hook at it (39). Swing leftward and spot a second grapple point on another spear below you (40). Toss your hook at it and let yourself hang stationary. Here you can climb the rope and swing to a treasure. Then use the same grapple point to lower yourself down to the bottom of the rope. From there, you can drop safely to the ground.
 Hamsa Mythical Goose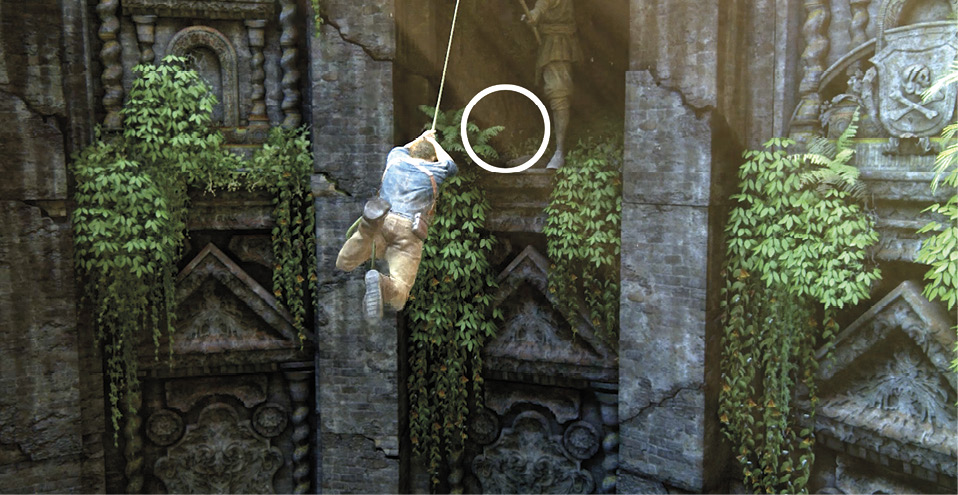 After you grapple to hang from the second spear in the big cistern with the monumental statues, pull yourself up the grapple rope until you’re level with the feet of the statue holding the spear. Swing over to the small space on the statue’s left side to find the Hamsa Mythical Goose. |
You find yourself in a courtyard surrounded by doorways. Explore the two smaller entrances first.
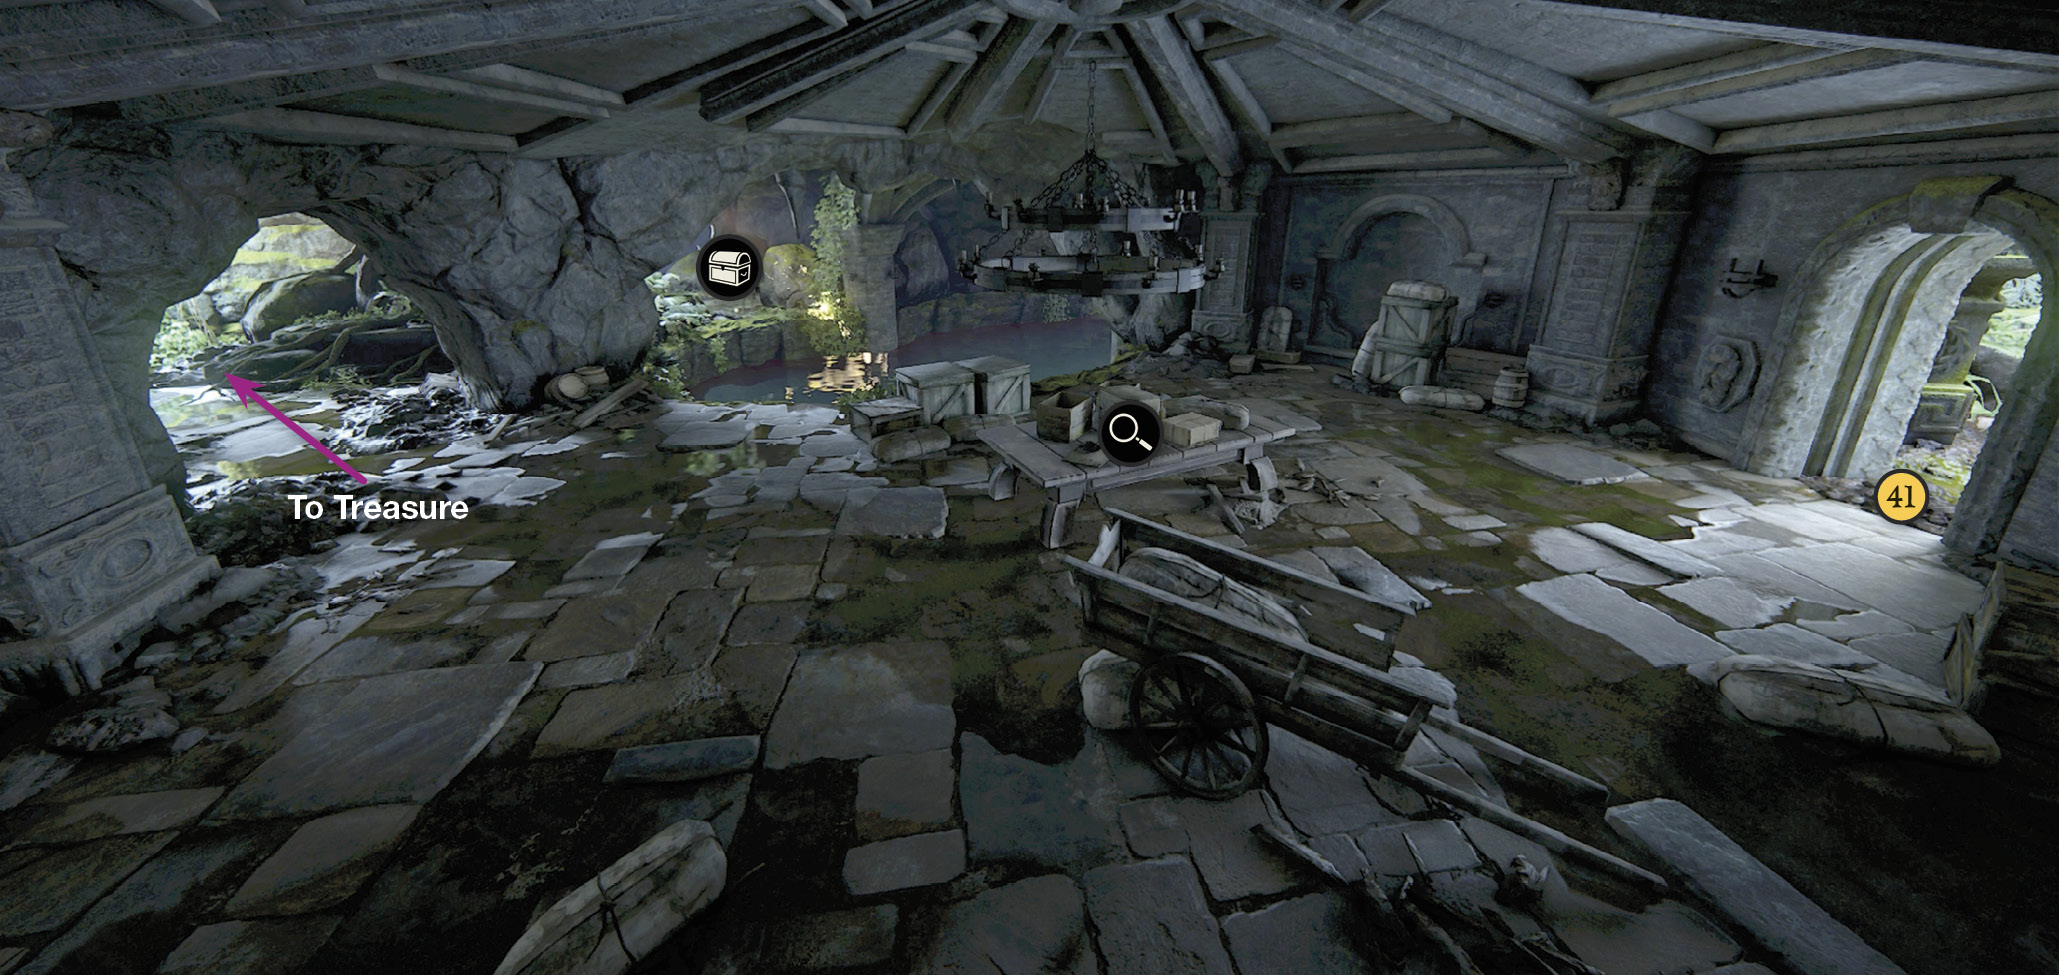
The leftmost small door (41) leads into a supply way station. Examine the items on the table. Note that you can access two pools of water from this room. The first pool leads to the Planning Room. You can also exit the far back of the way station into a pool that leads to a treasure.
 Pique Tortoise Shell Box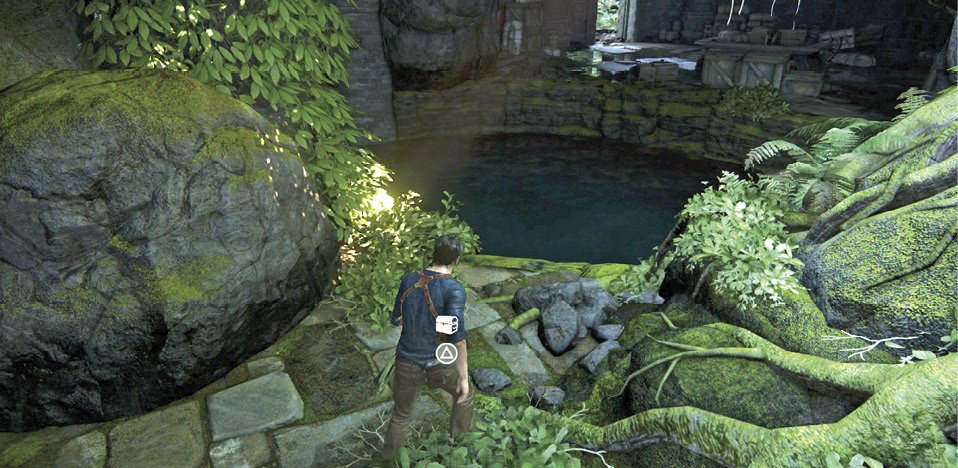 The supply way station has broken walls leading to two pools of water. The near pool connects to the planning room. The pool in the far back has a small ramp on the right; swim to the ramps and exit the water onto a small paved platform. Here you can find the Pique Tortoise Shell Box on the ground. |
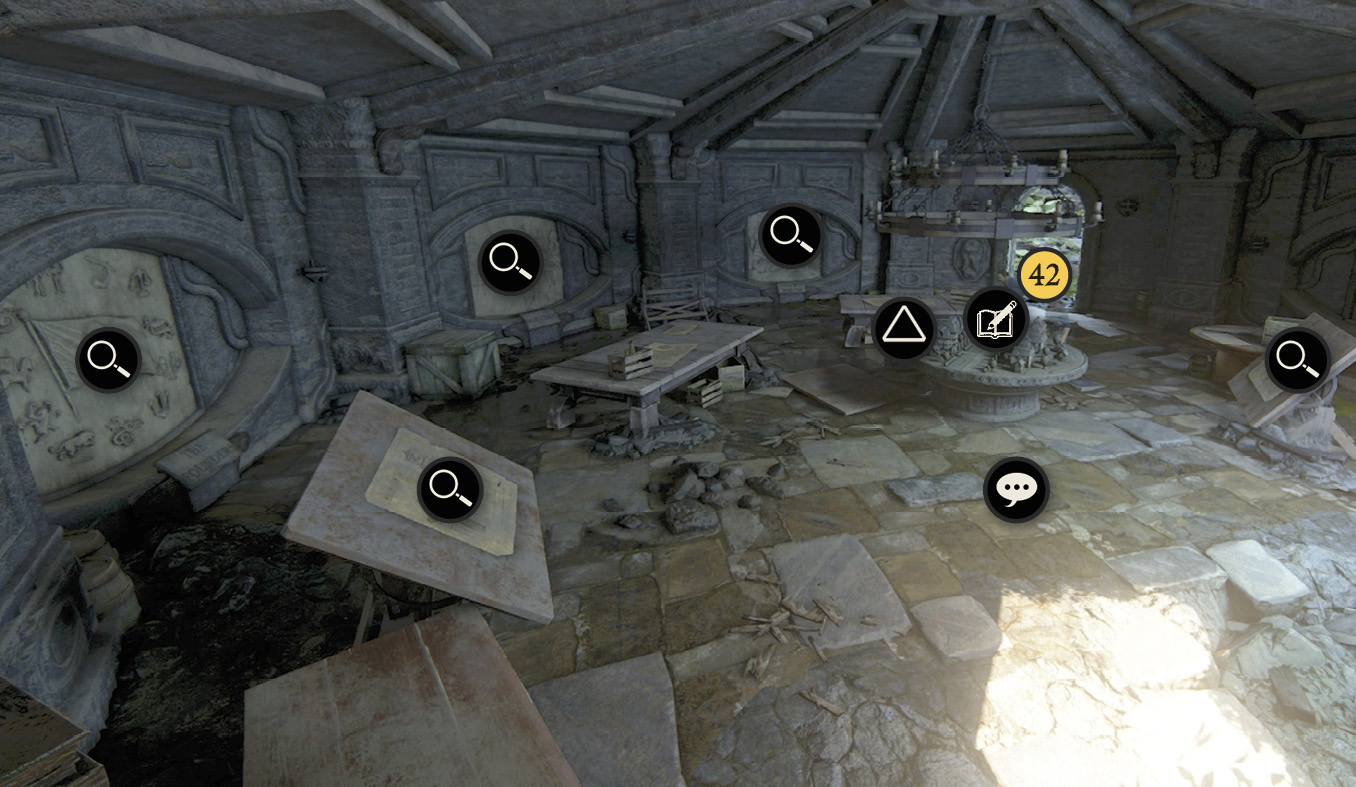
The door on the right (42) leads into a planning room filled with a trove of…well, not treasure, but information. Examine each of the marked items to explore the origins and plans for Avery’s pirate utopia, Libertalia. Look at the diorama to add an Optional Journal Entry and pick up the statue on it; examine the blueprints, sketches, and wall carvings. Exploring all six items activates an Optional Conversation with Sam: “A Staging Ground.” Then exit the planning room back into the courtyard.
Solve the Gear Rotation Puzzle
Enter the taller doorway (43) and examine the pressure pad in front of the heavy wooden door on the left. When the door malfunctions, join Sam in lifting it by repeatedly tapping . Enter the large ornate dome and approach the wheel in the center of the room.
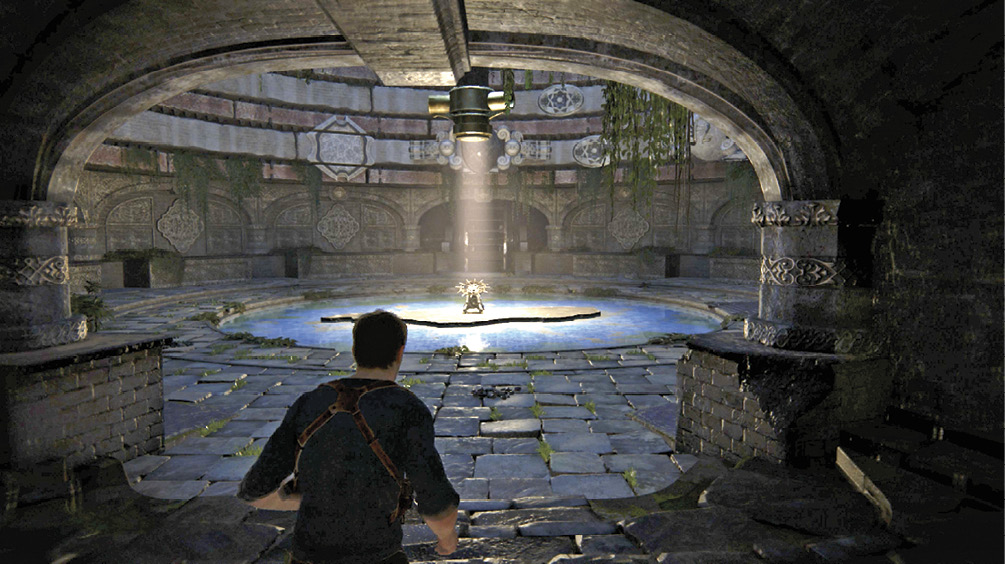
Here’s the layout:
- Three separate tracks encircle the dome interior. You work on them one at a time.
- Spotlights directly above you shine symbols onto two big plates over on the track.
- Two mechanisms are locked onto each track. Each mechanism has symbols on it. You can move these mechanisms around the circular track by turning the control wheel in the center of the room. (Use your controller’s left stick to do this.)
- You also see several smaller dark disks on each track. These are gears that can rotate the mechanisms.
- When you move a mechanism directly over a gear and press
 , the gear rotates the mechanism. Note that pressing rotates all of the gear disks on the same track at once. This makes the later steps of the puzzle a bit trickier.
Lower Track Solution
This one is quite manageable:
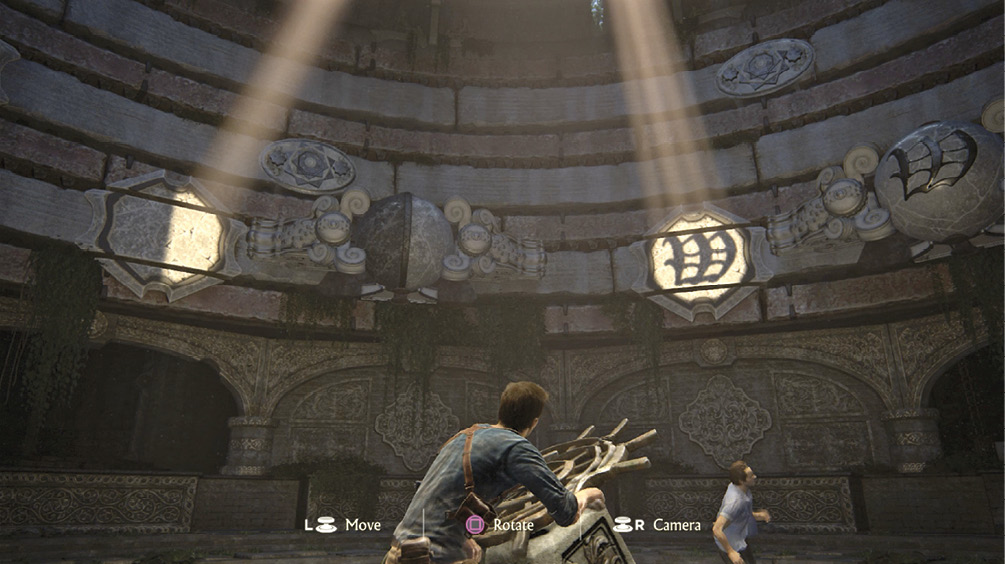
- Use your left stick to move the left mechanism (the one whose globe is half dark, half light) over any gear on the track.
- Rotate the gear until the mechanism’s globe shows half black on the left and half white on the right. (This matches the glyph projected by the spotlight onto the left disk.)
- Now move the right mechanism (the one whose globe has a series of four symbols) over any gear on the track.
- Rotate the gear until the globe’s symbol facing out matches the “W”-like glyph projected by the spotlight onto the right disk.
- Now move the globe mechanisms until they roll onto the two lighted disks. The patterns match…and the first set of four pirate captains is revealed.
Middle Track Solution
Here’s the solution sequence for the middle track. It’s slightly more complicated, but not too bad:
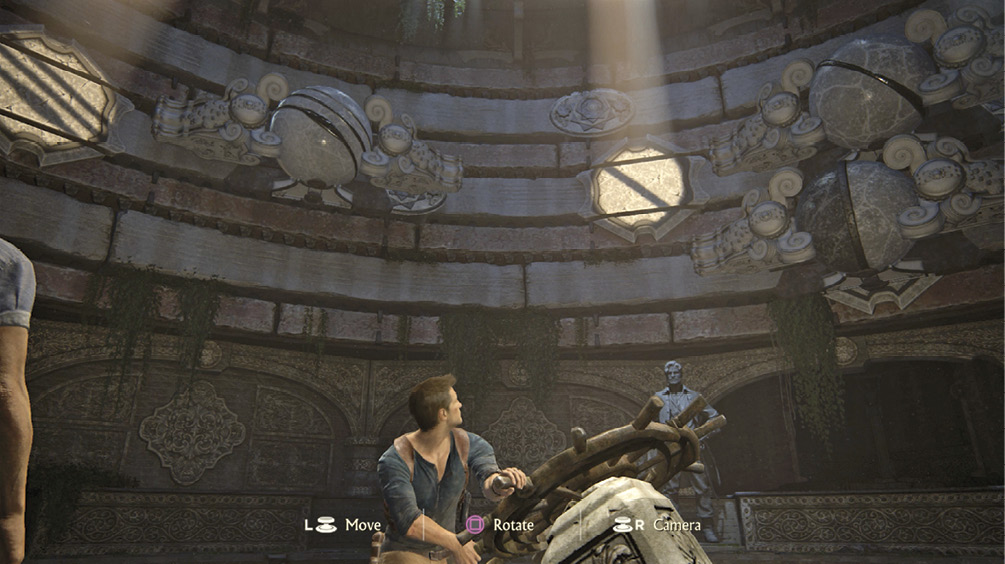
- Use your left stick to move the left mechanism (the one whose globe has three slashes encircling it) over any gear on the track.
- Rotate the gear until the three slashes on the globe match the angle (from upper left to lower right) of the pattern projected by the spotlight onto the track’s left disk.
- Now move the right mechanism (the one whose globe has a single slash encircling it) over any gear on the track that leaves the left globe not over a gear. (Reason: You only want to rotate the right globe, while leaving the left globe set where it is.) Note: there are two gears that fulfill this requirement.
- Rotate the gear until the mechanism’s globe symbol matches the single slash projected by the spotlight onto the track’s right disk.
- Now move the globe mechanisms into the spotlights. The patterns match, revealing the second set of four pirate captains.
Top Track Solution
Now it gets tricky. The male/female symbols on the final two mechanisms spin as they move around the track! So you must set the symbols to positions that will rotate to the correct alignment when they reach the lighted disk. Like we said: tricky. But here’s how to do it:
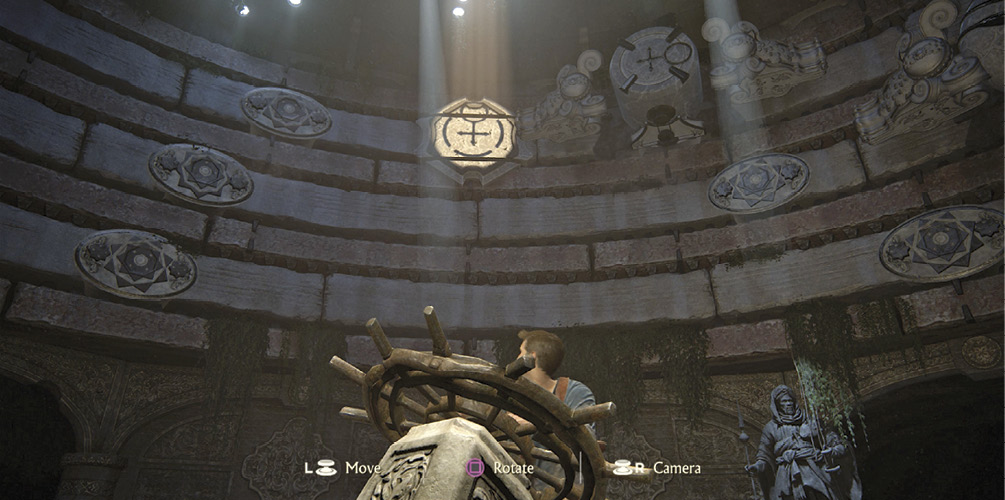
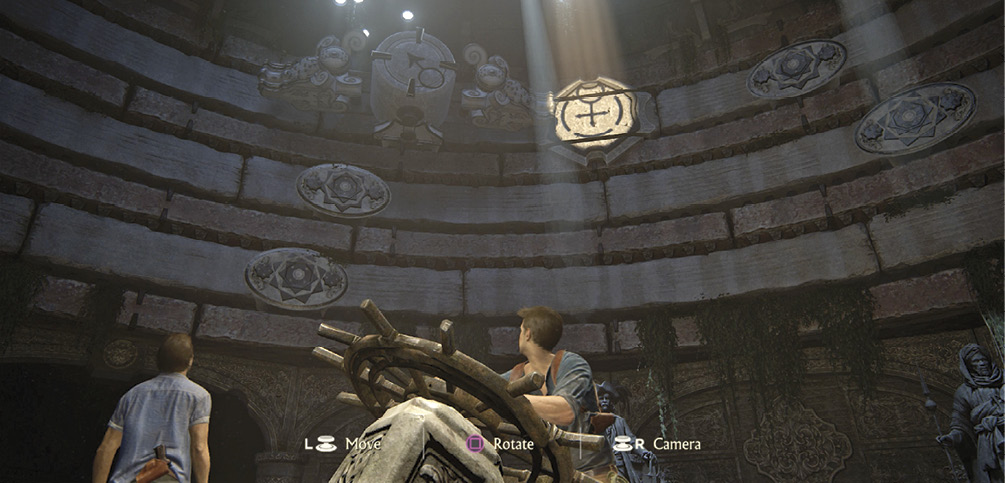
- First, use your left stick to move the mechanisms into the spotlights. You see that the male (left) symbol needs to be rotated 180 degrees (one half turn) to match up, and the female (right) symbol needs to be rotated 90 degrees (one quarter turn) to match up.
- Move the mechanisms rightward until the one with the female symbol moves over the very next gear. This leaves the male symbol “ungeared” so it won’t rotate when you set the female symbol.
- Rotate the gears twice—that is, press twice—to rotate the female symbol 90 degrees clockwise. It is correctly set now.
- Now move the symbol mechanisms rightward until the one with the male symbol moves over the next gear to its right. (This leaves the female symbol “ungeared” so it will stay set the way you want it.)
- Rotate the gears four times—that is, press four times—to rotate the male symbol 180 degrees. It is correctly set now.
- Now move the mechanisms back into the spotlights. The patterns match, revealing the third set of pirate captains. One more pirate remains: Where is Henry Avery?
Exit the puzzle room via the newly opened staircase. Pull the lever on the circular lift platform to ride it up. What does Captain Avery have in store for you next?
Get to the Avery Statue
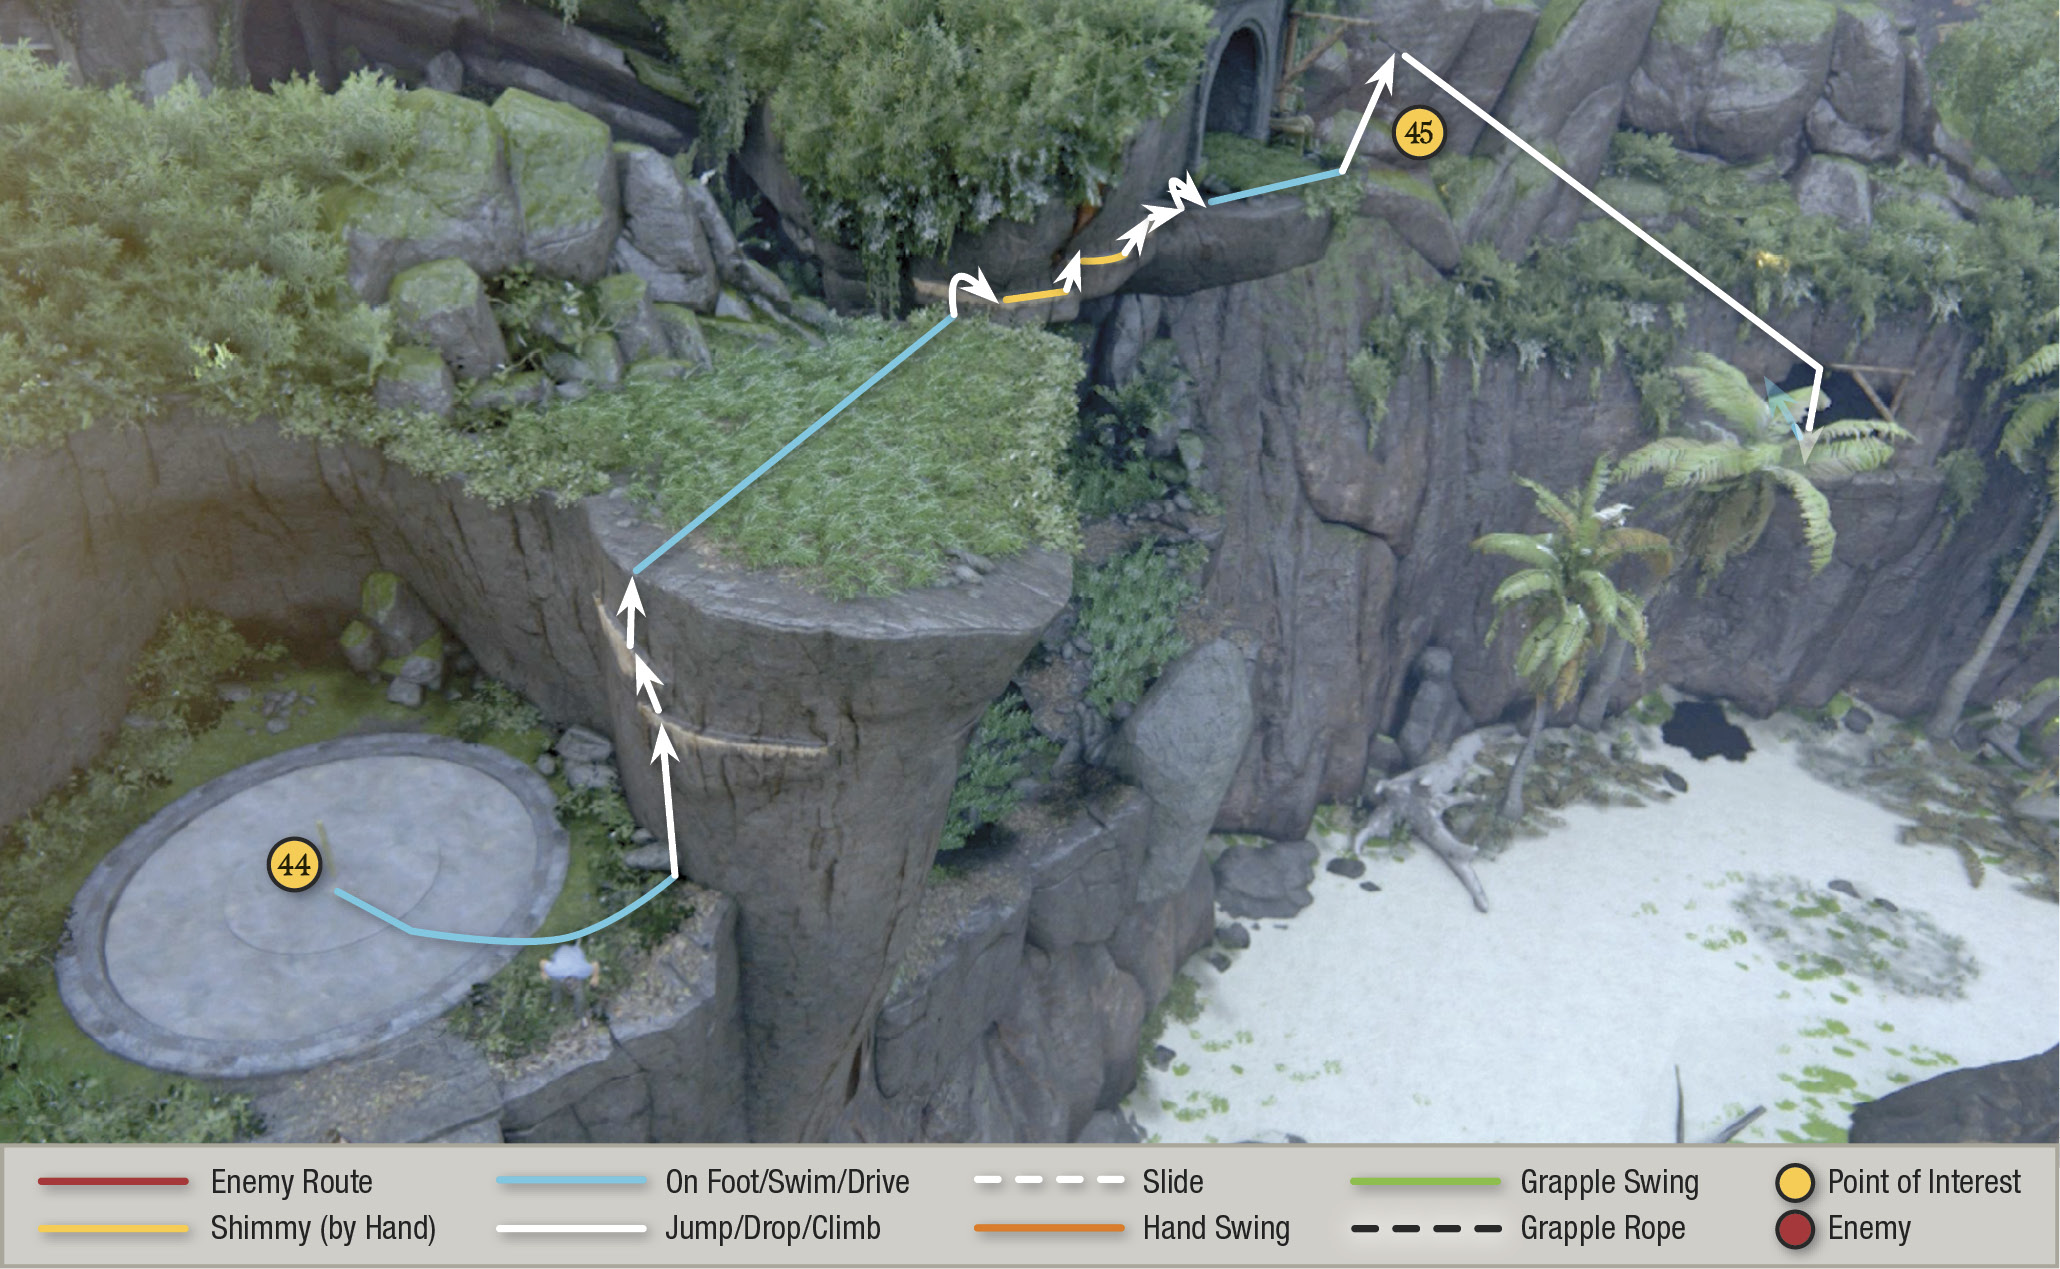
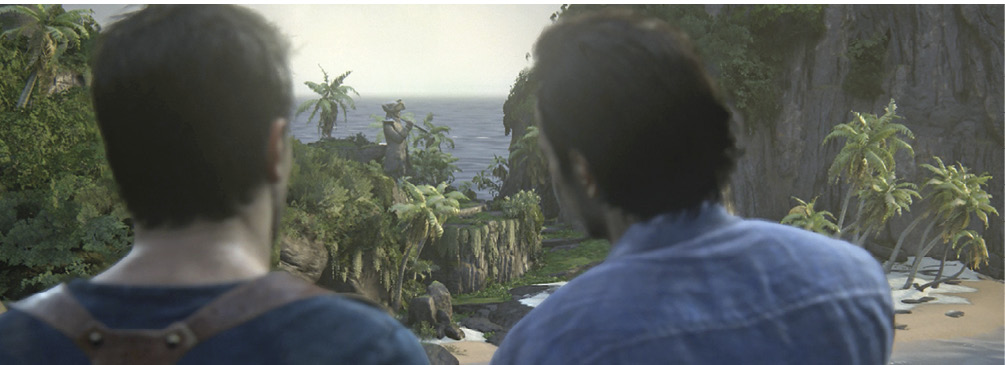
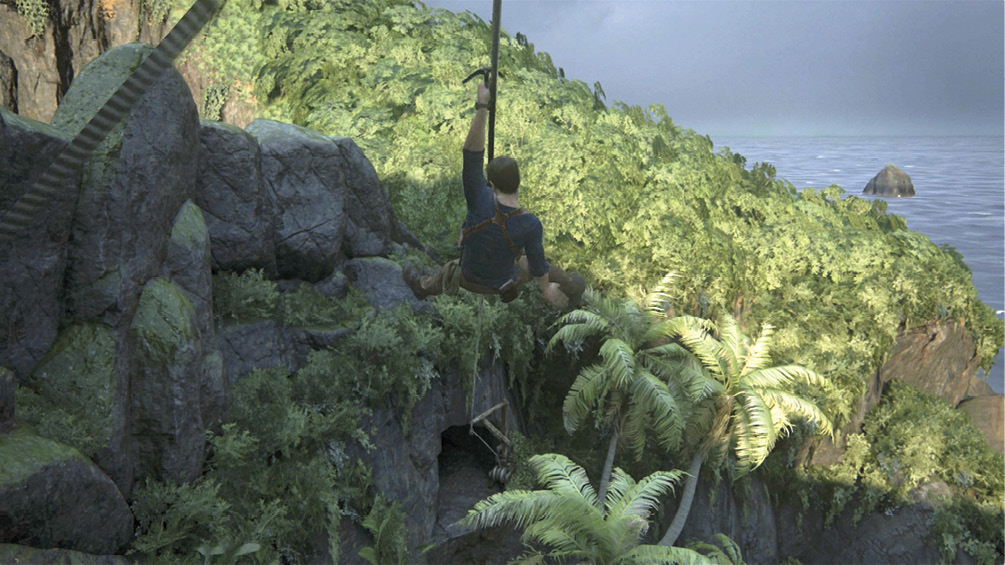
When you arrive at the surface (44), watch as Nathan and Sam observe the missing pirate statue rise from the ground over on the smaller island. Note also that ominous clouds appear to be rolling in. After the scene, turn left and climb the nearby handholds up the wall. Jump across to another set of handholds and climb rightward to the rope line (45). Press  to ride it down to the cave mouth. Then proceed through the cave tunnel and hop down the terraces to the water, where you can swim to the boat.
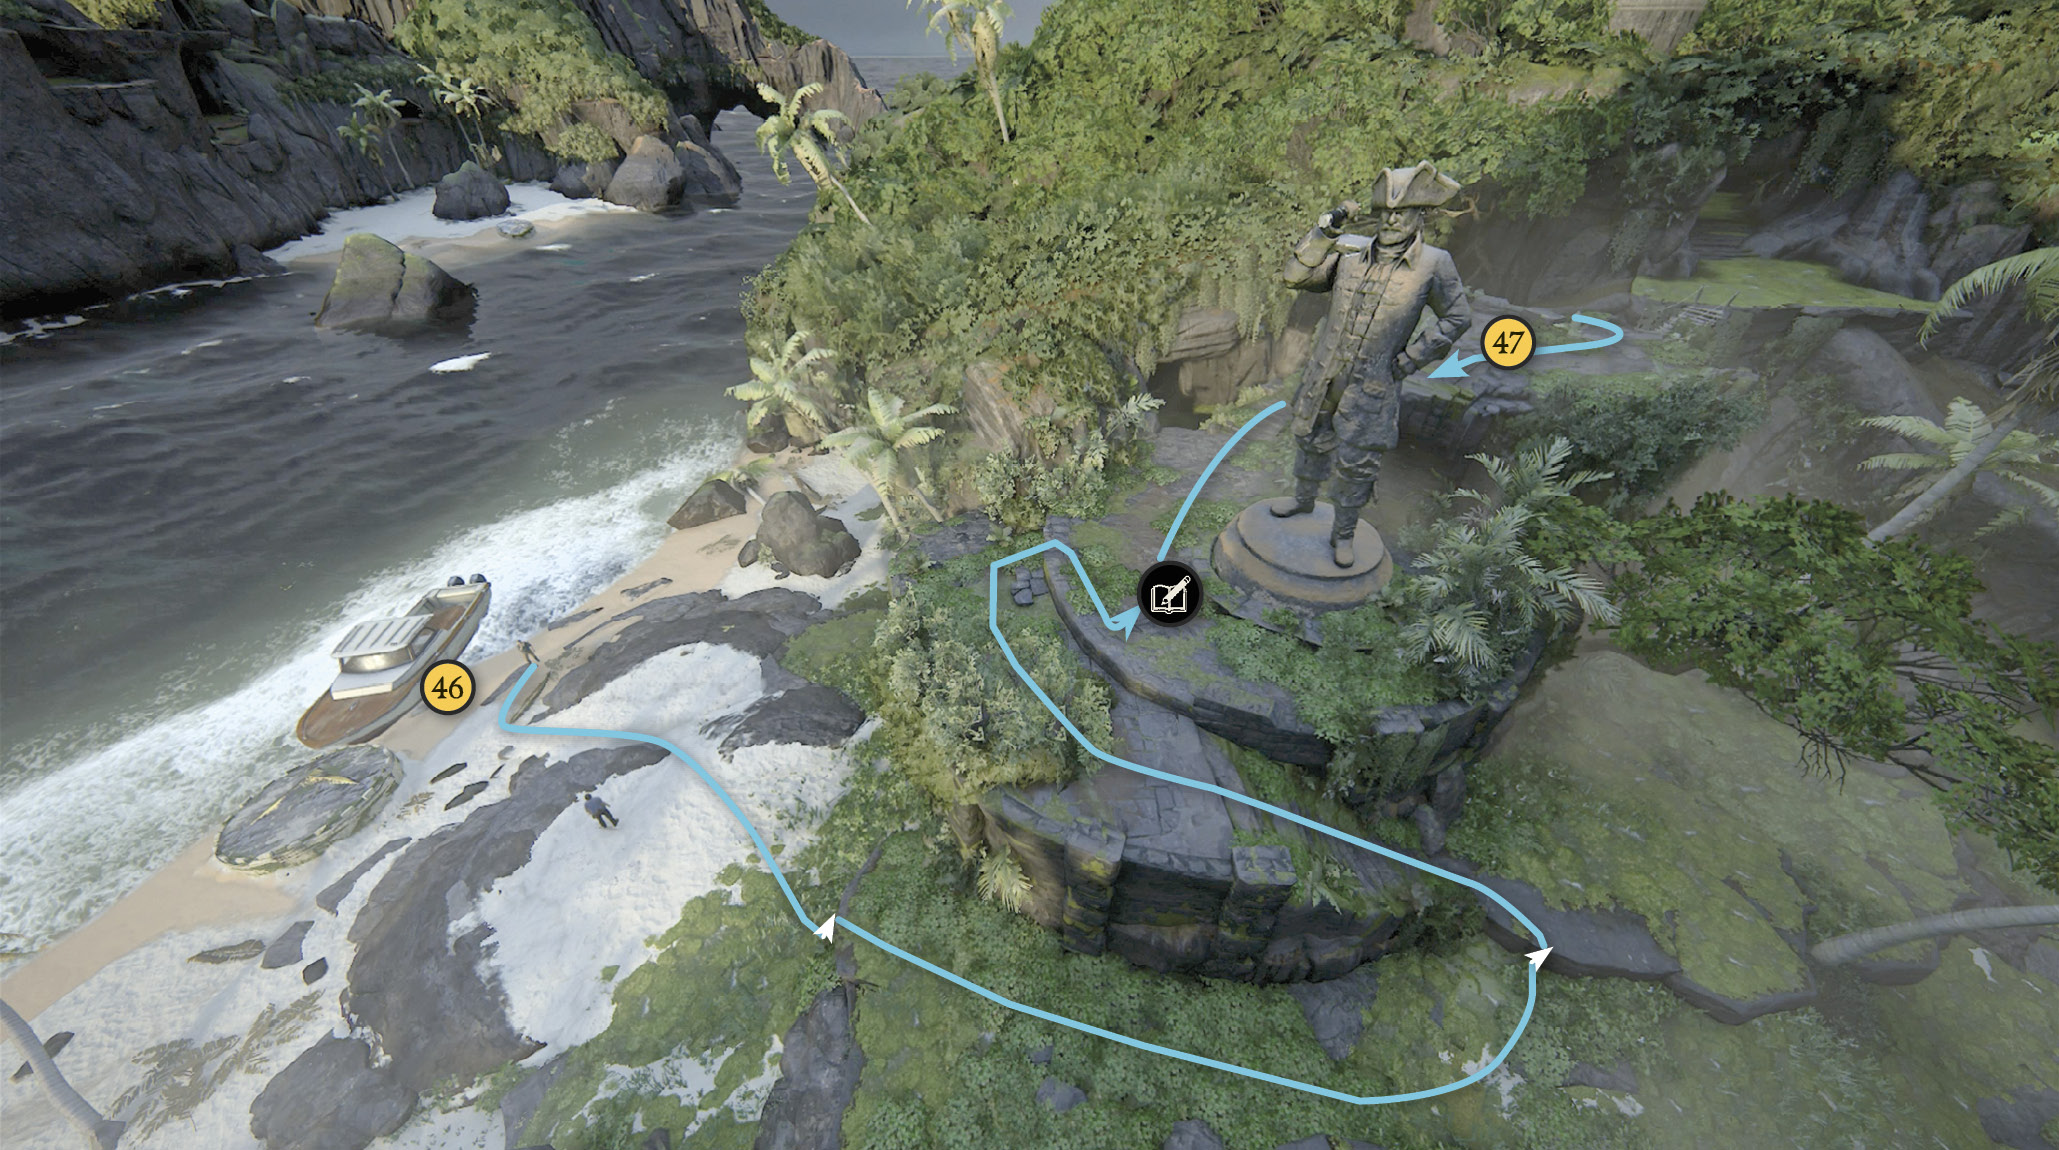
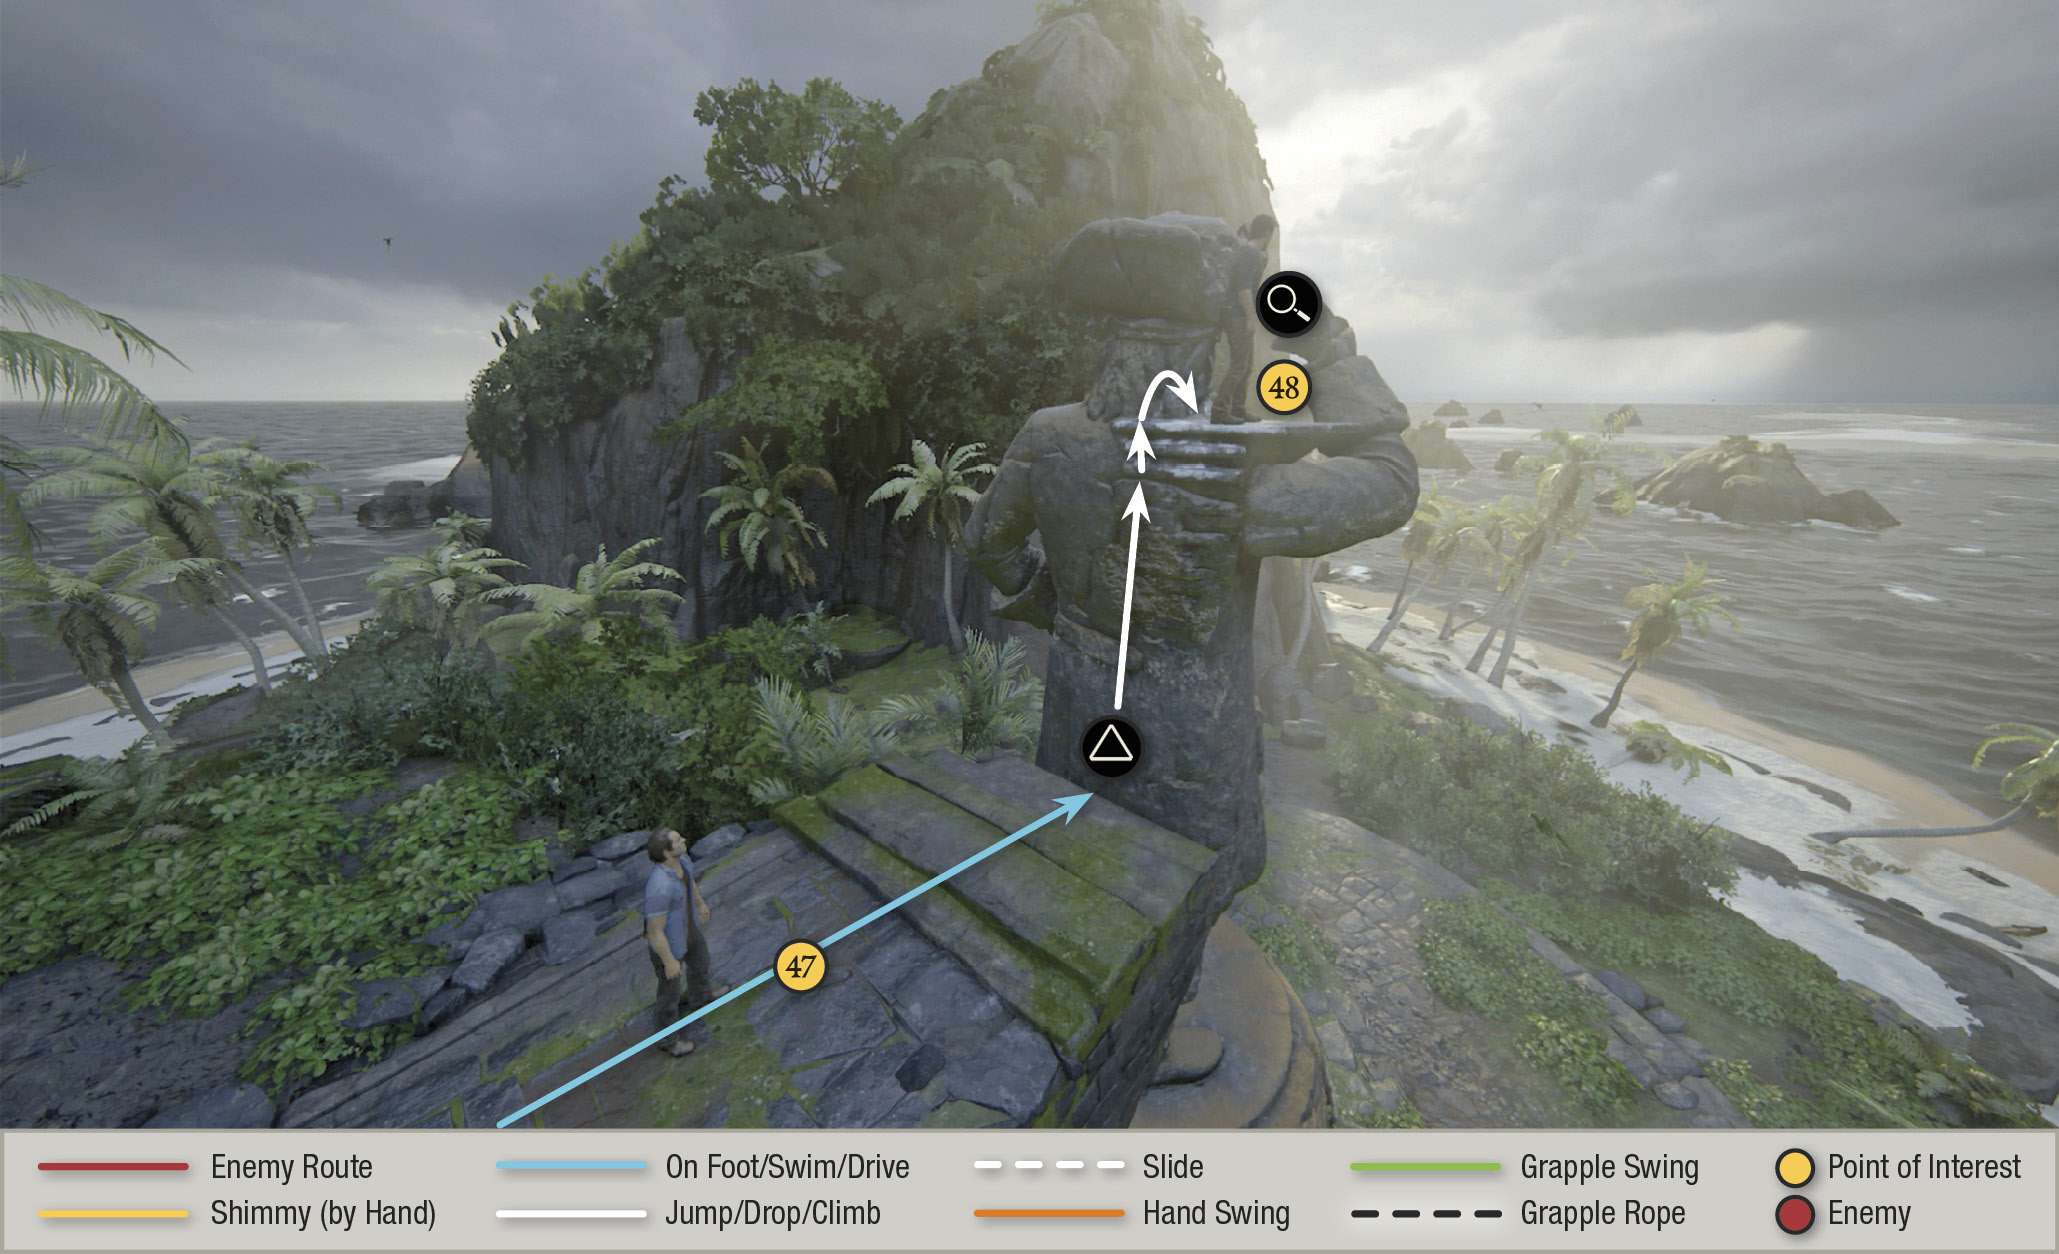
Drive the boat back to the first beach (46) and climb to the Avery statue’s base where Nathan can make an Optional Journal Entry. Then continue up the stairs to the platform behind the statue (47).
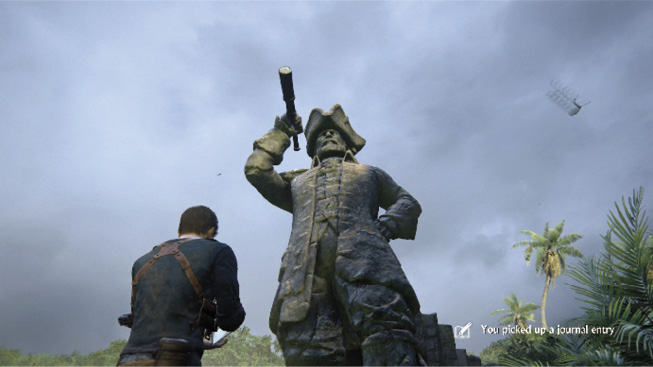
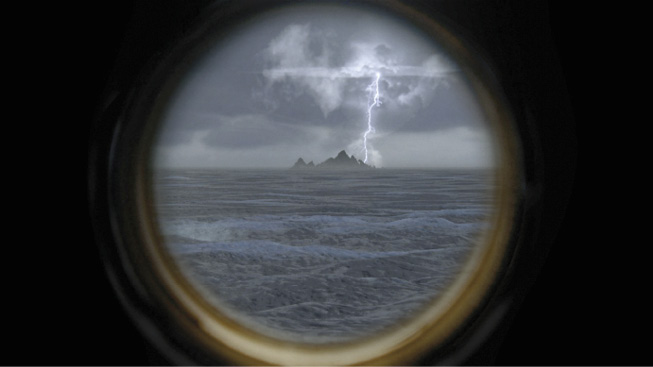
Approach the statue and press to trigger Sam’s boost of Nathan. Climb onto Avery’s shoulder (48) and examine the telescope to see your next destination across the water. This triggers a cutscene: As a nasty squall rolls over the island, the brothers spot an approaching flotilla of Shoreline gunboats. Time to flee!
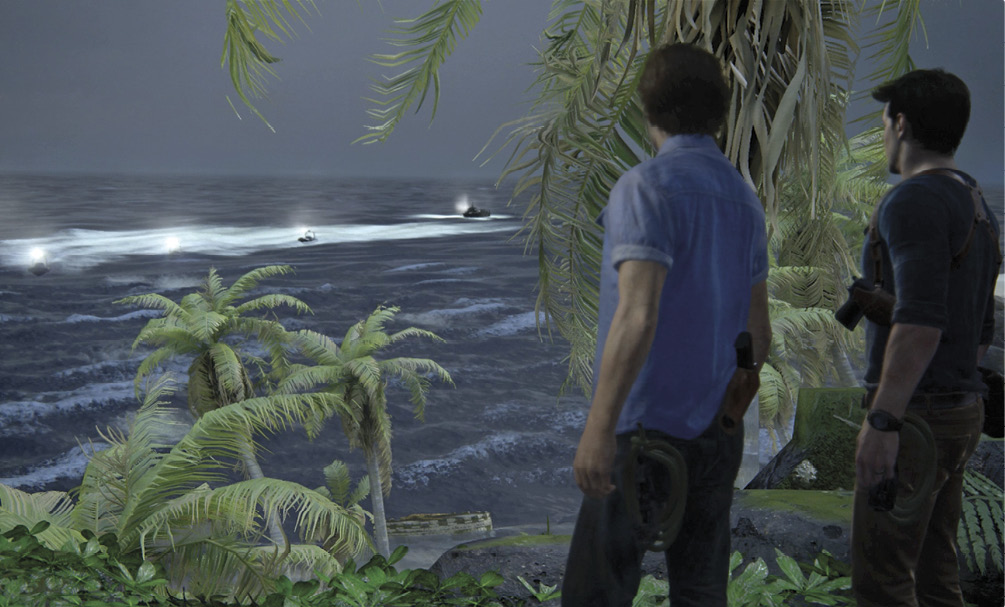
Here you see flashbacks of the nautical skirmish that opened the game. This time, of course, you understand the full context of the desperate battle in the storm. Refer to our Prologue chapter if you need a refresher on the events.