Uncharted 4: A Thief's End Guide Story Walkthrough
Chapter 17: For Better or Worse
Nathan finishes telling Elena the story of the brothers Drake as she helps him recover. It may not be everything…but as Elena says, “it’s a lot.” After a radio check-in with Sully in his seaplane, the couple gears up to rescue Sam from the mercenary clutches of Rafe and Nadine.
CollectiblesTreasures: 6 Chapter Specific Trophy: “Just Floor It” Optional Conversations: 6 Optional Journal Notes: 1 Optional Journal Entries: 2 |
Get to the 4x4
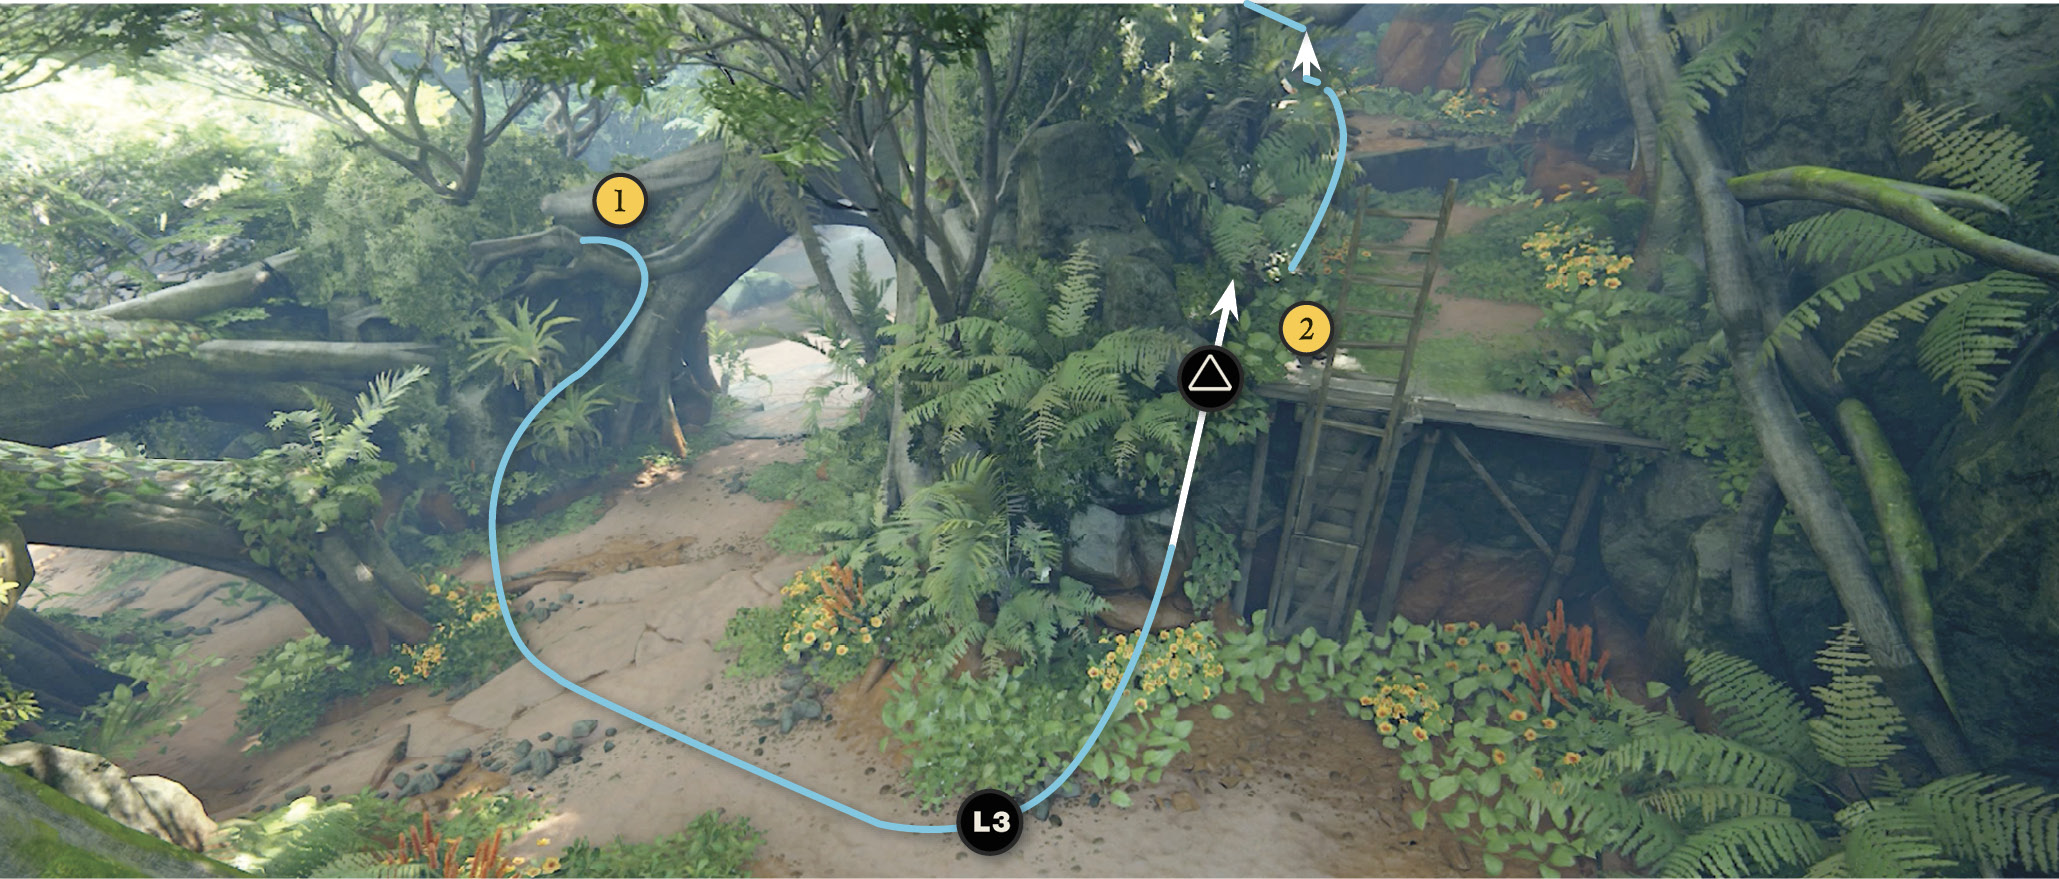
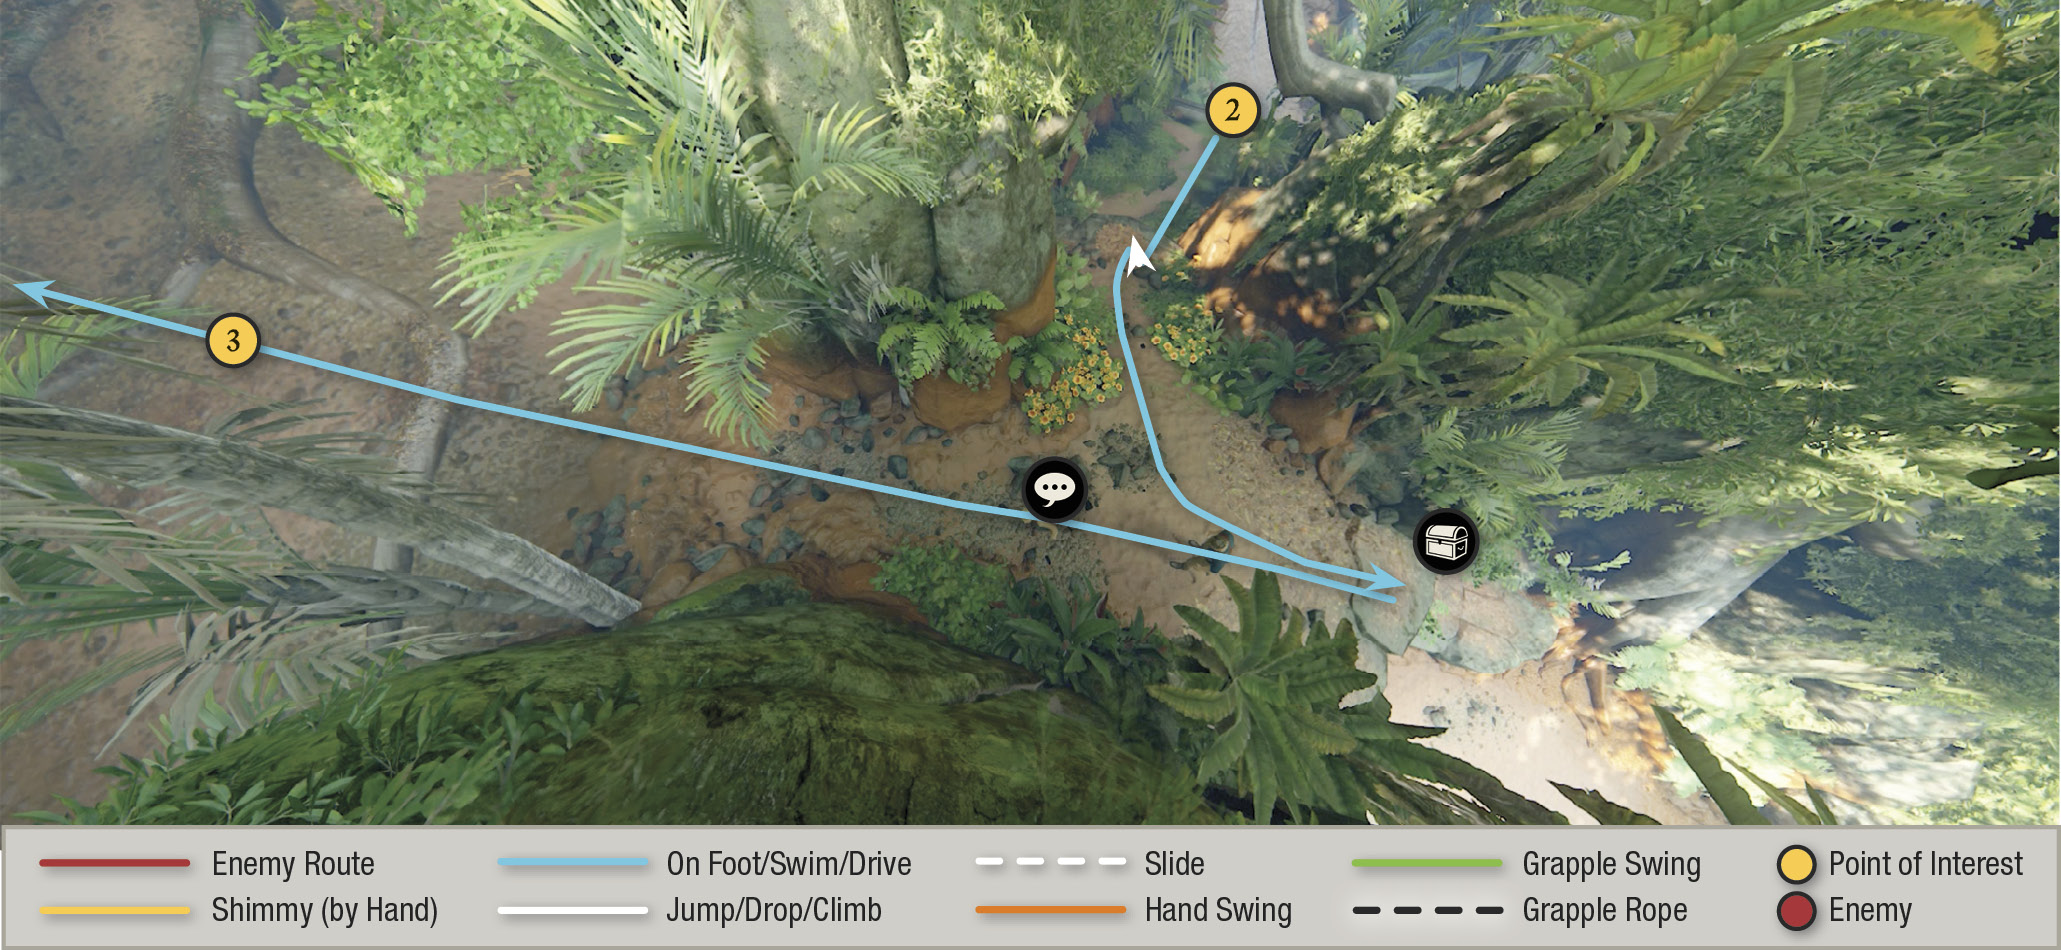
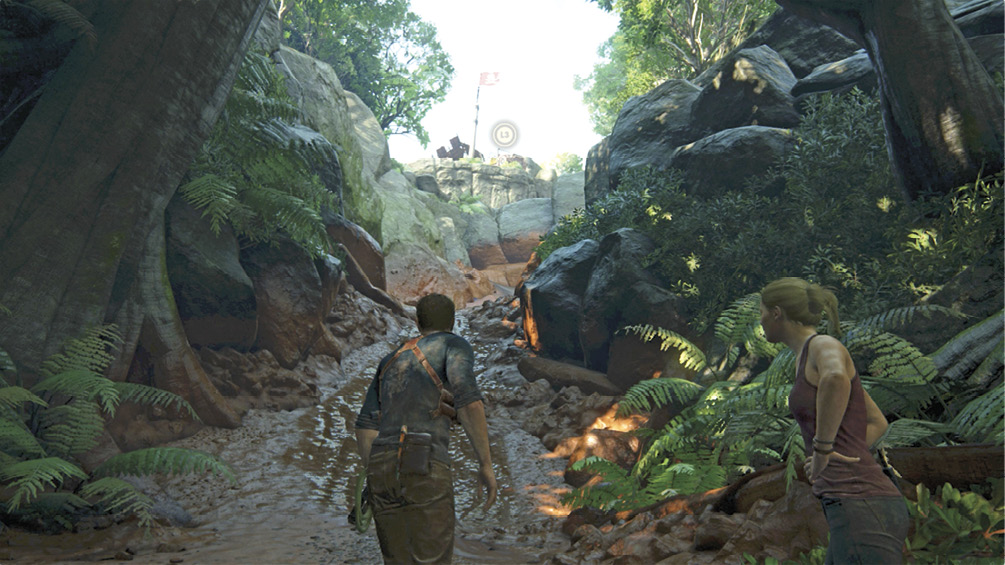
From the start (1), move across the river and climb the hill to the raised ladder (2). Press L3 to look at the 4x4 waiting for you, and then boost Elena up the ladder; she kicks it down for you. Climb up and follow the narrow path to a small clearing where an Optional Conversation, “Have You Been Here Long” can be had with Elena. To the left is a treasure near the edge of the hill.
 Mughal Flared Vase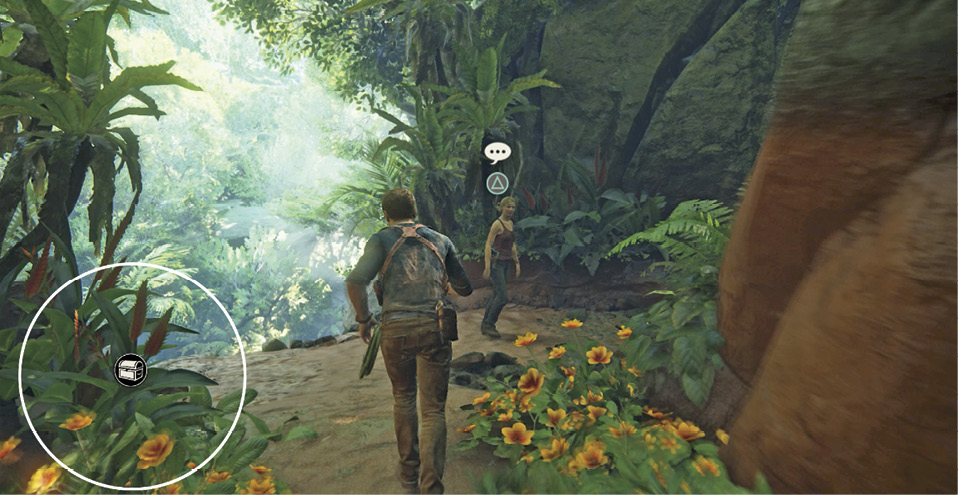 After you climb the ladder, head uphill and turn left where the first Optional Conversation with Elena is initiated. The Mughal Flared Vase is at the small falls’ edge. |
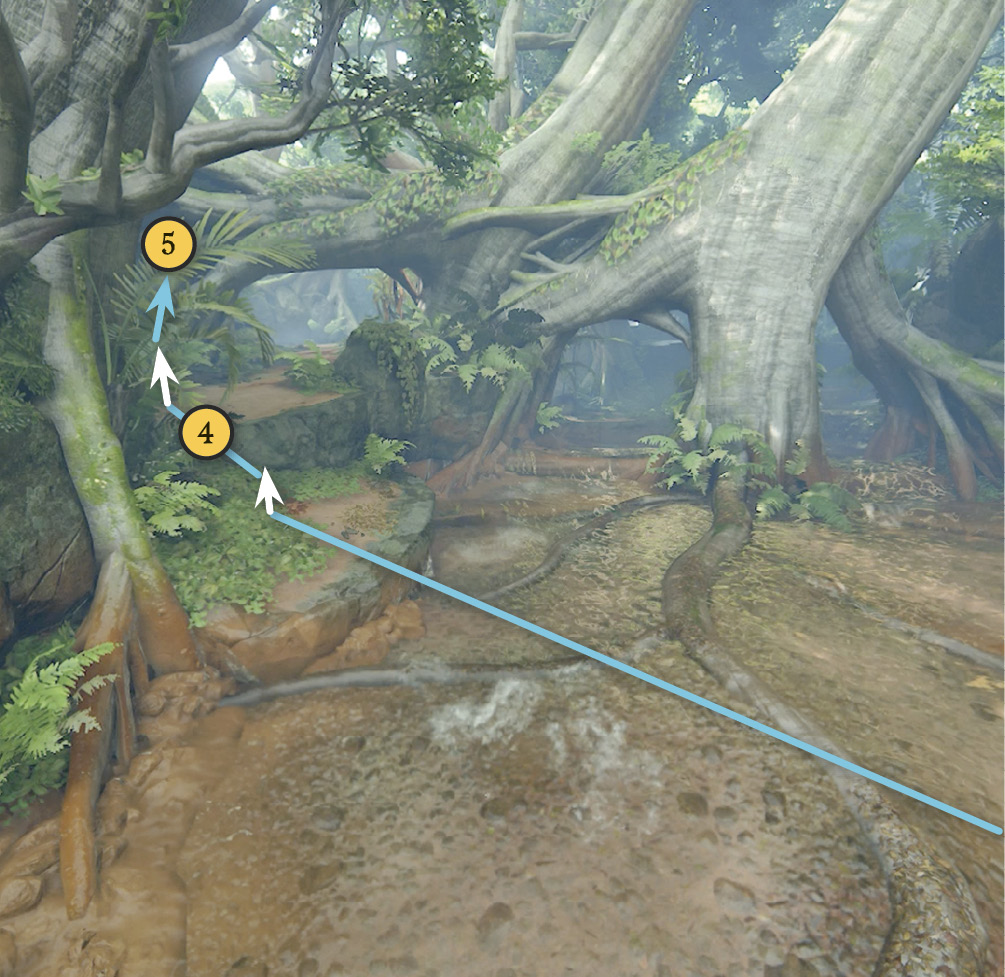
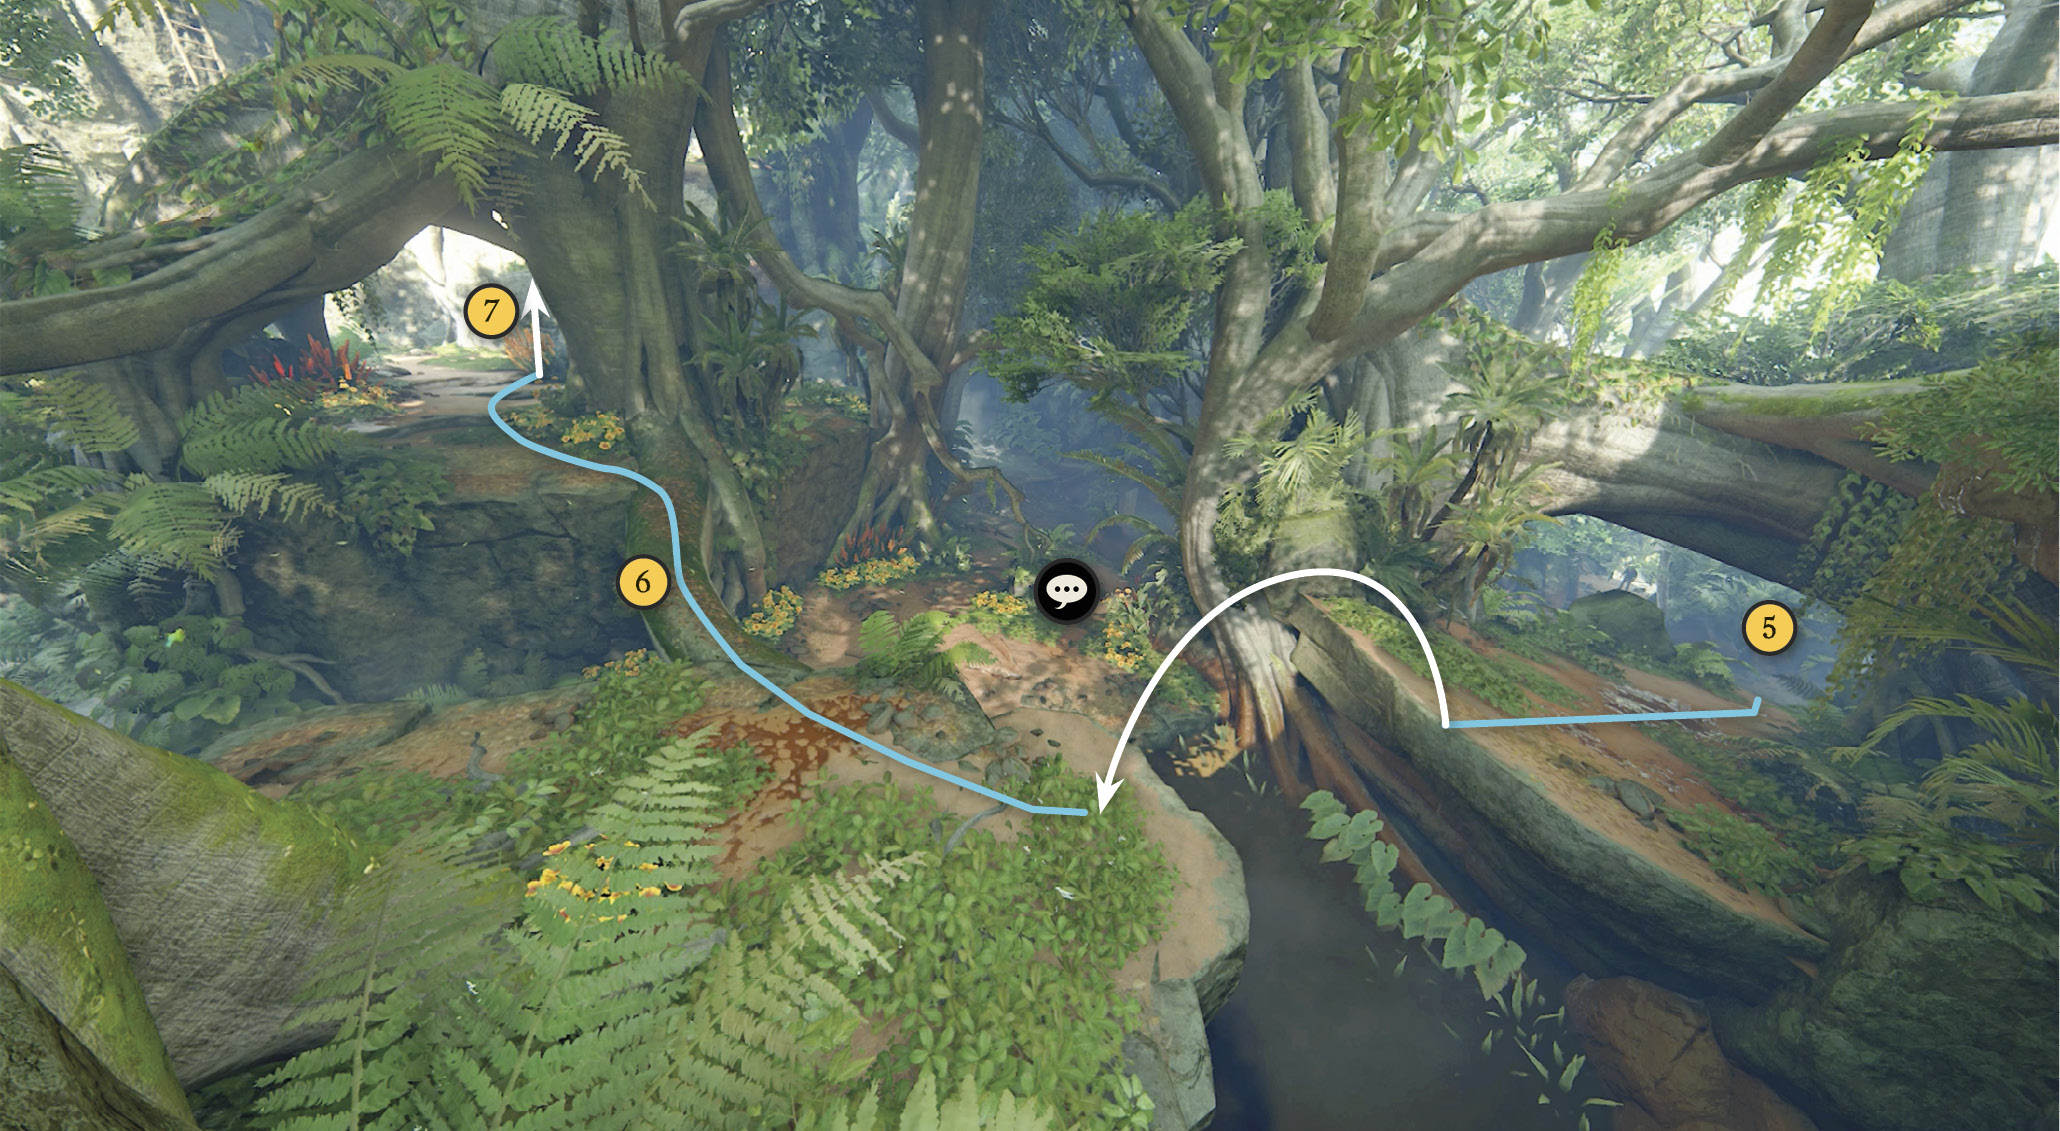
Proceed across the shallow stream, over big roots (3), and up the red clay ledges (4) on the opposite bank. Elena will take the next path to the right. Go underneath the tree root arch (5) on the ledge.
Optional Routes
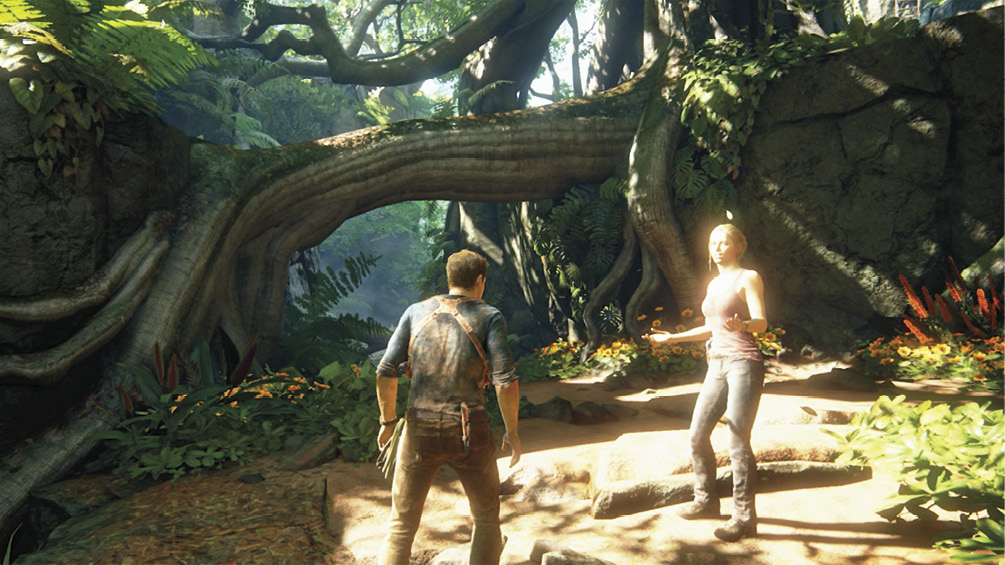
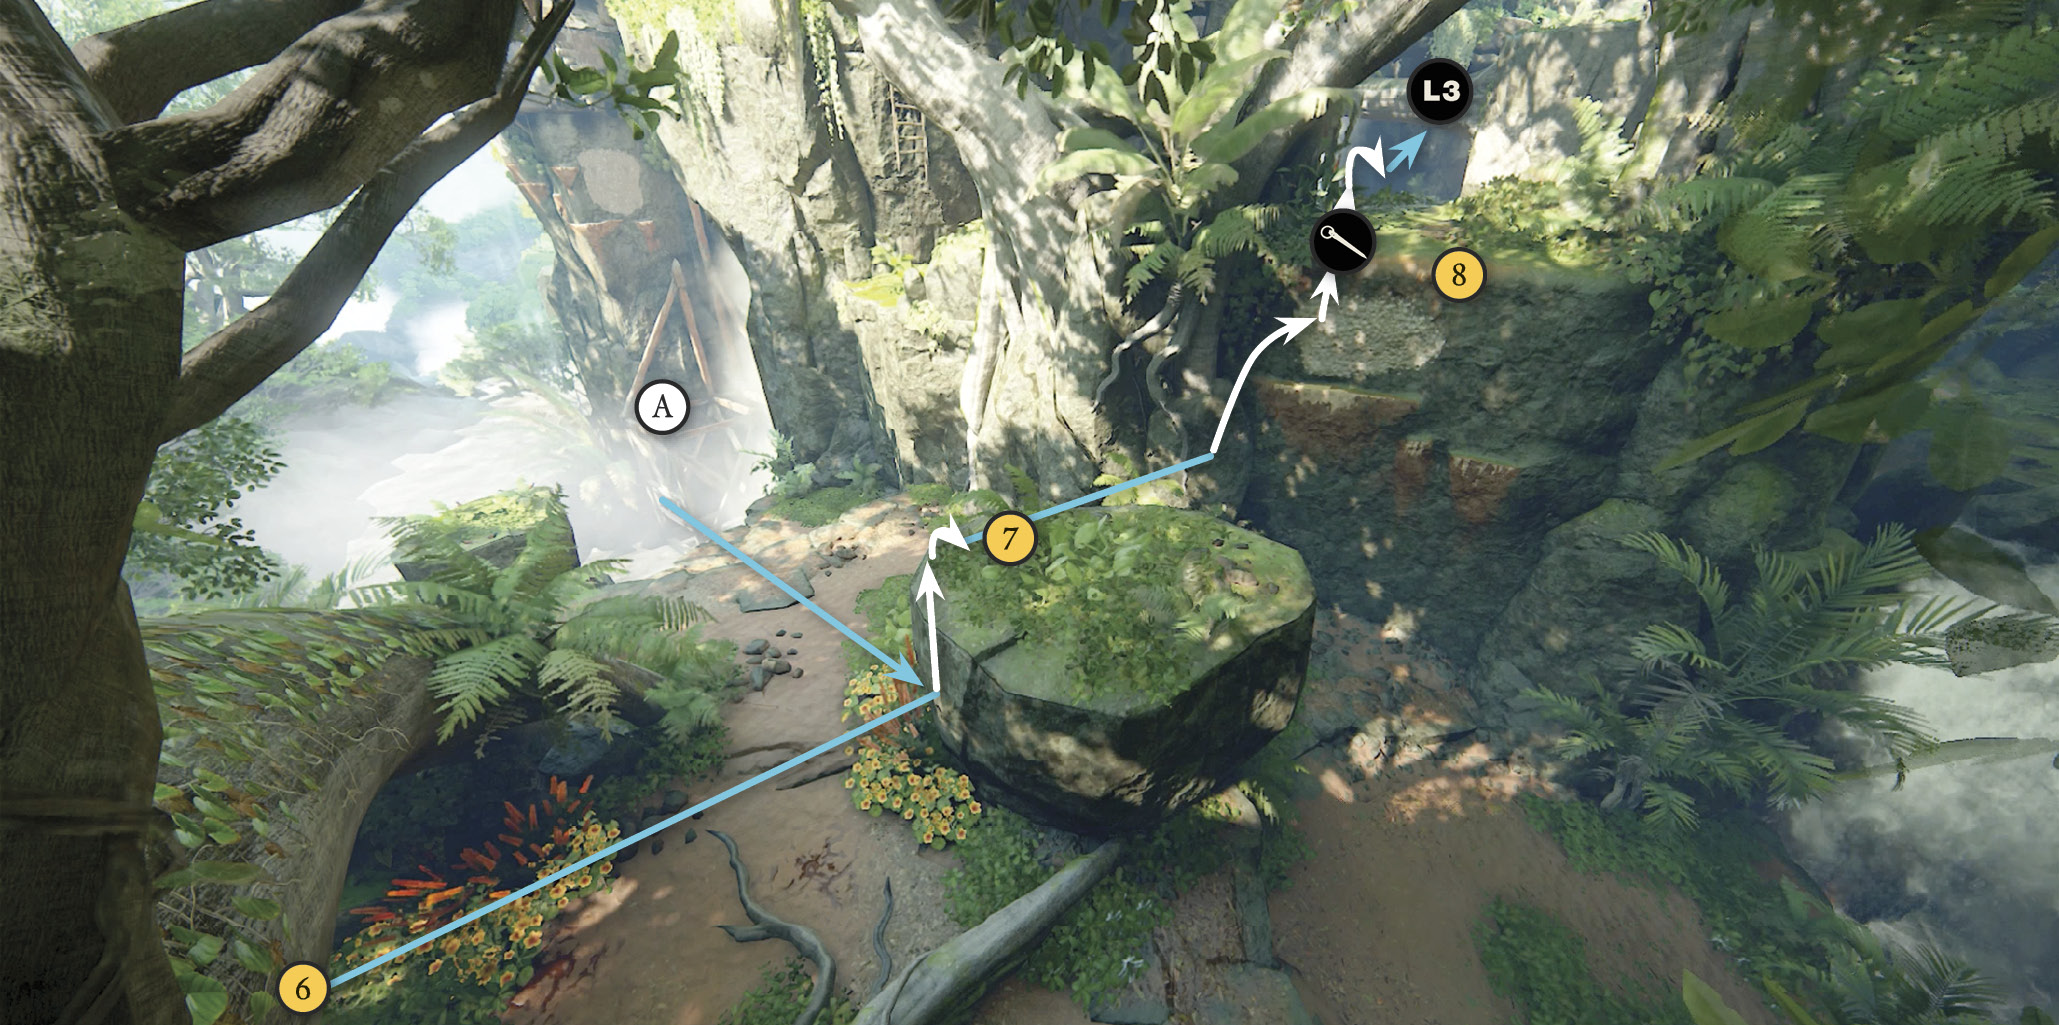
After passing under the tree root arch and reaching a gap, turn and look to the path on your right. You’ll see Elena waiting for you to talk to her. This is the Optional Conversation, “Did Sully Fill You In.” If you are on a speedrun, ignore this and keep truckin’ along our mapped route. If you jump down to talk to her, there is an alternate (longer) path you can take by moving under the root bridge (6), passing the view of the elevator (A) on your left (which the couple comments on if you press L3) and then turning right to continue up the ledges to reach the rock terrace (7).
Back on Track
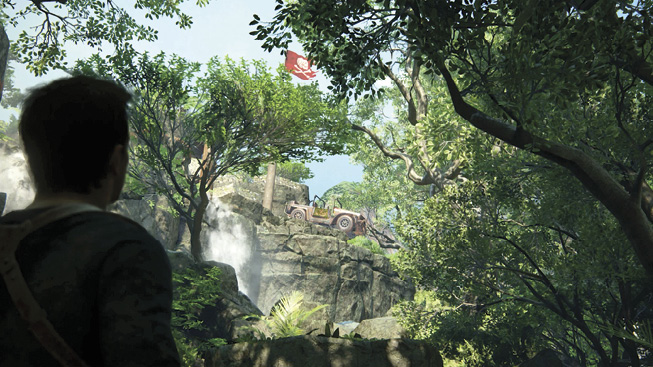
If you ignore the second Optional Conversation, jump over the gap and walk across the root bridge (6). Climb onto the rock terrace (7) and jump across to the far wall. Use the piton on the porous surface (8) to climb the ledge. Press L3 to catch a closer view of Elena’s Shoreline 4x4.
Get Up the Tower
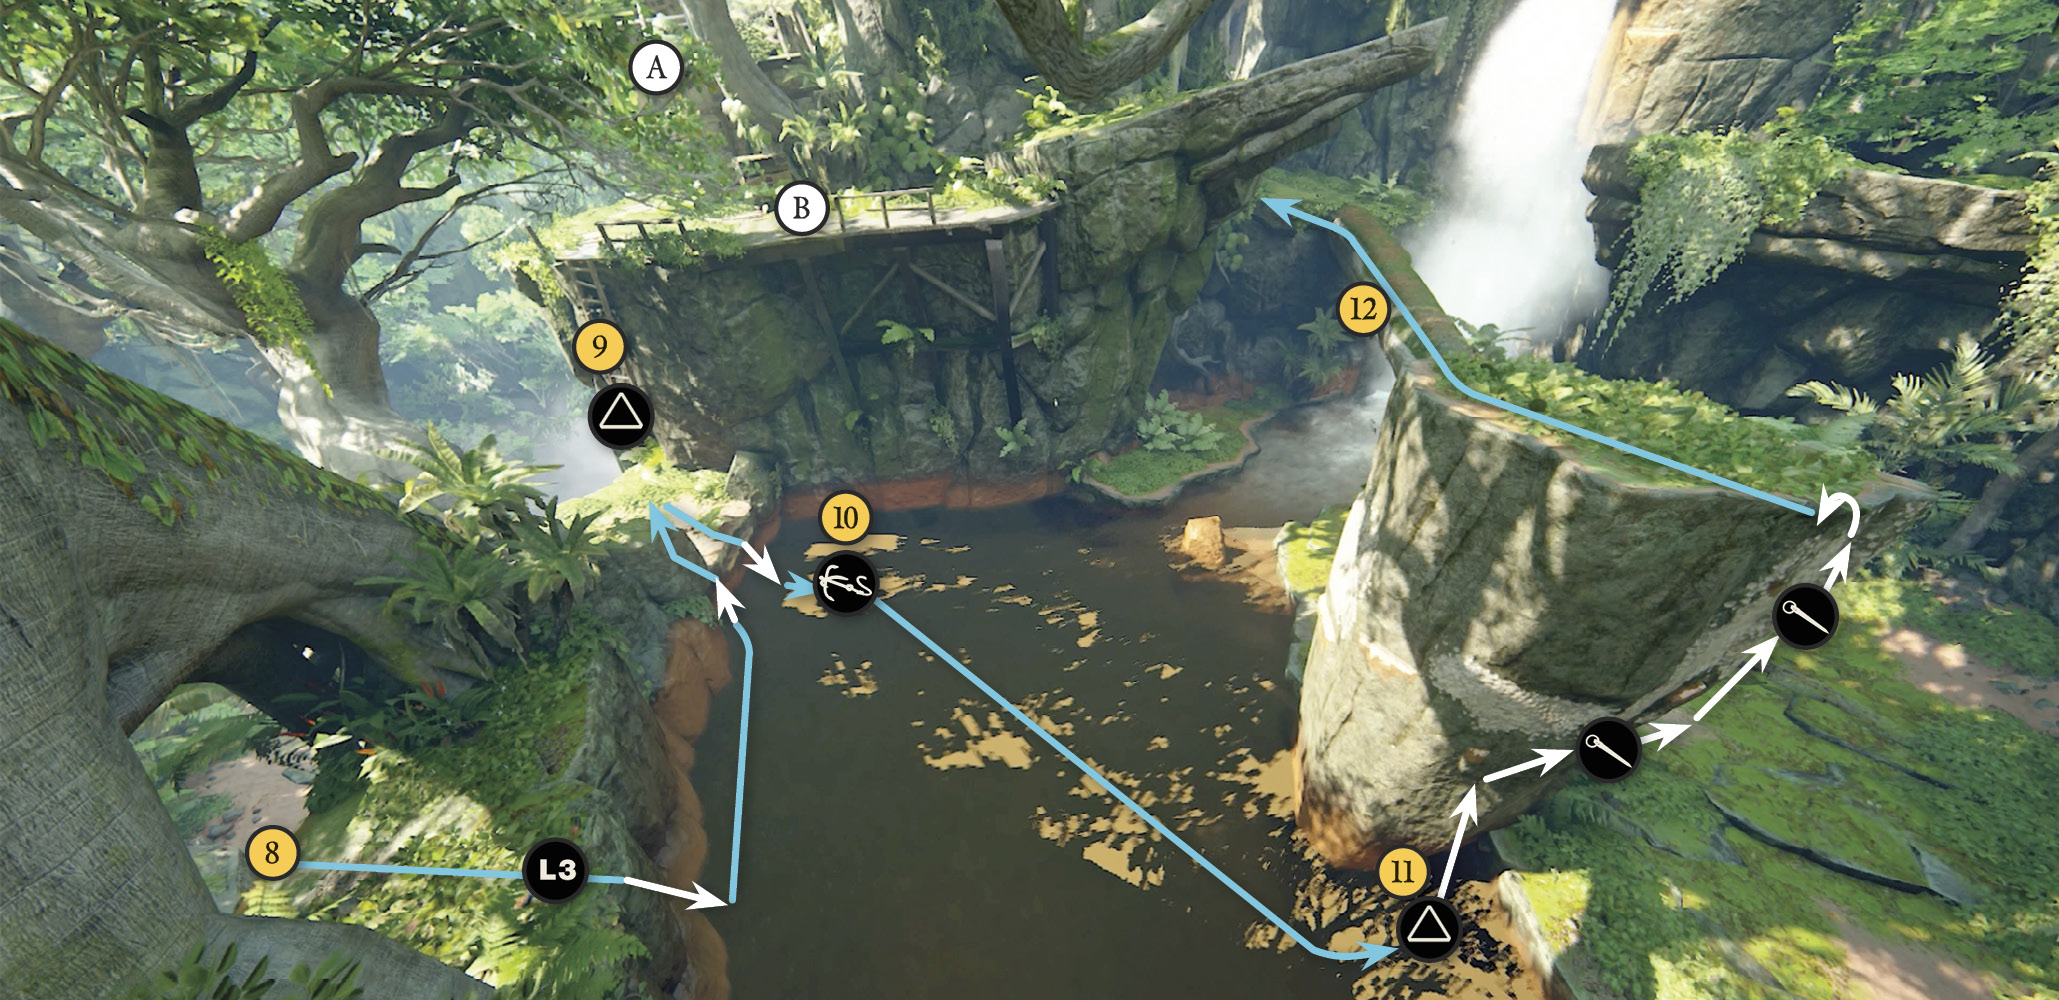
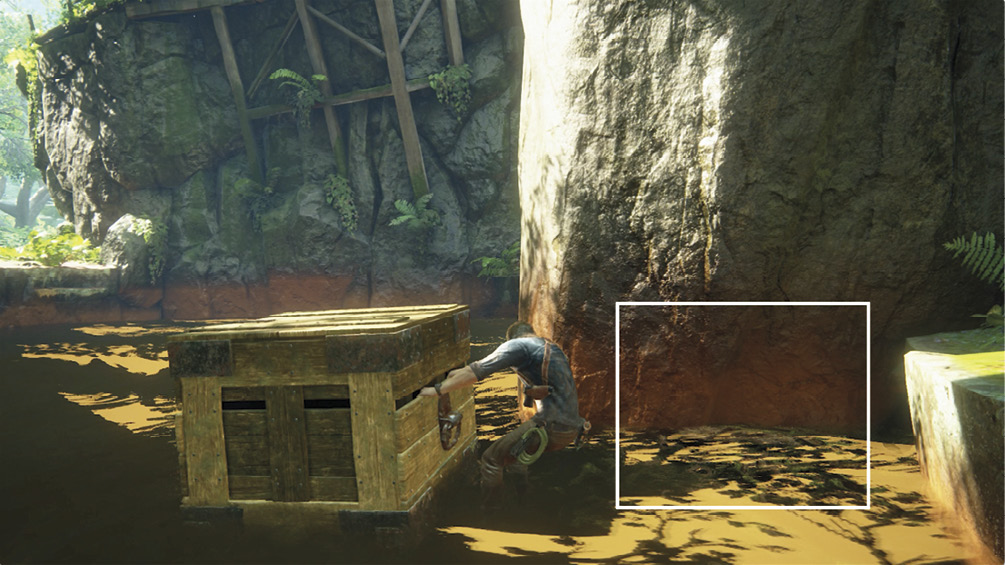
Drop down into the river. Swim over to the ledge and examine the broken ladder (9) to boost Elena up. She pushes the crate (B) over the ledge and it comes to rest (10) in the river. Attach your grapple hook to it. Move toward the rock pillar (11) and press L1 to pull the crate through the water into position at the pillar’s base. When the crate reaches ground you can grab it  and pull it into place under the handholds on the pillar. Then use the crate to climb up to the pillar, while using your piton on the pockmarked, porous patches. At the top, walk across the fallen tree trunk (12) and climb the ledge beyond.
Find and Use the Elevator
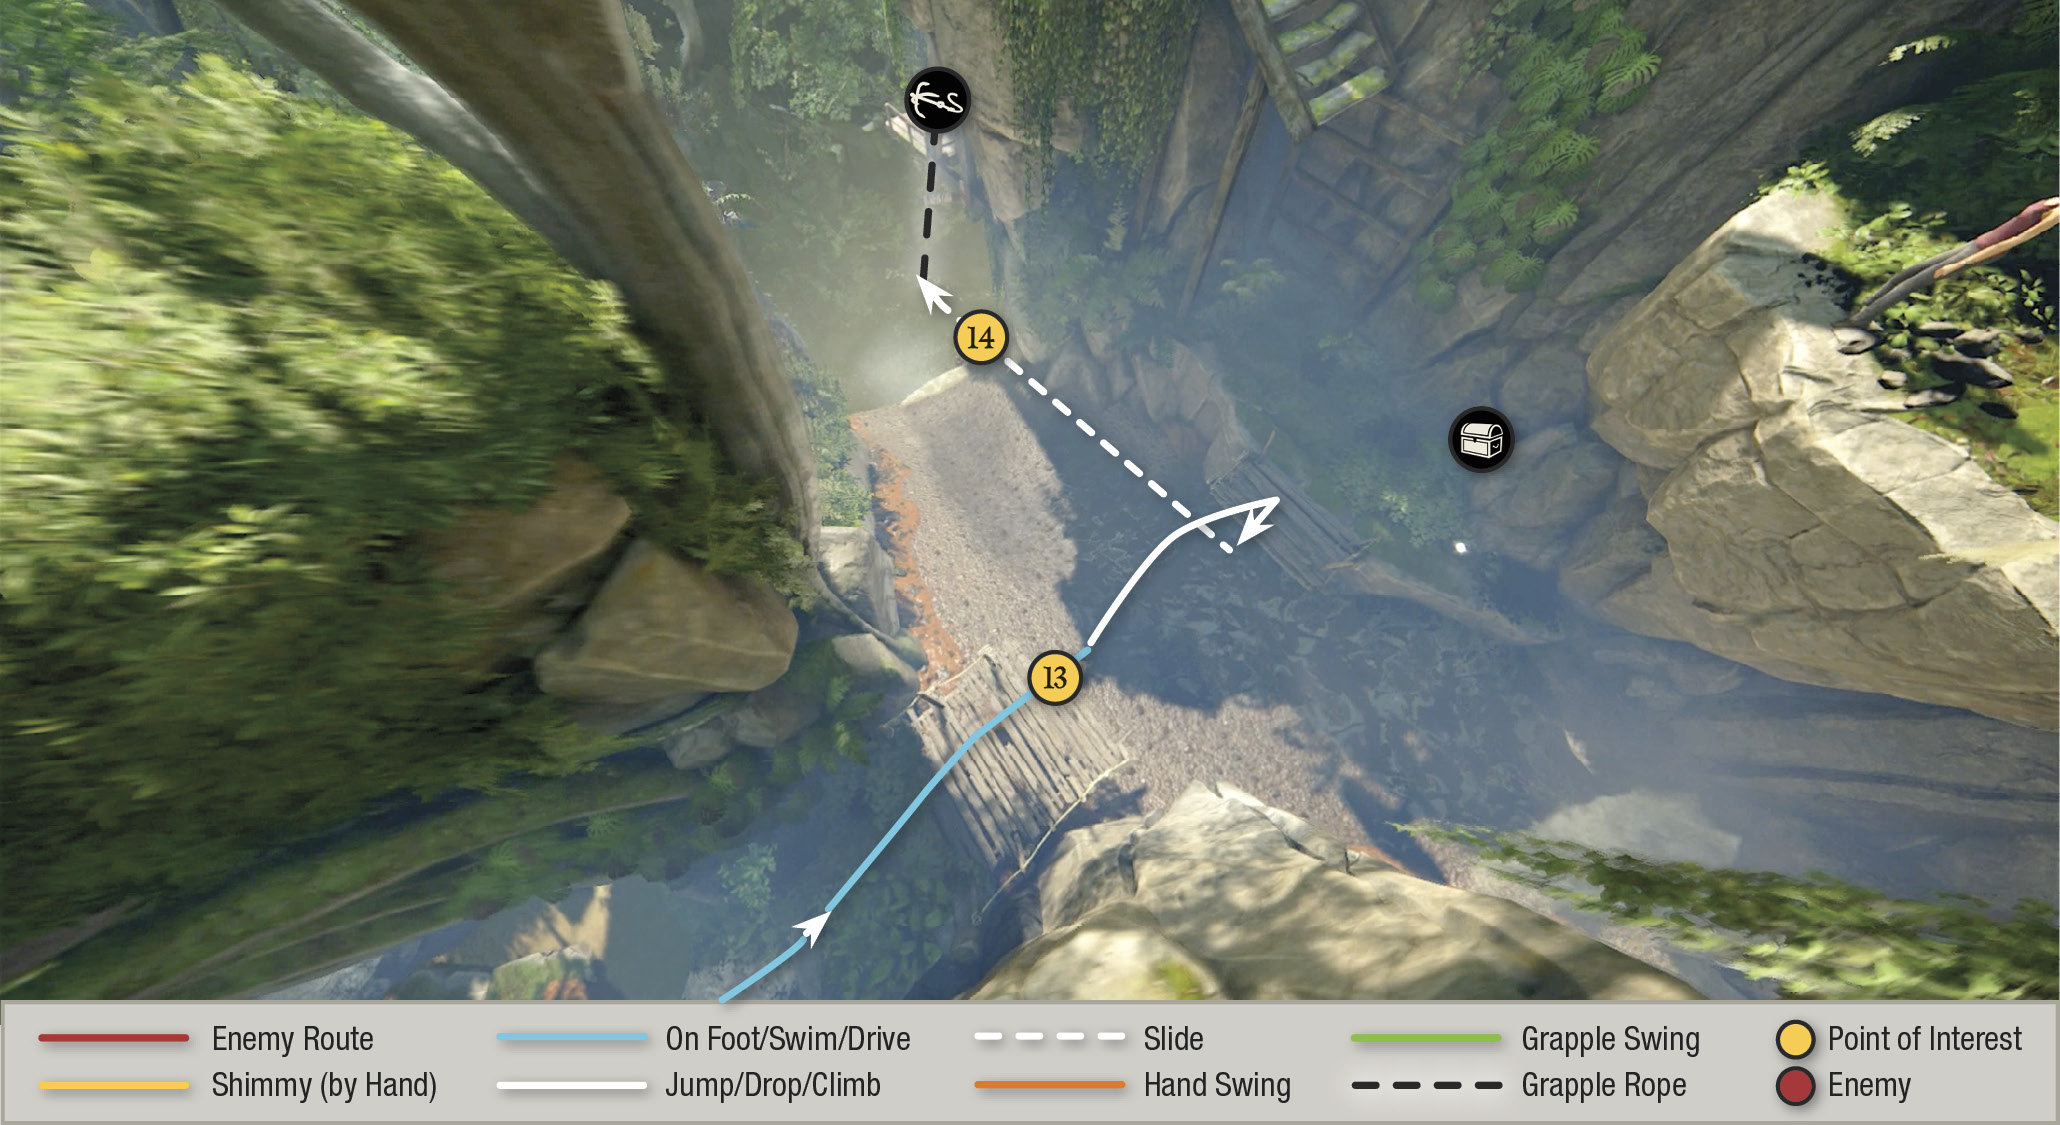
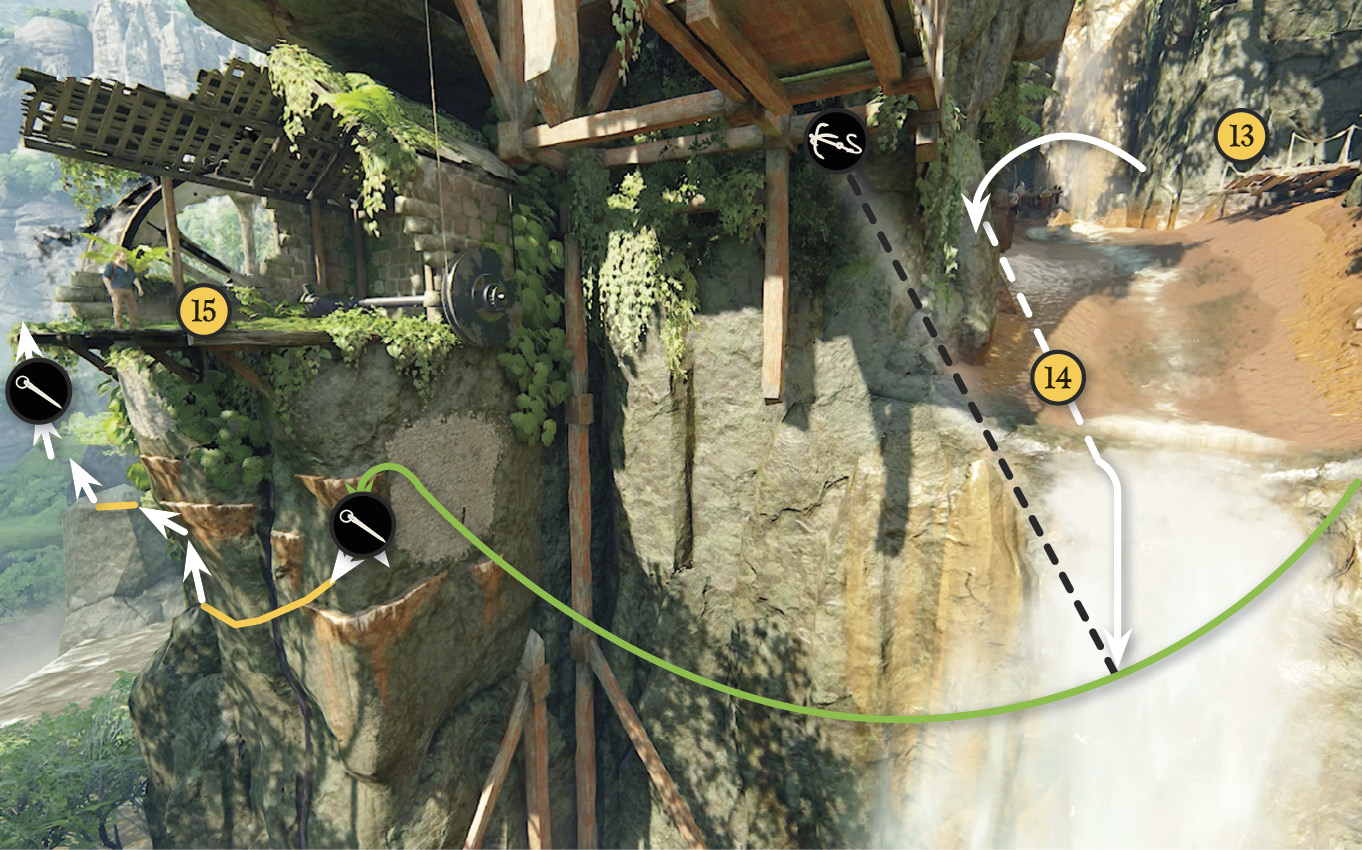
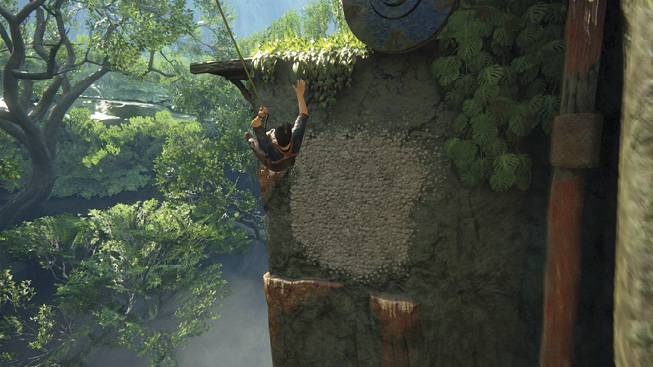
Approach the broken bridge (13) and get ready for a wild slide. (Note the treasure glowing on the opposite platform; you can’t reach it yet, but don’t forget it’s there.) When you try to hop across the bridge gap, the span collapses and Nathan slides downstream! (You can’t avoid this.) Just before the waterfall drop-off (14), fling your hook at the grapple point above. Swing around the rock face and leap for the handholds or the porous piton section on the cliff under the waterwheel mechanism. Shimmy left around the corner and climb leftward then upward (using your piton) to the platform (15).
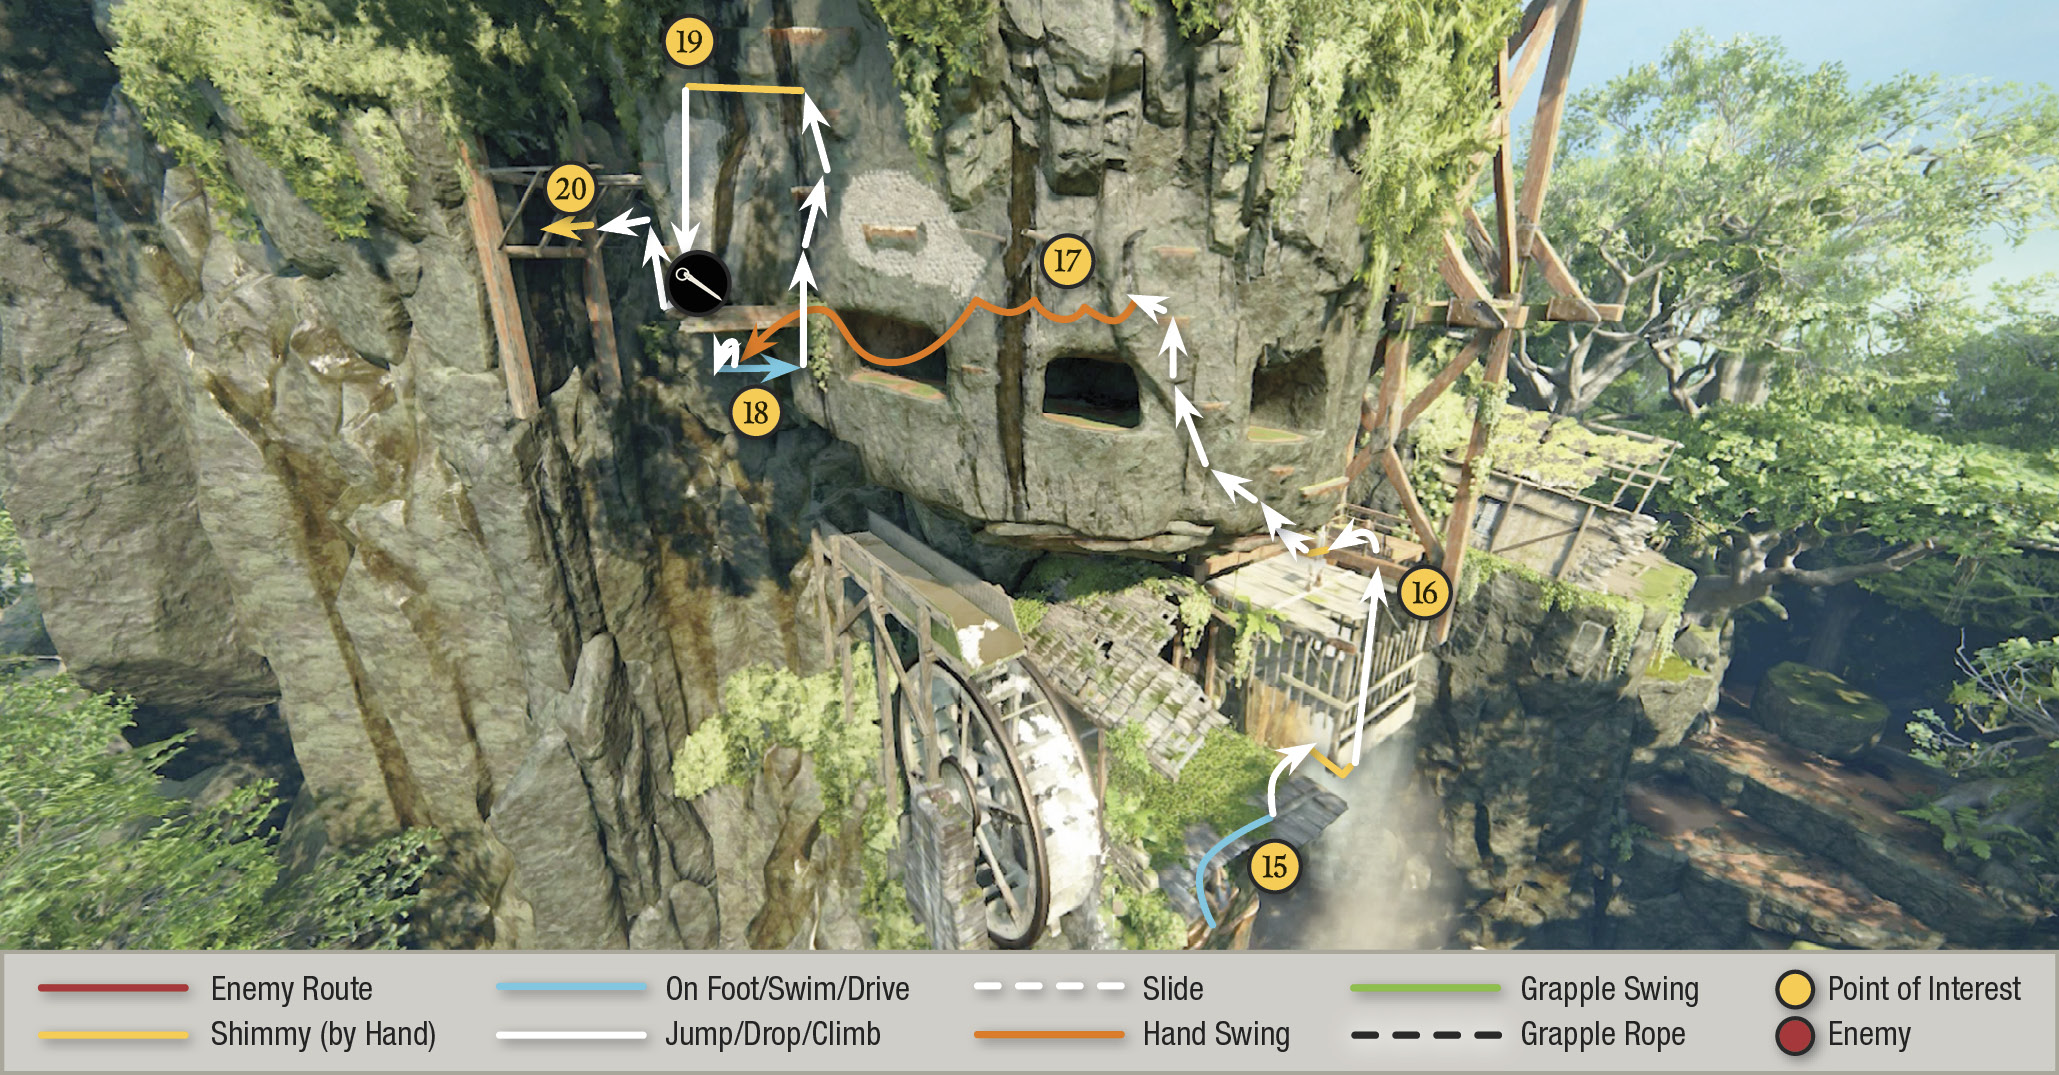
Elena lowers the elevator platform to your level. Hop to the horizontal beam, then shimmy around the corner to the right; Elena raises the elevator partway but it gets stuck (16). Shimmy to the left, jump to the cliff, and use the handholds to climb leftward diagonally to the series of poles (17). Hand-walk across them and swing to the big mossy beam (18). Pull up and walk on the beam toward the canyon wall. Climb up the wall and shimmy left to the end of the ledge (19) where you hang directly above a long section of soft pockmarked rock. Drop from the ledge but quickly hit  to stab the porous wall with your piton.
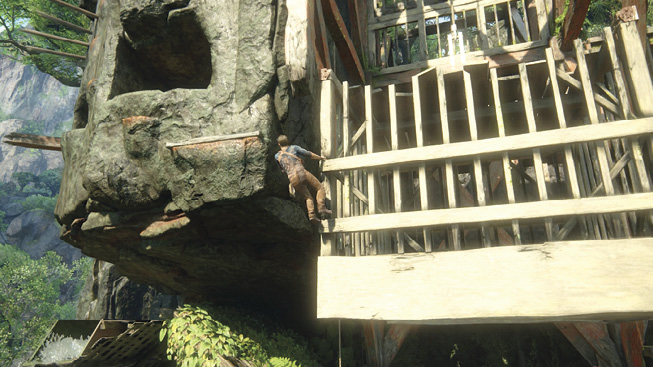
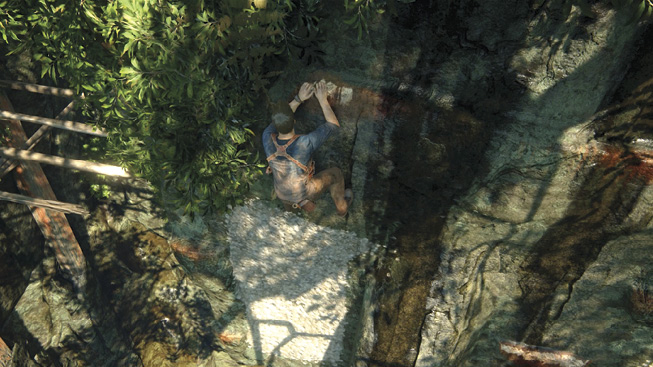
Use the handholds to the left to reach the broken horizontal strut (20) jutting from the frame. When you grab hold, it starts to sag…and suddenly two Shoreline mercenaries appear on the next platform! While hanging, gun down the goon on the left while Elena swiftly KOs the goon on the right. Then swing and leap to the clearing (21).
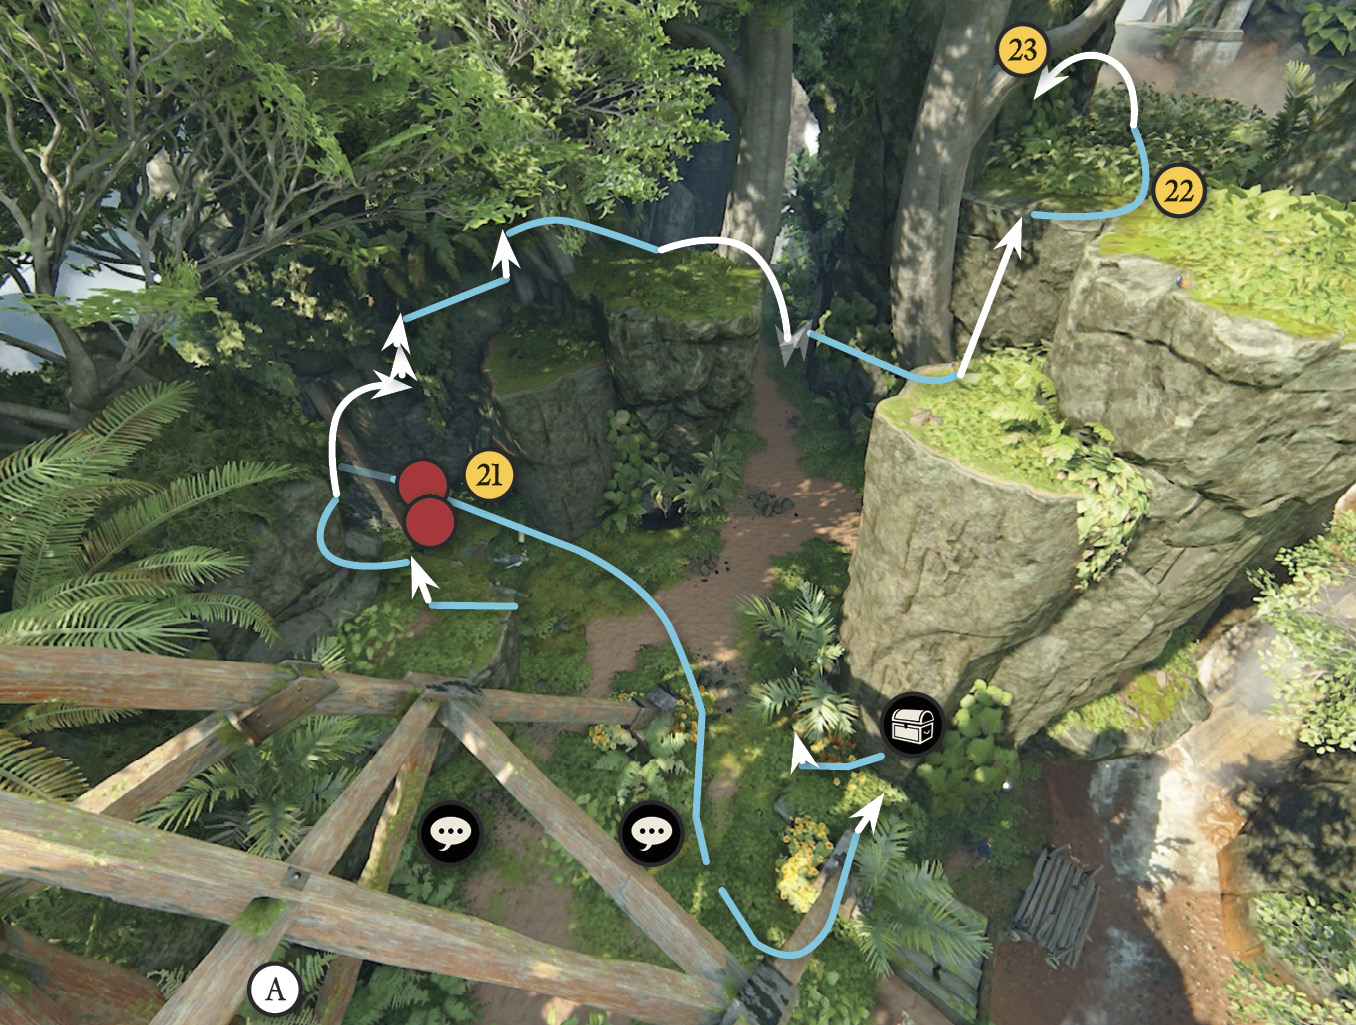
Now you can go get that treasure you had to bypass earlier when the bridge collapsed. Use the large ladder and broken bridge to return to higher ground. Approach the elevator (A) to the left. Two consecutive Optional Conversations occur here: “Quite a Feat” and “At Least I Didn’t Lie Again.”
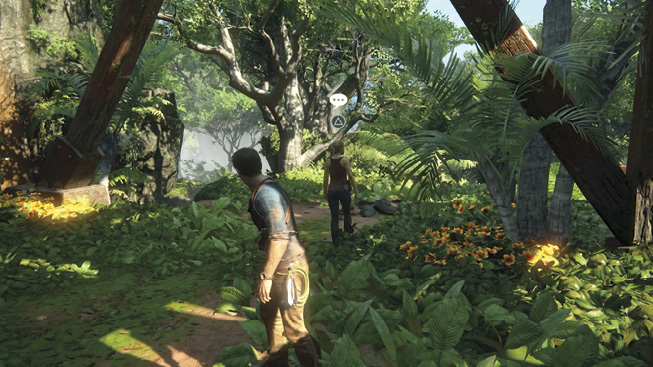
After conversing with your wife, return and follow our climbing route to work your way to the terraces (22) and then jump across into the tall camouflaging foliage (23) overlooking the river. From here, you can see Elena’s 4x4…and the Shoreline squad camped on the other side!
 Mughal Hinged Box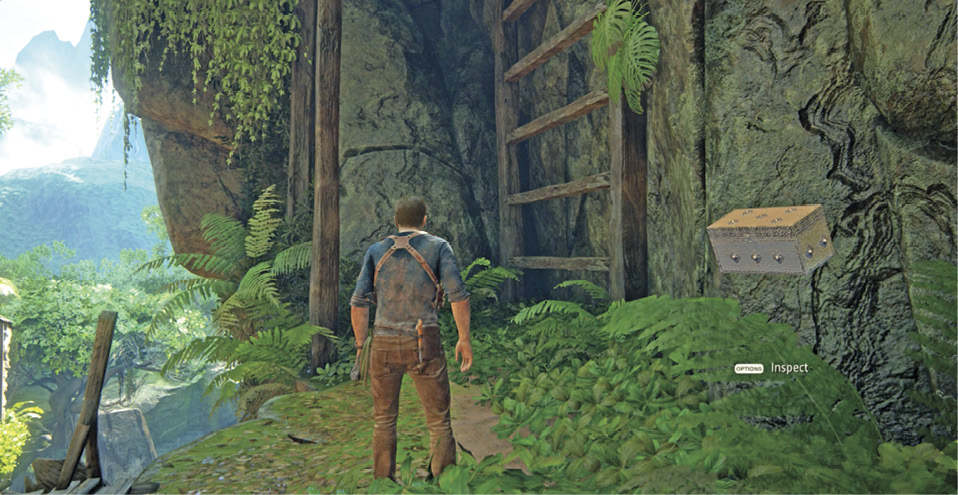 After you take out the first two guards, move directly across the clearing and drop onto the riverside ledge below to snag the Mughal Hinged Box. Climb the wooden frame and broken bridge to get back up to the clearing near the elevator. |
Kill ’Em All
Optional Battle Strategy
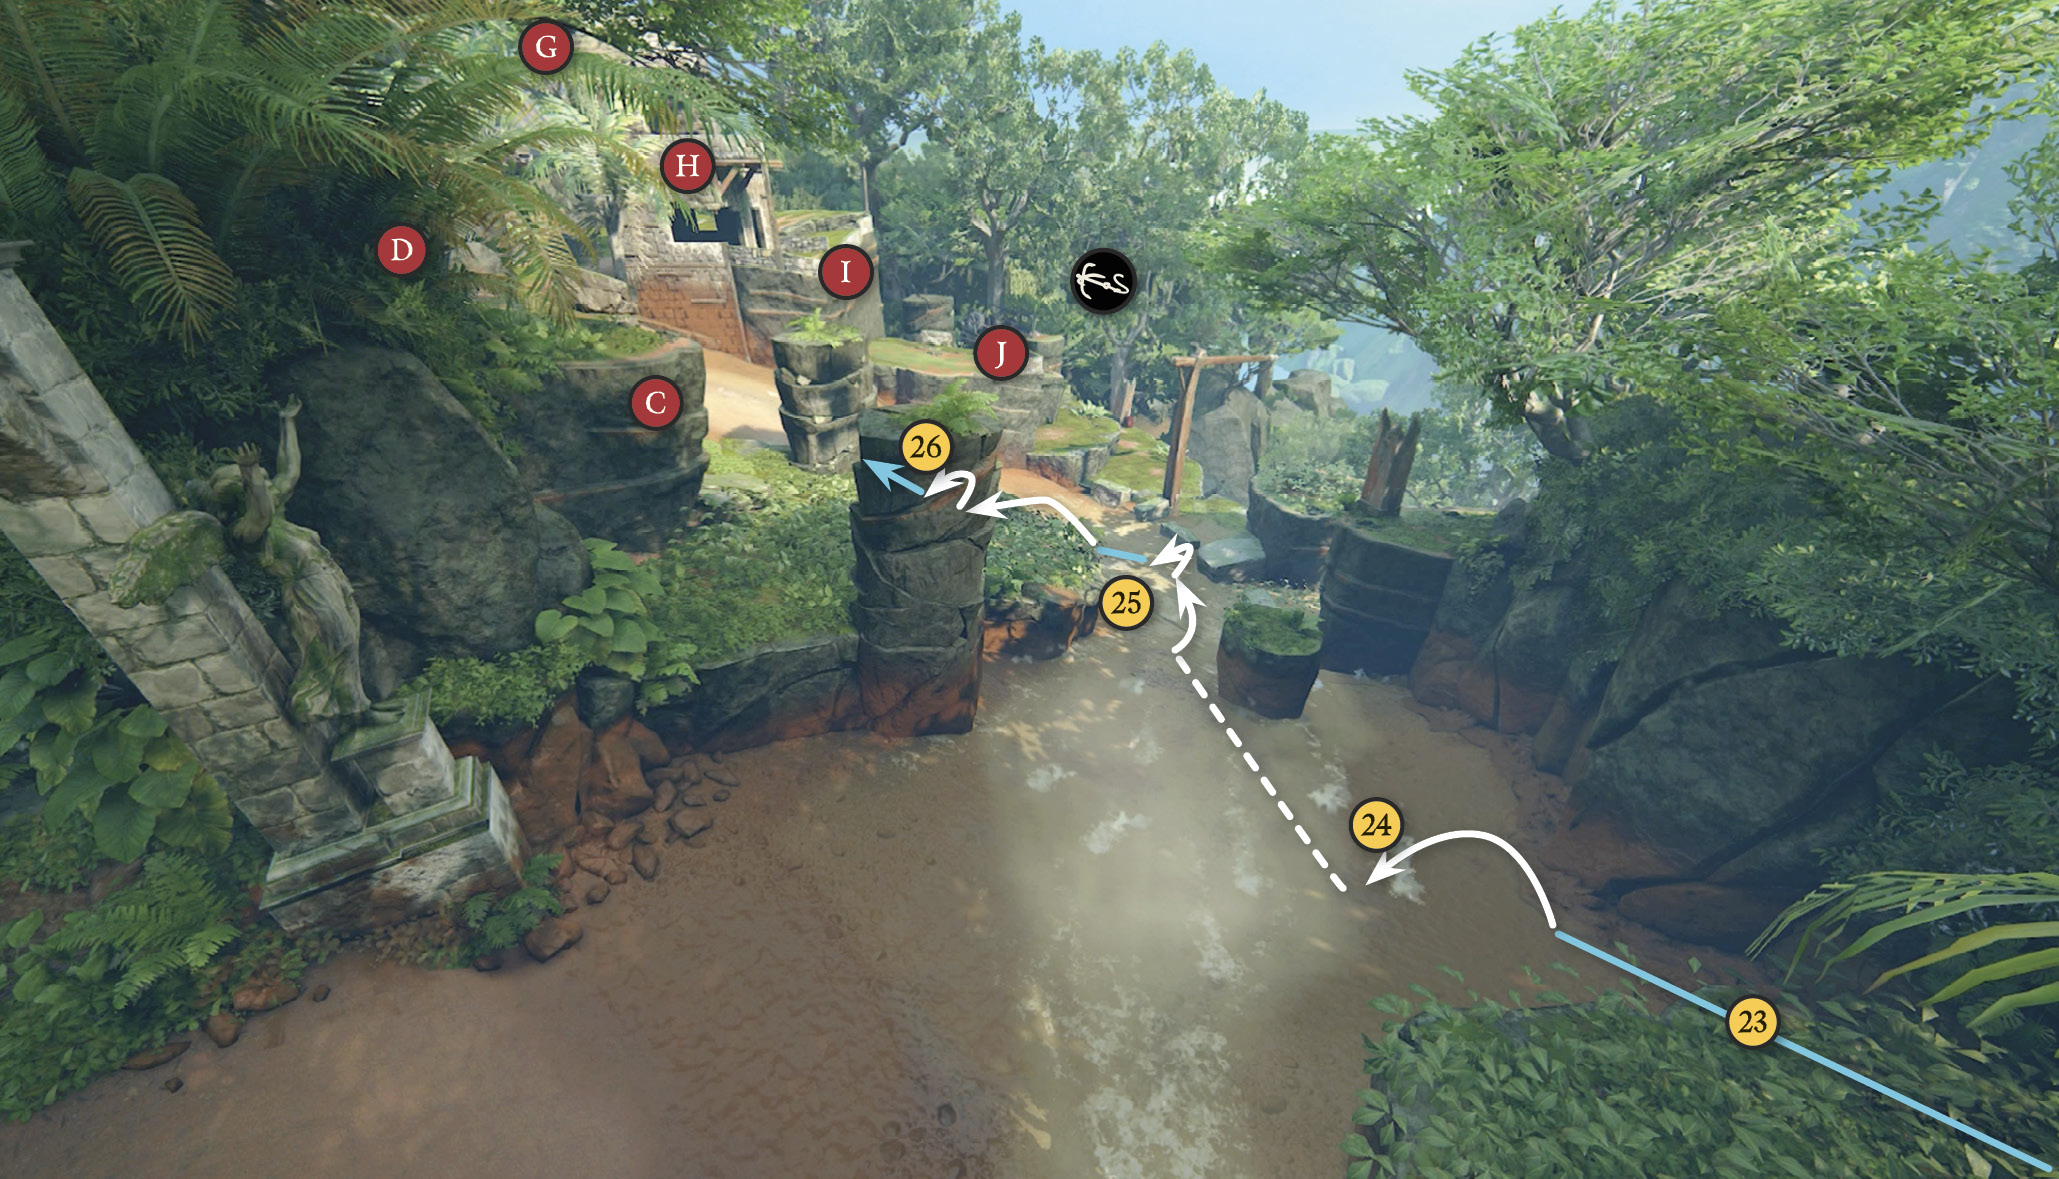
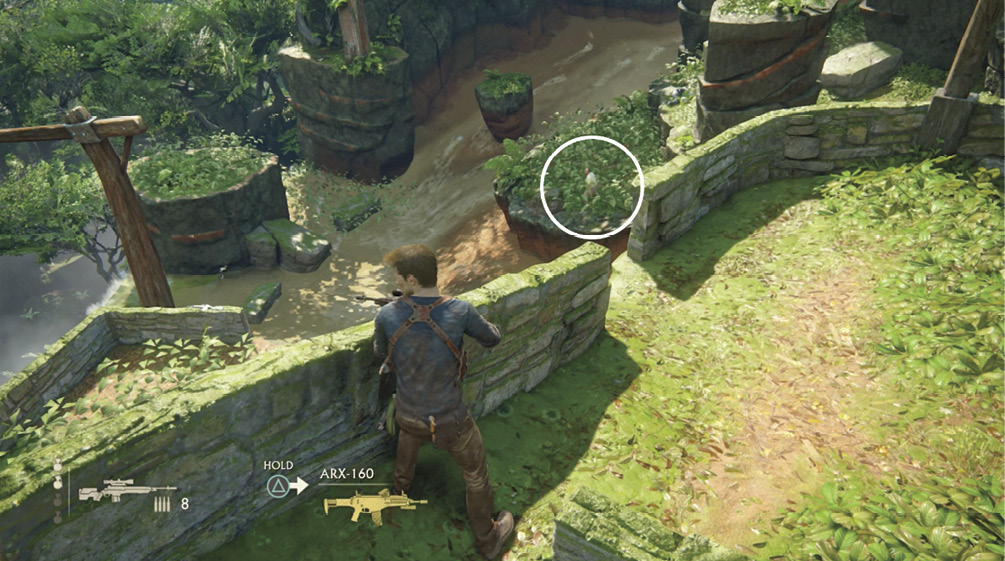
You need that 4x4, but it’s well guarded. Note the sniper (G) with laser scope atop the tower by the flag. He has the longest range of sight of all the Shoreline soldiers. (When playing on Crushing, watch out for a Turret near location (G).) The troopers are deployed on multiple levels so you can eliminate them one by one with stealth takedowns, if you want. Here’s a stealth path to the sniper.
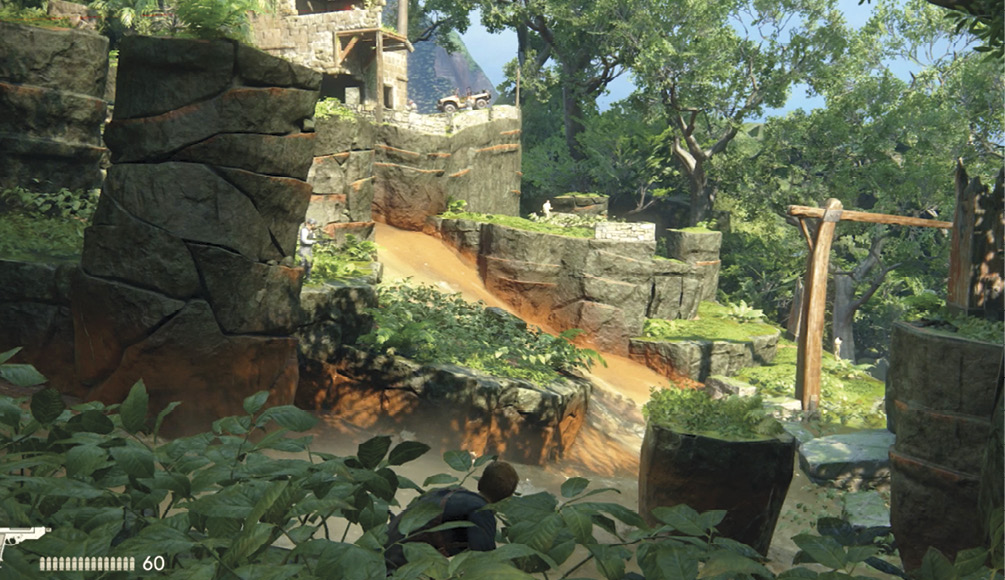
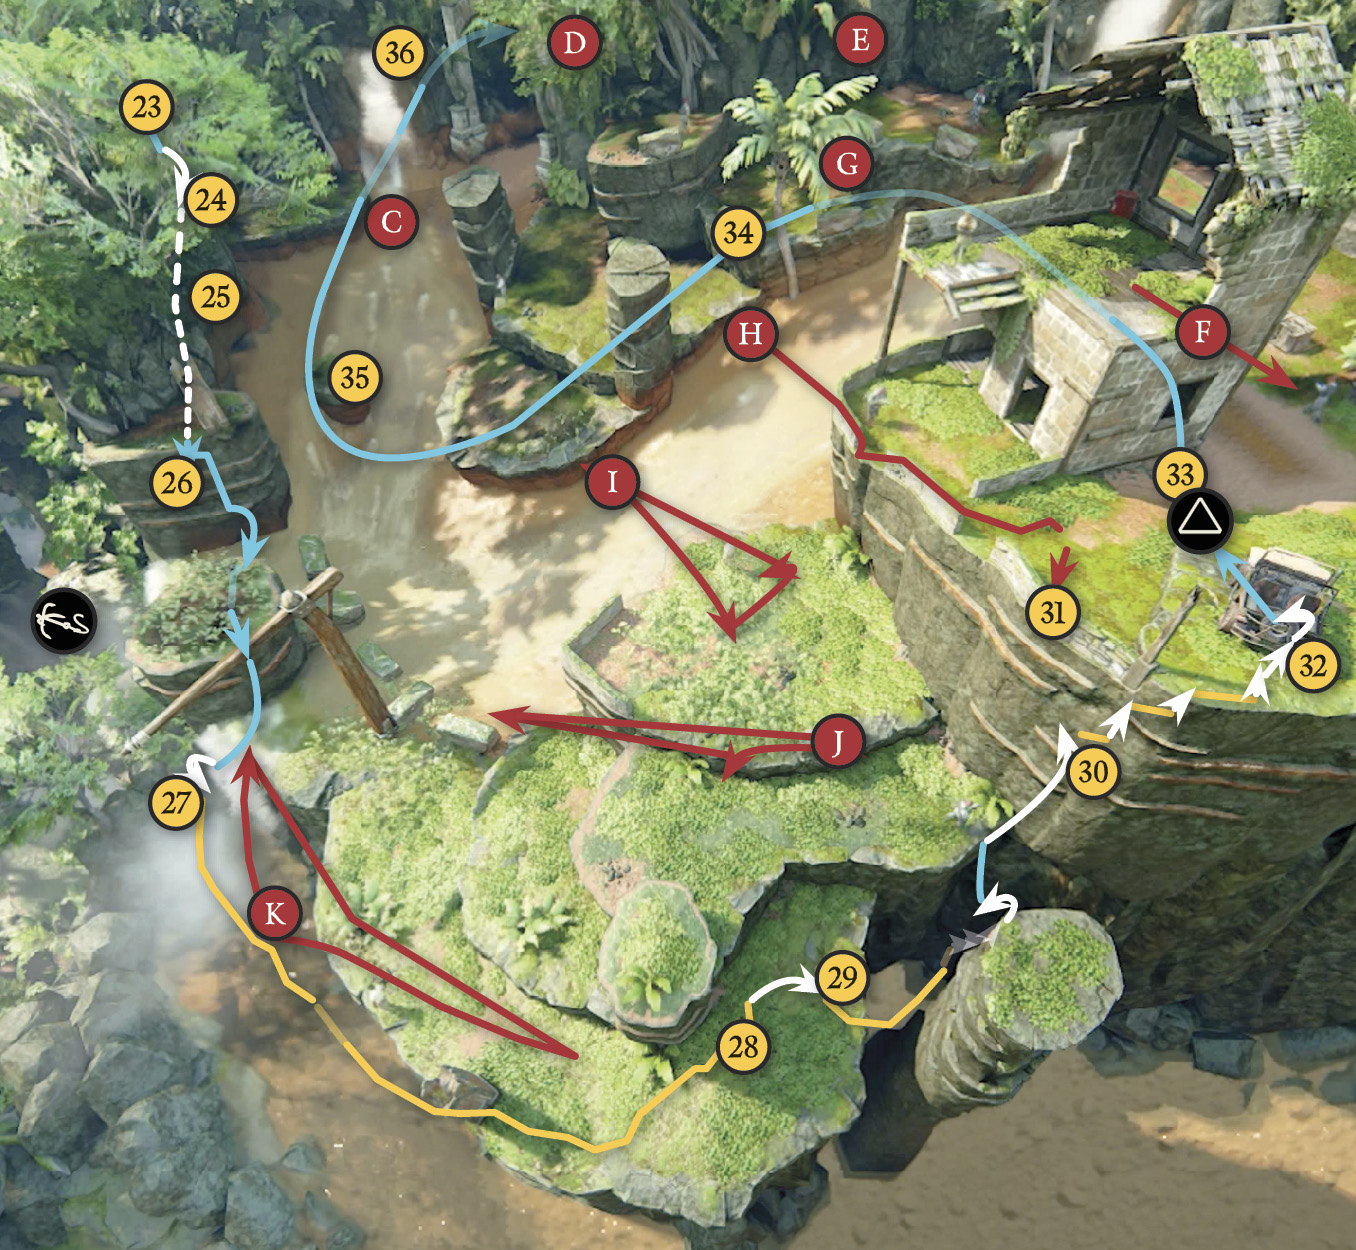
First, wait for all guards in sight range to be turned away, then hop into the river off the right side of the ledge (24) and slide to the rock
pillar (25) downstream in the river’s middle. Jump and latch onto the backside of the pillar. Hang onto the side if a guard is watching. Pull up to the top and then run and jump to the landmass (26) on the river’s opposite side. Duck into the tall plants to hide.
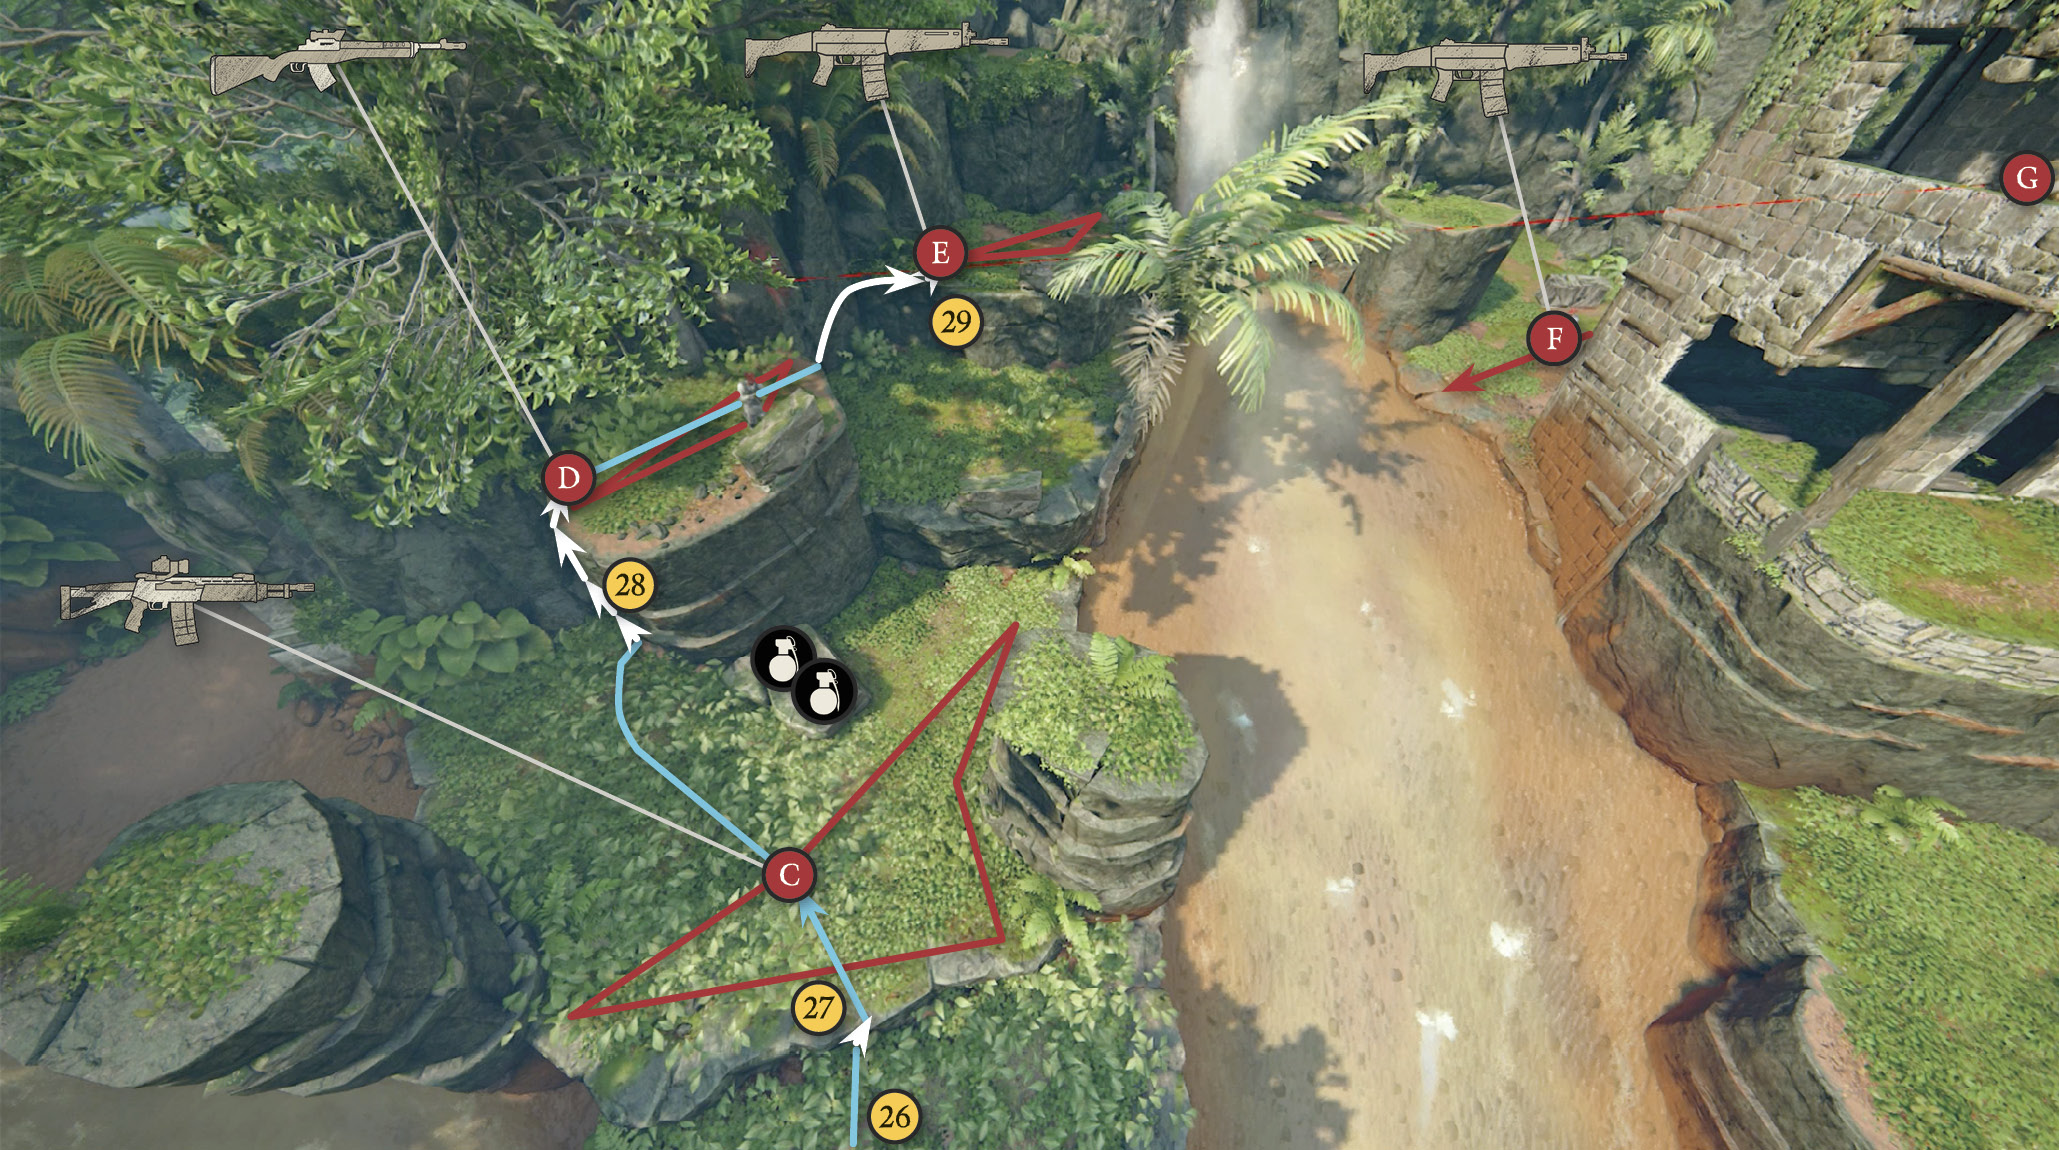
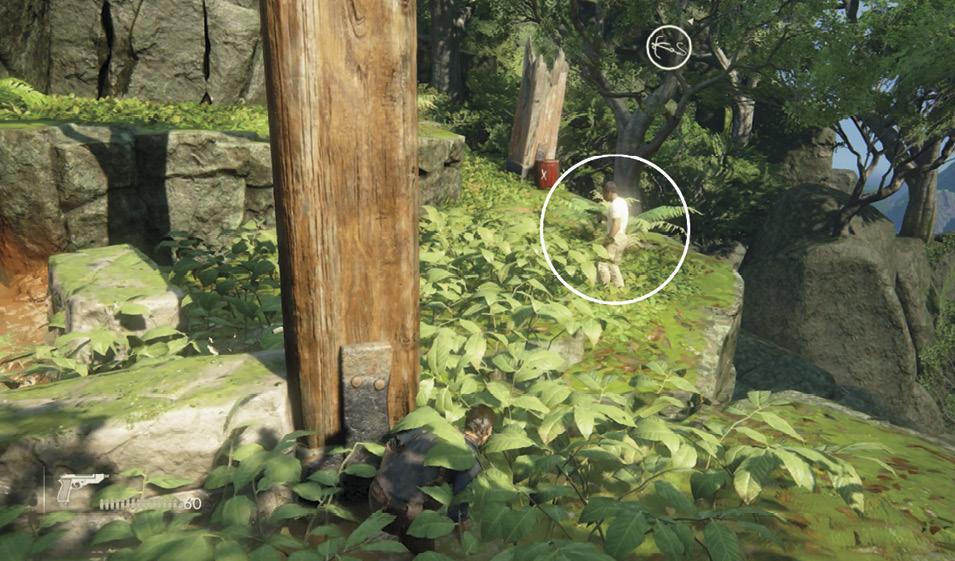
Push forward to the top of the next step in the ledge (27) and wait for the approaching guard (C) to move close, then take him down quietly in the thick plant life. (Don’t be surprised if Elena takes him down before you do.) Then climb to hang from the platform to the left (28) and pull down the guard pacing there (D). Hang on the side of the ledge and wait until no other guards are looking including the sniper, and then hustle along the top of the pillar and jump to the next terrace (29) to pull down the guard posted there too (E). Quickly dive into cover behind the nearby low wall.
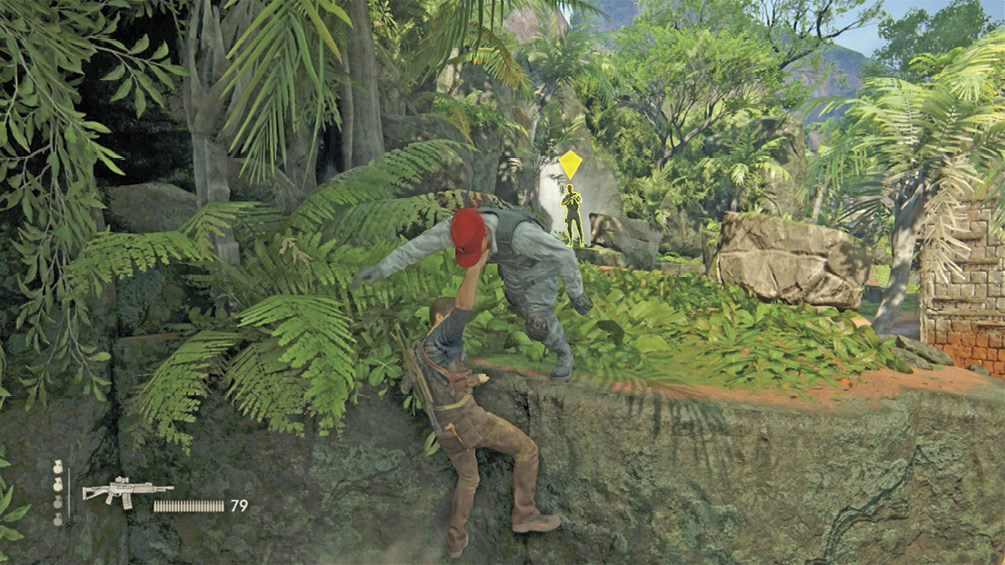
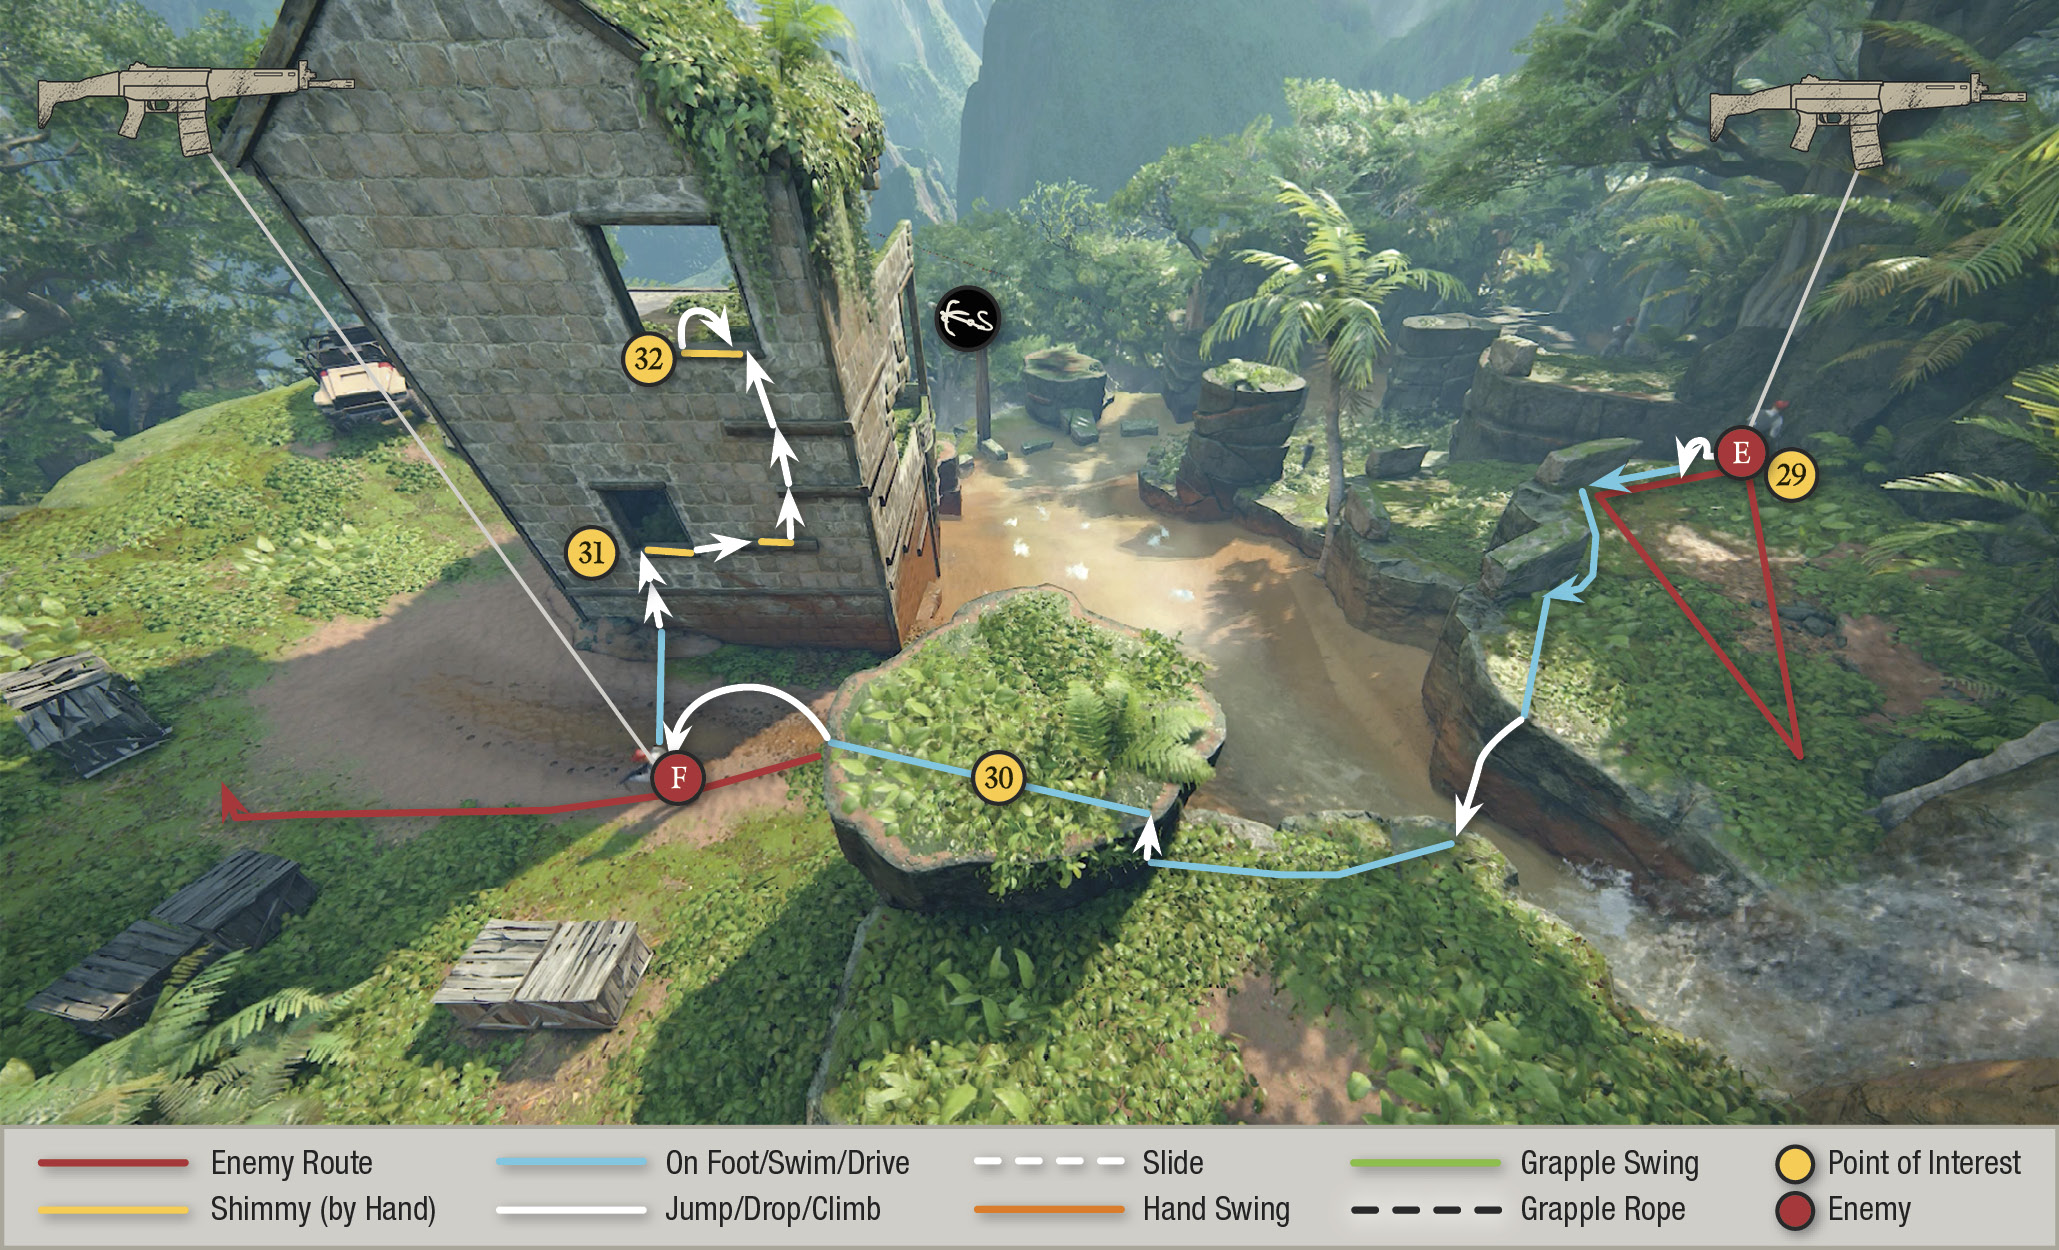
Spot the trooper patrolling below (F). Wait until he faces away; make sure the tower sniper isn’t looking; and then leap across the river where it’s narrow in front of the waterfall to the next platform (30). Move carefully to the edge overlooking the pacing guard below (F). Drop directly onto him for a vertical takedown. Now climb the wall beam to the back window (30) of the sniper tower. Scale the wall and hang from the upper right windowsill (32), watching the sniper on this floor through the window.
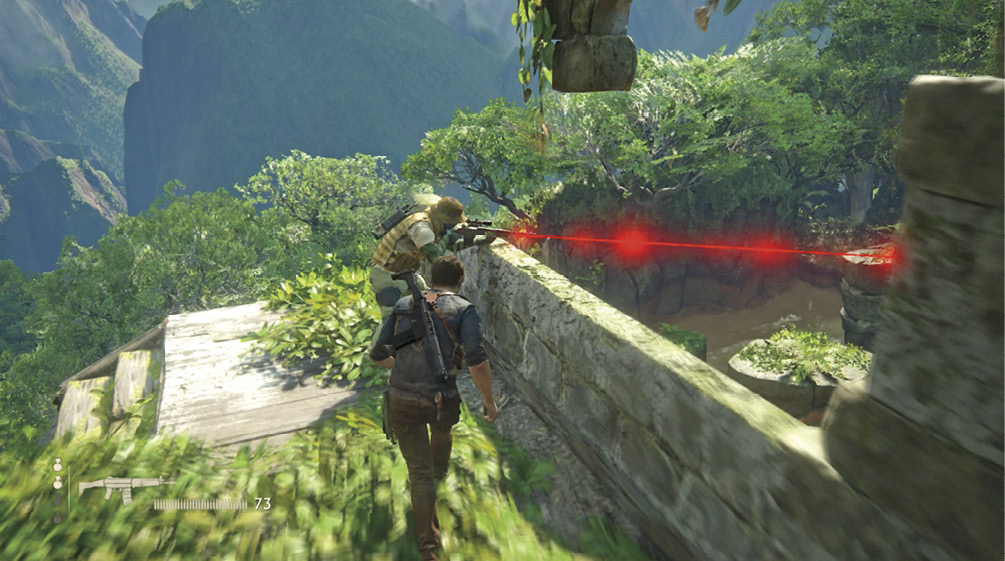
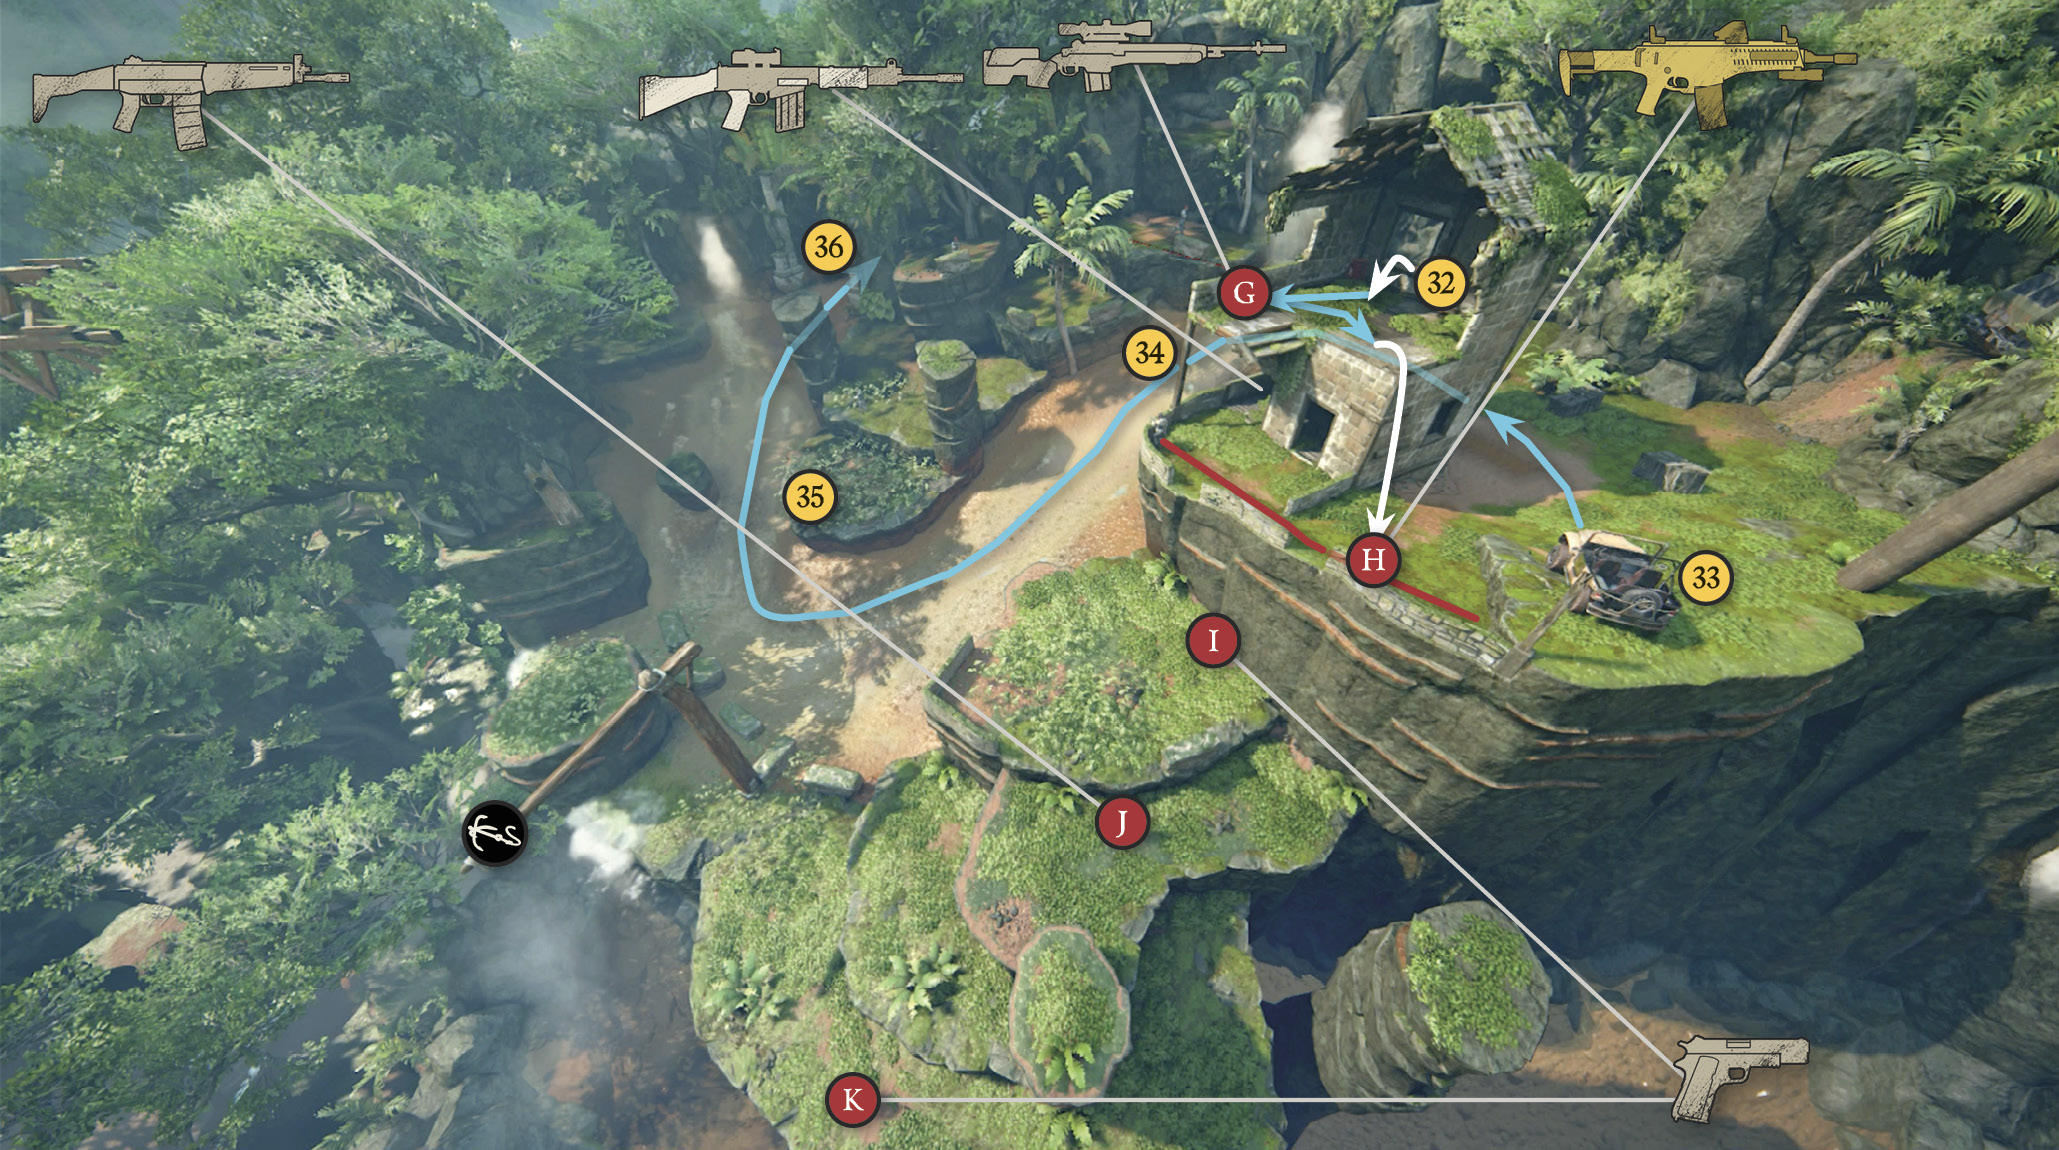
When the sniper (G) has his back to you, hop through and take him down from behind (pulling him toward you and not kicking him over the edge so you can have his powerful M14 Custom sniper rifle). Next, execute a vertical takedown on the heavy trooper pacing below (H). Then take cover at the low wall and use the sniper rifle to pick off the remaining three Shoreline guards below. Keep in mind, once you break your stealth by firing a weapon, guards will break their patrol route and search for you. If you shoot (K) first, you will likely find (J & I) across the river (35) looking for you.
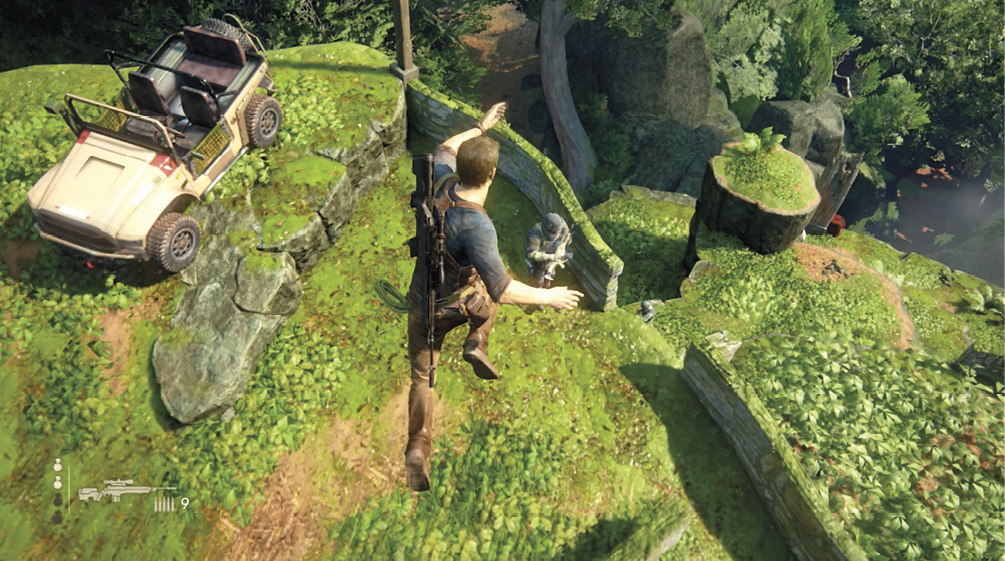
Once the area is clear, hop into the 4x4 (33) and steer downhill behind the sniper tower and into the river. Turn left to drive downstream (34), then turn right at the fork (35) and proceed upstream through the arch (36) and over a pair of drop-offs for the checkpoint.
Just Floor It!
Optional Battle Strategy
To earn the “Just Floor It!” trophy, you must drive off in the 4x4 and reach the next checkpoint without killing anyone (intentionally or unintentionally). This strategy diverges from the previous one at step (25). Note the sniper (G) with laser scope atop the tower by the flag. He has the longest range of sight of all the Shoreline soldiers. The troopers are deployed on multiple levels. Here’s a stealthy path to the 4x4.
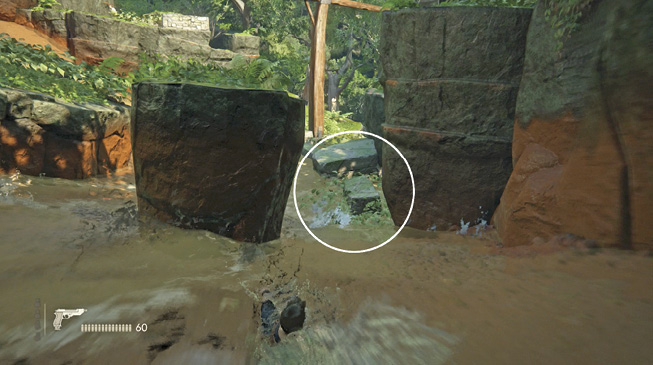
When guards (C, I, & K) are walking away from you, jump from the right side of the ledge (23) and into the river (24). Slide to the right of the river pillar (25). Steer your slide to end up in the thick vegetation next to the first boulder (26) you come to near the falls. Follow the boulders around through the vegetation (there’s one clear spot, so watch for soldiers) until you are at the base of the grapple post. When guard (K) is walking away, simply walk through the vegetation on land and then drop over the side of the cliff (27) and shimmy along the edge of the terrace until you reach the far edge (28) (where if you go any further, guard (J) could spot you when he’s at his rightmost patrol position).
When guard (J) has left his rightmost patrol point, continue to shimmy around the corner and then face and jump to the pillar (29). Quickly shimmy around out of sight. Jump up the multiple grip points and when guards (J & H) are not looking, jump from the top of the pillar to the grips on the side of the canyon wall (30). Work your way right and upward to stay out of sight of the helmeted guard (H). He will look over the edge behind the 4x4 area (31). So climb to the top edge (32) and hang there and watch guard movement.
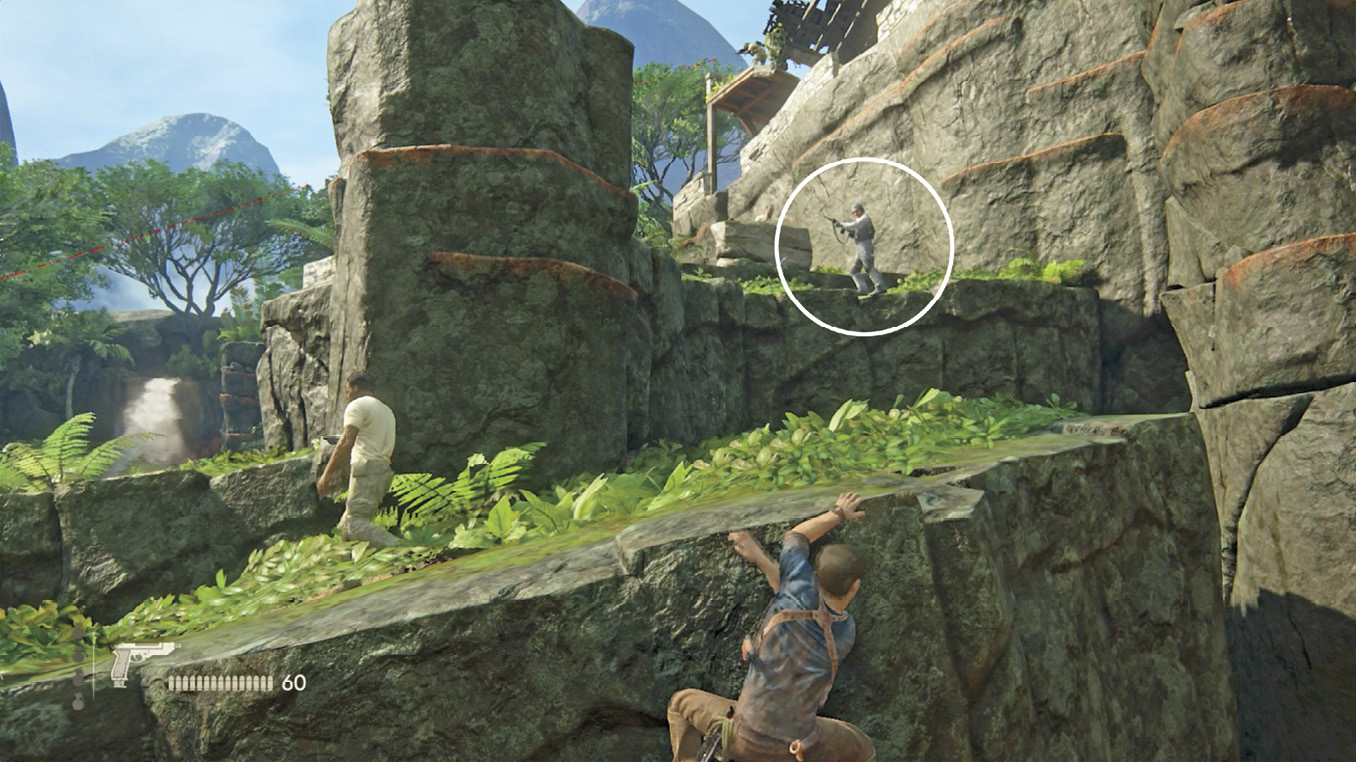
When the helmeted guard and the guard (F) behind the sniper tower both walk away, pull up to the top of the cliff, enter the 4x4 (33) and speed off around the backside of the guard tower.
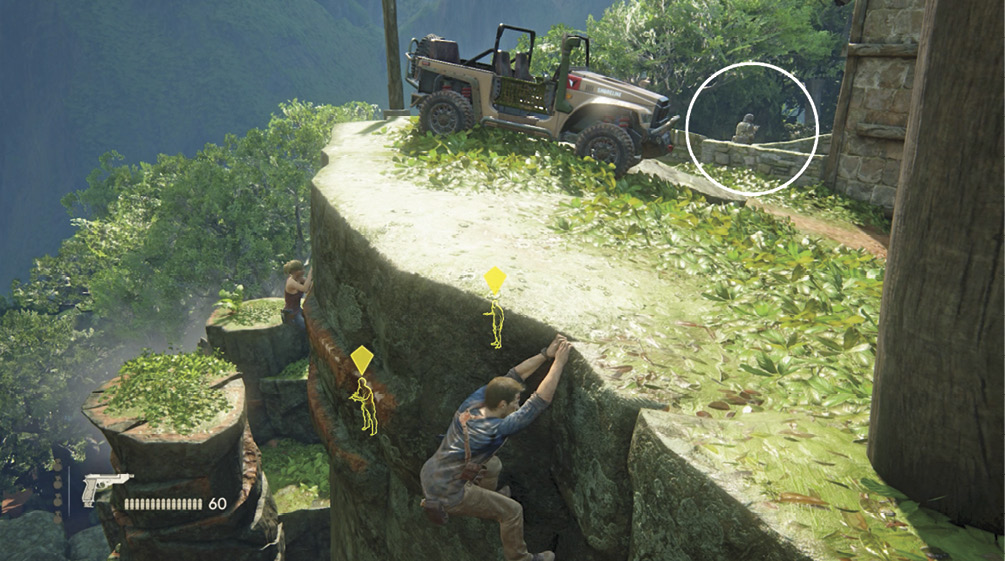
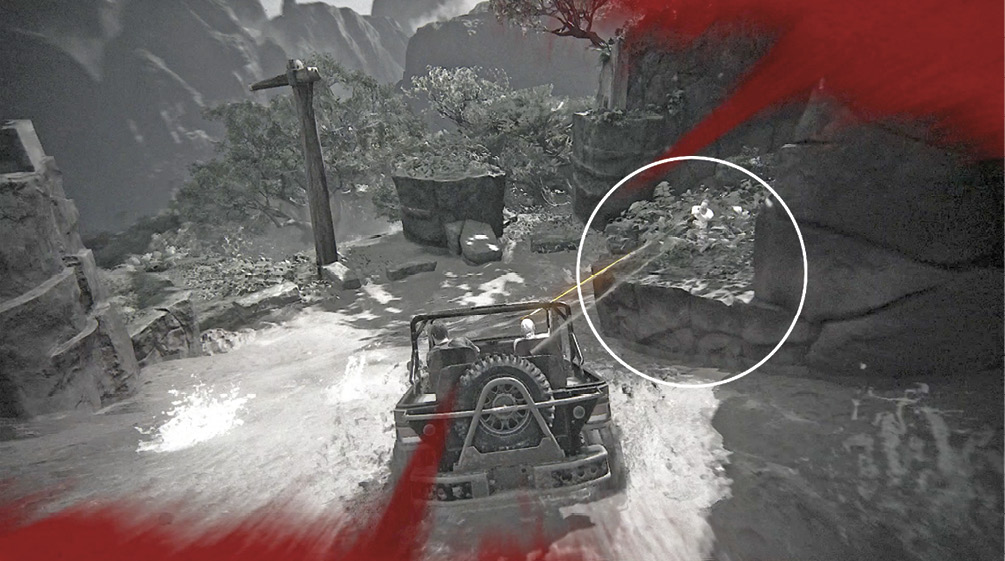
Avoid running over guard (F) behind the tower. You will take damage but you will survive by following the stream (34). When making the sharp right turn (35) to head up stream, make sure to get as close to the right side rock wall as possible to avoid most of the enemy fire. A guard or two enter the stream to get a shot at you from behind. Sticking to this wall keeps you alive. Once you drive through the arches upstream (36), you’re home free. Drive over the drop along the next path to reach the checkpoint and earn the trophy.
Drive Upstream to the First Elevator
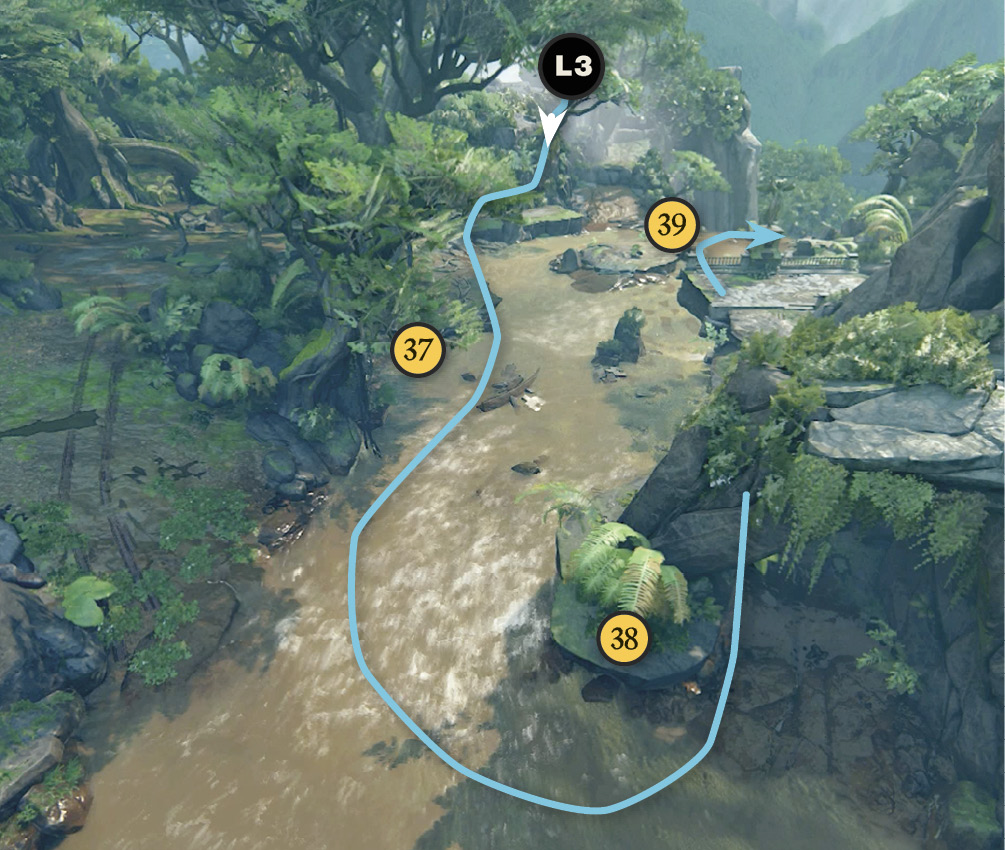
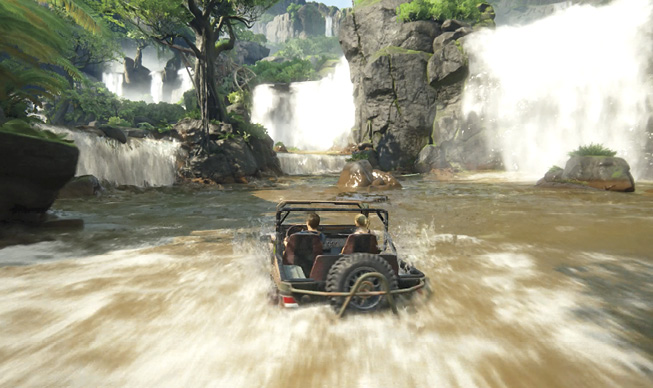
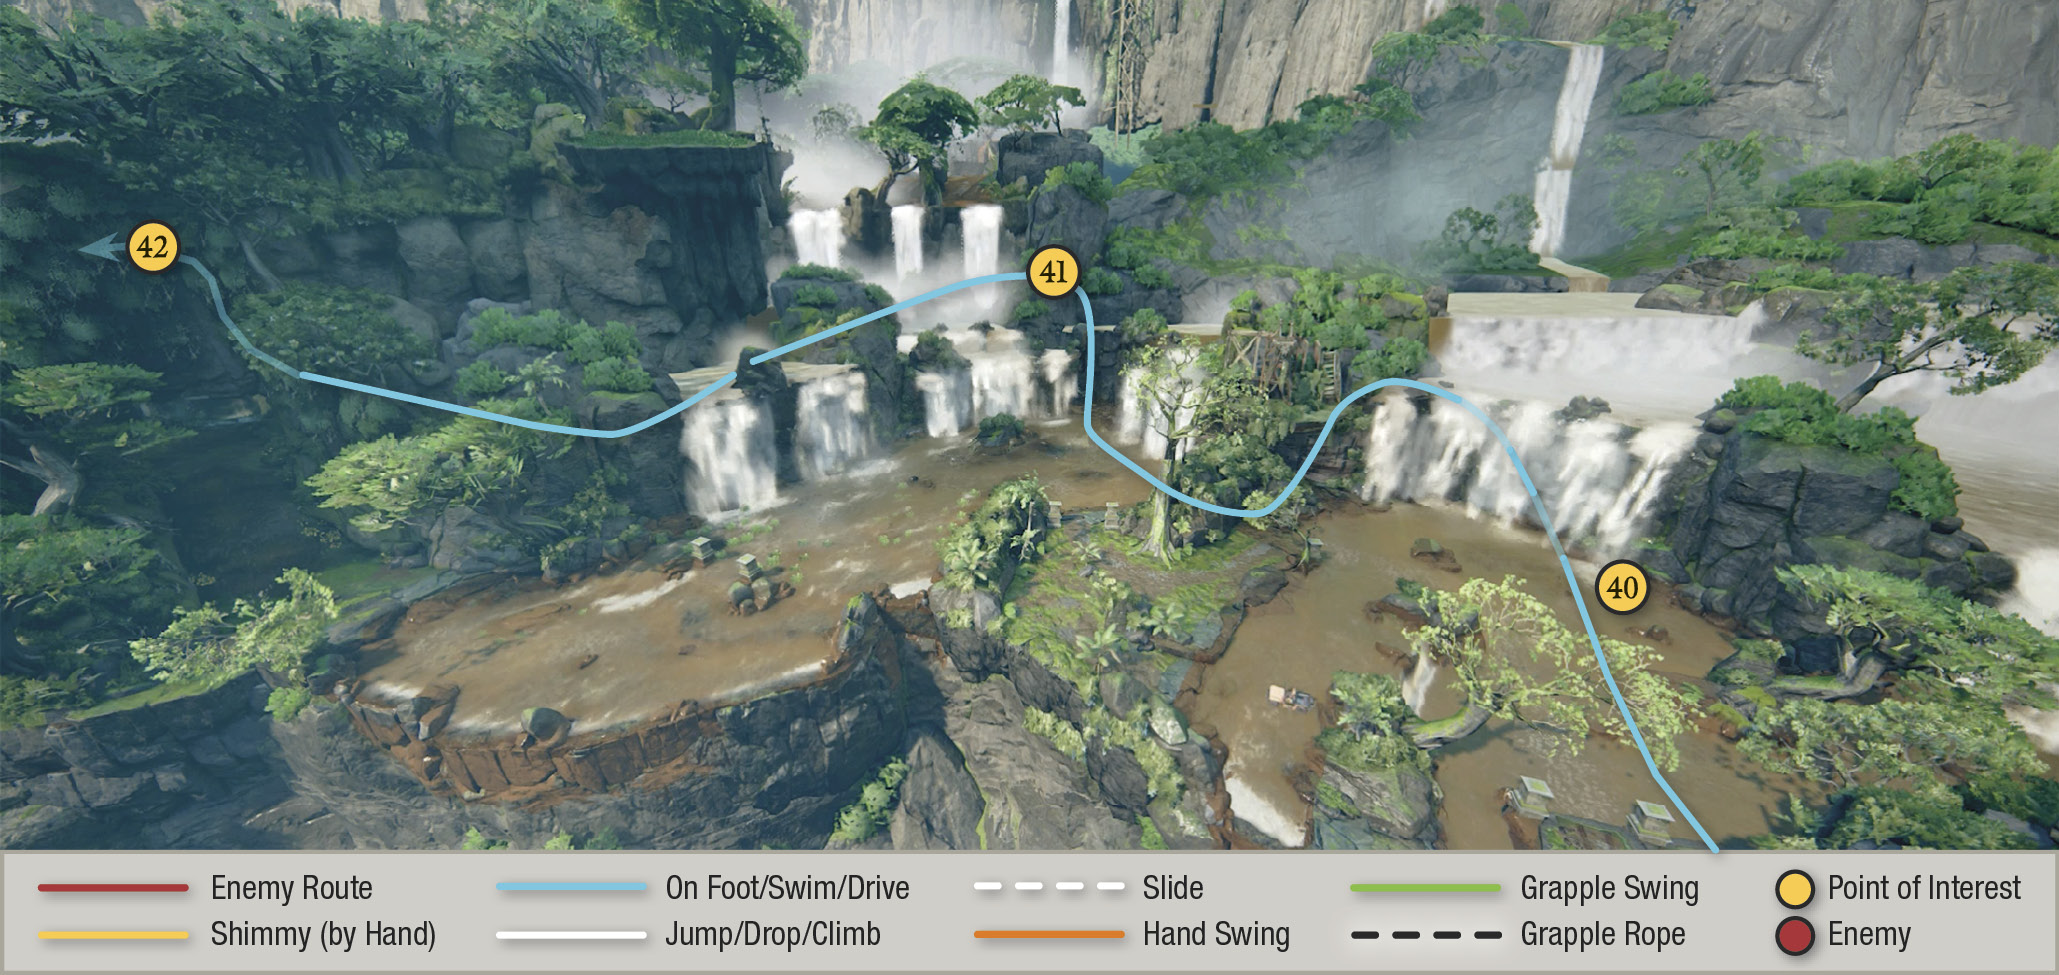
You reach a checkpoint when you drop down the ledge in the road. Press L3 to look at the elevator tower in the distance. This is your next destination. Keep driving upstream past the washed out bridge (37) and steer up the ramp on the left bank (38); it runs under the rock arch and up to the bridge (39). Descend the slope past another pair of drop-offs and twin road-marker pillars (40), then follow the river upstream. Follow the pathway as it curves out of the water and through two more pairs of pillars then plunges back into the water past a line of spectacular waterfalls (41). When you exit the river again, drive up the muddy hill (42) and veer left to follow the road down.
Activate the Elevator
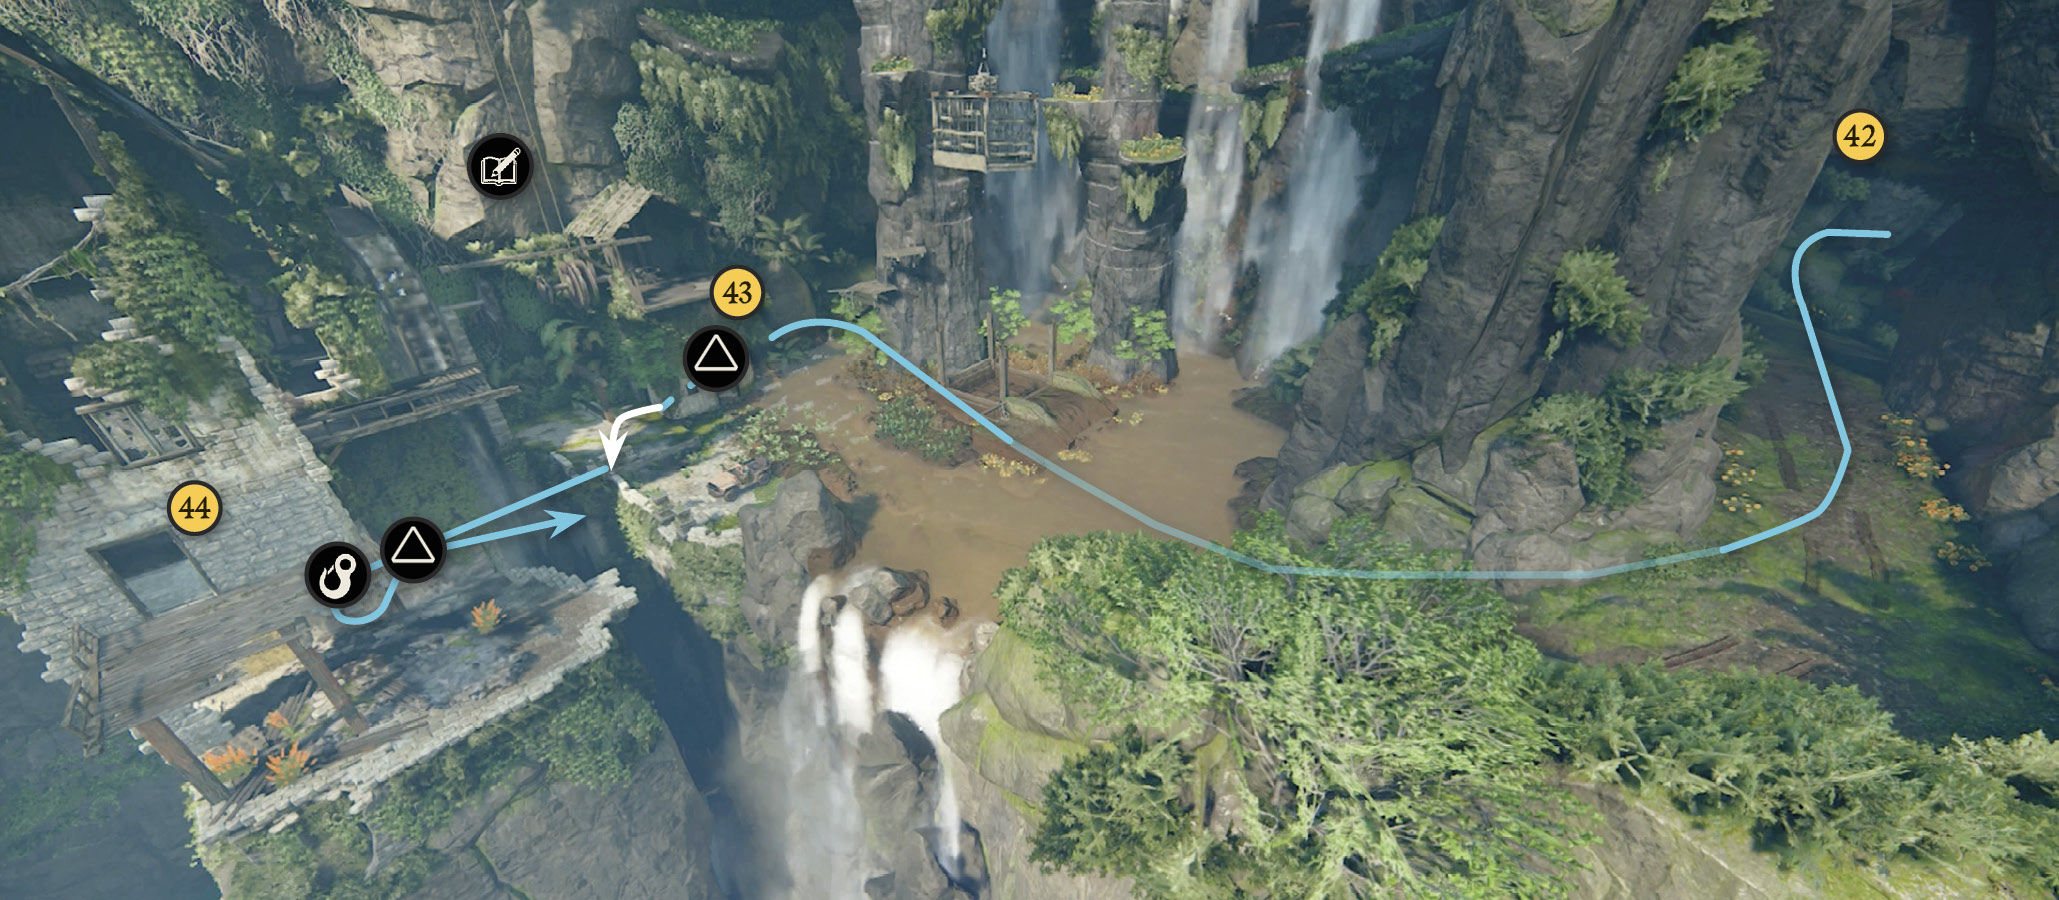
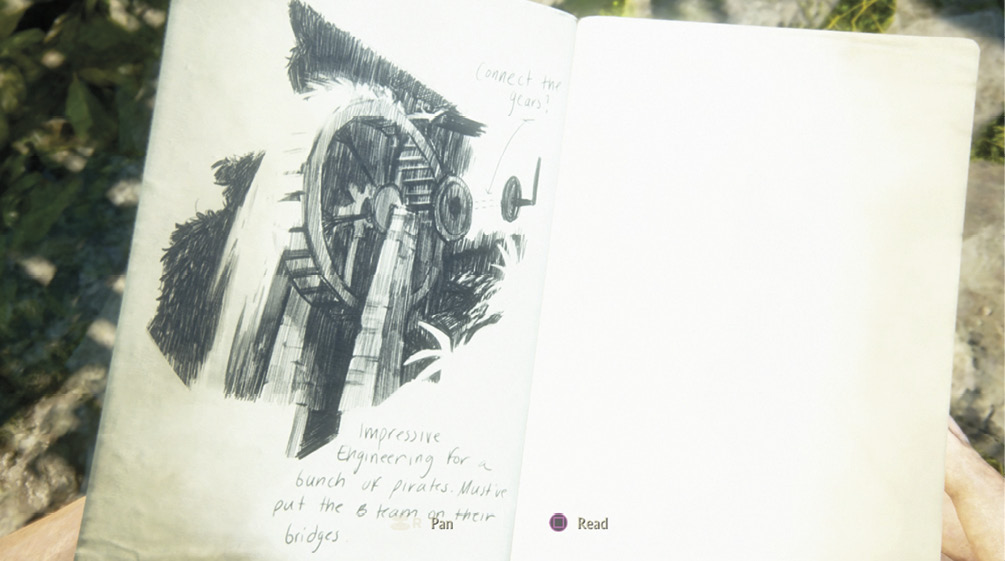
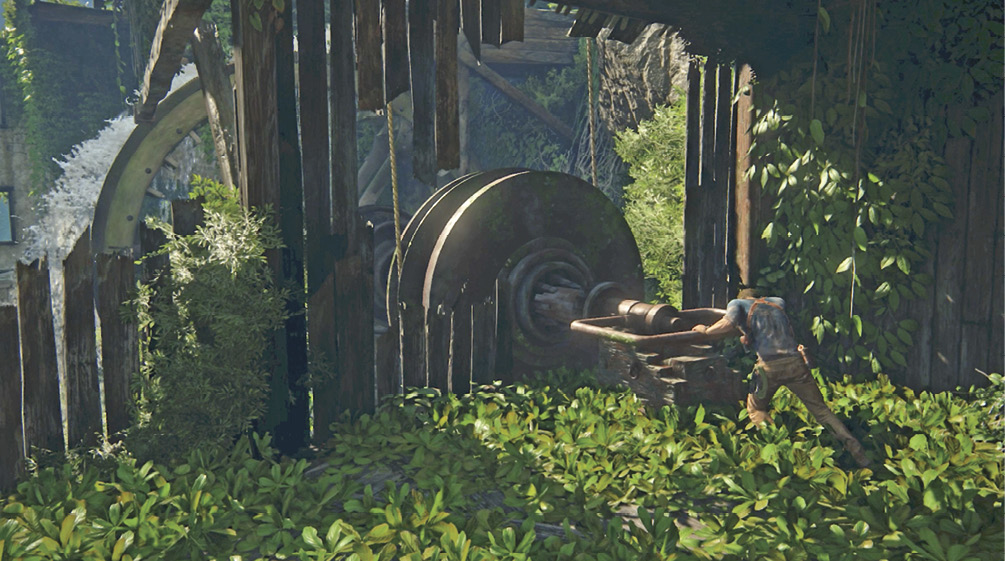
Follow the muddy slope to a shallow pond at the massive waterwheel and elevator mechanism (43). Exit the 4x4 and walk toward the waterwheel while looking up at the gears to trigger an Optional Journal Entry. Nathan sketches the waterwheel with a note to connect the gears.
Nathan sees that the elevator’s gears aren’t engaged to the waterwheel, so the elevator has no power. He needs to climb up and engage the gears. But the stairs leading to the entry balcony (44) have collapsed. The solution: Park the 4x4 facing the balcony, attach the 4x4’s winch around the balcony support beam, and back up the 4x4 to pull out the beam.
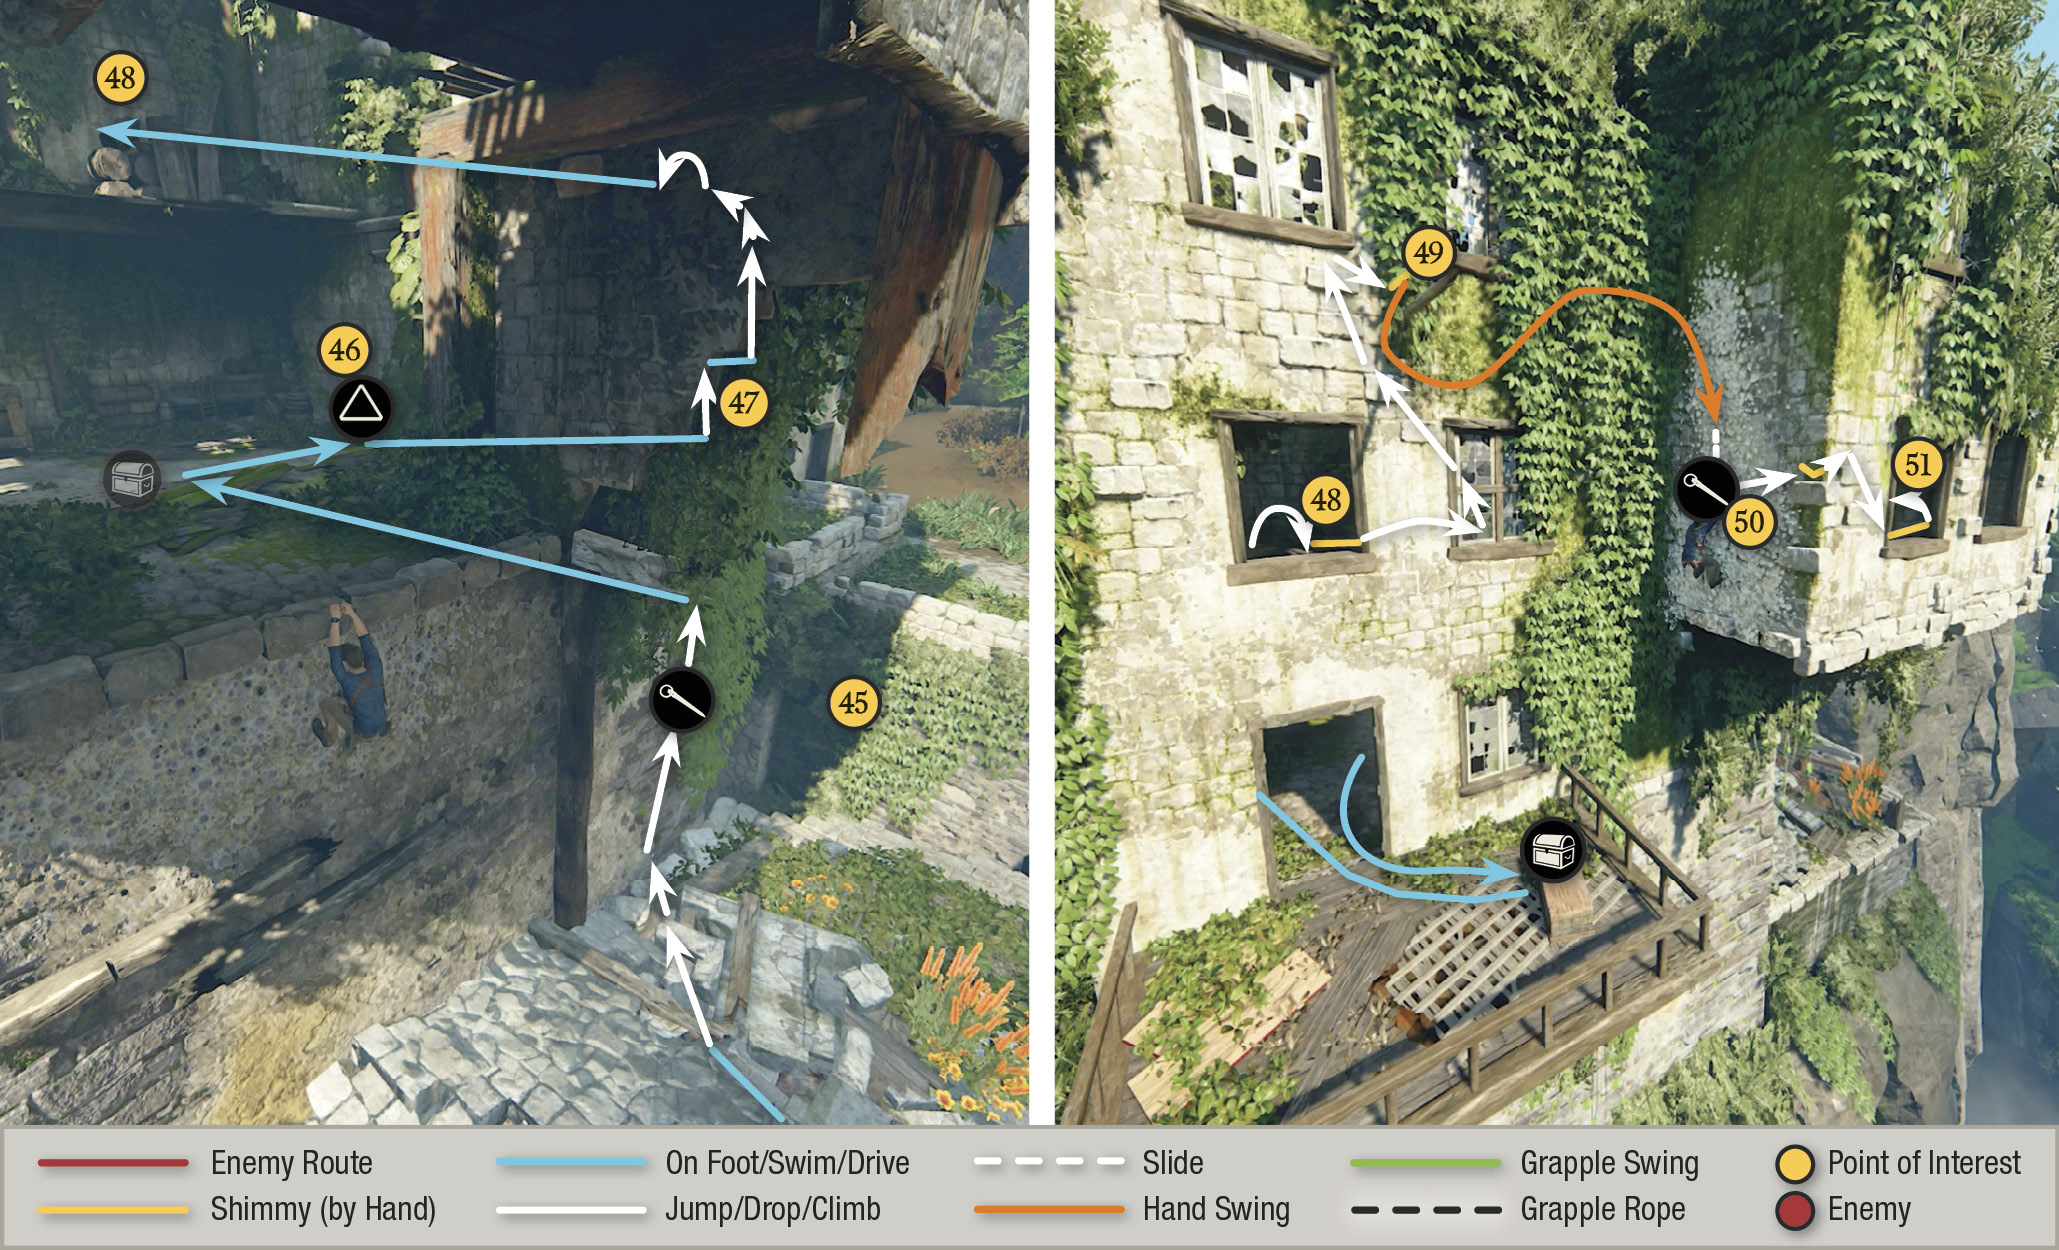
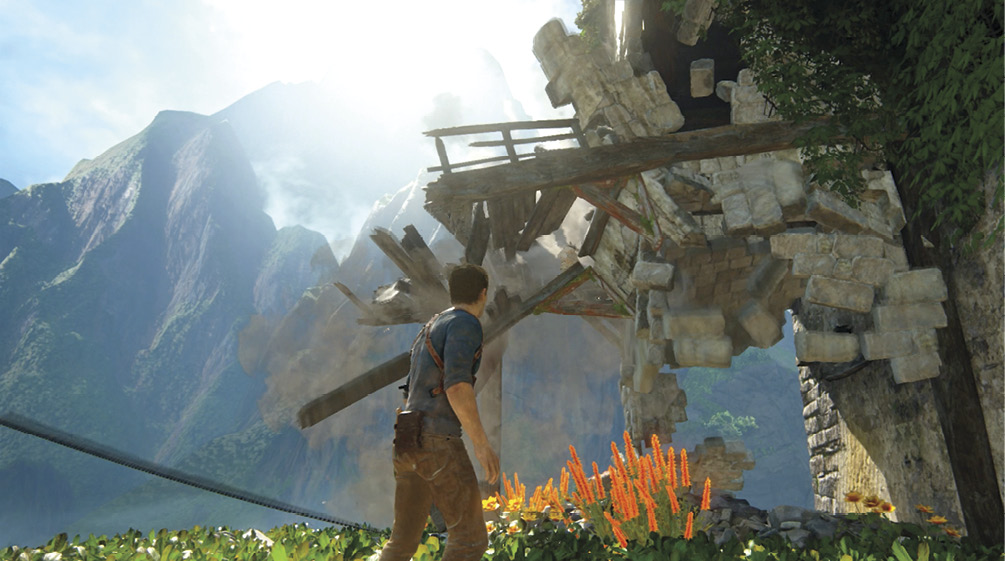
Climb the wall beams (45) and then use the piton to get up onto the platform. Find the treasure on the balcony, then return inside and push the crate (46) against the wall under the exposed beams (47). Use the crate to climb to the second floor and hang outside the window at far left (48). Climb to the post (49) and swing to the porous wall (50), stabbing it with your piton as you land. Then climb around and go through the first window (51).
 Jade Serving Bowl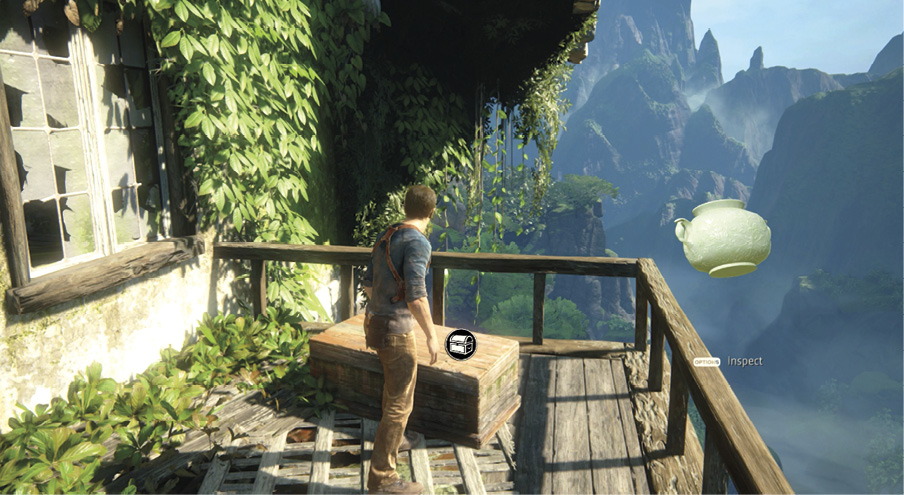 After pulling down the waterwheel building’s balcony and climbing to the first floor platform, find the Jade Serving Bowl on the balcony to the left. |
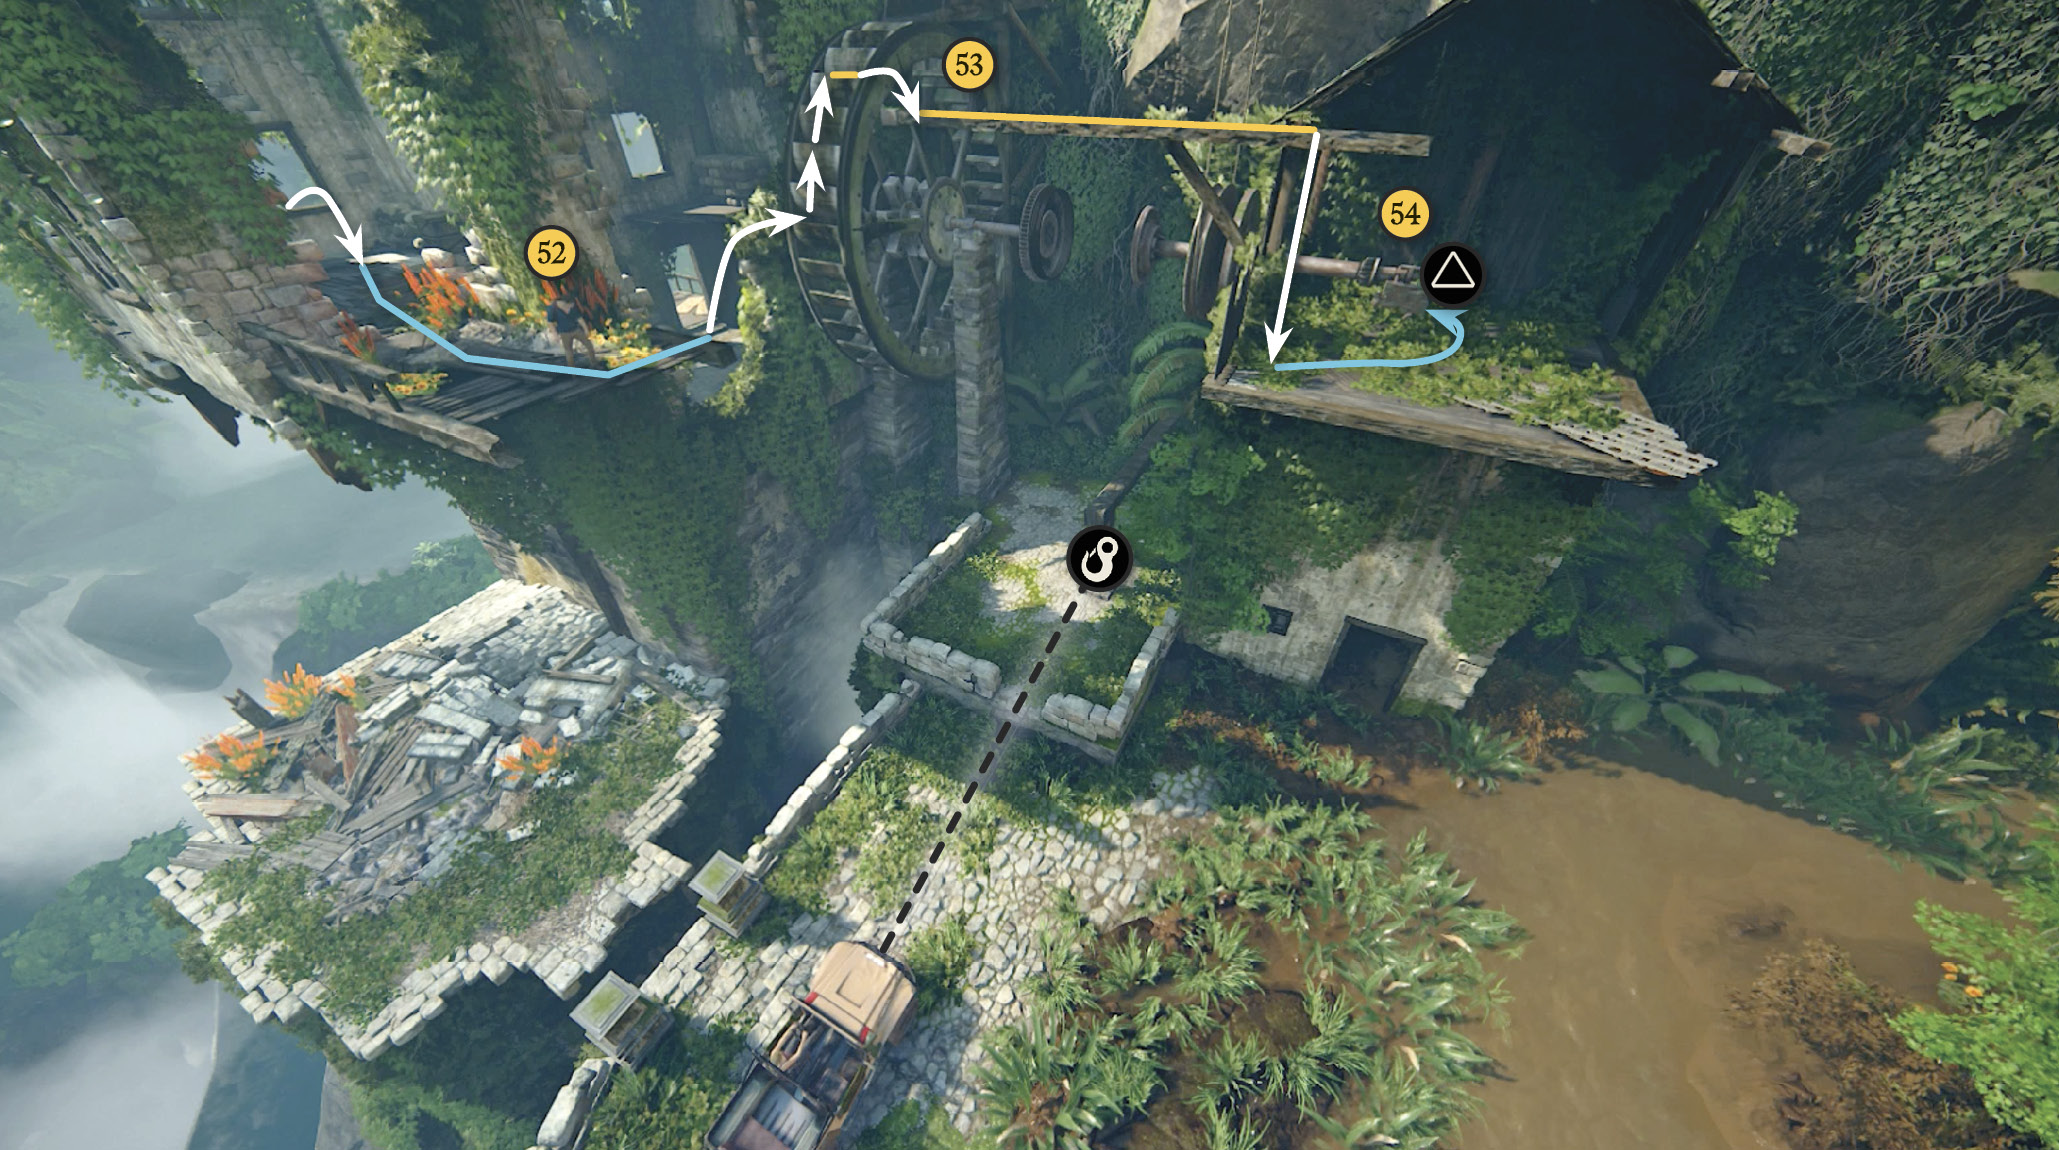
Stepping through the broken wall ahead (52) triggers a quick sequence: Elena uses the 4x4 winch to pull a big lever that stops the waterwheel rotation. Now you can climb up the wheel (it starts turning!) and then hop rightward to the beam (53) near the top. Shimmy to the beam’s far end and drop down (54); Elena automatically drives the 4x4 to the edge of the elevator platform. Press to grab the gear handle, then push your left stick forward to engage the gear to the waterwheel. This triggers a quick scene: Elena drives the 4x4 into the vehicle elevator cage and the platform starts to rise.
Hurry! Jump across from the extended plank to the elevator tower’s lower floor (55) and climb to the top platform. Then jump across to grab the elevator cage. (If you don’t do this quickly, the platform under you collapses.) Grabbing the cage triggers a short scene: The elevator stalls for a few seconds and then starts up again as three gunmen (including a sniper) suddenly appear on the far terraces.
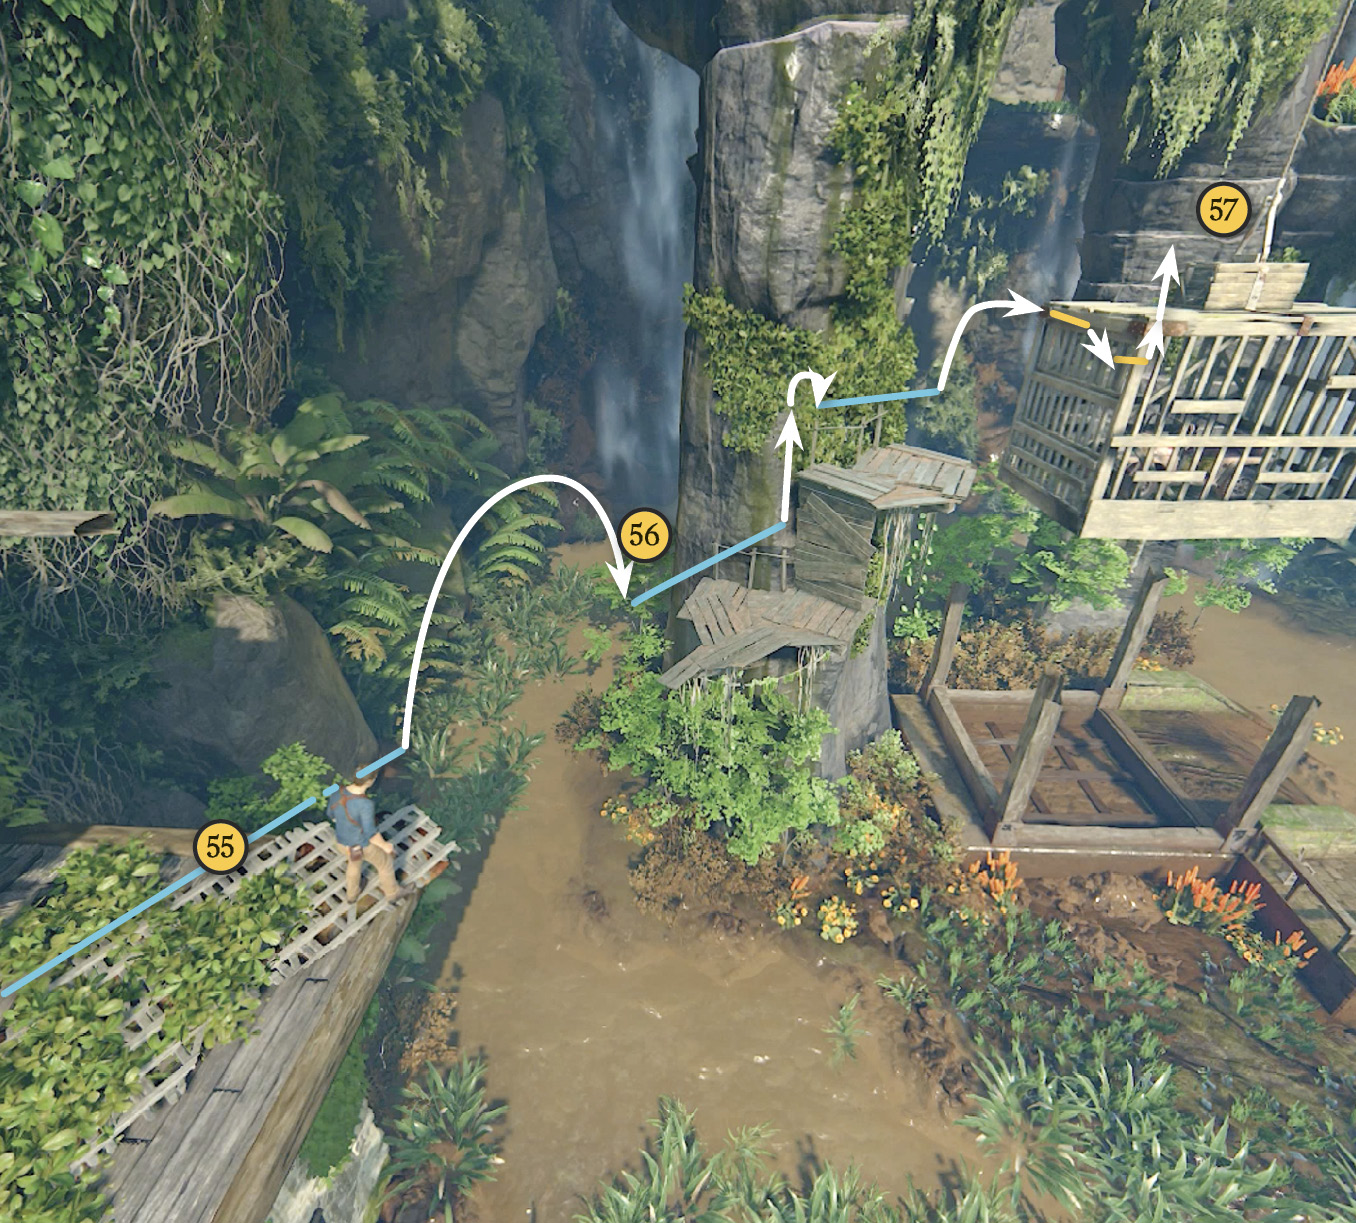
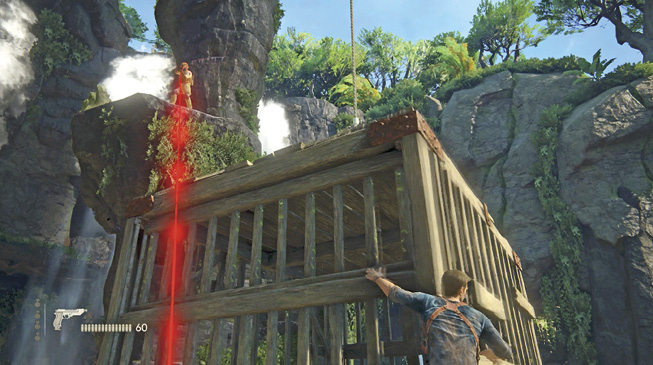
When control returns, don’t climb atop the cage! Instead, shimmy around the corner to the right (56) and keep hanging to use the elevator cage as cover.
Fend off Attackers!
Enemy gunmen appear on the surrounding rock terraces in a specific order as the slowly rising elevator hits certain trigger markers. They appear whether or not you’ve dispatched any of the shooters who’ve previously appeared. So if you don’t take out targets early, their numbers increase and can become overwhelming. They also attack from different directions, flanking your position and taking away your cover angles if you haven’t eliminated the earlier attackers.
First Wave: Three Gunmen
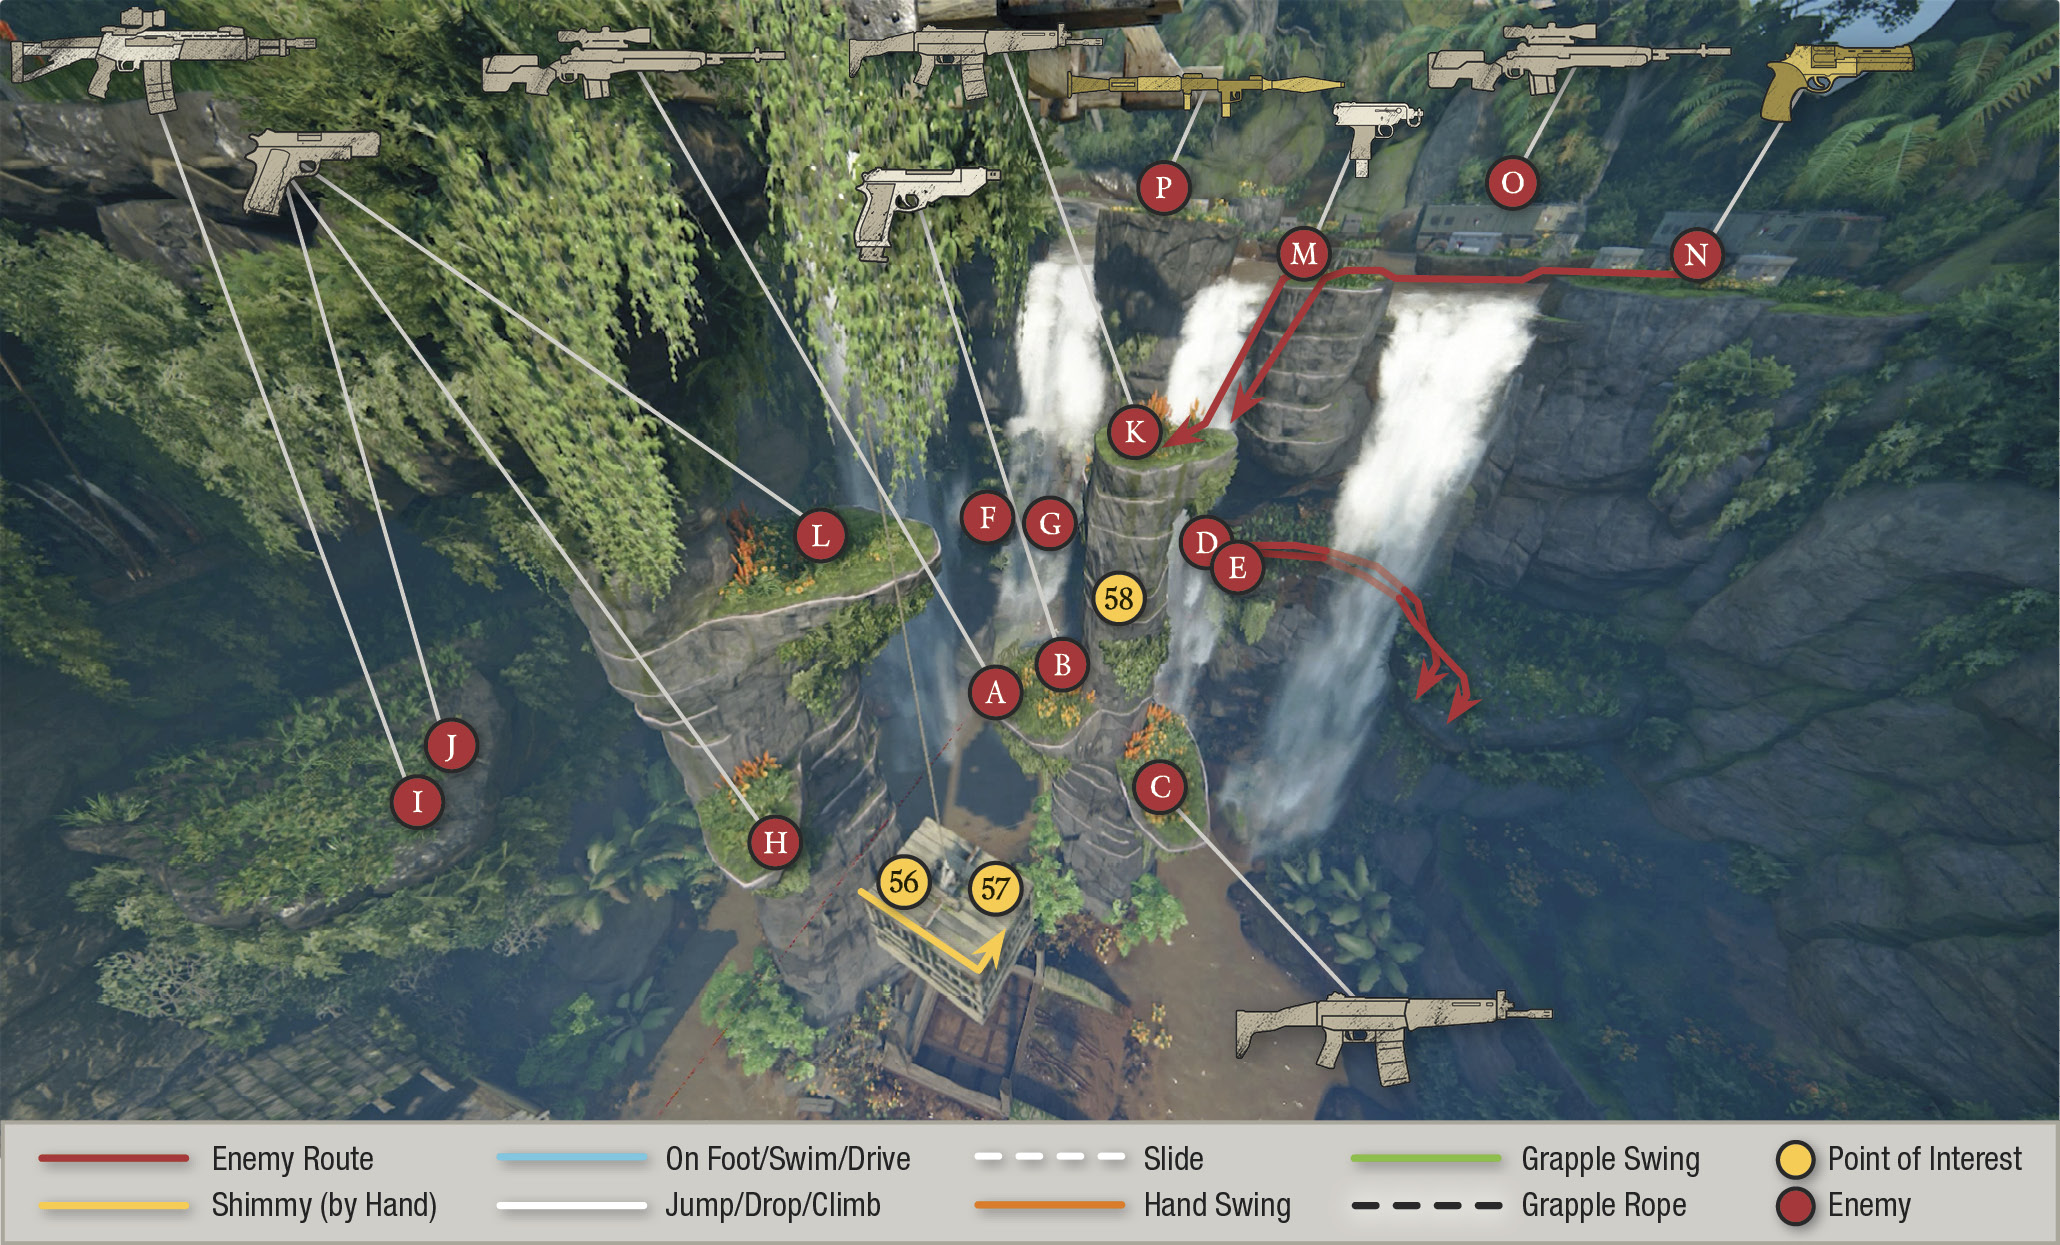
Refer here to the red circle letters on our maps. Again, remain hanging from the top edge of the elevator (56) cage for cover. The first wave to appear includes three shooters. Your first target should be the sniper (A) on the small terrace on the pillar (58) directly in front of you. Next shoot whichever target is more exposed, the white shirt shooter (B) on the sniper ledge, or the rifleman (C) on the terrace to the right.
Second Wave: Two Gunmen
The next two shooters (D, E) appear on ledges near the waterfalls behind the main pillar (58) and work their way to a distant ledge to the right. They actually appear while the first wave is active but are not a real threat until they come into view. Once the first three gunmen are down, look for them on the back right ledges against the canyon wall. Gun them down before grenades fly. If you nail them fast, you get a short respite, which could be used to leave the elevator and pick up dead guard (B)’s pistol and the sniper’s (A) M14 Custom sniper rifle. Quickly return to the elevator and get into position or remain on the pillar just long enough to use a rifle on attack wave three…
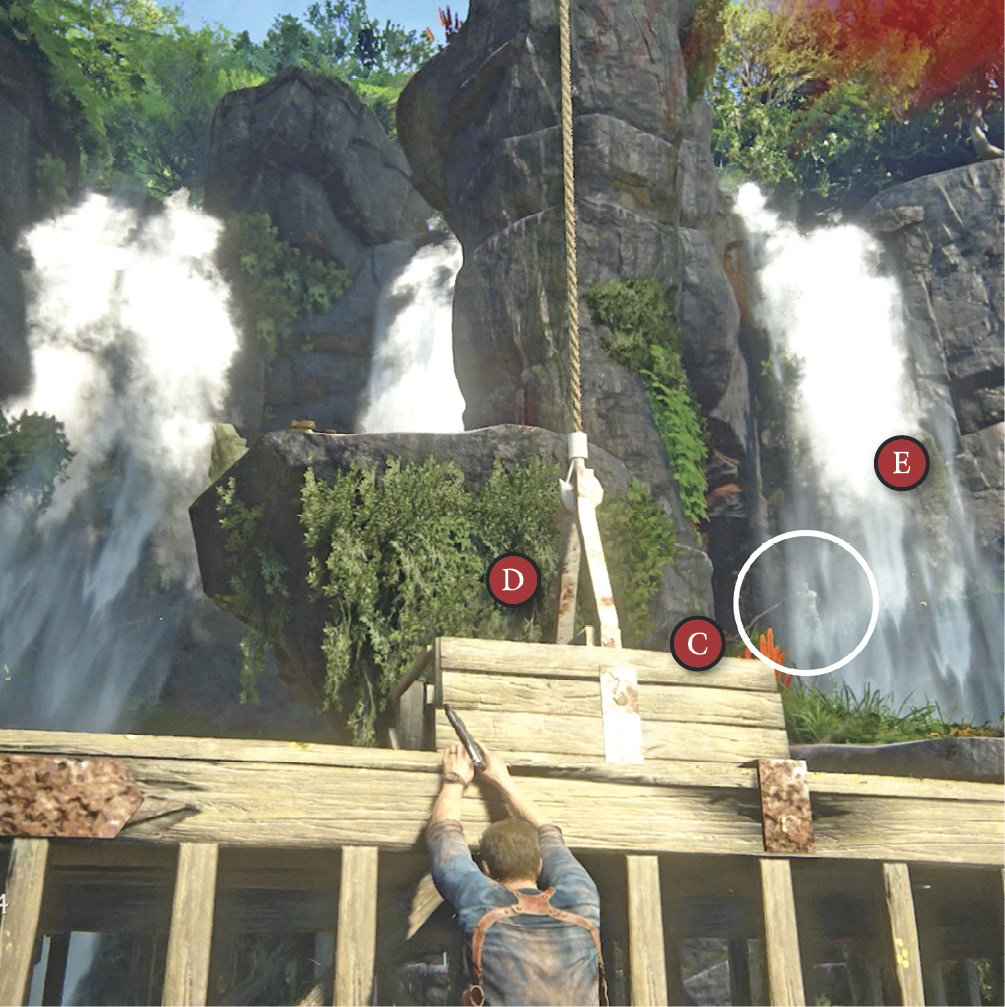
Third Wave: Two Gunmen
The direction of the next pair of foes (F, G) allows you to shoot from either side of the elevator (56) or (57). Look for these guys to appear between the two waterfalls to the left of the central pillar (58). Quickly gun them down and then shimmy to the right side of the elevator (57) to prepare for the next wave to appear on the left side.
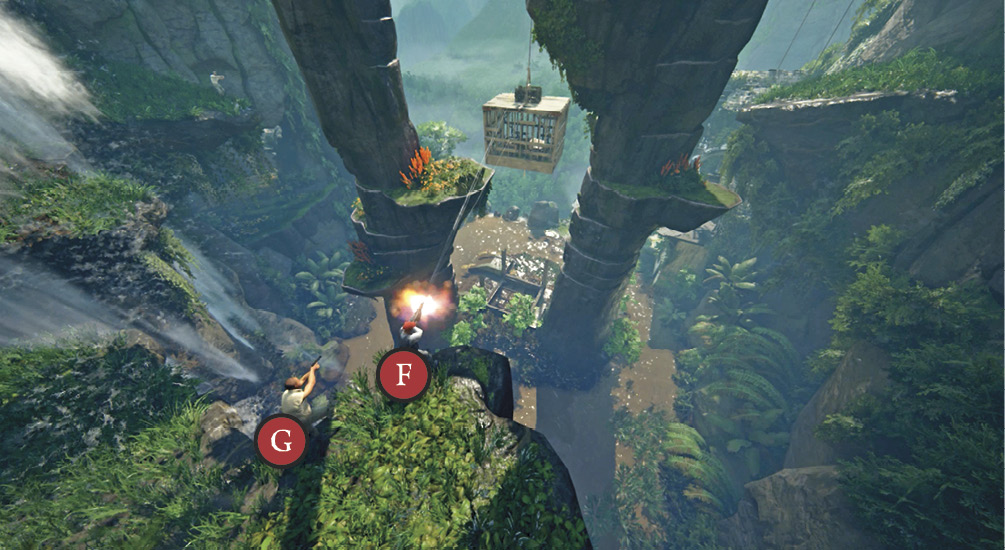
Fourth Wave: Three Gunmen
From the right side edge of the elevator (57) prepare to shoot the white shirt-wearing guard (H) as he comes into view on a ledge to the left on the elevator pillar. Next, shoot the two soldiers (I, J) on a distant ledge behind the elevator pillar. Now shimmy to the left side of the elevator (56) or stand on the top if you want to snipe or rifle your way through the next wave…
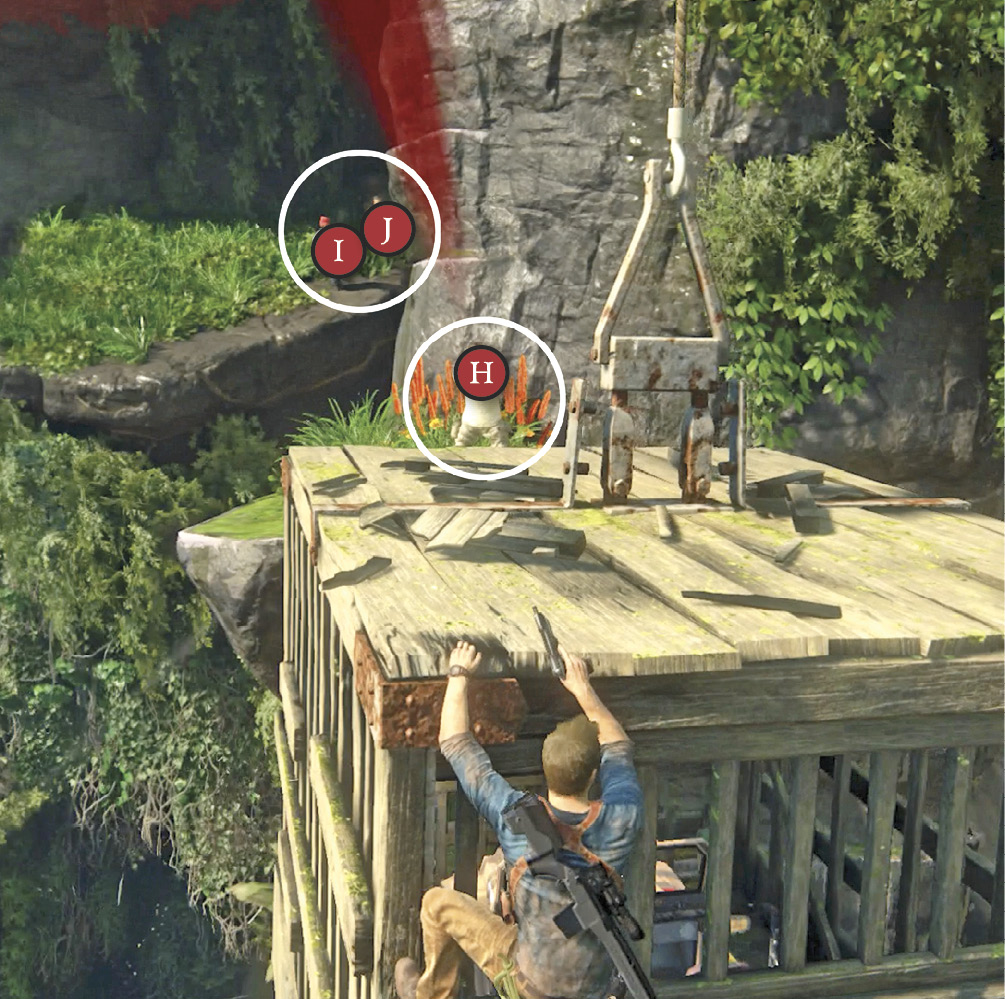
Fifth Wave: Two Gunmen
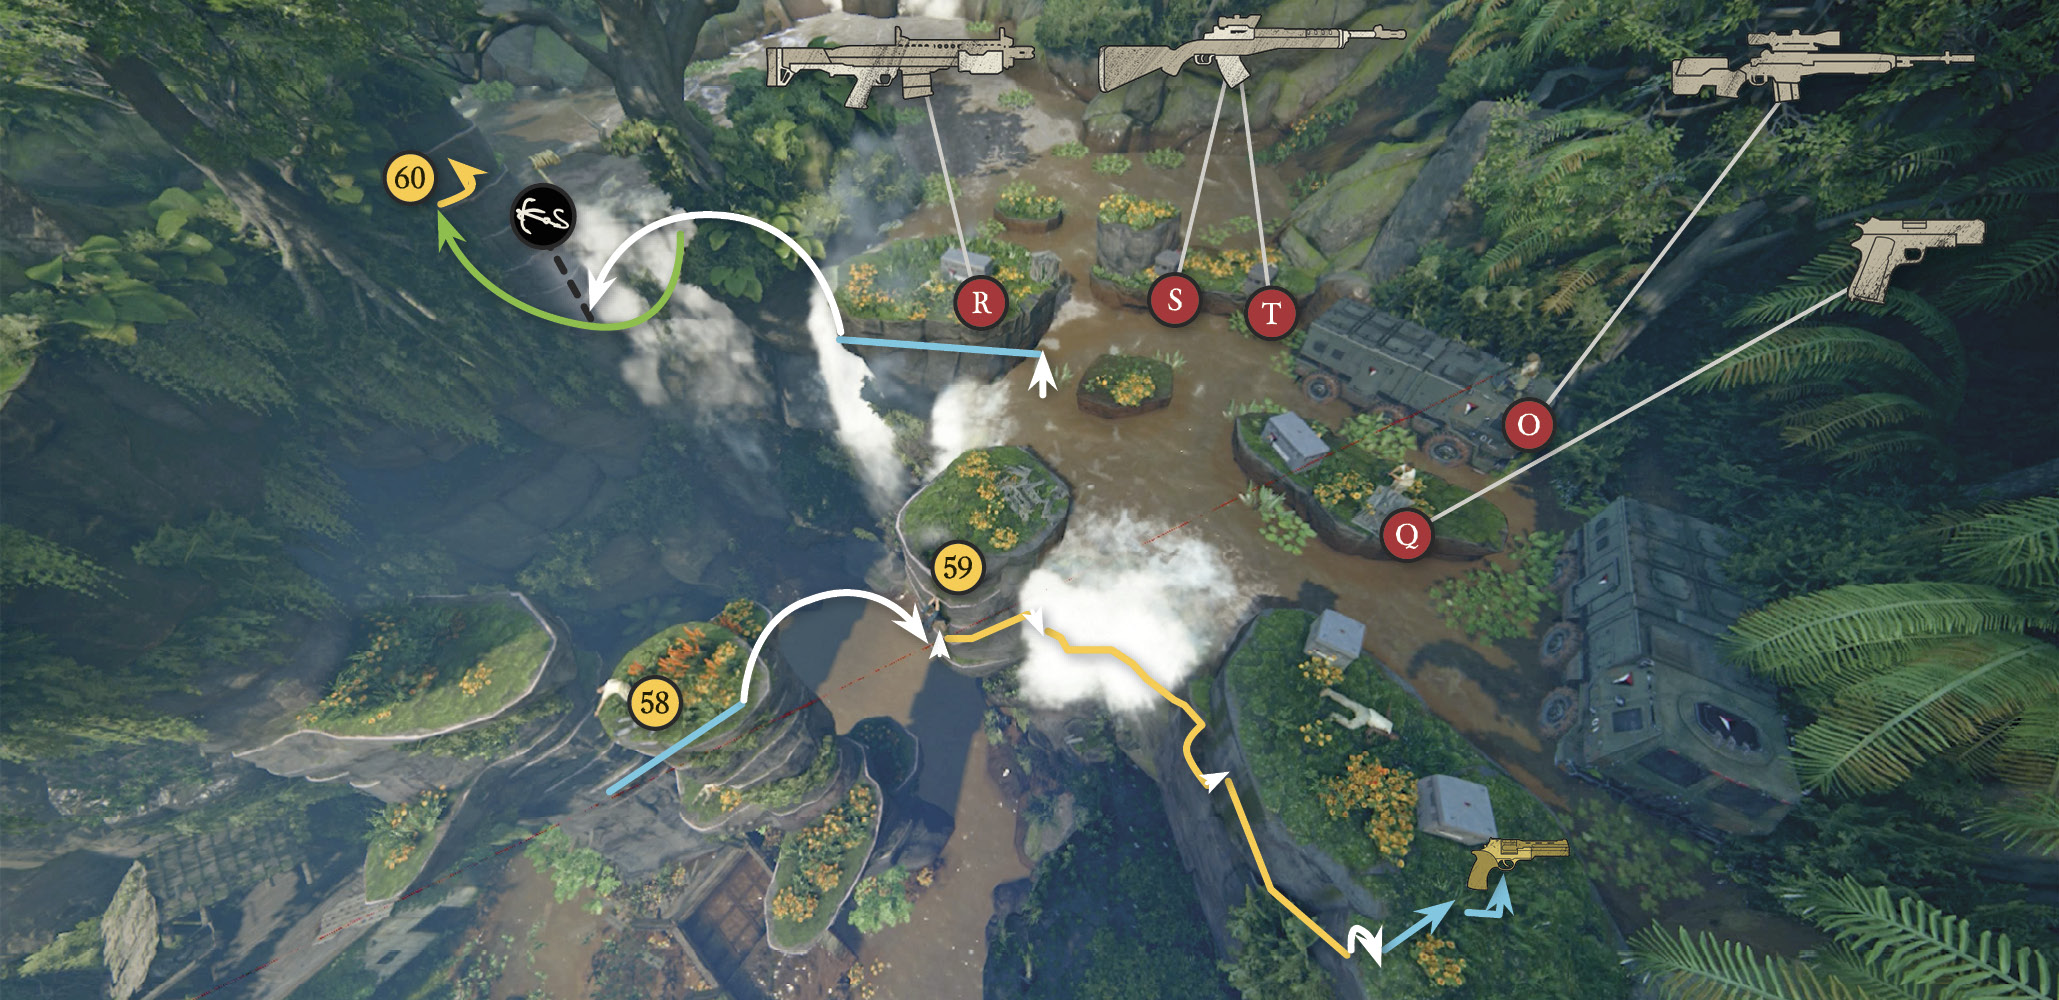
The two guys in this wave appear at the same time but you should take out the rifleman first, as he is more dangerous and sometimes comes into view sooner. The rifleman (K) arrives atop the tall pillar (58) directly in front of you. Eliminate him quickly and then turn your aim on the handgun-wielding soldier (L) that rappels down from above onto the elevator pillar’s top ledge to your left. Again, you can do this while hanging onto the edge of the elevator or you could risk some damage by standing on top of the elevator using the sniper rifle.
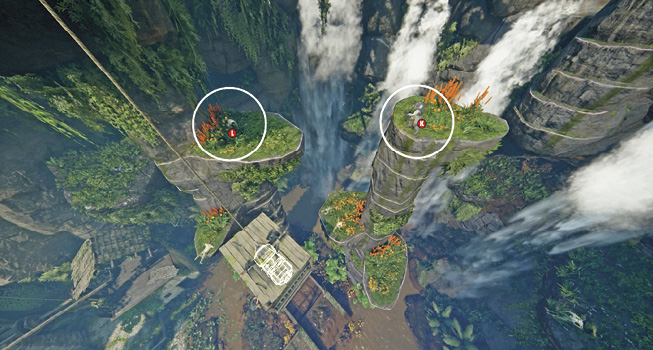
Sixth Wave: Three Gunmen & Rocket Launcher
These killers are spread farther apart. The shooter (M) on the highest terrace in the middle of the falls immediately jumps to the middle pillar (58), often shooting as he is jumping. Take him out first. The goon (N) over to the right also on top of the waterfall sometimes follows the other soldier’s (M) actions, depending on where you are positioned. So they may both jump to the central pillar one after the other. Or the second shooter may remain on the far right waterfall ledge. If you have the sniper rifle, be waiting on top of the elevator with your scope ready to pick them both off quickly. Otherwise, continue to shoot from the edge of the elevator.
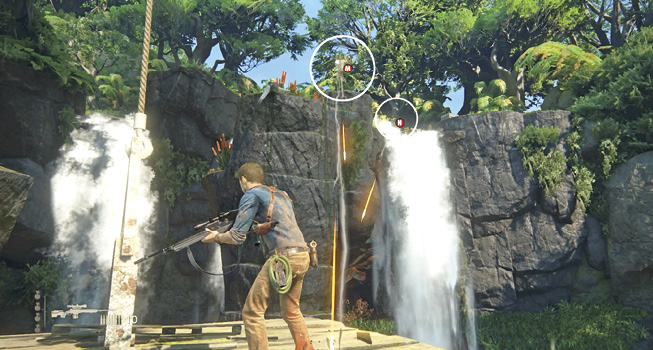
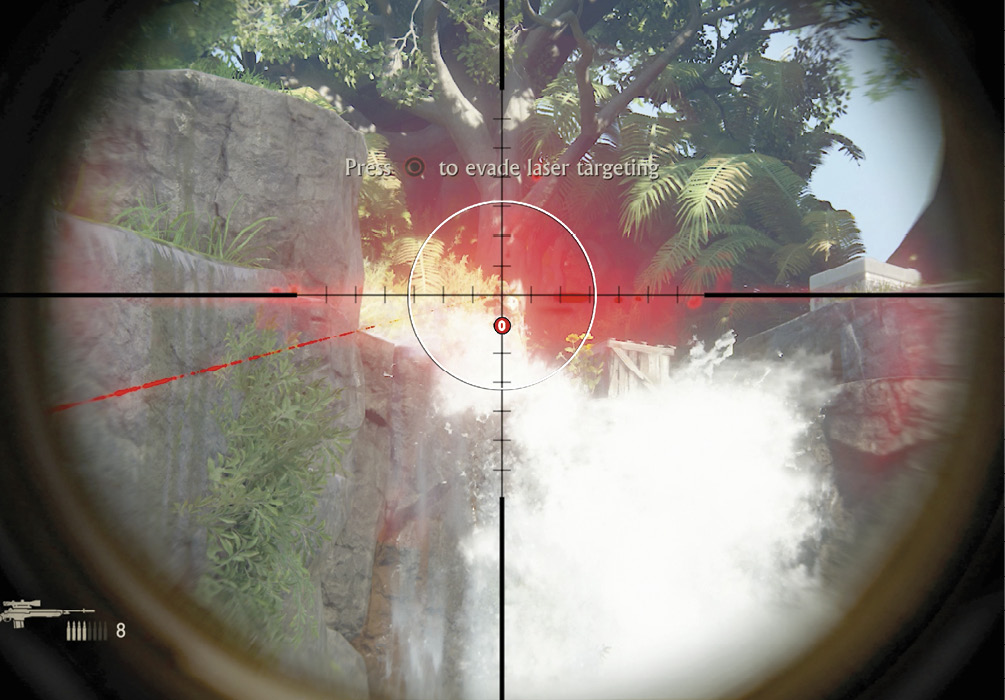
The next soldier that appears is very threatening. A sniper (O) climbs to the top of a Shoreline truck in the middle of the waterfall rapids above. And if you haven’t died during this battle, a soldier with an RPG (P) will appear on the leftmost pillar at the falls.
If you’ve died several times, this rocket-launching soldier will not appear. We recommend staying on the top of the elevator and quickly sniping the sniper and the rocket launcher (if he appears). If you’re not that great with the scope, then remain on the edge of the elevator and shoot or deal with him when you get closer. If you do take him out, continue to ride the elevator until it stops and take out any other enemies that appear in the next wave with the sniper rifle from the top of the elevator.
Restart the Elevator: Four Gunmen
Eventually, the elevator stalls again as it gets near the top, and Nate decides to do something about it. Keep using the cage for cover until you’ve eliminated all remaining attackers. Then climb onto the top and jump across to the narrow pillar (58). Of course, the moment you jump, the elevator restarts and rises to its destination; let it go. If soldier (N) jumped and died on this pillar, then pick up his dropped Barok .44. Next, jump to the handholds on the waterfall pillar (59).
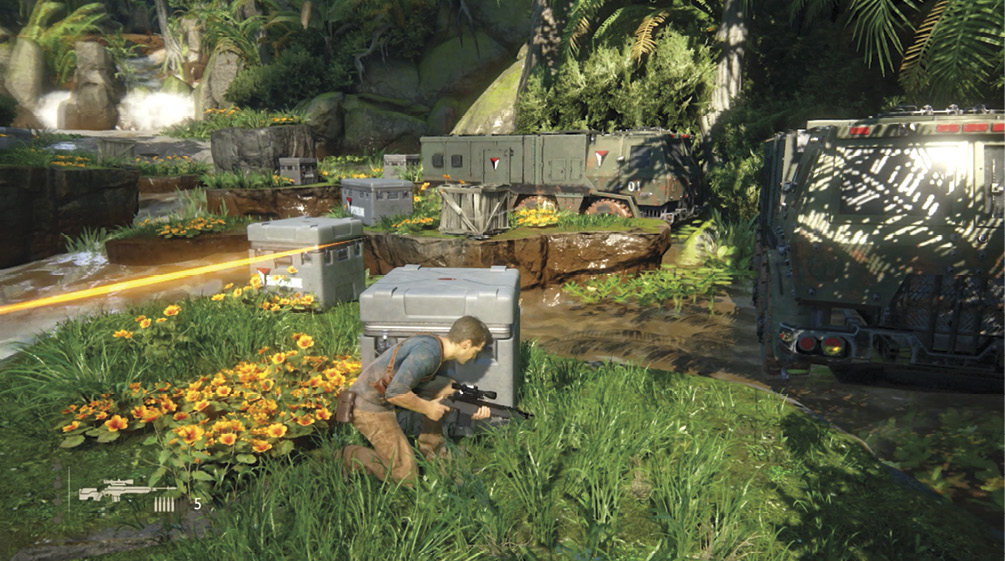
As you make these jumps, one last team of gunmen advances across the upper ledge area to attack. You can use the pillar for cover, as you did the elevator, but grenades will be thrown quite often. You can also drop off the edge of the waterfall on the right, shimmy along the edge through the water, and then make your way to crate cover (and a Barok.44 from dead soldier (N) if he died closer to where he spawned). Use the crates for cover or the front of the rightmost truck as you eliminate the rest of the enemies (Q, R, S, & T).
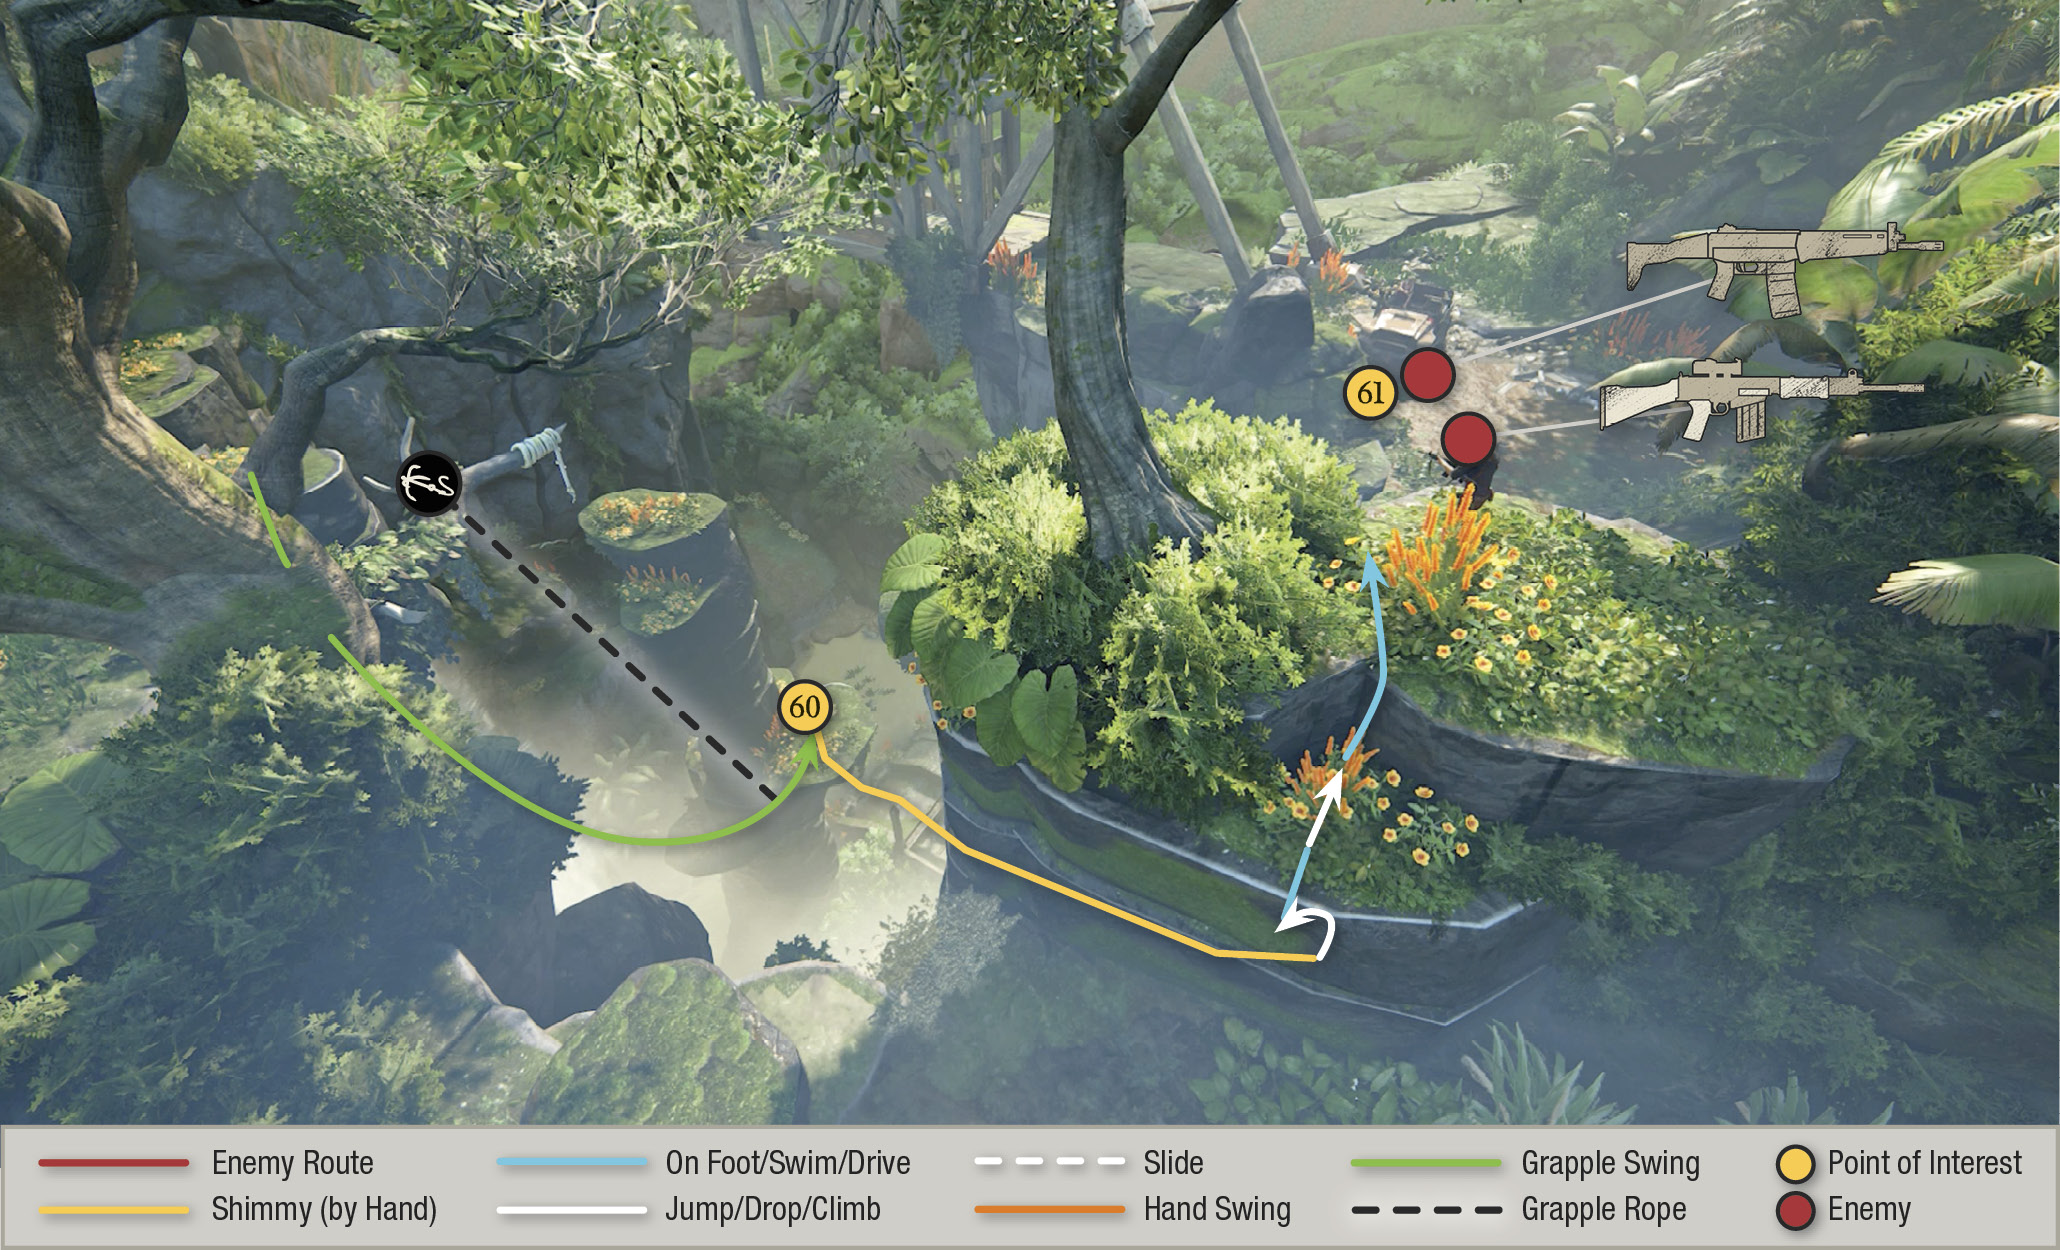
When all are dead, hop across the islands to the left. Use the tree branch to grapple-swing across to the rock handholds (60) near the elevator tower. As you proceed, you hear more goons attacking Elena. Don’t hurry—in this case, she can take care of herself. Shimmy rightward along the ledge until you can pull yourself up and see her run over the Shoreline soldiers with the 4x4. Head past Elena and the 4x4 (61) to find a treasure on a small ledge.
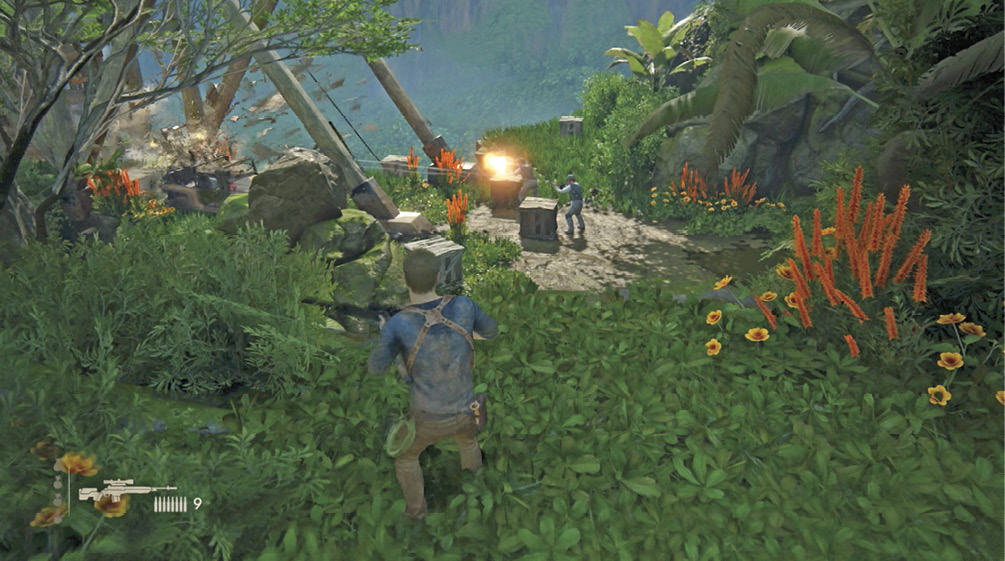
 Ancient Stone Bowl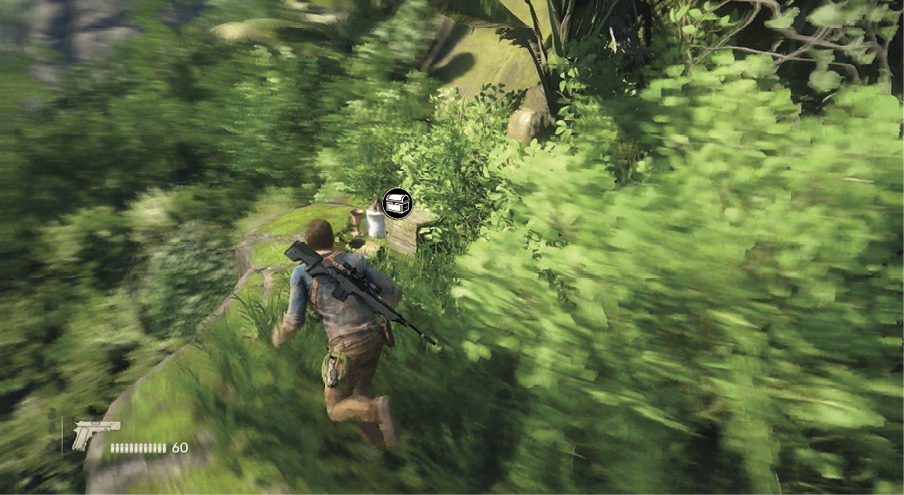 After witnessing your wife run over two gunmen with the 4x4, walk past her and the elevator to find this treasure. It’s on a crate on the cliff’s edge. |
Drive Upstream to the Sluice Gates
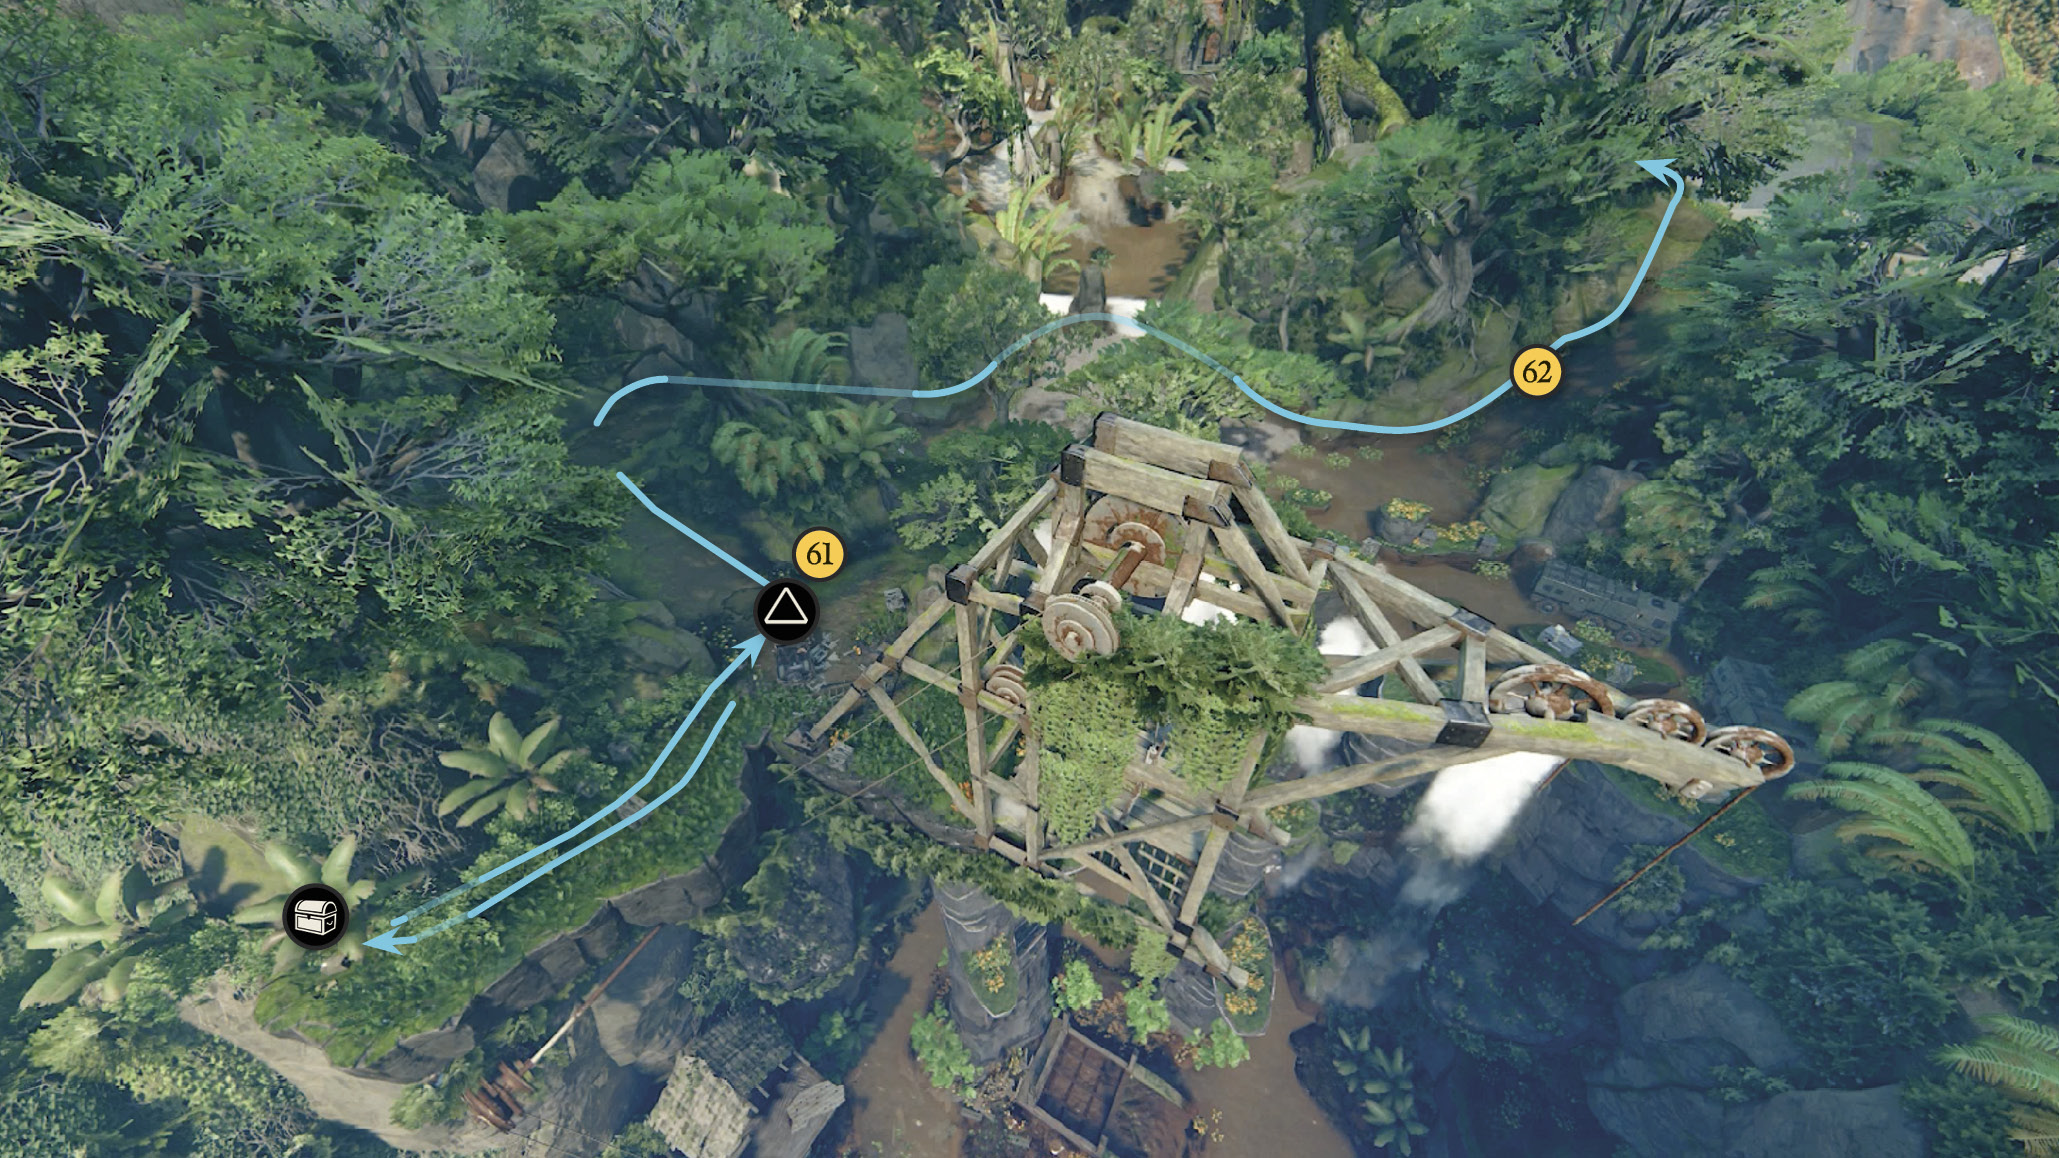
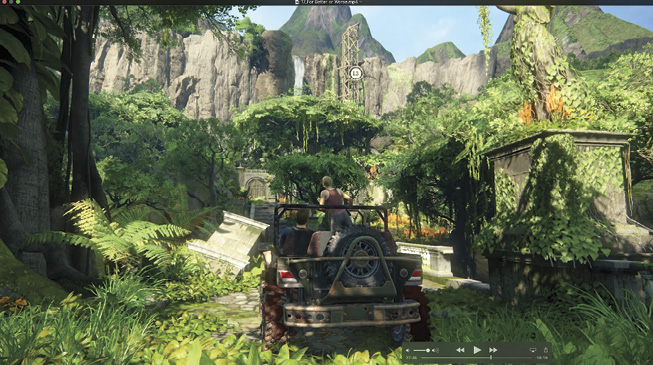
When you finally reach your vehicle, hop in and follow the narrow streambed around a curve to the river. Drive across the river to find a steep road (62) on the left side. Follow the road to a collapsed bridge (63). Take a moment to admire the distant elevator, pressing L3. Veer left through the arch formed by the tree trunk and plunge downhill into the river.
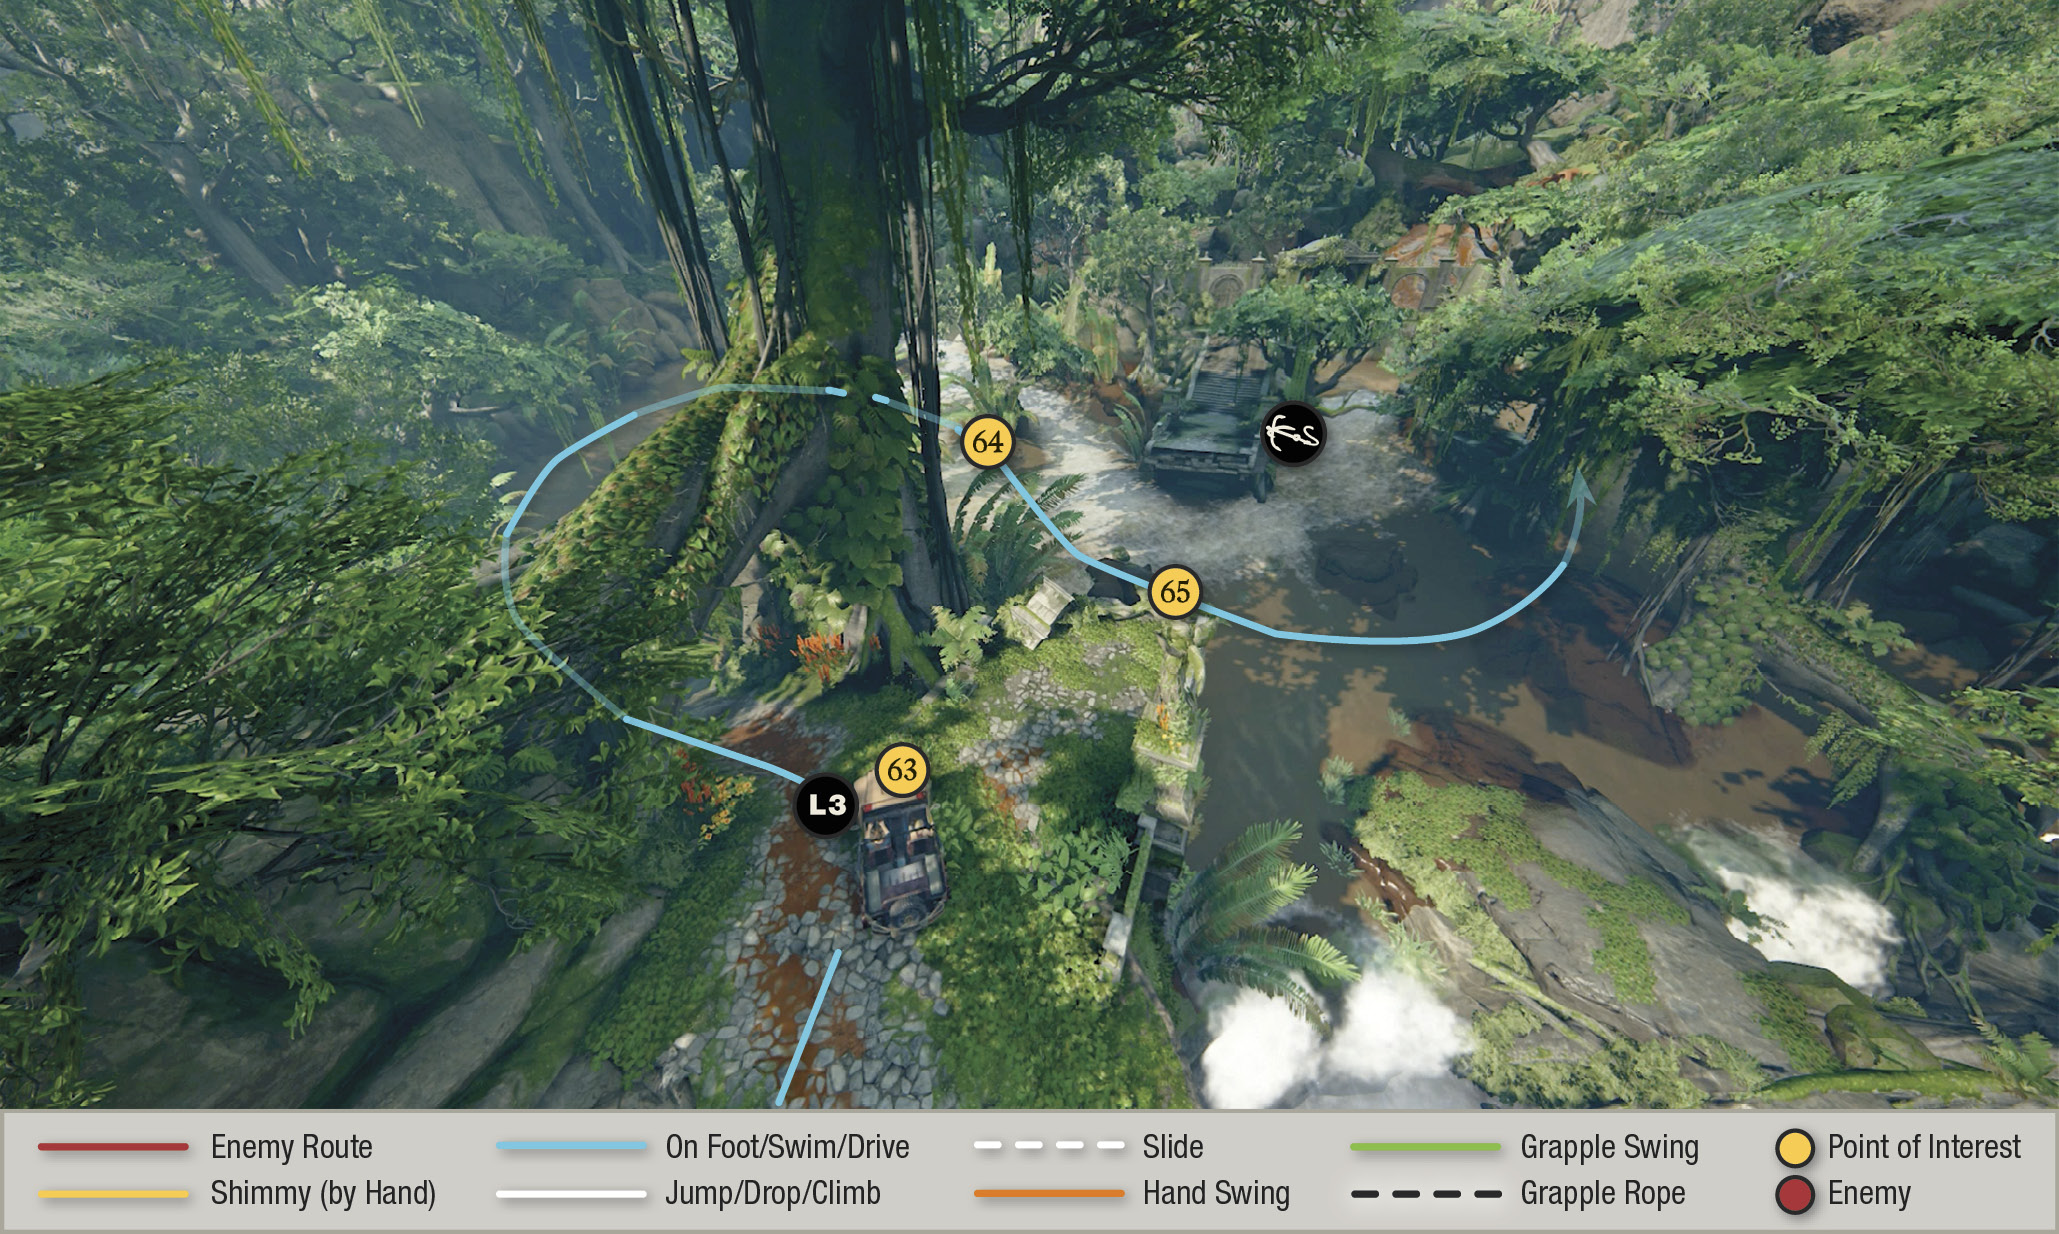
You can’t drive against the rapids, so steer upstream in the calmer water along the rocks on the left. Follow the curve until you drive onto the rock overlooking the whitewater chute (64). Drive into the rapids, riding the current downstream until you can get enough traction to steer left between the broken bridge sections (65). Here, drive straight across the river and up onto the far bank, and then turn left to continue upstream. When you reach the closed sluice gates, park (66) and exit the 4x4.
Open the Sluice Gates
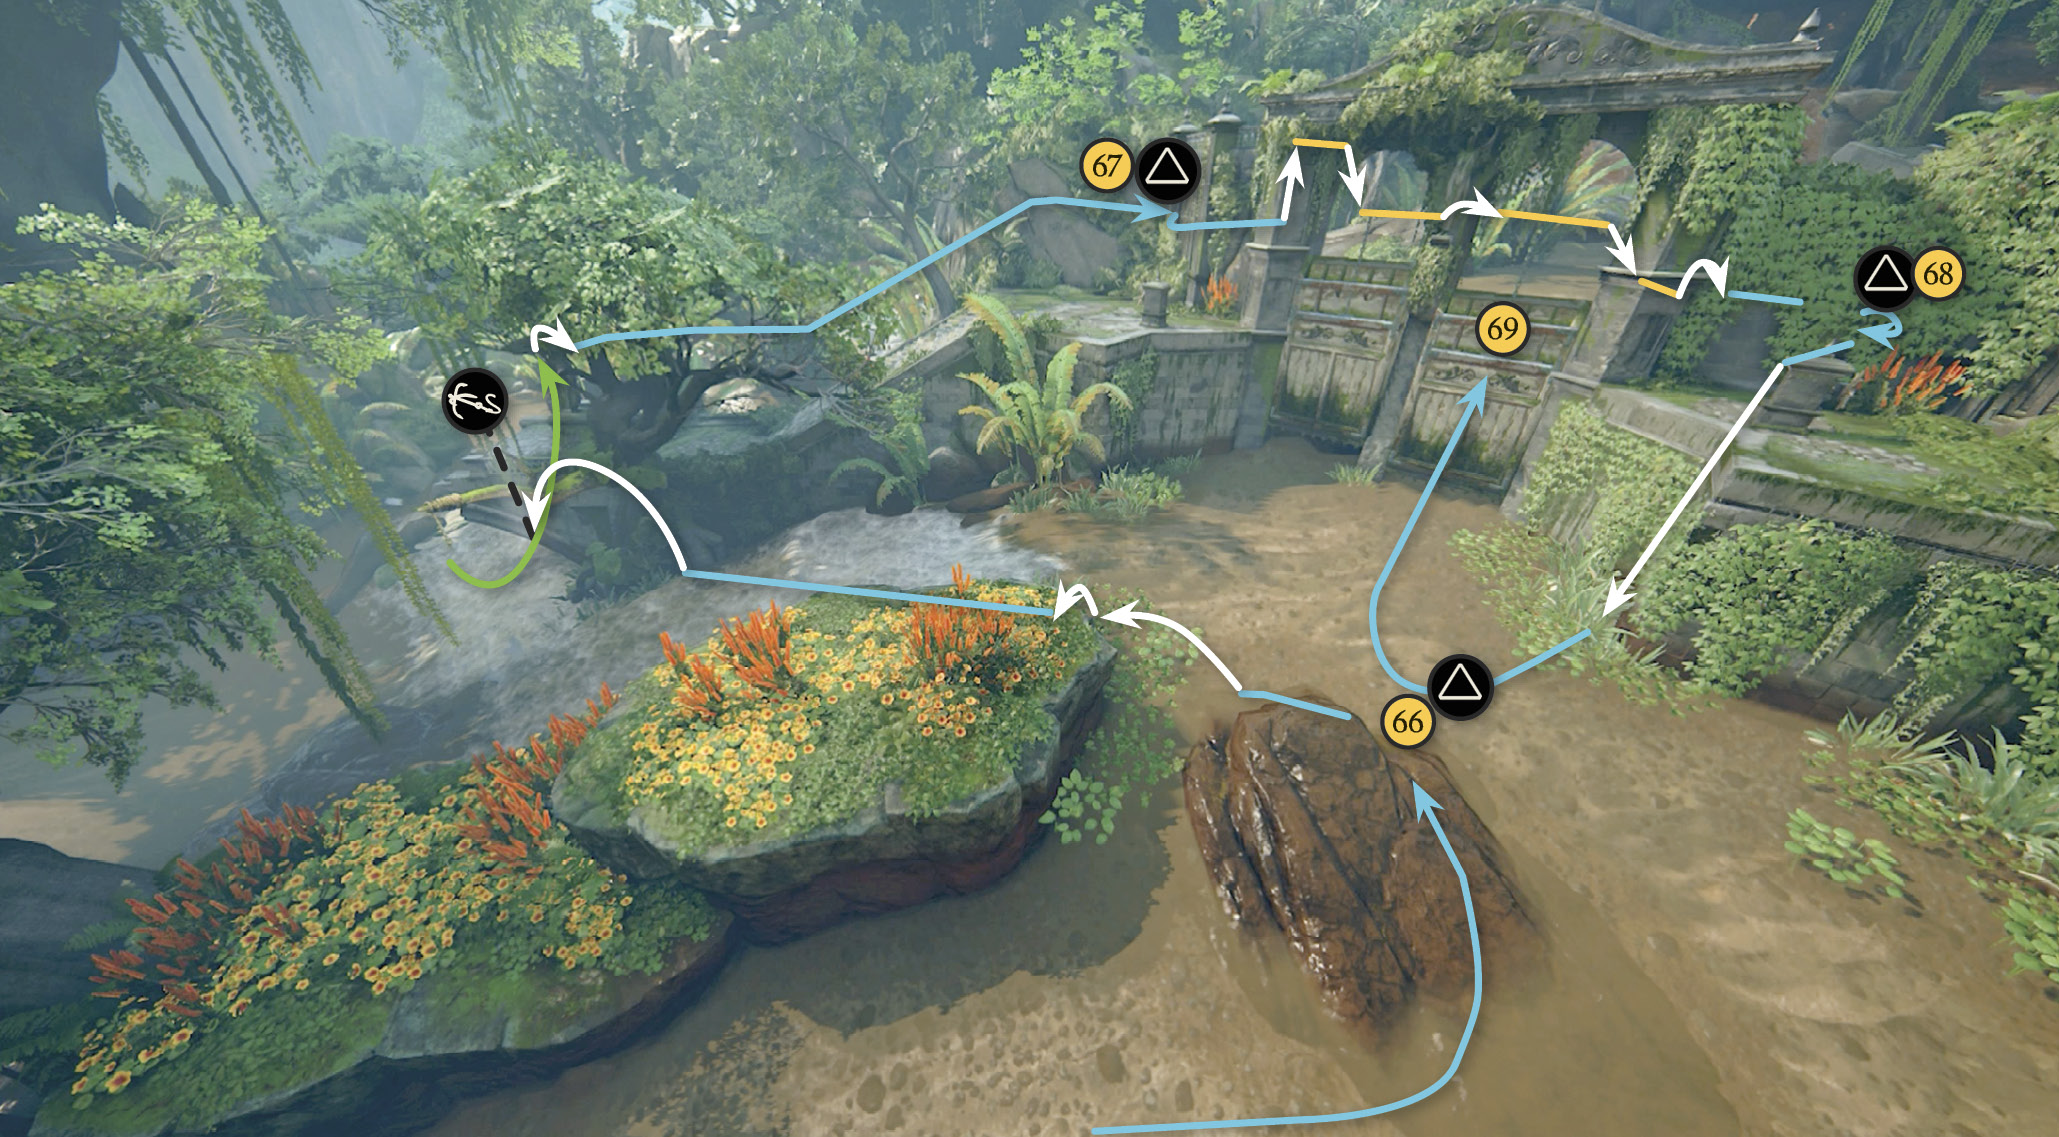
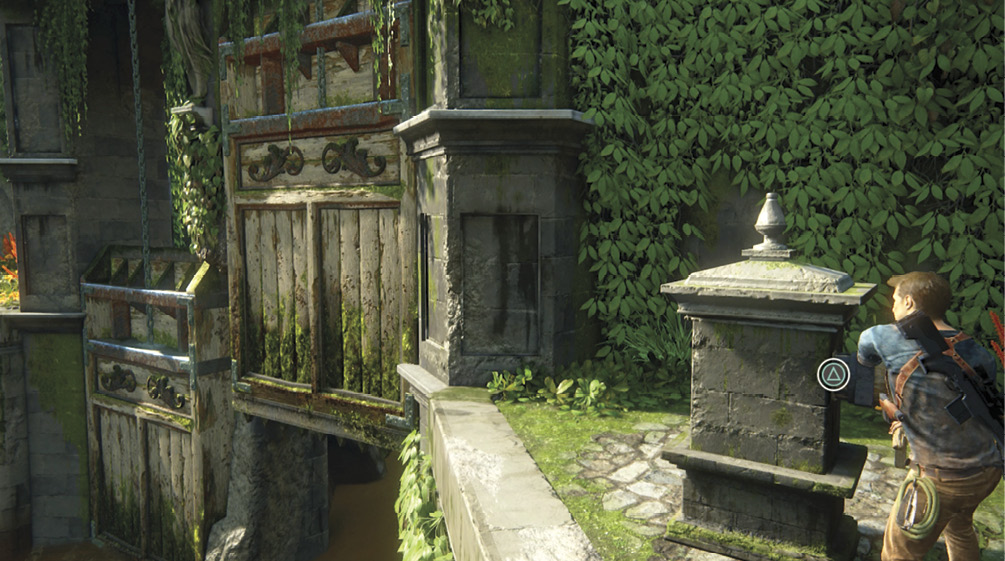
Climb onto the nearby island and use the tree root as a grapple point to swing across onto the broken bridge section. Climb the stairs and use the crank (67) to open the left sluice gate. Unfortunately, the gate is clogged with debris. Climb across handholds on the gates to the opposite platform and turn the crank (68) there to open the right sluice gate. Return to the 4x4 and drive through the gate (69).
4x4-Jump Across the Bridge Gap
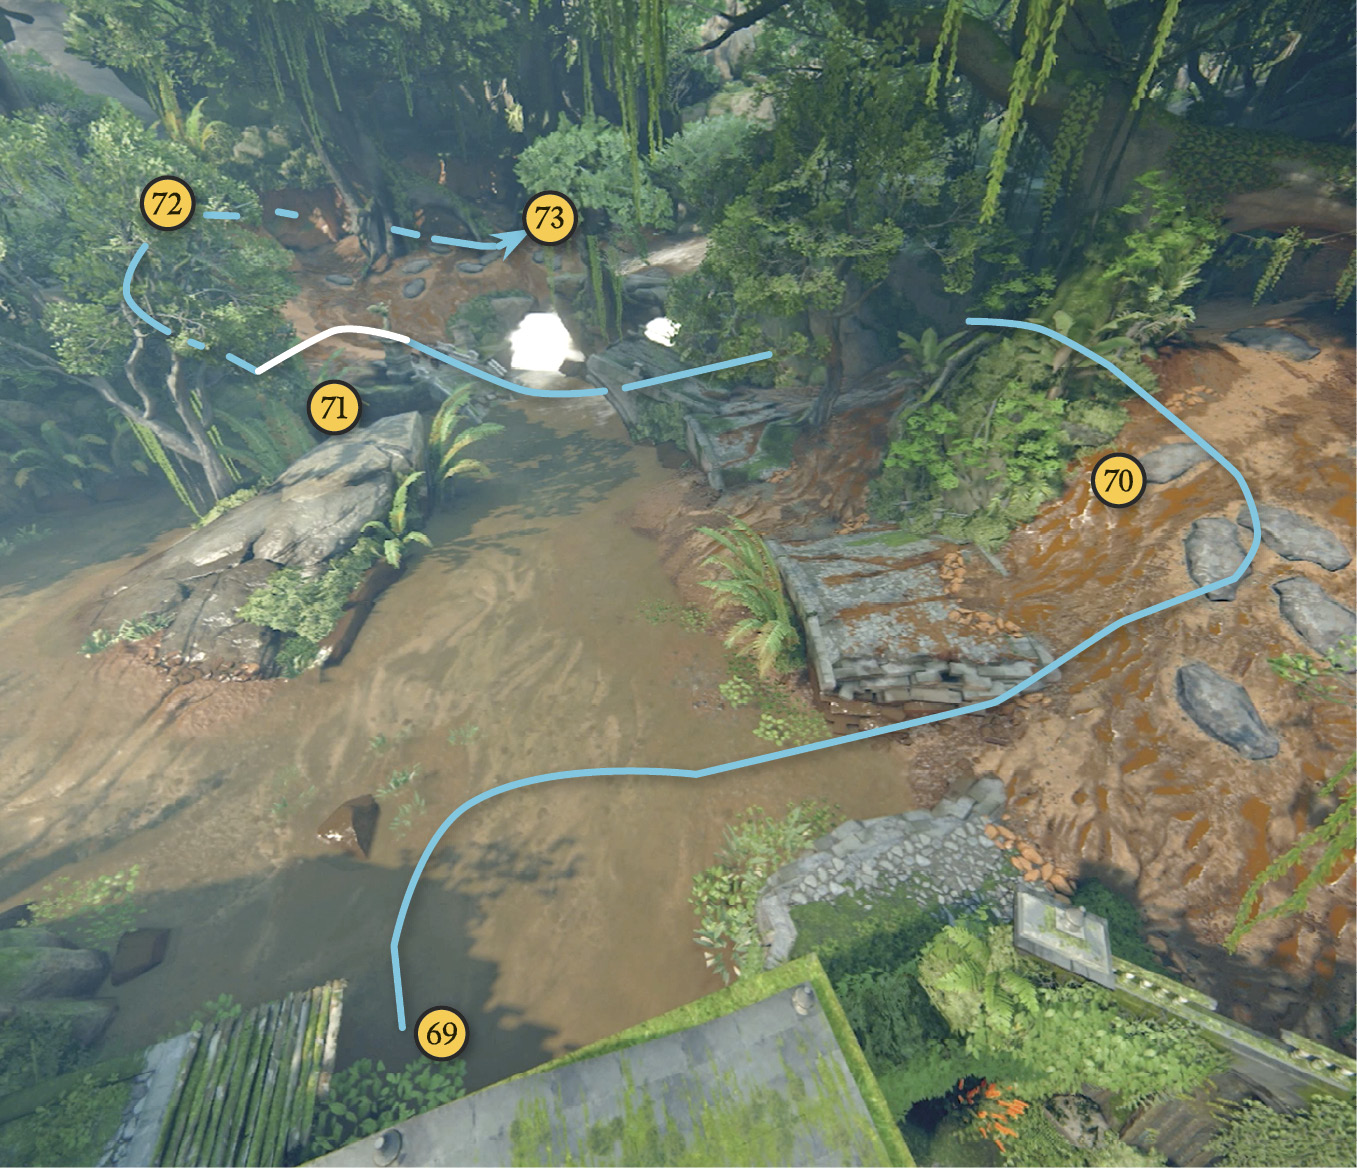
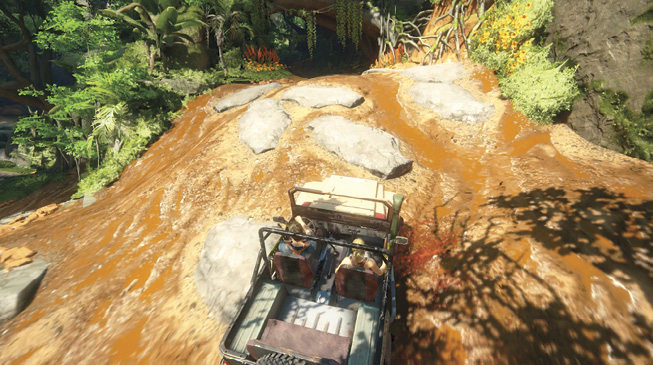
Your next challenge is to get across another broken bridge just ahead. You can jump the 4x4 across the gap, but only if you build up enough downhill speed on the approach. Just after driving through the newly opened sluice gate (69), turn hard right and gun it uphill (70). Important: The hill is steep and muddy, and the only way to reach the top is to steer over the gray rock sections. The red mud is too slippery for even a 4x4 to get enough traction. When you finally reach the hilltop, turn left and accelerate downhill to the bridge ramp (71). Hit it dead center and you should fly across the gap.
Use the Second Elevator
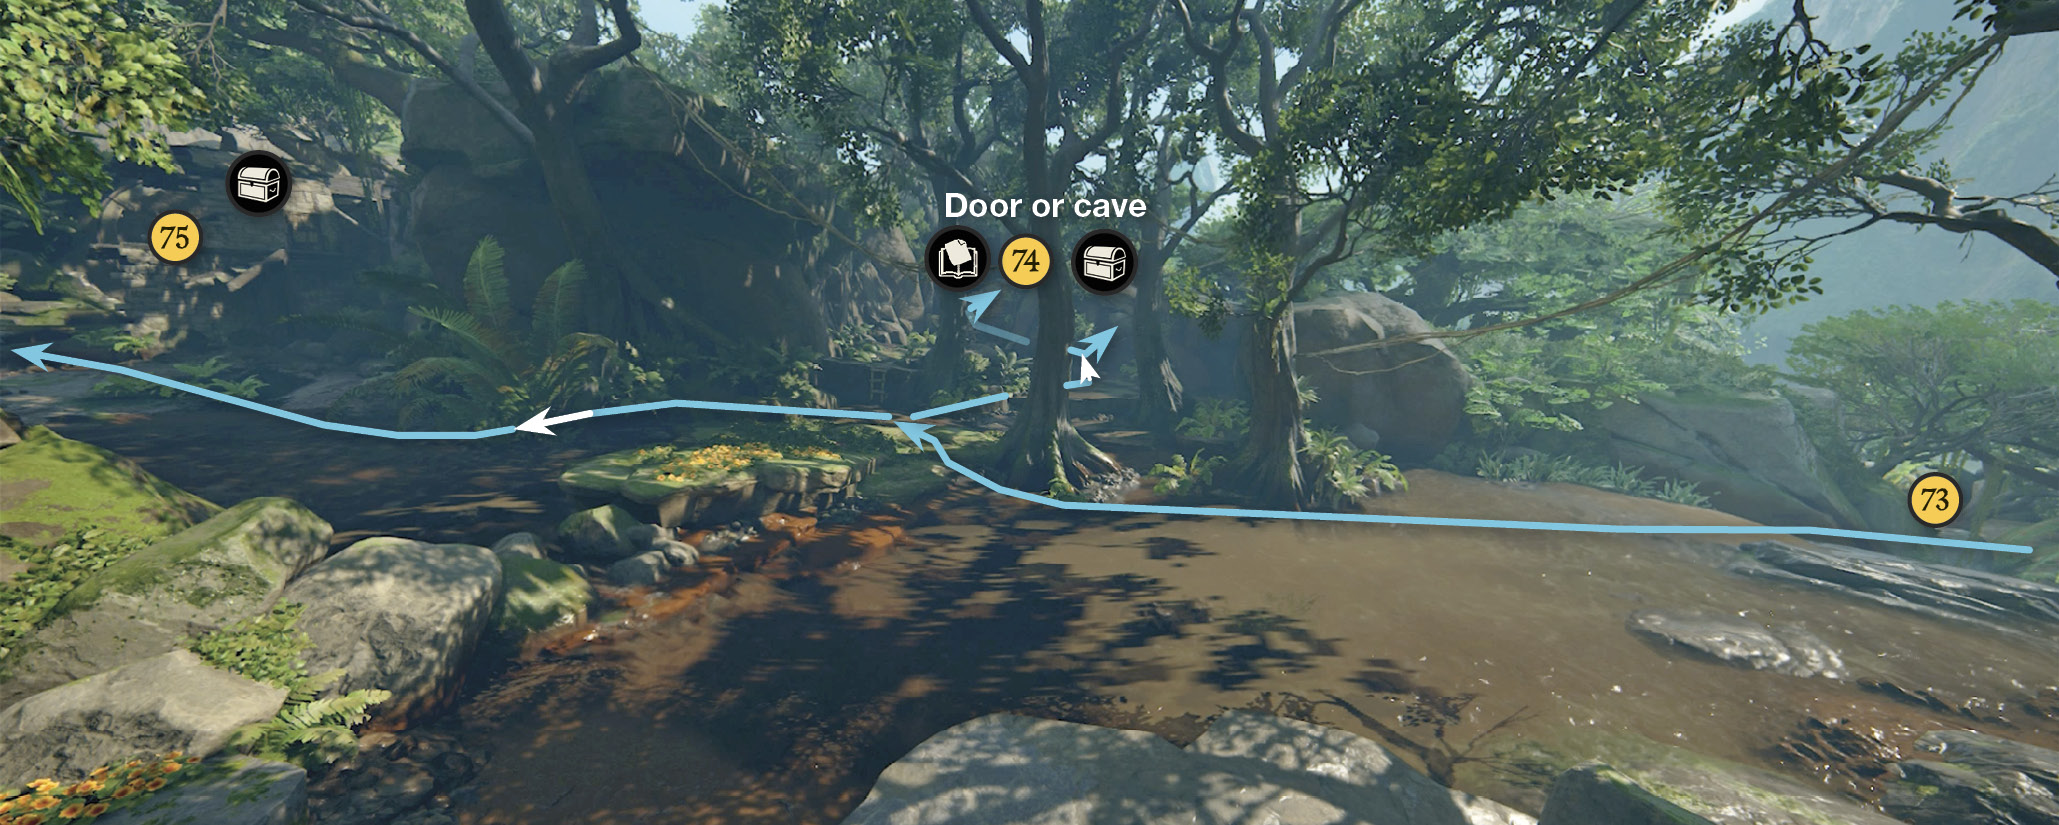
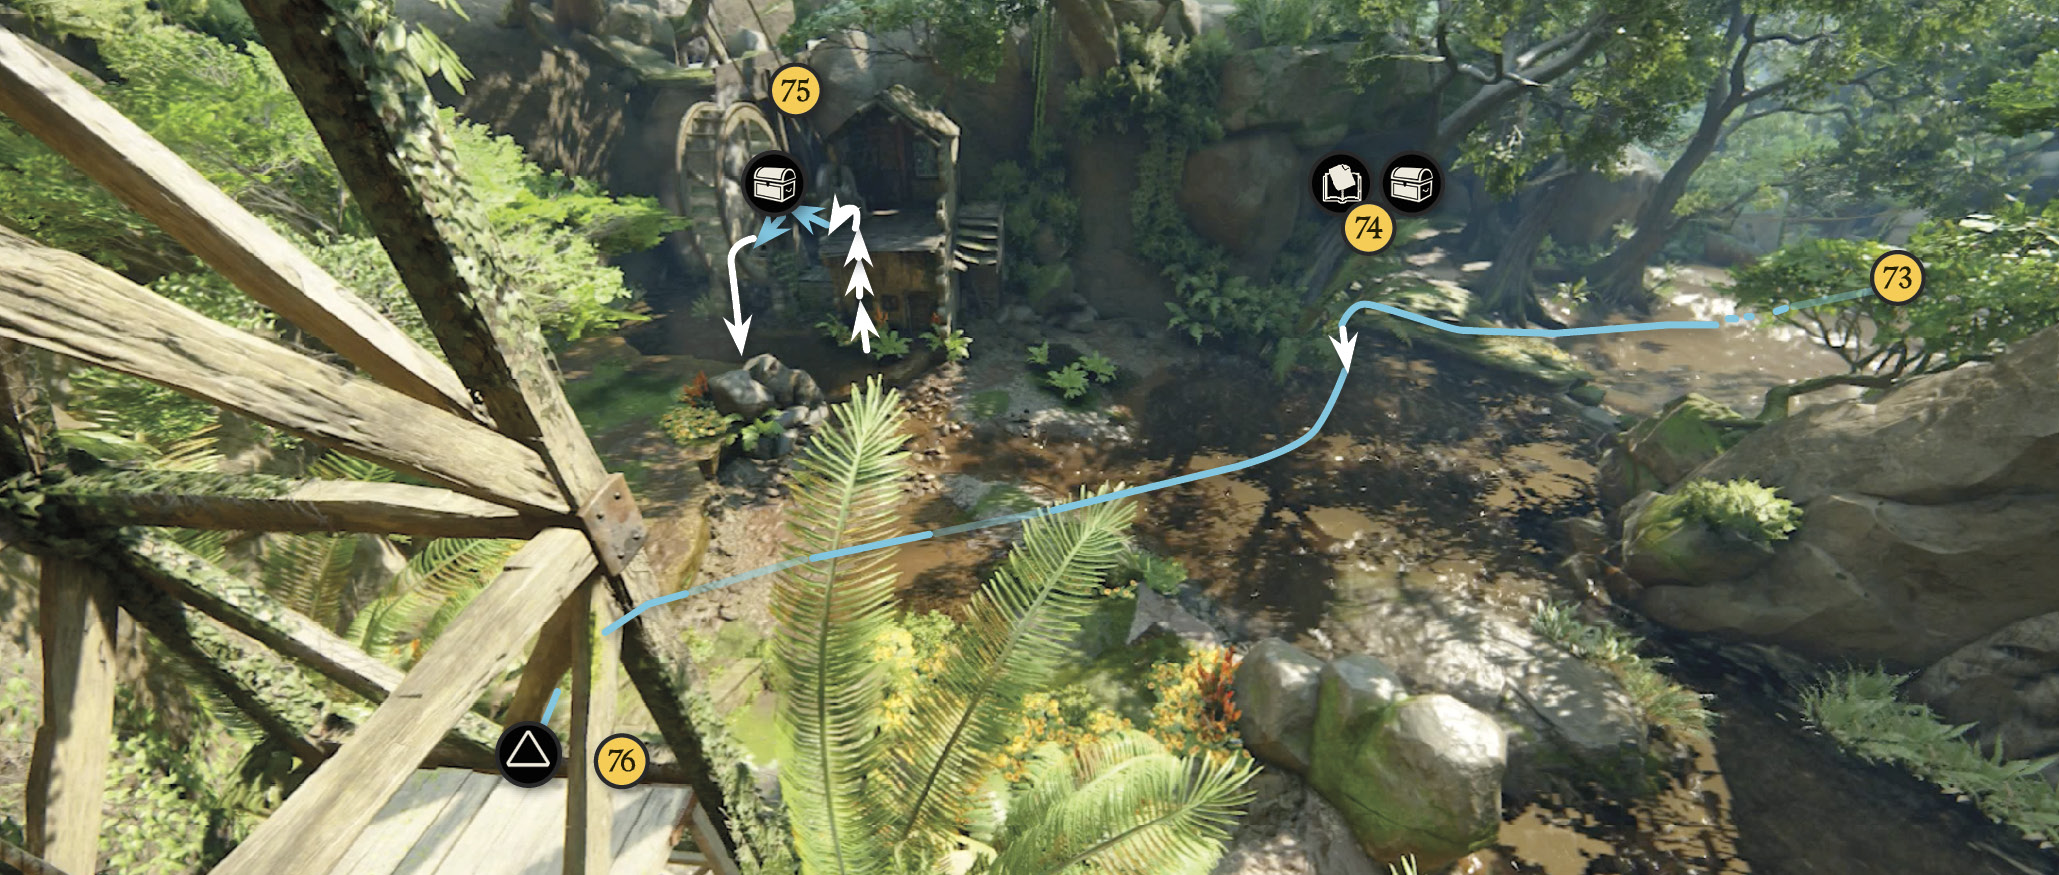
Climb the hill on the other side and follow the curve through the trees (72) back to the river. Now drive upstream (73) toward the next elevator tower. Note that you can find treasures and an Optional Journal Note in a pair of structures on the right side of the river (74, 75).
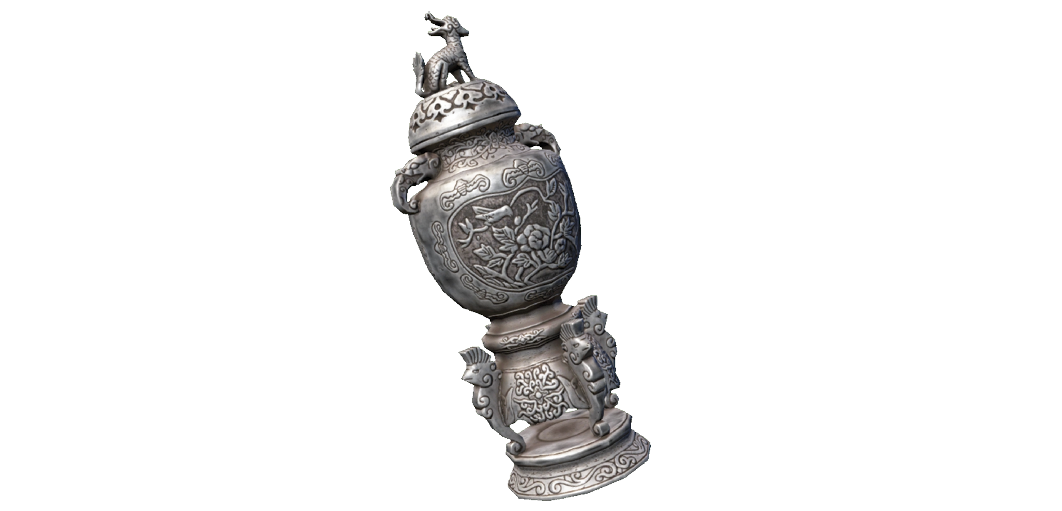 Pewter Incense Burner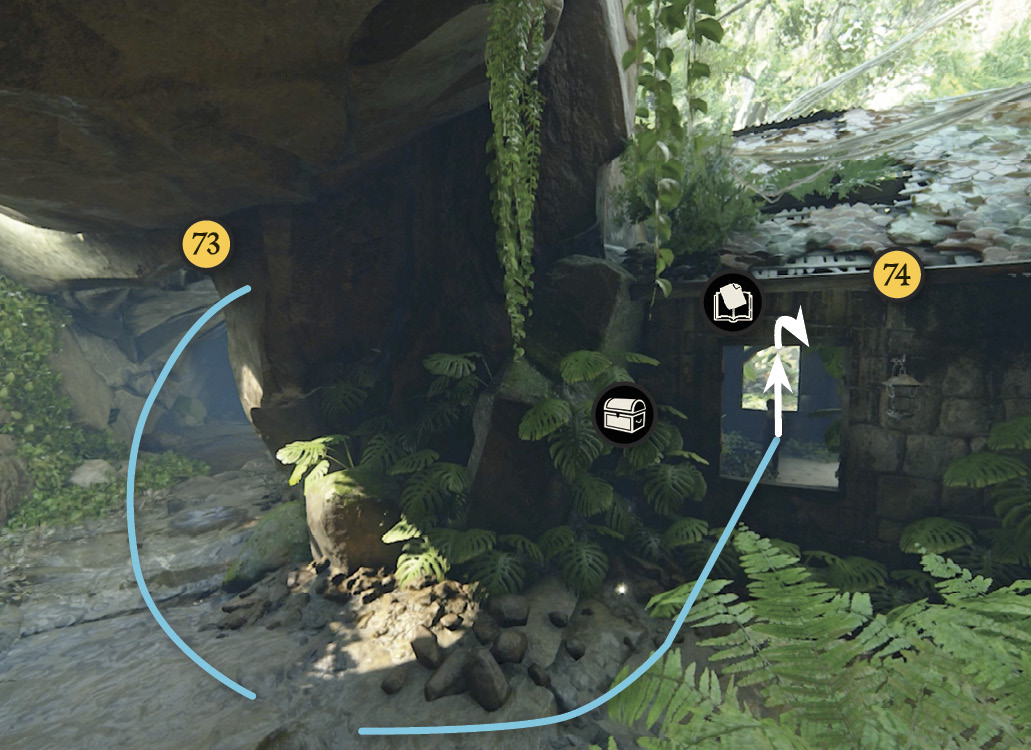 After you 4x4-jump the bridge and head upstream again, find the ramshackle hut on the right bank. In the tunnel behind the shack, you can find the Pewter Incense Burner next to the shack. Inside you find an Optional Journal Note from an elevator caretaker. |
 18th Century Combination Lock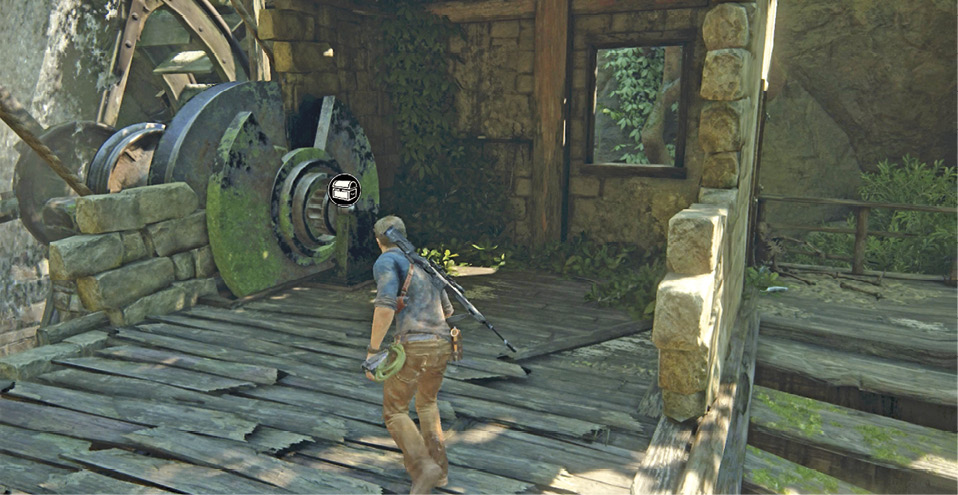 Climb the broken brick section on the right corner (facing the building) of the waterwheel building across from the elevator. You can find the treasure on the waterwheel gear on the second floor. |
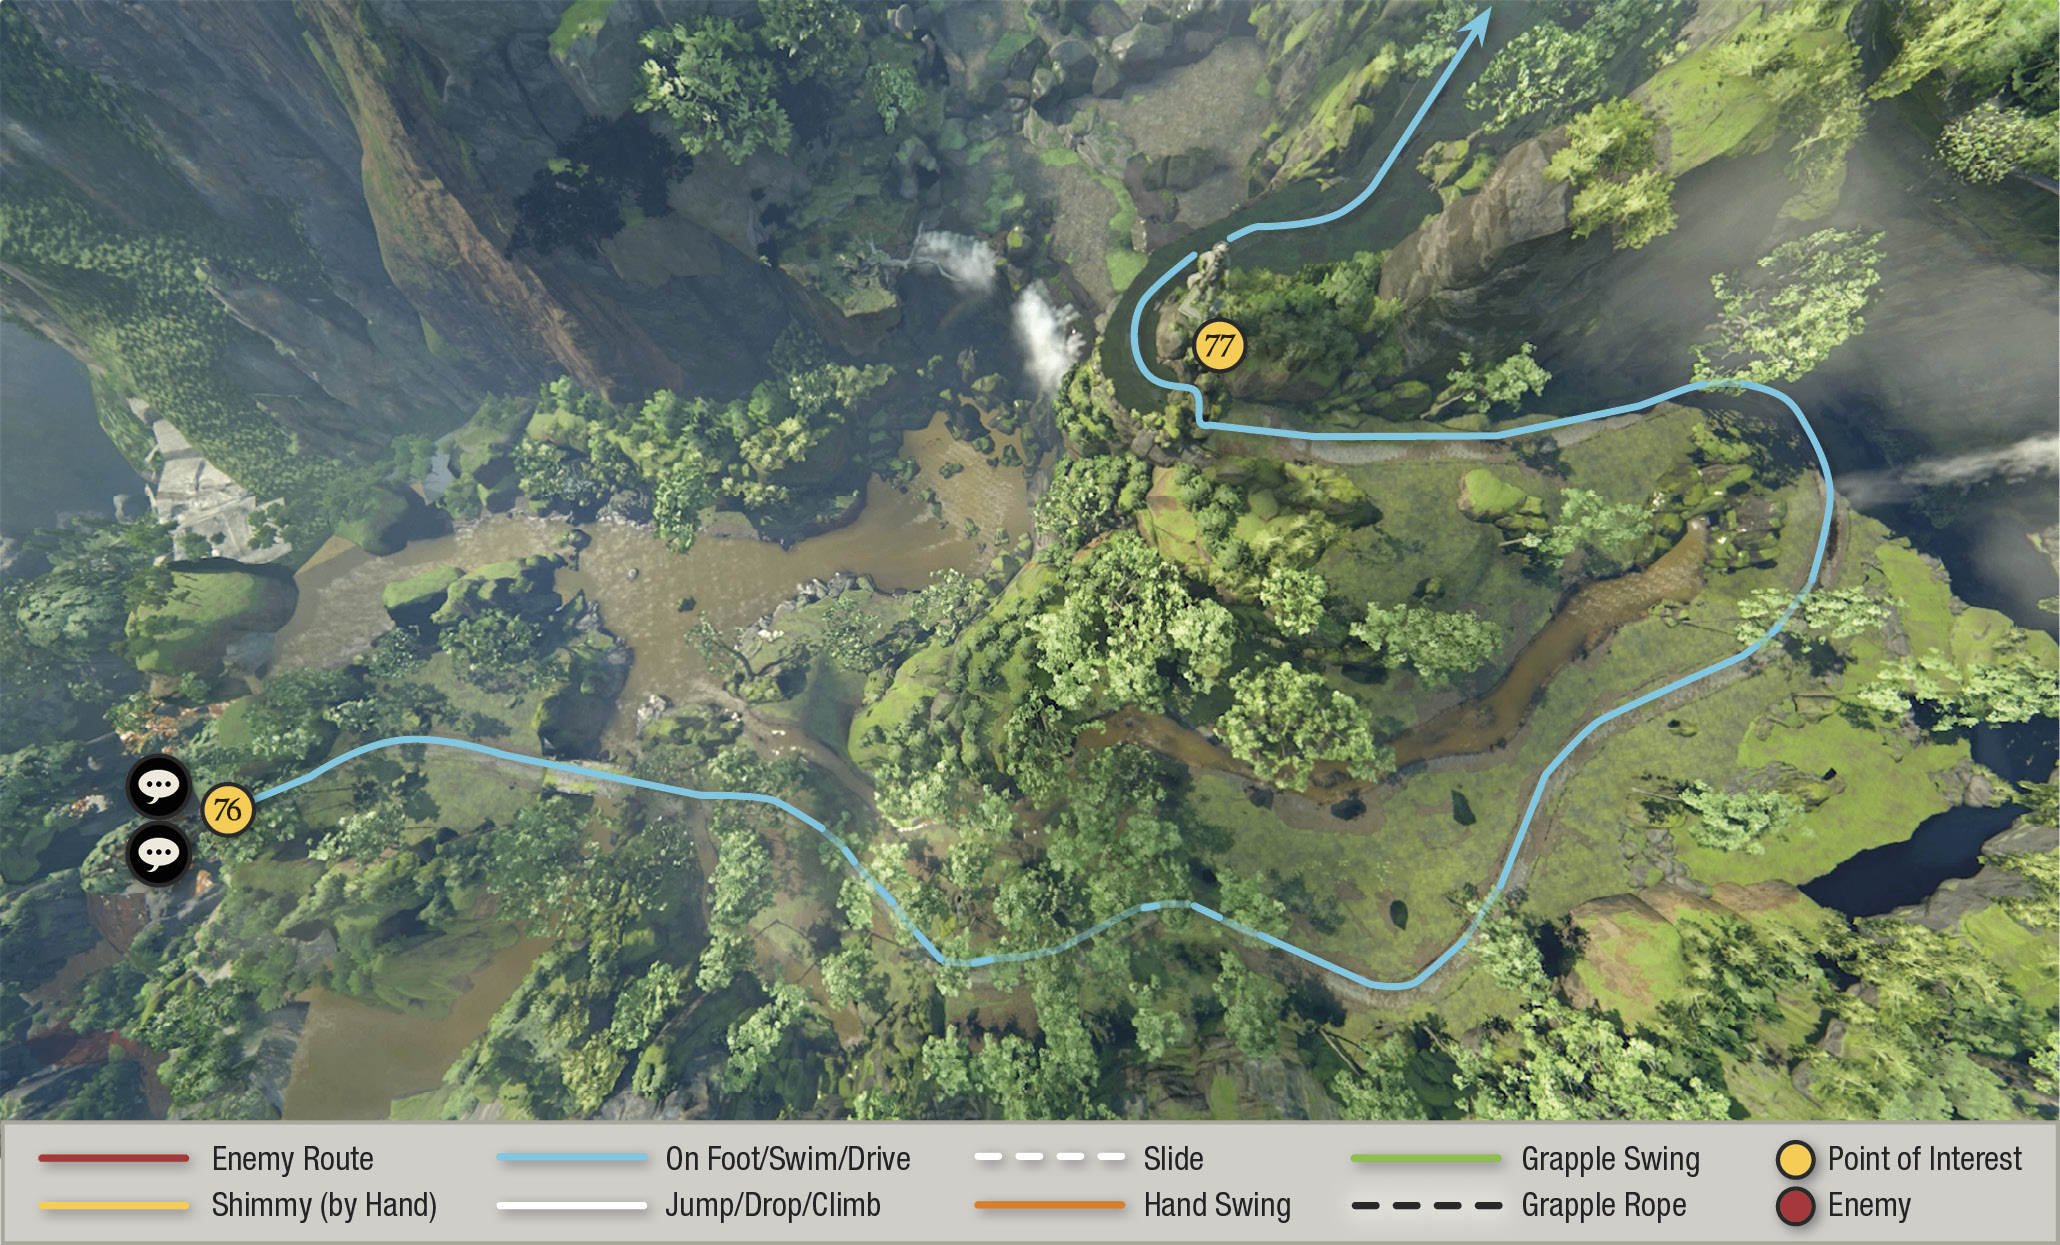
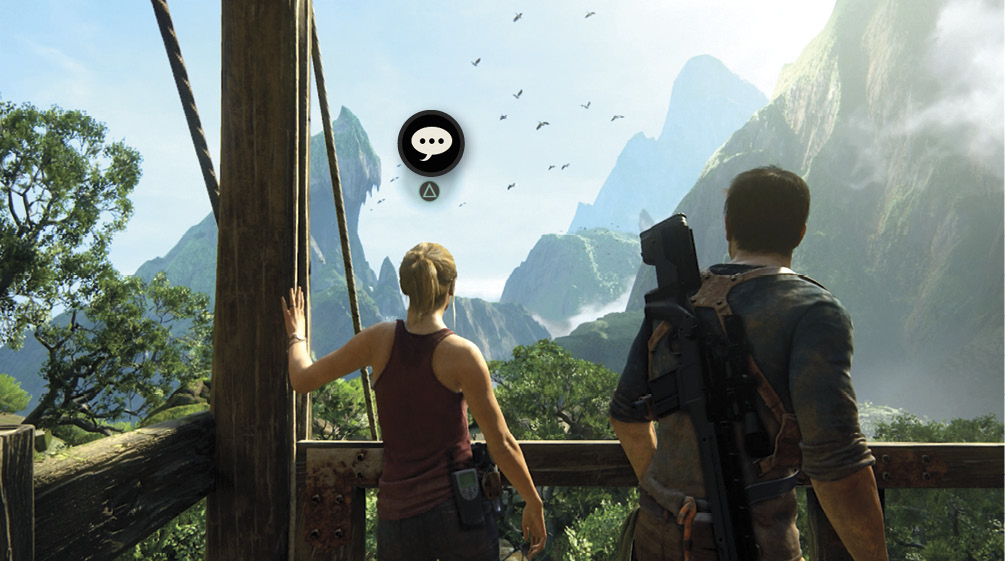
When you reach the tower, exit the 4x4 and open the elevator gate by tapping until Elena drives the 4x4 in. Then pull the lever inside to raise the elevator. Listen to the two Optional Conversations on the way up, and then repeat the button tapping to open the gate again at the top.
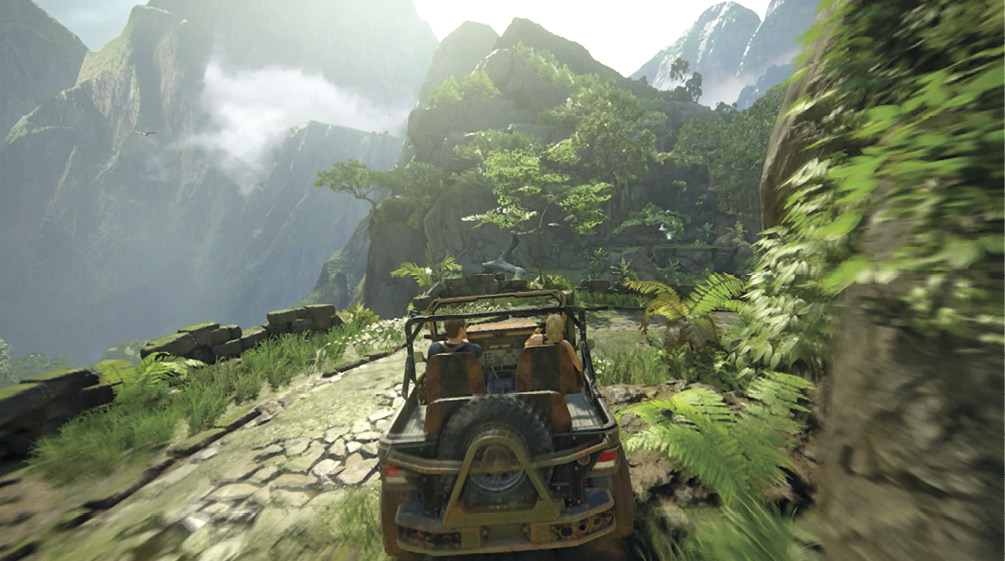
Hop in the 4x4 and follow the long road from the elevator (76) past the mini-avalanches at the Avery statue (77) and the bridge (78) that leads into New Devon.
Survive the Bridge Collapse!
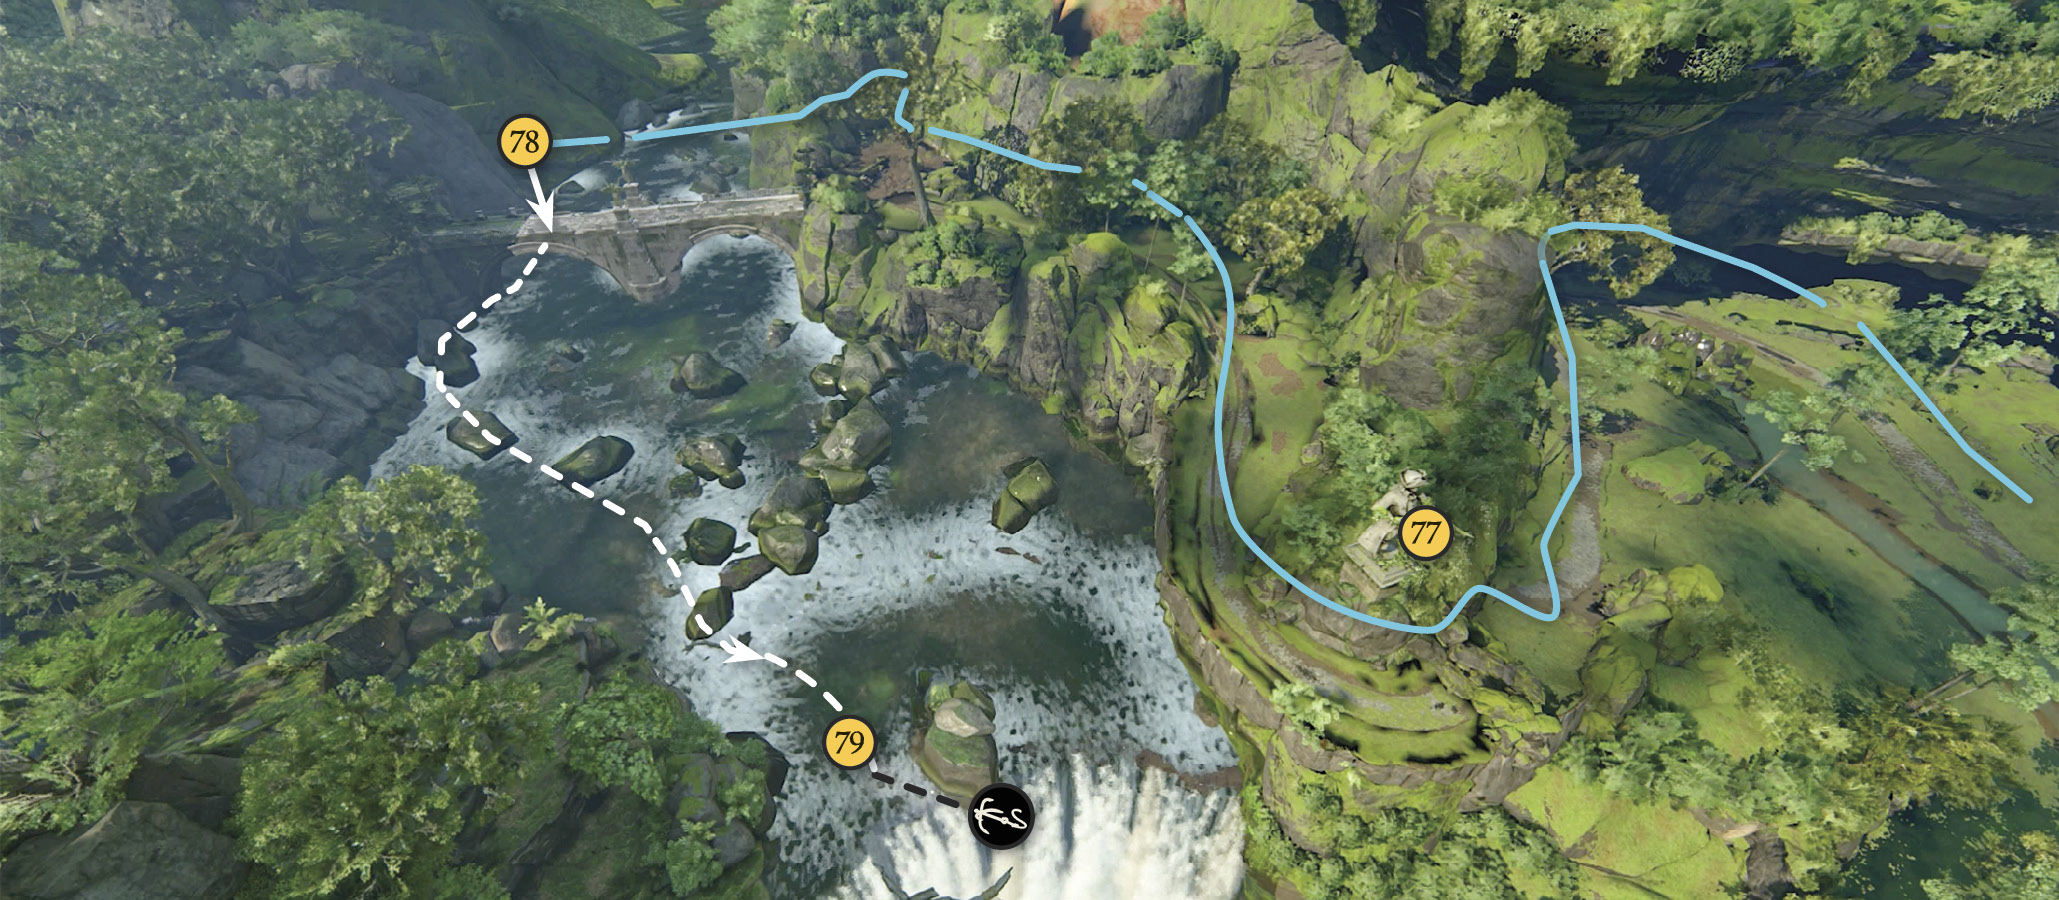
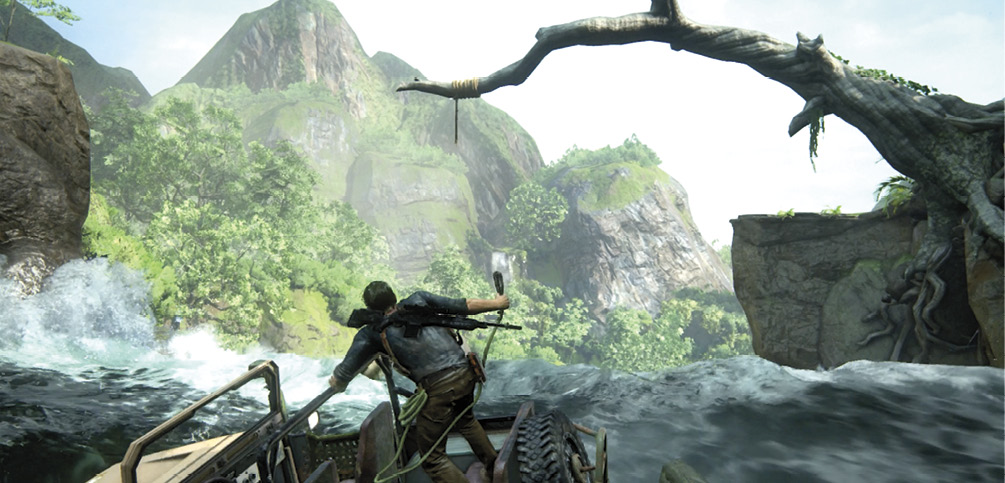
When you try to drive across the New Devon entry bridge, it collapses and drops the 4x4 into the river. Now you ride the rapids downstream. At one point, Elena manages to escape but Nathan can’t hop out of the 4x4 in time. Keep riding down to the great waterfall. As you go over the edge (79), sling your grapple hook at the branch of the great dead tree on the cliff.
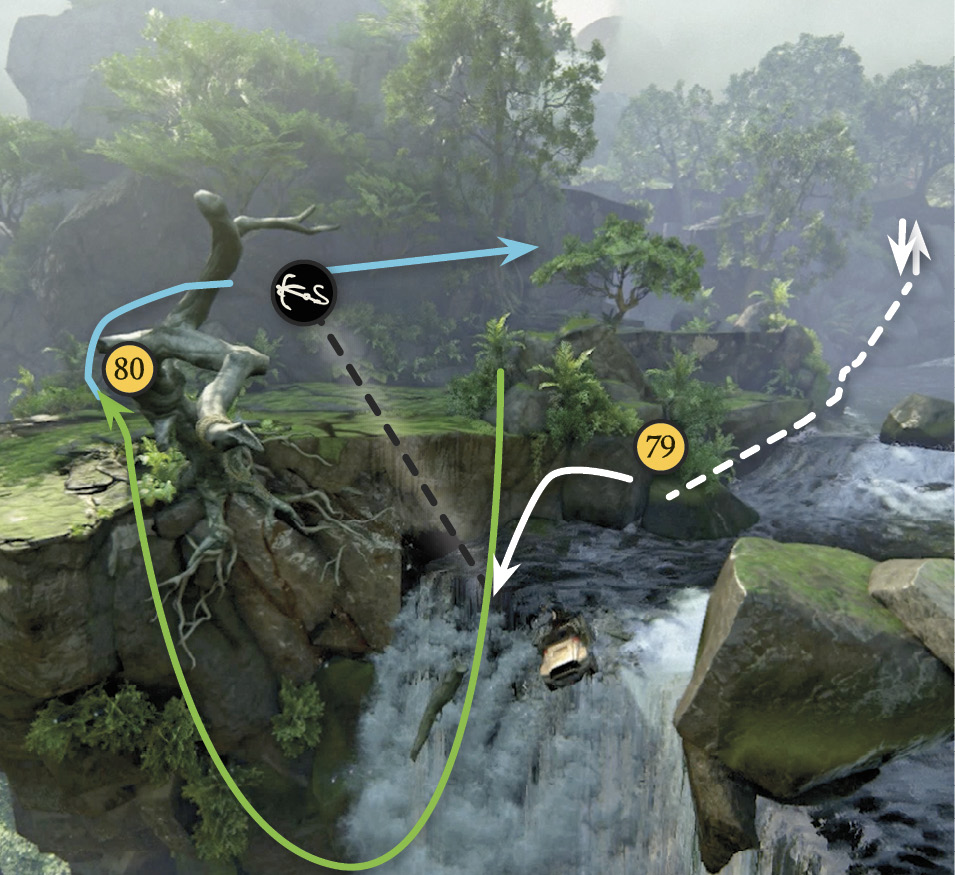
This doesn’t end the ordeal—the tree begins to sag! Quickly, take one more big swing up to the ledge where Elena waits (80). If you wait too long, the tree snaps off and drops into the gorge.
Climb to the Cave
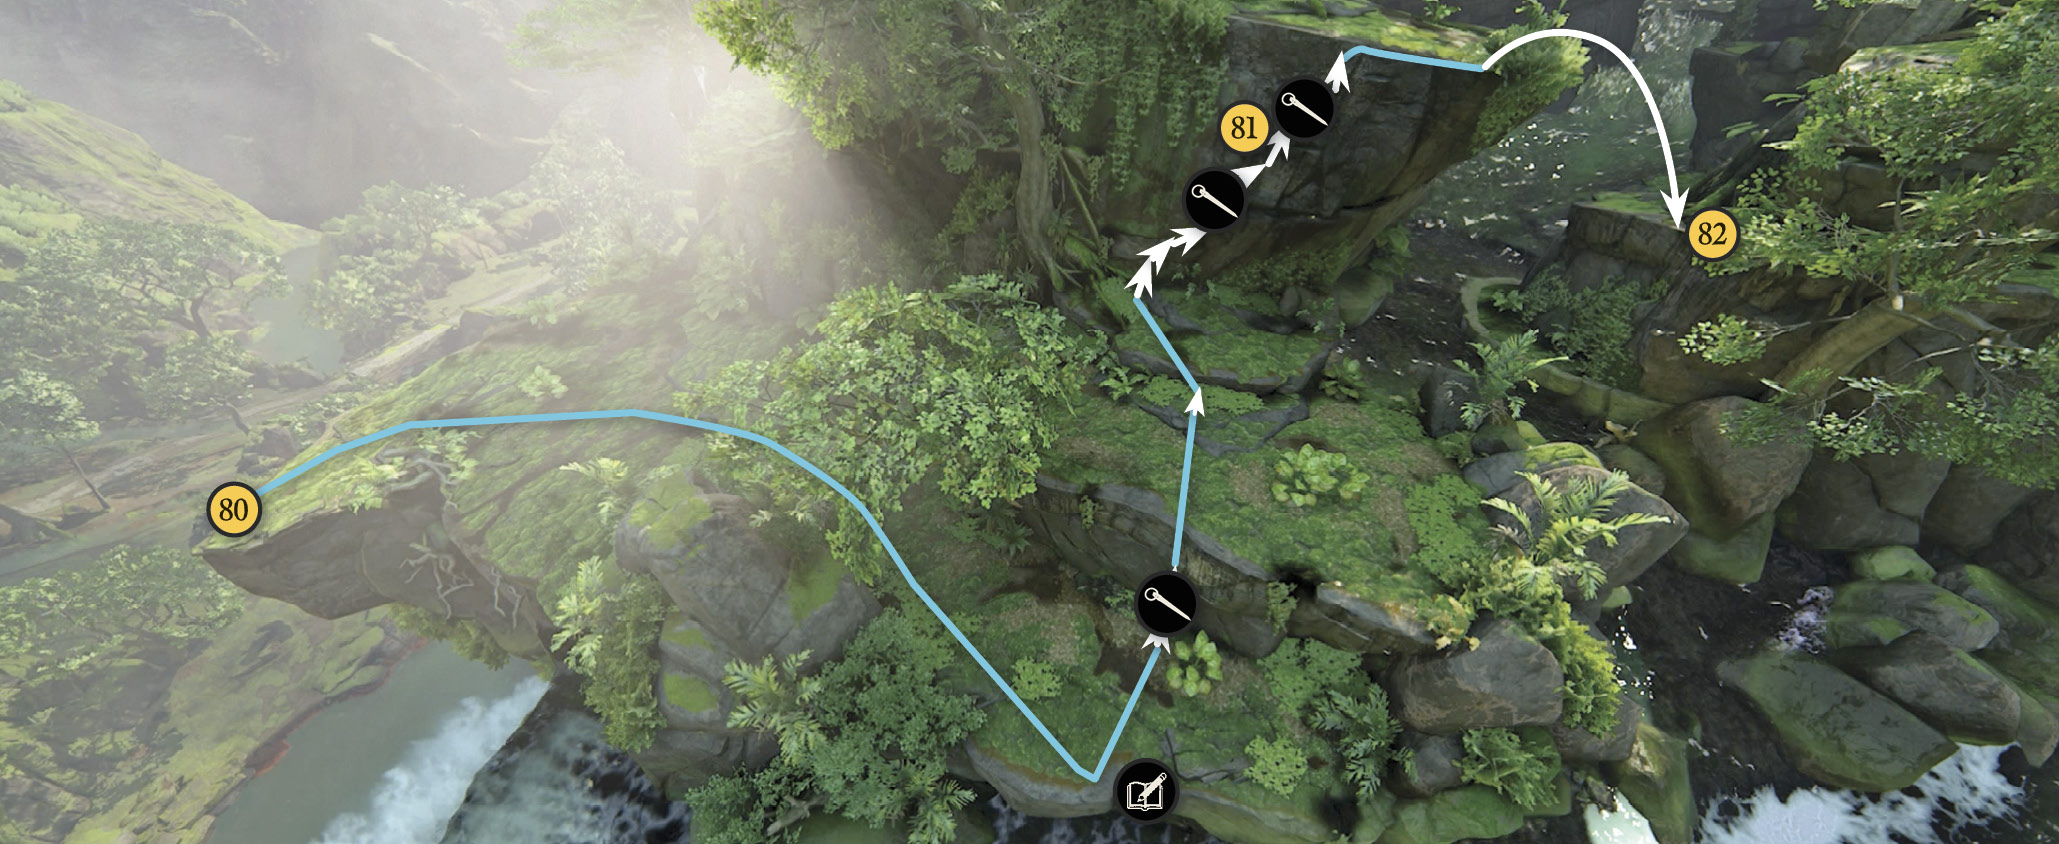
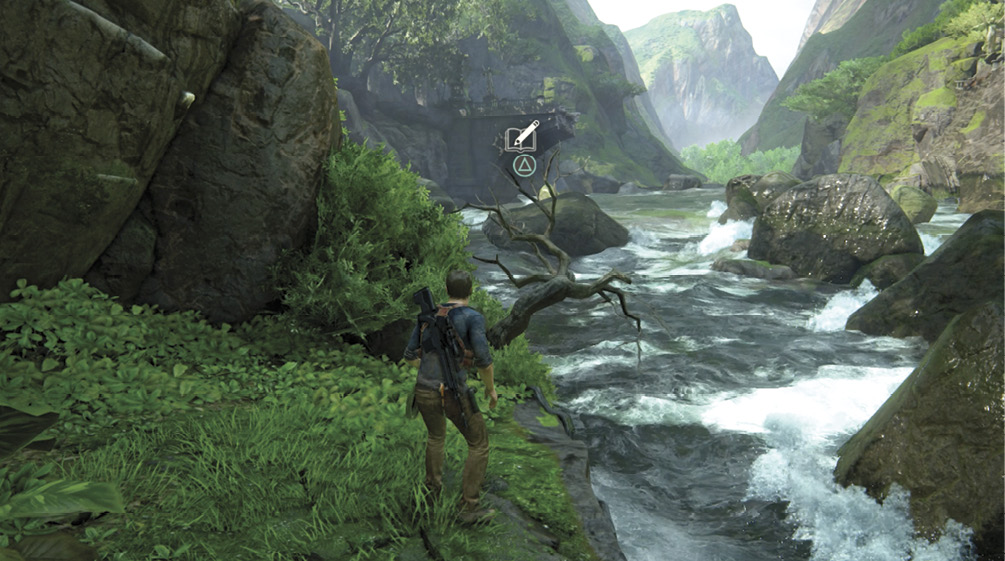
Walk along the right edge of the pathway following the river upstream. Just before the climbing cliff face, look at the broken bridge that almost killed you. This is an Optional Journal Entry; Nate sketches some funny images about what pirate bridges are made of, making fun of the collapsed bridge.
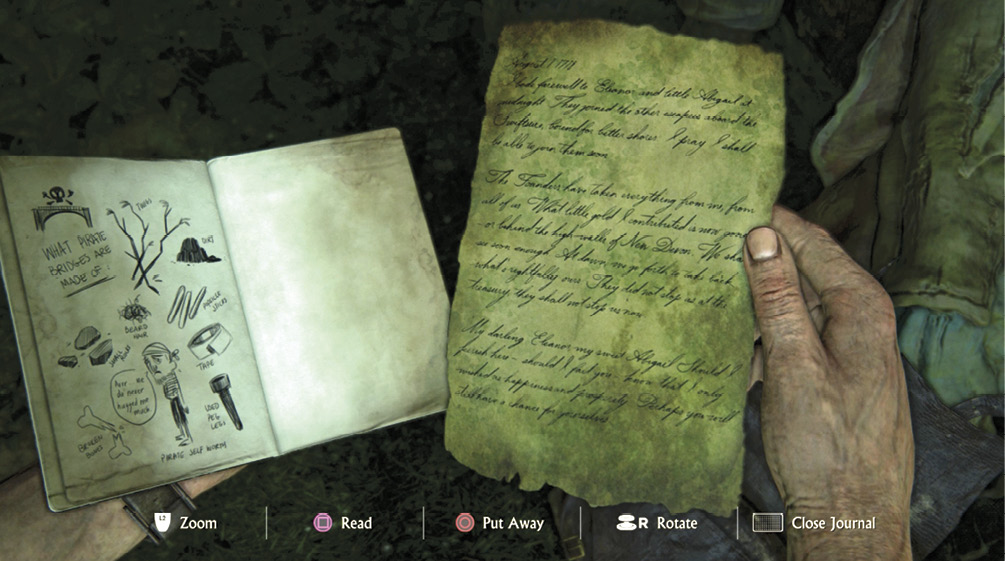
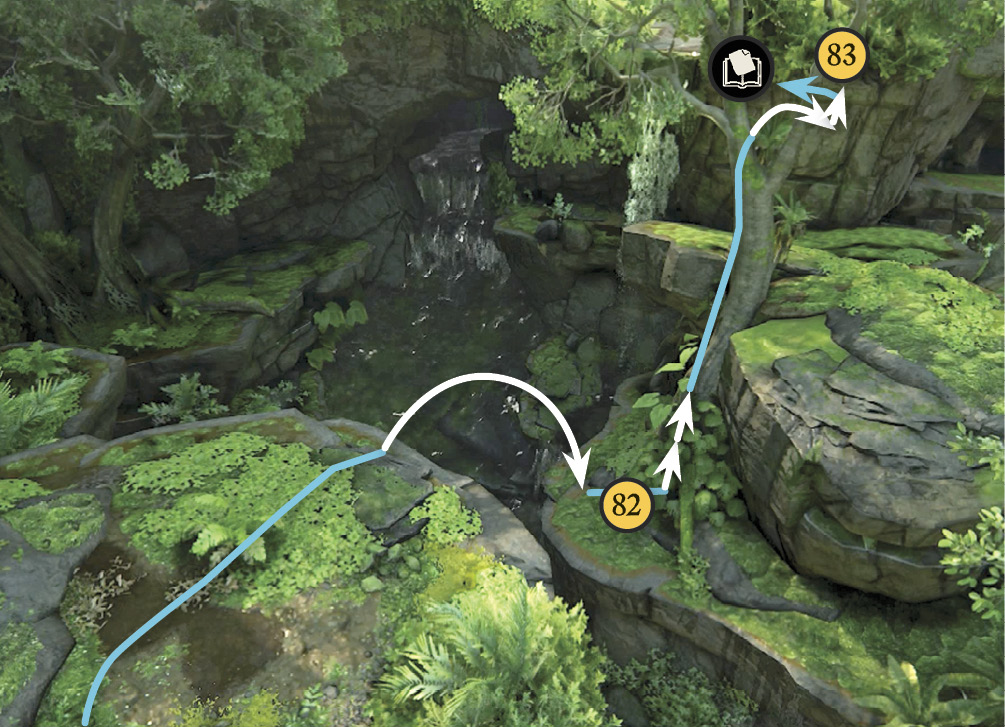
Follow Elena up the cliff face (81) with porous patches on the stream’s left side—use your piton to get up. Then hop across the ravine (82) and climb to the high platform on the stream’s other side. Head off to the right to find a corpse with an Optional Journal Note (83): more diary entries from the river watchman. (It explains the origin of the bloody sigil in the secret tunnels under the town.)
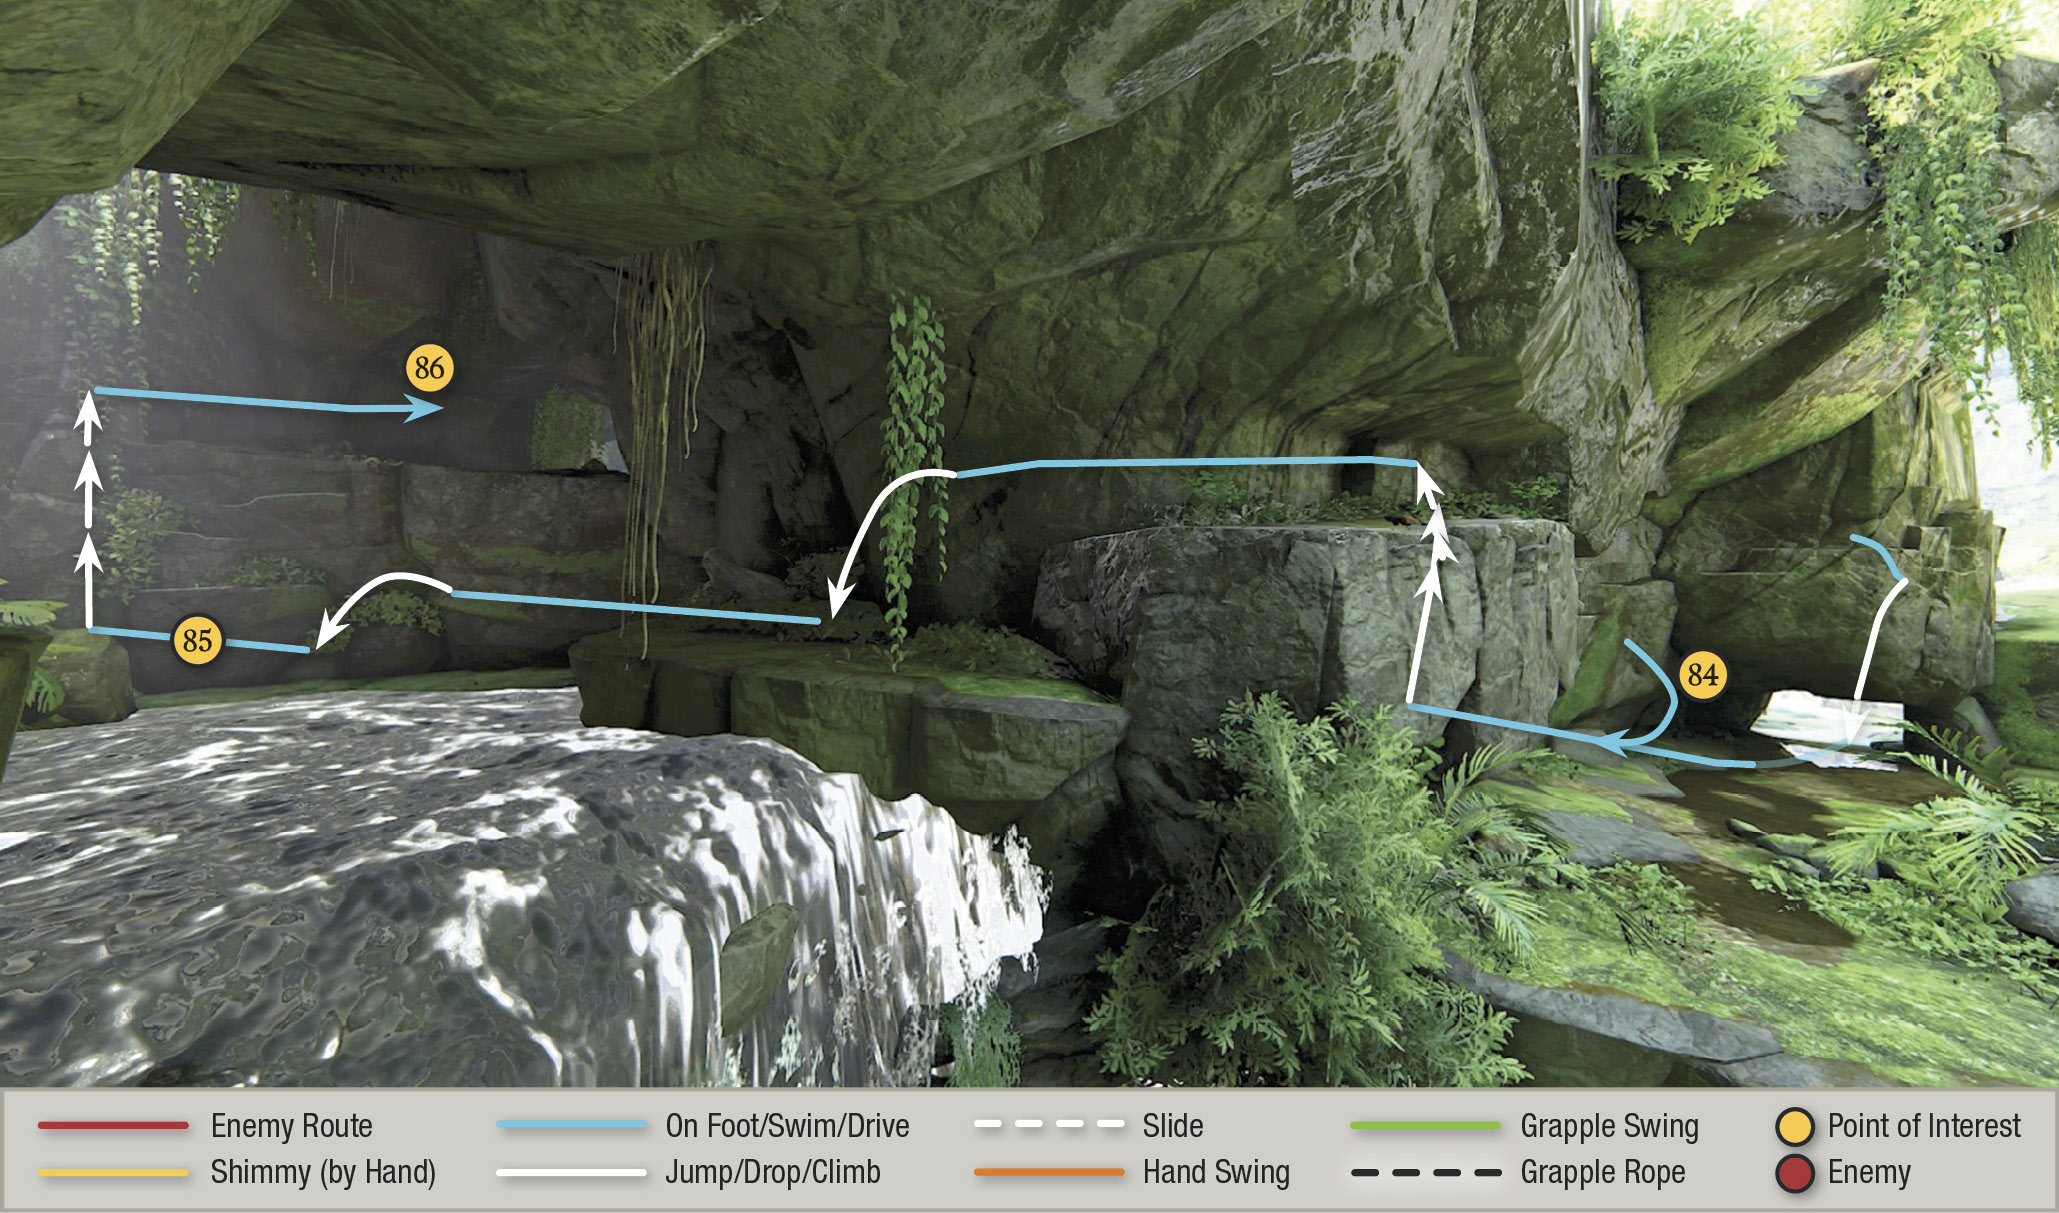
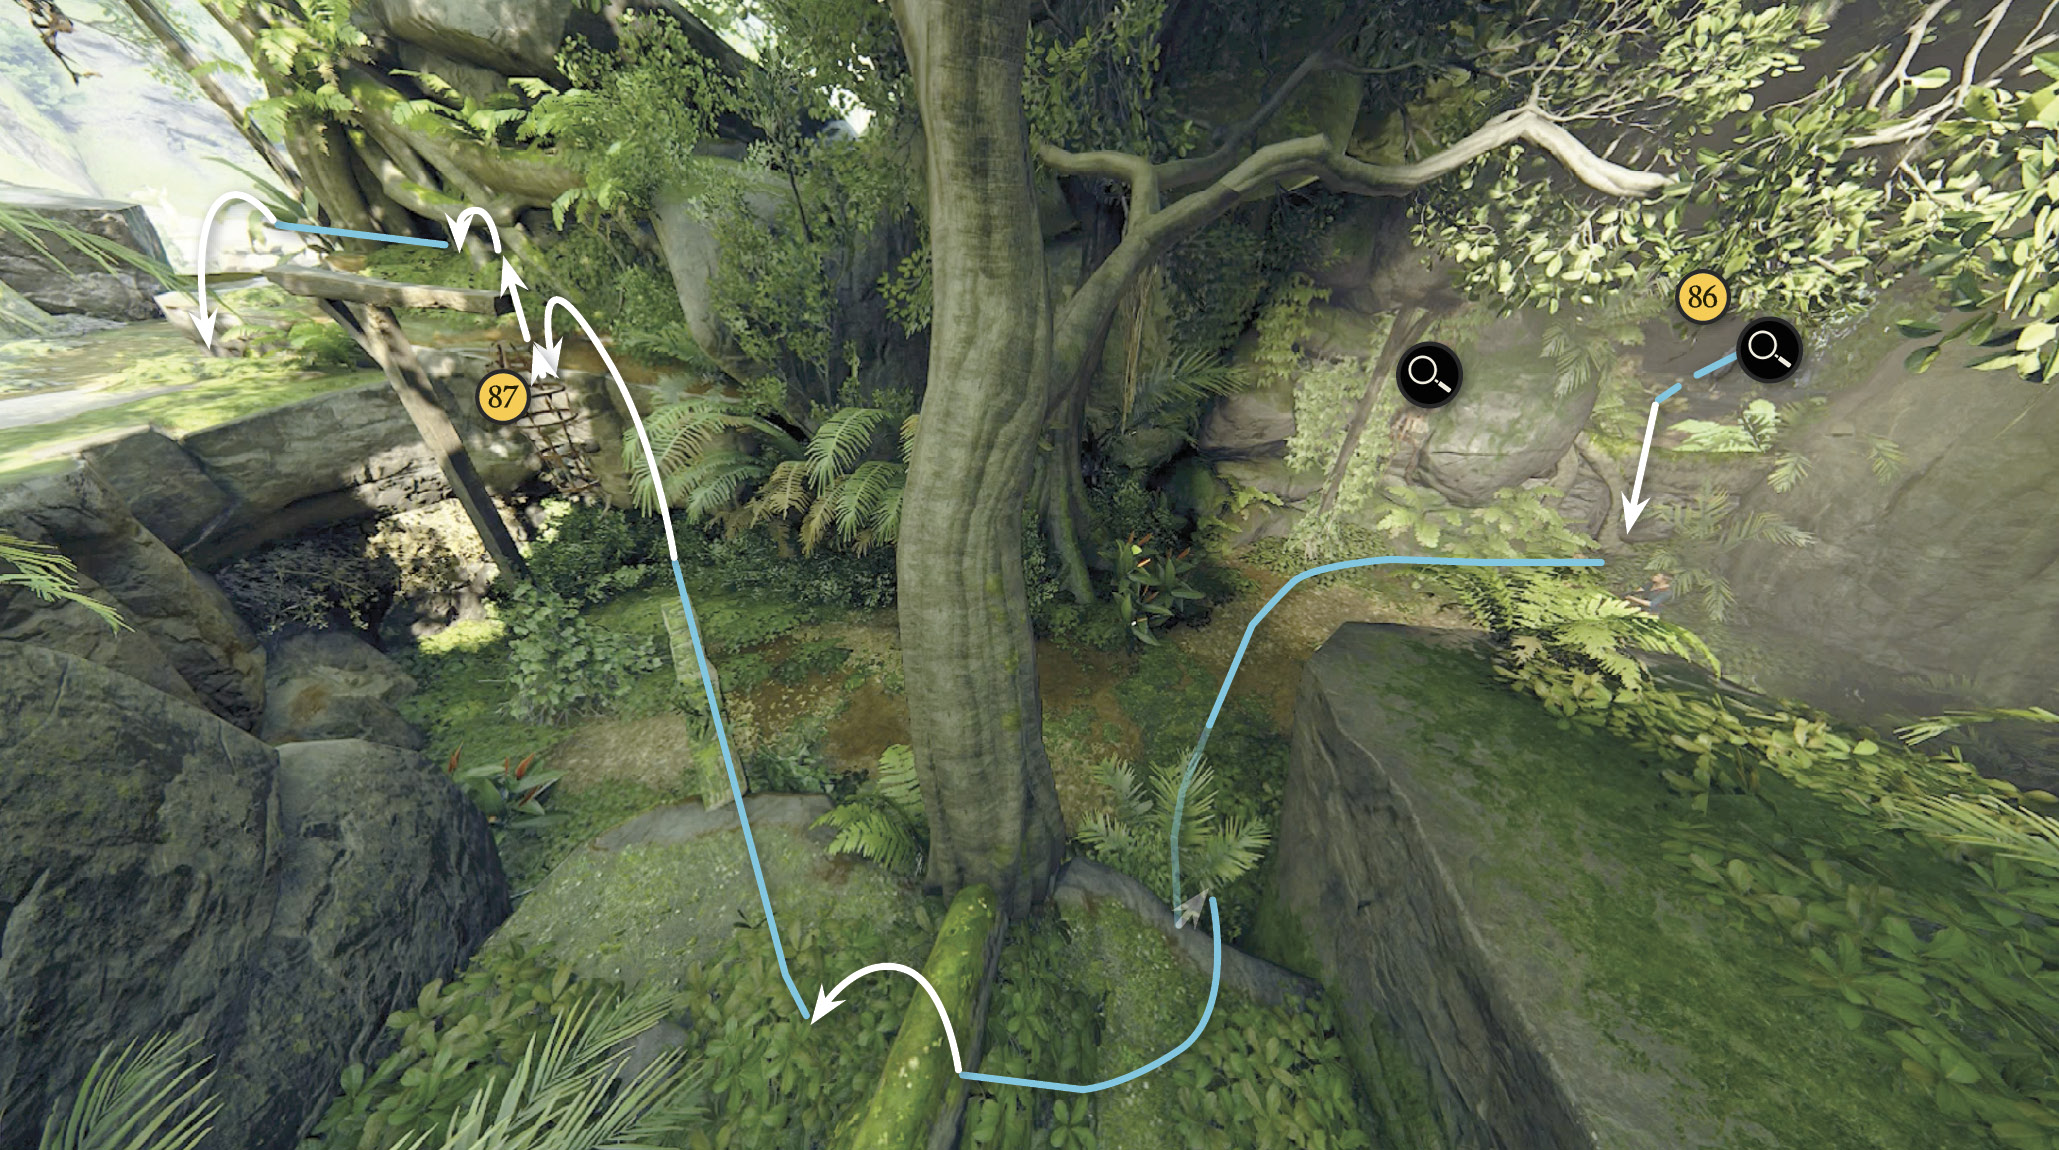
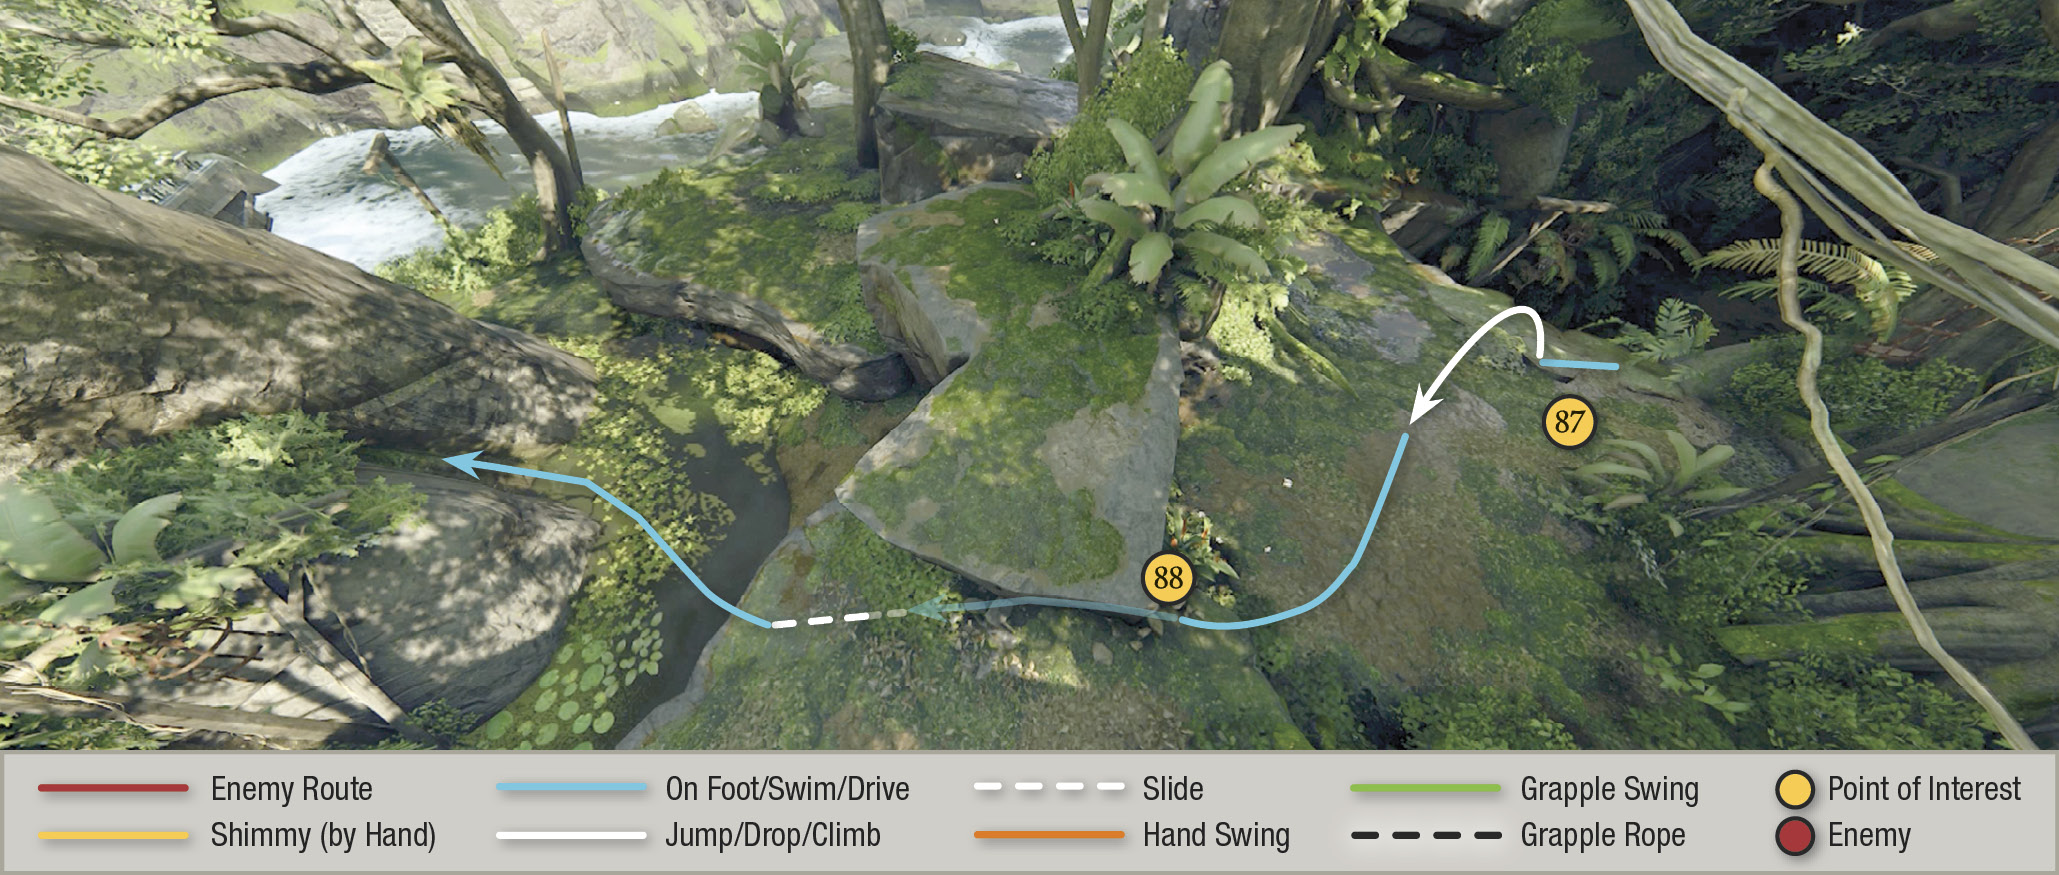
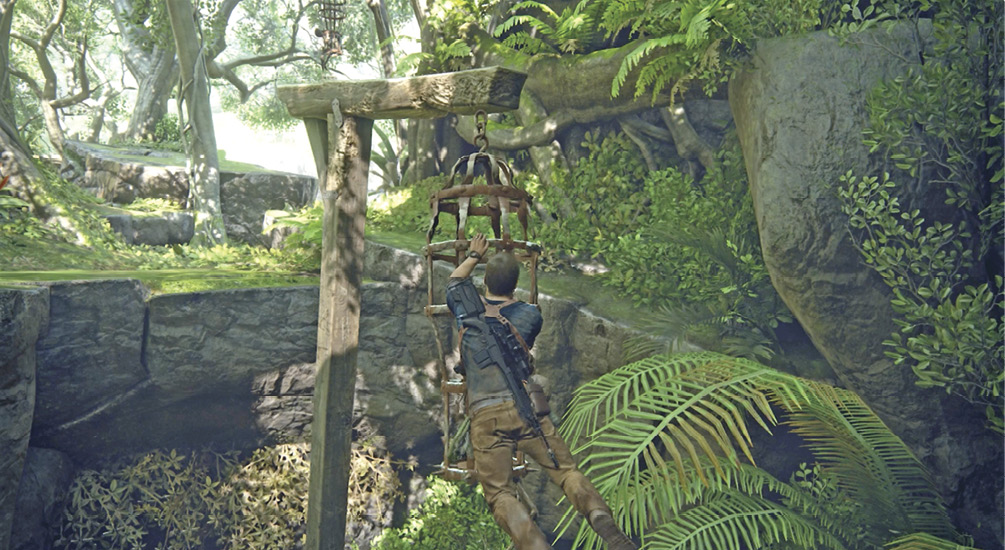
Drop to the terrace below and crawl through the low tunnel (84). Climb leftward to the river and wade across (85), then climb to make a disturbing discovery in the cave above (86). Examine the grisly find, then hop out of the other end of the cave and examine the gibbet hanging nearby. Veer left to climb around to the mossy strut. Jump from the end of the strut to the gibbet (87), the hanging iron cage. Climb to the top beam and jump over onto the plateau. Proceed across the terrace (or through the low cave and mudslide (88) to discover a veritable gibbet field.