Uncharted 4: A Thief's End Guide Story Walkthrough
Chapter 21: Brother’s Keeper
Having abandoned the party to pursue his selfish desire for adventure and Avery’s treasure, Sam recklessly continues the quest. Nathan, unwillingly separated from Elena and Sully, tries to pick up his brother’s trail and bring him back alive—with or without the treasure.
CollectiblesTreasures: 4 Chapter Specific Trophies: “Lost History” and “Relic Finder” Optional Journal Notes: 1 |
Find Sam
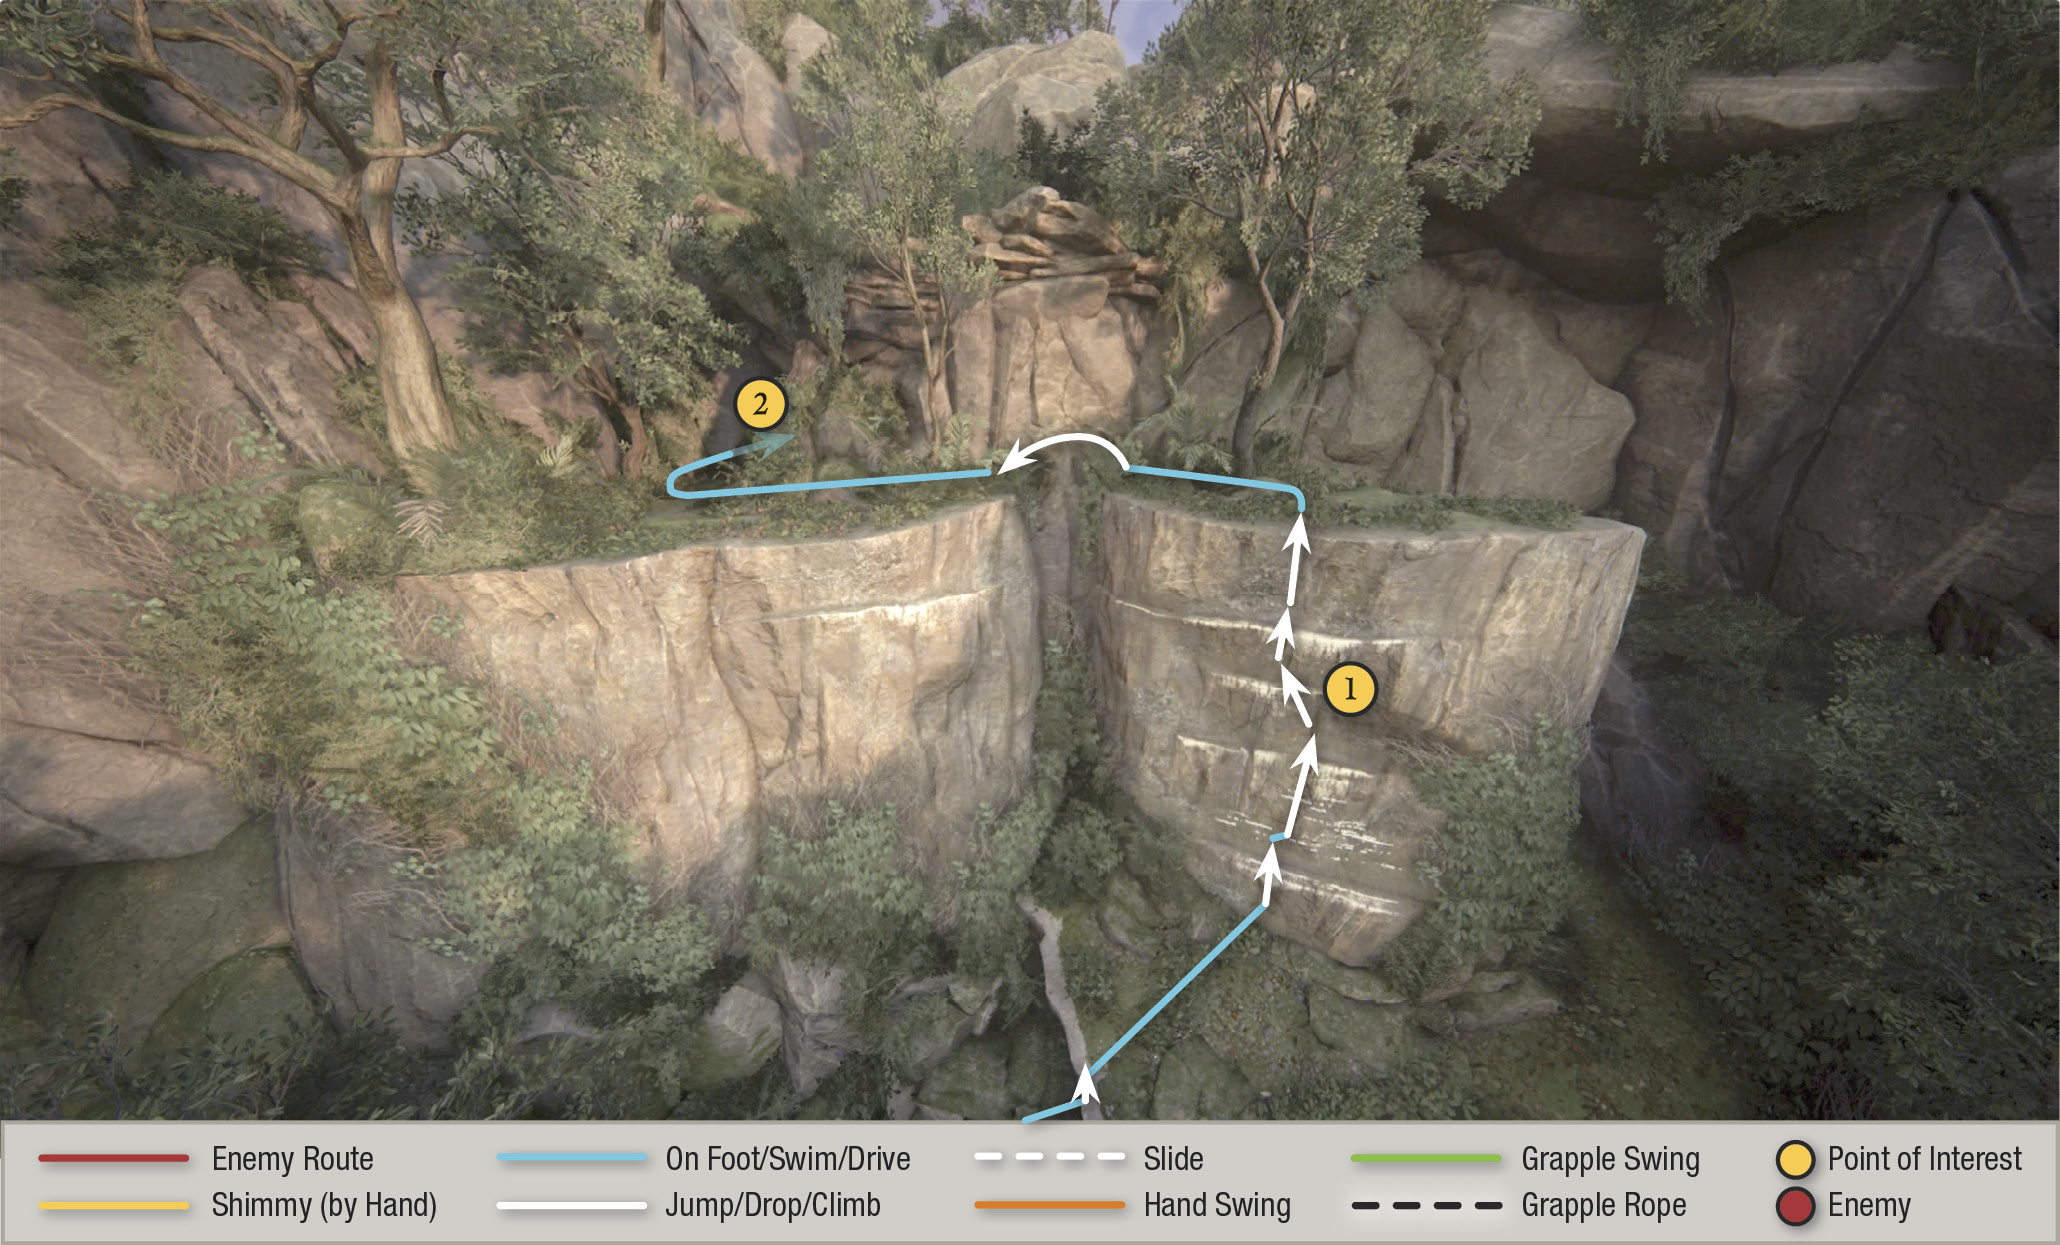
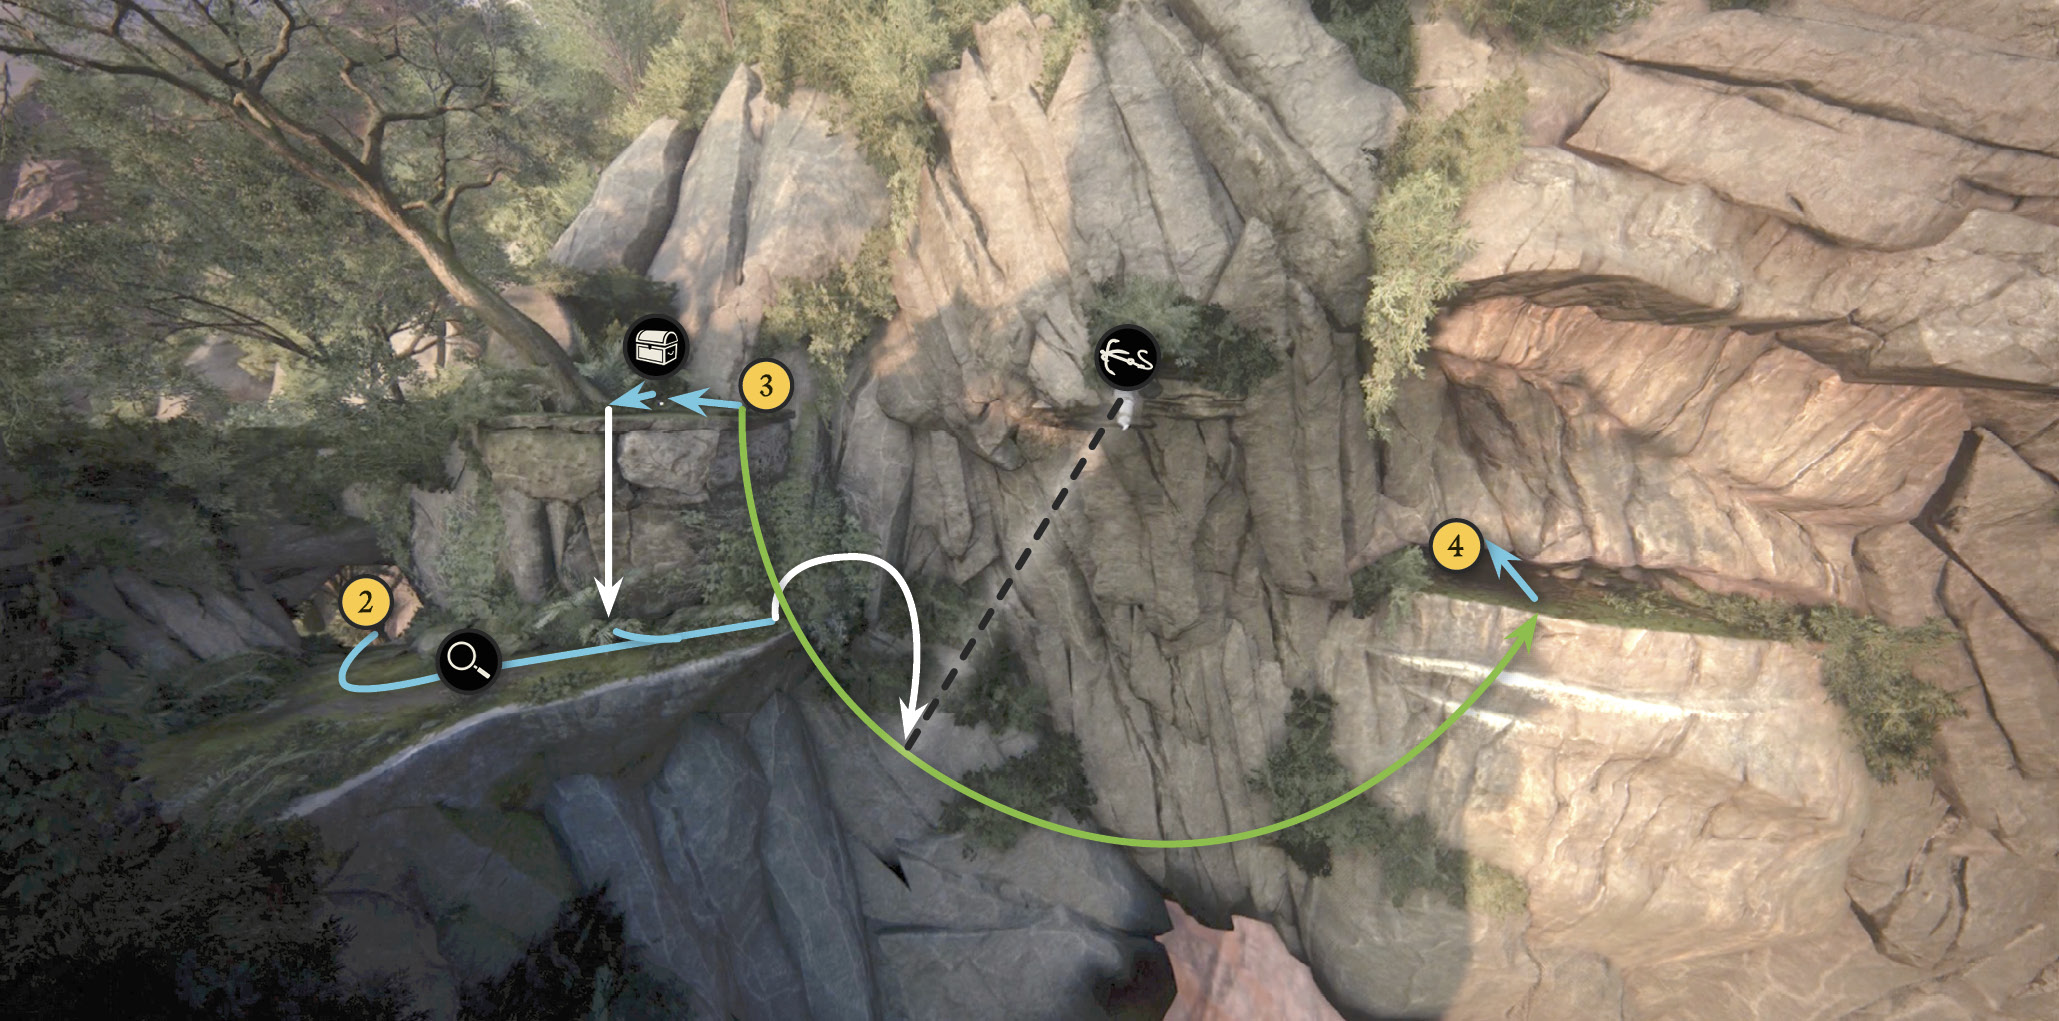
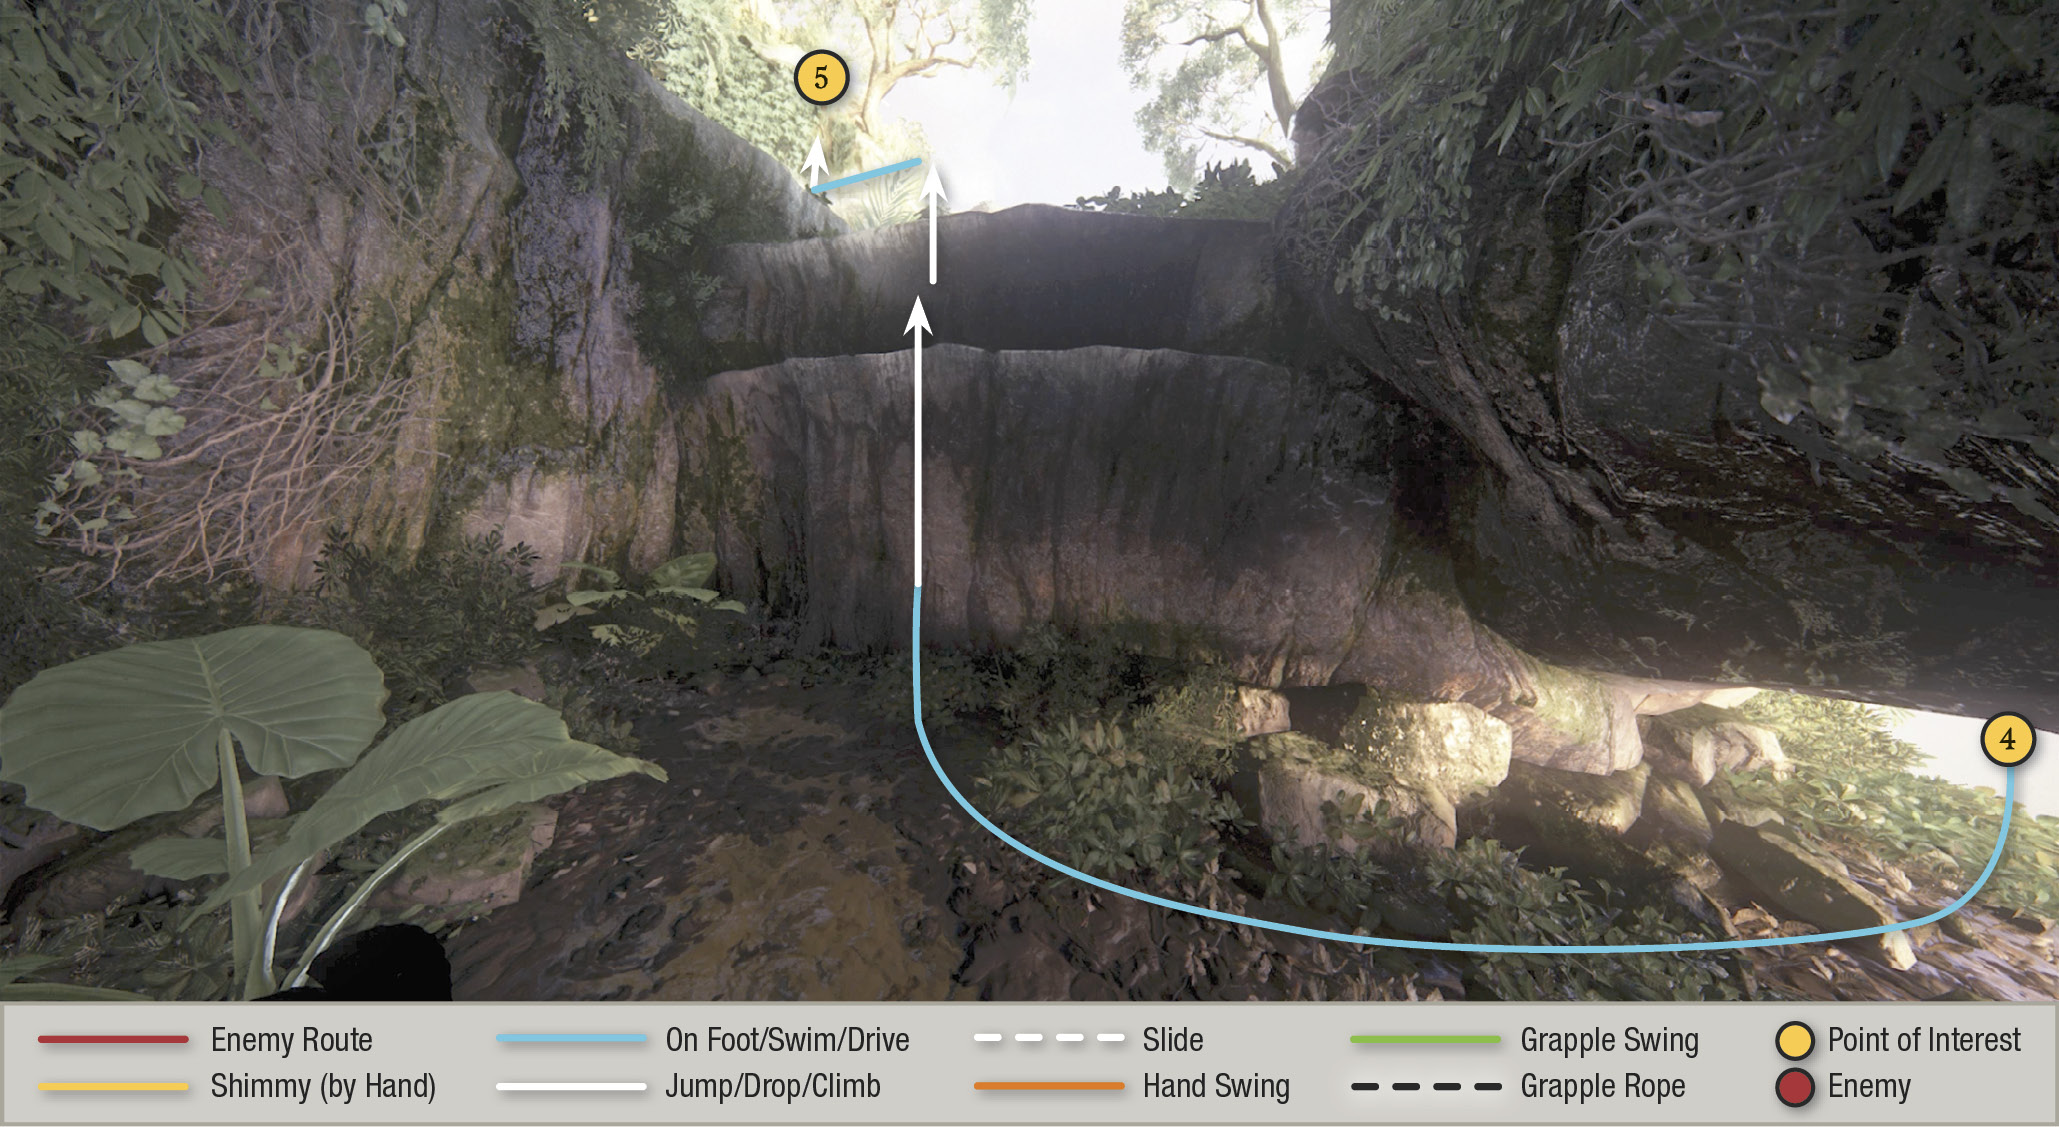
Follow the path and hop up the short terraces; then climb the high wall (1) and leap across the gap. Move through the short tunnel (2) and examine Sam’s footprints at the next overlook. Toss your grapple hook up to the branch above and step off the overlook. (You can swing out and back first, leaping to a ledge (3) behind you to pick up a treasure.) Swing across to the seam in the rock face and crawl through the low cave (4). Inside, turn right and climb the ledges to exit (5).
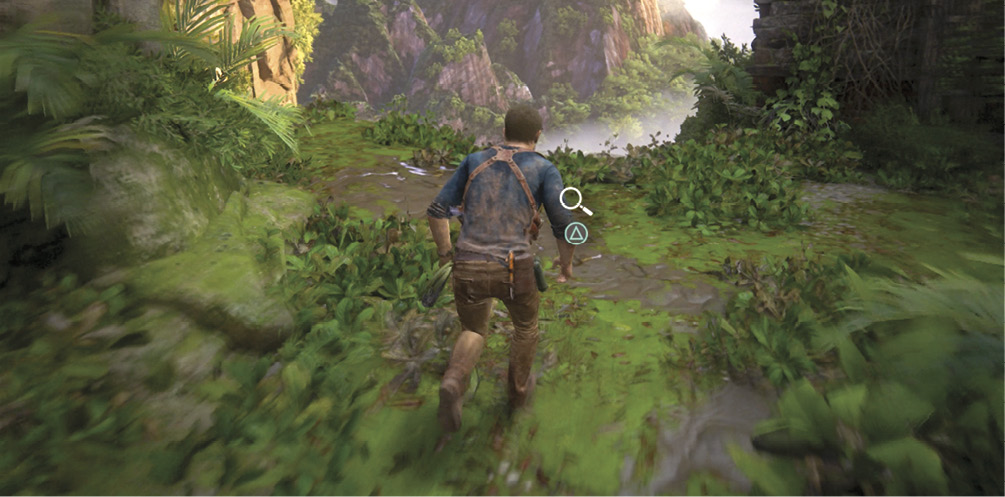

Mughal Enamel Bird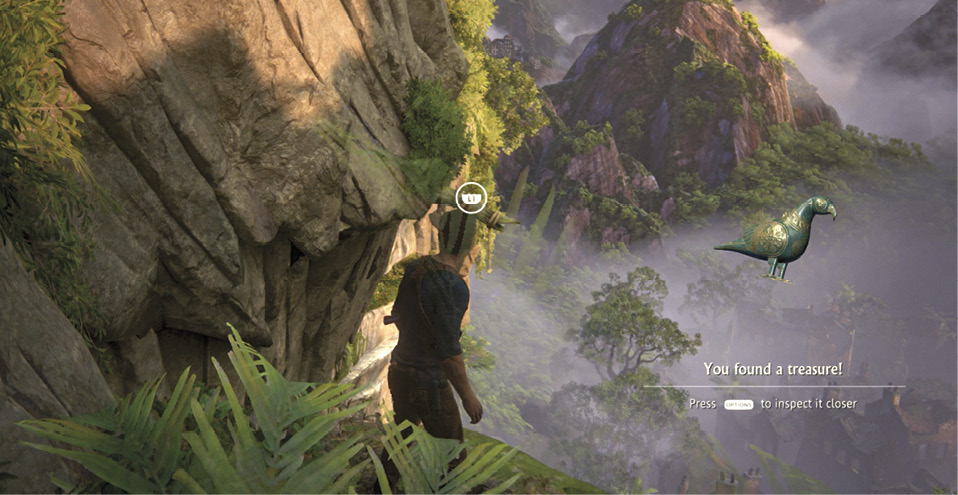
This treasure sits on the ledge just above where you find the first set of Sam’s footprints. The Mughal Enamel Bird is on the ledge directly above you, but you can’t reach it by climbing. Grapple swing out and back to get up there. |
At the top, turn left and work your way across the series of terraces, climbing and hopping and shimmying leftward to a plateau (6) and then walking up the slope to examine more of Sam’s footprints. Back on the trail!
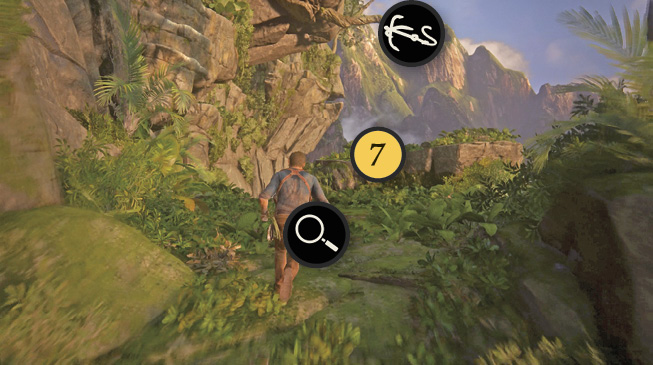
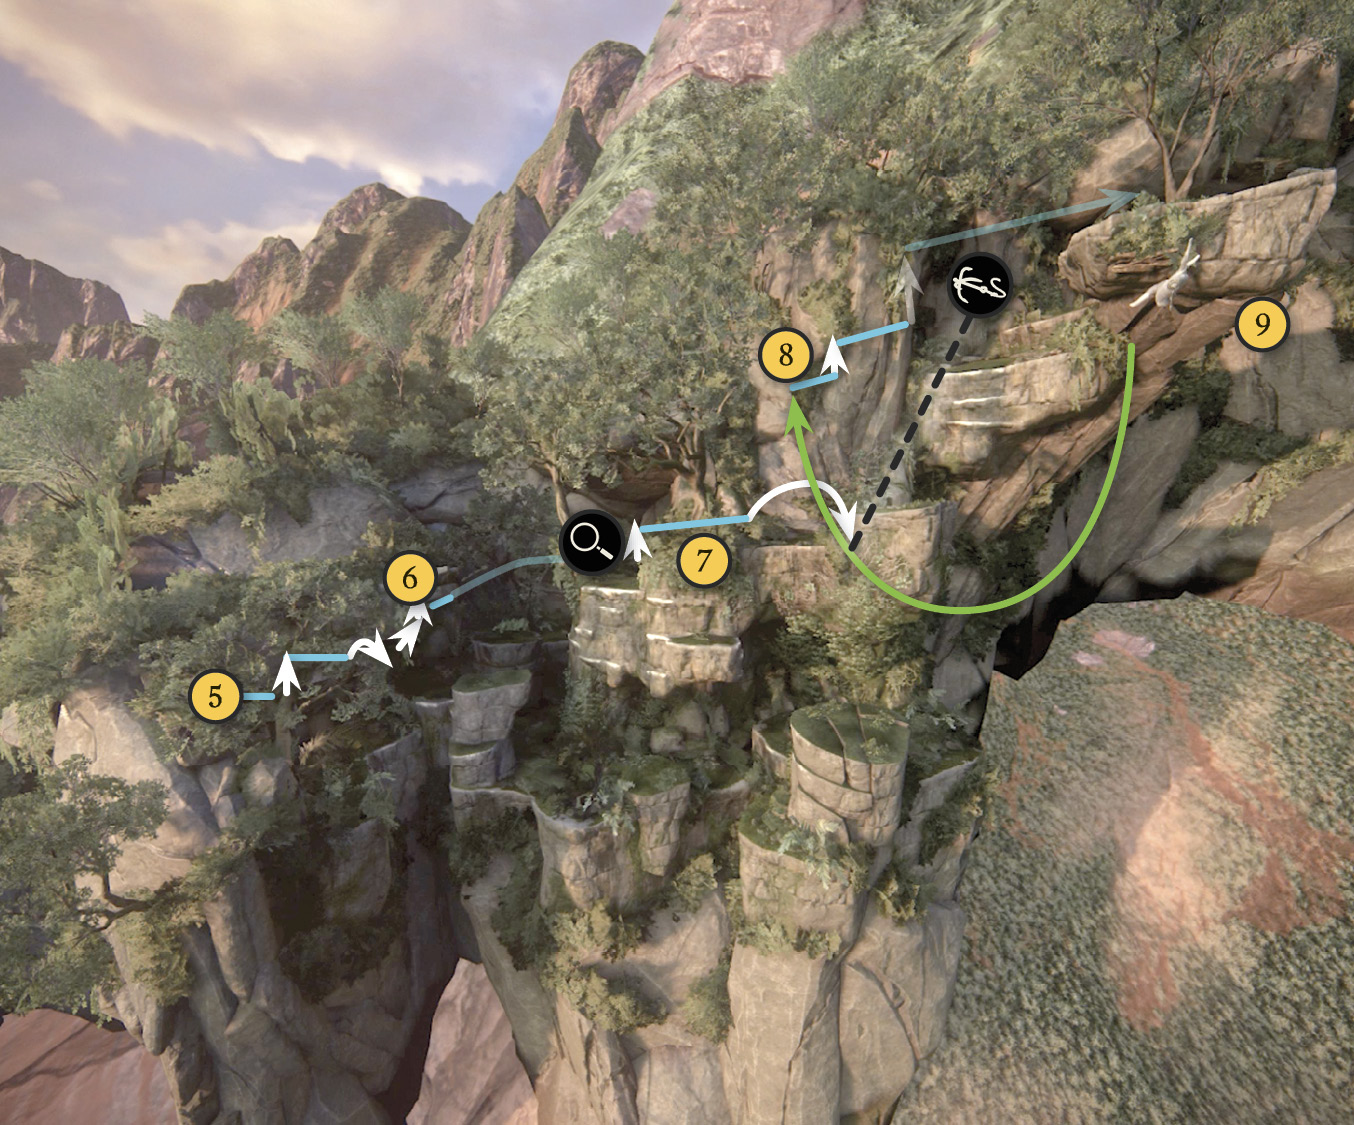
Climb onto the rock just to the right (7) and sling your grapple hook at the jutting tree root above. While hanging from the rope, position the camera back toward the grapple point you’re hanging from and you’ll see a ledge with some grip points below it. This is your destination point from this grapple challenge. Steer your next swing toward the ledge (8) above the grip areas. With a huge swing, you can make it to the edge of the ledge. Climb the ledges until you reach the last and highest platform near the tree and before a big gap (9).
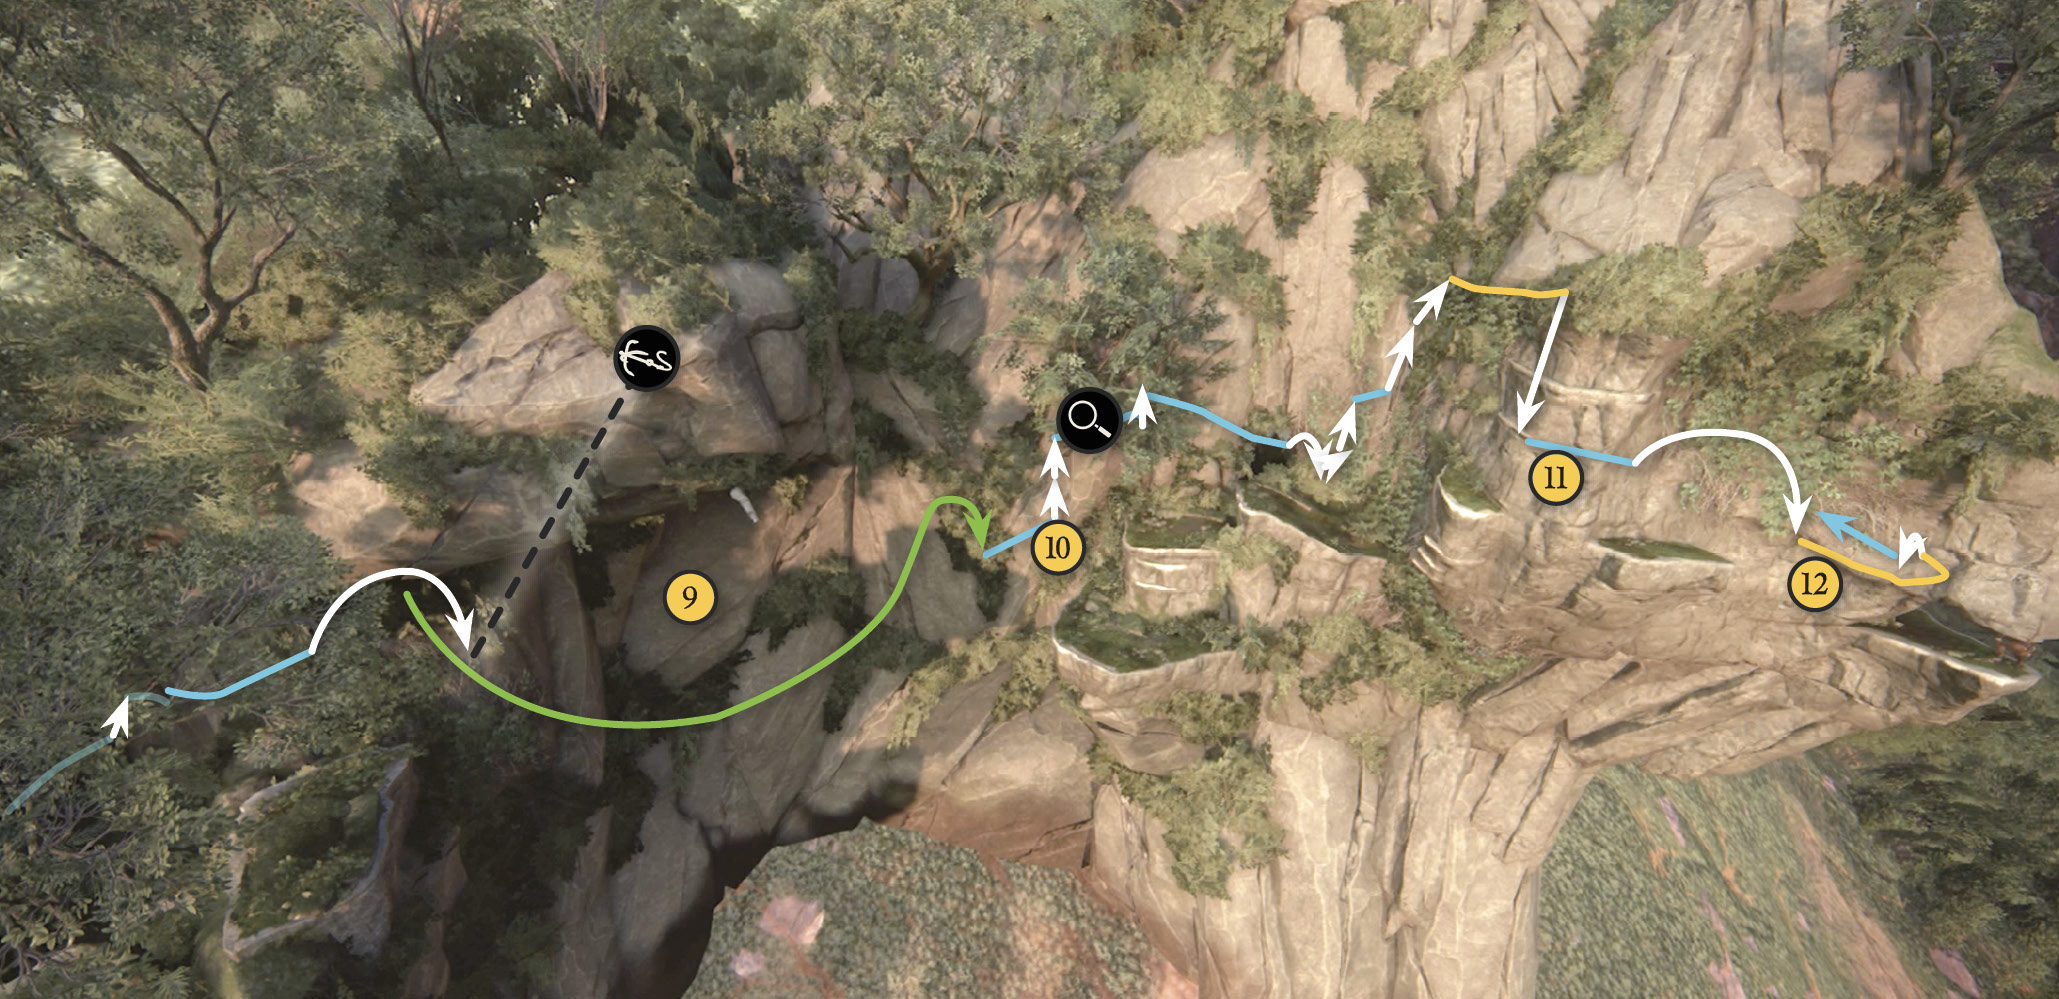
Use the grapple post to make a big swing across the huge gap to the green terrace (10) and climb the handholds to find another set of Sam’s footprints.
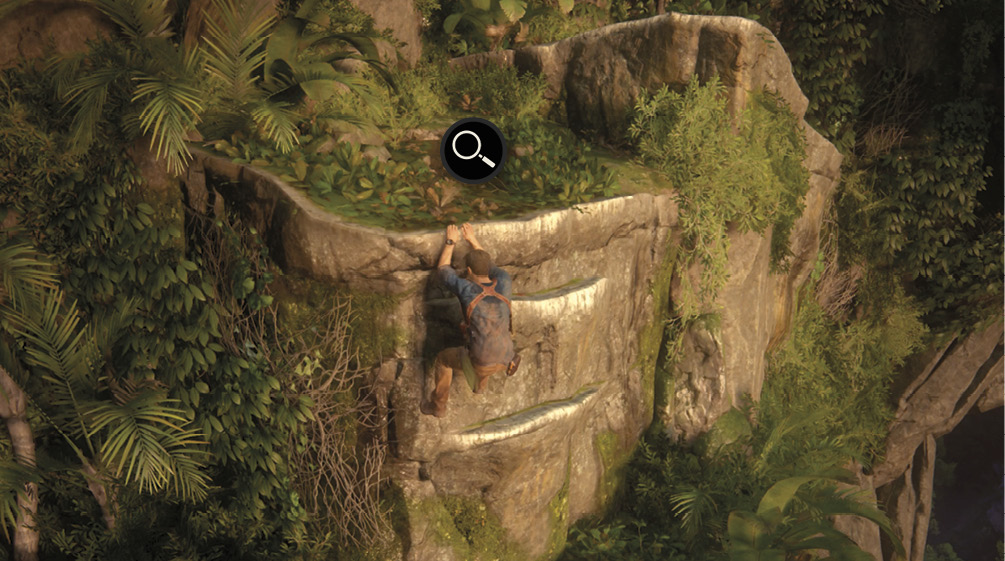
Keep climbing to a ledge where you hand-shimmy rightward around the rock and then drop onto the small platform (11). Leap to grab the next small platform and pull up into a low overhang (12).
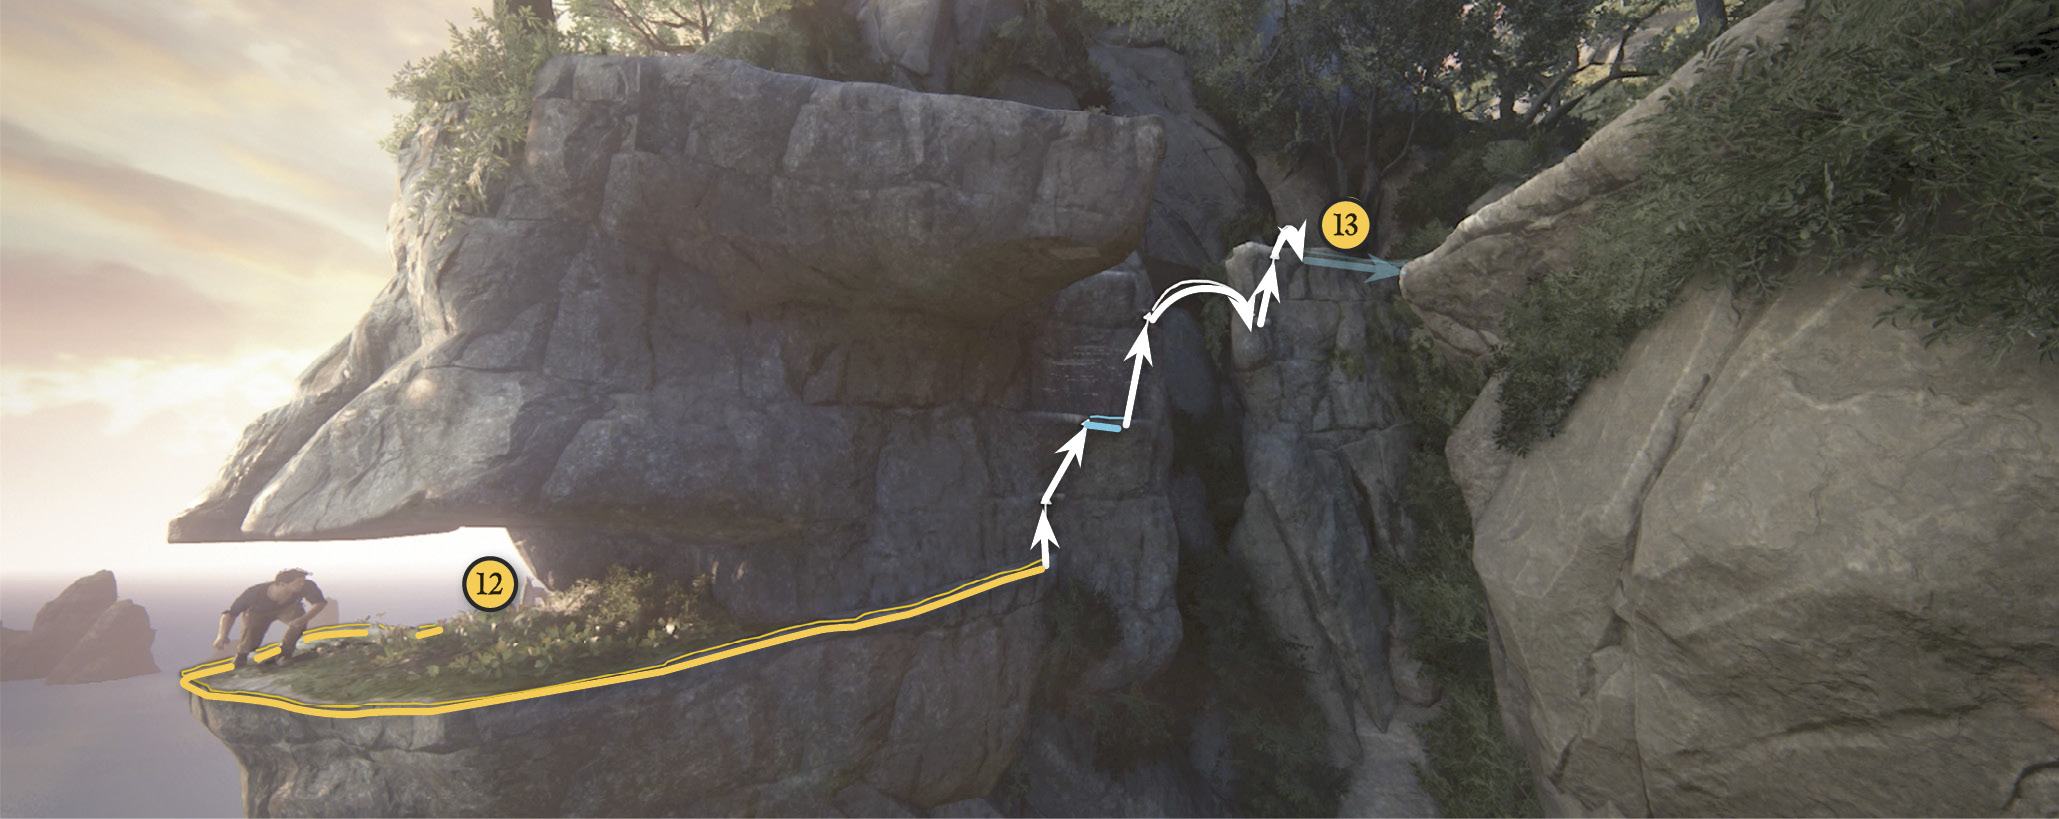
Crouch and move through the low overhang (or just hand-shimmy around the edge), then climb the handholds to the next platform (13). Move across the platforms to the corpse and pick up the Optional Journal Note. Then grapple across to the next platform where you spot more footprints (14). Continue onward into the cave opening and follow the tunnel to the broken bridge. Jump across (it nearly collapses) and proceed through the next cave tunnel (15).
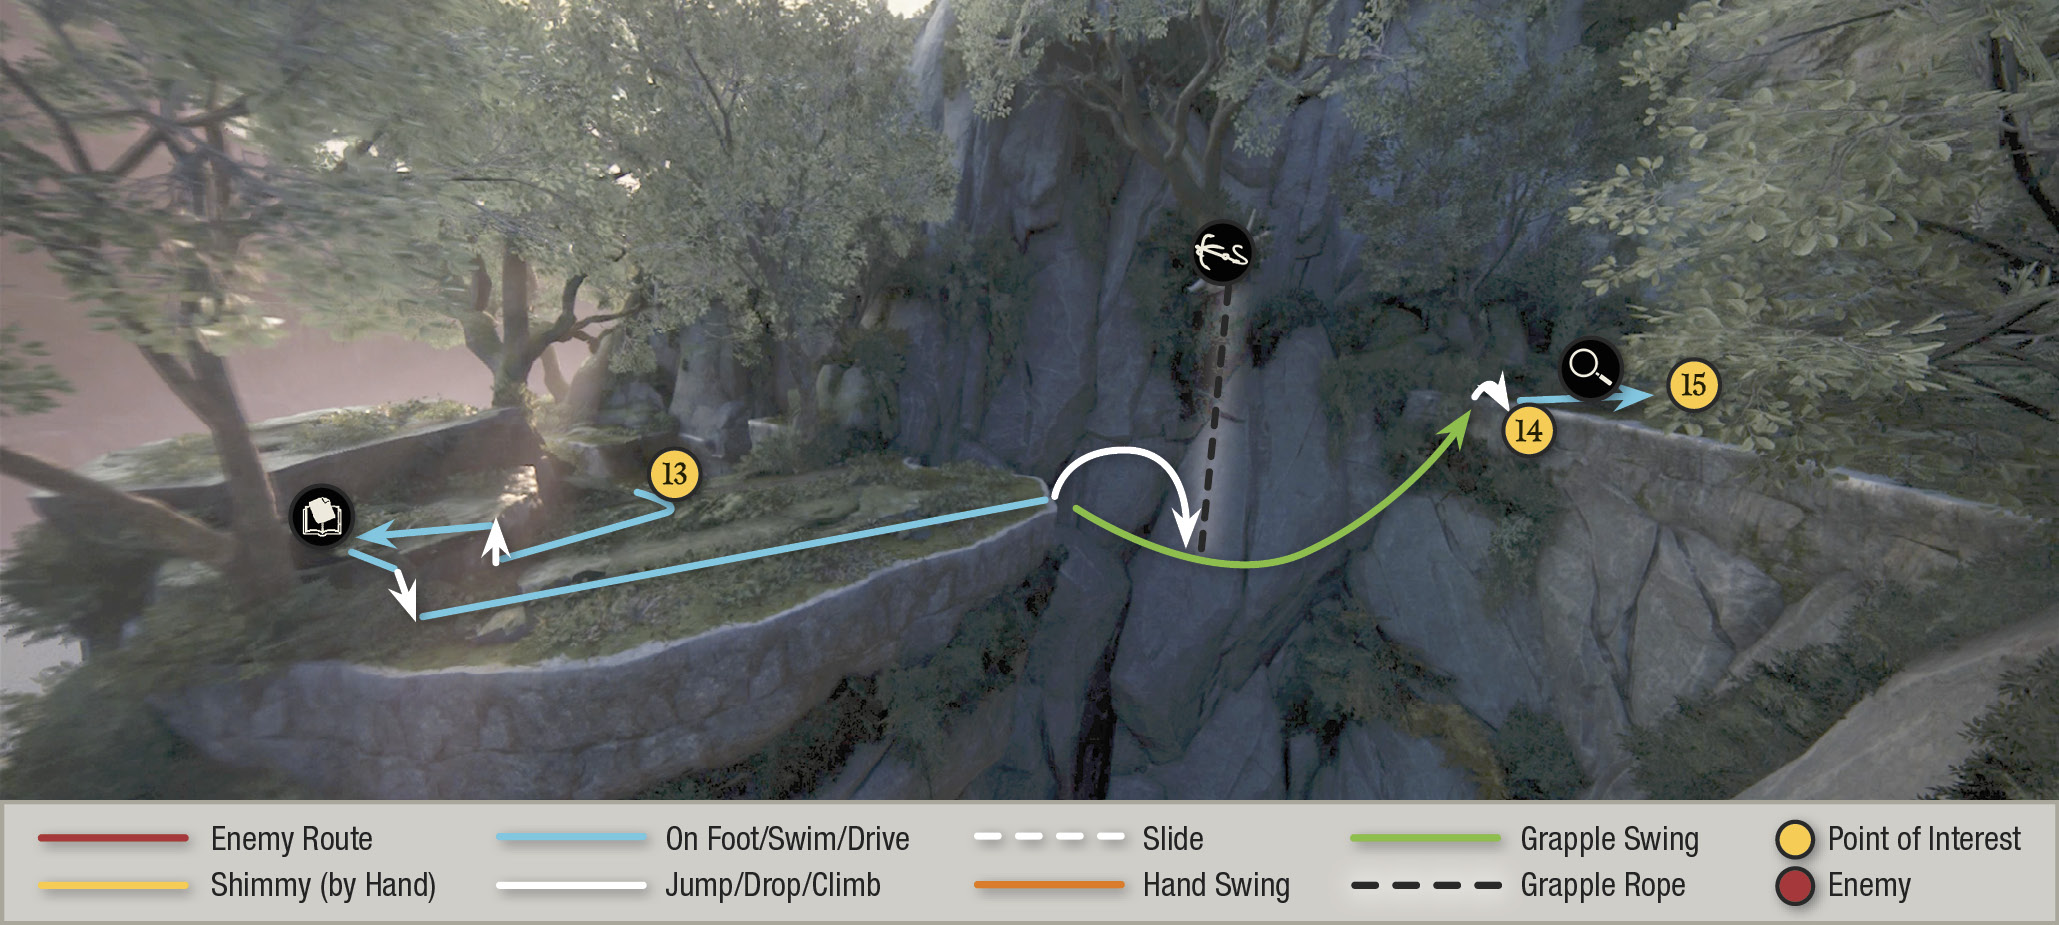
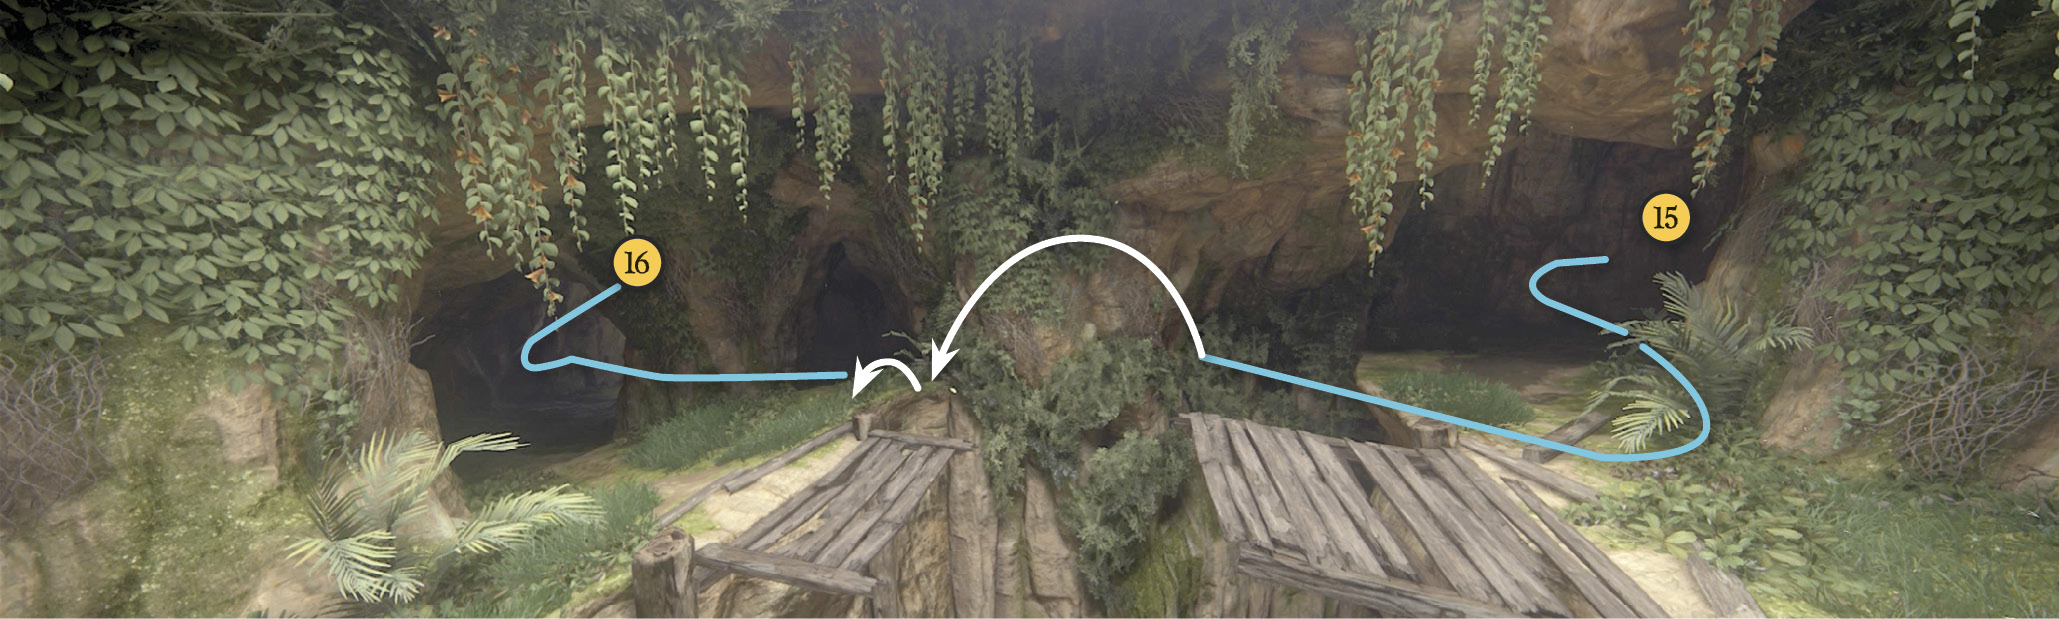
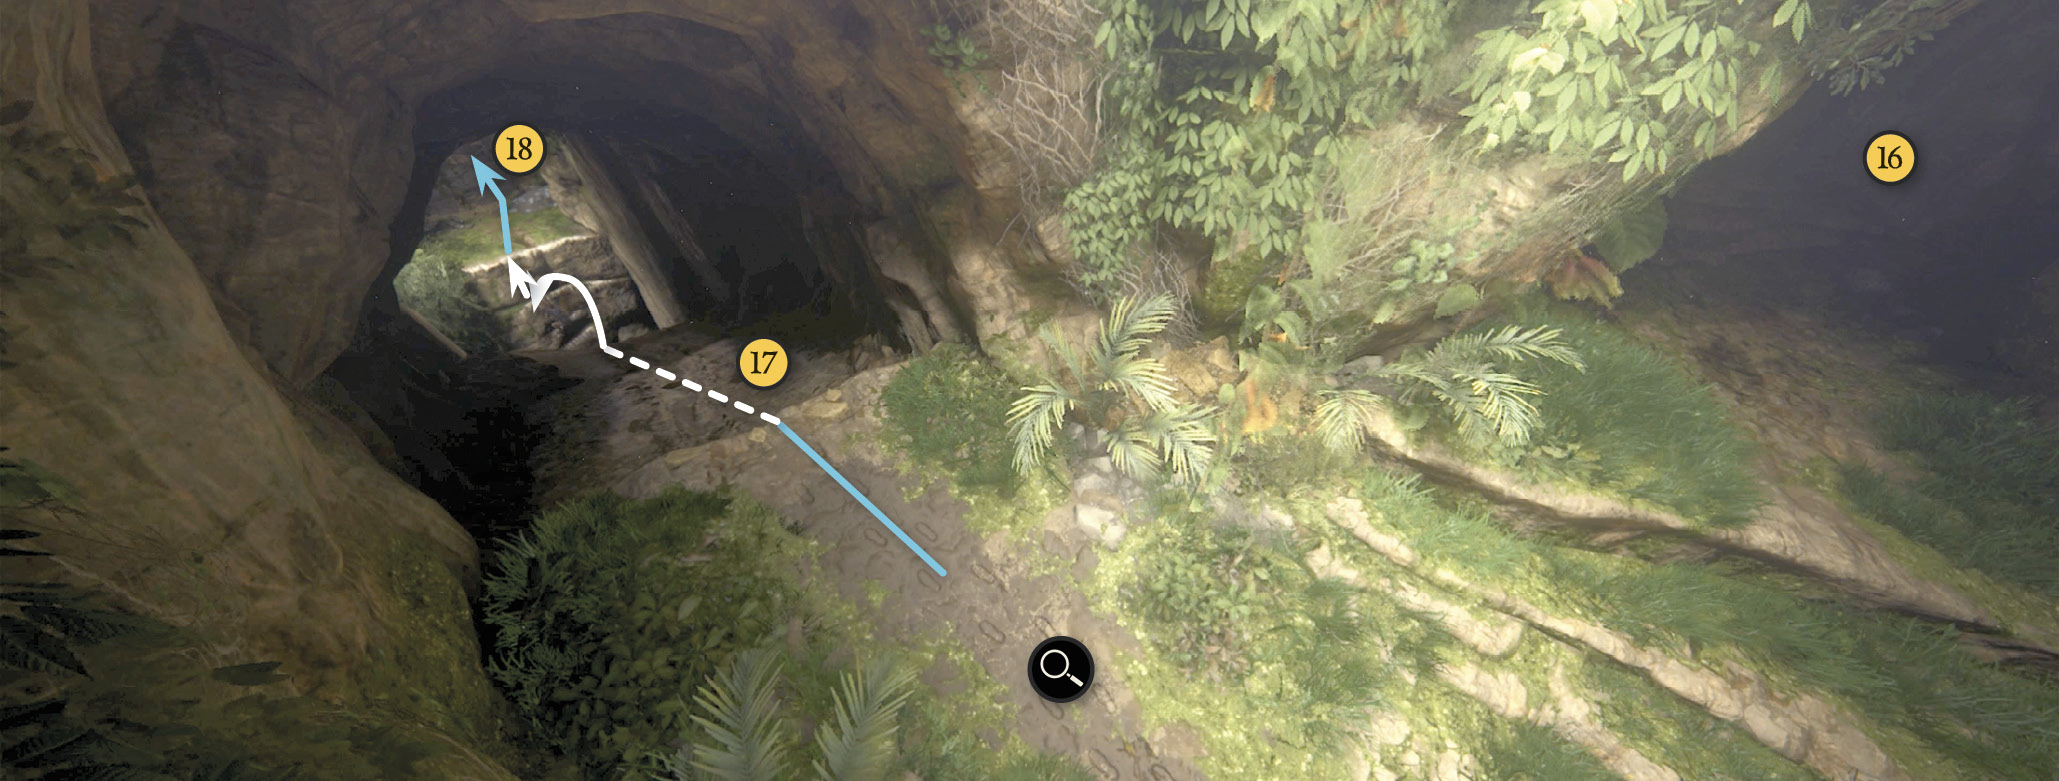
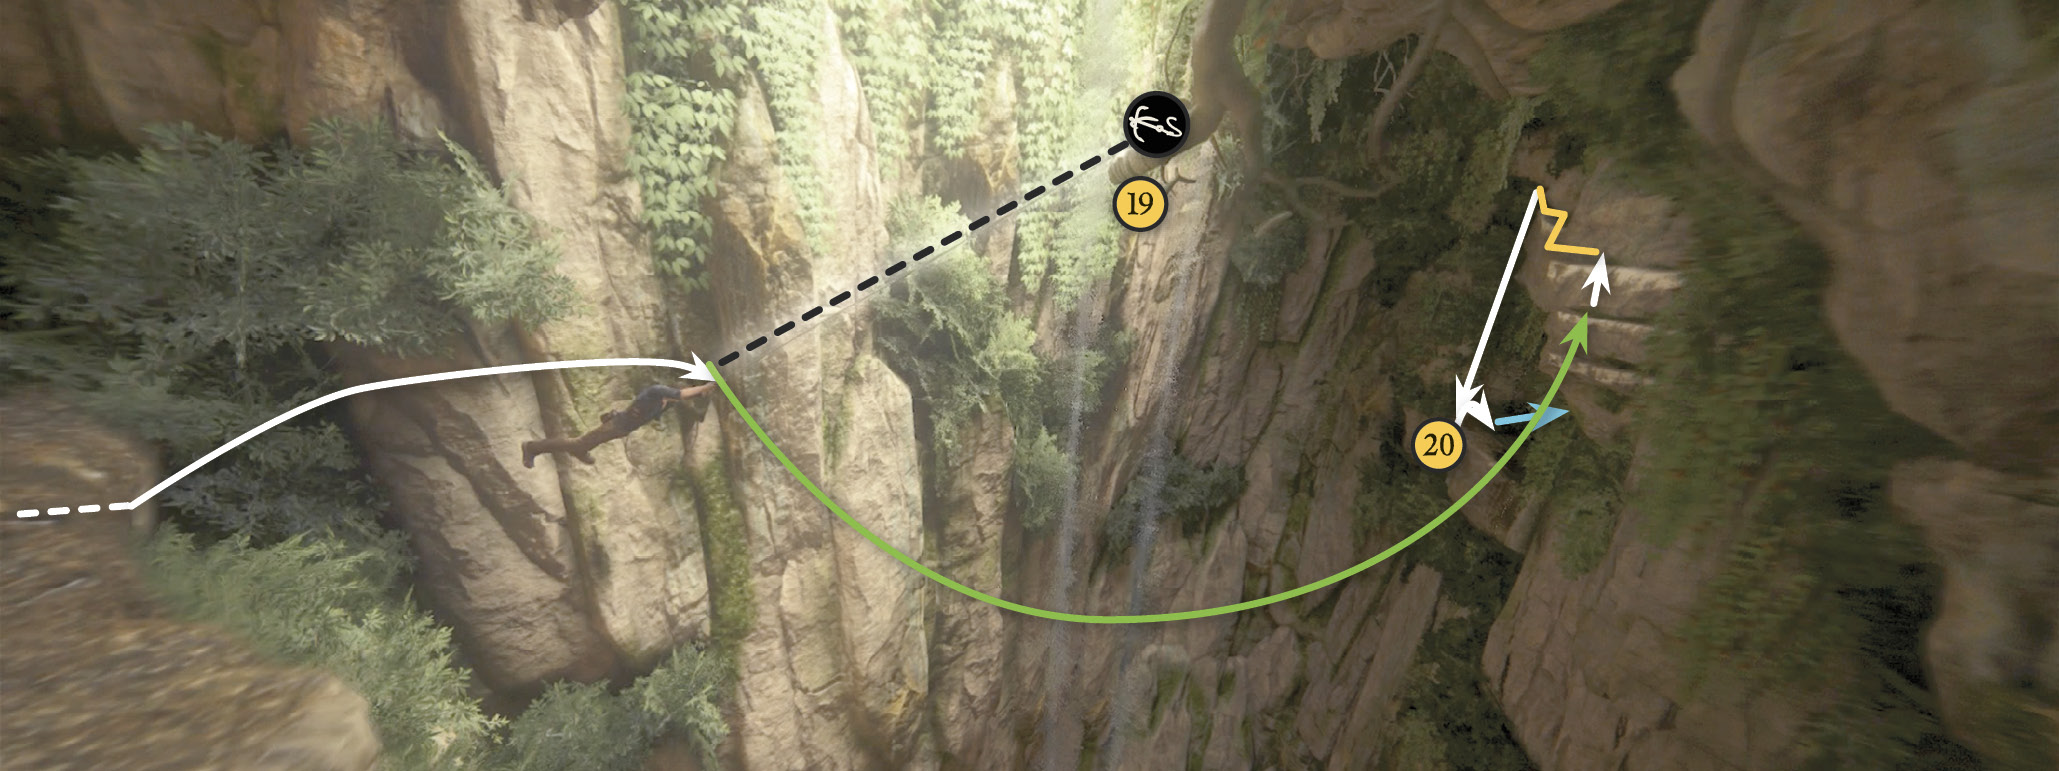
Leap over a gap in a broken bridge and latch onto the opposite side. Pull yourself up and continue into the next tunnel (16). Just after another set of Sam’s prints, you encounter a mudslide (17). Ride it down and leap at the bottom to reach handholds on the far ledge. Climb up and try to cross the next bridge (18). When it unavoidably collapses, ride the slide to the bottom and then sling your grapple hook up at the branch (19) and swing across to the handholds on the far ledge.
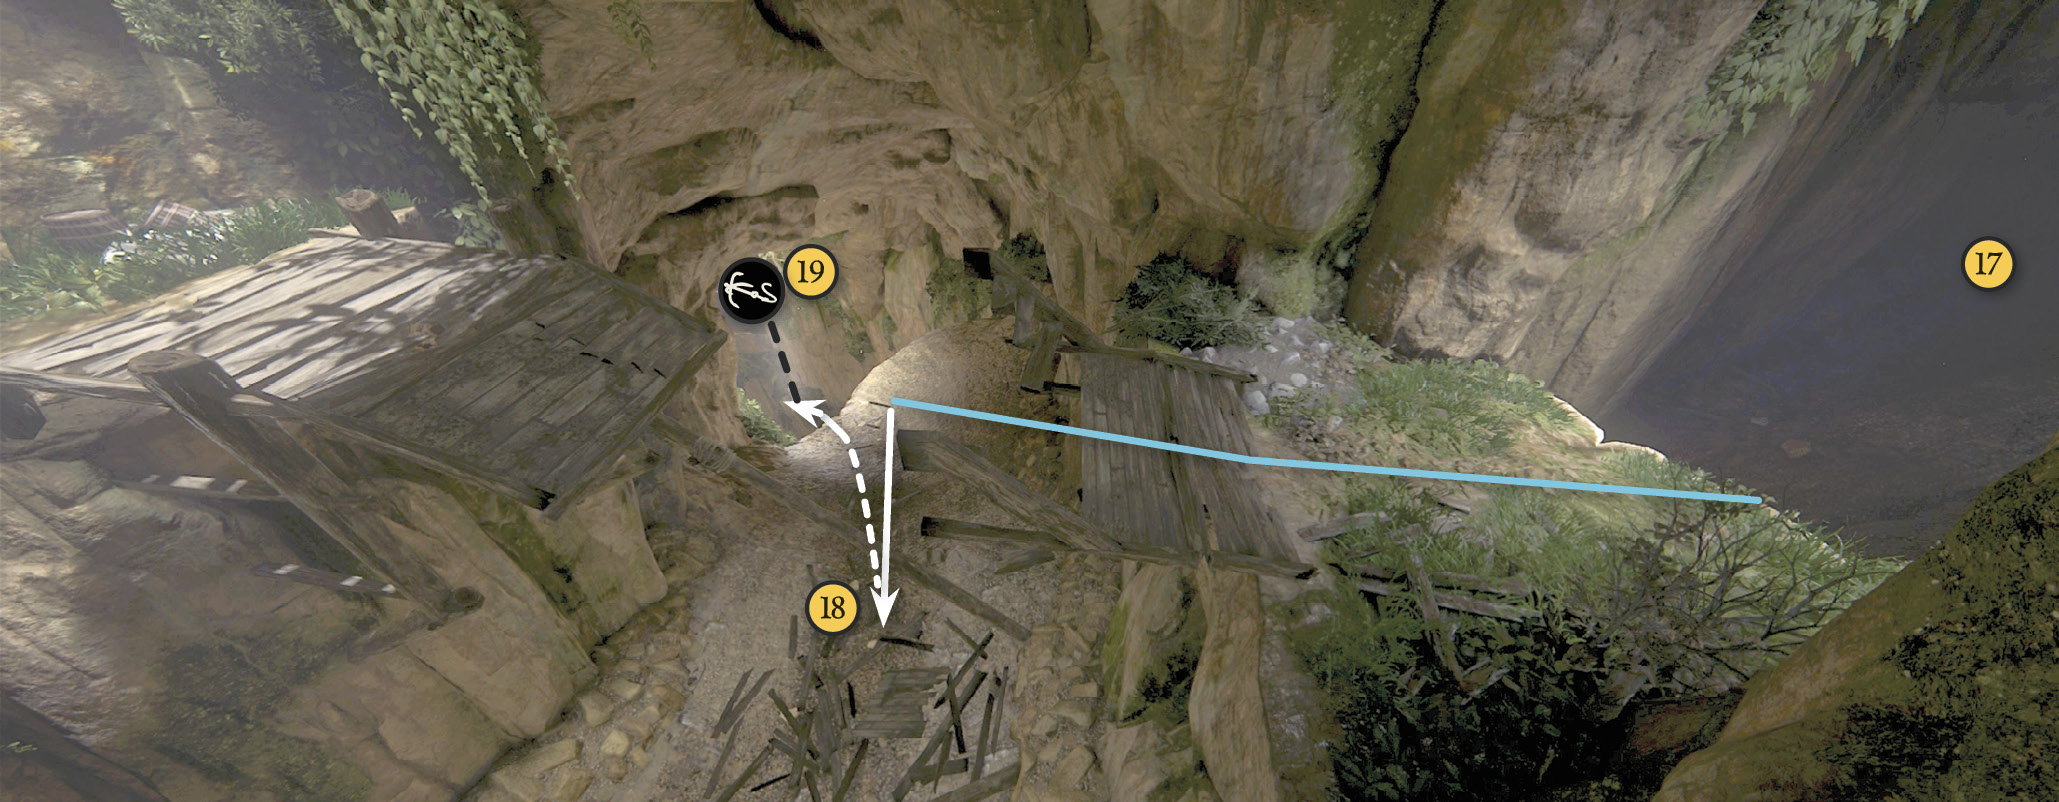
Climb to the highest handhold and shimmy leftward as far as you can go. Then press  to let go and make a stomach-fluttering drop to catch the edge below (20). Pull up and proceed through the low tunnel.
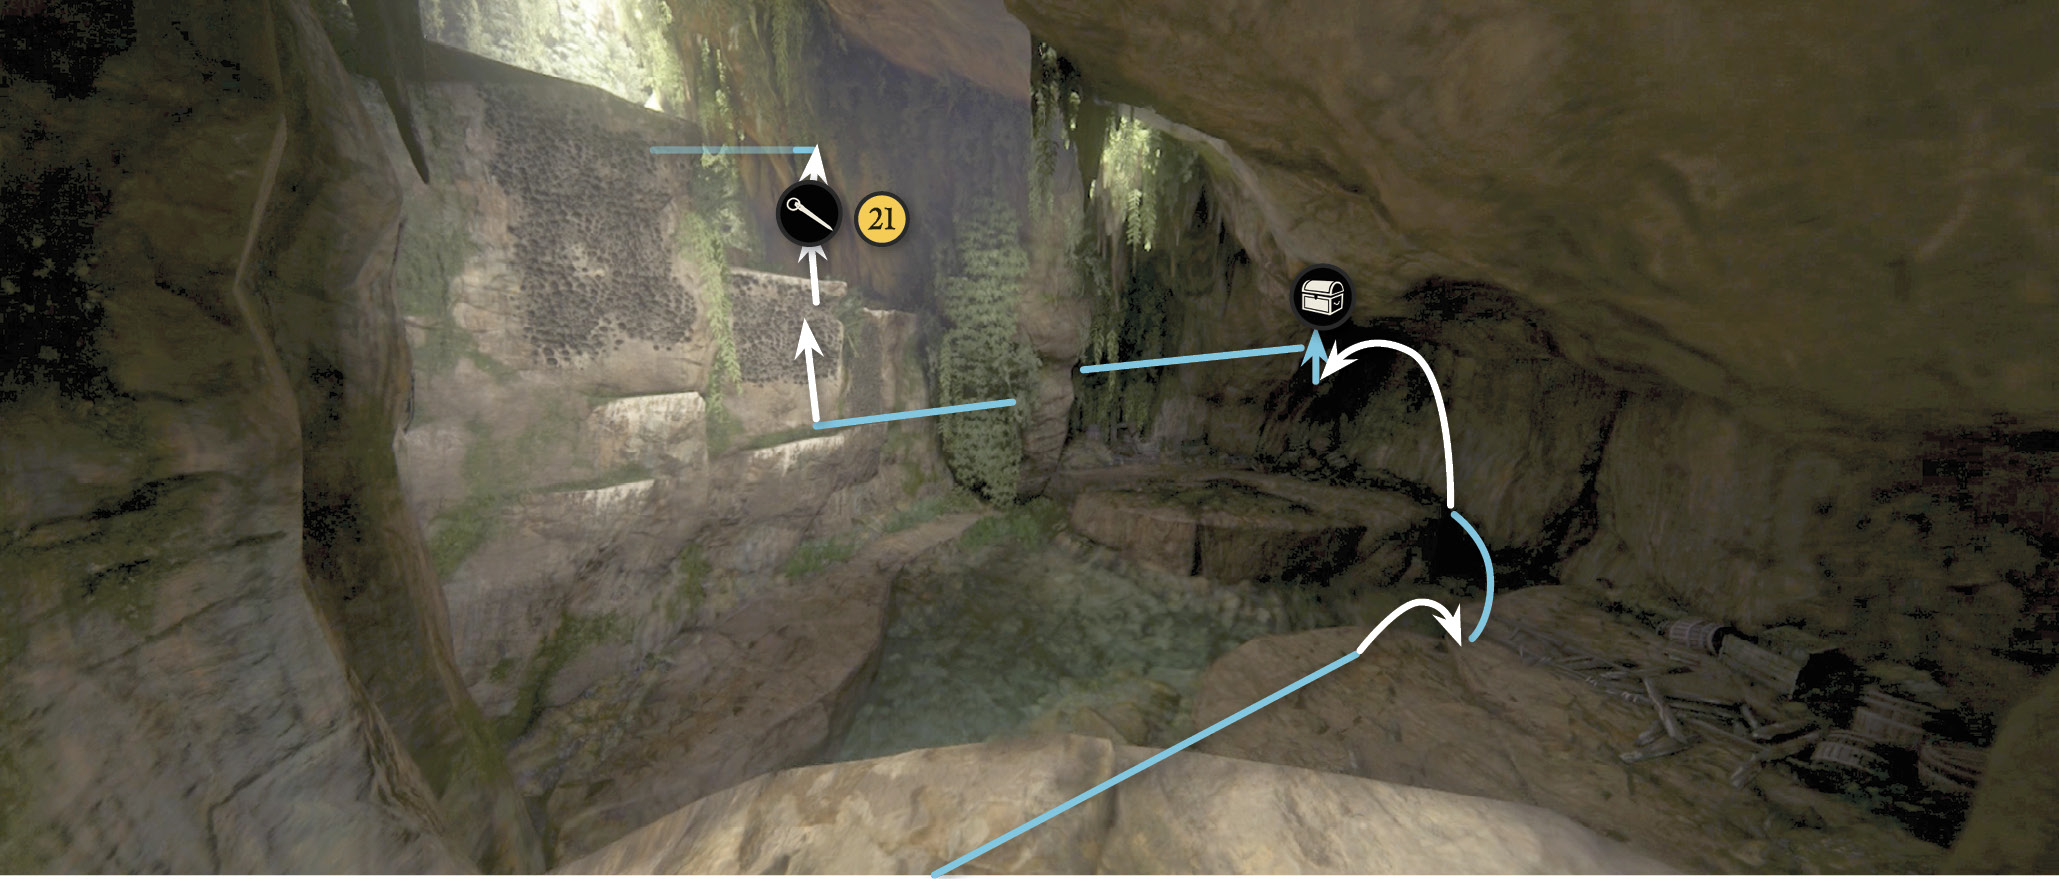
Keep following the tunnel until it opens into a tall cavern. Don’t miss the treasure tucked in a box here. Then go to any section of the porous wall (21) and use your piton to climb onto the ledge.

Stone Vase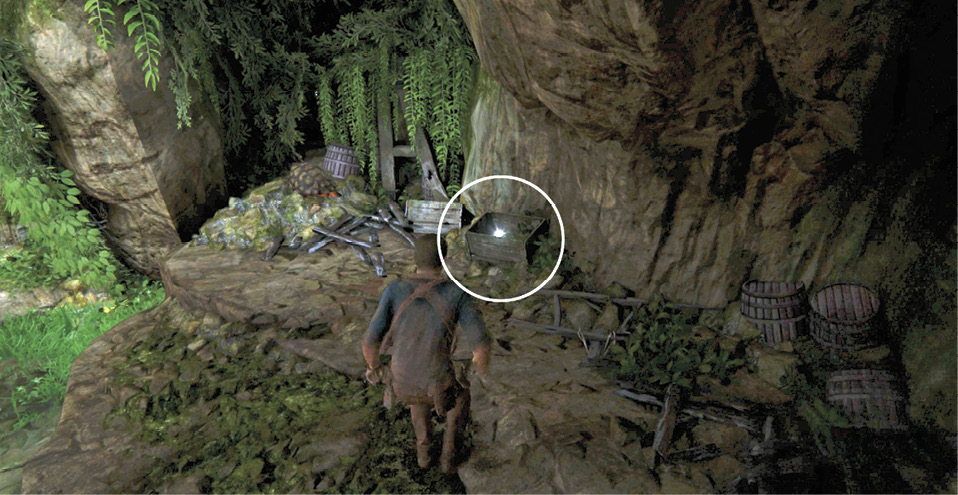
After the long, low tunnel opens into a tall cavern, go to the the far wall (a big tortoise crawls away as you approach). Find the Stone Vase stashed in a small wooden box with other debris. |
Grapple Down the Cavern
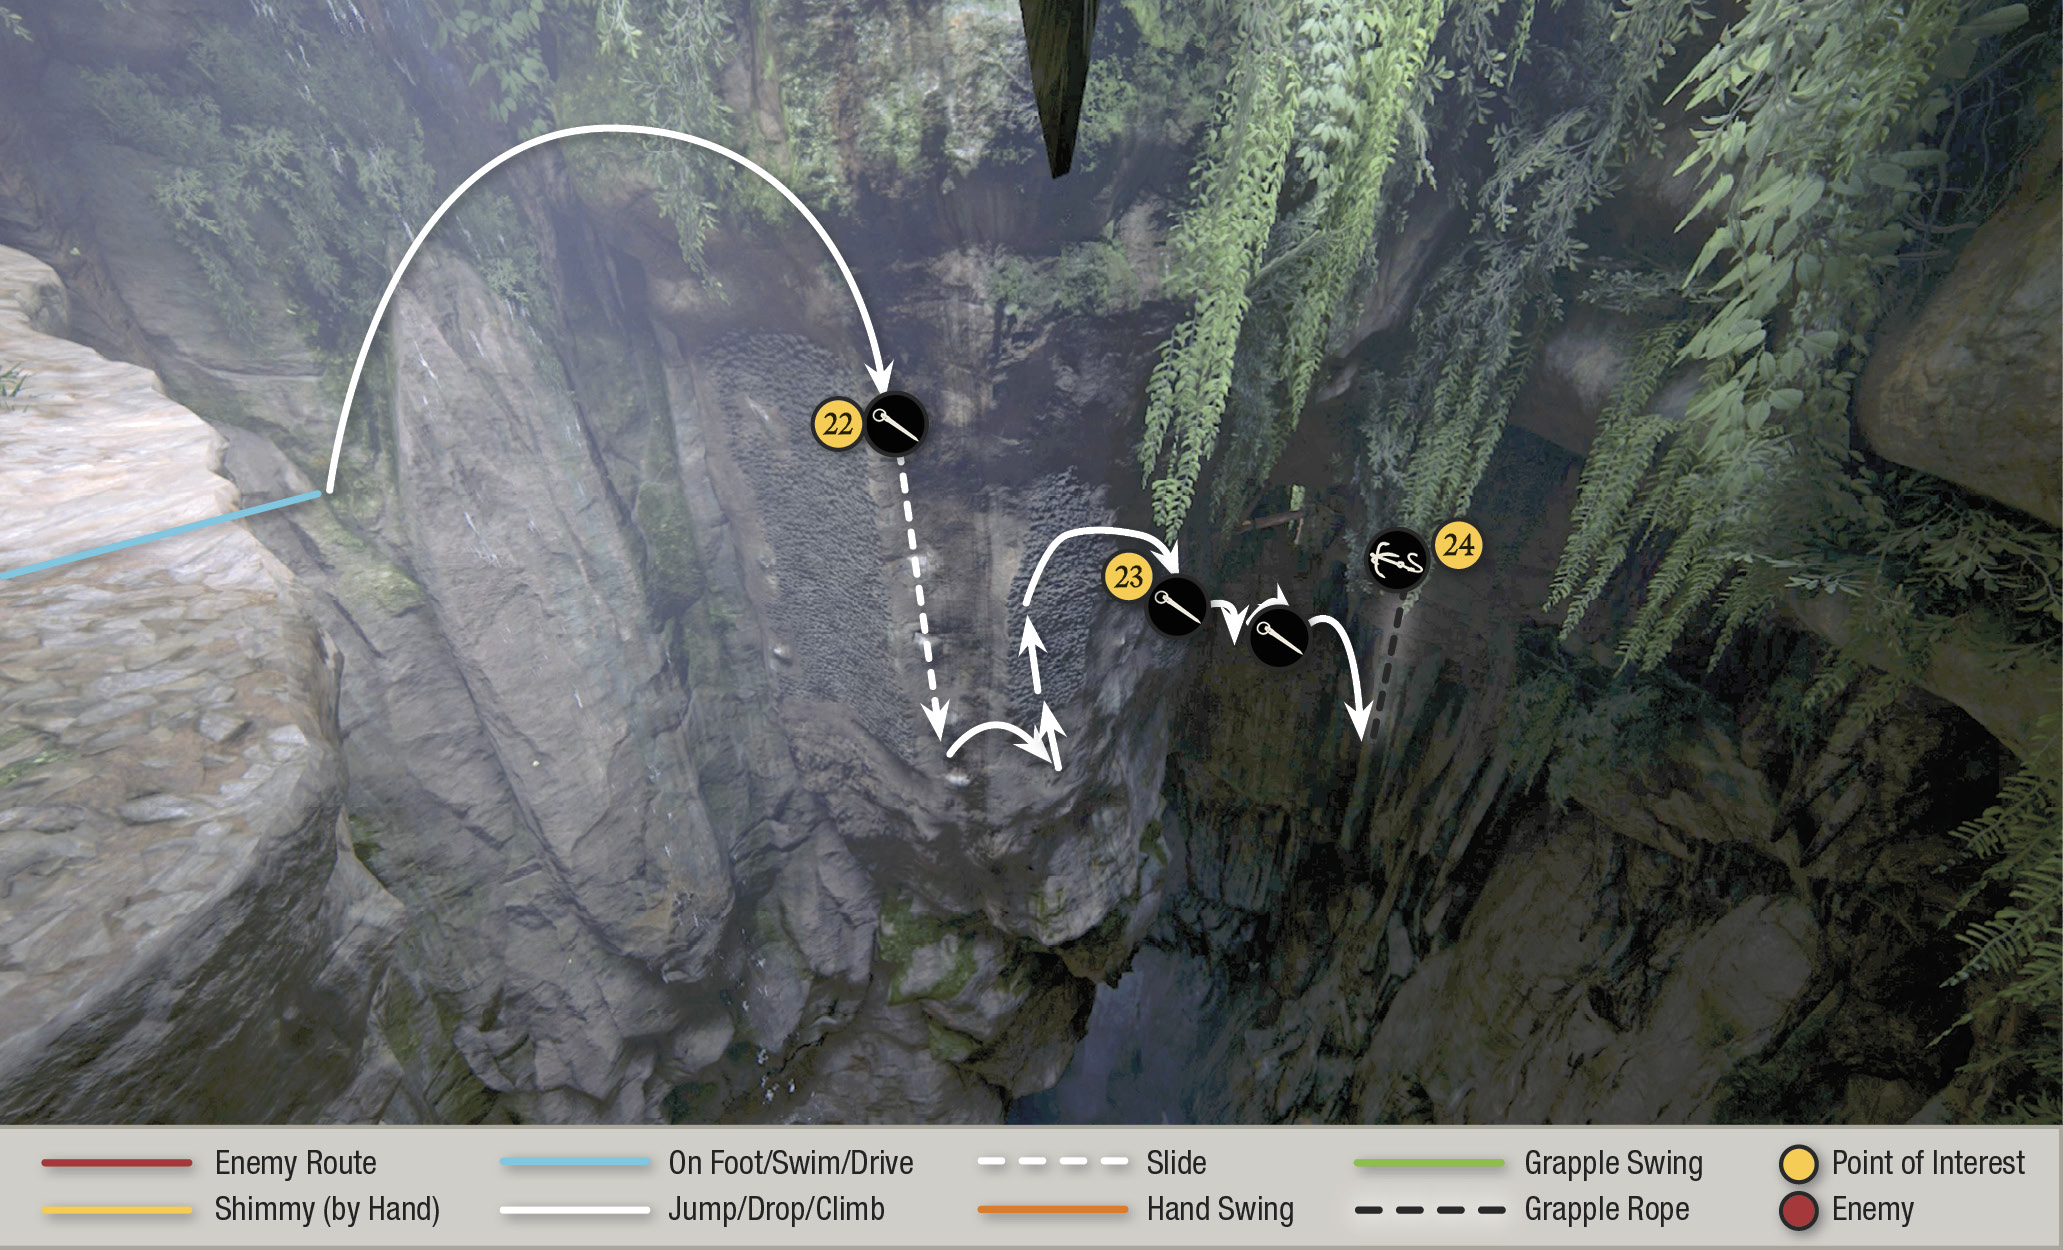
At the next drop-off, you see a tall section of porous rock (22) across the gap. Aim toward the right side of that pockmarked section, then jump and ram your piton into the wall as soon as you can. There will be some sliding down the wall due to gravity and velocity. When you stop, you have an option of handholds to the right. Climb to the top handhold and reach to the right again, and leap to jab your piton into the next porous wall (23). Now you can reach over to grab another handhold. From there, reach out and hop rightward then immediately jab the piton into the last section of porous wall. Here you can toss your grapple hook at the pole to your right (24).
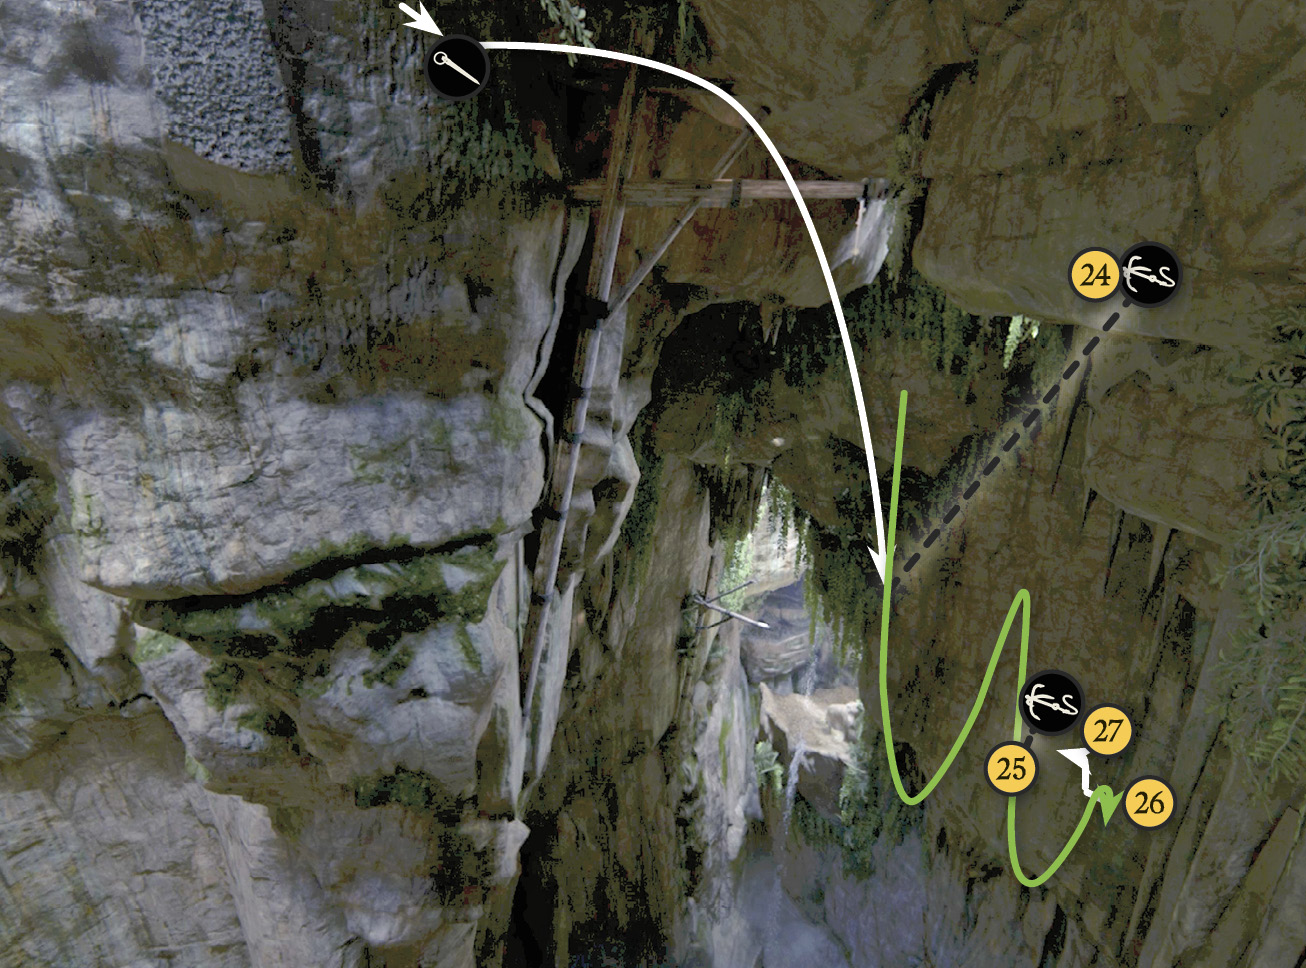
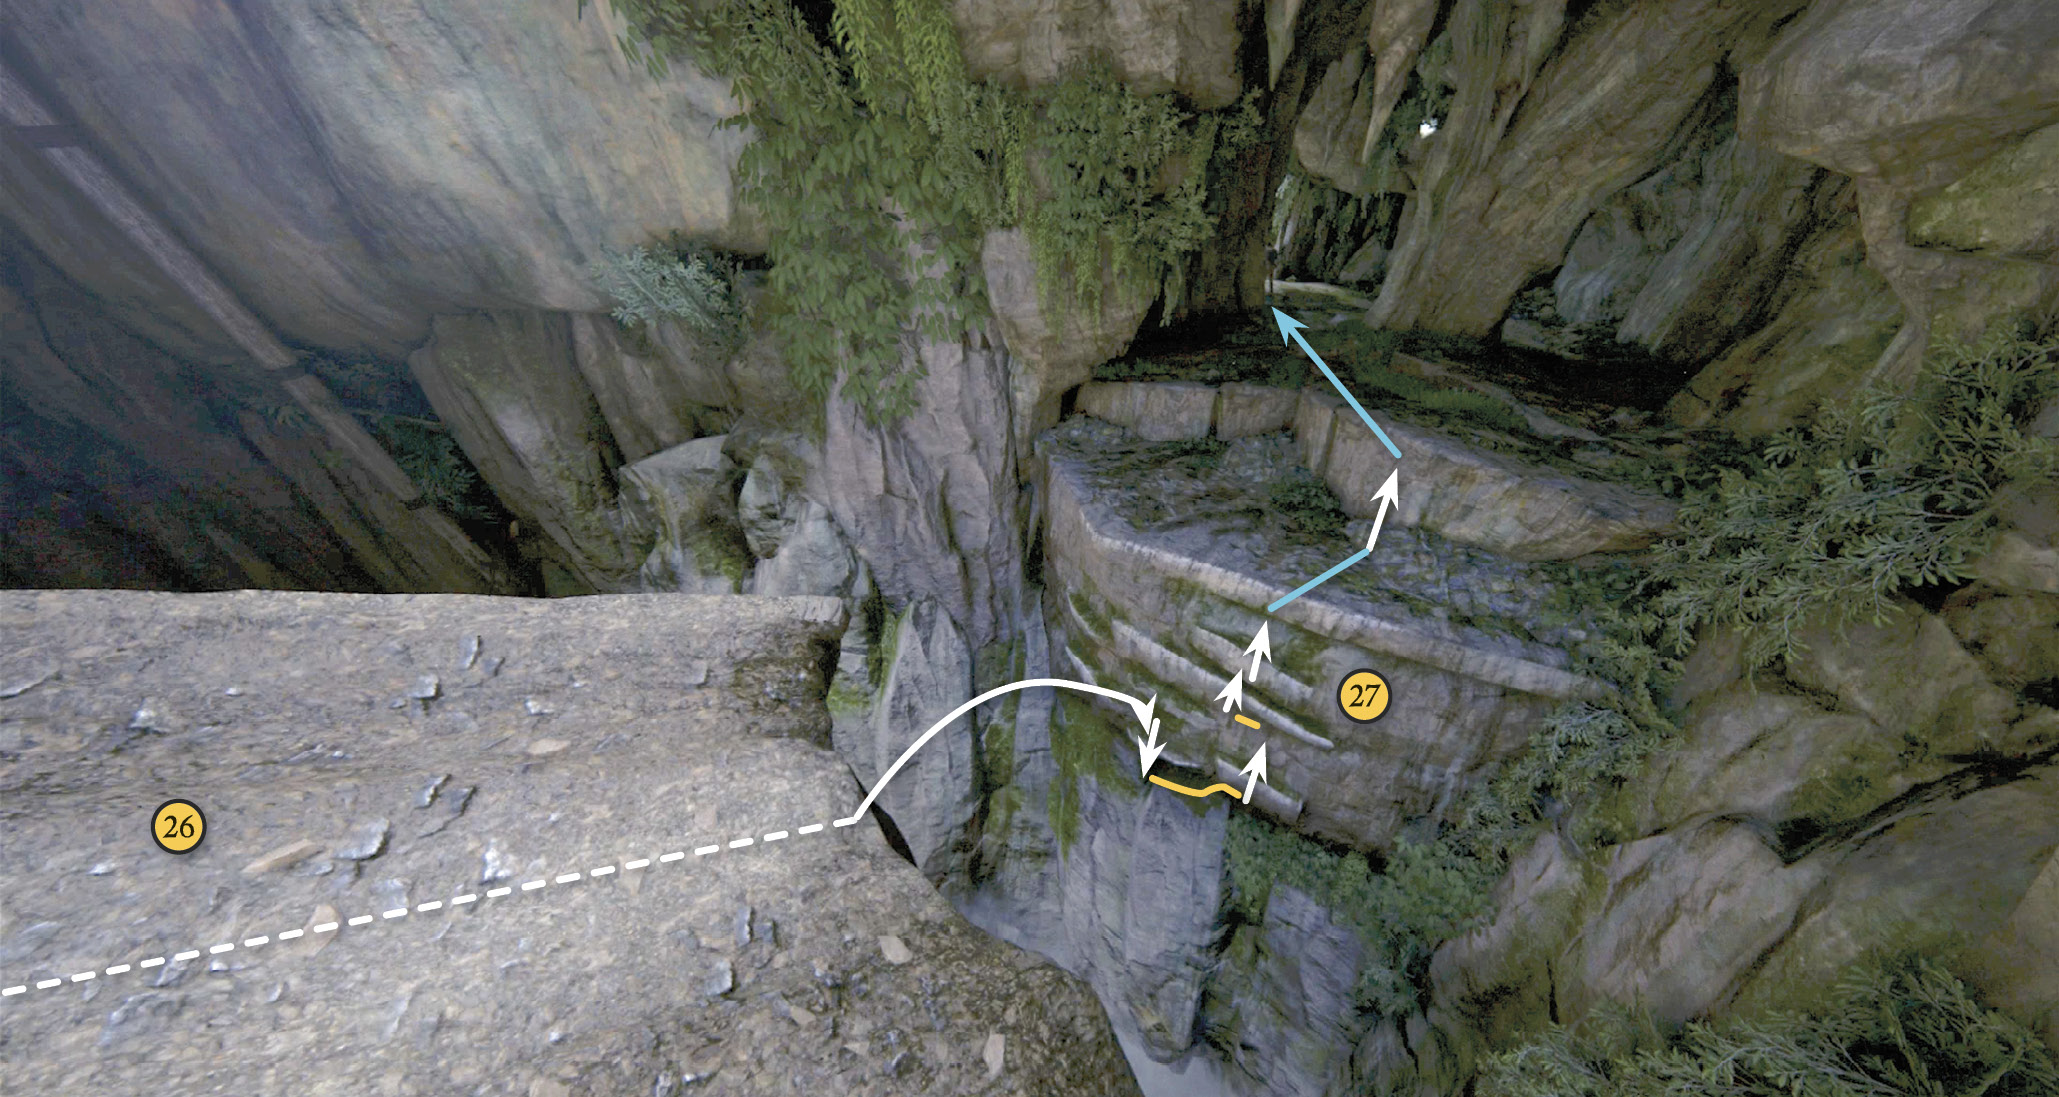
Now comes a tricky double-swing grapple. Swinging from the first pole, jump toward a second pole (25) below you. Quickly hit L1 again to snag the second pole with your hook. Swing and jump onto the short rockslide (26) below; at the bottom, leap across to the handholds on the opposite side (27). The one Nathan grabs breaks off, and he barely catches the bottom hold. Slide rightward then work your way up the ledges and proceed through the next cave opening.
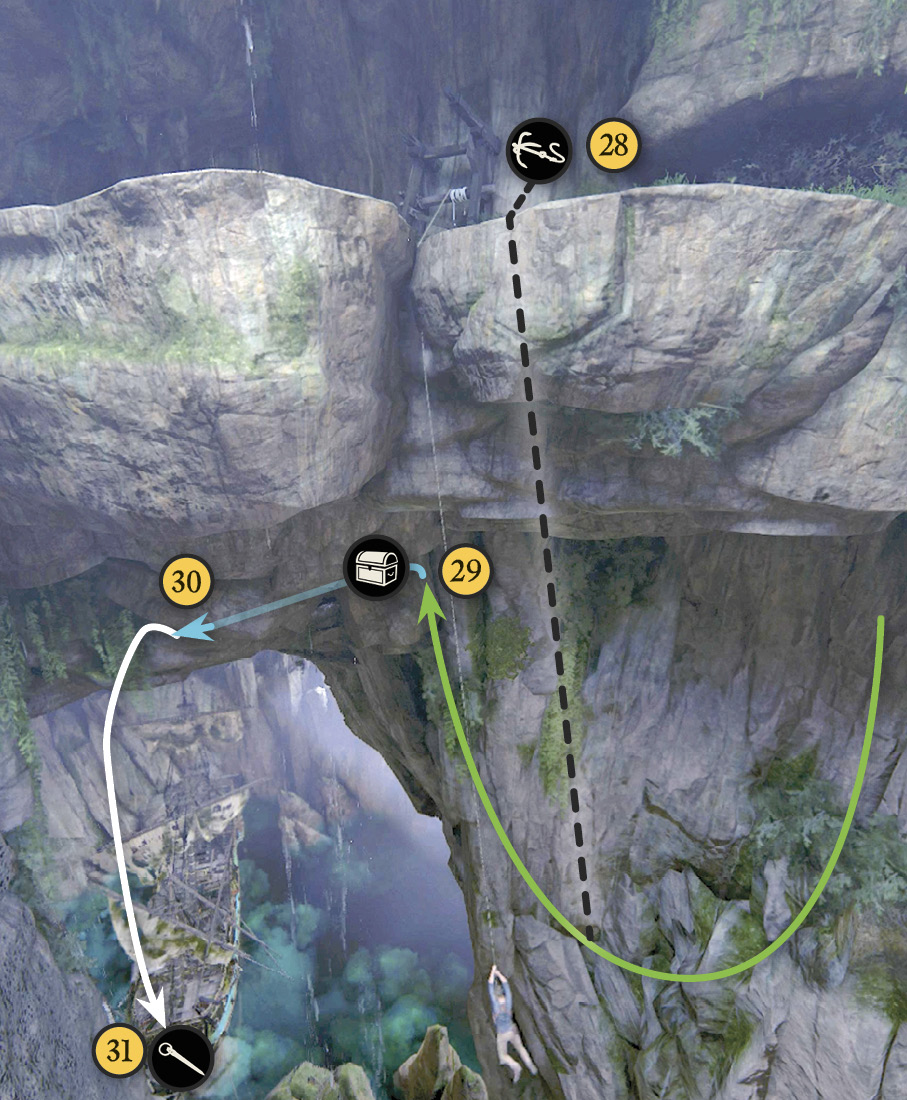
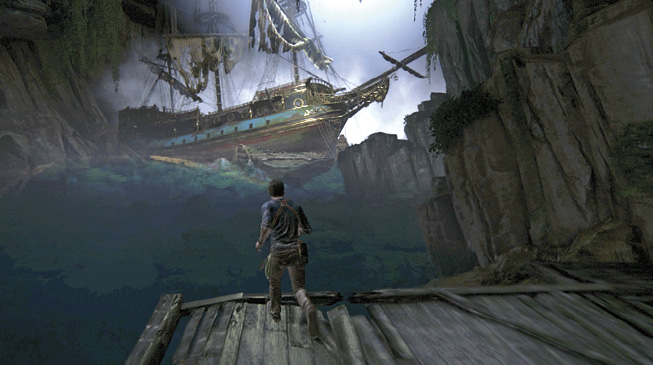
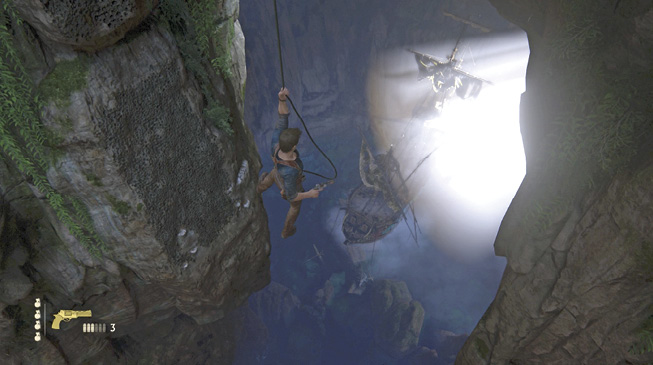
Now get ready for a chill. Attach your grapple hook to the old broken winch frame (28) and step off the next cliff. Hang there and look down at a spectacular sight—Henry Avery’s ship, the Fancy, moored below! Before you swing, drop and puncture the porous wall to your left; there’s a treasure in a small hidden cave (29) under the land bridge where your rope is attached.

Strange Fruit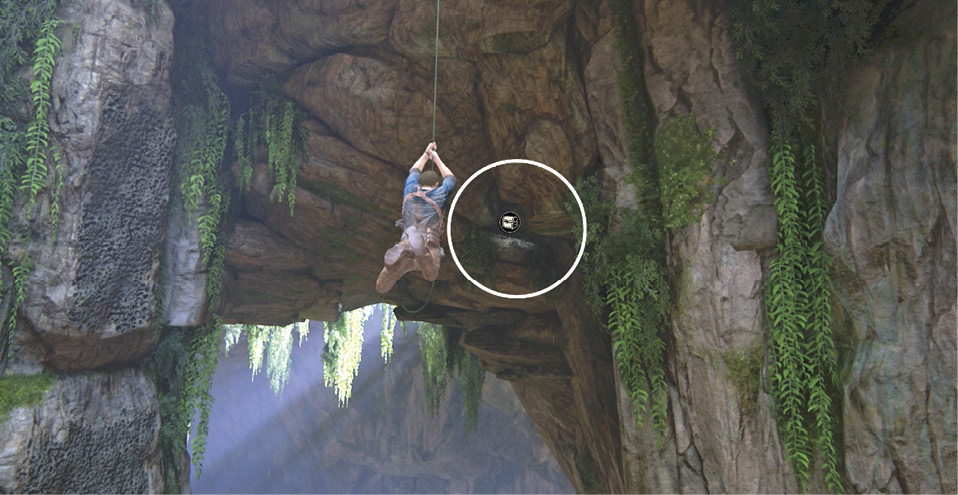
While swinging from the ledge with a view of Avery’s ship, look up and find a small cave with a small white ledge under the land bridge you hang from. Swing hard to that ledge, avoiding the rock outcropping to the right. Release from the rope when Nathan’s hand reaches out, signaling a reachable ledge. Pull into the cave and grab the Wumpa fruit from the darkness. Recognize this Strange Fruit? |
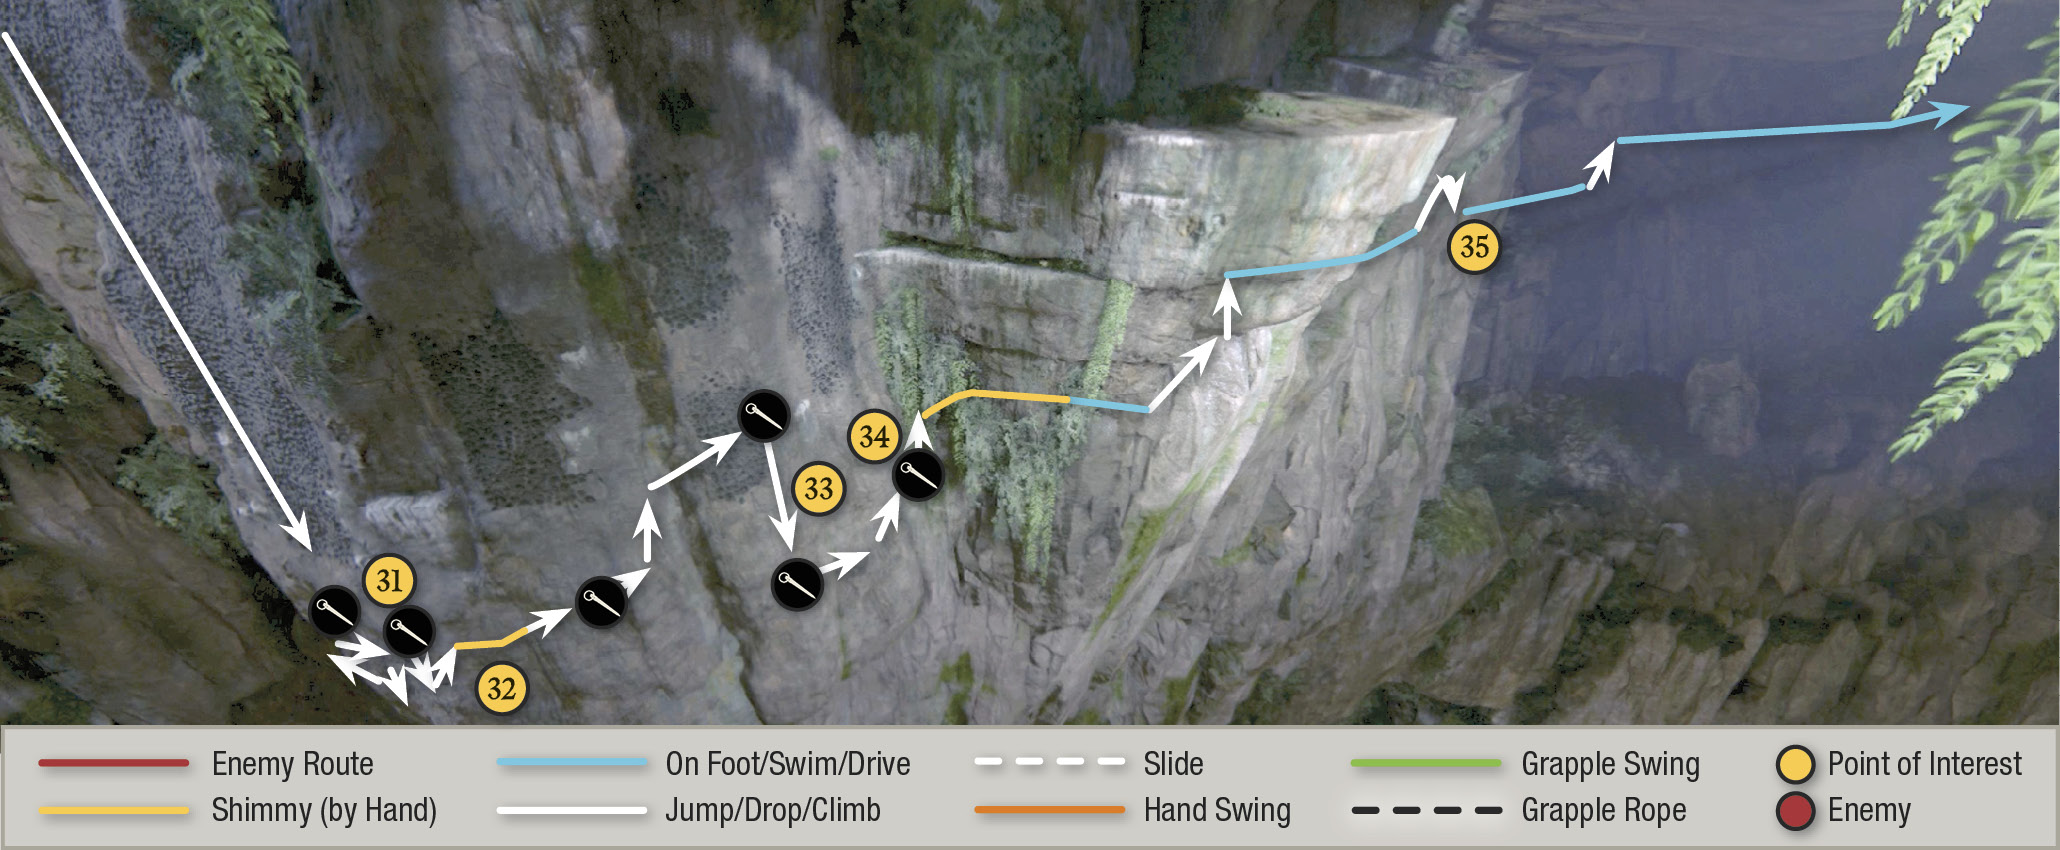
After collecting the treasure from the hidden cave, head to the far end of the cave and jump from the exit (30) to the porous wall (31) below, jamming your piton into the second section below the first (you will not be able to reach the first section when exiting from the cave). Reach the nearby grip point and then drop to the lowest one to continue. Reach out as far as you can to the left and punch the piton into the porous wall, and then reach out again to the left and grab the white-lined rock grip. Move to the longer rock (32) where you need to shimmy further left to reach the next porous wall section.
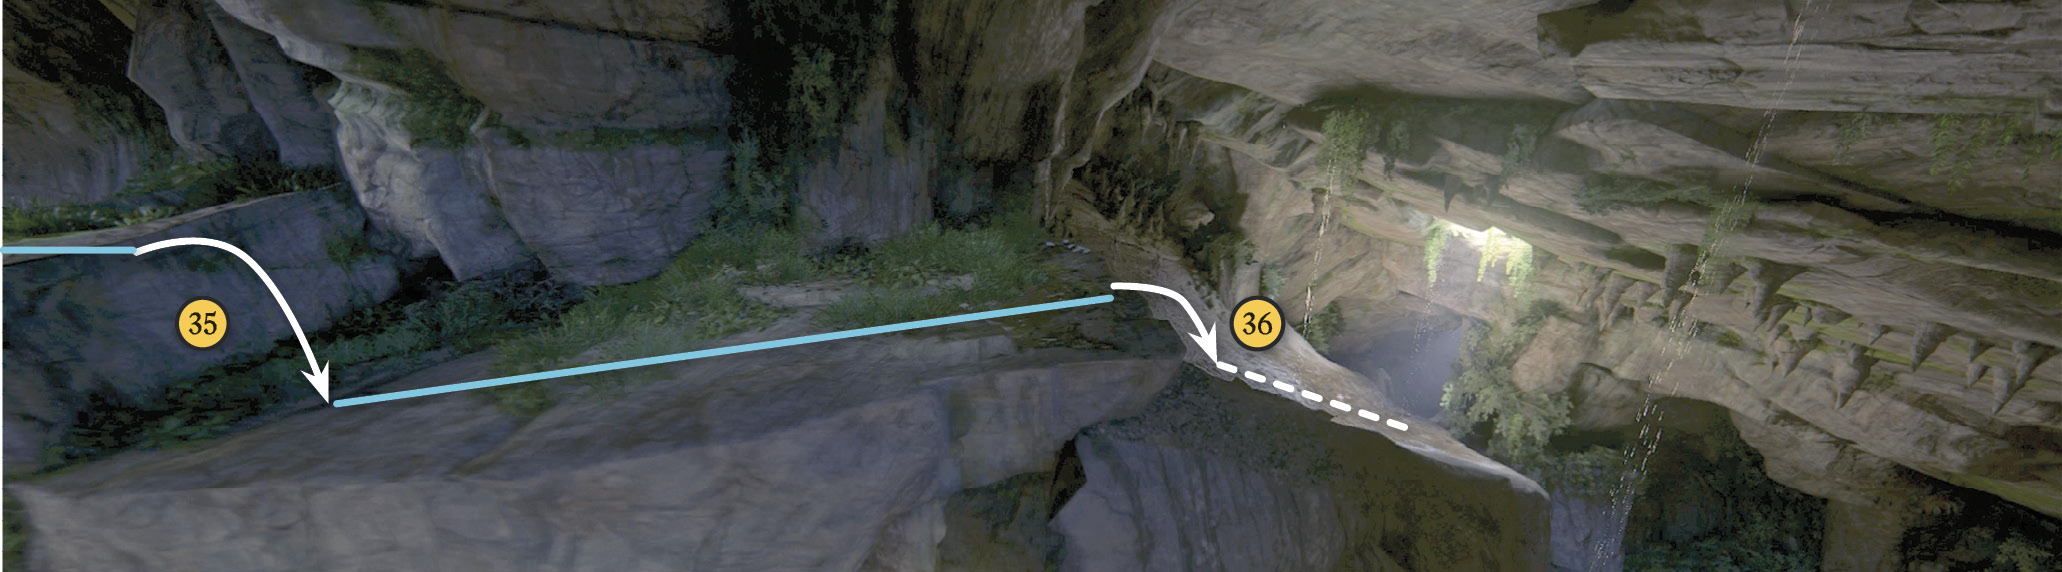
Work your way rightward along the ledge and the porous walls. At one point (33) you face a scary drop to a lower section of porous wall; be quick with the piton here! Reach for the handhold to the right. And then comes another tricky stab—jump rightward and upward (34) as far as you can to make your last piton placement. From there you can shimmy and reach and hop to the ledge where you can stand and traverse rightward until you can climb to the platform. Hop across the next gap (35) and continue on to the long rockslide (36).
Rockslide
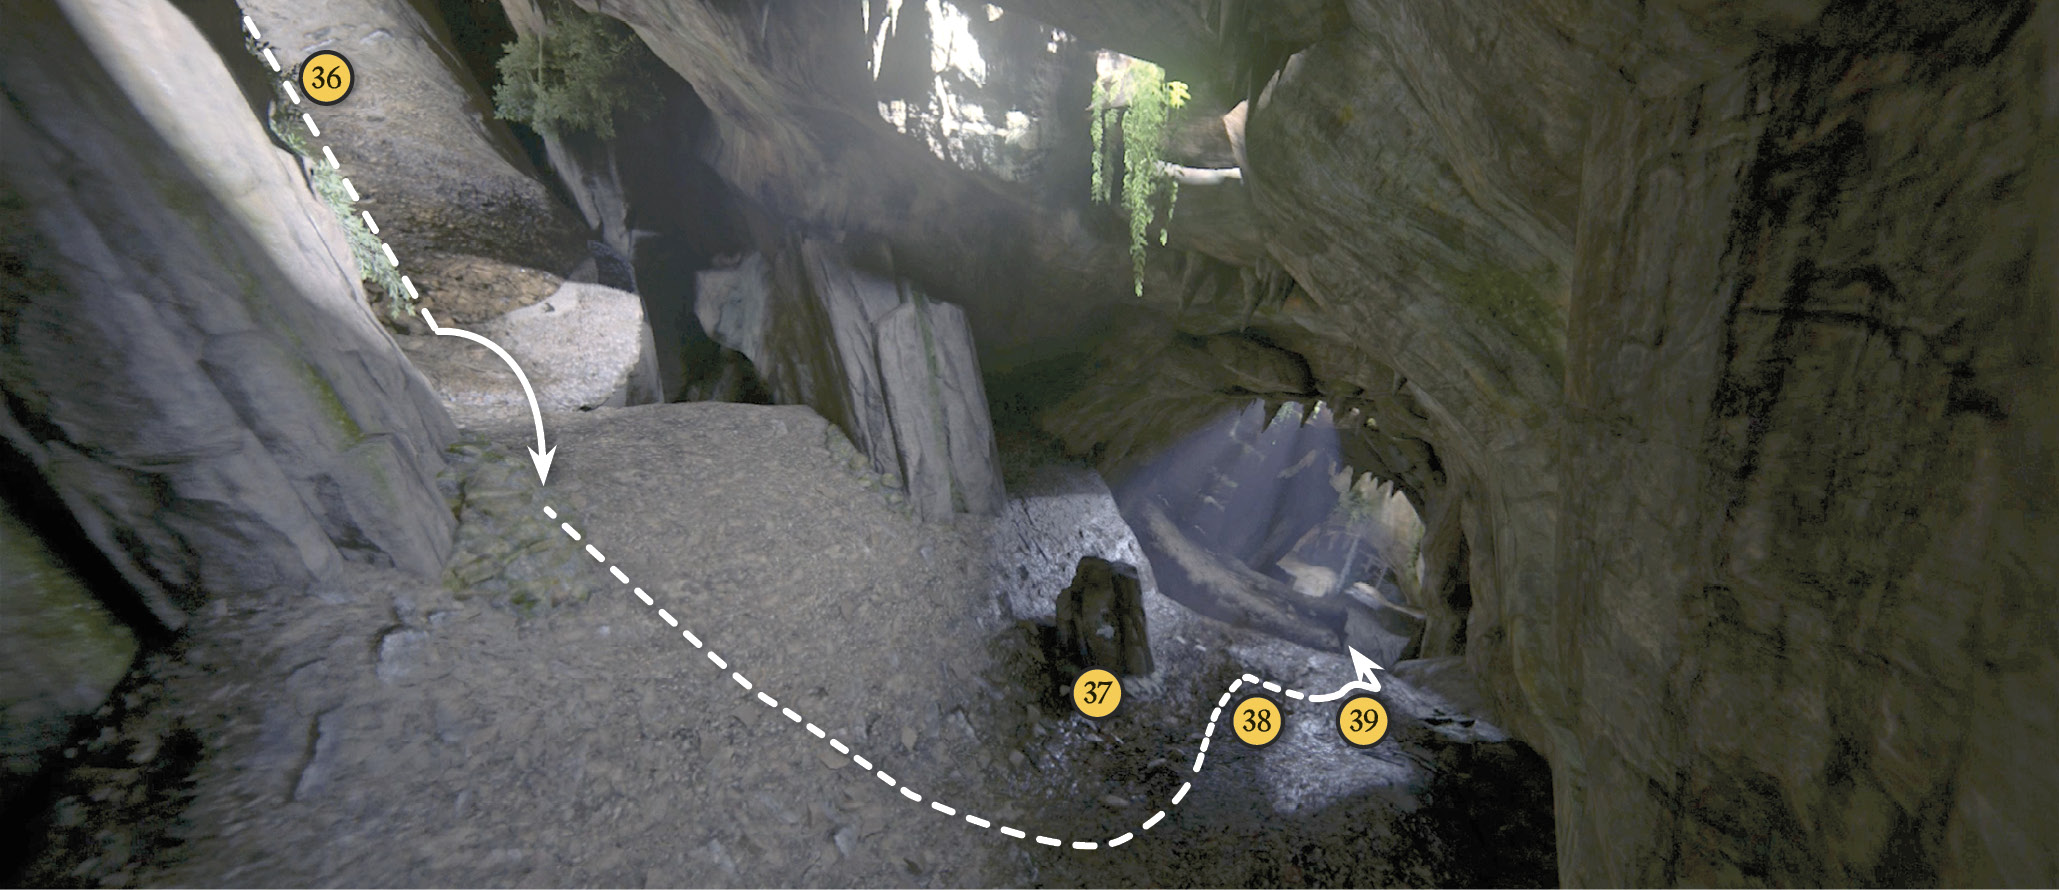
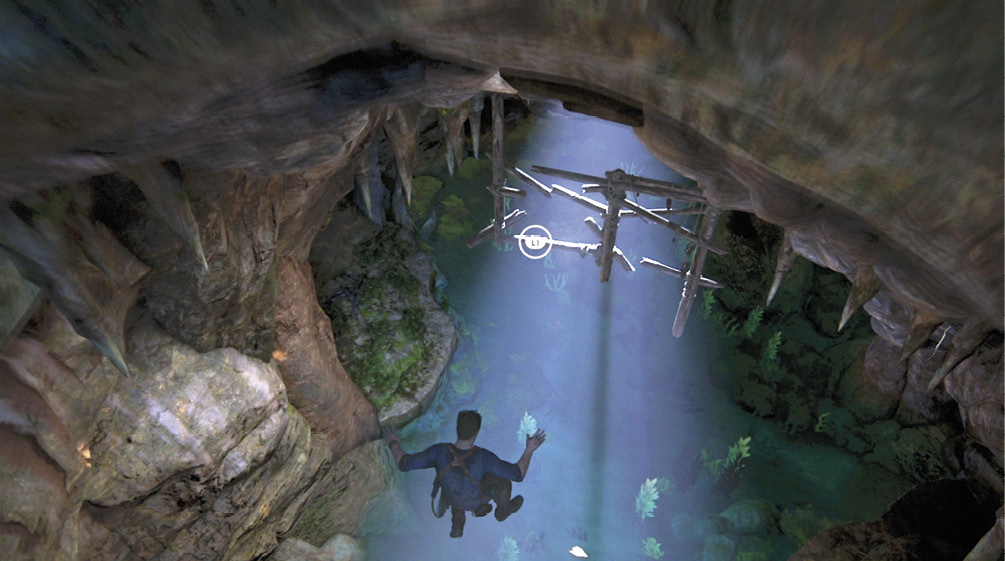
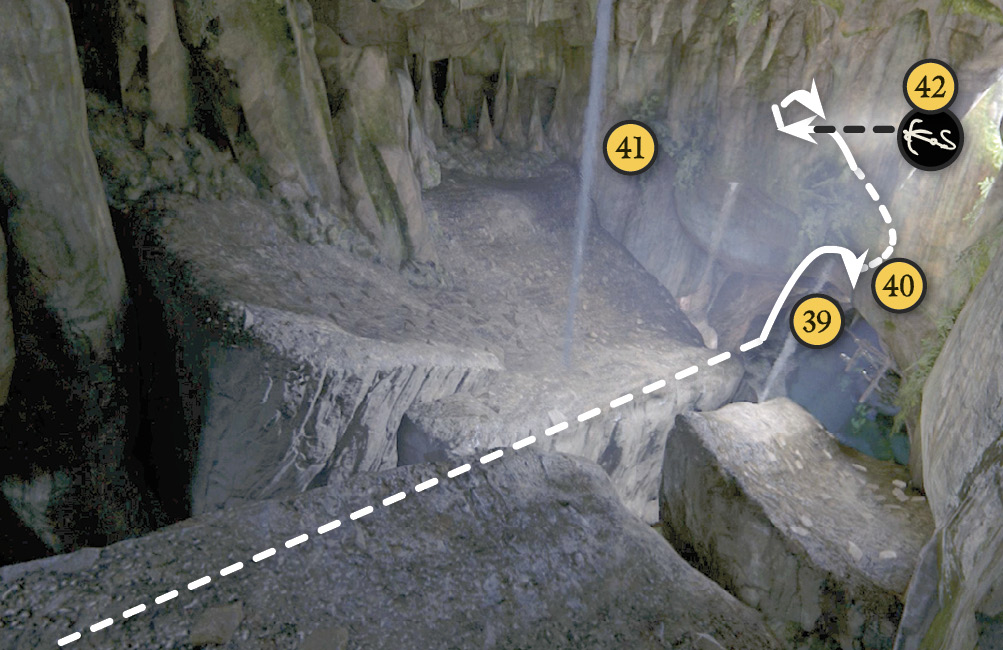
Hop on the slide and ride. When you reach the boulder (37), curve tightly around the right side of it and get ready to punch  to jump across a gap (38). The slide continues! Veer rightward now and jump across the next gap (39) onto a smaller slide section. Continue downhill and jump either to the small platform on the right (40) or the bigger one on the left (41). When you reach the end of the slide on either one, jump and toss your grapple hook to snag the wooden frame above (42). This triggers a quick scene: The frame breaks apart and Nathan plunges into the water below (43).
Swim to the Fancy
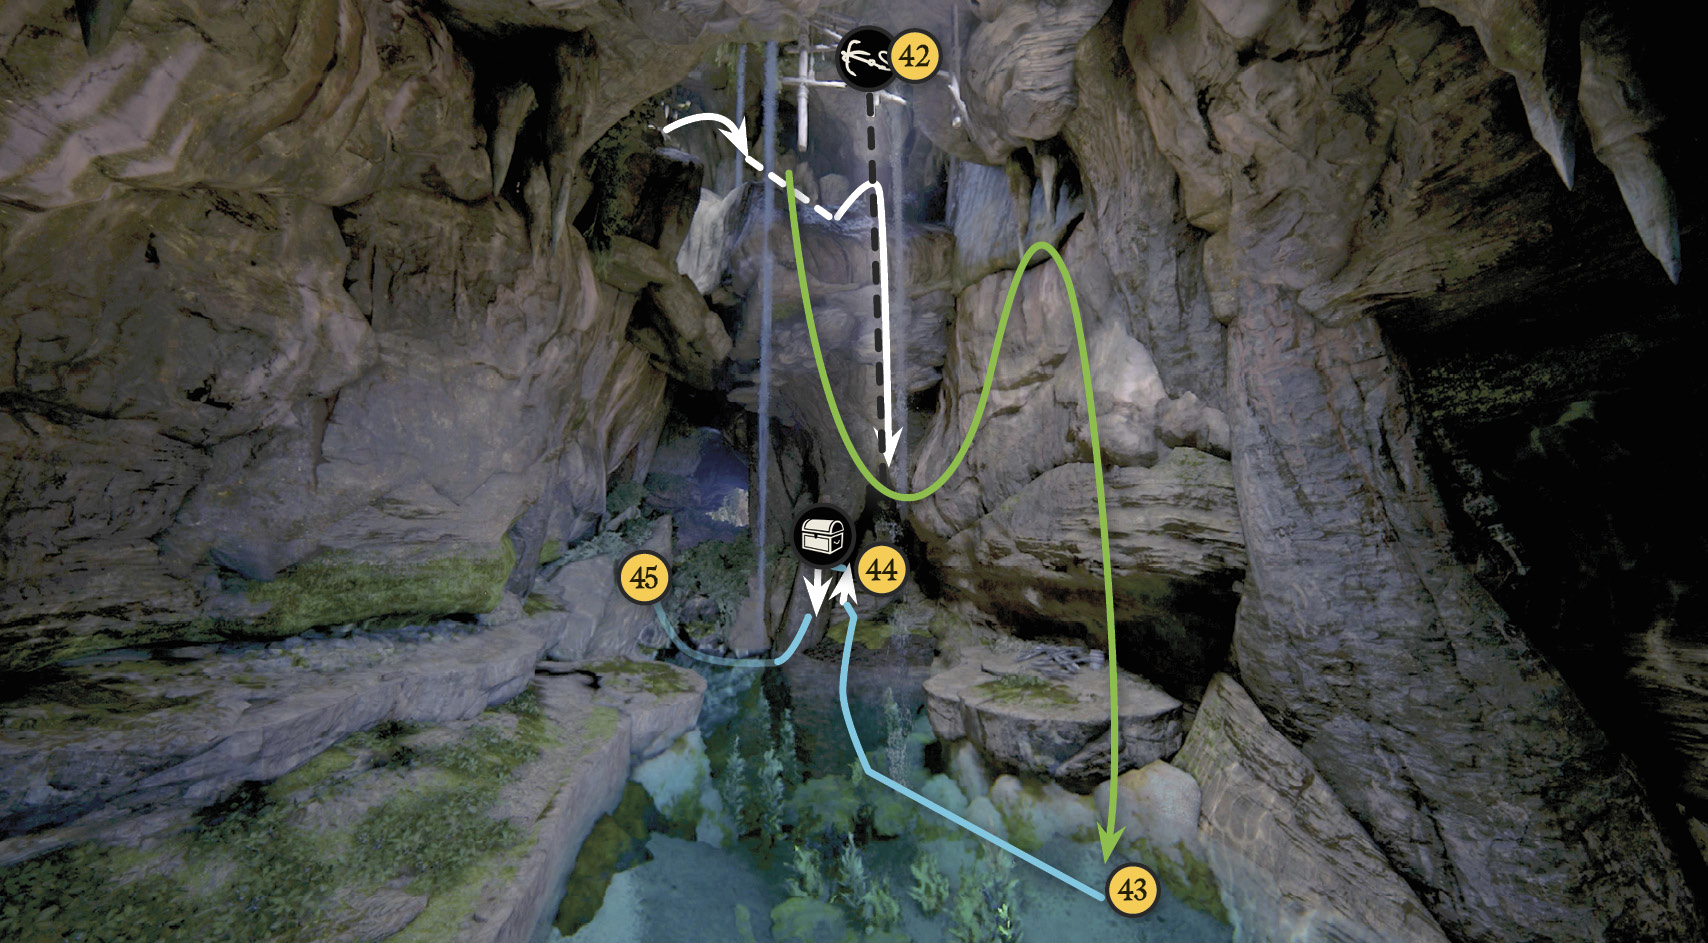
Swim back towards the waterfalls and pull yourself out of the water and into a cave (44) on the right side to find a treasure inside.

Rajasthan Box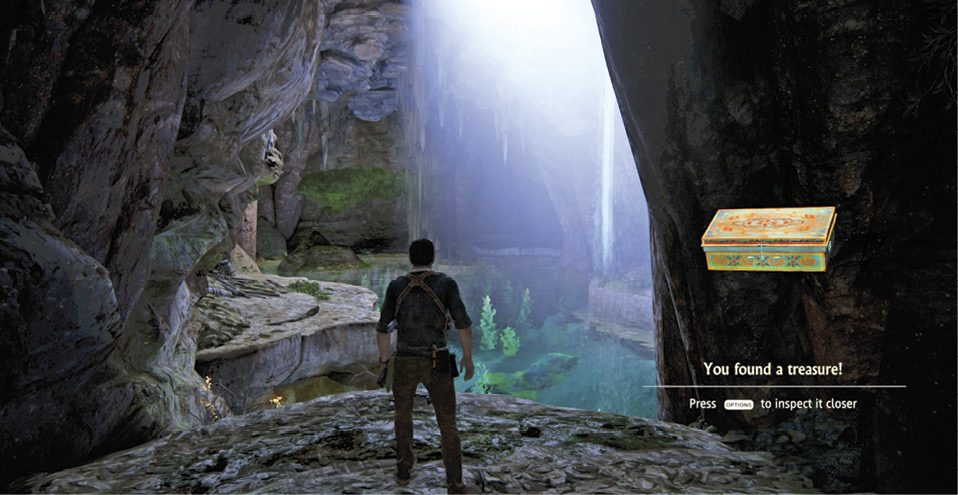
After dropping into the subterranean water reservoir, swim toward the thin waterfall in the distance. Climb into the cave (44) to the right of the waterfall and find the Rajasthan Box on the cave’s left side in the dark. |
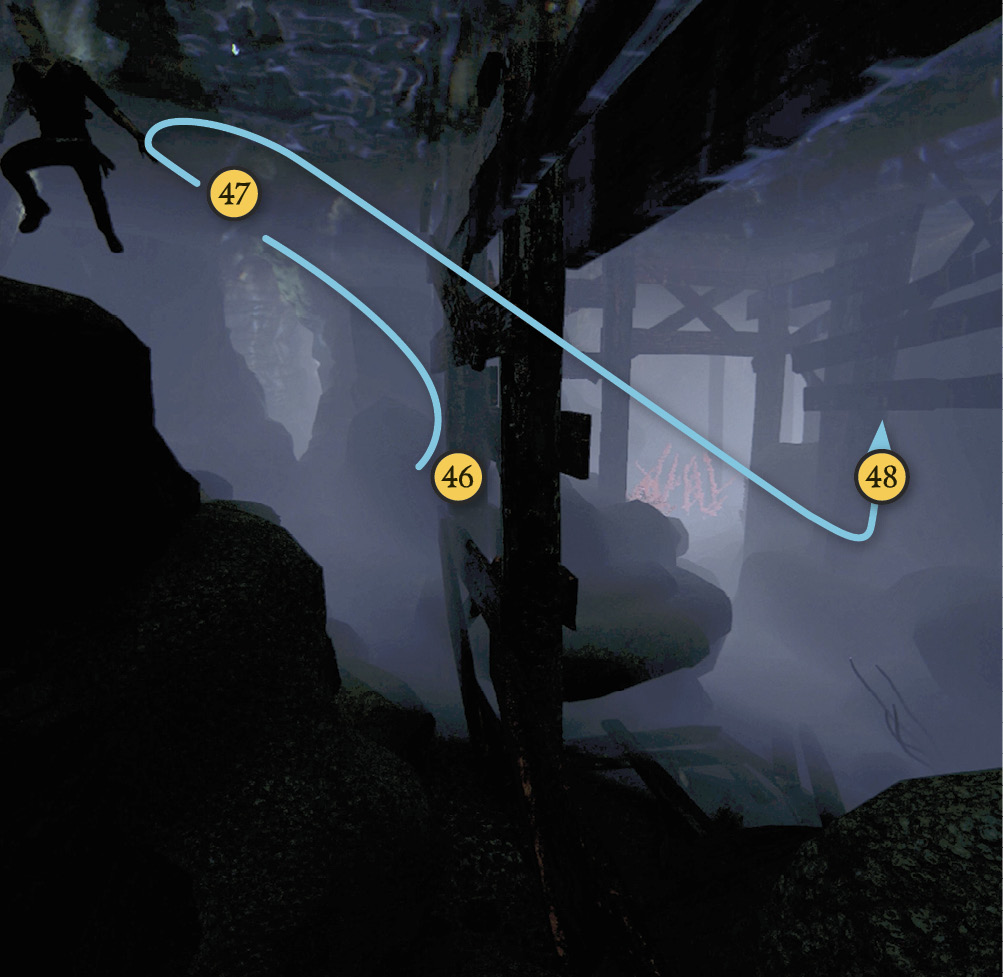
After nabbing the treasure from the cave, return to the reservoir and find the low, narrow passage through the rocks (45). Dive slightly to get through it into a water-filled chamber. The only way out is underwater, so turn right and swim around the rock jutting from the pool to find another low passage (46). Dive down to swim through the narrow fissure.
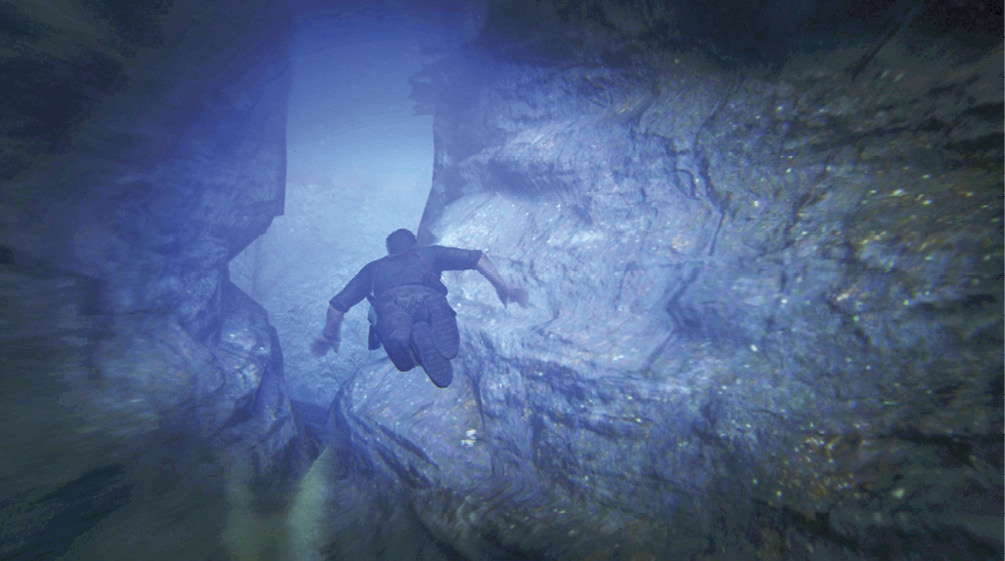
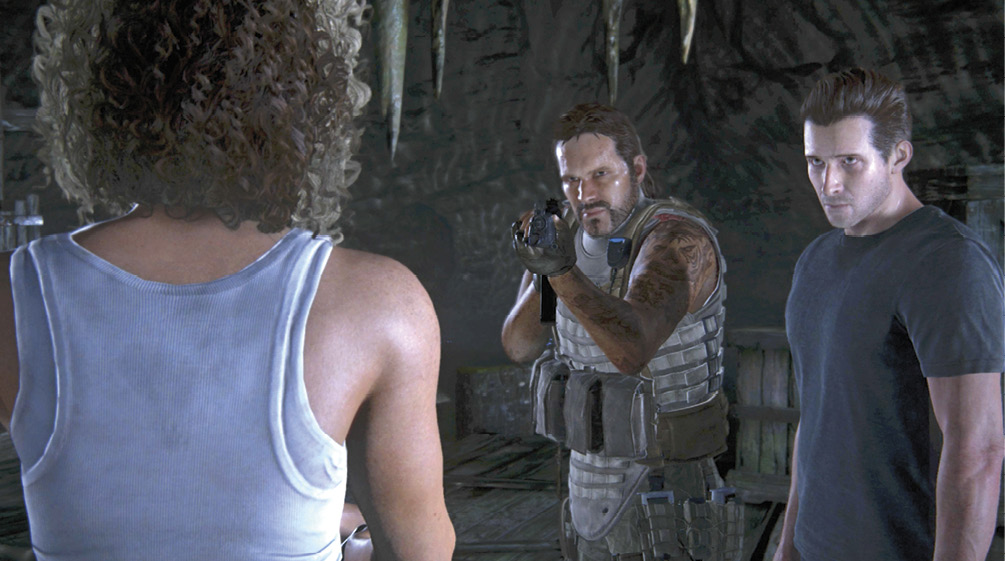
You enter (47) a darkened chamber. Surface to trigger a long cutscene: Nathan emerges underneath a dock. Directly above him, Nadine Ross and Rafe Adler discuss the pros and cons of boarding a pirate ship likely bristling with insidious traps. Nathan learns one good piece of news: Sam has acquired a boat.
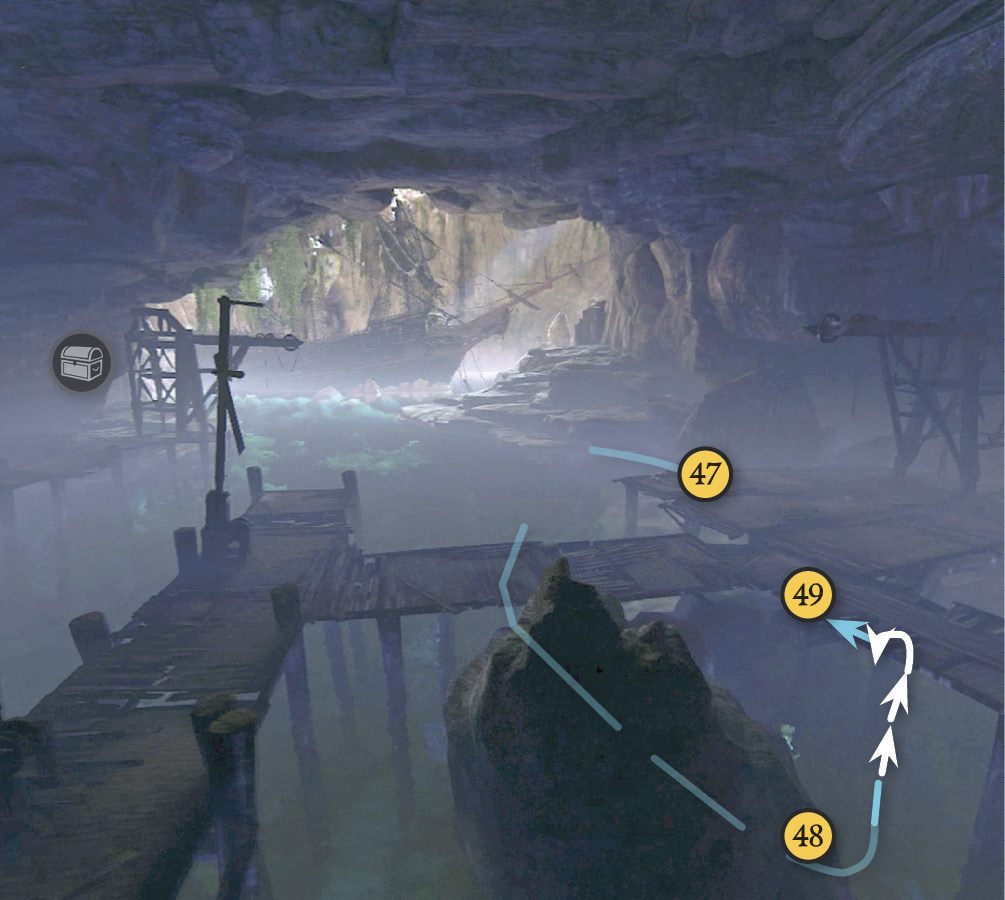
When control returns (47), dive down, swim through the opening in the vertical supports, and veer left toward the patch of waving underwater flora (48). When you reach them, kick up to the surface. Swim to the end of the dock and climb the horizontal beams (49).