Uncharted 4: A Thief's End Guide Story Walkthrough
Chapter 11: Hidden in Plain Sight
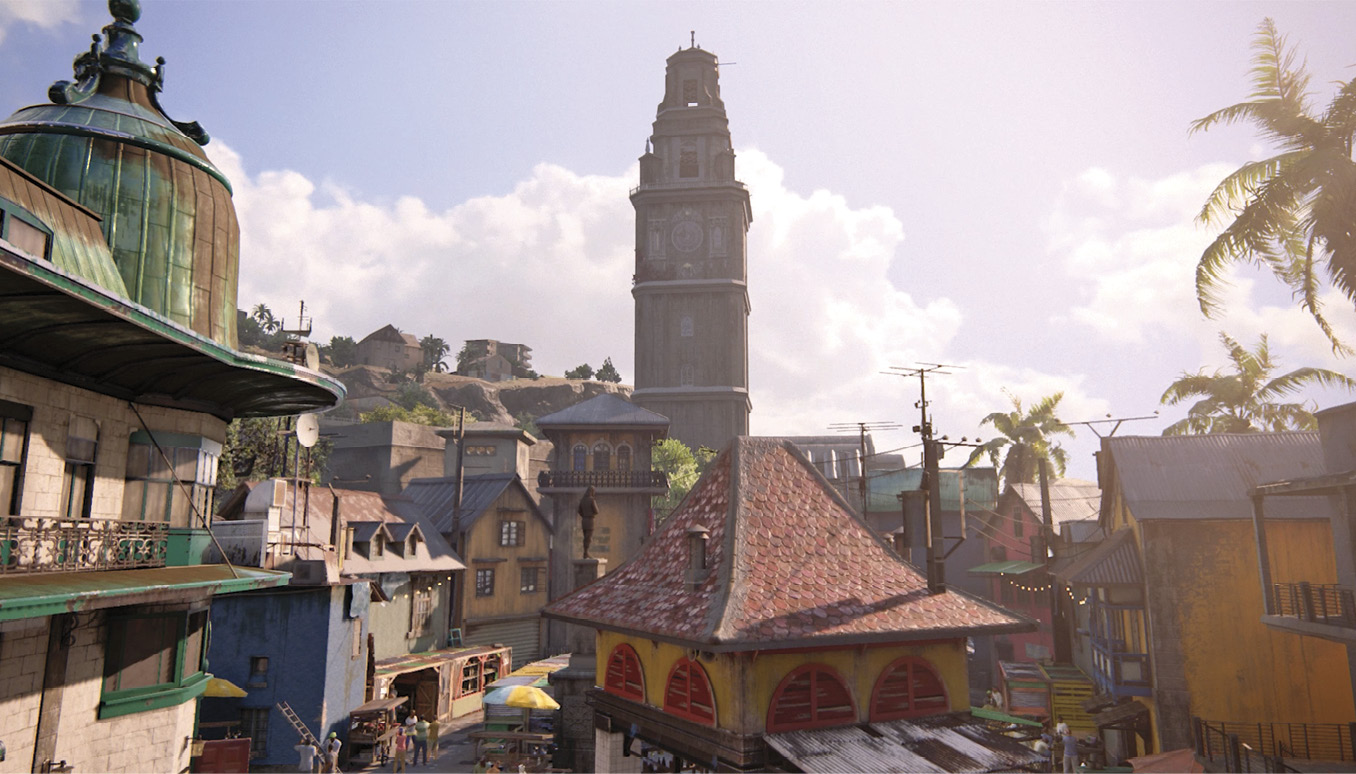
Nathan and Sully have chosen the tower located in the heart of the city. To reach it, you must maneuver through the city marketplace during business hours. Then prepare for some puzzle-solving after an arduous climb, followed by a harrowing vehicular chase/escape.
CollectiblesTreasures: 5 Chapter Specific Trophies: “Don’t Feed The Animals,” “Treasure Hunter,” “I Can See My House From Here,” “Glamour Shot,” and “Stage Fright” Optional Conversations: 1 |
Get into the Tower
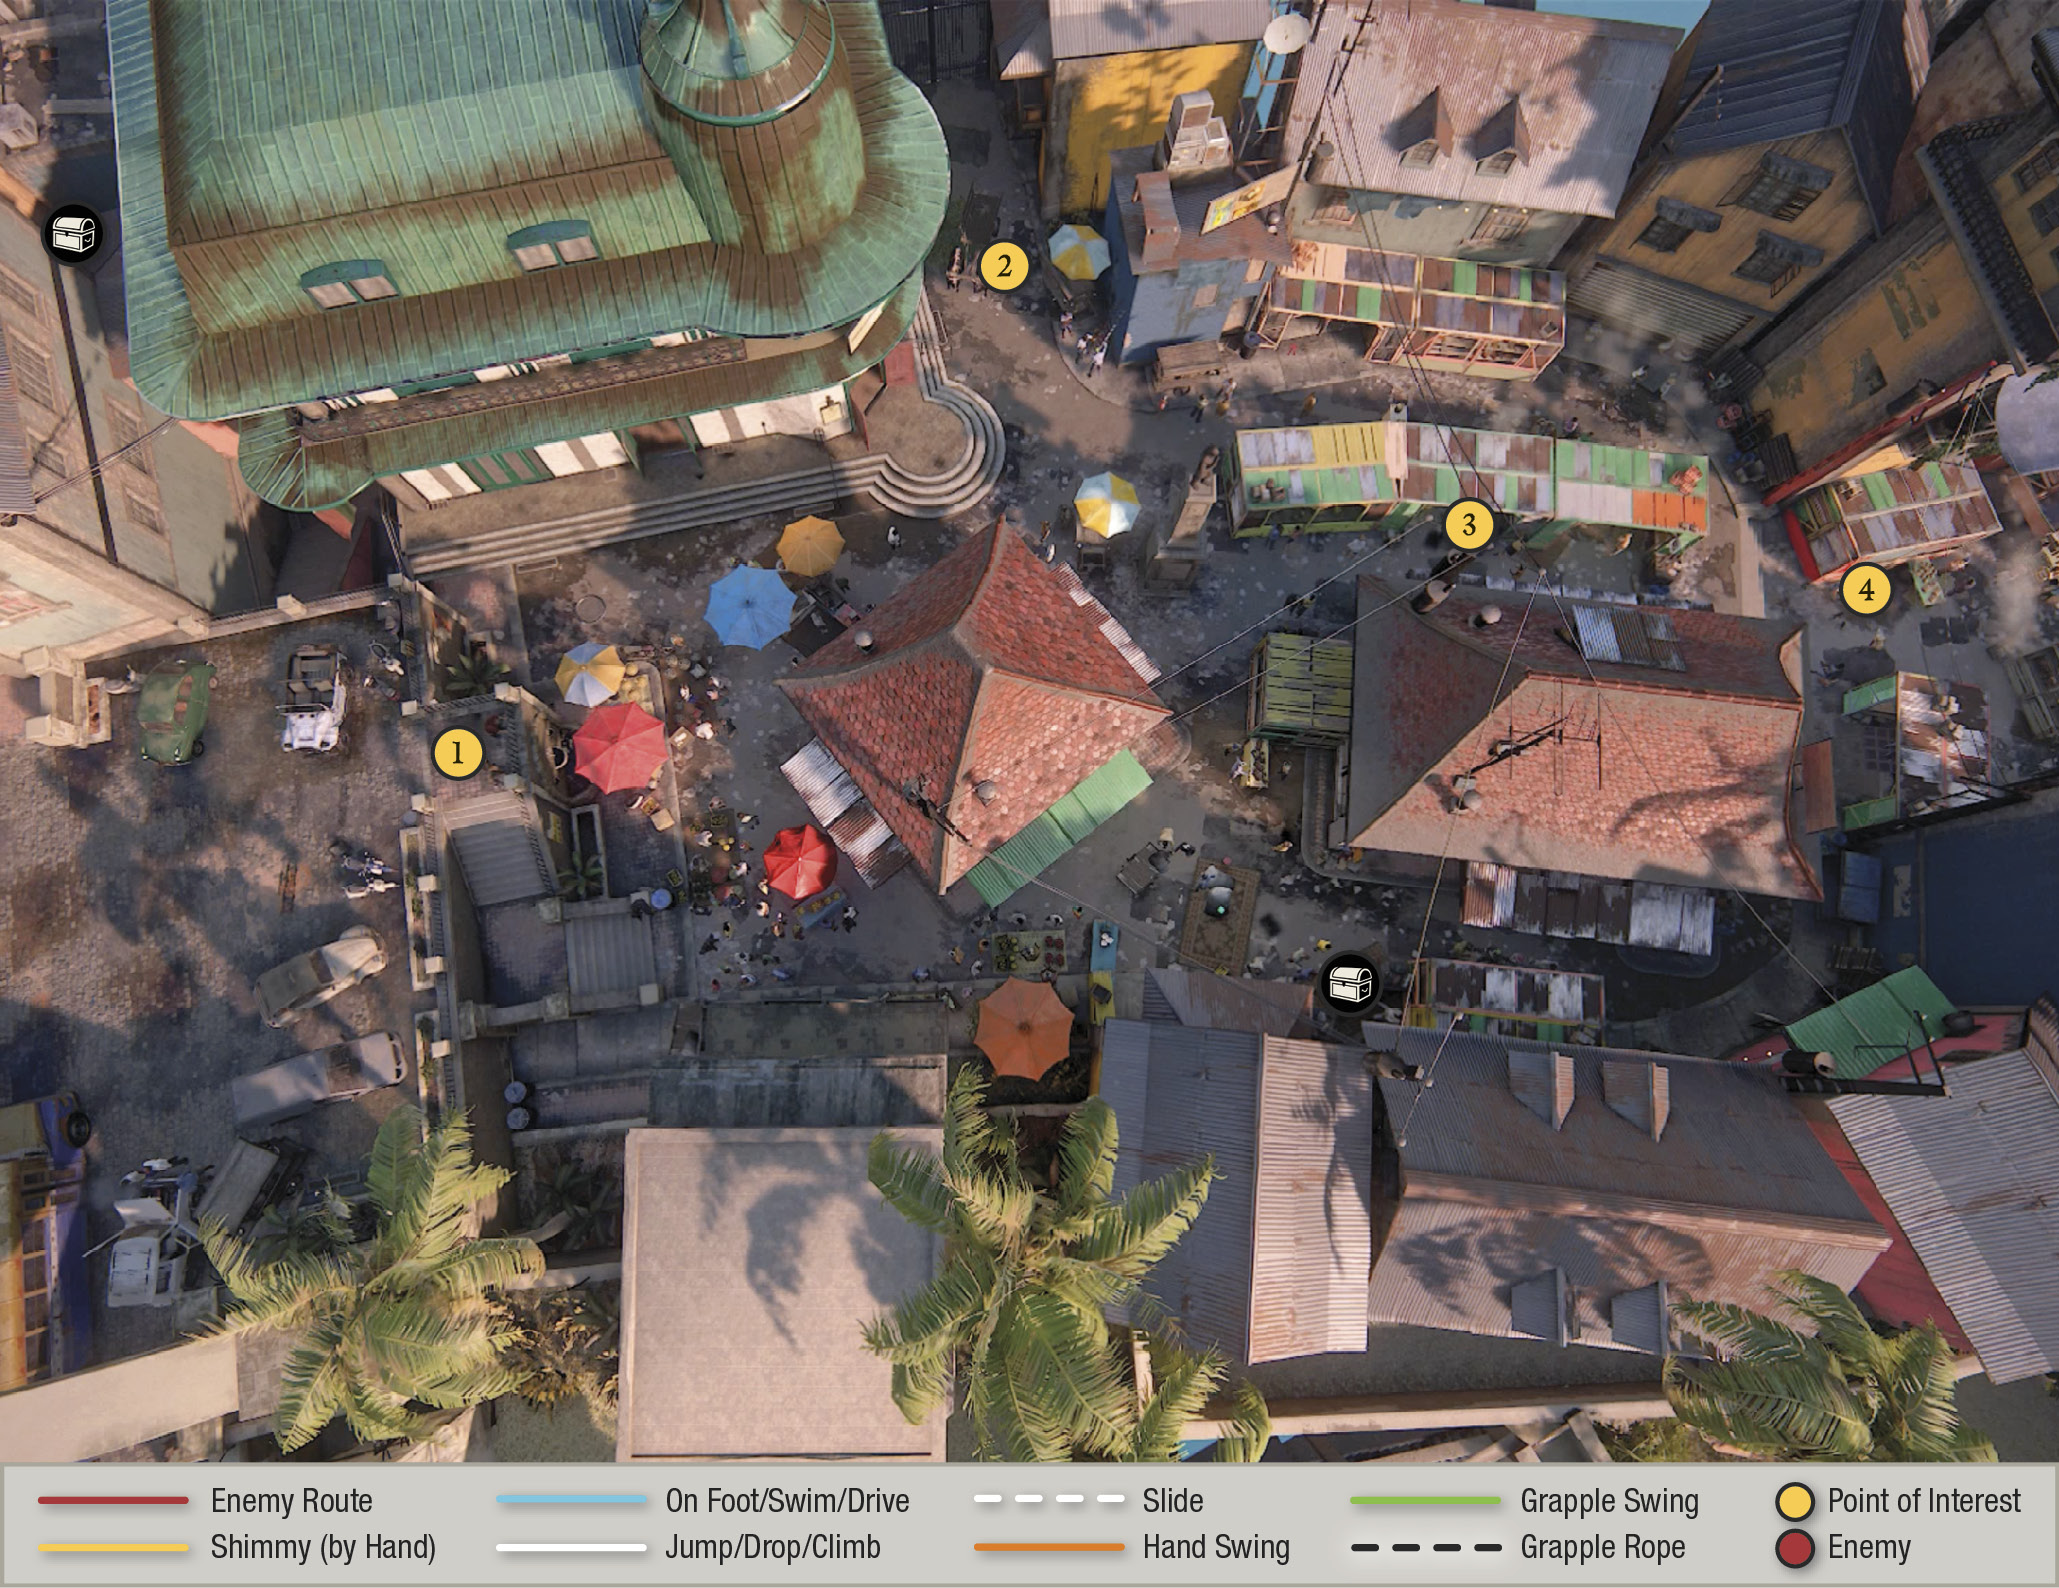
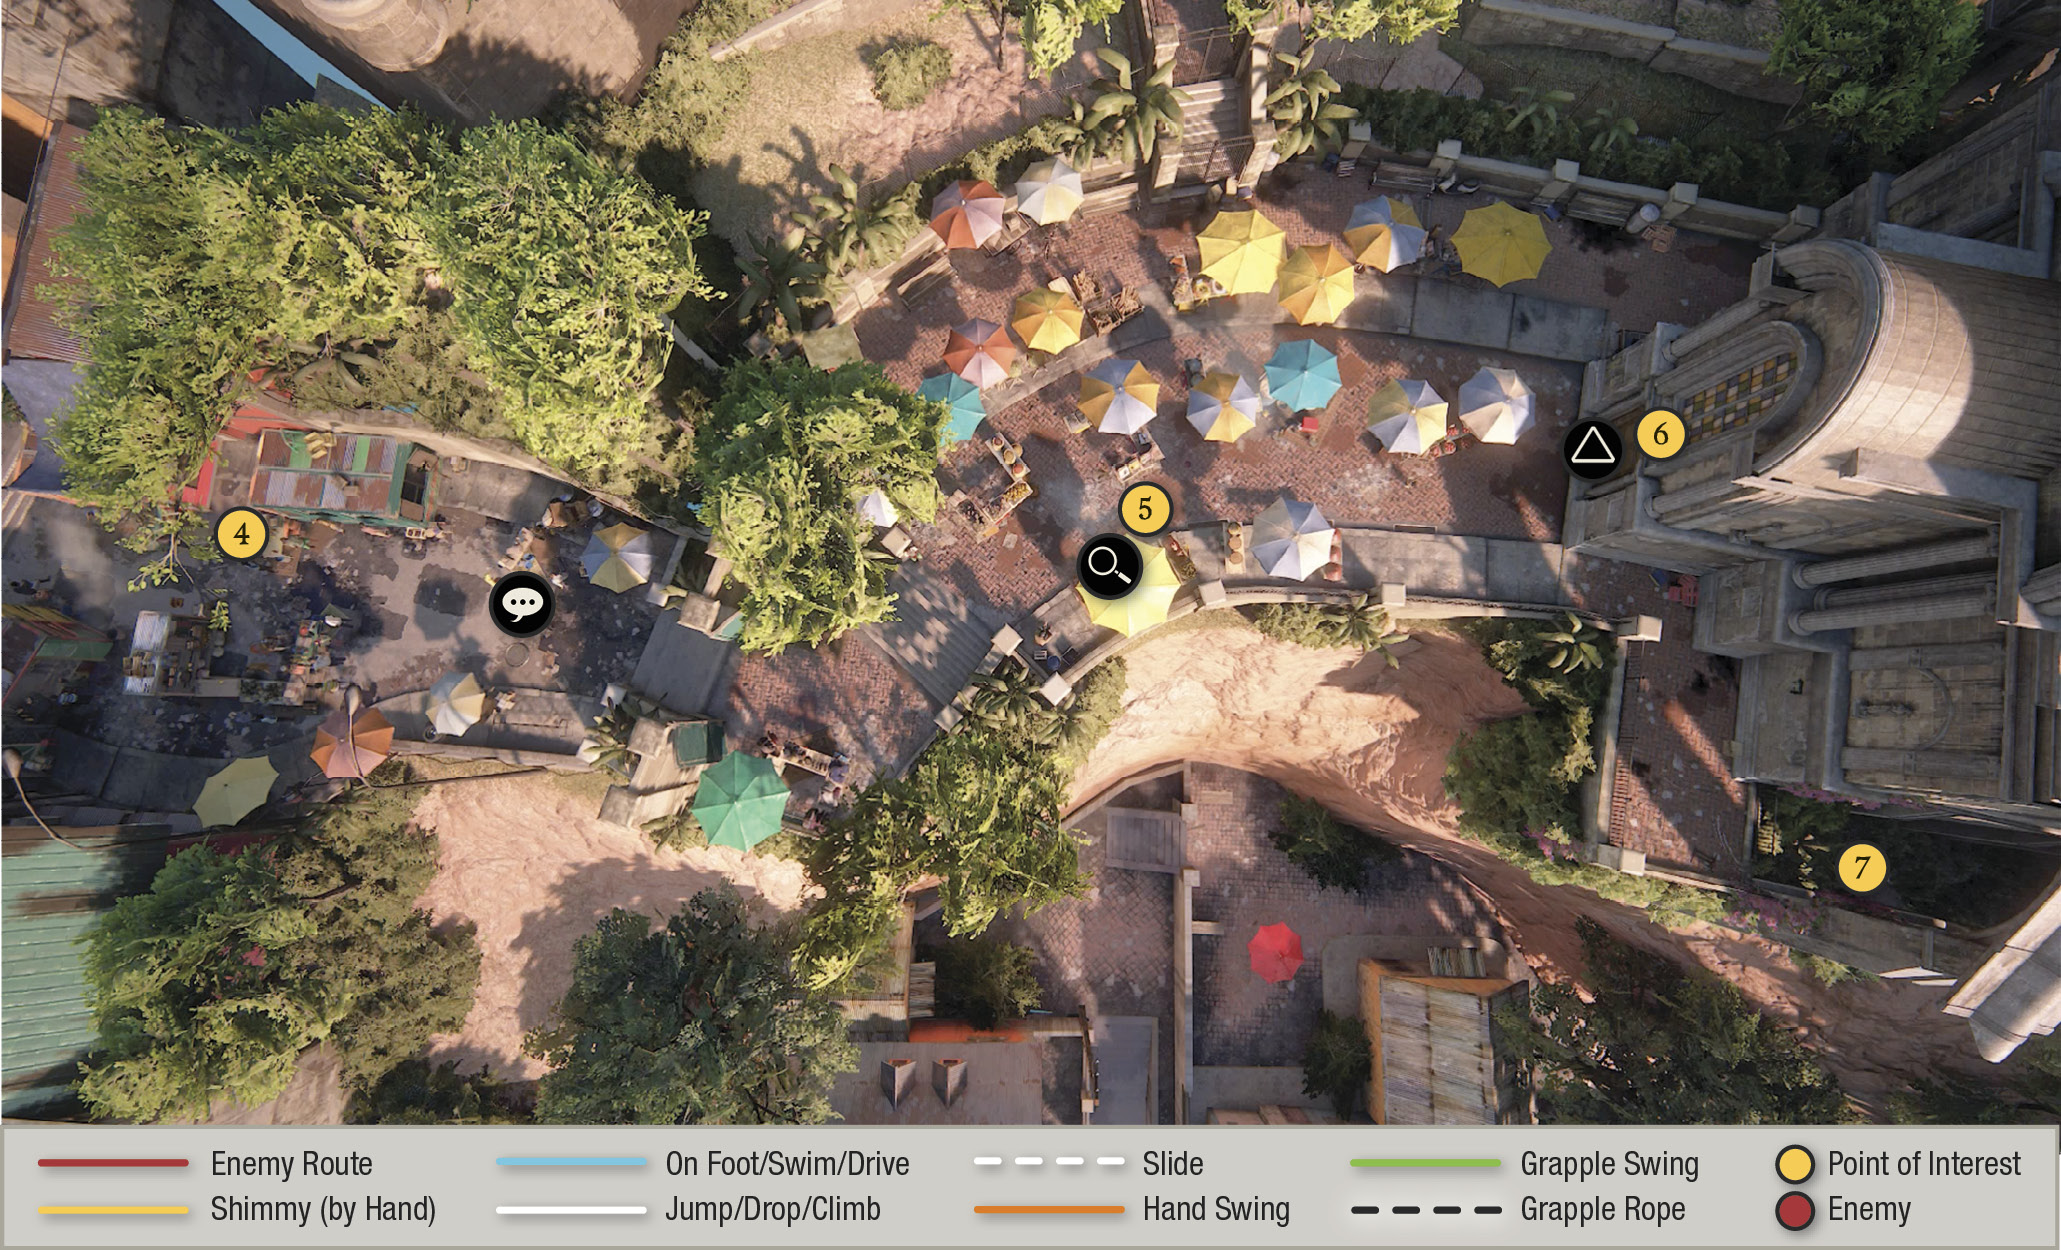
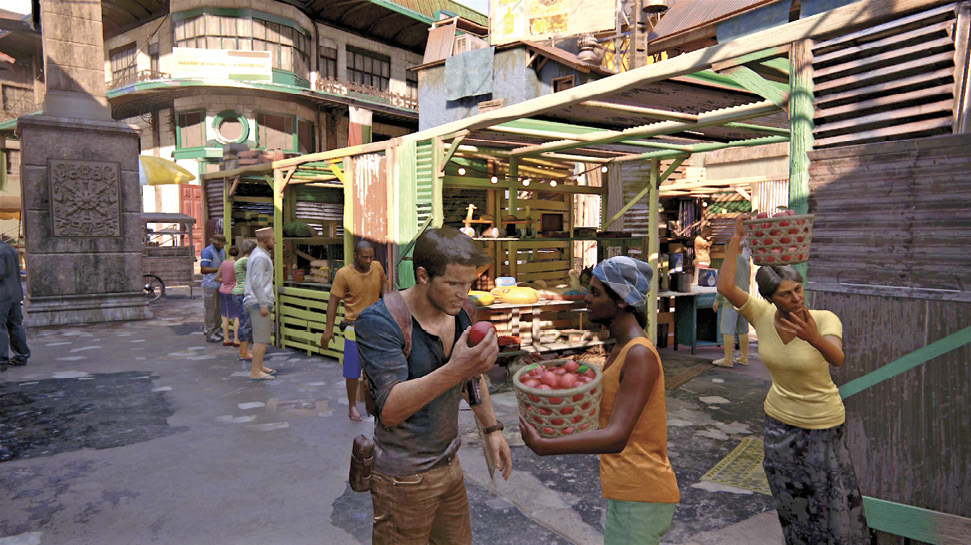
From the start (1), head downstairs into the vibrant city bazaar. (Before you get too far, don’t miss the treasure in a nearby back alley.) Some points of interest as you follow Sully through the market: talk to the oxen (2) attached to the cart near the painters; bargain with the trinket merchant three times to purchase a treasure that Nate sketches in his journal; buy an apple from the apple lady (3); check out the lemur (4); have an Optional Conversation with (“I’m Gonna Get A Dog”) Sully; and smell the cooking chicken (5). (If you examine the lemur after you buy the apple, the lemur follows Nathan and snatches the apple. This gives you a Trophy: “Don’t Feed the Animals.”)
 Earthenware Mug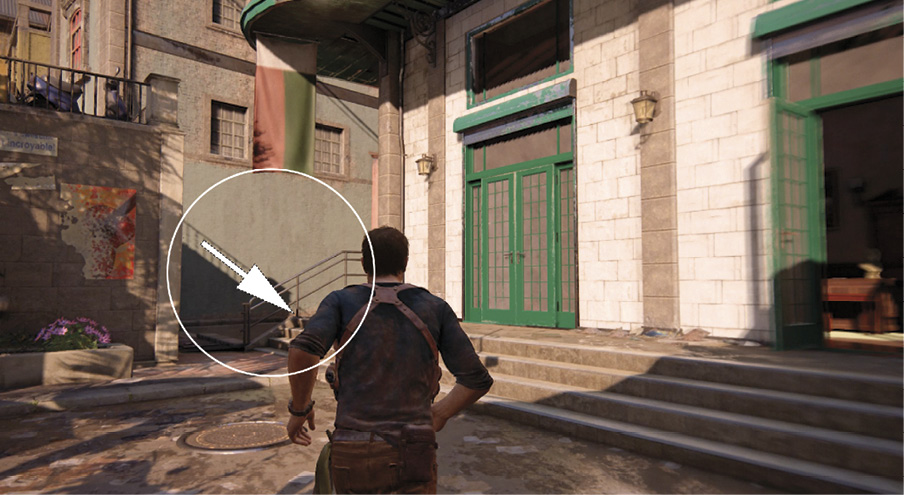 Explore the dark alley behind the Passport/Visa Bureau near where you start the chapter. The Earthenware Mug is sitting on a stack. |
 “Antique” Compass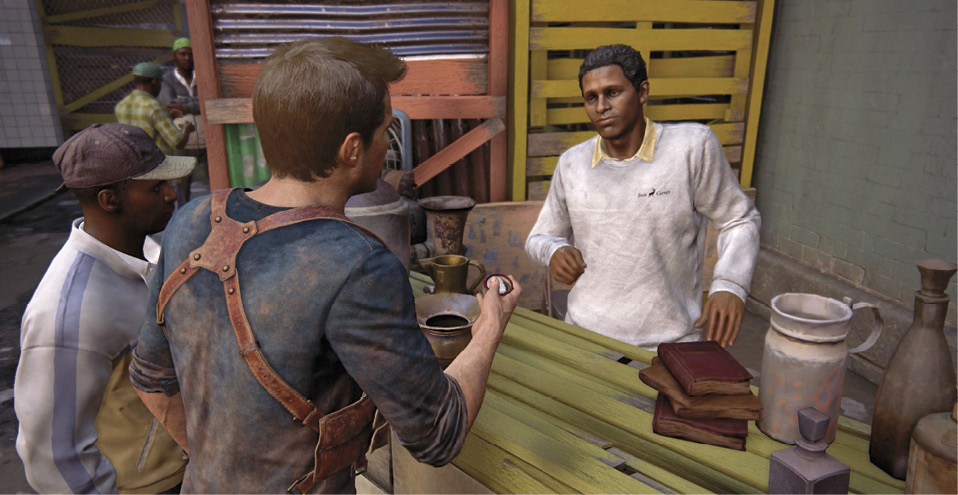 Haggle three times with this trinket merchant on the marketplace’s right side to purchase the “Antique” Compass for $300. |
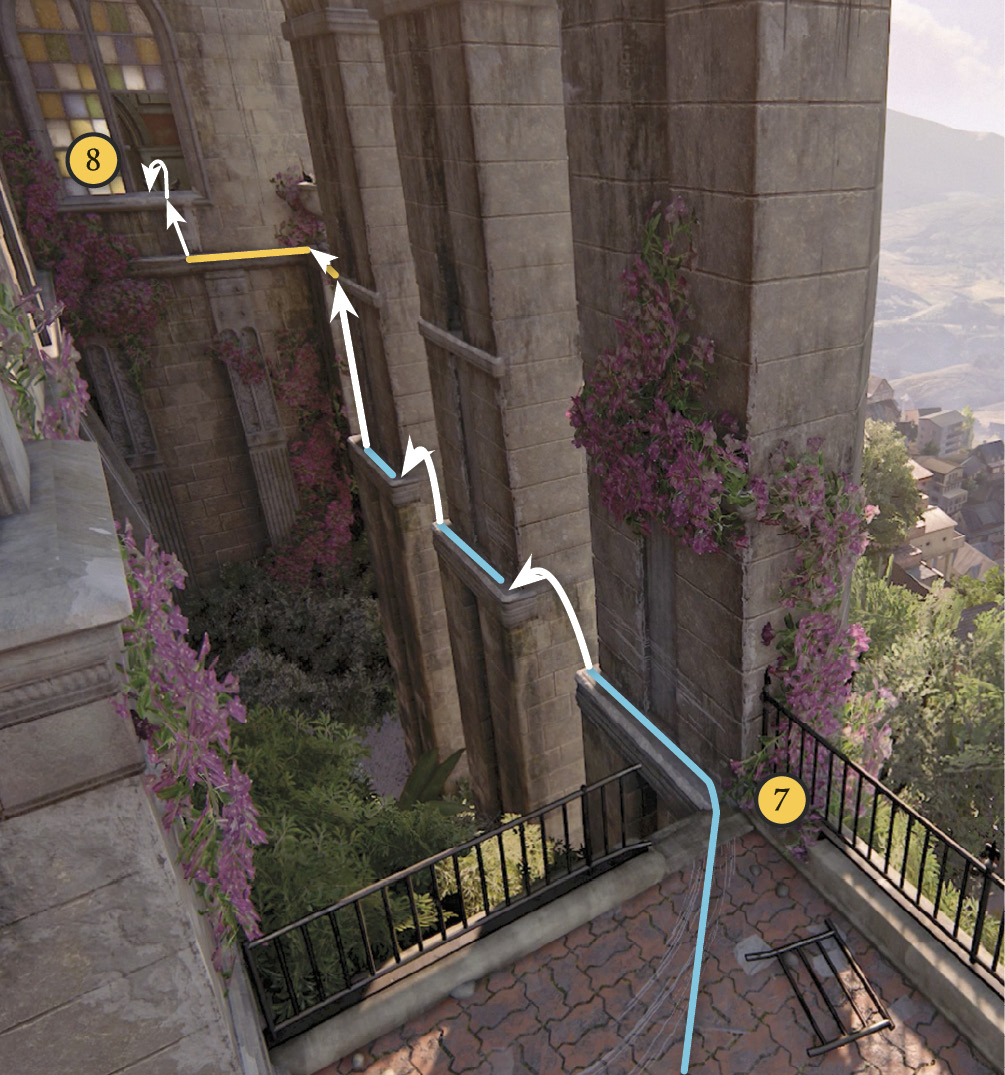
When you finally reach the tower, you find the front door locked (6). Go rightward to the railing where Sully points out the broken stained glass window above. Slide through the hole in the fence (7), then hop from pillar to pillar and climb through the window (8).
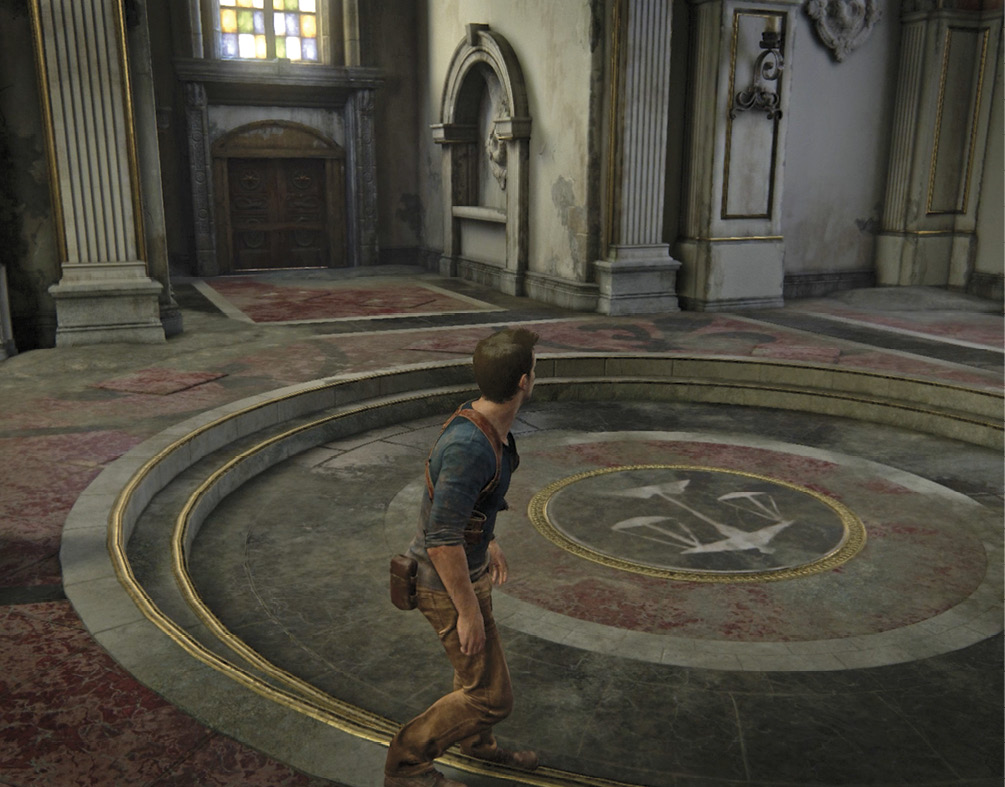
 Nephrite and Jade Bowl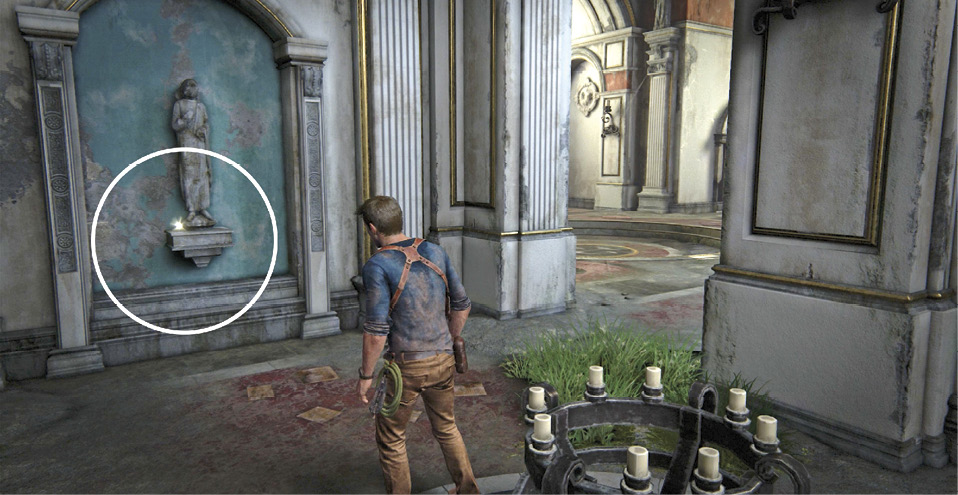 Enter the alcove off to the side of the room with Edward England’s sigil on the floor. Find the Nephrite and Jade Bowl at the base of the statue. |
Climb to Scorpio
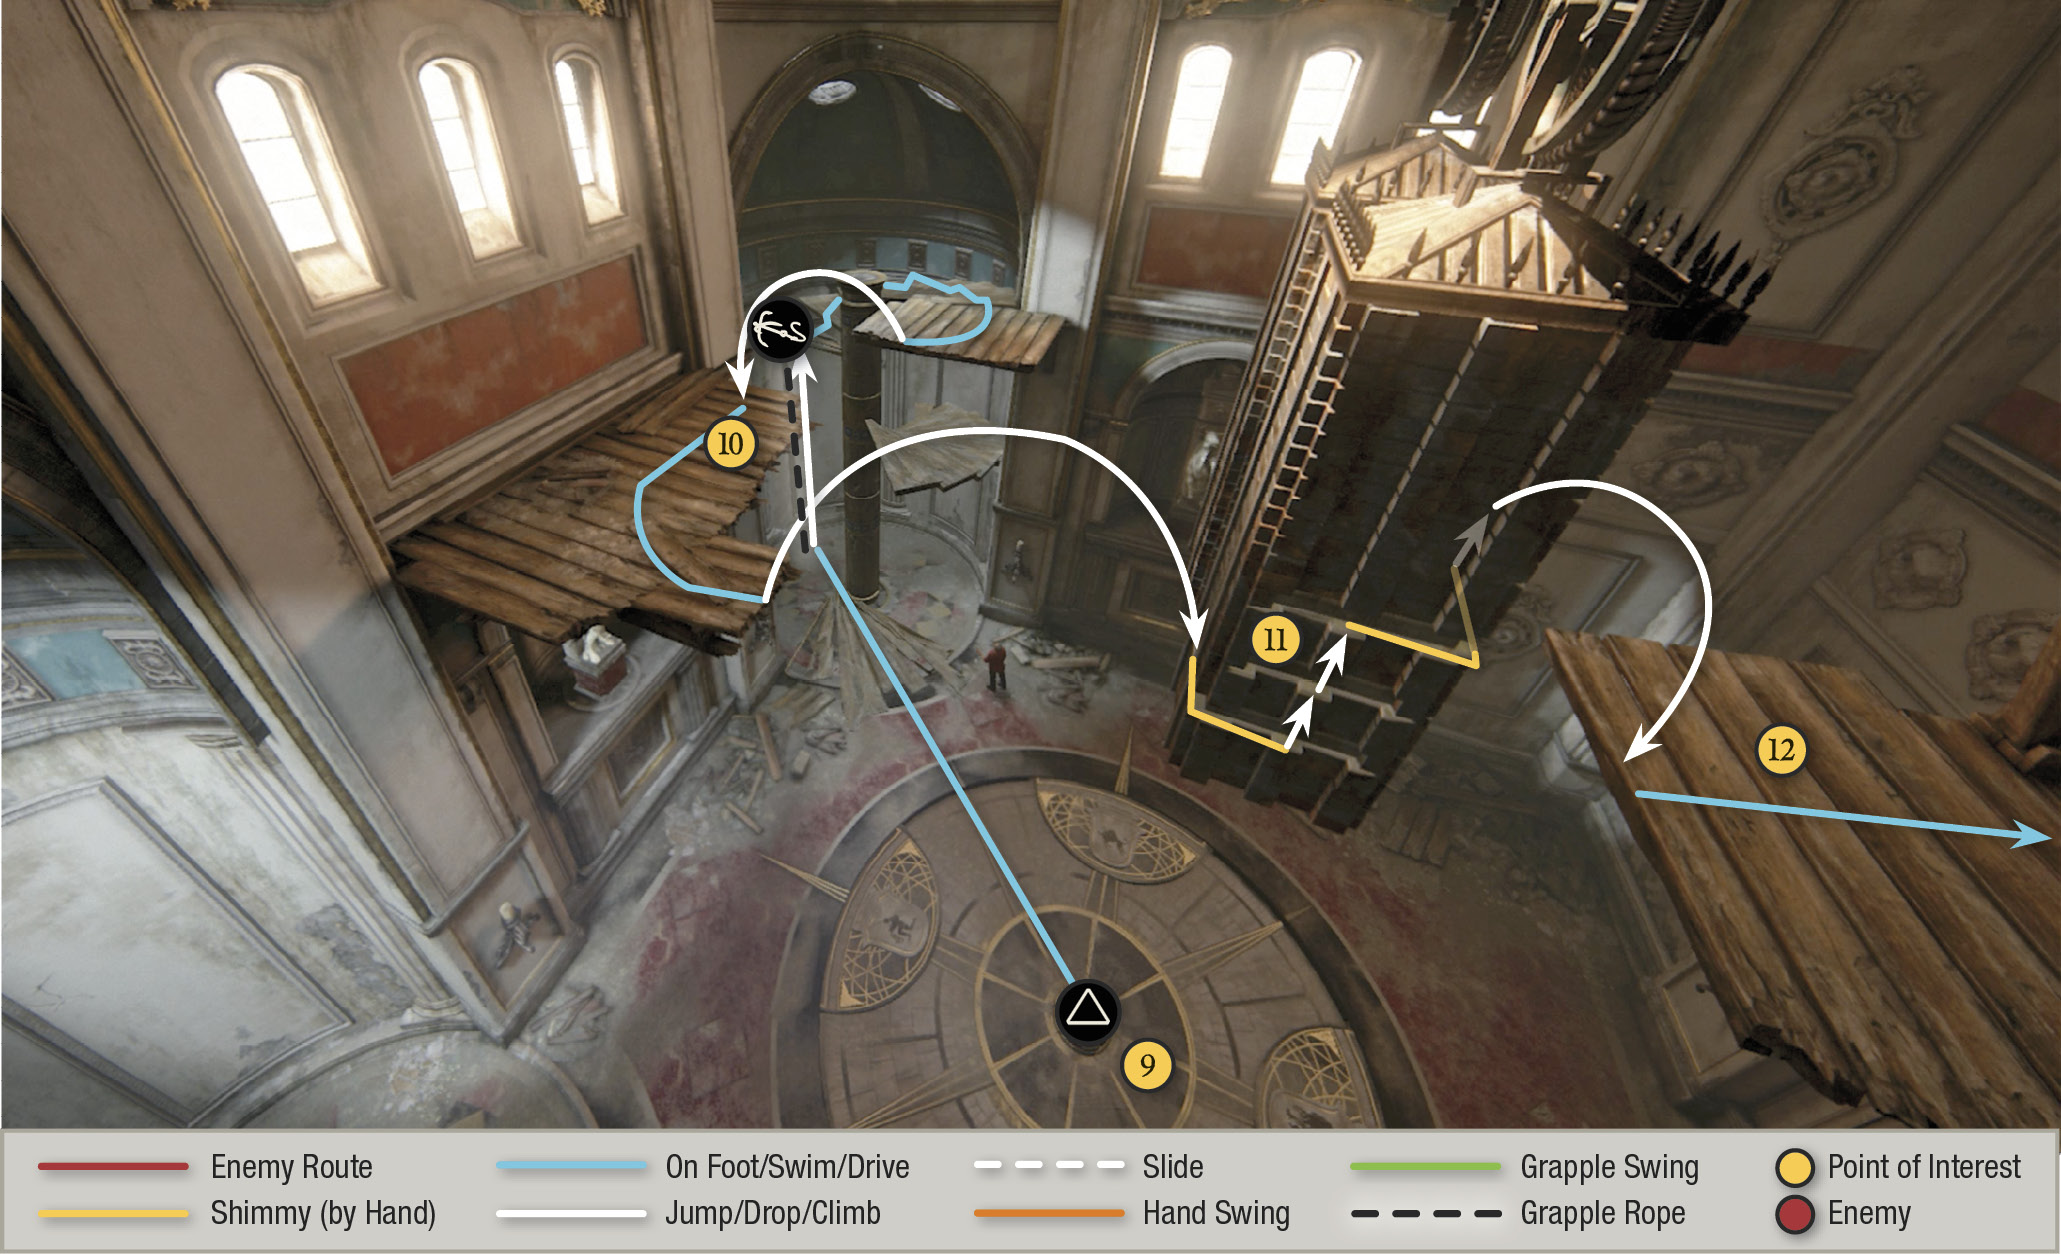
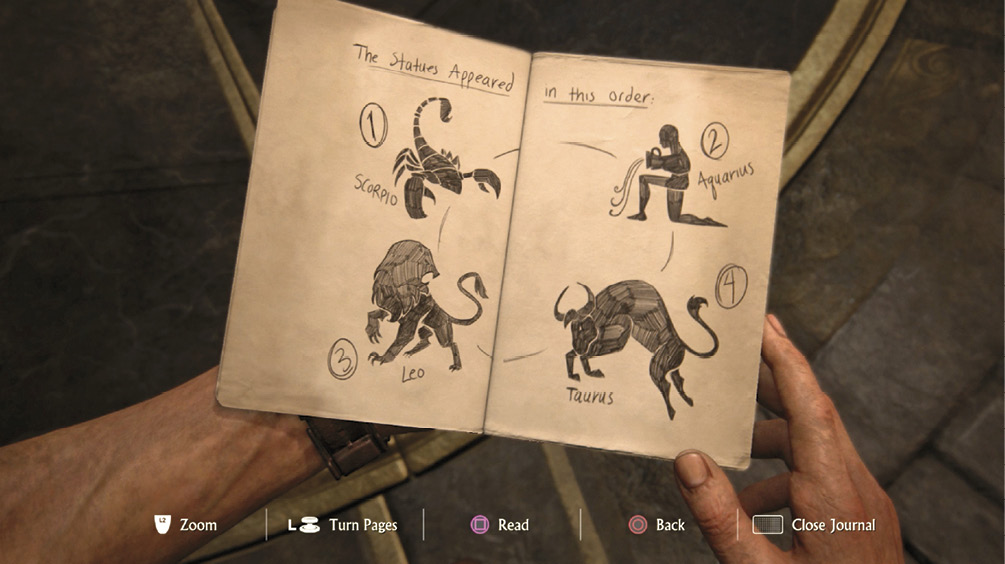
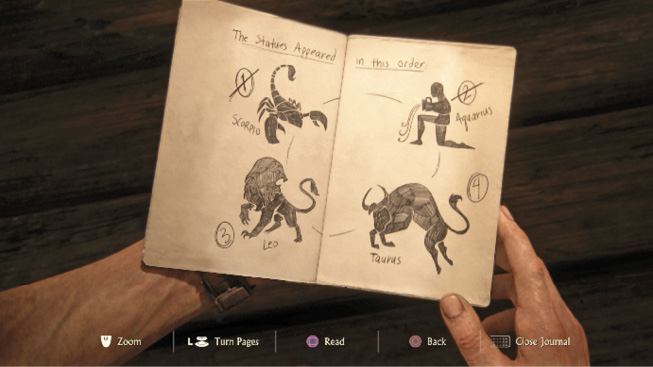
Examine the podium (9) in the center of the floor. This triggers another cutscene: Nathan inserts Avery’s coin and the clock mechanism activates. Up above, four Zodiac statues rotate in this order: Scorpio, Aquarius, Leo, Taurus.
Walk under the broken spiral staircase and sling your hook at the grapple point. Climb the rope onto the stairs and follow the stairs to the top. Jump to the broken platform (10), and then hop to the rightmost clock weight (11); Nathan’s added weight pulls it downward. (It also pulls the other clock weight upward.) Just hang on until the clock weight stops. Then climb rightward and upward across the clock weight’s grooves until you reach the top of the opposite side. From there, hop across to the next platform (12). Behind you, the two clock weights rebalance.
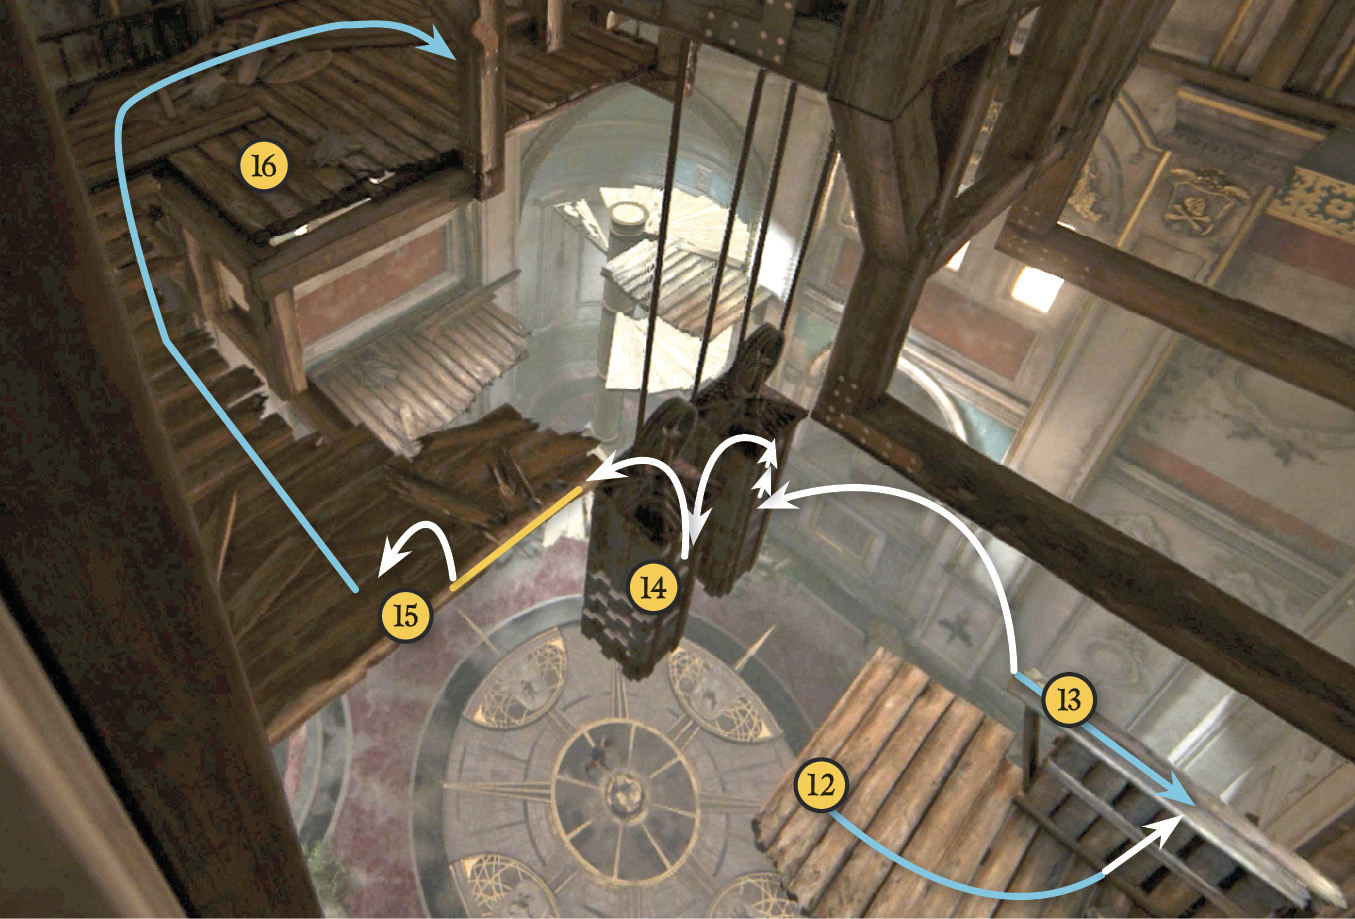
Now comes a tricky jump puzzle. Climb atop the low wall section (13). Remember, when Nathan hangs on a clock weight, his added weight pulls it downward, while the opposite clock weight is pulled upward.
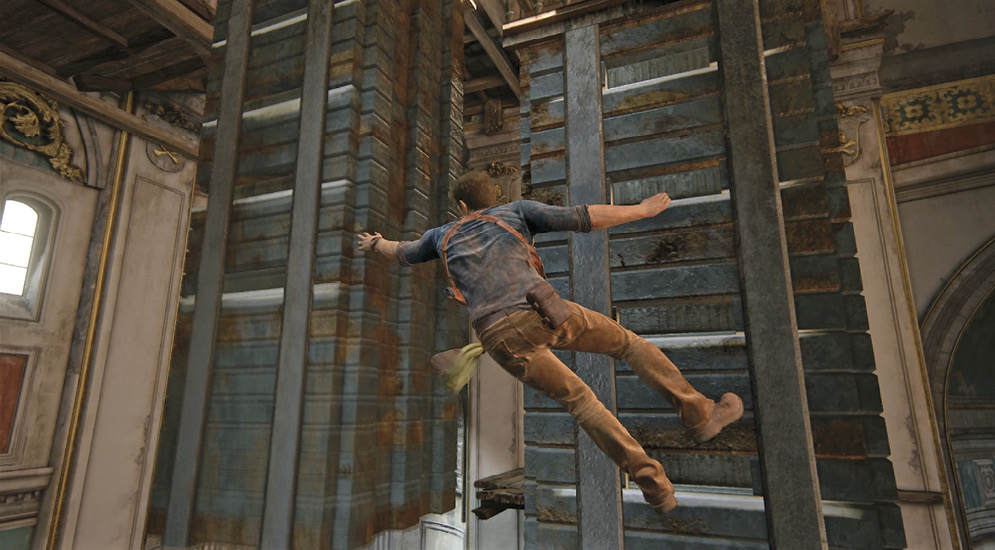
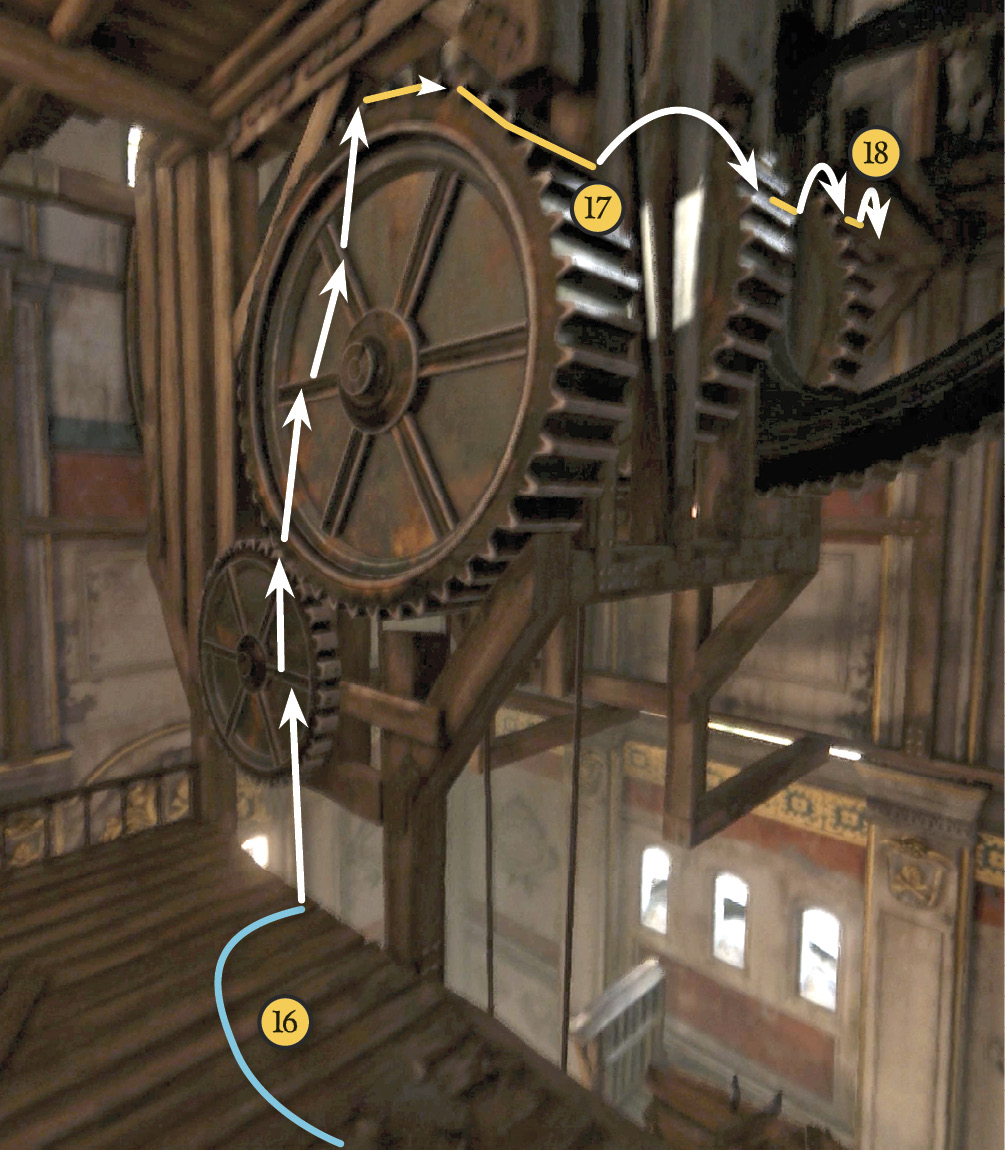
Jump across to the first (rightmost) clock weight and scramble to the top; leap leftward to the second clock weight (14) as it rises past you. Climb quickly to the top of the second weight, then hop back rightward to the first weight. Keep hopping back and forth, riding higher until you can finally leap from the top of the second (leftmost) clock weight over to the landing (15) on the left…which promptly starts to collapse. Hurry! Scramble up the collapsing landing and hop over onto the platform to the right (16). Whew!
Jump or Climb to Aquarius
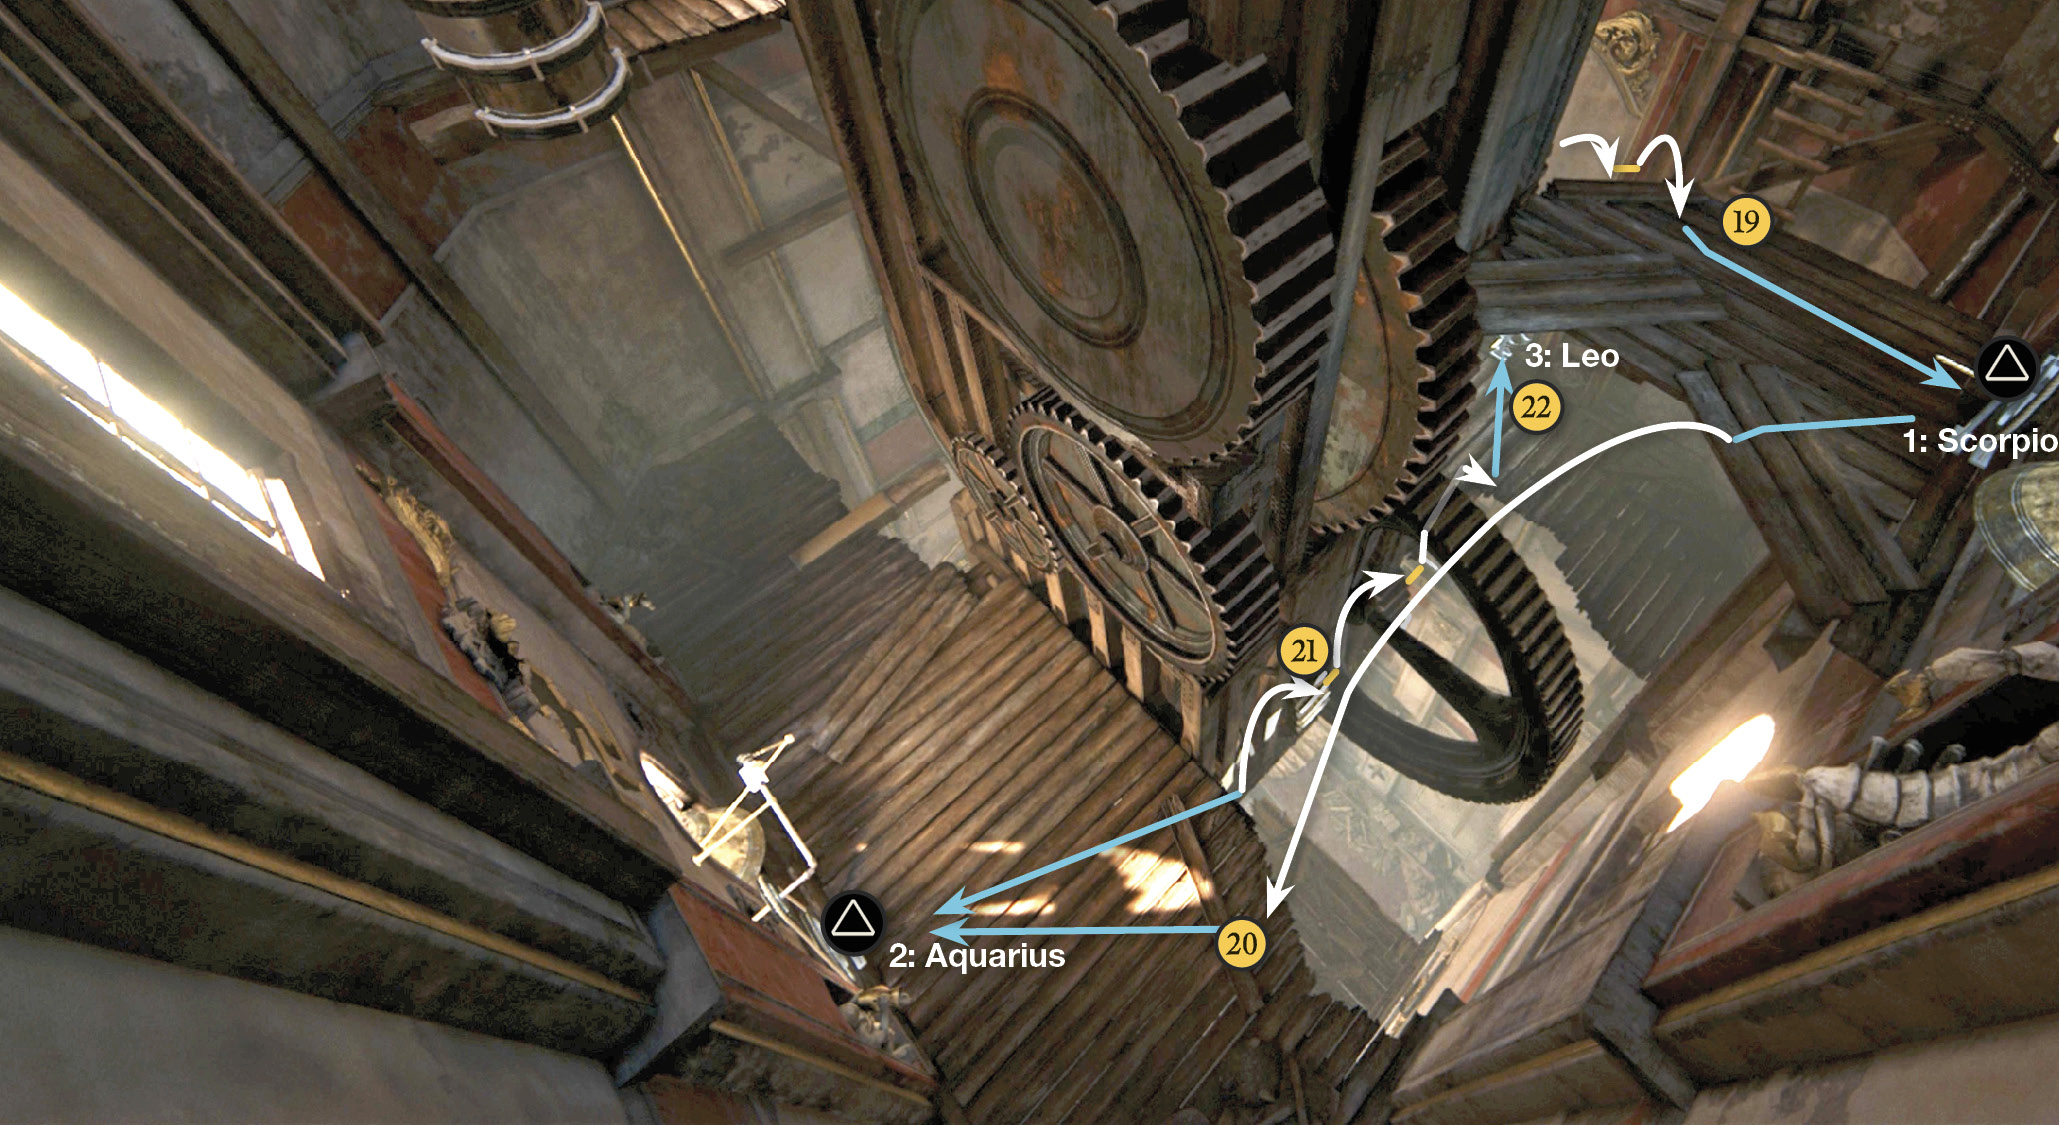
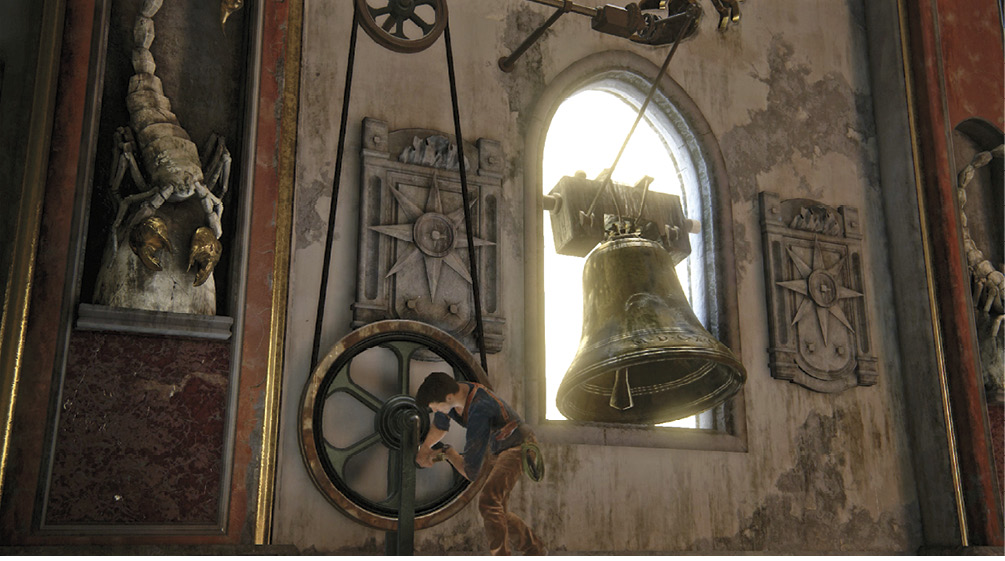
After you ring the Scorpio bell, turn right and go to the edge of the platform to see the Aquarius bell platform (20) below you. You can climb down to it via the gears, or just make the big jump down. Turn the crank to ring the Aquarius bell. Below on the floor, the Aquarius lock is released. Nathan crosses Aquarius off the list in his journal.
Climb to Leo
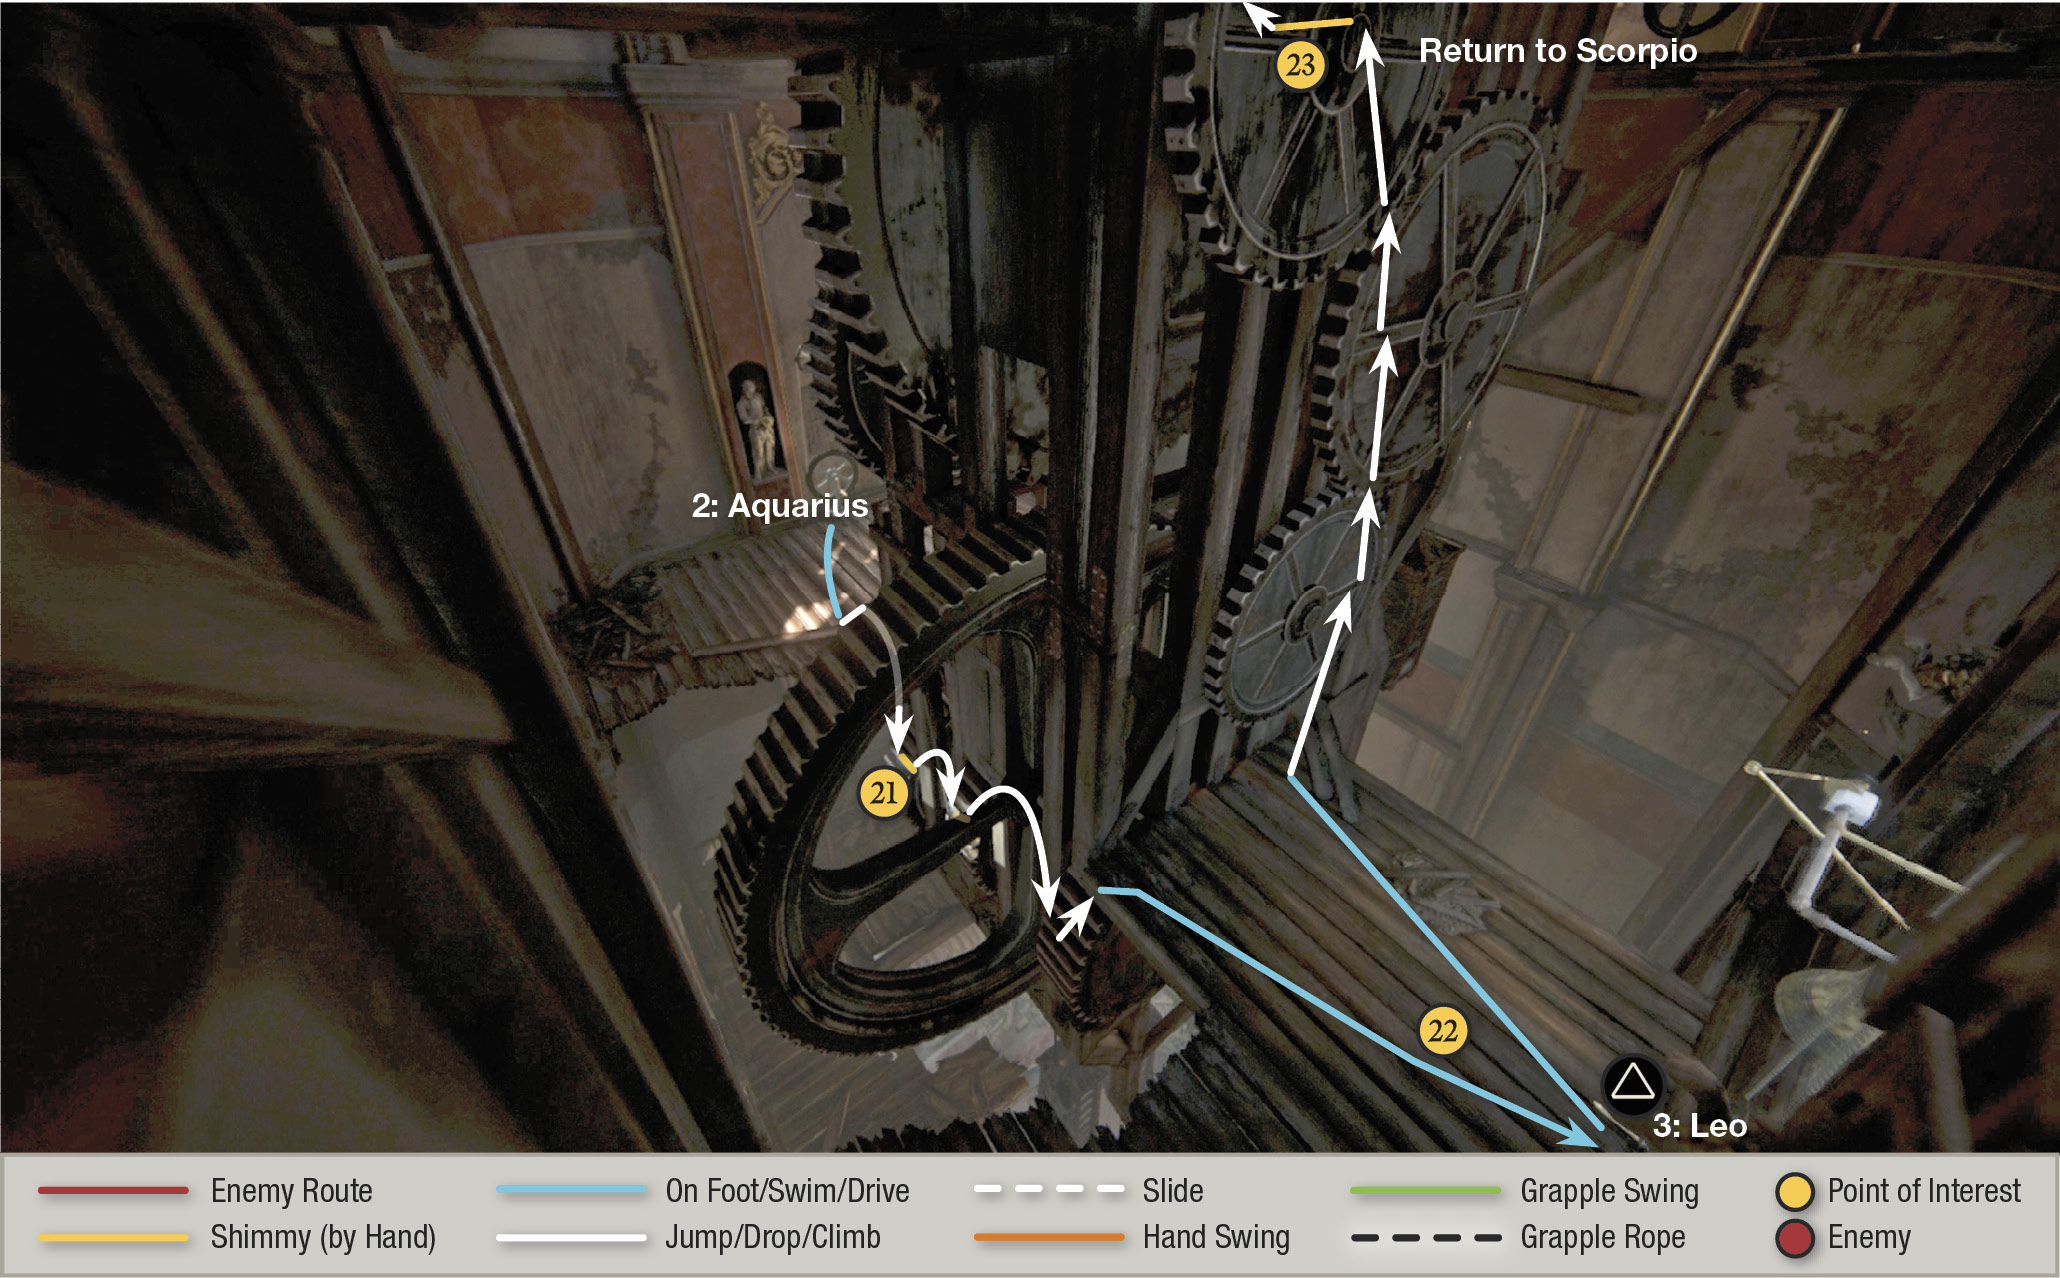
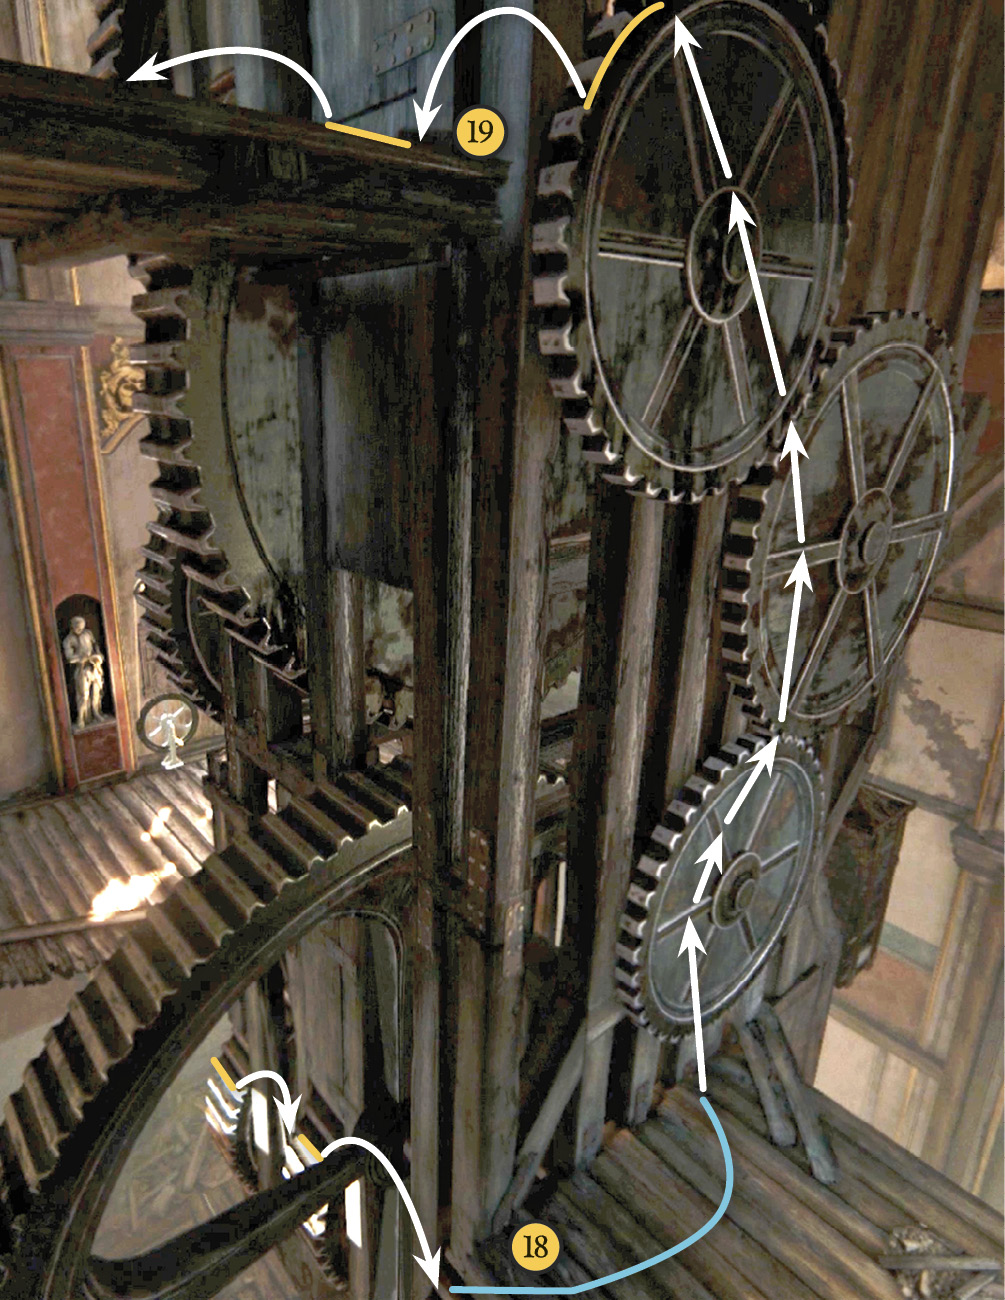
After you ring the Aquarius bell, turn around and step to the edge of the platform on the right side of the central gear tower. Jump down to grab the teeth of the first gear below (21) and climb rightward and hop through the turning wheel to the second gear. Climb up that gear to reach the Leo bell platform (22). Turn the crank to ring the Leo bell that releases the Leo lock on the floor below; Nathan crosses off Leo in his journal. Now climb the gears, heading upward and leftward (23) to return to the Scorpio bell platform.
Climb to Taurus
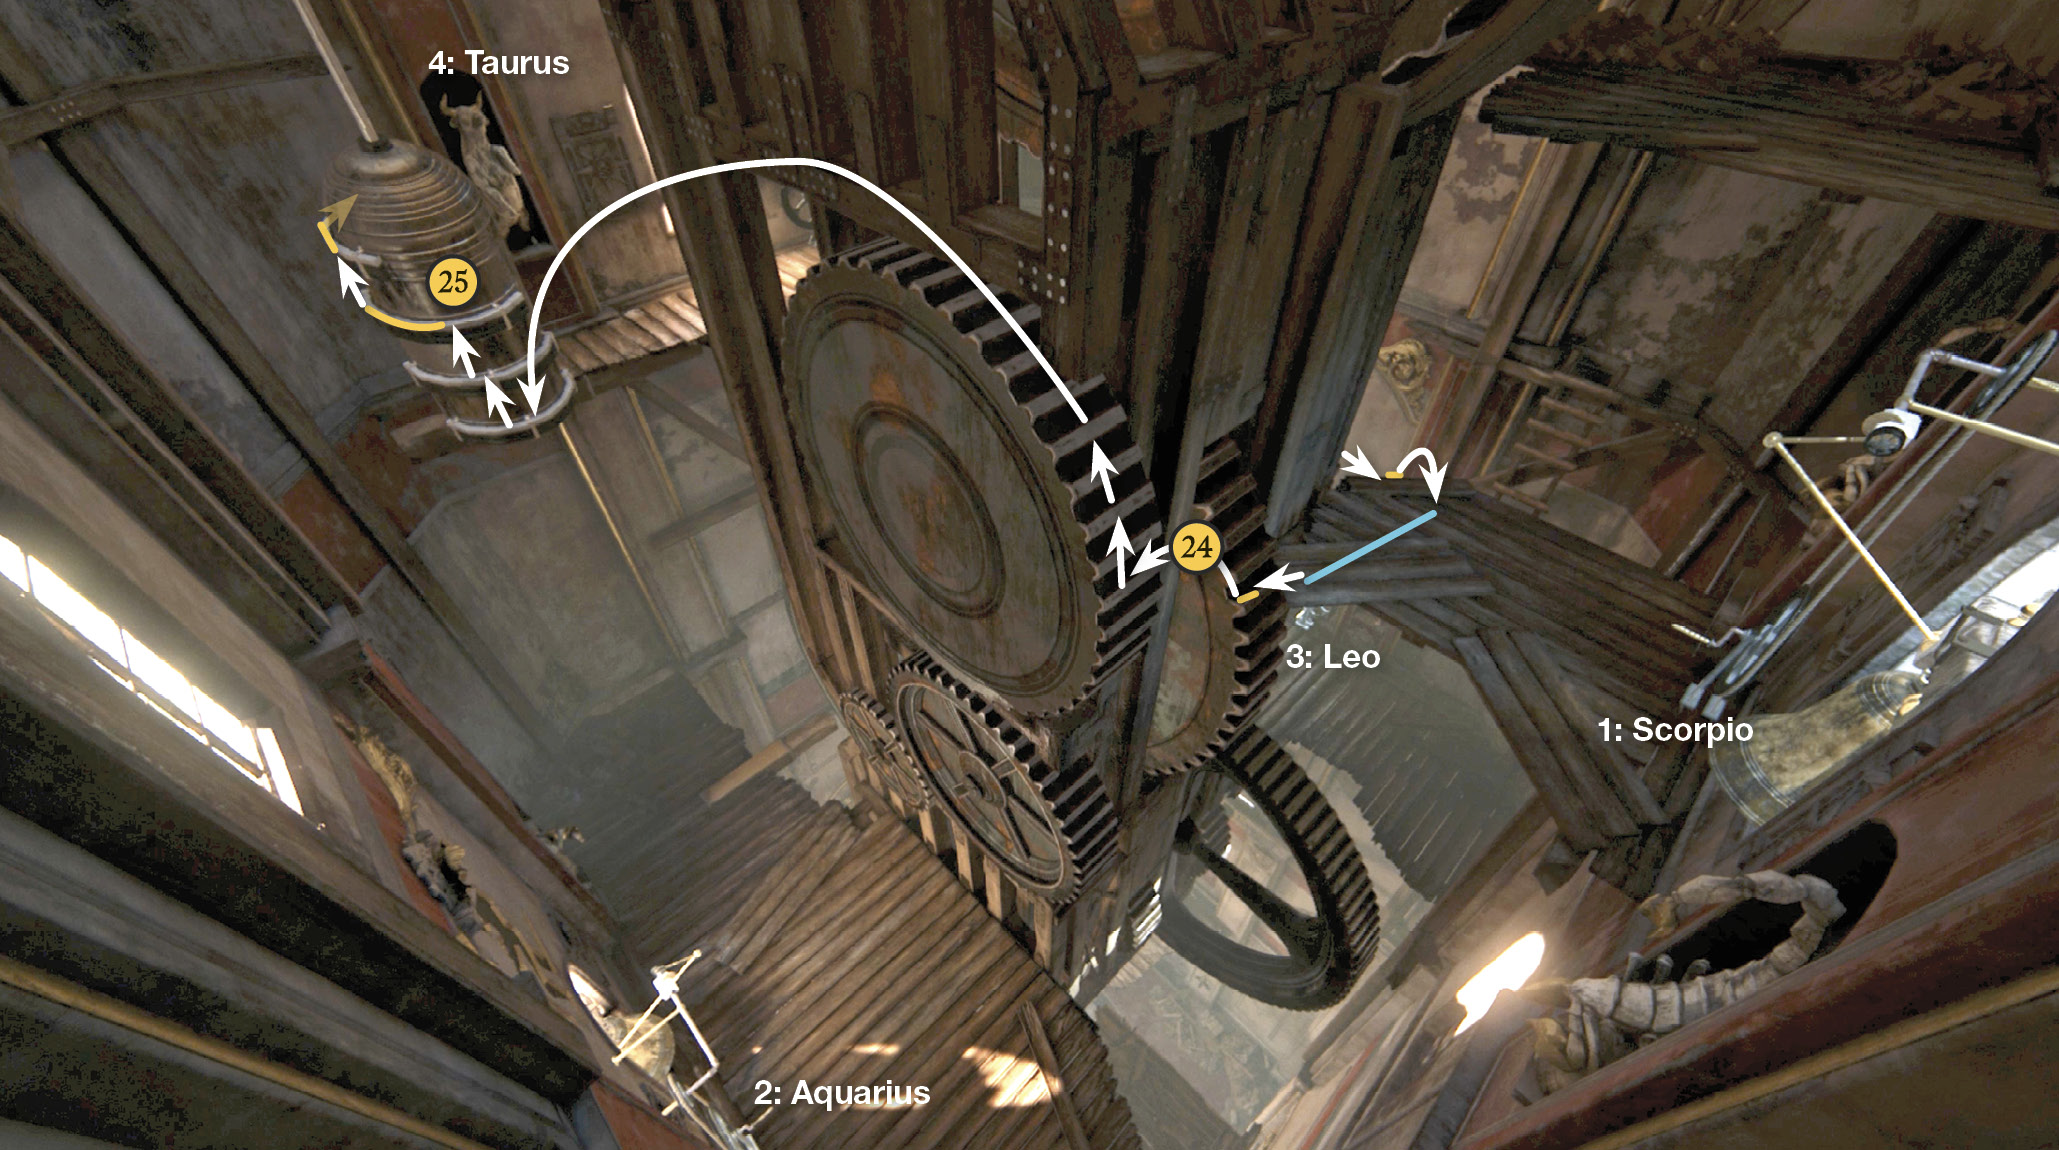
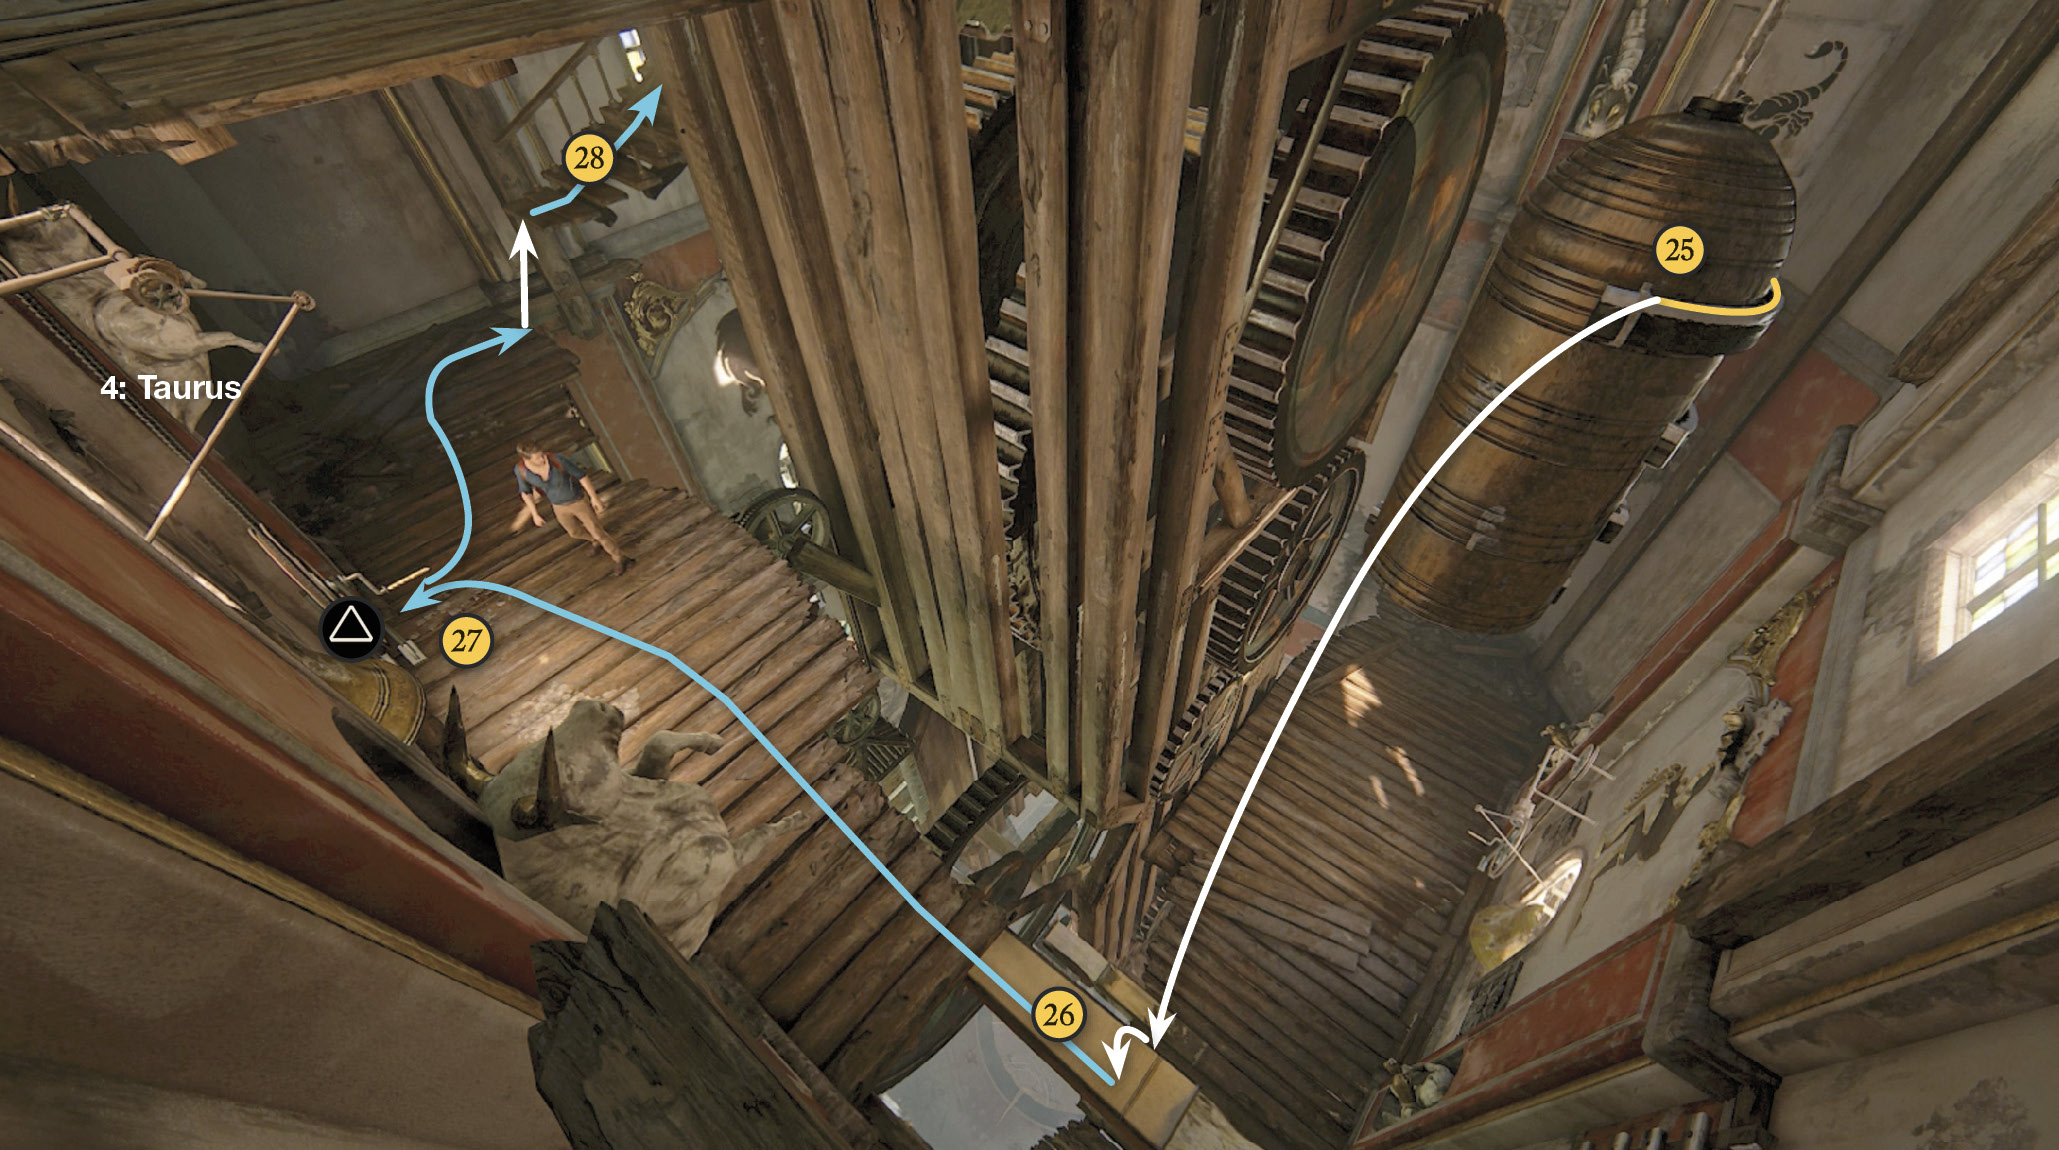
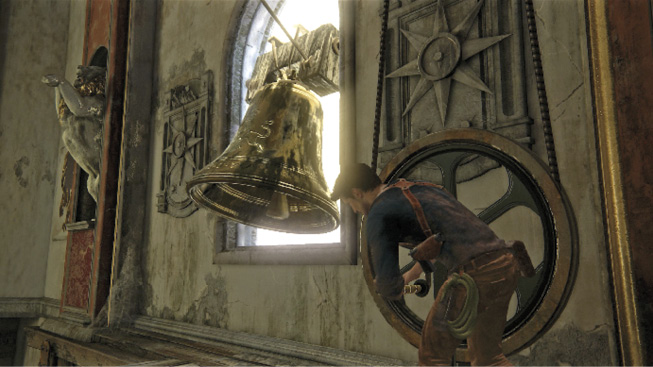
From the Scorpio platform, climb leftward and upward across the teeth of the two turning gears (24). Scramble atop the second gear, then hop across to the swinging pendulum (25). Shimmy around to the far side of the pendulum. Note that Nathan reaches out his hand as the pendulum swings close to the end of its arc. When you see this, hop to the beam (26) jutting from the Taurus bell platform. Pull yourself onto the platform and turn the crank to ring the Taurus bell (27).
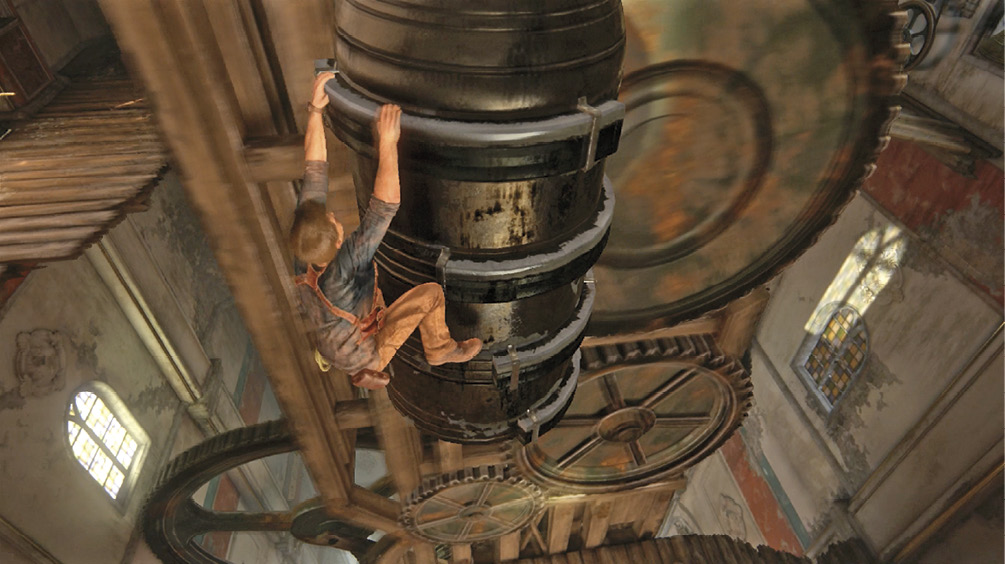
Down on the floor, Sully reports that releasing the last Zodiac lock reveals Avery’s sigil…but nothing else happens. Then Nathan sees a new staircase (28) lowered to his platform. Looks like you’ve got more climbing to do.
Climb Across the Clock Face!
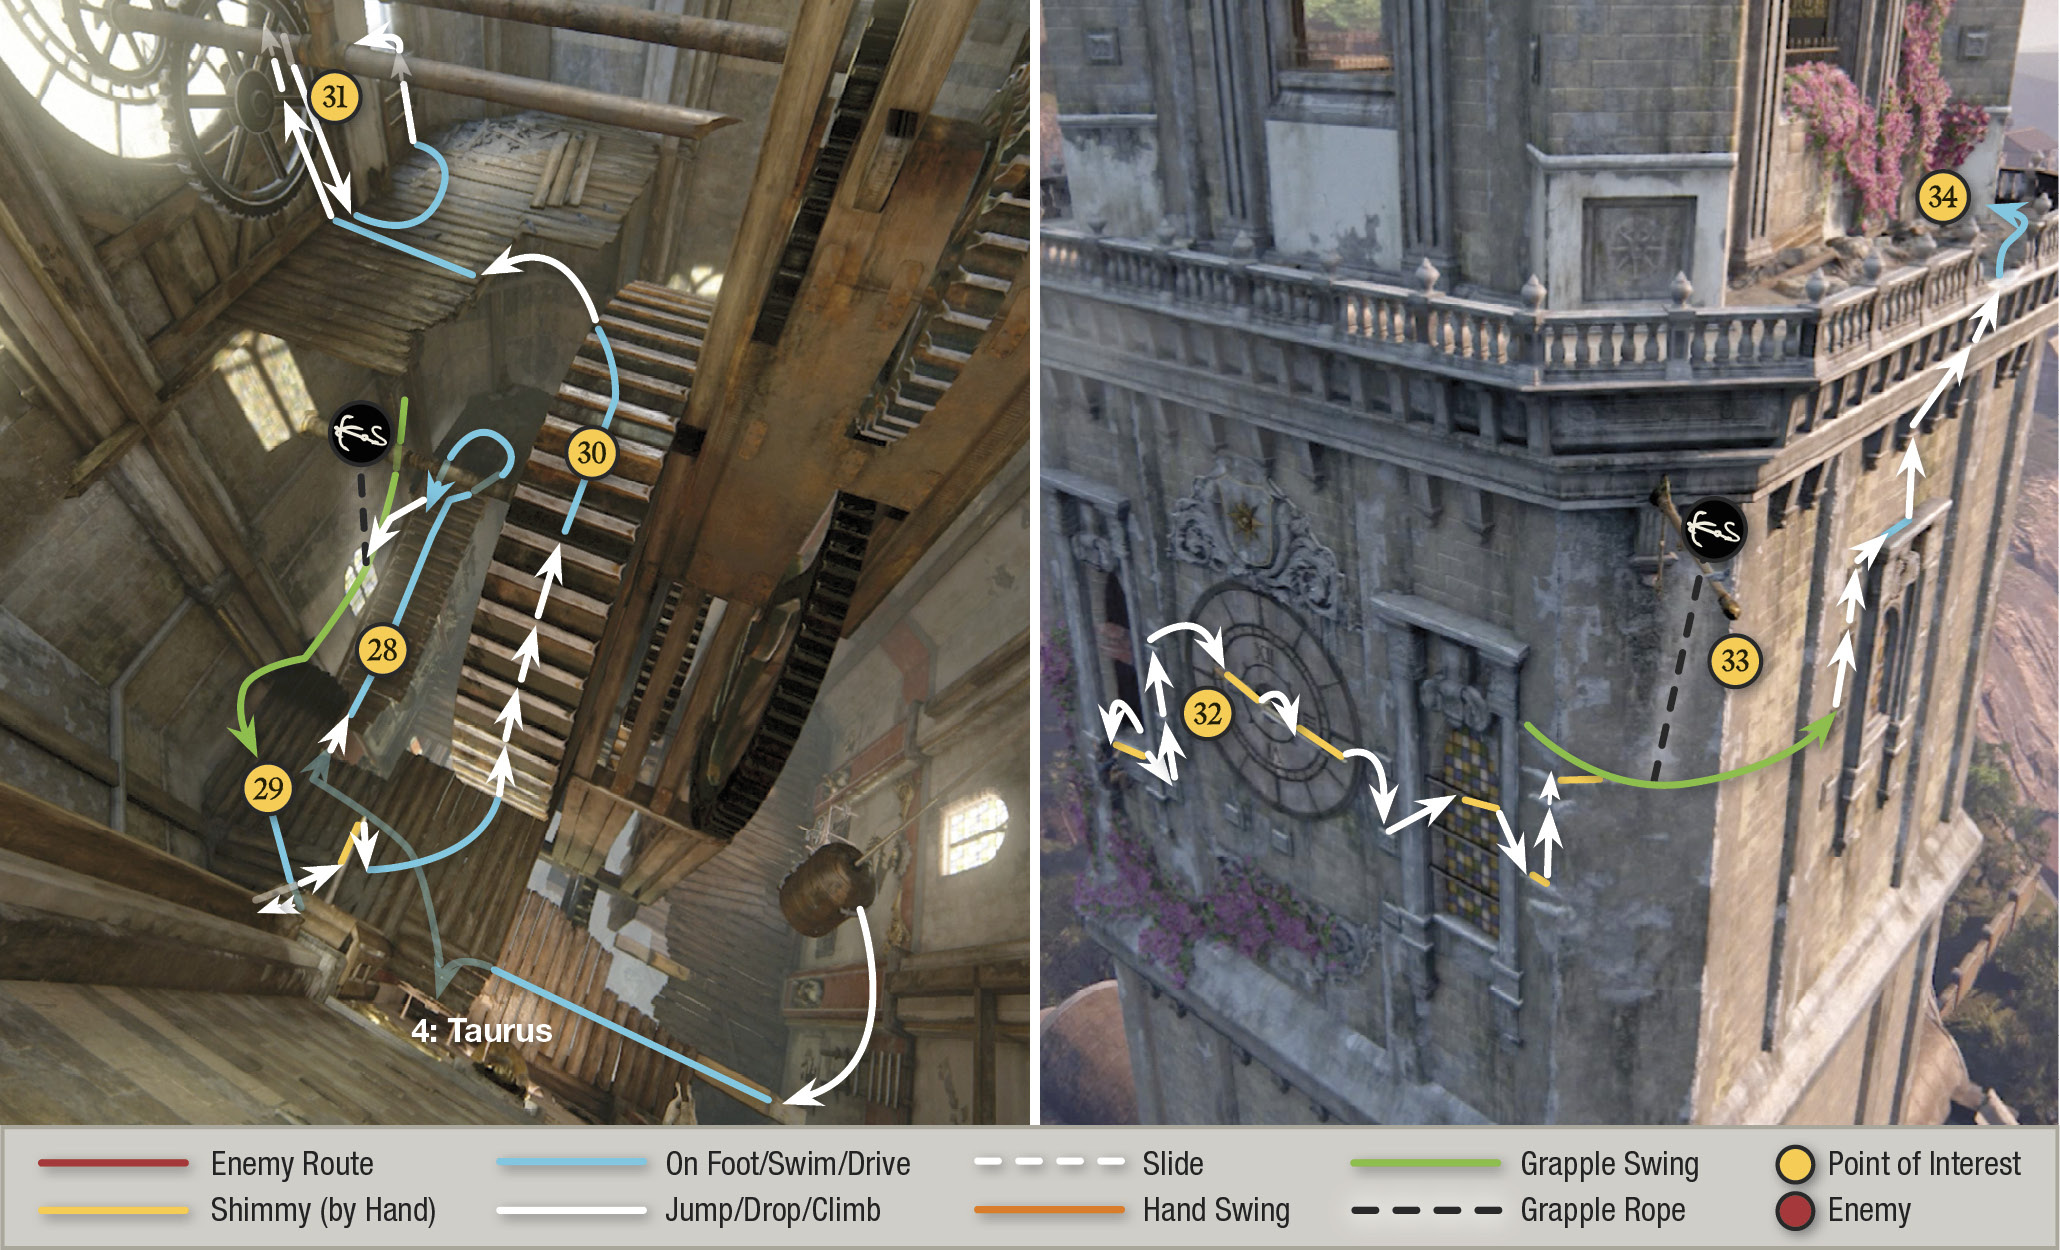
Jump to the newly lowered staircase and ascend the stairs to the landing. Use the grapple point to swing across to a platform (29) with a big lever. Climb the handholds on the lever housing and slide left to hang on the lever; Nathan’s weight pulls it down. This halts the nearby spinning gear (30), which lets you climb it. (When the gear is spinning, it turns too fast to climb.) But hurry! The moment you drop from the lever, you get just 12 ticks (seconds) to climb the gear teeth and hop over to the next platform.
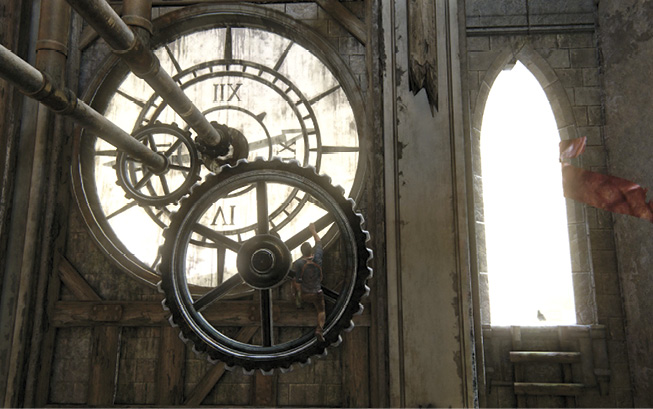
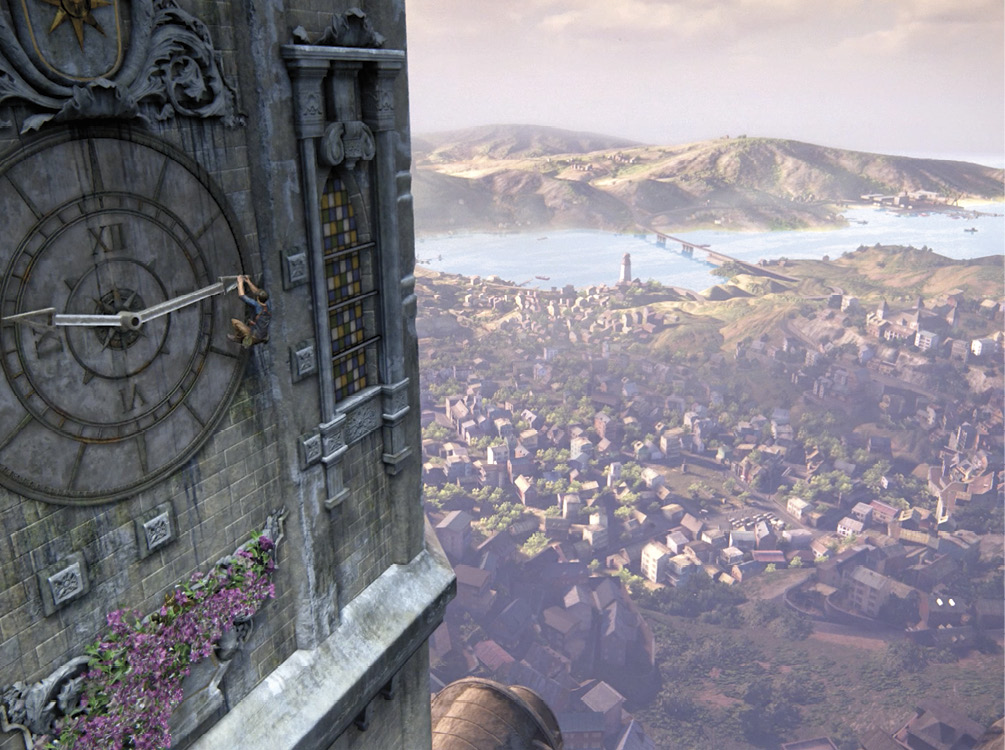
The only way up to the belfry is across the outside of the tower. But if you climb outside the open window, you see that the handholds only get you to the clock face and no further! You must manipulate the clock’s minute hand (the longer one) so that it gives you something to climb across.
Here’s how to do this:
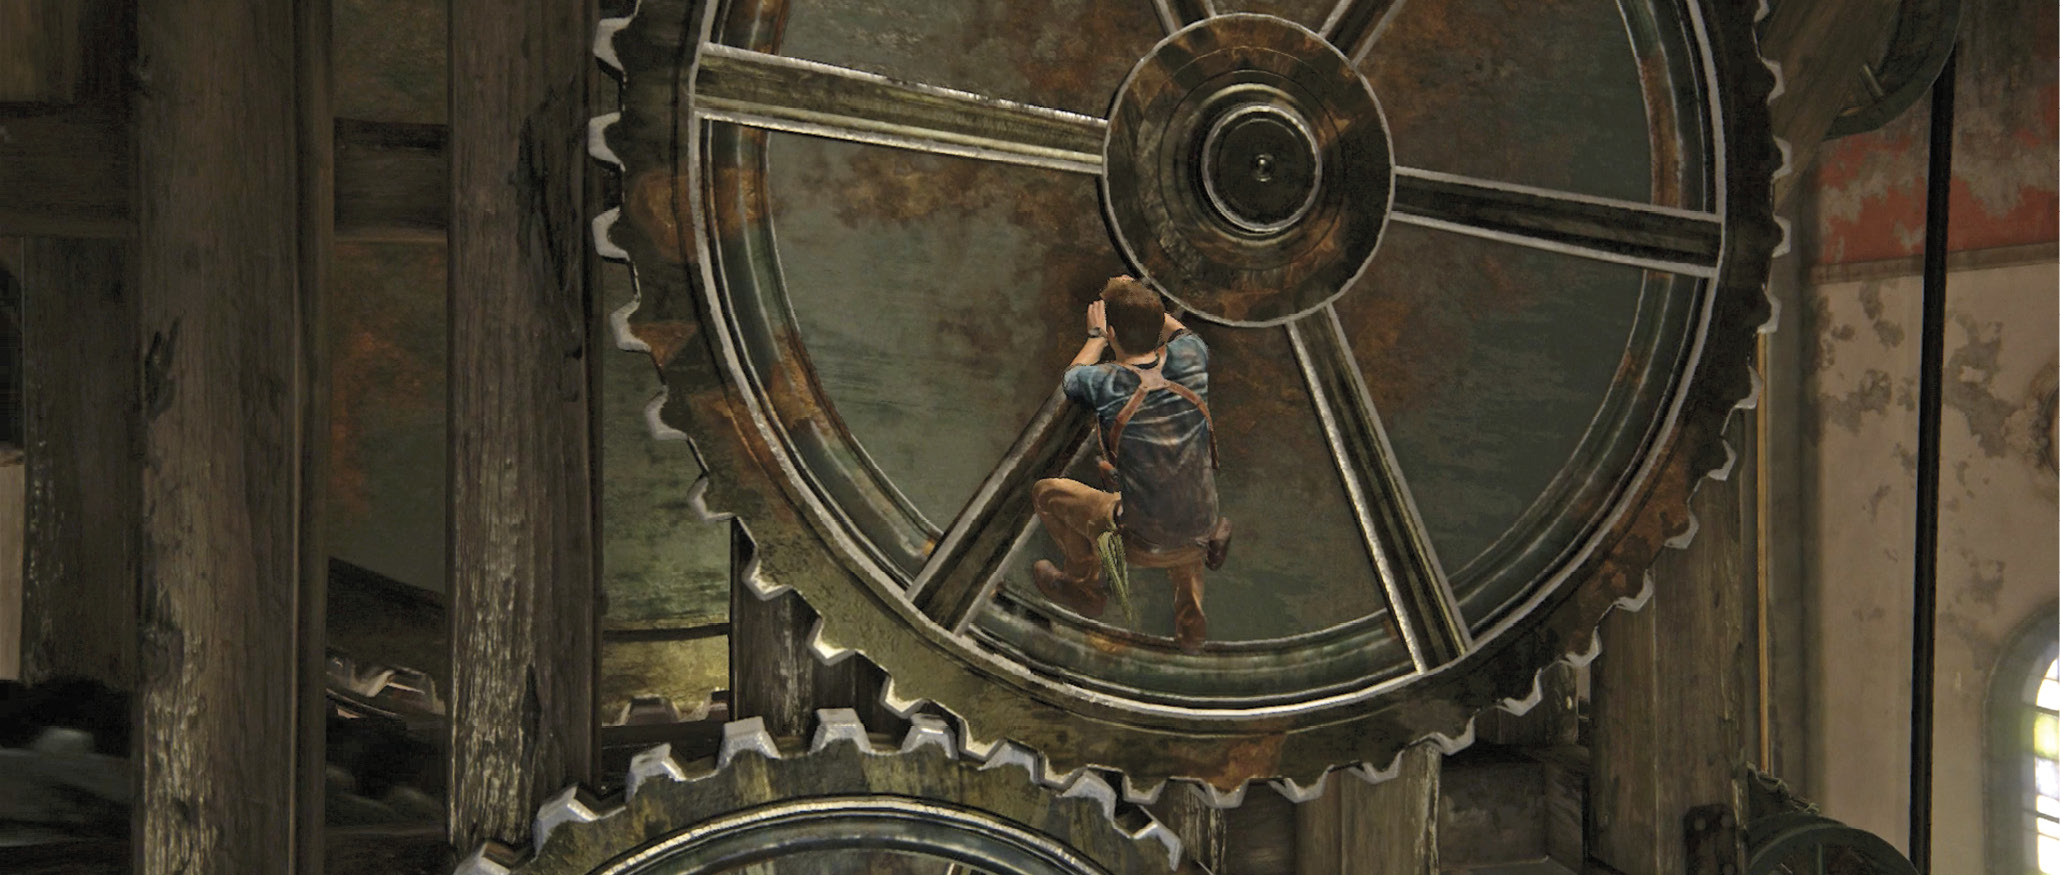
- Inside, jump onto the right side of the big gear wheel (31) to pull it downward. This turns the hands clockwise on the clock face outside.
- Keep pulling the gear wheel until the minute hand (the longer hand) is pointing to the two o’clock position—that is, to the left (as seen from inside) and slightly up.
- Climb out the window and use the handholds to reach the hour (shorter) hand (32). Then use the minute (longer) hand to slide rightward across the clock face. Hurry! The minute hand starts dropping the moment you grab it!
Use the handholds and window bars to reach the corner, then sling your grapple hook at the flag pole (33) and swing around the corner to handholds on the other side. Climb up to stand on the ledge above the window. Then climb straight up to reach the belfry balcony (34).
Optional: Treasure & Trophy
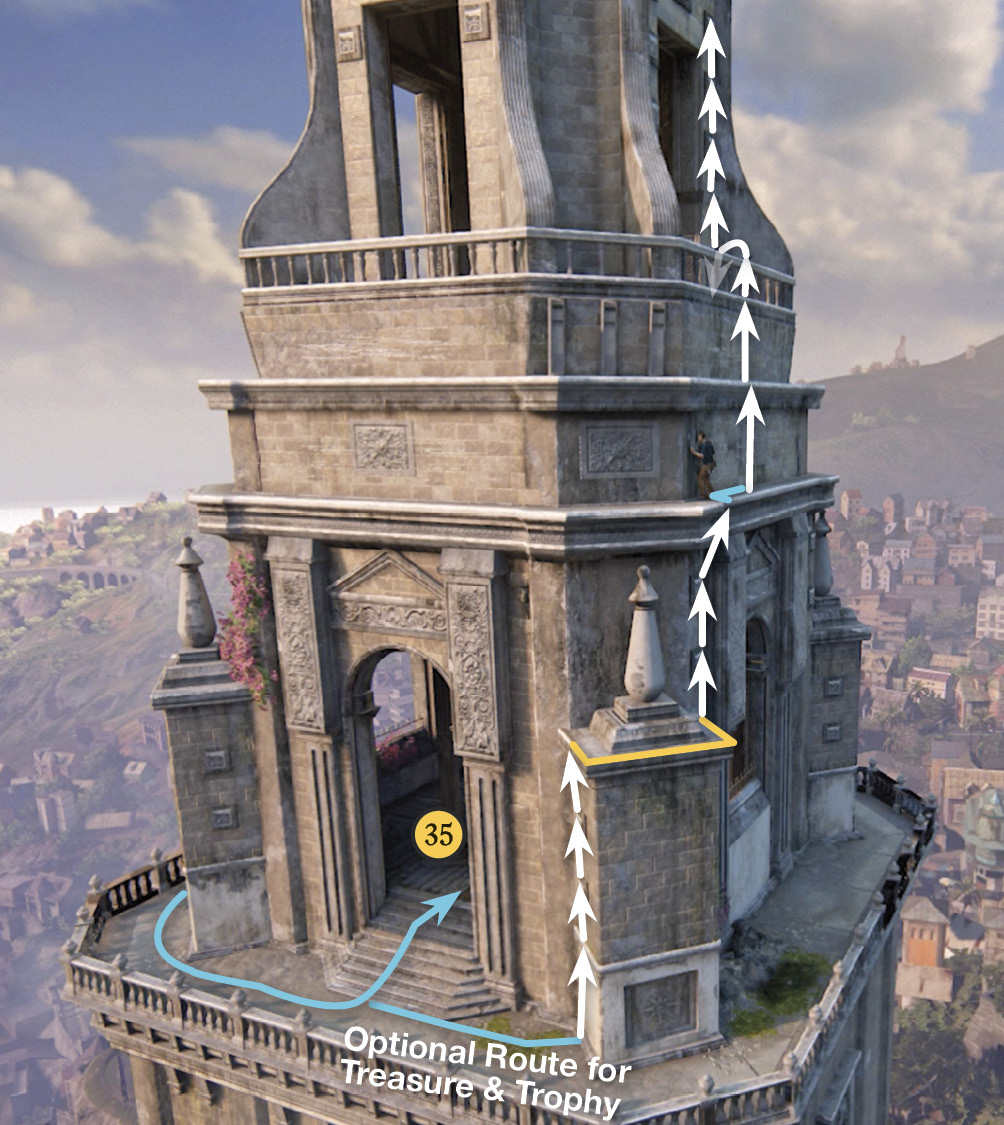
From here, you can simply walk around to the belfry entrance (35) and ring the big bell, if you want. But first, you can find a treasure and acquire a special trophy by climbing just a bit further.
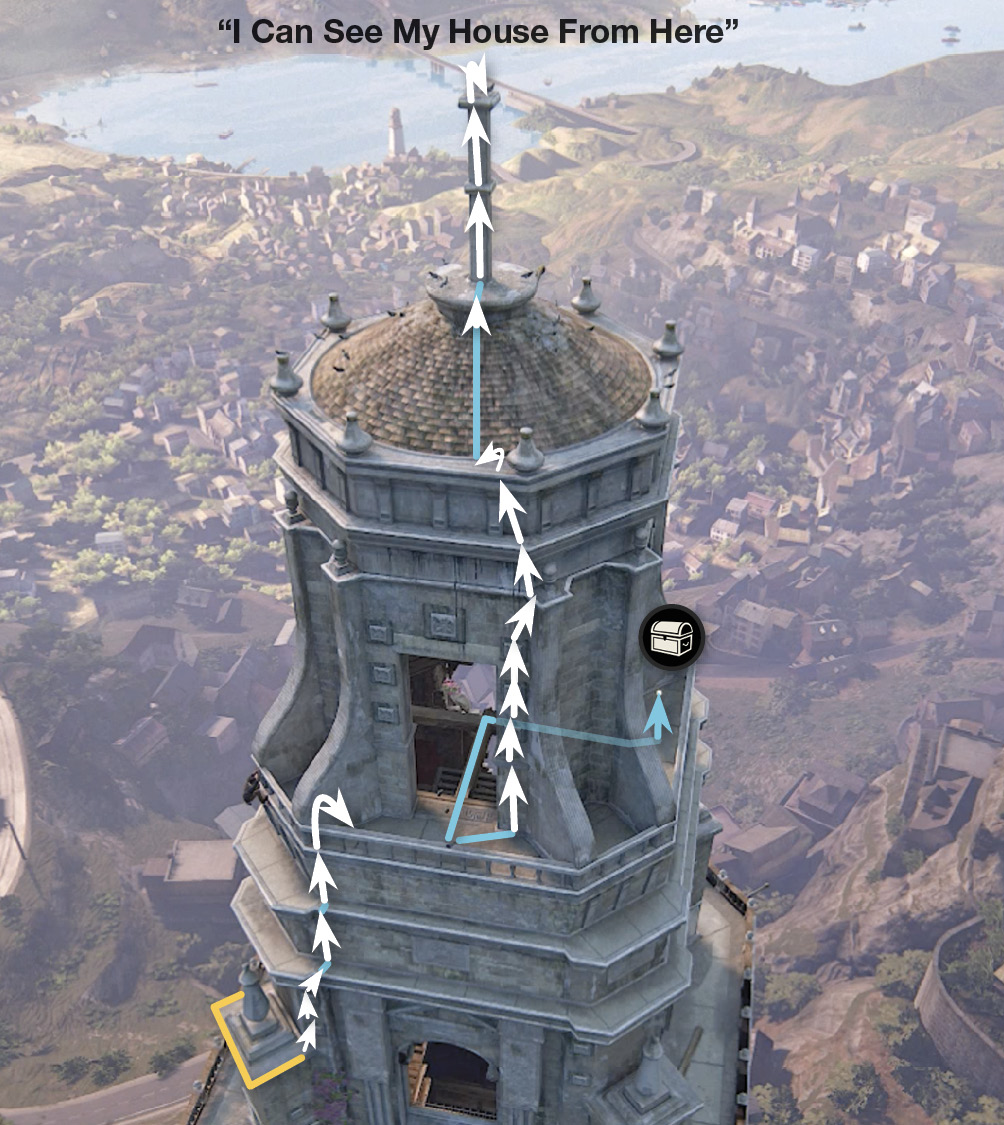
 Ivory Handle Dagger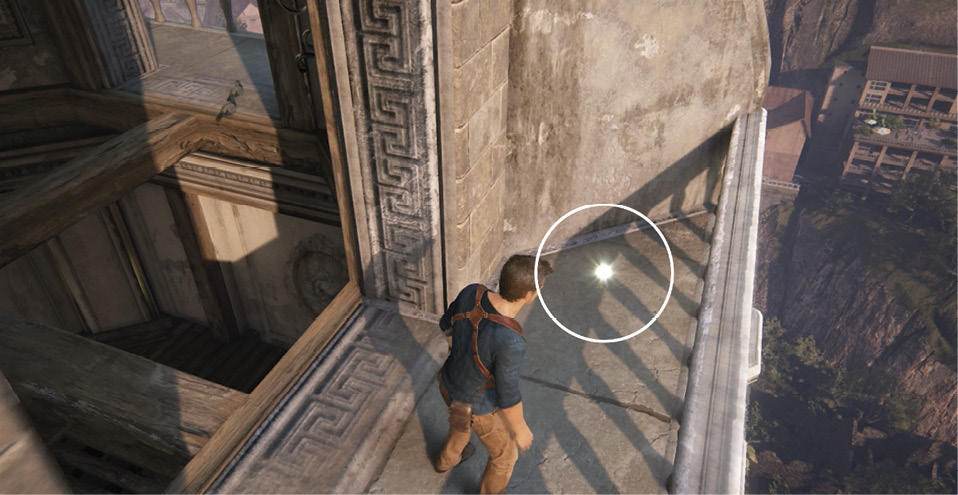 Climb the handholds just right of the belfry entrance, then scale the ledges up to a narrow balcony. Walk across the beams leading to the right to find the Ivory Handle Dagger on the side balcony. |
Ring the Belfry Bell
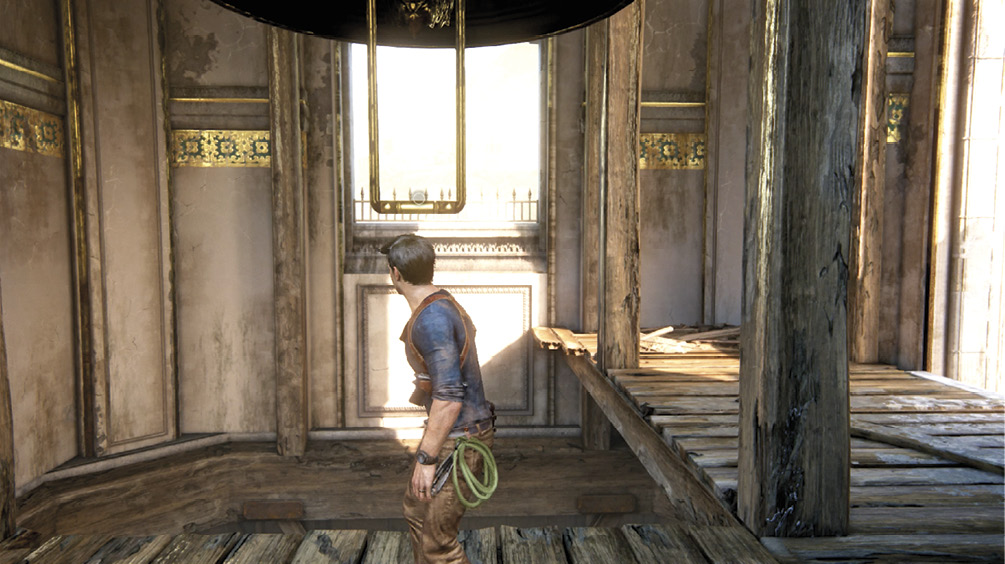
When you turn the crank to ring the belfry bell, the ancient crank handle breaks off. Jump to grab the clapper hanging underneath the bell, and then start swinging to ring the bell. This triggers a crazy falling sequence.
Survive the Tower Fall!
First, watch Nathan tumble until he starts sliding down a big gear. When he reaches the bottom of the gear (and cries “Now!”), hit  to jump. Nathan leaps and snags the swinging pendulum. You can climb it if you want, but it won’t matter.
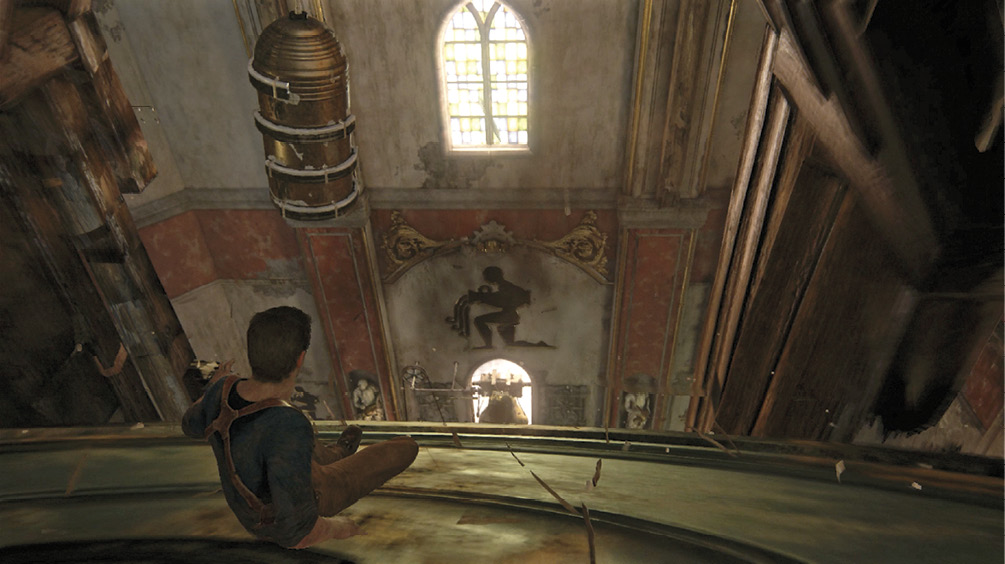
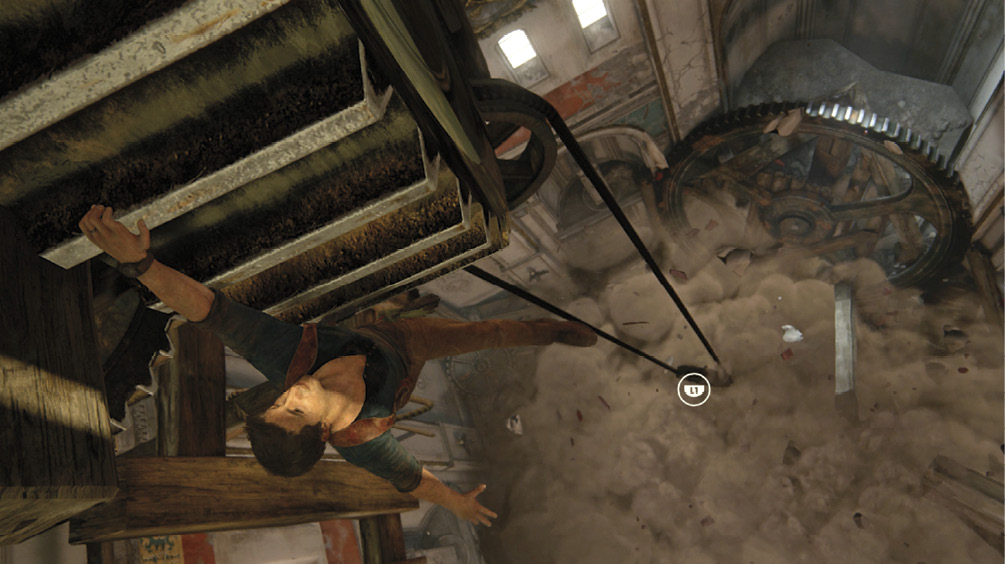
After a few seconds, Nathan falls onto the teeth of a big gear. When the gear starts turning, climb fast up the teeth! (If you don’t climb, Nathan takes a deadly drop.) Nathan ends up hanging from the gear. Now watch carefully. The big belfry bell hits the gear, knocking it loose.
The moment you see the L1 icon appear on the pulley belt just below Nathan (see Fig. 11-16), hit that button to sling your grapple hook to it. This slows Nathan’s fall just enough that he drops to the floor safely.
Solve the Basement Puzzle
Find the treasure in the debris pile nearby. Then head down the spiral staircase and get Sully’s help to move the debris that blocks the passage. Continue downstairs as Sully finally makes phone contact with Sam.
 Brass Globe Hand Warmer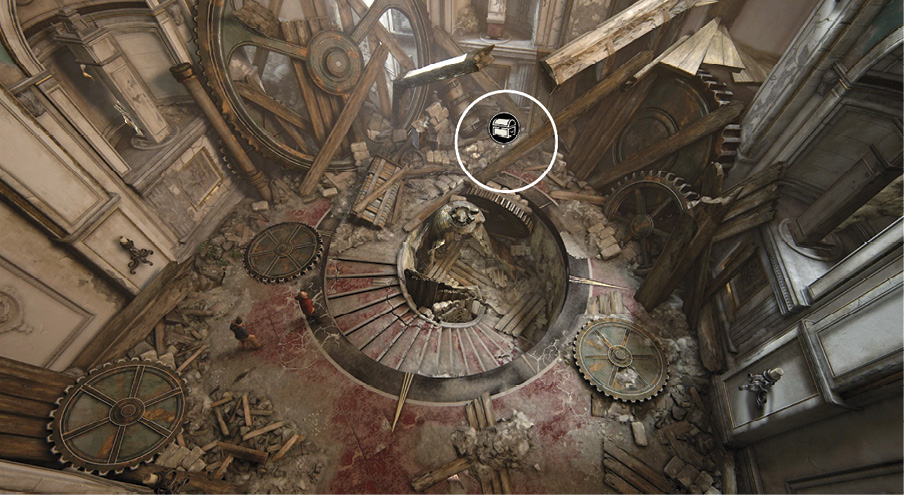 After you survive the plunge from the belfry to the tower floor, look for the Brass Globe Hand Warmer in the debris on the floor next to the fallen pendulum. |
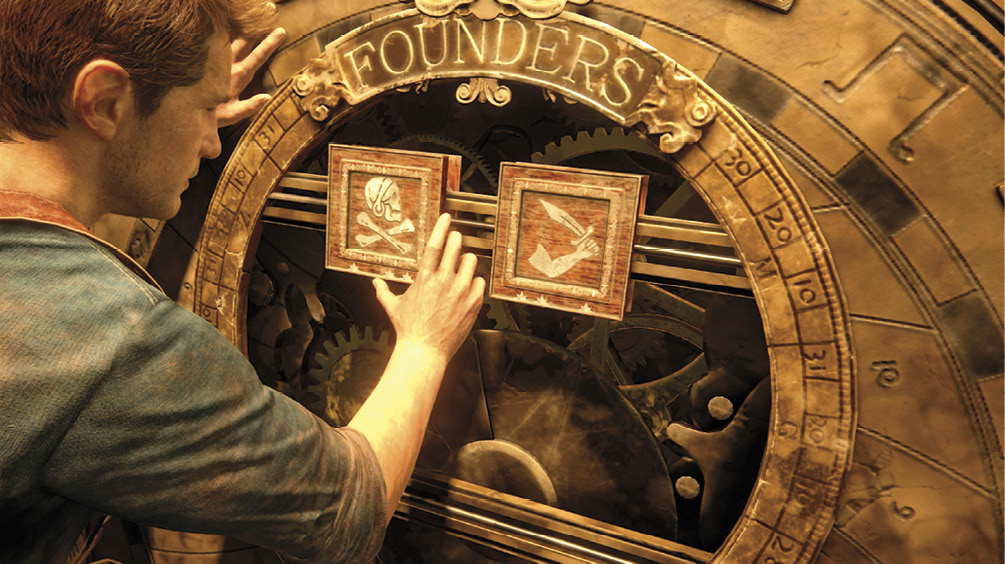
At the bottom, push open the door to enter the puzzle room. Examine the puzzle wheel mechanism—Nathan notes the square sigil tiles of Avery and Tew, and Sully points out the star patterns on the edges.
First Sigil Set: Avery, Tew
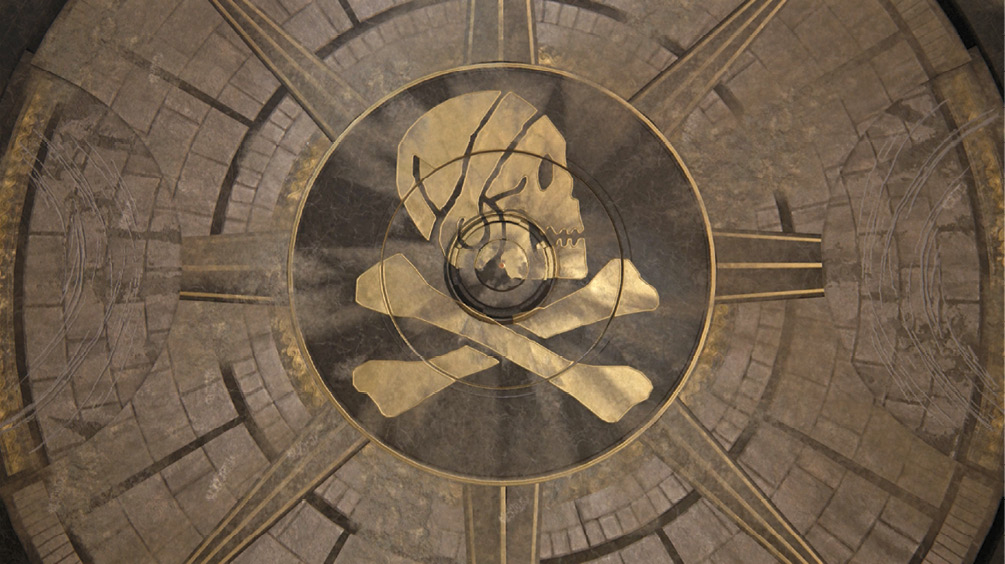
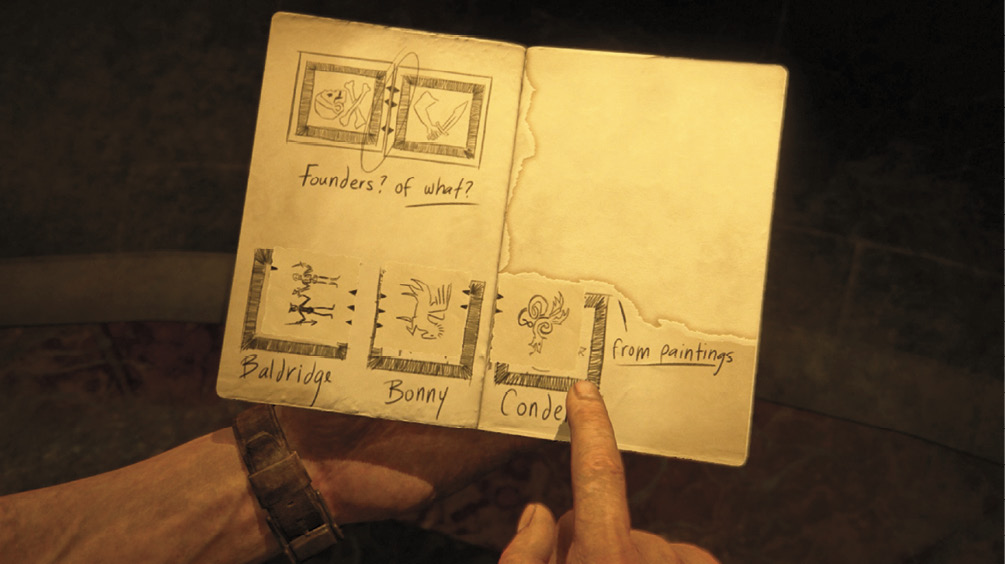
Turn both sigil tiles so that their star patterns are aligned in the middle (see Fig. 11-18), thus matching up. Specifically, select Avery’s sigil (skull and crossbones) and press L1 once; then select Tew’s sigil (arm and sword) and press R1 once. This slides three more pirate sigils into the center of the puzzle wheel. Nathan recognizes these as the sigils of Adam Baldridge, Anne Bonny, and Christopher Condent. It also opens a nearby door.
Second Sigil Set: Baldridge, Bonny, Condent
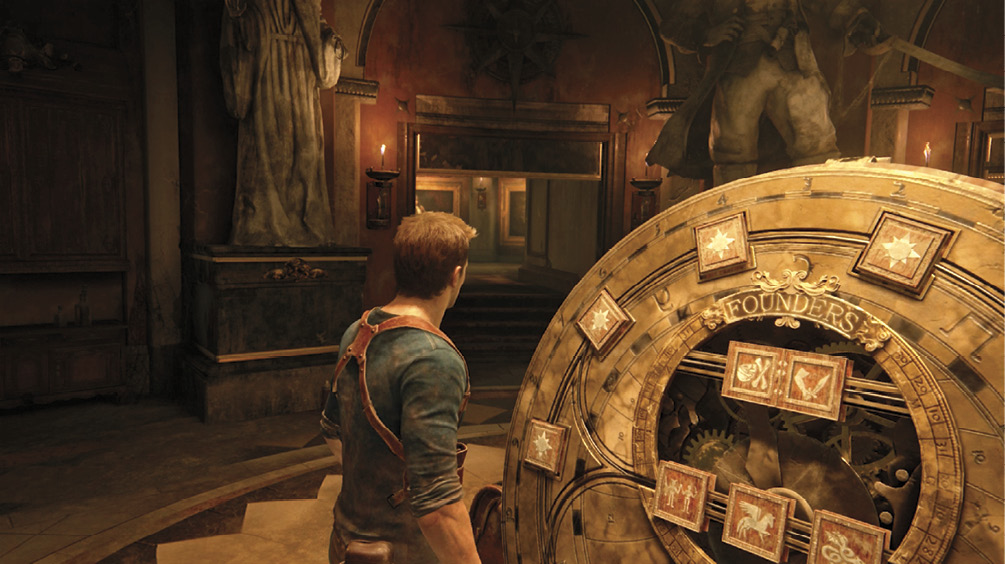
The three new sigils can be rotated too. To figure out the correct alignment, enter the newly opened room. On the walls hang portraits of the pirates associated with the new set of sigils: Baldridge, Condent, and Bonny. Each portrait includes a subtle square with stars along certain edges. Approach each portrait and hold in L2 to bring up a square template. Use the right stick to move the template over the square in the painting and press  ; Nathan sketches the sigil and its star pattern in his journal.
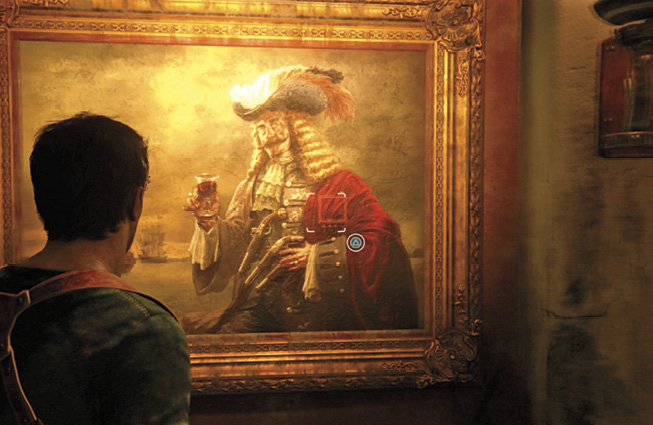
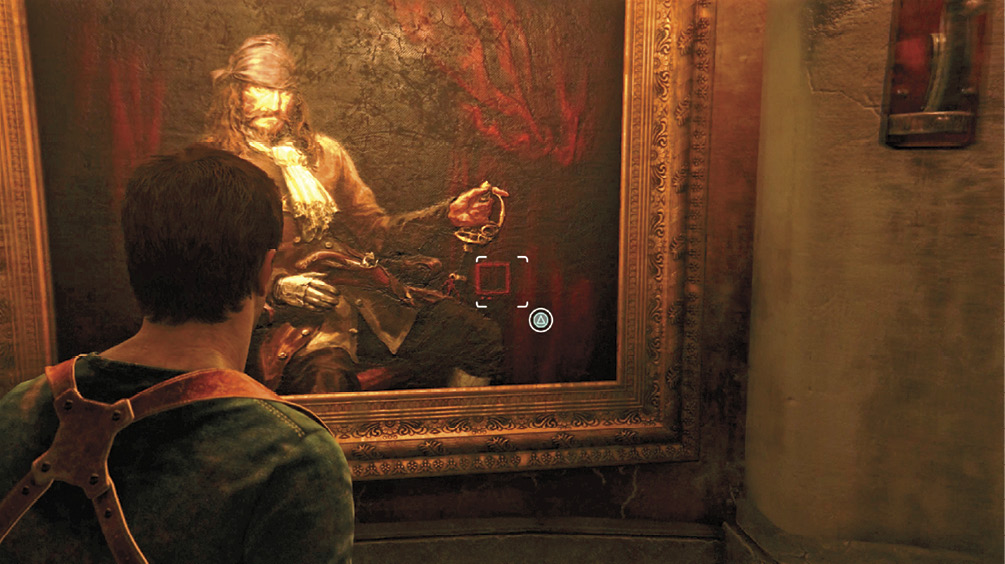
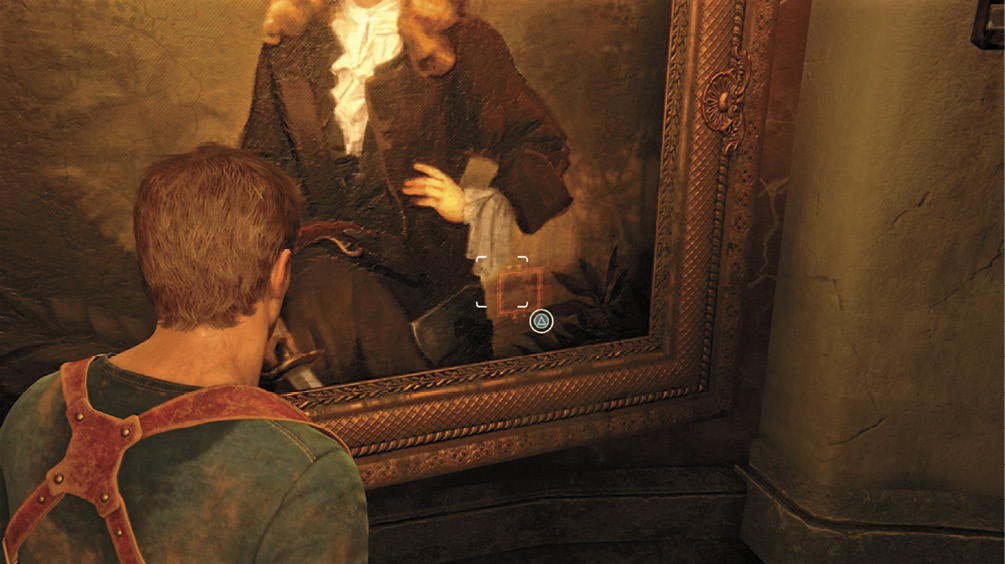
After you select/enter all three sigil star patterns, a quick scene triggers: Nathan tears out the three star patterns from his journal and arranges them side by side on the page, in the same order as on the puzzle mechanism. Now you can turn the squares in the journal to match up the star patterns of the edges (see Fig. 11-22). Once you do this, go back to the puzzle wheel mechanism and turn the three wooden sigils to replicate this arrangement (see Fig. 11-23).
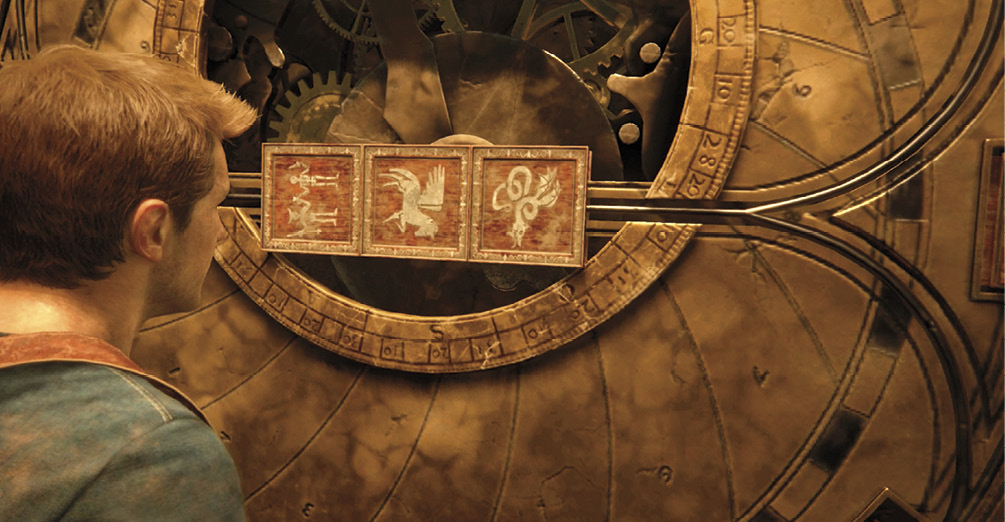
Third Sigil Set: Mayes, Want, Farrell
Solving the second set of sigils opens a new room and brings up a new set of three sigils. This time, Nathan isn’t sure which pirate captains are associated with the sigils, so he uses Sully’s phone to take a picture. Center the three new sigils in the viewfinder and press to snap the photo. Nathan automatically texts the picture to Sam.
Now enter the newly opened room. Once again, the wall features portraits of pirates: William Mayes, Richard Want, and Joseph Farrell. (Farrell’s portrait is on the floor; hang it back on the wall with Sully’s help.) As before, examine the subtle square on each portrait to log it in your journal. After you examine the first one, Sam calls with the info you need on the sigils: the dolphins are Want’s sigil, the trident is Farrell’s sigil, and the skeleton hands with a pearl are Mayes’ sigil.
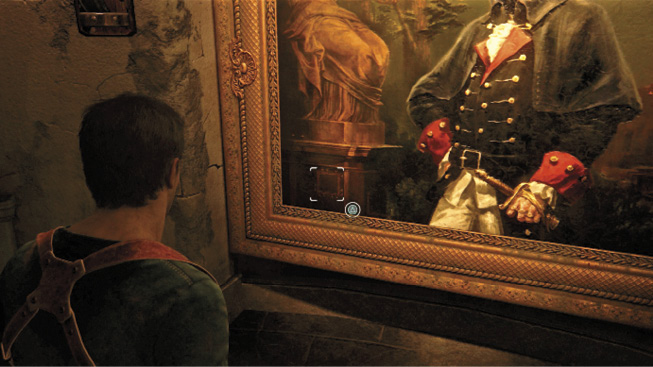
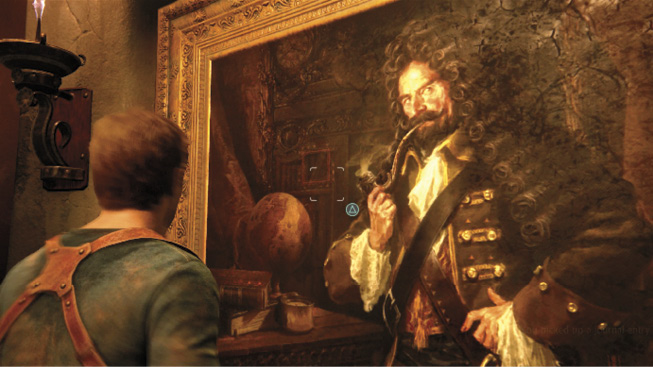
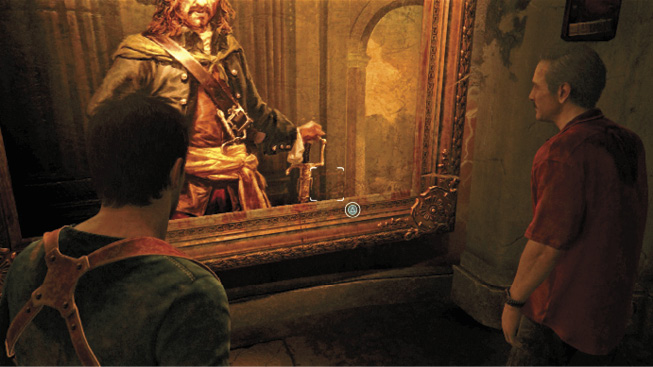
After you find and log the third star pattern, return to the puzzle wheel mechanism. Use Nathan’s new journal entry to figure out how to turn the sigils to match up the star patterns. Then rotate the wooden sigils on the wheel mechanism to replicate this arrangement (see Fig. 11-27).
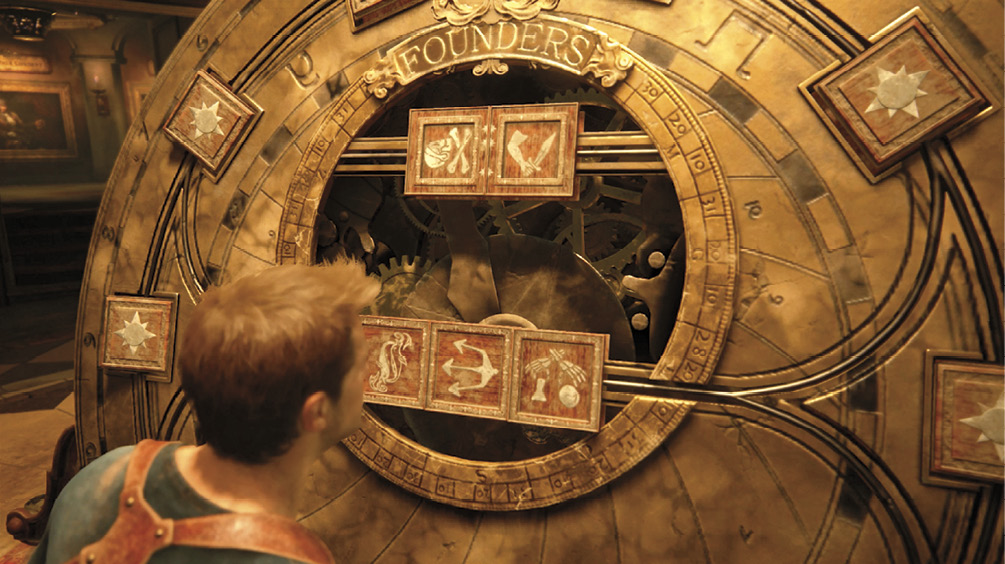
Fourth Sigil Set: England, Malik, Unknown, al-Basra
Solving the third set of sigils opens a final room and brings up a new set of sigils, this time four of them. As before, Nathan isn’t sure about the sigils, so he uses Sully’s phone to take another photo for his brother. Again, press to snap and text it to Sam.
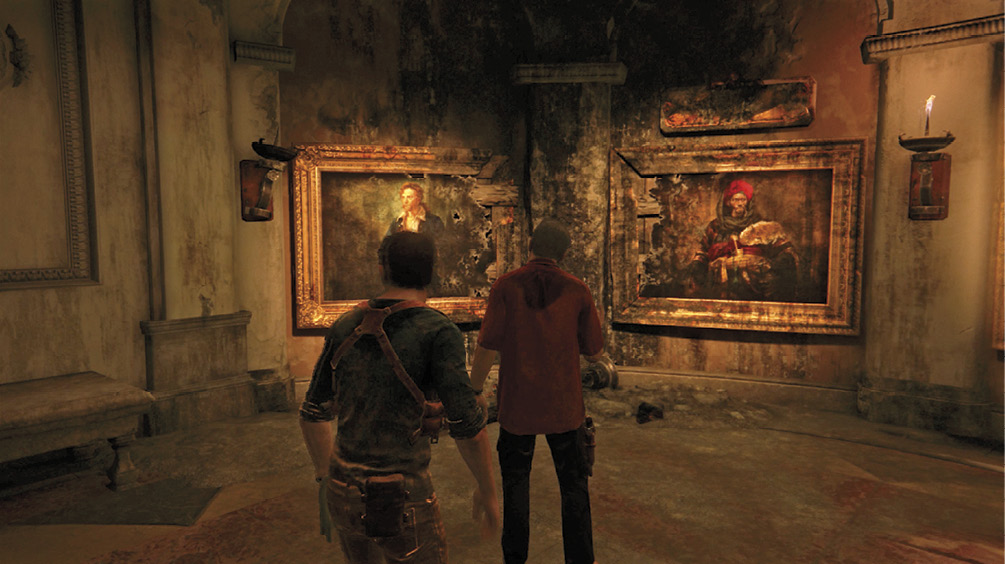
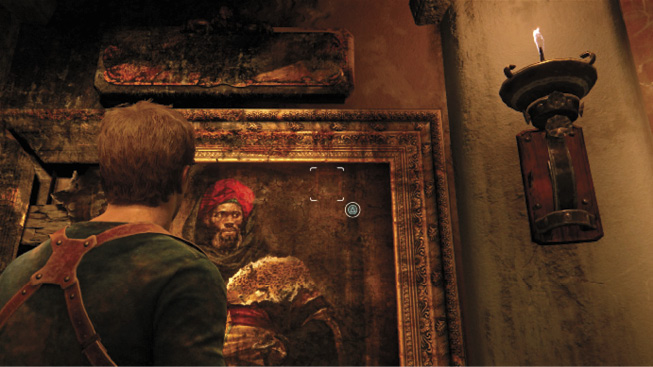
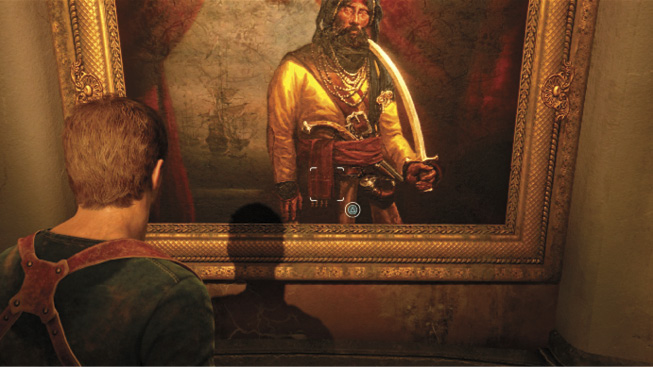
Now enter the newly opened room with four portraits. This time, fire has damaged the two on the left, with burn marks also obscuring those two names. The names still visible over the other two portraits on the right are al-Basra and England. Soon Sam texts the info you need on the order of sigils on the puzzle wheel mechanism. From left to right: Edward England the scales, a monkey sigil that Sam doesn’t recognize, Tariq bin Malik the sea serpent, and Yazid al-Basra the tiger.
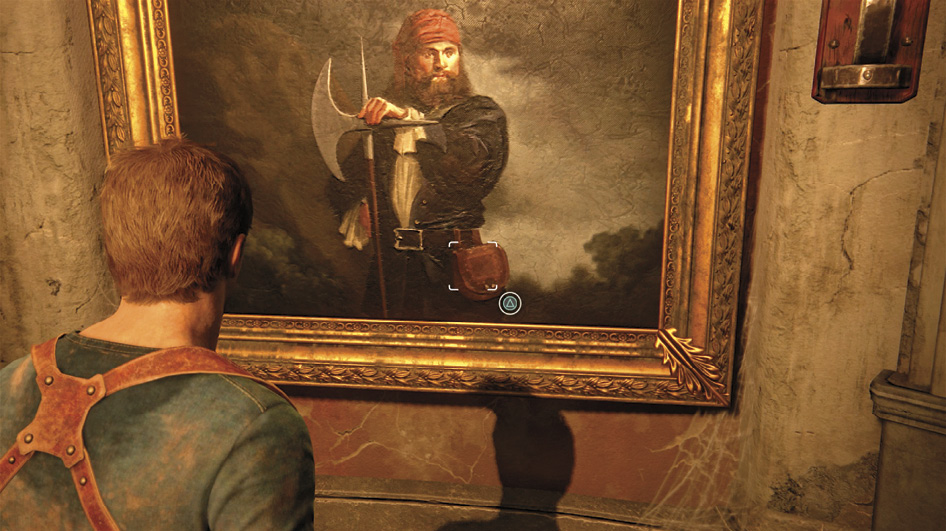
As before, examine the subtle square with a star pattern on each of the four portraits to log it in your journal. While observing the paintings, Drake will not recognize the pirate on the far left. When you acquire that sketch, open your journal and place that star-pattern square over the monkey sigil. That means the other pirate with no nameplate is most likely Malik, so place that star-pattern square over Malik’s sea serpent sigil.
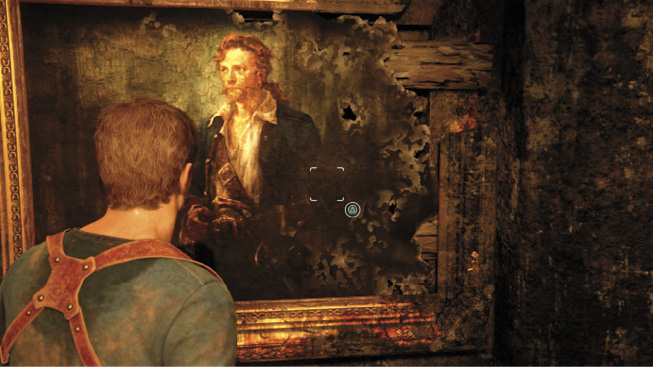
After you find and log the fourth star square pattern, you can return to the puzzle wheel mechanism. Open your journal and use Nathan’s new entries to match up the star patterns. Then rotate the wooden sigils on the mechanism to replicate this arrangement (see Fig. 11-33).
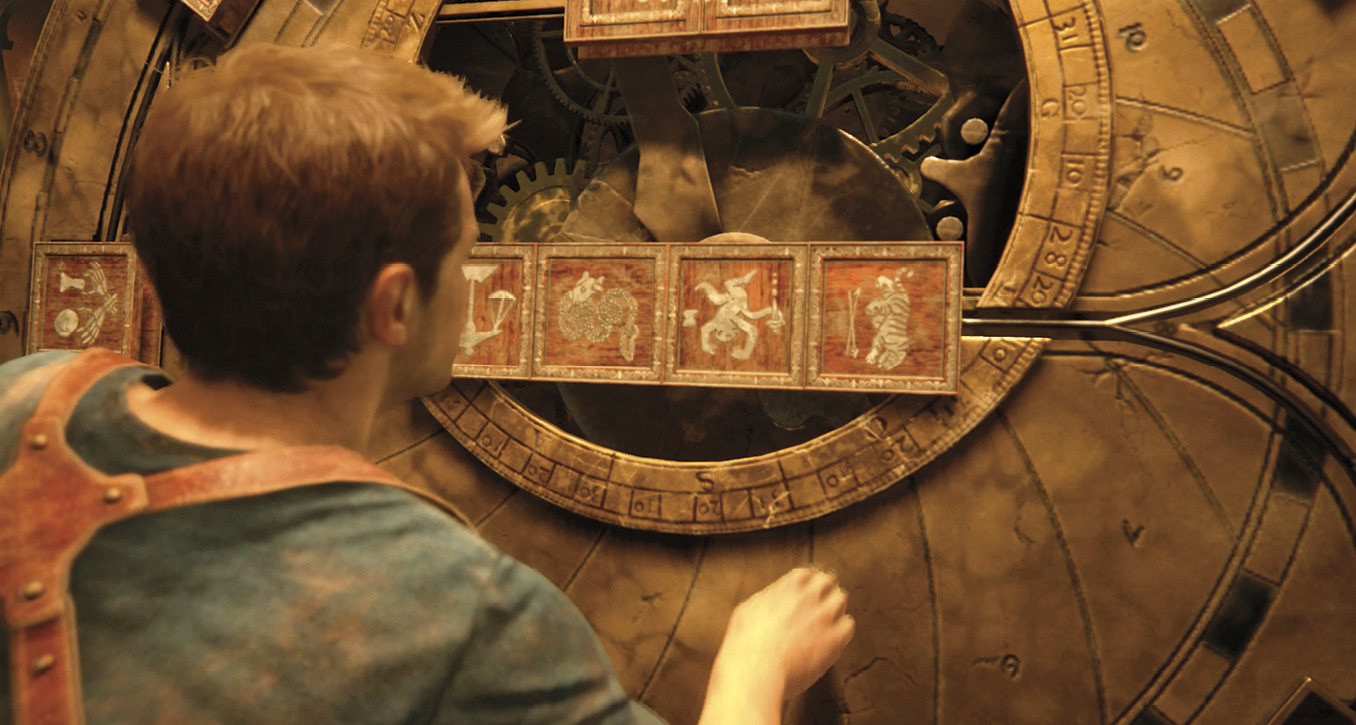
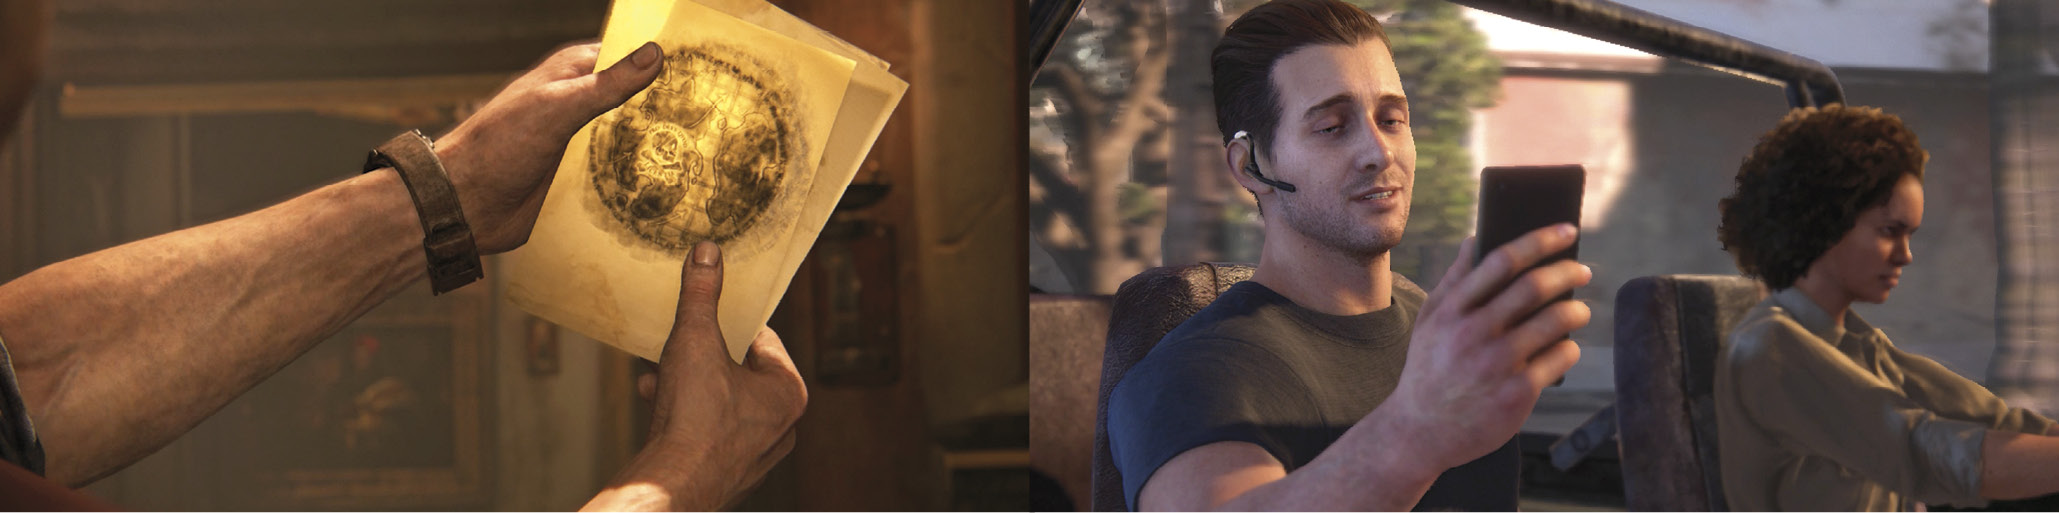
Correctly aligning the fourth set of sigils activates the mechanism to reveal a set of three map disks. Take photos of all three as prompted, and then watch the extended cinematic: Nathan realizes that the three disks must form a combined clue. He also learns that Rafe Adler has a tap on his data stream.
Fight Past the Marketplace Mercenaries
Exit via the open doors, descend the stairs, and proceed to the tower’s front entrance. Press to unbar the door and exit; Nathan points out “Sam’s tower” in the distance—it’s down by the waterfront. Now follow Sully through the marketplace.
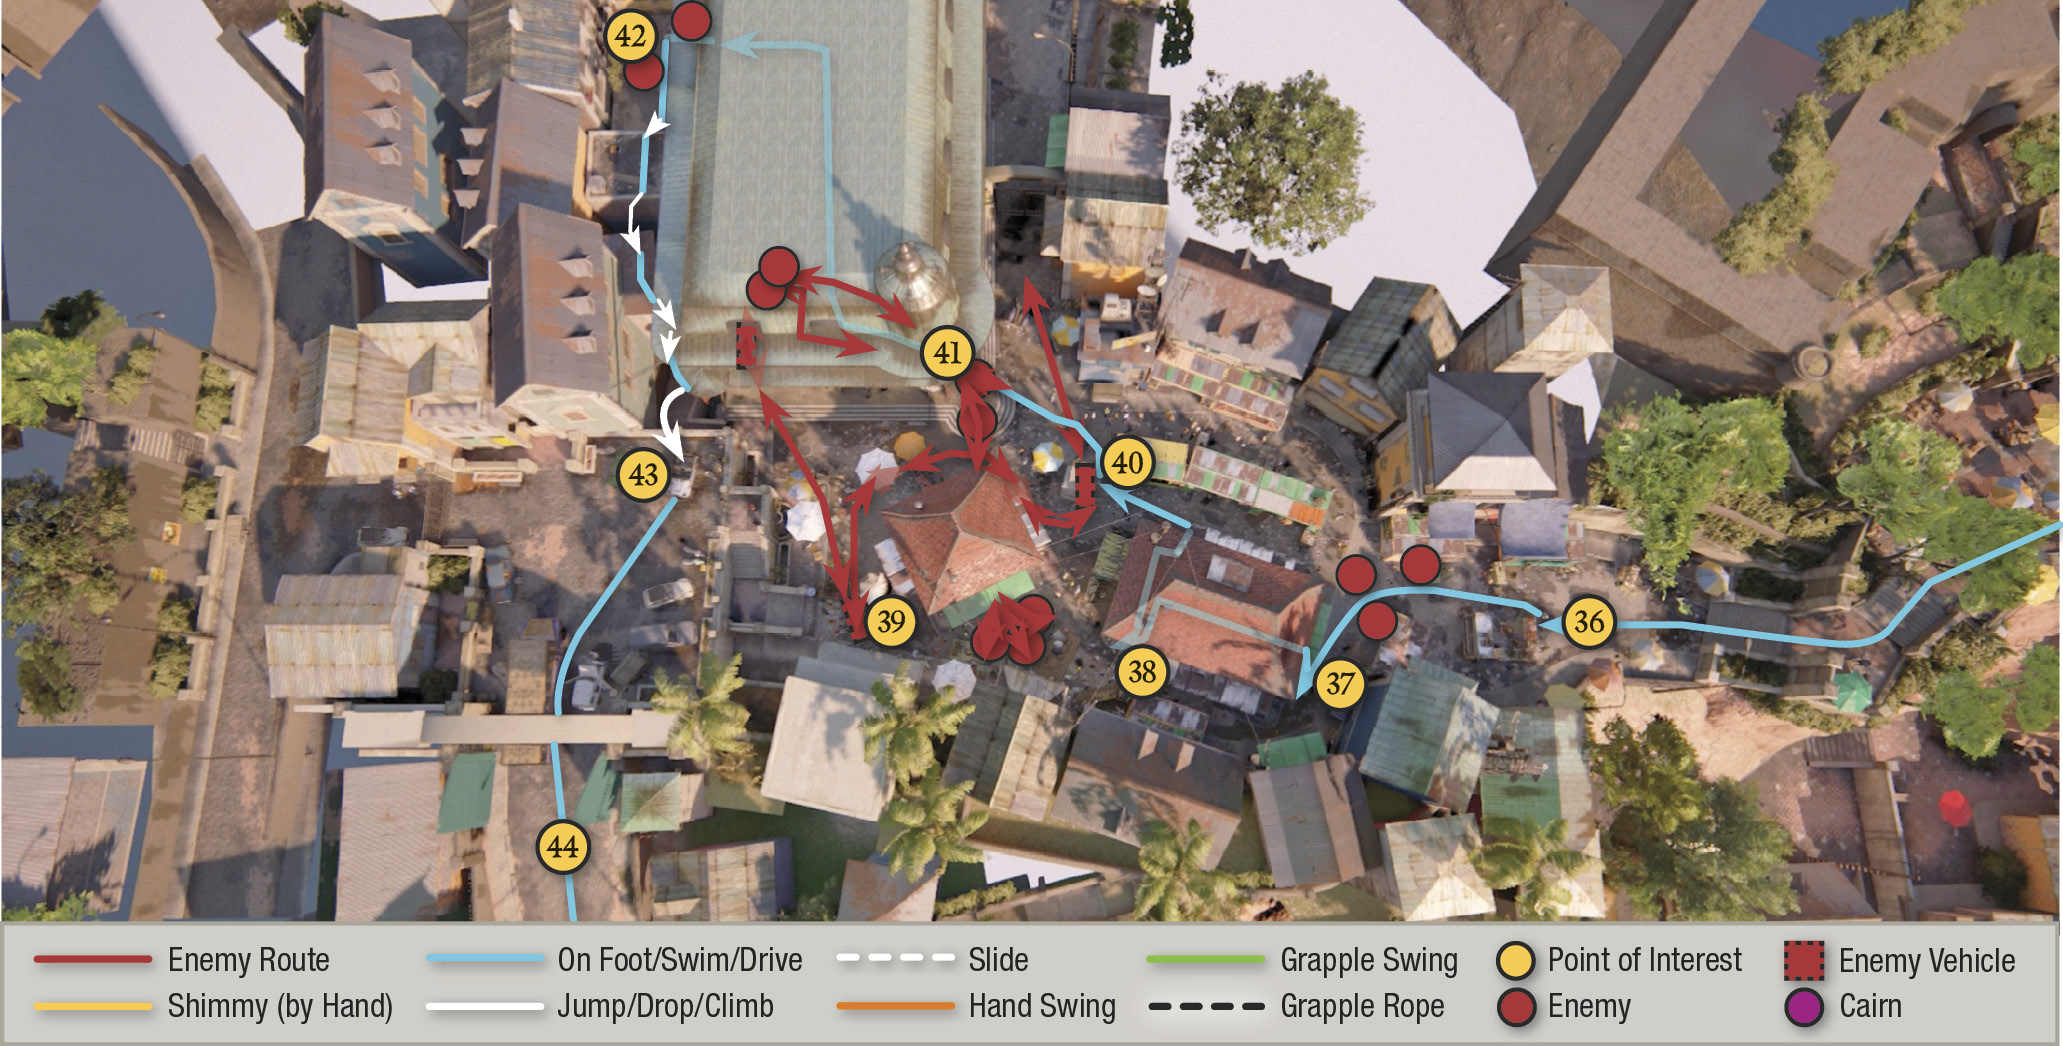
When you reach the bottom of the staircase, three Shoreline goons arrive and open fire. Take cover behind the wares (36) and wipe out this first wave. Then push forward until the Shoreline turret truck opens fire with its brutal, top-mounted 50-caliber machinegun. Quickly dive behind the left side of the meat counter (37) to cut off its shooting angle.
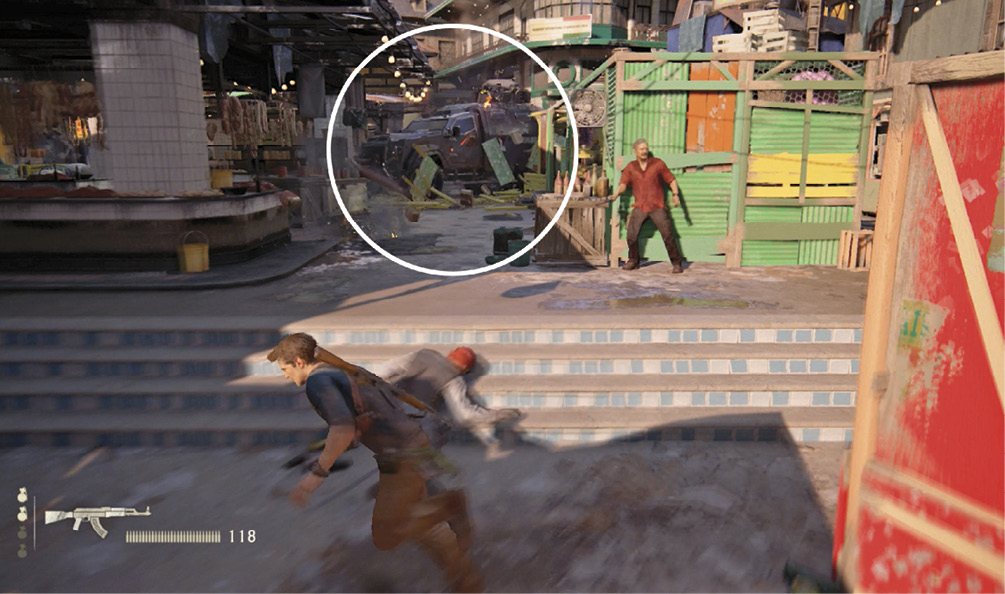
You can’t take out this thickly armored truck, and its gun turret is quite lethal, so your objective here is evasion and escape. Stay left and pick off the troopers deployed ahead. Then push forward to the far end of the meat market (38) and stop. The turret truck roars into position directly ahead (39) looking to cut off your escape.
Escape through the Passport Office
Your only escape route now is through the Passport & Visa Bureau building to the right. Make a dash across the market to the stone pillar (40) and take cover. (The turret truck backs up again to target you.) Gun down the troopers who emerge from the nearby entrance (41), then sprint inside and take cover behind the desk—more gunmen are posted across the room, plus the annoying turret truck smashes right into the lobby!
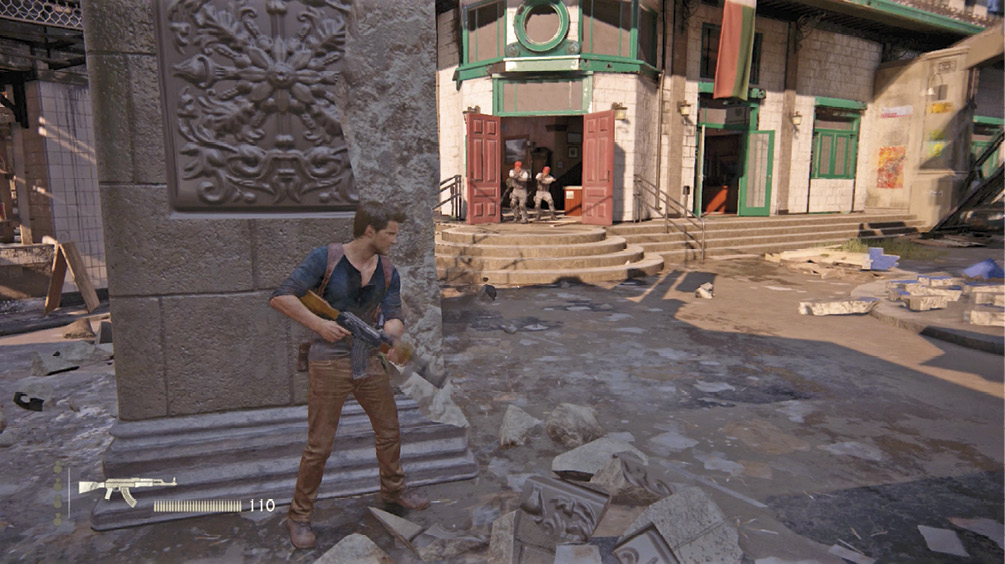
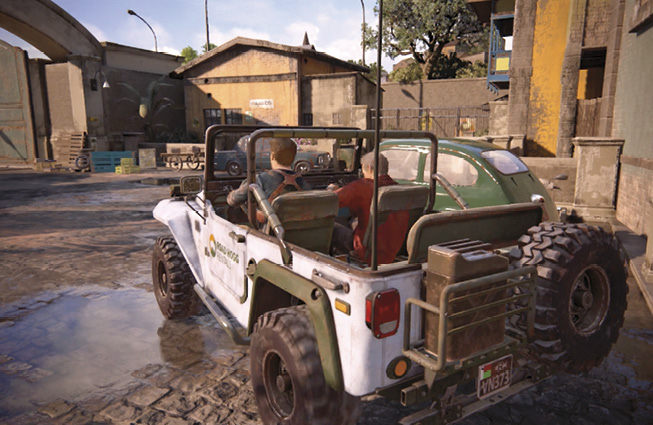
Again, you can’t disable the truck so dash upstairs to the second floor. Two last goons lie in ambush out on the patio (42), including one sneaky enemy who lurks just to the right beyond the doorway. After you clear the patio, run and jump across the rooftops and awnings overlooking the alley below until you reach your 4x4 (43). When you hop inside, Sully joins Nathan. Accelerate down the road (44).
Evade the turret Truck
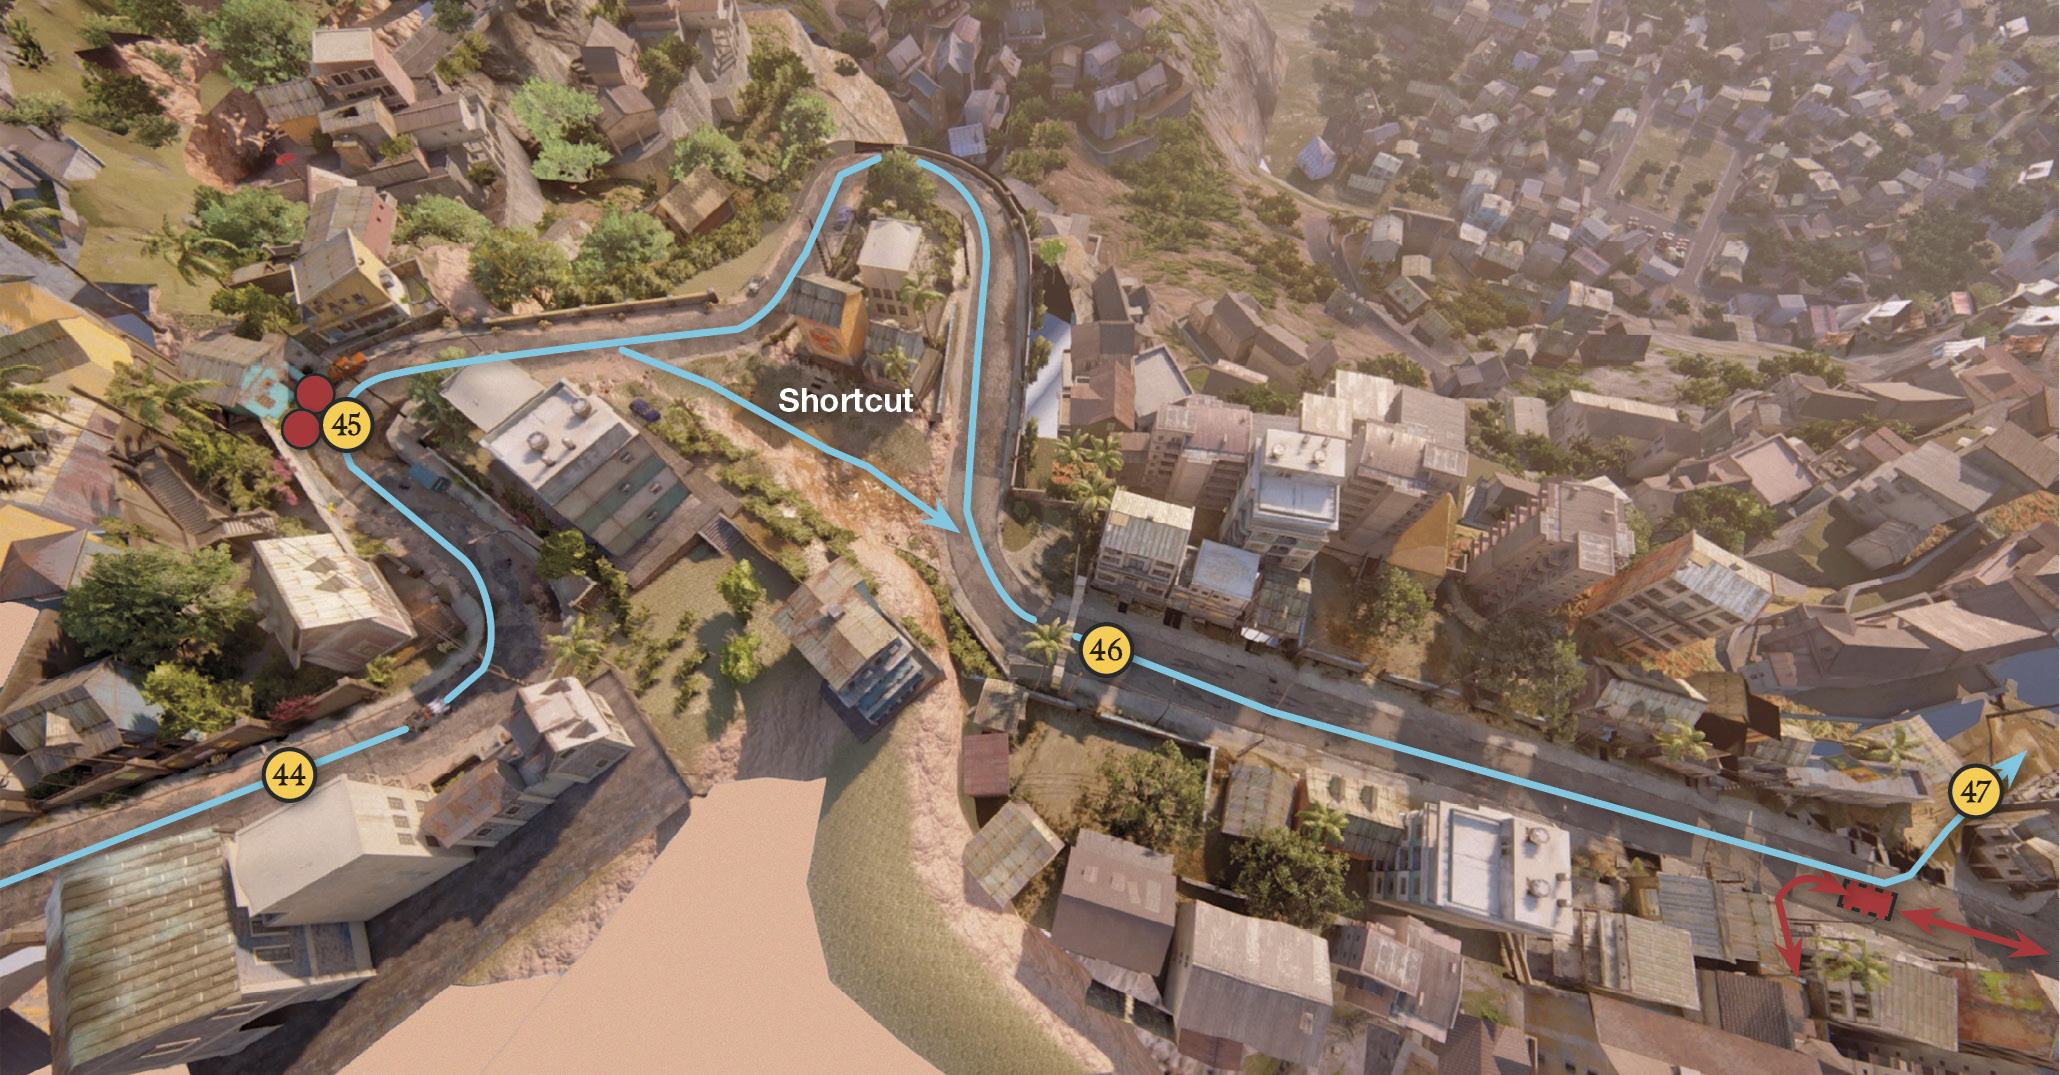
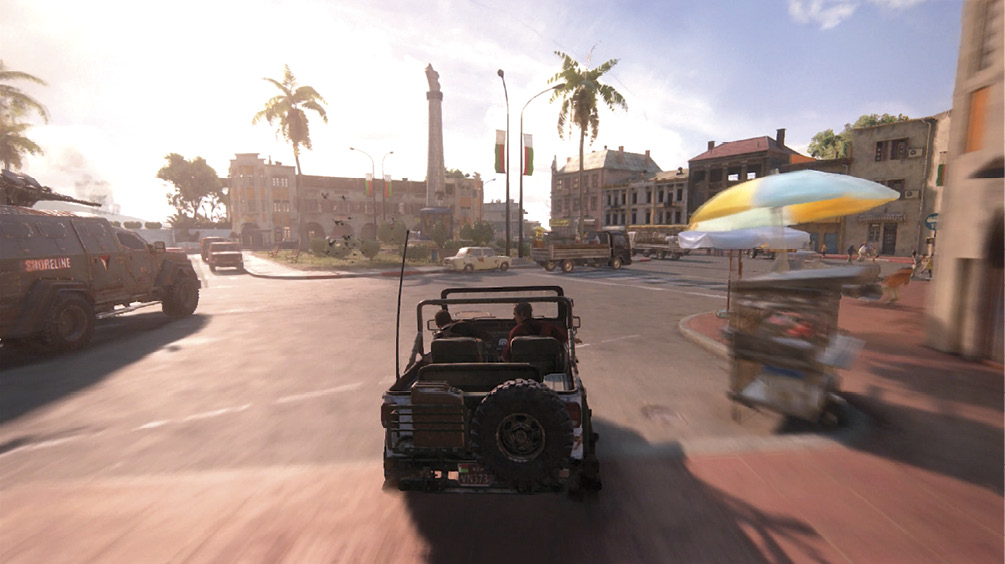
Now your objective is to reach Sam while dodging the relentless Shoreline turret truck. When Nathan asks how to do this, Sully replies, “Just keep heading downhill.” Good advice, Sully. Follow the street around the curve past two gunmen (45). Run right over them if you want, but don’t stop. (More advice: Don’t stop anywhere. If you halt your 4x4 for too long, you fail and restart at the last checkpoint.) Take the alley shortcut on the right, then speed through the archway (46), avoiding pedestrians en route. Soon the turret truck bursts onto the road ahead. Veer leftward through the alley (47) to avoid taking deadly fire.
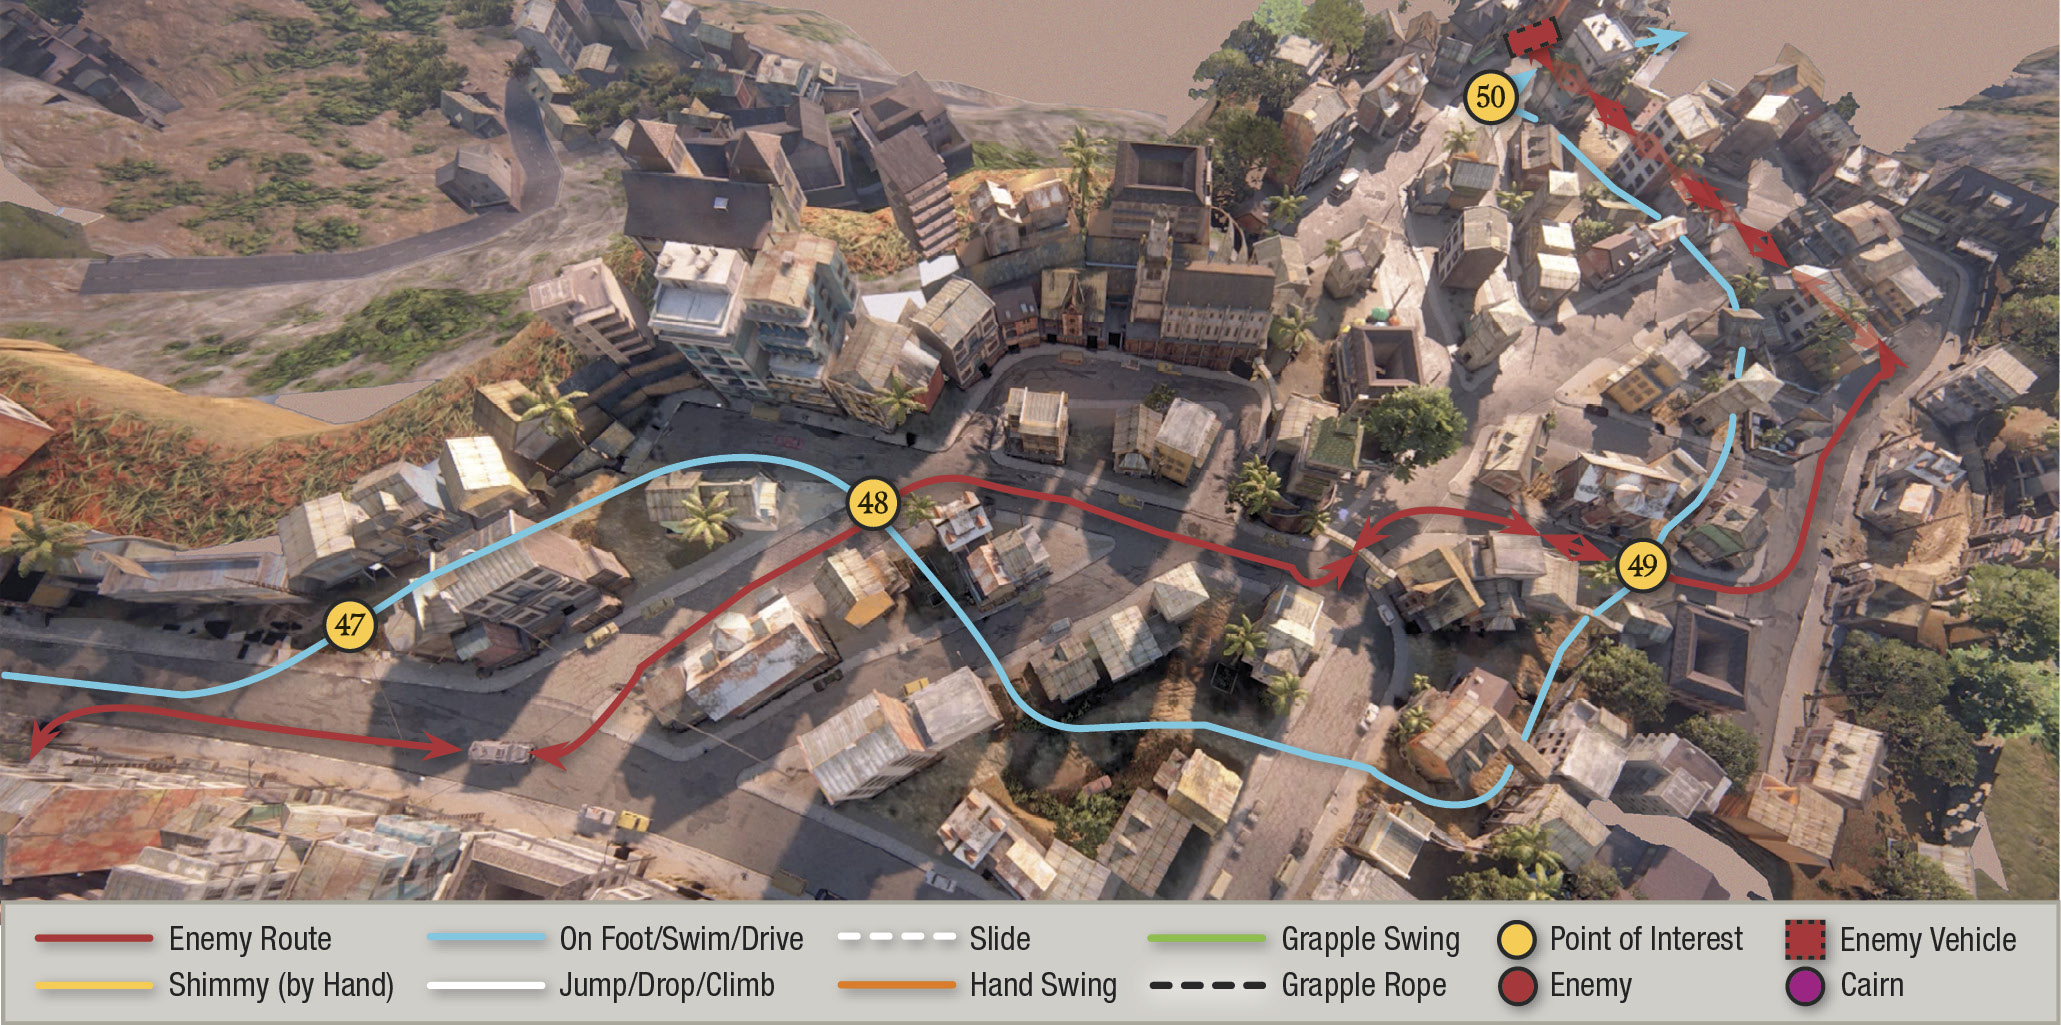
Check our map to see the turret truck’s route (in red) along the city streets, and your evasive route (in blue) via alleys and other shortcuts. The routes cross several times (48, 49)—you can’t avoid these encounters, but if you follow our suggested path, you minimize exposure to the truck’s deadly gunfire. Just put your head down and accelerate hard. Keep plowing through fences, trashcans, crates, gardens, laundry lines, and other stuff as you grind through the yards and alleyways. Eventually, you reach a spot where the truck parks and waits for you (50). Speed past it and veer left into the dead-end street. Then hit Pause and check out our next map.
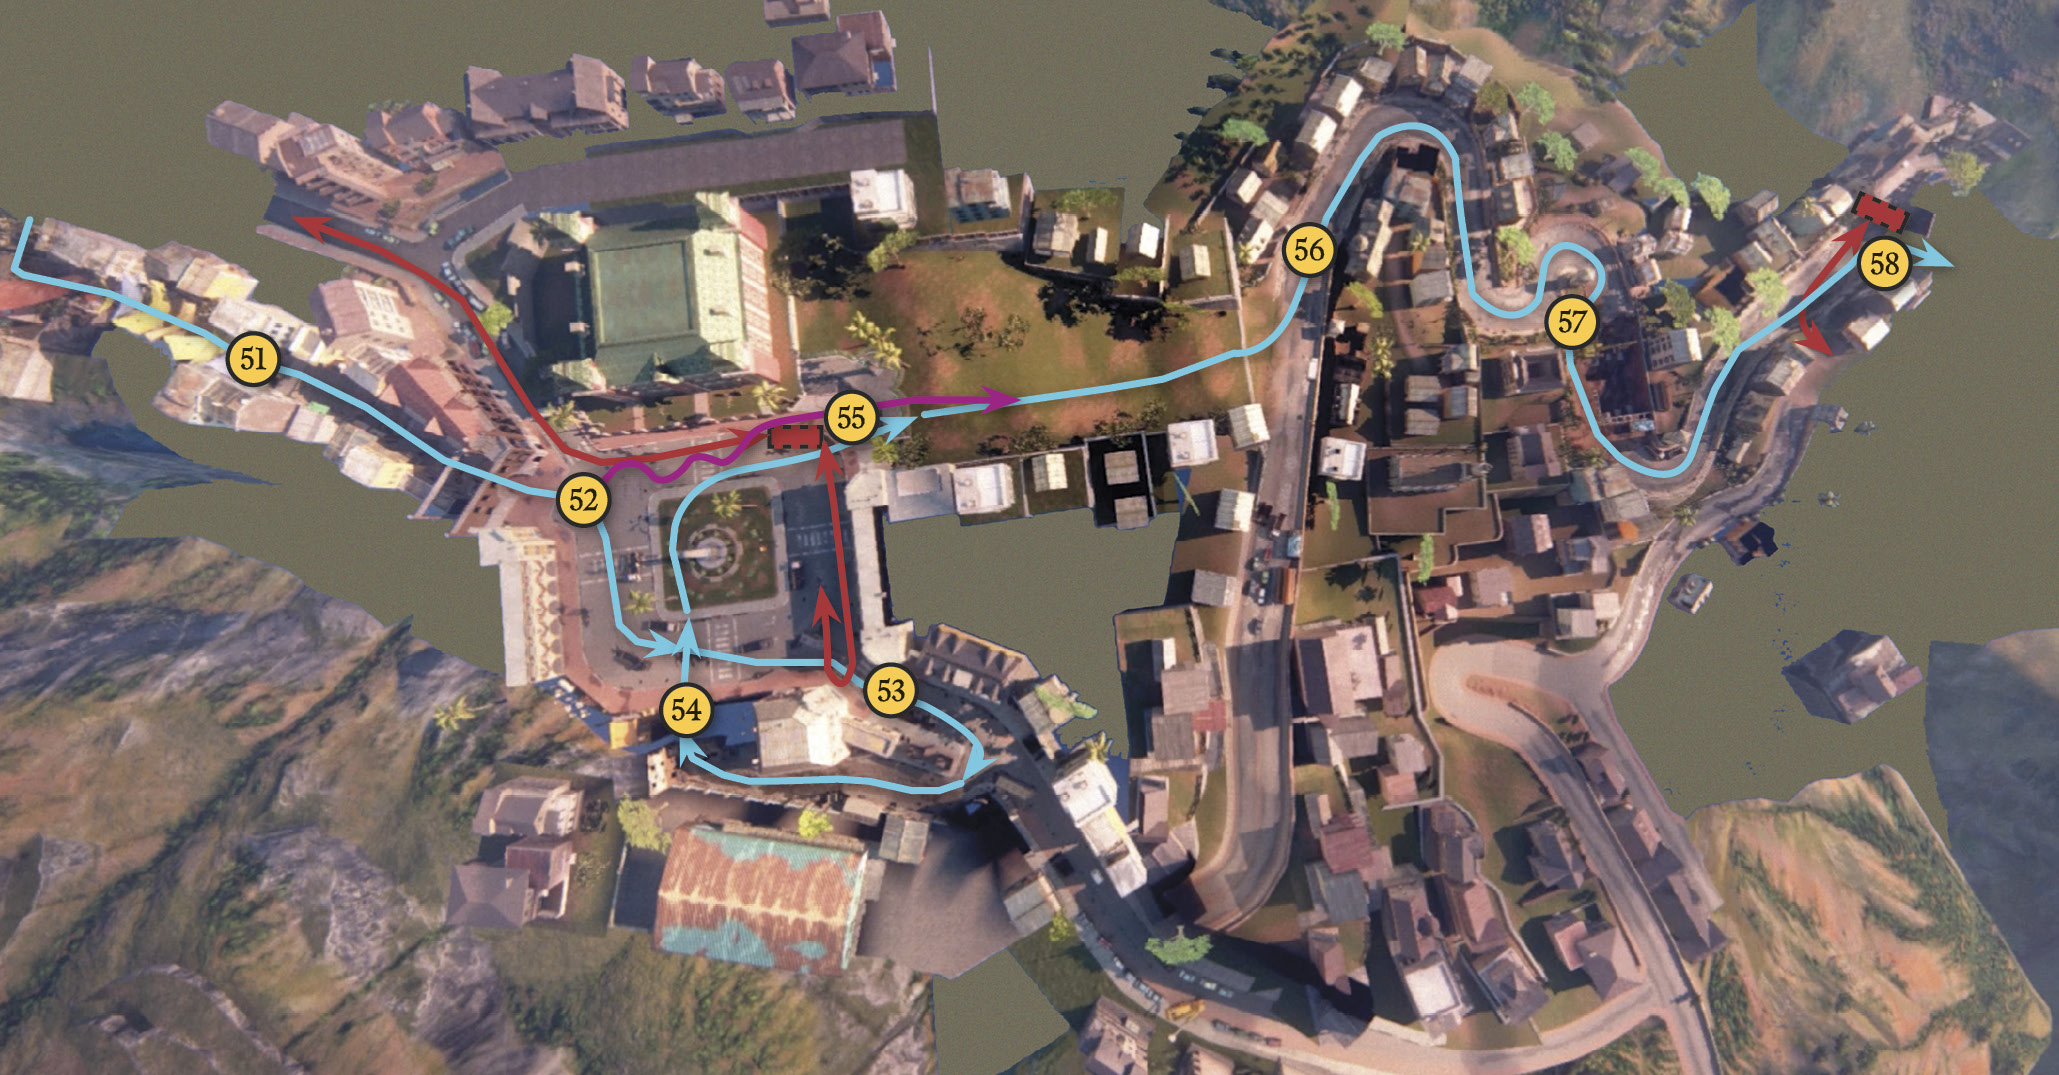
You fly off an embankment and plunge through a street faire (51), smashing downhill through tables full of wares. When you finally exit the promenade via the archway at the bottom (52), you burst out into a big monument square…and run into the Shoreline turret truck again!
Here the truck wants to prevent you from exiting the square via the staircase to the left (55). You can try swerving back and forth behind the truck (see our pink route) and then accelerating past it up the staircase, but you’ll take a lot of damage and you may fail.
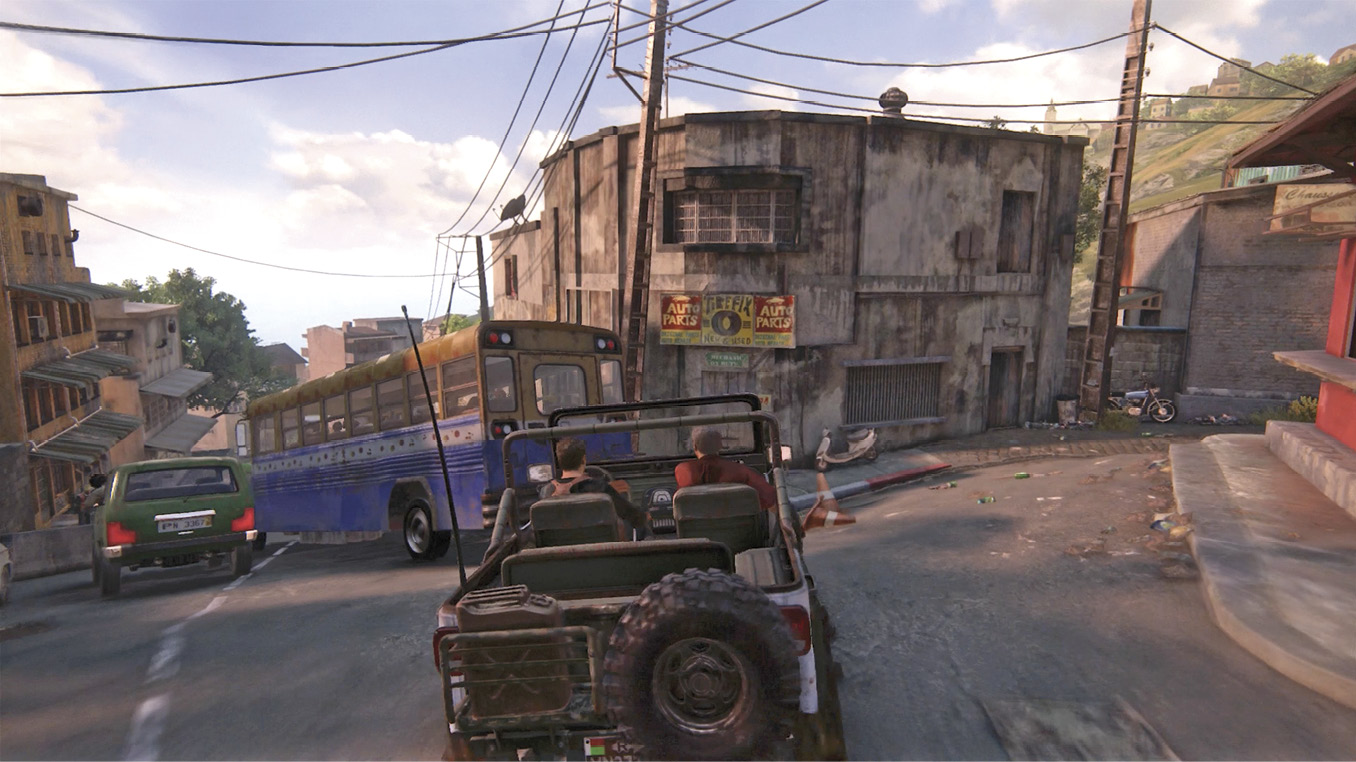
The safer route is to exit the square via the street to the right (53), which lures the turret truck in that direction. Turn hard right at the stalled bus; drive down the back alley; smash through the small construction site (54) back into the square; speed around the monument and then directly to the escape staircase (55) on the far side.
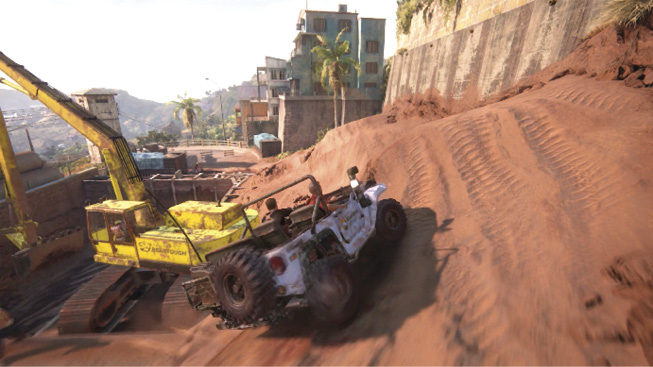
Plunge down the grassy hill and turn left onto the street (56) at the bottom. Follow the curves until you reach the road construction (57), then veer rightward to climb over the dirt mounds, going around behind the big digger. Continue down the road on the other side until, amazingly, the turret truck reappears and blocks the road. Turn hard right and smash through the chain-link fence (58) to escape.
Catch Up to Sam
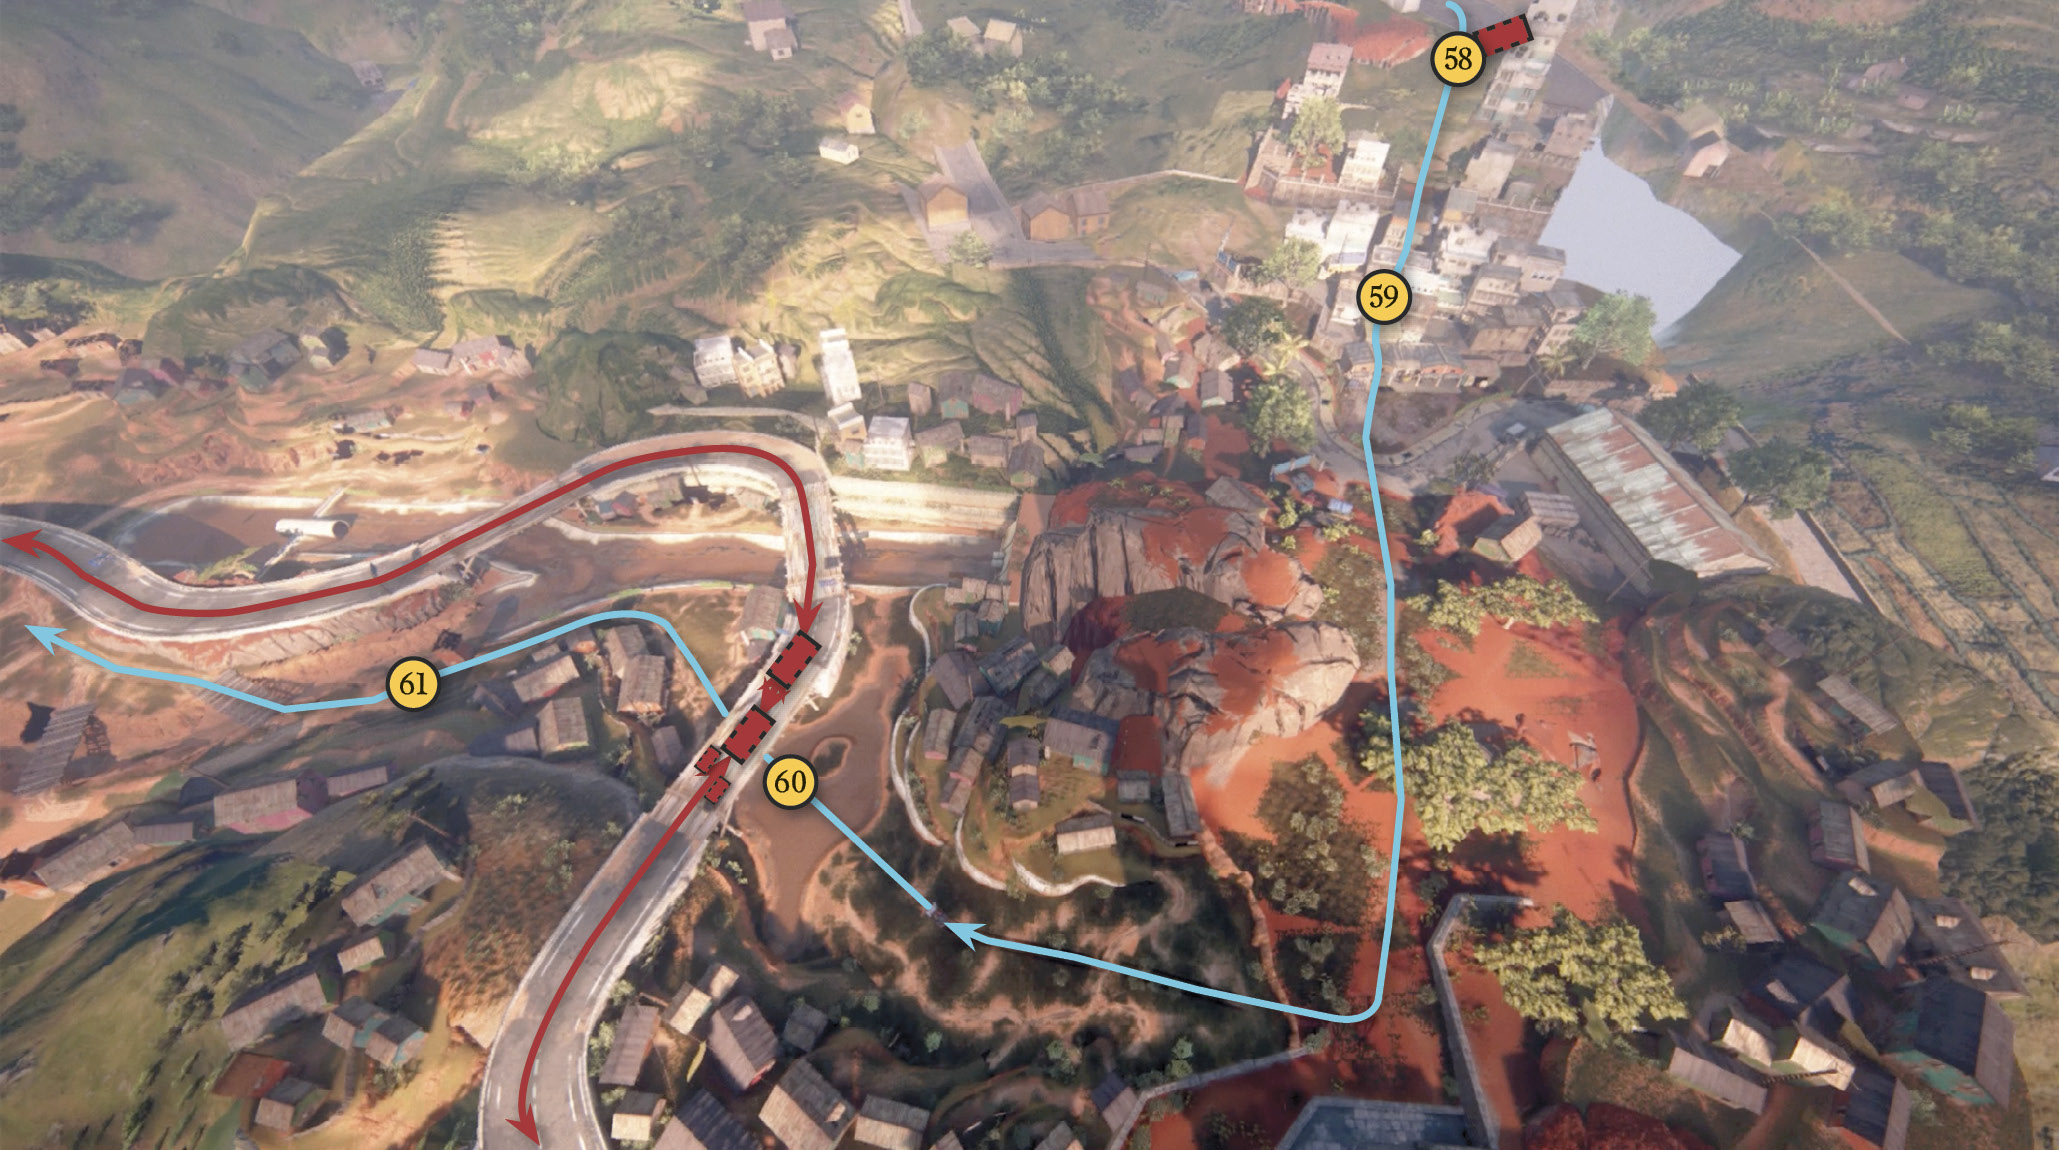
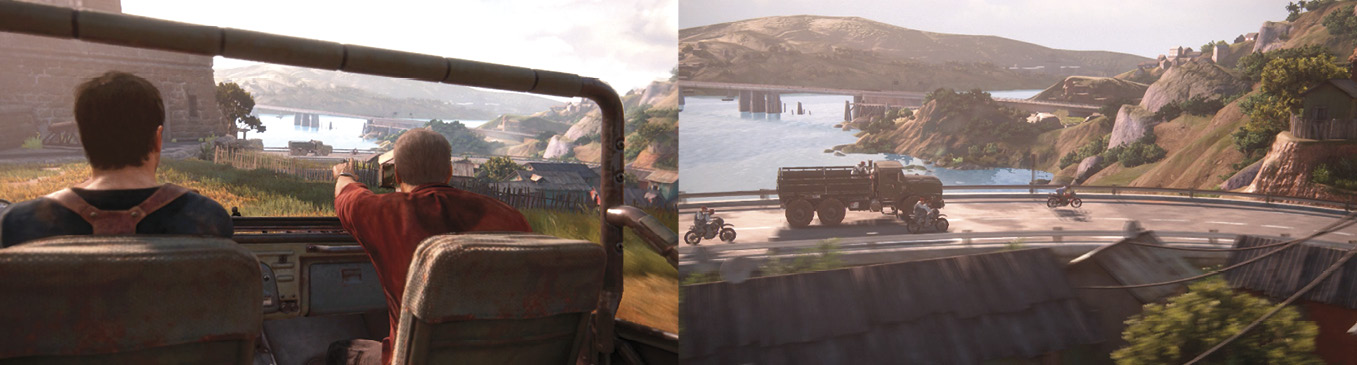
As you careen downhill, steer straight across the string of rooftops (59) until you bounce back onto the ground and see Sam’s tower ahead. Head directly toward the tower until you trigger a short scene: Sully spots Sam trying to escape from a convoy of Shoreline pursuers on a raised causeway. Nathan automatically turns the 4x4 toward the chase.
Drive under the first bridge (60). When you reach the second bridge, you can go underneath it as well to keep following the convoy, but we prefer to curve left (61) and drive along the muddy culvert on the left side of the causeway. Just before the culvert dips underneath the causeway, turn hard left past the farmhouse (62) and follow the winding road uphill. On your right, you can see the causeway enter a tunnel.
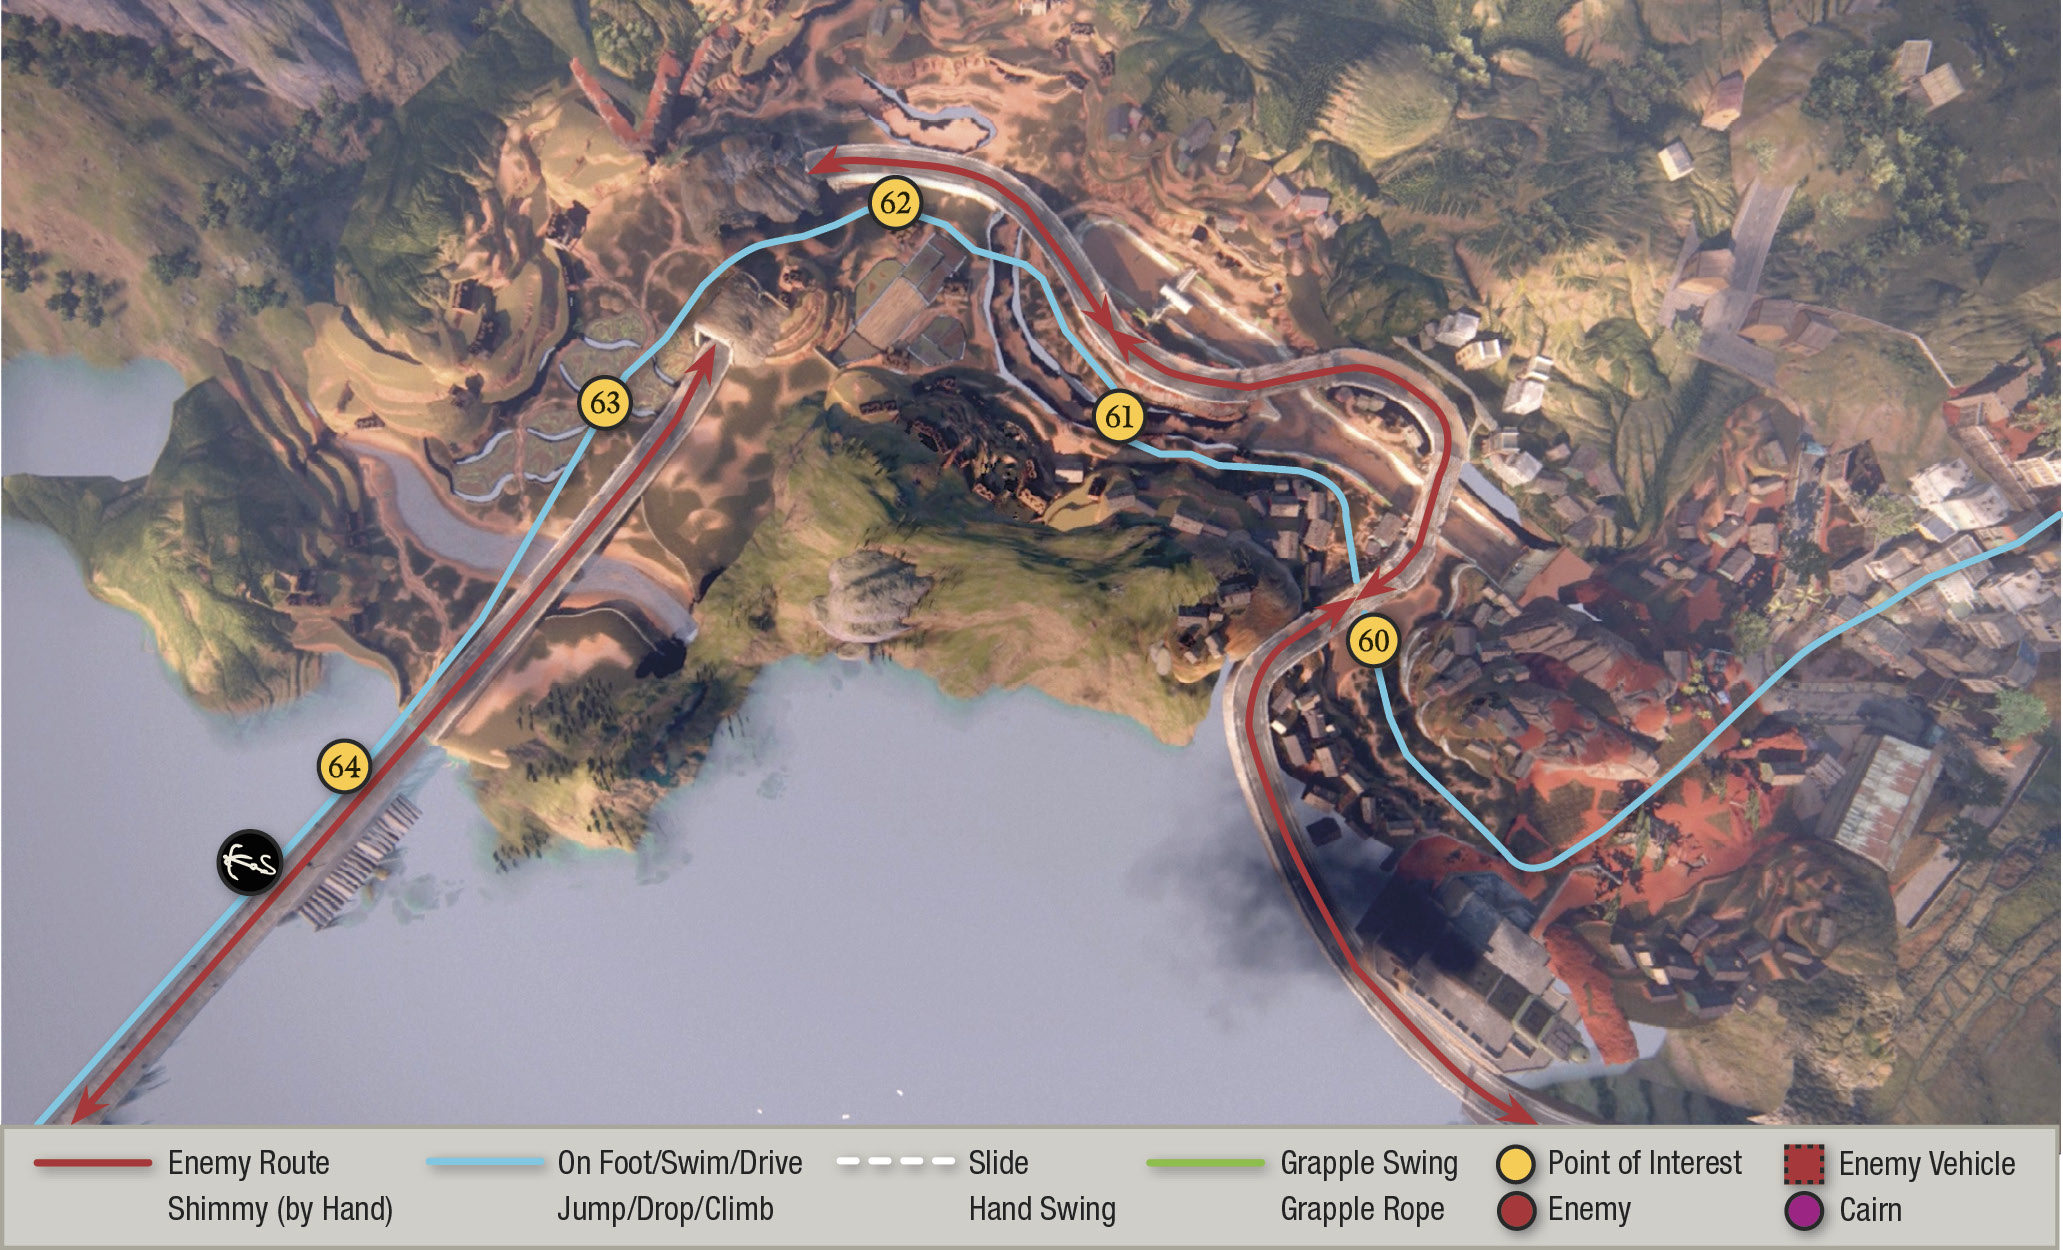
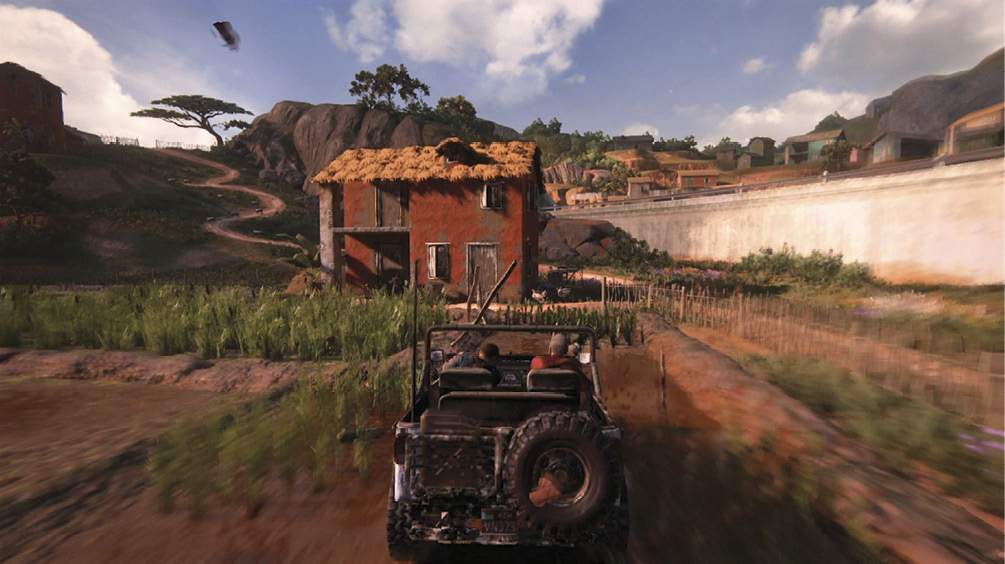
When you crest the hill, you actually cross over the top of the causeway tunnel so that when you descend the hill on the other side (63), Sam and pursuers are now above you to the left. Steer the 4x4 so that you’re traveling along beside the causeway. After you cross a small stream, you approach a wooden side ramp (64) where the causeway begins to cross a wide river.
Grapple to the Crane Truck
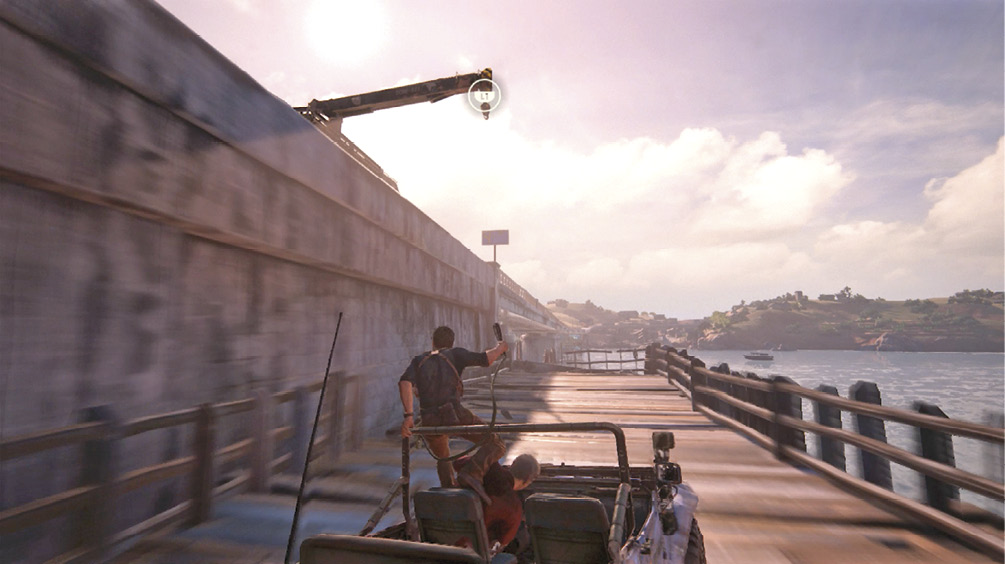
As you drive onto the wooden ramp, Nathan tells Sully to take the wheel. Look up to spot the grapple point L1 icon on the crane of the big truck chasing Sam. Toss your grapple hook before you run out of platform!
Now things get really crazy. Here’s the sequence:
- Quickly! The moment you snag the crane with your grapple hook, you reach a stack of wooden pylons sticking out of the river next to the bridge, so swing hard left or right to miss it.
- Next, you reach a rickety scaffold that you can’t avoid. When Nathan crashes through it, he slides down the rope into the water, still hanging on.
- Quickly again, press L1 and push the left stick forward to climb the rope. The reason: Ahead, a river tugboat is passing under the bridge into your path. Climb the rope high enough to clear the boat.
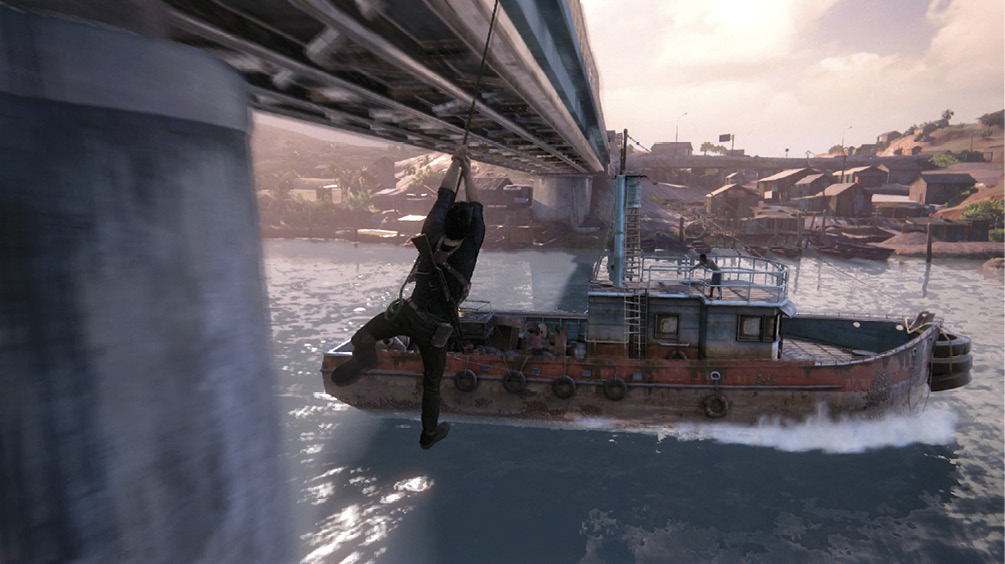
- Immediately swing hard right to avoid a second tall stack of pylons.
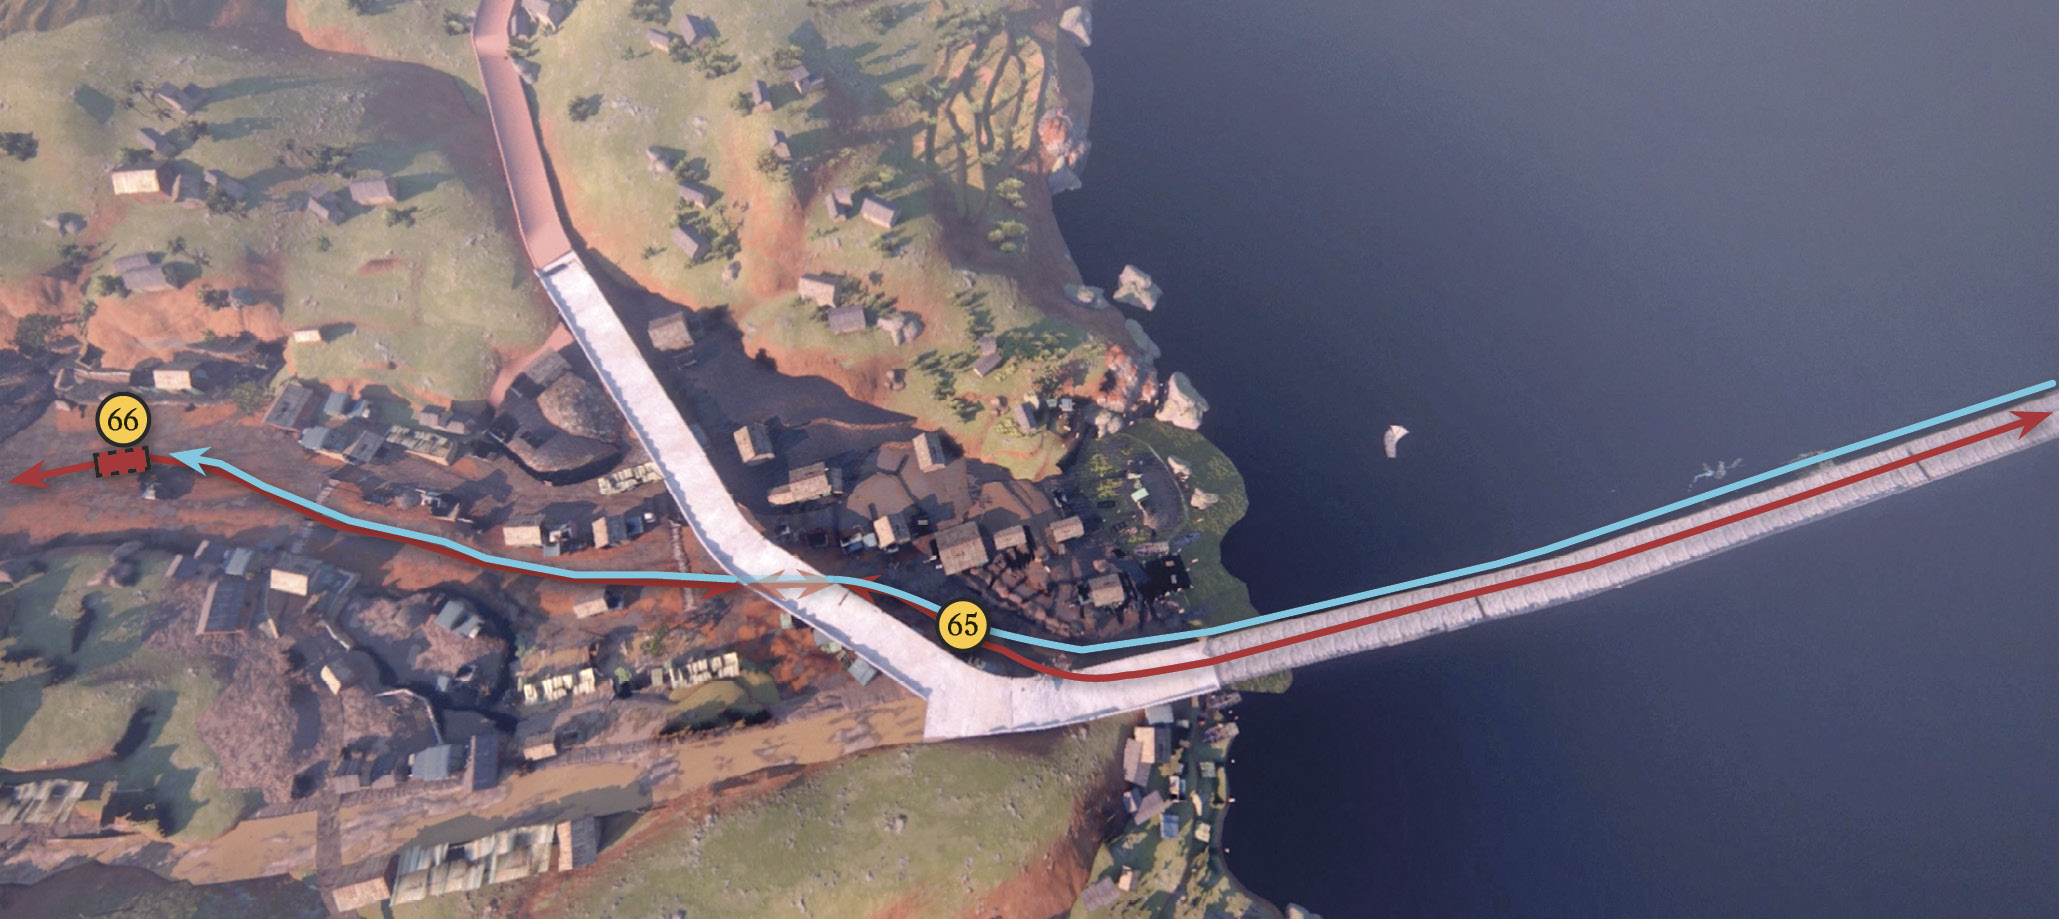
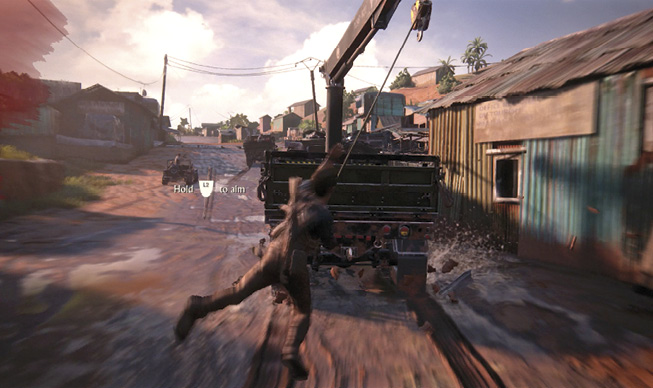
- As you reach the riverbank, Sam and the convoy suddenly veer off of the causeway down a muddy dirt road (65). Now the crane truck drags Nathan through the mud!
- Again, pull yourself up the grapple rope until you can jump into the back of the big truck (66). In the truck bed, you find weapons/ammo that may come in handy.
Jump & Fight Your Way Forward to Sam
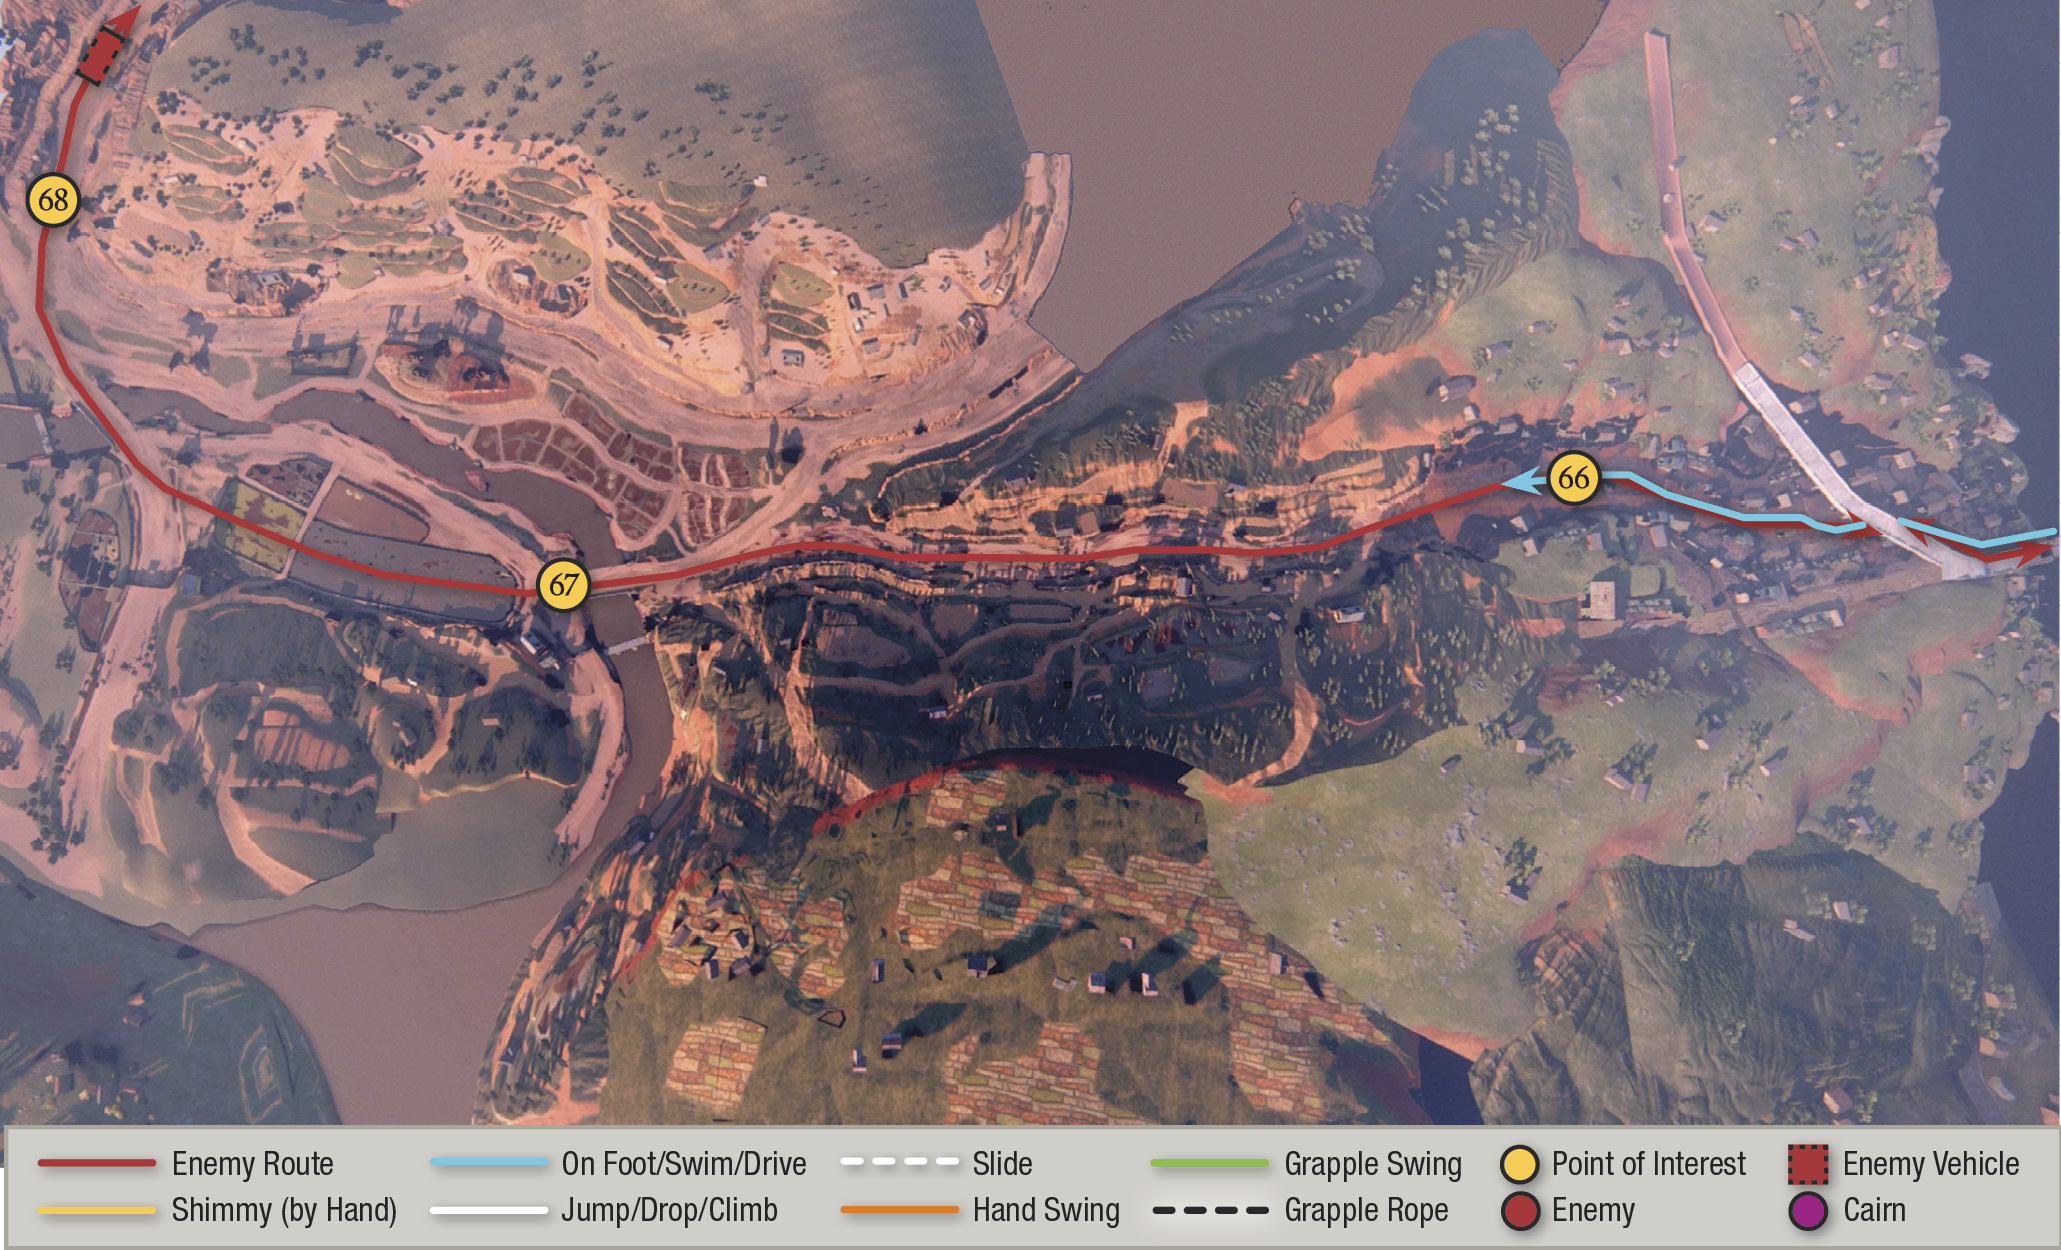
Your objective here is to jump to a series of enemy vehicles with the goal of reaching Sam at the front of the pack. This vehicle-jumping follows a specific order: from crane truck to first convoy truck to any 4x4 to second convoy truck (via grapple) to any 4x4, and then drive that second 4x4 up to Sam’s motorcycle.
Step 1: Jump to the First Convoy Truck
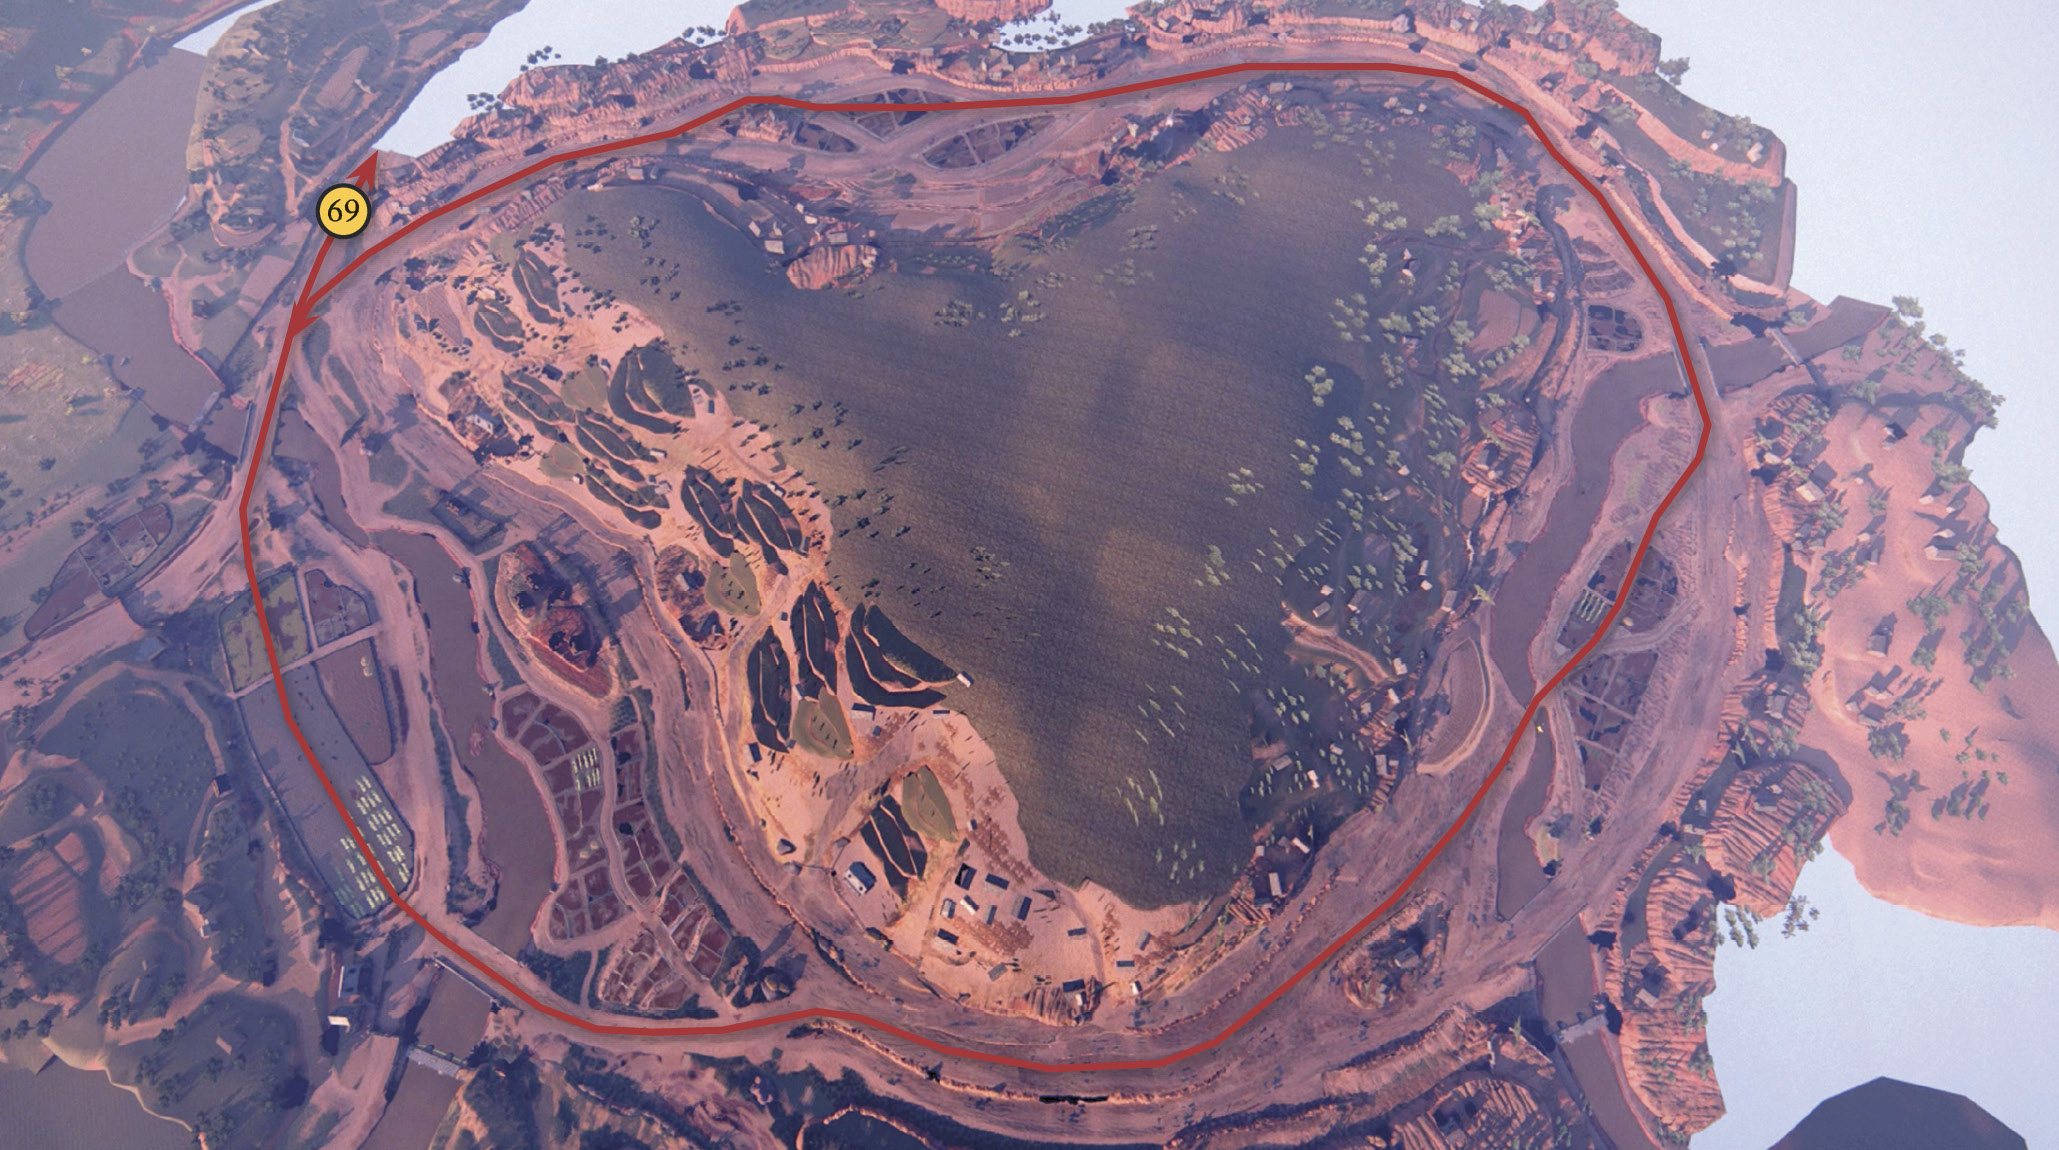
As you pass through a rice paddy and cross a bridge (67), the big crane truck pulls up very close to a smaller convoy truck just ahead of it. Meanwhile, Sam veers his motorcycle off to the right (68), and the full convoy follows. As you can see on our map, the chase now follows a circular route. You will stay on this loop until you complete Step 4.
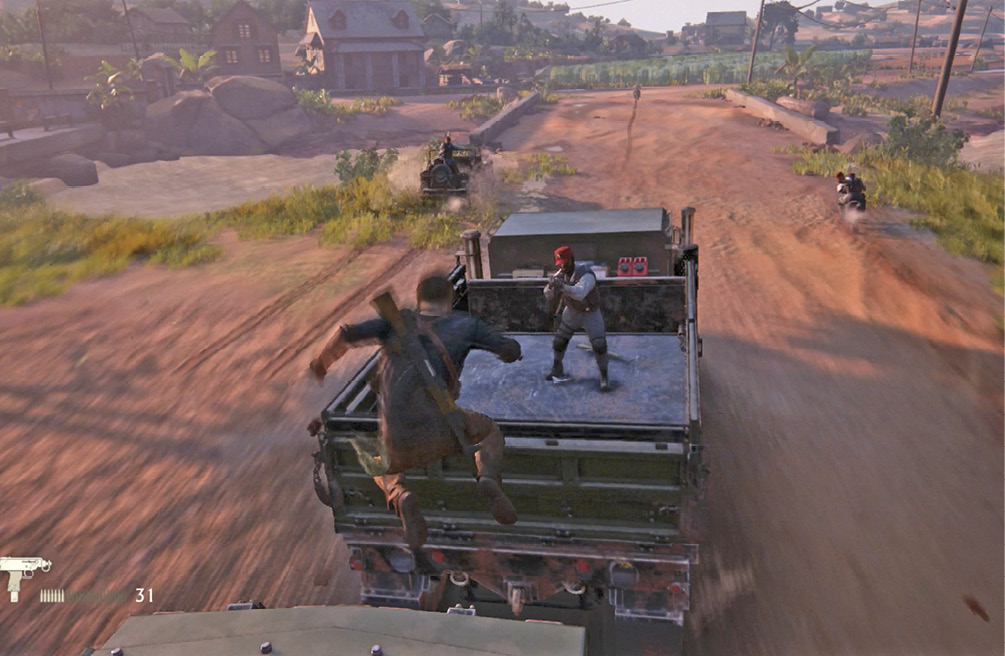
Before you jump, pick off the lone gunman in the back of the convoy truck directly ahead. Then, climb to the front of the crane truck and press to jump into the bed of the convoy truck. (If you can’t pick him off first, make your jump an attack!) There, you find more weapons/ammo. Watch out for hostile goons leaping to your truck from the backs of motorcycles or 4x4s—one hops over from the right side shortly after you crawl into the truck bed.
Step 2: Jump to the First 4x4
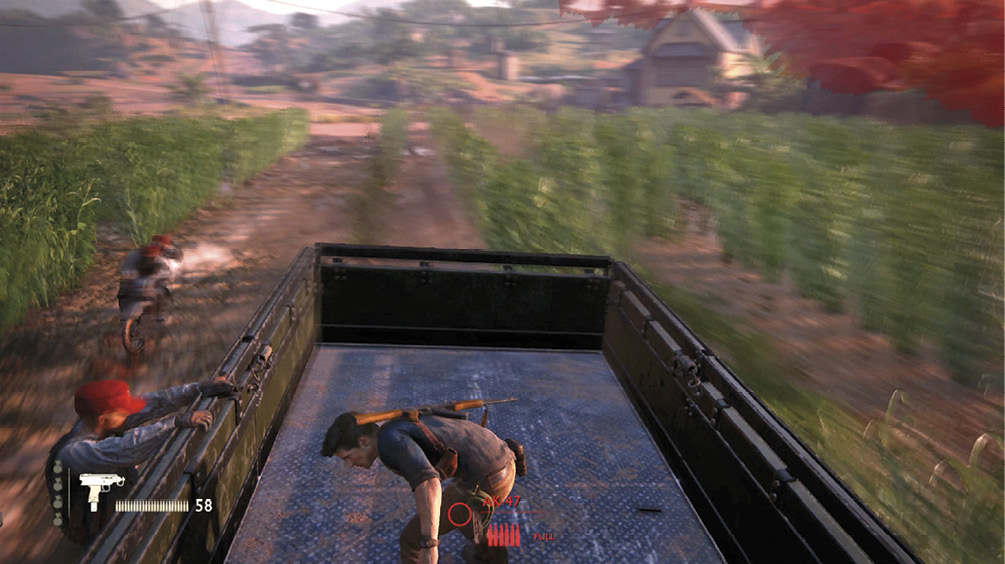
Get the truck bed secured. Then, as soon as any Shoreline 4x4 veers in close, press to jump over onto it. (The convoy truck explodes as you jump from it.) Tap  to toss out the 4x4 passenger, then tap again to knock the 4x4 driver out of his seat and take the wheel. Accelerate and chase the next convoy truck.
Step 3: Grapple to the Second Truck
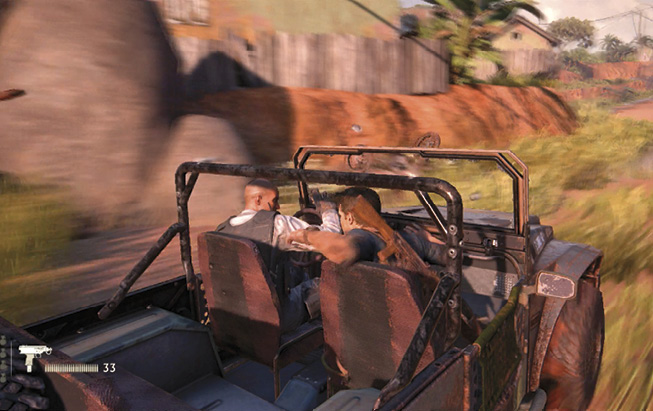
When you get close to the second convoy truck ahead, watch for the L1 grapple icon. When it appears, tap that button to snag the truck. Climb the rope to reach the truck’s back gate and grab hold. Two tough troopers ride in the bed. Shoot them or pull them over the edge or climb aboard and beat them silly.
Step 4: Jump to the Second 4x4
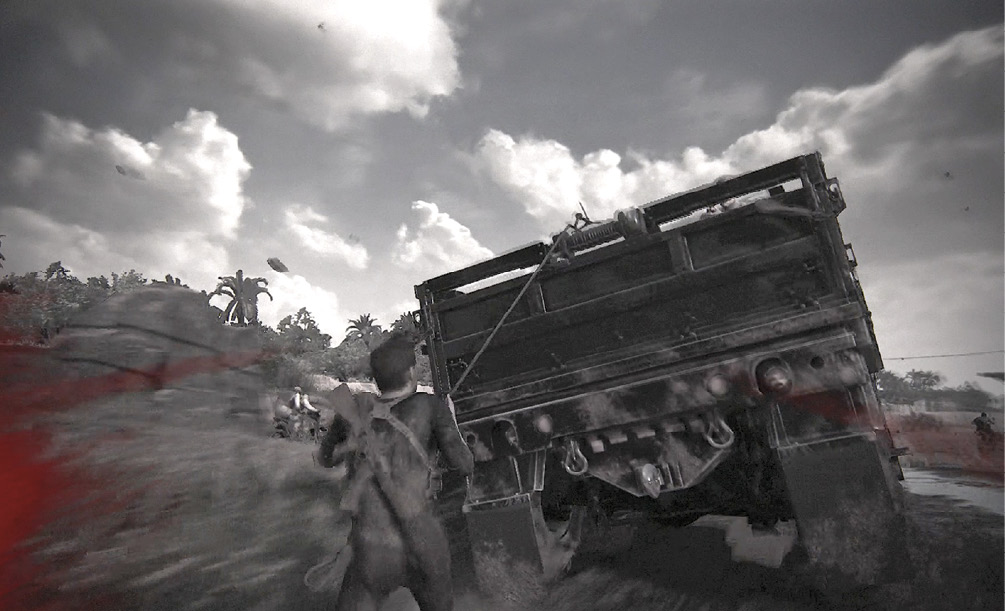
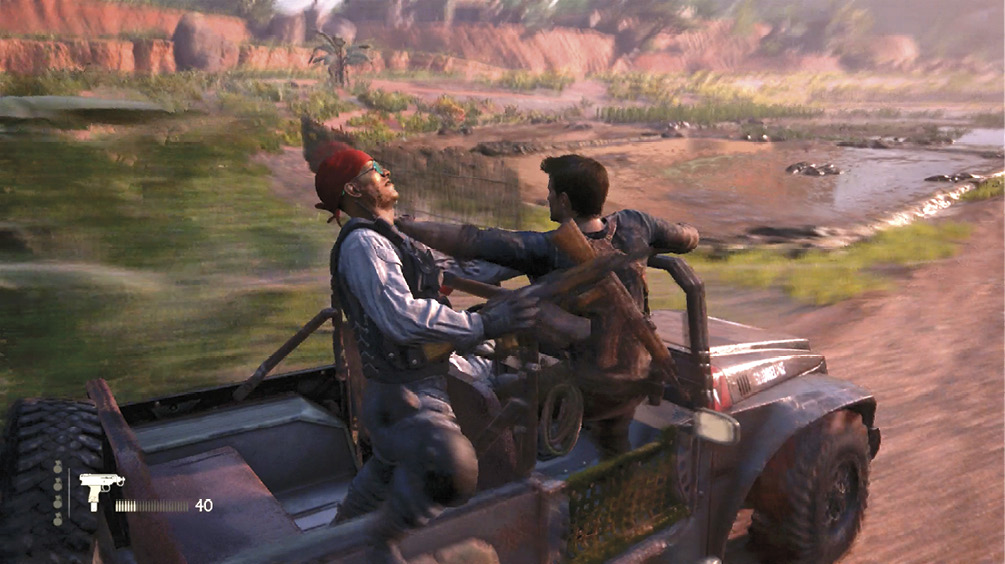
Once you’ve secured the truck bed, climb atop the cab and wait until another 4x4 veers over close to the truck. Jump to that 4x4, tap to throw out the passenger, and then tap again to knock out the driver; Nathan takes the wheel. The moment this happens, the chase automatically exits the loop and jumps to a new stretch of road (69).
Step 5: Catch Sam!
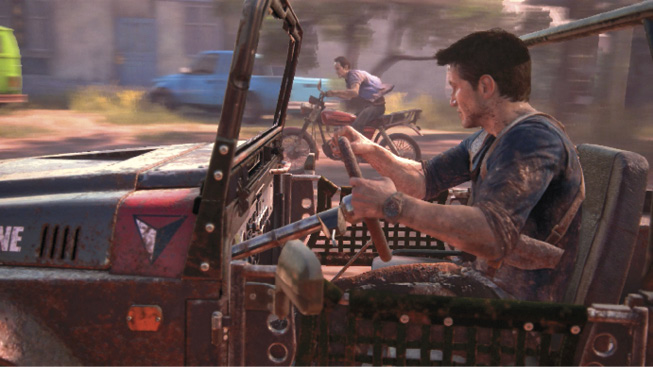
Your final task is to simply stay alive while keeping close to Sam. A buzzing swarm of Shoreline motorcycles makes the task difficult. Ram the enemy bikes if the opportunity presents itself, but stay focused on tracking Sam. Be ready: Passengers on the enemy bikes may jump to your 4x4. If that happens, focus on driving while tapping to knock the interloper off your vehicle. Note that you don’t need to eliminate any of Shoreline bikes to advance. Just stay close to Sam!
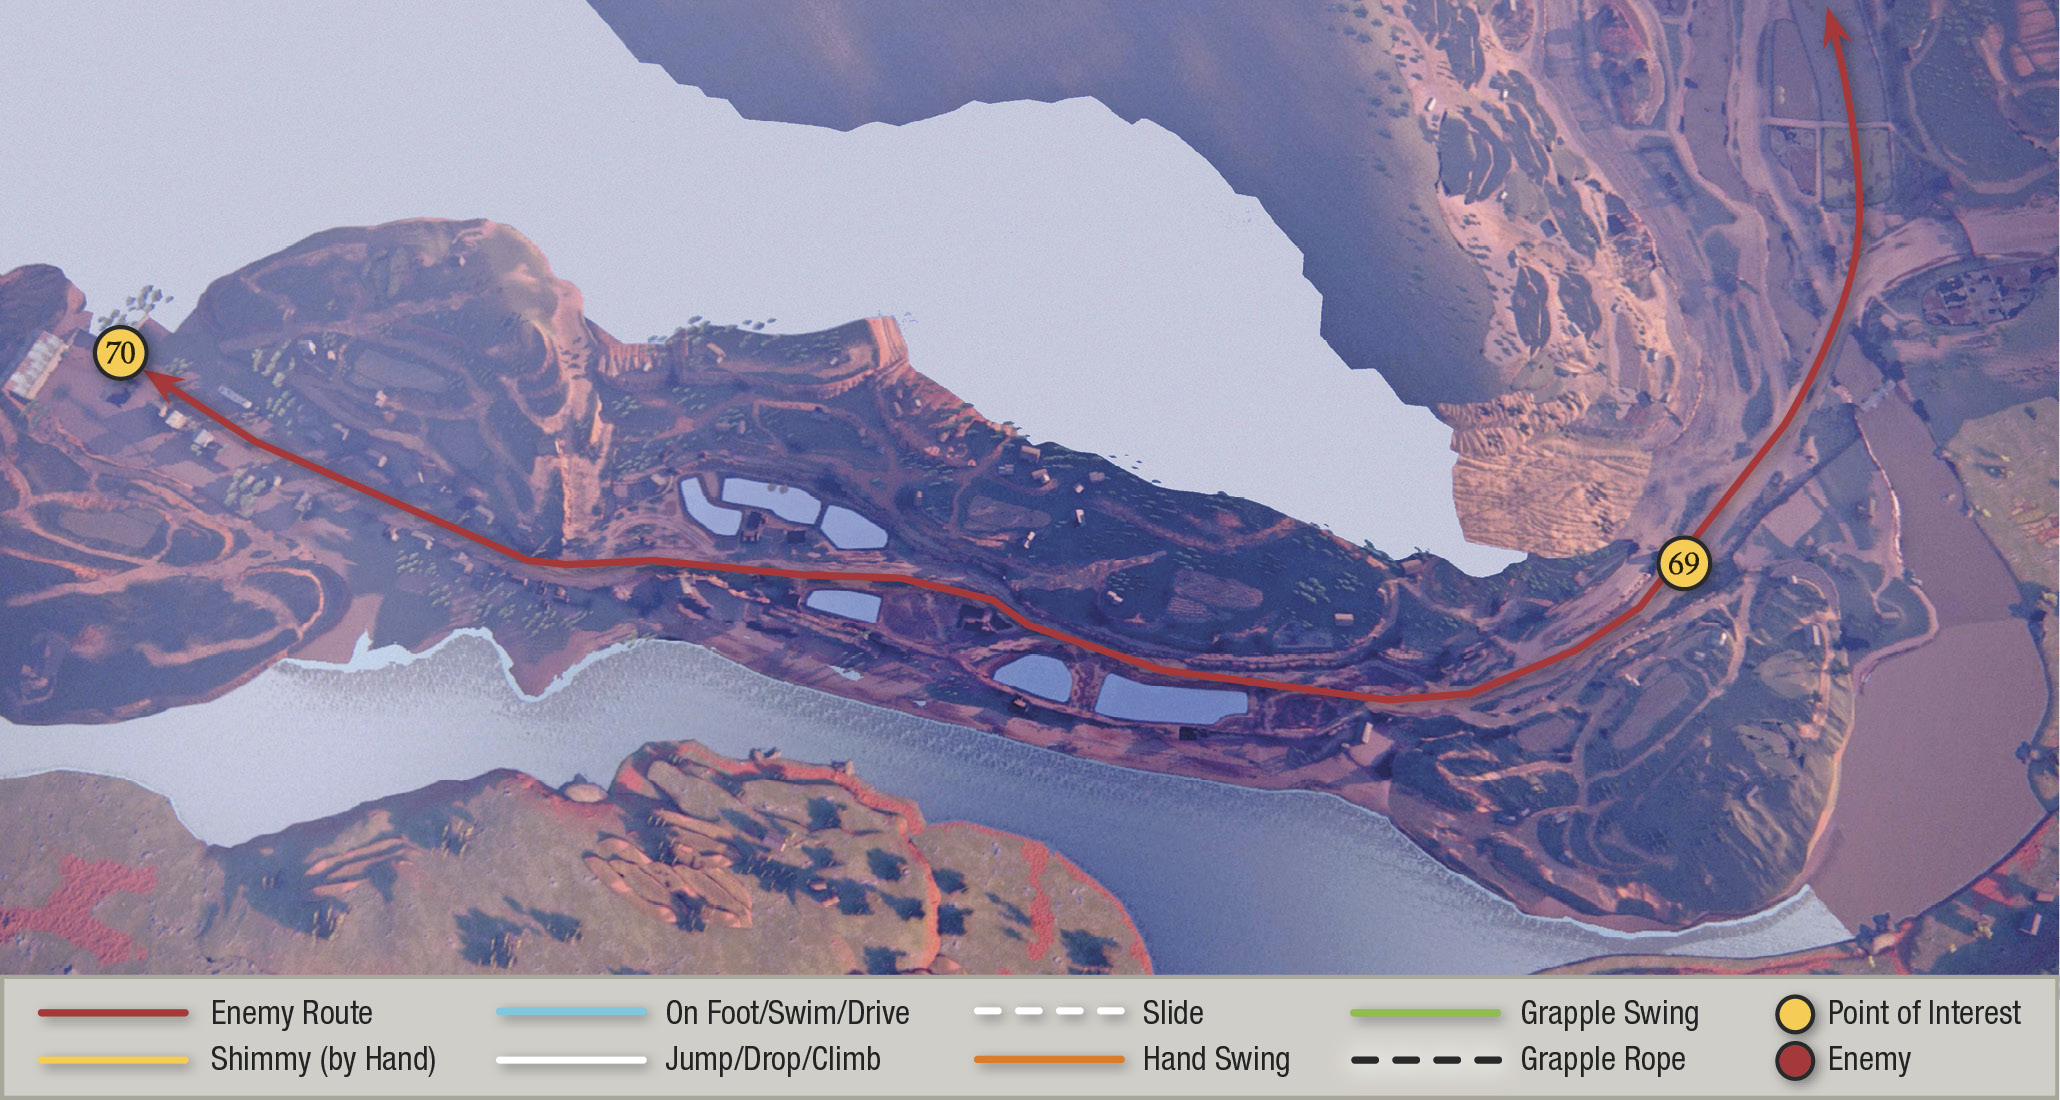
When you get past the paddies and the road narrows between rows of houses (70), a cutscene triggers: Sam tries to get his brother aboard the bike, but suddenly Nathan’s 4x4 takes a furious broadside slam from the same Shoreline turret truck that made your life so miserable back in the city.
Step 6: Get Out of the Wreck!
Nathan ends up trapped underneath the overturned 4x4, pinned to the ground by the driver’s seat as flames start to spread. Complete these tasks quickly to escape alive:
- First, repeatedly tap when that icon appears onscreen. When the green meter around the icon fills up, Nathan pushes up the seat. Hurry! The flames are spreading.
- Push the left stick forward to painfully crawl toward the passenger
- door. Nathan scoots slowly past the steering wheel and reaches his right hand upward.
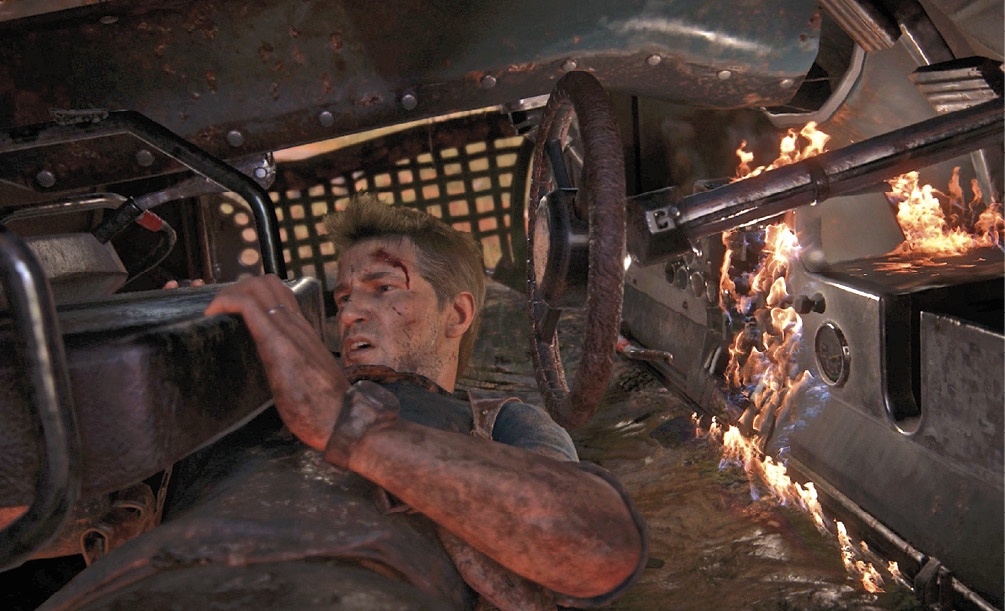
- Push the left stick leftward until Nathan grabs the left handle and pulls himself closer to the door. Now he reaches out his other hand.
- Push the left stick rightward until Nathan grabs the handle on the dashboard and drags himself to the door. Now he pulls out his handgun and the icon appears. Get ready! Two Shoreline goons are waiting outside the 4x4.
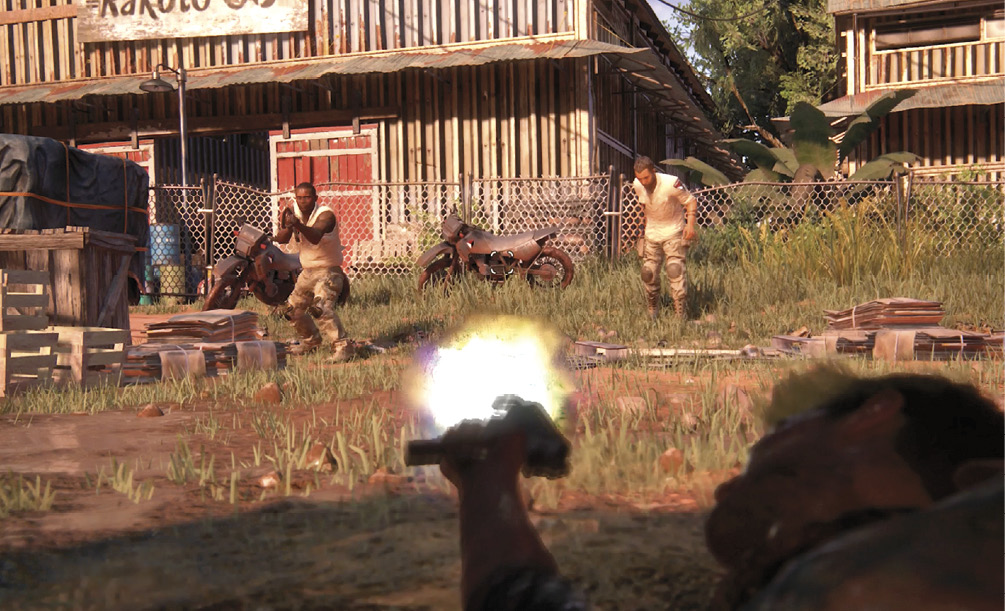
- Press to push the 4x4 door open. Immediately aim and shoot the two goons before they shoot you. Taking them out triggers a quick scene: Sam swoops in to pick up Nathan just as a hated, unrelenting nemesis reappears.
Step 7: Escape the Turret Truck
Yes, it’s Mister Turret Truck again, and now he’s really angry. Sam hands Nathan an automatic pistol. Your final task is to blast the seemingly invincible truck. Sam does the driving, so all you do is aim and shoot. You must inflict damage on the truck or else it will ram your bike and terminate the Drake boys.
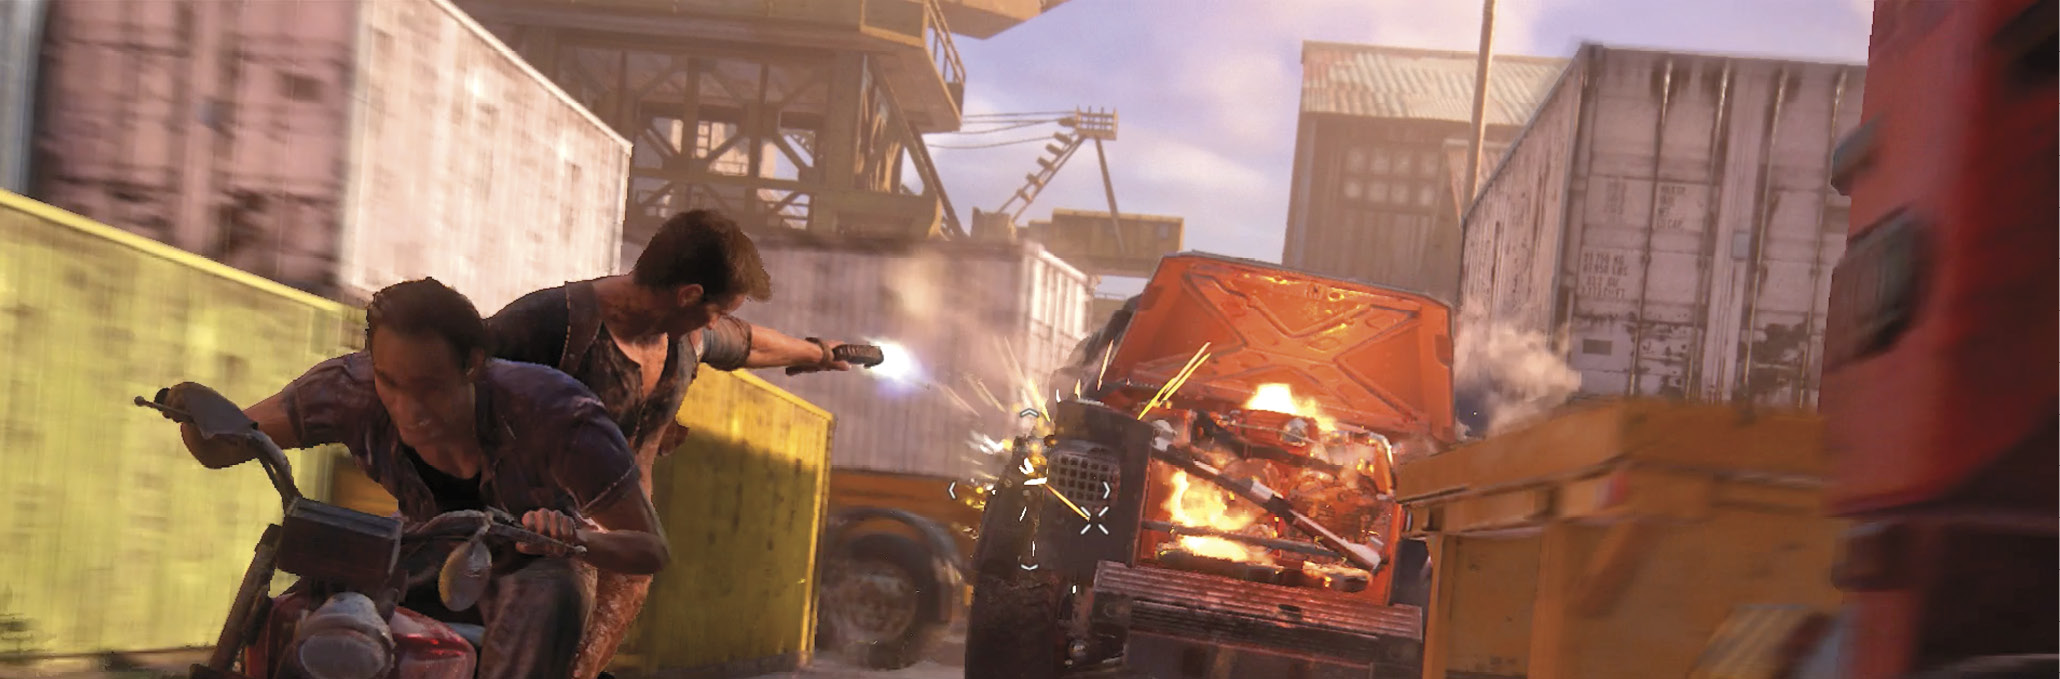
When the Shoreline turret truck finally dies in spectacular fashion, the fellas return to the Ikopa Motel (Budget Rates!) and formulate a new plan of action. Libertalia, the legendary pirate colony, is out there waiting, just northeast of King’s Bay. But a surprise visitor tosses a huge monkey wrench into the proceedings.