Uncharted 4: A Thief's End Guide Story Walkthrough
Chapter 2: Infernal Place
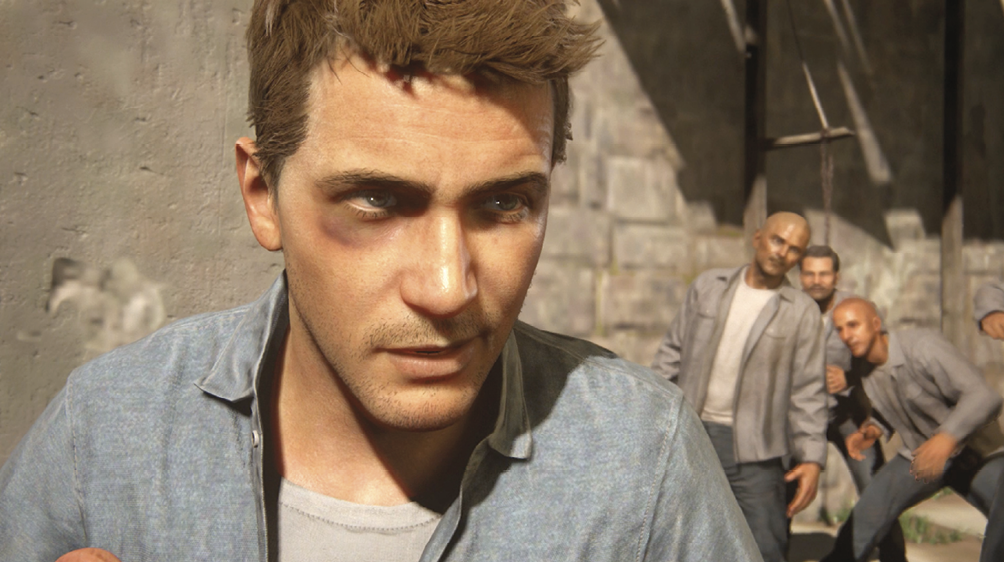
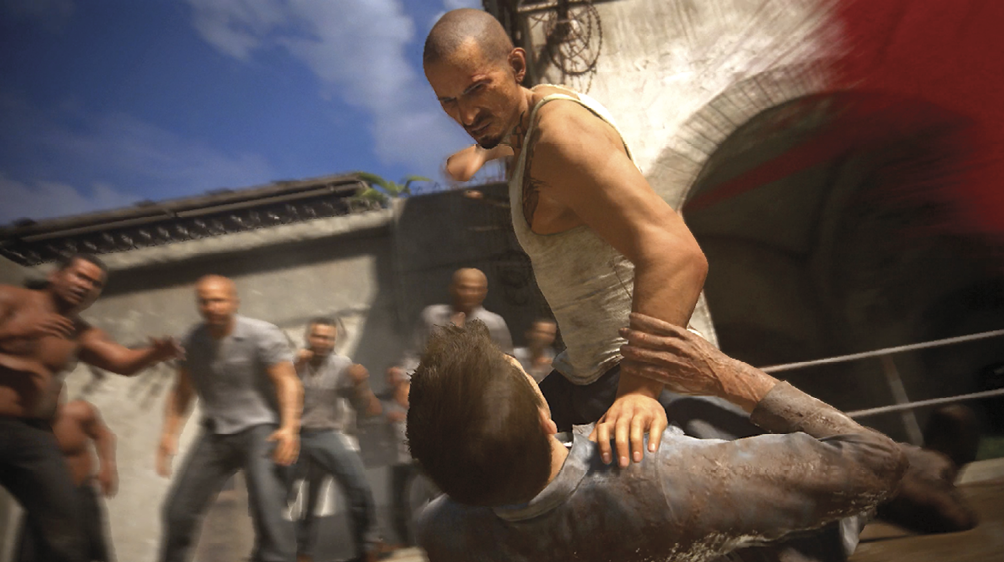
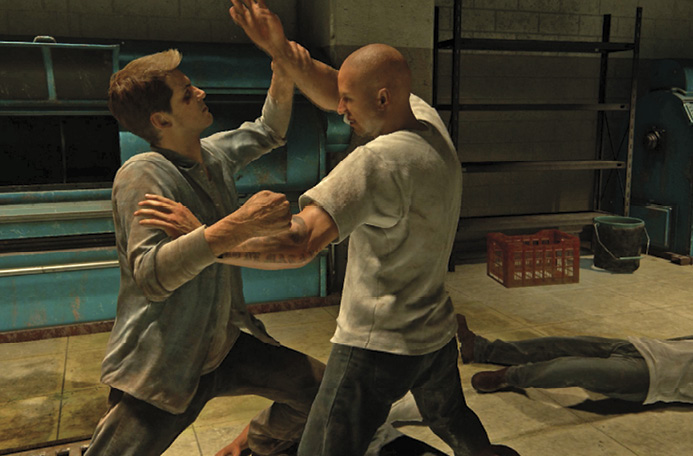
The story hops ahead more than a decade to a nasty prison yard brawl in one of Panama’s notorious hellholes. Nathan Drake, now a young man, exchanges blows with a fellow inmate. The opening sequence teaches you the basics of melee fighting.
CollectiblesTreasures: 2 Chapter Specific Trophy: “First Treasure” |
Fight!
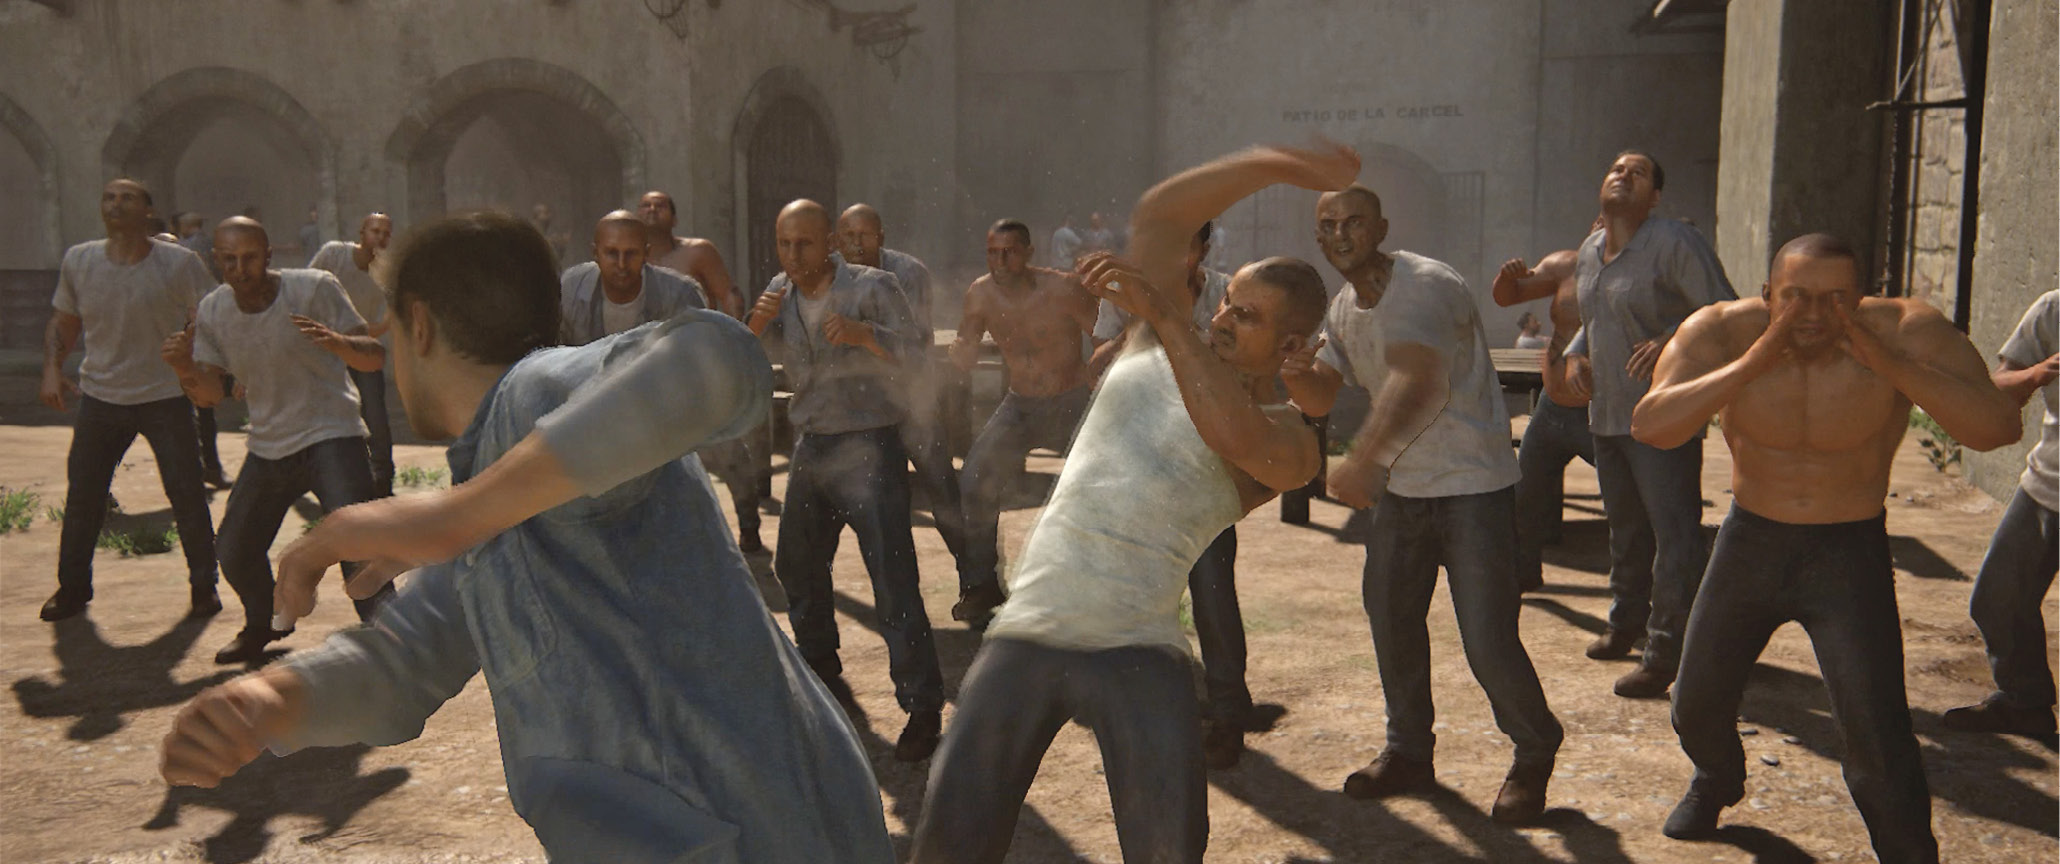
When control returns, approach Nathan’s opponent and start pressing  to throw punches at him. If the two combatants get into a clinch (called a “struggle”), just press the
  button once to escape. But if an ally of Nathan’s foe suddenly gets you in a chokehold from behind, break free by rapidly tapping until the meter circling the button icon fills with green.
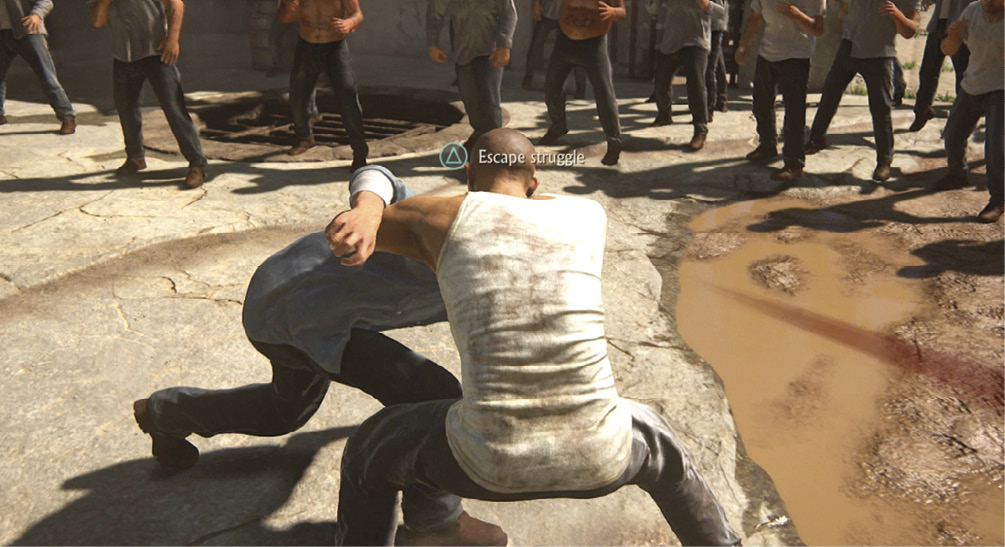
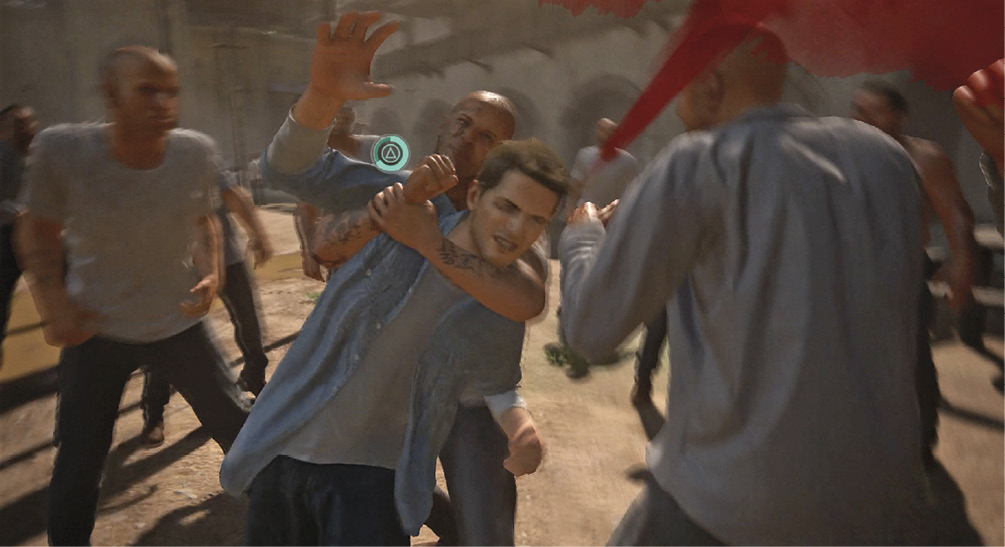
The fisticuffs finally end when the guard captain, Vargas, sends in his men. Nathan gets tossed into a dark isolation cell. Later, Vargas rousts Nathan, handcuffs him, and marches him through the cellblock.
Go to the Old Prison
The Panamanian facility features a newer penal complex adjacent to ruins of a centuries-old Spanish prison built on the seaside cliffs. You start in the solitary confinement wing of the new prison. When control returns, start walking. Follow Vargas along the corridor to the staircase. Climb upstairs and continue along the walkway until you emerge into the outdoor exercise yard.
Just keep following Vargas. Turn into the first doorway; it leads into the old prison. Follow the corridor past a prison guard’s gruesome baton attack on another inmate. Here, if you stop anywhere, Vargas shoves you roughly forward. Turn left down the next hall where Vargas opens a heavy wooden door. Descend the stairway to a drainage tunnel. Turn left then right to approach a heavily barred door that Vargas opens for you.
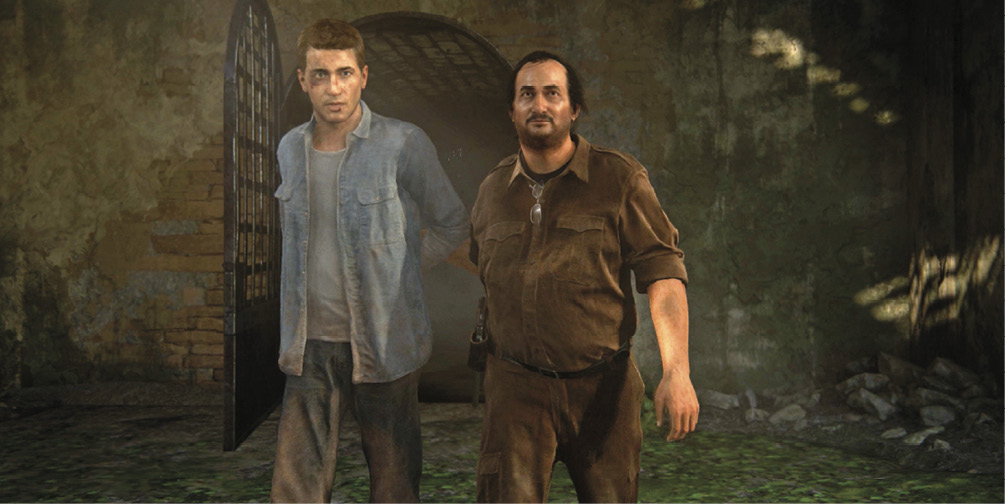
Vargas pushes Nathan out into an open area and a cutscene plays: You discover how Nathan came to be incarcerated in this “infernal place.” You also hear of Henry Avery, the legendary pirate captain said to have pulled off the biggest heist in history: the plunder of the Gunsway, an enormous treasure-laden vessel, flagship of the Grand Mughal, as it sailed from India to Mecca. Nathan is tracking down the treasure. And now Vargas wants a piece of the action.
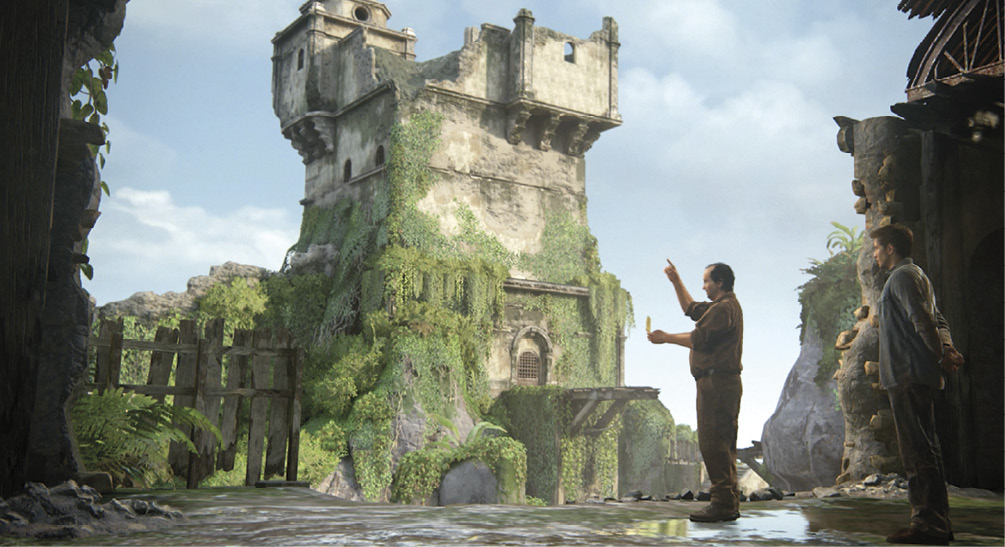
Get Across the Canyon
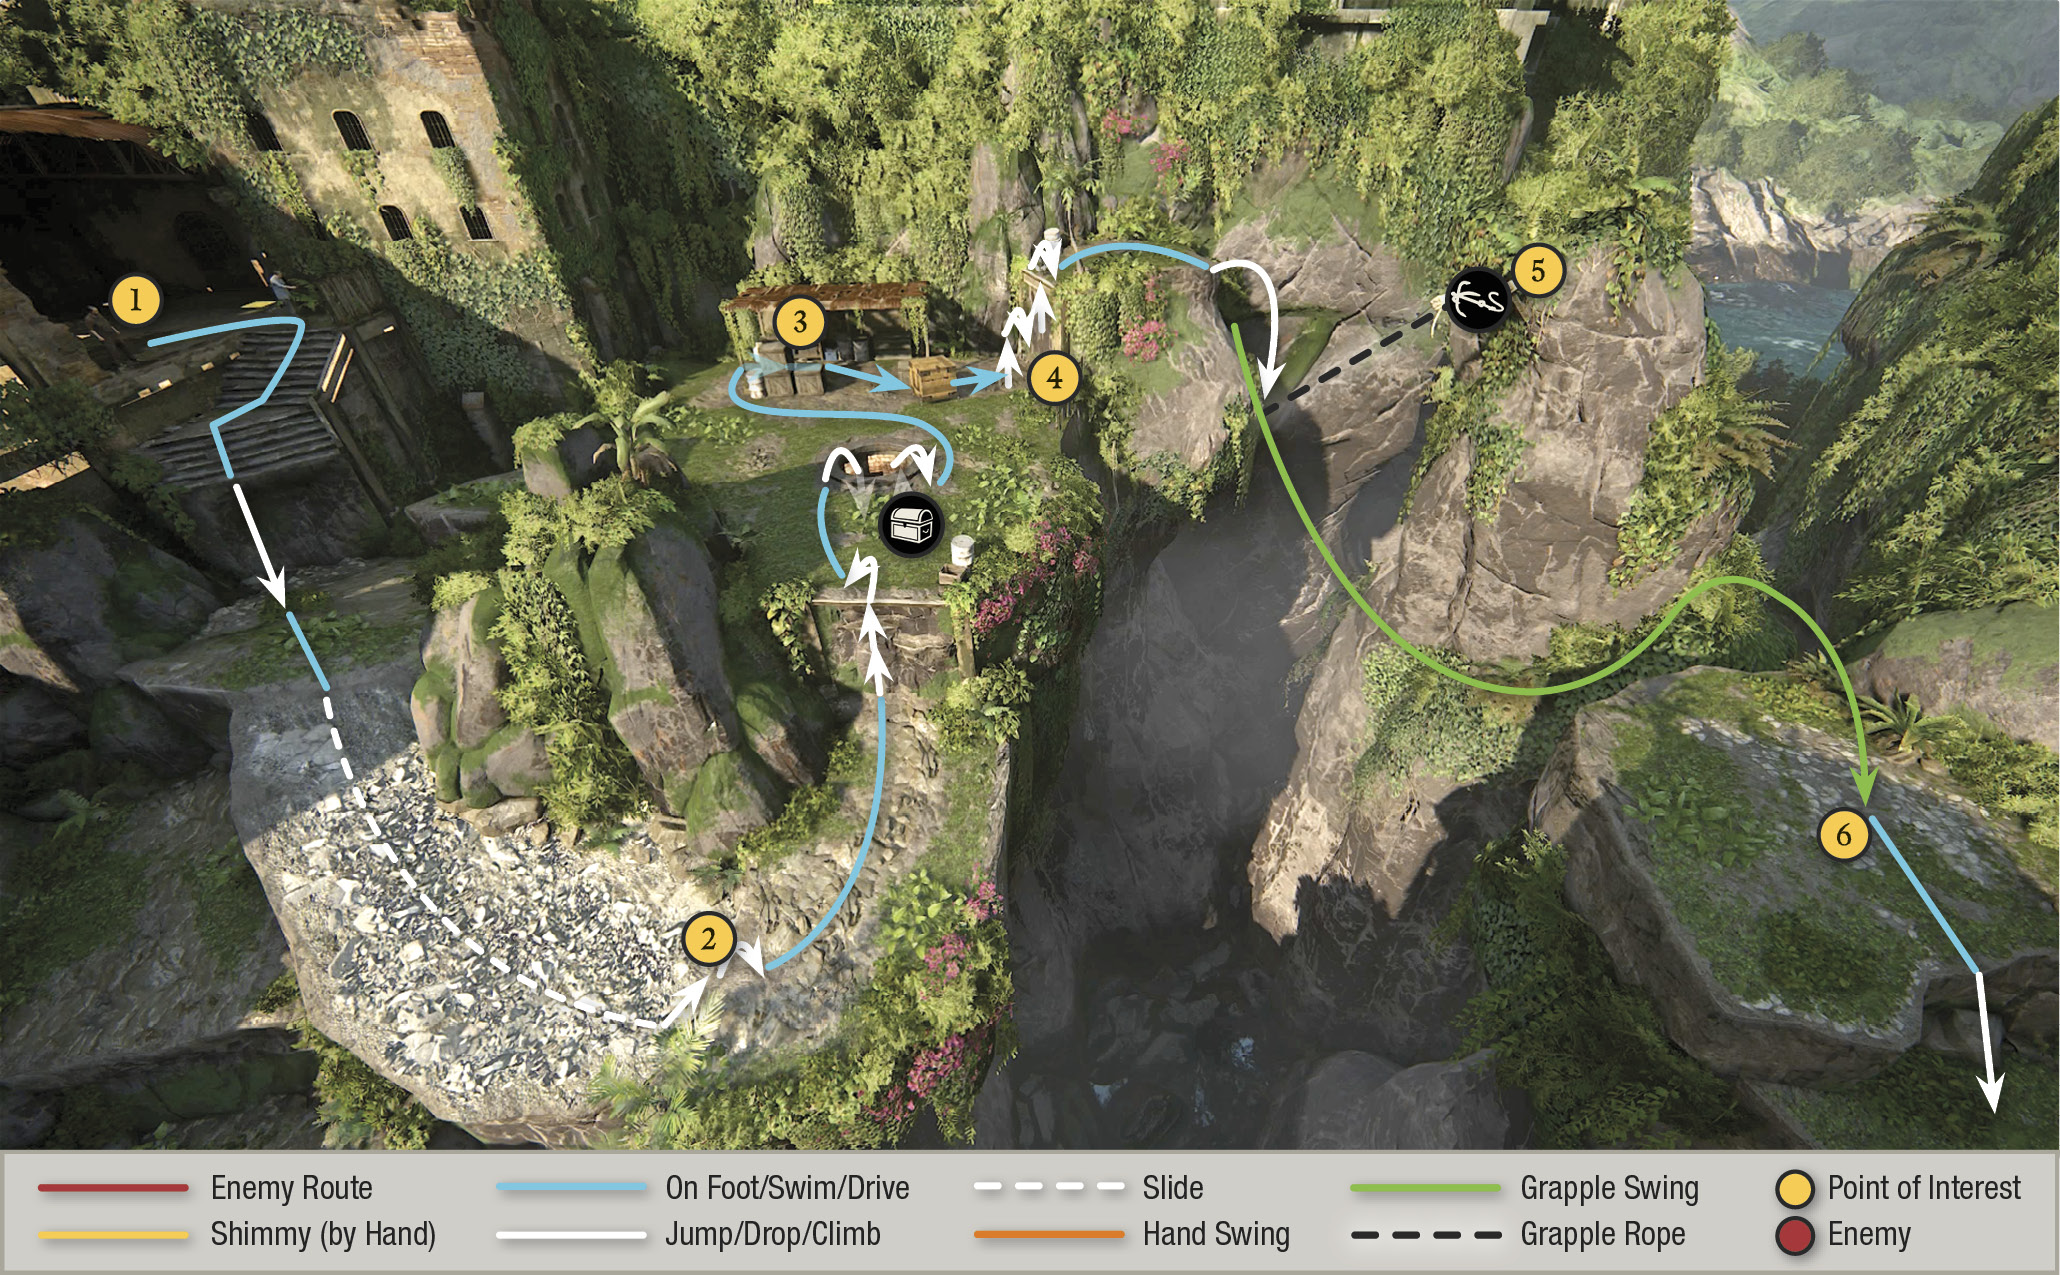
Your main objective is to reach the prison cell at the top of the old crumbling tower across the canyon. (Note that Nathan asks, “Did you bring what I asked?” Vargas points down at the next terrace and replies that he hid it under the worktable by the crates.)
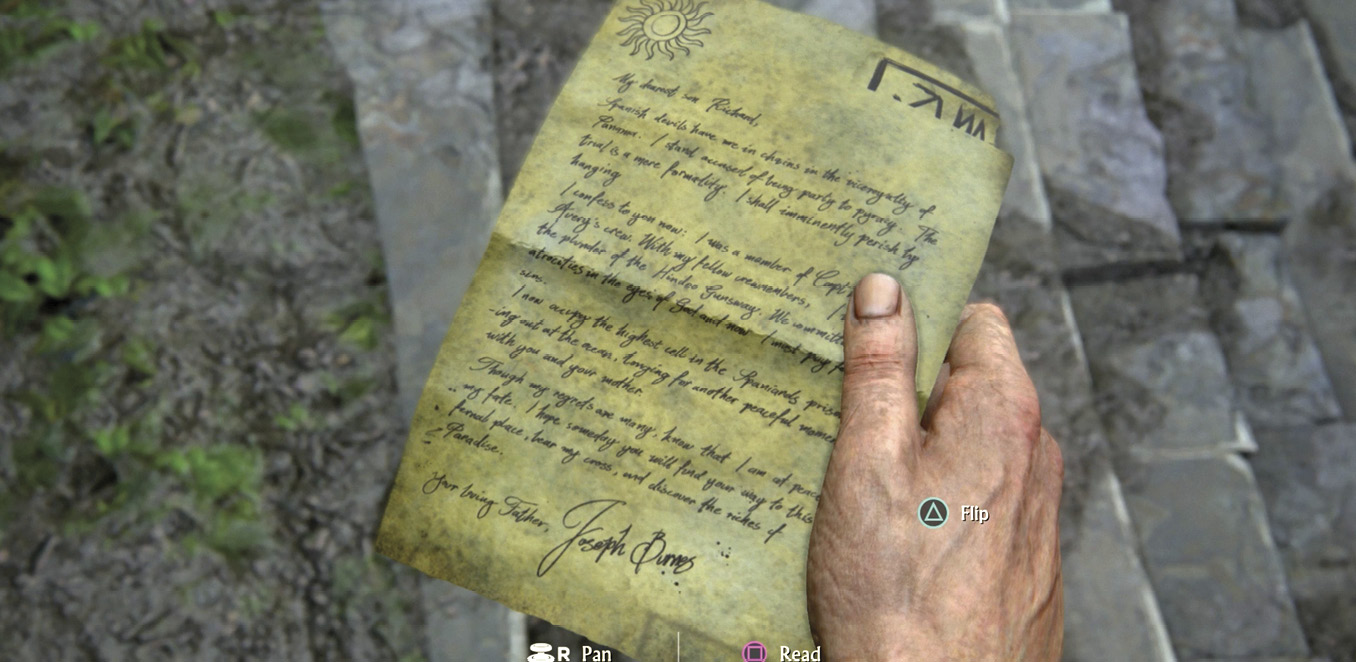
When control returns, press the PS4 touchpad to take a look at the old letter from Joseph Burnes to his son Richard. Note the odd diagrammatic drawings at the top.
From your starting point (1), head down the steps and hop off the bottom of the staircase. Follow the path to the rockslide and slide down (2), jumping just as you reach the wall at the bottom to climb up. Proceed to the next wall and climb it to reach a courtyard with a dry well and an old work shelter. Look for your first treasure down in the well. (See the “Treasure: Panamanian Cat Pendant” sidebar.)

Panamanian Cat Pendant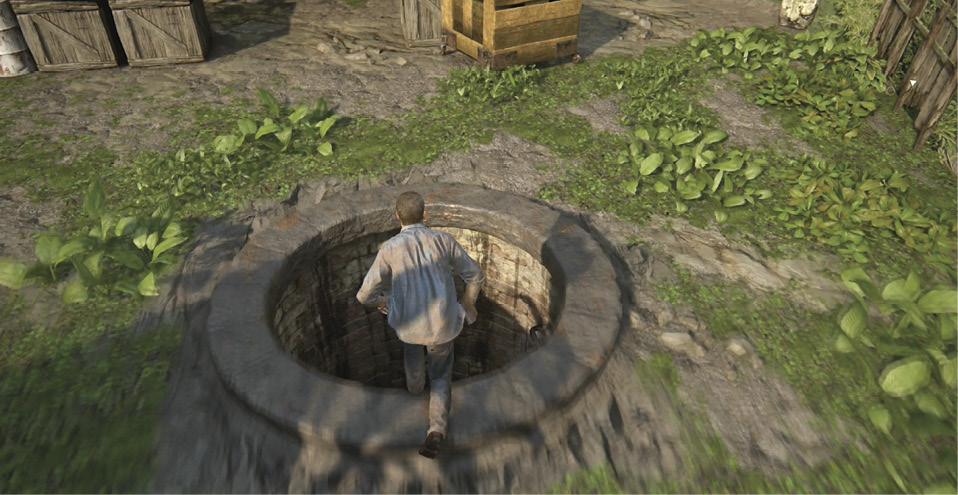
When you reach the terrace where you find the grapple hook, drop into the old well. Then move down the short tunnel to find your first glowing treasure, a Panamanian Cat Pendant. |
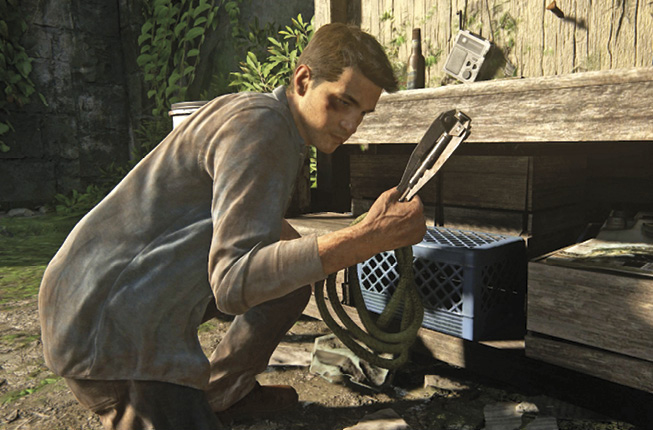
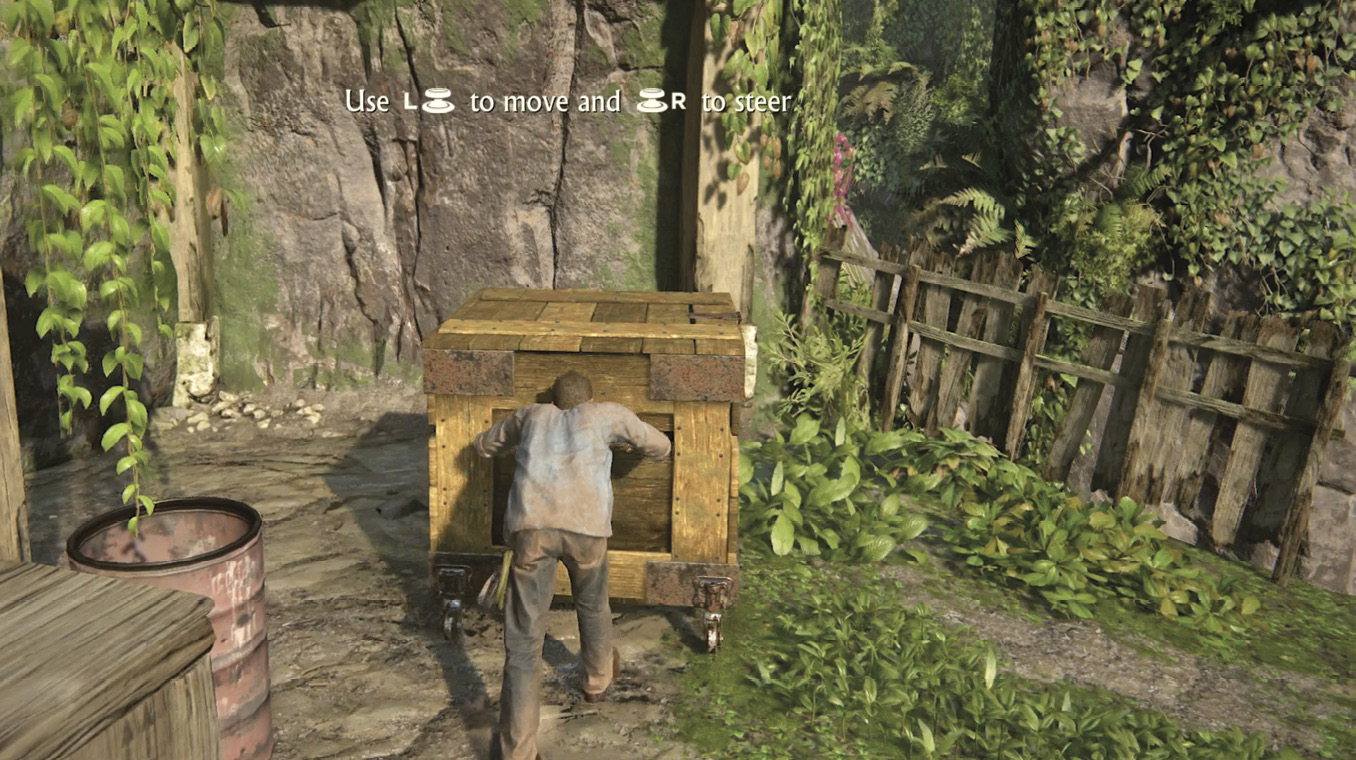
Go into the shelter and grab the grapple hook and rope sitting on the lower shelf of the worktable (3). Approach the nearby rolling tool cart, press to grab it, and then push the cart over to the rock wall (4) to the right of the shelter. Press  to let go.
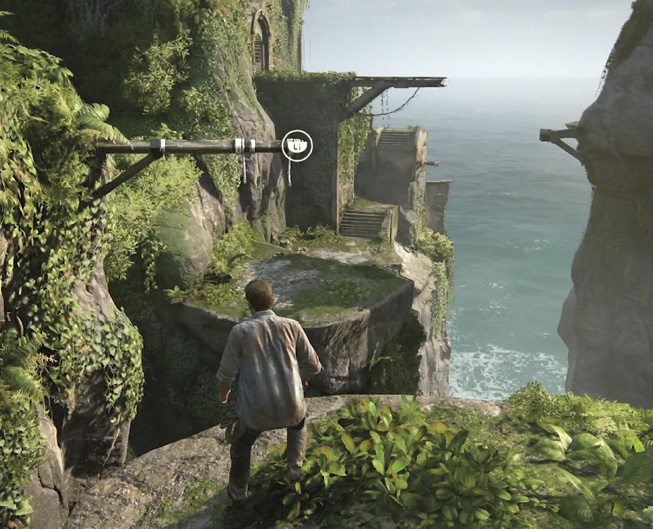
Clamber atop the cart and climb to the small ledge above. Face the wooden strut (5) wrapped with rope that juts from the nearby rock pillar. Press L1 to toss your new grapple hook to snag the strut. Then swing across the gap and jump to the far ledge (6).
Climb the Old Prison Tower
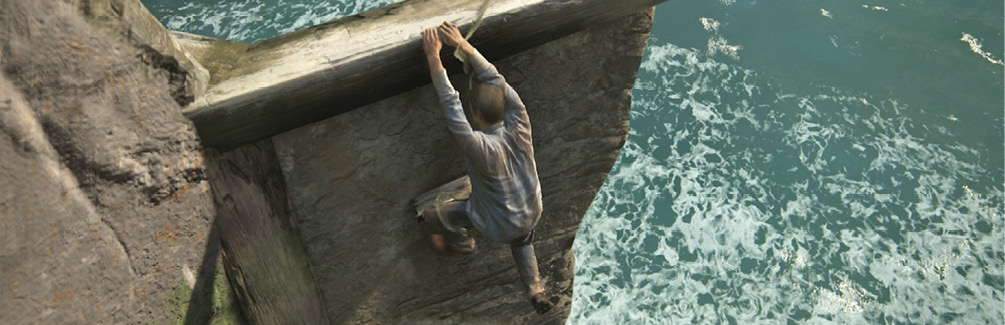
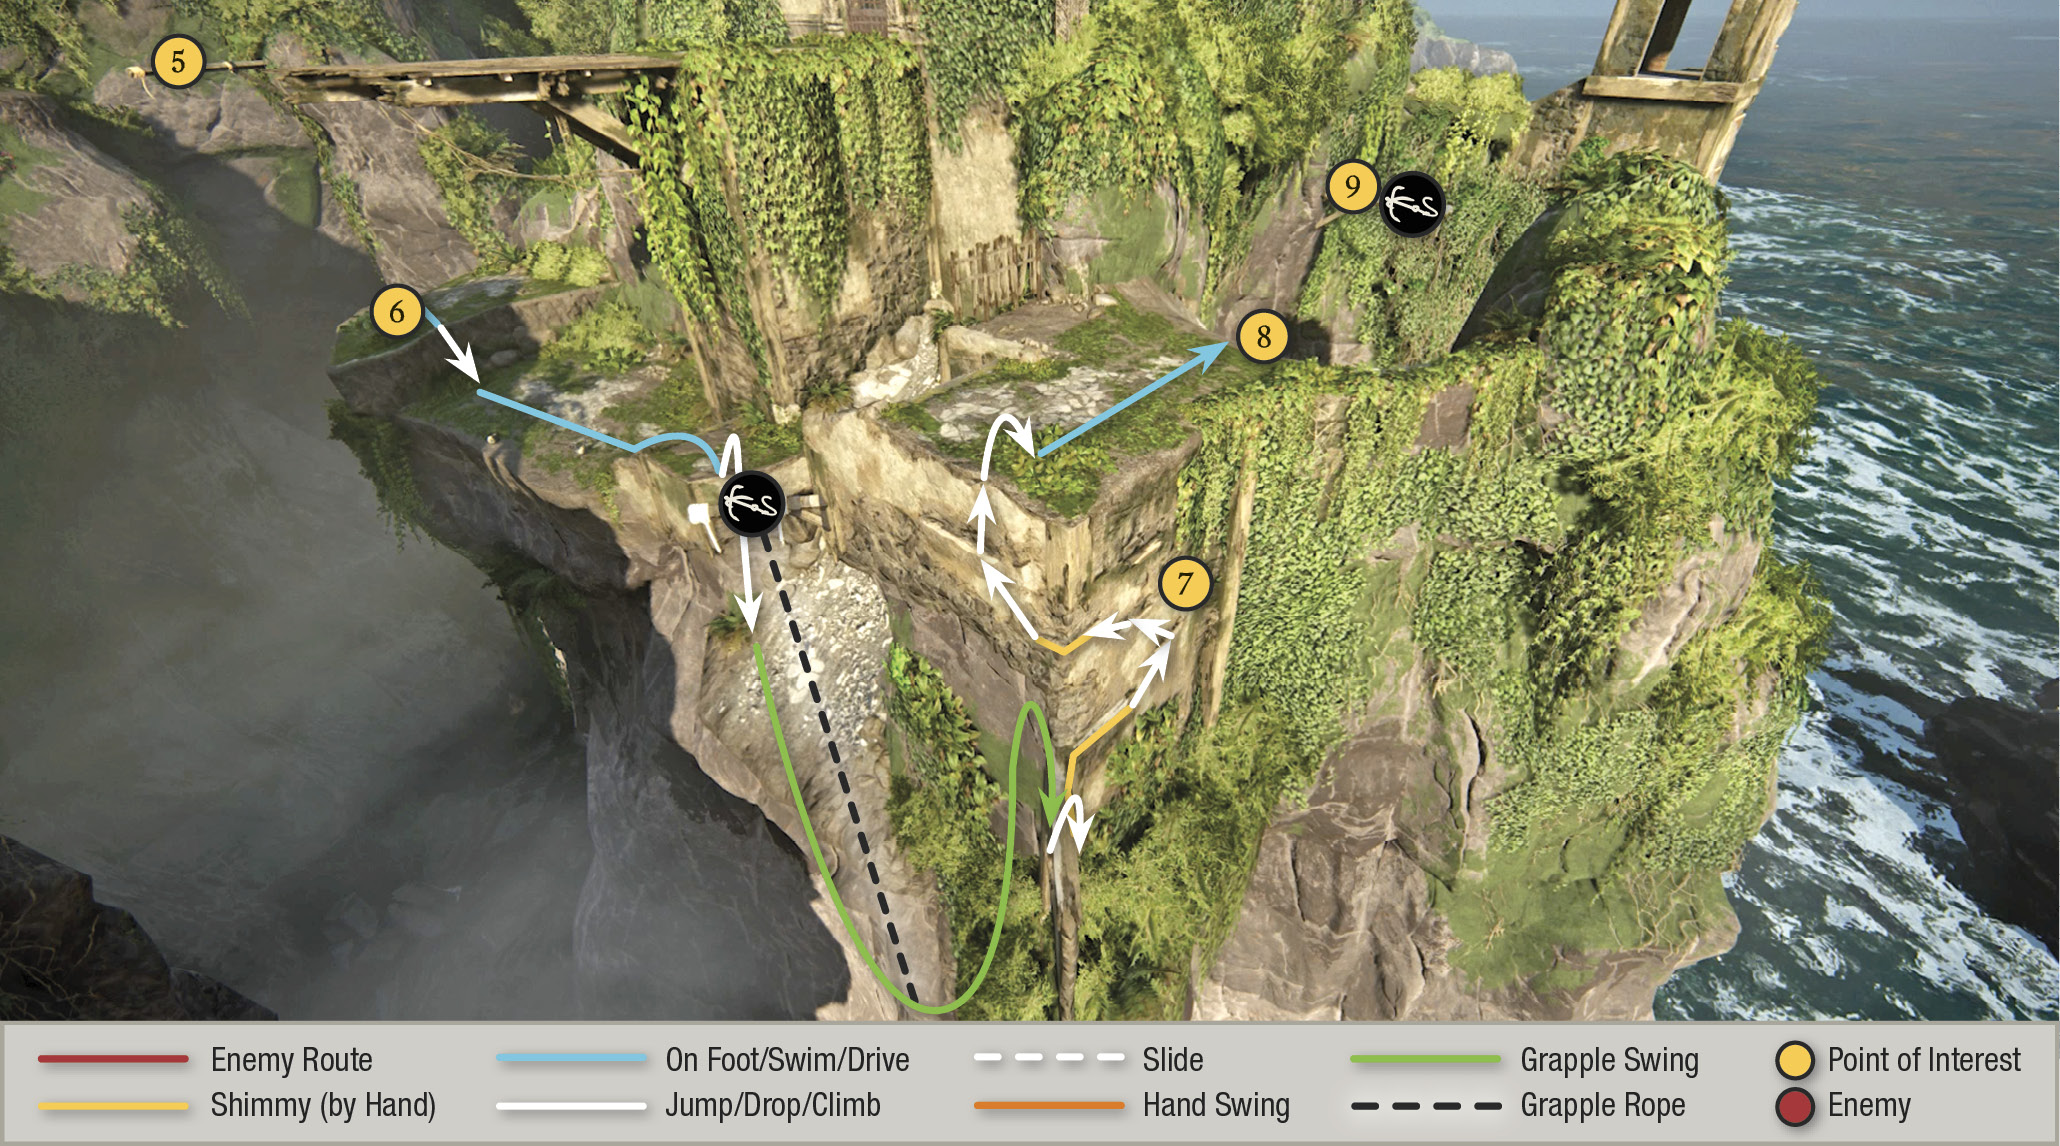
Proceed up the stairs to spot another strut jutting from the cliff ahead. Grapple to the strut and swing to grab the wall (see Fig. 2-10) on the far side. Crawl over the wall and hang from the other side. Shimmy rightward along the beam to a series of handholds (7) that lead up and left. One breaks off but keep going around the corner until you can pull yourself onto the landing above. Walk to the edge of the rockslide (8) just ahead and spot the next strut (9) on the cliff above.
Get Past the Rockslide
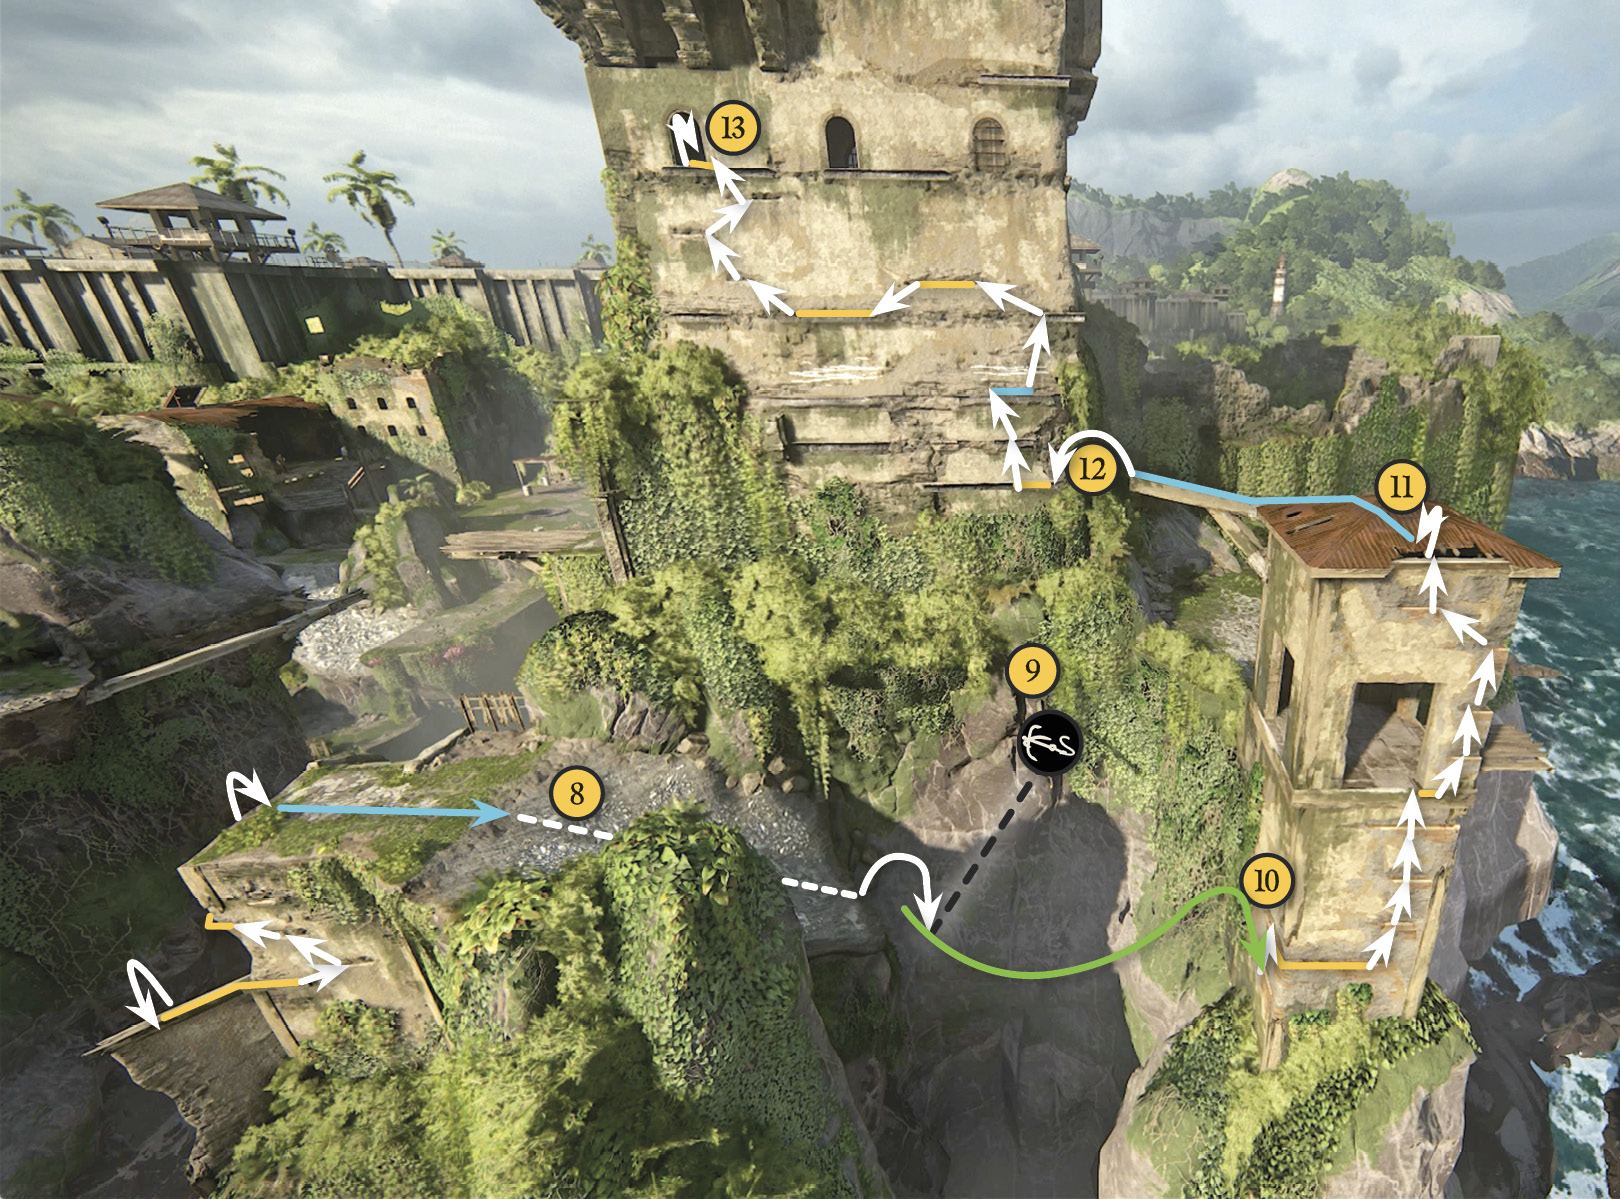
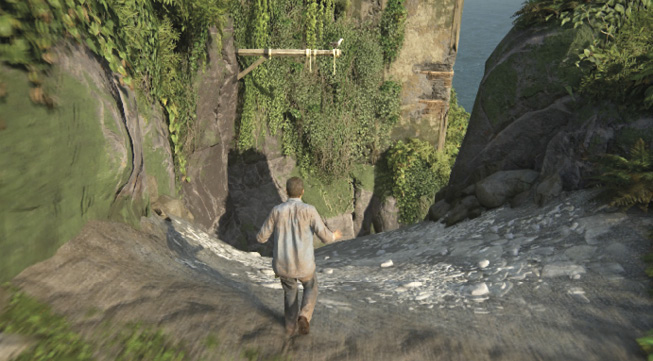
Now comes your first slide-and-grapple maneuver. Face the strut and step out onto the rockslide. As Nathan slides down, tilt the camera view up to see the strut. The moment the L1 icon appears onscreen over the strut, punch that button on your controller to hook it!
As you swing, use the left stick to aim Nathan’s arc toward the wooden beams (10) in the watchtower base across the gap. Climb to the top beam then shimmy rightward around the corner until you can climb the series of handholds all the way to the watchtower roof (11).
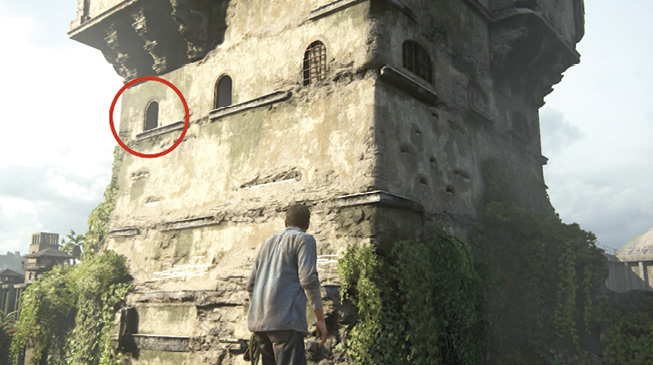
Walk to the end of the narrow strut extending from the watchtower’s corner and leap across the gap (12) to grab a ledge on the main prison tower. Follow the climbing route on our map to traverse the tower face and reach the open window (13) in the top left corner (see Fig. 2-11). Climb inside to enter the tower.
Get Through the High Exit Window
Nathan is now inside the tower, but your exterior climbing isn’t quite finished yet. Hop down to the staircase and descend to the main floor. Examine the grim prison log on the table and grab the treasure next to the rubble pile by the pillar.
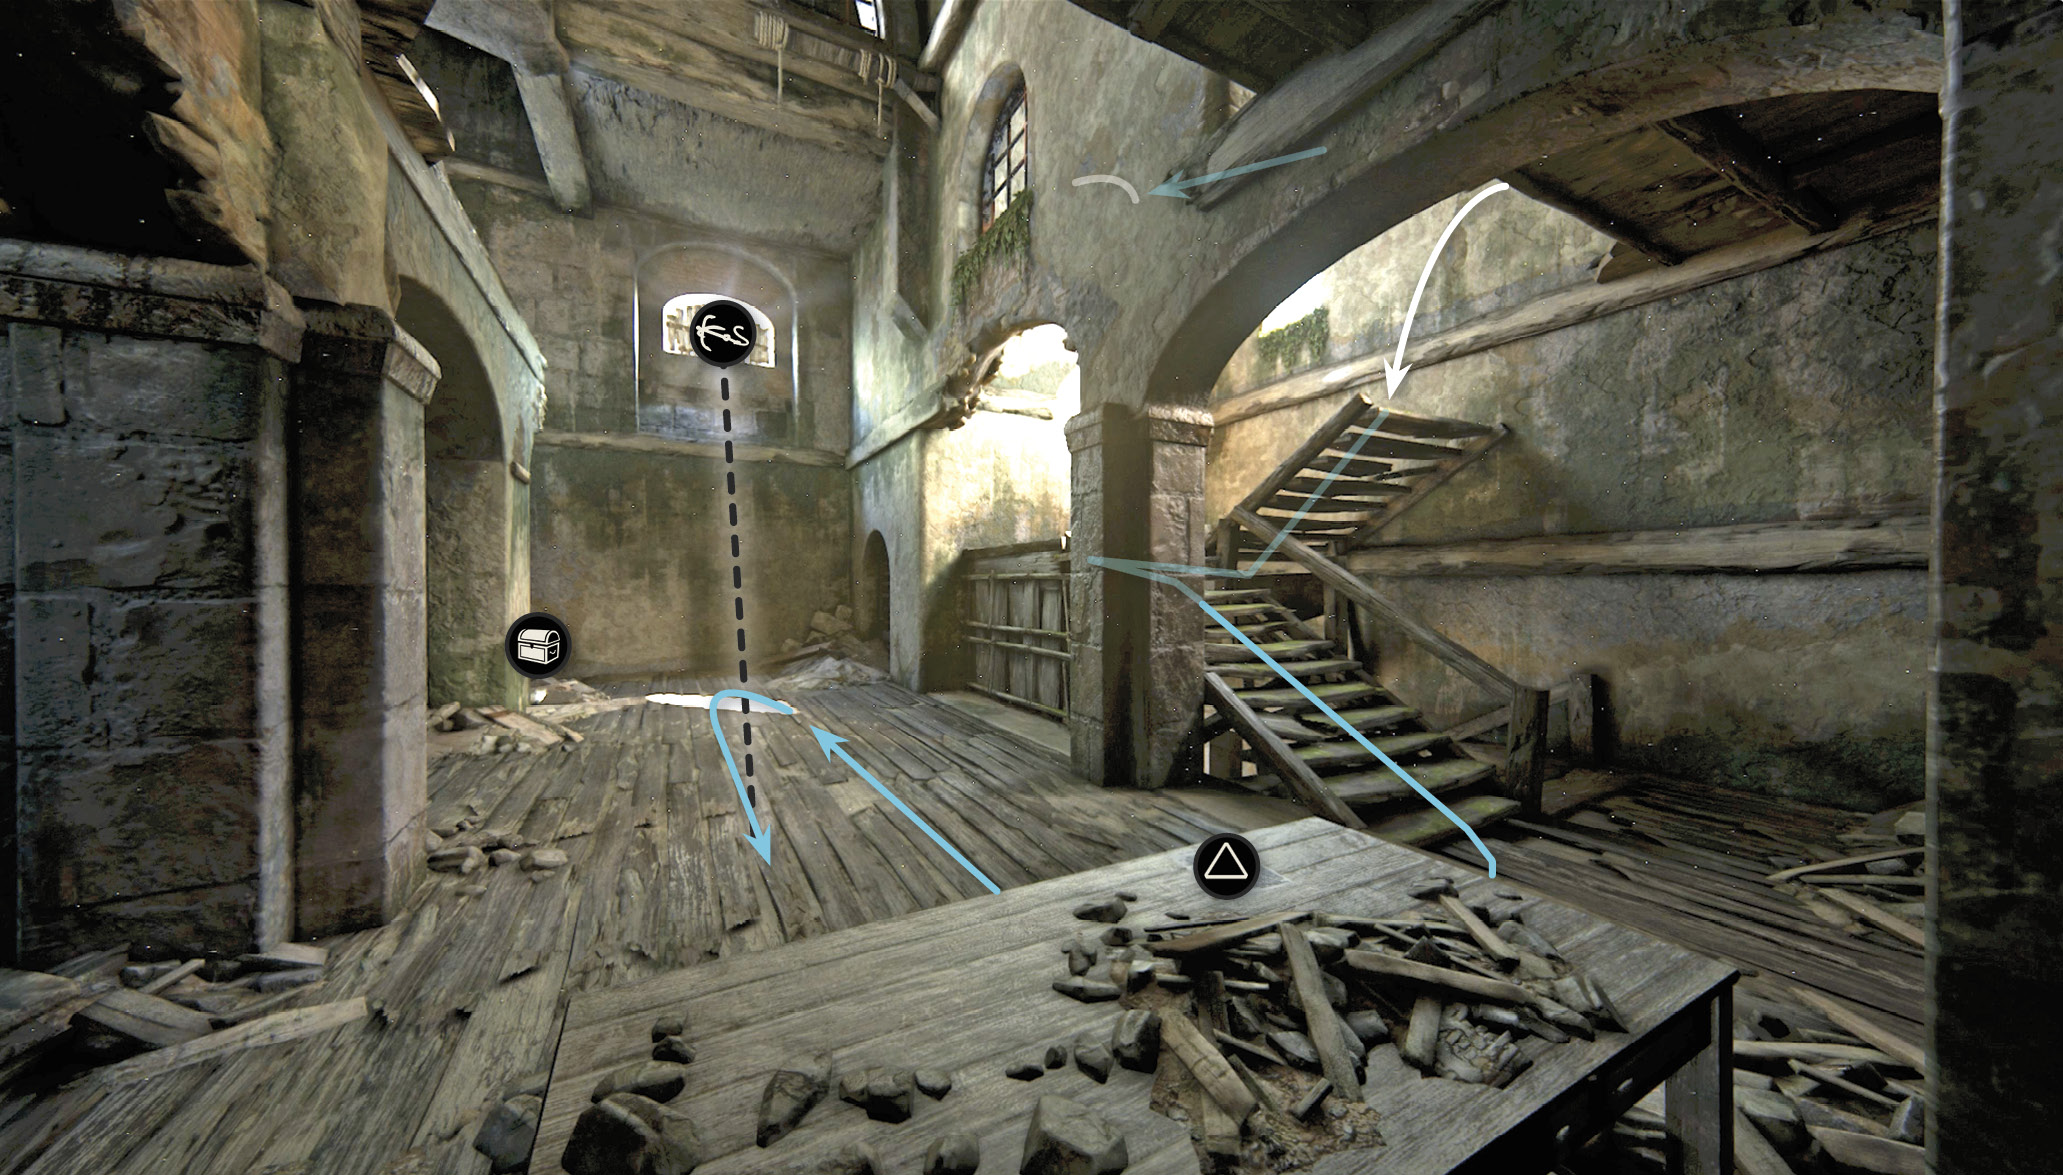
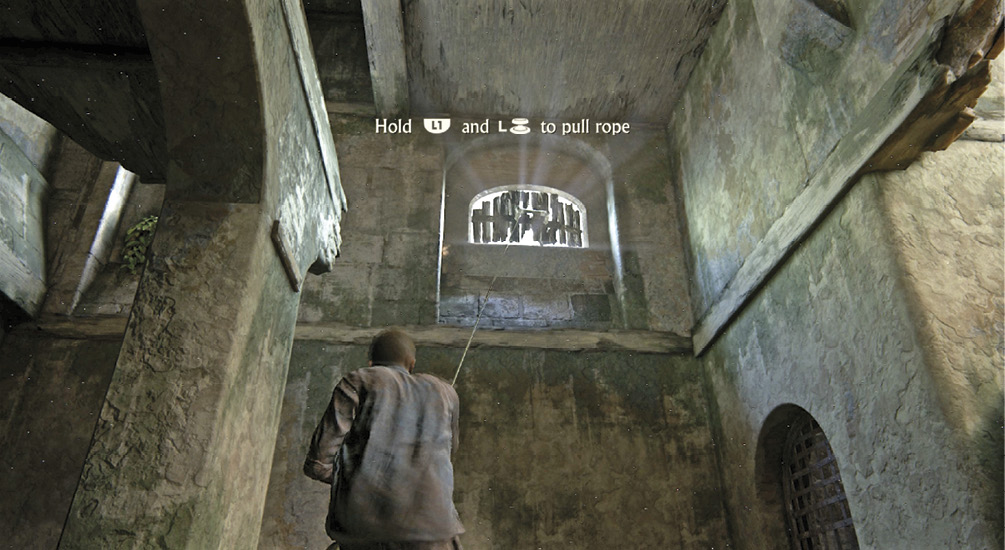
Now locate the high window shuttered with wooden planks. Center your view on it until the L1 icon appears onscreen then press the indicated button to toss your grapple hook. Once the hook is attached, hold down L1 and pull back the left stick to pull the rope. This rips the planks out of the window, creating the exit passage you need.

Navaja Folding Knife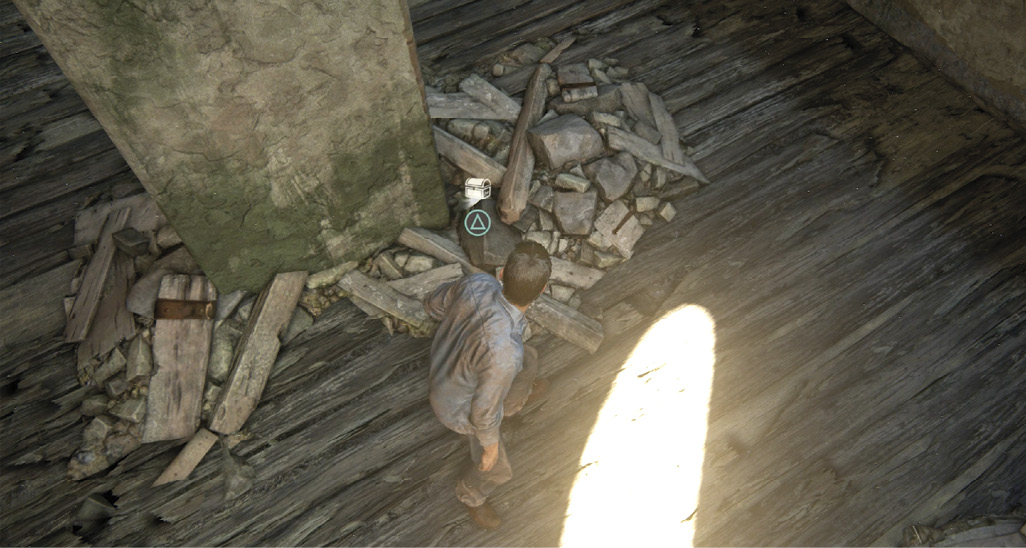
When you first enter the prison tower interior, search the pile of rubble next to the pillar under the high, boarded window. You find the Navaja Folding Knife. |
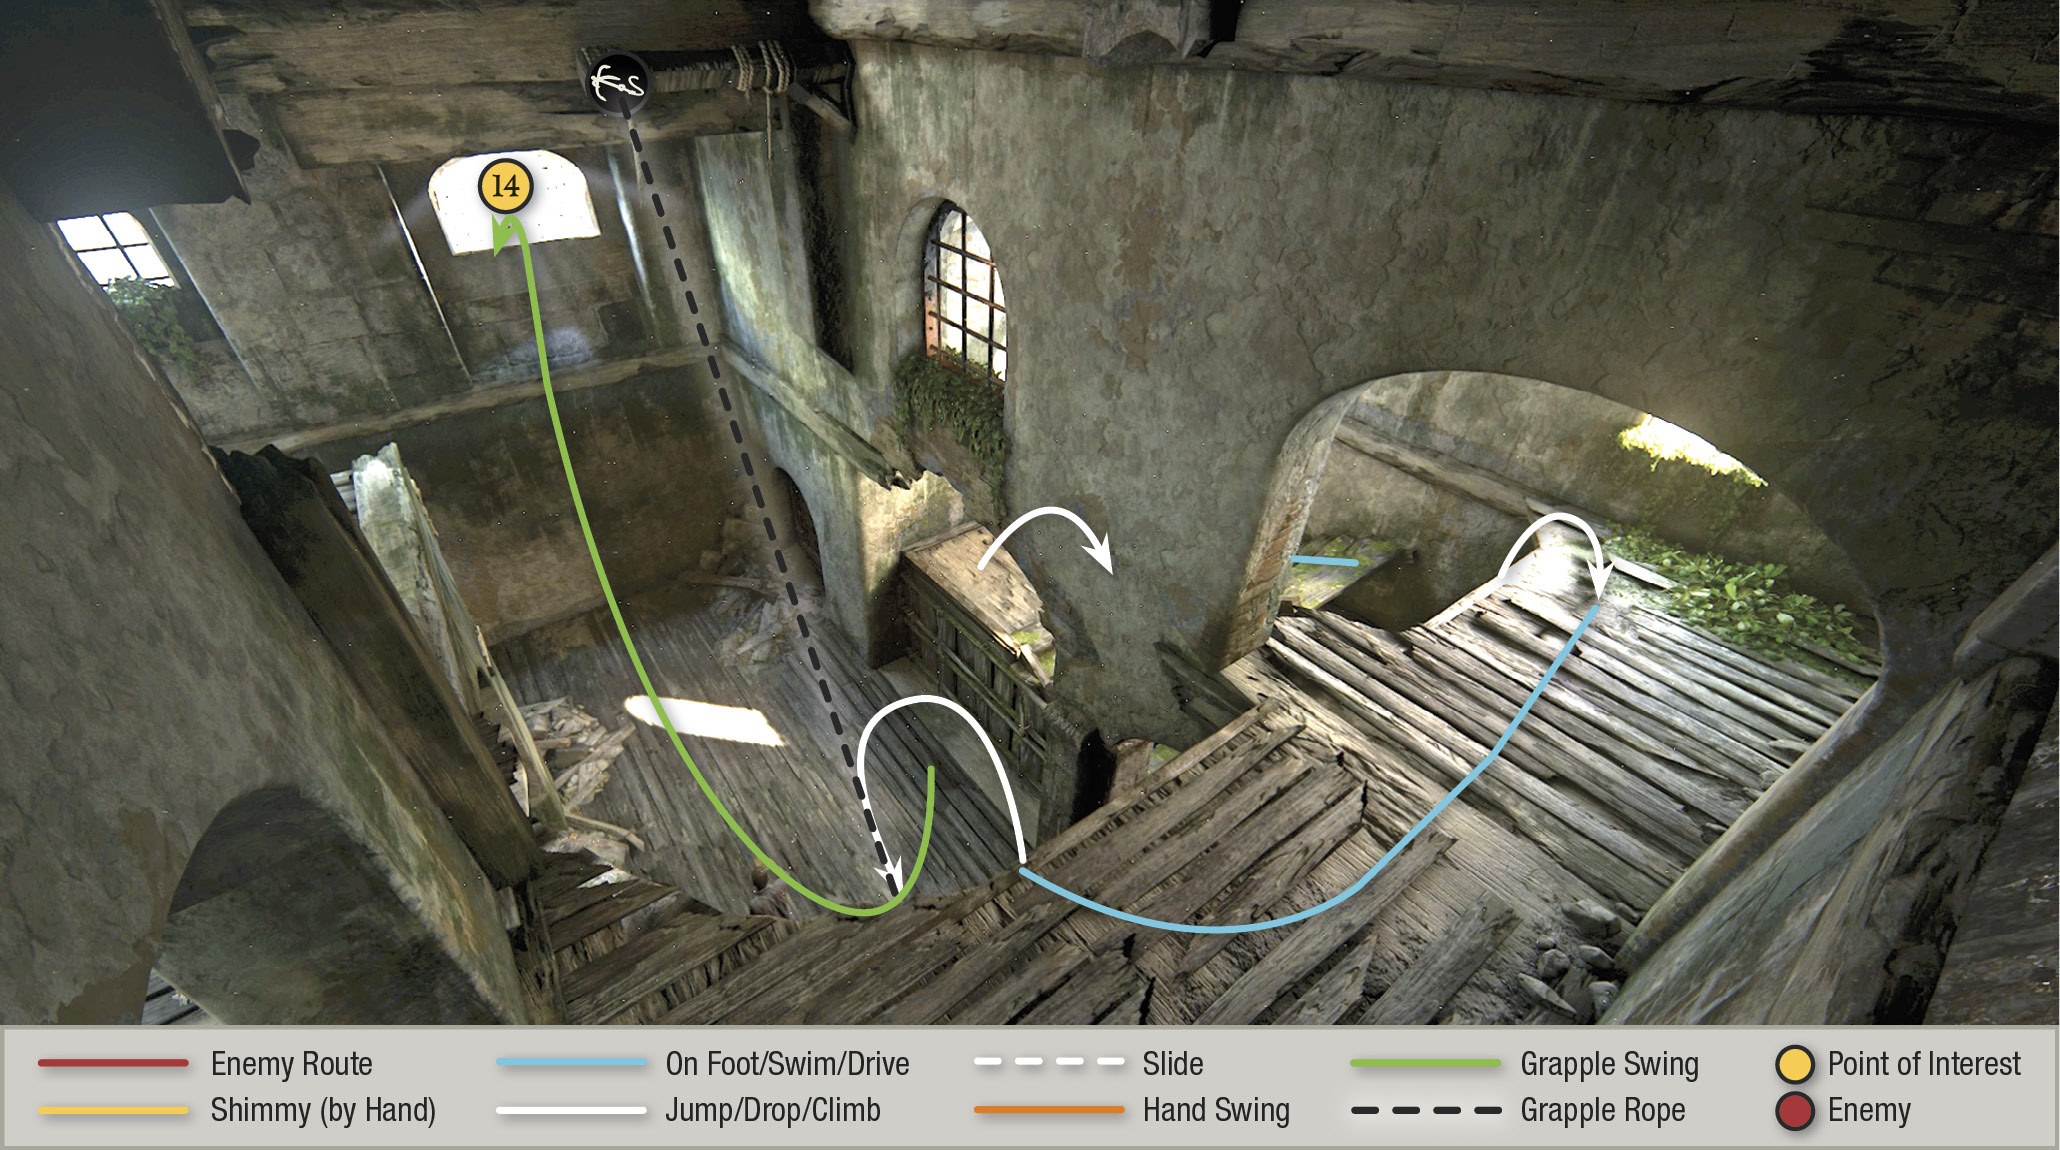
To reach this high exit, climb the stairs back up to the window where you entered the tower. Move across the high floor until you can turn right to face the window (14) you just tore open. Use your grapple hook on the beam halfway across the ceiling and swing over to the open window. Leap from the rope to grab the windowsill then climb out and hang outside.
Climb to the Tower Prison Cell
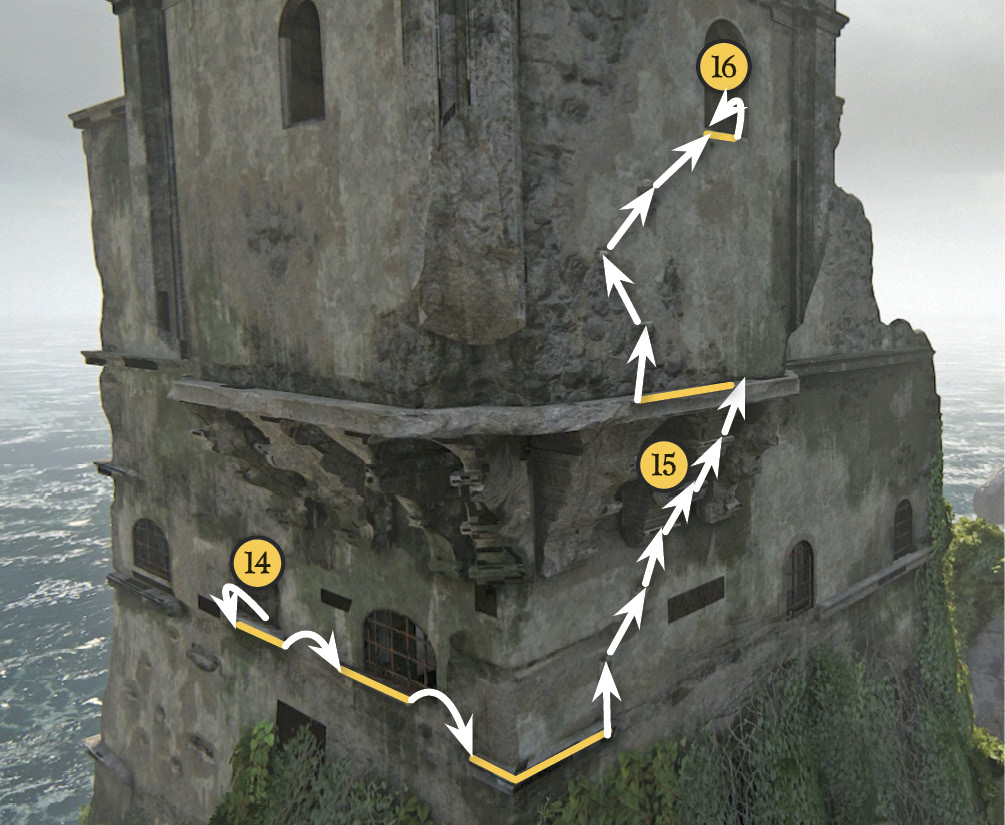
Outside the window (14), shimmy to the right and jump across to grab the next sill. Jump from there to the corner ledge, shimmy around the corner, and start working your way upward to the right using the series of handholds including some on the wall buttress (15). Follow our climbing route up to the open window (16) to enter the tower prison cell where Joseph Burnes was incarcerated.
Solve the Cell Wall Puzzle
The cell walls are covered with etchings and a number of protruding stones. Examine the etching marked in the corner (see Fig. 2-14)—the top half appears to be the sun and the bottom half looks like the moon and stars. As Nathan notes, these are alchemy symbols used for gold and silver. Note also that a combination of sun, moon, and stars can be used to symbolize the Zodiac.
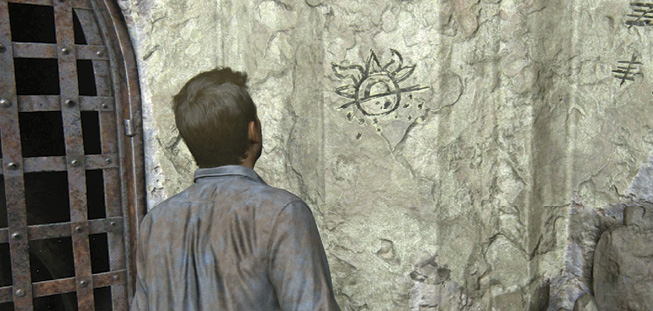
Now follow the onscreen prompt and press the PS4 touchpad to examine the Joseph Burnes letter again. A full sun is in the upper left corner. If you press to flip the note, you see a half moon and stars in the bottom right corner. Flip the note to the front again—now you have a new onscreen option available, “Fold.” Press  to fold the note. The drawing in the note’s upper left corner now matches the sun/moon etching on the wall.
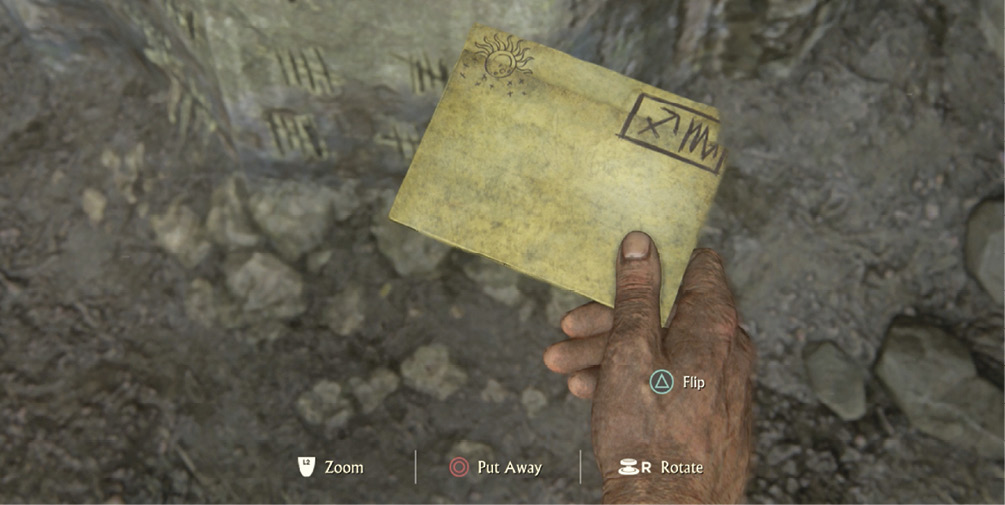
Folding the Burnes letter also changes the two symbols in its upper right corner. The first one is the Zodiac symbol for Sagittarius; the second is Scorpio. Now put away the note and find those two glyphs on the walls. The Scorpio glyph equals with the Roman numeral for two: “II.” The Sagittarius symbol equals the Roman numeral for ten: “X.”
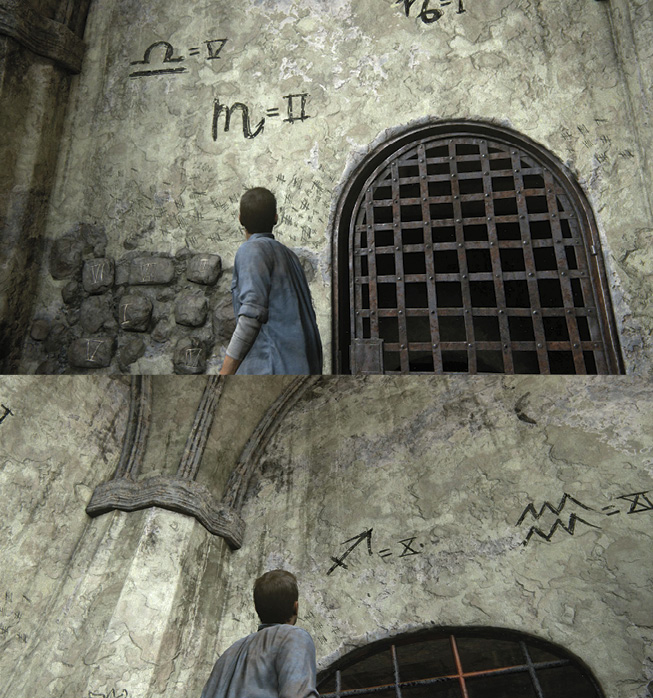
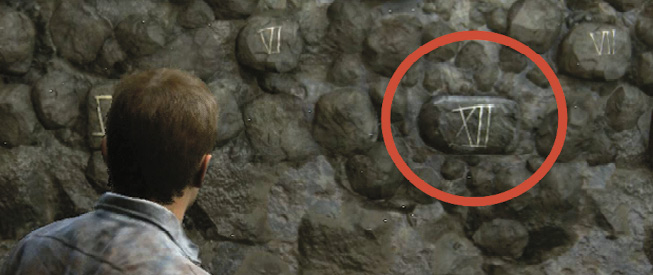
So let’s do Roman math: The two Roman symbols combined, X plus II, equal twelve. Find the Roman numeral twelve (XII) on a stone protruding from the wall directly under the compass etching. Approach it and press . Nathan pulls the stone from the wall and finds an item in the hole behind the stone.
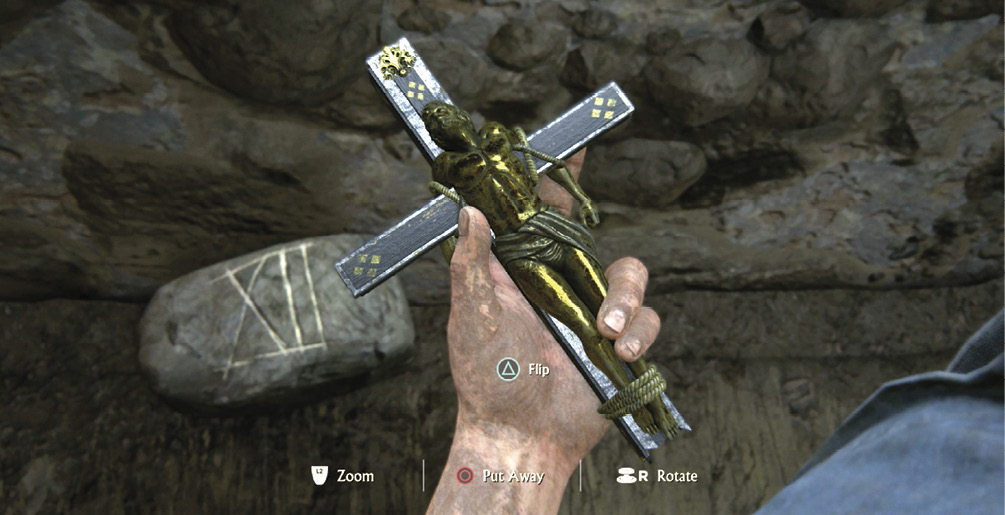
Escape the Prison Tower
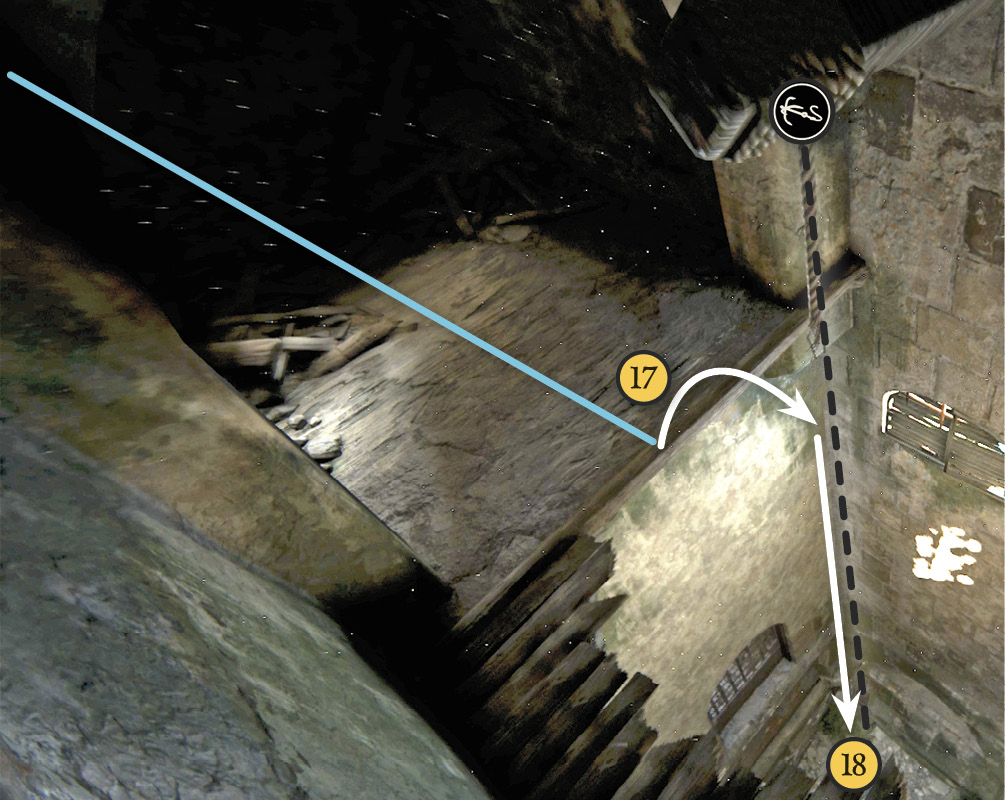
Time to go! Approach the cell door and repeatedly tap to push it open. Drop to the floor below then approach the next drop-off (17)—it’s a long fall to the next floor below, too far to simply hop down. Instead, toss your grapple hook at the beam on the ceiling then step off the edge to dangle from the rope. Hold L1 and press your left stick downward to rappel down the tower shaft to the very bottom of the rope (18).
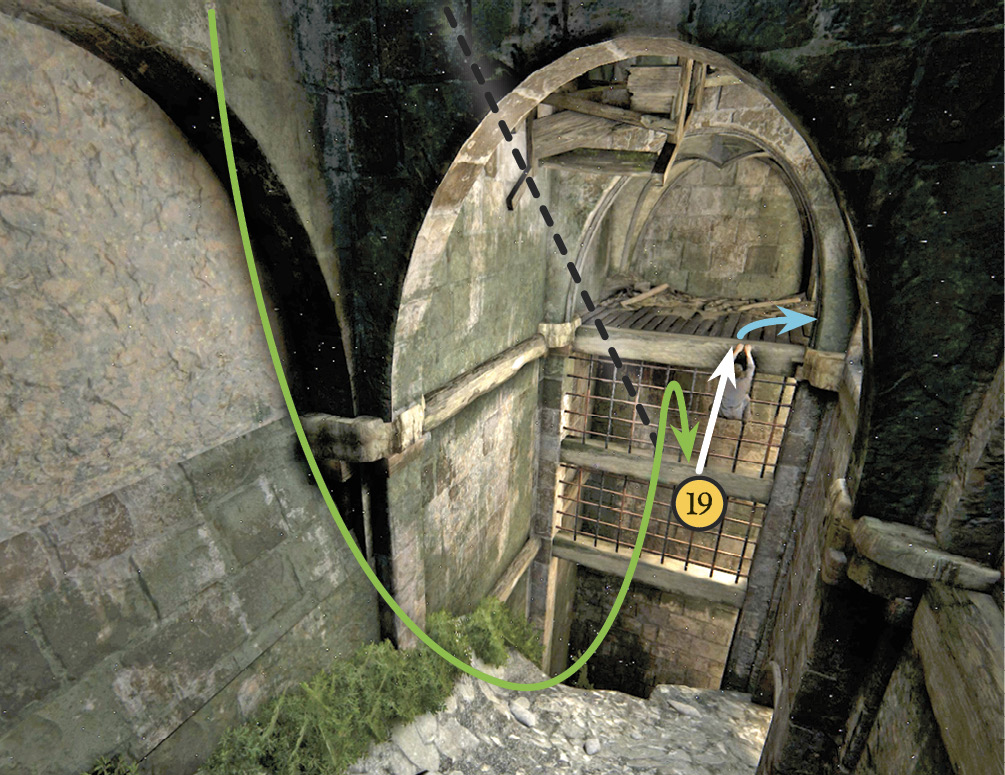
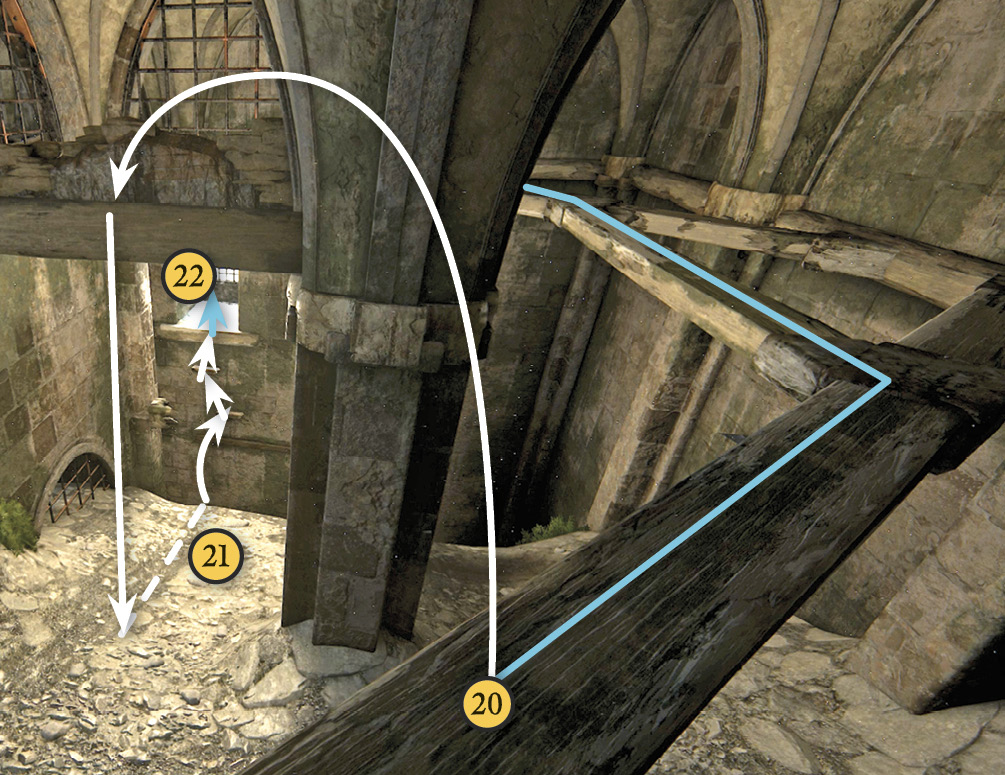
Still hanging to the rope, swing and jump to grab the nearby metal grating (19). Climb up the grate and walk to the single beam extending from the floor. Walk along the three connected beams until Nathan stops (20). Then jump to grab the beam and hang over a rockslide below (21). See that grated window (22) filled with sunlight across the shaft? Drop onto the rockslide, ride down to its drop-off, and quickly jump to grab the wall beam under the window. Hop up the handholds to the window and push it open to escape the tower.
Get Back Across the Canyon
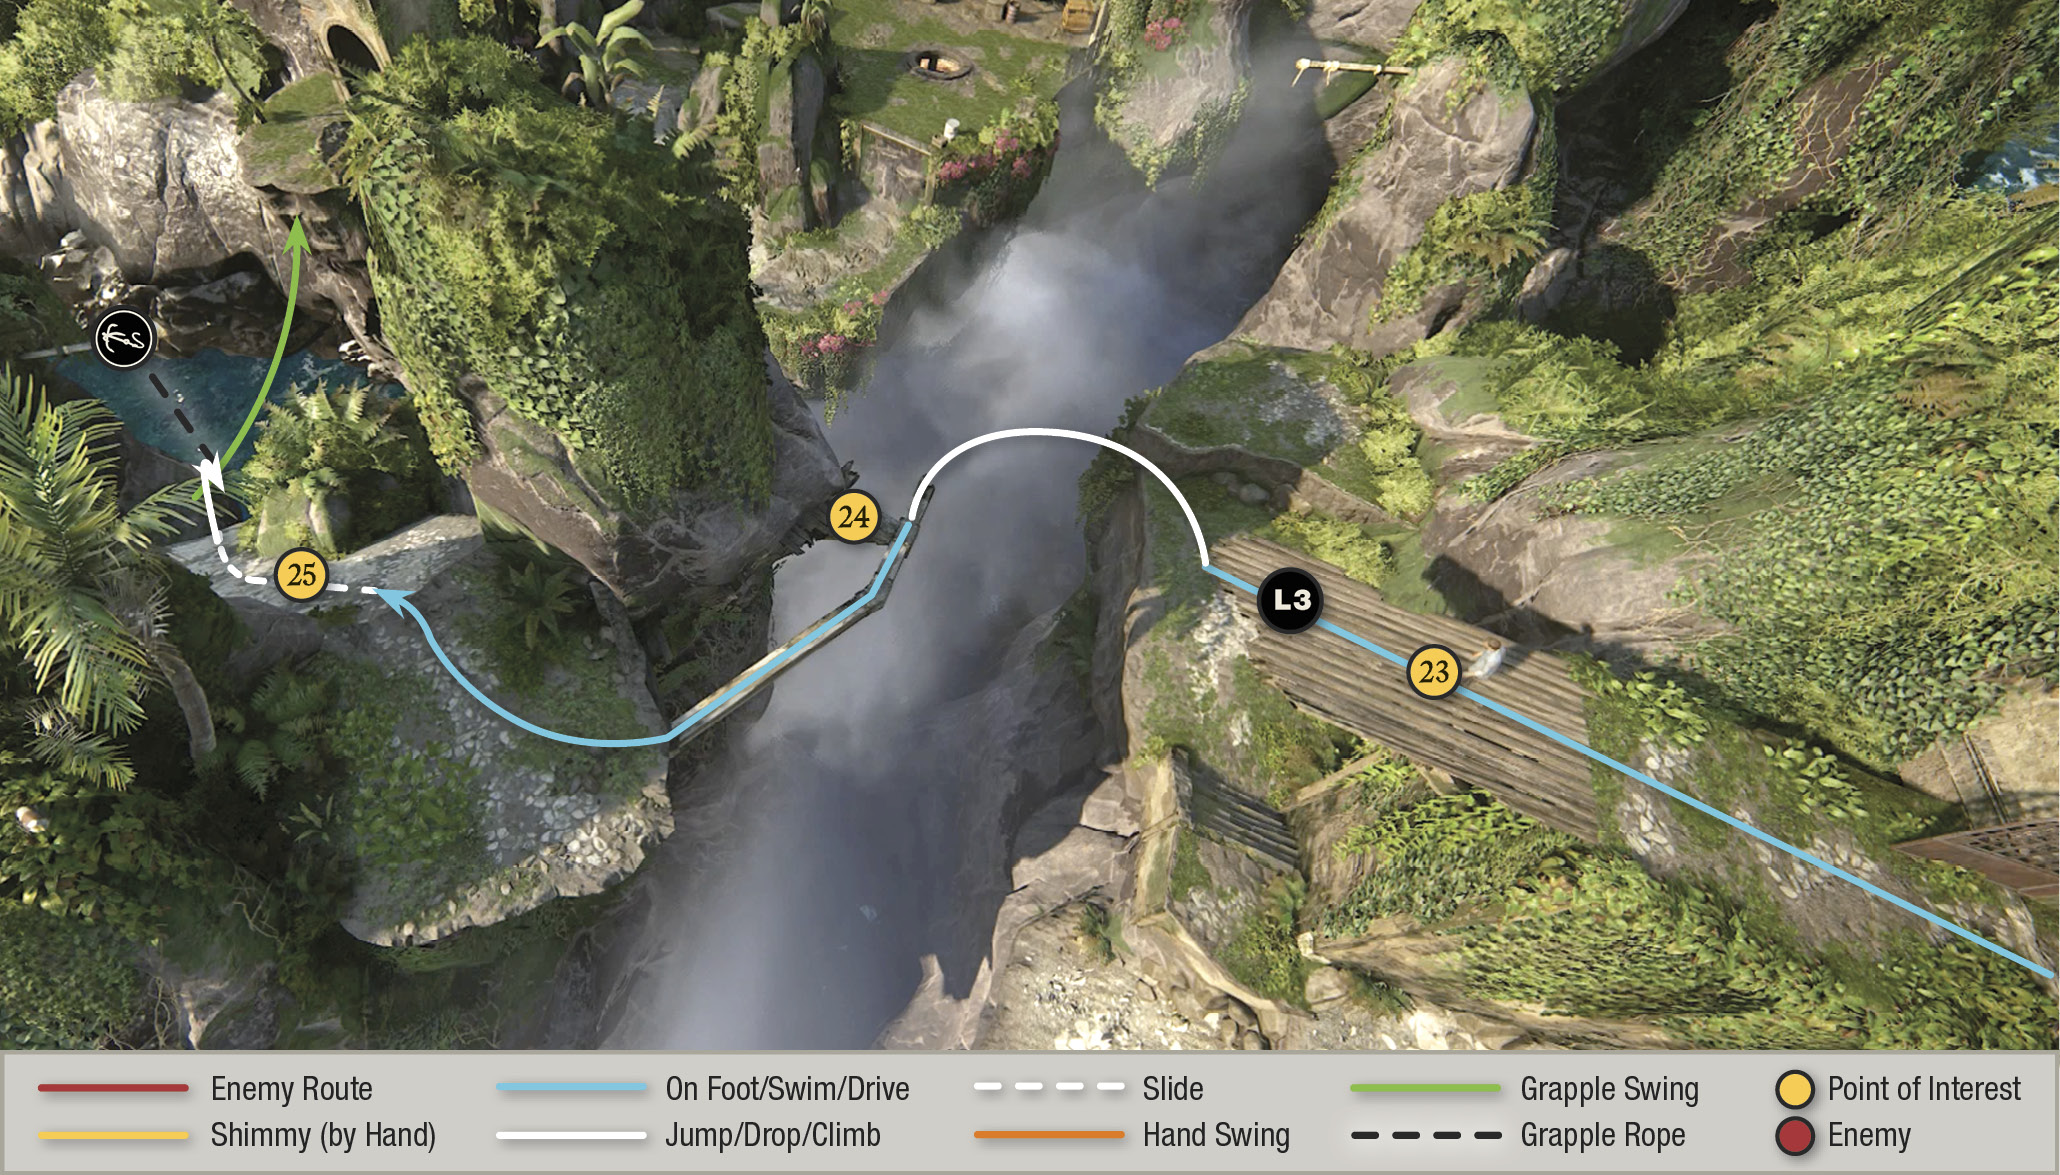
Outside the tower, walk down the broken bridge (23) and press L3 to spot Vargas back across the canyon, waiting for your return. Jump from the end of the bridge to grab the support beam (24) across the gap. Pull yourself atop the narrow beam and walk to the plateau, crossing it to the top edge of the rockslide on the far side.
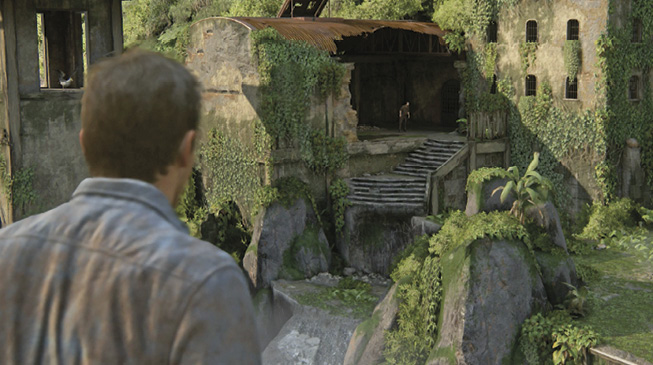
Before you slide, spot the strut jutting from the cliff ahead. Then step forward onto the rockslide (25), keeping your camera view on that strut as you go. Remember, you can steer your slide direction using the left controller stick. As you ride downward, toss your grapple hook when the L1 icon appears on the strut. At the far end of your arcing swing, jump to the opposite cliff (26) to snag one of the handholds there. Climb onto the terrace.
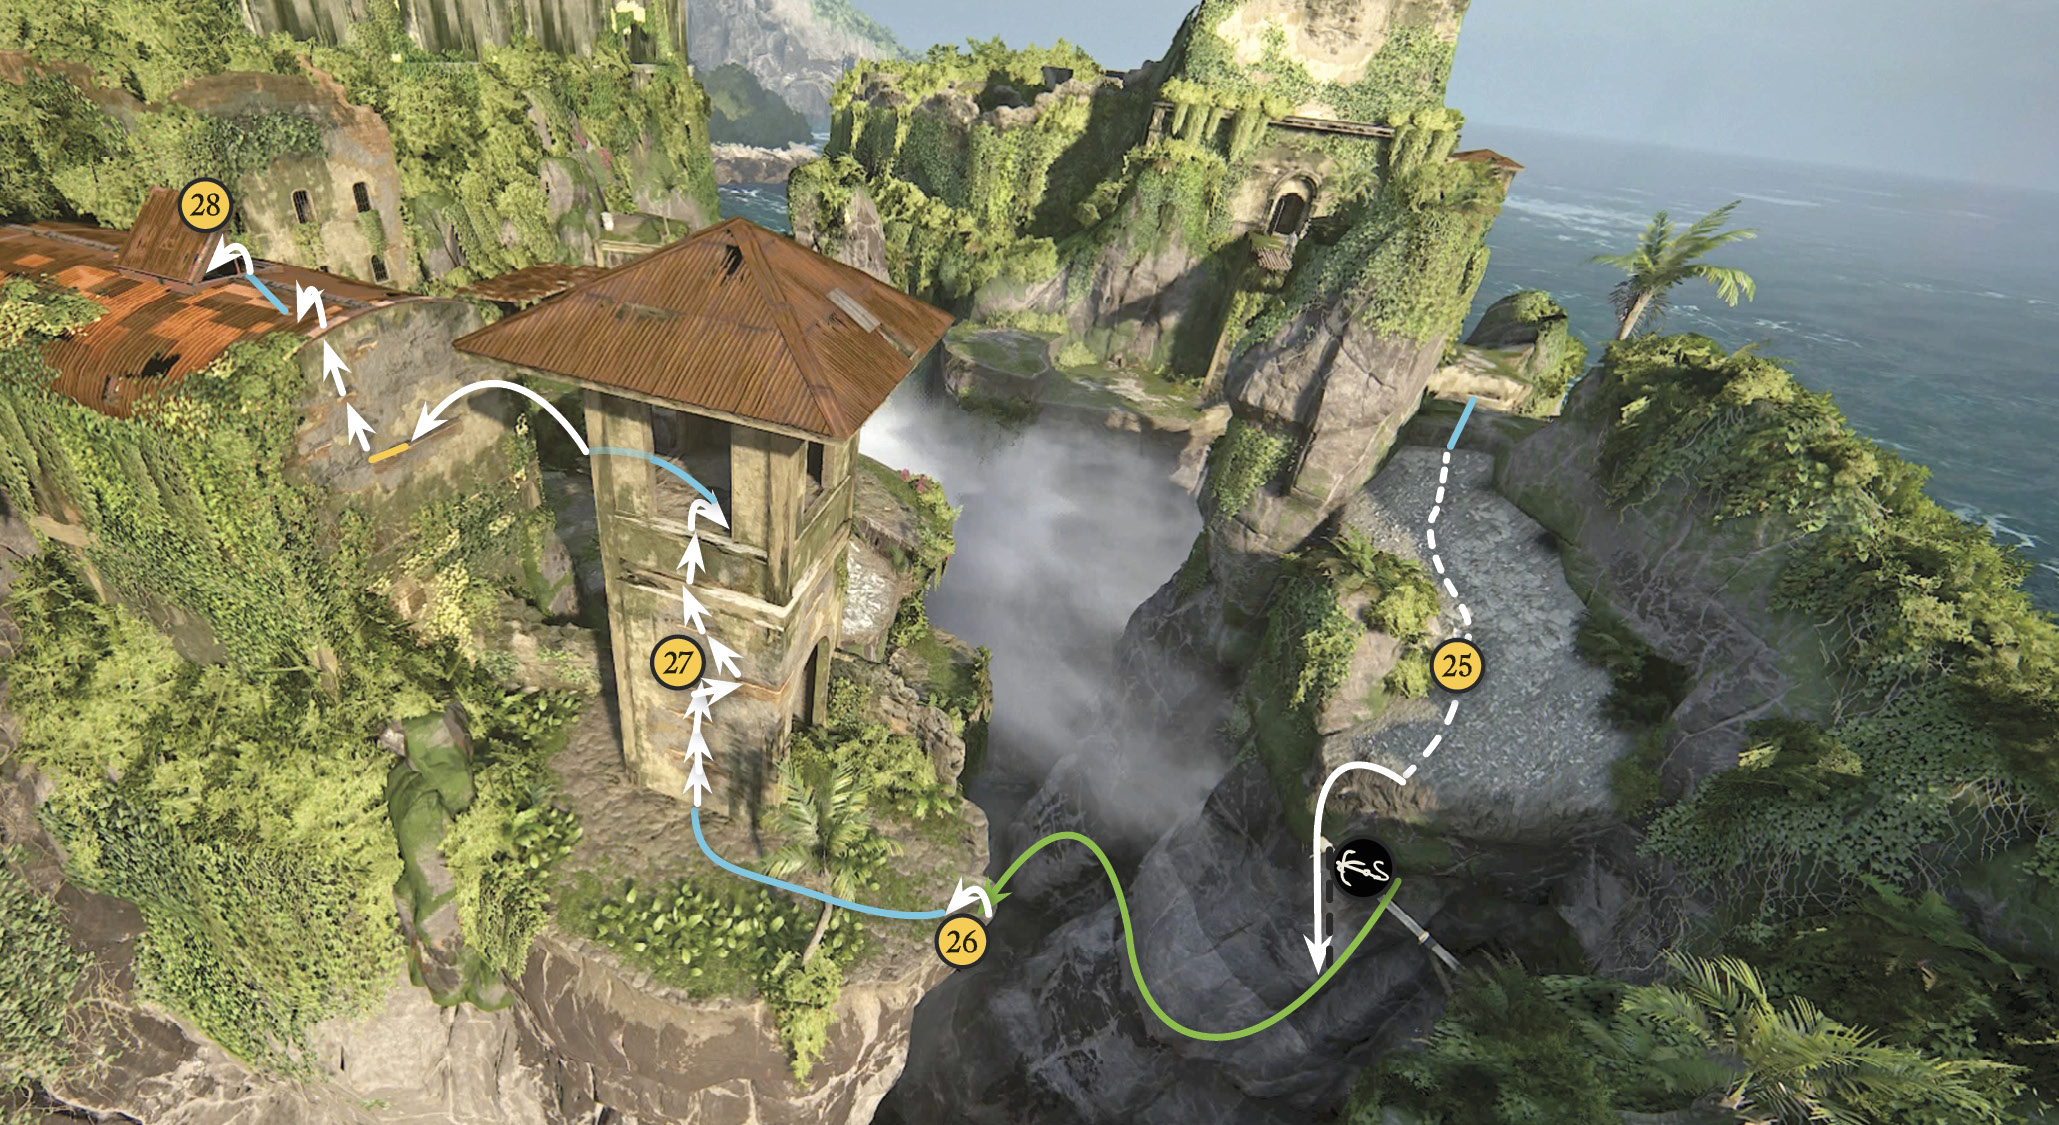
Move to the left outer wall of the watchtower (27) and climb the series of handholds to the platform. At the top, turn left and make a running leap across the gap to grab a handhold on the decrepit storage building. Climb to its curved roof, walk to the open roof hatch (28), and drop in on your buddy Vargas.
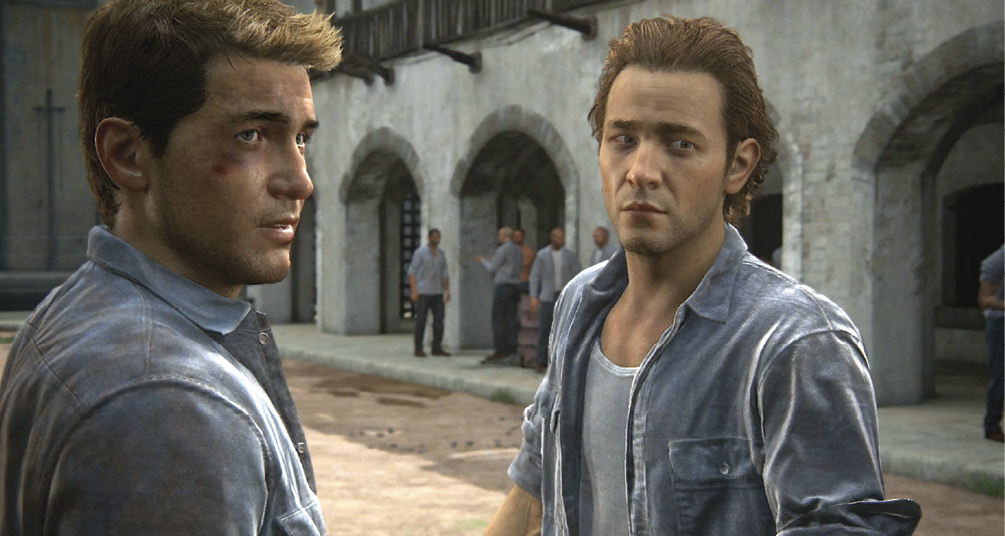
This triggers a pair of cutscenes: Nathan sends Vargas to look for prison blueprints and then meets up with Sam Drake—that’s right, the older brother you met in the orphanage flashback. Nathan makes a report to Sam and another partner, Rafe Adler. As the team examines the unusual artifact, Sam uses his Catholic schooling to figure out what it might mean. Next destination: Scotland.
Defeat the Thugs
But first, you need to get out of Panama alive. Start punching thugs, using the melee combat controls you learned in the first prison fight plus a new move: press to roll and evade punches (onscreen button prompts help you, just in case).
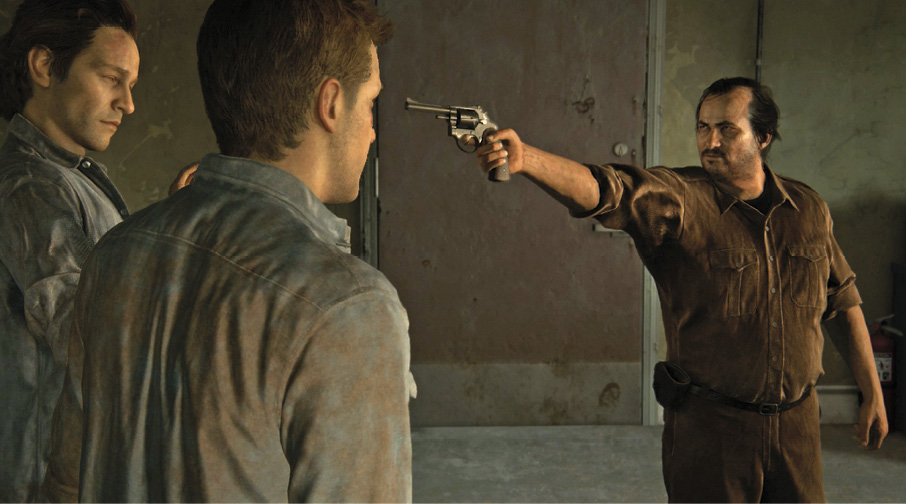
Keep knocking out hostile inmates until Vargas halts the battle and hauls Nathan and crew into his office. There, the negotiations go awry, and your team needs to make a hurried escape. Rafe grabs Vargas’s keys and takes off running. Your objective: reach the getaway boat below the lighthouse just outside the prison.
Escape the Prison!
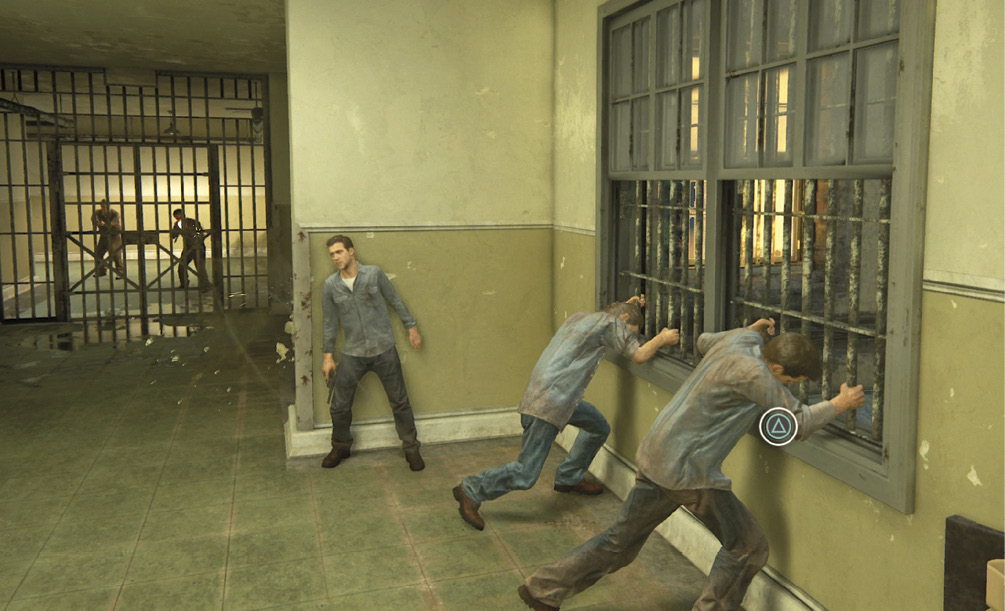
To start, simply follow Sam and Rafe through the corridors until you reach a locked dead end. Hurry! Heavily armed guards are in hot pursuit. Sprint immediately to the second pair of windows on the right side of the room and press to get Nathan and Sam in place. Then start rapidly tapping to push out the window bars.
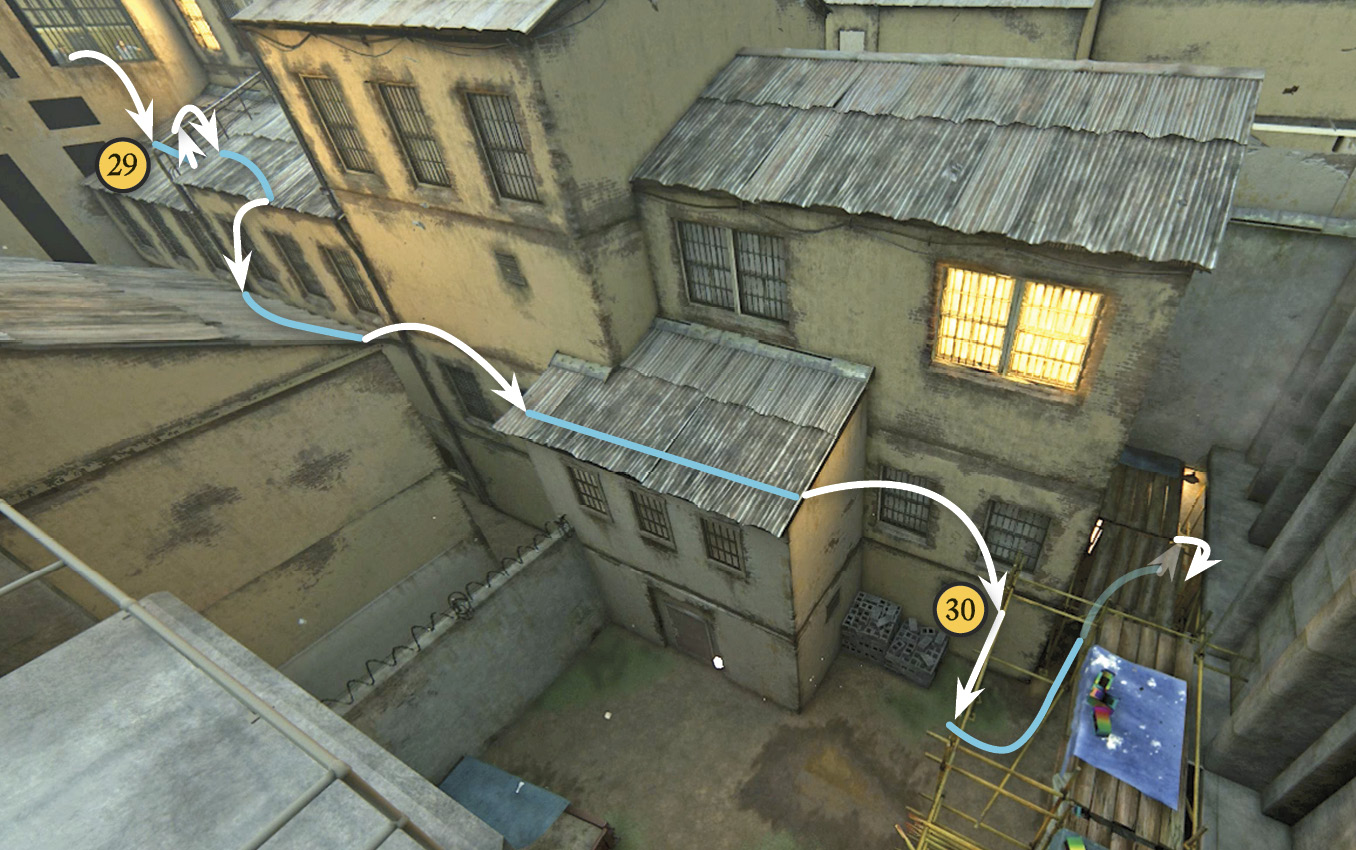
Hop out onto the roof (29) and run! Follow Sam as he hops across the rooftops then leap to the scaffolding platform (30) and drop into a courtyard filled with construction materials. (If you don’t snag the scaffolding on the jump down, Nathan’s drop is fatal.)
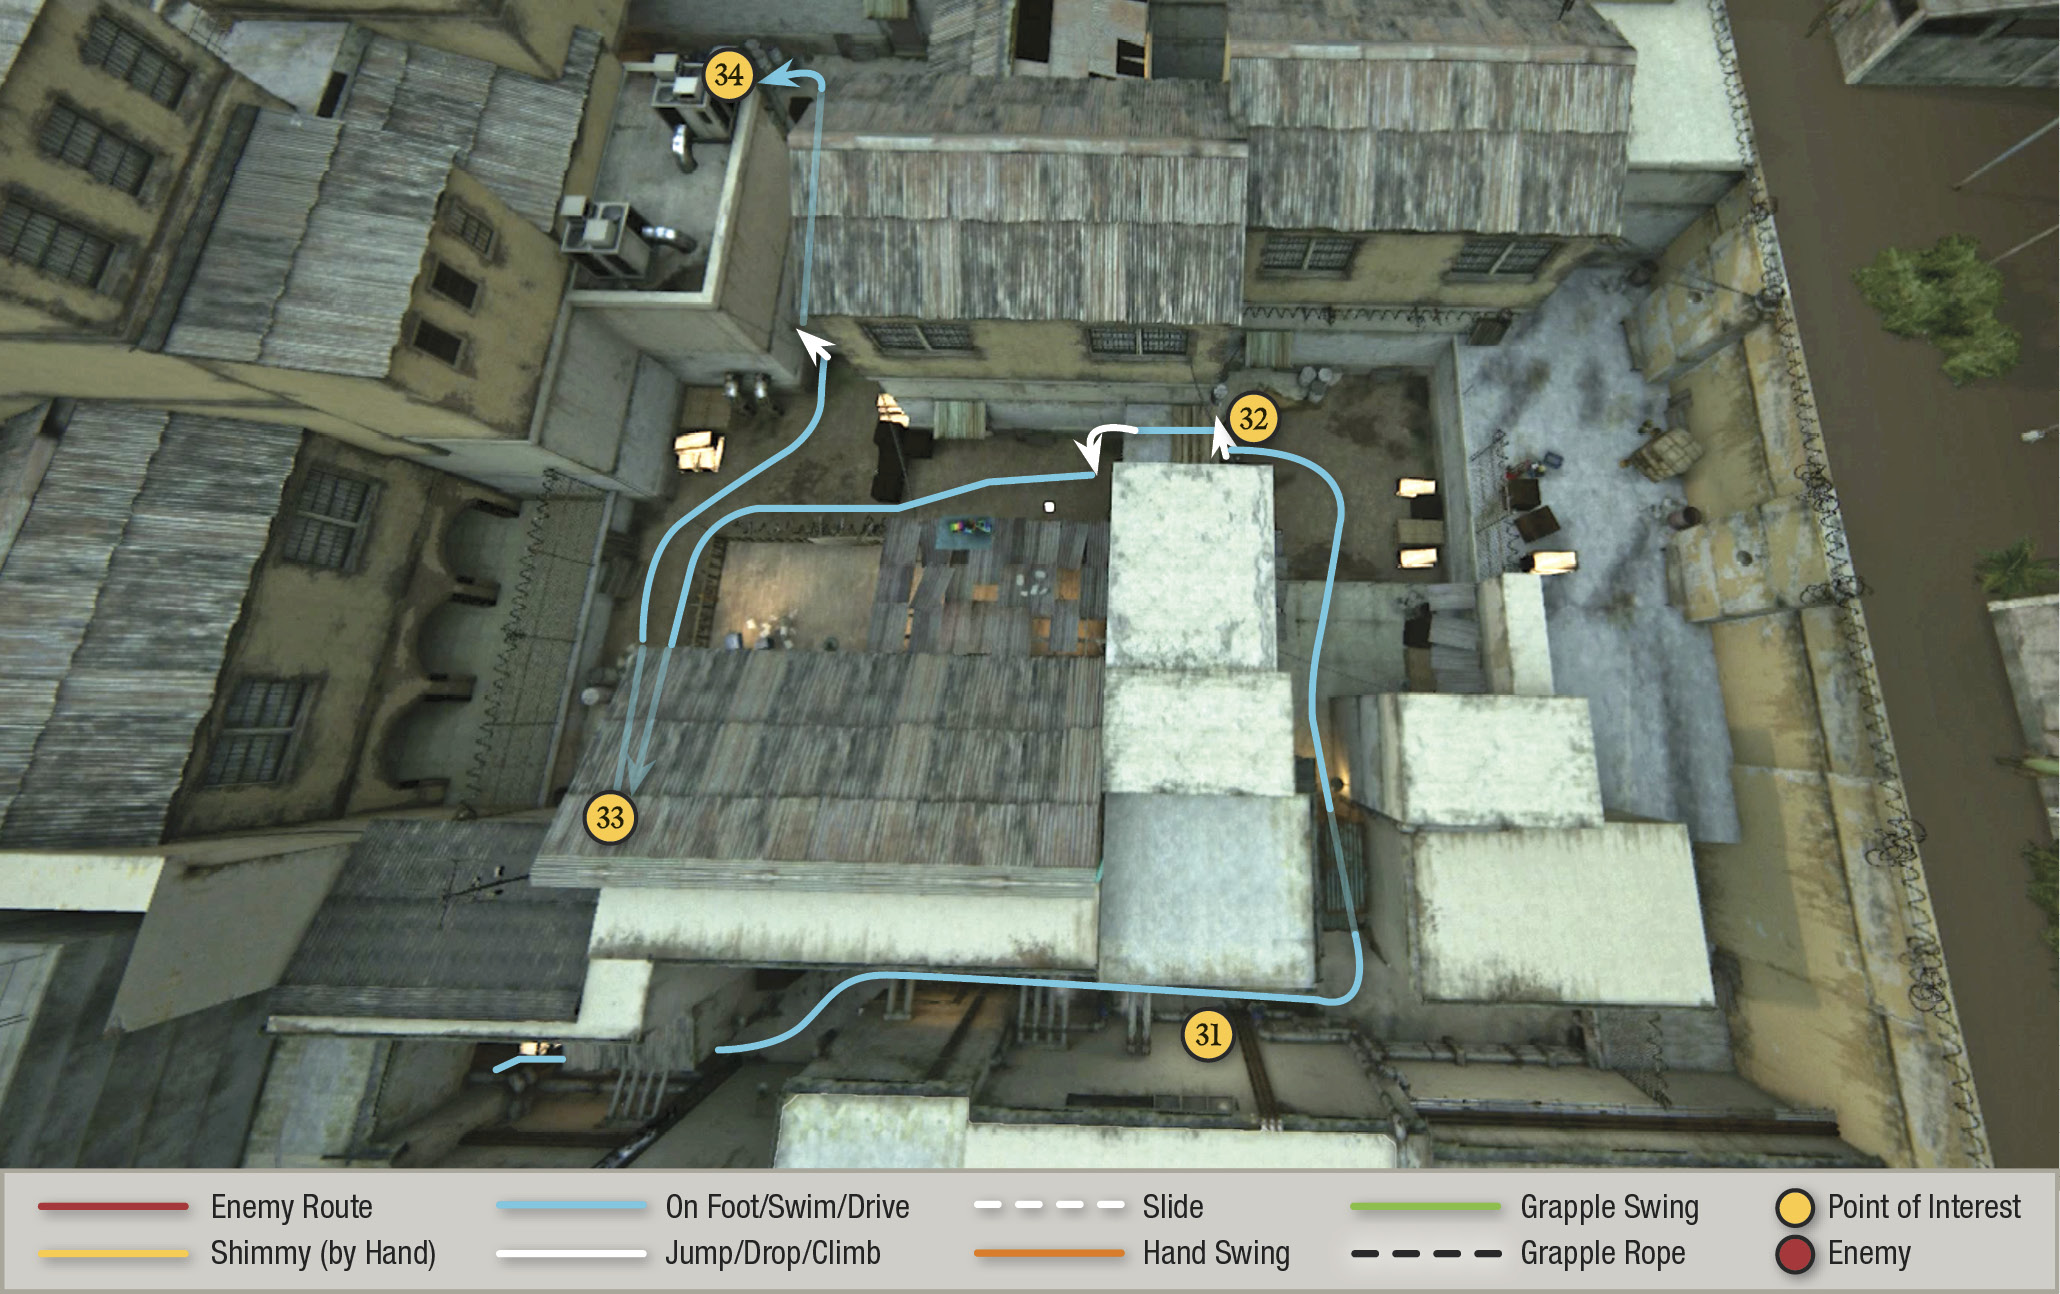
Stay on Sam’s heels as he sprints down an alley that veers into a pipe-lined corridor (31) where a guard opens fire at the far end. Duck left down the narrow passage and keep following Sam as he climbs a scaffold (32). In the next alcove to the left, Sam reaches a locked door (33). You can’t open it, so follow him back across the alley and climb the wall with a railing on top.
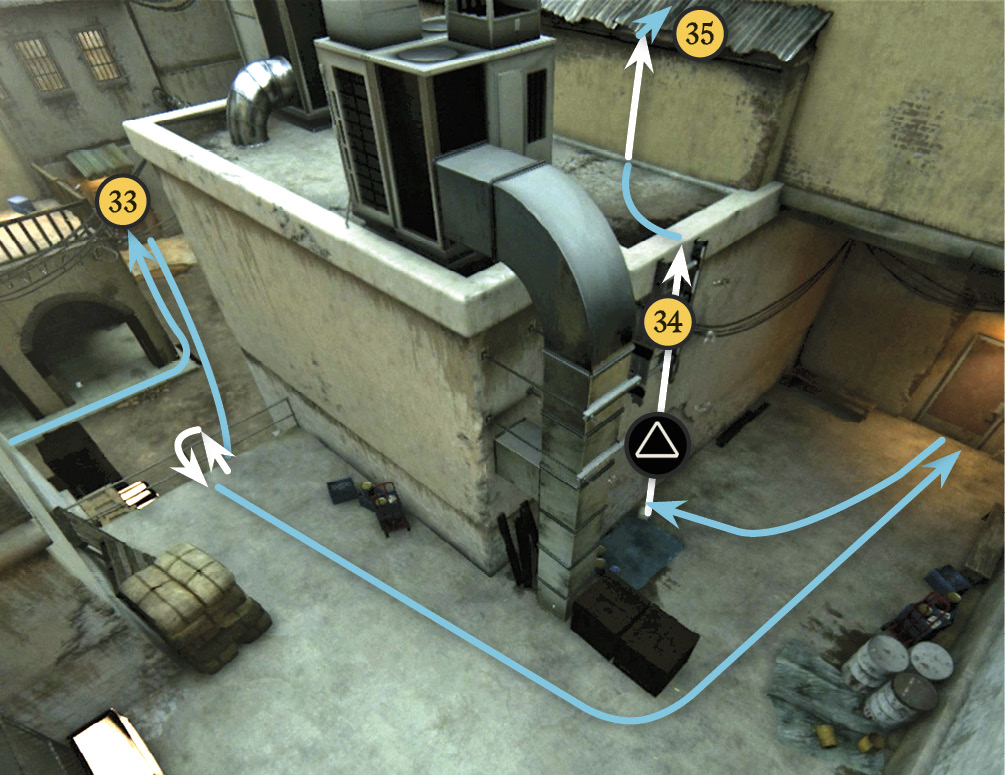
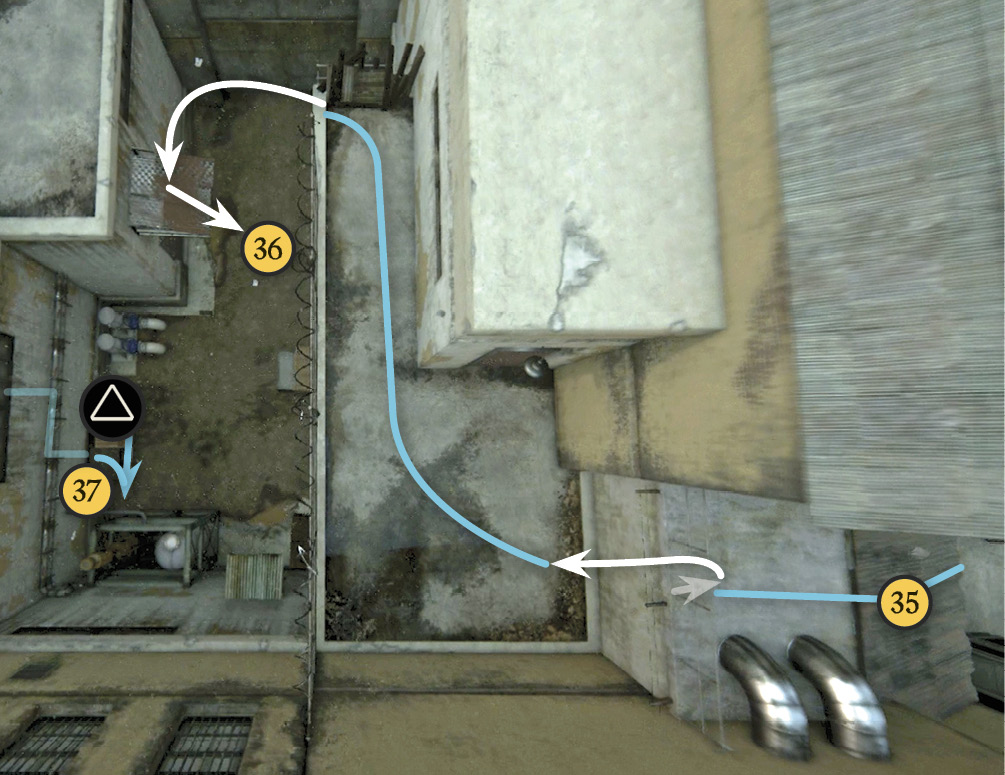
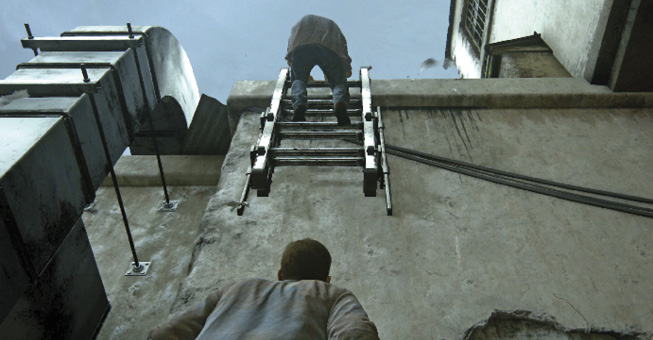
Look up and left to spot a raised fire escape ladder (34) then approach it to activate the onscreen button prompt. When you press , Nathan boosts Sam up to the ladder; when Sam reaches the top, he kicks the ladder down for Nathan and Rafe. Climb the ladder, hop onto the low roof on the right (35), and vault over the railing at the top.
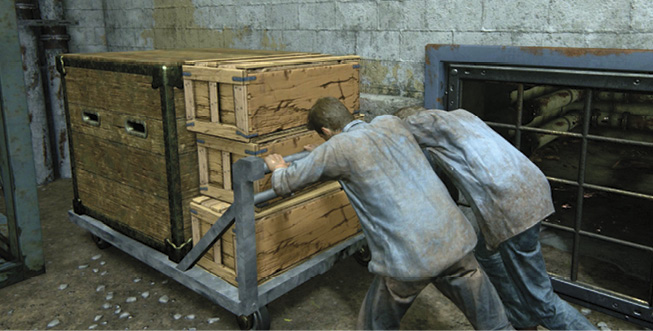
Next, turn right and hustle to the end of the security fence. Turn left to spot Sam then try to jump across to him. Nathan lands short and slides backward down the sloped roof onto the ground below (36). This lands you in the midst of a tough crew of prison guards. As you launch into melee combat, Sam drops down to help. After you KO all attackers, help Sam move the pushcart (37) to reveal a large air vent.
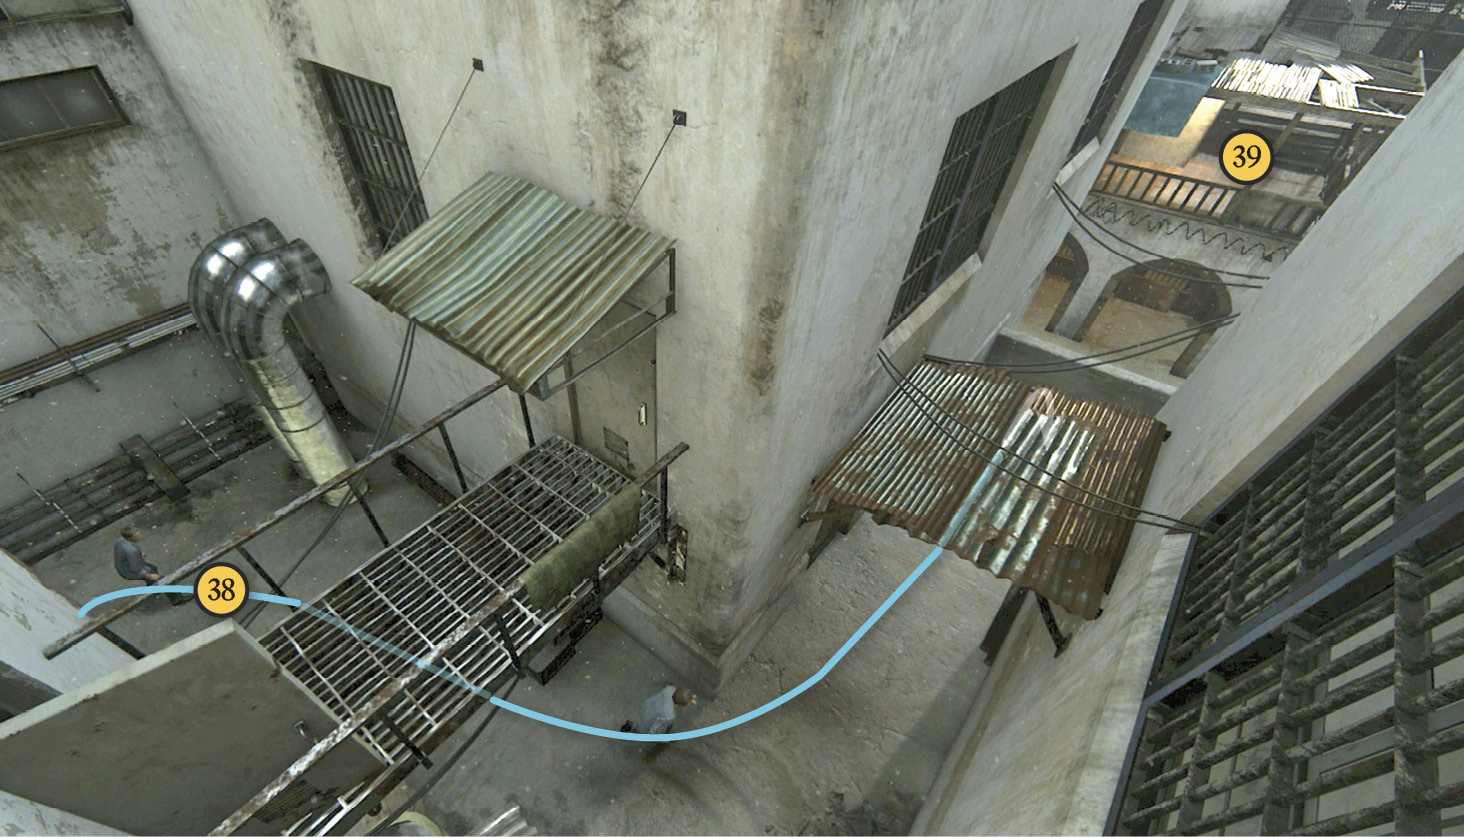
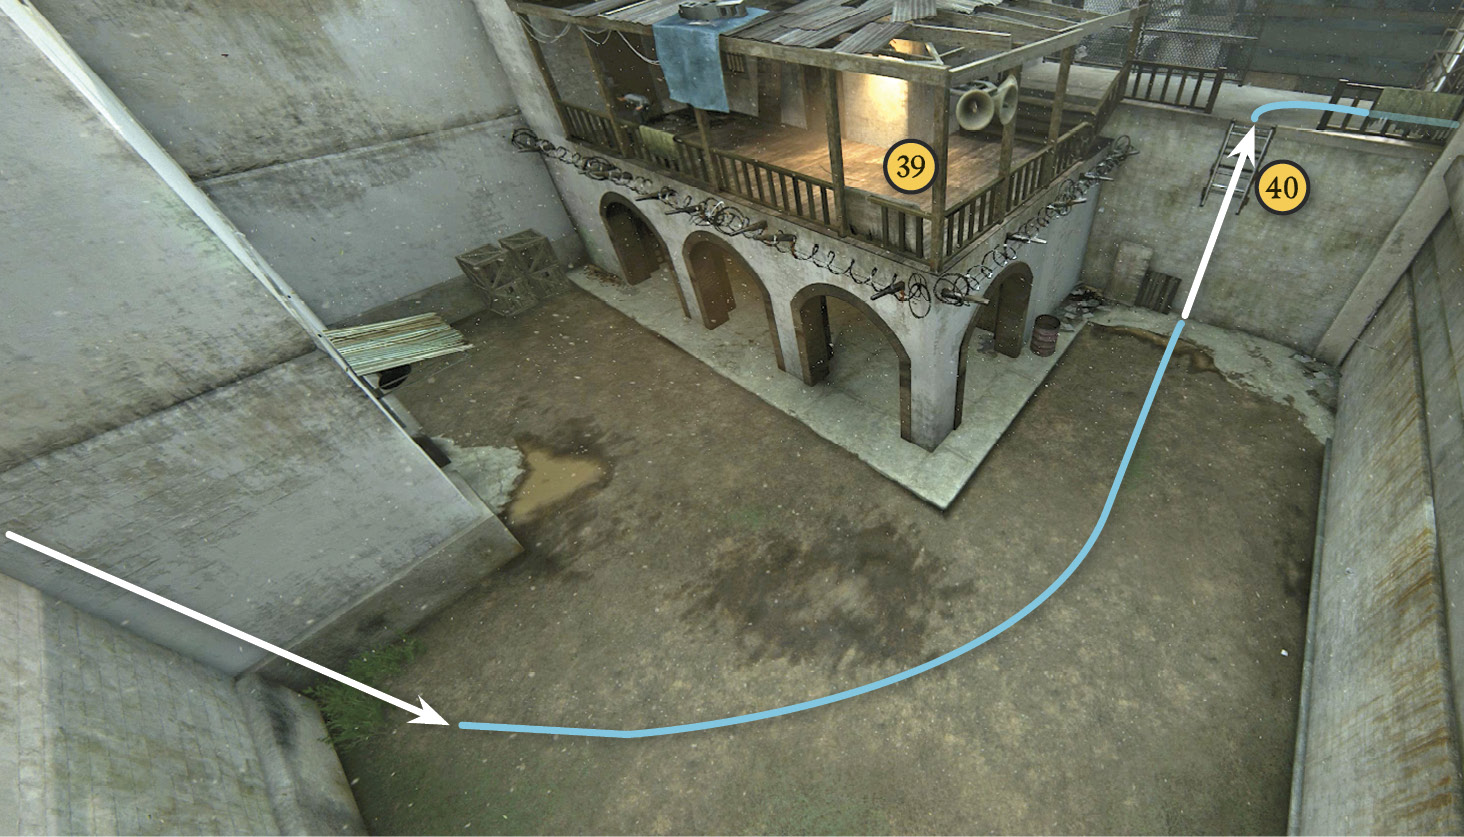
When Sam pulls open the grate, enter the vent and follow it to the grate at the duct’s end. Press to open it and exit the vent into a corridor (38). Follow it around the corner; you see Rafe knock out a guard on a raised walkway (39) up ahead. Drop into the courtyard below and run to another fire escape ladder (40). Rafe lowers it for you, so climb to the next level.
Get to the Boat!
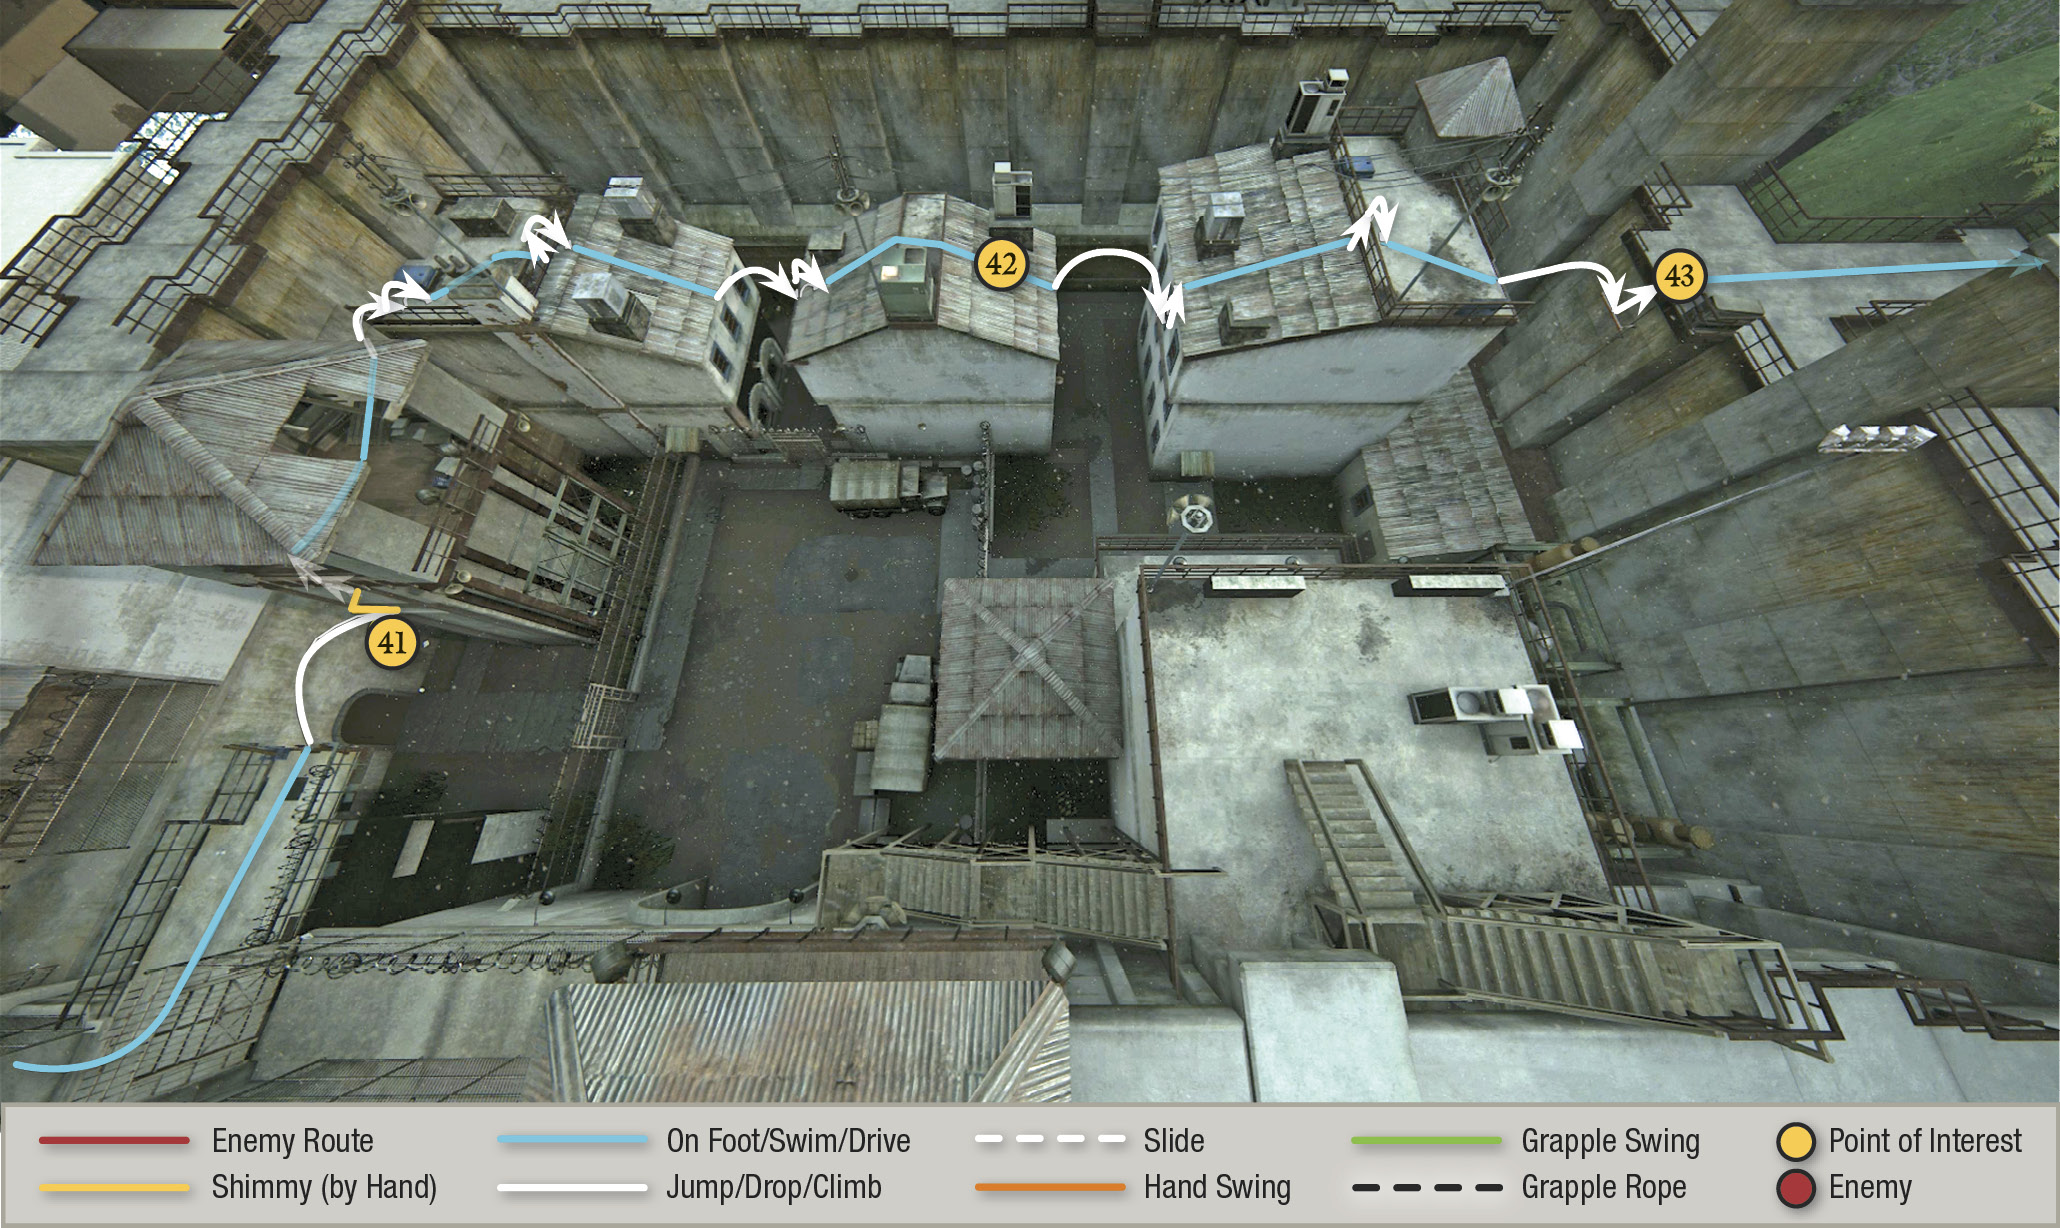
Note that from this point on, Sam stays behind you instead of leading the way—now you’re following Rafe. Jump across a gap to grab another a ledge (41), shimmy left around the corner, and then climb to a platform where you can look down at the prison’s vehicle pool.
Turn left and make a running leap from the wooden pallet to an open platform. There, you can turn right and spot Rafe on the next rooftop. Leap across a series of three roofs (42), following Rafe until you finally rejoin him on a platform atop the prison’s outer wall (43). You can see the lighthouse and open jungle just ahead! Rafe says a boat waits for you just beyond the wall.
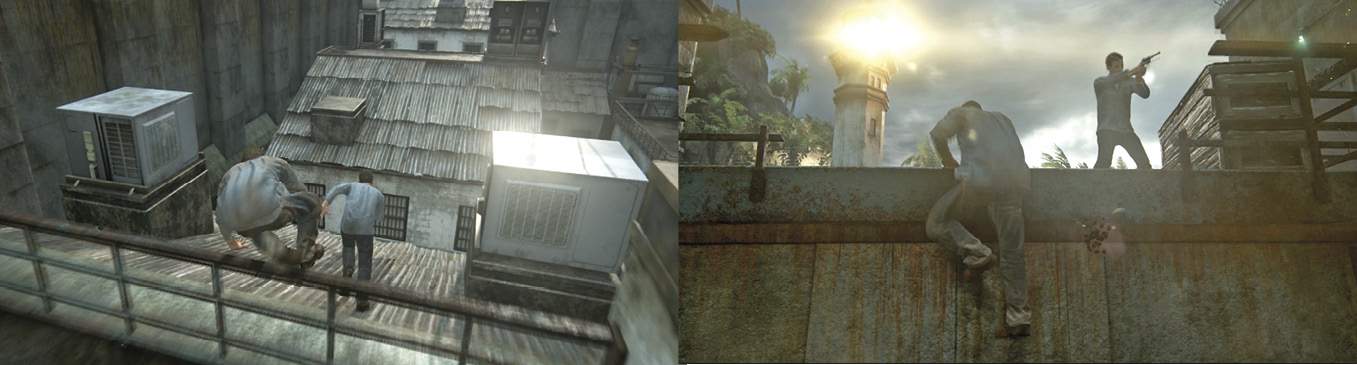
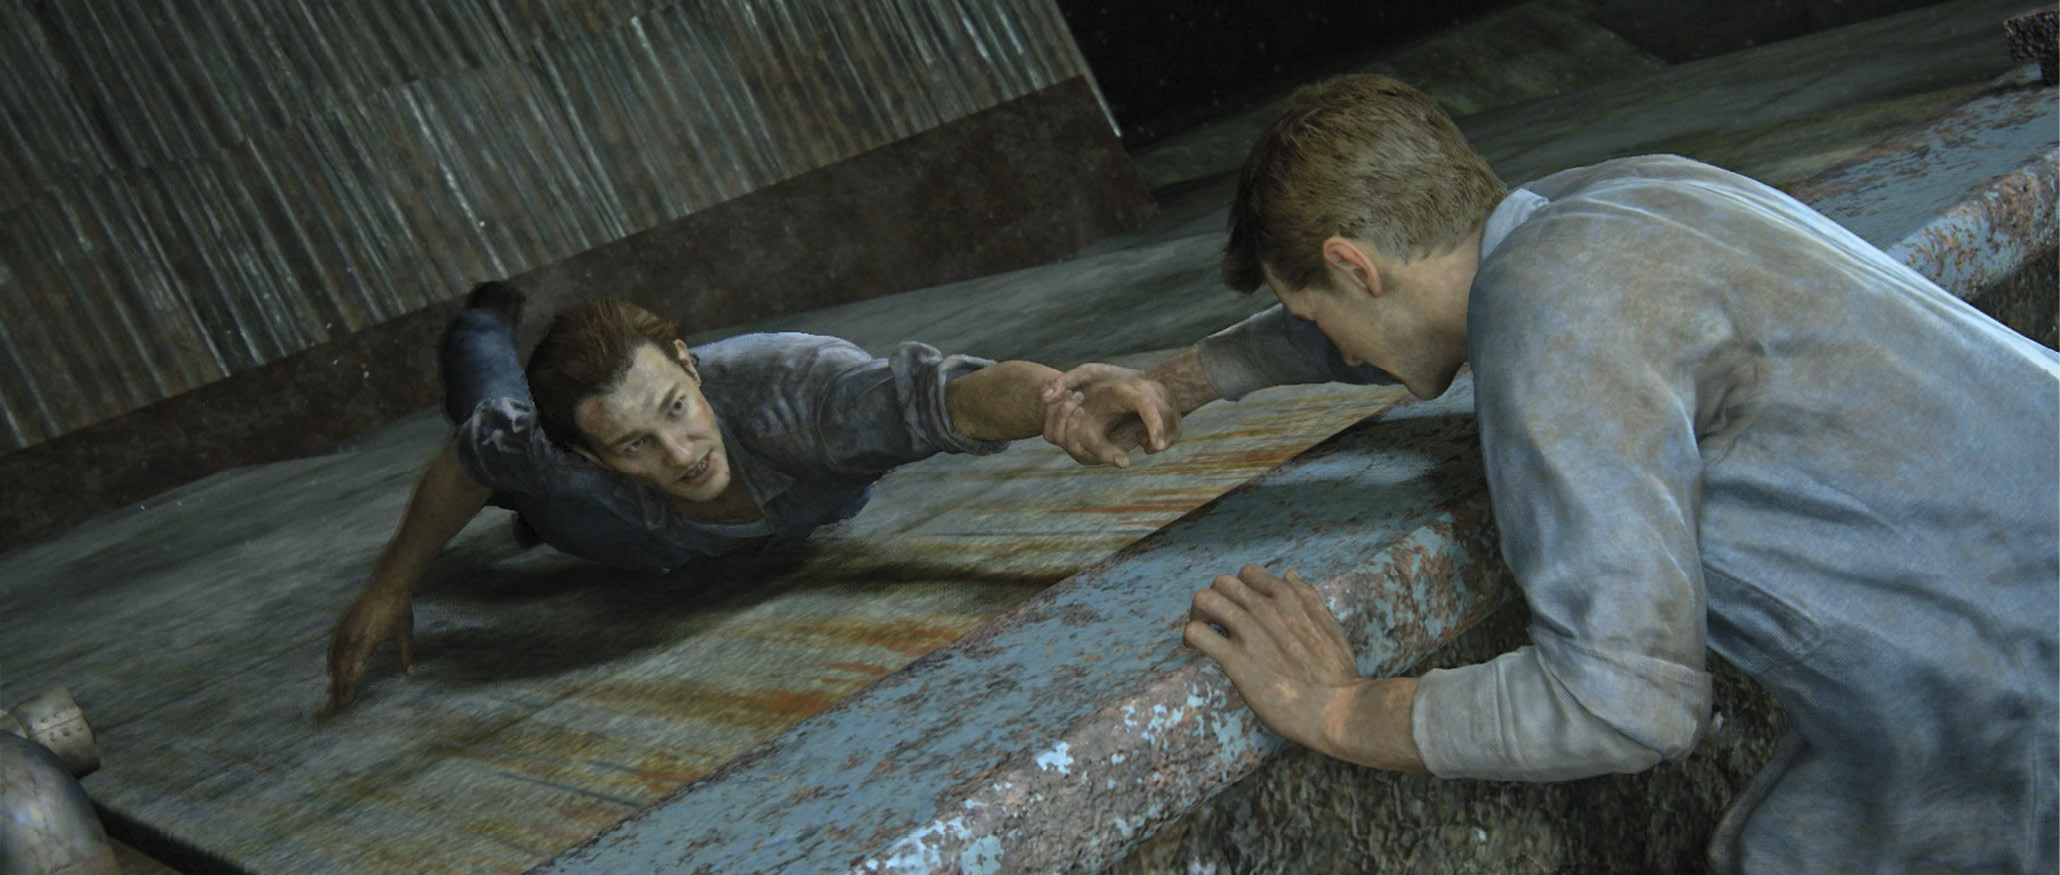
This triggers a dramatic cutscene: Sam makes the last jump and Nathan tries to give his brother a hand. When control returns, follow Rafe over the last railing into the jungle. Scramble downhill through the heavy foliage and over low walls, following Rafe until you reach a rockslide. Hop onto the slide and ride downward toward the water. Done! Watch the game opening credits.