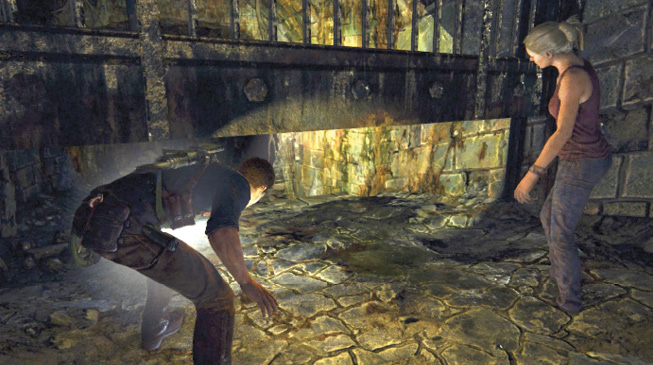
Uncharted 4: A Thief's End Guide Story Walkthrough
Chapter 18: New Devon
Nathan and Elena have discovered a veritable forest of gibbets. As Nate says, “I guess that’s one way to quash a rebellion.” New Devon also features a forbidding city wall with a locked gate that seems impassable.
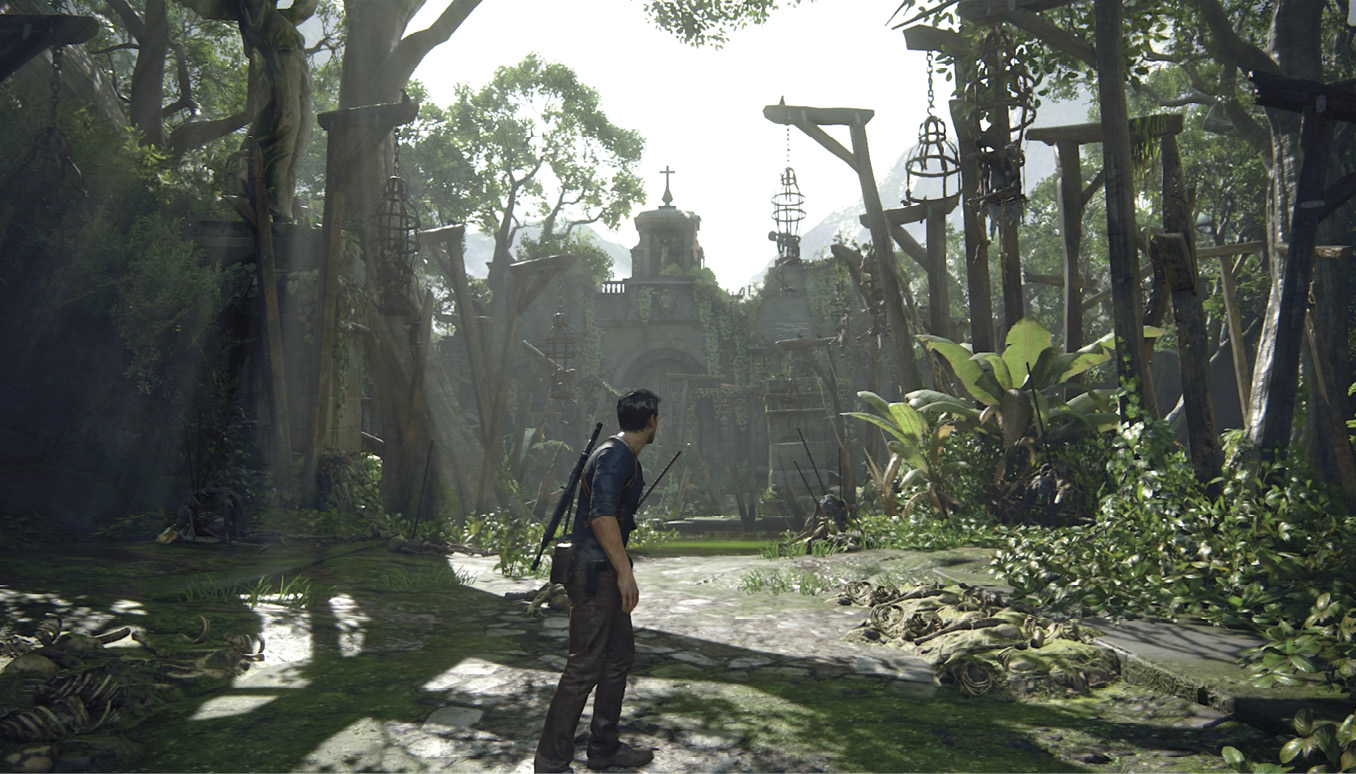
CollectiblesTreasures: 8 Chapter Specific Trophy: “Lost Art of Journaling” Optional Conversations: 5 Optional Journal Notes: 5 Optional Journal Entries: 2 New Weapons: DshK |
Get Over the City Wall
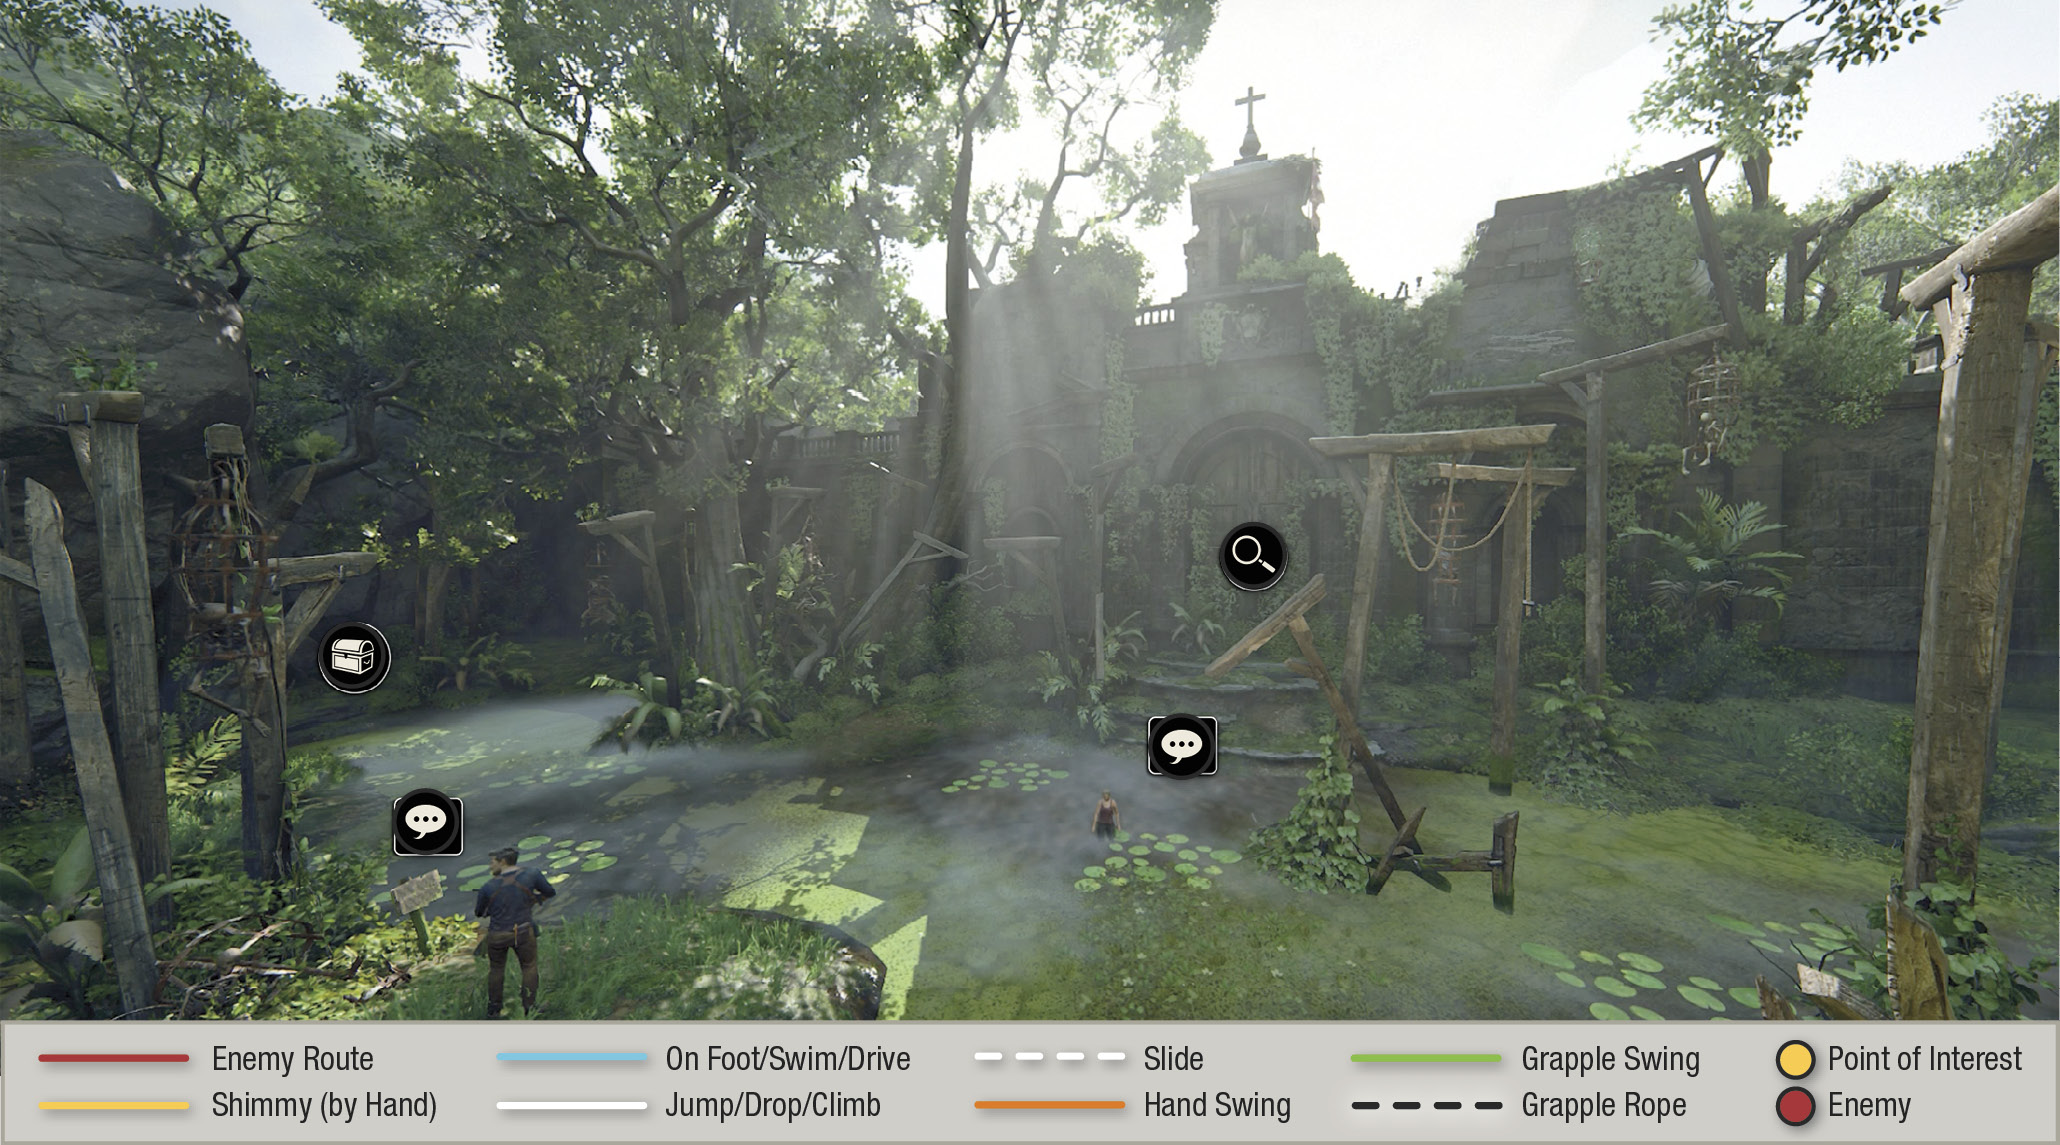
First, head to the sign in the ground and then approach Elena to trigger the Optional Conversation, “Digna Factis Recipimus”—Nate translates the Latin as, “We receive the due reward of our deeds.” Indeed we do. Continue past the sign into the yard’s back left corner to find a treasure. Then approach the big city gates to examine them; Elena starts reading the Latin inscription over the gates. Talk to her for the Optional Conversation, “Hodie Mecum Eris In Paradiso.”

Mughal Stout Vase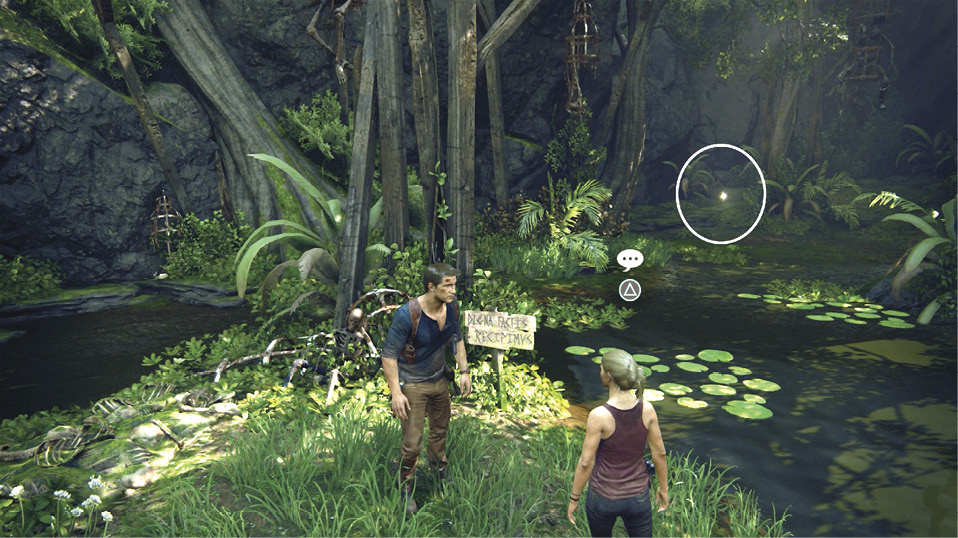
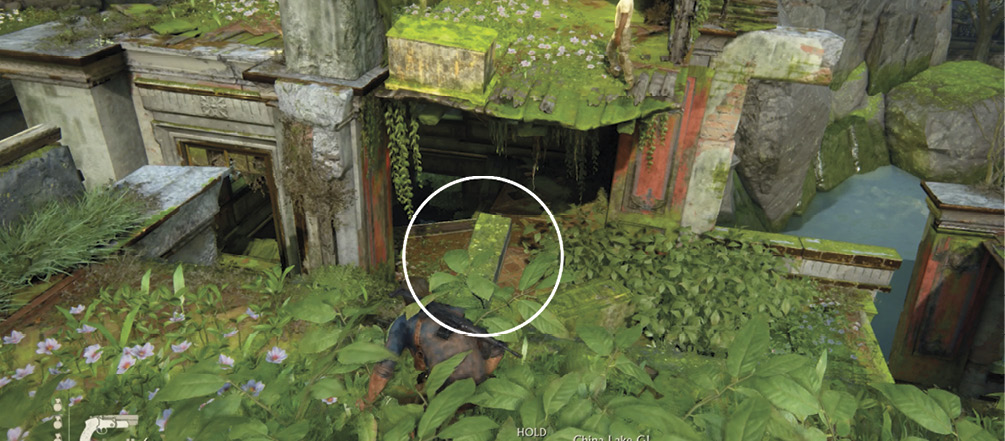
Find the Mughal Stout Vase (circled) in the left corner of the yard outside New Devon, not far from the “Digna Factis Recipimus” sign. It’s hidden in plants near the rock wall. |
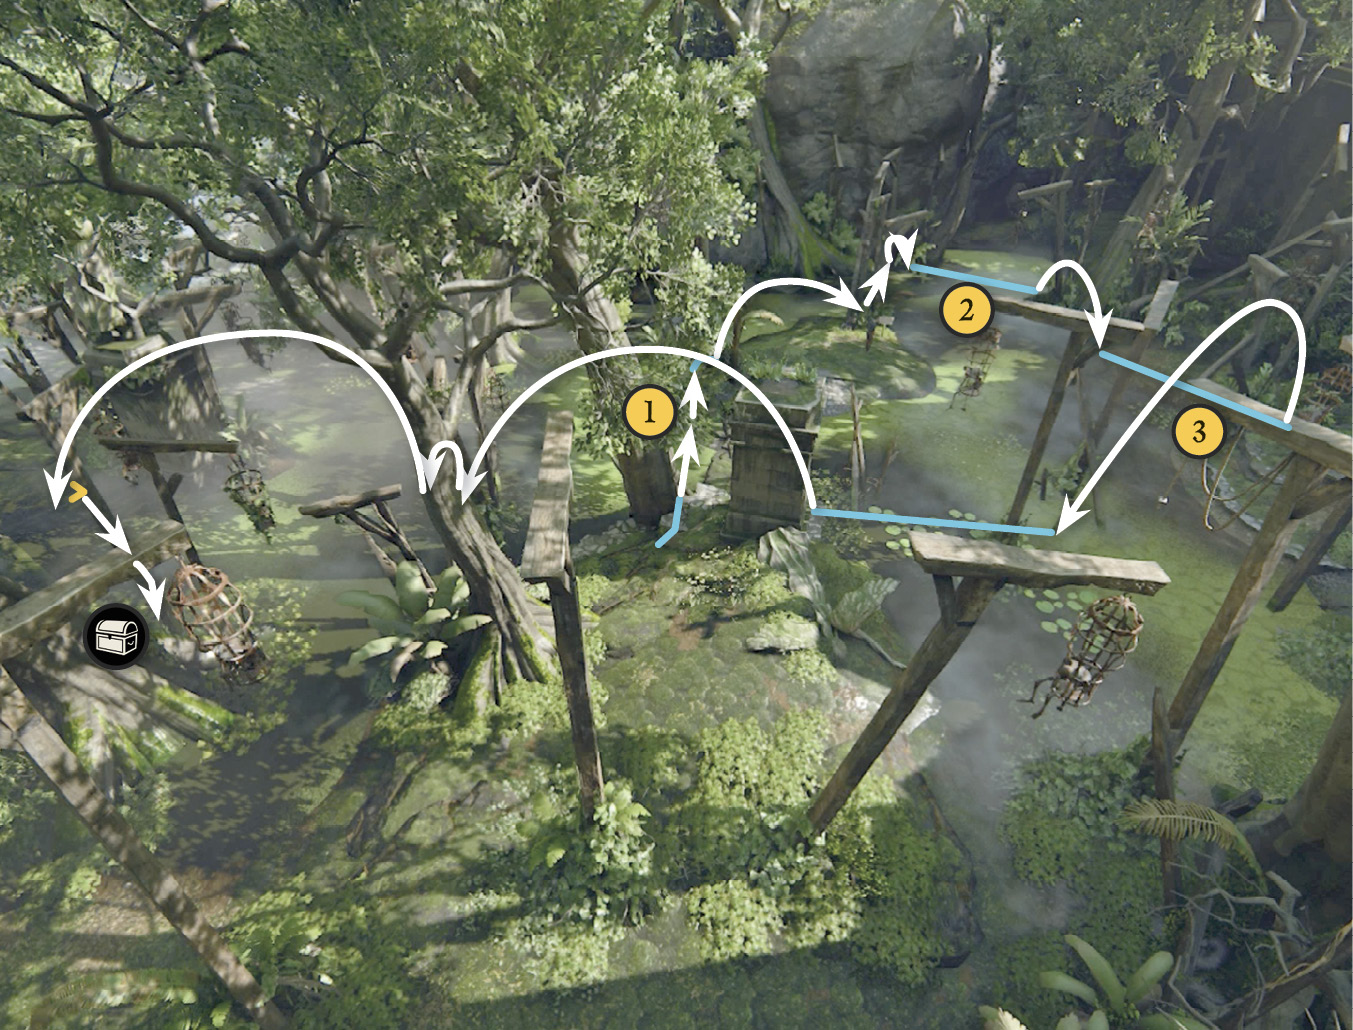
Climb atop the square stone pillar (1) in the center of the yard. Jump across to the nearest gibbet cage (2), climb onto its top beam, and then walk to the end and jump to the scaffold with the hanging ropes on the right (3). From here, you can turn right (away from the city wall) and hop across scaffolds to reach the treasure in a gibbet cage. Then retrace your route back to (3). Careful: If you fall off any gibbet or scaffold you restart at the checkpoint.
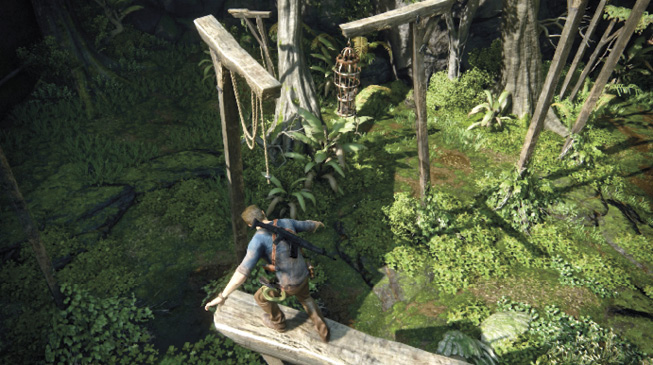

Small Mughal Dagger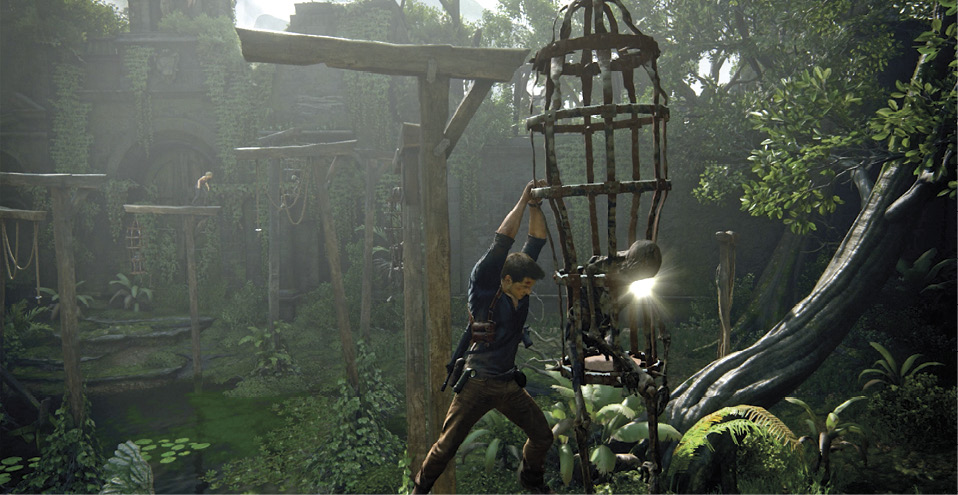
Hop across the scaffolds (see our map) to find the Small Mughal Dagger on the bottom of a gibbet cage. You must hang low and work your way around to the backside of the cage to grab it. (Don’t drop! Nate will take a nasty fall.) |
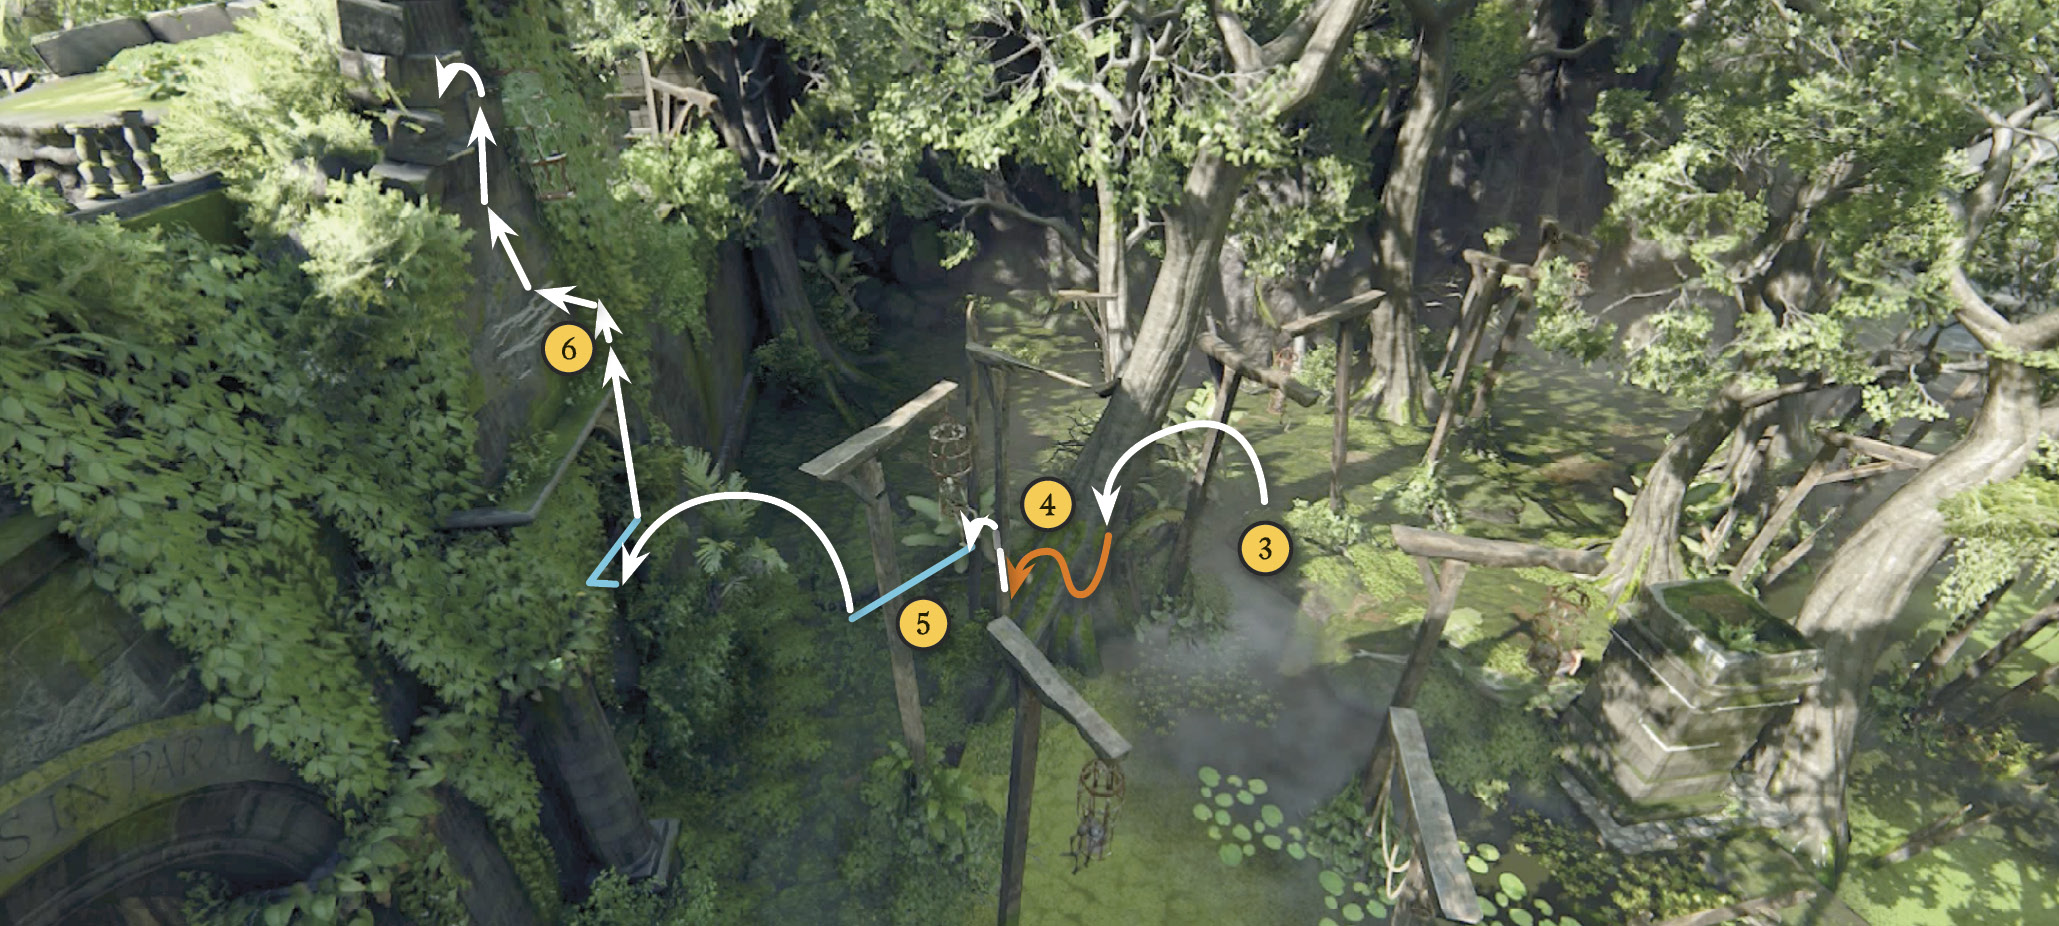
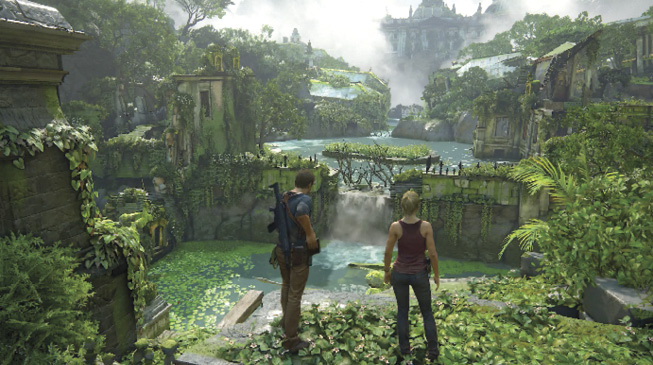
From (3) you can jump toward the city wall to grab the swing pole (4), then swing to the gibbet beyond (5). Jump from its top beam over to the ledge on the city wall. Traverse the ledge rightward to get underneath the plant-filled gibbet, then climb it. Reaching the top (6) triggers a cutscene: Nathan and Elena survey the neighborhood…and spot some interesting neighbors, including a relative.
Explore the First Mansion
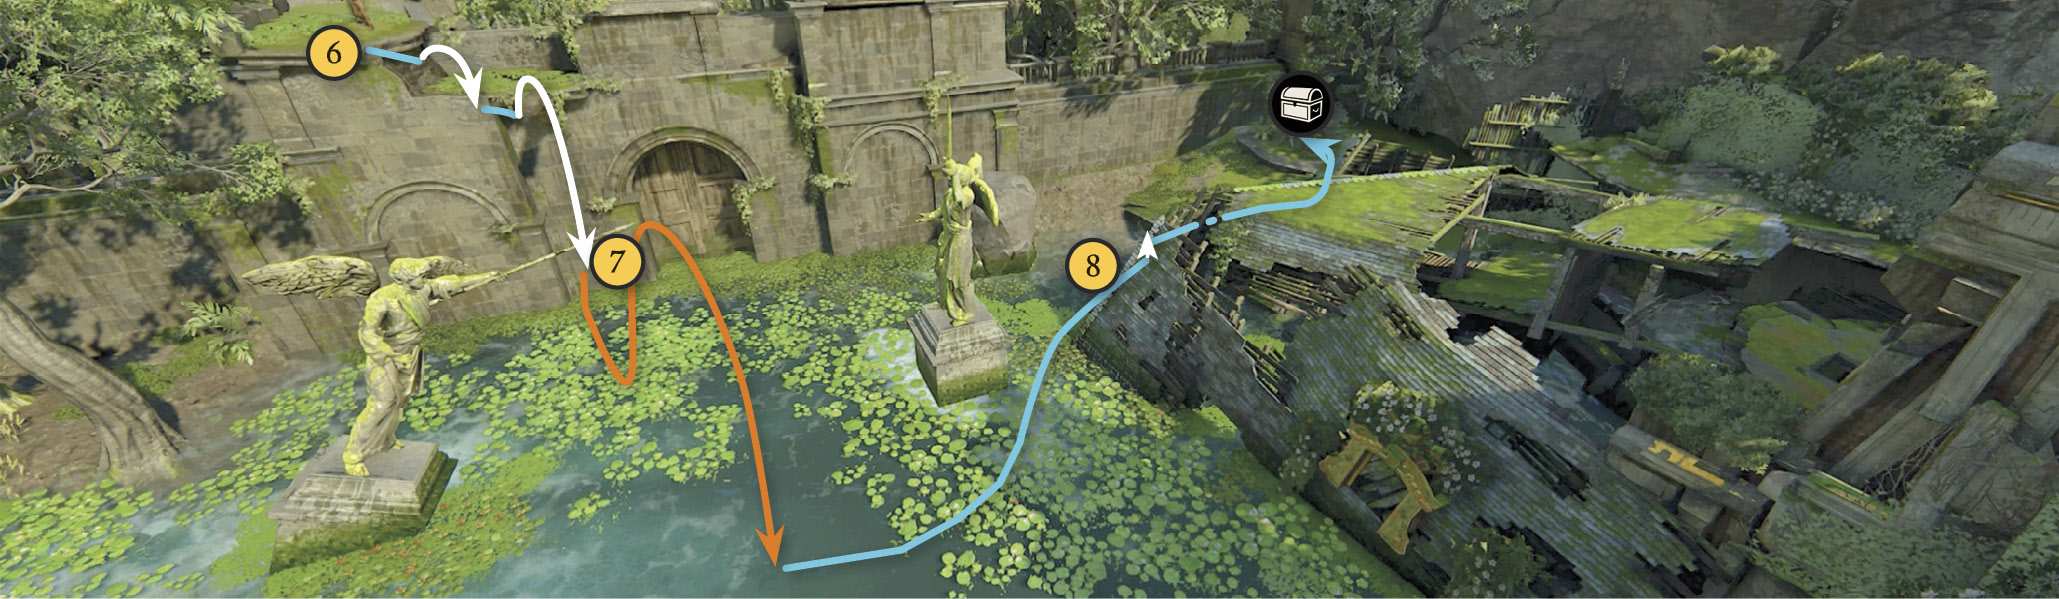
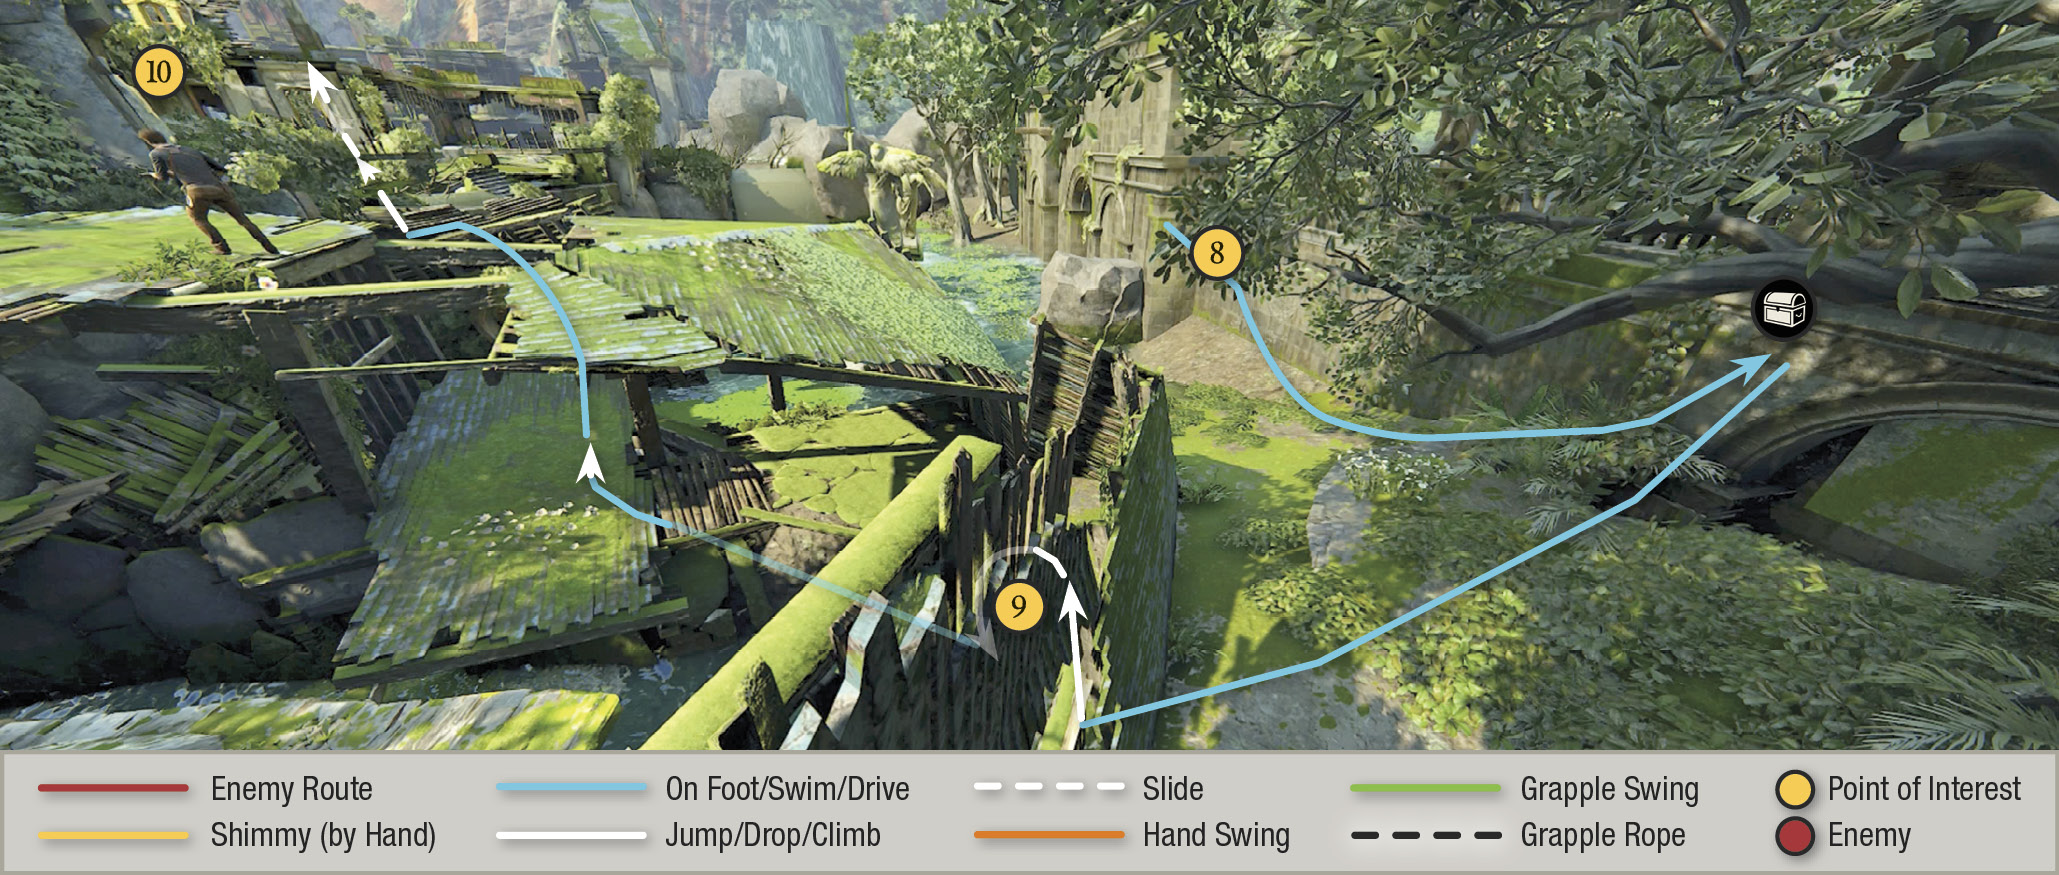
Drop down the terraces, walk to the end of the extended beam, and jump to hang from the statue’s spear (7). Swing out and jump into the water and swim to your left (8). Look for a treasure along the wall, then turn right and hop over the low part of the wall (9) into the ruins of the house. Climb to the second level (10).

Mughal Candle Holder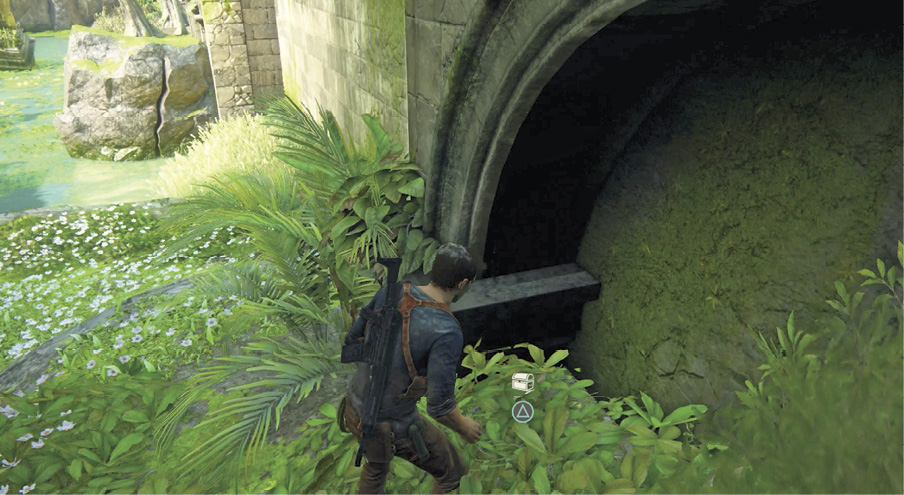
When you first drop into the water from the city wall, swim to the left and climb the slope. Follow the left wall to find the Mughal Candle Holder tucked at the bottom of the corner wall arch. |
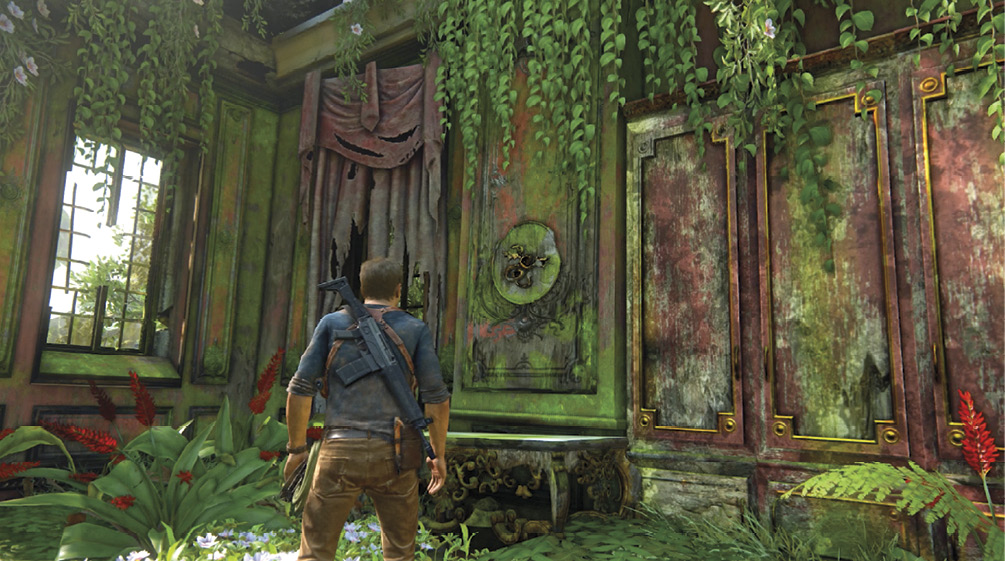
Use the mossy beam to hop over to the doorway (11). From the entrance, go left to duck under the beam and climb up the fallen floor. Hop down to the bedroom on the lower floor to pick up an Optional Journal Note on the bed—an ugly sign of discord between founders Condent and England. Then climb back upstairs to examine the sigil (12) on the wall: Aha, Christopher Condent’s house!
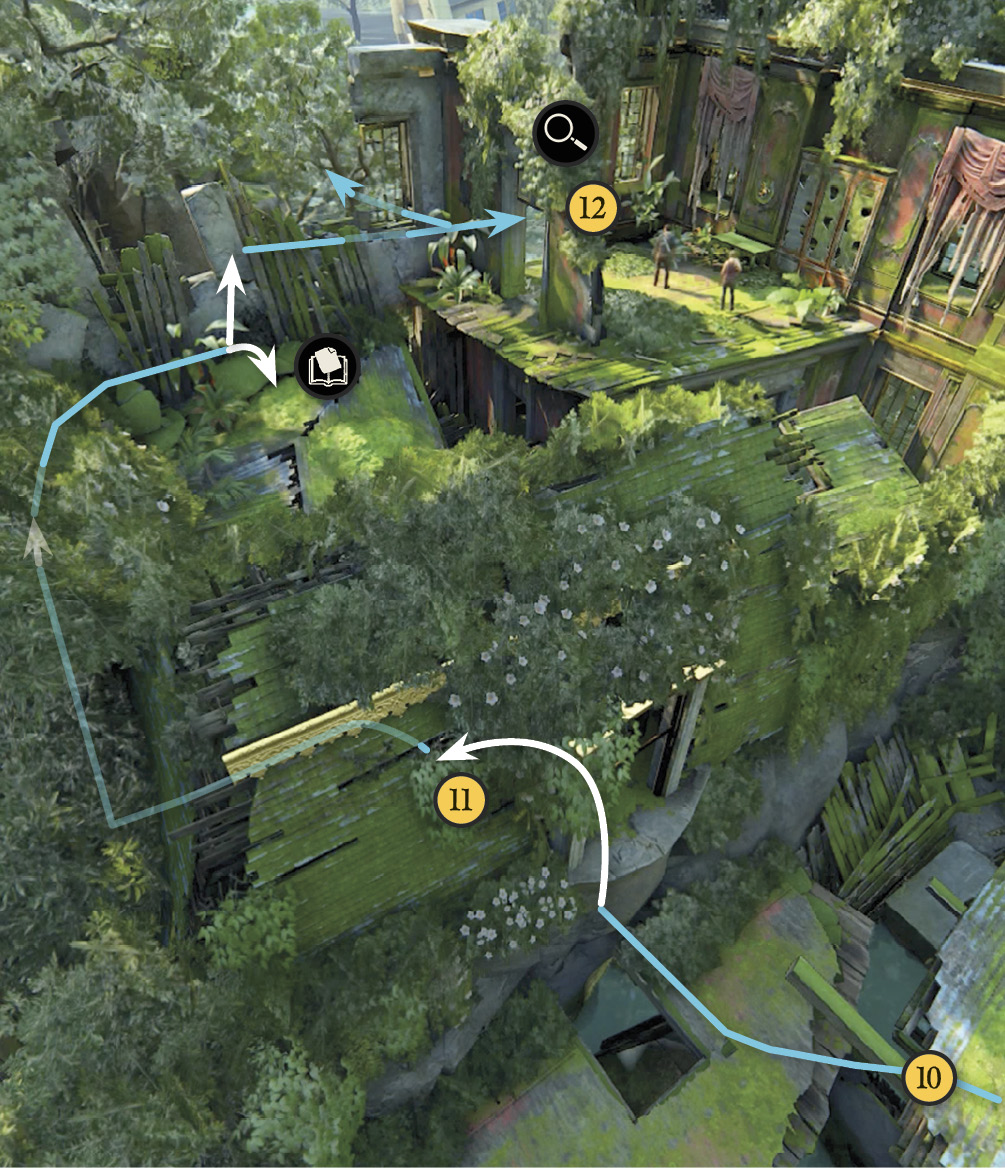
Exit left and hop down into the tall plants to trigger a scene: Nathan spots Shoreline mercenaries posted on the ruins of the next mansion. Elena suggests a swim underneath the house to avoid a confrontation. But you can also work your way through with stealth takedowns.
Reach the Cave Exit
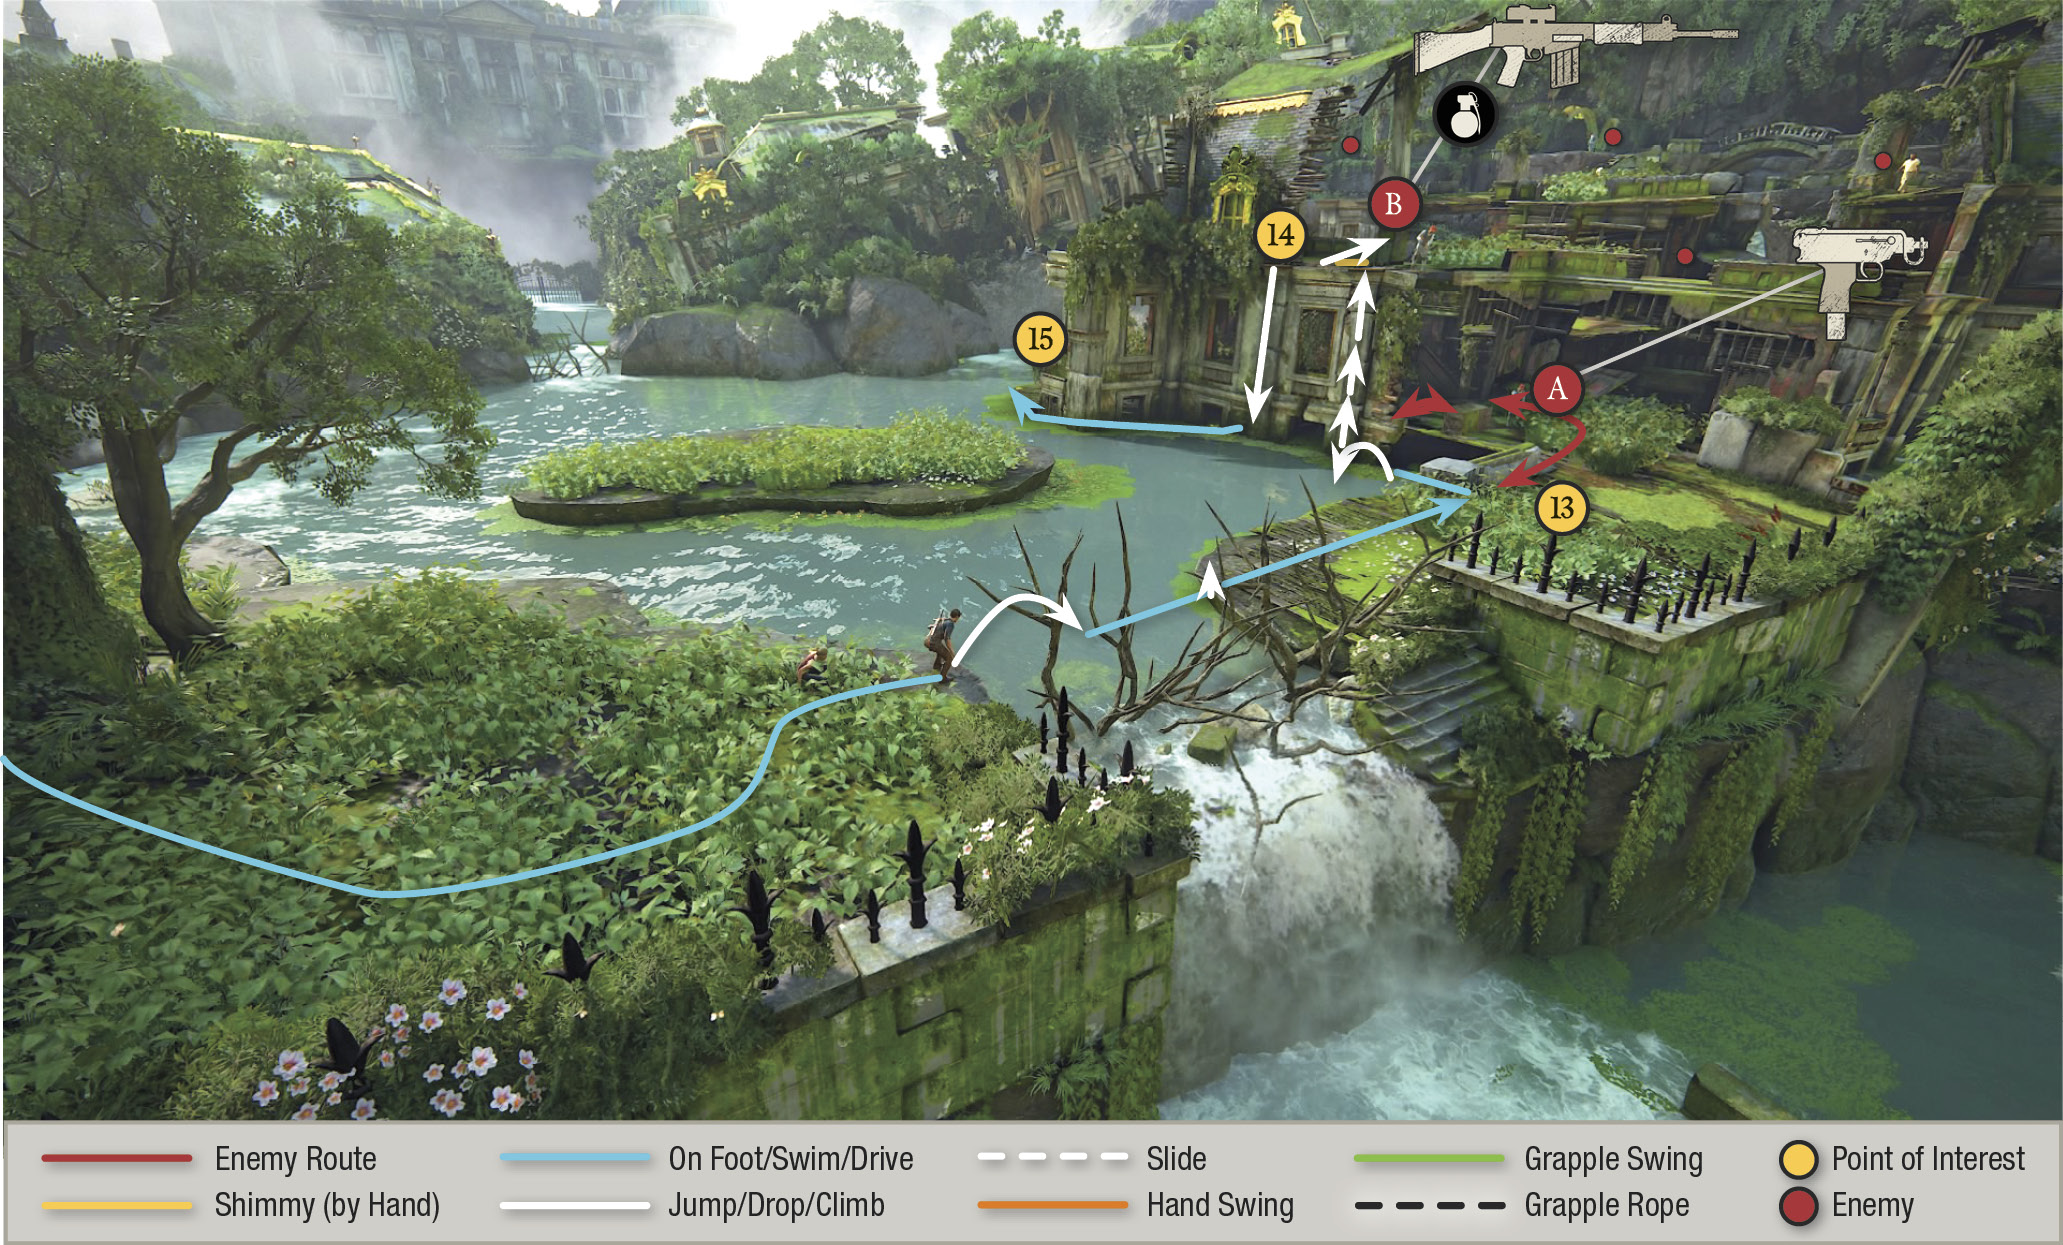
Your next objective is to get past the guards in the ruins to a cave exit in the back of the area. You can fight or move with stealth. Both options are difficult. We’ll give you our stealth path below, but it’s tricky and chances are good you’ll get spotted. So be ready to fight. Getting through this area stealthily means you don’t have to fight two guards in the first wave and a second more brutal wave of support soldiers will never be called.
Move through the tall grass to the water’s edge (where shown on the map) and jump in the water. Swim across and pull up to the next island. Roll to the tall grass (13) to avoid being detected by guards (A & B). Silently take down guard (A) as he wanders into the grass toward you. Sometimes Elena will beat you to it.
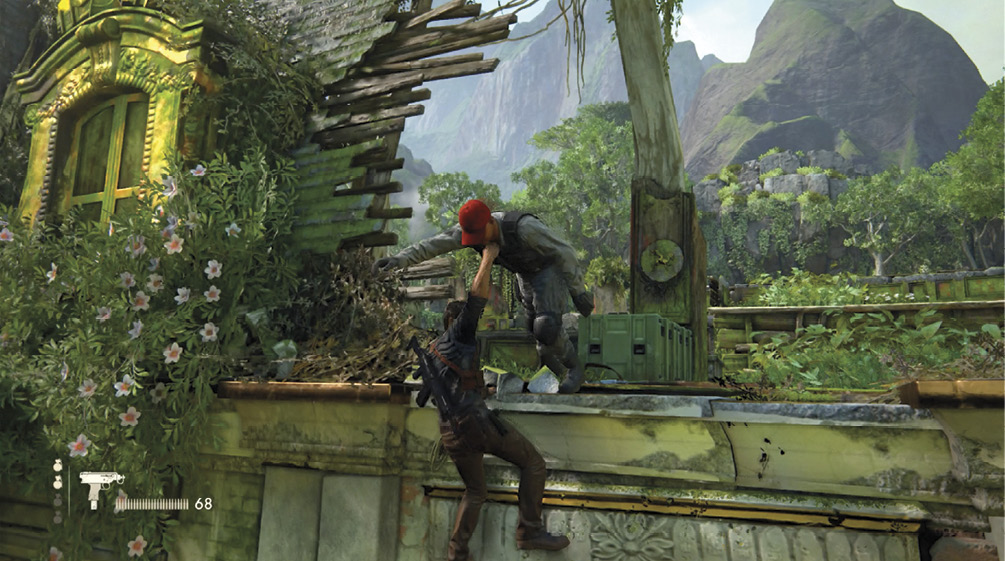
Jump into the water off the left edge of this platform. Swim directly to the wall underneath guard (B). Climb the wall and hang right below the ledge (14) where the guard stops on his patrol route. When he stops at the edge, pull him over into the water. Sometimes he hangs on to your leg. Button mash  to shake him off. Take the grenade he drops, and then hop down into the water and swim with the current to the island’s left side (15).
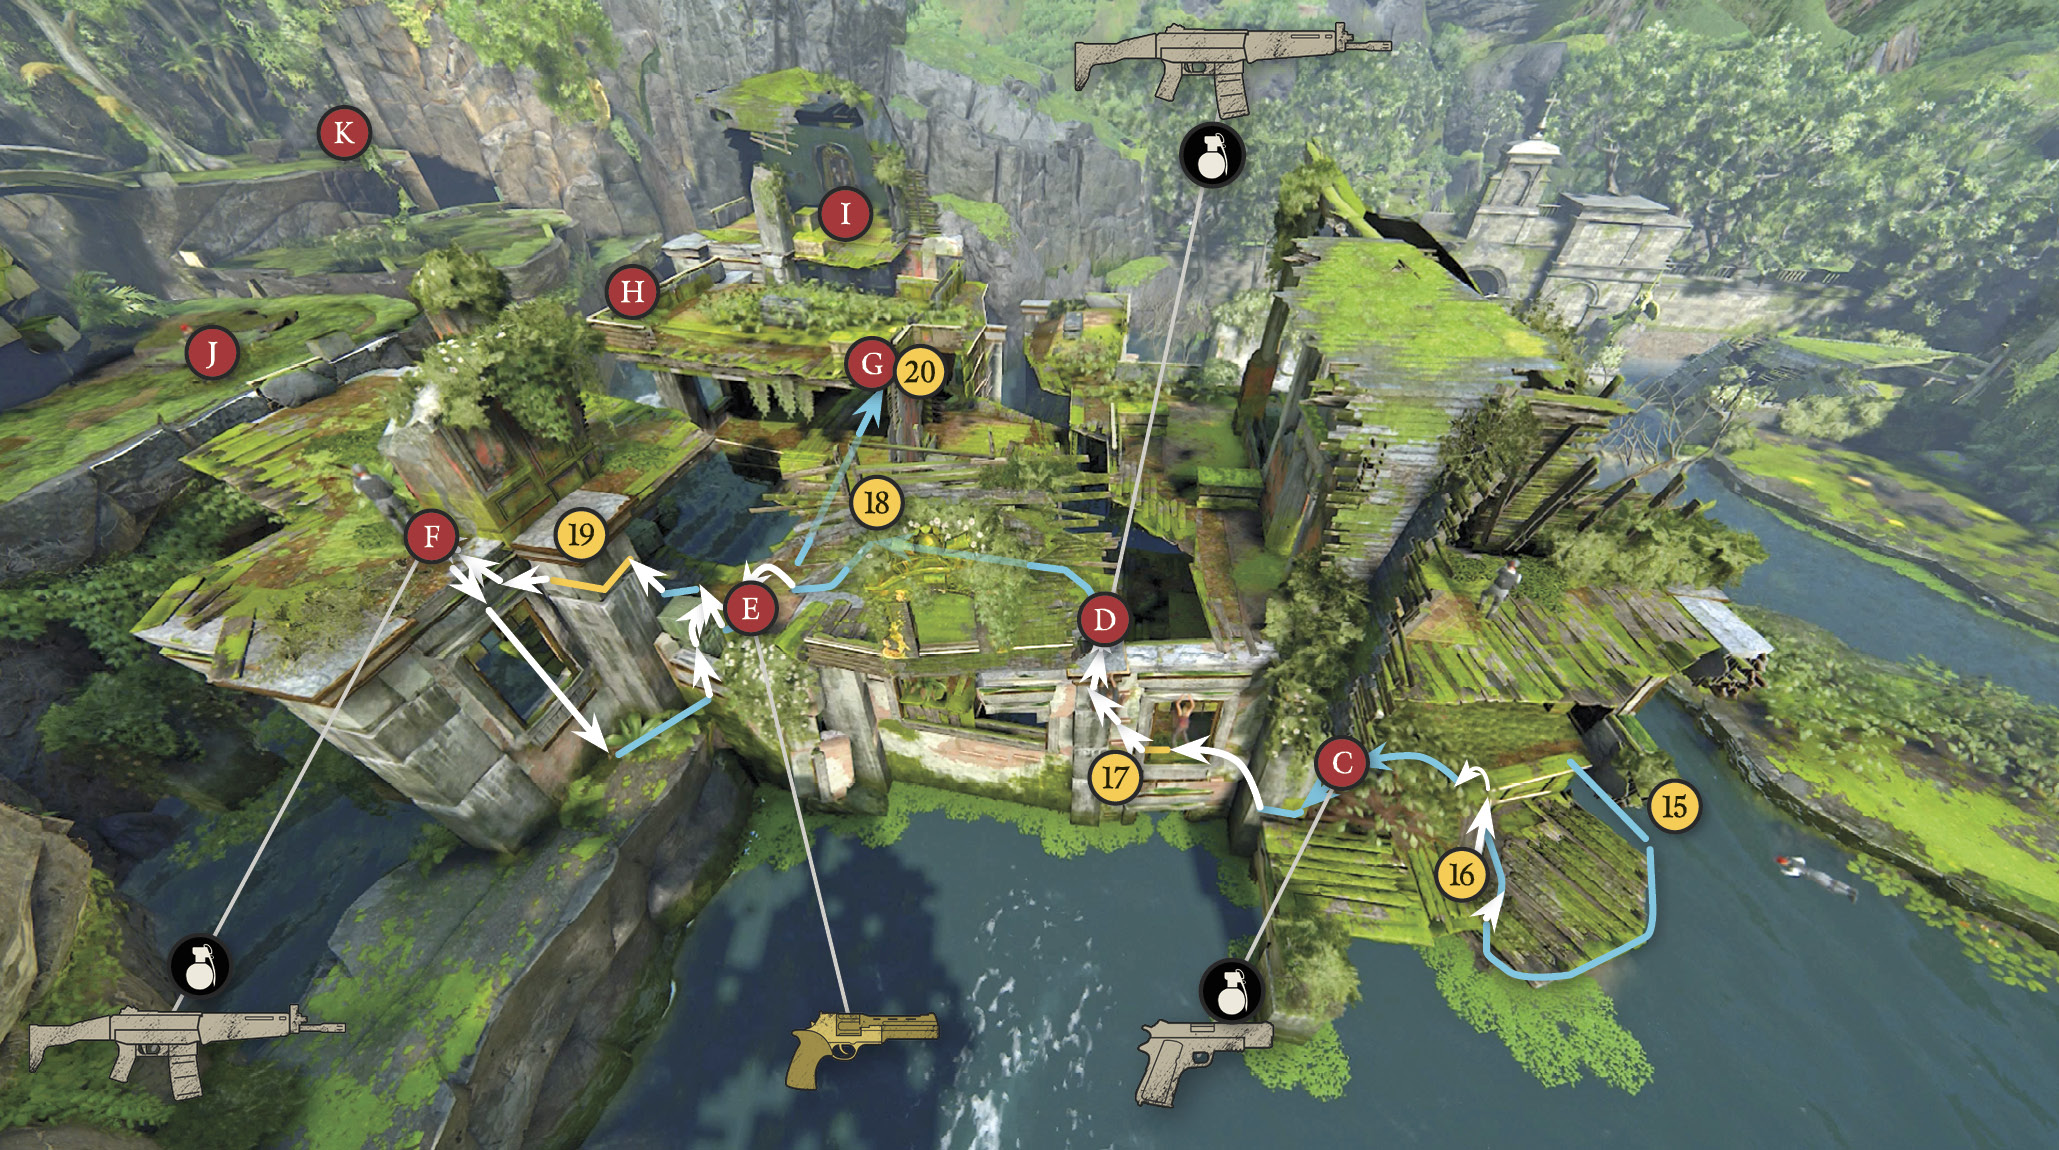
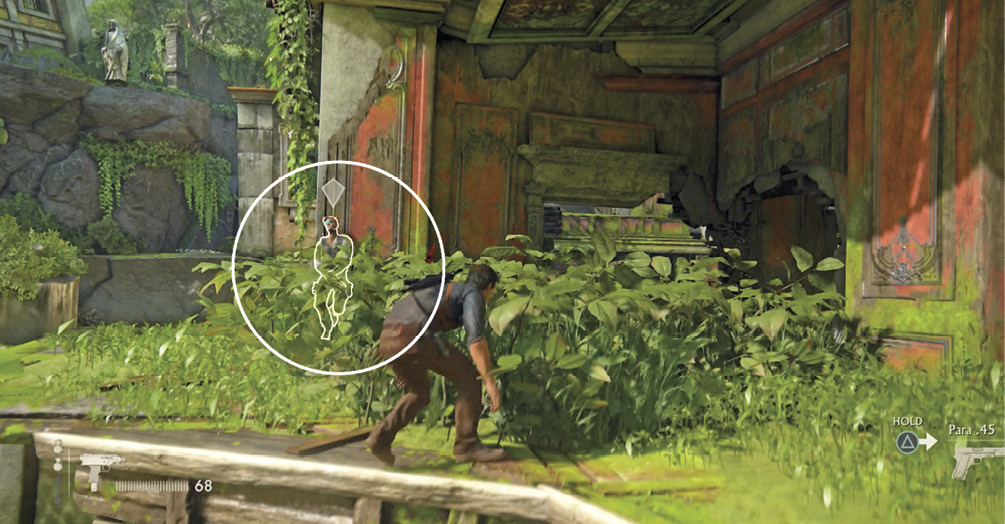
Swim around the building’s left corner and pull up out of the water when you’re near the higher floor (16) so that guard (C), who has a very short patrol route, doesn’t see you. He often leans against a wall in a batch of tall grass. While he’s leaning on the wall, pull up and enter the tall grass and then rush him and take him down quickly. Sometimes the guard on the top floor (D) will enter a yellow alert status and come down to see what happened. If he does, stay in the tall grass and then take him out quietly. Sometimes Elena beats you to it.
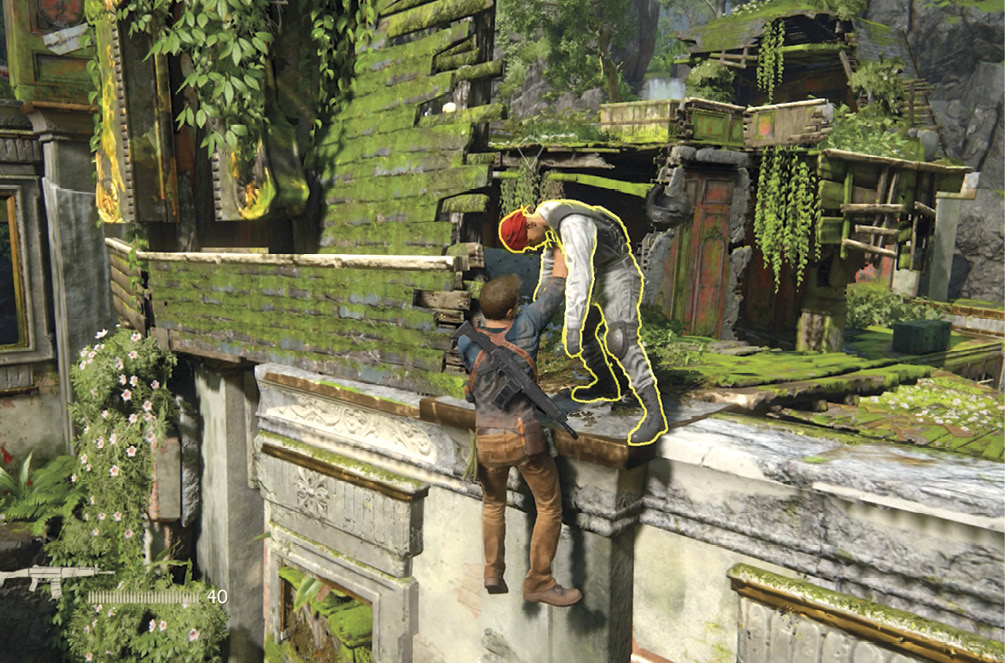
When guard (F) is not looking in your direction, leap from the left edge of this platform to the windowsill, or further left if you can. Once you’re on this wall (17), you are in no danger of him seeing you. Using the jutting bricks, scale the wall and hang from the top edge. Guard (D) patrols the top floor here (if he entered white or yellow alert status and did not jump down to the lower floor when you killed the last guard, you can sometimes find him in the room on the right). So either pull him into the water on his patrol route from the wall’s edge or quickly enter the room on the right when guard (F) is not looking and choke him out.
Quickly hide behind the short wall (18) on his floor to hide from guards (E, F, G). When guards (F & G) are not looking and guard (E) is in the nook to the left near the crates used to climb the column, run from behind cover and perform a quick vertical takedown. Do not hesitate and quickly climb the crates and get onto the column (19). Quickly shimmy around the corner to hide from guard (G) and hang from the rooftop’s edge under guard (F). Pull him over when he walks up to the edge. Guard (J) in the distance may enter yellow alert, but if you drop off the wall out of sight nothing will come of it.
On the small ledge below the window near the column you climbed, scale the short wall that guard (F) was near and peer across the structure into the central structure’s opening (20). If you do not see guard (G), pull up and sprint into that building. Take cover behind the furthest wall where it opens to a view of a ramp. Guard (G)’s patrol route stops at this opening.
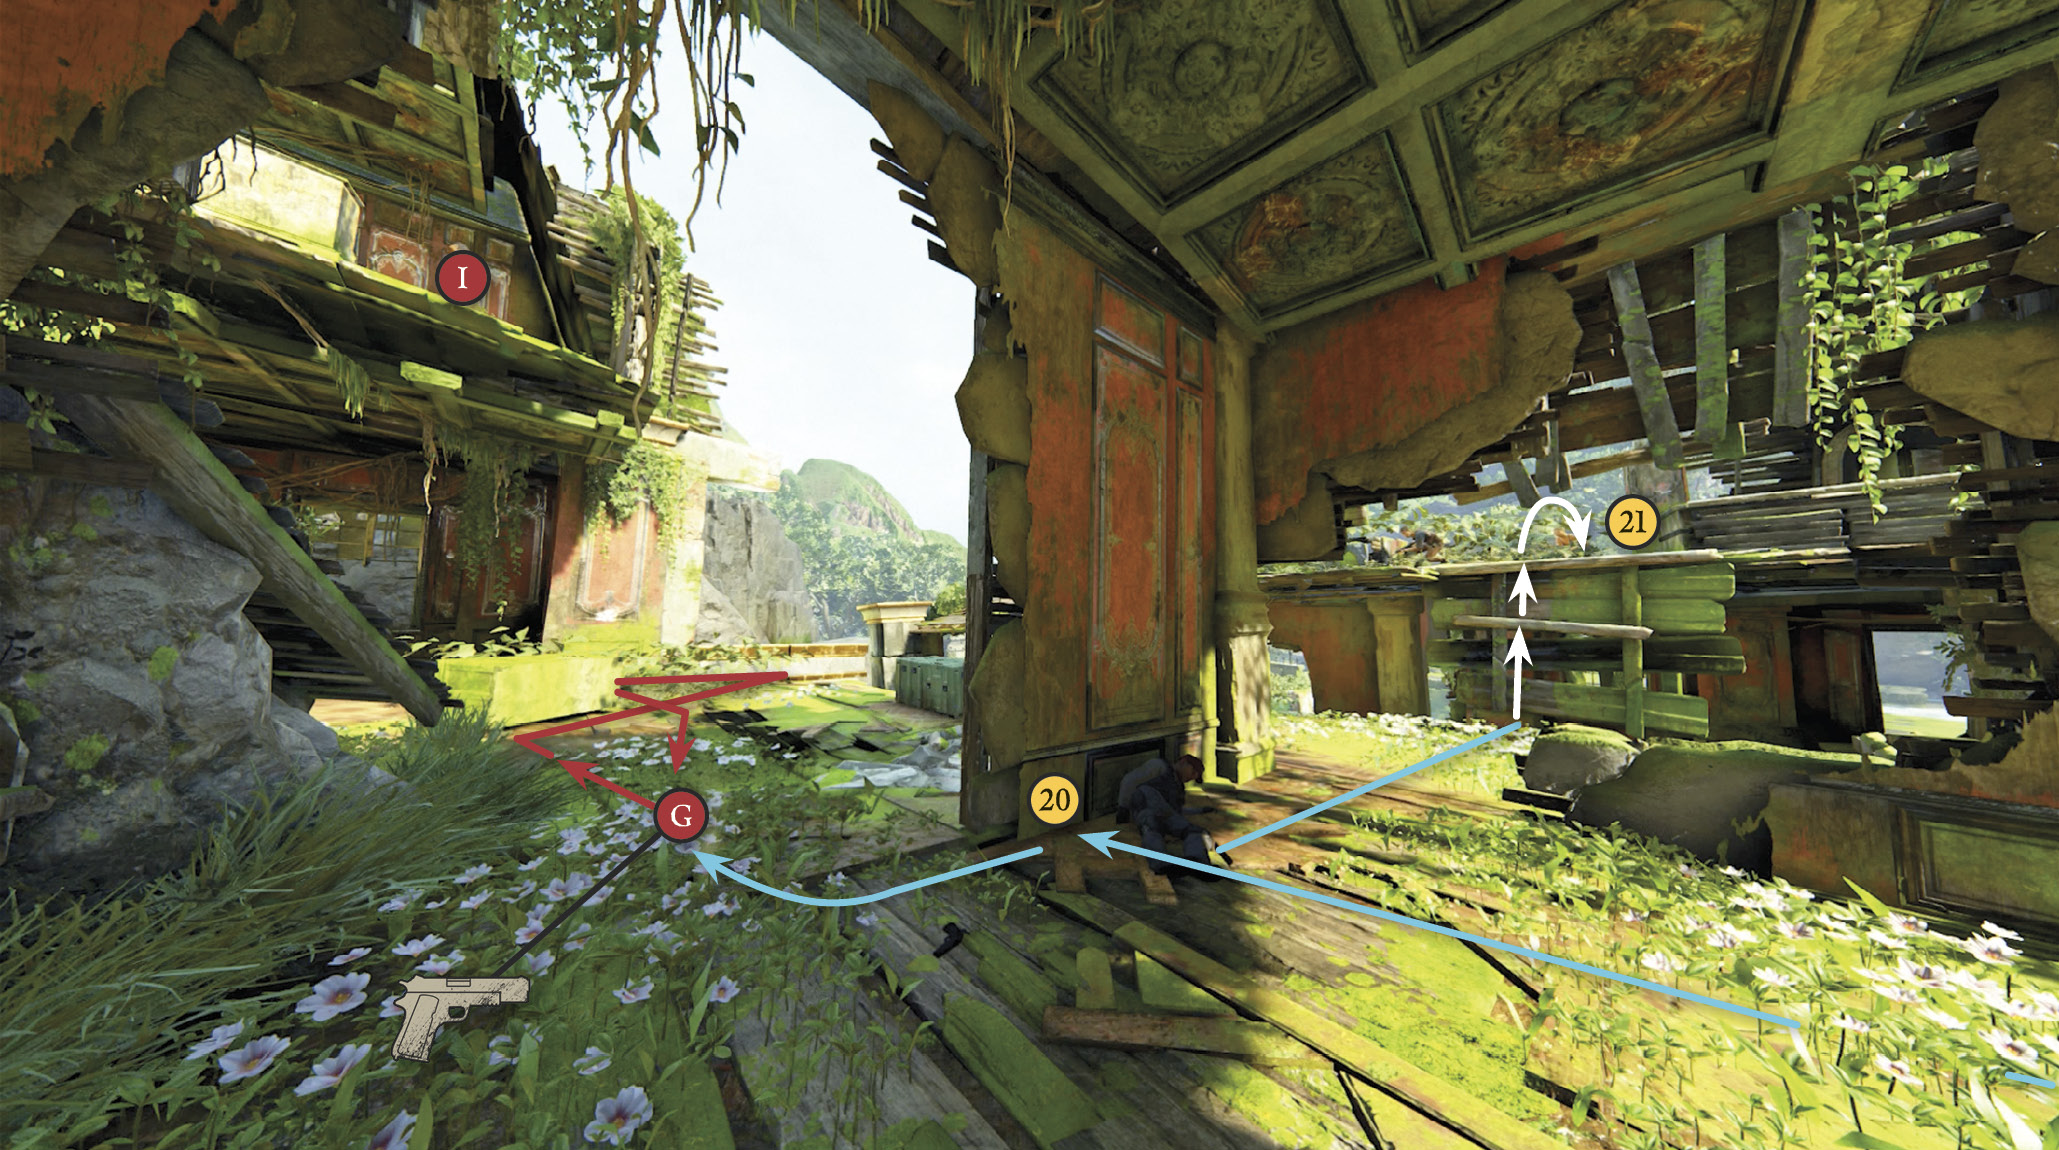
If your wife doesn’t beat you to the kill, spring out from behind the wall (20) and perform a stealth takedown when guard (I) is not looking. Nate will reach out and slam him against the wall. Brutal. Now run out the hole in the wall to the right and climb into the tall grass on the next platform (21).
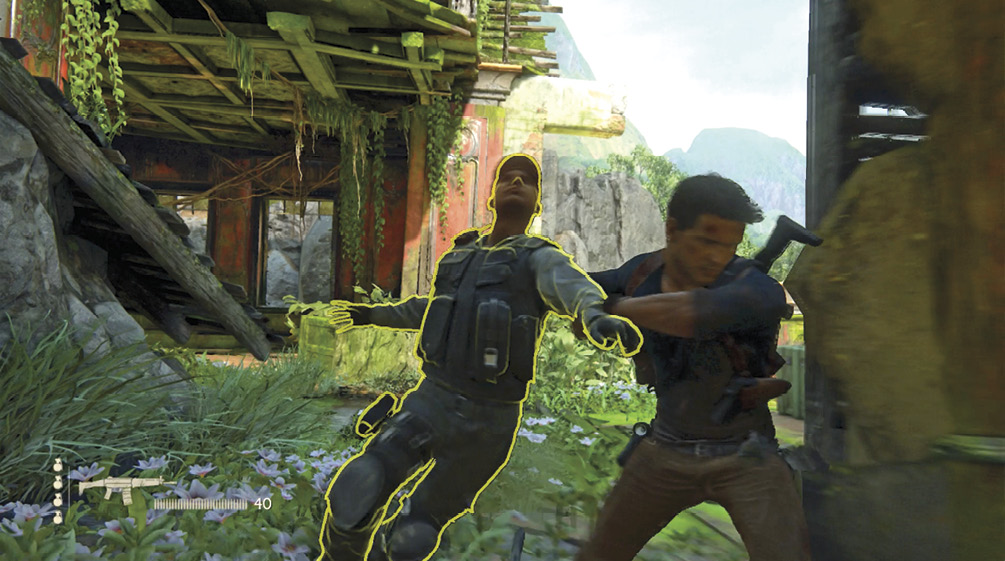
Leap from the ledge (21) to the rooftop of the building you just left. Head through the tall vegetation and take the China Lake GL from the crate in the center if you wish. It could come in handy much later if you don’t use it during this scenario. When (J) and (I) are not looking, roll through the clearing of vegetation (22) to the guard (H) who always keeps his back to you. Choke him out and very quickly roll back into the vegetation.
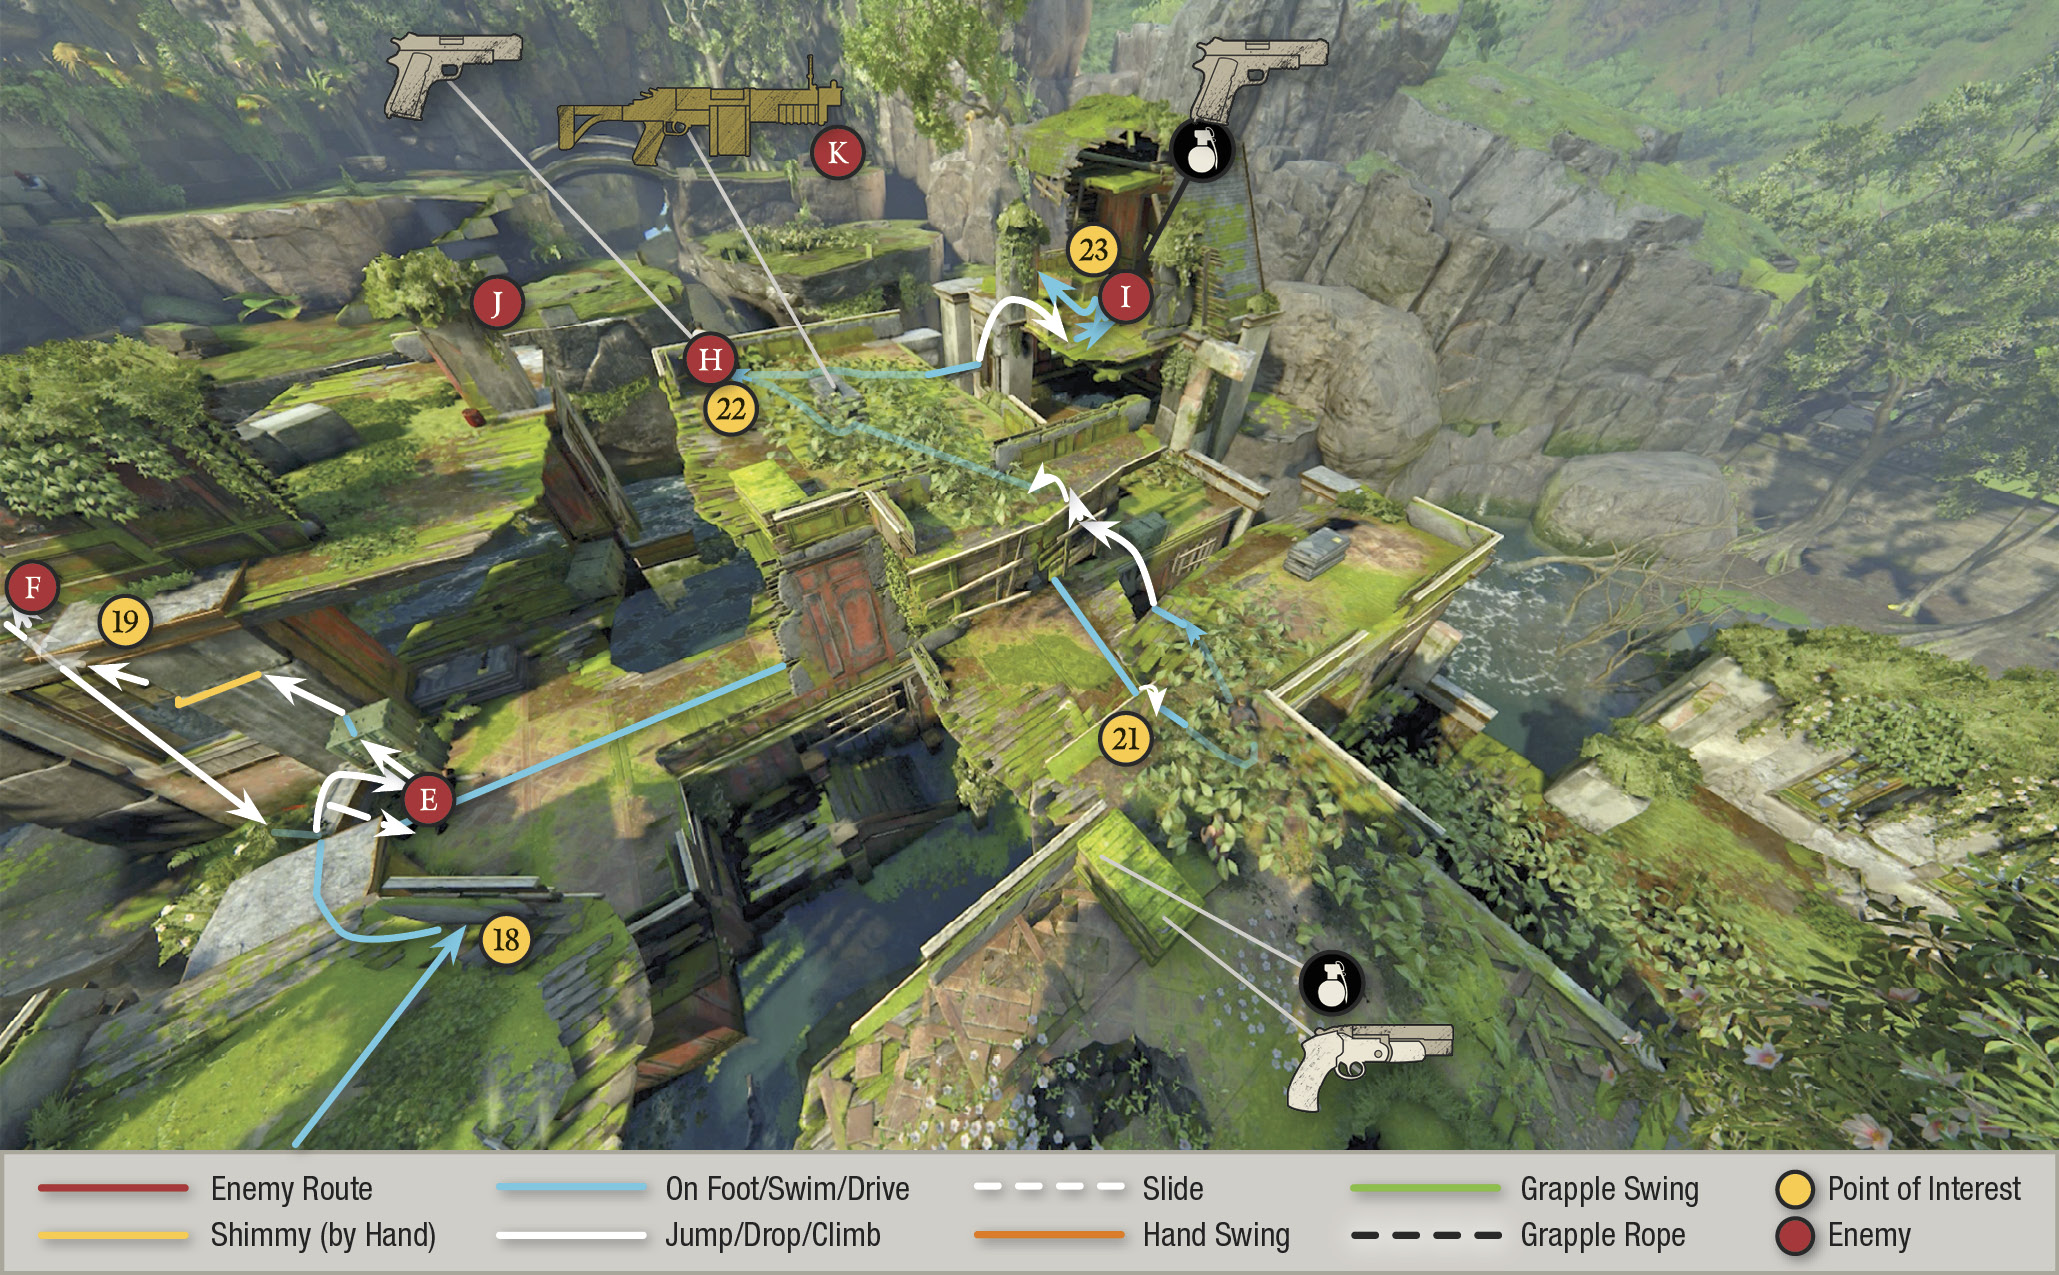
Now get to the very end of the vegetation on this rooftop’s right side and wait for (J) and (I) to be headed away from you before running across the mossy beam and leaping to the top floor of the next room with (I). Quickly choke him out and take cover behind the block in the middle of the room (23). Roll over the block to cover at the low wall at the back of the building so the guards across the ravine don’t see you.
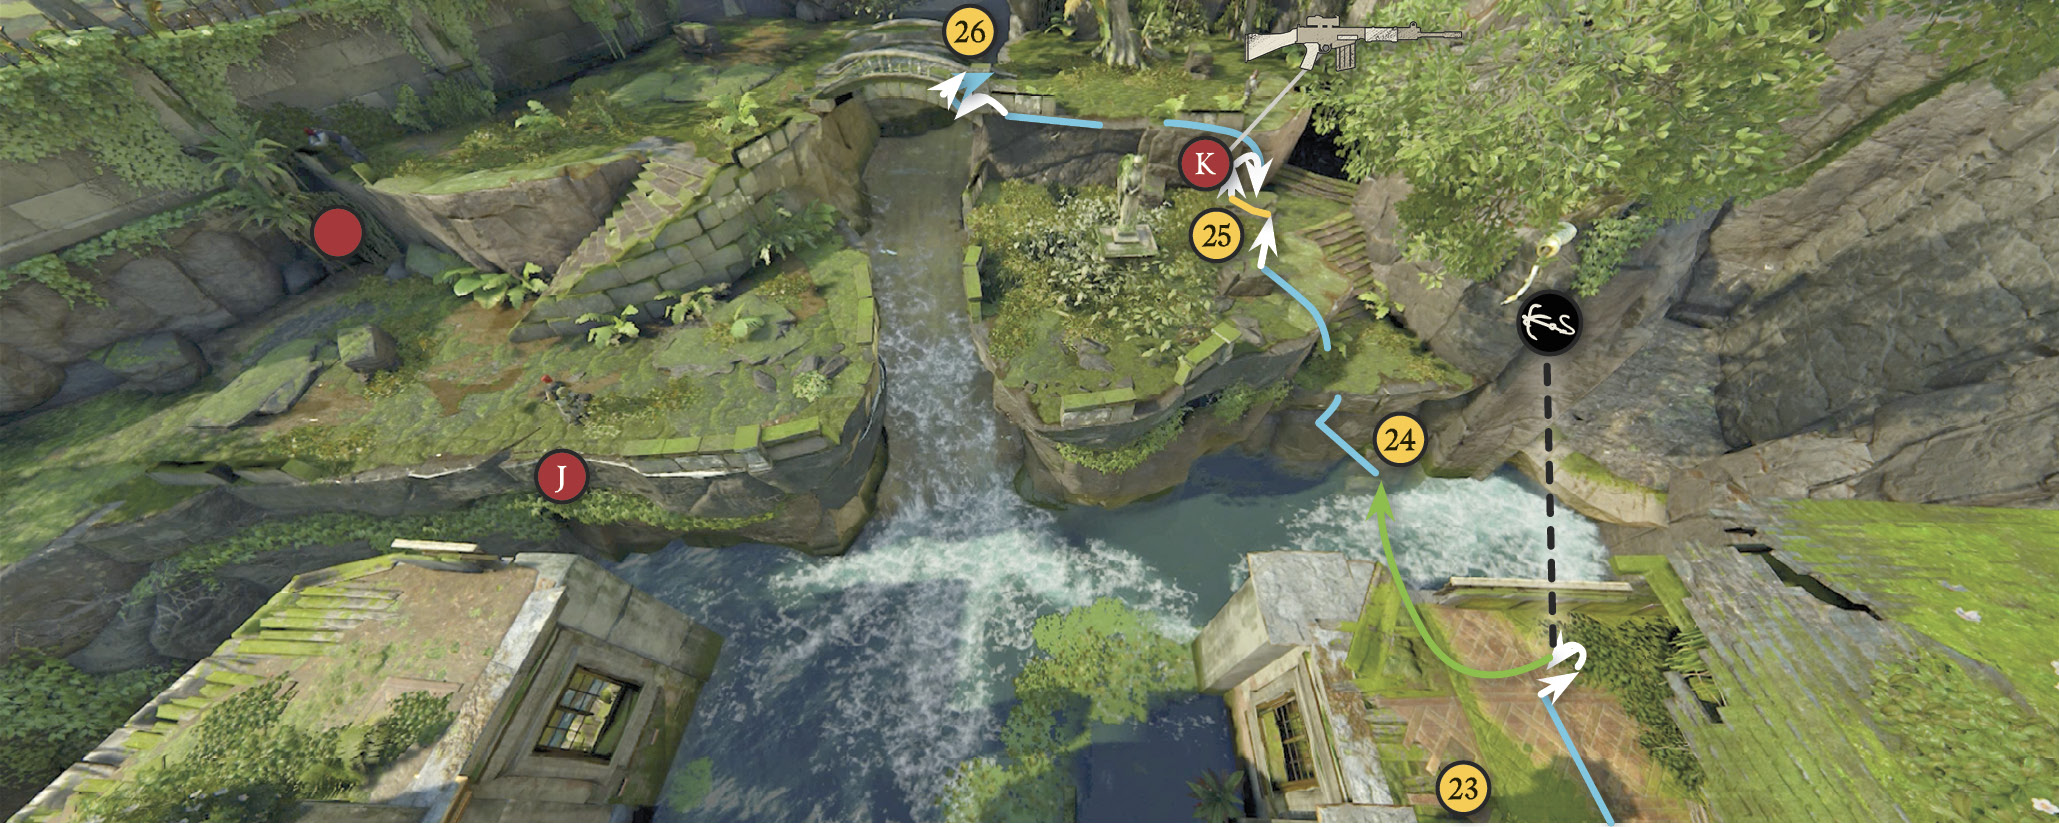
When the two guards (J & K) are looking away, quickly jump over the wall so you are hanging on the other side. Then quickly press the Grapple button so you achieve a very low and quick swing across the water to the nearby low ledge (24) at the bottom of the staircase. When the guards look away, rush up the first set of stairs and hang on the wall (25) lining the second stairs. Shimmy slightly left and use the camera to make sure the lower guard (K) is looking away, then pull down the upper guard (J). Roll into the tall grass behind the nearby tree. When the coast is clear, jump across the ravine and run into the exit cave (26).
Find a Way to Richard Want’s Mansion
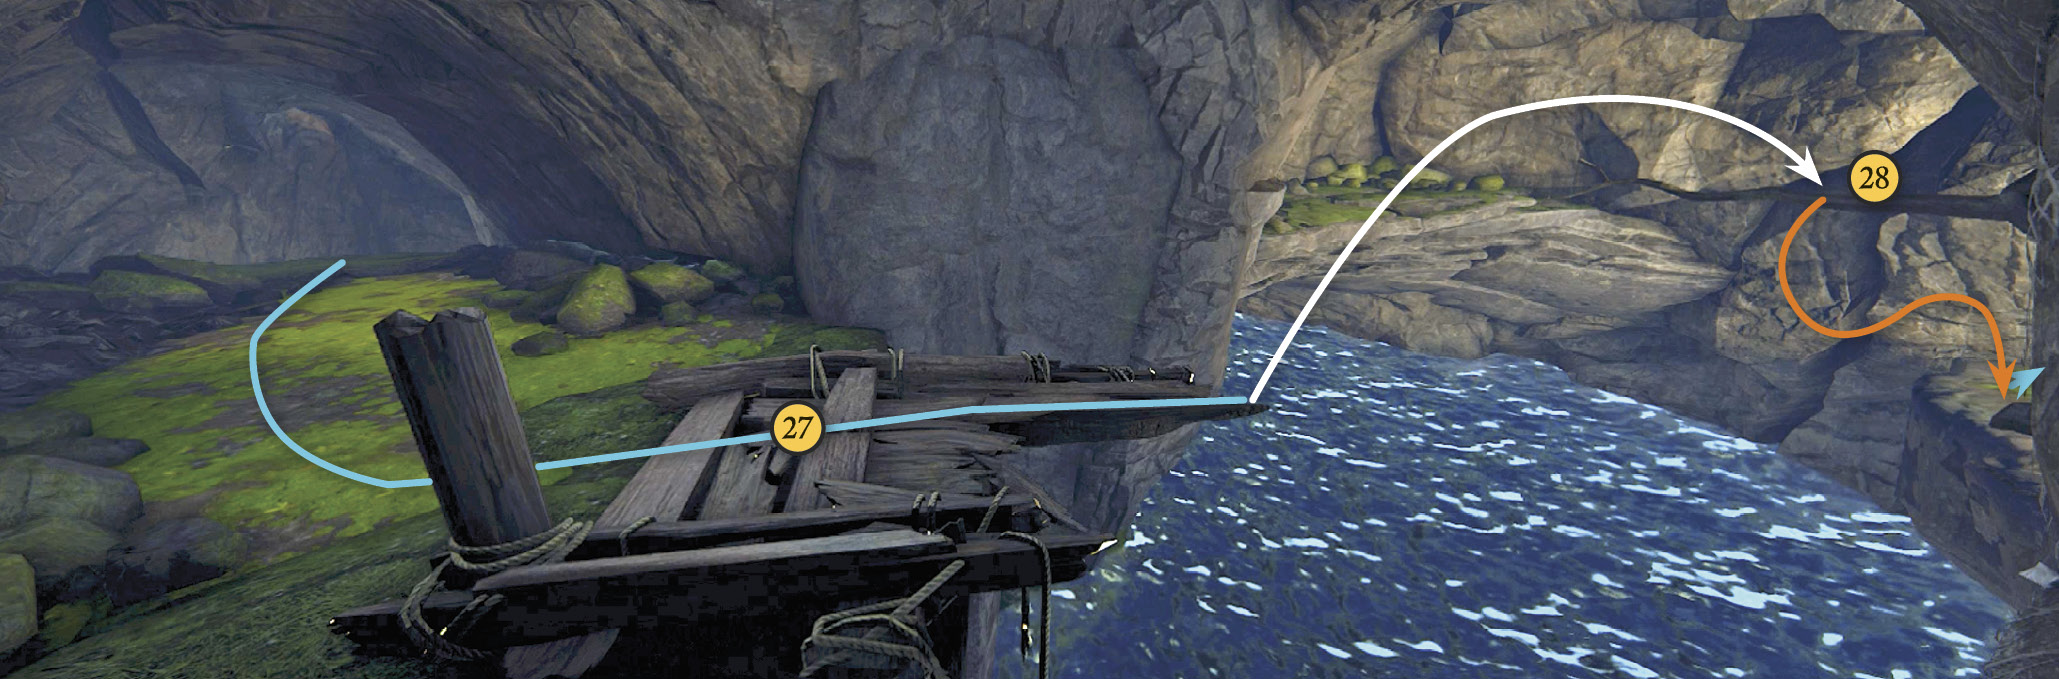
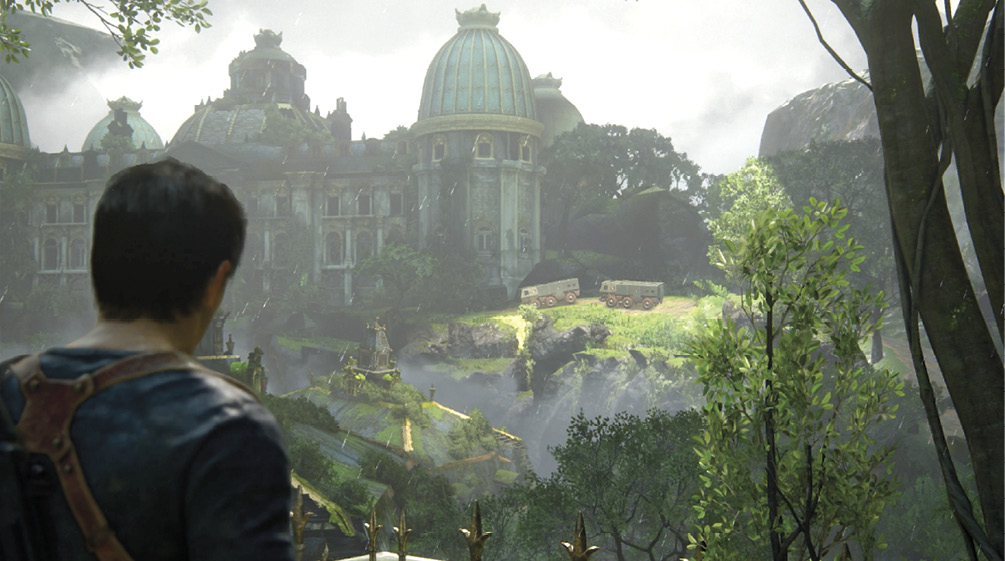
Work your way up the cave’s left side to reach the pool at the very top. Drop into the water, turn left, and dive through the short underwater tunnel. Surface in the next cave and swim to the low landing where you can pull yourself out. Climb the next wall and proceed to the broken bridge section (27). Jump to grab the branch (28) jutting from the cave wall and use it to swing over to the green ledge. Exit the cave and click L3 to spot the Shoreline military trucks parked at Avery’s mansion across the ravine.
Get Atop Want’s Mansion
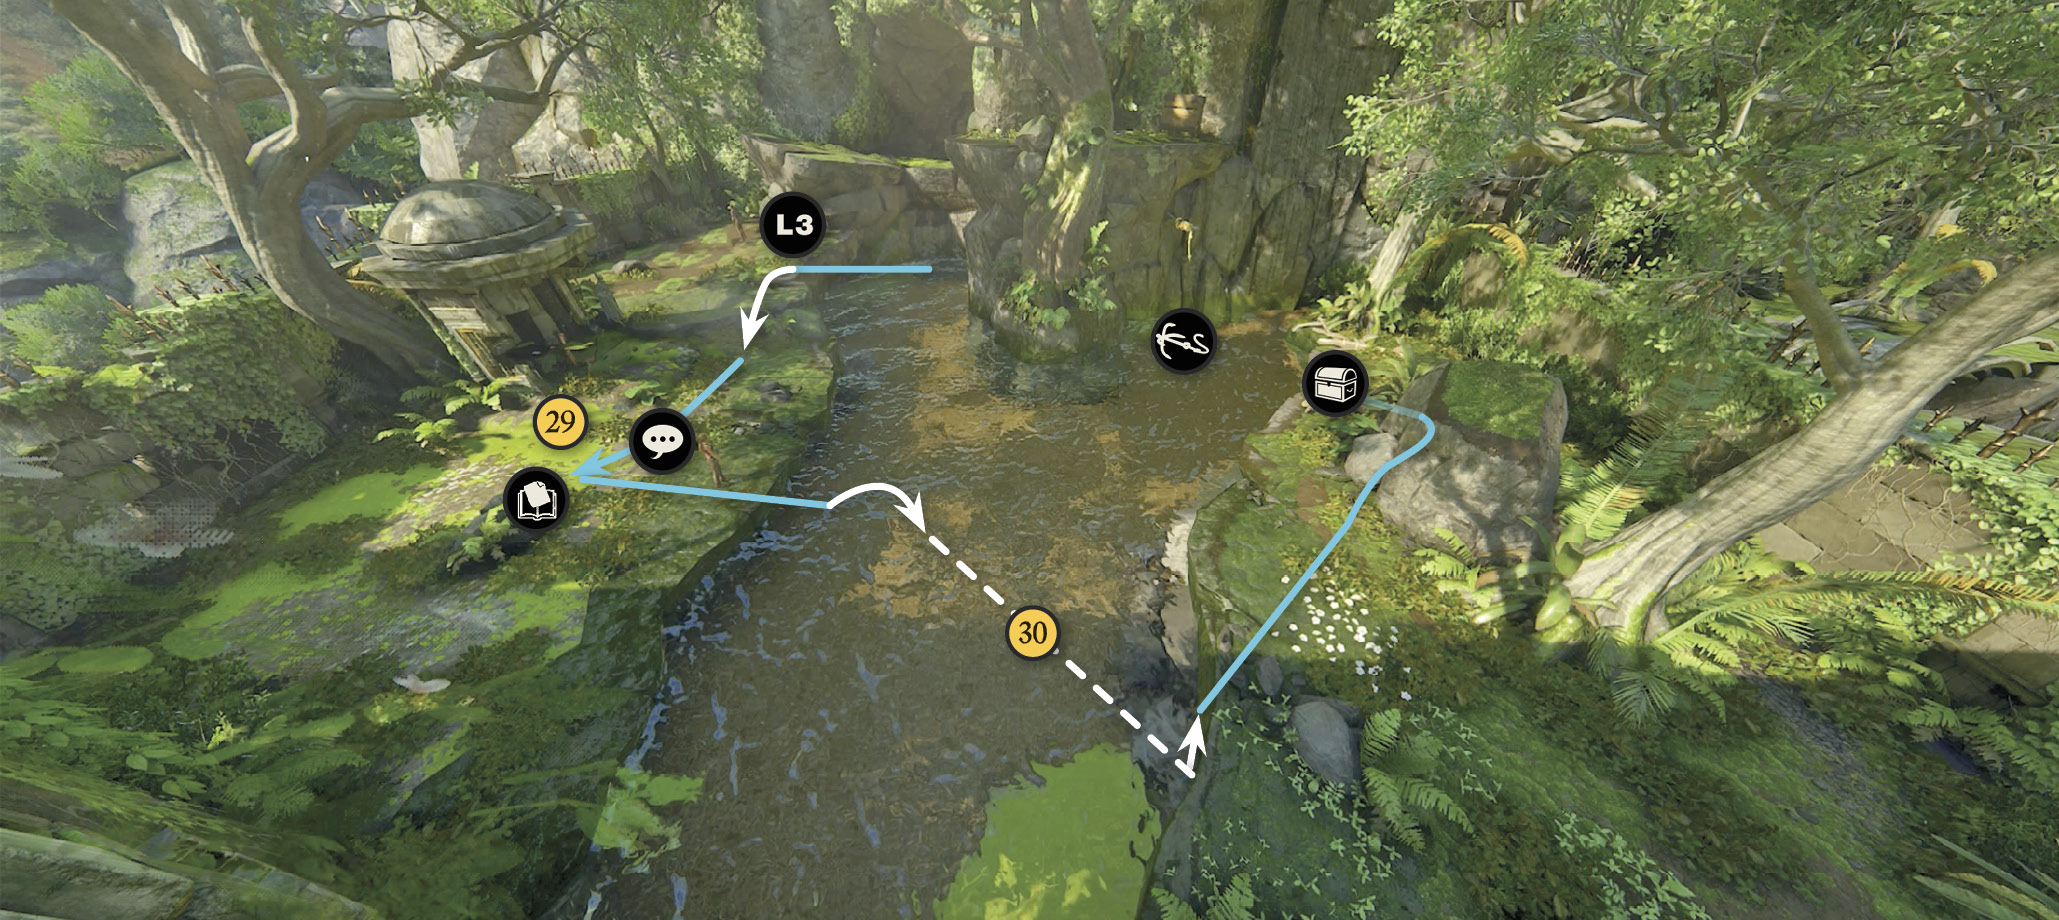
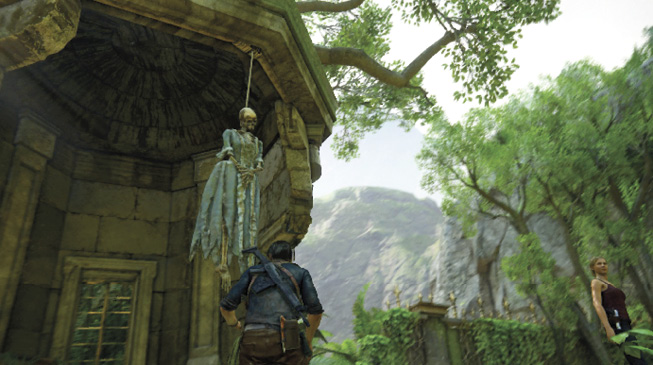
Hop down the ledge and approach the gazebo (29) where you can find the Optional Journal Note, a brutal message from Adam Baldridge to Richard Want—two more pirate captains at each other’s throats. The ruined house just ahead must be Want’s mansion. After you pick up the note, the Talk icon appears over Elena’s head and you can engage her in the Optional Conversation, “They Were Both Founders.” Then swim across the swift current (30) to the opposite side. If you explore upstream along the bank, you can find a treasure.

Mughal Circular Box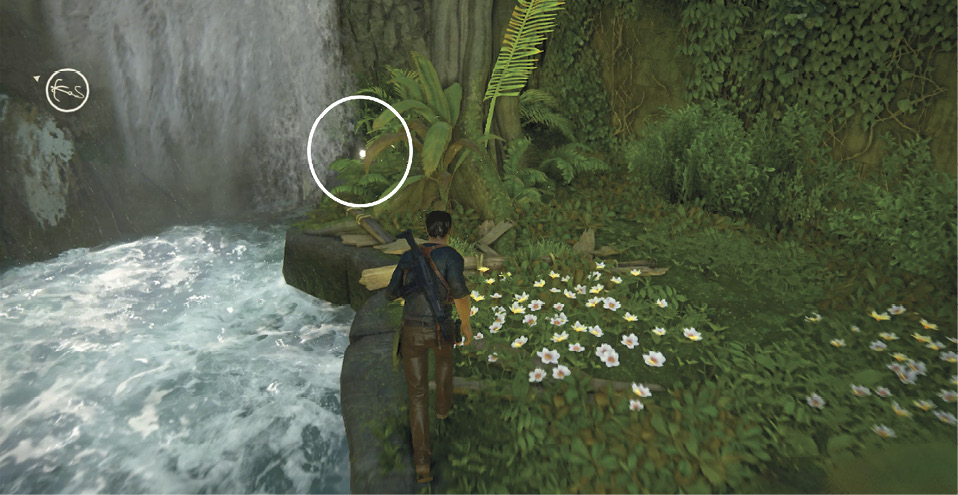
After you swim across the fast stream from Want’s gazebo, move up the opposite bank to find the Mughal Circular Box at the base of the cliff next to the waterfall. |
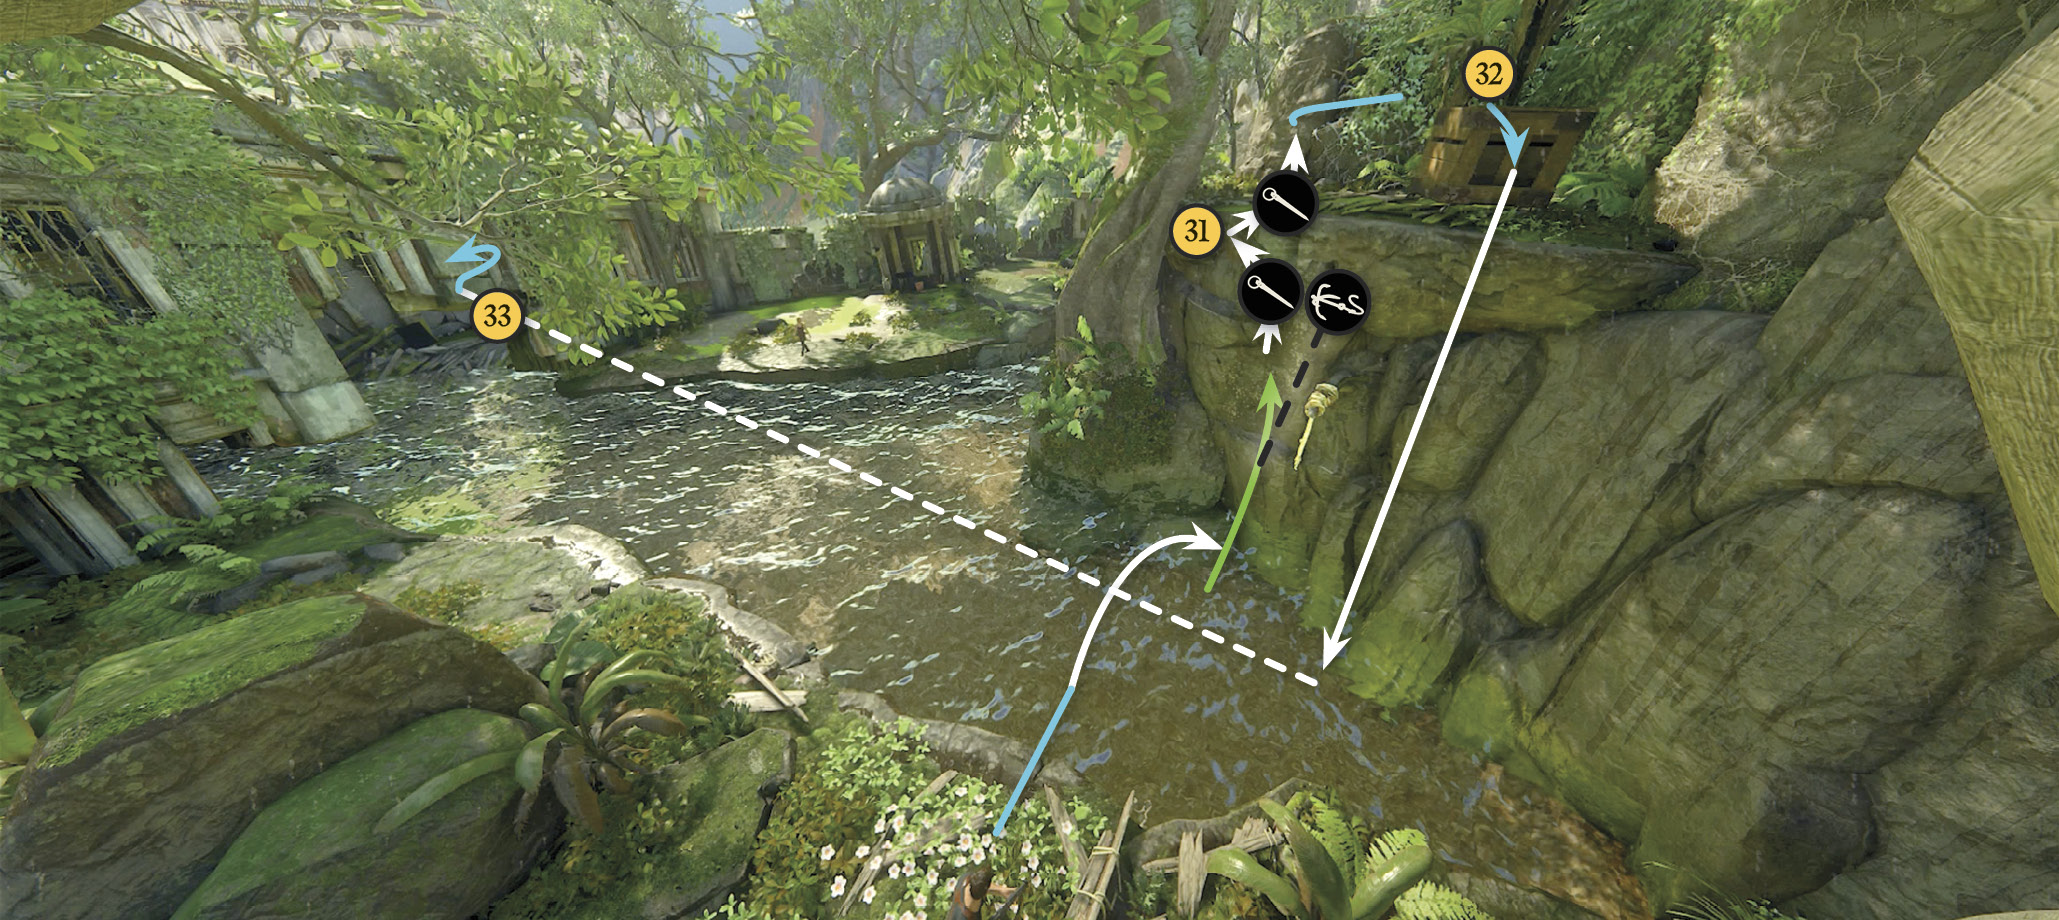
If you head downstream to explore the ruins of Want’s place, you’ll soon find that you need a way to climb higher in order to proceed. In short, you need a box. Go upstream to the waterfall cliff and toss your hook at the grapple point. Press L1 and push the left stick forward to climb the rope as high as you can. Then jump and grab the groove in the rock face.
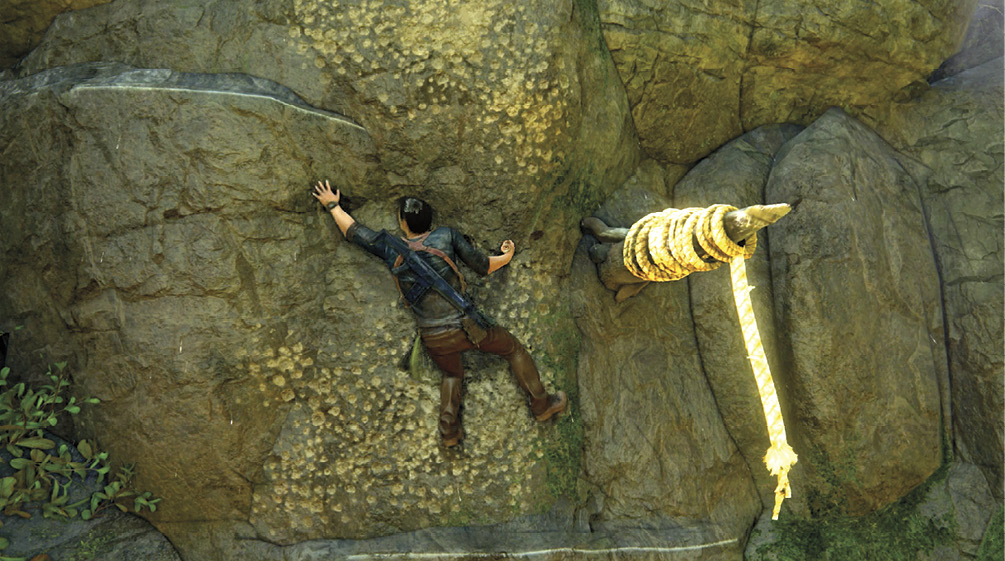
Make a piton stab into the porous rock and reach up to the left to grab the next ledge (31). Make another piton placement up to your right, then pull up to the crate (32) on the terrace. Push the crate down into the water; the current carries it to the house (33).
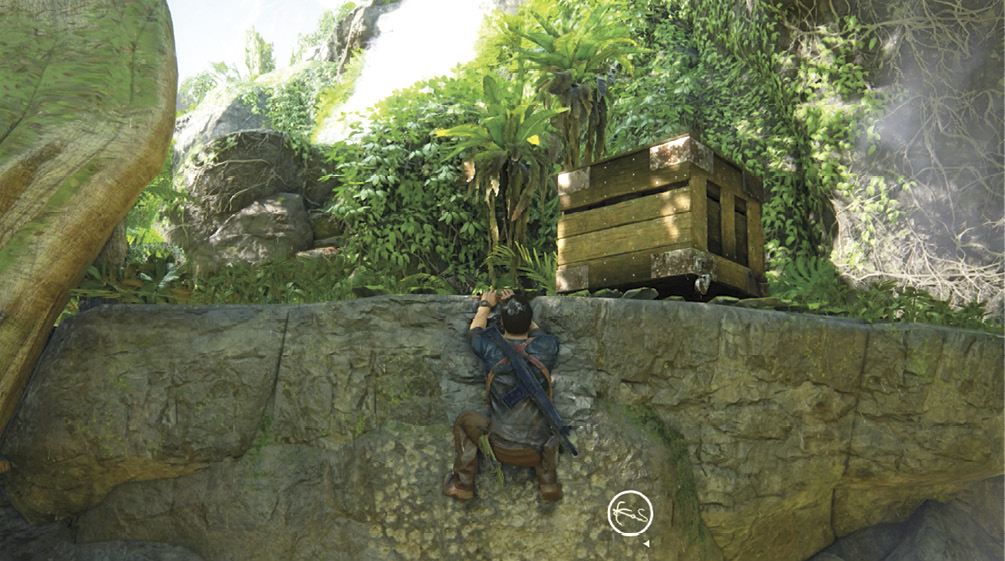
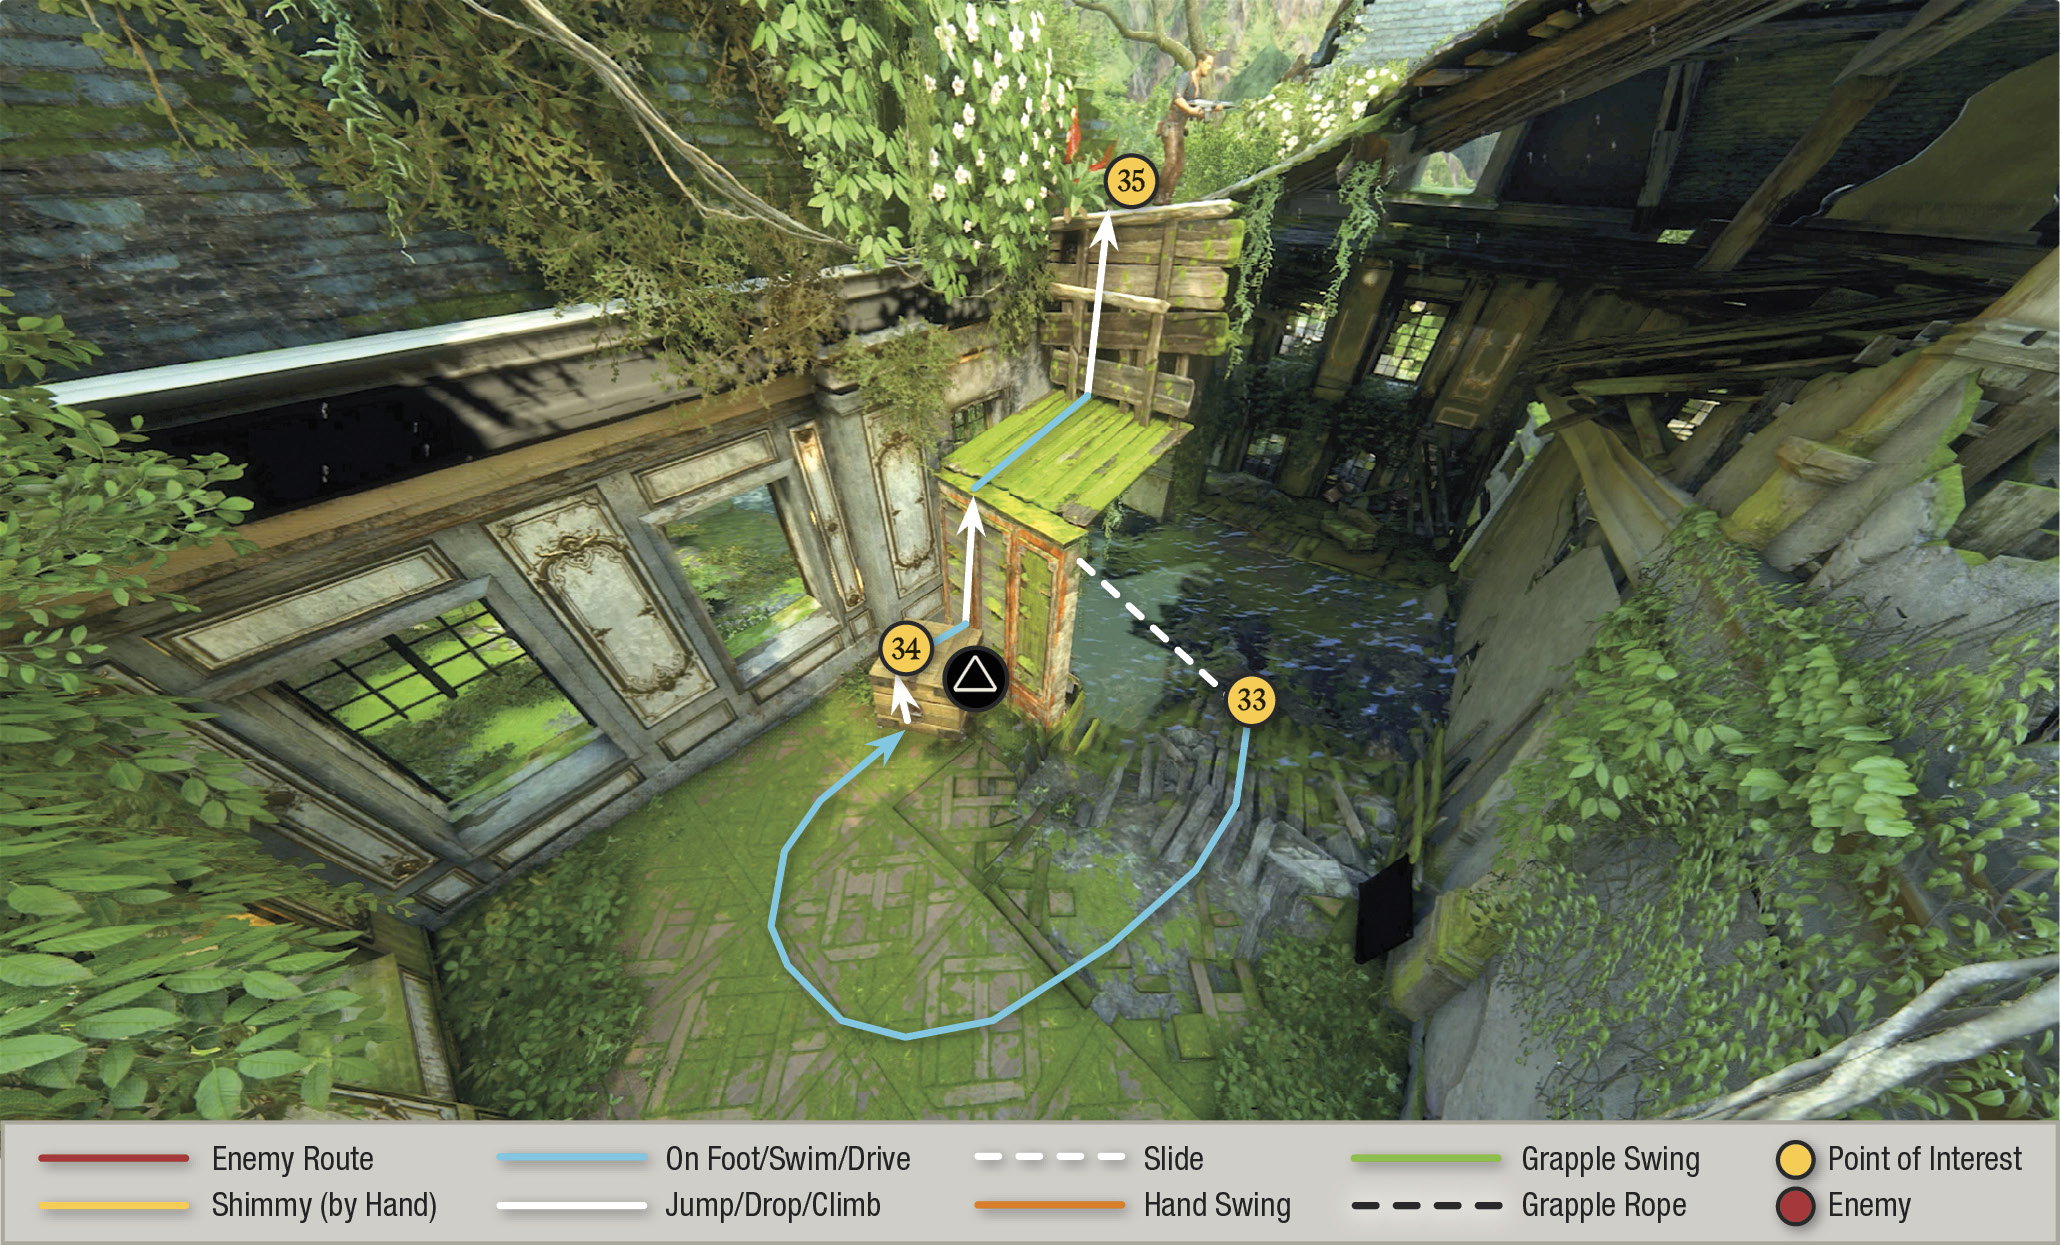
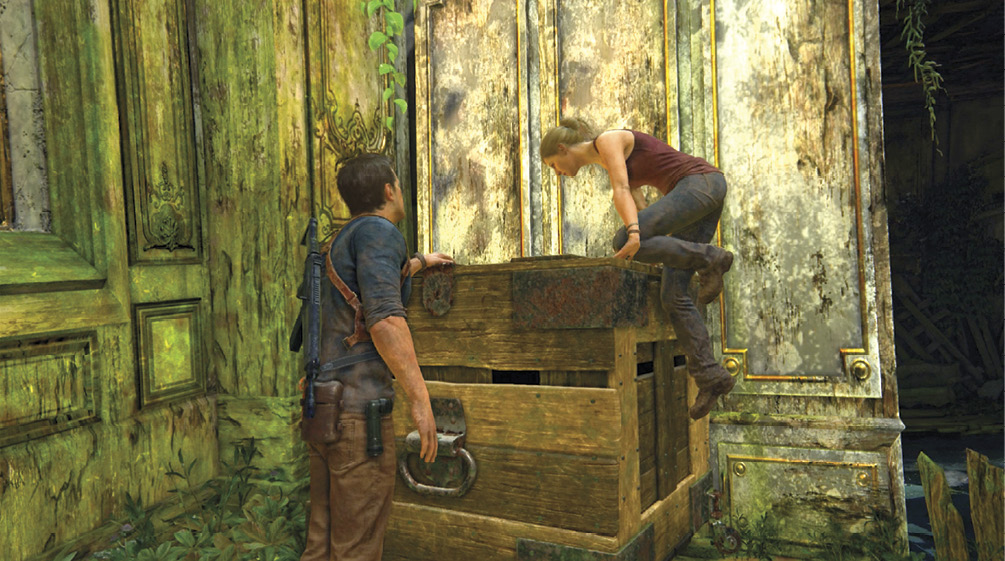
Jump into the water and ride the current down to the ramp next to the crate. Walk up the ramp to the floor platform and toss your grapple hook to the crate—Nathan says, “Come…come to papa!” Press L1 to pull the crate onto the ramp. When it’s secure, grab the crate and drag it next to the tall cabinet (34). Elena automatically climbs the cabinet; follow her to the roof (35). Then step forward until the roof collapses. You can just sit back and watch the wild ride as Nathan and Elena end up in the lagoon below.
Explore Adam Baldridge’s Mansion
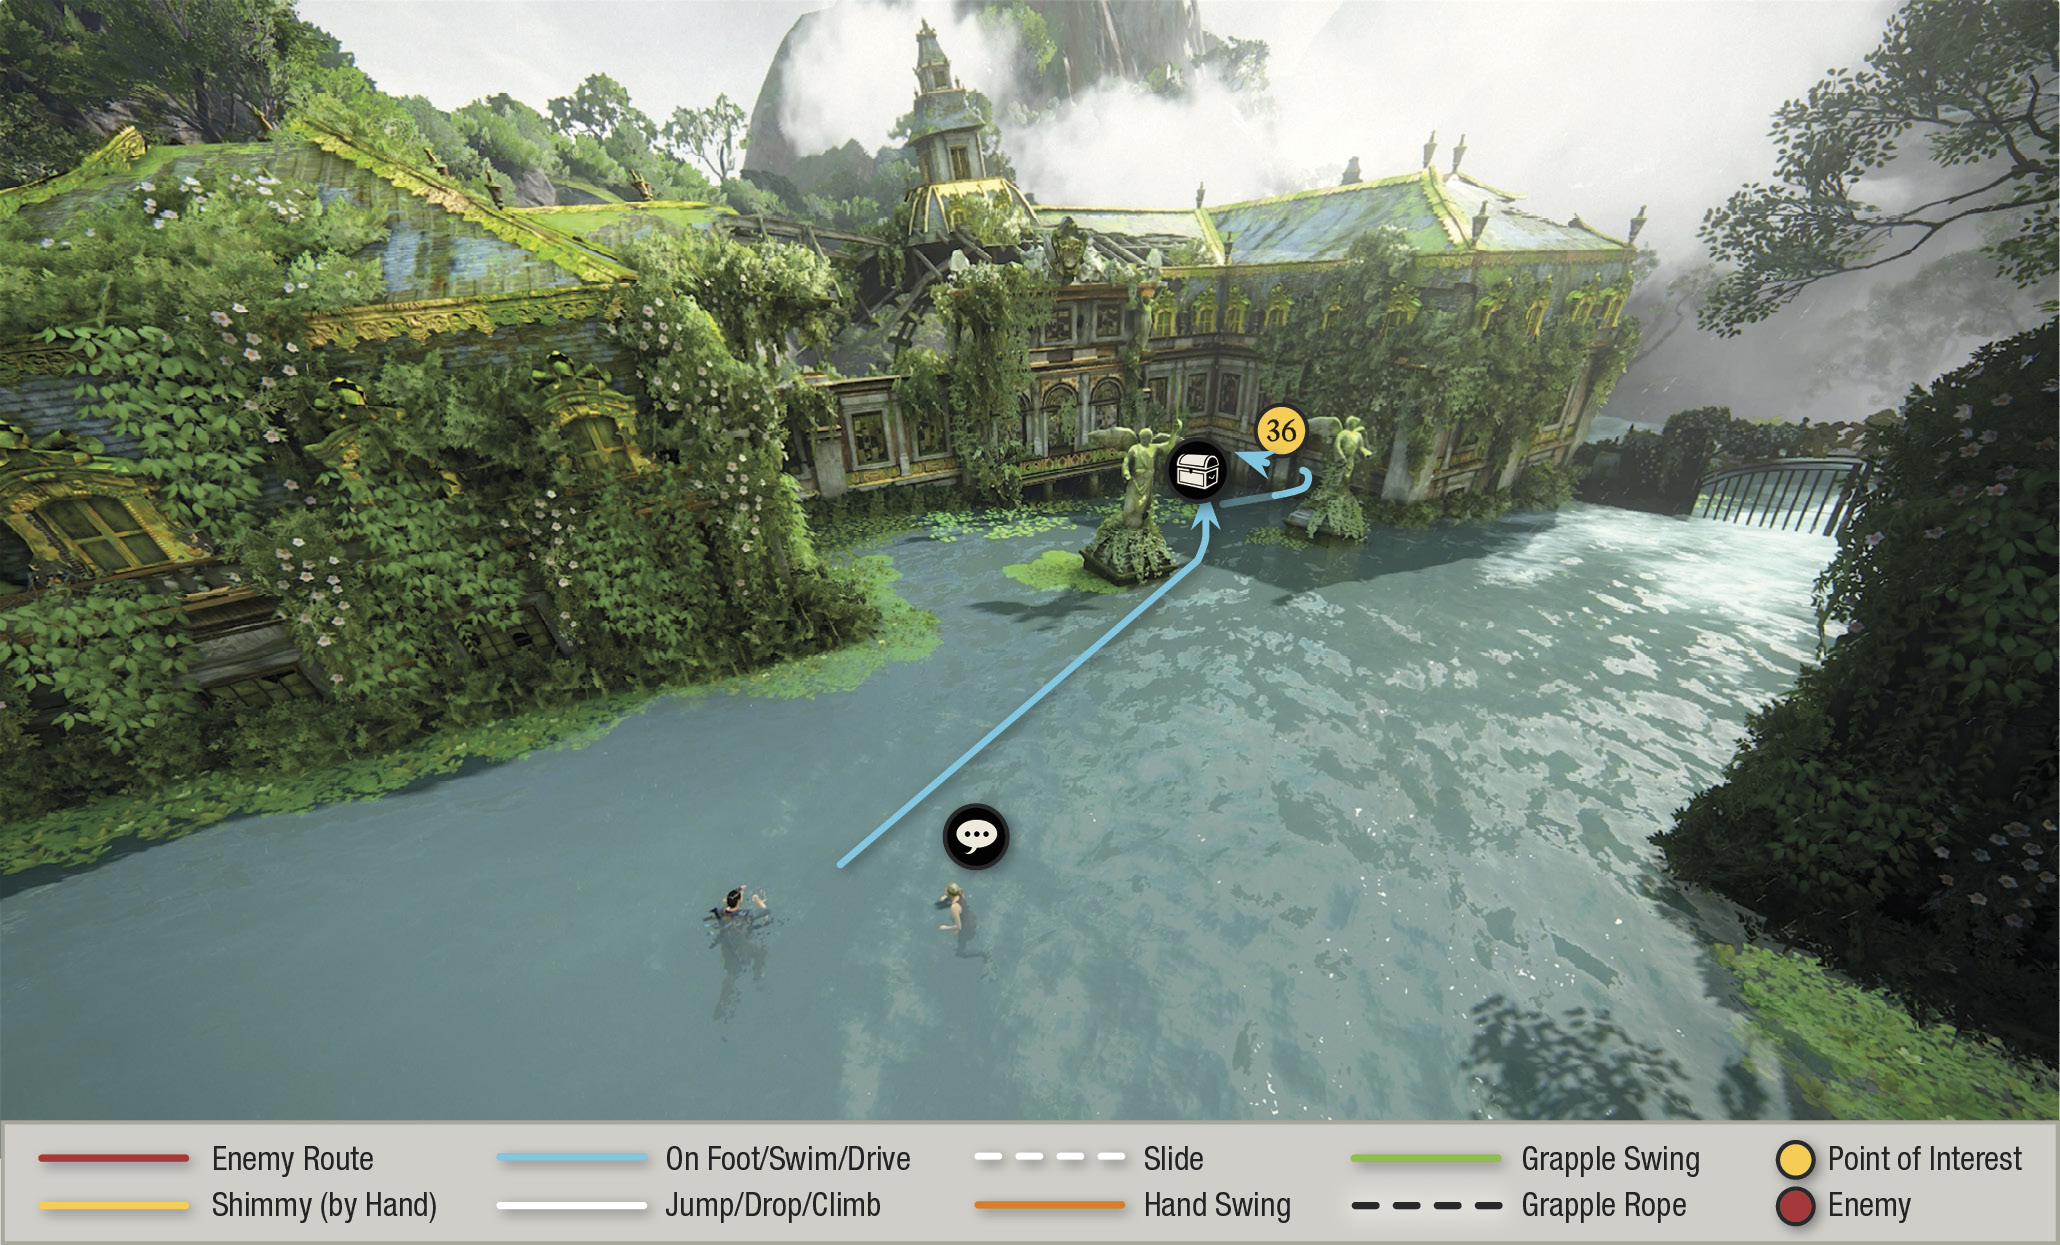
After landing in the lagoon, talk to Elena for the Optional Conversation, “I’m Fine…You?” Swim toward the next flooded house, veering toward the three open windows (36) near the rightmost angel statue. Look for a treasure in the water, then swim through any of the open windows.

Mughal Headdress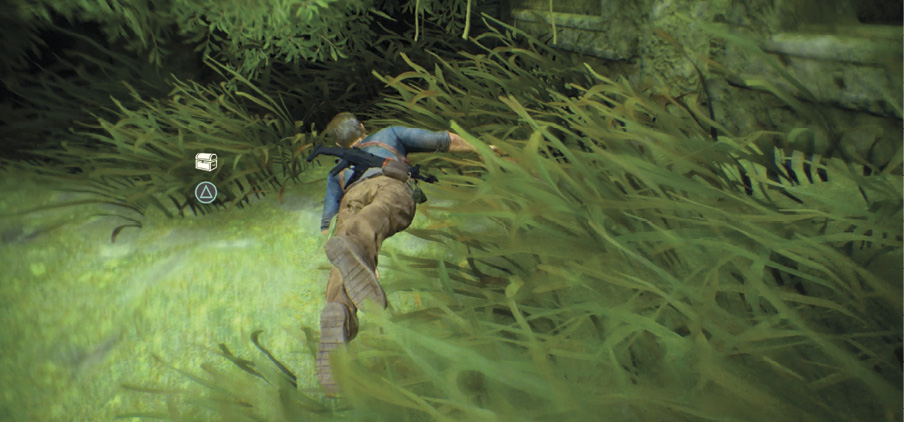
After the roof of Want’s house collapses and Nathan plunges into the lagoon, swim toward the next mansion, Adam Baldridge’s house. Dive into the corner behind the rightmost angel statue to find the Mughal Headdress in the underwater grass. |
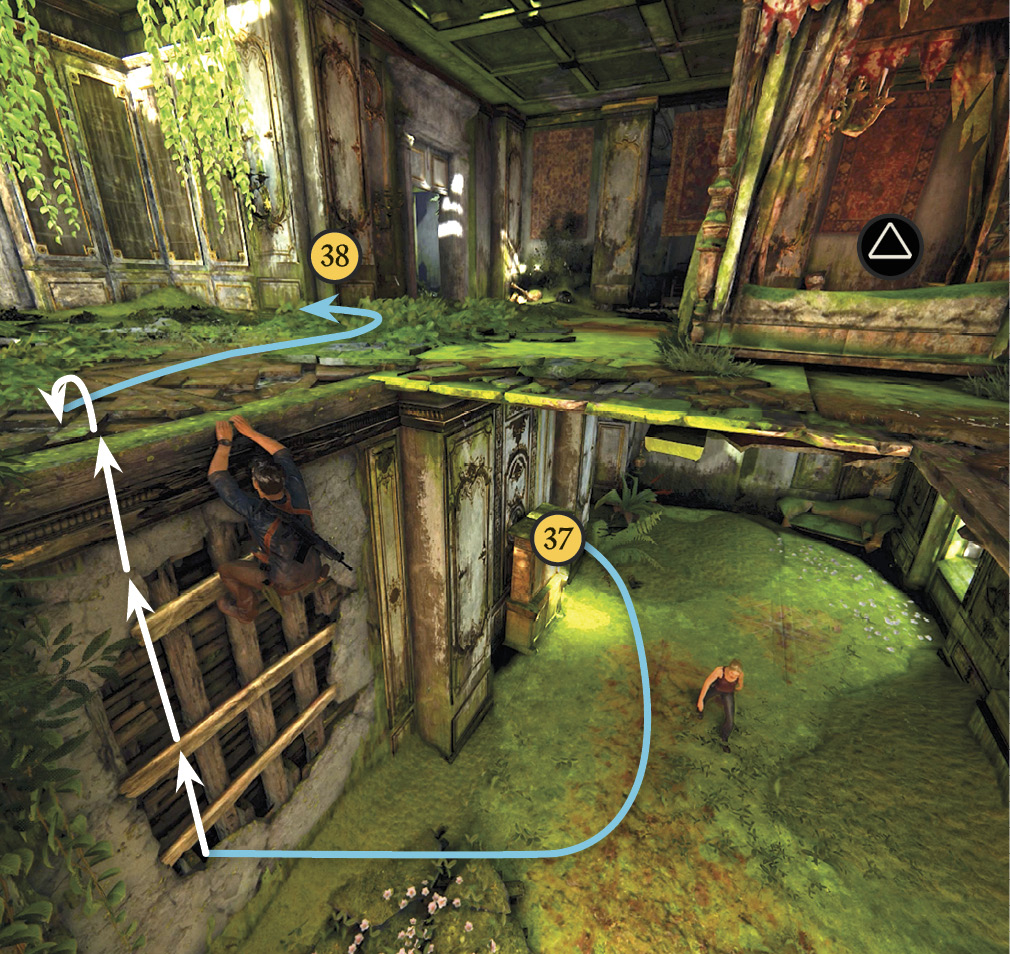
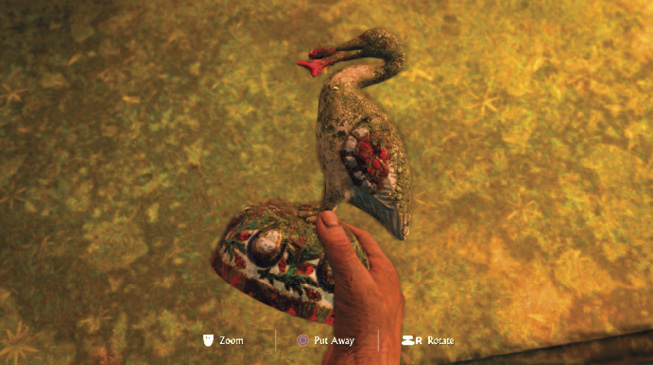
Inside, turn left then swim down the long corridor until you can walk. Continue around the corner (37) and climb the beams of the exposed wall frame into the bedroom on the second floor. (You can pick up and examine an ornate bird statue on the dresser.) Exit the bedroom via the doorway (38) into a grand hall lined with pillars.
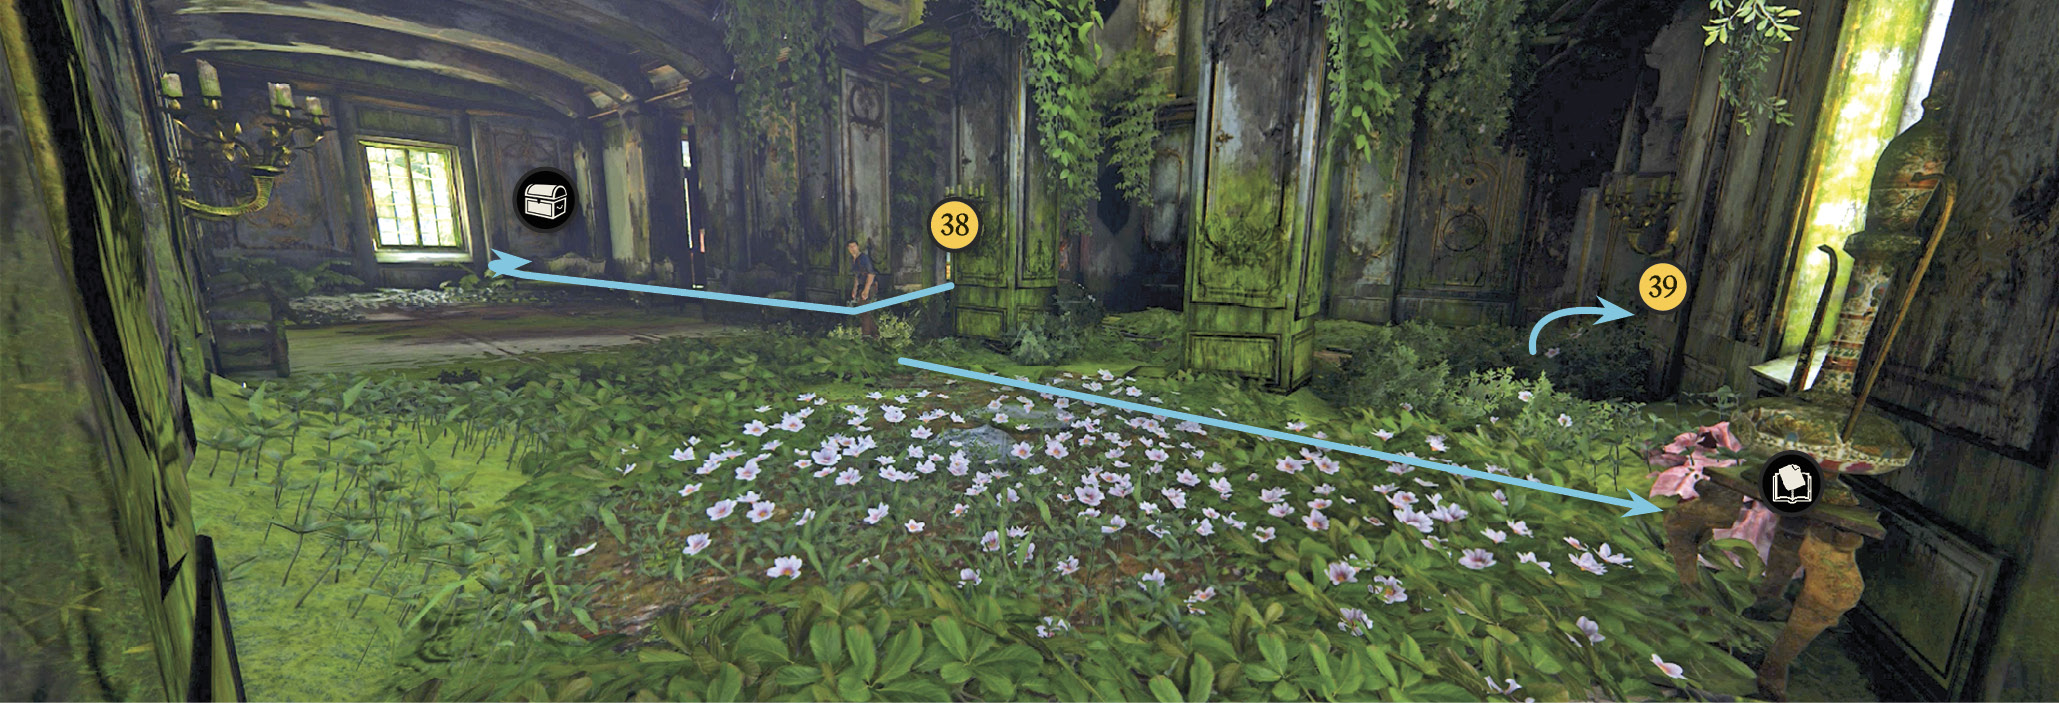
In the pillared hall, look for a treasure in one corner. Then approach the tall vase sitting on a small side table between the windows on the opposite wall. It’s from the Gunsway heist, and Nathan jots an Optional Journal Entry to record it.

Spanish Brass Chalice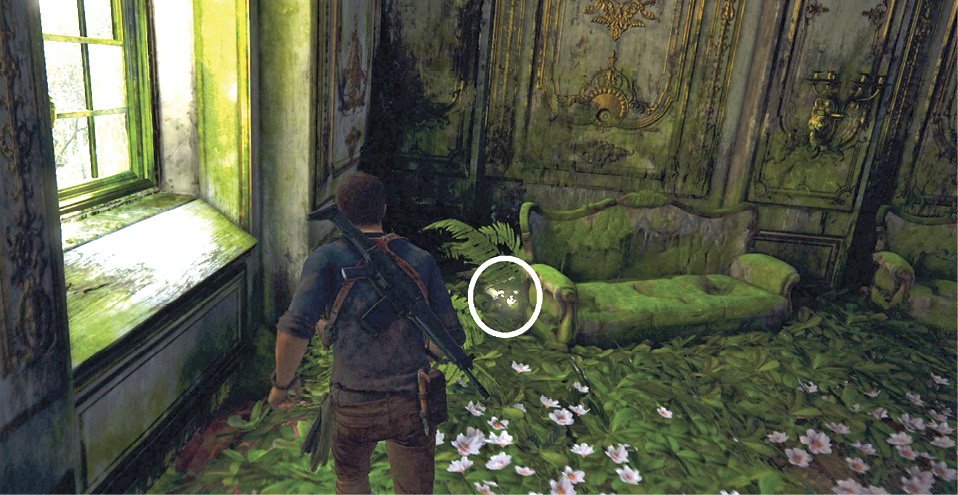
On the second floor of Baldridge’s mansion, look for the Spanish Brass Chalice in the pillared hallway outside the bedroom. It sits on the floor in a back corner, behind one of the settees near the tall window. |
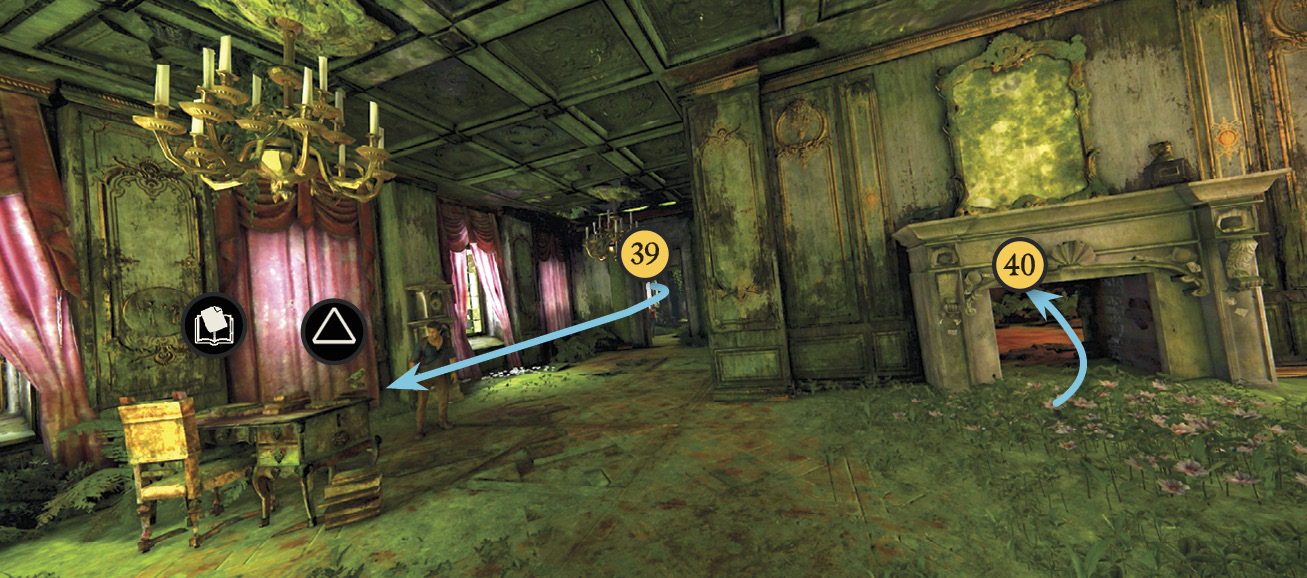
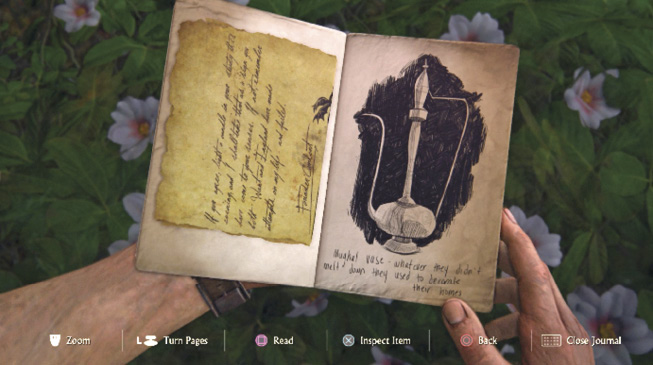
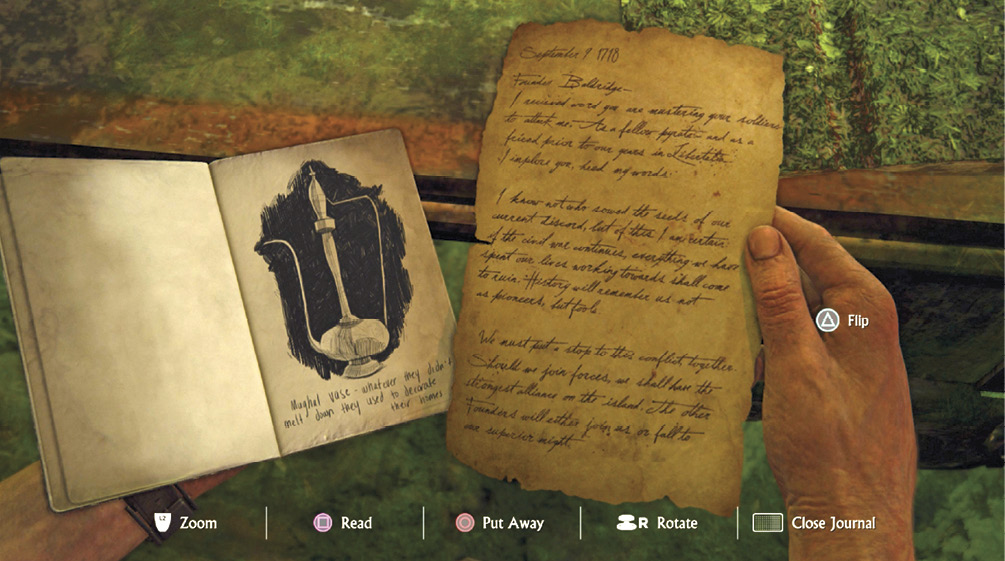
Proceed through the nearby doorway (39) into the next room, a study with a desk. You can pick up and examine a parrot statue sitting on the desk’s left corner. Then pick up the Optional Journal Note and read the letter from Founder Condent to Founder Baldridge to learn that conspiracy and rivalry ran rampant amongst the pirate founders of Libertalia. As Nate puts it, “It got all Lord of the Flies in here.”
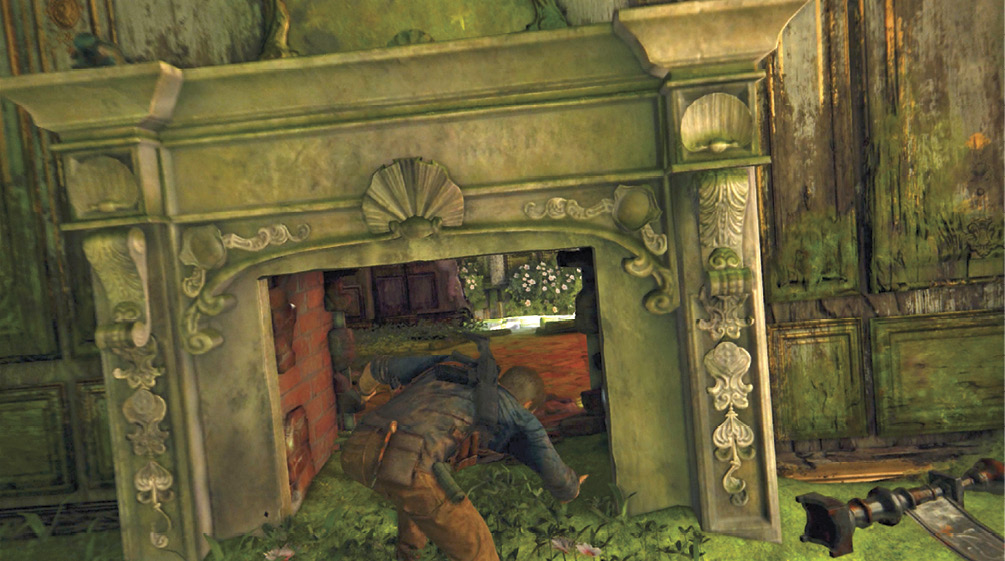
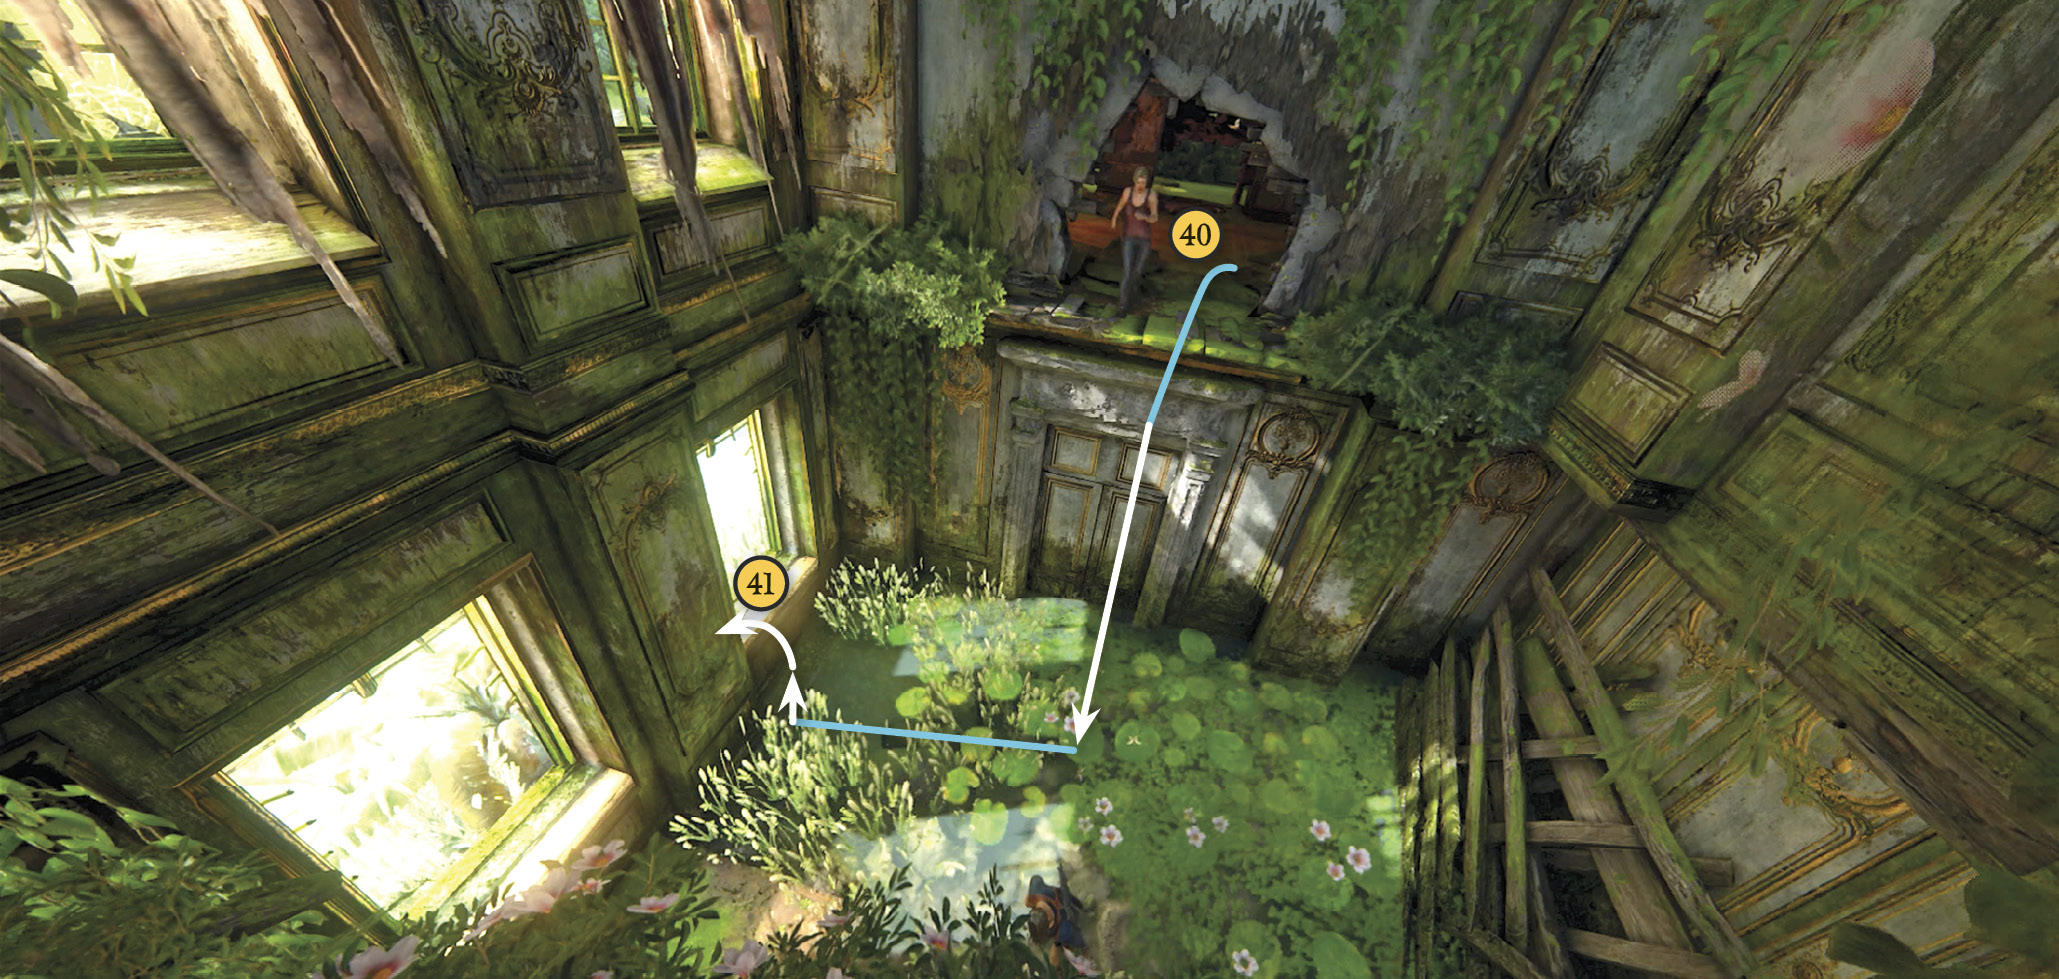
Exit Baldridge’s study through the fireplace (40), then crawl through the hole in the opposite wall to drop into a room below. Exit the house through the open window (41) and swim to the cannon-lined front steps of the next mansion.
Get to the Second Floor of Thomas Tew’s Mansion
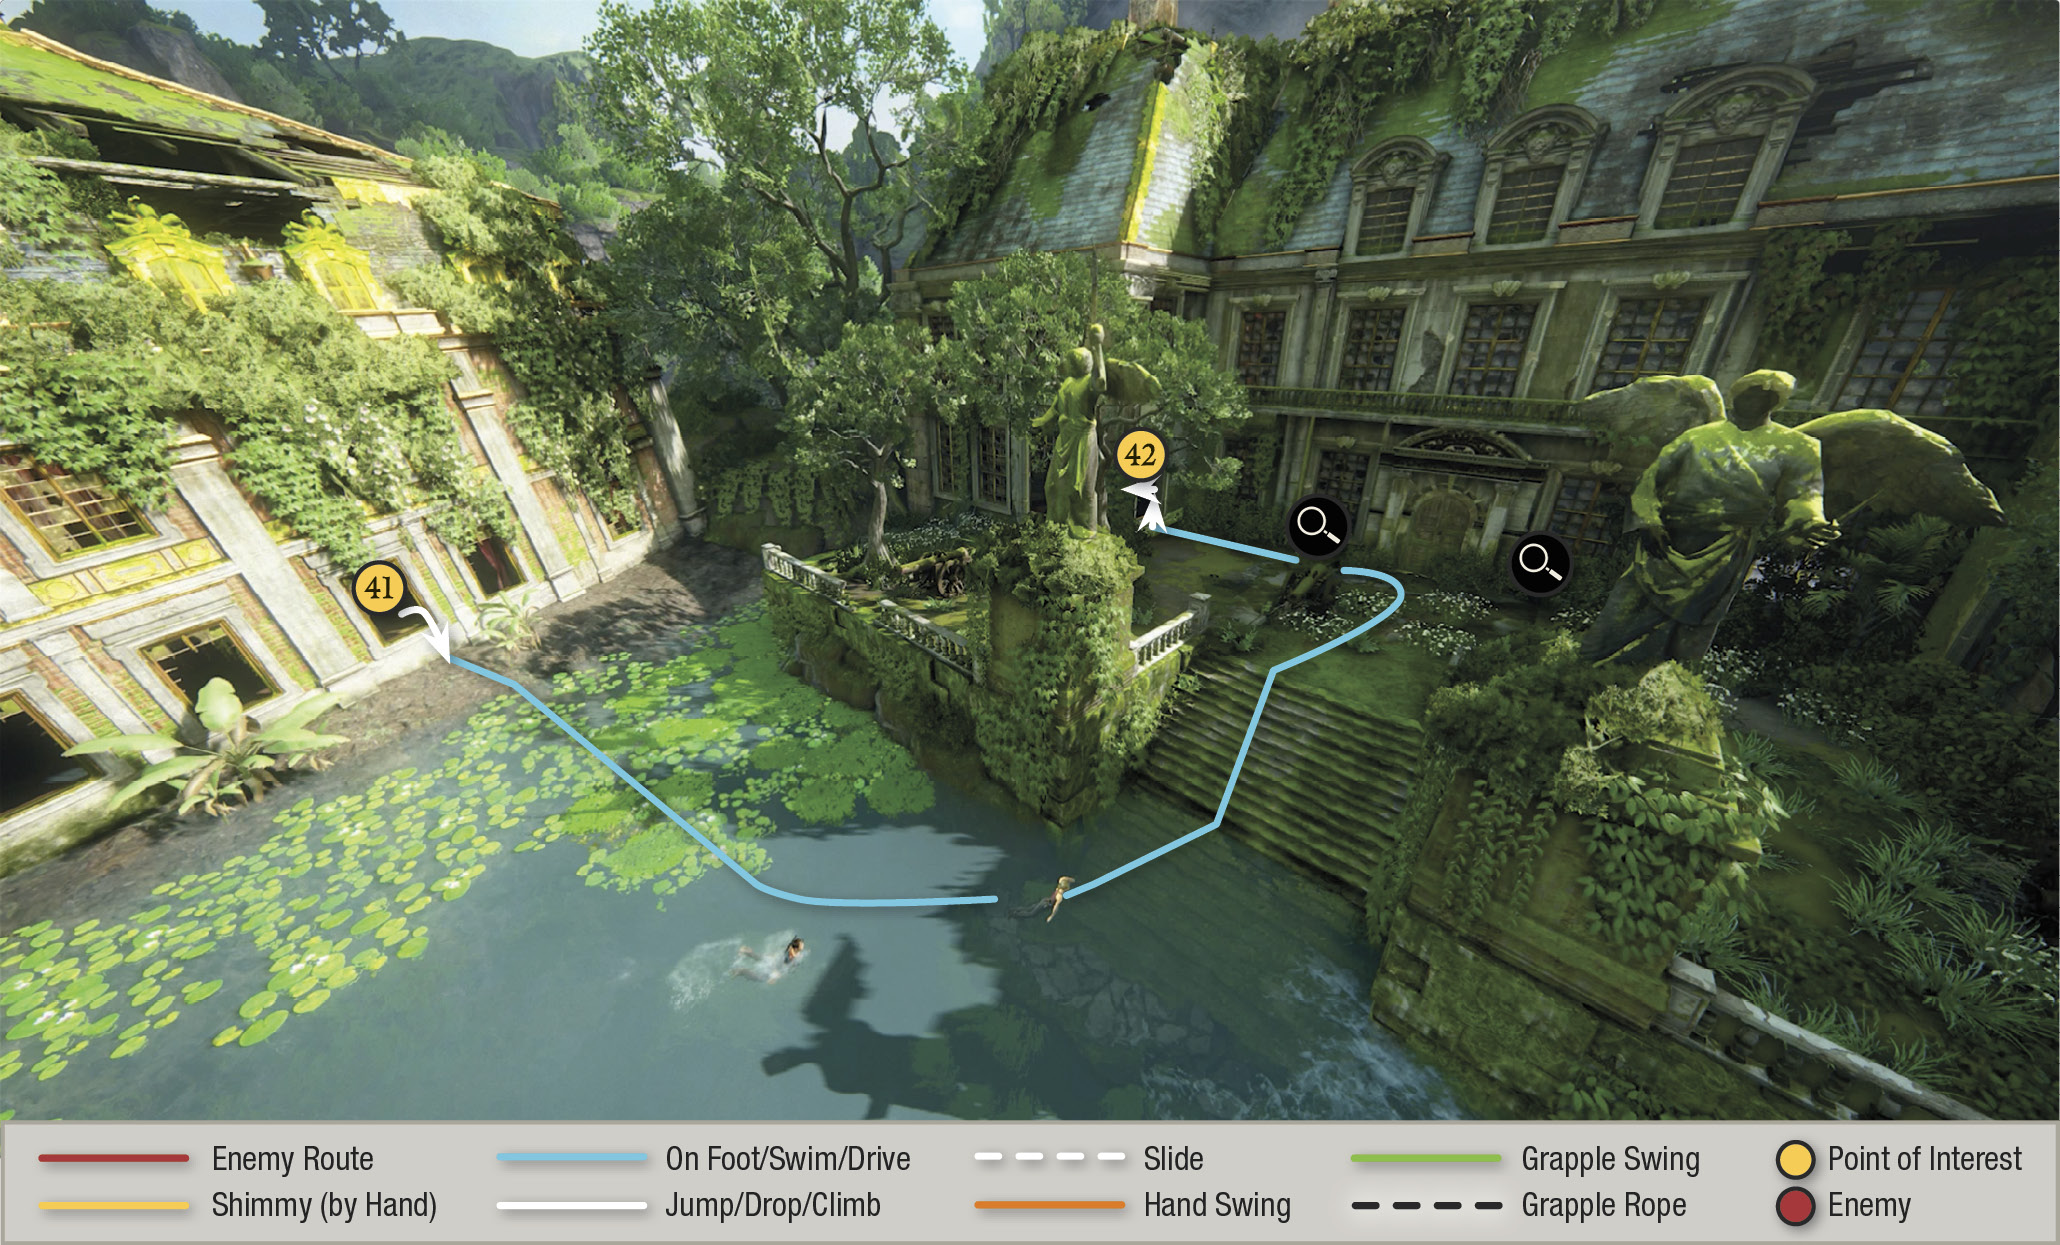
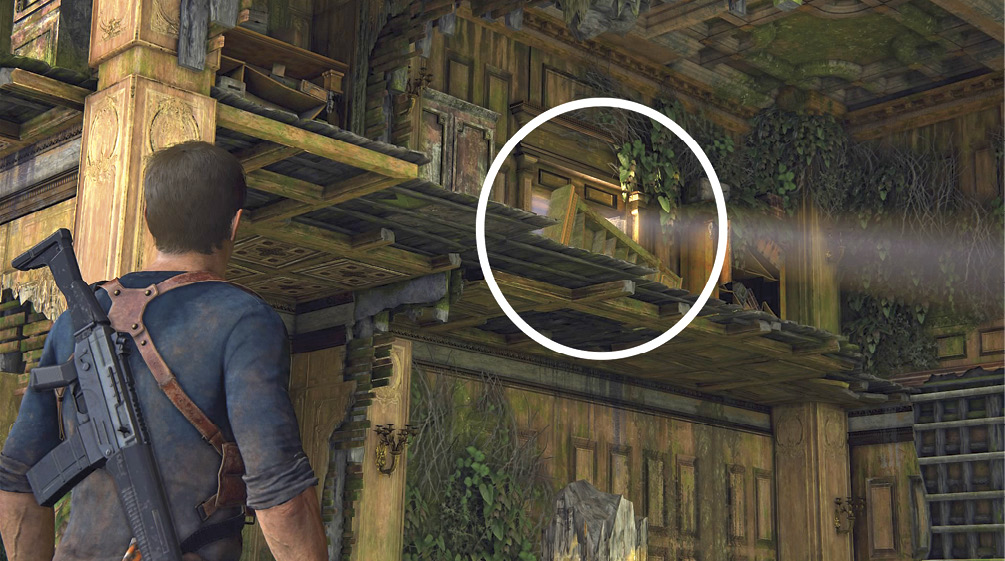
Examine either one of the cannons, then enter the mansion via the broken window (42) to the front door’s left. Move through the doorway into the great entry hall where a very swift current flows under the collapsed floor. Elena spots a possible exit on the remnants of the second floor; press L3 to focus on it. Your task here is to find a way to it. Because the current is so strong, this requires several steps.
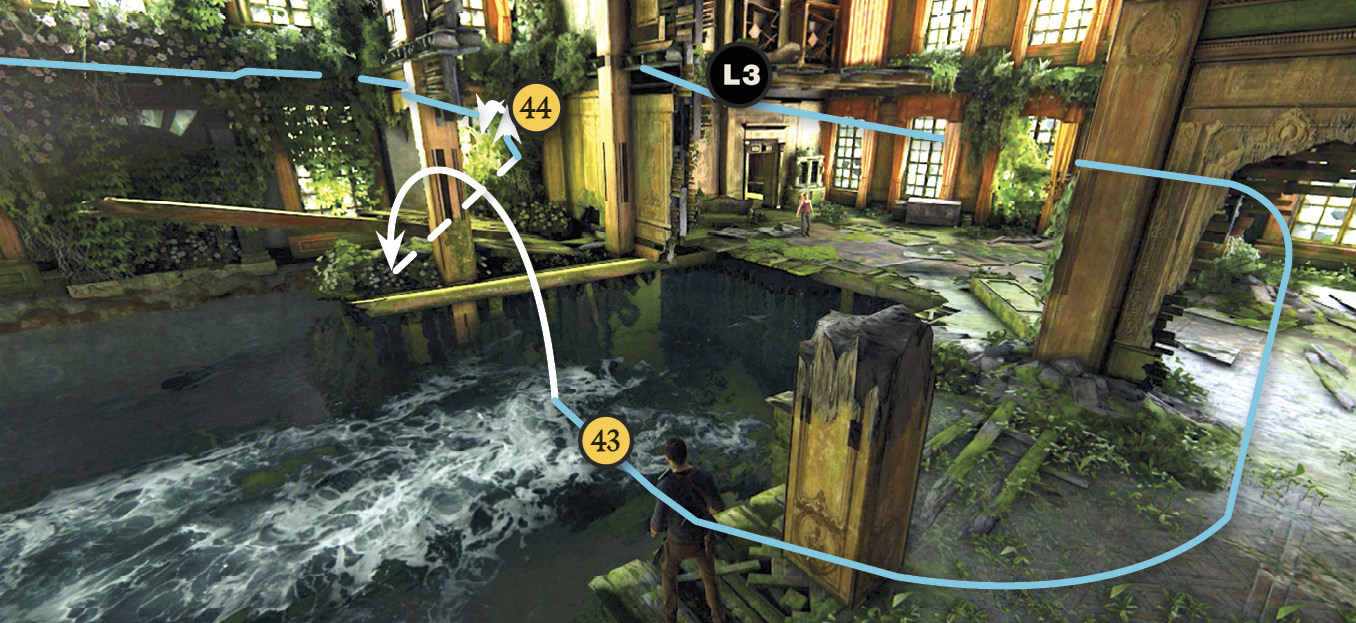
First Step: You need to reach the long plank extending from the fallen ceiling chunk on the isolated floor section across the room. The current is too powerful to just step into the water and swim straight across to it. Instead, walk around the room and follow the long red rug through the wall hole. Go to the end of the floor (43) before you make a running jump out into the water. This way you can swim across the strong current before you get swept past the floor section you’re trying to reach. Climb up onto the floor (44).
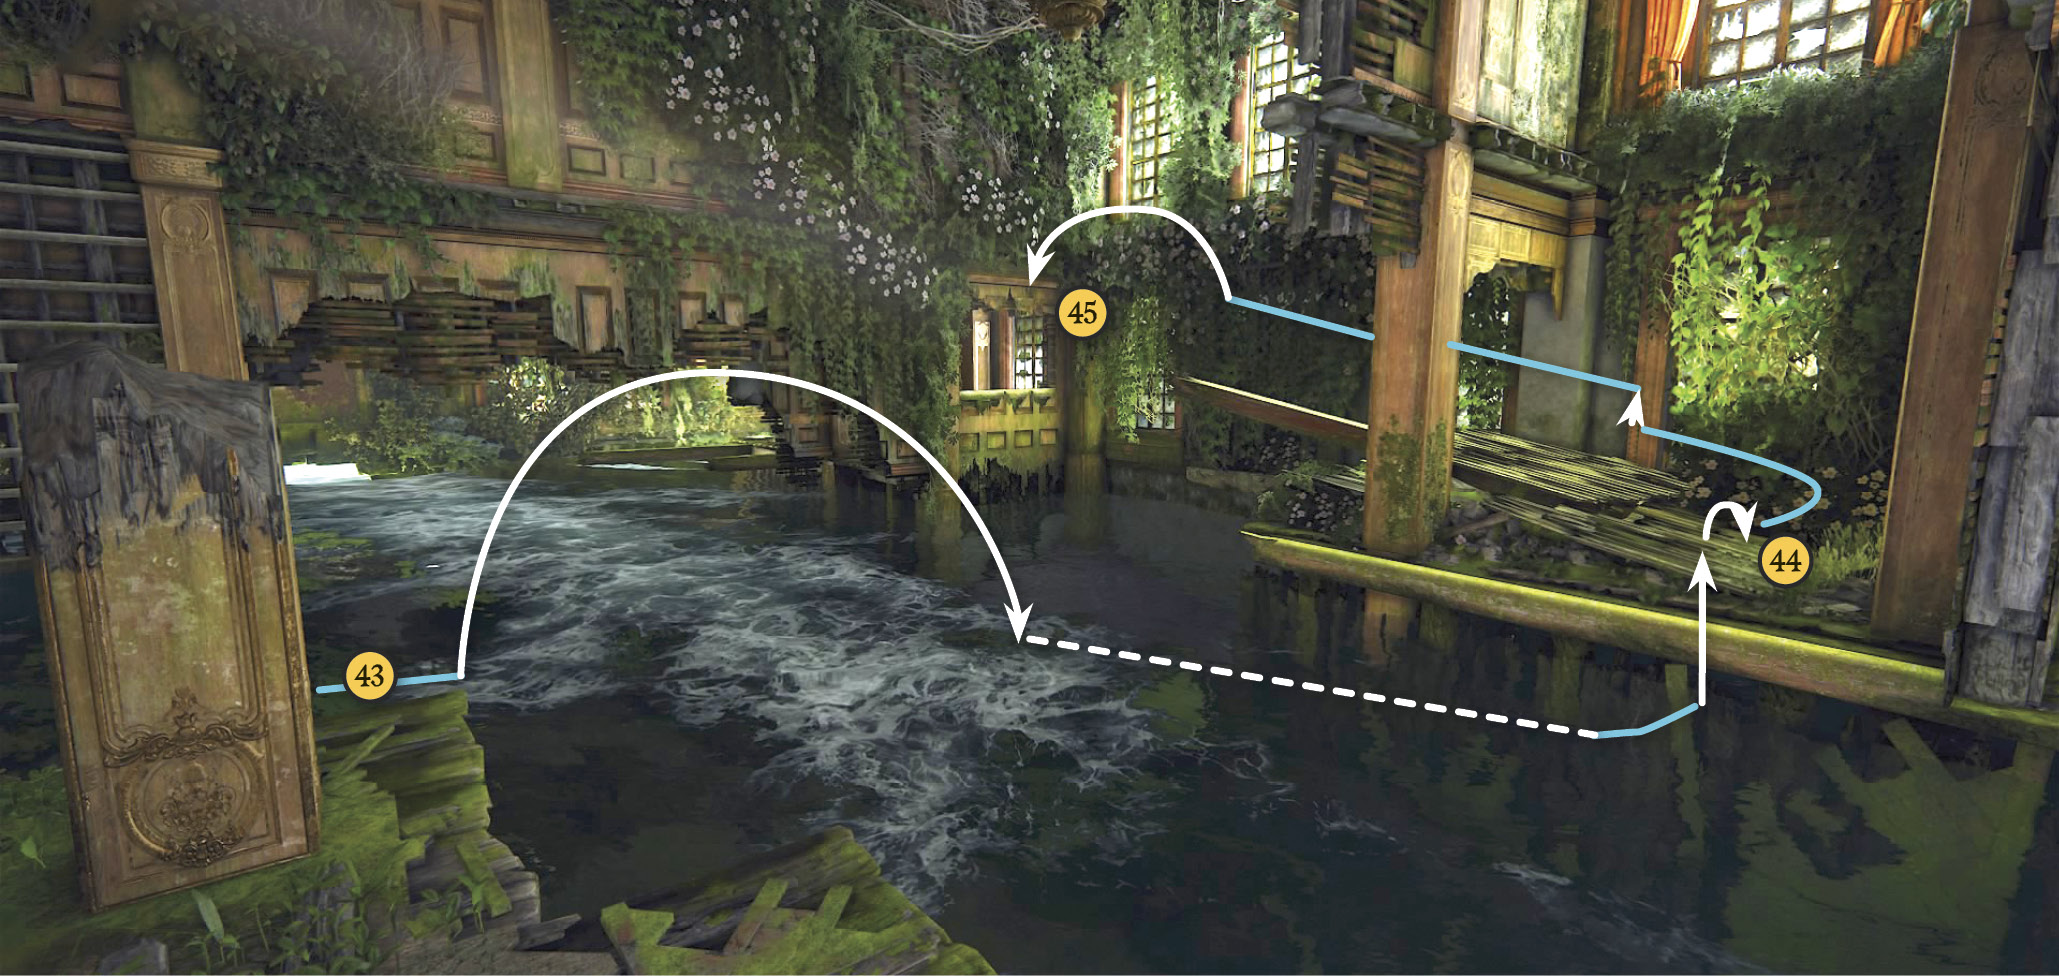
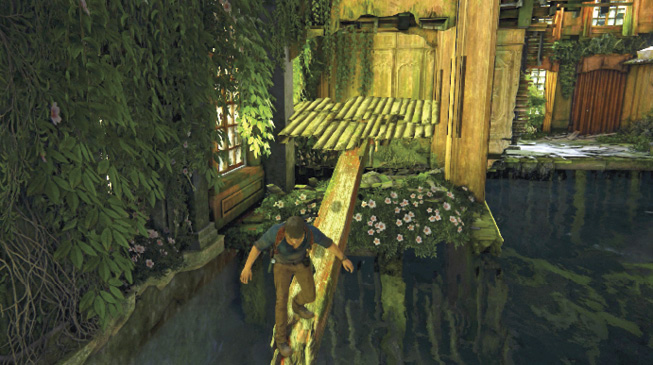
Second Step: Walk to the end of the plank (45) over the water, then try to jump toward the hole in the far wall. The first time you try this, your weight forces the plank downward and you can’t reach the hole. But Elena swims over to join you and steps onto the fallen ceiling chunk as a counterweight. This lets Nathan walk the plank again and complete the jump to the wall hole.
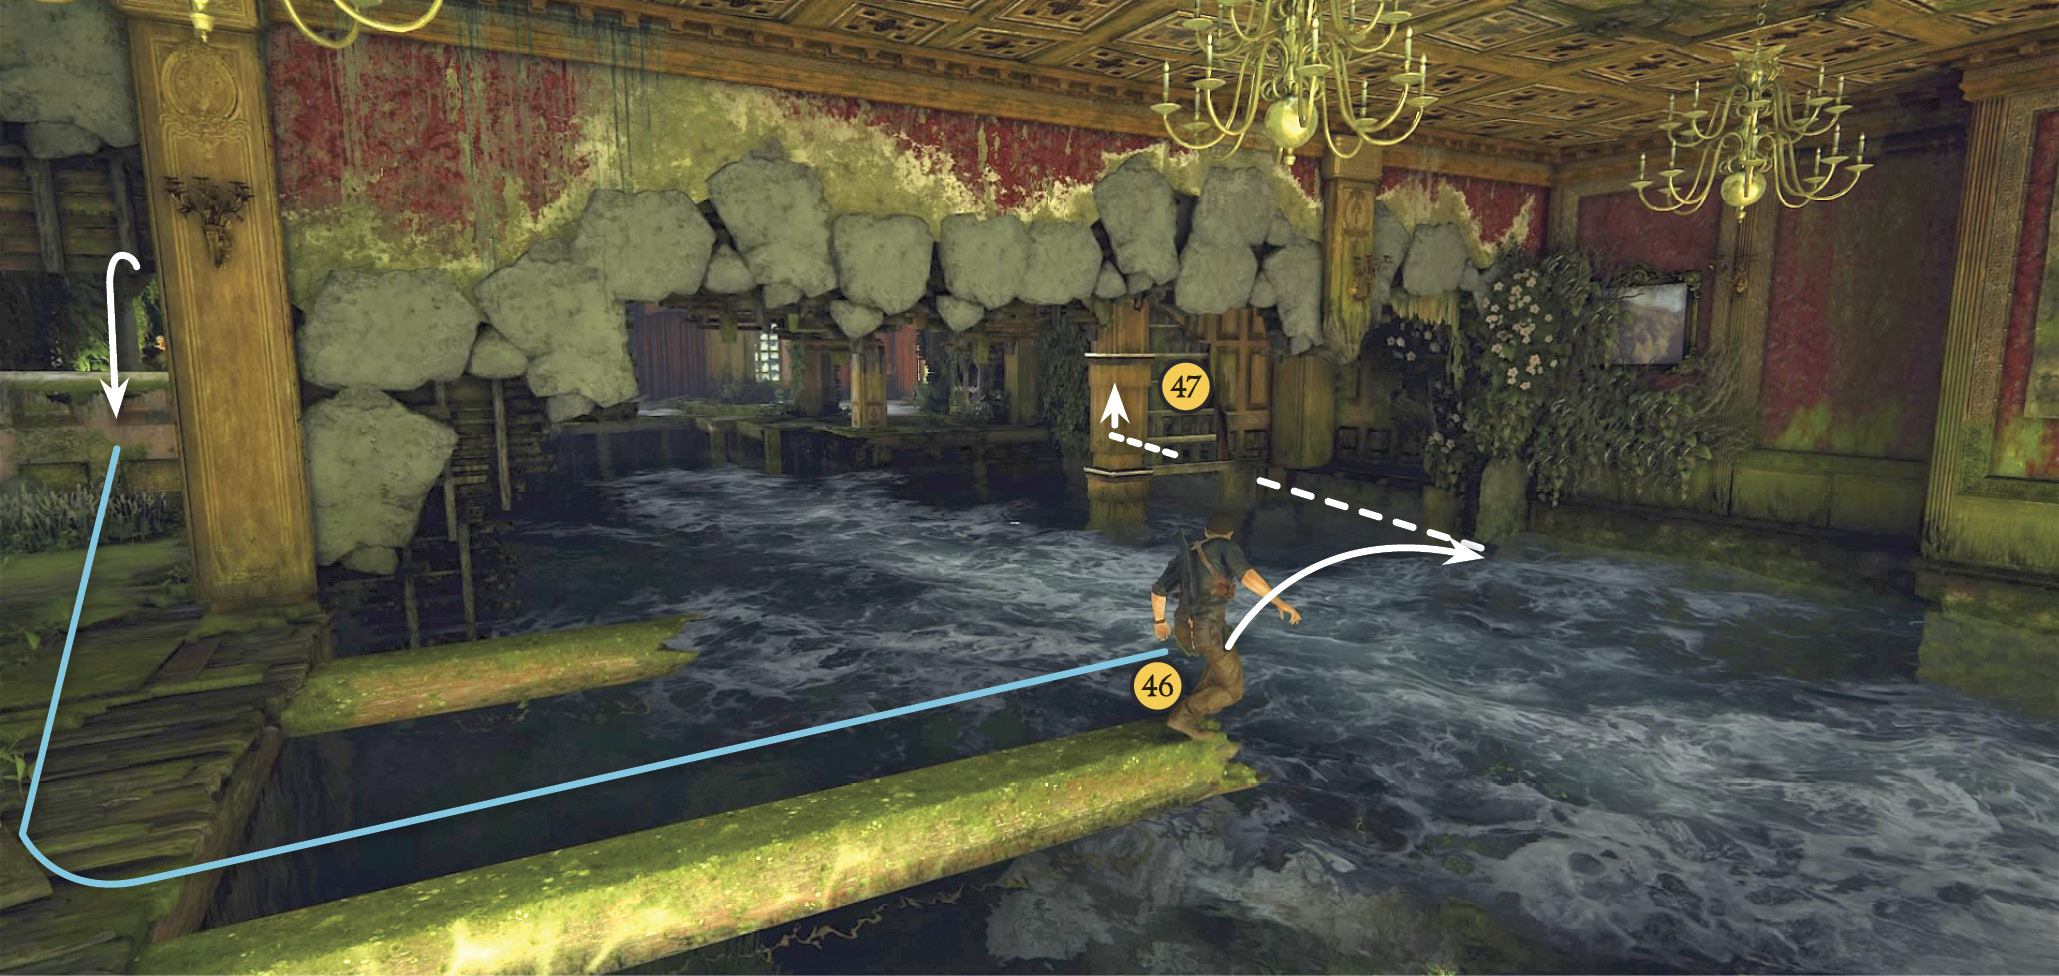
Third Step: After you get through the wall hole, walk to the end of the longer broken beam (46) extending over the water. Use it to jump as far as possible into the current, then swim toward the second vertical support strut (47), which has handholds on it.
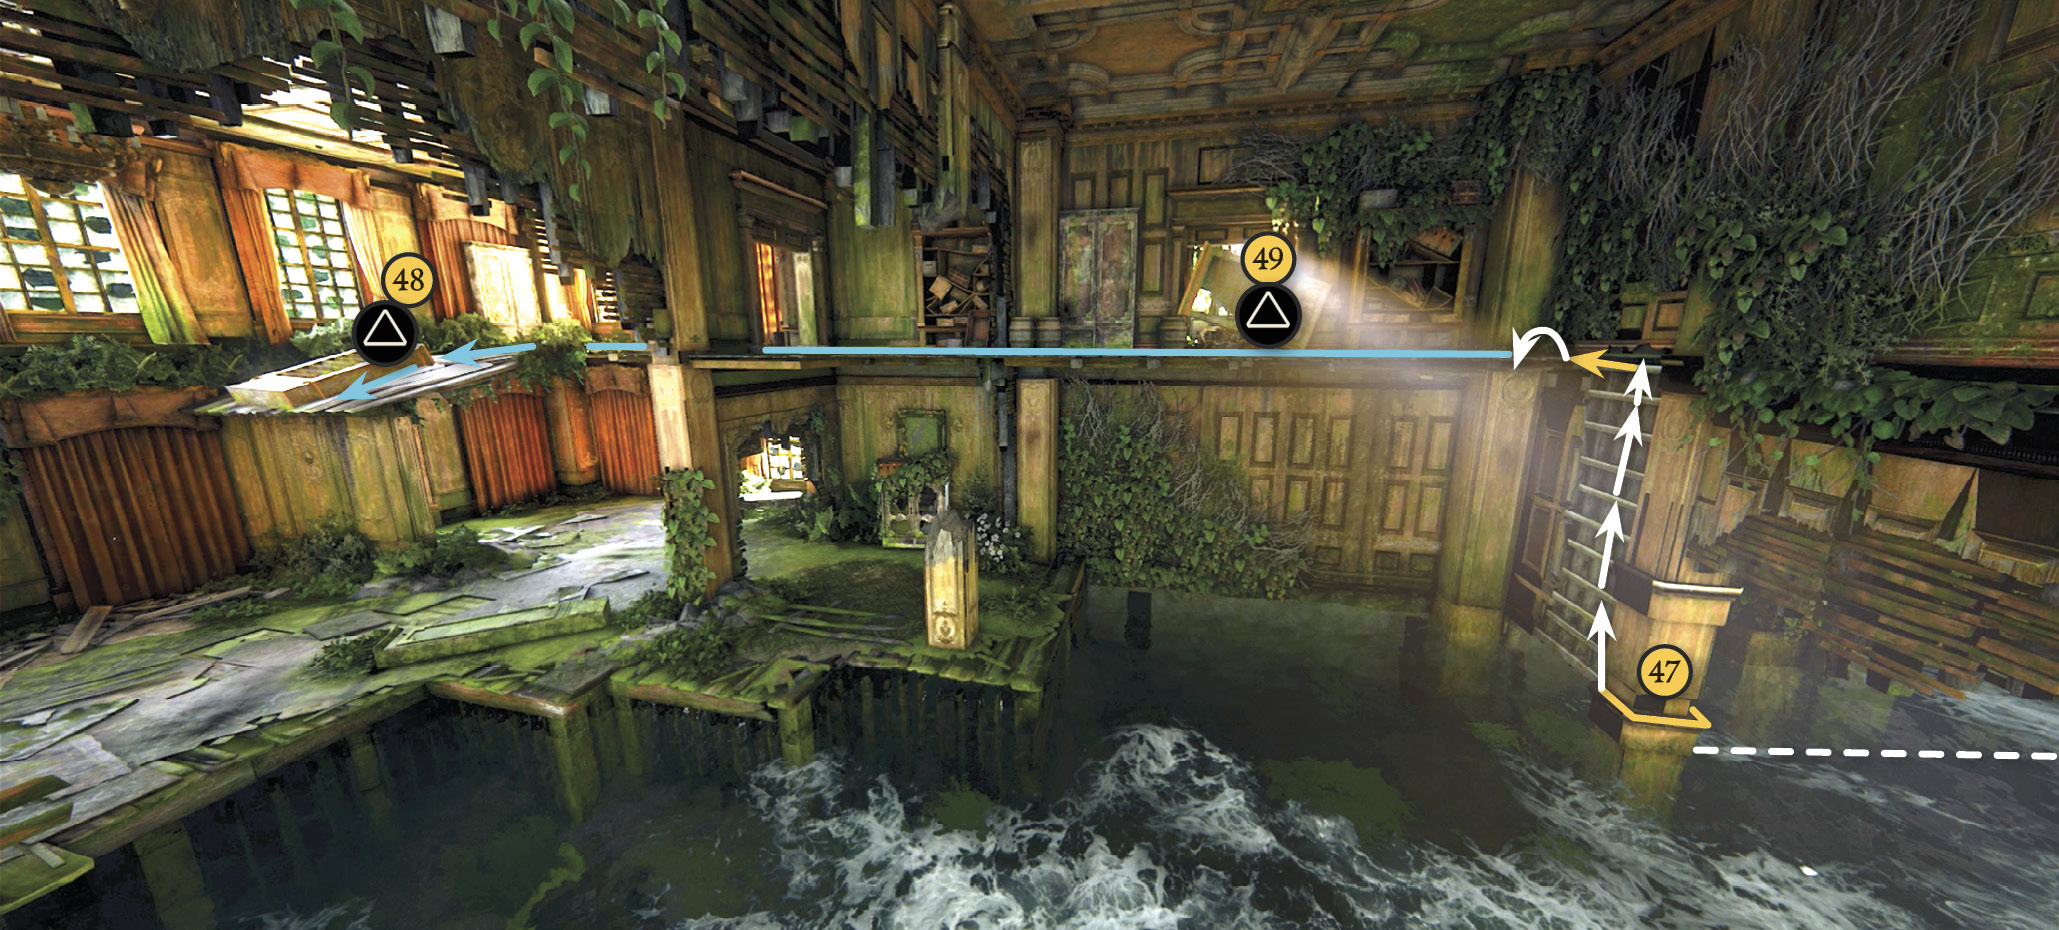
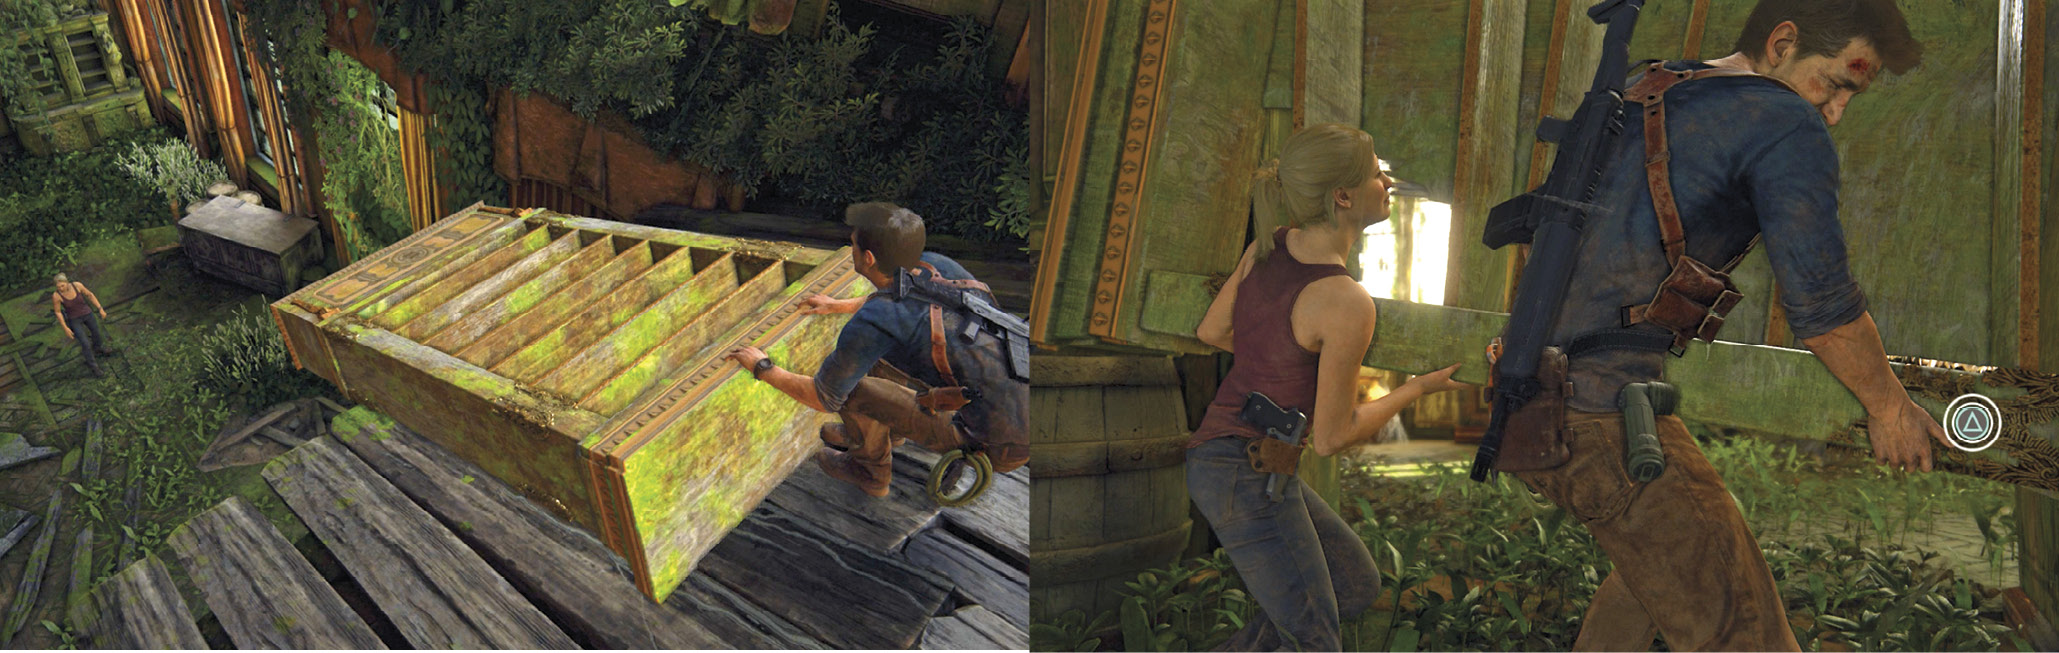
Fourth Step: Shimmy around the strut and climb the exposed wall frame to the top. Reach over to pull yourself up onto the second floor. Walk past the blocked exit and continue through the far doorway. Then grab the cabinet (48) and move the left stick to push it off the edge of the floor for Elena to climb up. Go back to the blocked exit door (49) and, with Elena’s help, lift it out of the way.
Find Tew’s Banquet Hall
Head down the corridor and examine the sigil on the left wall: This confirms you’re in Thomas Tew’s house. Continue to the doors on the left and enter the banquet hall. This triggers a scene: Nathan and Elena examine the remains of a fateful dinner and toast.

After the cutscene, pick up the Optional Journal Note (Tew’s invitation) from the corner of the table. Then examine the banquet table to make one last Optional Journal Entry—this is the last one in the game!
Get to Henry Avery’s Mansion
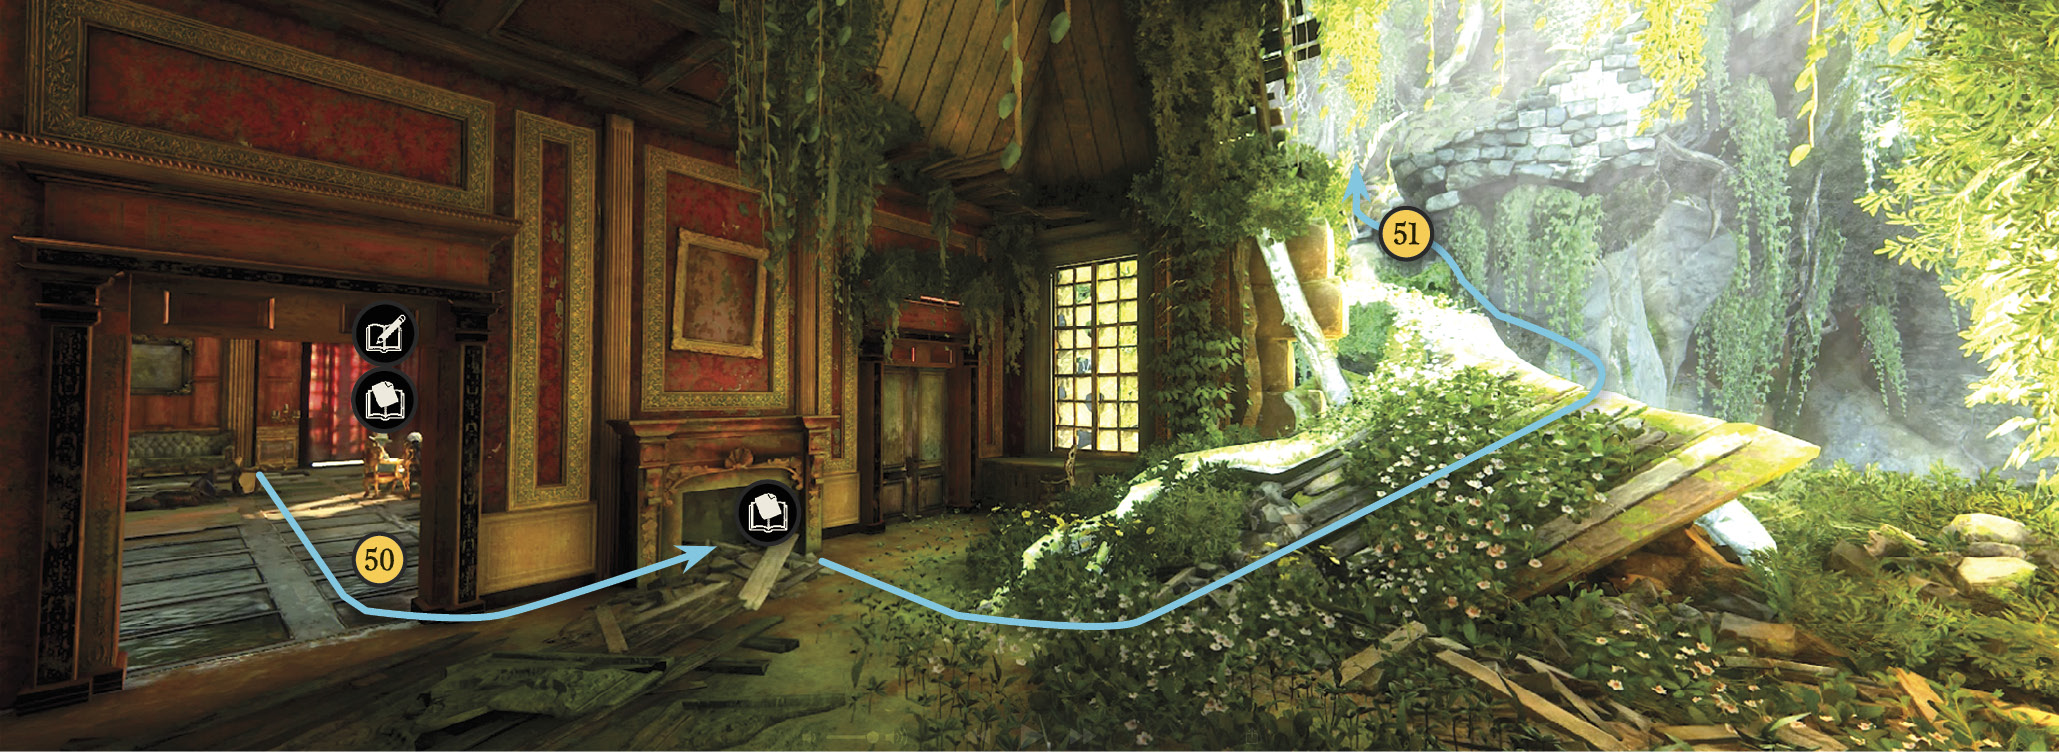
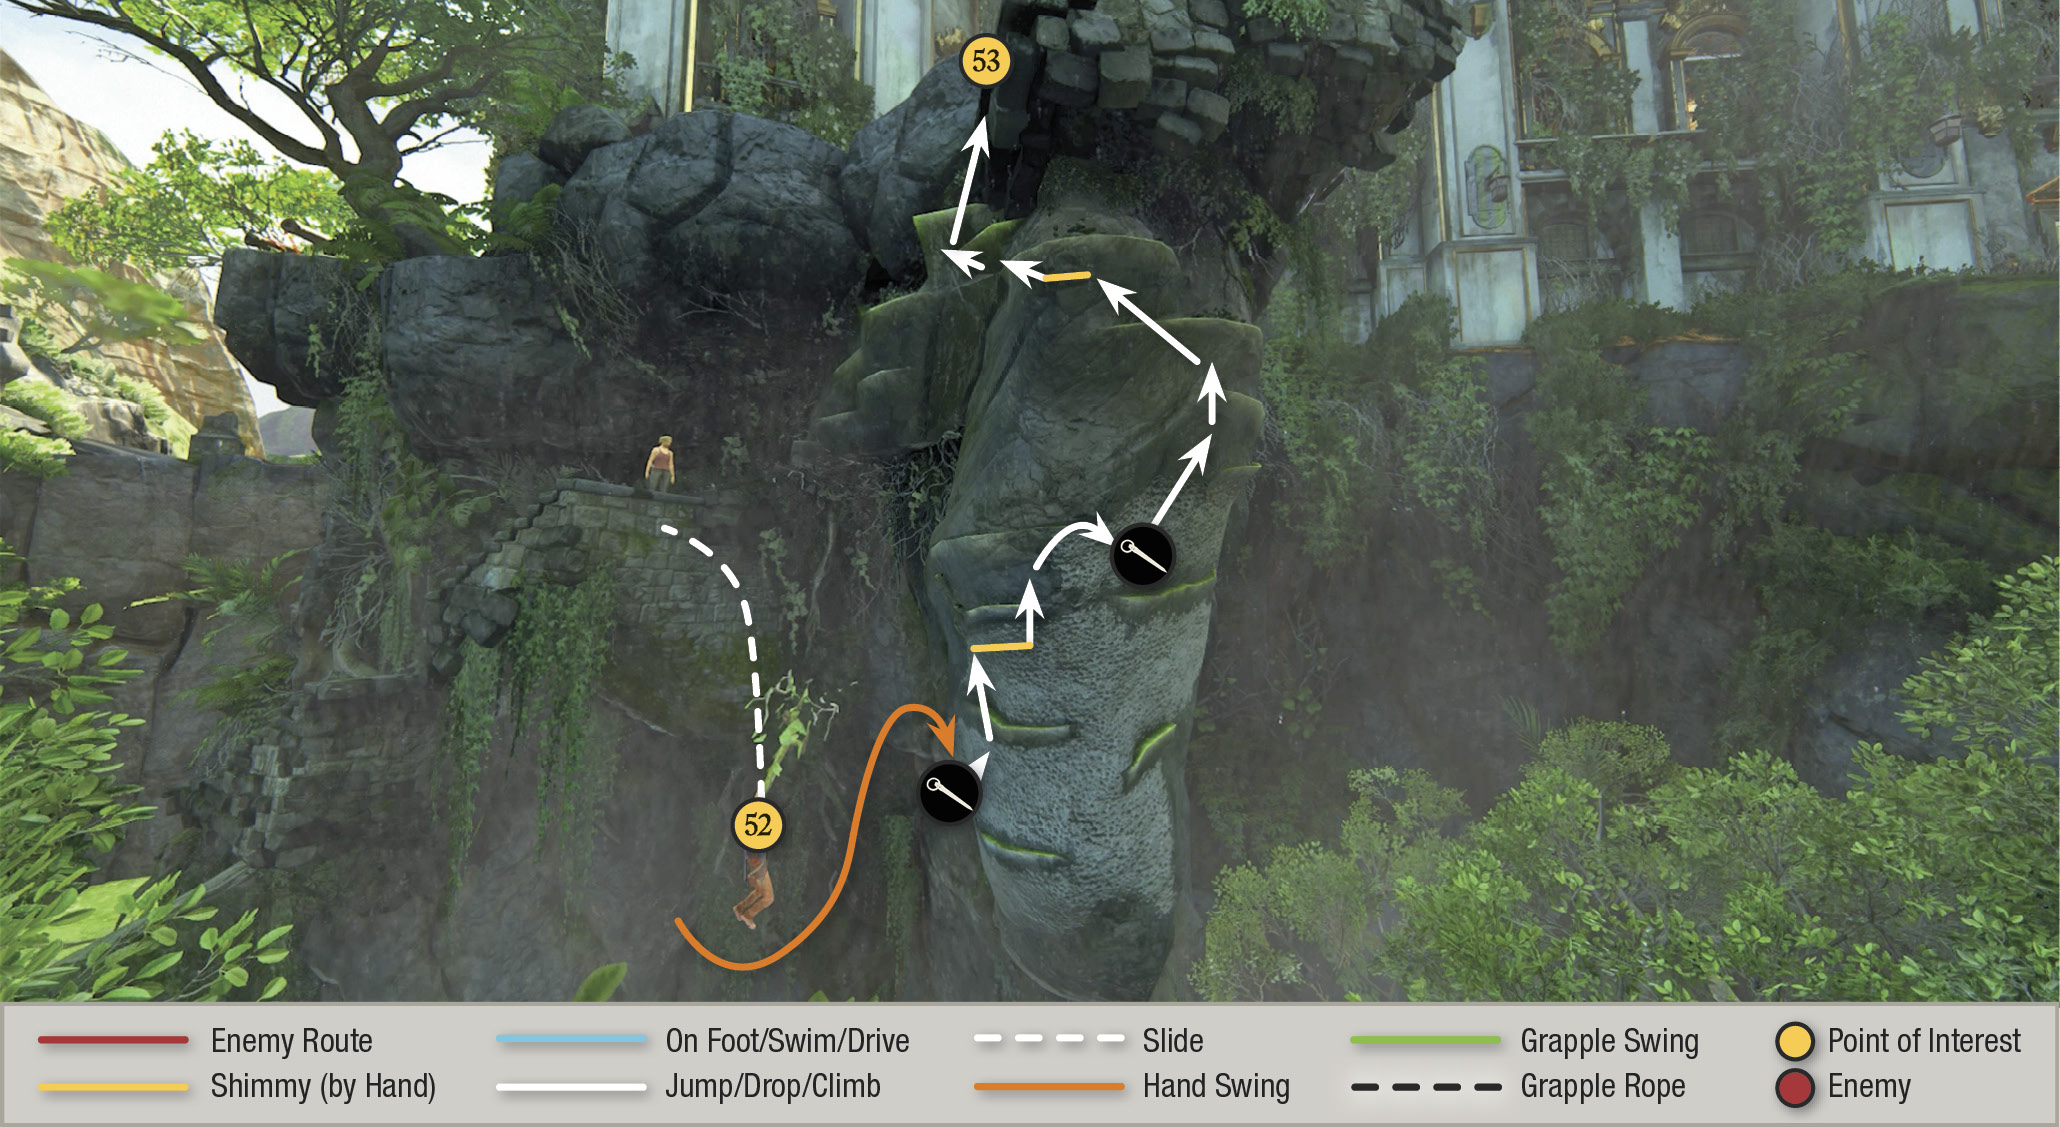
Exit via the far door (50) into a side room and look in the fireplace to find Tew’s partially burnt Optional Journal Note asking for forgiveness. Then exit the house and cross the narrow, mossy bridge (51) to the stairs. Climb the staircase until it collapses; Nathan grabs a branch (52) on the way down. Swing to the handholds on the cliff and climb to the top, using your piton on the porous rock sections. At the top (53), note the Shoreline truck still parked by the house.
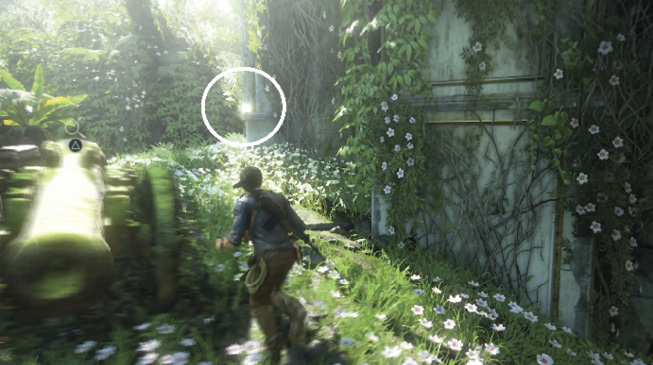
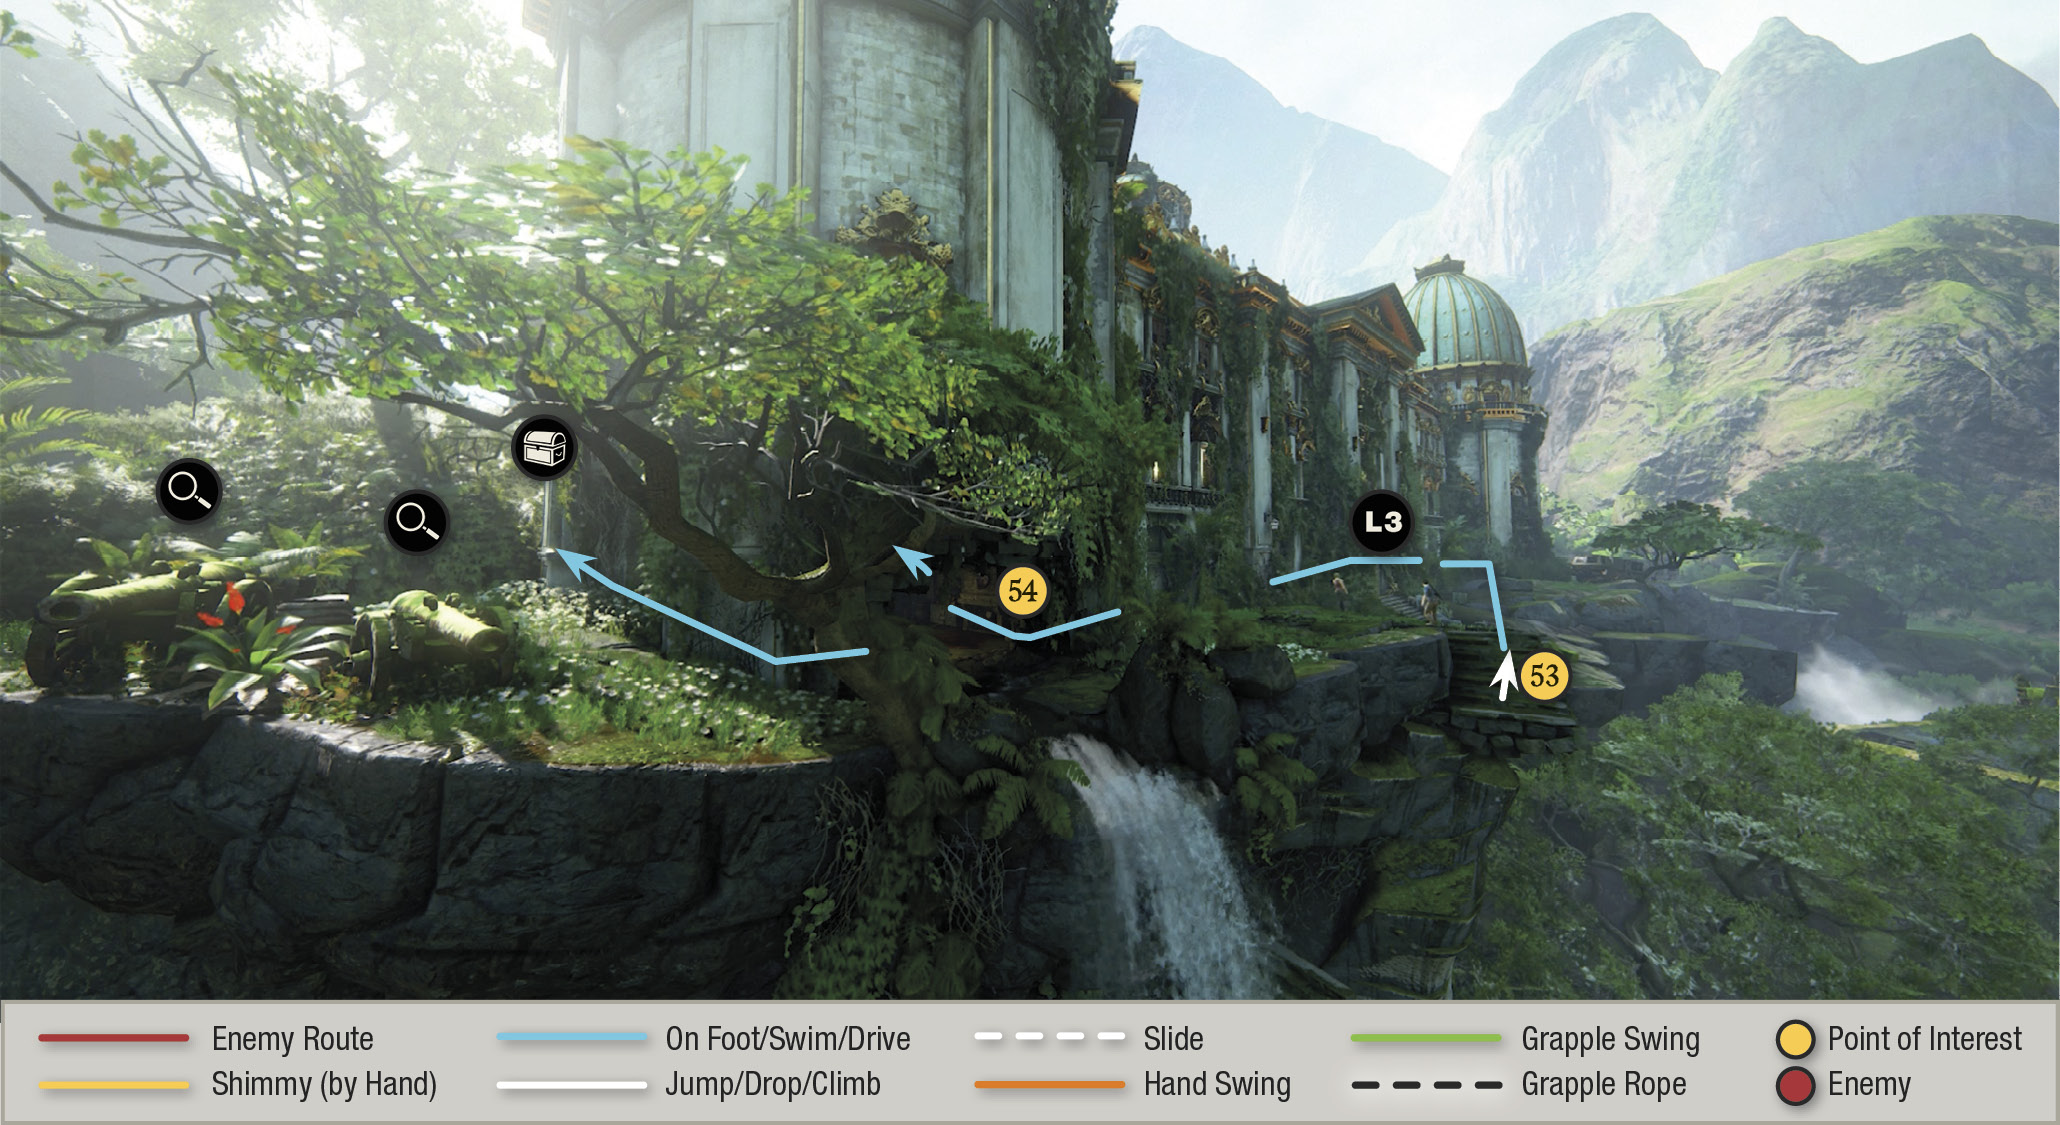
Go around the mansion’s left side to examine either one of the two cannons and find a treasure on the nearby wall. Then come back toward the front and duck into the hole in the wall (54) that leads right into the kitchen area.

Mughal Painted Elephant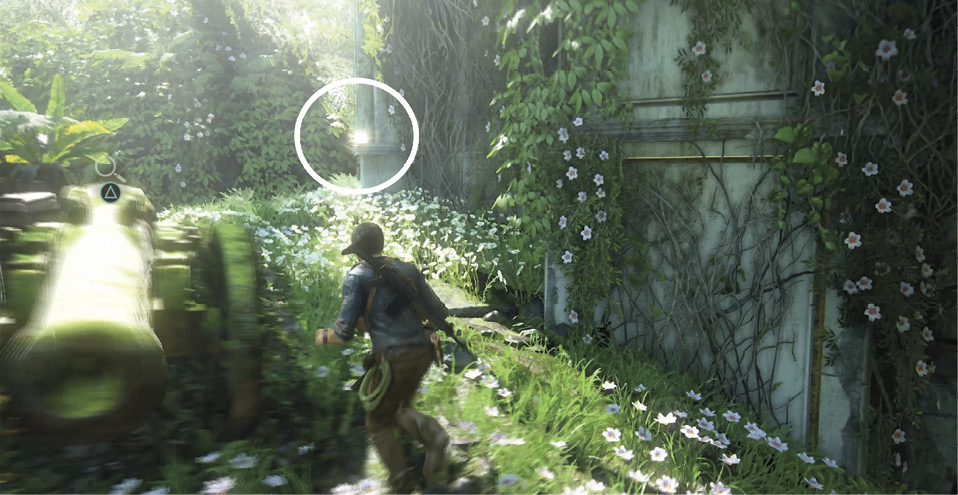
When you reach Avery’s mansion, walk around the left side past the cannons and find the Mughal Painted Elephant sitting on a low ledge on the house’s wall. |
Get to the Entry Hall
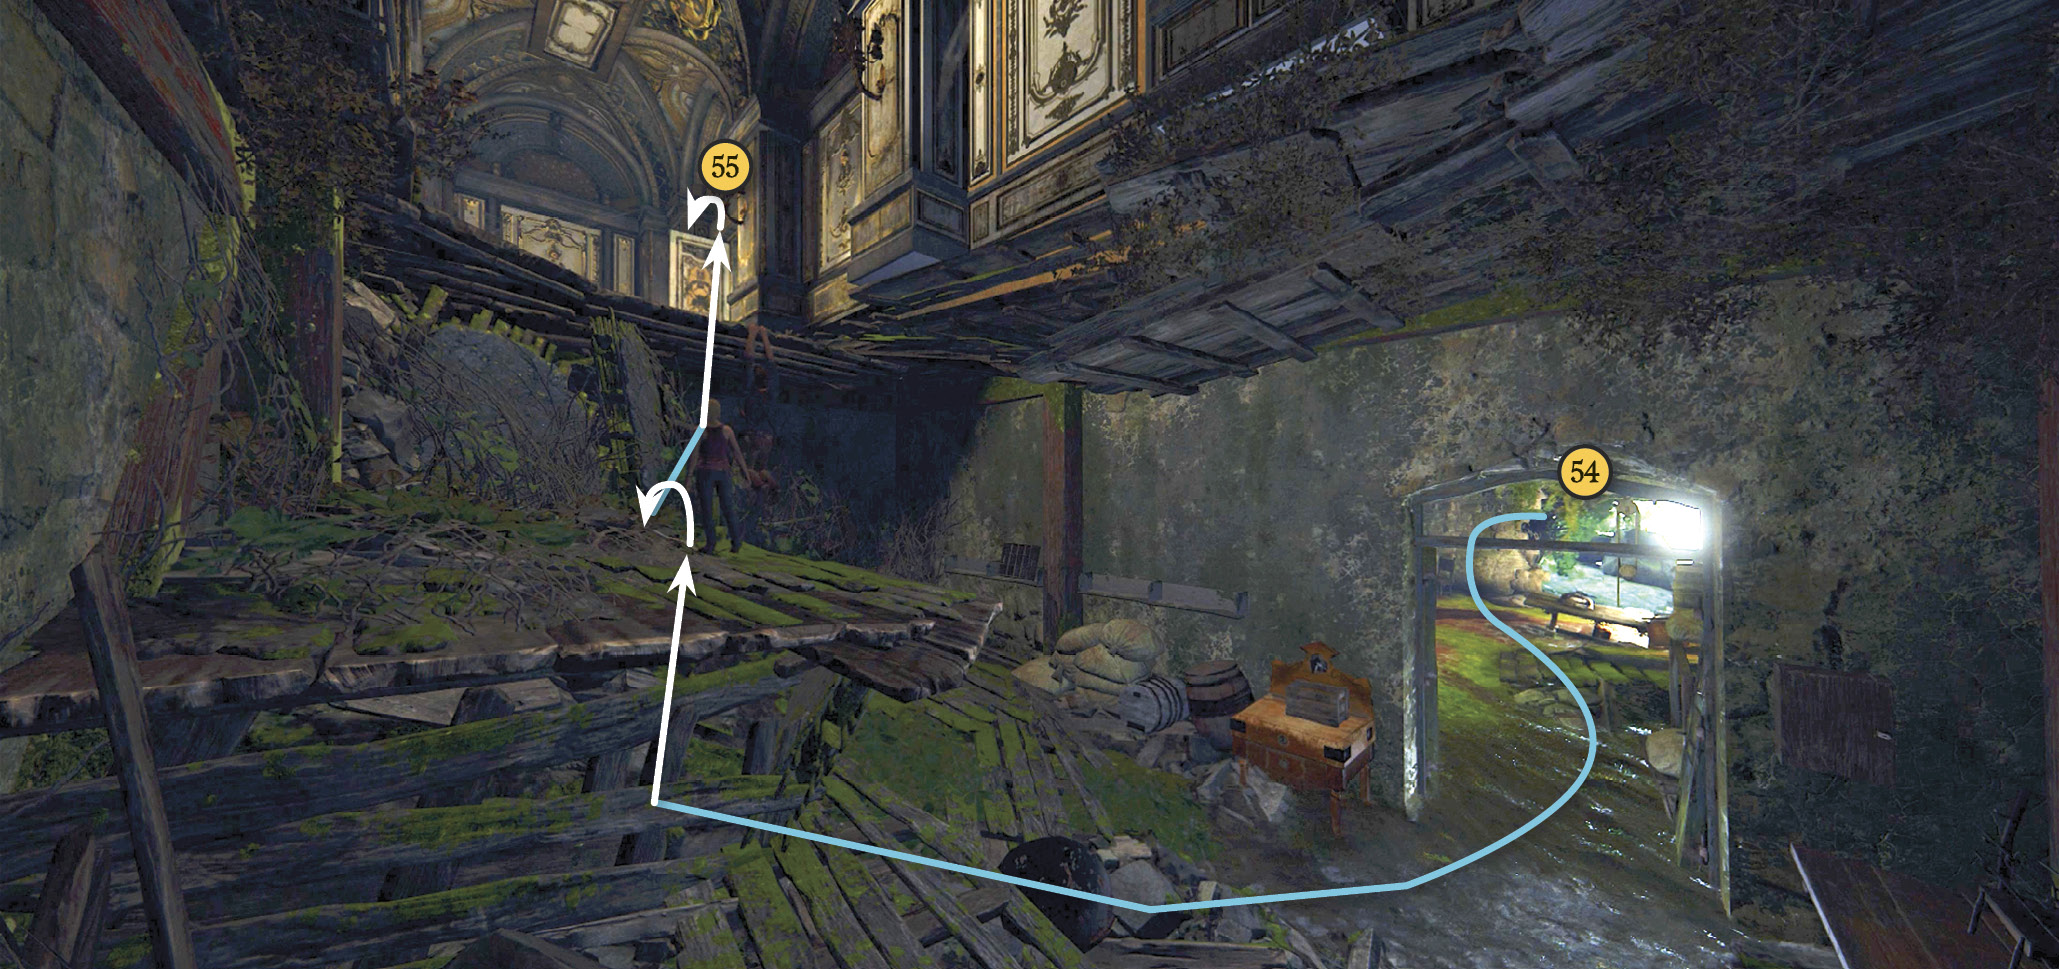
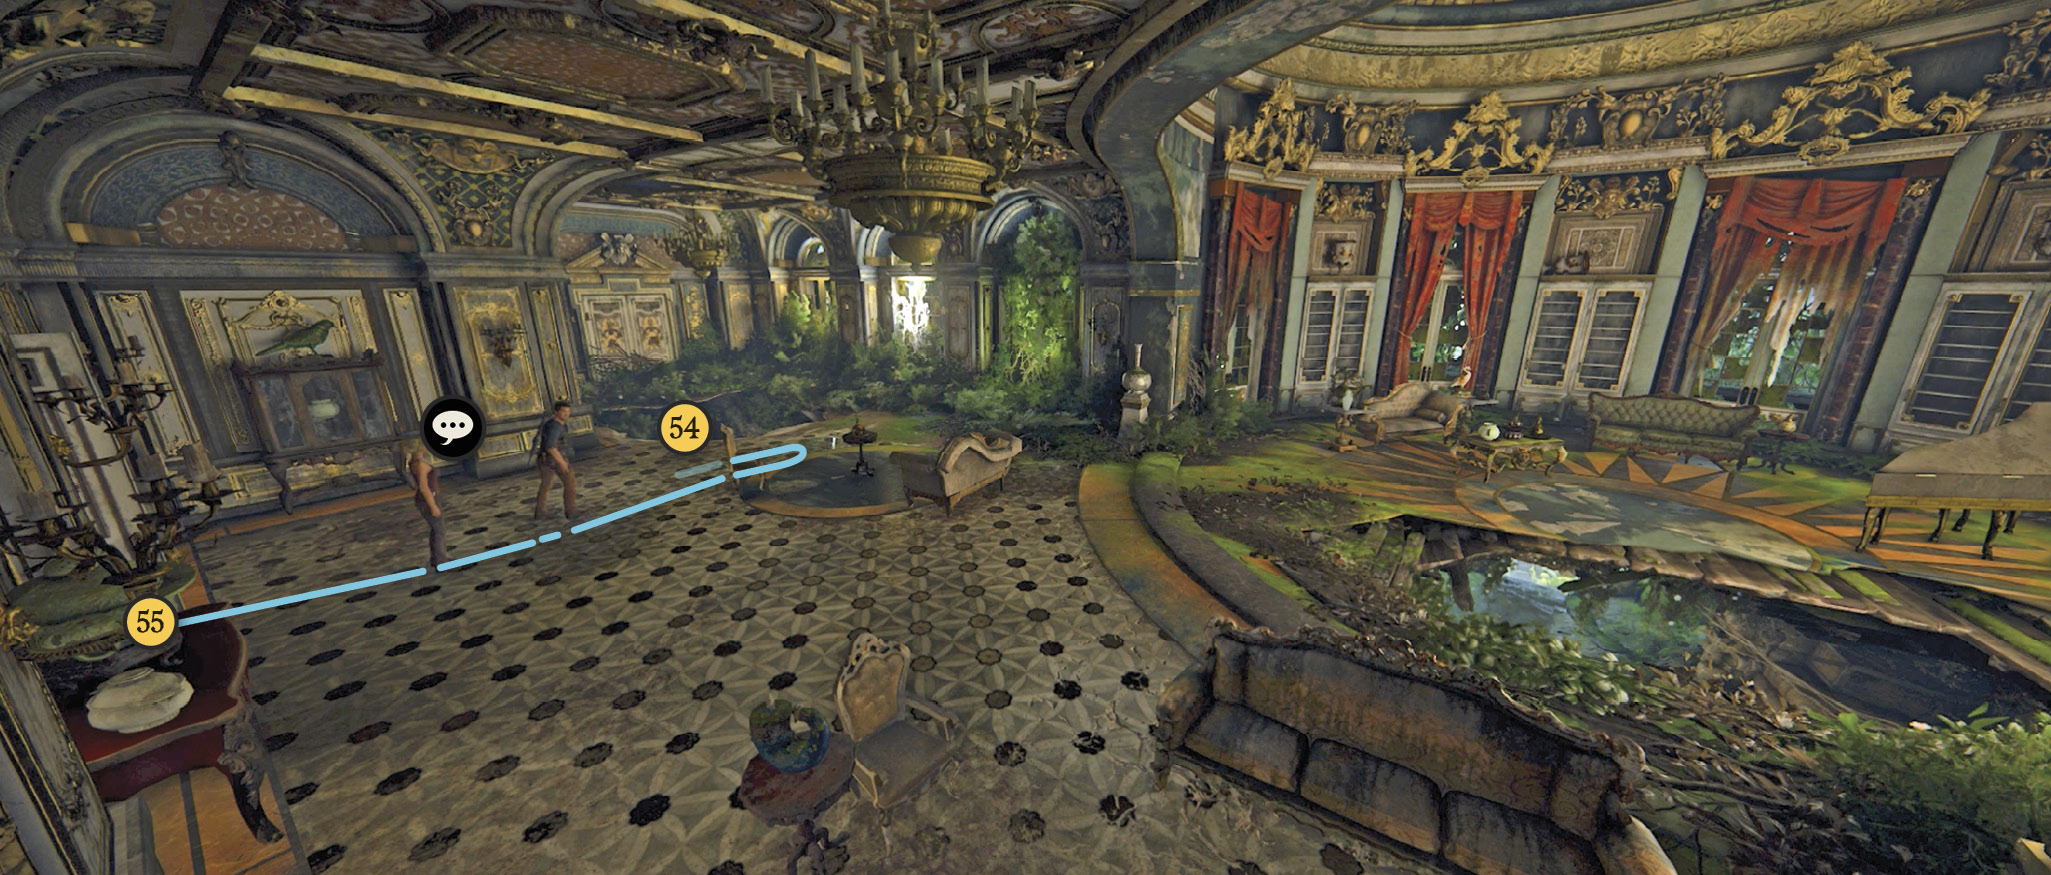
Move through the kitchen into the next room, a storage area. Pull up onto the collapsed ceiling section, then climb onto the mansion’s first floor (55). Go through the next doorway and behold the ostentatious display of wealth as Nathan and Elena chat; when the Talk icon appears over Elena, engage in the Optional Conversation, “Sounds Like My First Job.” Veer left to jump down the floor hole (56) and short slide. Then move into the massive entry hall.
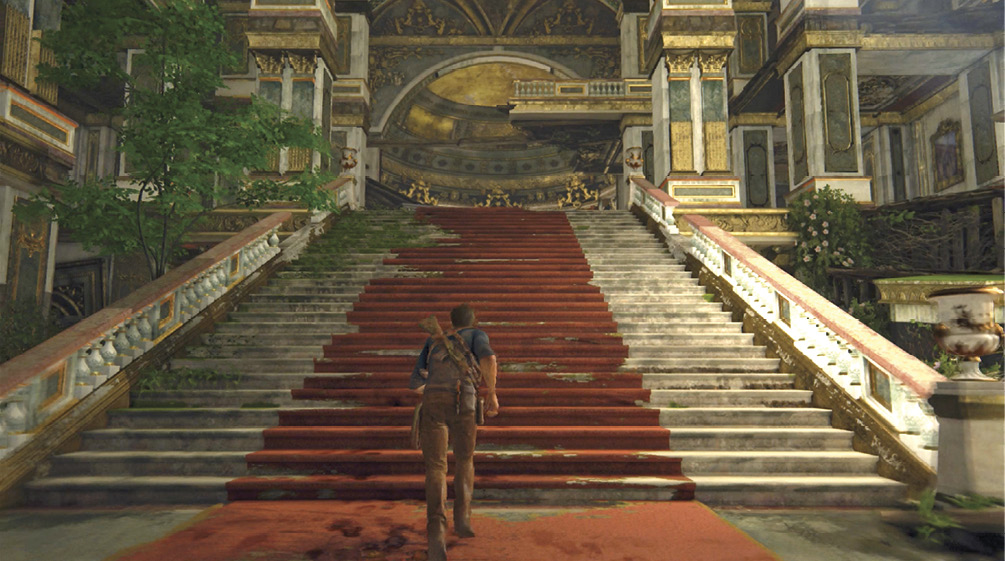
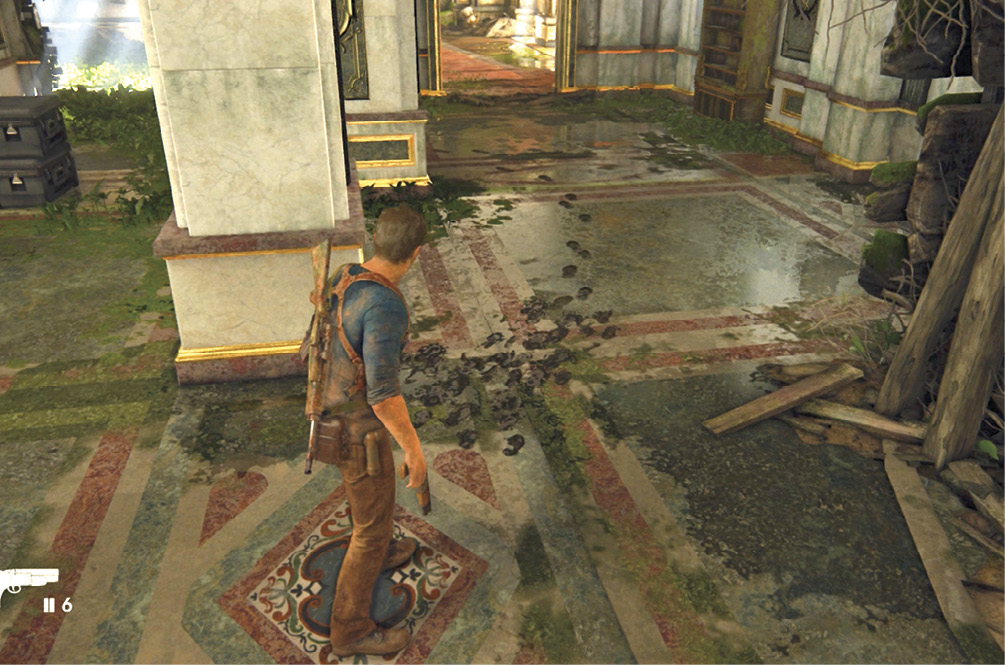
Examine the front entrance on the right; Nathan points out that Shoreline has barricaded the door, and Elena notes their muddy footprints. Before you follow the tracks, look around to find weapons/ammo sitting on crates. Stock up for the impending gunfight!
Track Down the Mercenaries
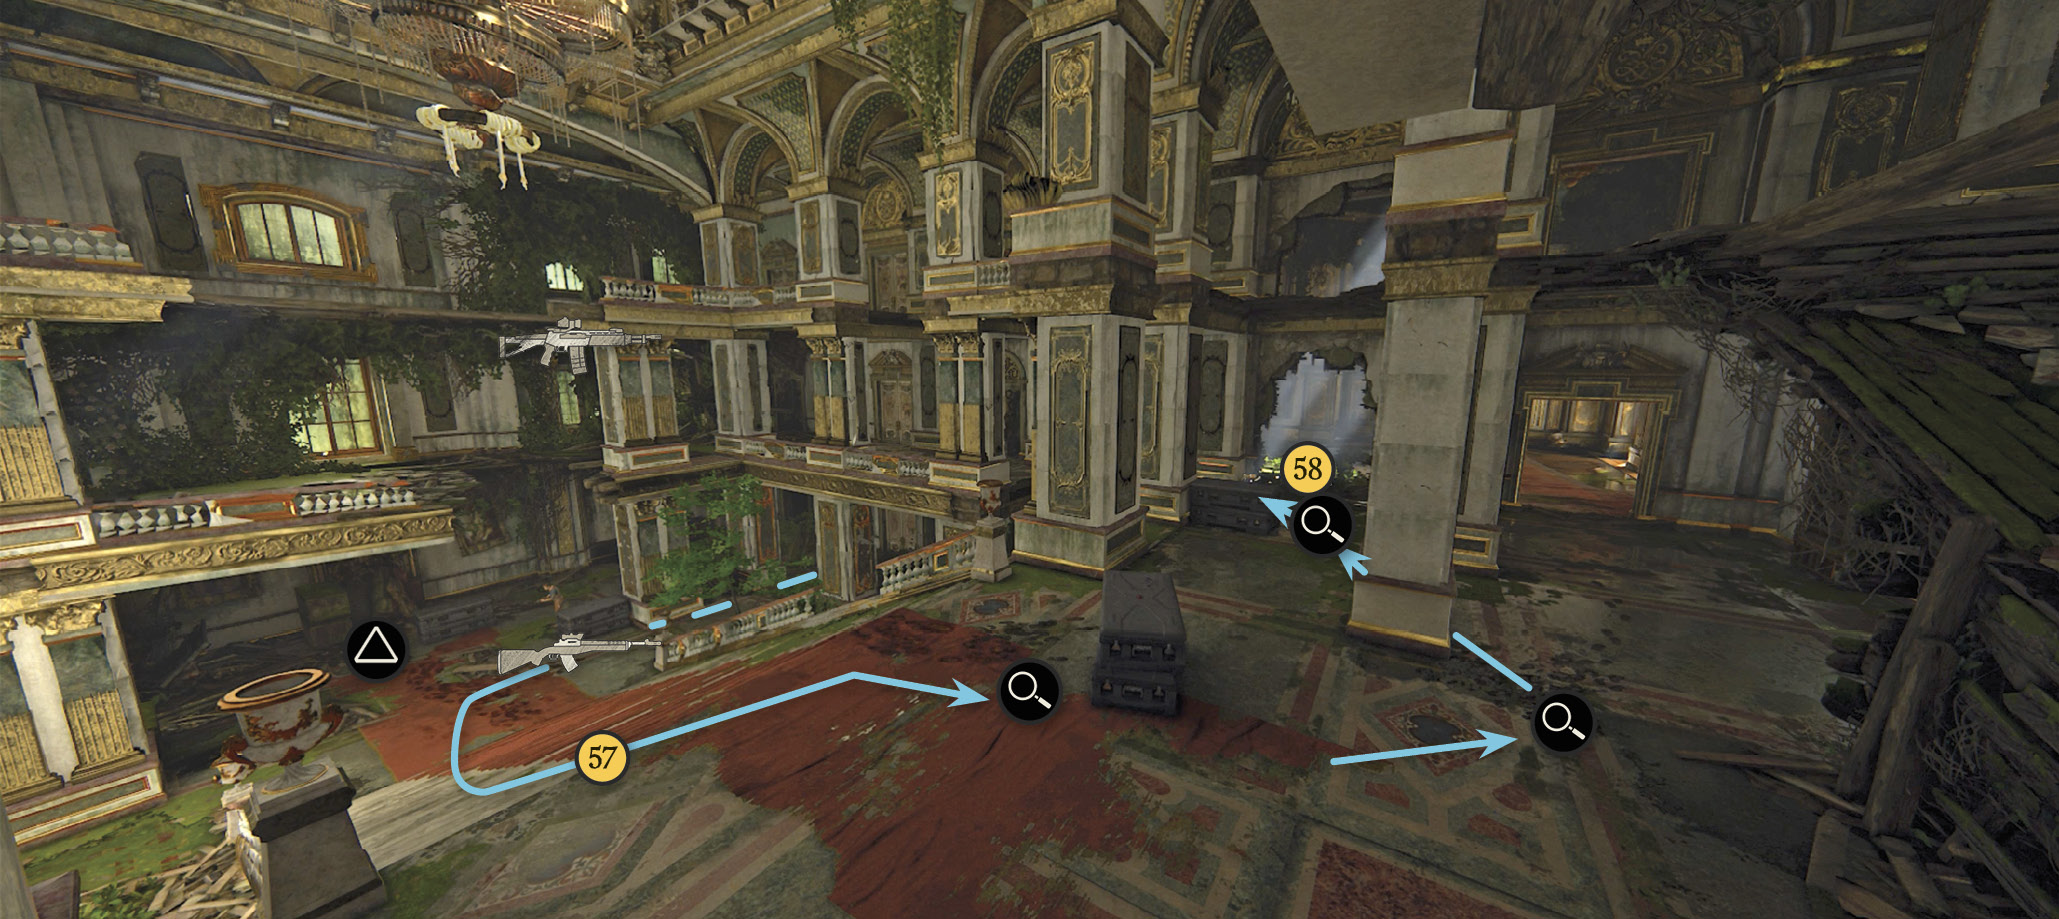
Now start tracking the muddy footprints. Climb the main staircase (57) to the second floor. Turn left and follow the prints through the door or wall hole (58) to the back stairs (59). Climb those stairs to the third floor. (Note the dark crates stacked in the corner at the staircase’s top—a well-protected defensive position for the wild gunfight you’re about to trigger.)
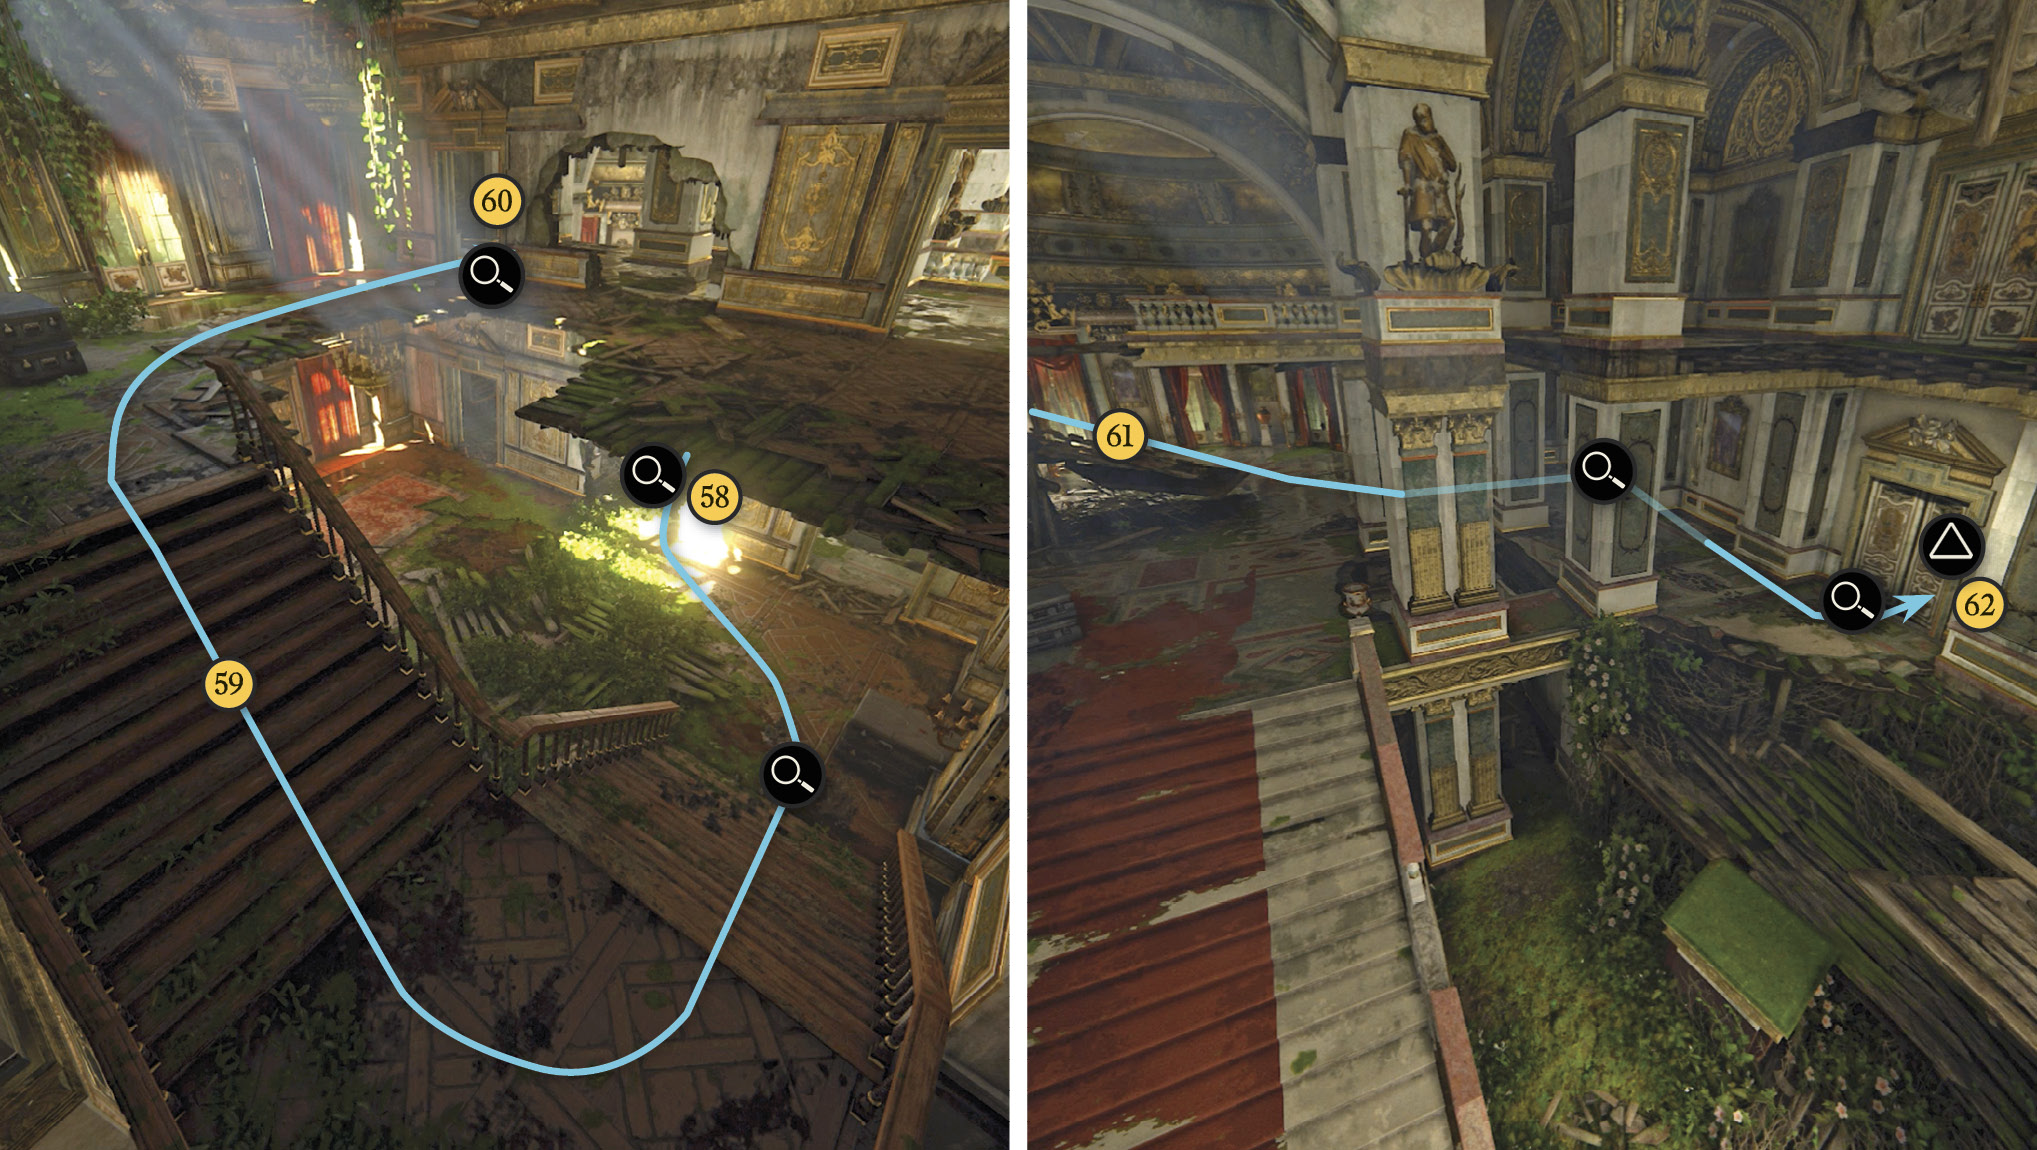
The footprints lead through a doorway (60), then descend a ramp formed by collapsed flooring (61) that leads back down to the second floor…right back where you started at the top of the main staircase! Finally, the prints curve around one last corner and end at a pair of ornate doors (62) blocked from the other side. Try to push open the doors with Elena’s help. This triggers an ambush!
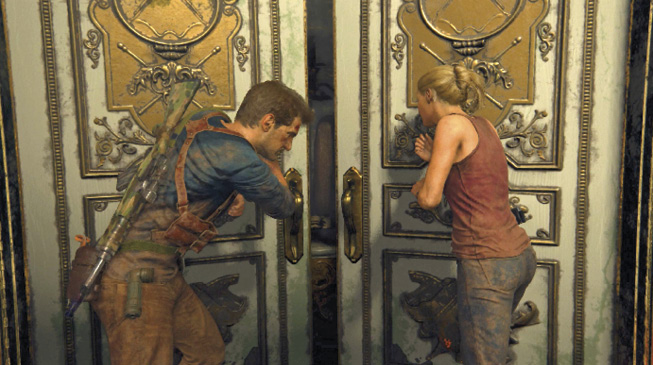
Fight Off the Shoreline Thugs!
This is a nasty fight. Cover and peripheral awareness are more important than usual because you’re seriously outnumbered, the attackers are on multiple levels, and they actively try to use their advantages to outflank you. If you have a good rifle with a scope and plenty of ammo, you can try to stay put and patiently take out goons while keeping a sharp eye on side movement. (Elena helps some, but don’t count on her to protect your flanks.) Or you can get aggressive, pick up a shotgun, and fight on the move.
You face a full variety of Shoreline troopers, including snipers on separate balconies across the hall from where you start the fight. You can try advancing up the fallen floor ramp to their level and then taking them out. Grab one of their M14 Custom rifles, sit in a perch and pick off foes from afar.
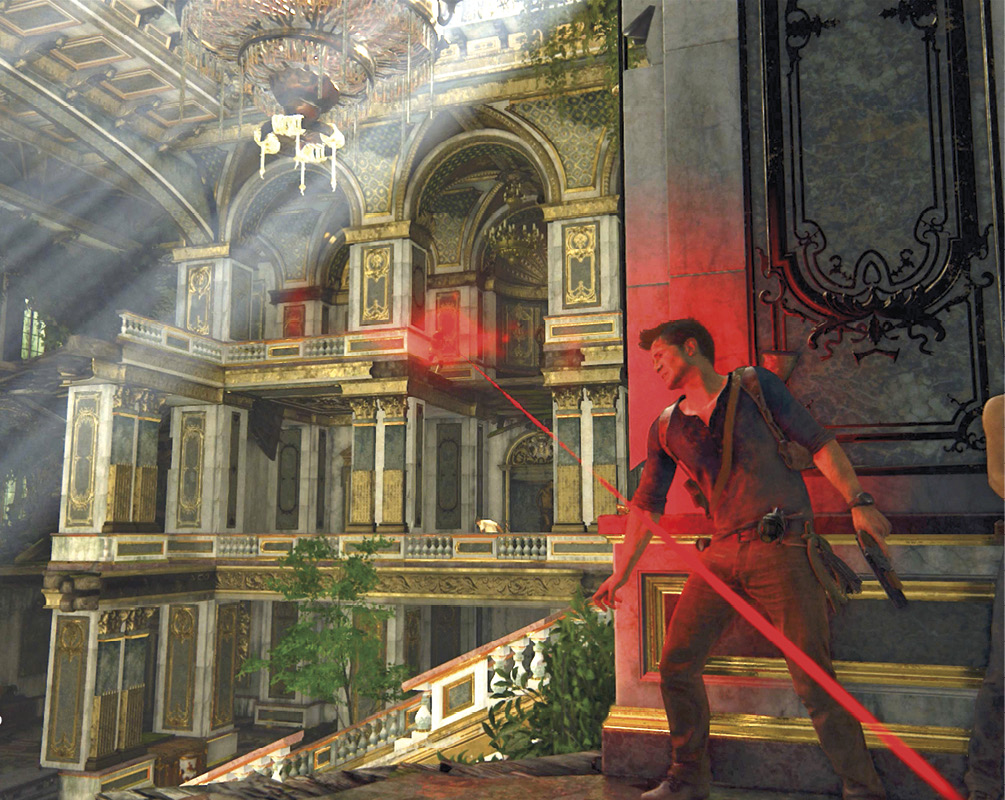
Also beware of the heavy trooper wielding the New Weapon, the rapid-firing DShK heavy machinegun. He wears thick body armor, so he advances aggressively at your position, largely ignoring cover. When you knock out this trooper, you can try lugging this weapon for a bit—you gain fearsome firepower but lose mobility and the ability to cover (except to step behind obstructions that stand between you and the enemy).
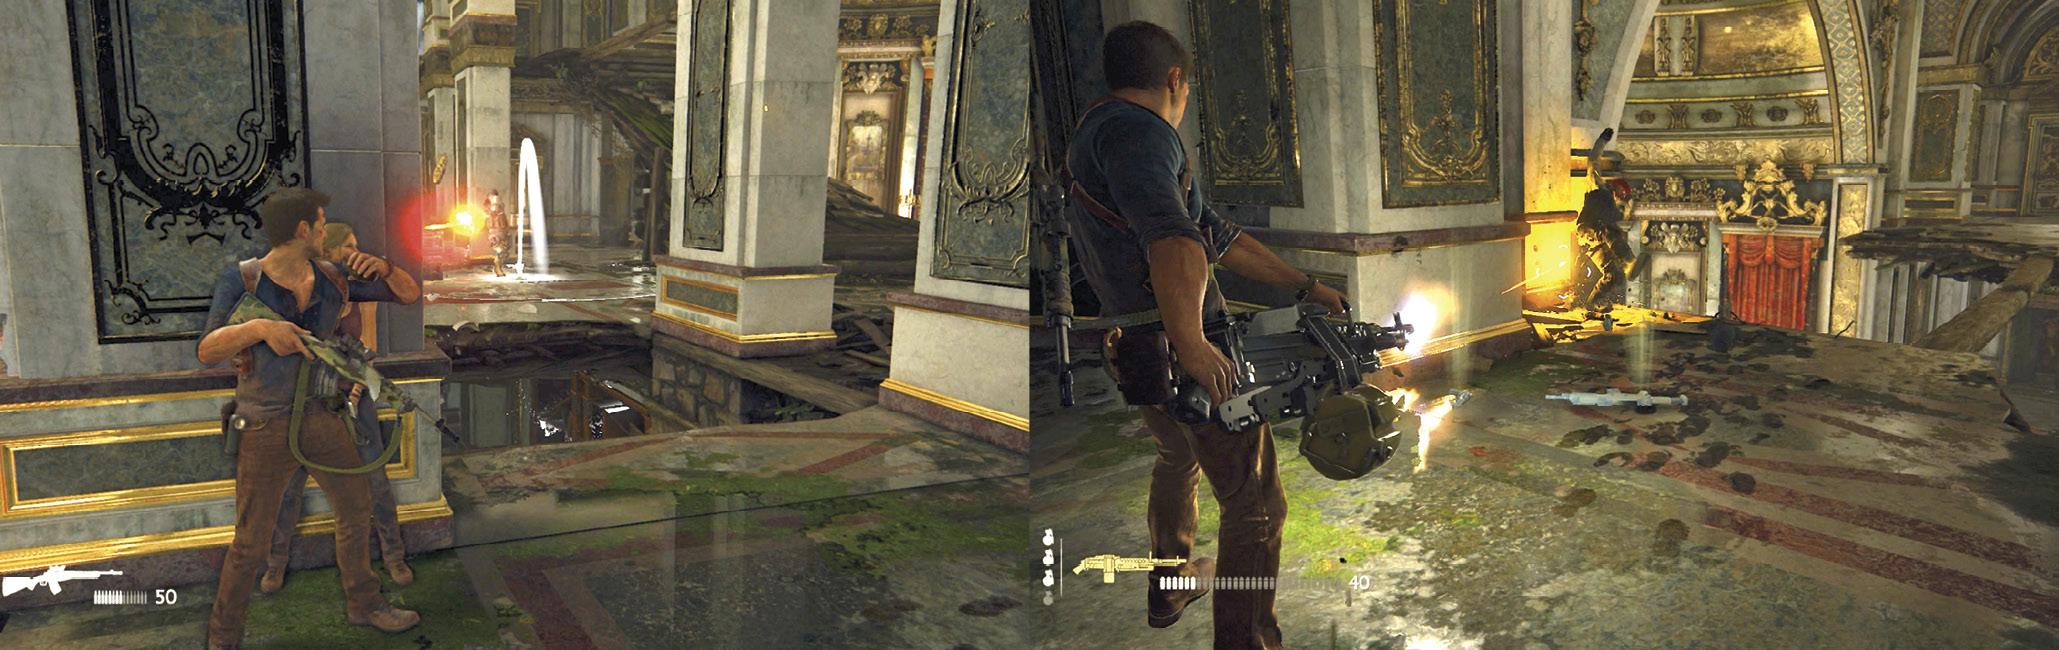
Find Avery’s Study
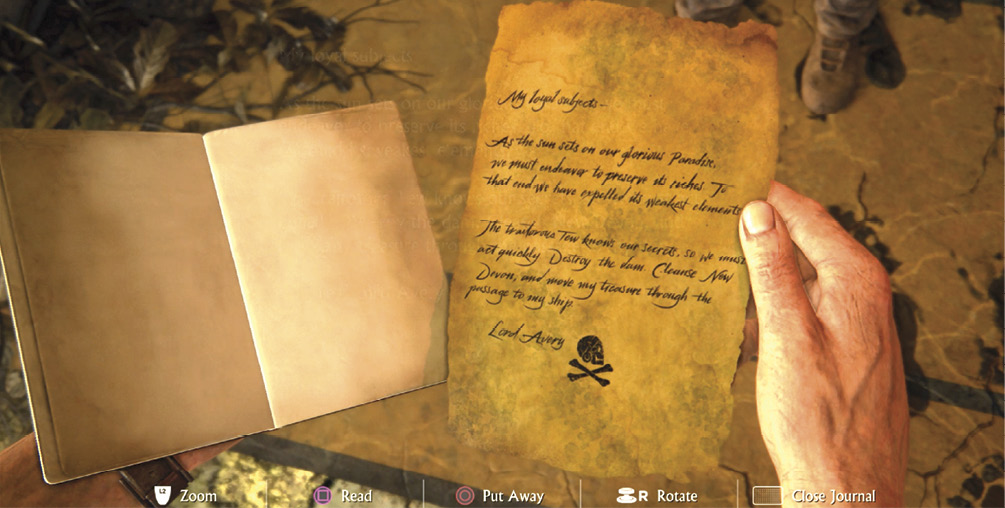
When you finally clear the hall, go back to the blocked door (62) on the second floor and ram it open with Elena. Nathan bursts through and lands almost face-first on a corpse holding a letter from none other than the lord of Libertalia himself, Henry Avery. Elena walks down the corridor to another doorway as she reads it, so follow her. Avery clearly grew to see himself as a new royalty, even referring to his “loyal subjects.” You learn why the waters flow through New Devon. The letter also mentions something about moving Avery’s treasure through “the passage to my ship.”
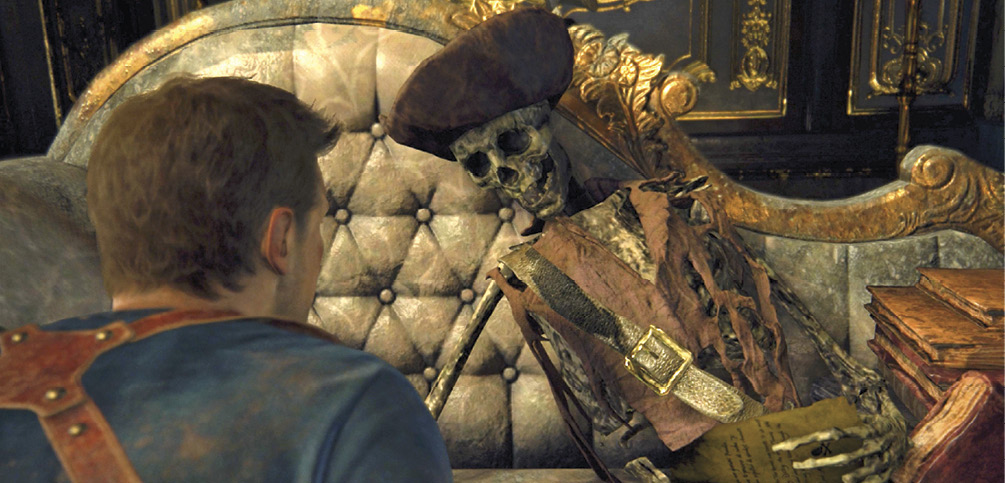
When Elena finishes reading, she hands Avery’s letter to Nathan; although it’s technically listed as an Optional Journal Note, you can’t proceed with the story unless you take it. Then follow Elena through the doorway into Avery’s huge study, where the Shoreline footprints suddenly end.
Find Avery’s Passage
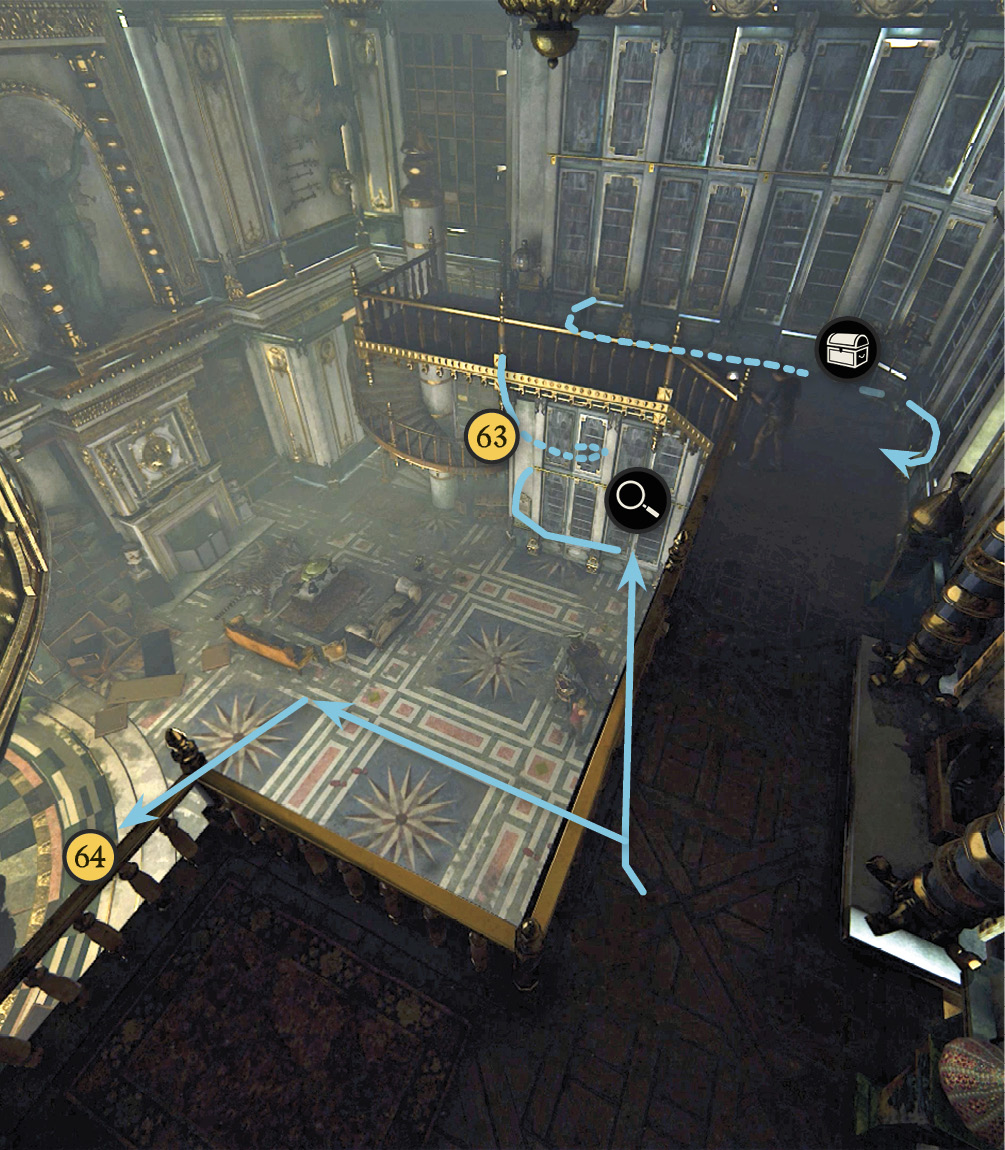
What a room! After Elena says, “Let’s look around,” go examine the framed proclamation near the spiral staircase (63) and climb the stairs to find a treasure. Then go explore the circular bay (64) of the study.

Mughal Dinnerware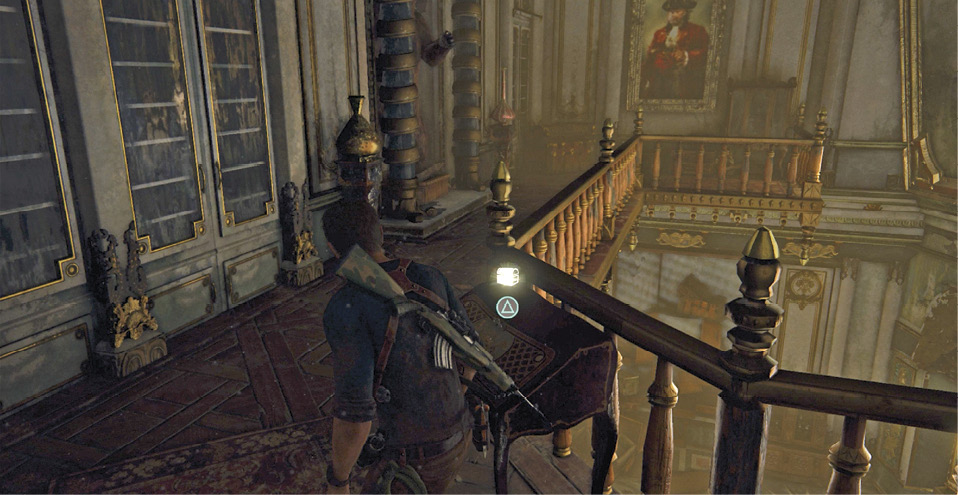
Climb the spiral staircase in Avery’s study and find the Mughal Dinnerware sitting on a small table at the corner of the balcony walkway. |
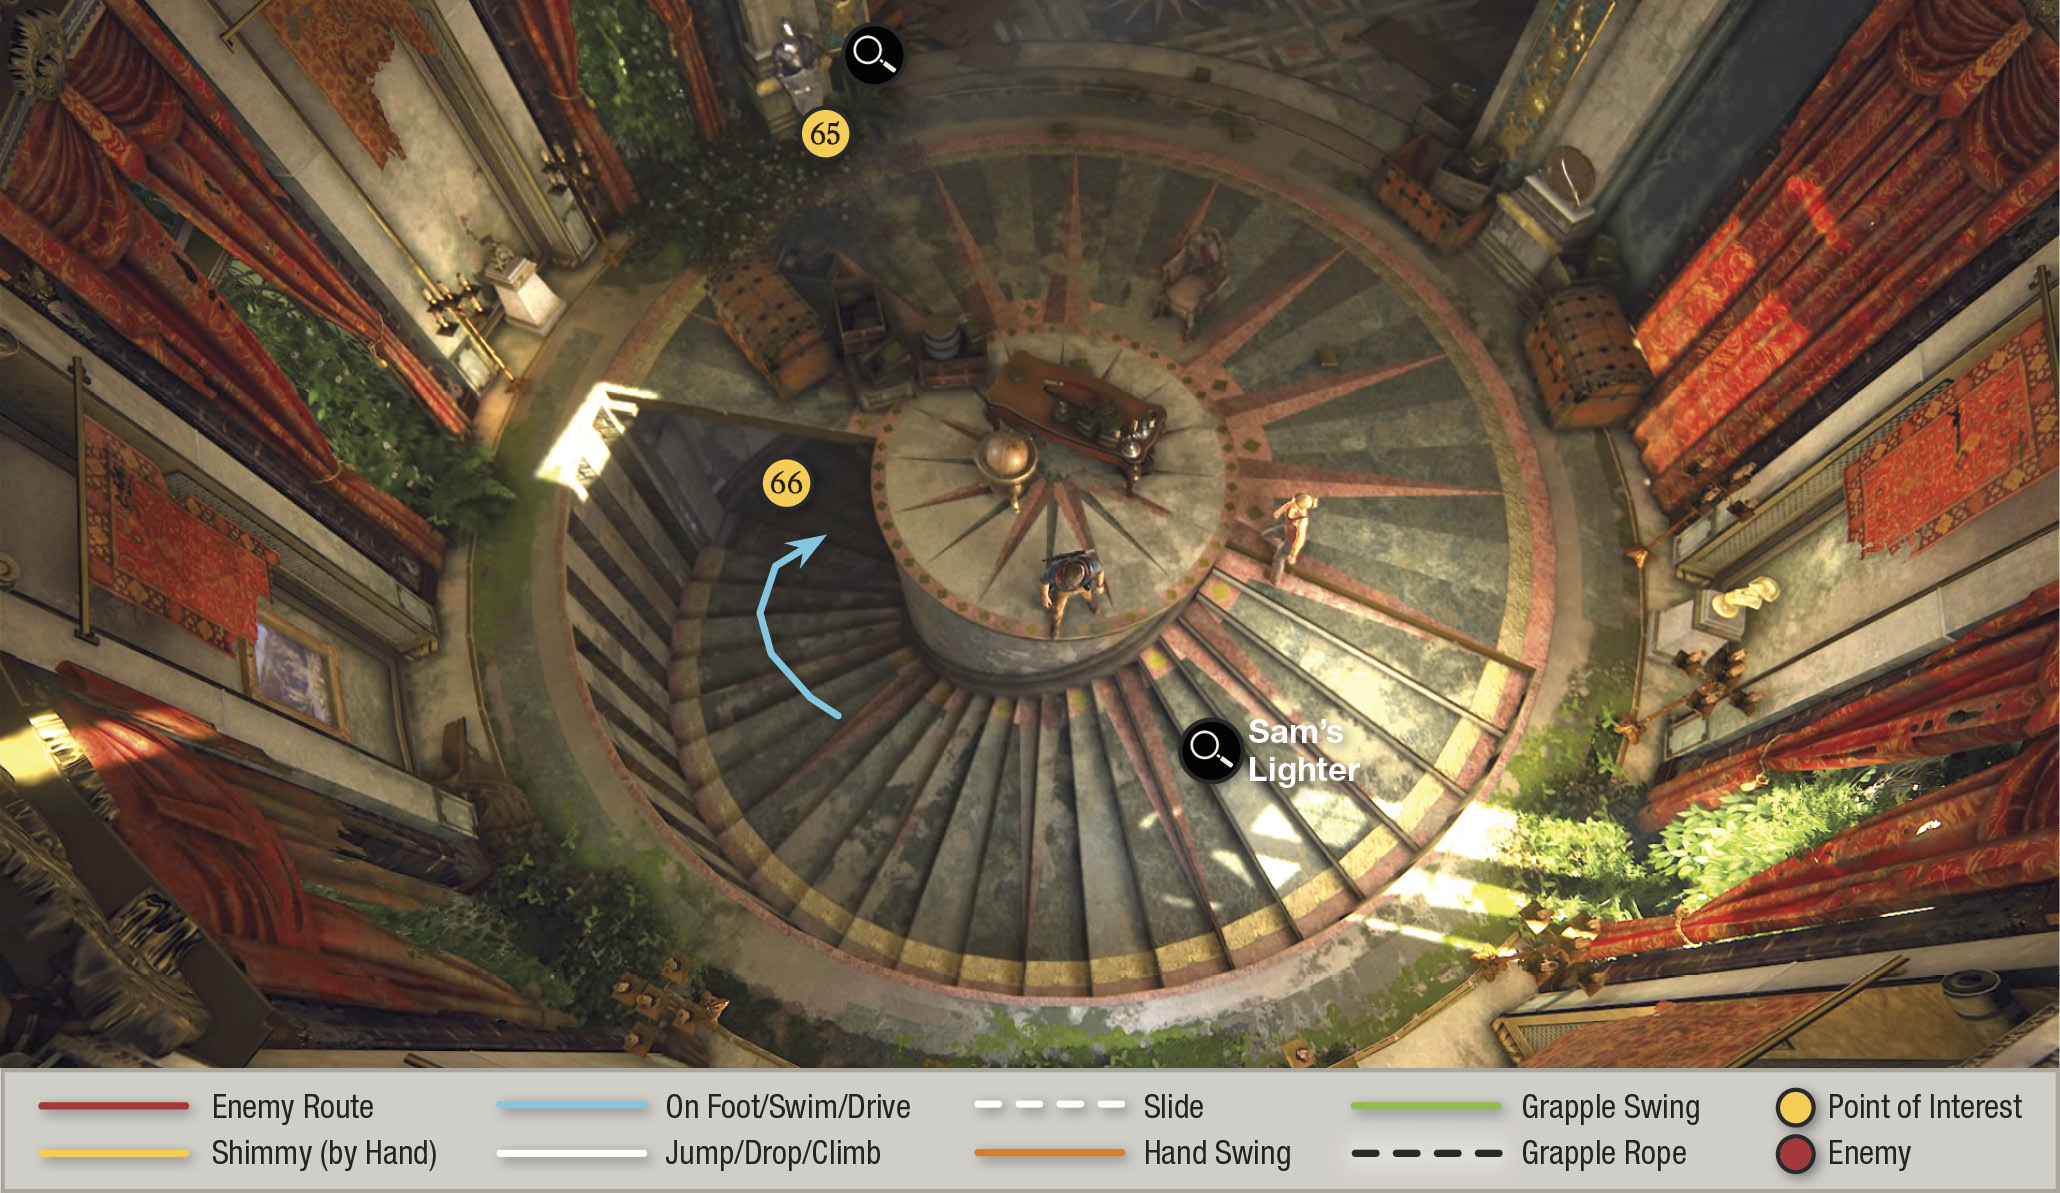
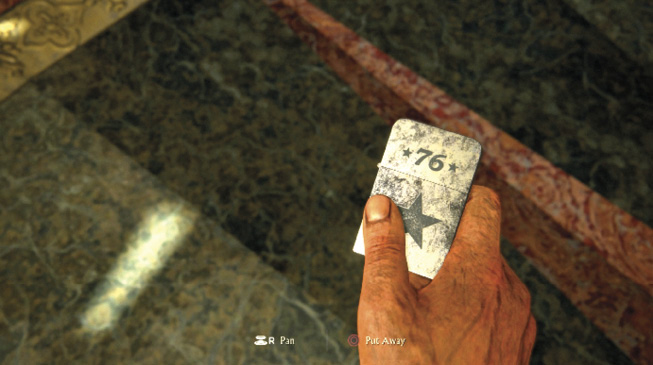
Find the lighter on the floor near the globe; Nathan recognizes it as Sam’s! He also deduces that the passage must be nearby, and a switch must activate it. Now you can start exploring stuff along the wall. You can examine the paintings to look behind them; pick up the clock, urn, and sculpture; and pull on the suit of armor.
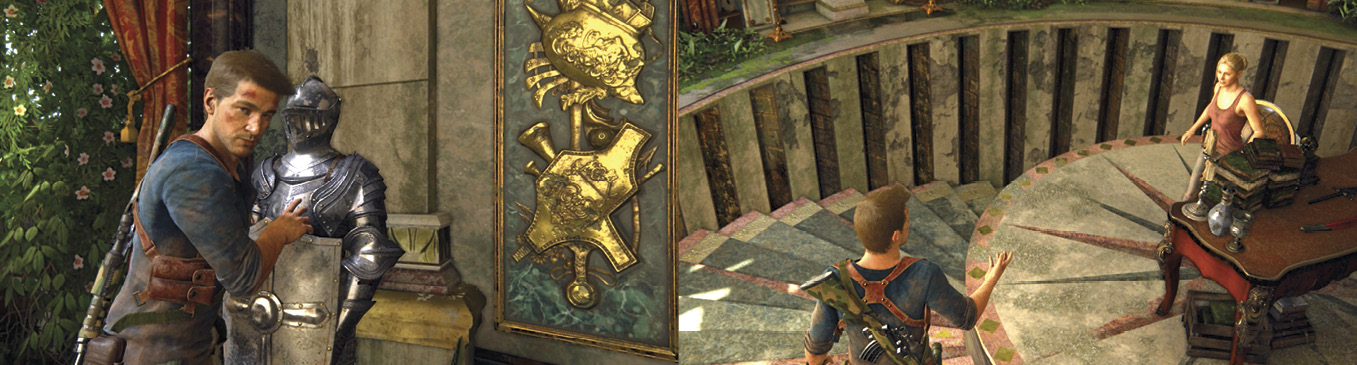
Examining the armor (65) triggers a scene: Elena touches a spot on the globe, and that activates the opening of a circular stairwell. Head down the stairs (66). At the bottom, turn the crank to open the gate and trigger the short, chapter-ending cutscene: Nathan and Elena begin their descent into Avery’s secret passage.