Uncharted 4: A Thief's End Guide Story Walkthrough
Chapter 14: Join Me in Paradise
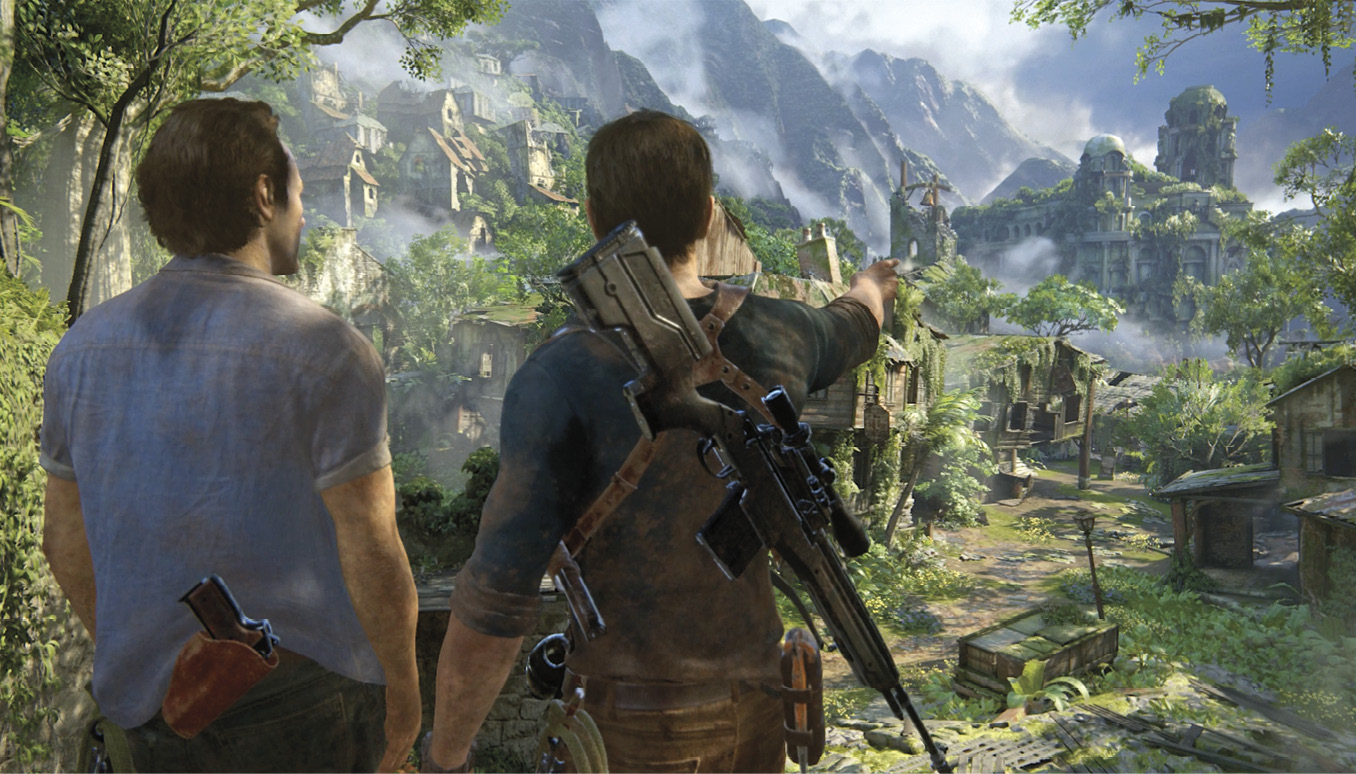
Libertalia! The Drake brothers gaze across a fantastic cityscape fallen into ruins. In the distance looms a great structure with a massive guard tower. That’s your next destination. But first you must pick your way through the ghost town maze below.
CollectiblesTreasures: 9 Optional Conversations: 6 Optional Journal Notes: 2 Optional Journal Entries: 4 New Weapons: Powder Keg |
Explore the Commercial District
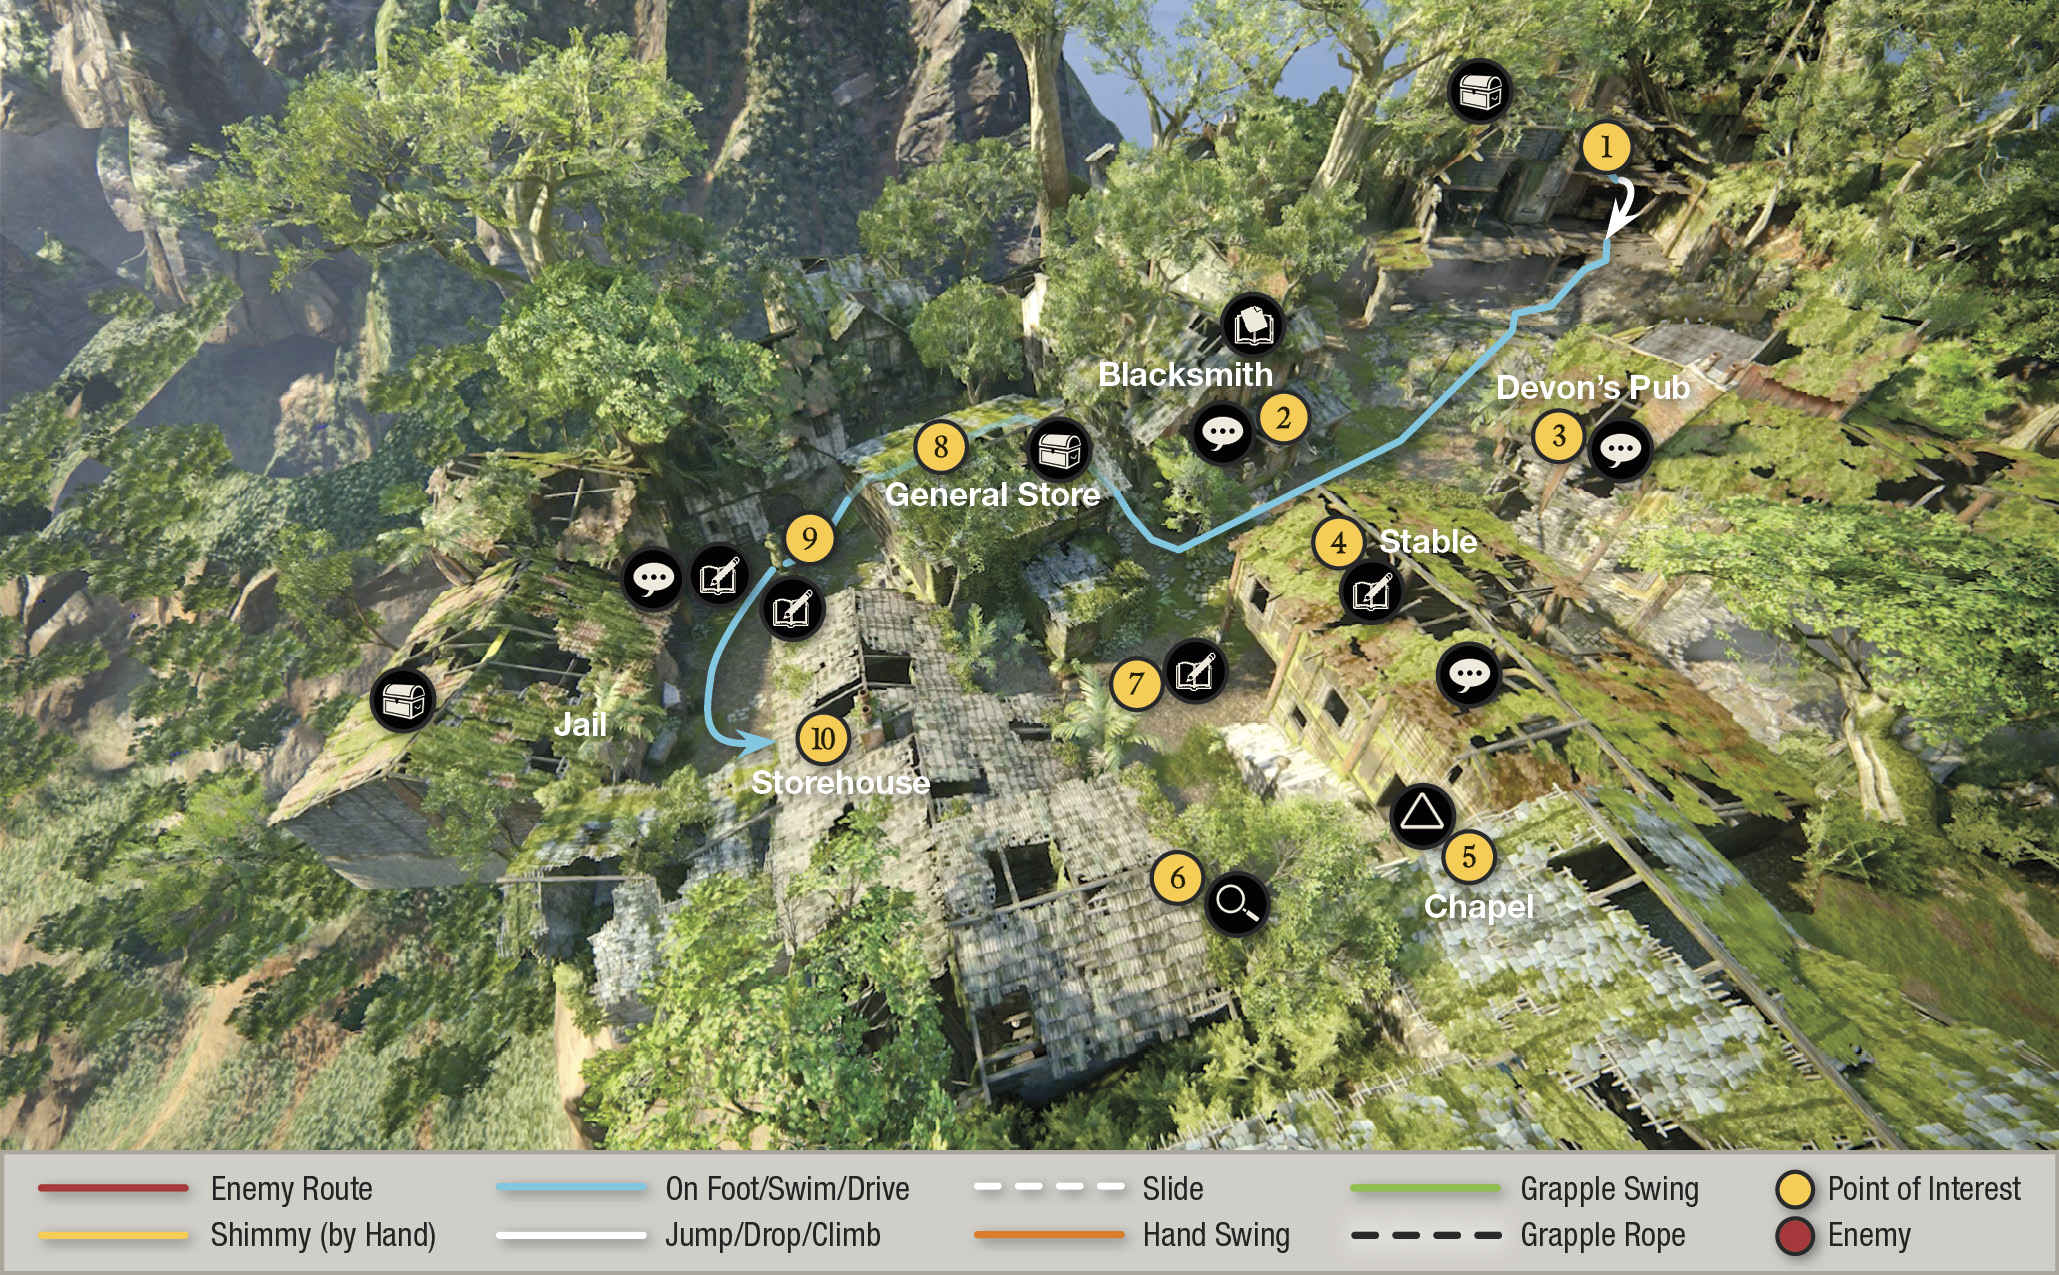
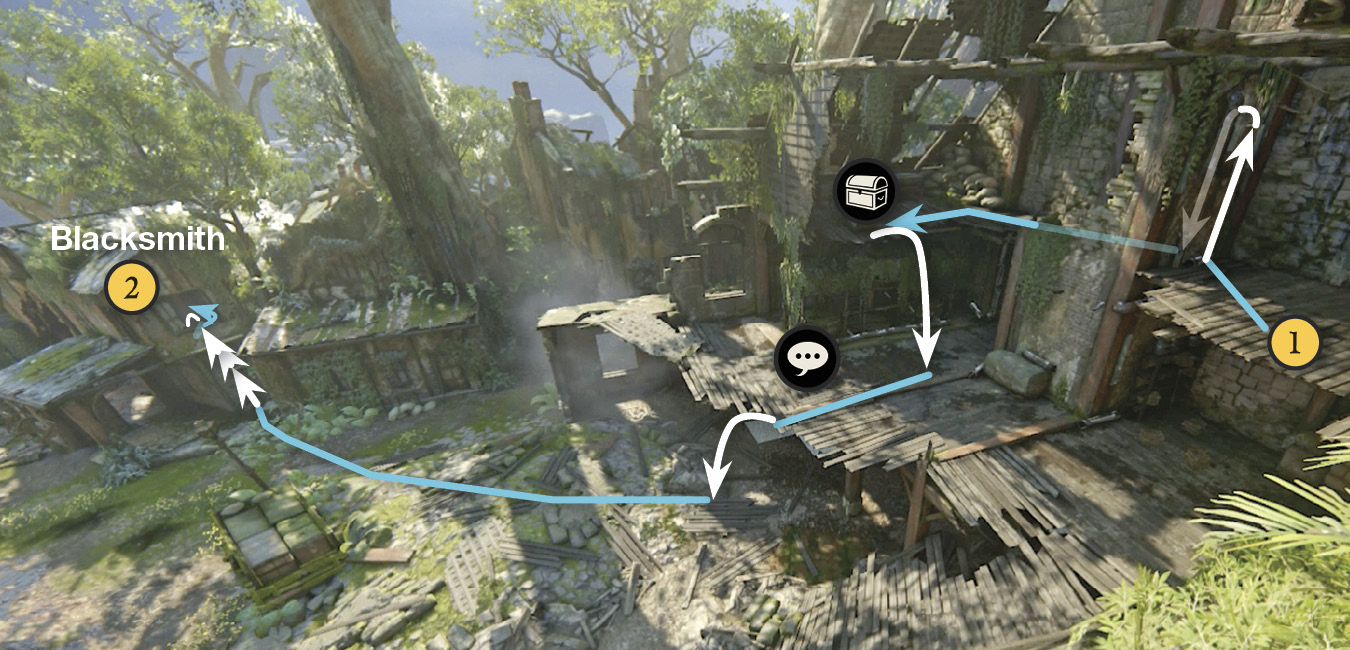
Our route line on the commercial district overview map marks the linear path that bumps the story ahead. But as you can see, the ghost town offers plenty of exploration opportunities on the side. At the start (1), you can climb through the high window on the wall to your right to find a treasure. Then drop onto the fallen floor section and approach Sam for the Optional Conversation, “Quite the Find.” Then hop down to the street and approach the first building on the right side, the blacksmith shop (2).
 Carved Horn Bird Sculpture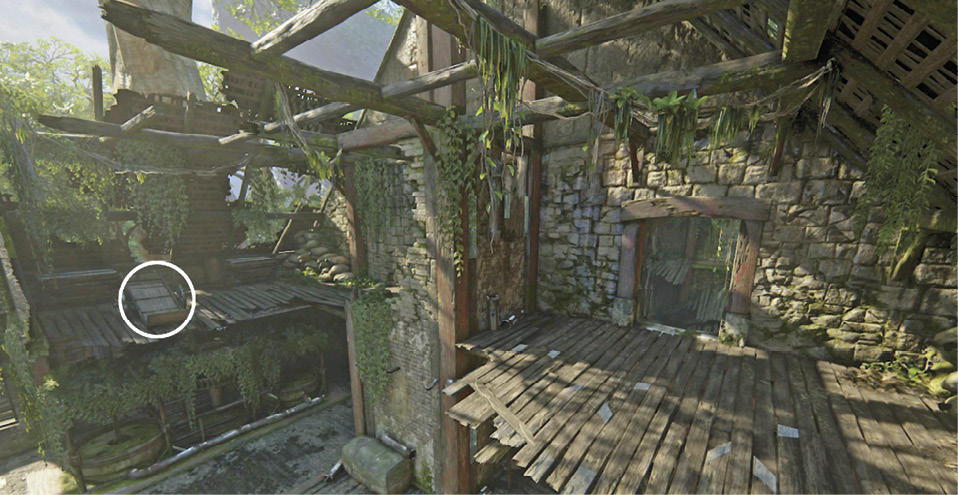 At the Chapter 14 starting point, turn right and climb through the high window. Drop down the other side and find the Carved Horn Bird Sculpture sitting on the two-wheel cart. |
Blacksmith Shop
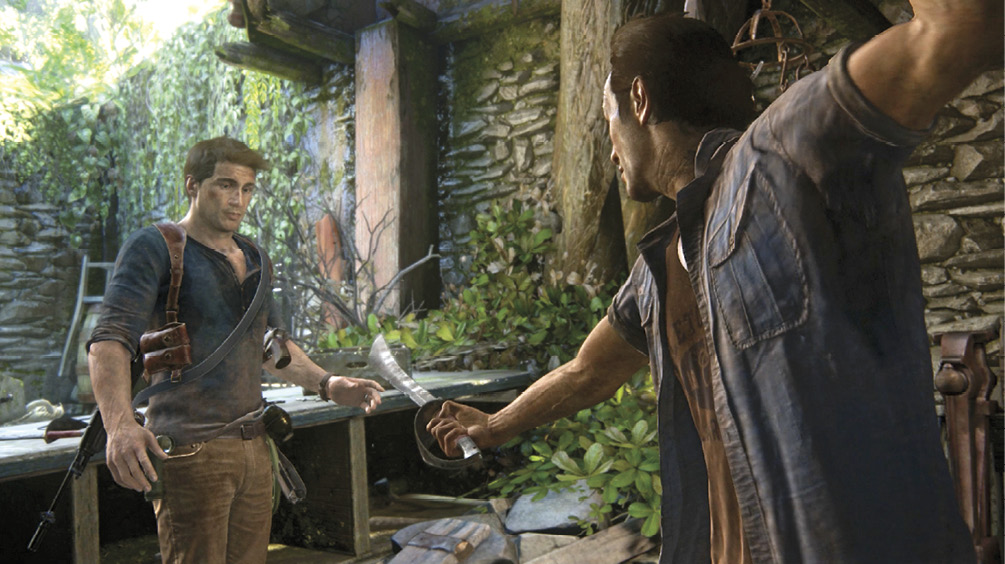
Go past the hanging hammer/anvil sign into the shop and explore the forge, bellows, and other tools of the ancient trade. Examine the worktable to pick up a cutlass and trigger a quick bit of brotherly horseplay. After the cutlass scene, a Talk icon appears over Sam. Engage in another Optional Conversation, “Traded with Other Colonies” to discuss colony issues.
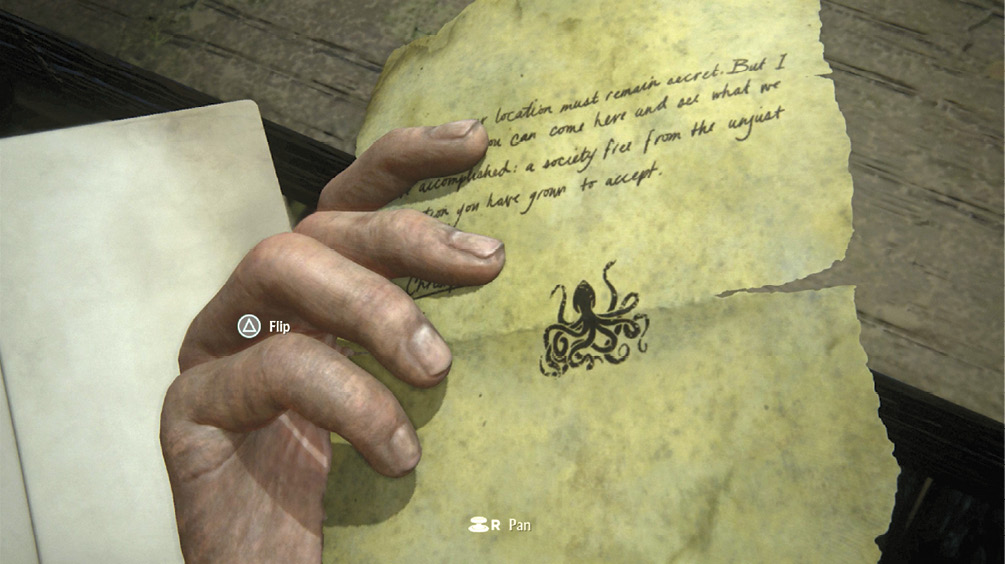
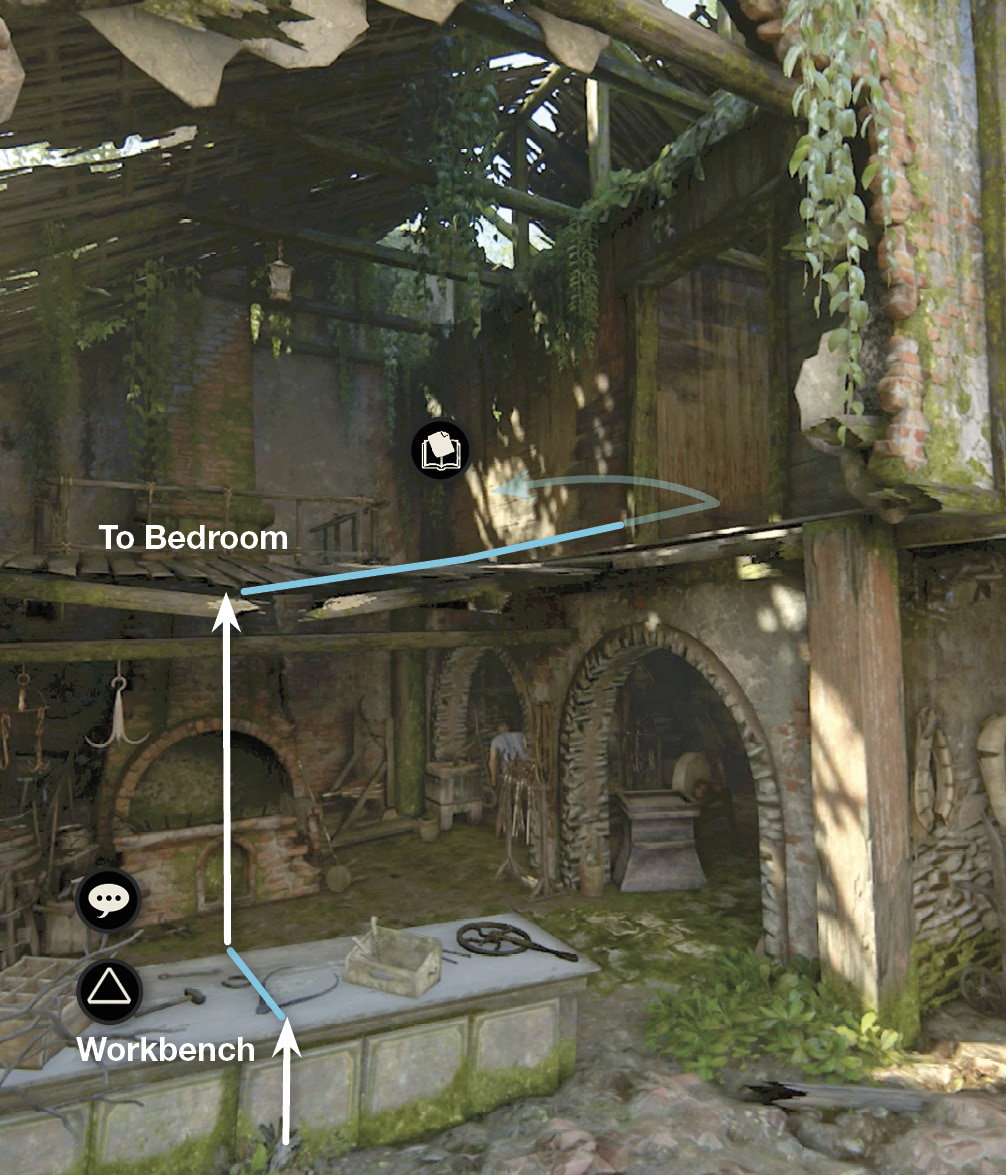
Then use the worktable to jump and grab the upper floor. Pull yourself up, go into the back bedroom, and examine the letter on the table to add it as an Optional Journal Note, “Letter to Father.” Exit the blacksmith shop and go to the pub (3) across the street and to the left.
Devon’s Pub/Stable
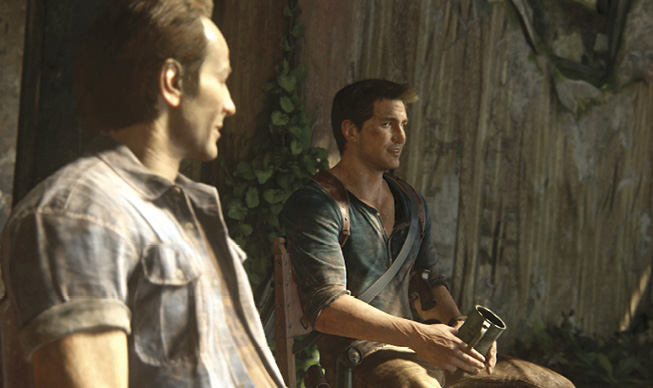
Explore the tavern’s main floor, then go outside and climb through the side entrance onto the second floor. Examine the chair marked with the Talk icon to trigger a seated Optional Conversation, “Tavern Talk,” with Sam. Keep pressing  when the icon appears to hear the full discussion.
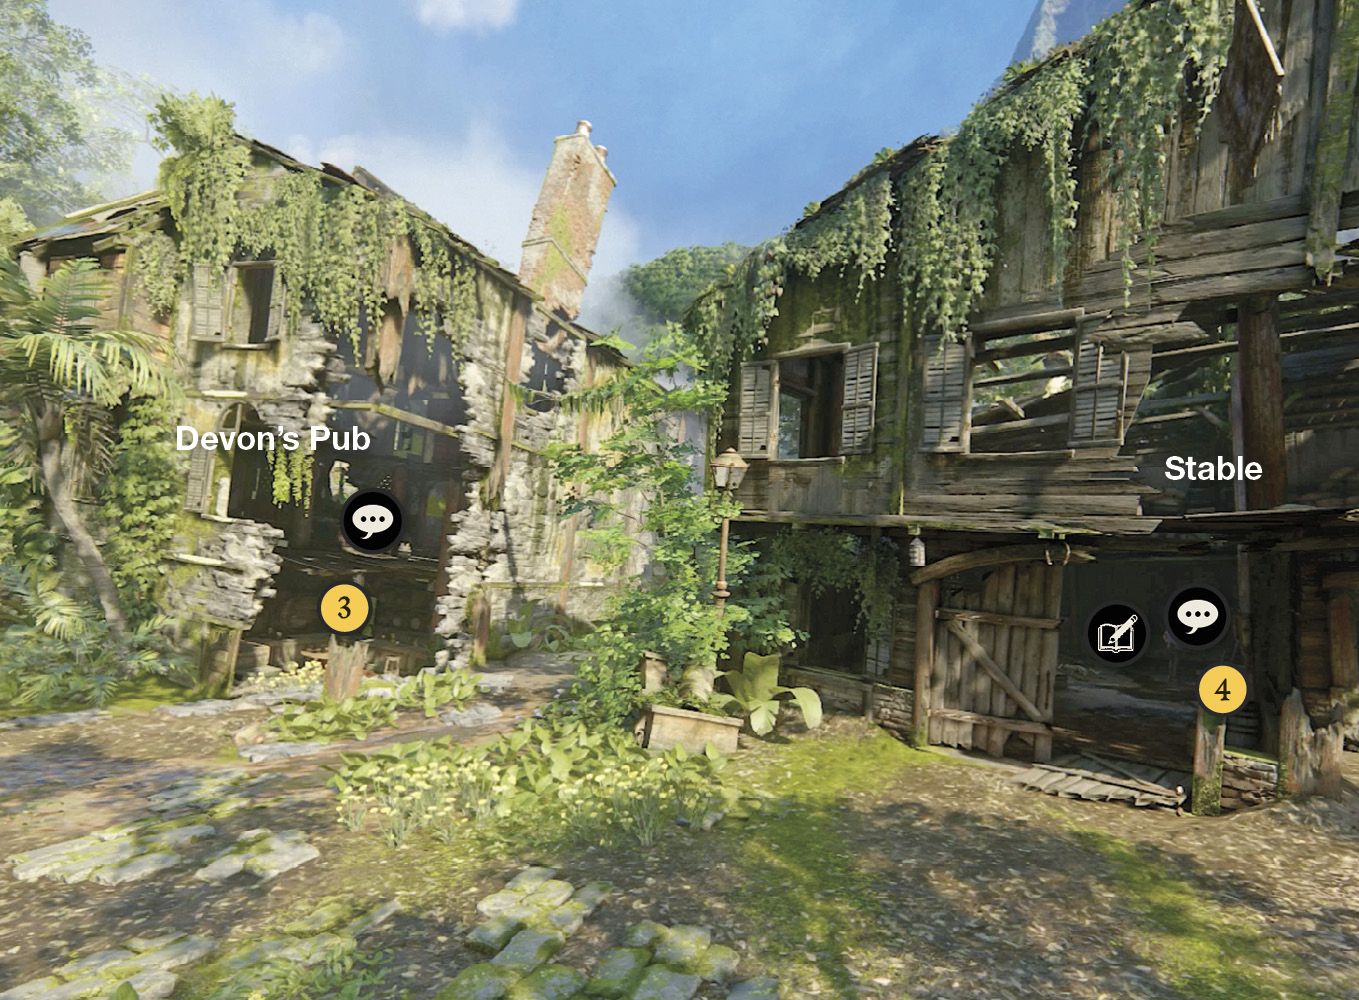
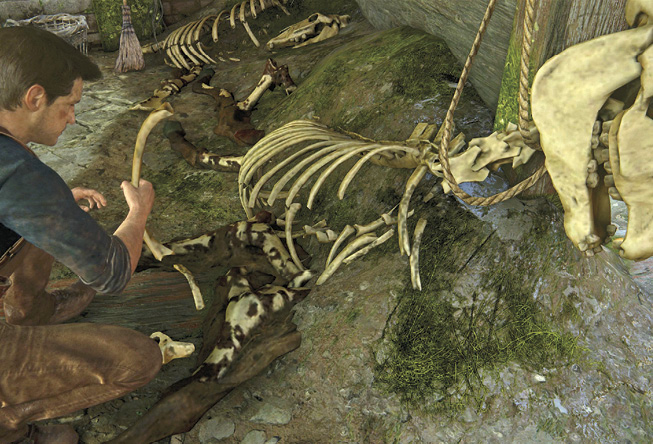
Exit the pub and head next door to the horse stable (4). Inside, examine the horse skeleton on the floor: Nathan makes an Optional Journal Entry on the horse bones, and the brothers speculate on the odd clue. Speak to Sam when the Talk icon appears for another Optional Conversation, “The Simplest Explanation.” Then exit the stable.
Other Points of Interest
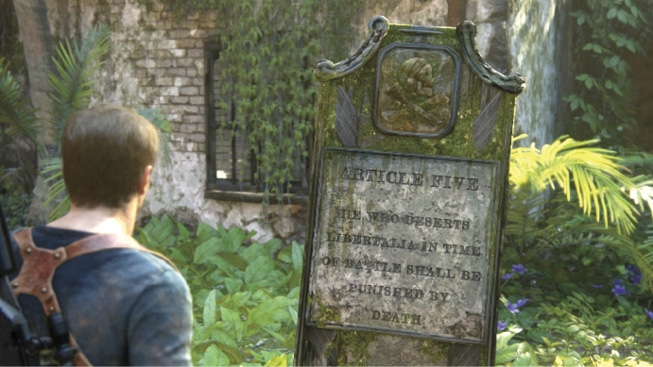
Climb the stairs outside the stable that lead to the chapel (5). Try the door—it’s locked. Come back downstairs and examine the crack in the buckled wall (6) underneath the broken sign to spot the path you need to reach eventually. Then examine the monument stone (7) to check out the Code of Conduct; Nathan adds an Optional Journal Entry on the topic.
General Store/Jail
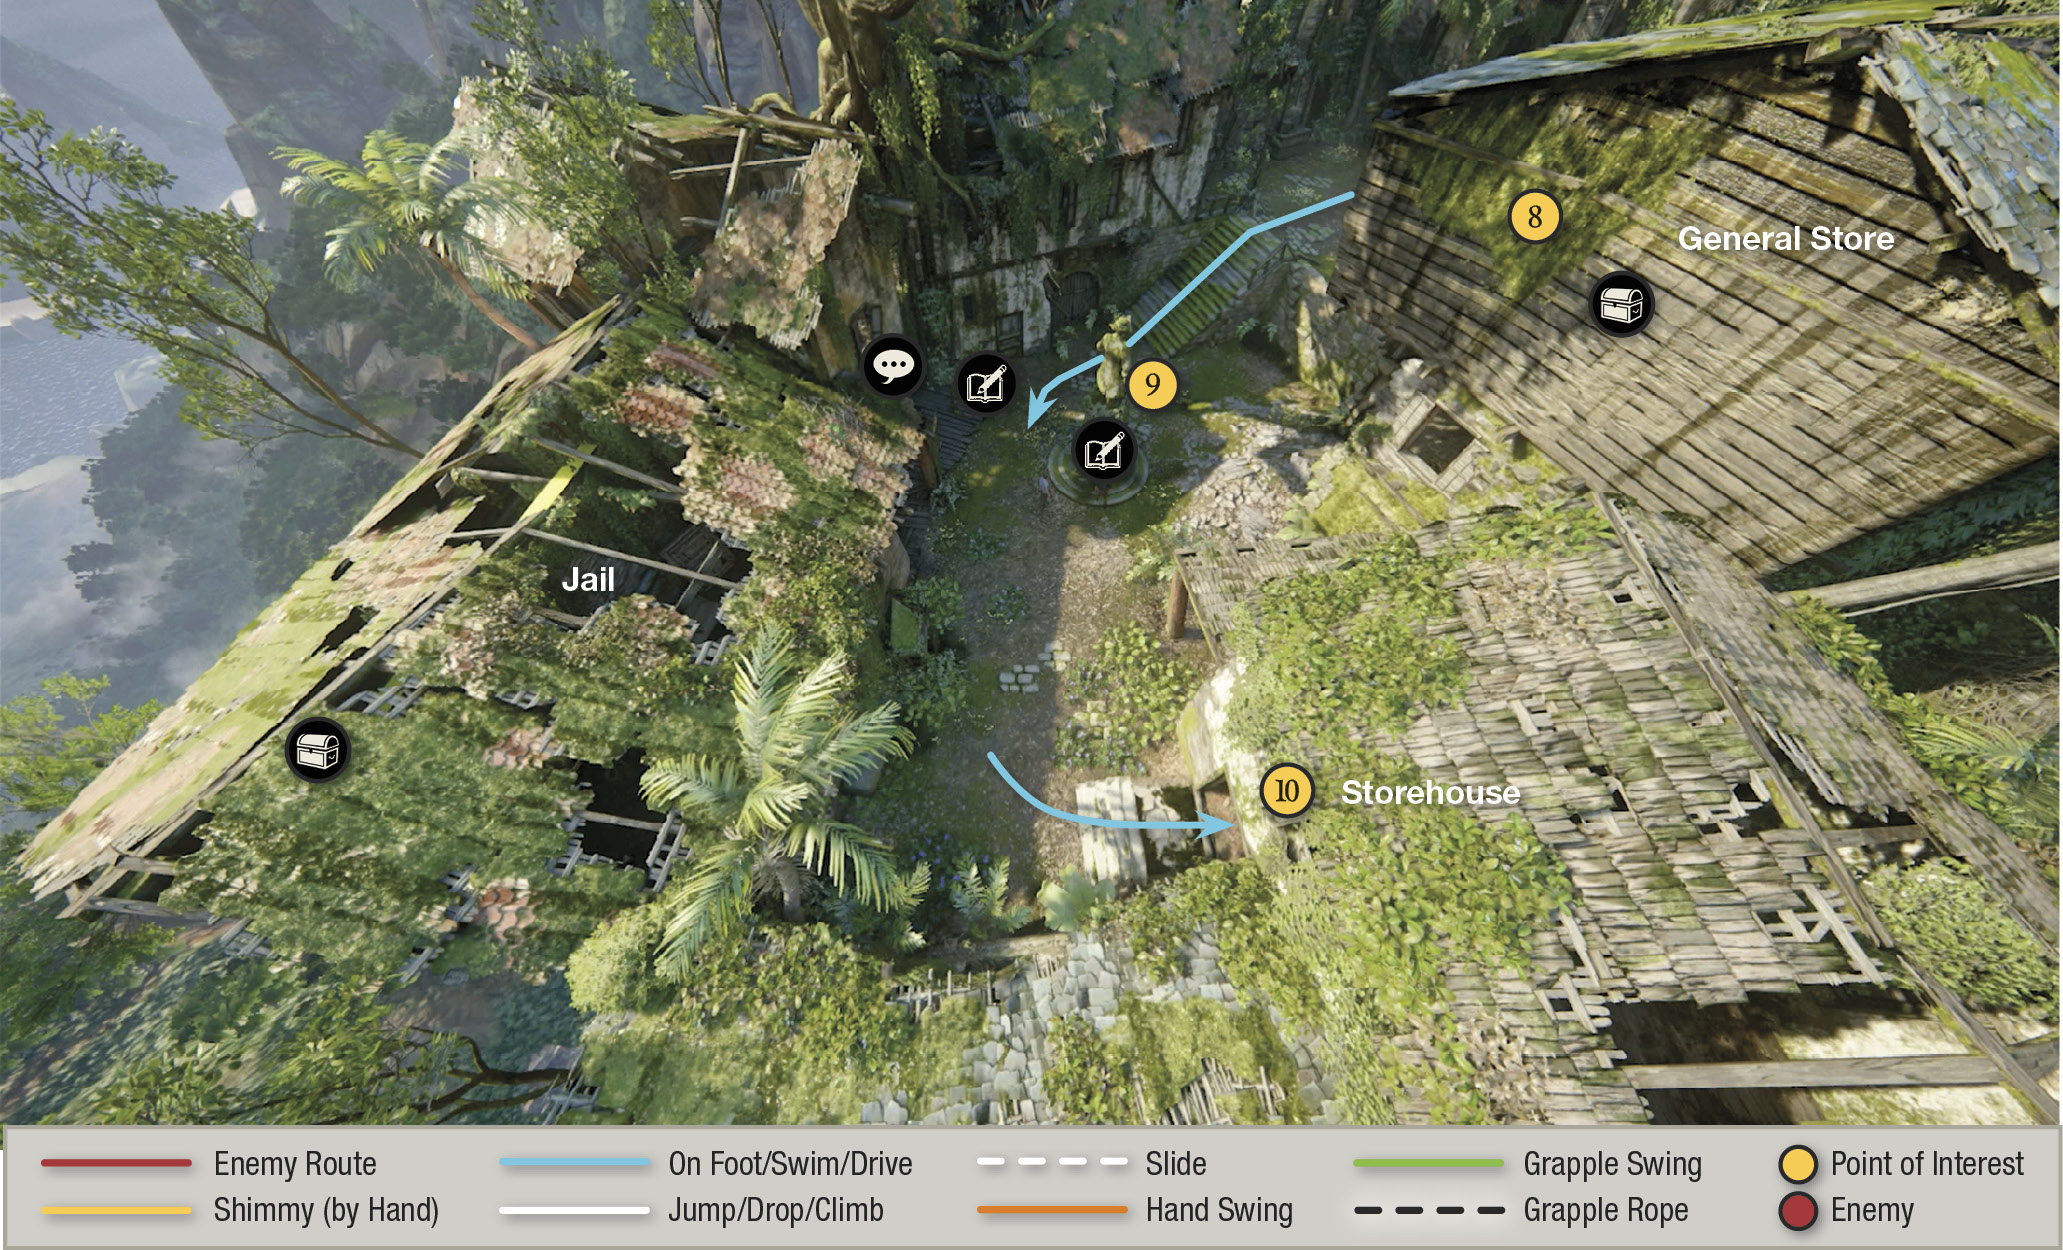
Continue through town, looping around the next building (8) and then entering it. This was the town’s general store. Find a treasure in the back room downstairs. Then climb upstairs to discover that this was also a family’s home, with young children. Once again, it looks like everyone left in a hurry.
 Mughal Vase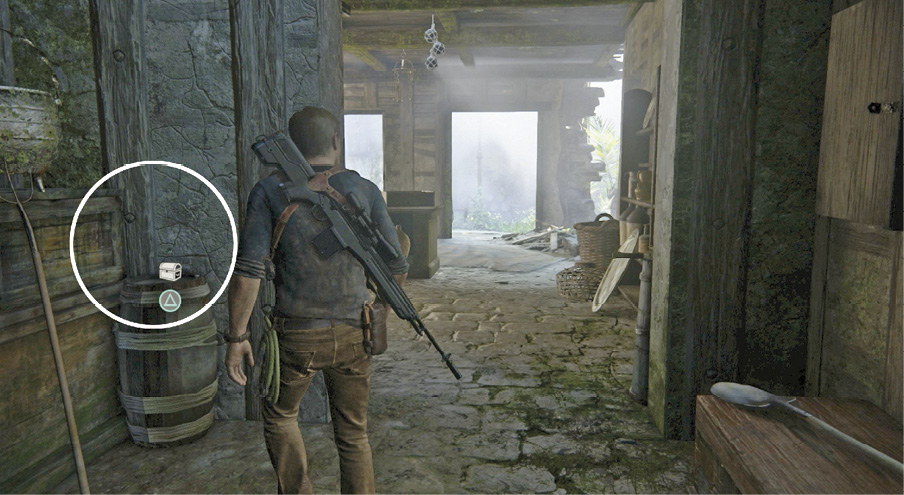 In the general store, go into the back room on the main floor to find the Mughal Vase sitting on a barrel near the doorway. |
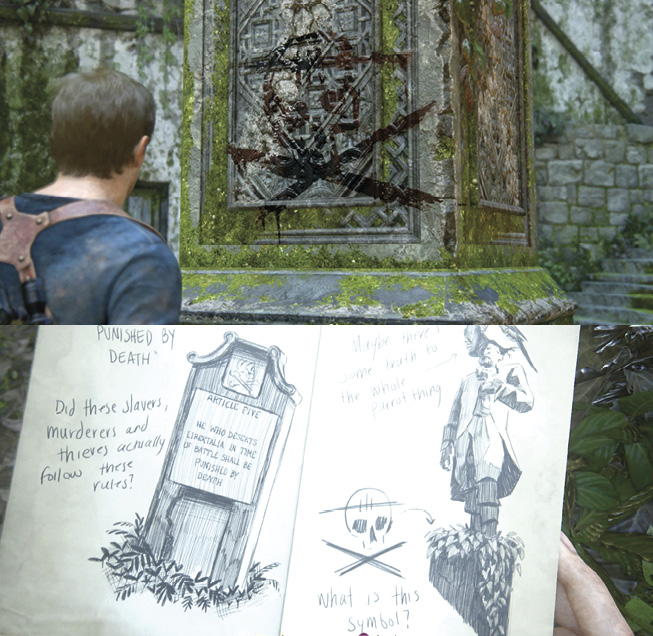
Exit and head into the square and examine the strange sigil-like graffiti on the back of the Avery statue (9); Nathan sketches the defaced Avery statue as an Optional Journal Entry. Then Sam gets interested in the stockades in front of the jail.
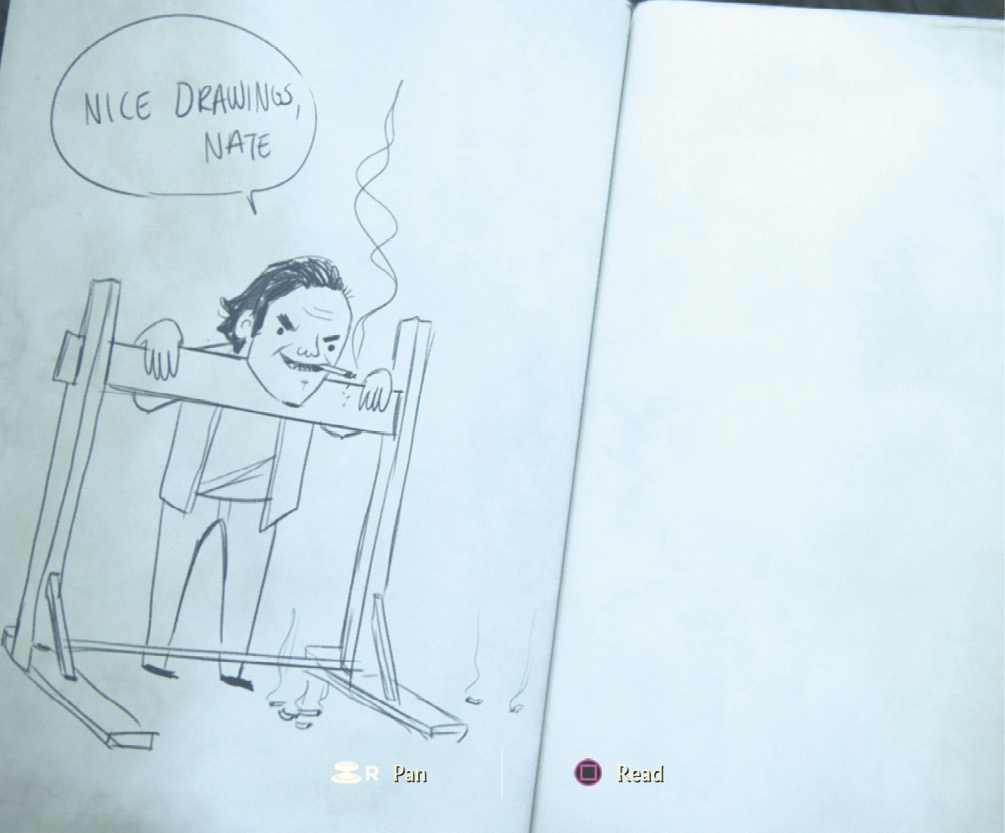
Approach Sam and trigger the Optional Conversation, “If We Had a Camera”; Nathan sketches another Optional Journal Entry. (If you wait too long, Sam moves on and the moment is lost.) You can also find a treasure inside the jail, the building behind the stocks.
 Ancient Stone Pot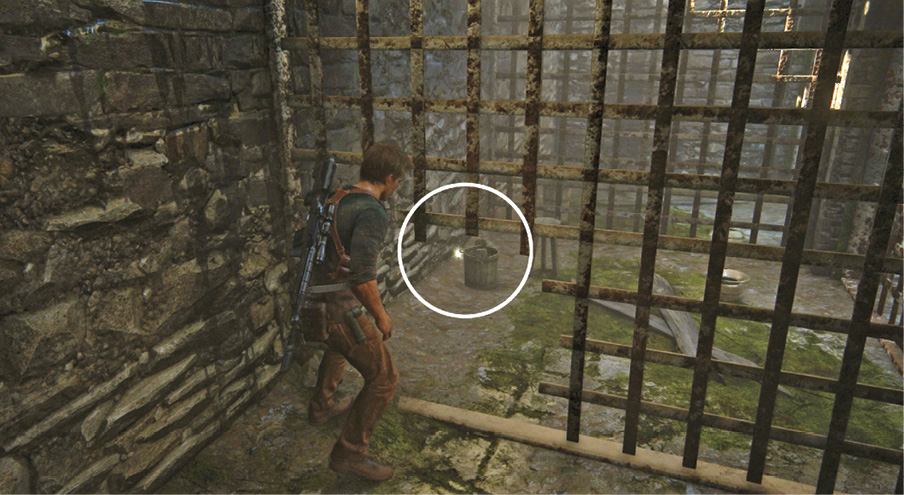 Enter the jail and go inside the leftmost cell. Duck through the low hole into the next cell to find the Ancient Stone Pot. |
Storehouse/Chapel
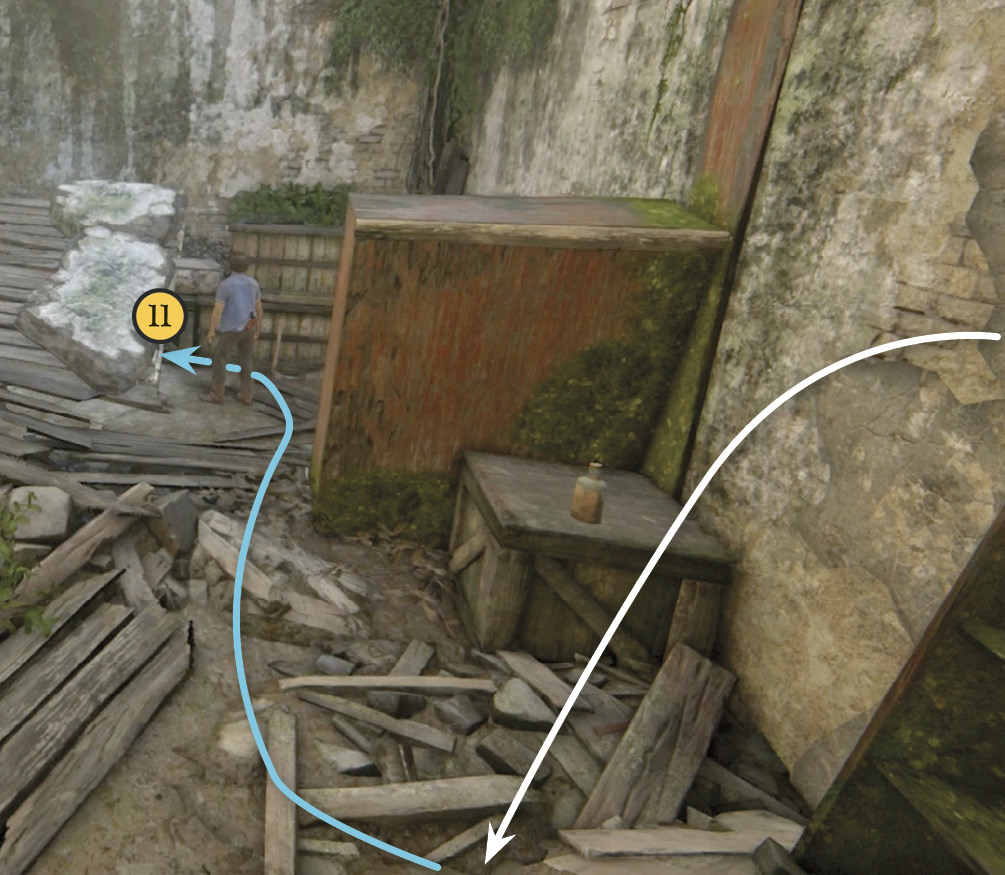
Enter the storehouse (10) and go into the back room. Climb over the shelf to find the fallen ceiling section (11), and crawl under it to enter a tunnel. Follow the tunnel to a big room with bunks, provisions, and other signs of being a secret hideout. Examine the wall map of the commercial district, including the treasury and guard tower.
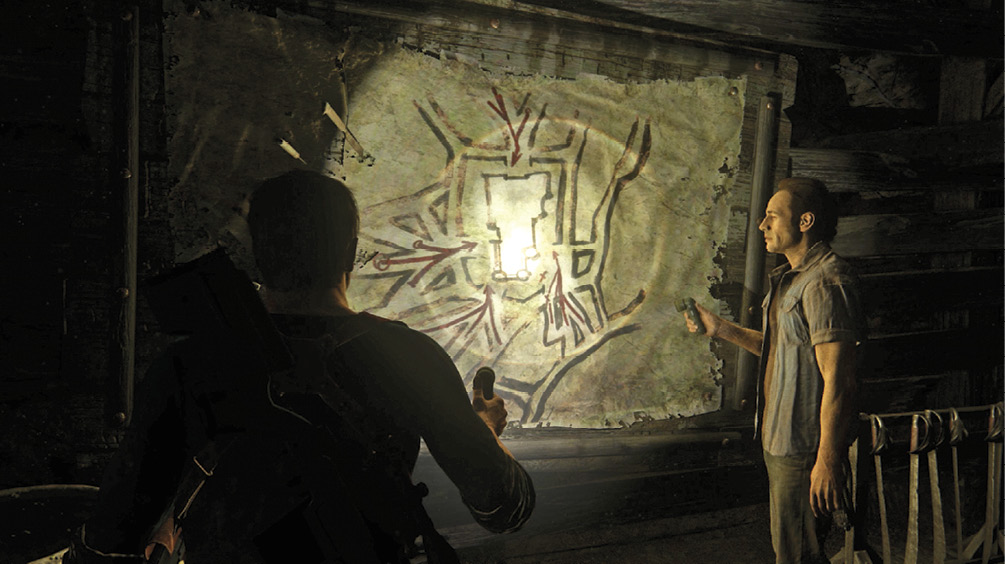
Examine the wall graffiti to get more musings from Nathan and Sam: Was this a secret society? Rebels? When you’re done exploring, climb the nearby ladder (12). Up top, you can find a treasure down the dead-end shaft to the right. The left shaft leads to the bottom floor of the chapel.
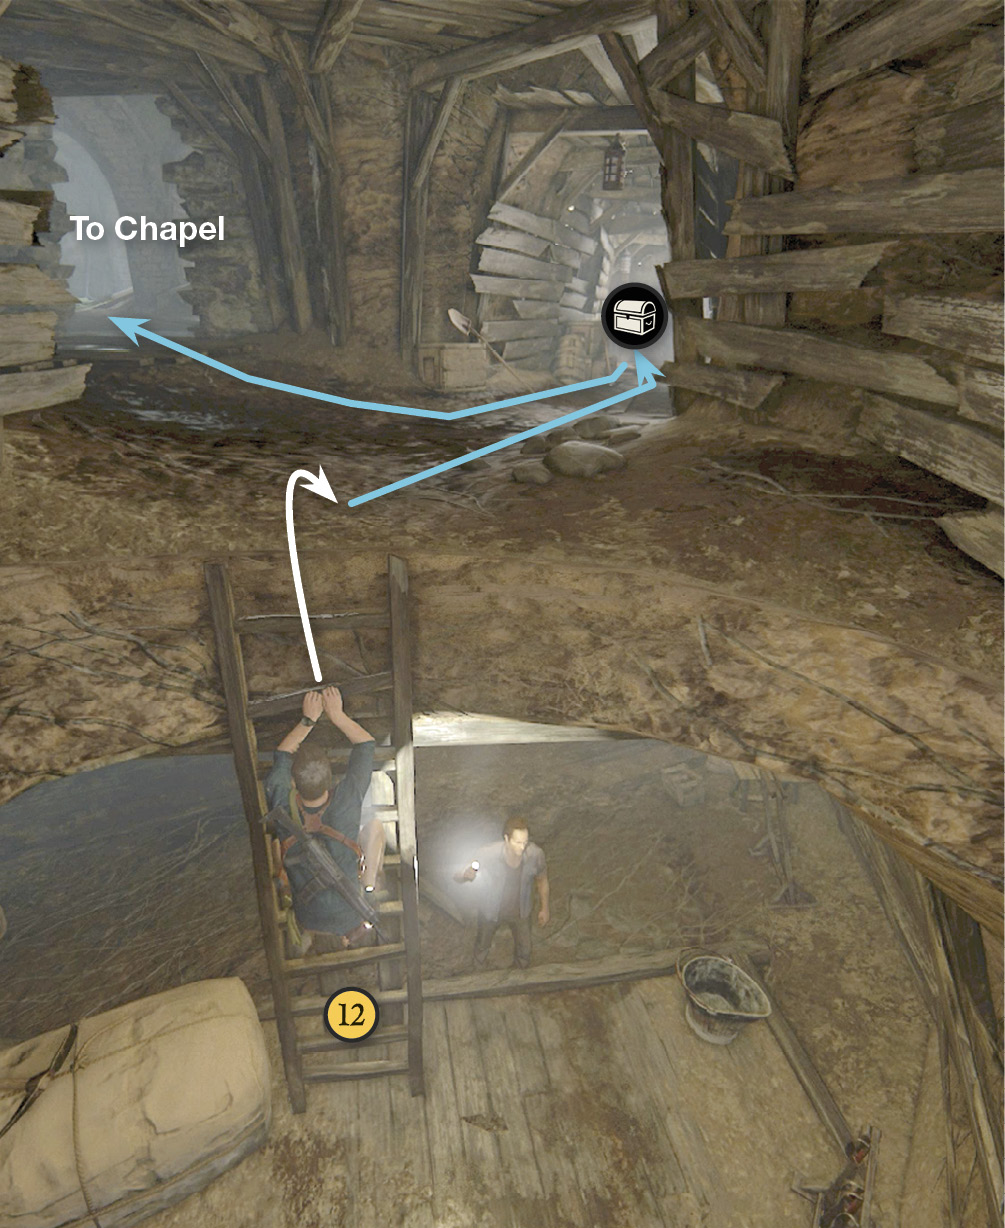
 Painted Copper Bottle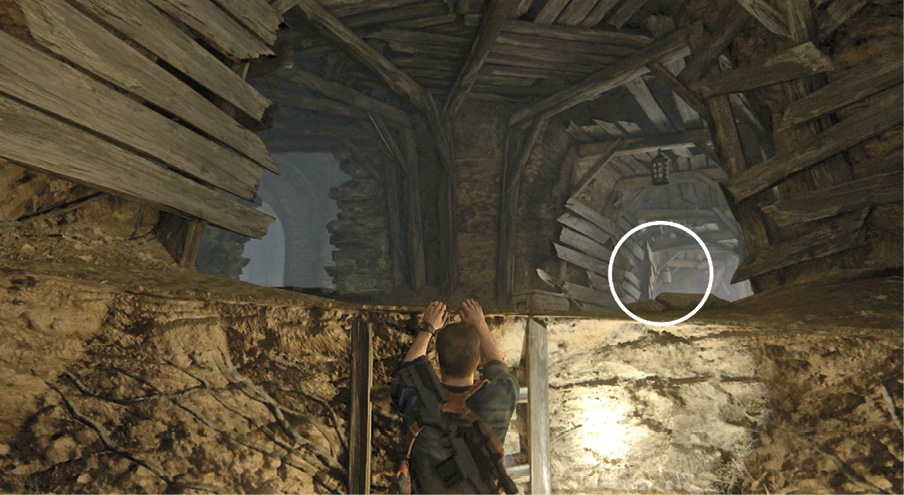 After you climb the ladder from the tunnel hideout, head down the right passage to find the Painted Copper Bottle. |
Go to the well shaft in the back corner and attach your grapple hook to the beam. Rappel down the shaft to the end of the rope. You find yourself looking across at another section of the city…and it happens to be crawling with Nadine Ross’s Shoreline mercenaries.
Advance Stealthily Across the City
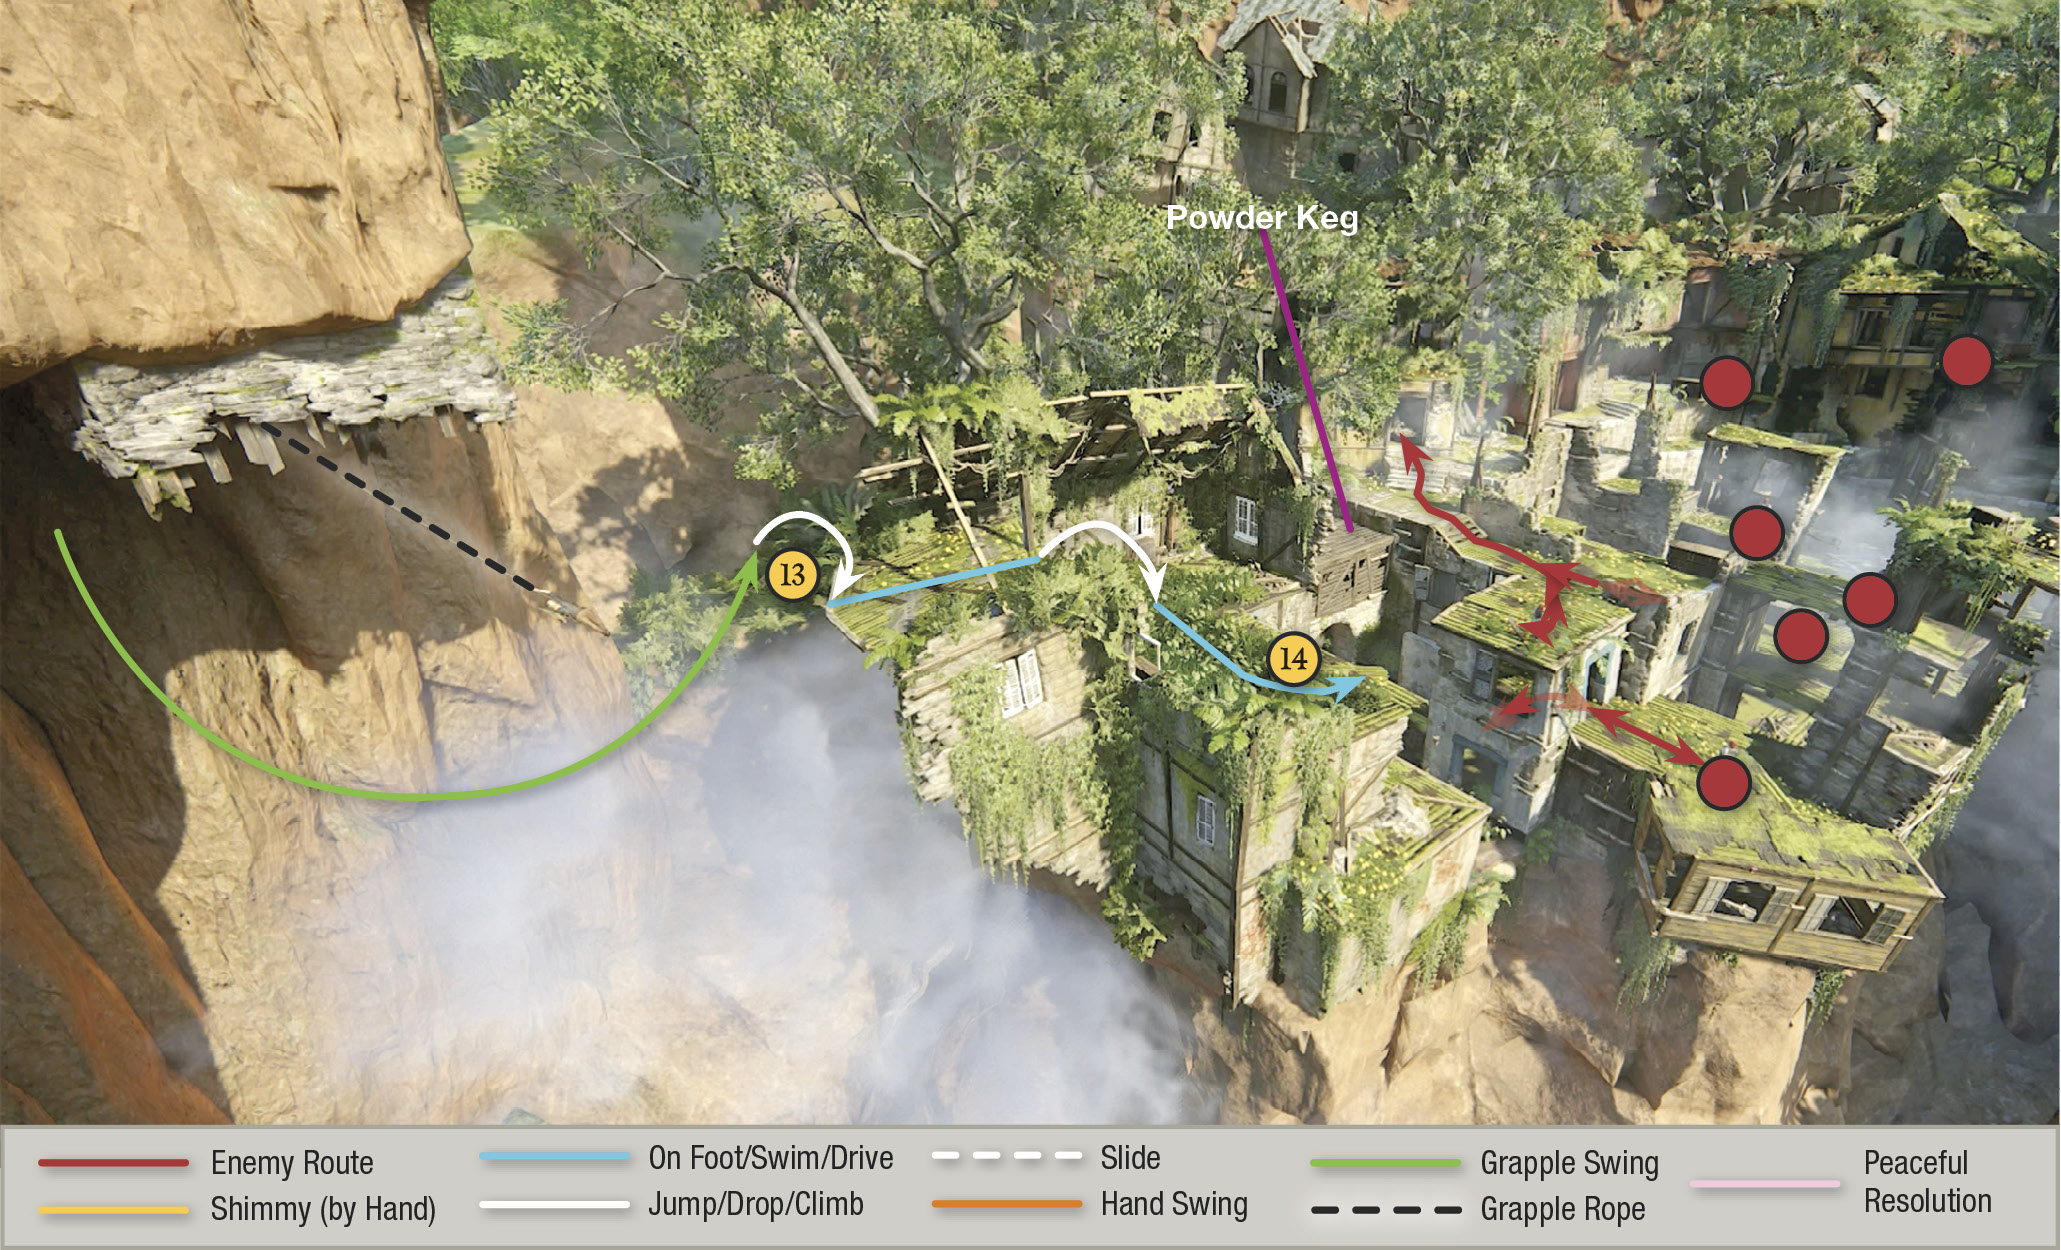
Swing over to the platform (13) and hustle immediately forward to drop into the high grass on the next level down (14). As always, you can choose to simply brutalize the area, pushing forward with guns blazing. But that’s a tough road here, and these stacked structures are tailor-made for stealth.
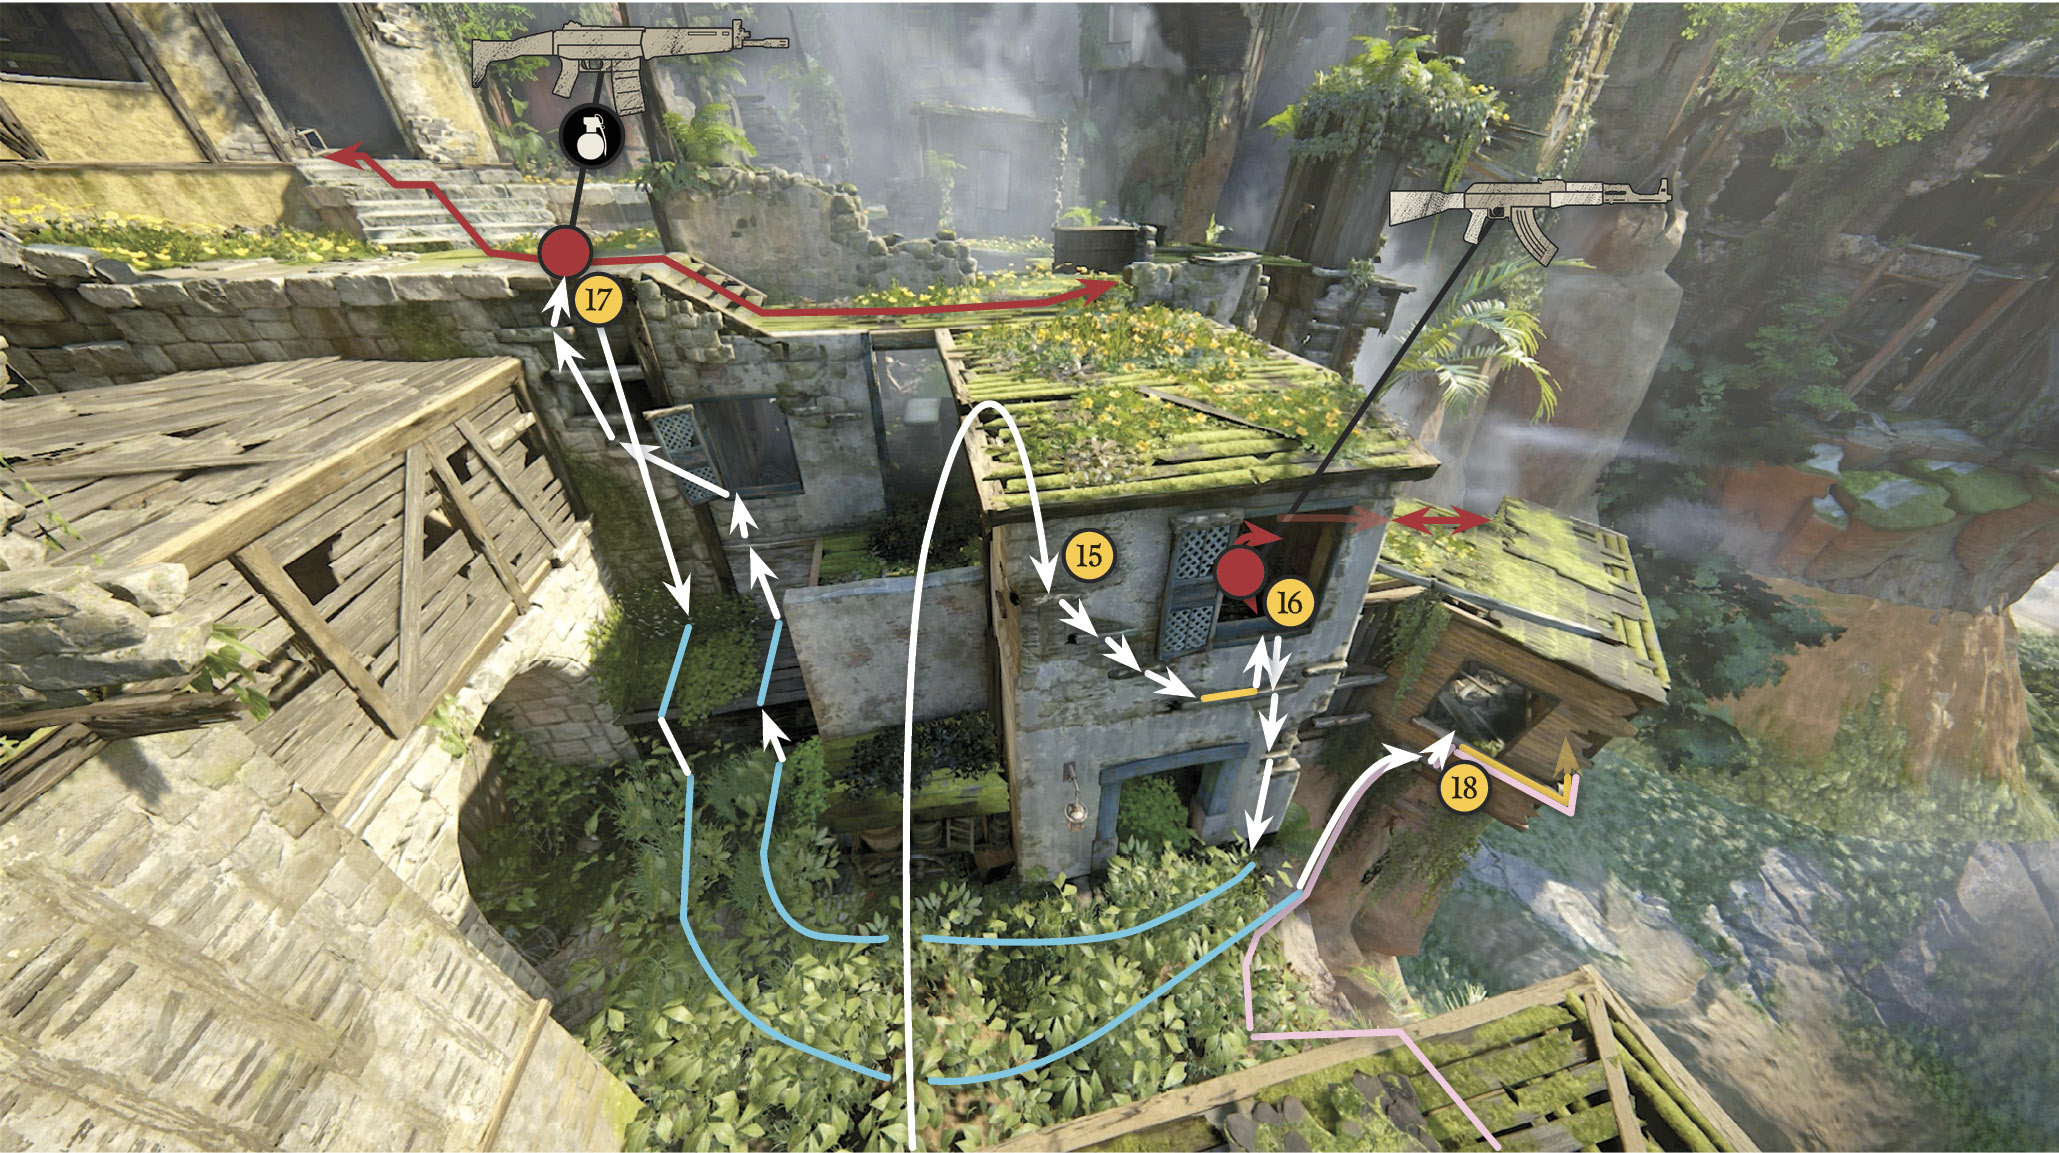
Watch and wait until the guard on the next roof kicks the barrel over the edge and looks down. (If you’re hanging there already, he will see you.) Now get ready to move. Wait until no guards are looking your direction and then jump across to grab the building handholds (15) just left of the window. Climb rightward to hang from the windowsill (16). When the guard inside comes to the window, pull him down! Drop to the bushes and hurry around the building’s left side, hiding in the bushes there.
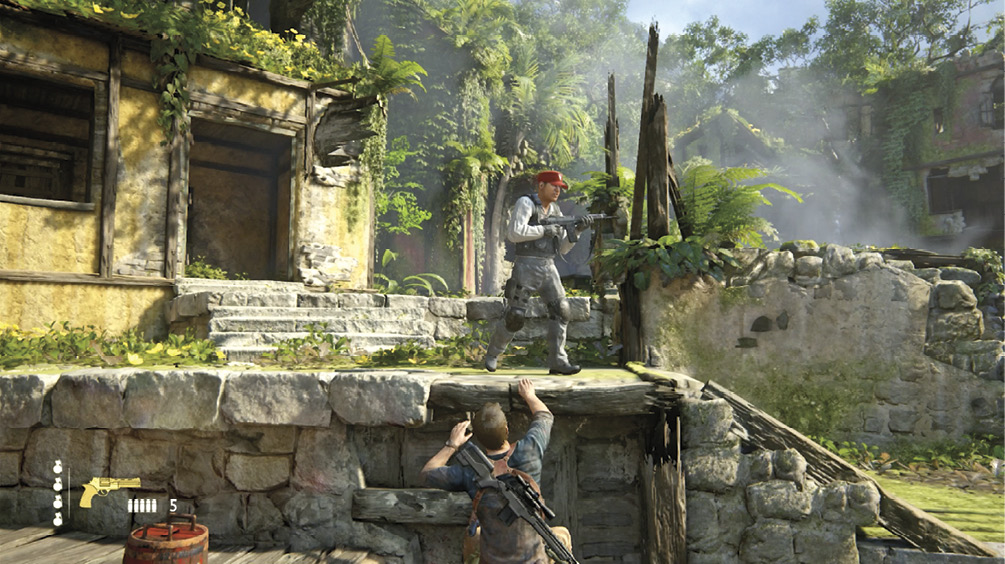
Next, carefully climb the wall ahead, waiting until the guard patrolling above you on the sidewalk passes by on his way to the left. Climb the left side of the window (using its shutter) and hang from the sidewalk above (17). When the guard passes heading rightward again, pull him down! That’s two gone. (Note: If you miss him, climb back down or he may see you when he pivots and patrols right to left again.) Drop to the ground and double back the way you came. Jump across to the brown shack (18) and hang from the windowsill.
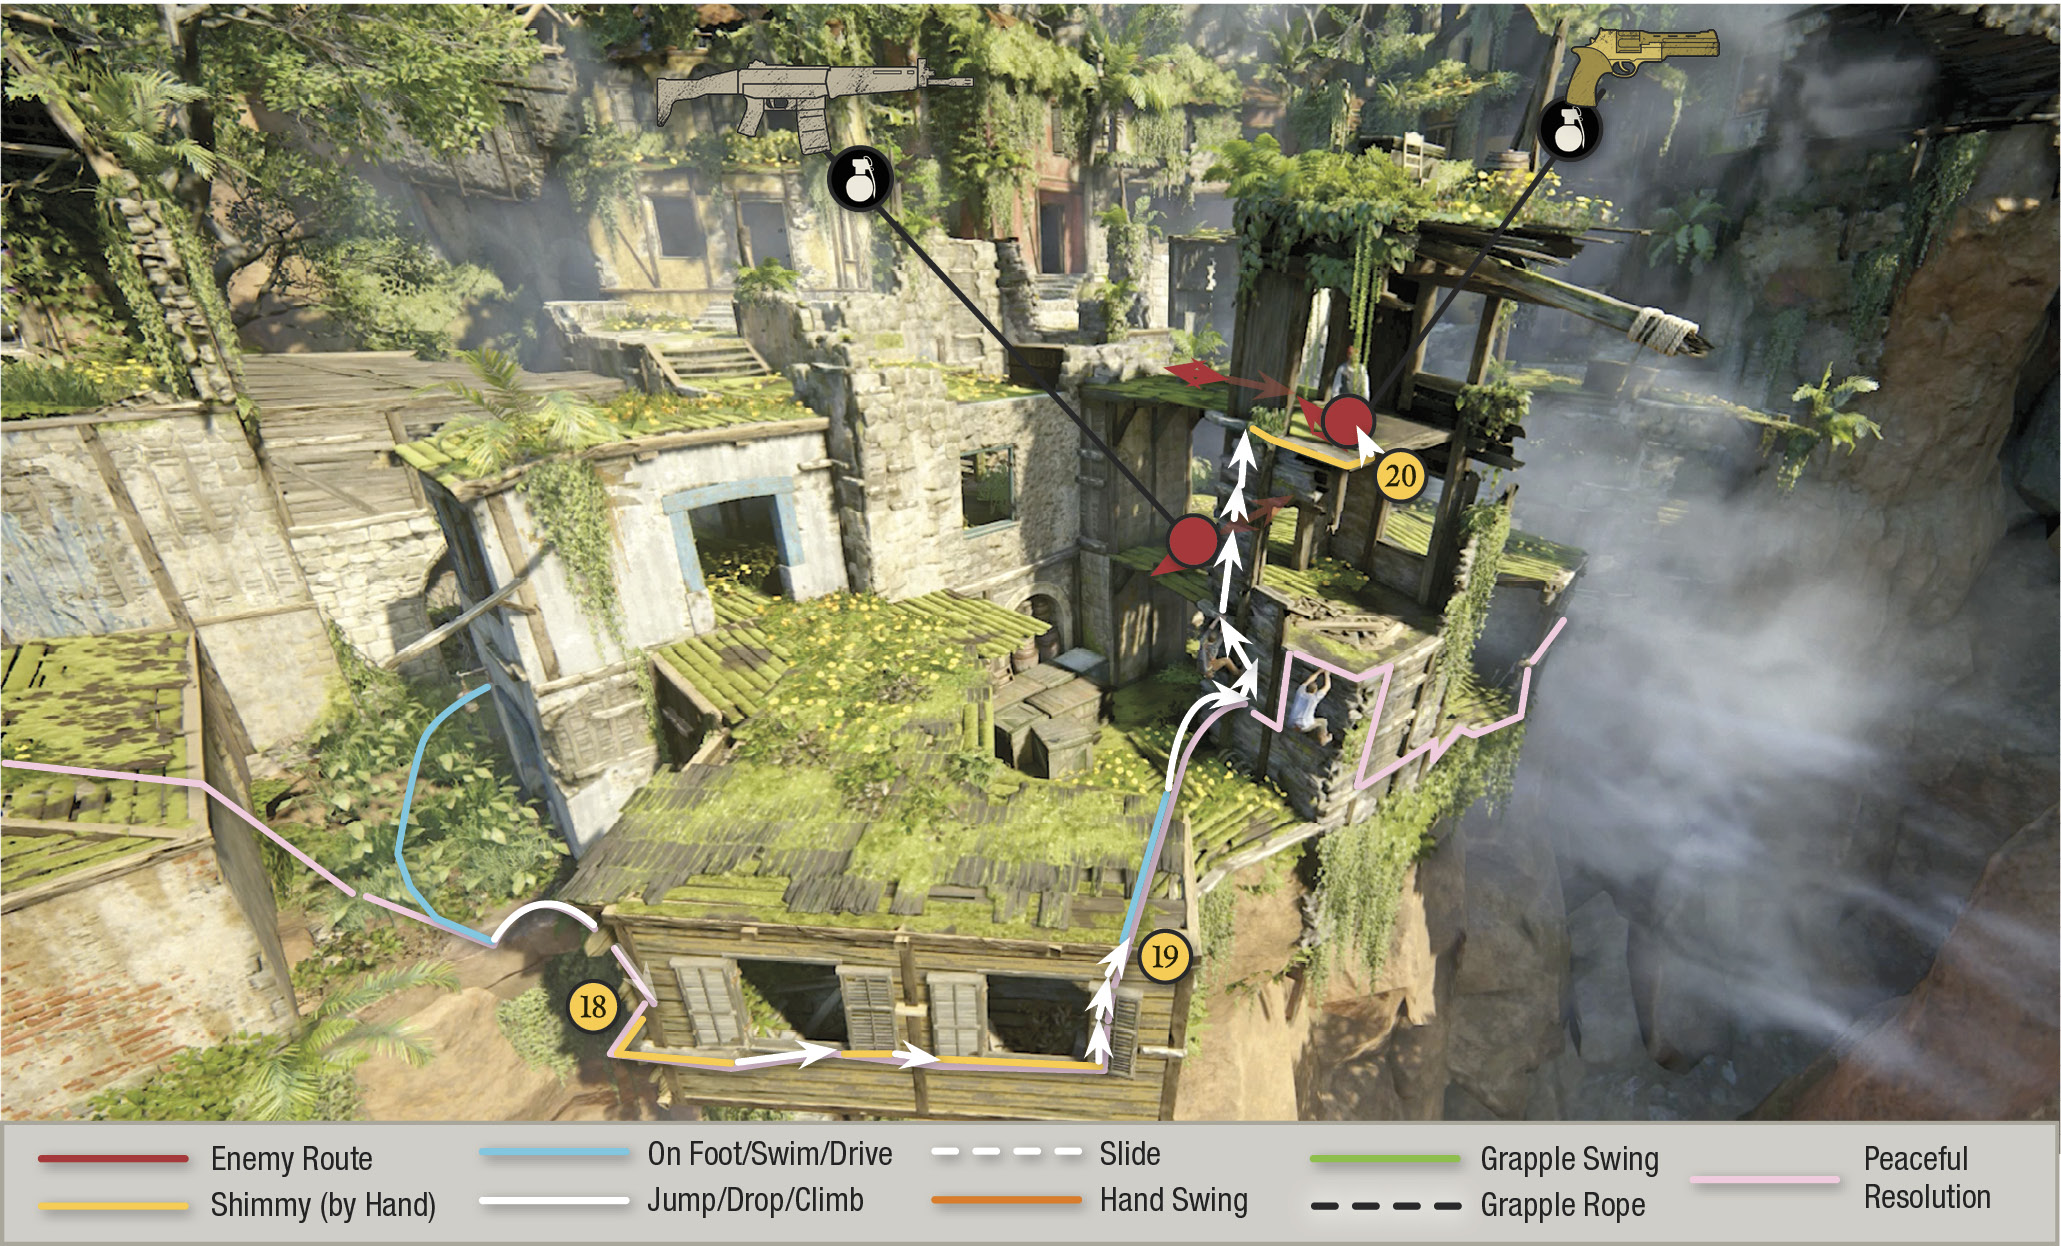
Slide around the corner all the way to the rightmost shutter, then climb it and hang from the roof edge (19). Watch the two guards over on the next tower. When both are turned away from you, pull up, run across the rooftop, and jump across to the tower. Climb up and shimmy rightward until you’re underneath the upper guard (20). Wait until the lower guard turns away, then pull down the upper guard!
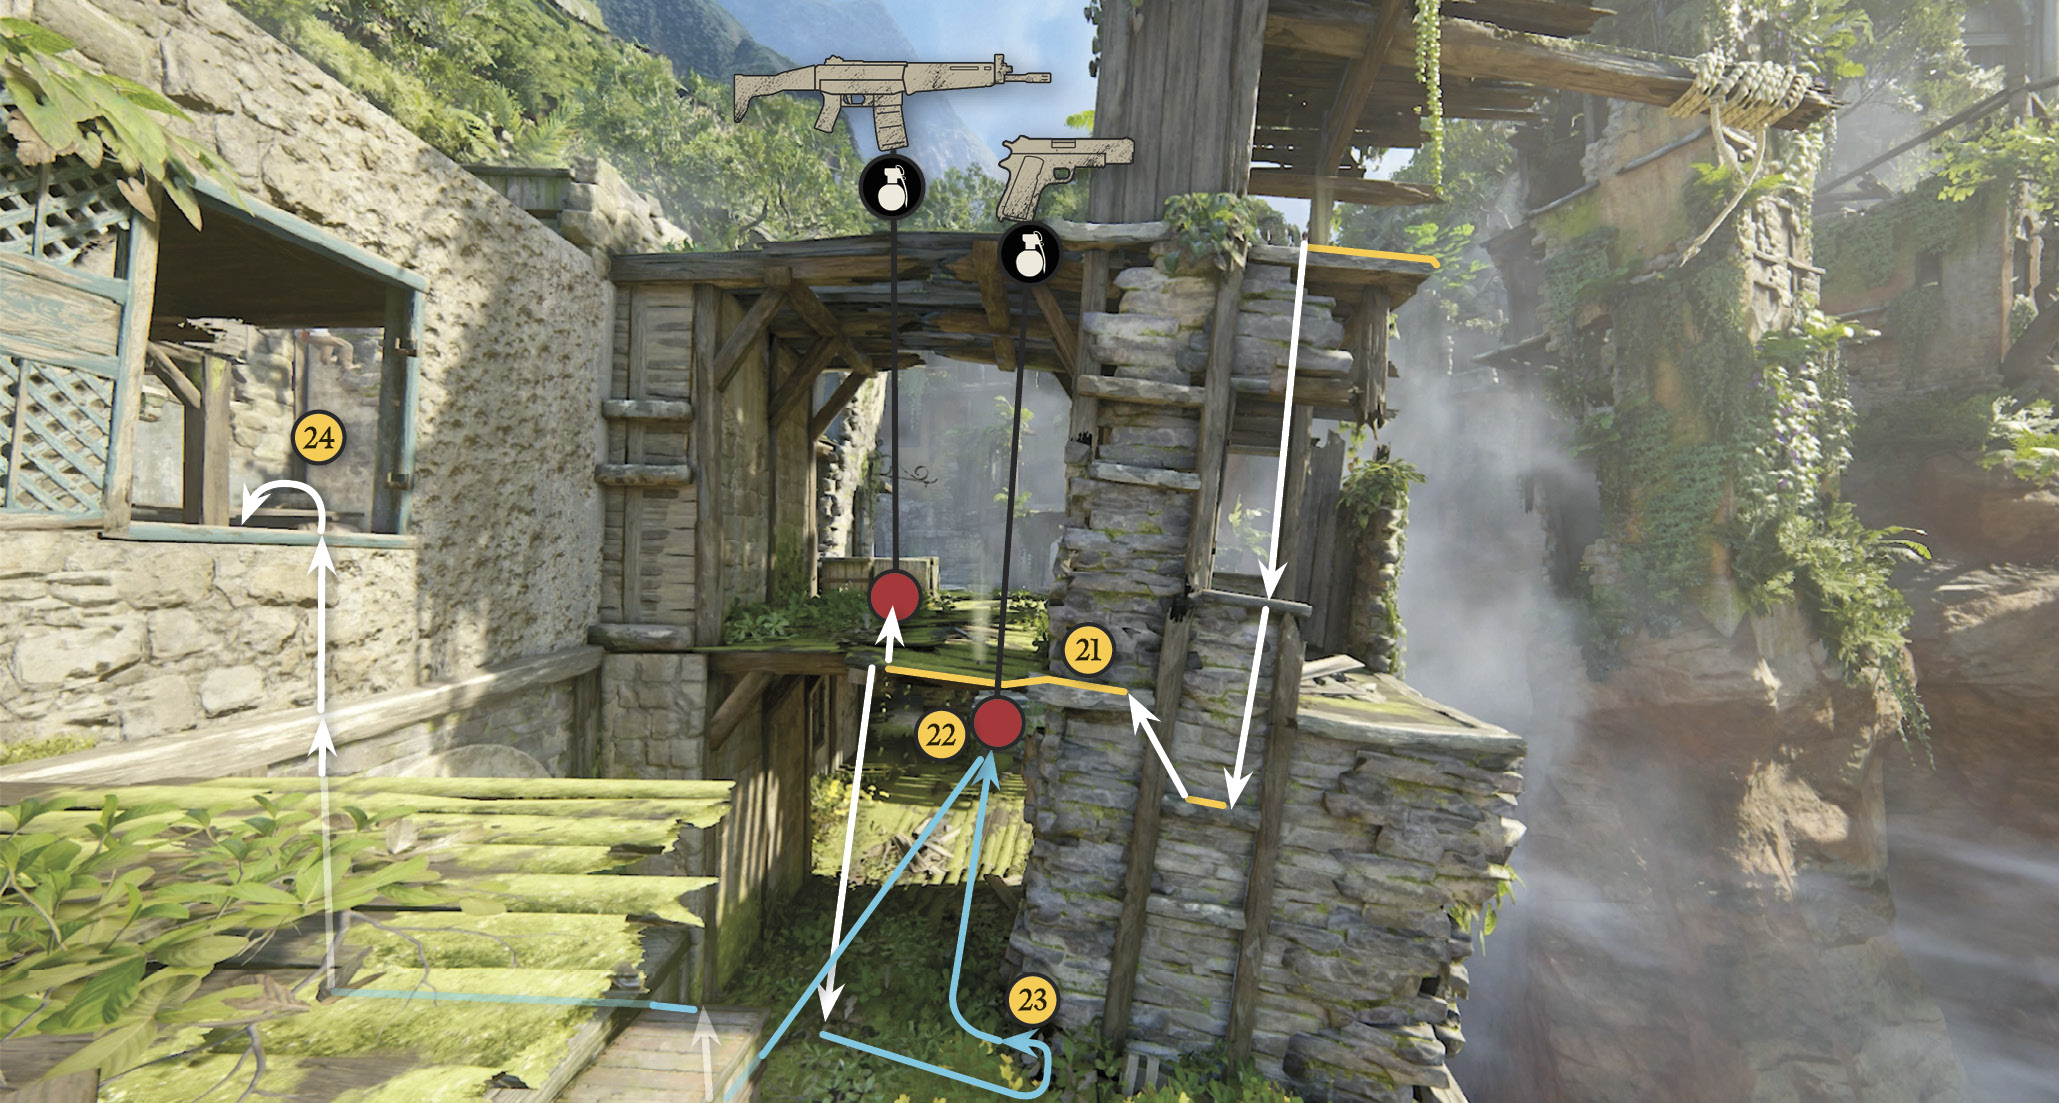
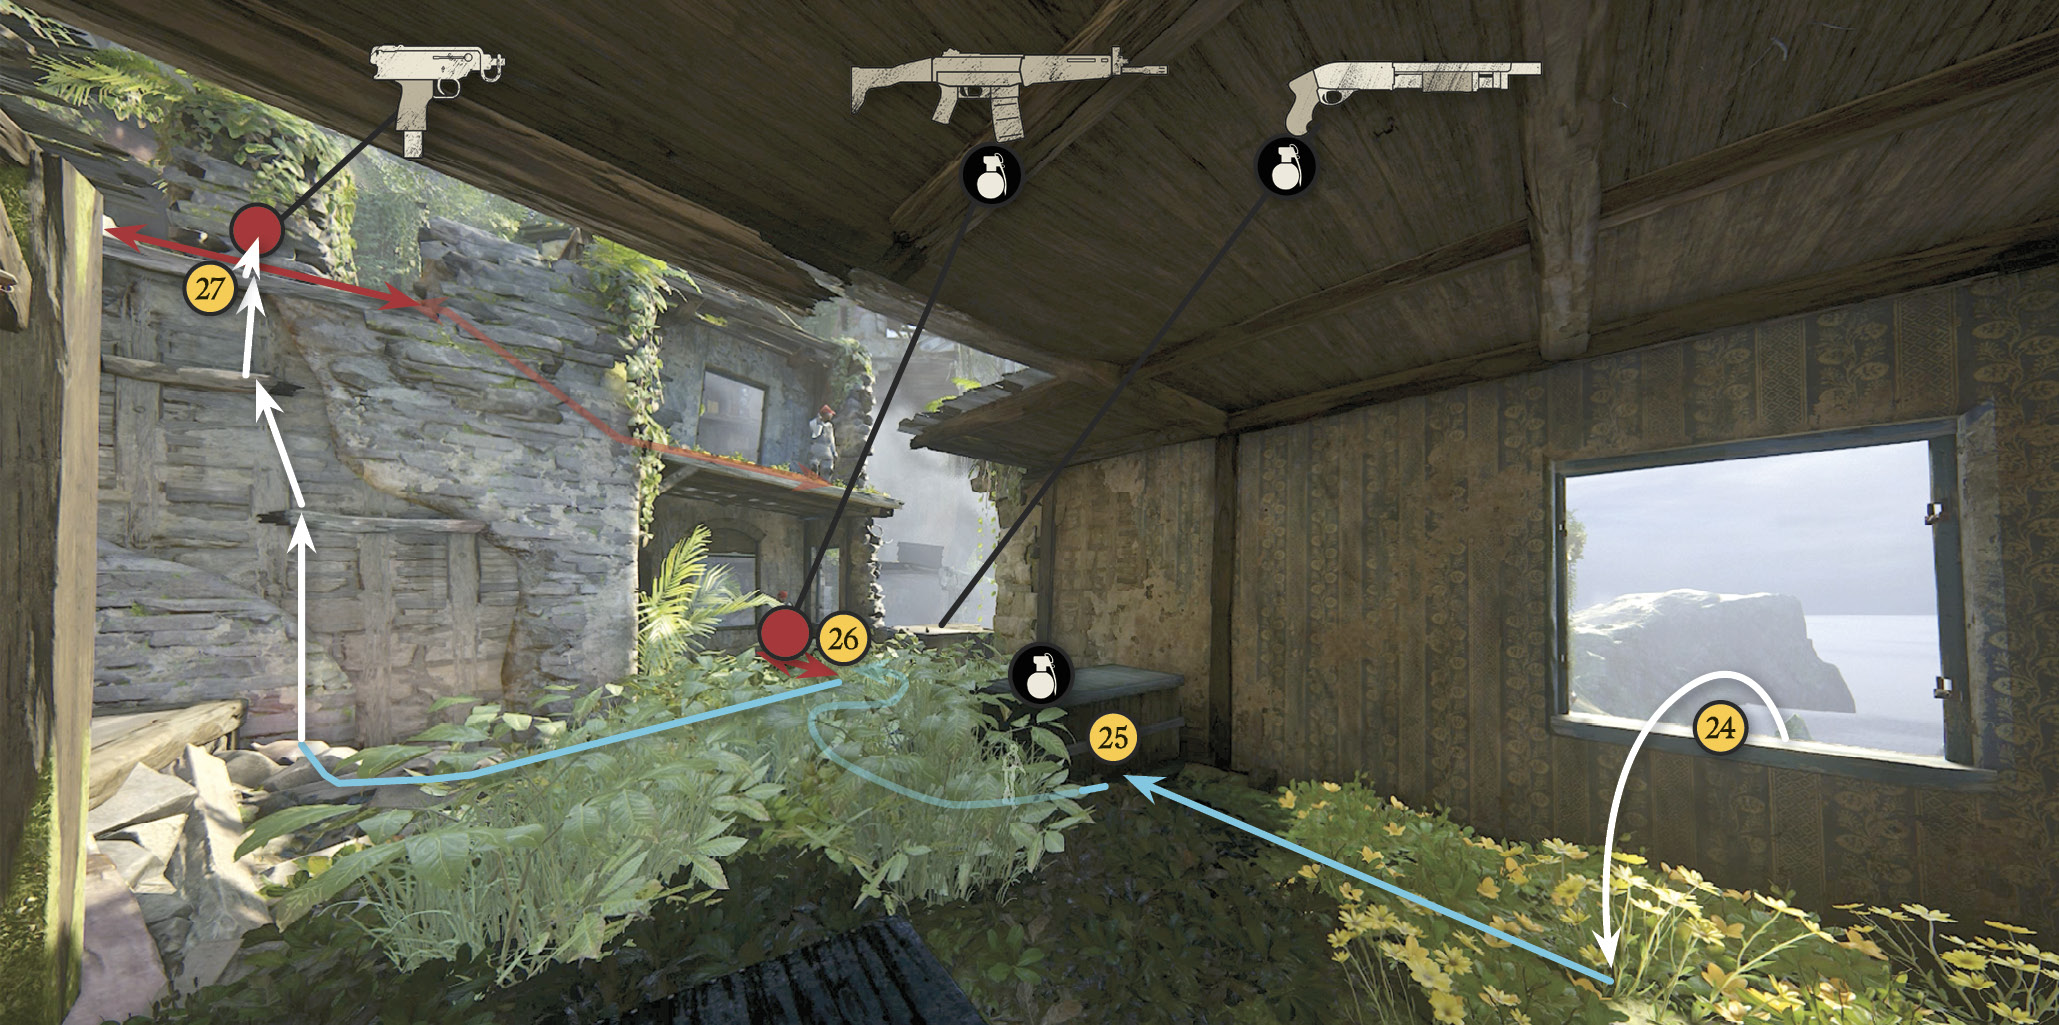
Quickly drop back down and hang from the beam (21), even with the second level floor where the lower guard is patrolling. Swing the camera so you can see another guard patrolling below on the ground level (22). Wait until this ground-level guard is moving away from you, then shimmy across the beam and pull down the guard just above you. Quickly drop down and take cover at the right side of the door (23). When the ground-level guard reappears, wait until he turns away, then sneak up behind him for a stealth takedown. Come back through the doorway and climb to the upper window (24).
Pull up through the window, turn right, and quickly roll to cover behind the crate (25). From here, observe the two guards ahead, one up high and one in the hut below. When the upper guard strolls away to the left, creep through the high grass toward the lower guard (26) but stop at the edge of the foliage. When he gets close, take him down. Now move left to the wall and climb up to hang from the edge of the walkway (27). When the upper guard passes by on patrol, pull him down!
Flank the Upper Guards
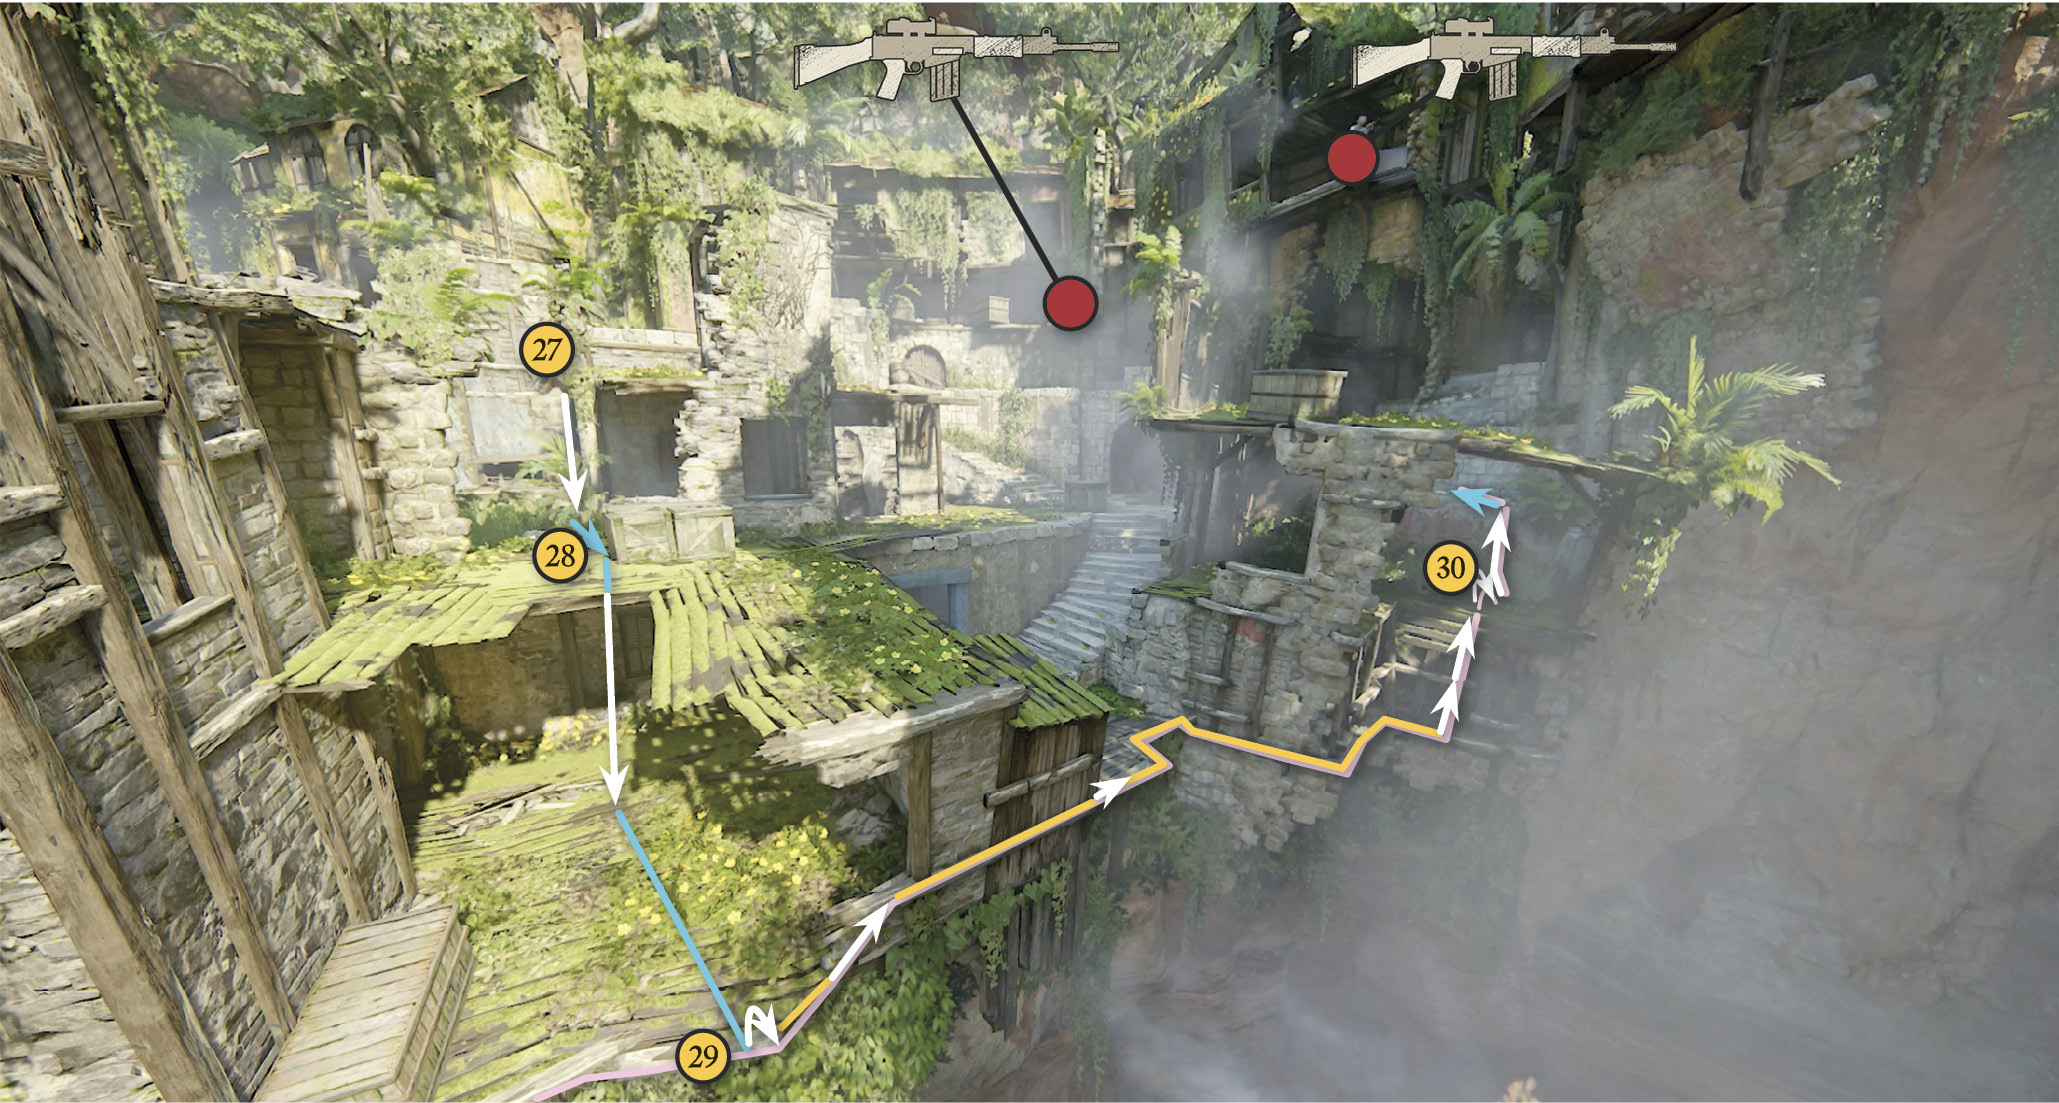
Drop back down, turn right, and move to cover at the boxes (28). Make sure the guards up high to your left aren’t watching, then jump off the drop-off and hang off the end of the next platform (29). Now shimmy and climb rightward along the outside edge of the structures until you reach the enclosure at the end (30) filled with high plants for cover.
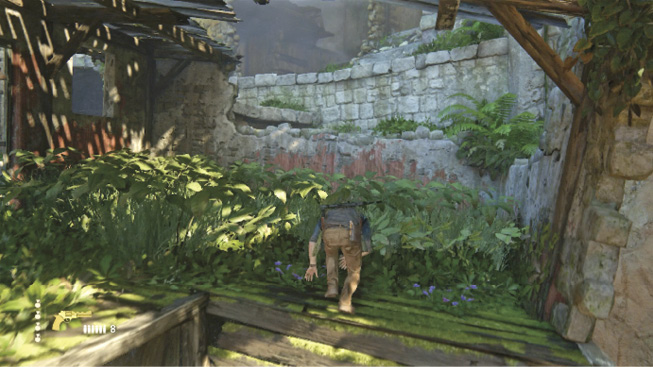
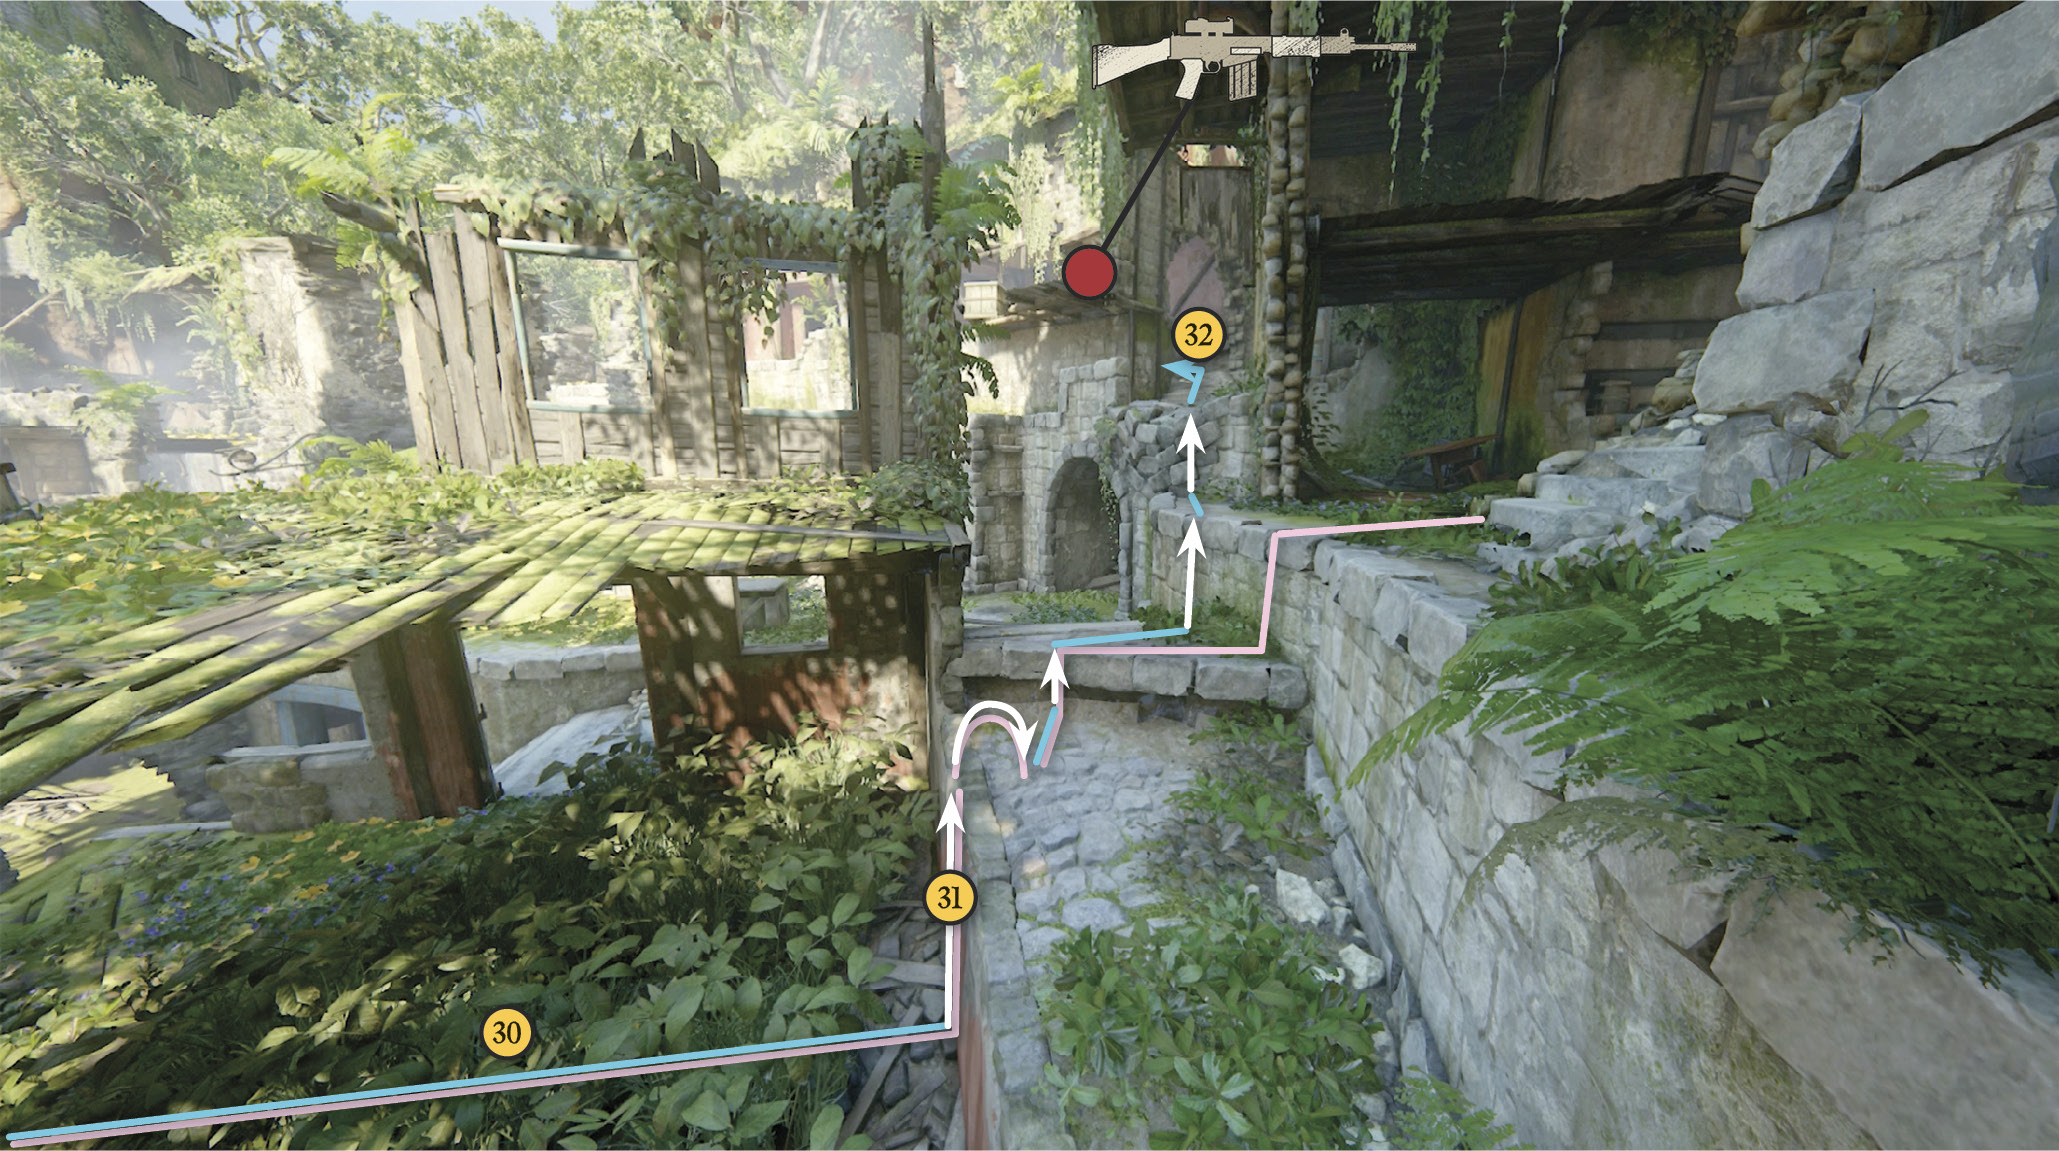
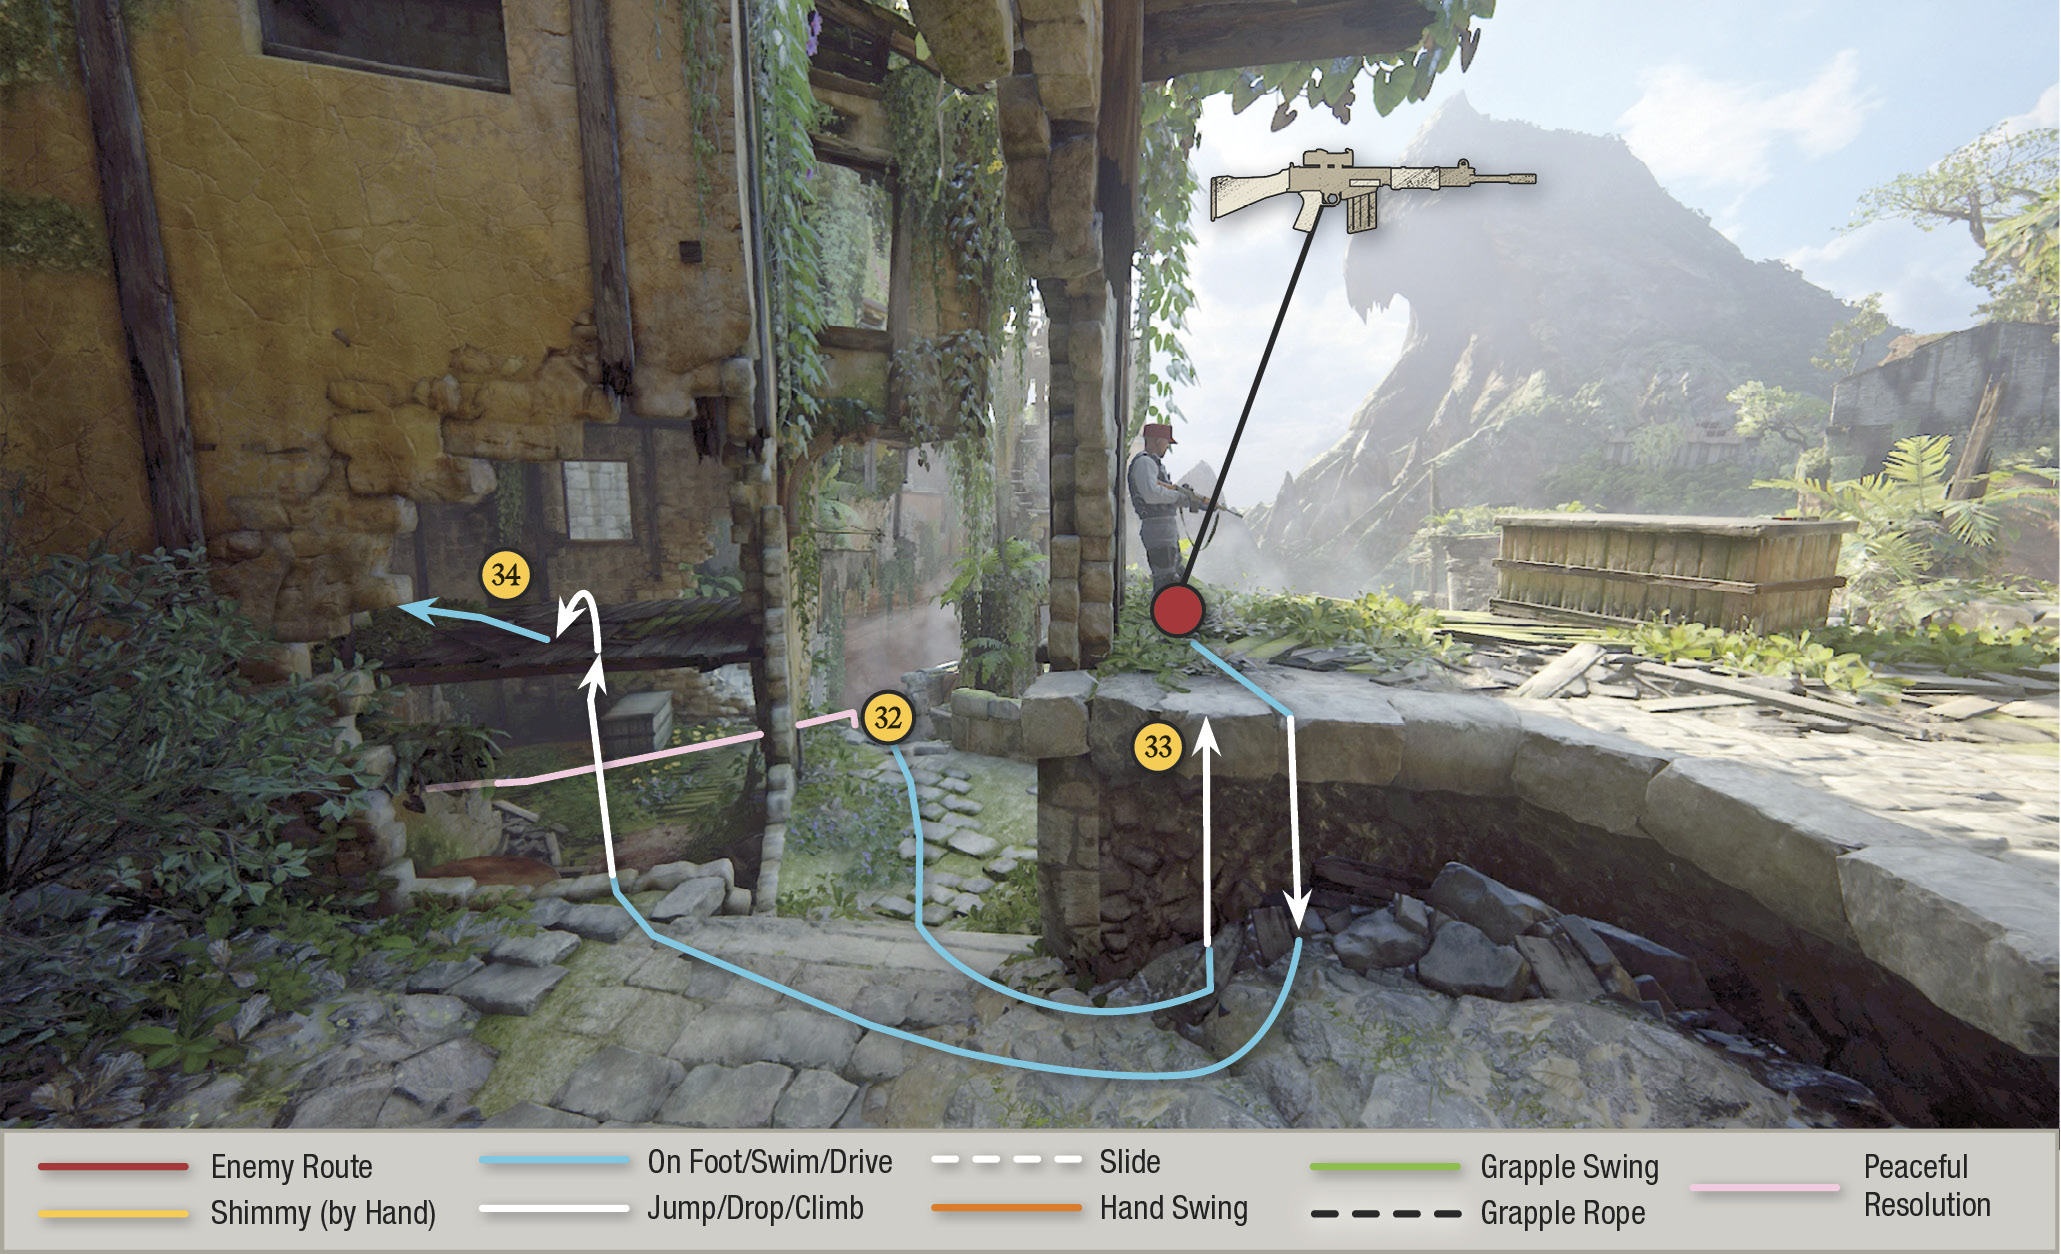
Climb the reddish wall (31) and turn left, working your way over the tunnel arch (32) until you’re under the next guard (33) who leans against the wall on the raised platform. Pull him down, then jump through the nearby hole in the corner onto the second floor platform (34).
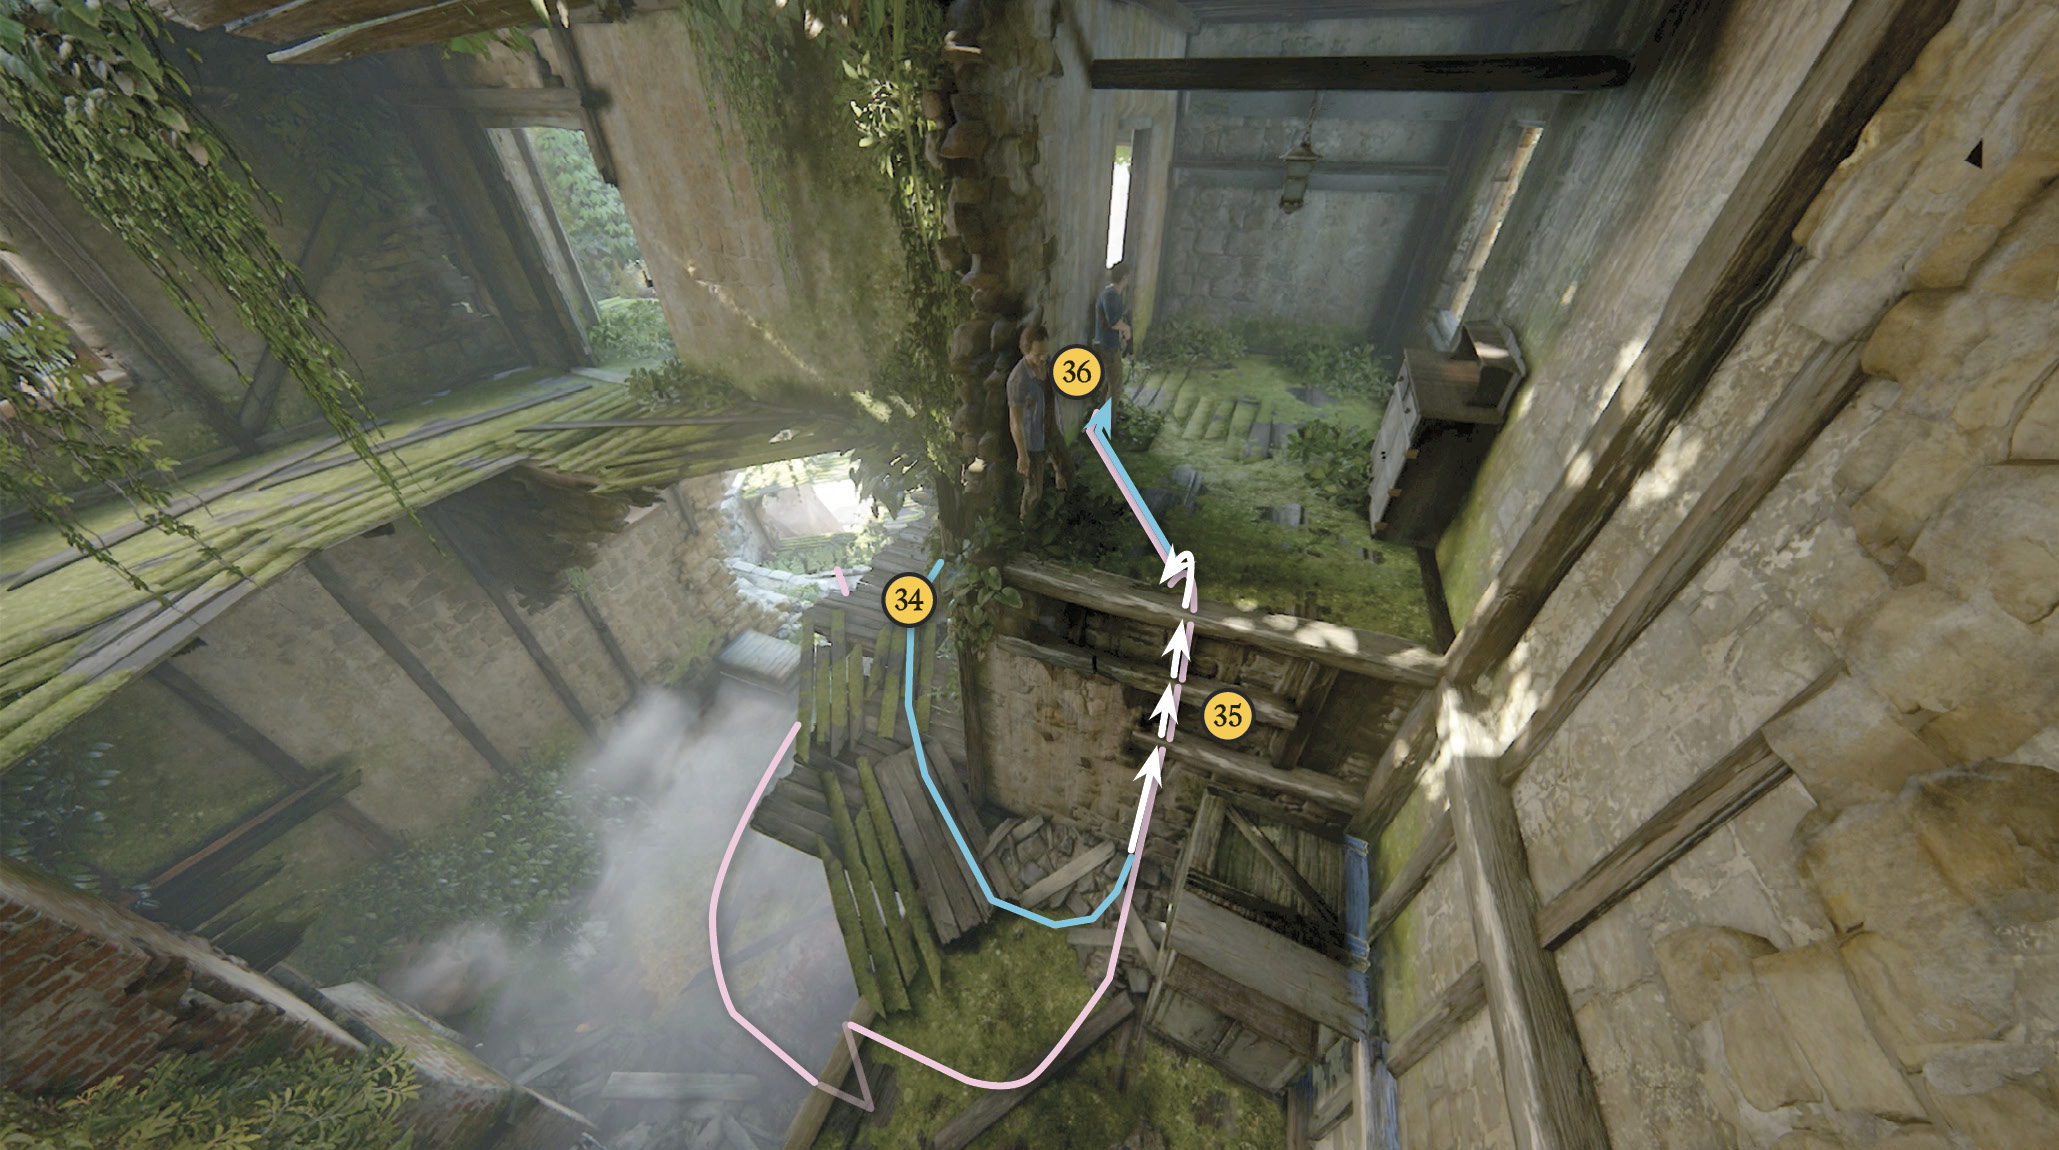
Move around the corner and climb the wall beams (35) to the small corridor. Take cover to the left of the doorway (36) and peek through to assess the situation. You see just one guard (37) pacing near a cabinet (38). But beyond him, snipers appear on the next building across the gap and start aiming their laser sights, looking for you.
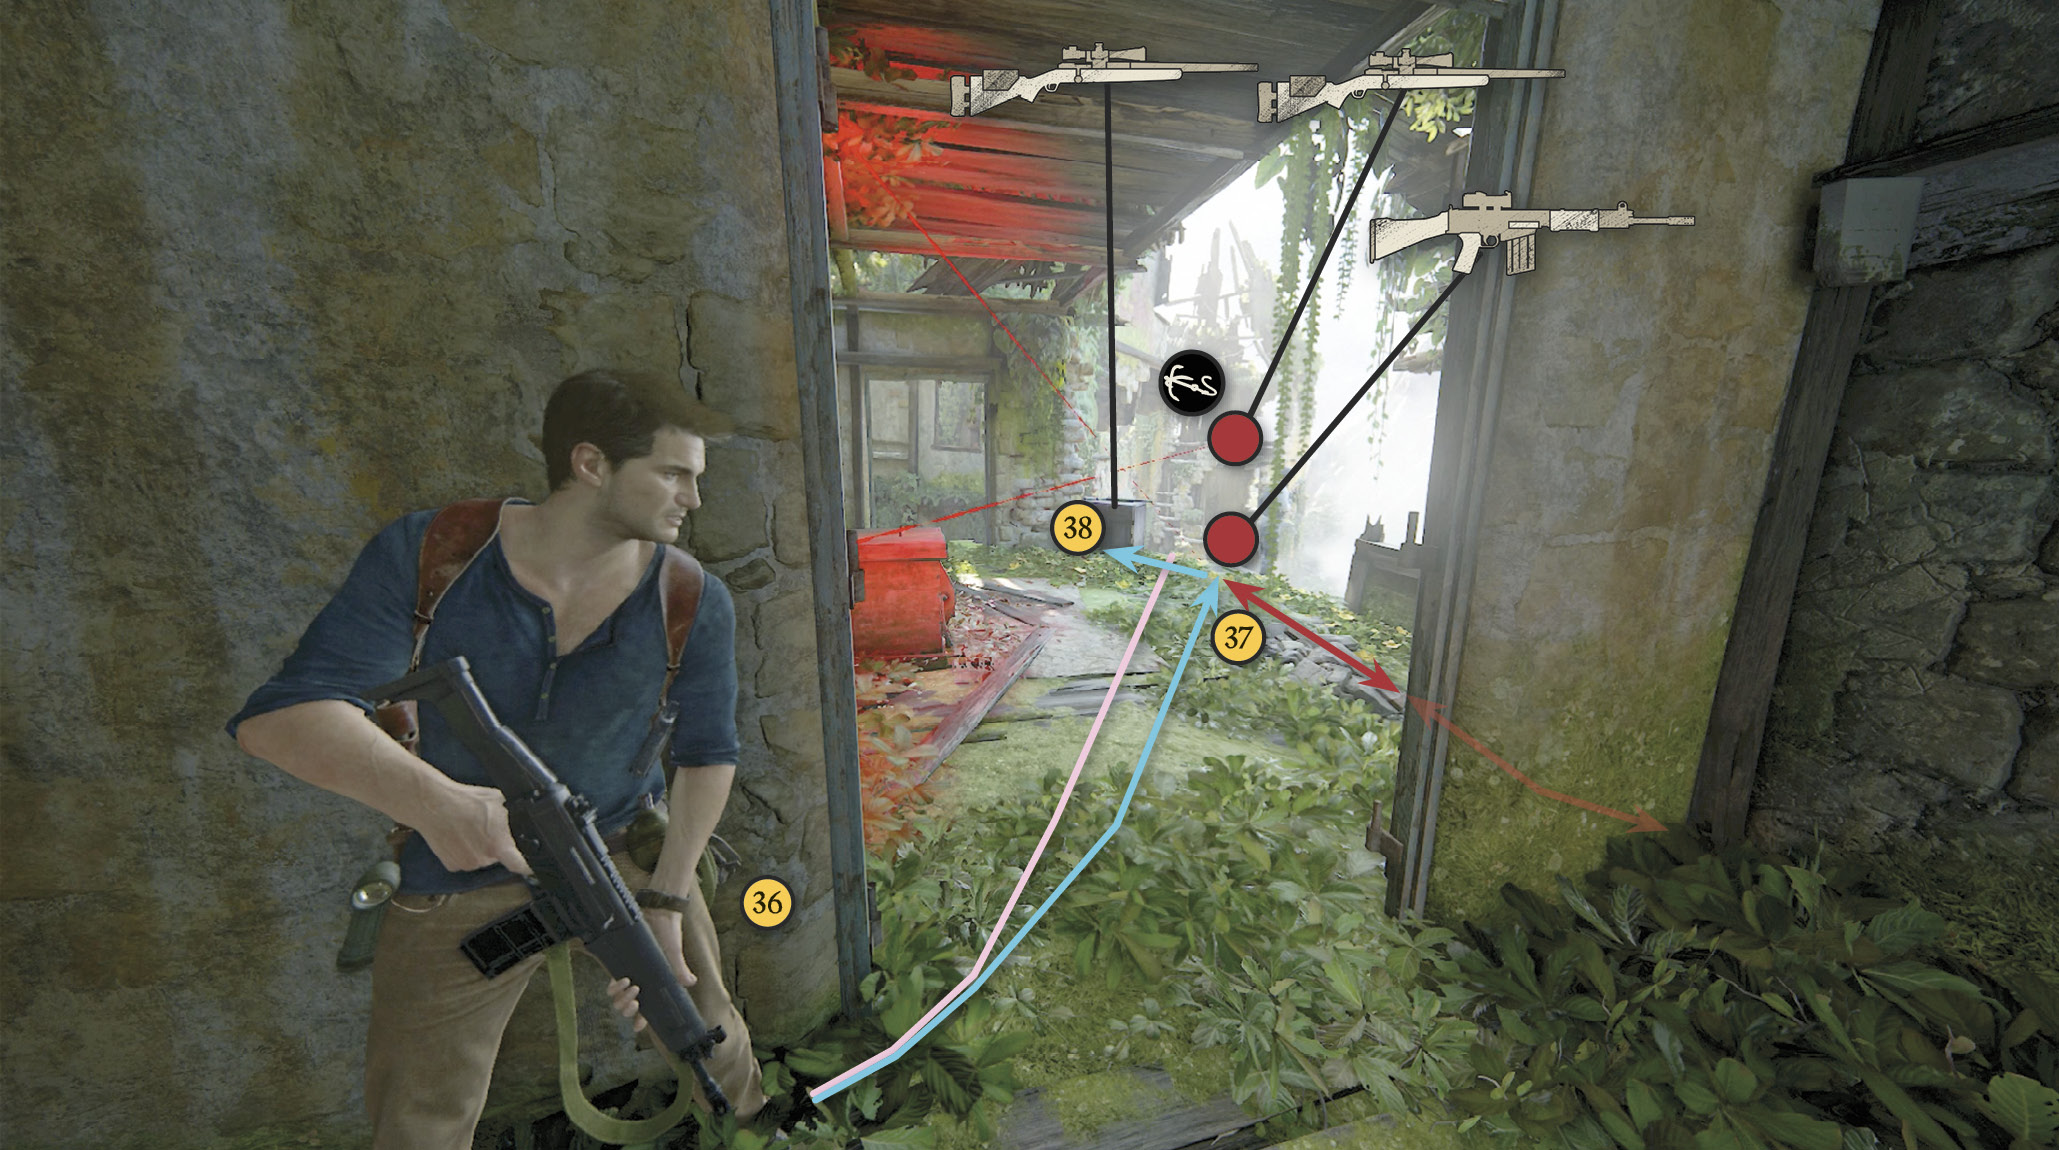
Wait until the guard nearest you turns away and the lasers stop flashing on your platform. Quickly! Rush in for a stealth takedown and then roll quickly into cover behind the cabinet so the snipers don’t see you. Pick up the Mazur LDR sniper rifle sitting atop the cabinet. Before you shoot anyone though, read the next section.
Take Out the Snipers and Heavy Trooper
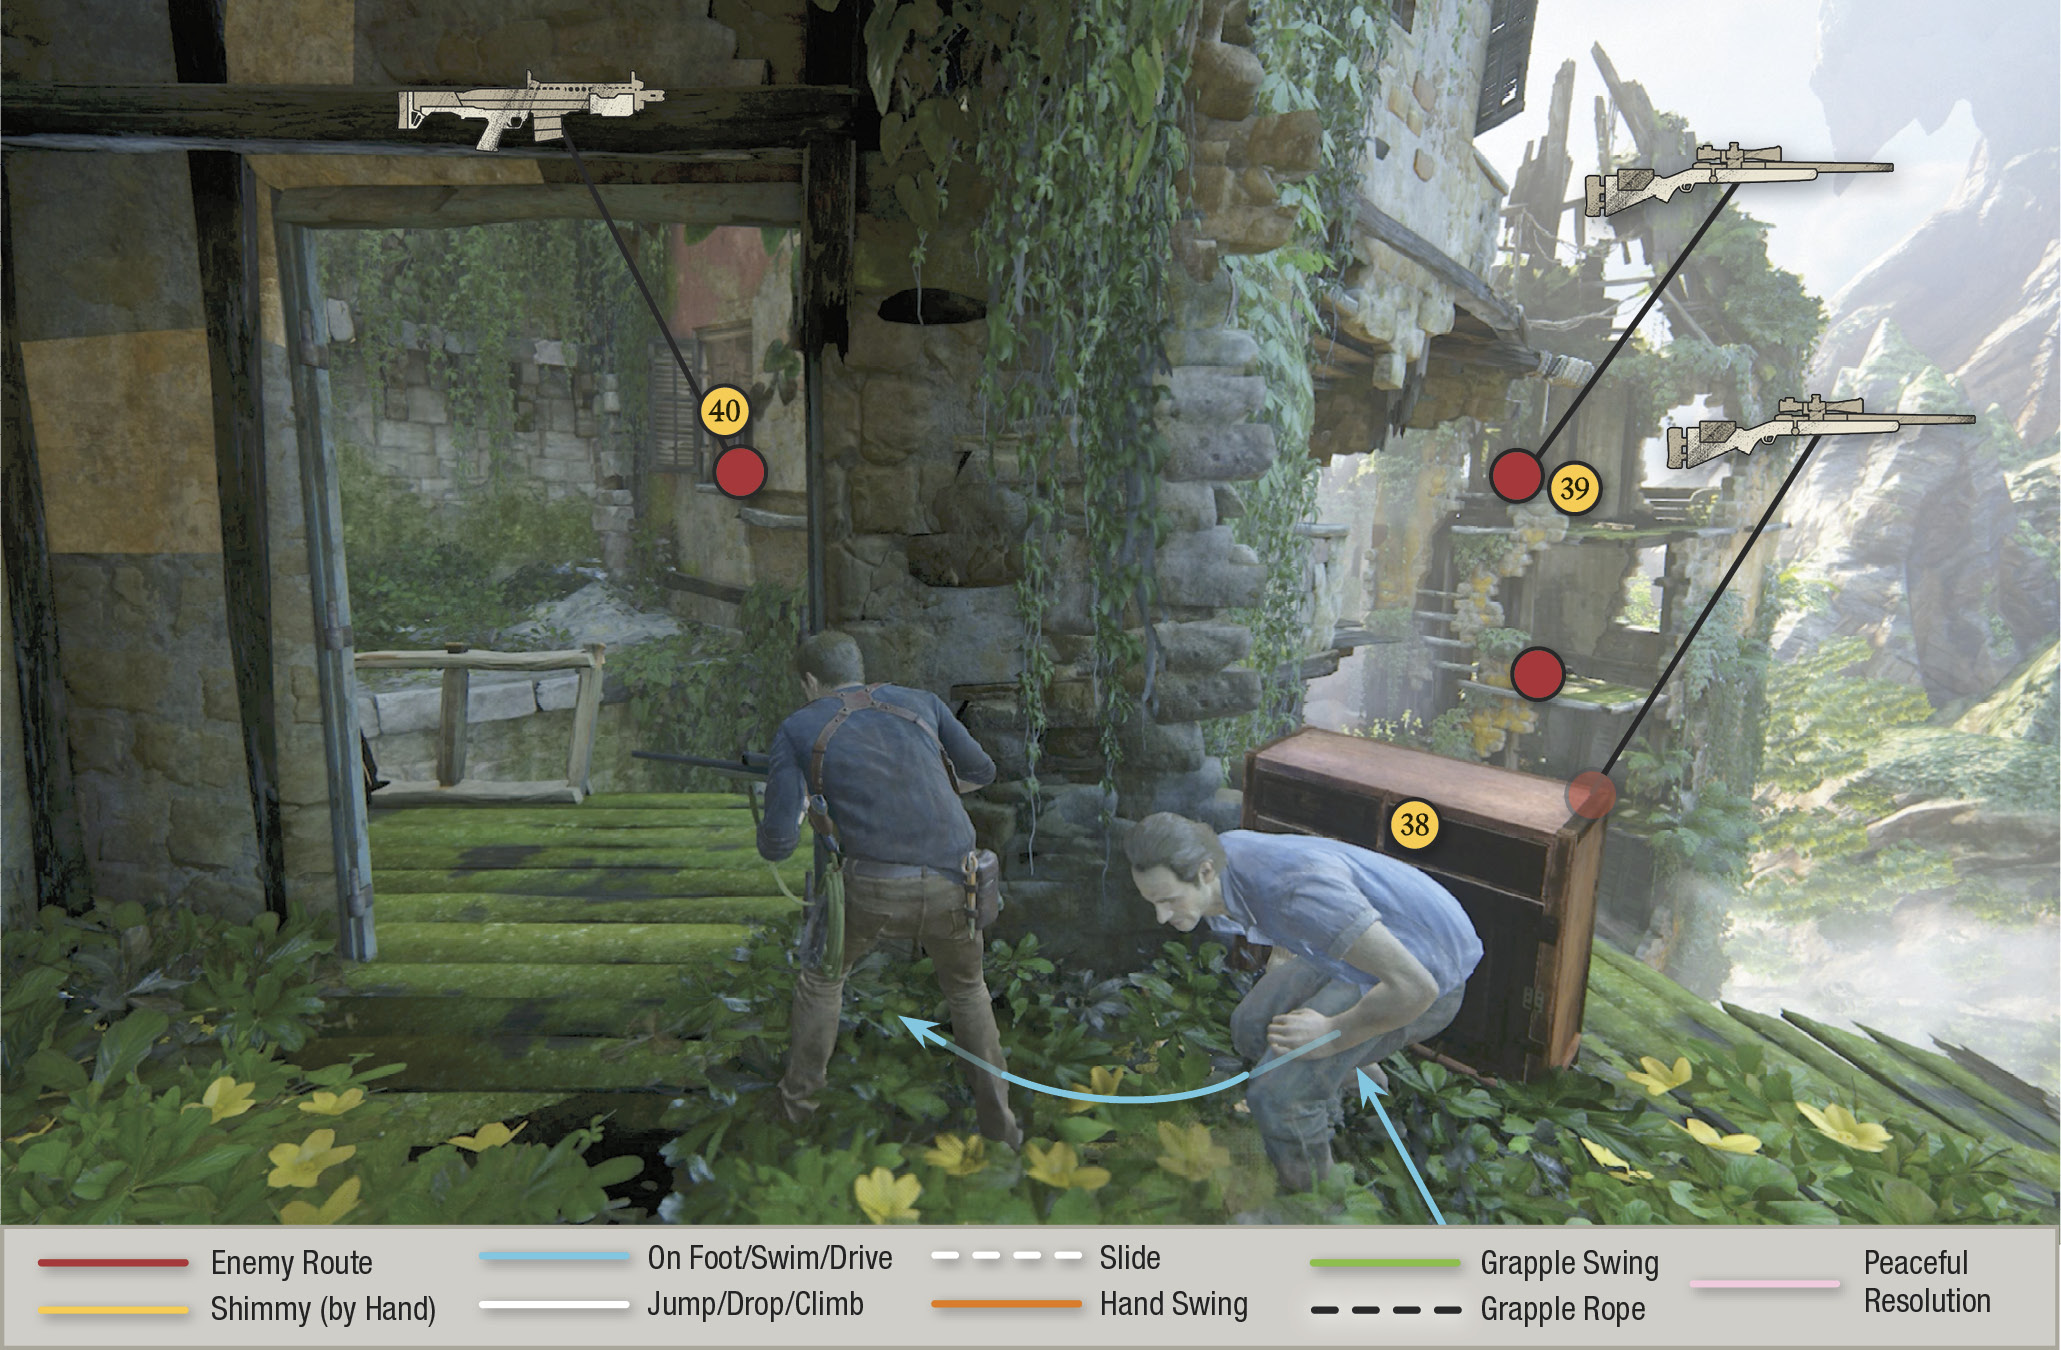
Over on the next building, the snipers (39) are posted on the top and bottom floors; sometimes a standard rifleman is on the middle floor too. But the moment you shoot any one of these gunmen, a heavily armored, shotgun-toting trooper suddenly advances directly at your position from the house between the snipers’ and yours.
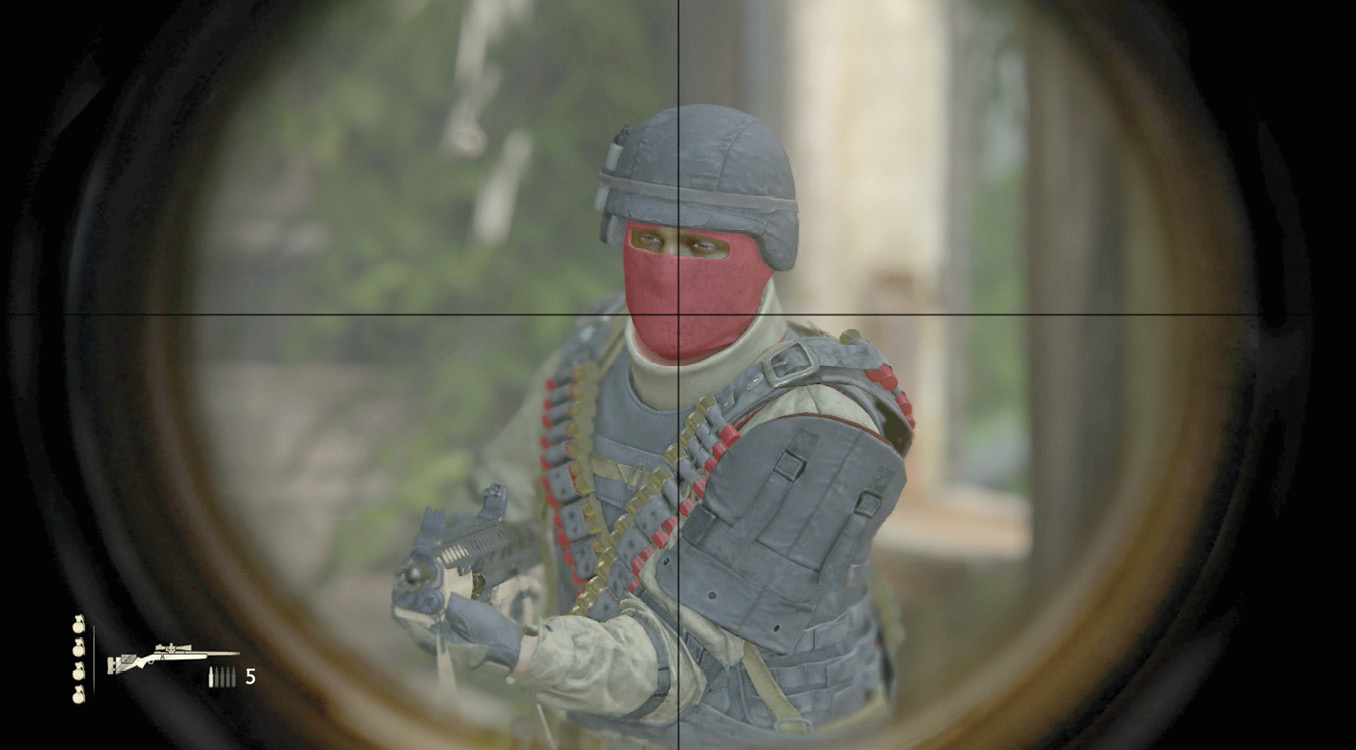
So here’s a good tactic: Nail the sniper on the top floor, then immediately slide leftward to the doorway and aim your sniper scope at that window (40) across the gap. The moment the heavy trooper appears in the window, shoot him twice—once to knock off his helmet, and then again to weaken or kill him. (If the second hit is a headshot, he goes down.) If you miss and the heavy trooper is still advancing, quickly switch to your sidearm to finish him off. Then switch back to your Mazur LDR, get in cover behind the cabinet again, and pick off the other riflemen on the far building.
Work through the Stacked Housing
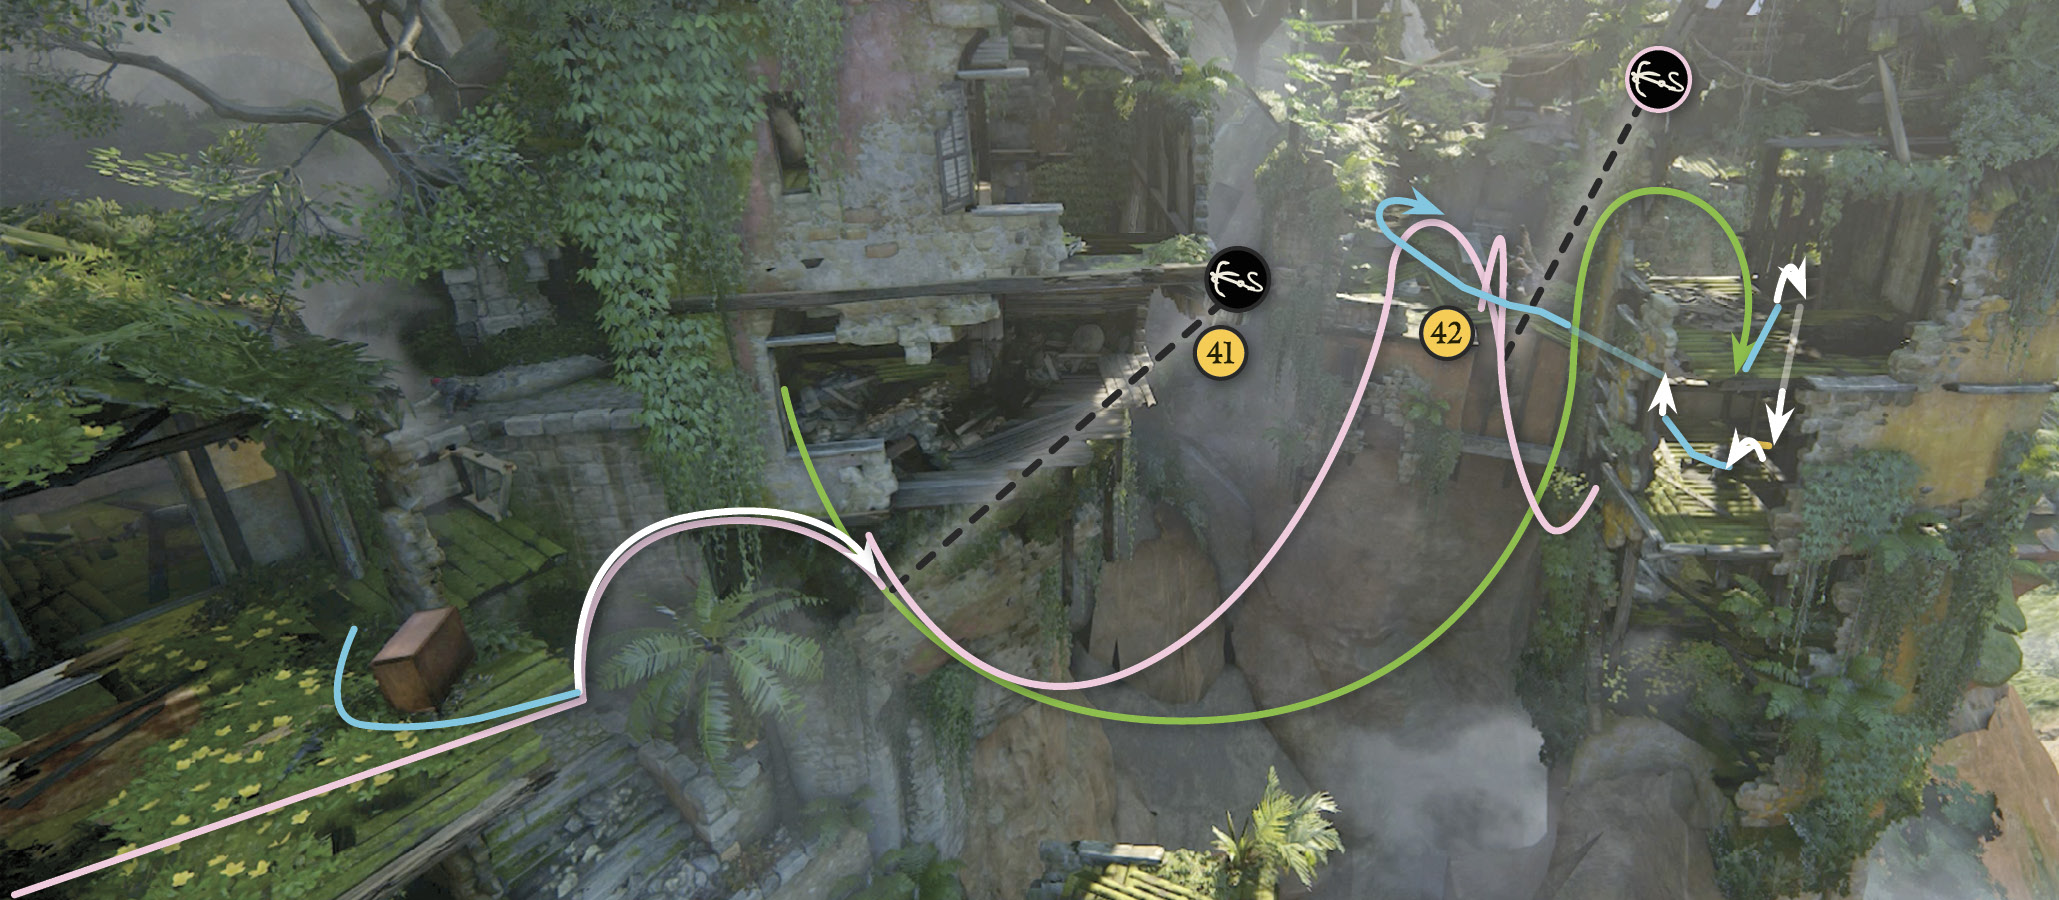
Hang onto the Mazur LDR rifle for now. From your sniper platform, use the grapple point (41) to swing over to the building where the now-dead enemy snipers were posted. Use the wall ladder to move between floors to stock up on the dropped sniper ammo. Then crawl through the exit window and cross the mossy plank bridge (42).
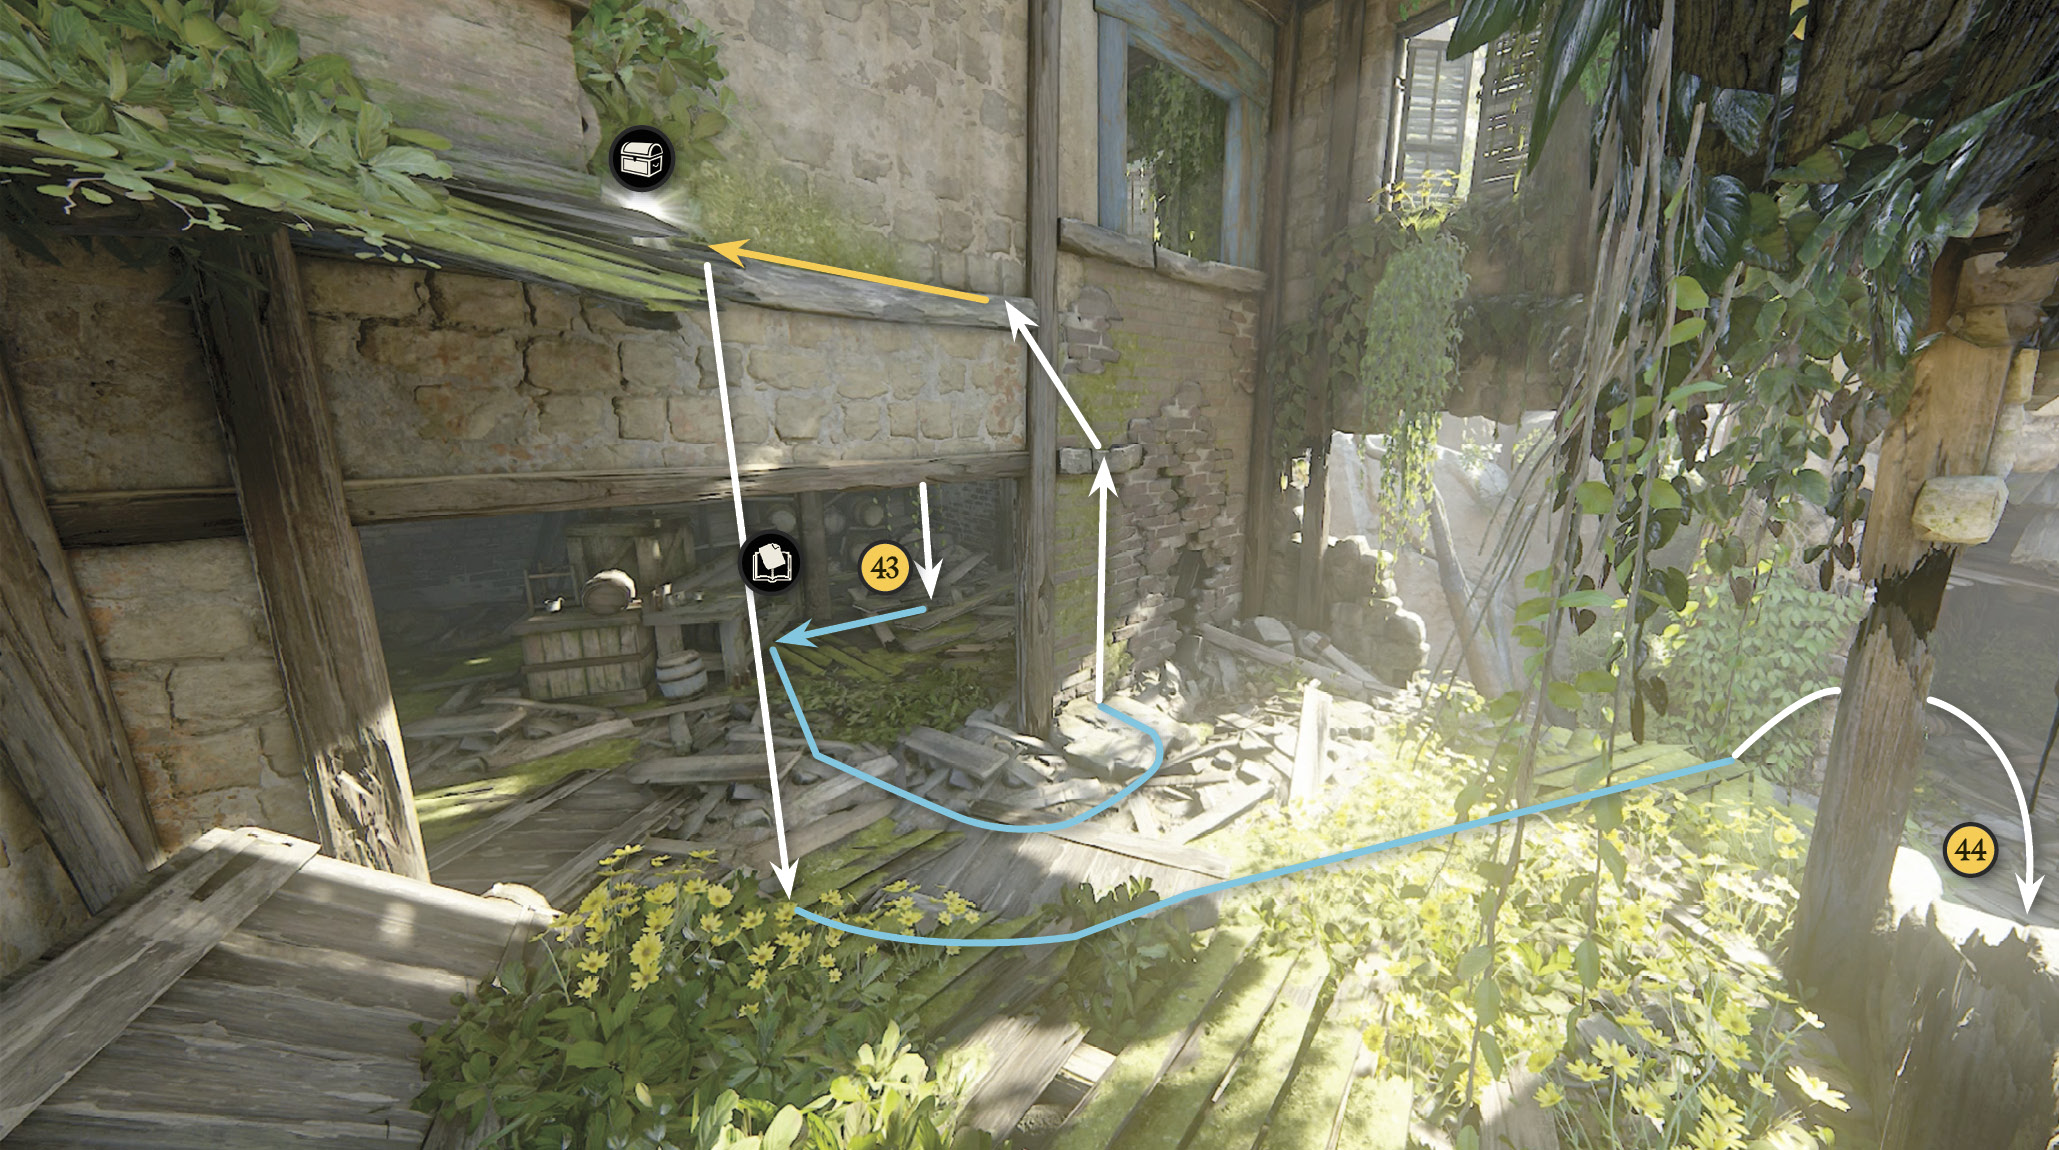
Go through the doorway into the back hall, turn right, and drop down the floor hole to the lower level (43). Be sure to pick up the Optional Journal Note on the nearby table: a letter that hints at dark rumblings in Libertalia. Step outside and find the treasure on the roof. Then jump across the big gap to the lower floor of the next building (44).
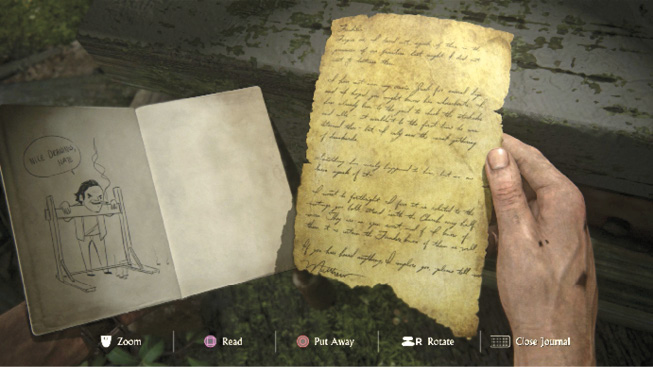
 Mughal Jade Bottle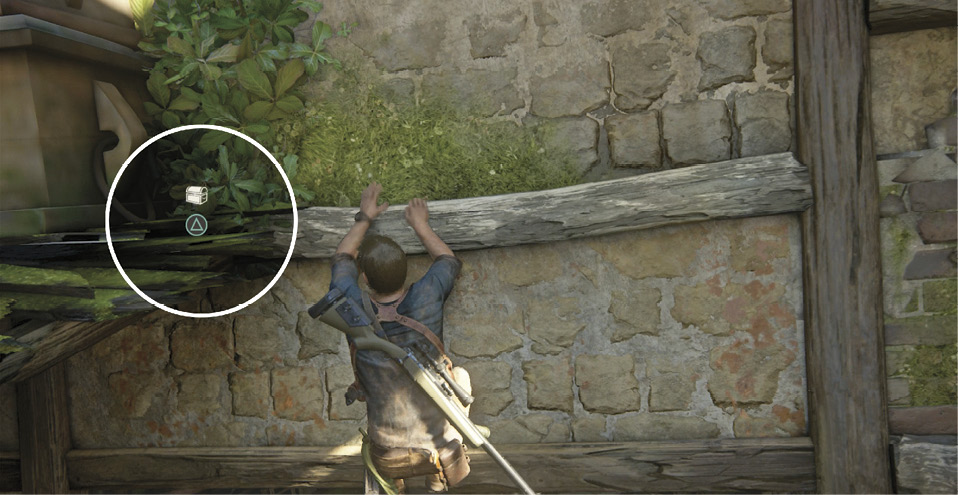 After you pass through the building where you find the note from Franklin to his friend Matthew, step outside and climb the wallboards to the small roof section to find the Mughal Jade Bottle. |
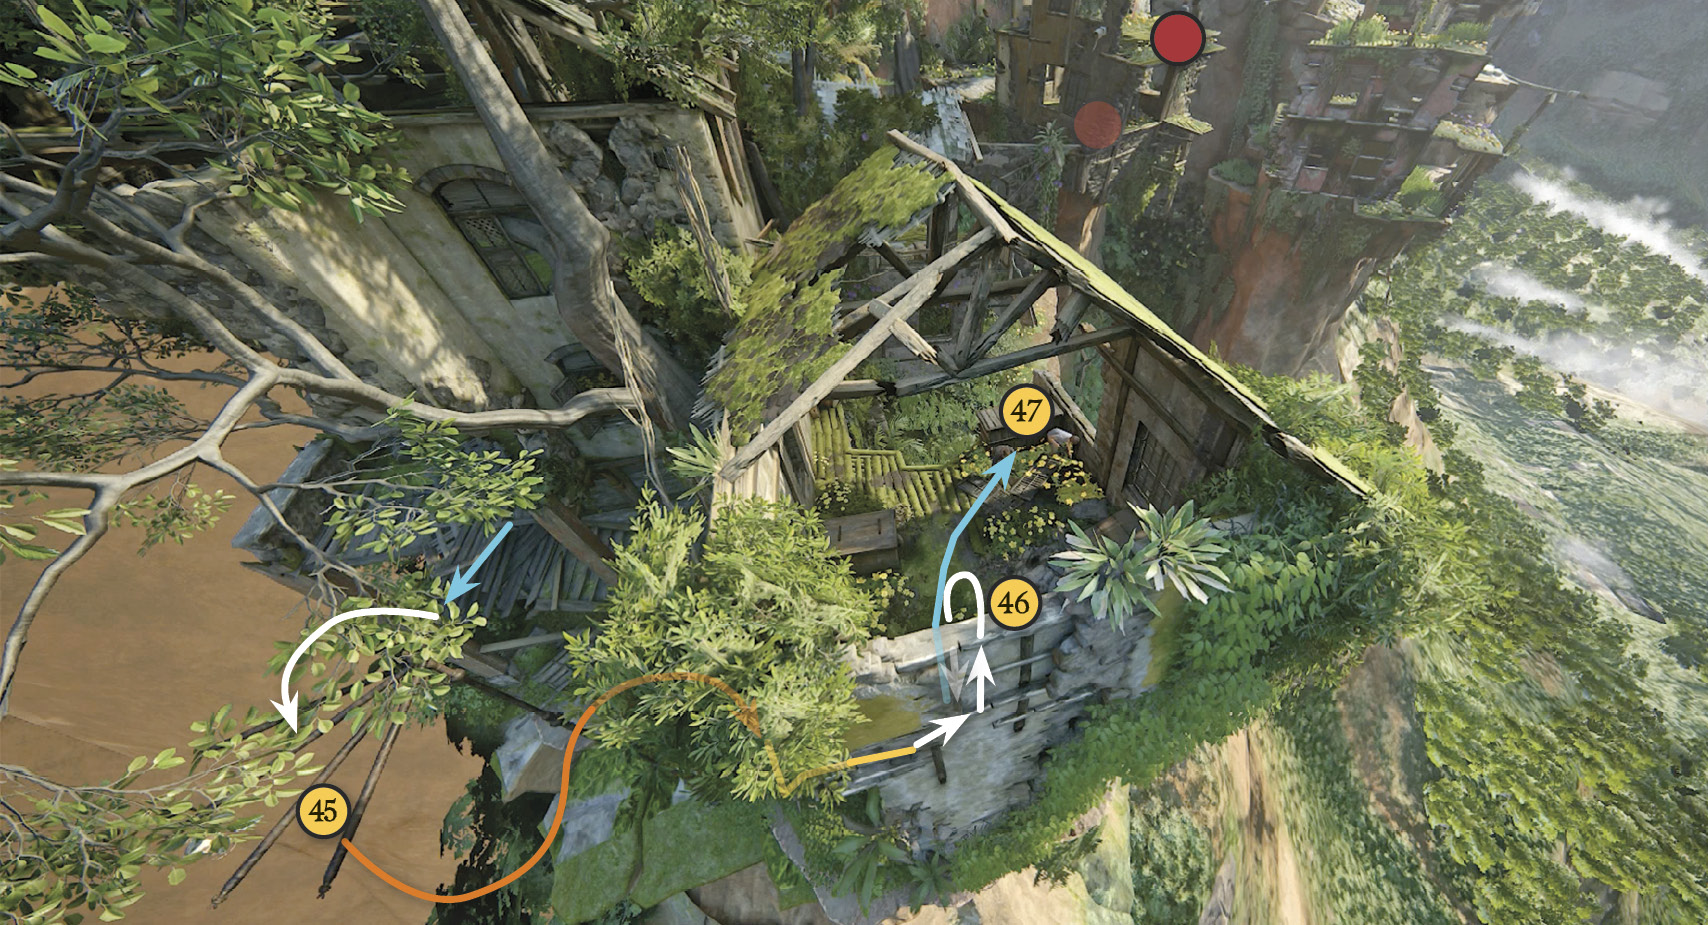
Move through the building to the far opening and jump to the first in a series of poles (45). Hand-walk across the poles, then swing from the last pole over to the exposed beams on the wall. Shimmy around the corner using the beams and climb to the top of the wall (46). Jump down on the other side and take cover behind the crate (47).
Knock Out More Snipers
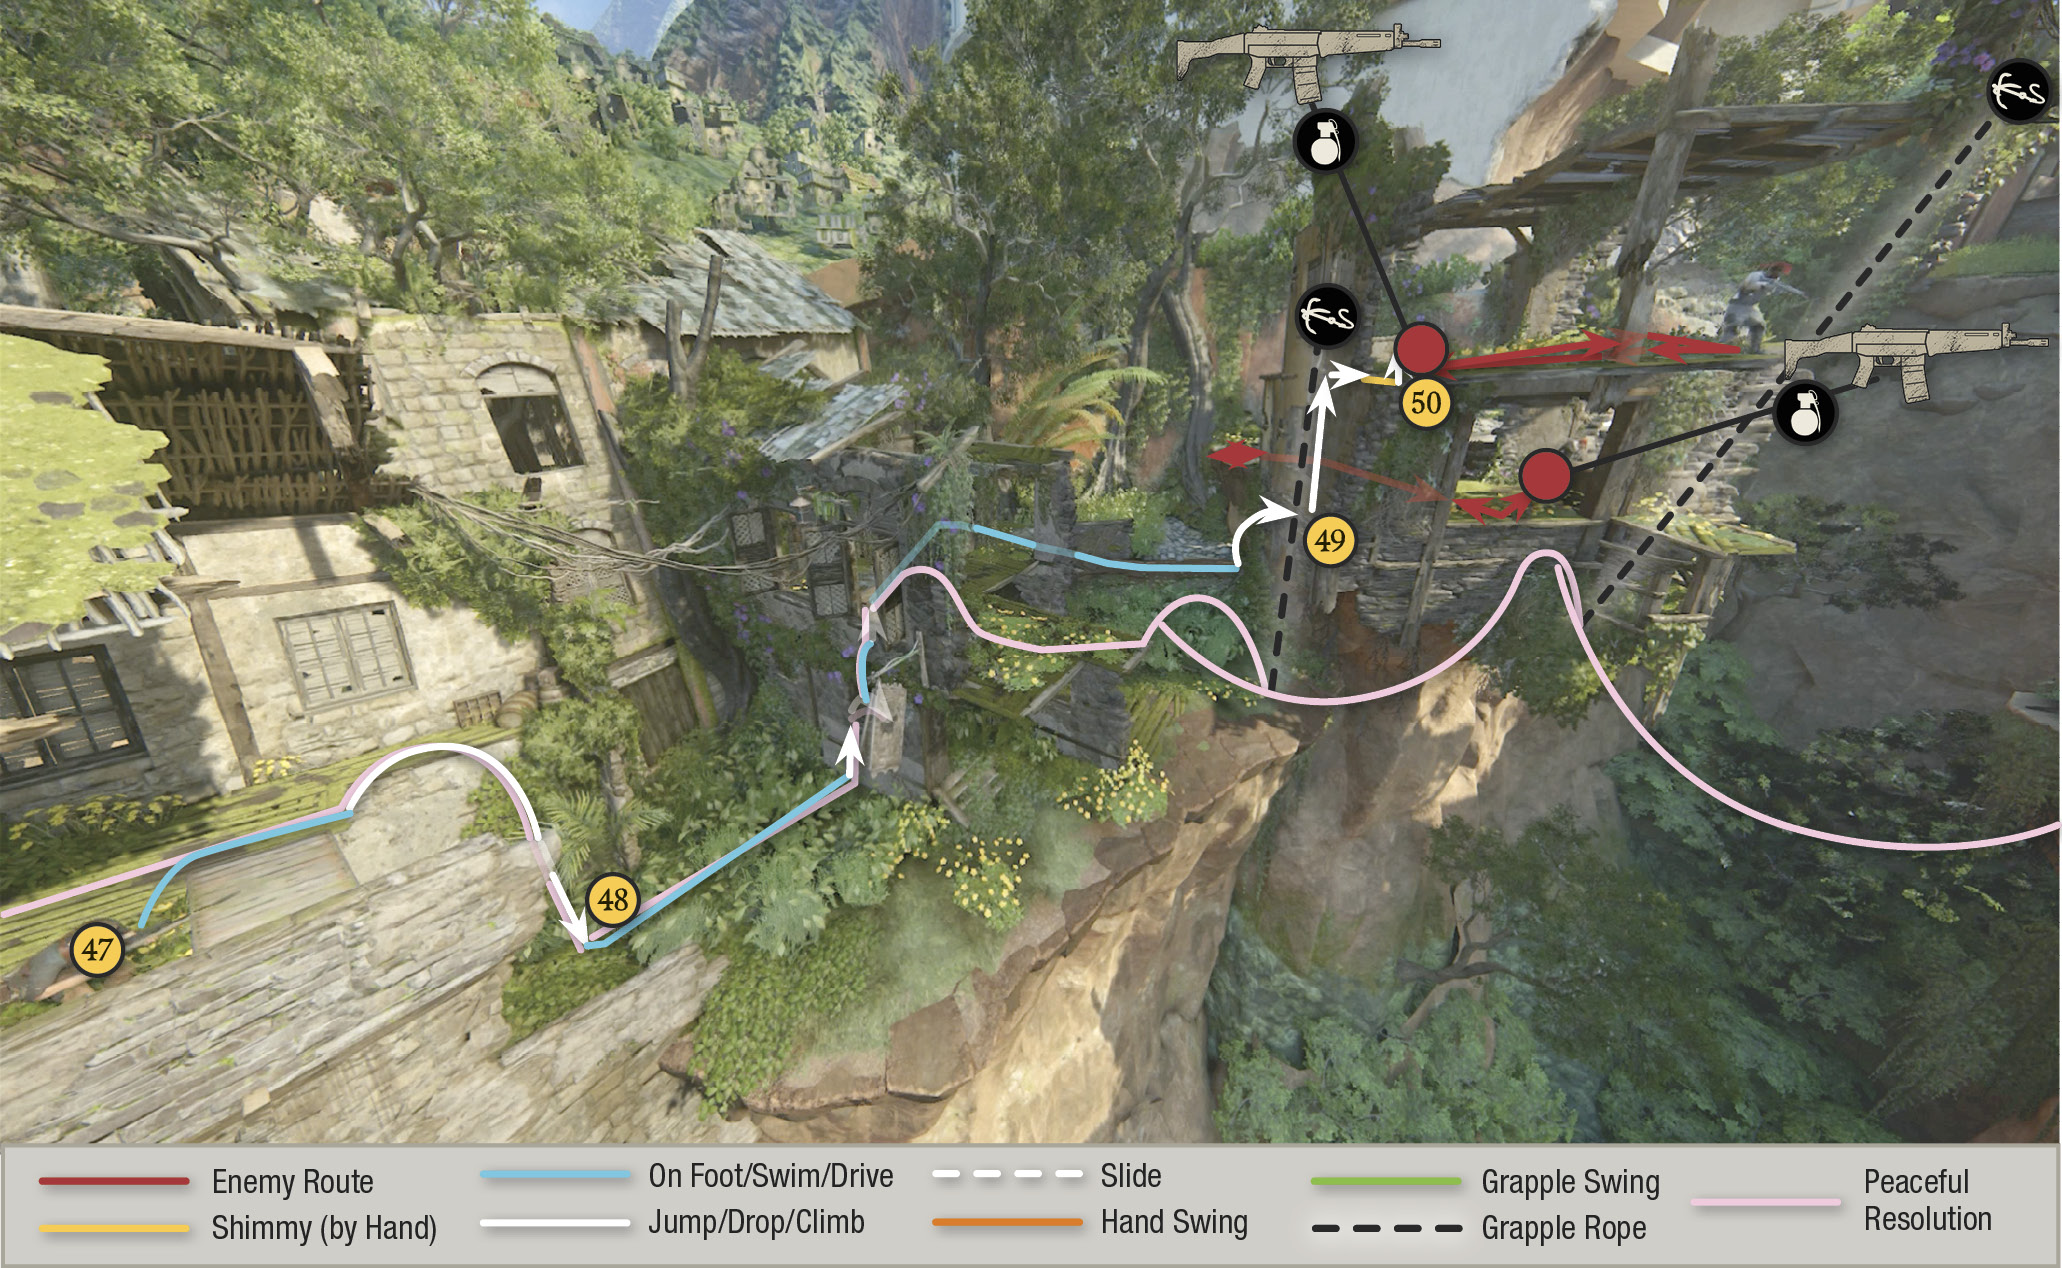
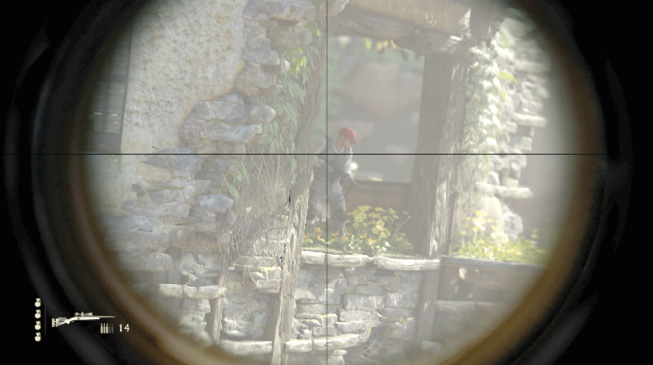
Hear those two guards chatting on the far building? An easy option is to simply pick them off from your perch (47) with the Mazur sniper rifle. (Note: You may need to shoot the lower guard through the closed window shutters.) Even if you miss your first shots and they fight back, they won’t alert other forces up ahead. But you can also try for stealth takedowns on both.
Hop down below (48) and work your way through the plentiful high foliage to the building where the guards are posted. Look up and sling your hook at the grapple point and dangle by the side of the building (49). Climb the rope and grab the edge of the floor. Then slide under the guard (50) and pull him over the edge.
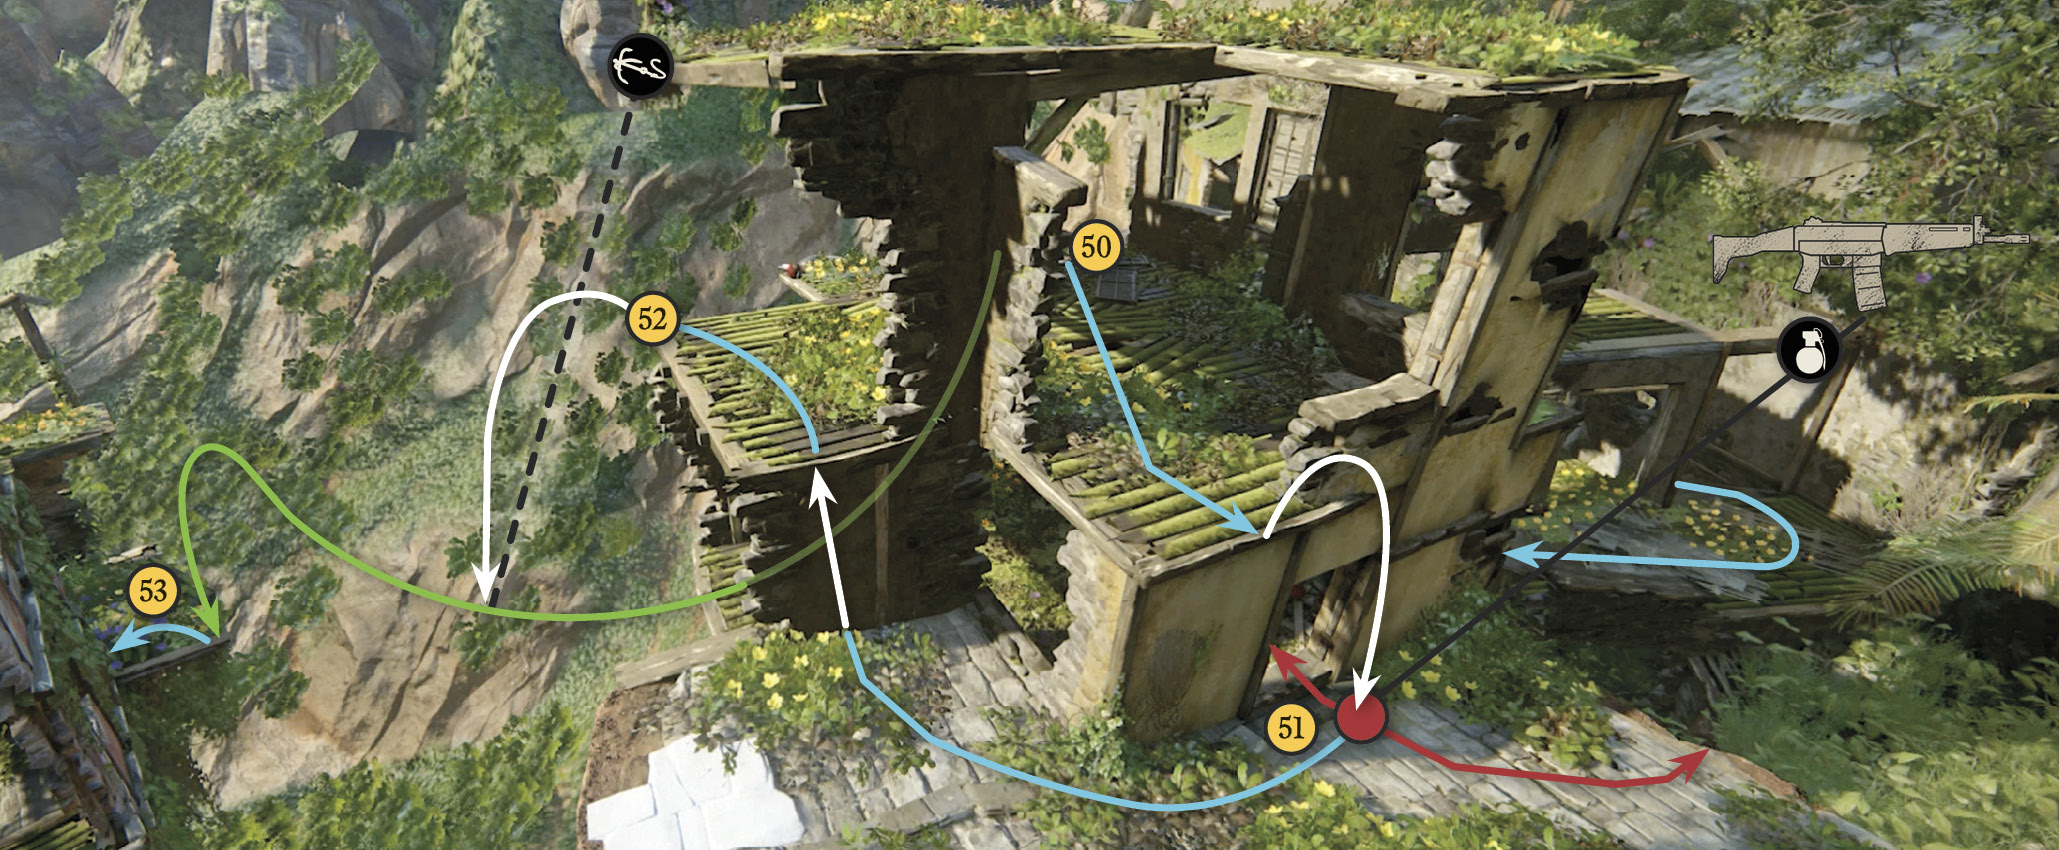
Pull up onto the floor and go to its opposite corner. Wait patiently until the lower guard patrols out of the door beneath you (51) and perform a jump attack. Climb back up to the second floor and go to the outer corner (52) to find the grapple point above you. Use it to swing across to the flower-covered balcony (53) of the next building. This spawns a new enemy deployment ahead.
Get to the Administration Building
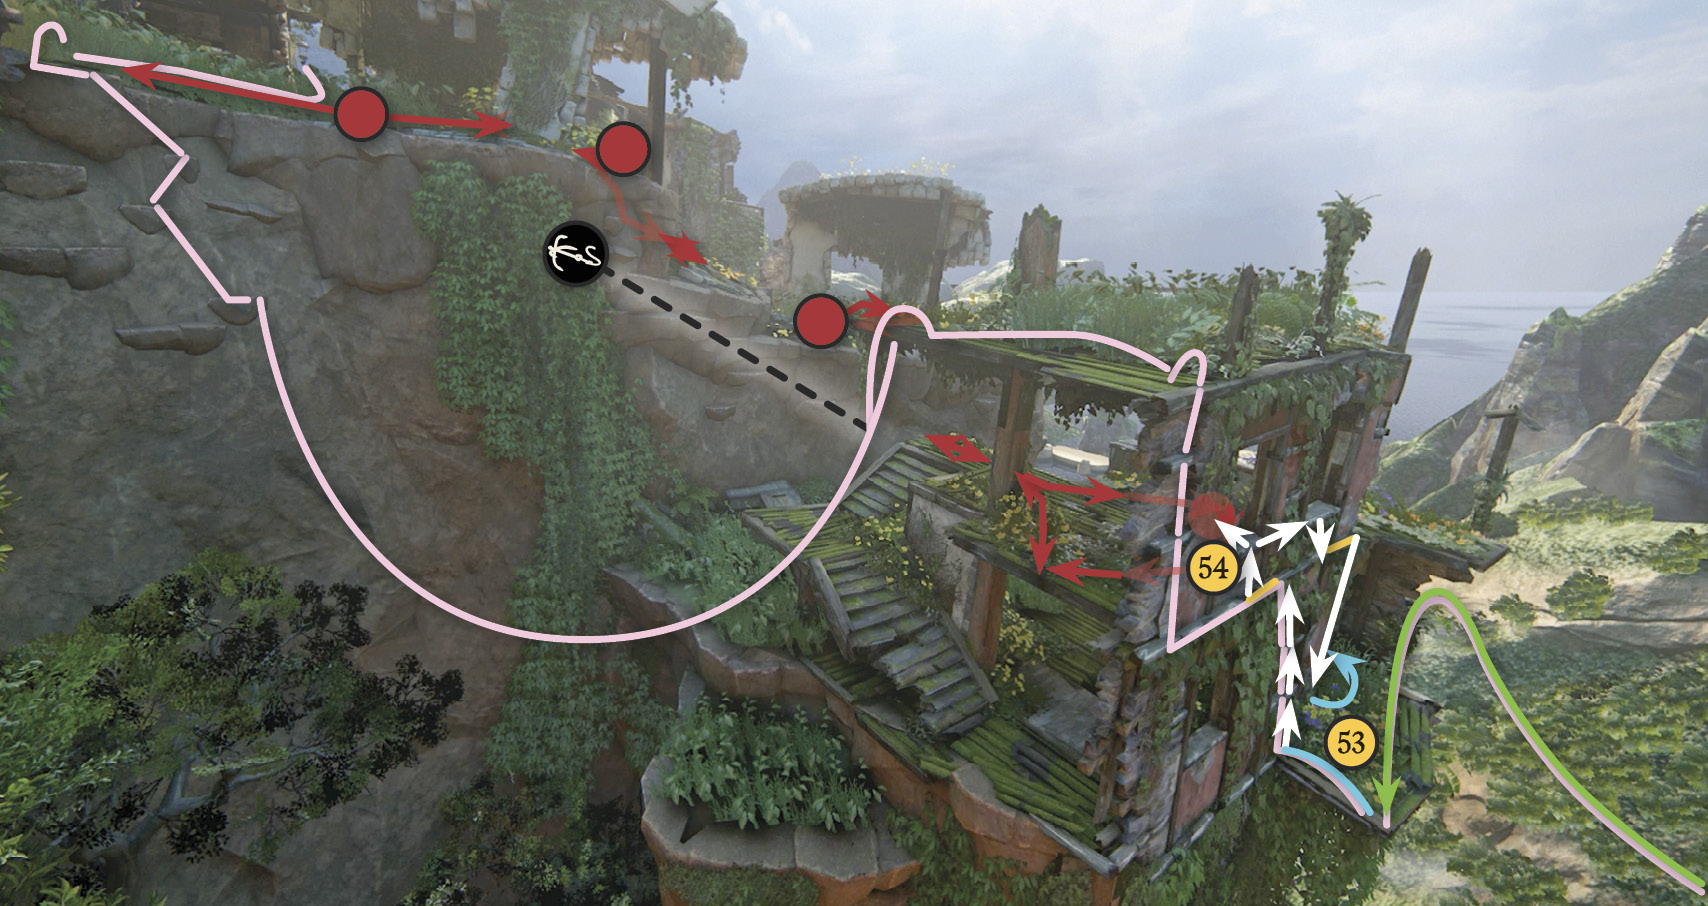
Climb the wall and slide left to hang beneath the leftmost window (54). A guard approaches, but don’t pull him through the window until the guard on the next terrace isn’t looking. Now you can avoid other enemies deployed up the hillside (including a nasty heavy trooper at the top) by shimmying back to the right, dropping to the flowered balcony again, and then creeping to the right through the high grass (55) until you spot the grapple point above.
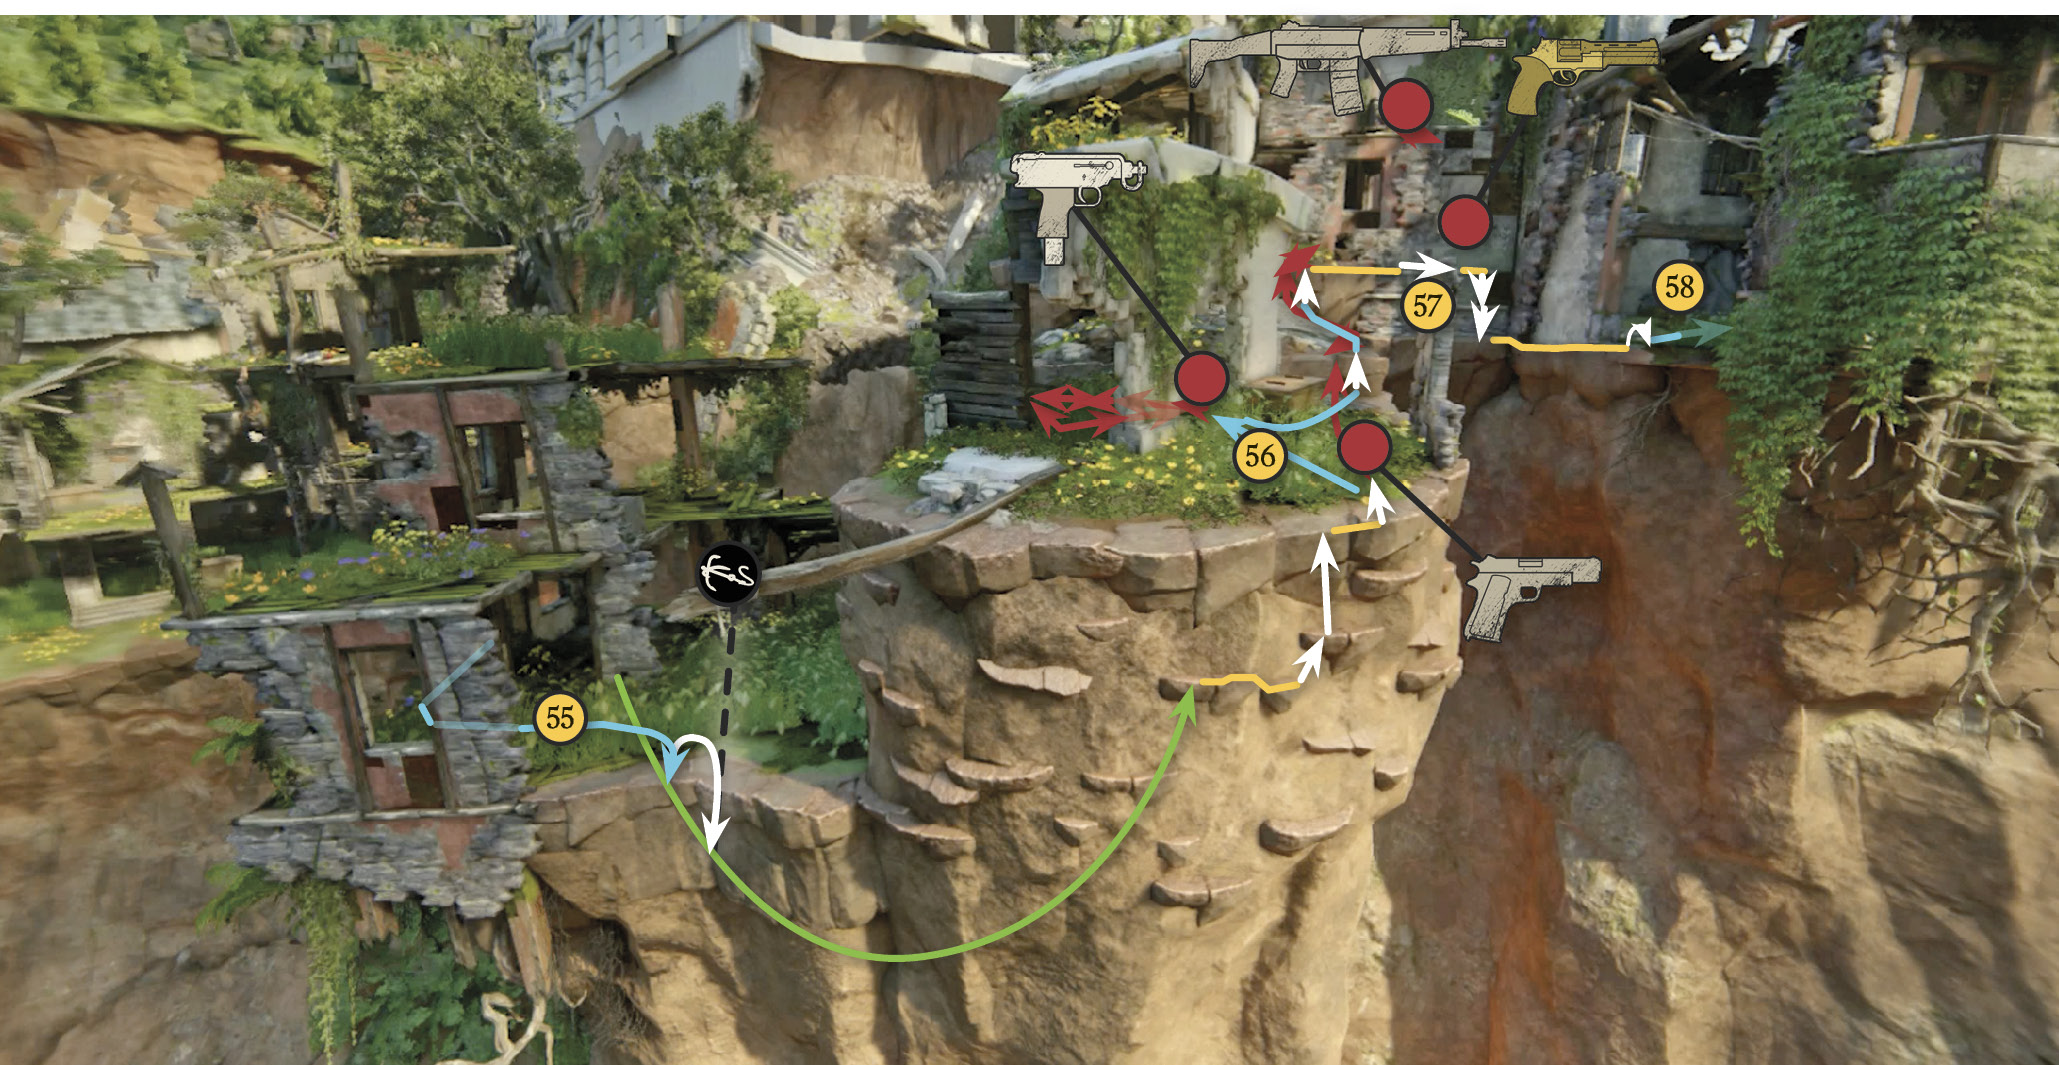
Use the grapple point to swing around the curve of the cliff and jump to the handholds there. Climb to the top and hang, waiting until the coast is clear, then pull up and roll into hiding in the tall grass (56). Here you can stealth-kill two different guards who wander through the grass. After that, look uphill to make sure the guard up on the high platform isn’t looking down at you, then hustle toward his position and hang on the second reddish rock wall (57).
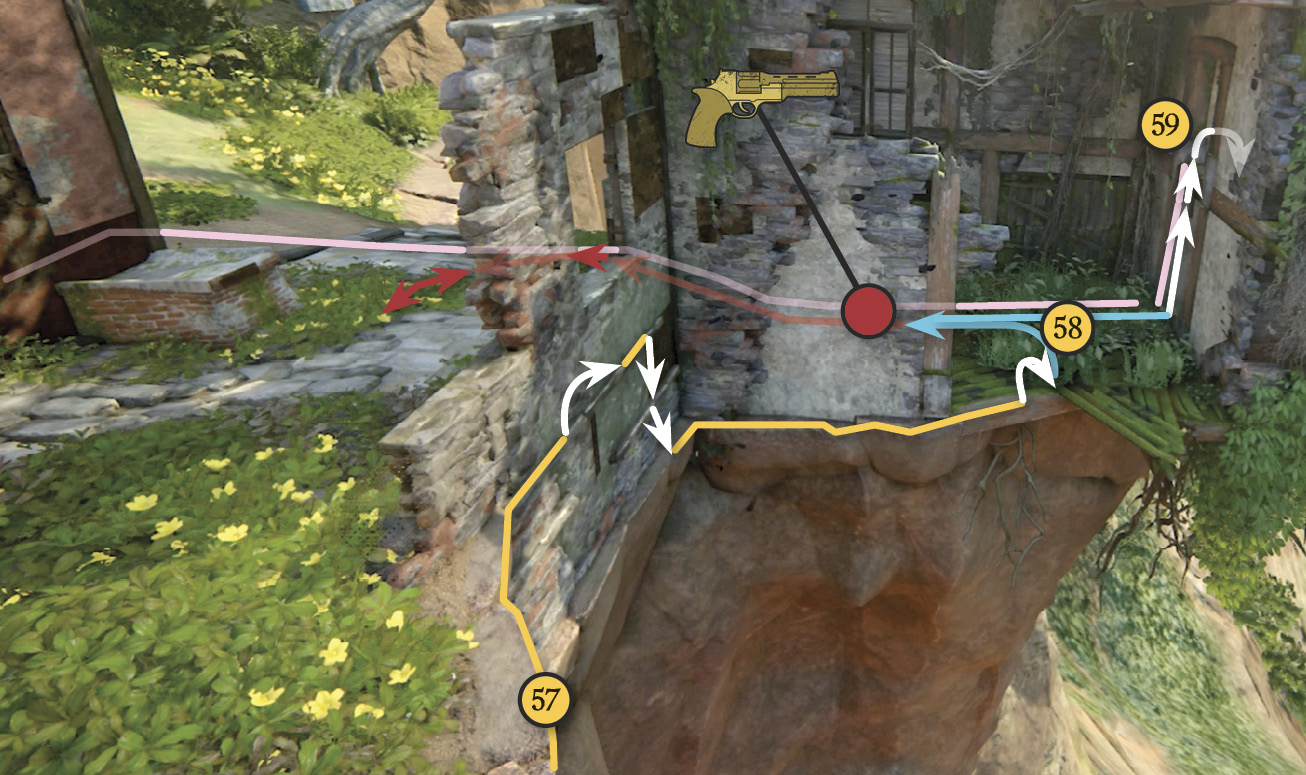
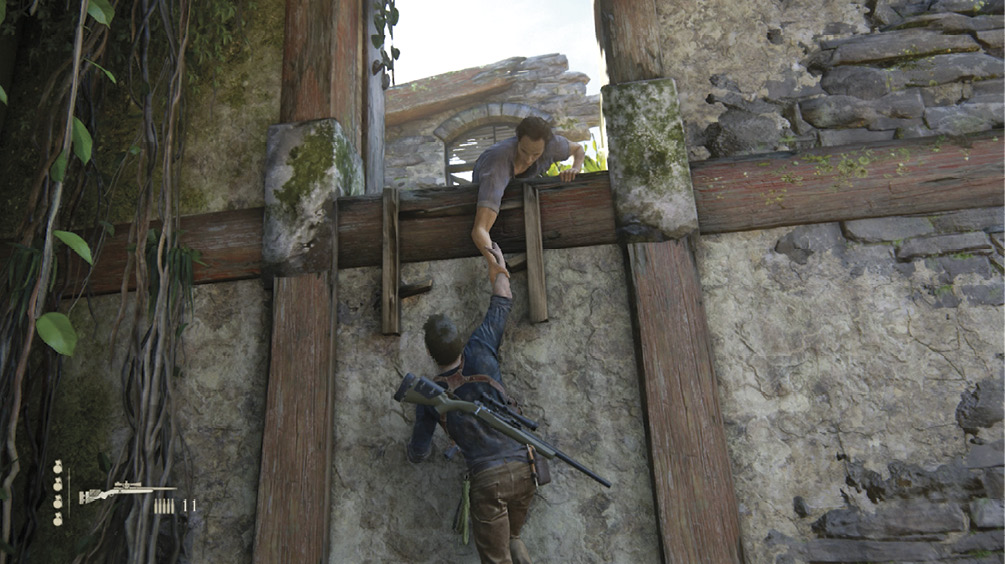
Shimmy rightward as the rock transitions to the beams on a wall; keep working around the corner to the right until you see the tall grass (58). Pull up and roll into the high grass when the guard patrols out, then take him down when he returns. Approach the broken ladder (59) and press to boost Sam up to it. Then jump up to grab Sam’s hand; he pulls Nathan up.
Shuffle to the right along the narrow ledge, then jump to the handhold to shimmy the last few feet to the next platform. Step through the door and drop down into the next room. Then open the marked door for a frightening near-death experience.
After the door falls, traverse to the narrow ledge’s end (60), then jump to grab the beam above. Shimmy around the corner and enter the tower door. Inside, turn left and climb to the top of the ladder. Pull yourself over to hang on the outside of the wall (61), then shimmy around the corner.
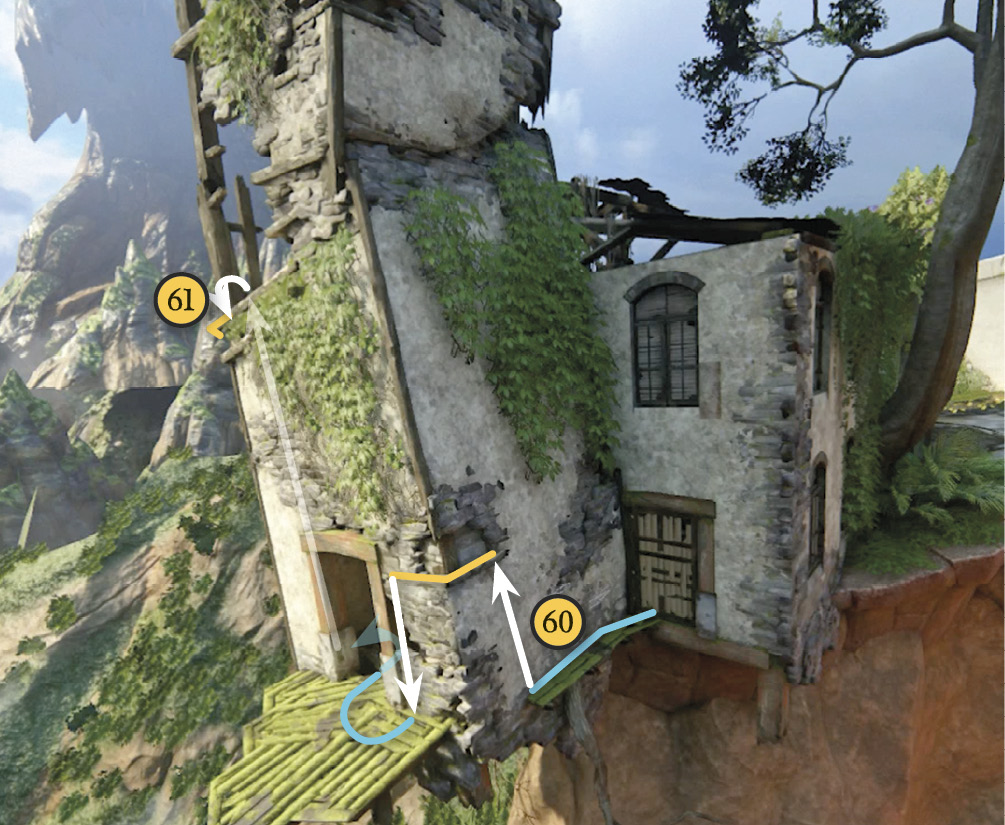
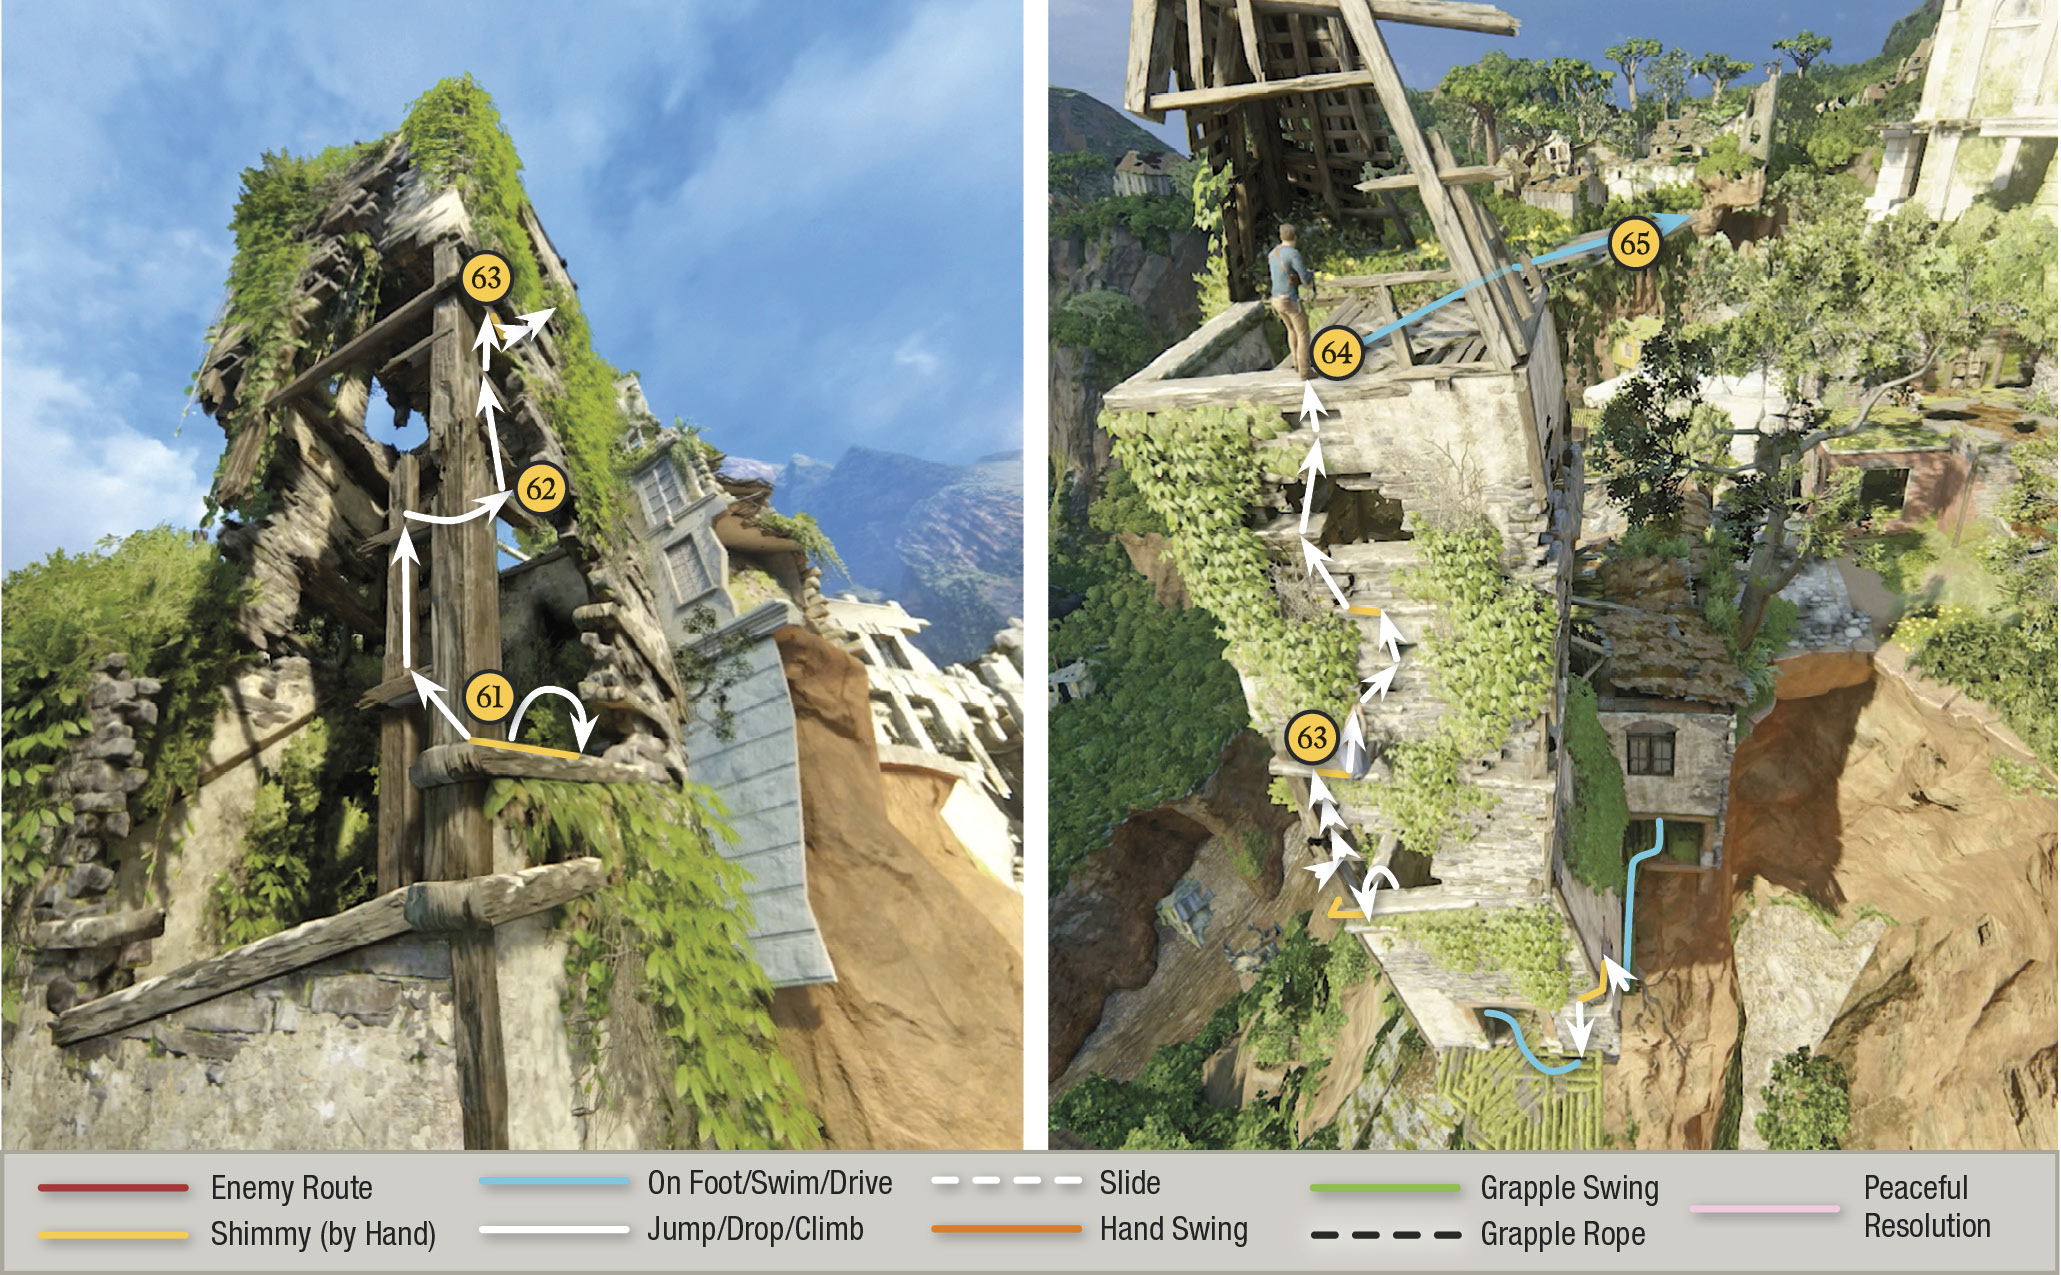
Jump up two broken beams, then reach rightward around the corner to grab another beam (62). Climb straight up to the intact beam (63) and shimmy rightward a bit, then continue up that same side all the way to the top (64). Walk to the end of the ramp (65).
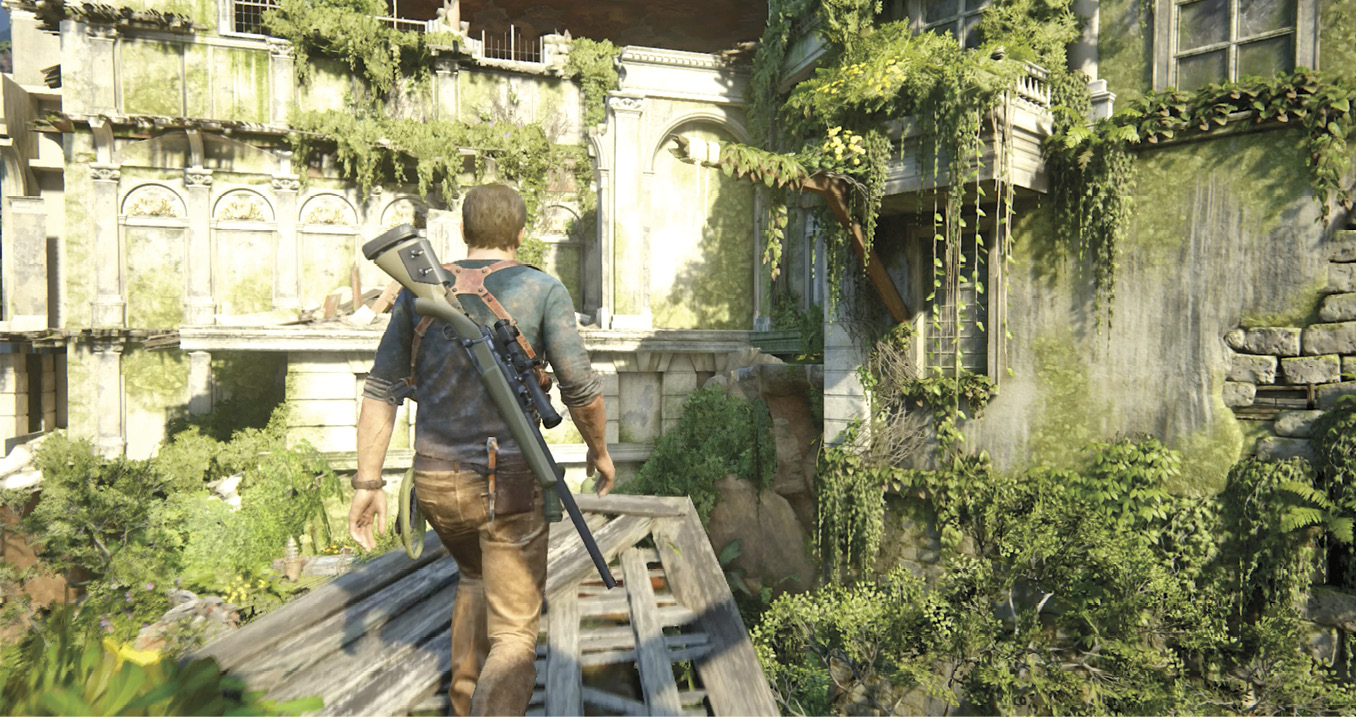
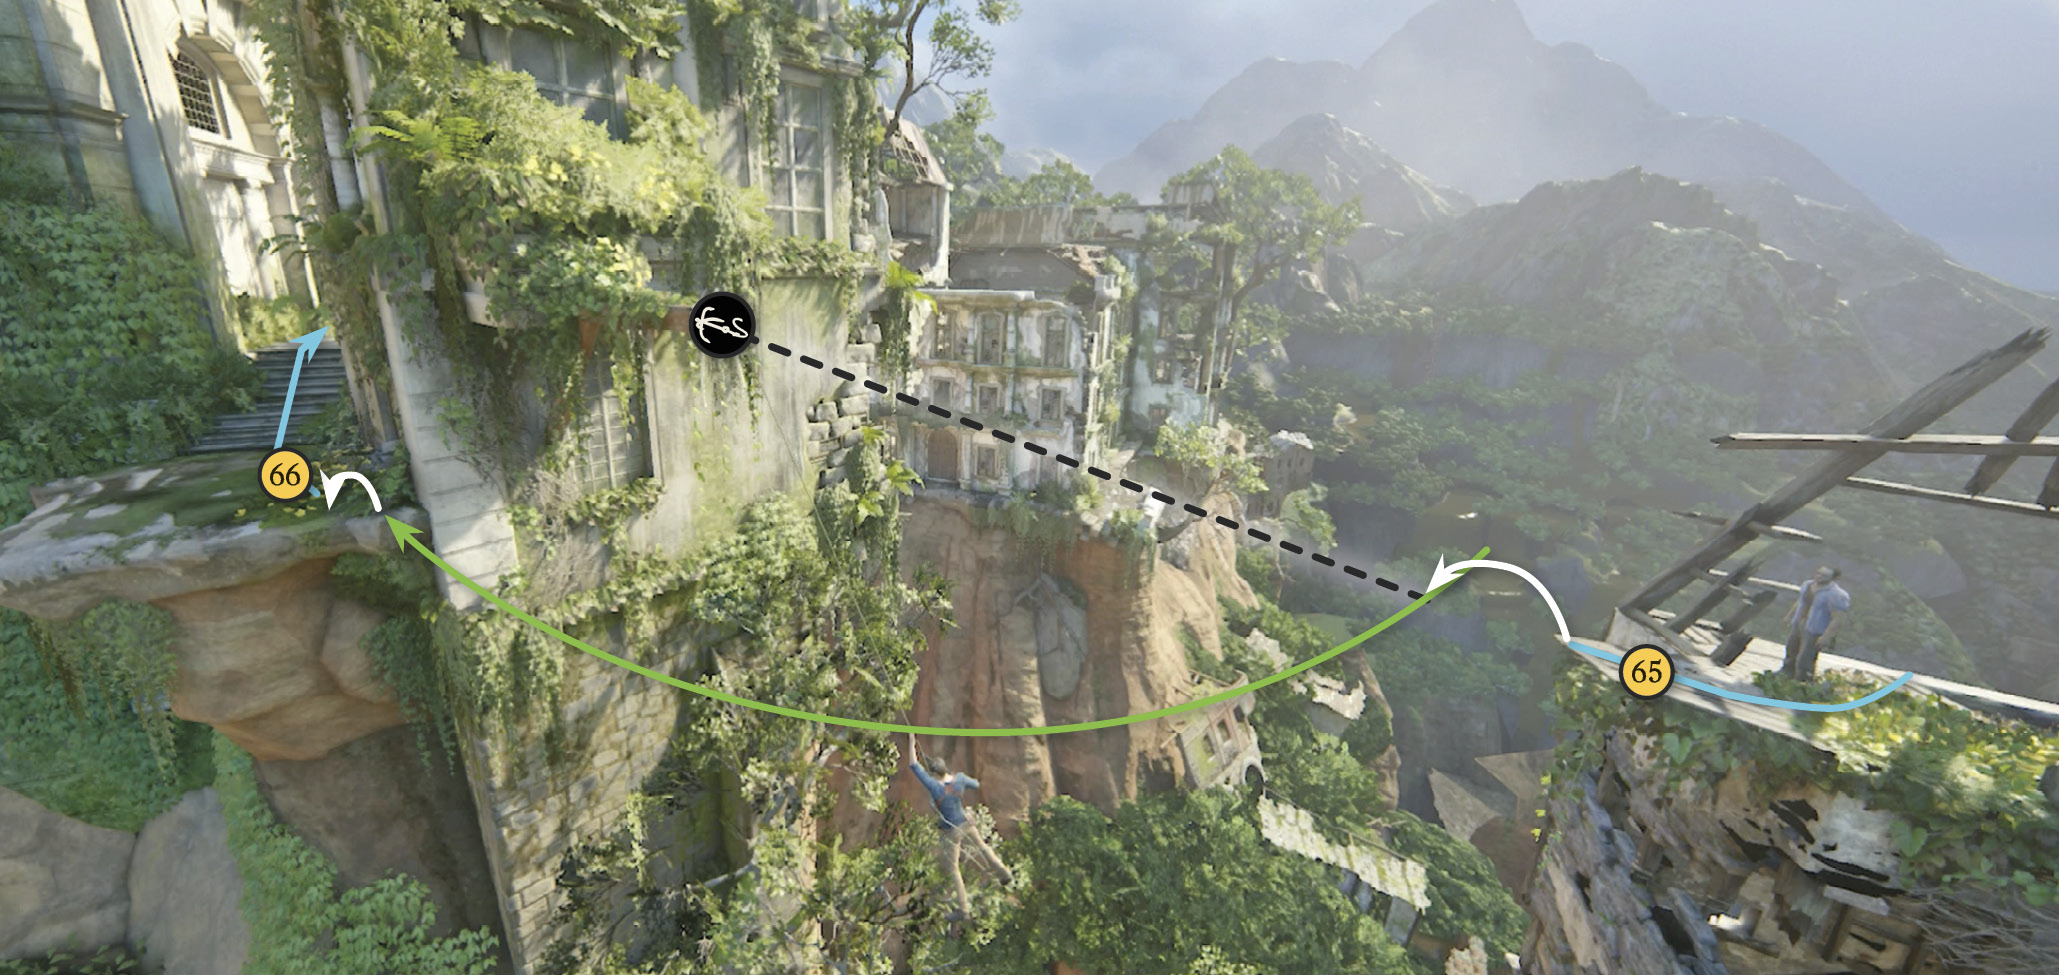
Use the grapple point to swing across to the ledge (66) on the huge white building. Climb the stairs, then hop off the wall. Here you can turn right, walk to the drop-off, and make another grapple-swing to a hidden treasure. Then swing back to the ledge and enter the building via the window (67).
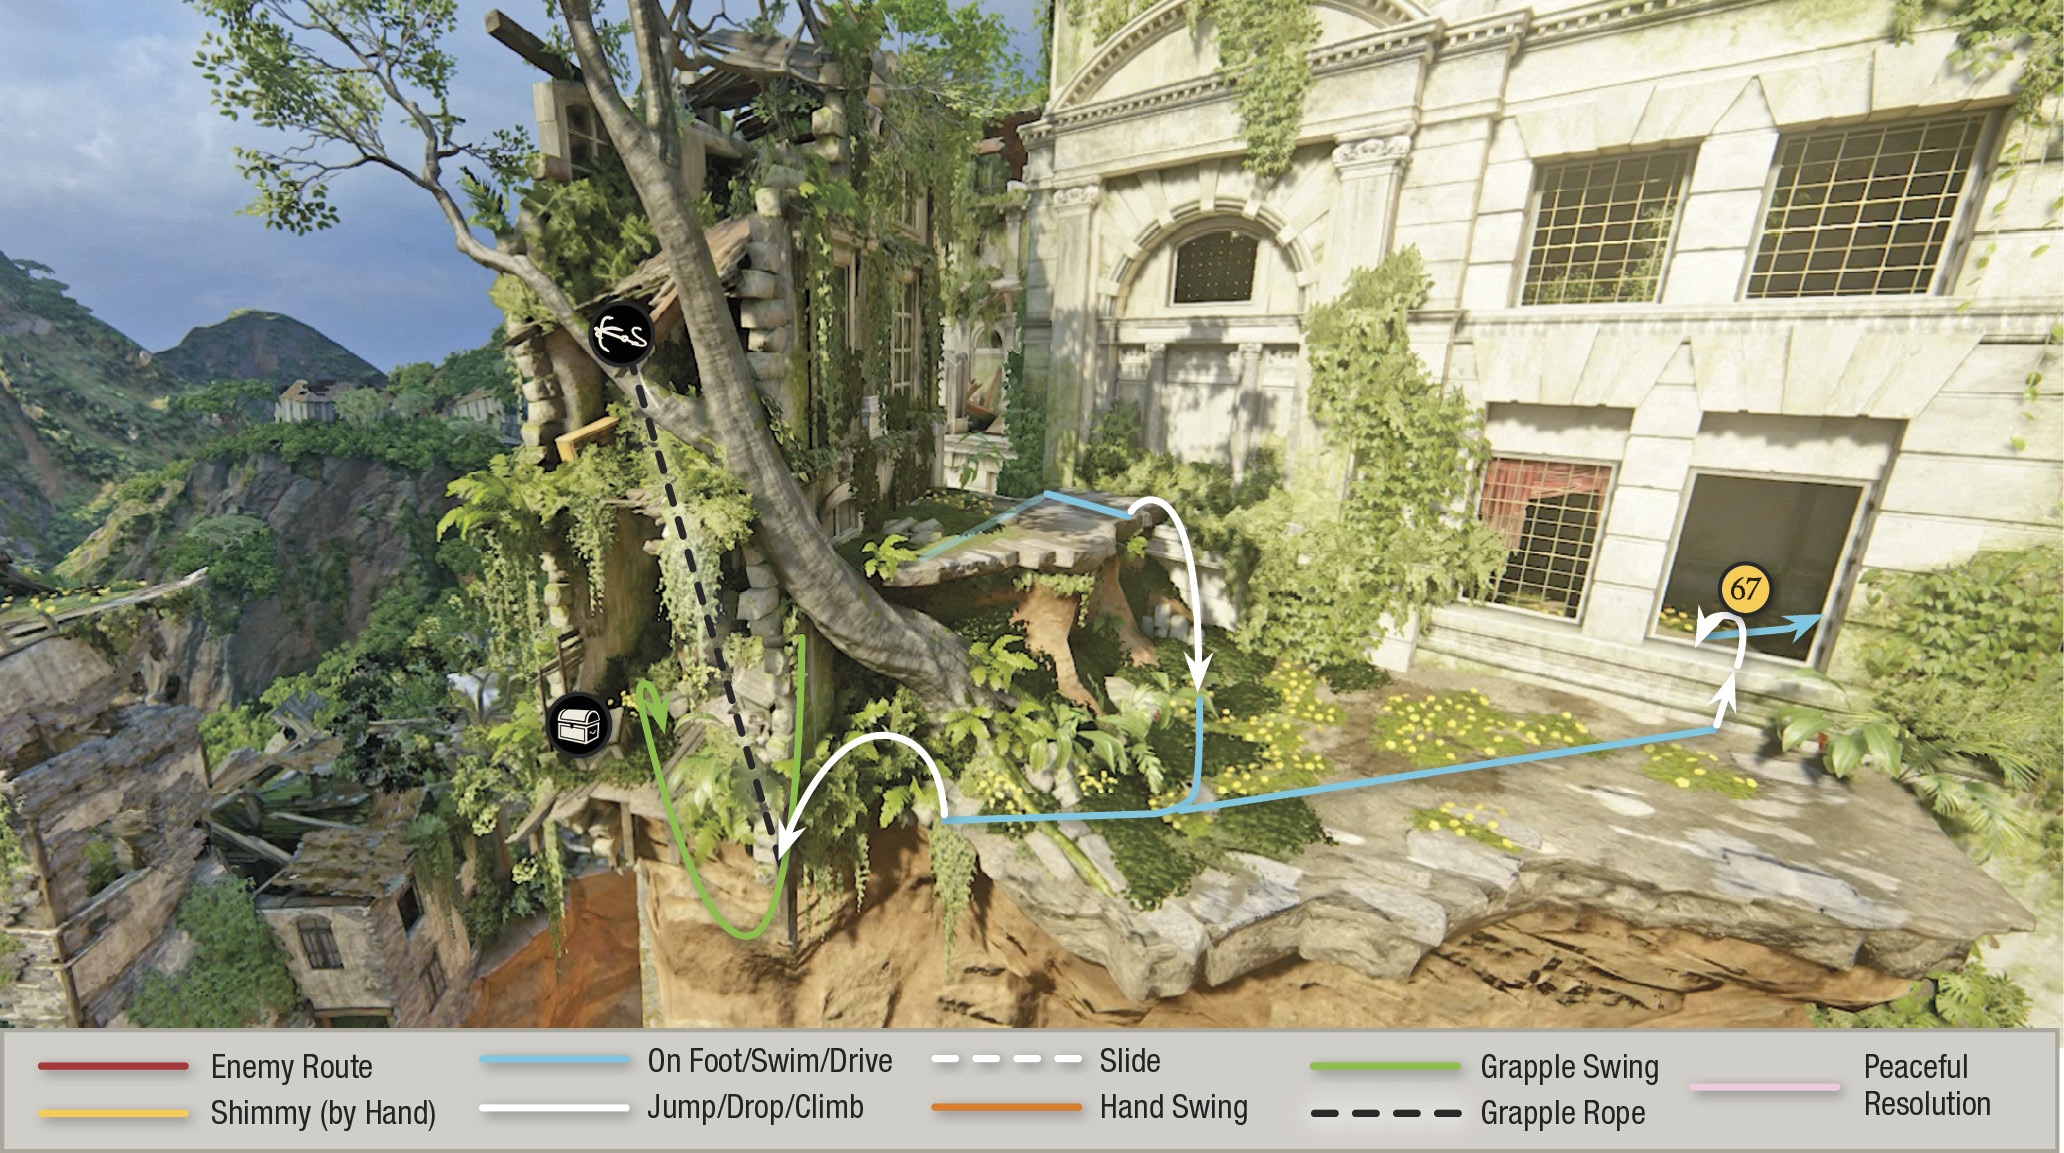
 Slipjoint Claspknife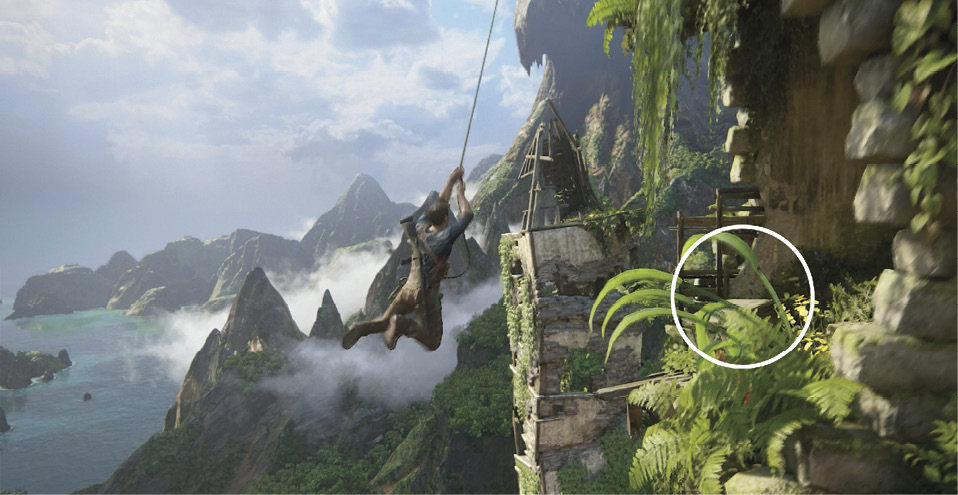 When you finally swing to the base of the big white building and climb the stairs, turn right and leap off the ledge. As you plummet, fling your grapple hook at the post on the wall to your right. Swing around into a room where you can find the Slipjoint Claspknife sitting on a crate. Use the same grapple point to swing back around to the ledge. |
Find the Treasury
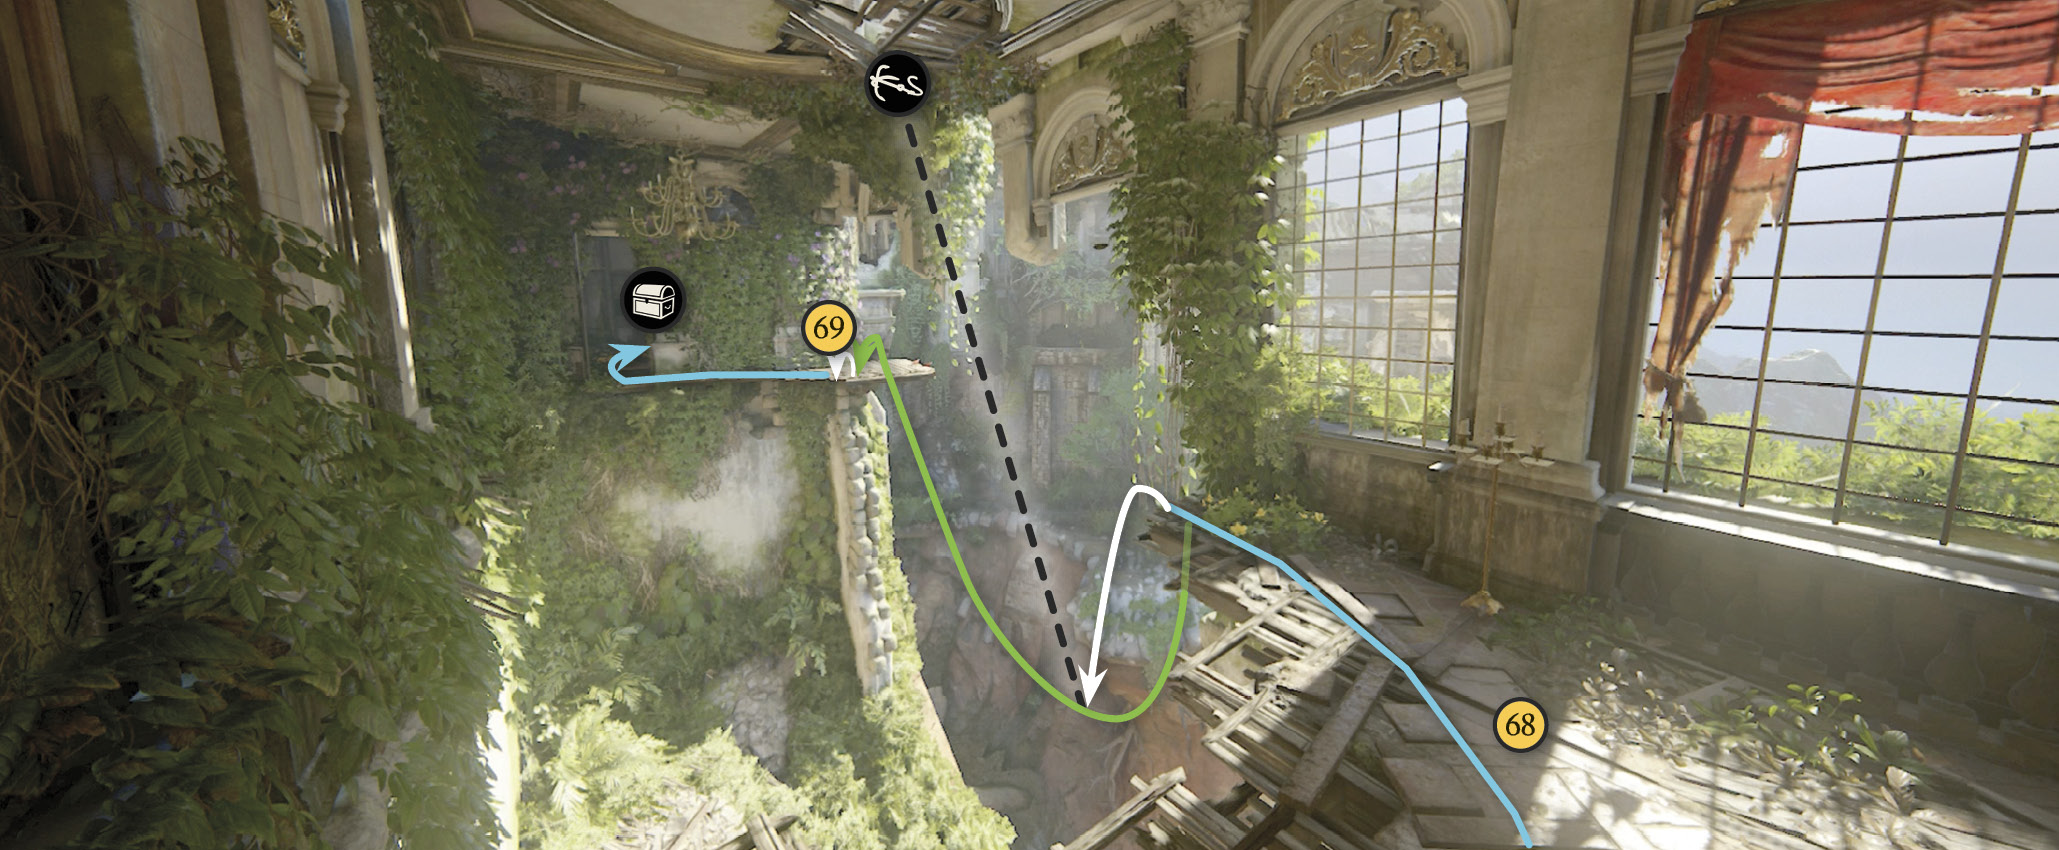
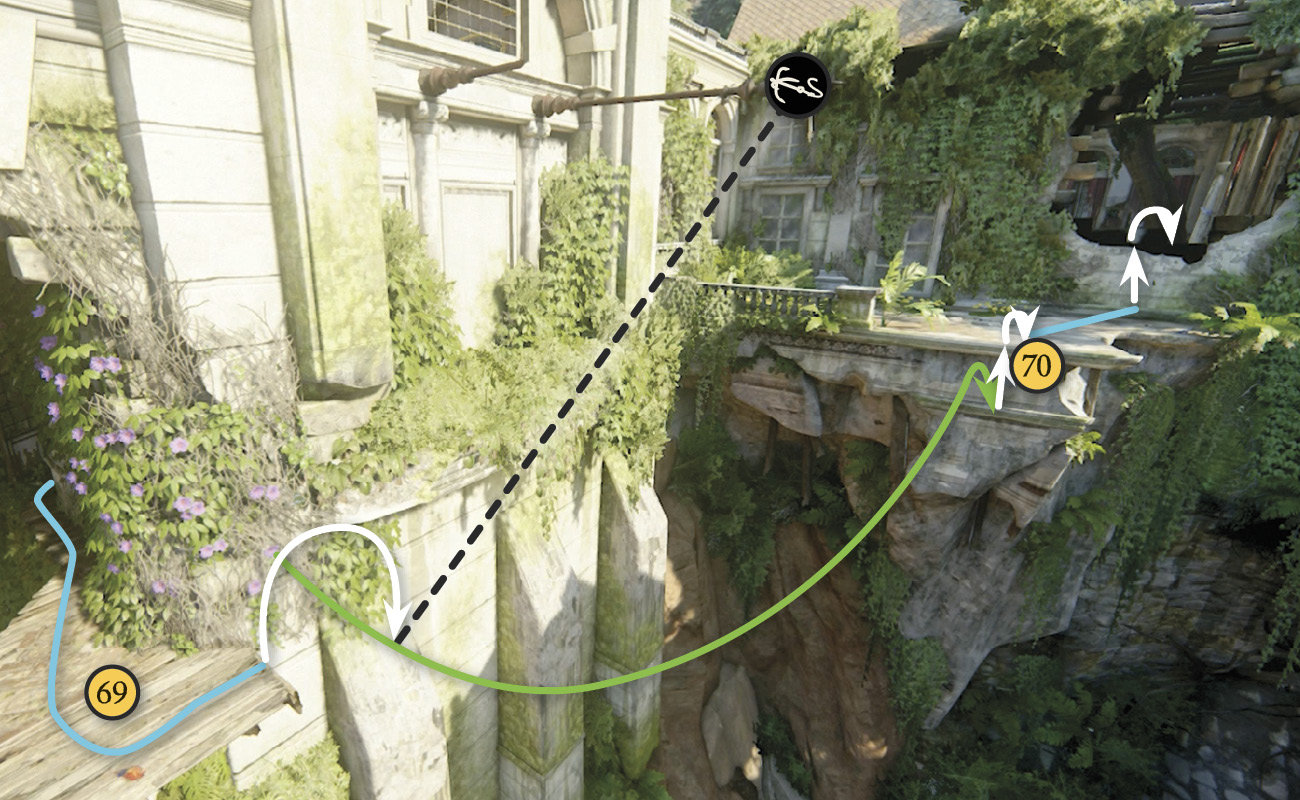
Go into the next room (68) and use the grapple point to swing across the collapsed floor to the other side (69). Here you can head left to find a treasure in the next room, then retrace your route back. Use the next grapple point to swing across the front of the building to land on a broken patio (70).
 Large Bronze Boar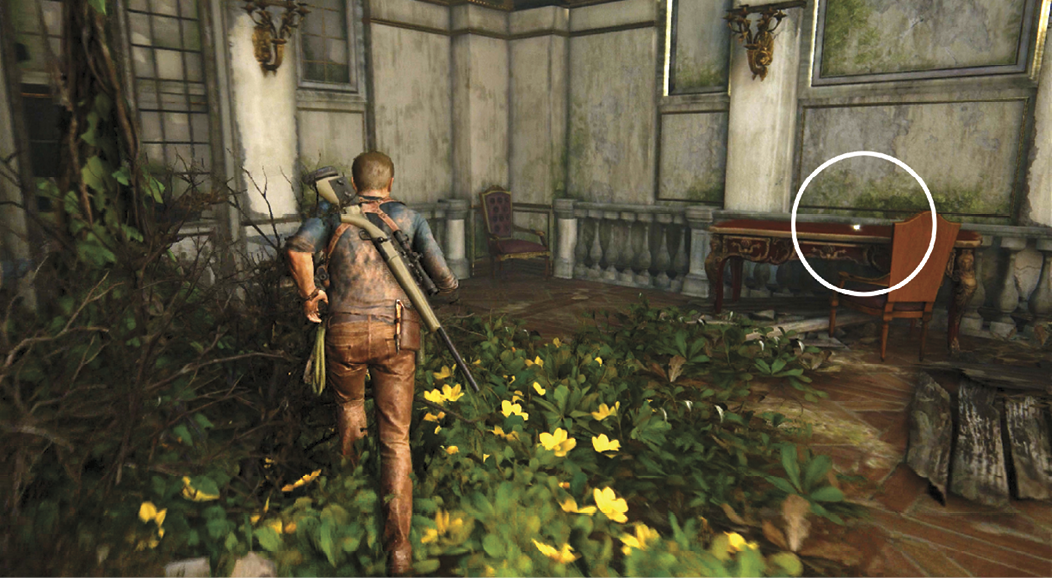 Swing across the collapsed floor just after entering the building, then traverse leftward to the open door. Enter the room to find the Large Bronze Boar sitting on a desk. |
Jump to climb over the broken wall beyond and drop onto a mudslide (71) that you simply ride down to the bottom. Step forward into the great vestibule. You can climb the stairs to the right to find a treasure on the balcony. Then exit the chamber via the open passage (72) on the left side.
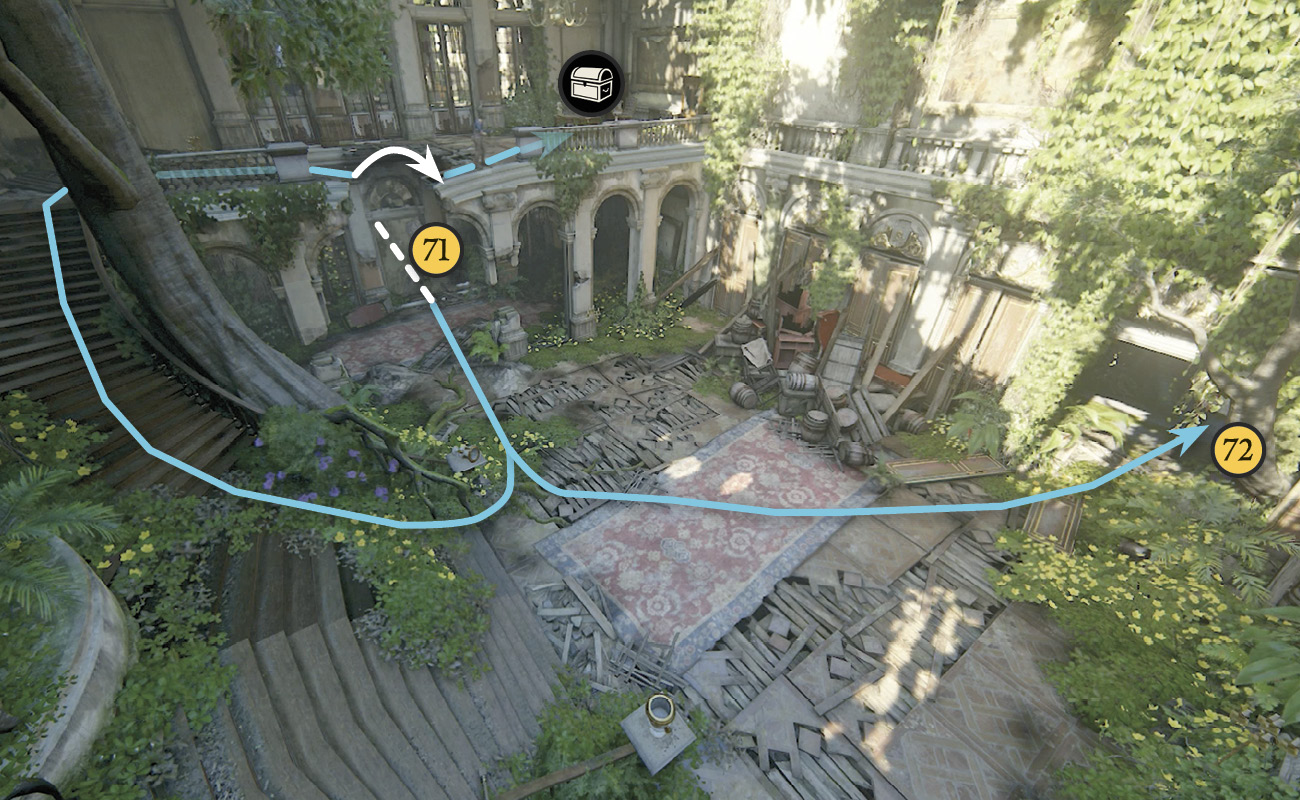
 Stout Vase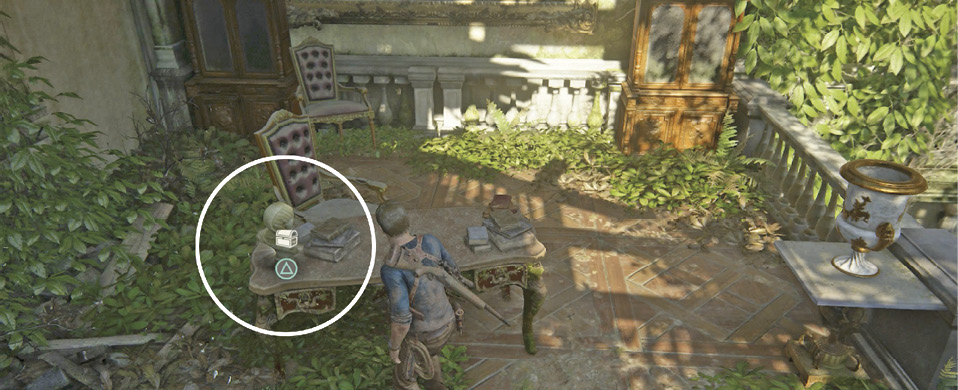 After you ride the mudslide into the vestibule, climb the stairs to the right and hop across the gap in the balcony to find the Stout Vase sitting on a table. |
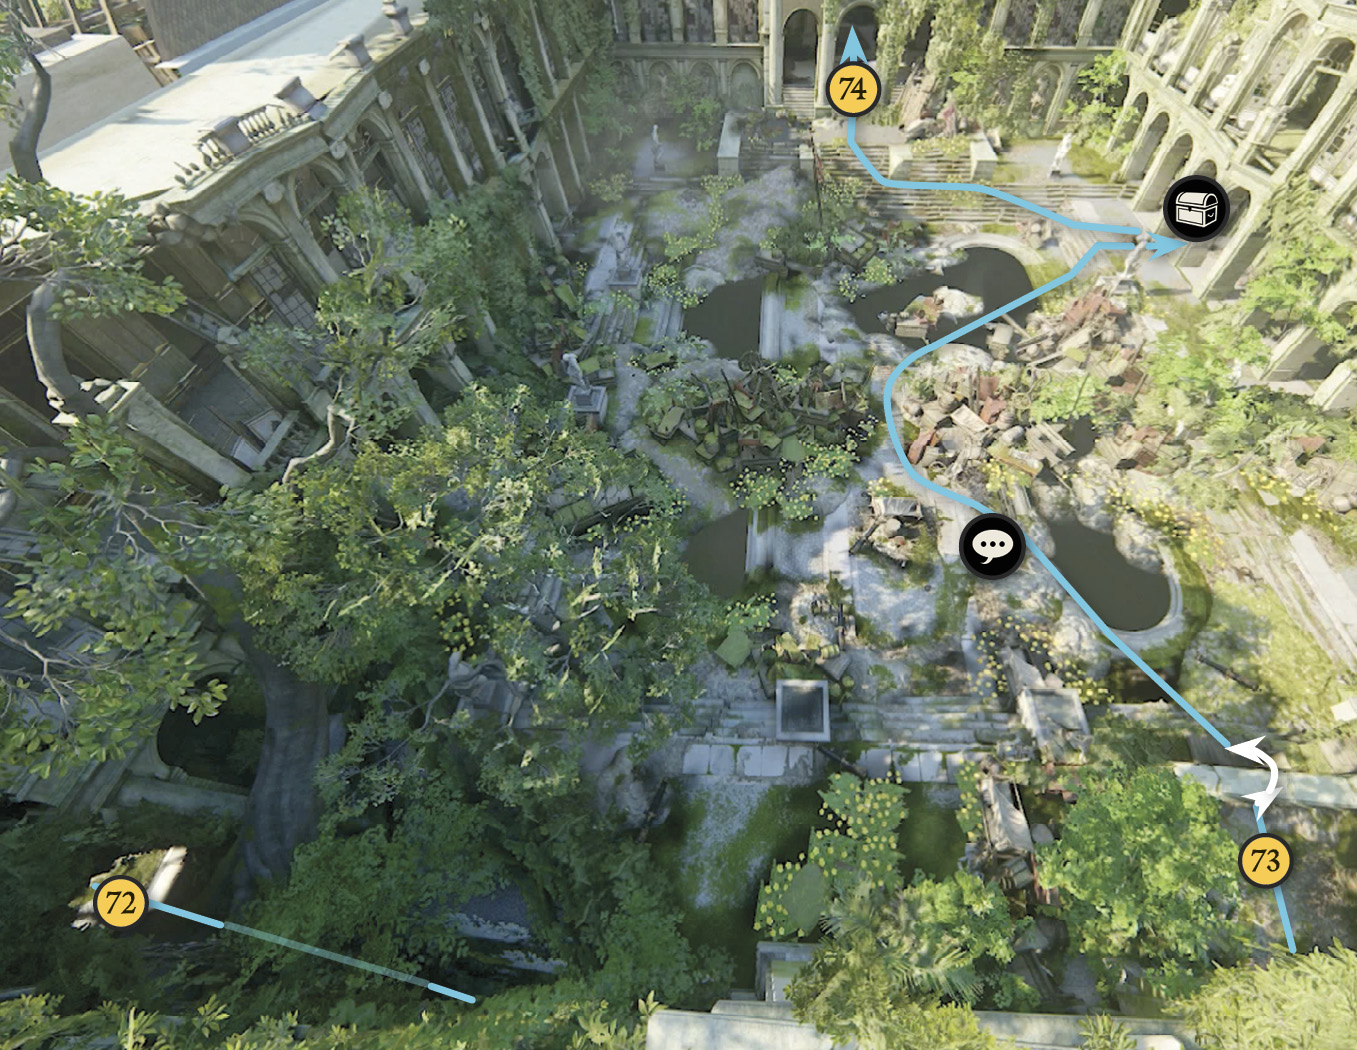
Follow the overgrown walkway to the collapsed wall, then crouch under the debris. At the end, turn left to enter a grand courtyard (73) filled with the vestiges of a brutal pitched battle; Nate automatically sketches the grim scene in his journal. Approach Sam as he examines a nearby corpse and trigger the Optional Conversation, “Bodies are Dressed More Fancy.” Explore a bit more if you want and don’t miss the treasure over on the right side. Then proceed through the grand entry arch at the opposite end of the courtyard (74).
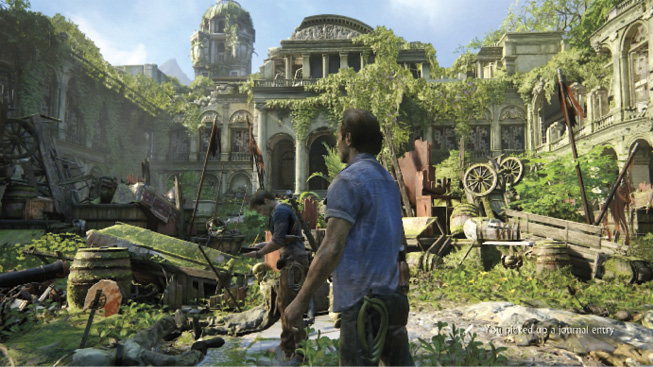
 Mughal Serving Vase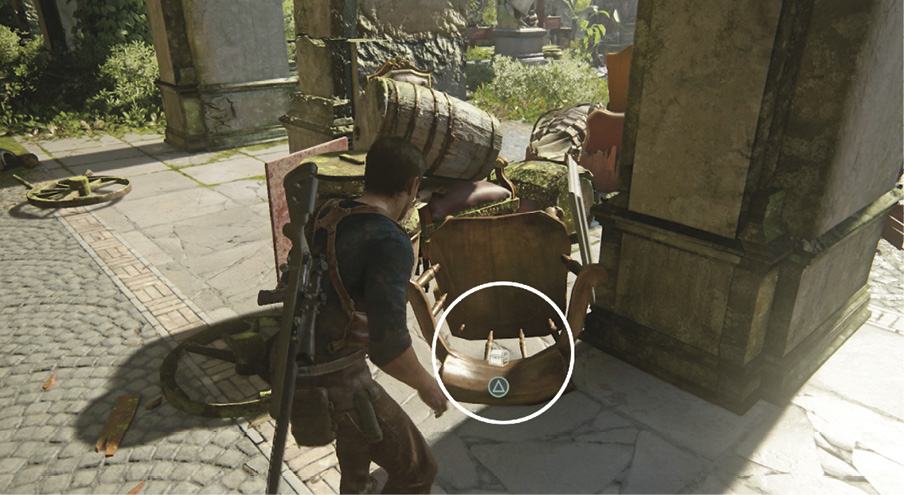 Find the Mughal Serving Vase on an overturned chair behind a stone column on the courtyard’s right side. |
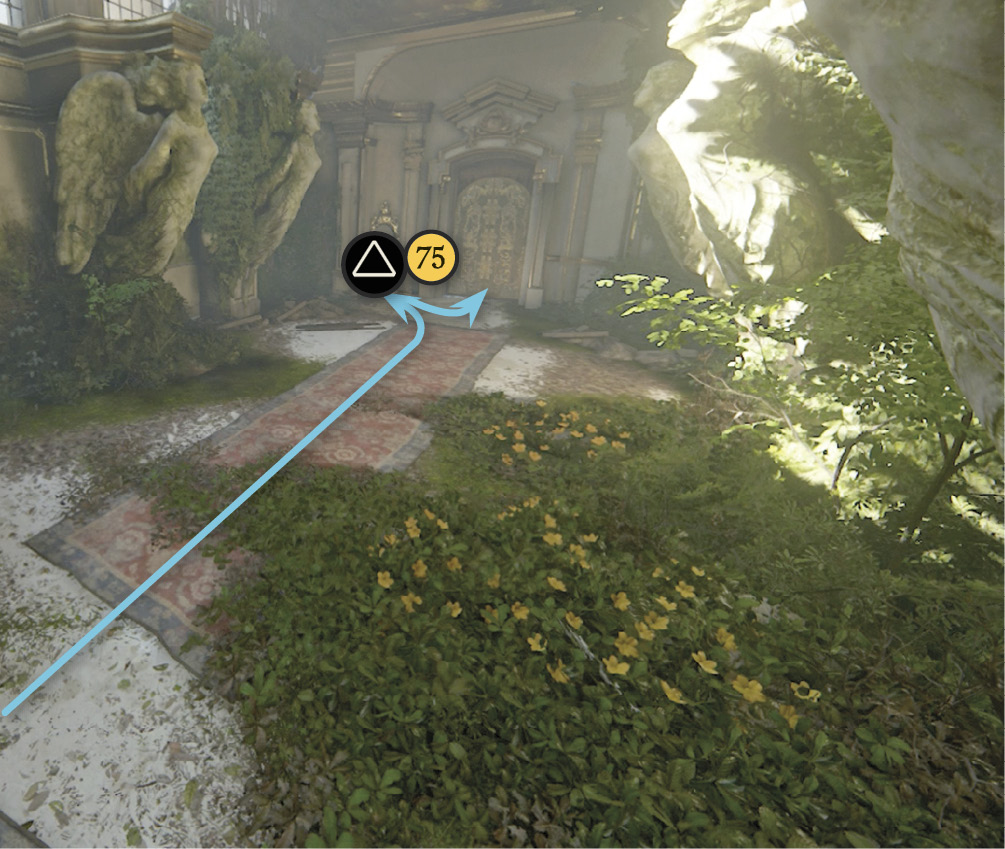
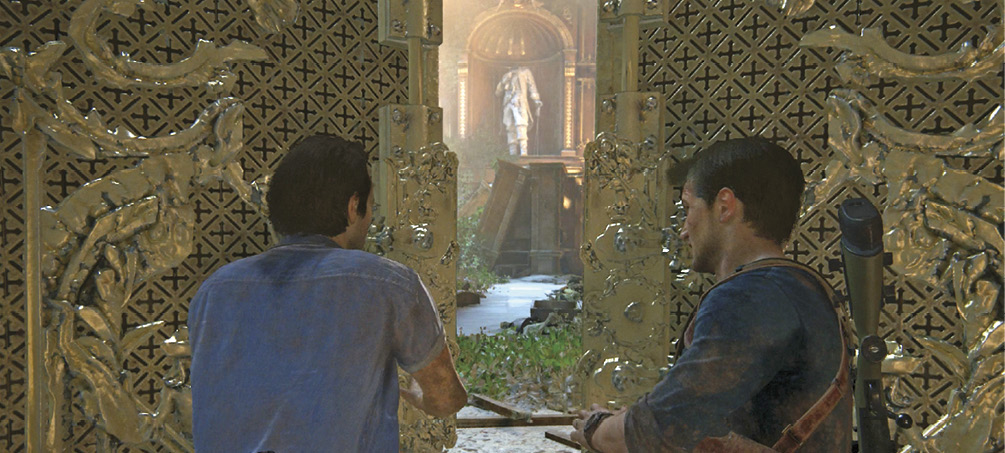
Head down the magnificent angel-lined passage to the marked lever (75) just left of the next door. Pull the lever to crack the door a bit, and then help Sam push it open to trigger the chapter-ending scene: Nathan and Sam step into yet another awe-inspiring interior space.