Uncharted 4: A Thief's End Guide Story Walkthrough
Chapter 13: Marooned
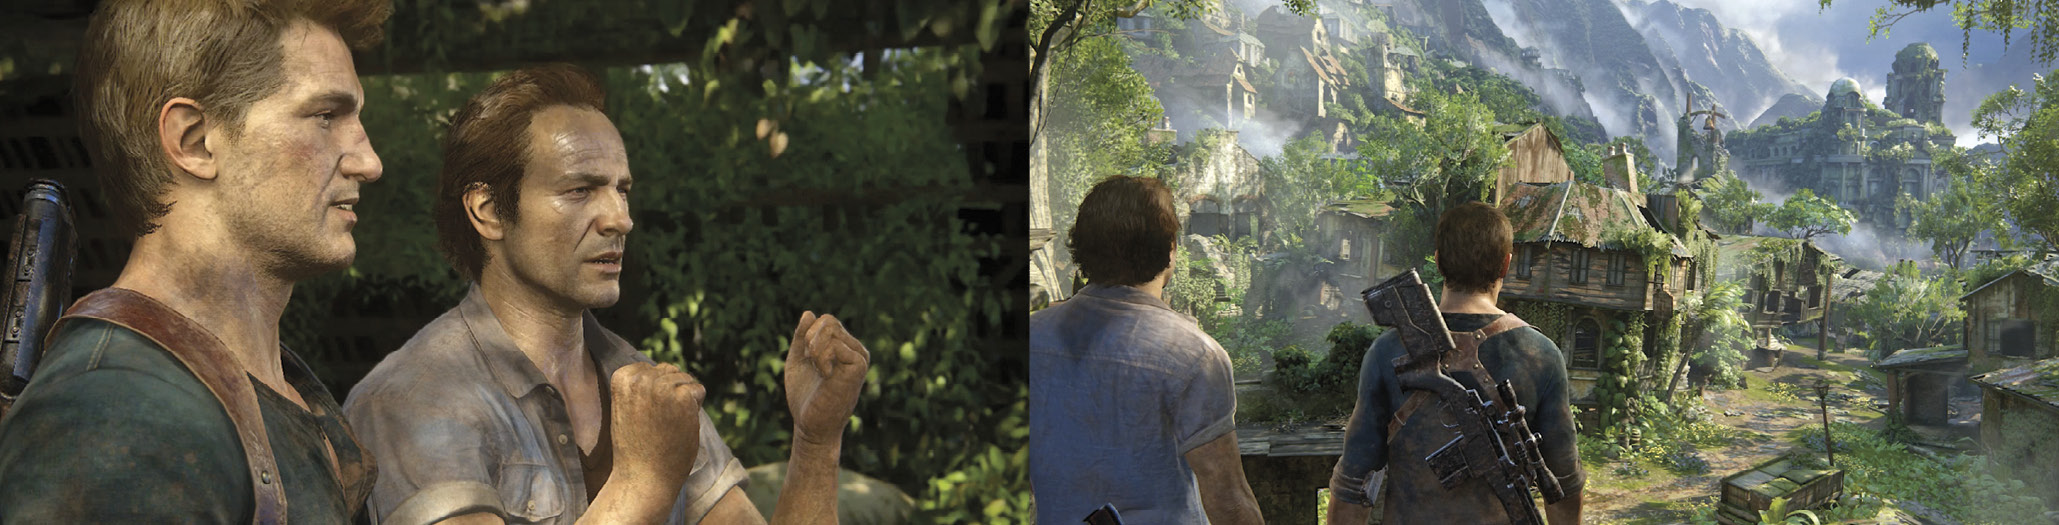
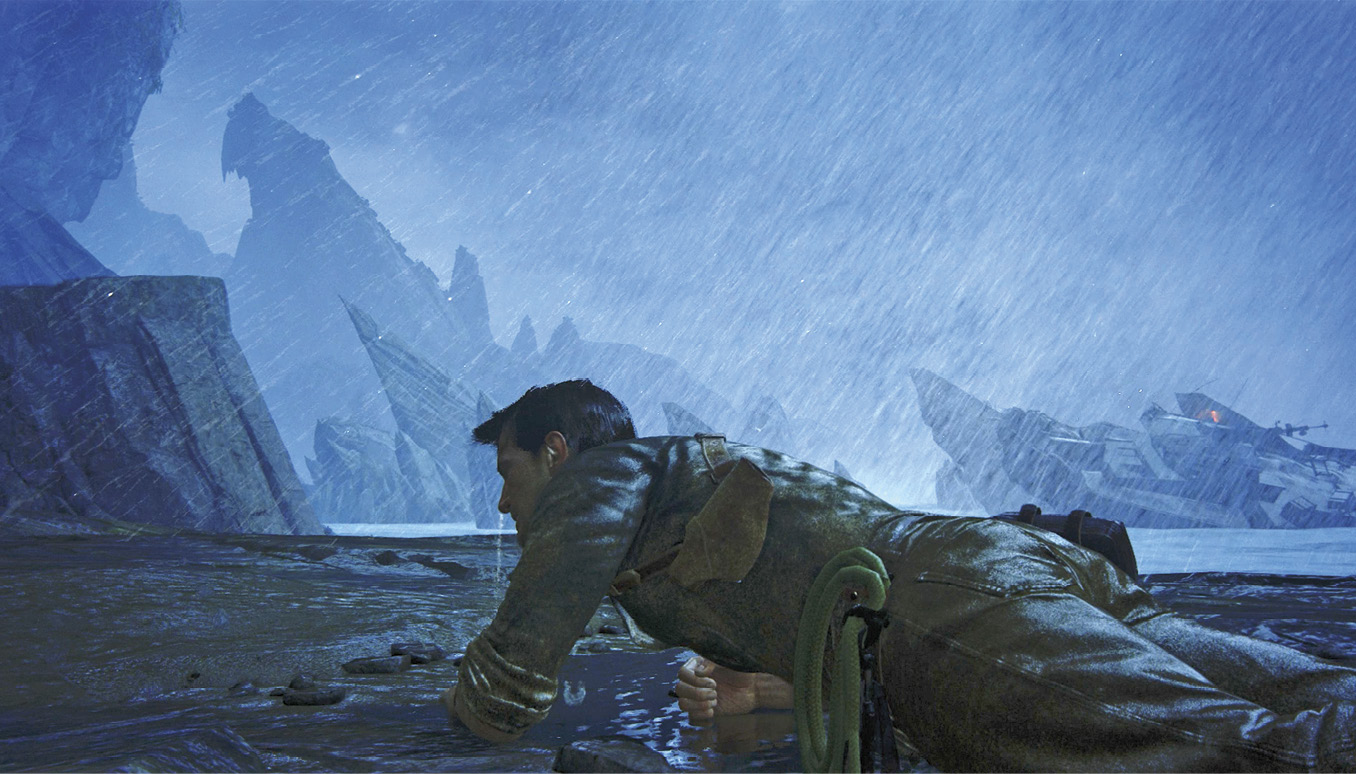
As the storm rages on, Nathan washes up on a beach. Sam is nowhere to be found, and the big Shoreline gunboat lies wrecked and burning on the nearby sand. You just know that Rafe, Nadine, and their mercenary goons are sure to turn up soon.
CollectiblesTreasures: 5 Trophy Started: “Peaceful Resolution” (continues through Chapters 13 and 14) Optional Journal Notes: 2 Optional Journal Entries: 2 New Weapons: Condor, ARX-160, M14 Custom, Copperhead SR7, DShK (Crushing only) |
Traverse the Wet Cliffs
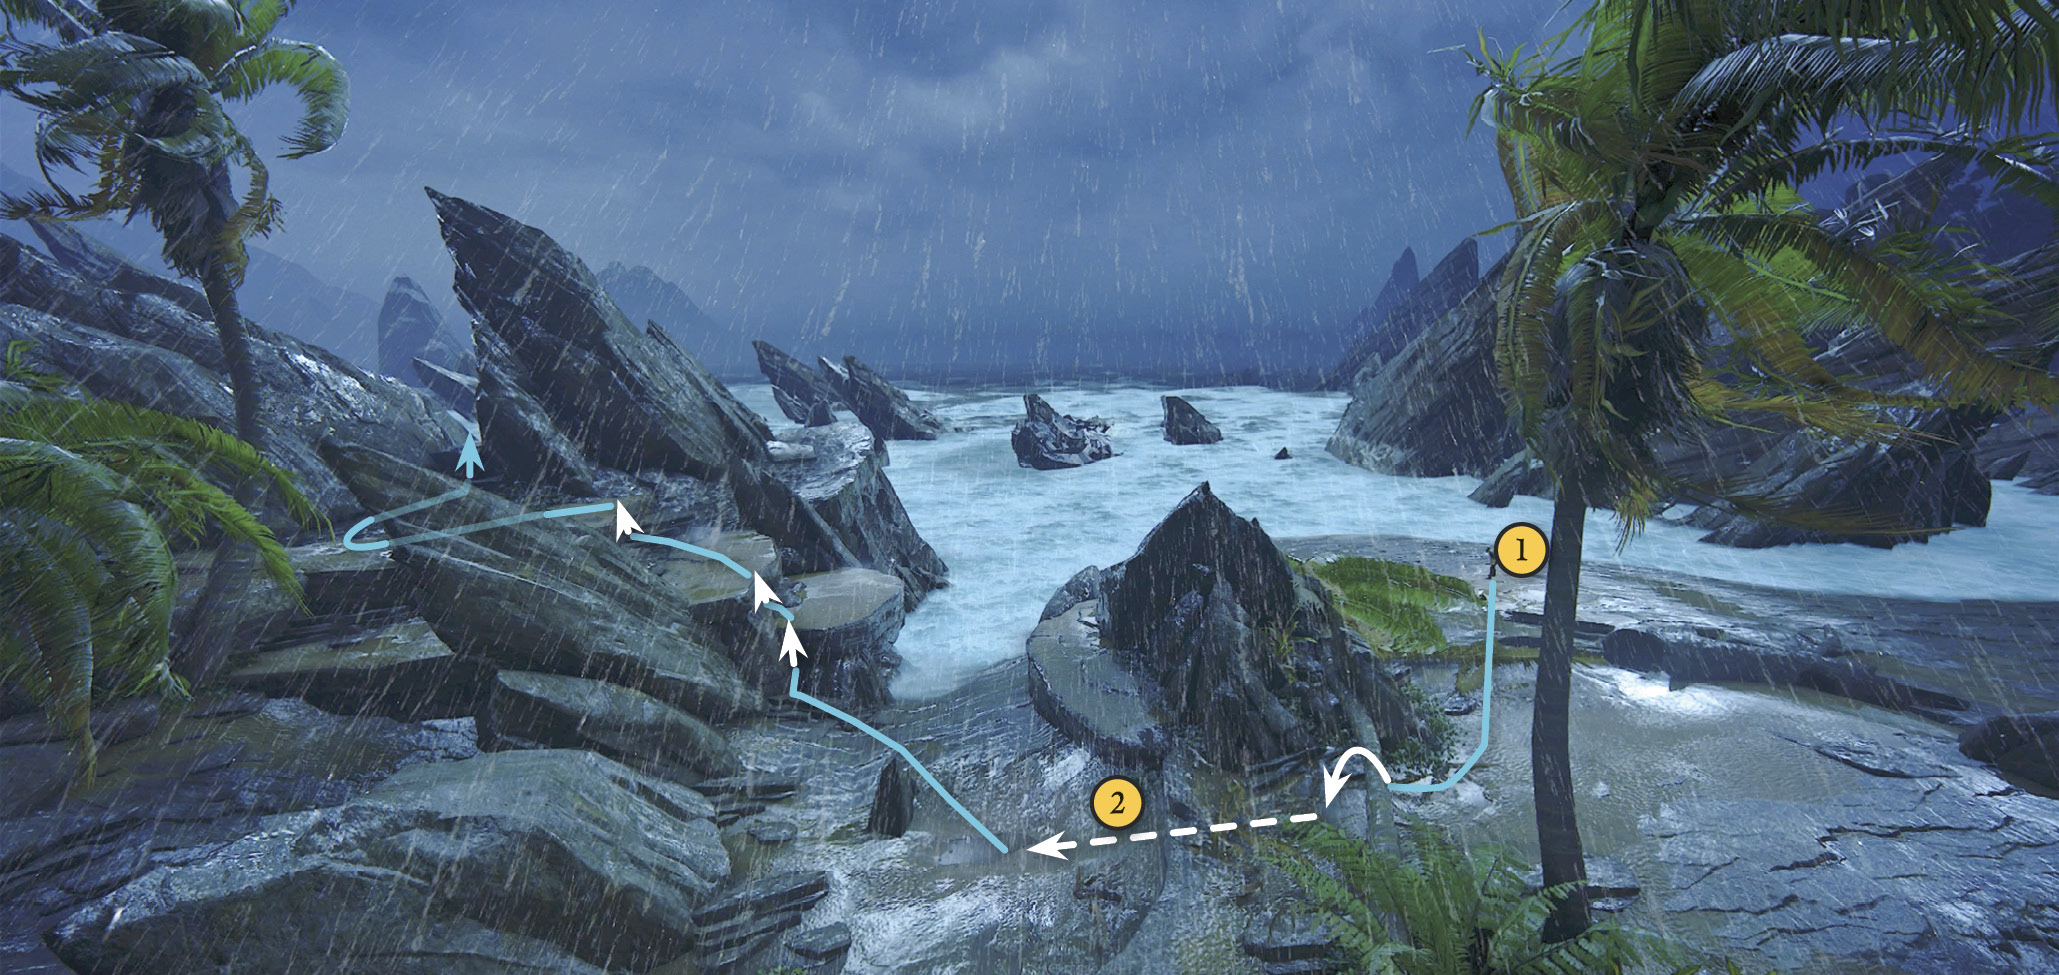
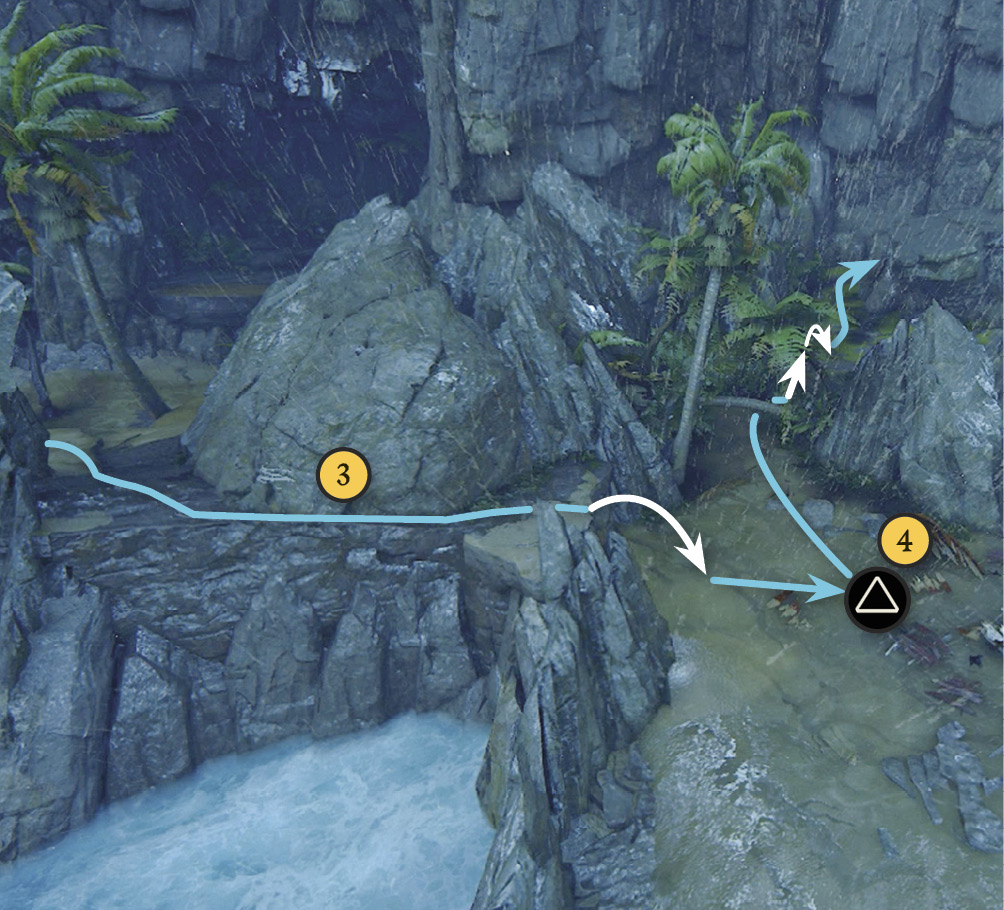
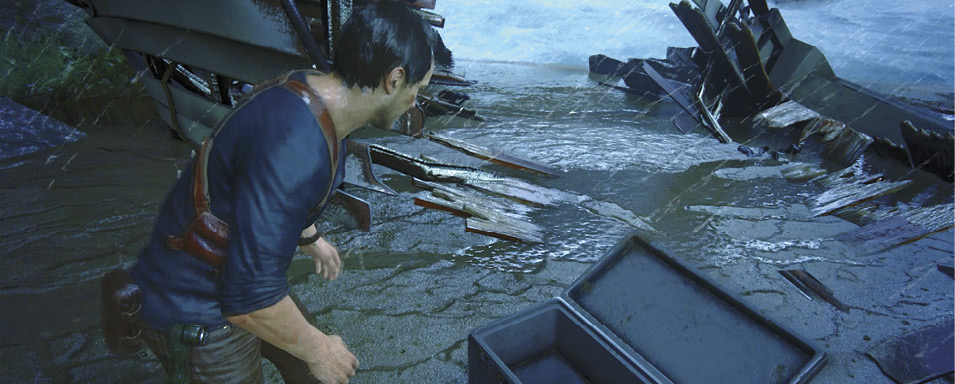
From the start (1), stagger up the beach past the log, moving roughly parallel to the waterline. When you climb over the fallen tree, Nathan takes a nasty tumble down the slope (2) on the other side. Climb up the series of rock terraces until you come to a cliff overlooking the churning water below (3). Shimmy along the narrow ledge, then hop down to find an empty supply box (4). Turn left and move through the passage under another fallen tree.
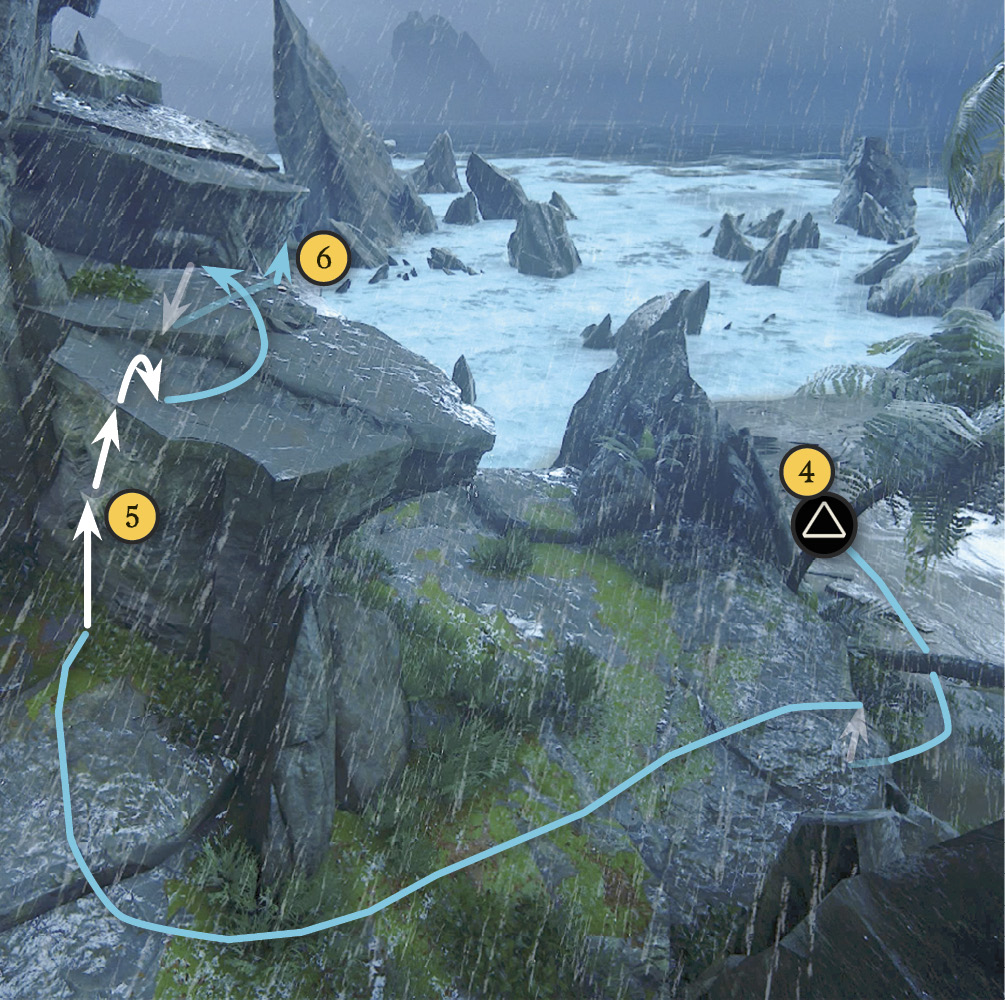
Find a handhold to climb up the next ledge (5). Nathan stumbles a bit when you drop off the other side; when you try to move around the next wall, the rock gives way beneath you (6). Shimmy along on the remaining narrow ledge to continue forward. Climb up the handholds on the other side and push on.
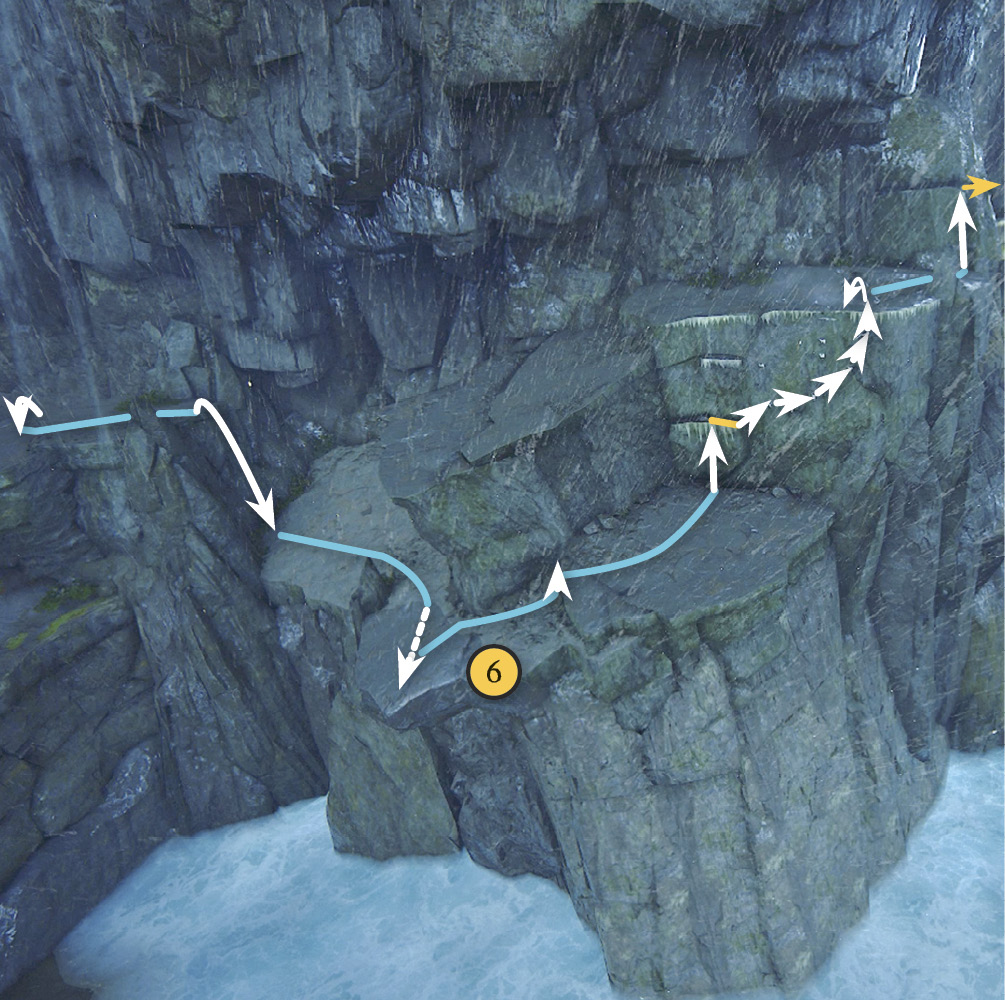
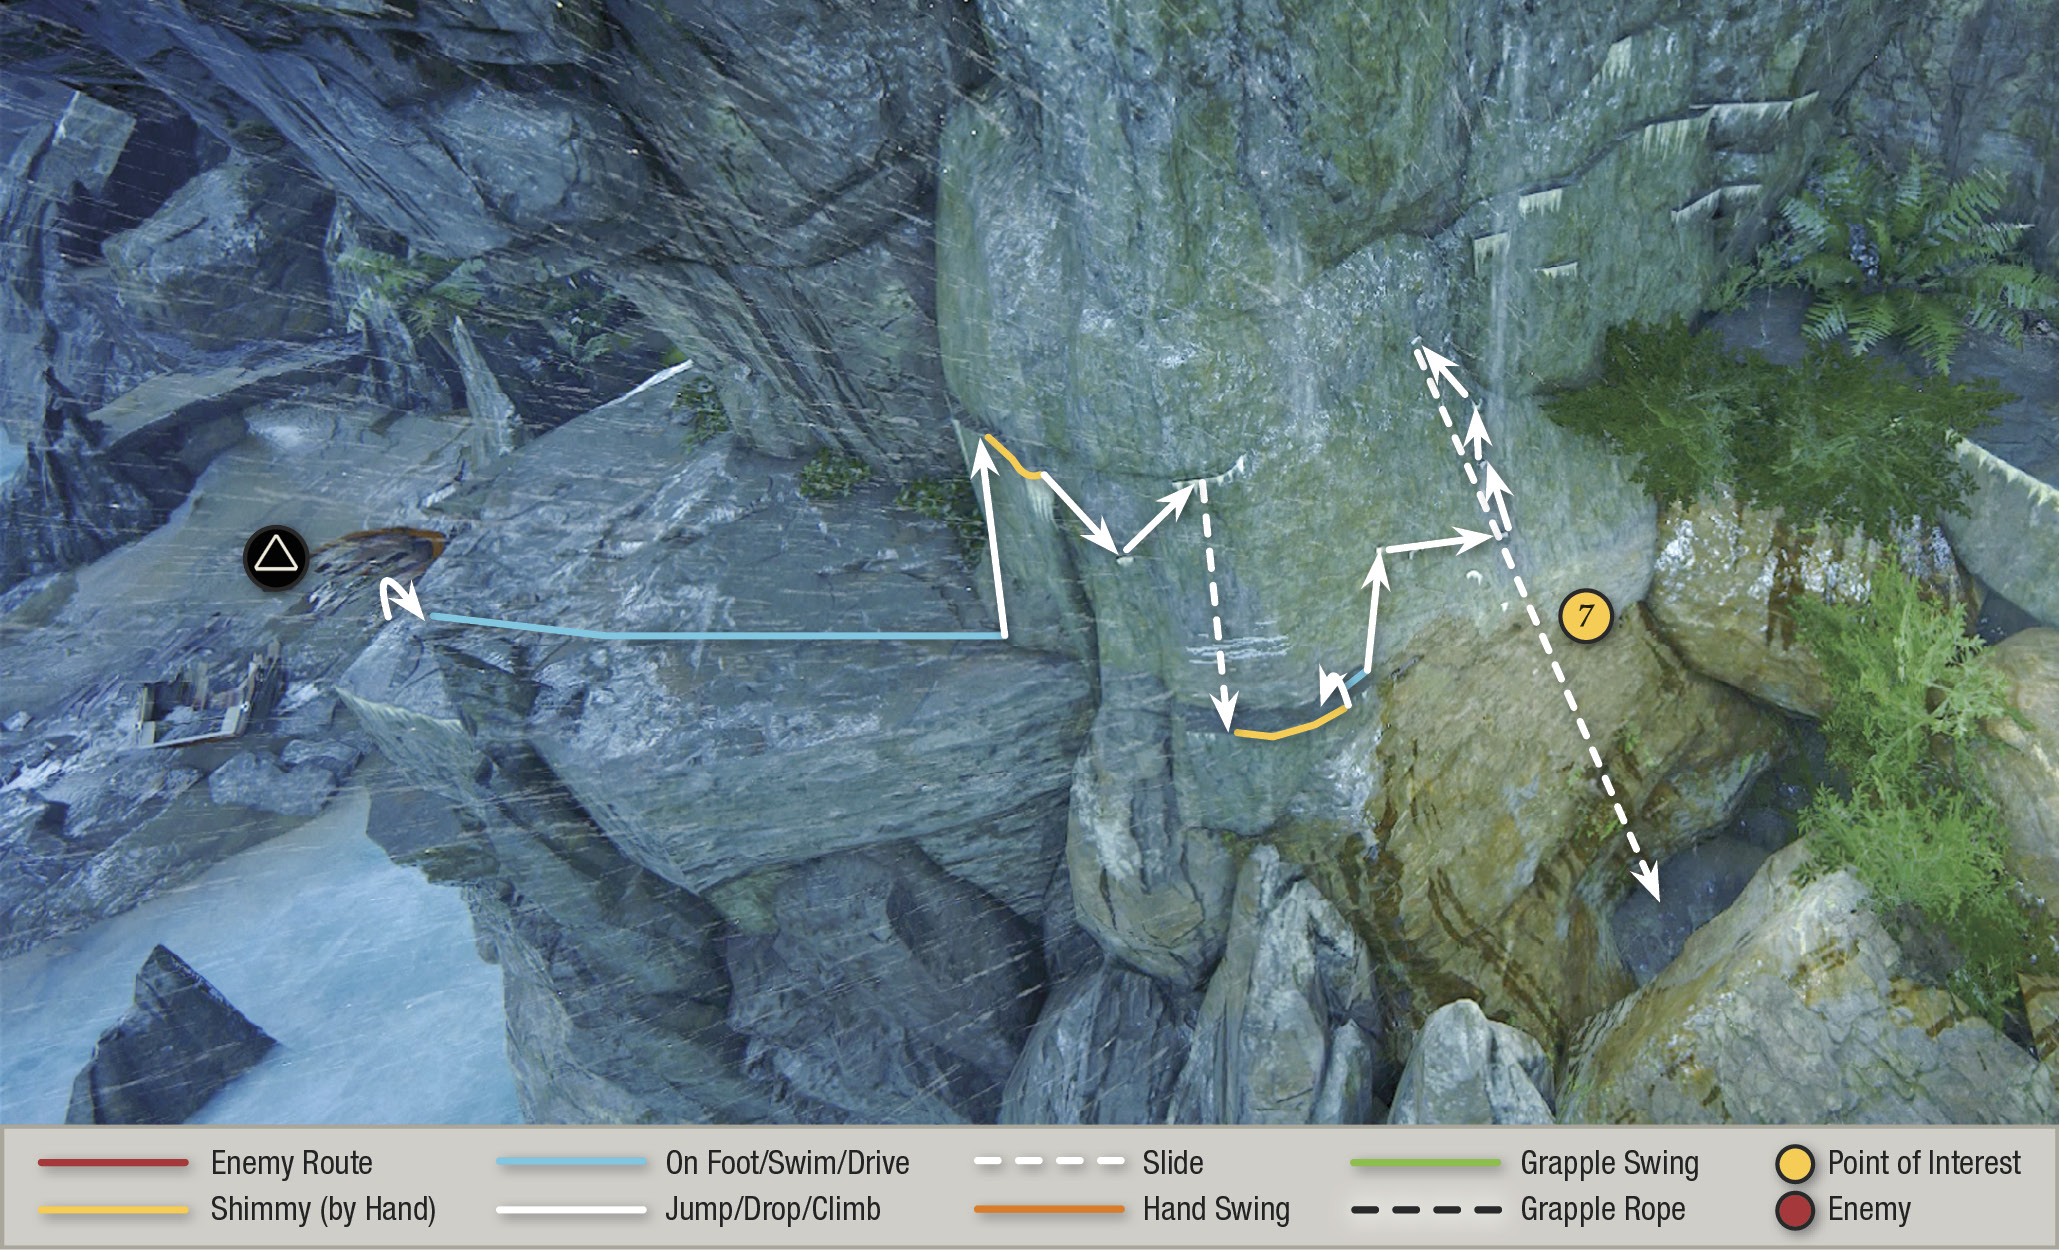
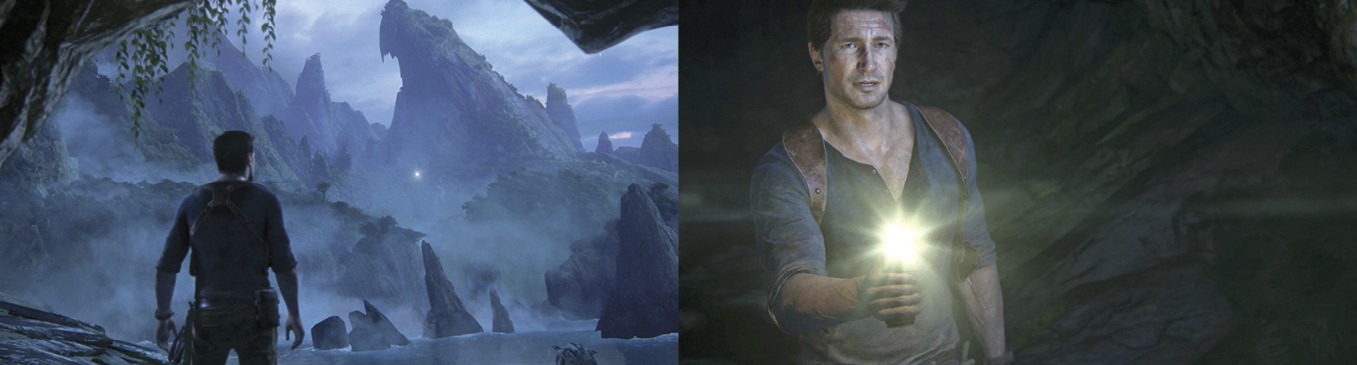
Climb carefully using more slick handholds. Work your way rightward around the corner of the next wall until you reach a spot (7) where the water streaming down the cliff-side overwhelms Nathan and he takes a long, hard fall. This triggers a cutscene: Nathan passes out then awakens later to find the storm subsided. He also spots a light up on the mountain, signaling: “Sic parvis magna.” Sam!
Climb to the Big Waterfall
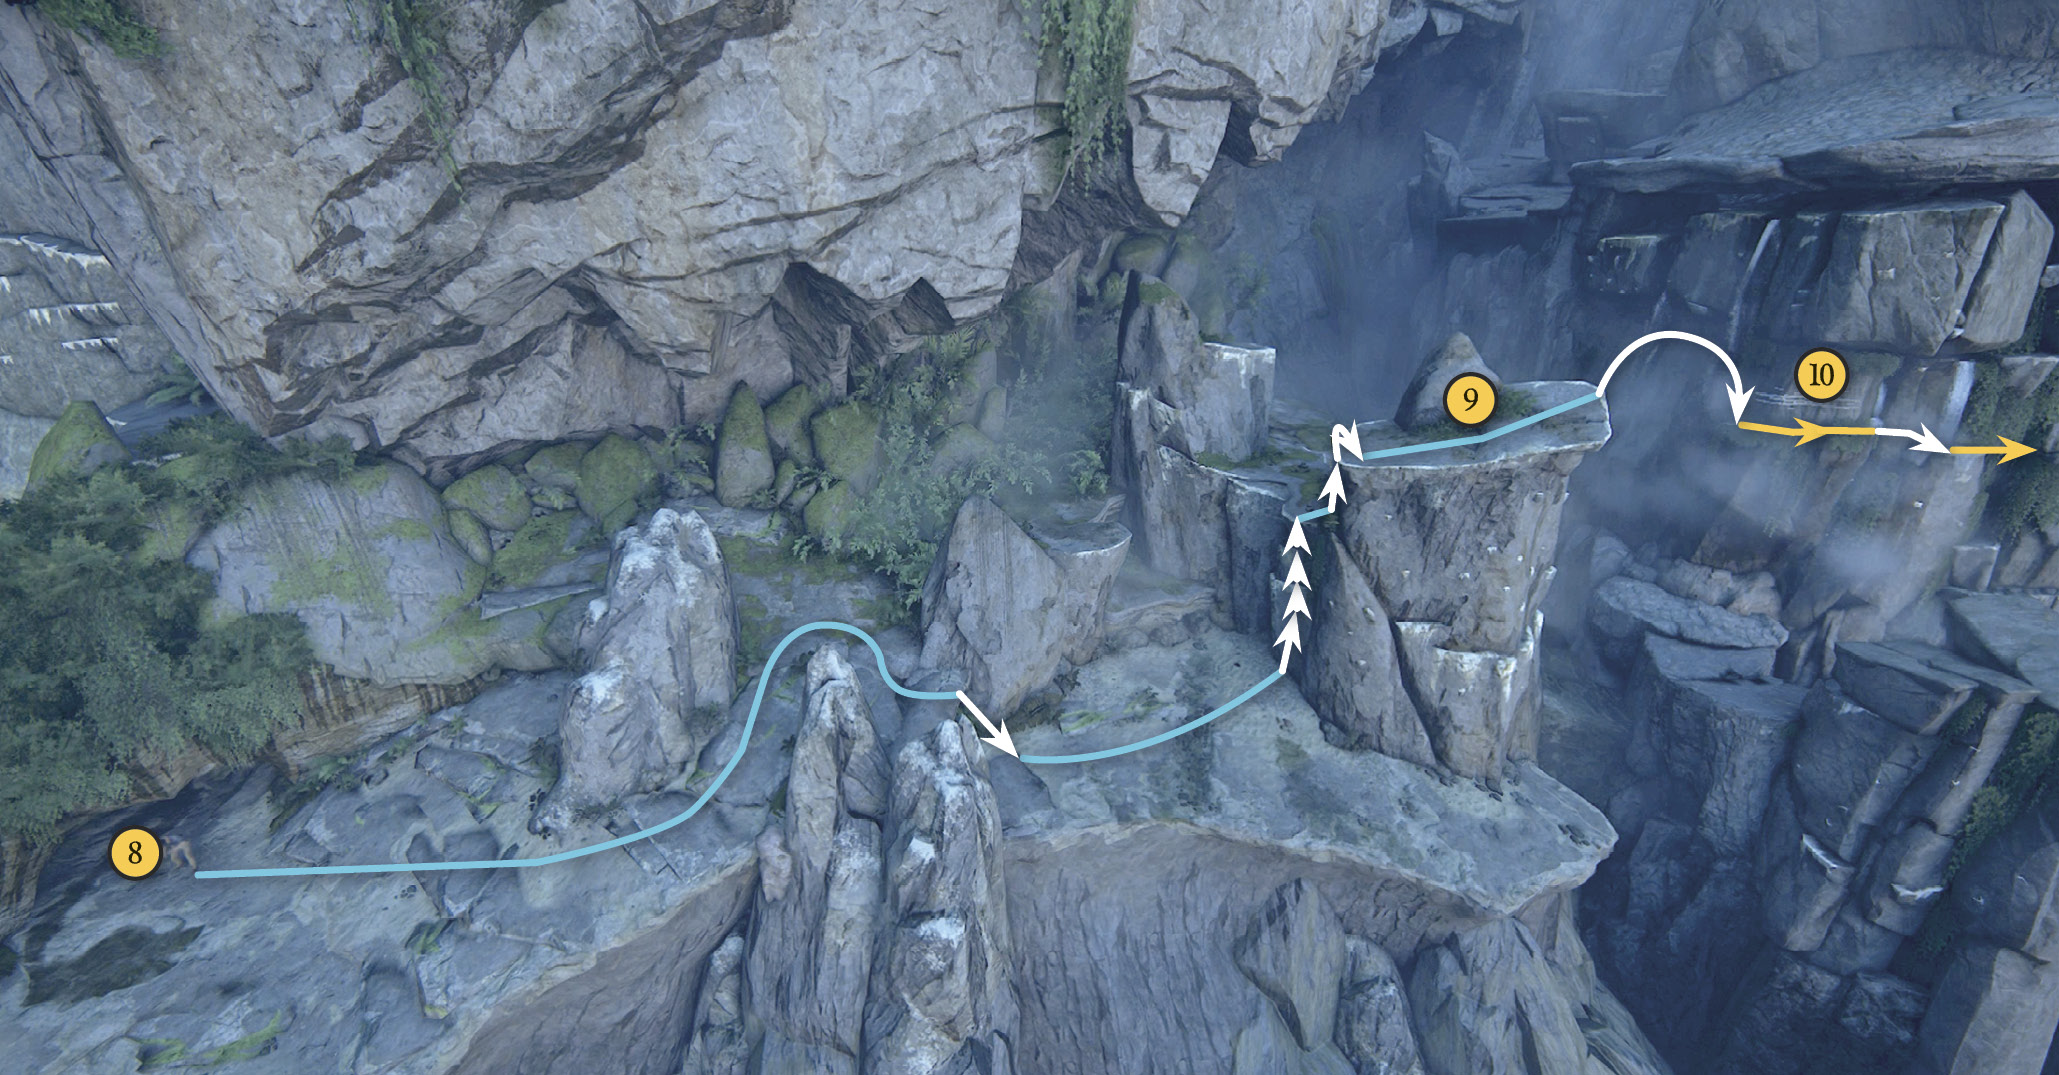
From where Nathan wakes up (8), start working your way across the rocks, climbing to the top of a pillar (9) facing across at the cliff sprouting many small waterfalls. Make a big jump over to the ledge (10) under all the horizontal scrape marks. Shimmy and traverse rightward across the small waterfalls and around the corner of the cliff. Then climb the handholds up onto the plateau—but watch for the glint of a treasure on the way. Follow our route behind the next rock formation. (Or you can go through the small cave tunnel, if you want.)
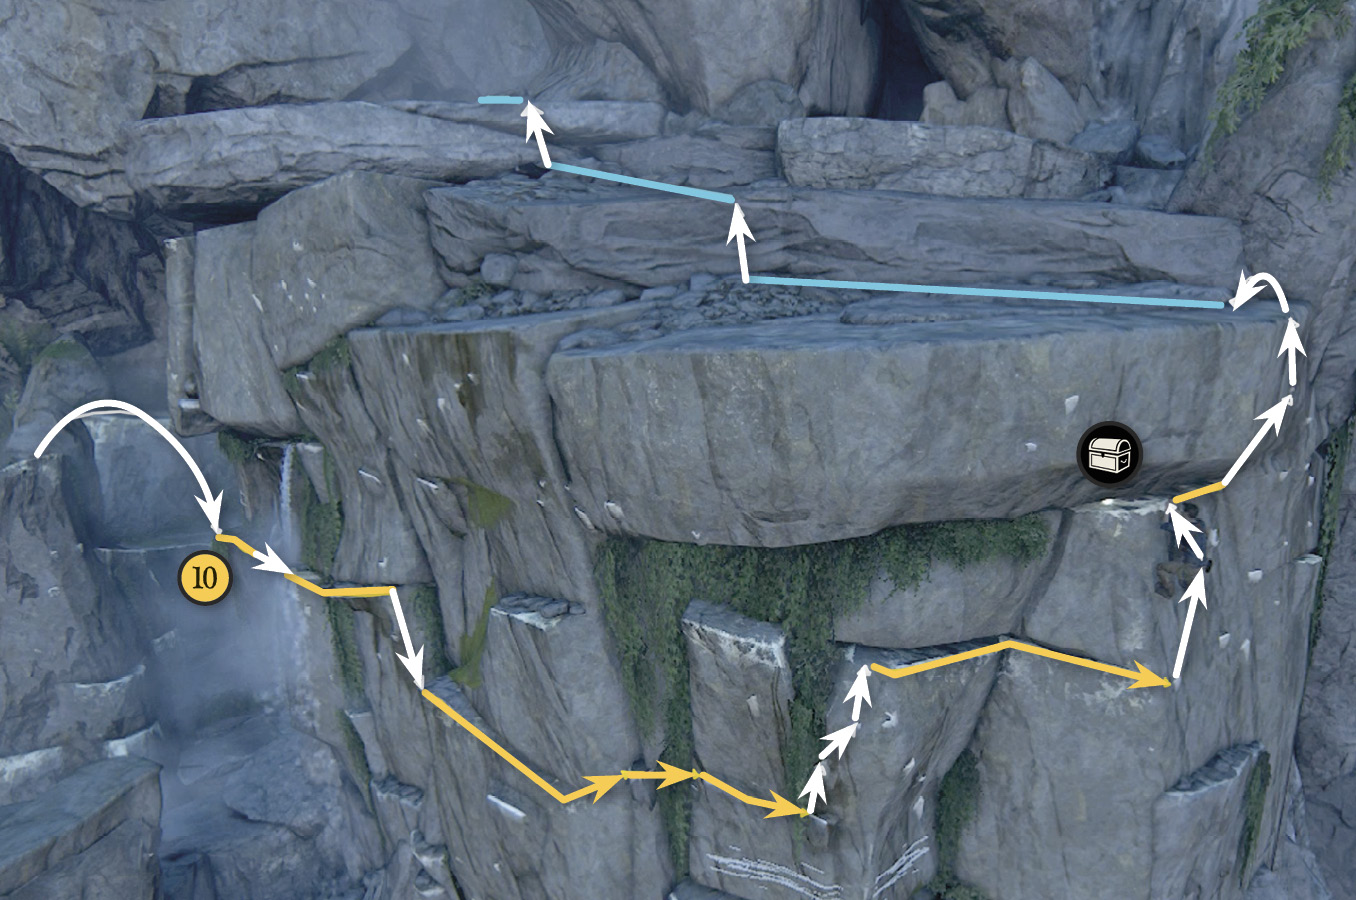
 Persian Ring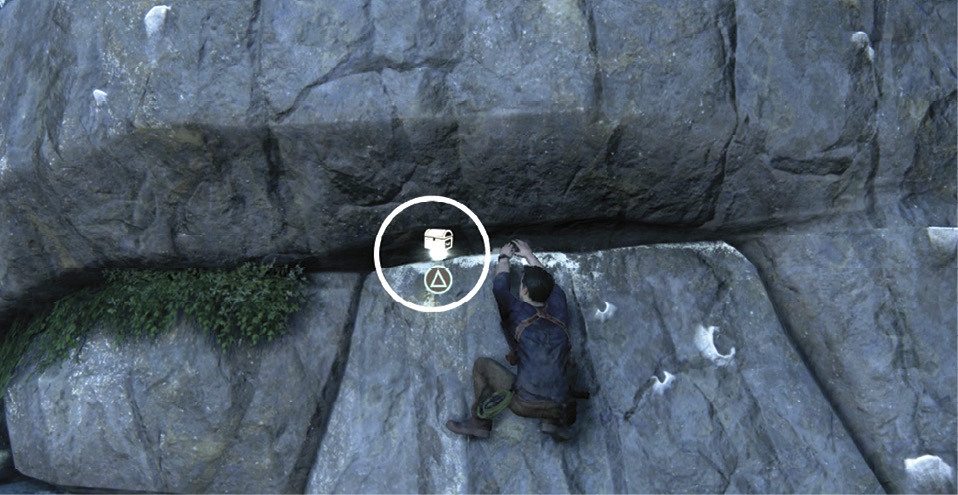 After Nathan recovers from his fall and awakens after the storm ends, follow our climbing route up and across the cliff face. Look for the glint of the Persian Ring in a small cleft in the rocks as you climb. |
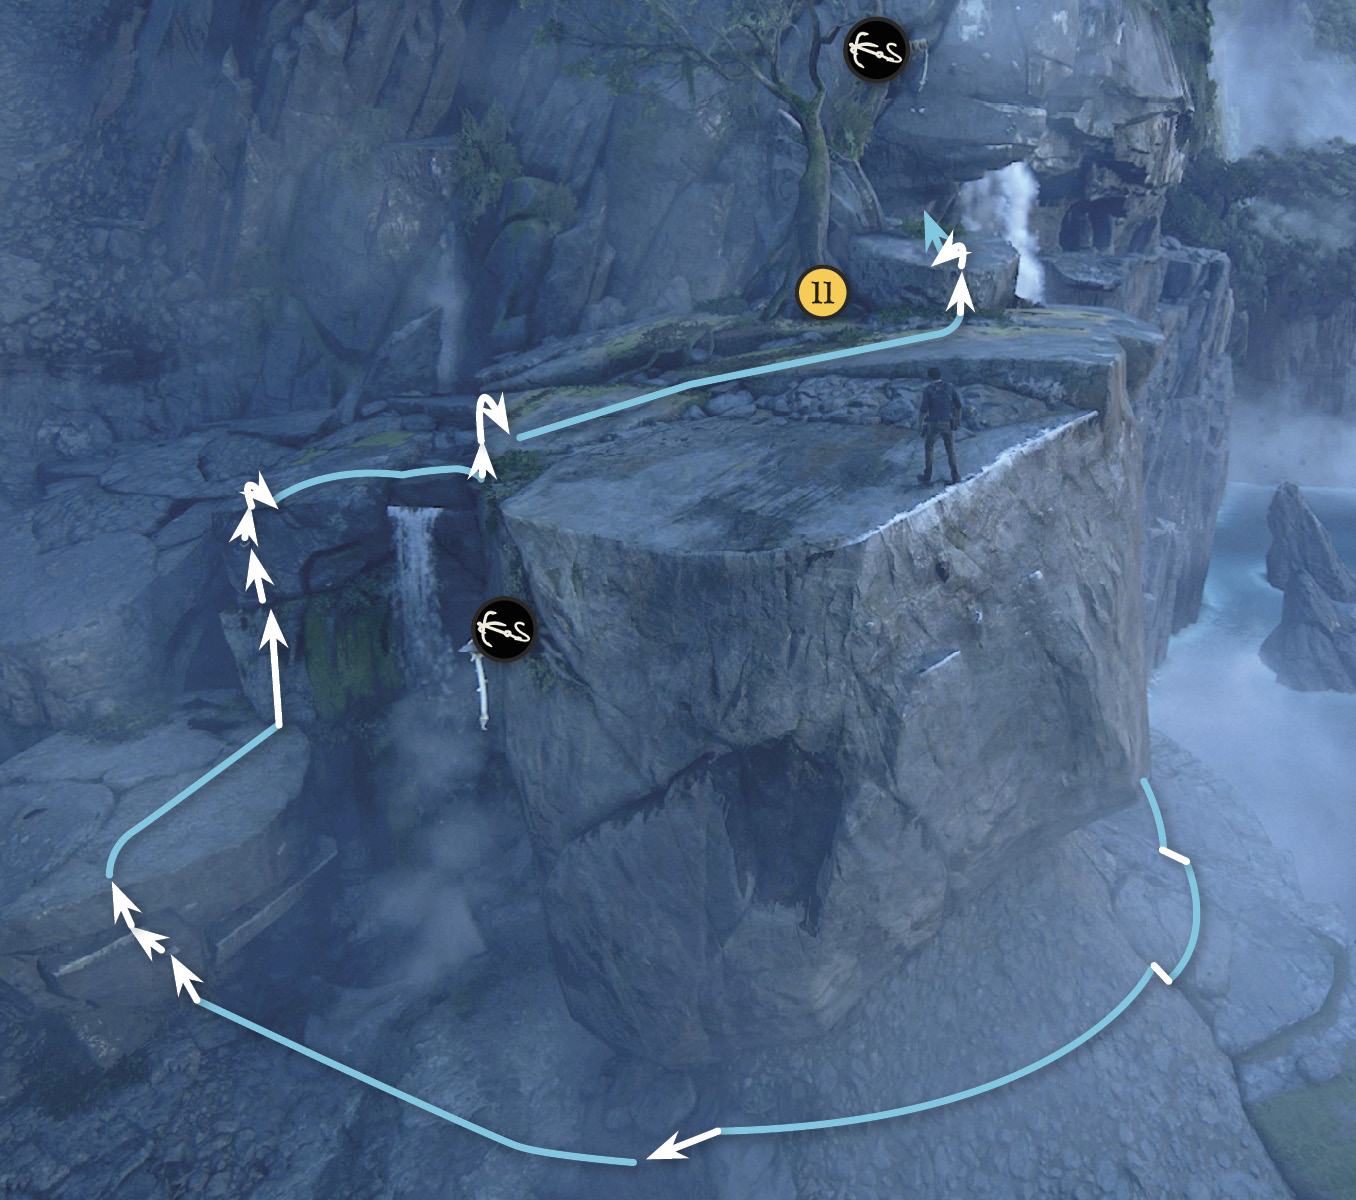
Climb the ledges until you reach the gnarled tree (11) on the terrace. From there, you can grapple-swing across to the next platform and climb the handholds until one breaks and Nathan nearly falls to his doom (12). Keep climbing rightward until you can start working upward again. When you finally pull yourself onto the terrace (13) overlooking the big waterfall, you trigger a cutscene: Nathan spots the Shoreline fleet approaching the island.
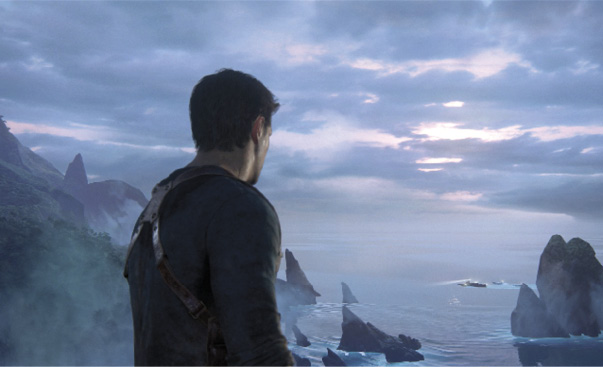
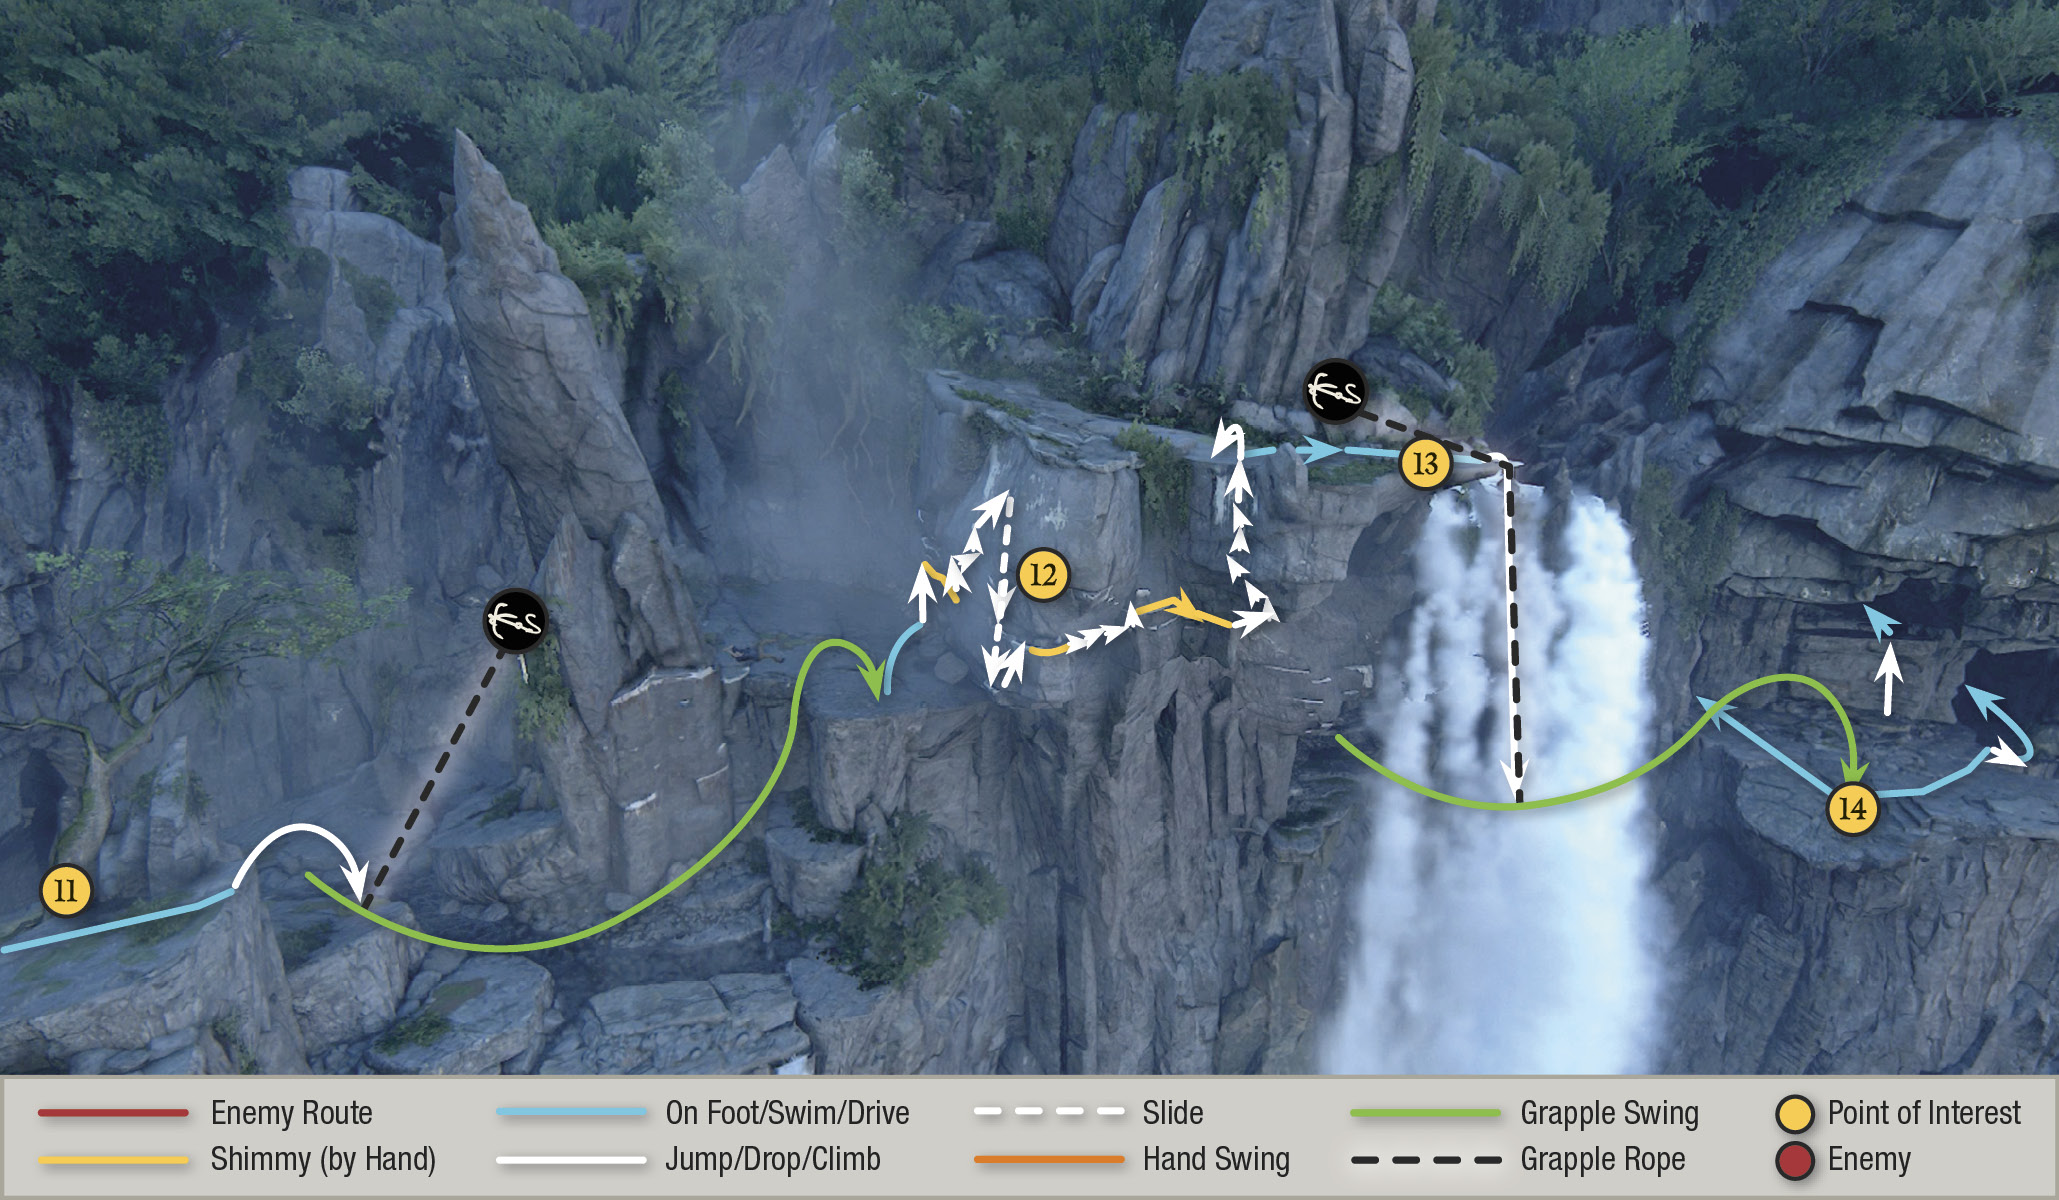
Attach your hook to the grapple point and step off the terrace. Swing across the waterfall to the small platform (14) below. (Part of it collapses when you land, but Nathan scrambles to safety.) Now you can take any one of three entrances into the cave complex behind the waterfall.
Get Through the Waterfall Caves
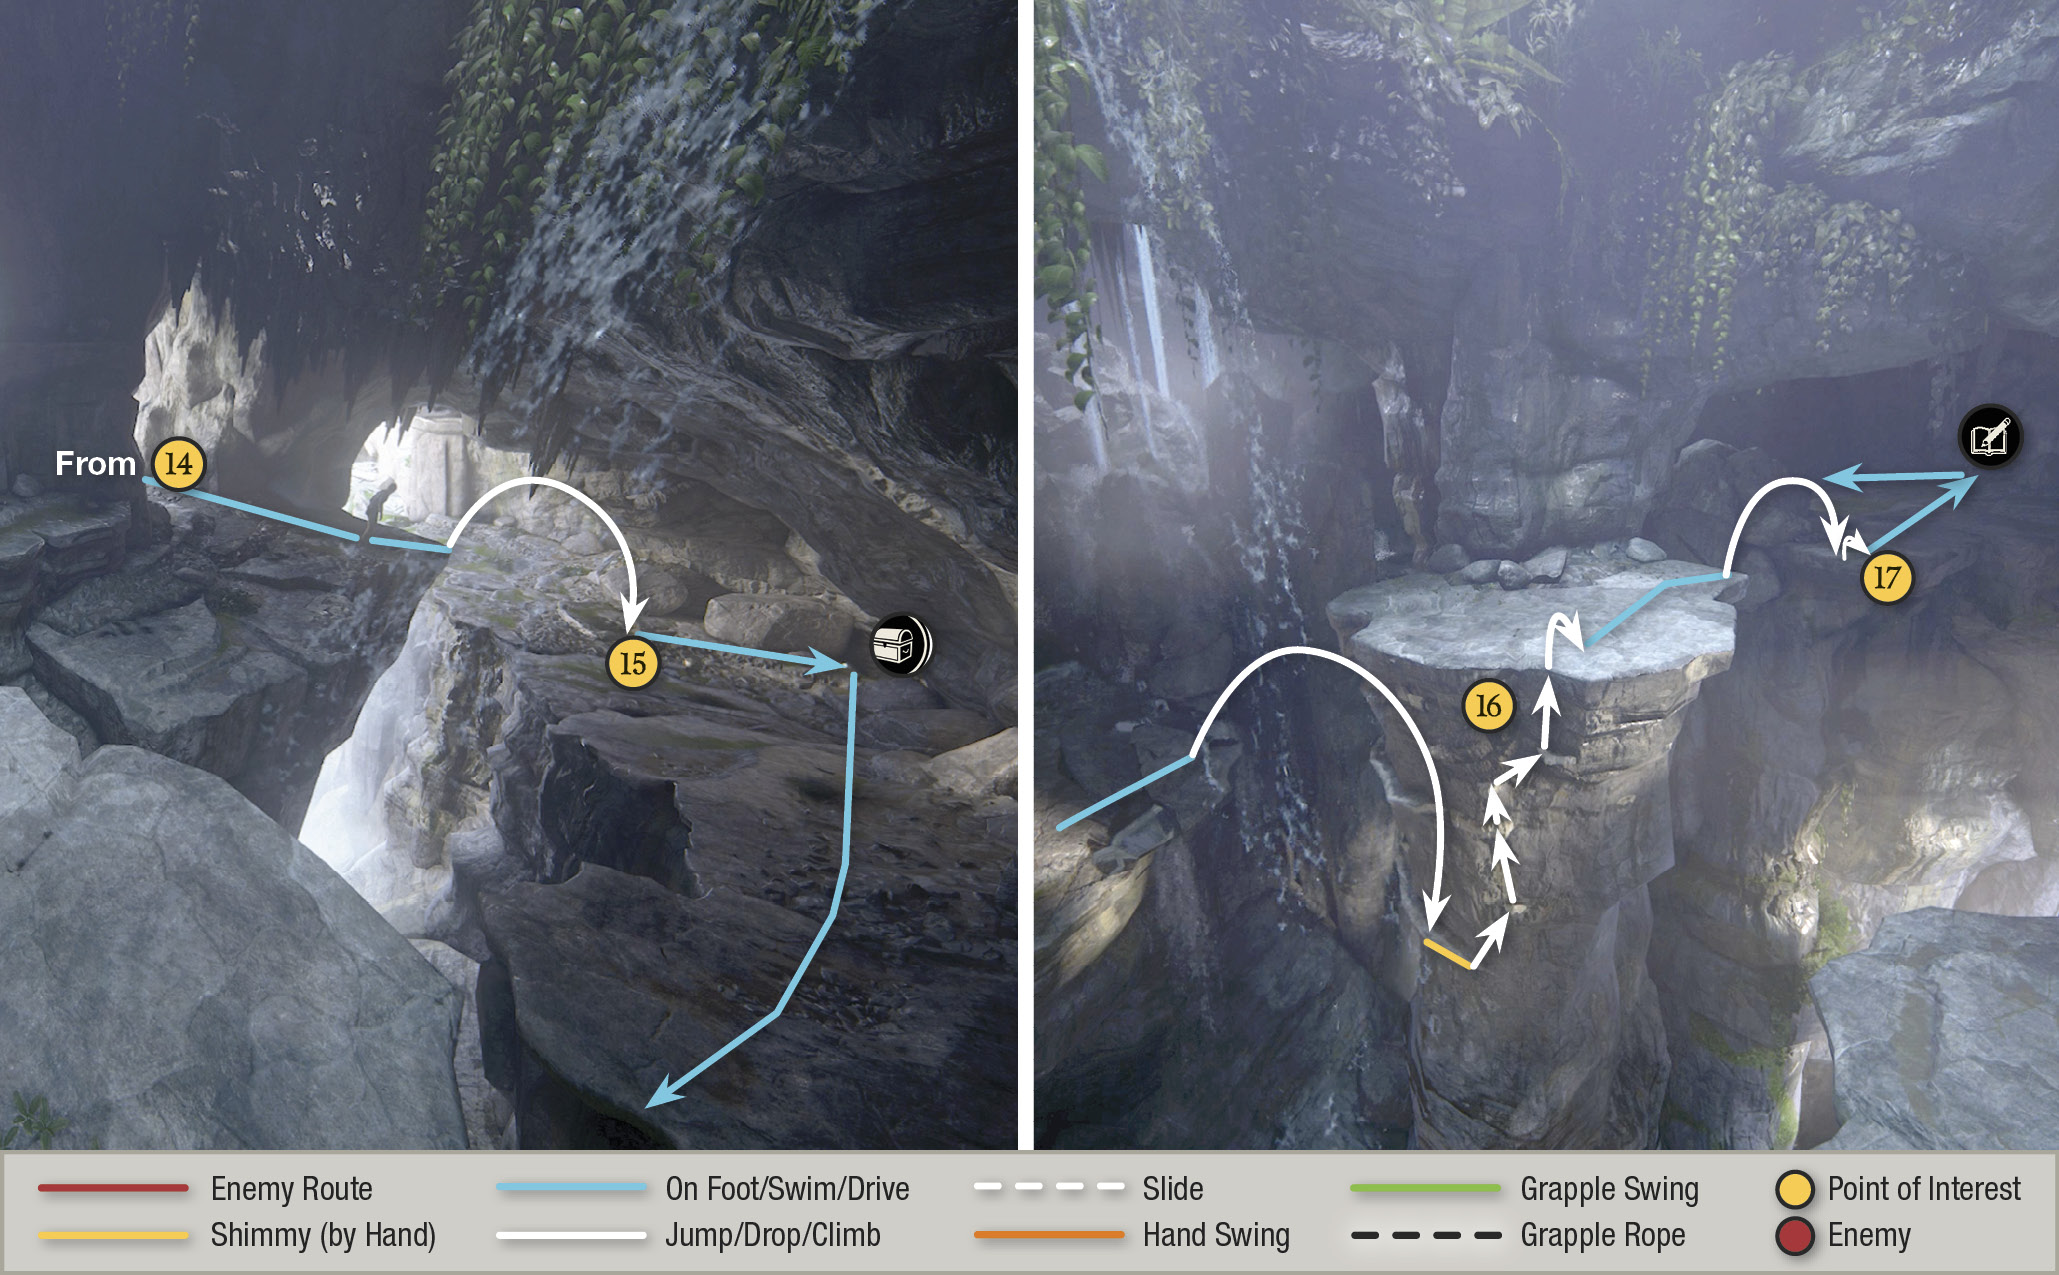
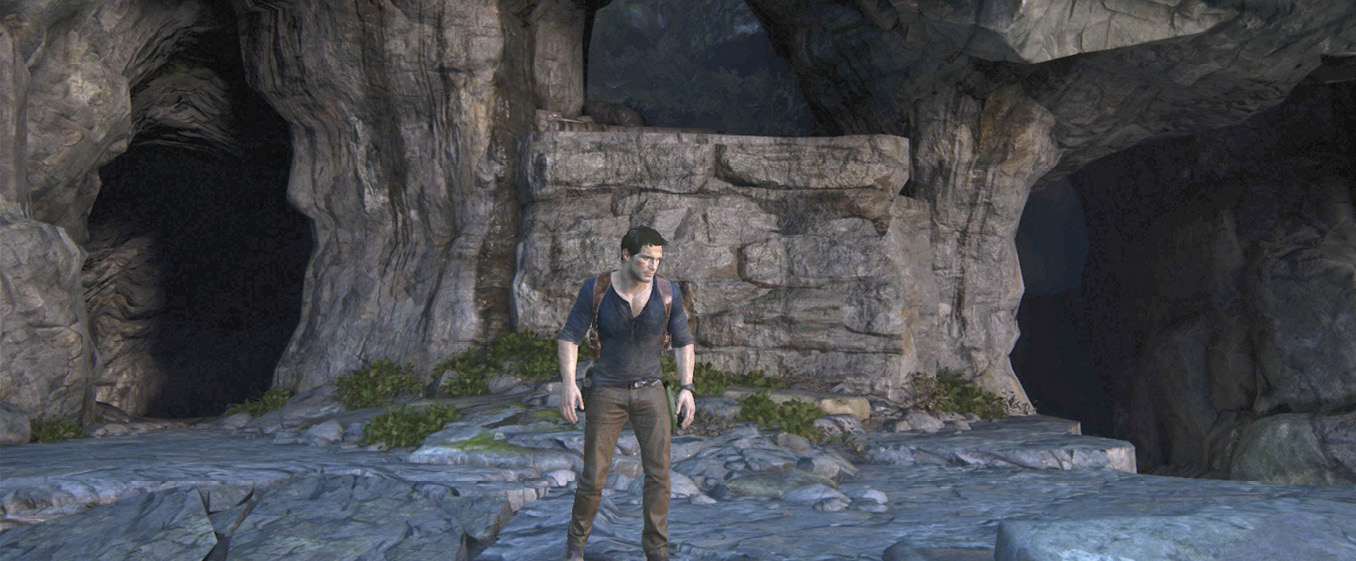
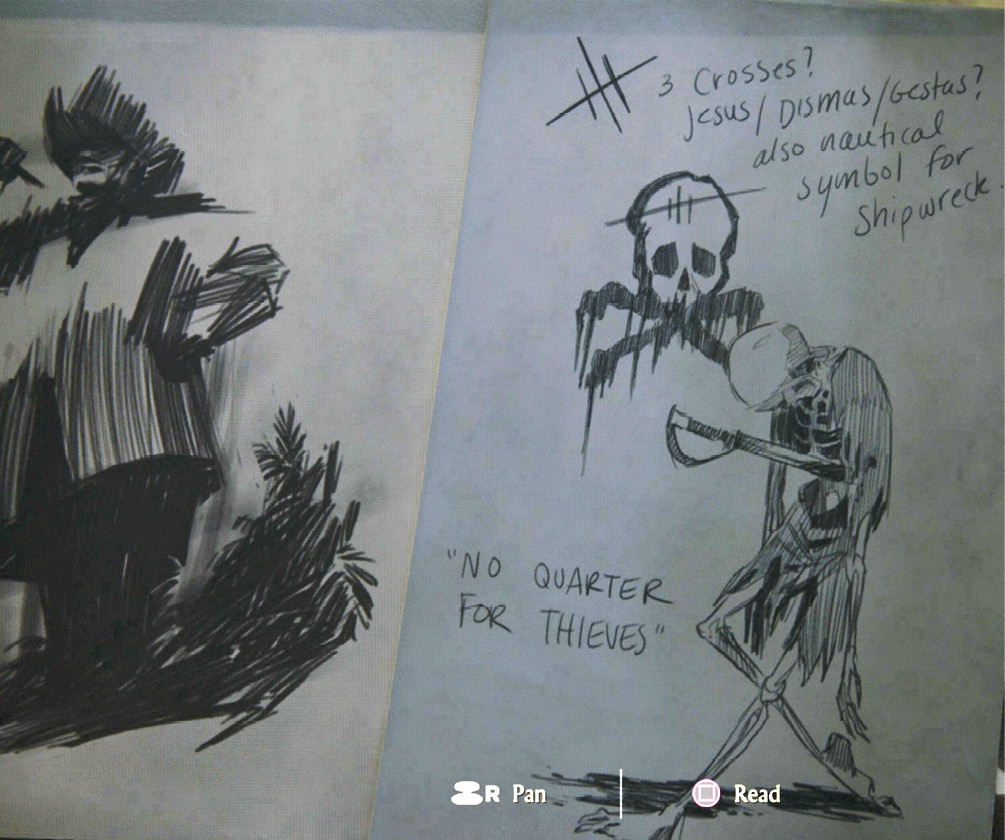
Once inside, jump down to the sunlit ledge (15) and find the treasure. Then turn right, move along the wall, and leap across the gap to grab the handholds on the rock pillar (16). Climb onto the platform, then move across and jump to the next ledge (17). Walk over to the impaled skeleton leaning against the wall to make another Optional Journal Entry(see Fig. 13-5).
 Wood Tankard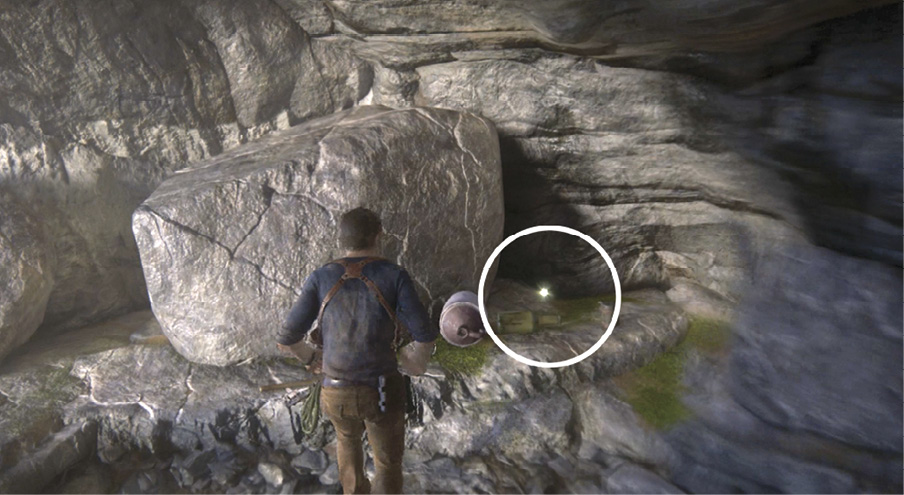 Just after you enter the cavern behind the big waterfall, jump down to the sunlit ledge and find the Wood Tankard on the ground next to the boulder. |
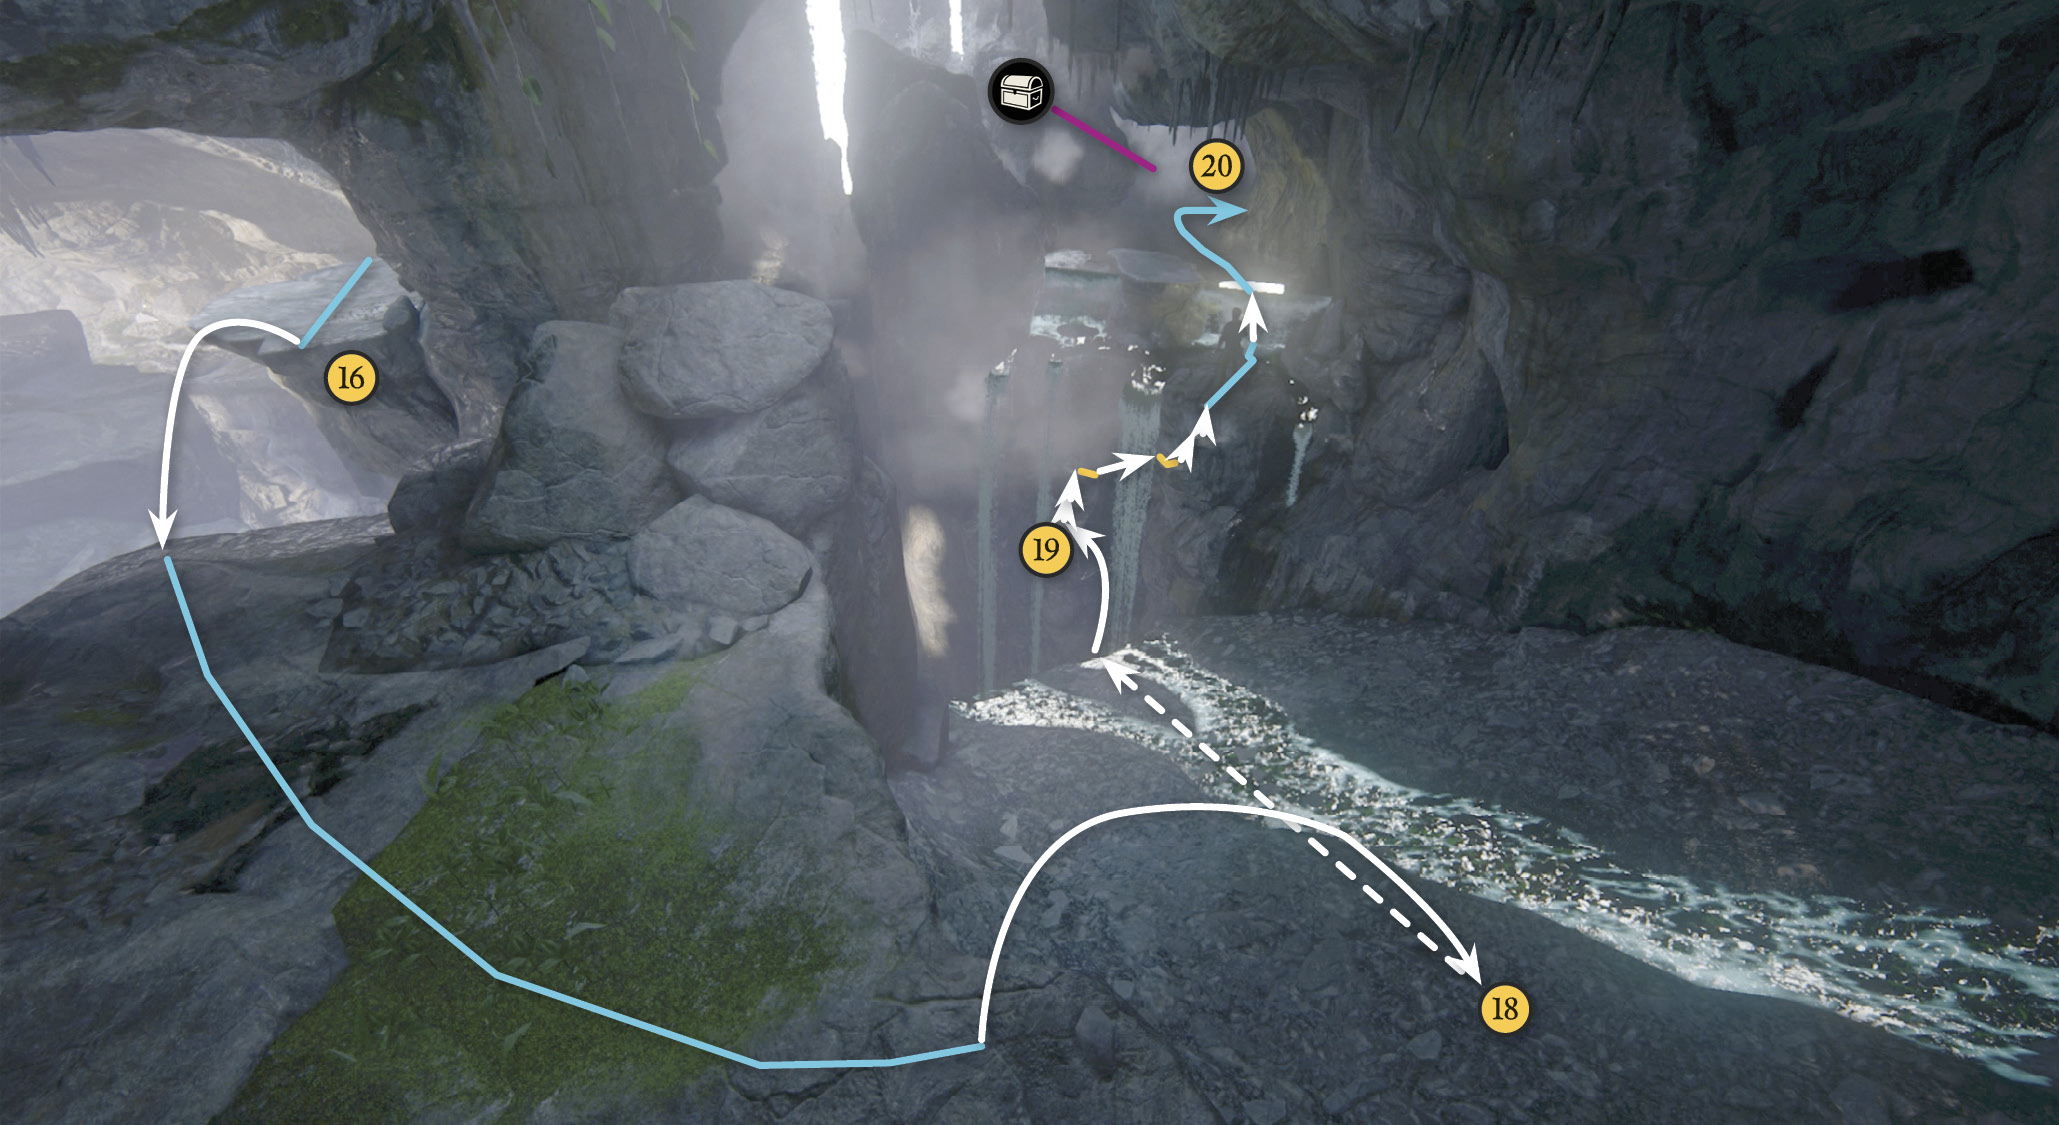
Turn left and hop onto the rockslide (18). As you ride down, steer toward the stack of handholds (19) between the small waterfalls on the opposite cliff. Jump to grab one as you reach the bottom of the slide. Climb rightward and up to the stream that feeds the falls, then wade upstream through the cave (20). (Don’t miss the treasure on the left.) Find the low passage on the stream’s right side and follow it out to daylight.
 Spy Glass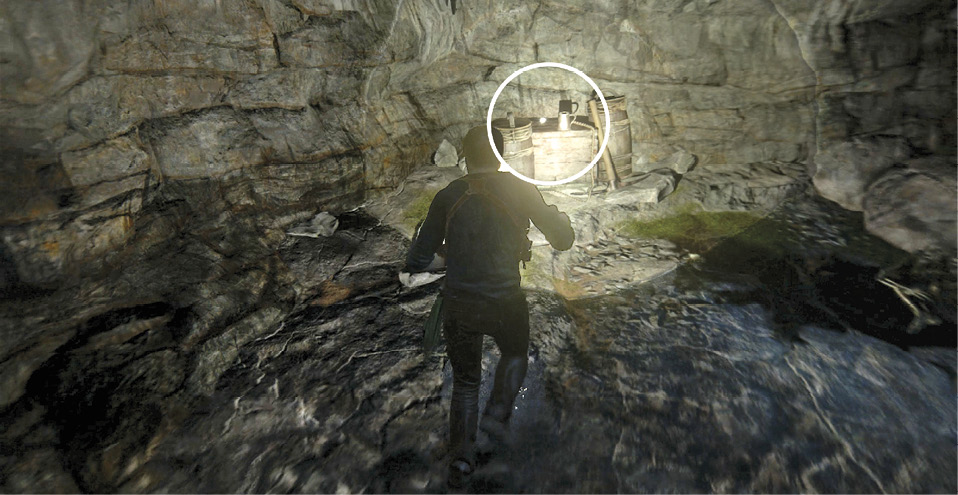 Just after you jump from the rockslide and start wading upstream in the cave tunnel, find the Spy Glass sitting on a crate in the nook on the left side. |
Obtain the Piton
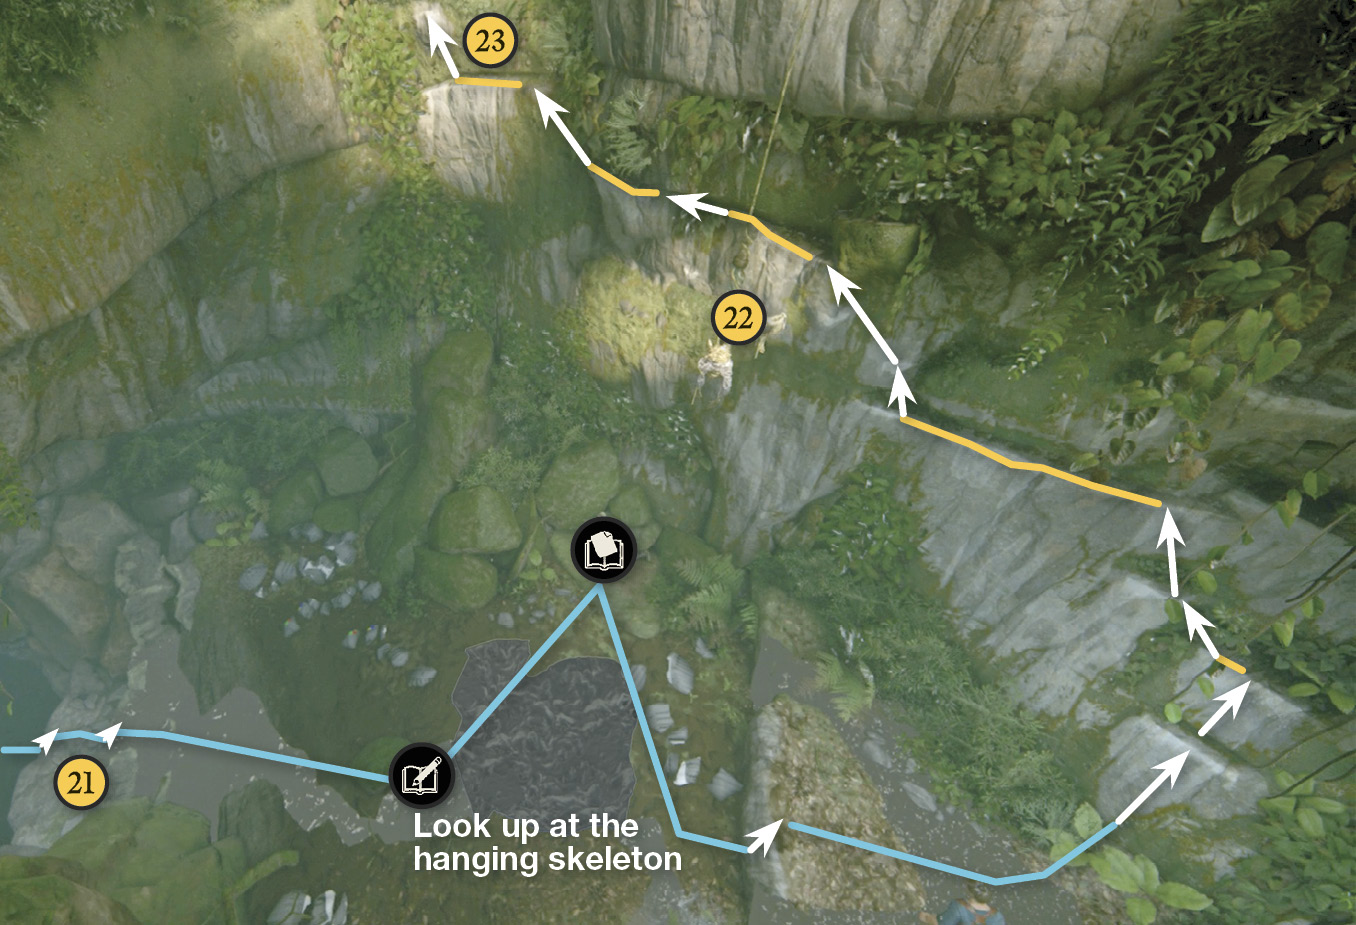
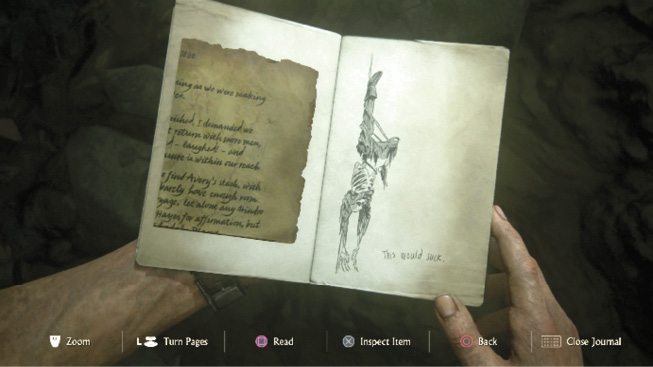
From the cave exit (21), move along the left cliff wall to find a skeleton with a pouch. Examine him to pick up a Optional Journal Note from the navigator of the Burnes expedition. Then look up at the unfortunate ex-climber (22) hanging upside down from his rope; Nathan makes an Optional Journal Entry. Work your way up the streambed and climb around past the poor dangling fellow then up the wall to the left (23).
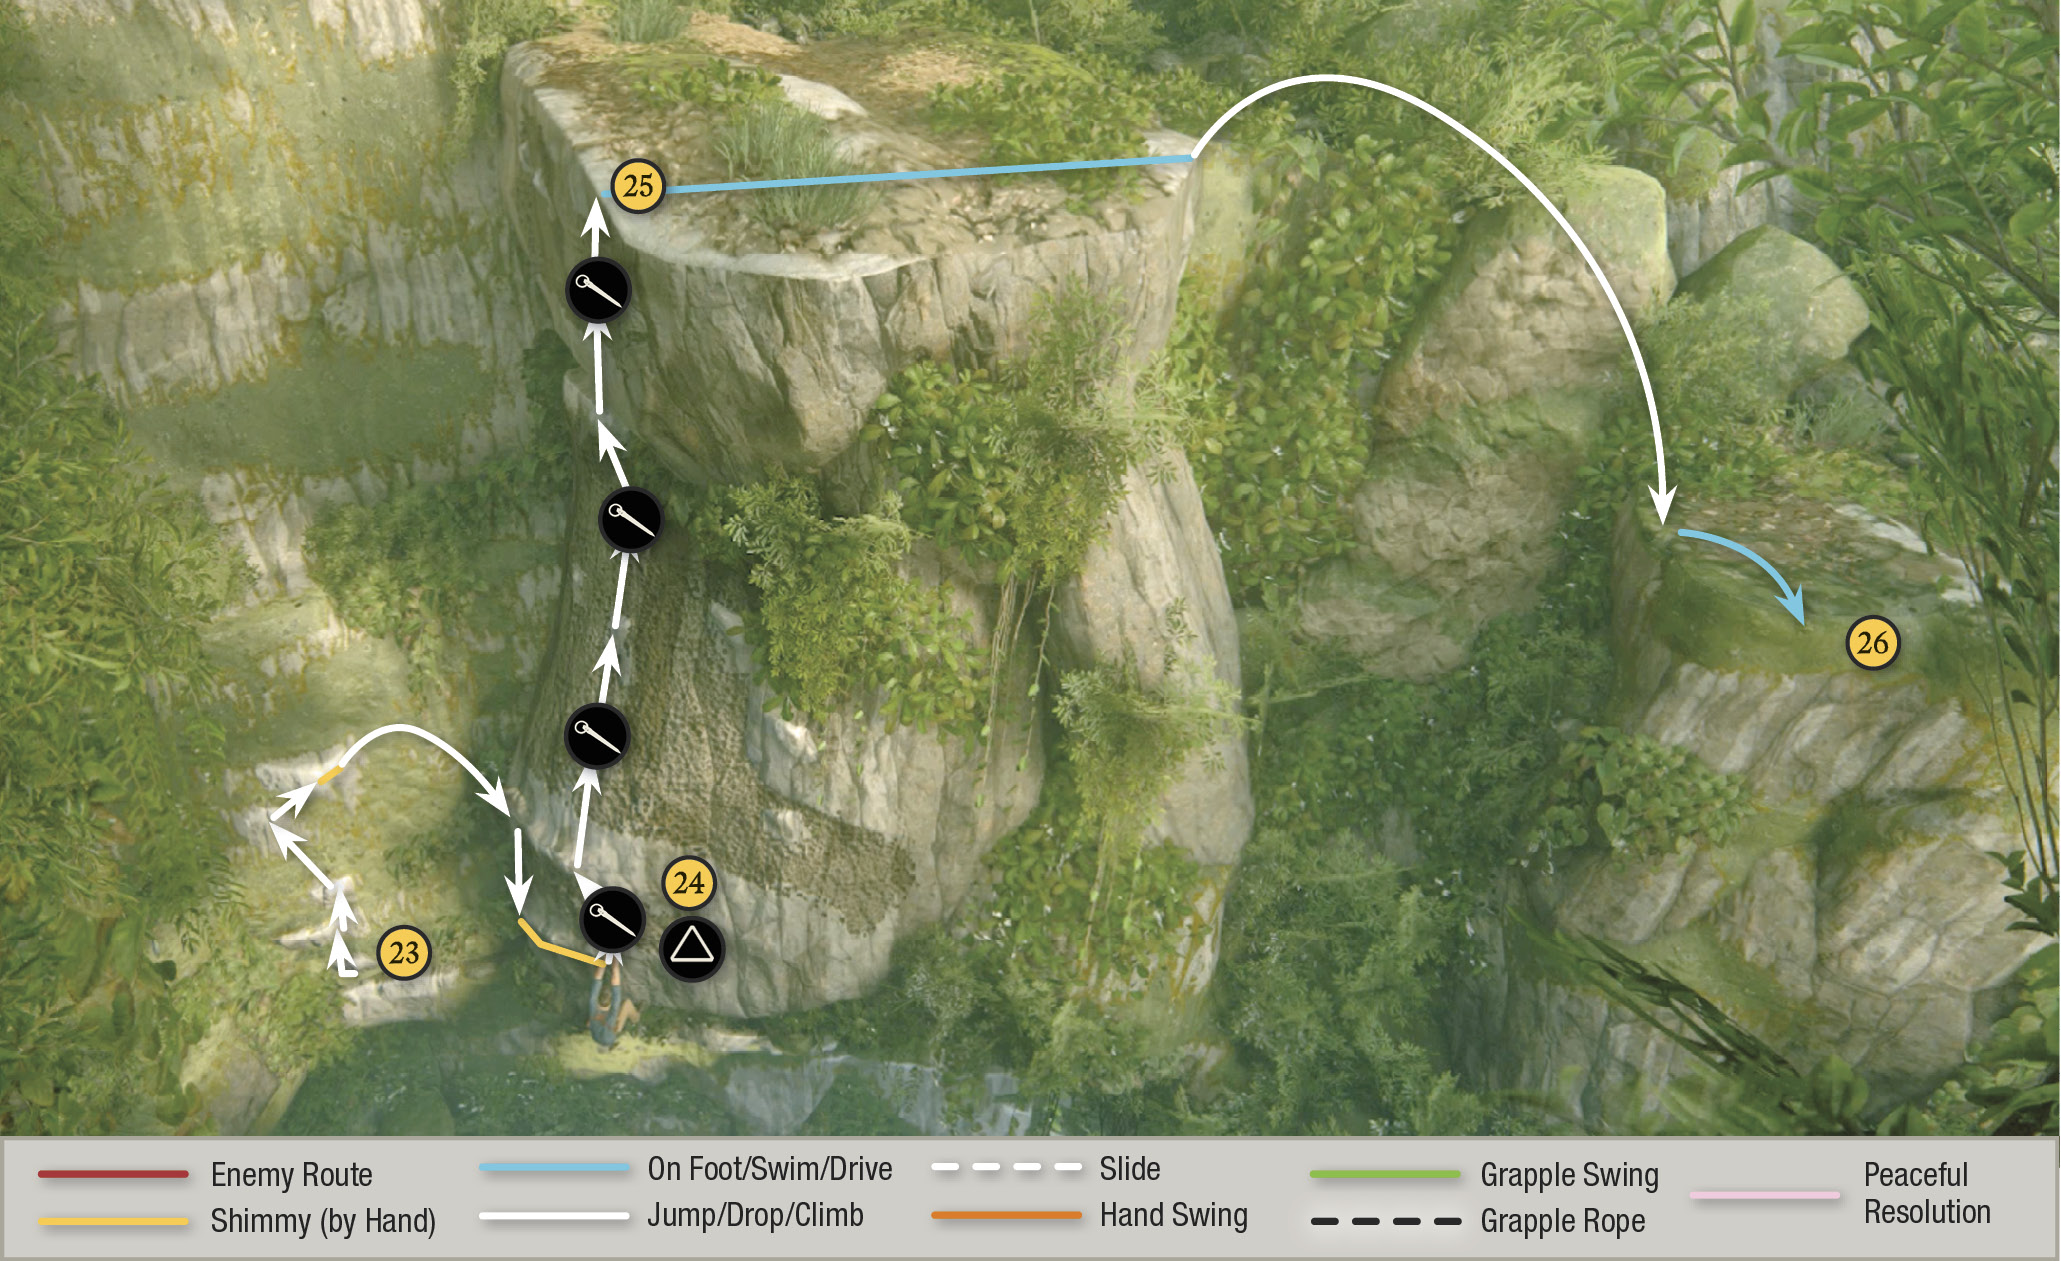
When the climbing route takes you rightward again, Nathan nearly falls when some porous rock breaks loose. Slide further right until you can grab the piton (24). Tap  repeatedly to yank it out of the rock.
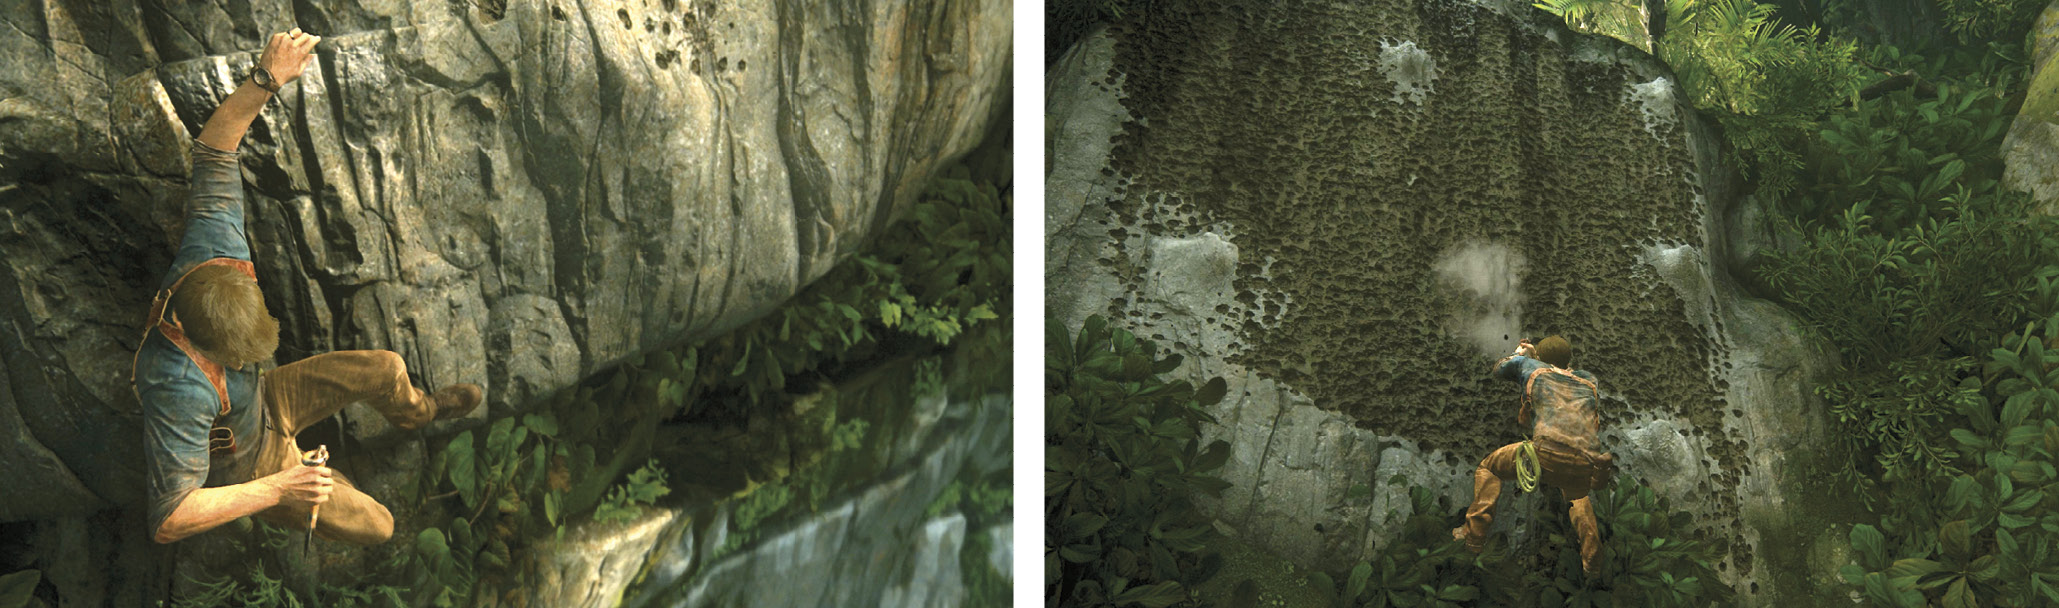
The piton is a very handy tool for a guy like Nathan Drake. Now you can climb any porous surface. Just reach out with the piton and press  to jab it into pockmarked sections of rock. You can even jump from a regular handhold and then stab the porous wall to extend piton placements further out. Mix piton stabs with handhold grabs to get up the rock face to the top (25). Then jump over to the next ledge (26).
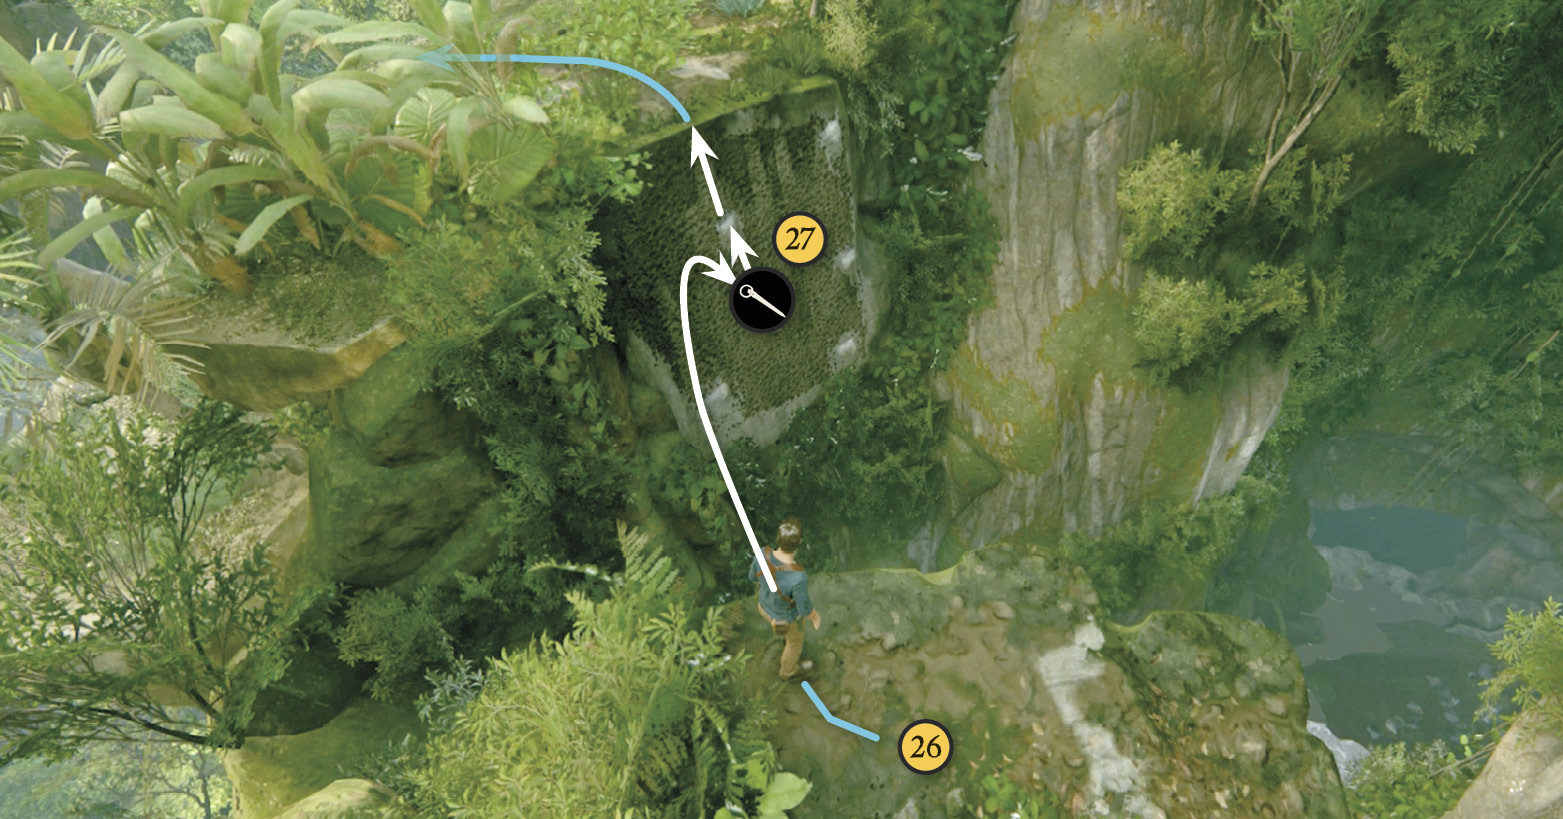
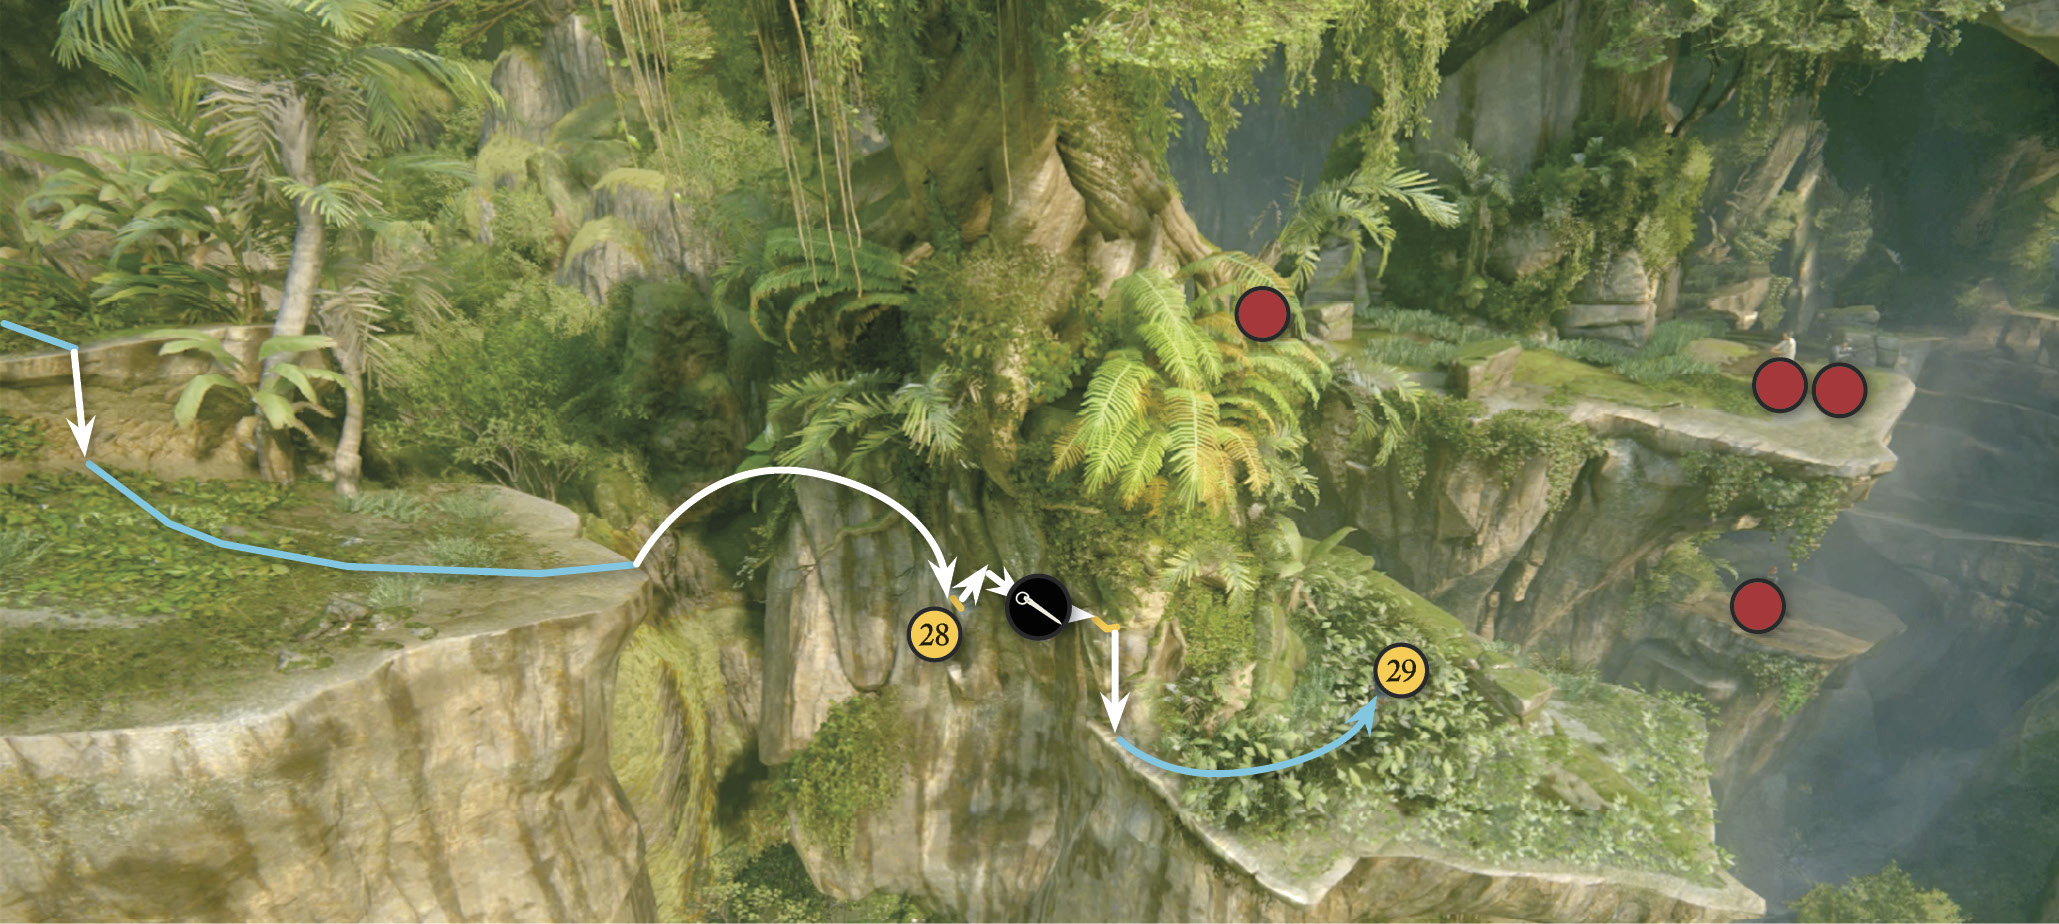
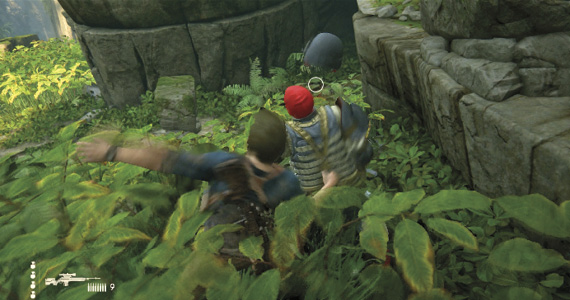
Now make a running leap across the next gap to the porous wall (27), tapping just as you hit to jab in the piton. Climb to the top then proceed to the next gap. Jump across to grab the handholds (28), then climb rightward to the small section of porous rock. Use your piton to get across to the next handhold. When you reach it, gunfire suddenly rings out! Two Shoreline mercenaries are over on the next terrace. Drop down the handholds and hang below the ledge until the shooter decides he didn’t really see anything suspicious. When the gunman turns away, creep forward into the tall plants (29).
Advance Stealthily Across the Terraces
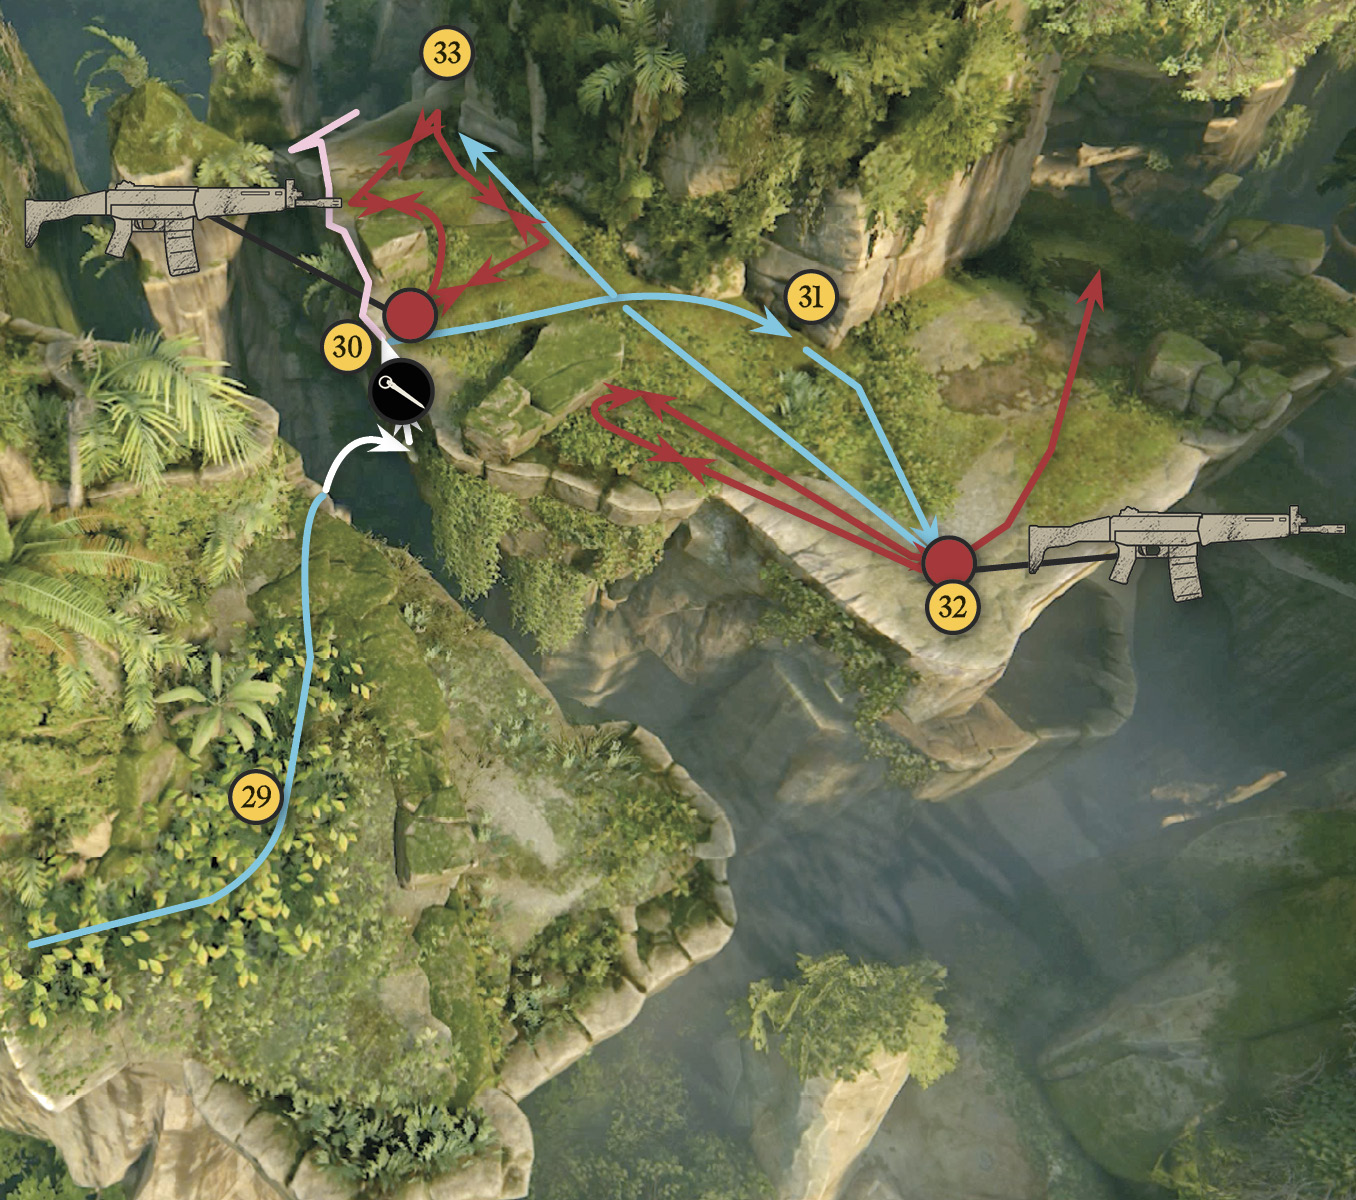
Remember, you have no weapon yet. Watch the guards resume their patrols. When the coast is clear, hustle to the gap and jump across. Use the piton to climb up then hang on the ledge (30) just to the right of rock. When the trooper returns to the ledge, pull him down. Nathan automatically snags his gun.
Climb onto the terrace and take cover at the wall (31). When the next trooper patrols to the ledge (32), sneak up behind him for a stealth takedown. Double back and move down the wall to the next corner. Take cover at the corner and observe the patrol patterns, then duck into the tall plants (33).
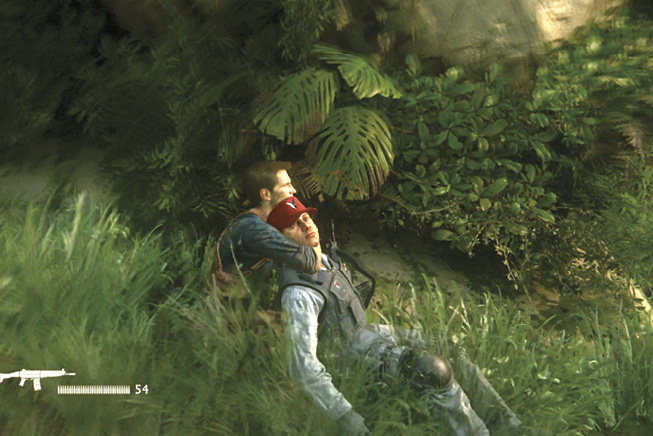
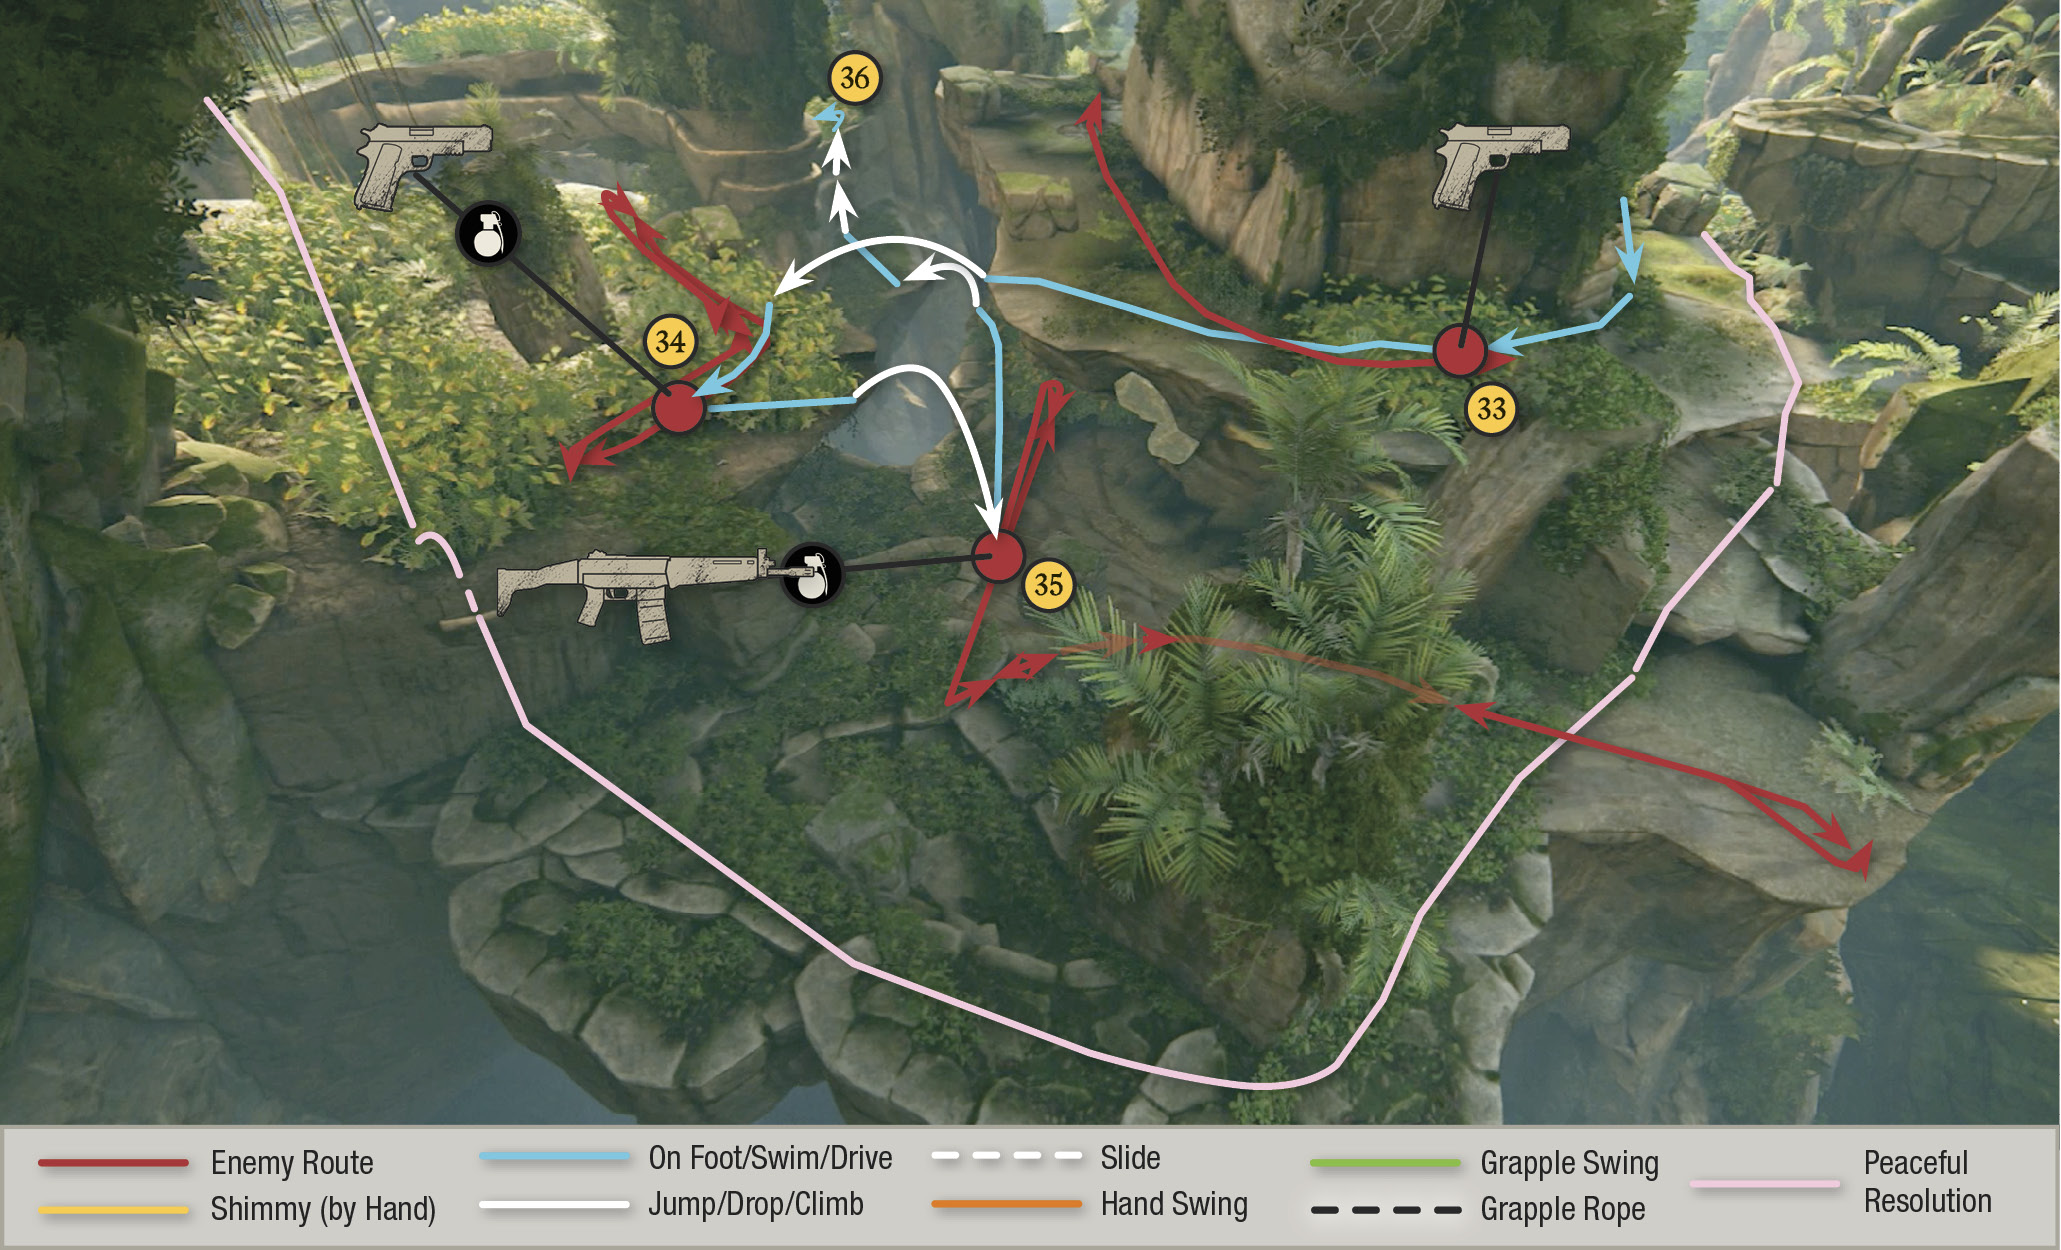
Take down the guard when he walks past you and stay hidden in the plants. Wait until the guard on the next ledge moves away to the right, then hop across to his ledge and duck into the tall plants (34). When the guard returns and moves past you, take him down in the bushes. Wait until the guard patrolling below you comes close to the ledge (35). Then make a jump attack, landing right on top of him for a quick, quiet takedown. Move along the ledge, hop across to the far platform, and climb up the ledges to the tall foliage at the top (36).
Hang out for a few seconds to observe the patrolling patterns of the next six troopers in the area. Then creep up behind the nearest guard as he stands looking away at the ledge (37). Drag him backwards into the bushes! The next move is tricky. Creep to the edge of the grass and watch the guard below and to your left (39). Make sure he’s walking/facing away from you. Then make a running jump across the gap to execute a jump attack on the other guard (38). Immediately take cover behind the log to avoid being seen!
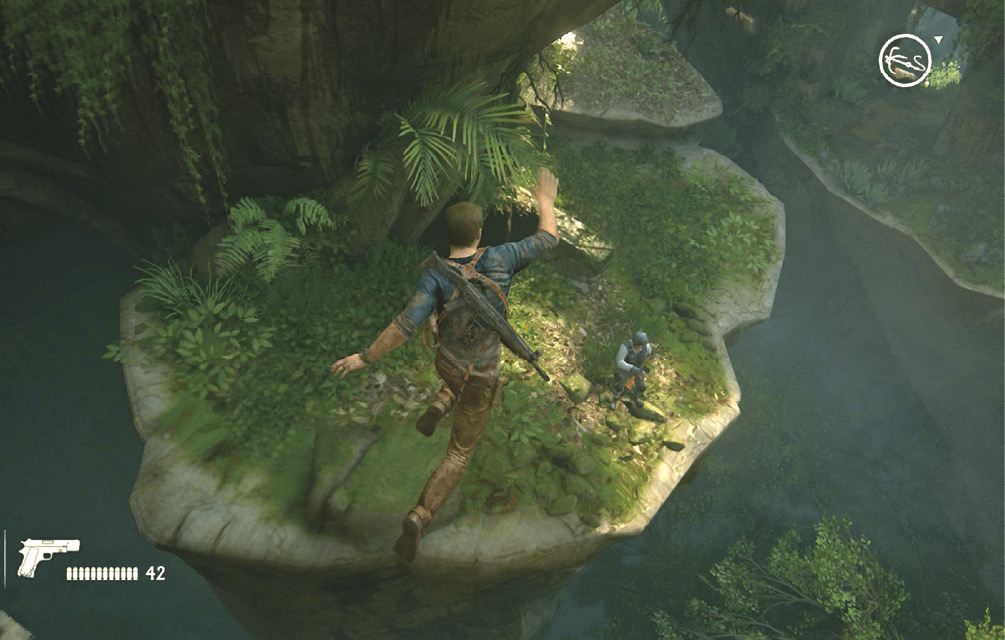
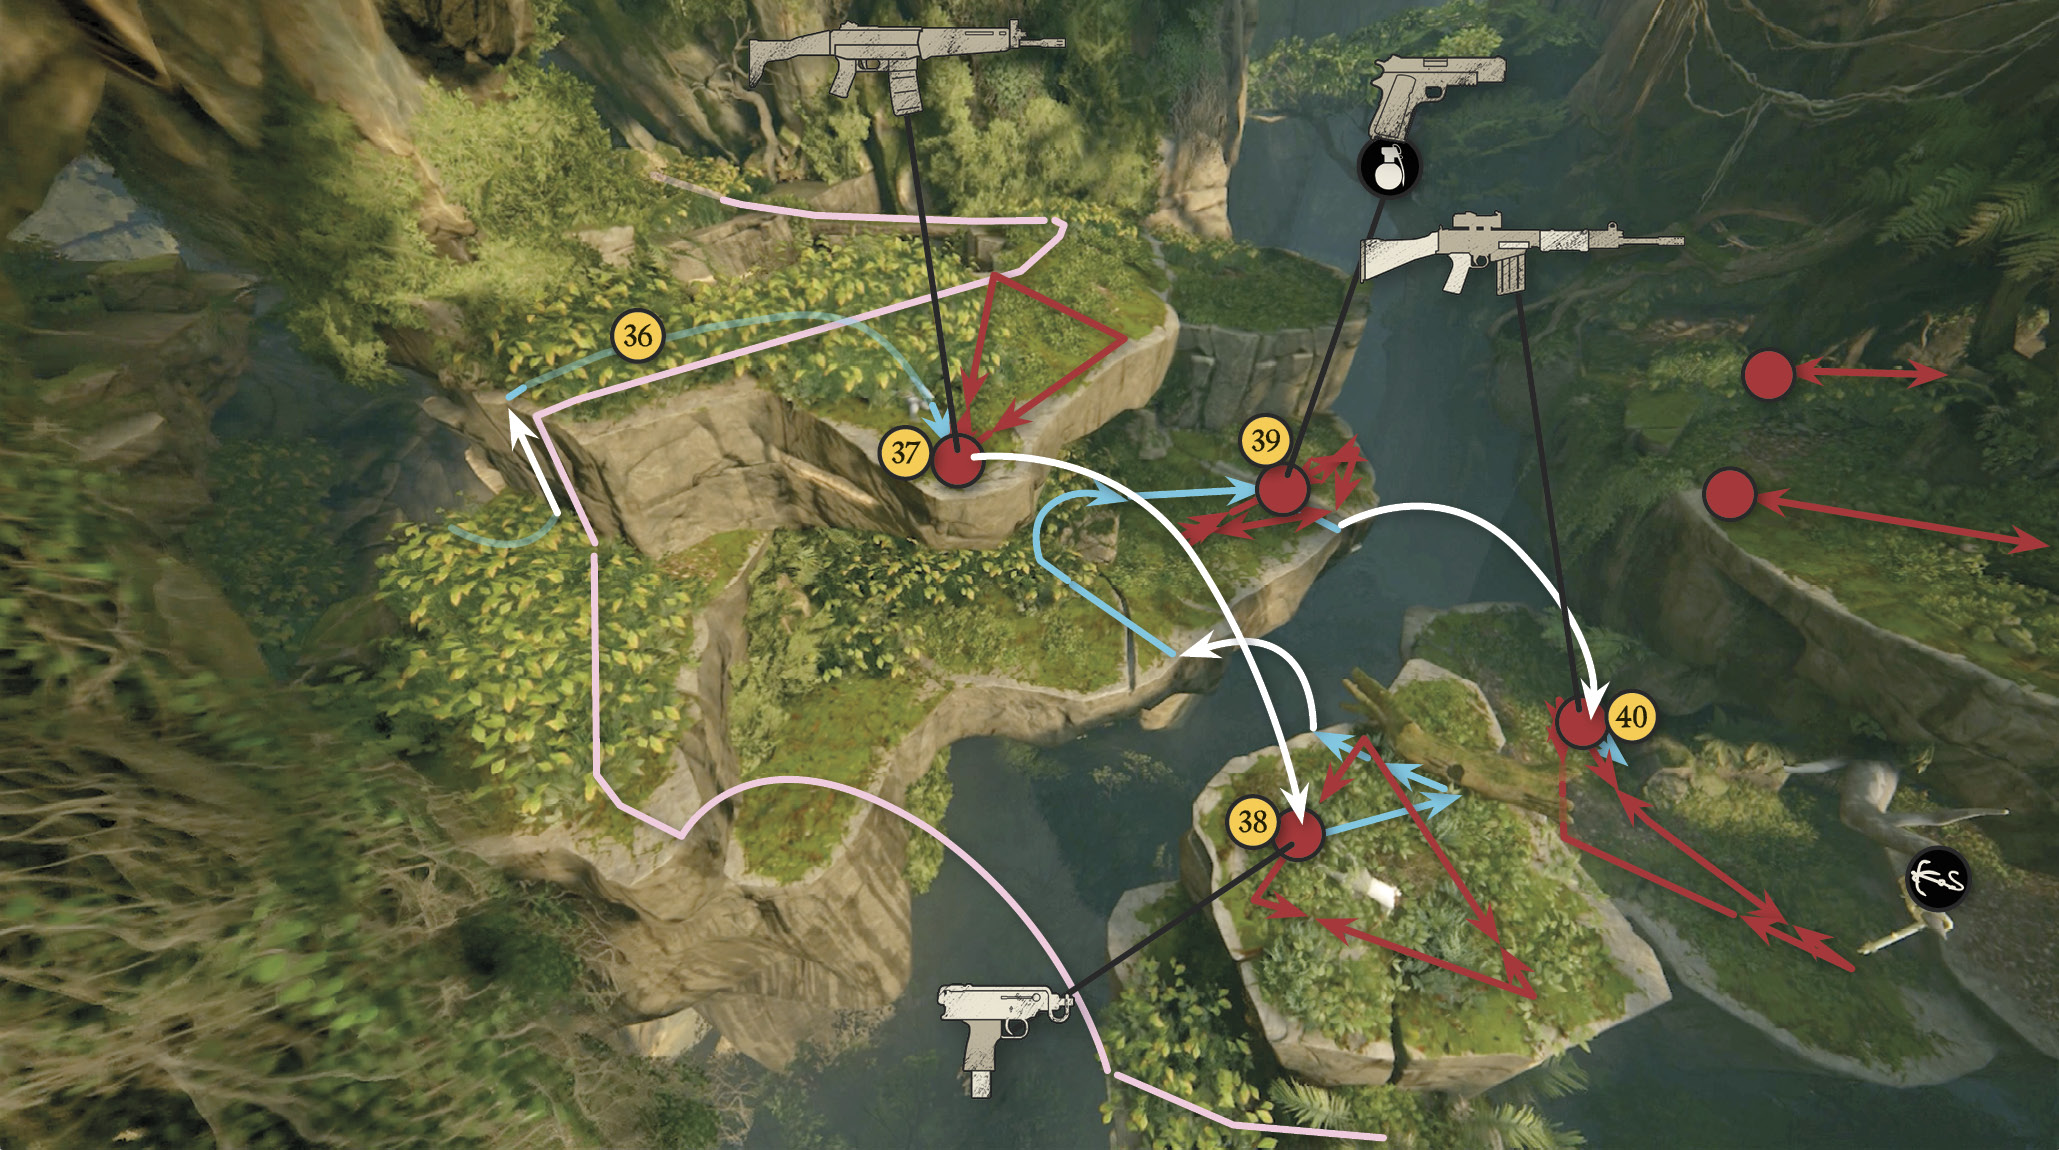
From behind the log, look around and wait until all remaining guards are facing away, then jump across the gap to your left and take cover in the bushes. Wait until the guards on the opposite ledge are facing away, then sneak up behind the nearby guard (39) for a stealth takedown. Wait again until the far guards face away, then take another running leap for a jump attack on the guard below (40) when he is close enough. Hustle quickly to hide behind the nearby rock.
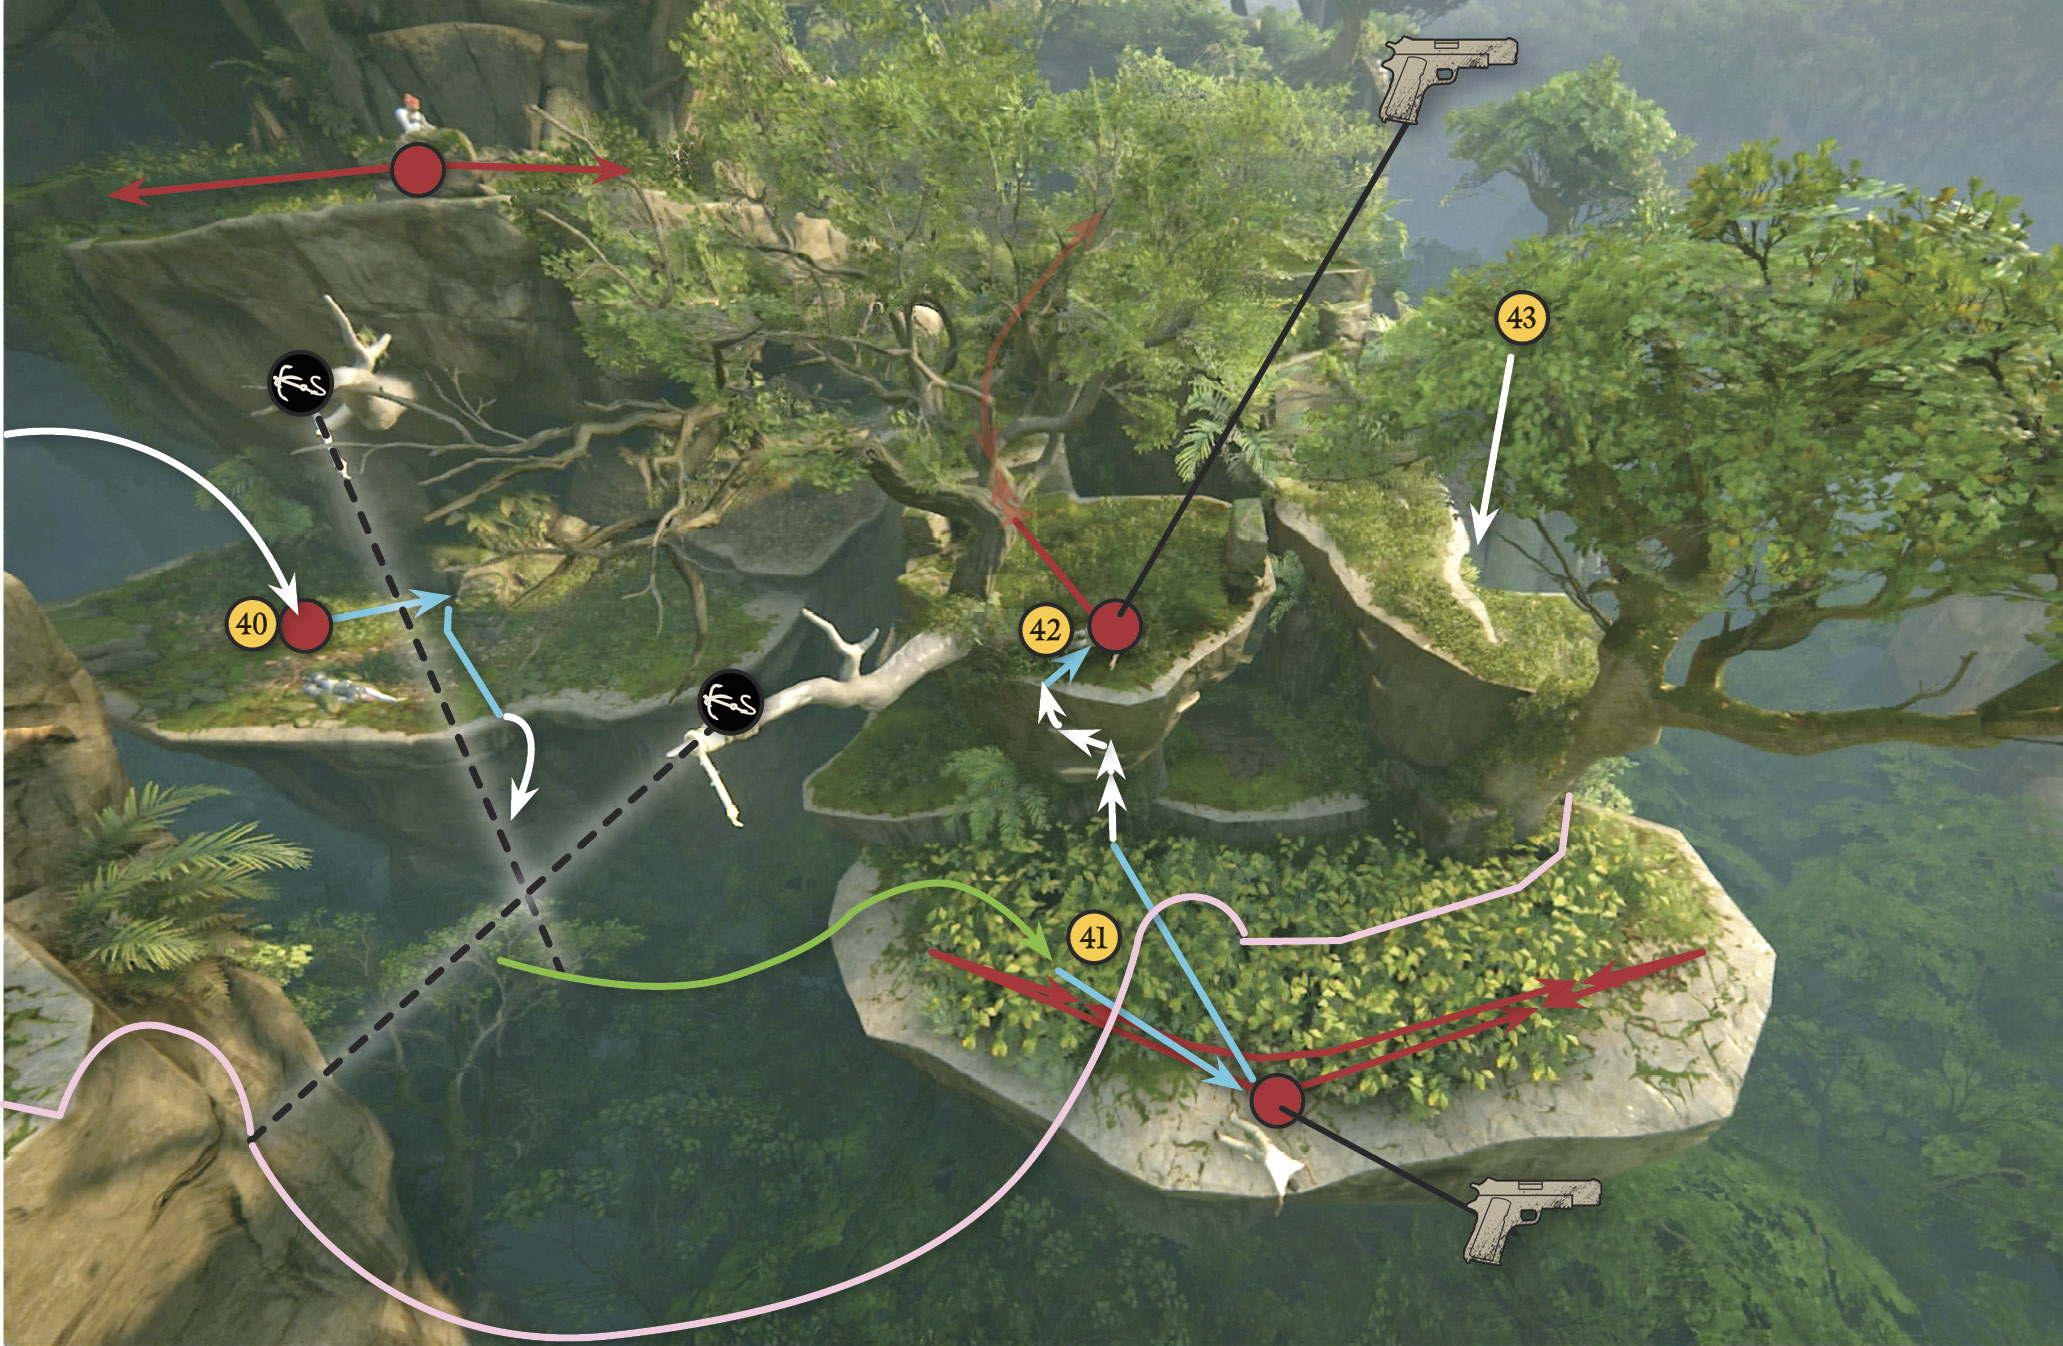
Now start watching the two gunmen over on the next island. When the lower guard is patrolling away from you, fling your hook to the grapple point above and swing across to land in the high grass on the lower level (41). Wait until the guard walks past you in the grass and choke him out. Climb up the handholds to hang on the ledge above, and then sneak up behind the upper guard (42) when he turns his back.
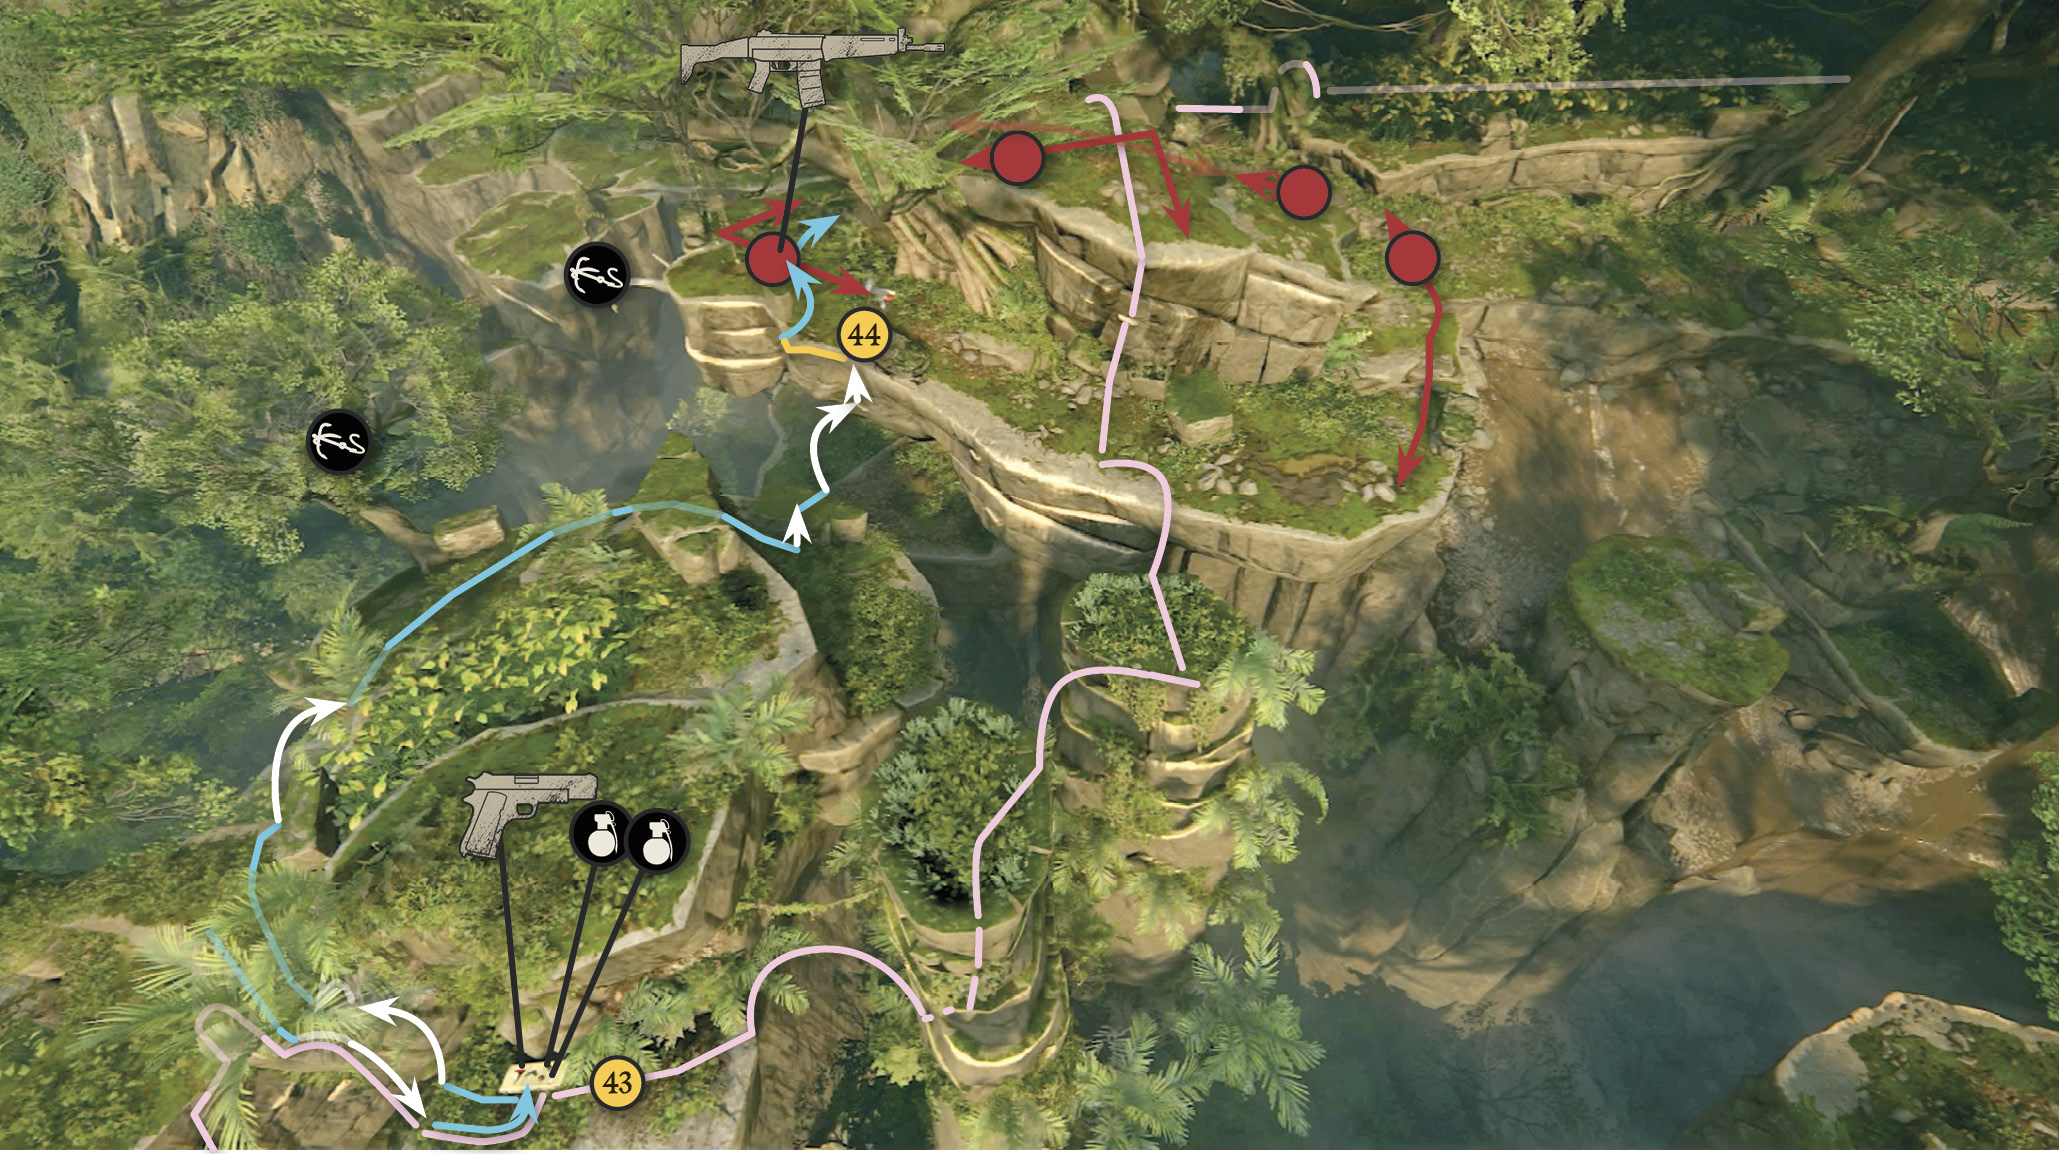
Optional: When both guards on this island are eliminated, you can climb to the far ledge and plunder an arms cache (43). Return the way you came and jump across to the next terrace (44) when the coast is clear. Remember to keep an eye on other guards and attack the guard patrolling here when he turns his back.
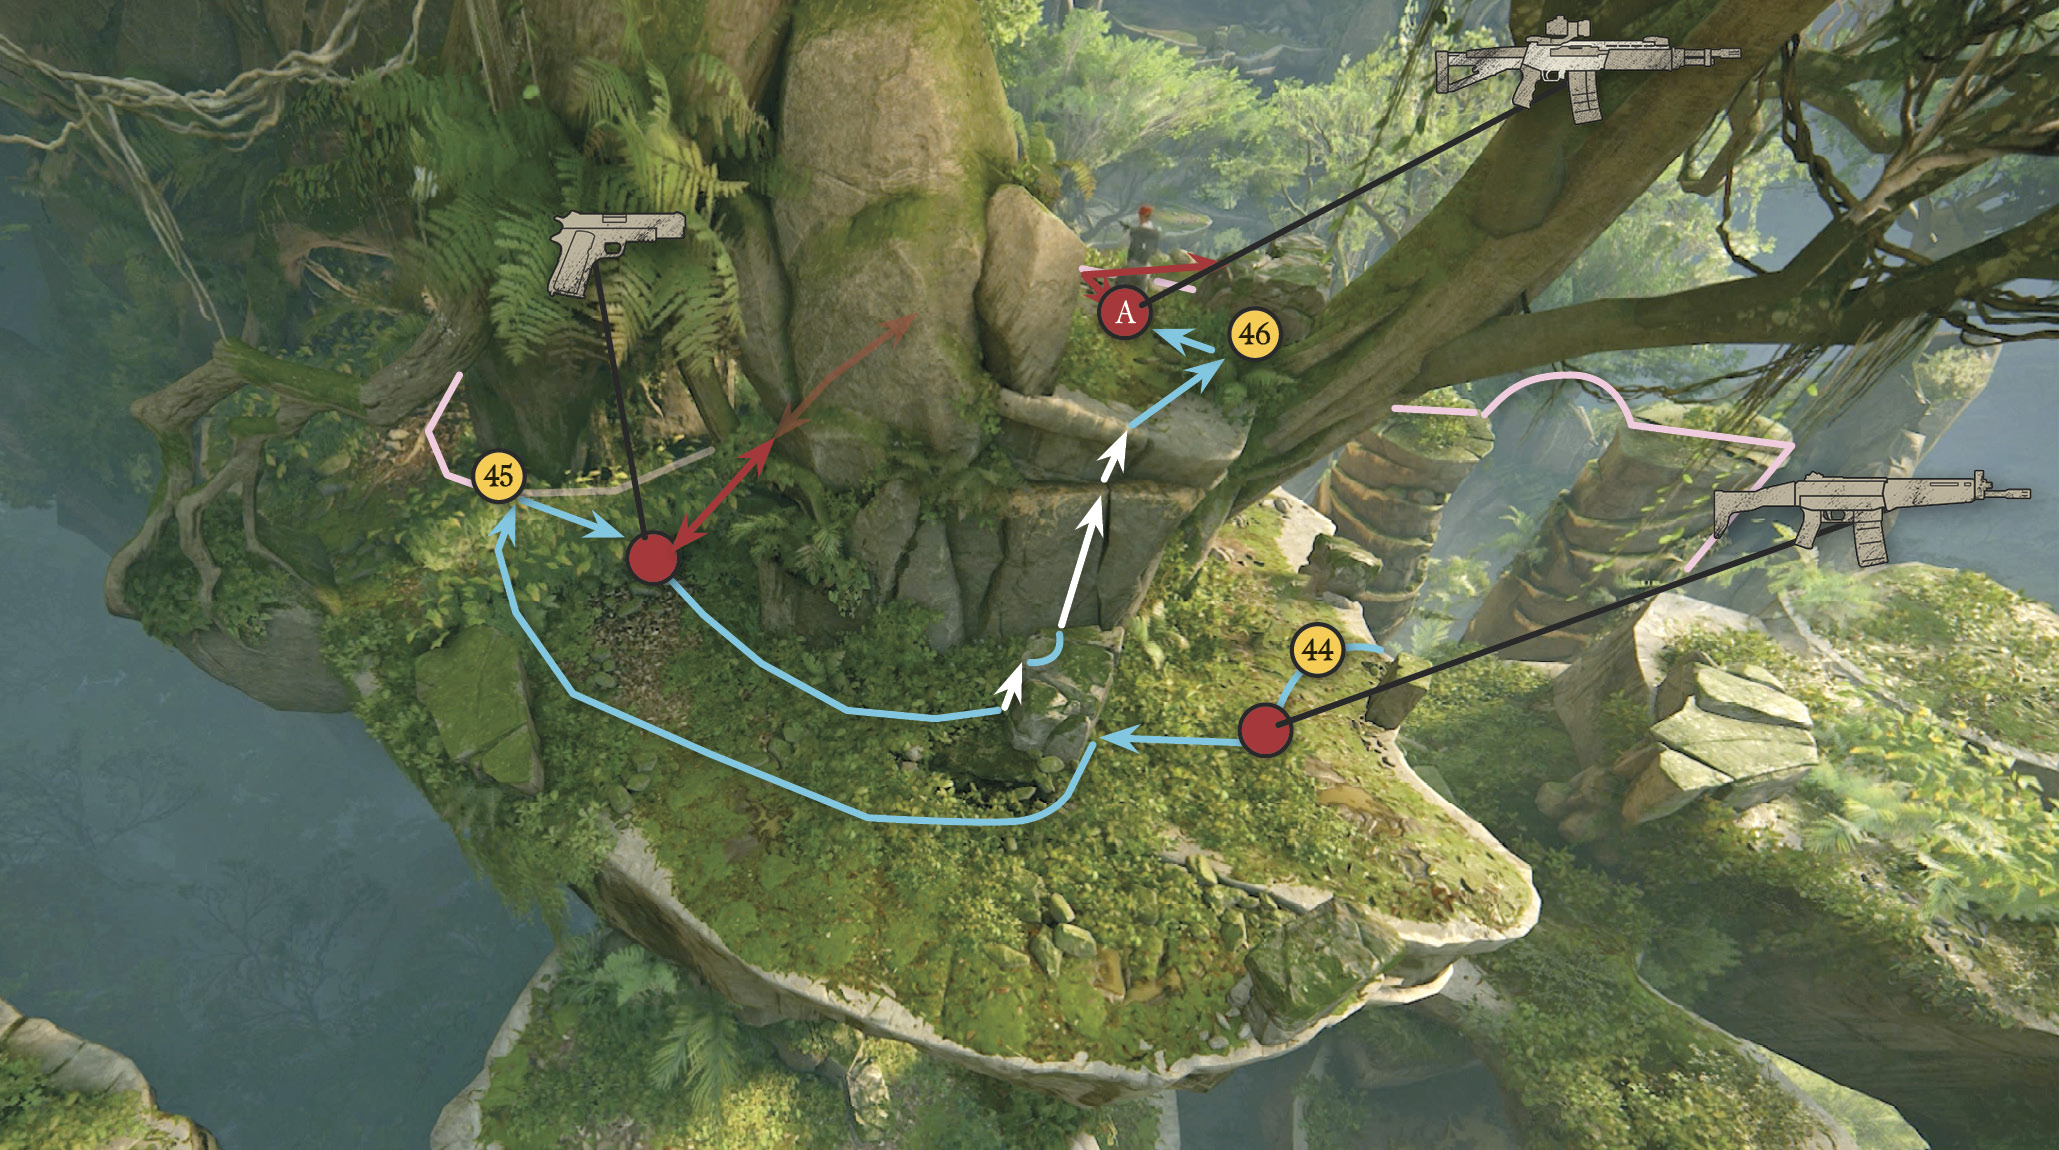
Sneak around the corner into the tall grass and take out the guard who patrols through the archway (45). Then roll to avoid the distant sniper’s laser sight as you move back around the rock formation and climb up; hang until the guard (A) approaches and then pull him over the ledge. Then duck behind the rock on the right (46). You could also wait behind the rock until you can choke guard (A) when he approaches the ledge. This guard carries a New Weapon, the Copperhead SR7.
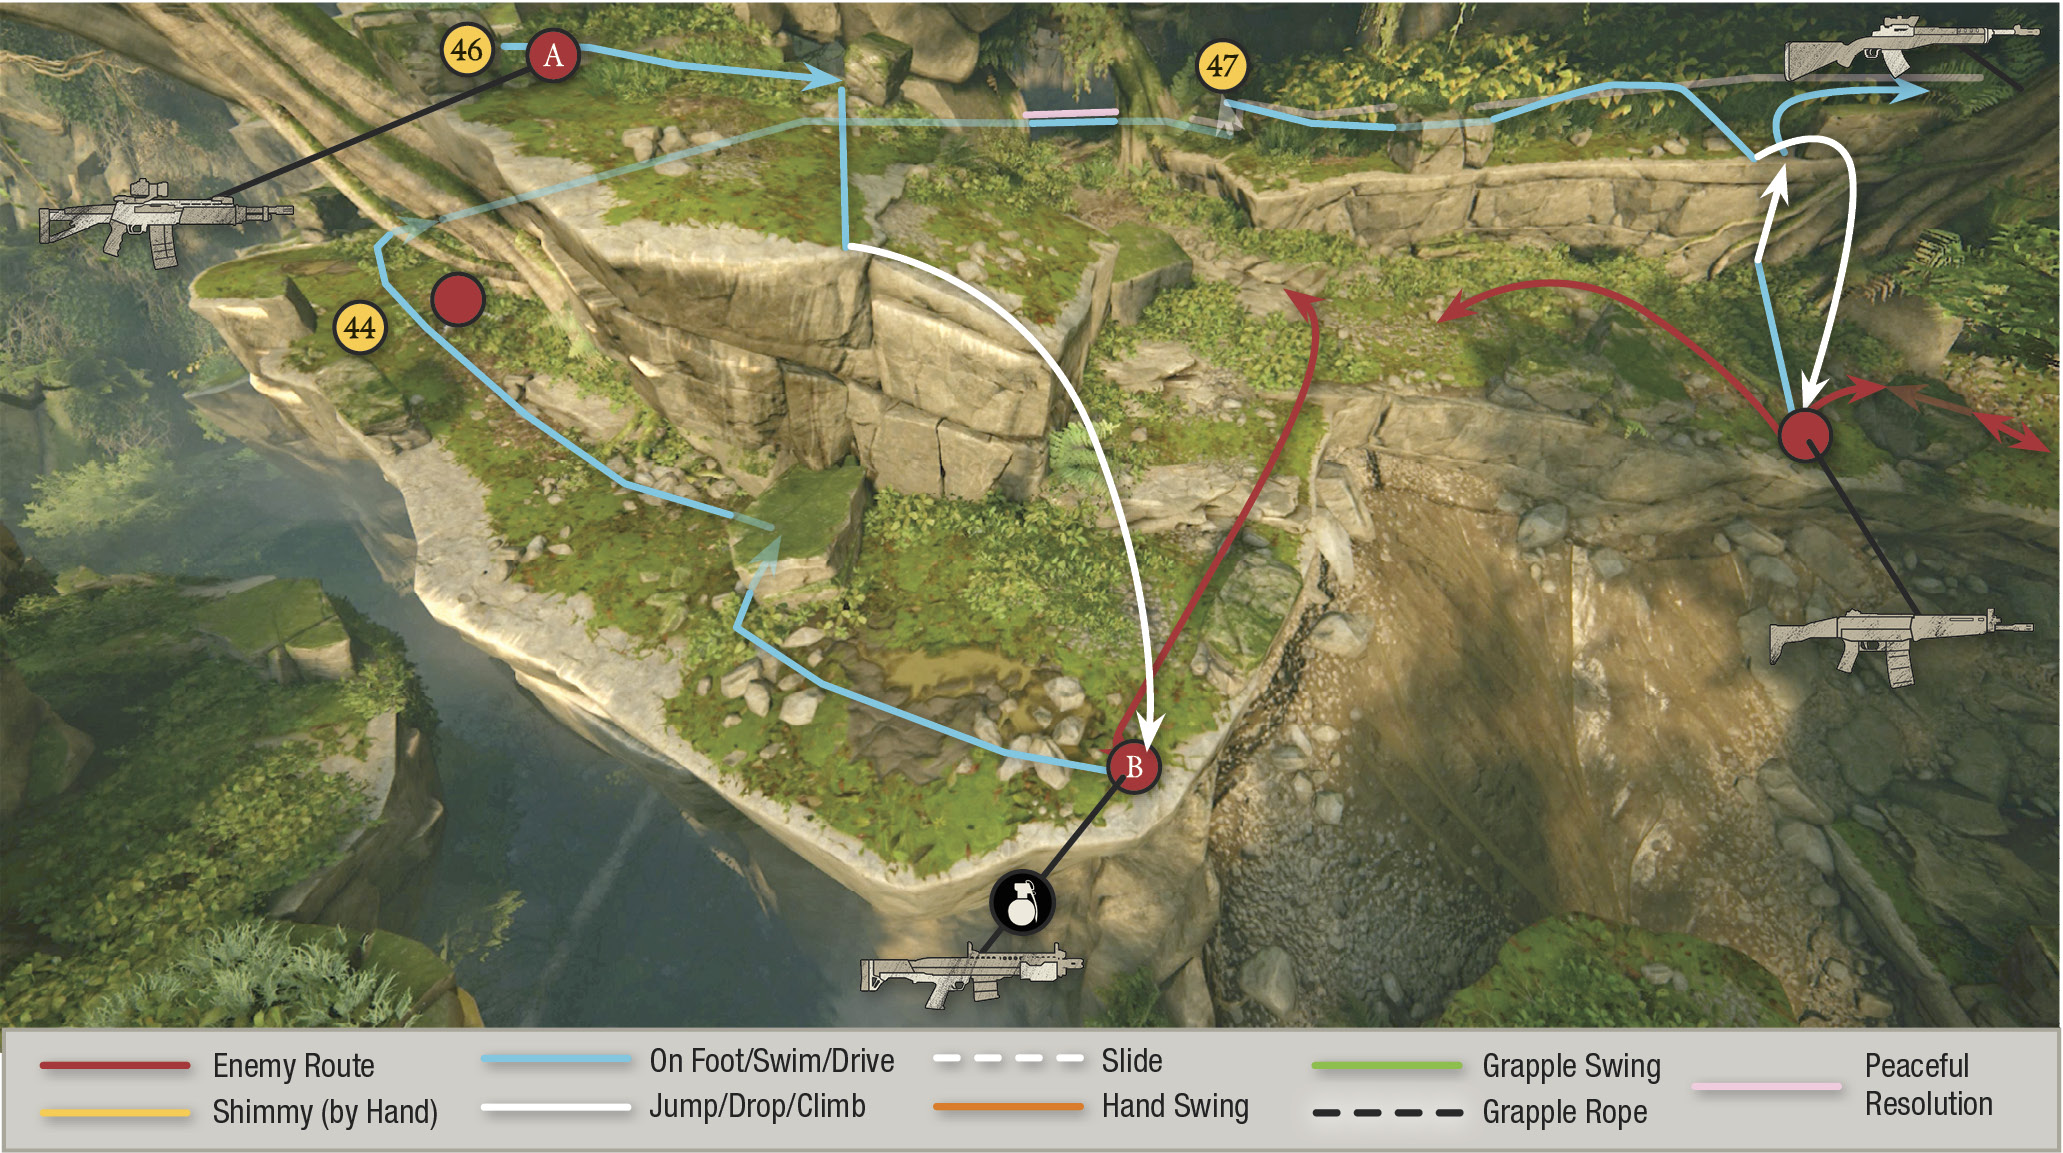
While covering behind the rock (46), watch for the distant sniper’s laser and roll forward to the next rock cover on the left toward the ledge’s end. Here you have a view of the next two patrolling guards below. When the guard along the left pathway is walking away, leap from the ledge quickly and perform a vertical takedown on the guard (B) on the right. This guard carries the New Weapon, the Condor, which is a more powerful shotgun than the Spezzotti. Cover behind the rock near this guard to hide from the laser if necessary. To avoid the laser and the last guard on this landmass, double back along the lower pathway behind you, heading for the spot (44) where you first climbed into this area.
Work your way back around the corner to the tall vegetation (45) and continue around the tree to the short ledge step (47). Climb into the tall grass and as you head forward you’ll see the last guard in this area on the lower path on your right. When the sniper’s laser is pointed elsewhere, leap off the ledge for a vertical takedown on the patrolling guard. Quickly return to the foliage on the higher pathway where you can find a Mettler M-30 on a short wall.
Tactic: Flank the Sniper
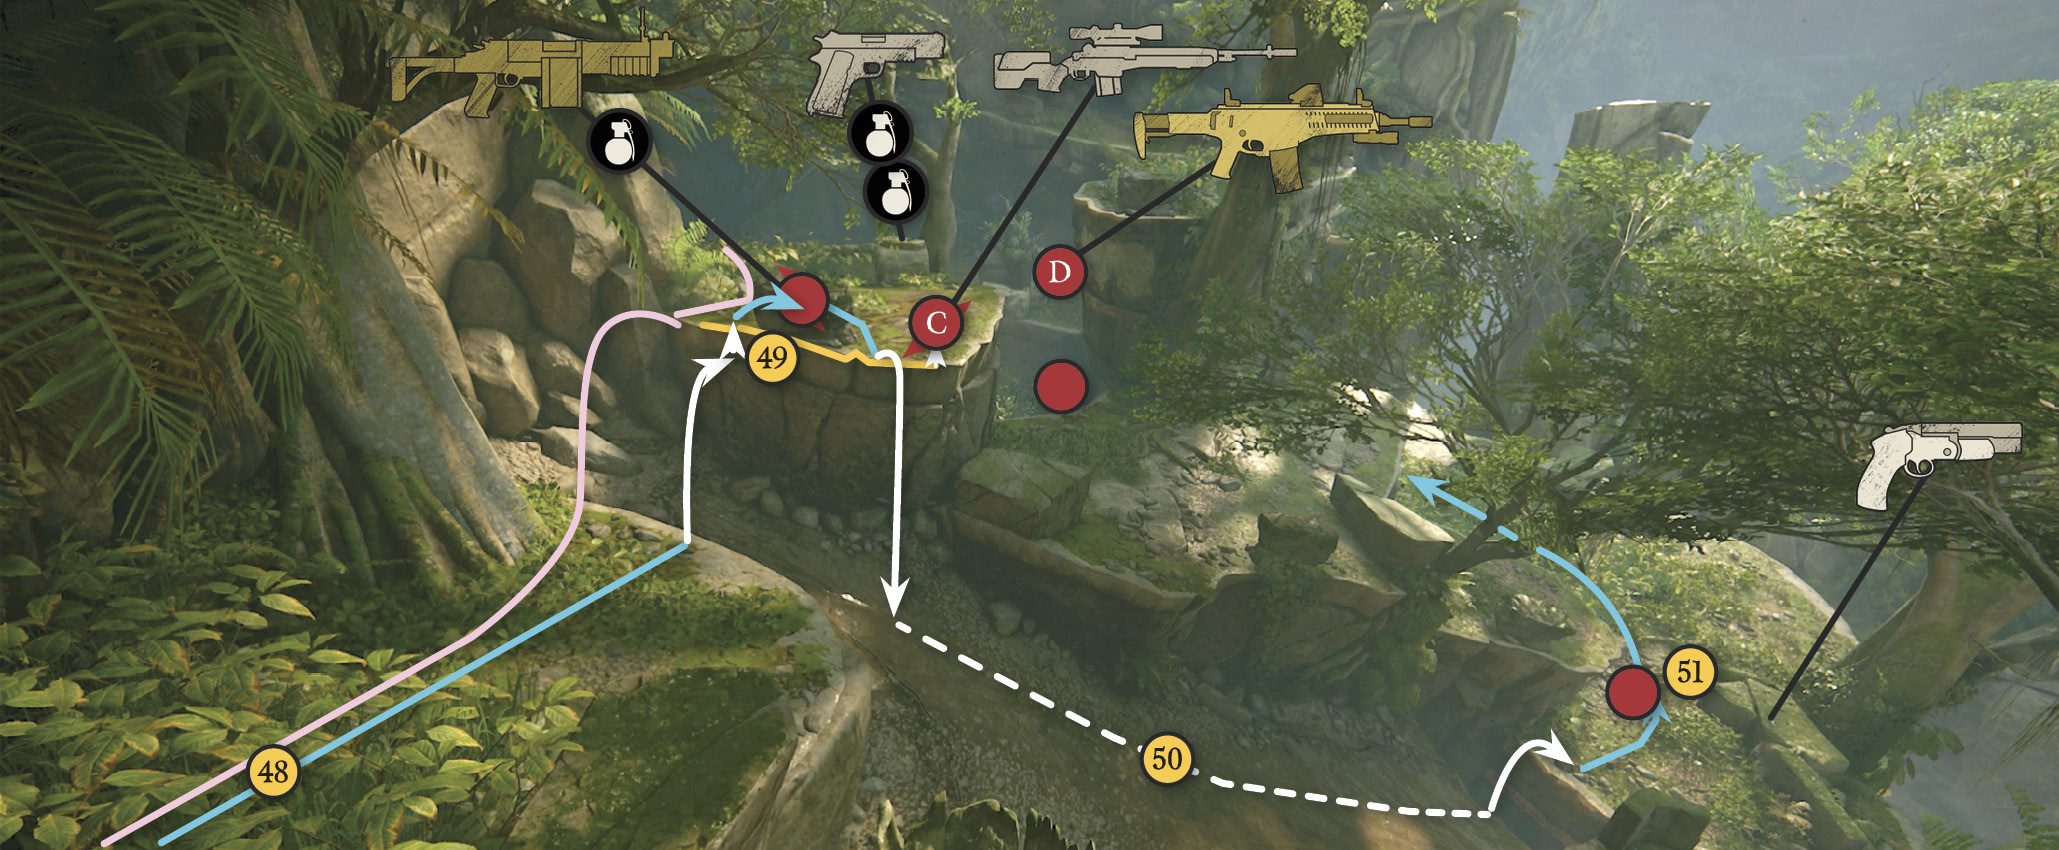
Continue through the foliage until you get to a position (48) overlooking the sniper’s platform. You can either toss a few grenades and then open fire (finally) to take out the shooter and the other troopers clustered around the platform (including a tough, armored heavy trooper).
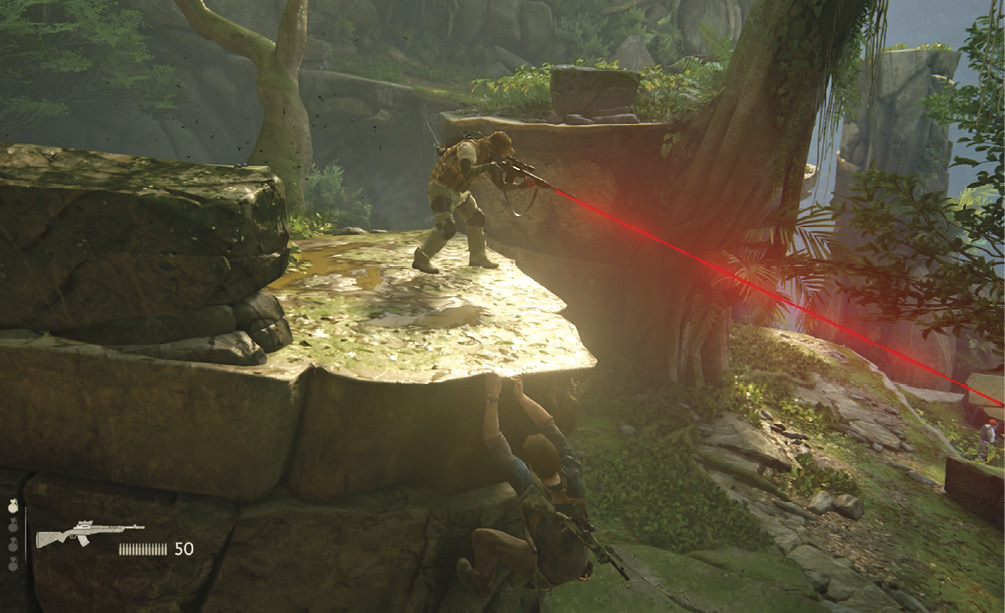
Or you can try a stealthier approach. When all goons are looking away, run down the hill and jump across the mudslide ravine to grab the platform (49). Here you can shimmy back and forth, pulling down the sniper (C) and any other trooper who comes close. (It’s fun to pull enemies into the mudslide (50)—they go tumbling down and off the cliff at the bottom!) After killing all you can here, drop into the mudslide ravine and ride it to the lower ledge. If you time it right, this leap can become a jump attack of the shooter on the platform (51).
Exit the Area
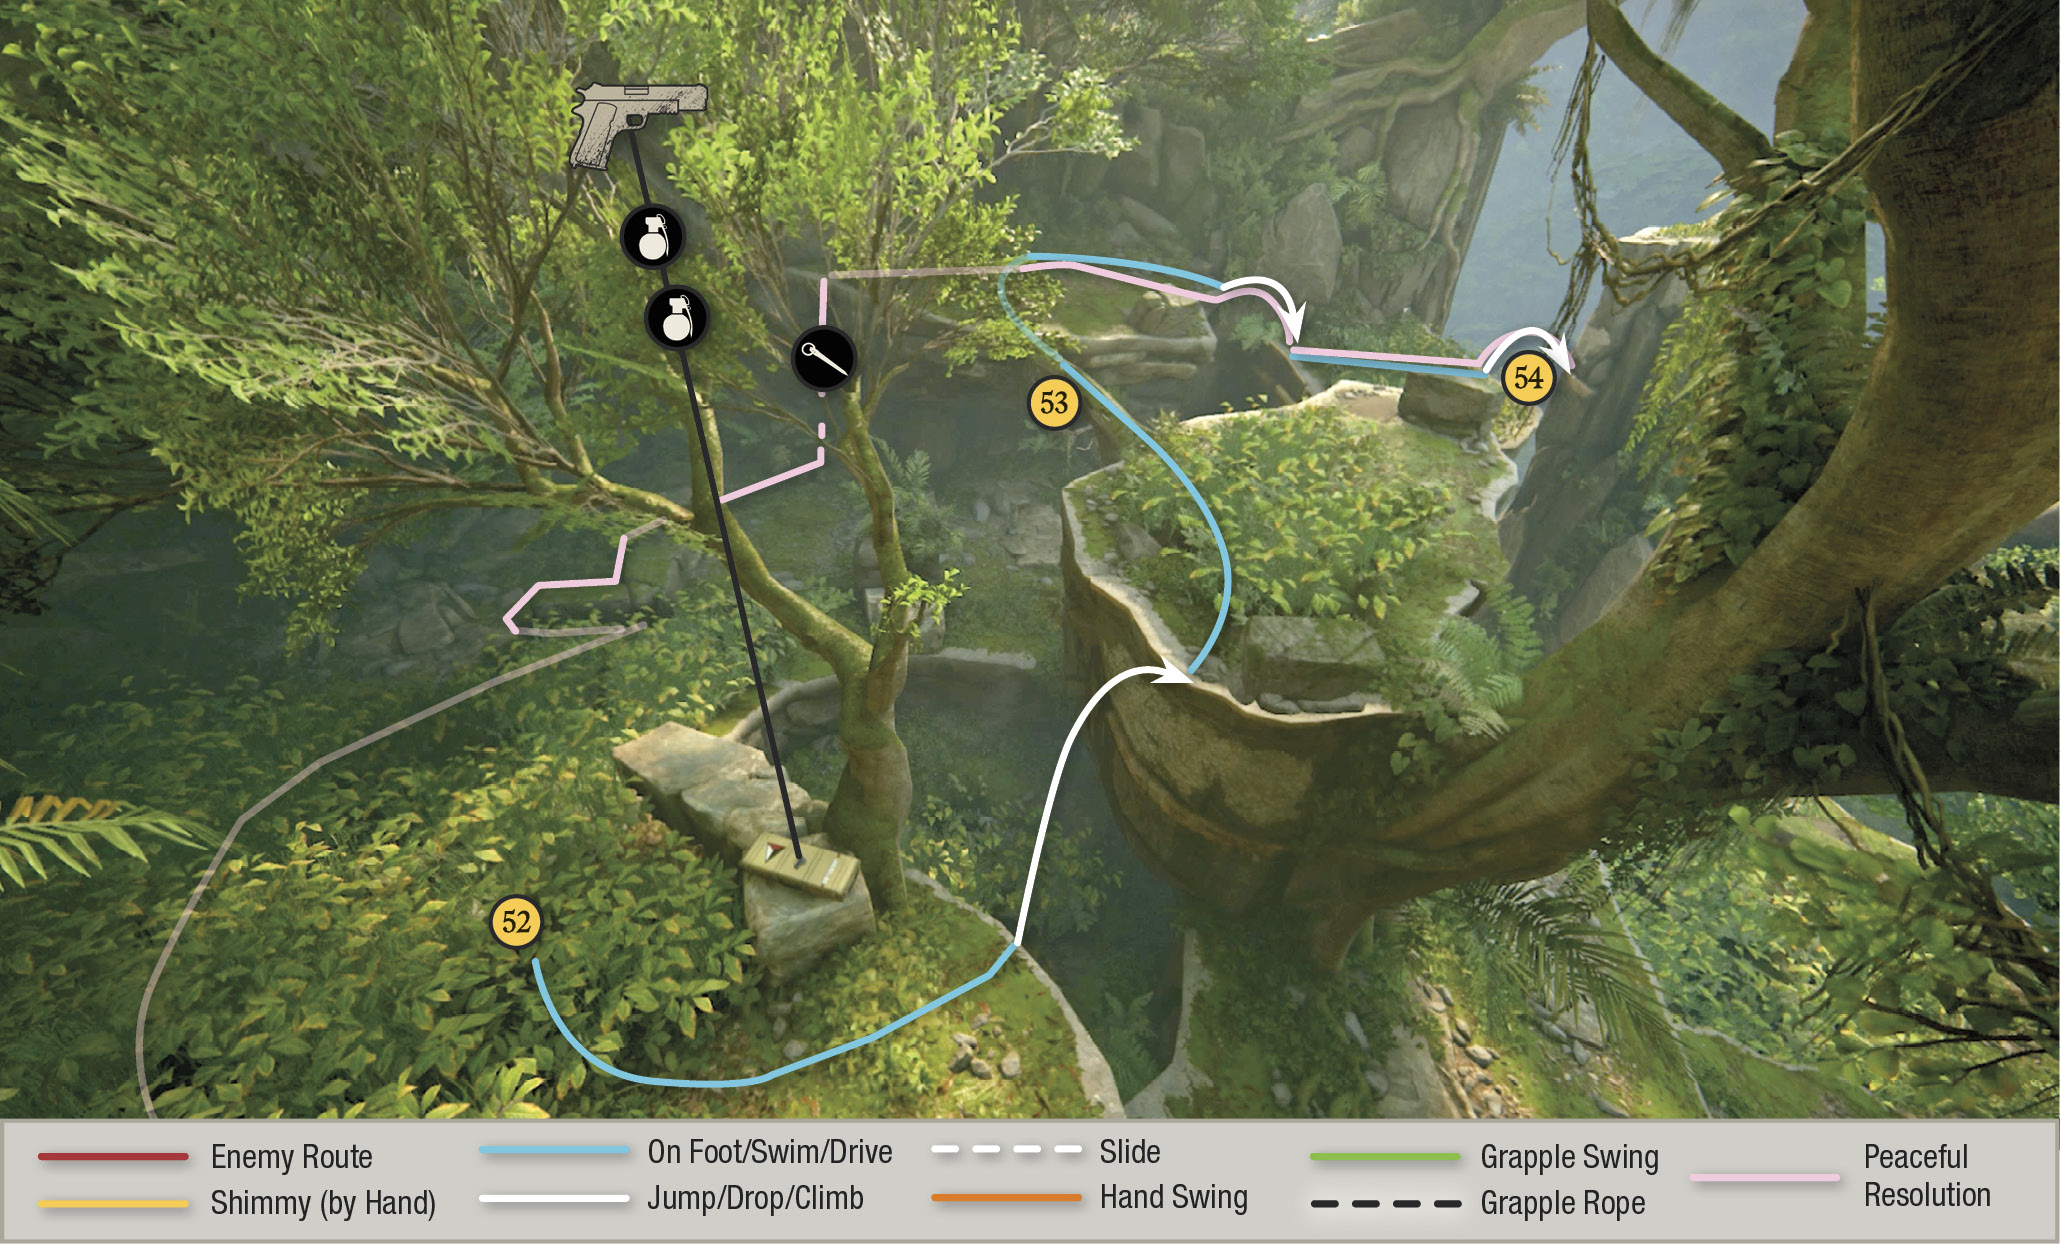
Once you reach the sniper’s platform (51), loot the Shoreline ammo chest by the tree and consider swapping out your long gun for the sniper’s M14 Custom rifle (New Weapon) to nail any remaining troopers over on the far ledges. Also look for other the final New Weapon choice in the area: the ARX-160 rifle dropped by the heavily armored, and helmeted soldier (D). When you finally clear out the area, jump across to the next platform behind the ammo chest and walk across the log bridge (53).
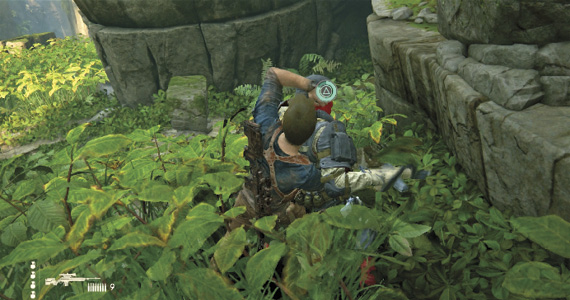
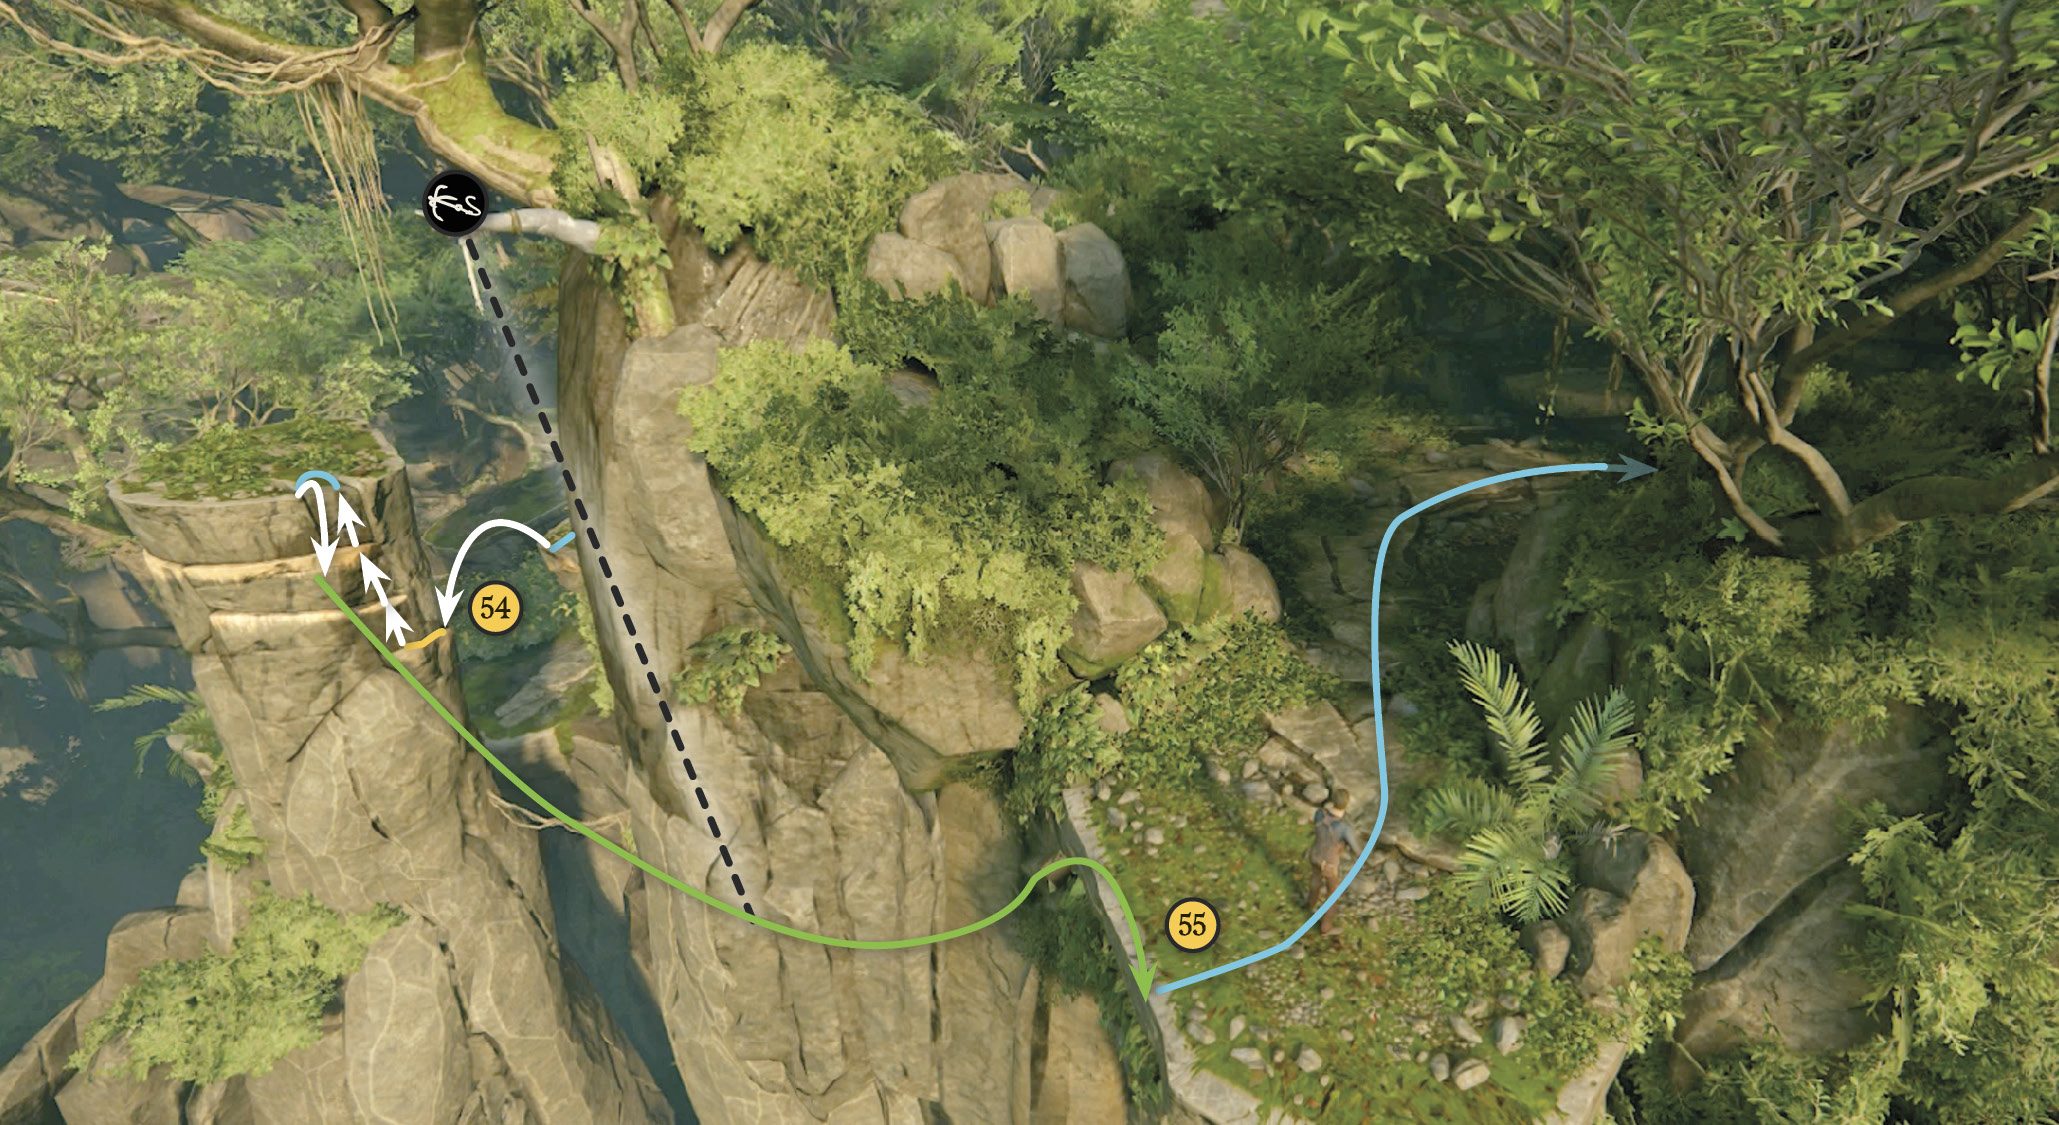
Turn right and hop to the next platform, then to the handhold (54) on the tall rock pillar. Although there’s a porous section on the pillar, you don’t need the piton. Just slide left along the cleft to find regular handholds leading to the top. Use the grapple point to swing across to the next platform (55) and move up the rocky path beyond.
 Dress Dirk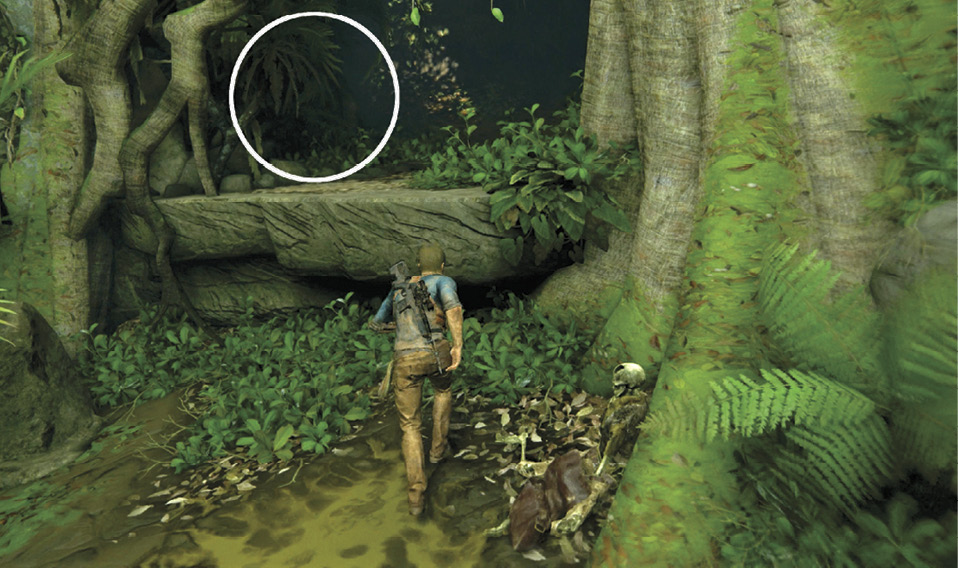 At the remains of Walter Hayes, hop up the low ledge just to the left to discover a short, dark trail beyond. Follow the trail to find the Dress Dirk on the ground. |
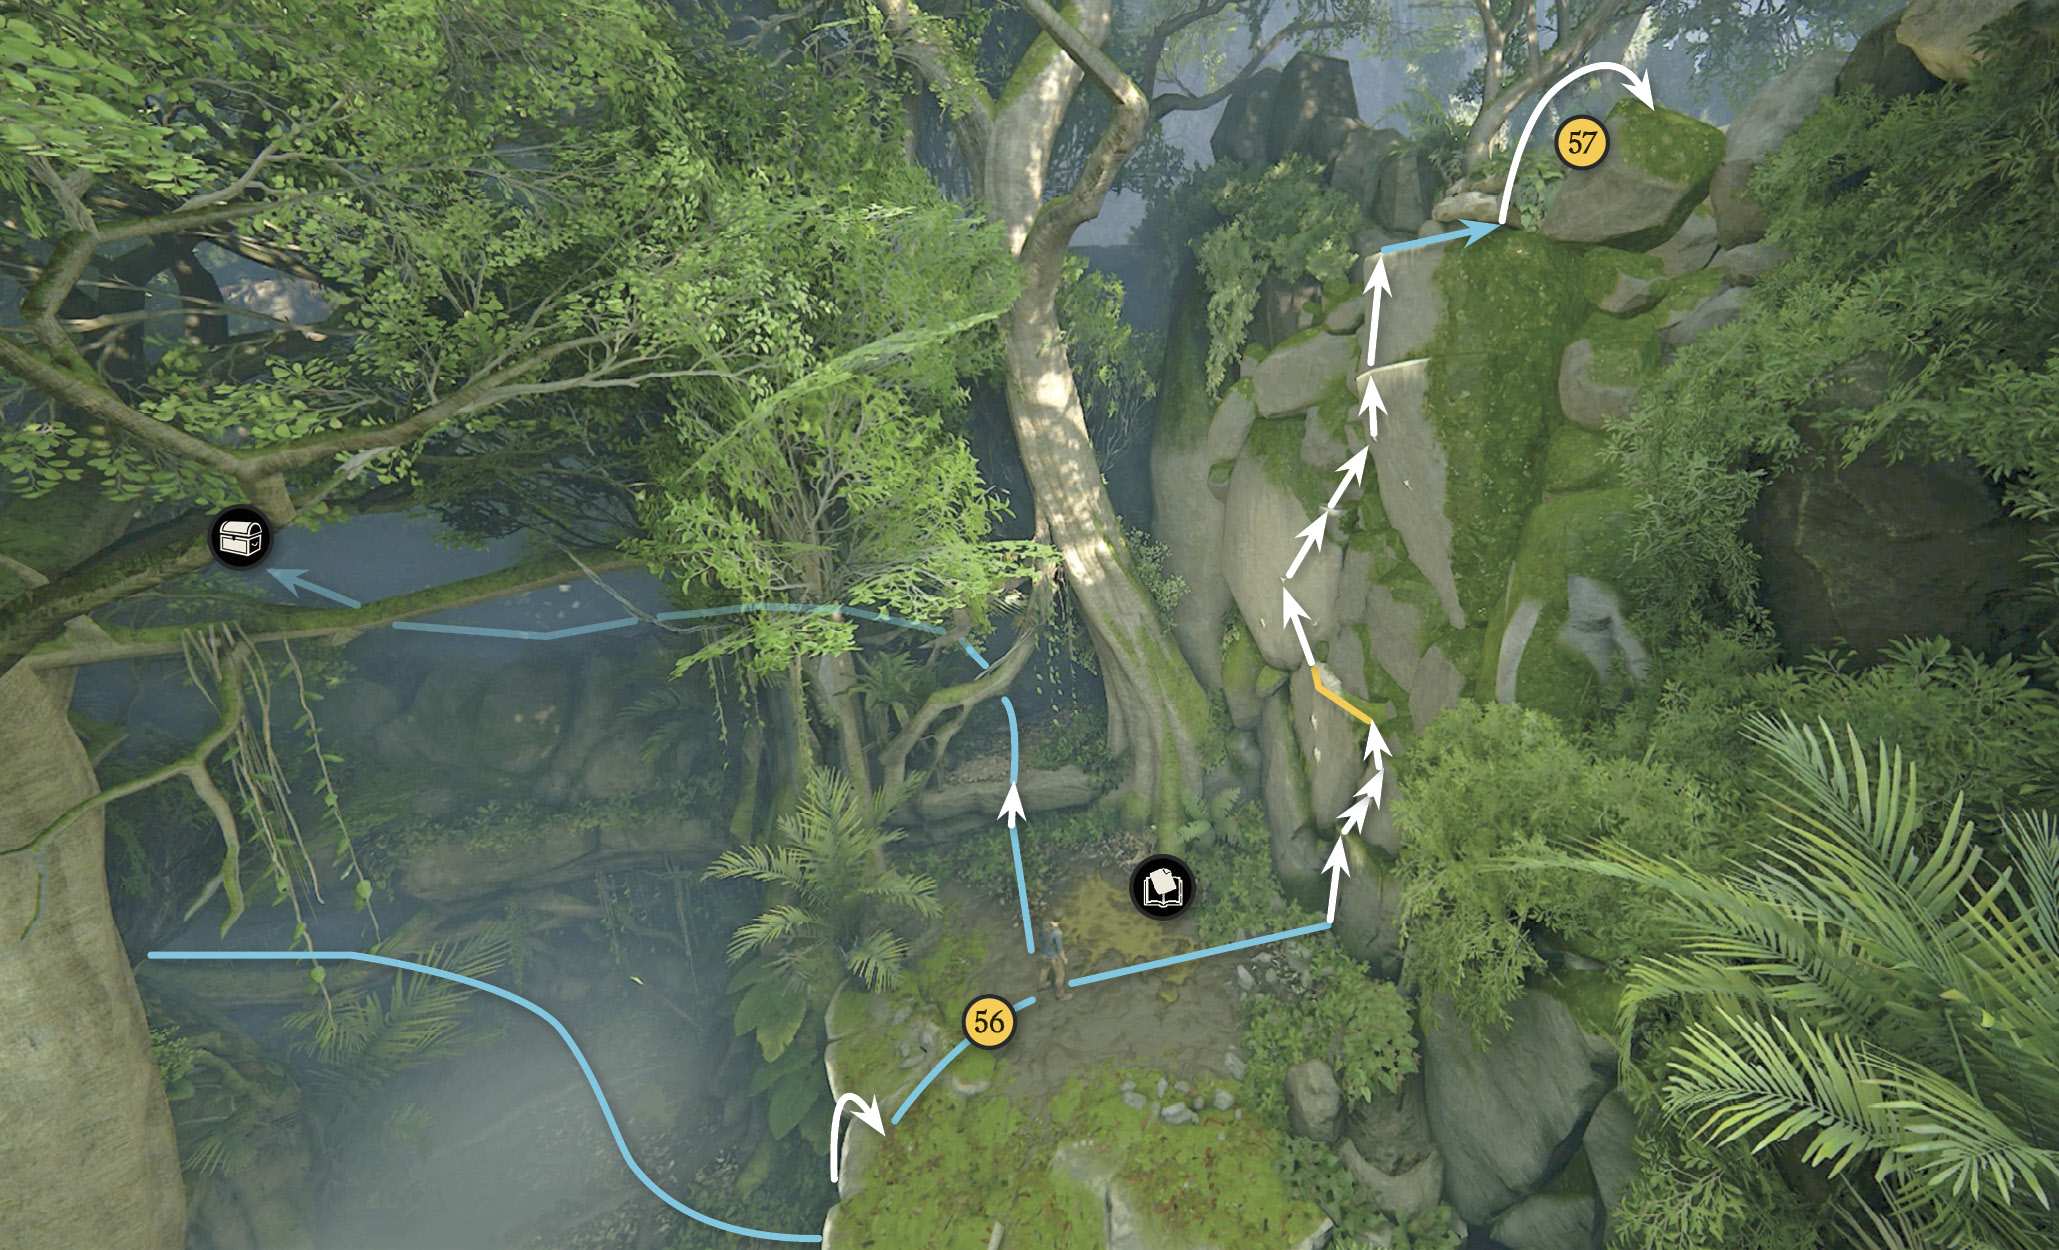
Follow the path through an overhang and weave through the tall trees until you reach another wall. Climb onto the low ledge (56) and examine the pack of the unfortunate Walter Hayes to pick up another Optional Journal Note on the maniacal treasure hunt of Jonathan Burnes. You can also find a treasure up the dark path to the left.
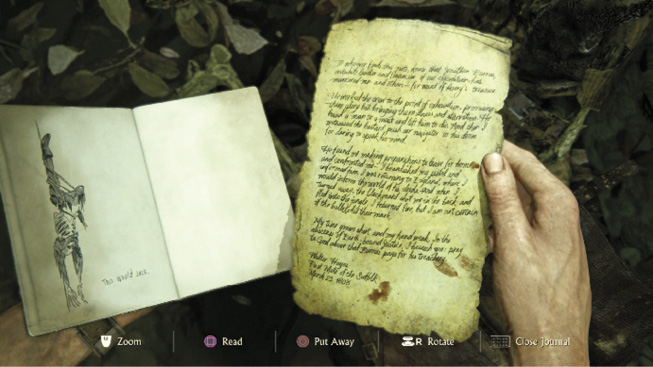
Then climb up the handholds on the wall until it collapses (57). This triggers a cutscene: Nathan finally finds Sam. After a healthy debate about options, Nathan finds something that settles the brotherly argument…for now, anyway.
Find the Pirate Colony
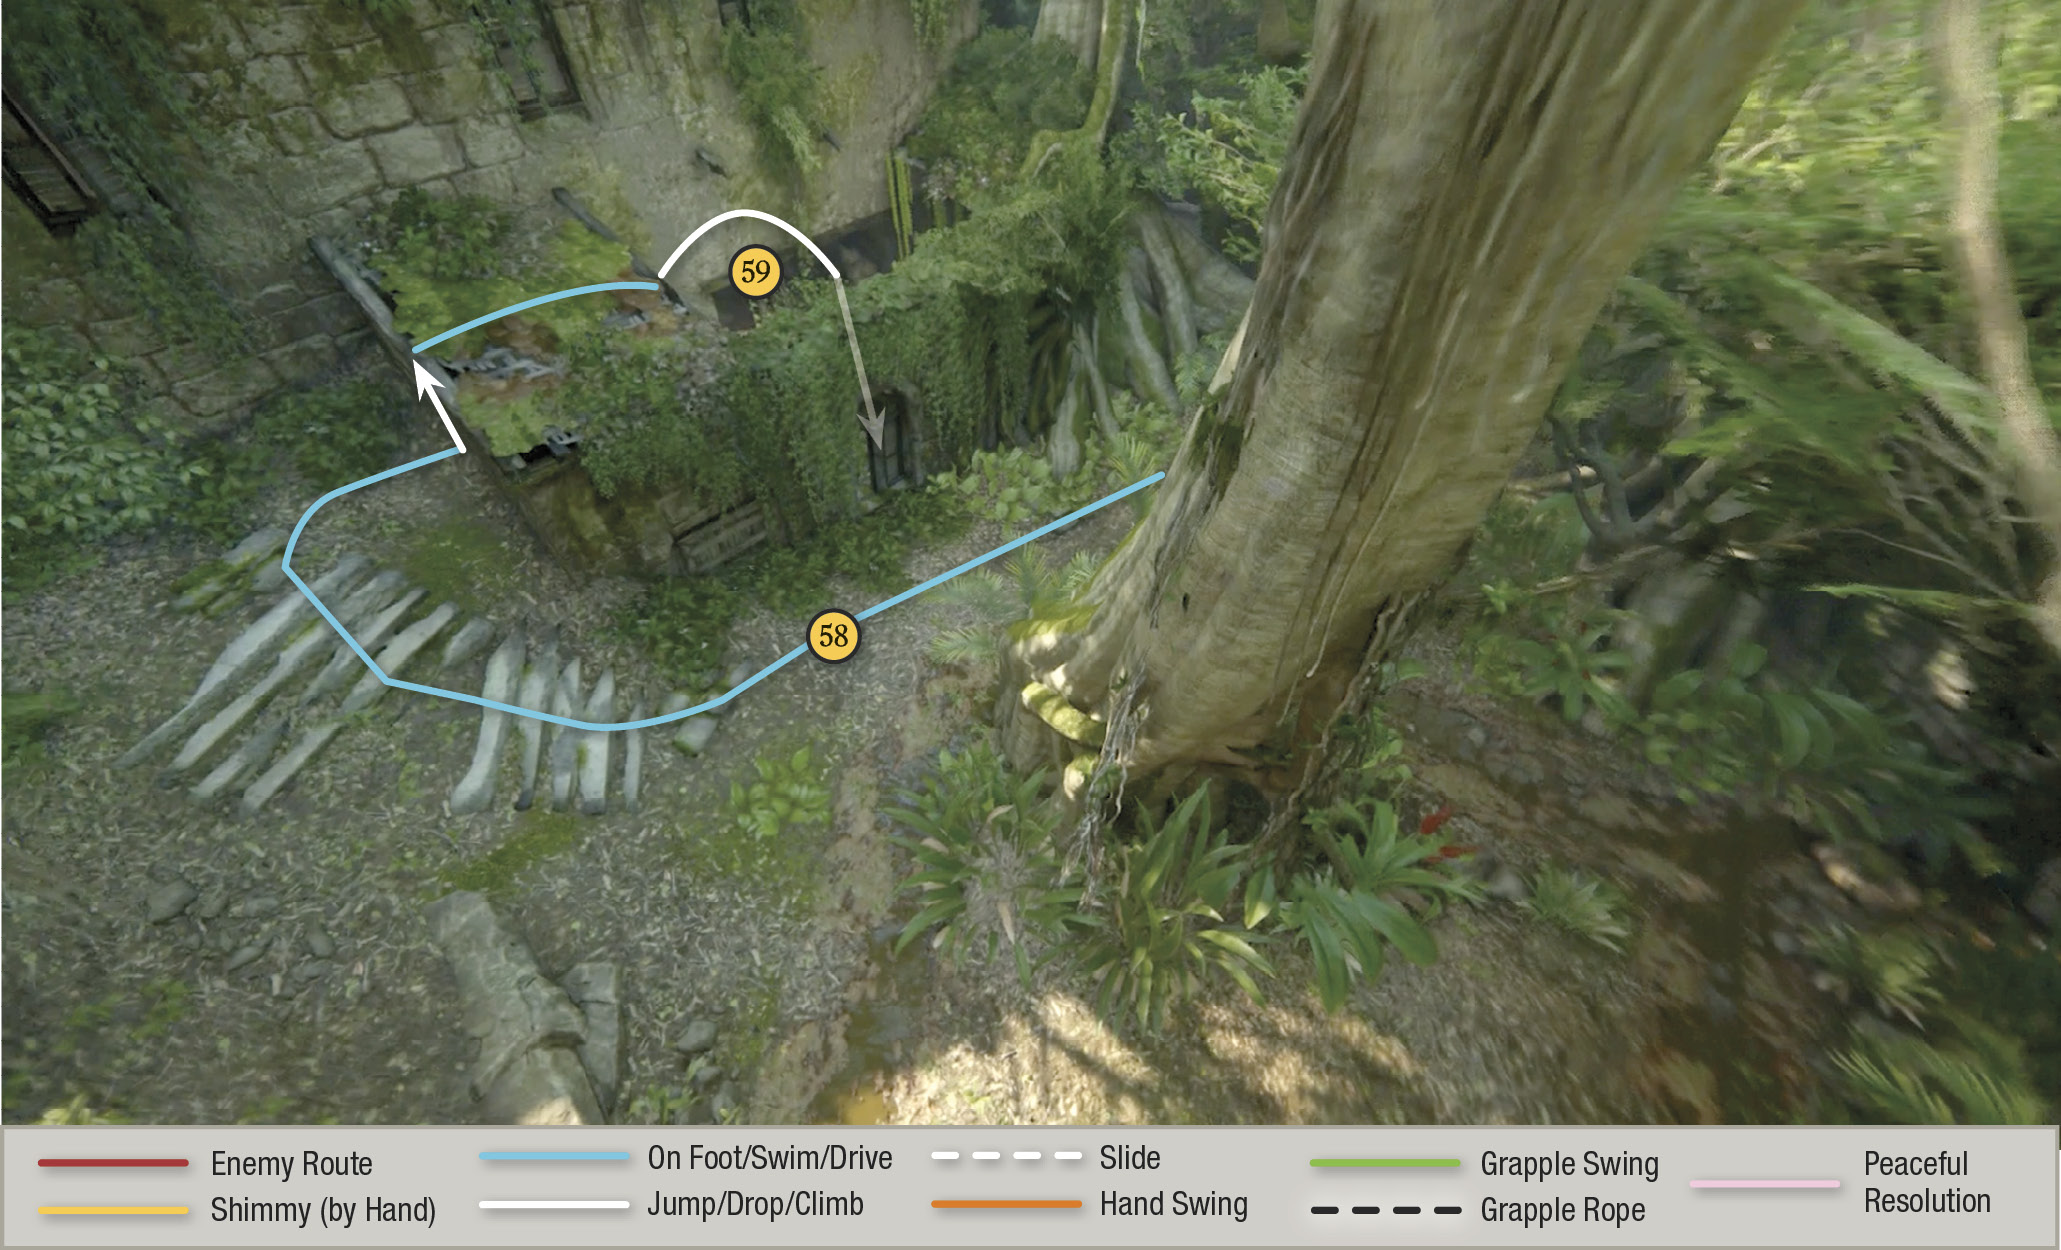
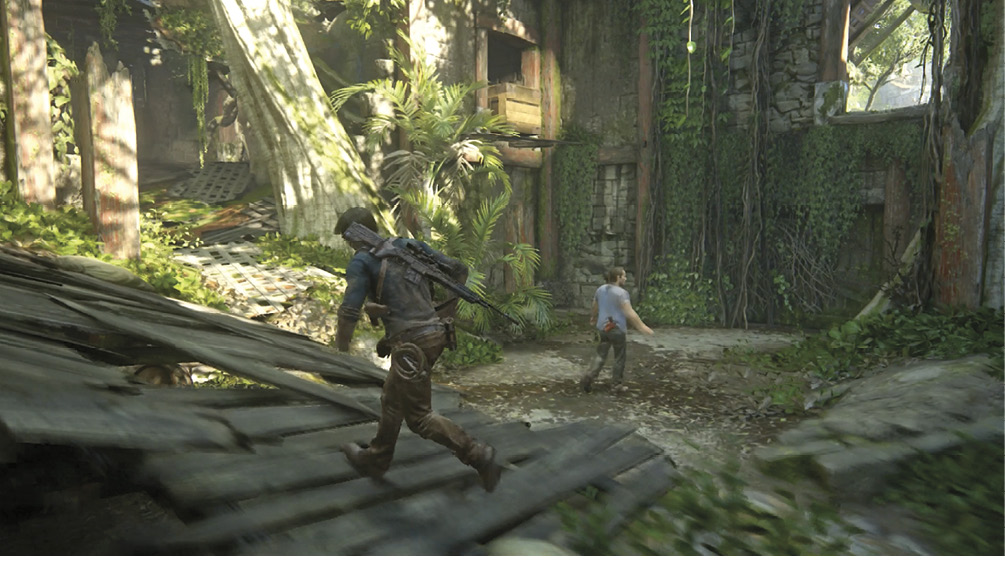
Follow Sam down the trail that leads through a decrepit gate into an old, crumbling outpost. Move through the tree-covered lane until you reach a staircase (58). Climb the stairs, crawl onto the low mossy roof, and drop down into the building (59).
Inside, approach the low beams in the back and press  to crouch under them and move down the low passage. Lift the crate to crawl underneath it; you can try to lift the wooden beam too, but Nathan can’t budge it and Sam calls him back.
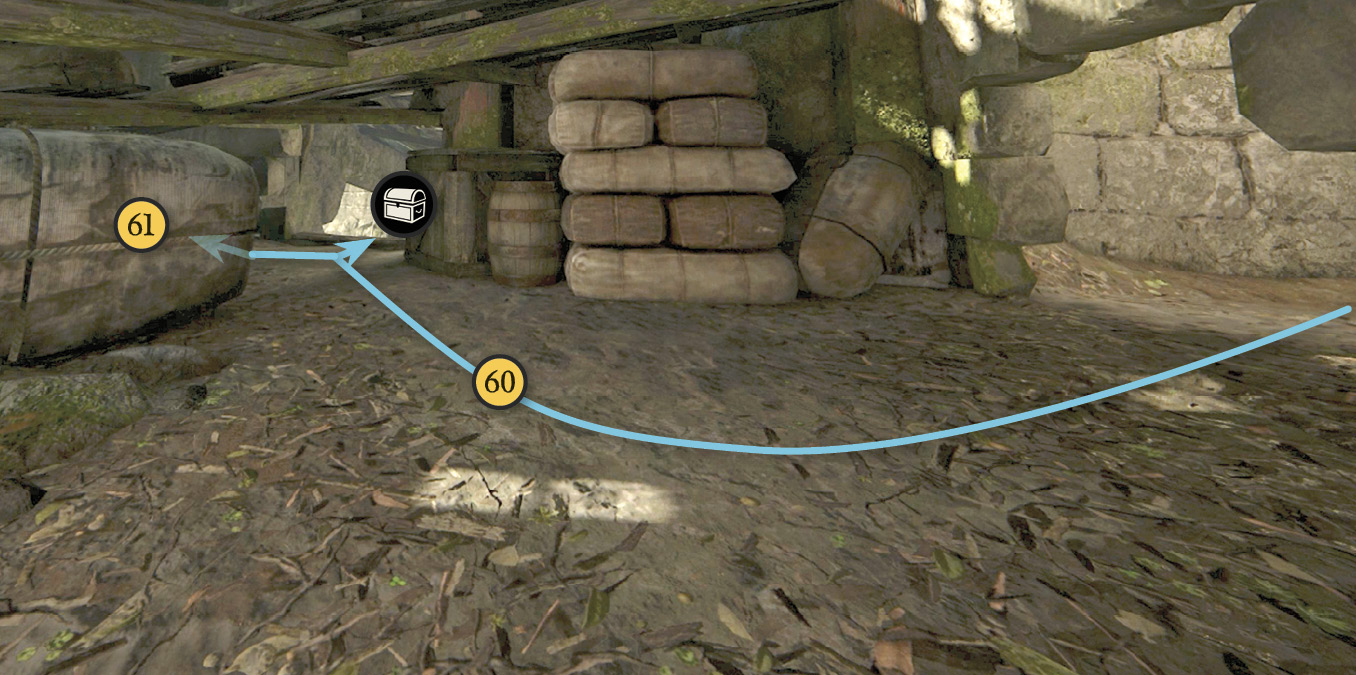
Climb the ramp and drop down the hole in the floor, then follow it to a fork (60). Veer right to drop into a room and find a treasure in the subfloor. Then come back and continue down the other fork (61) to exit into an open courtyard (62).
 Frechen Bearded Bottle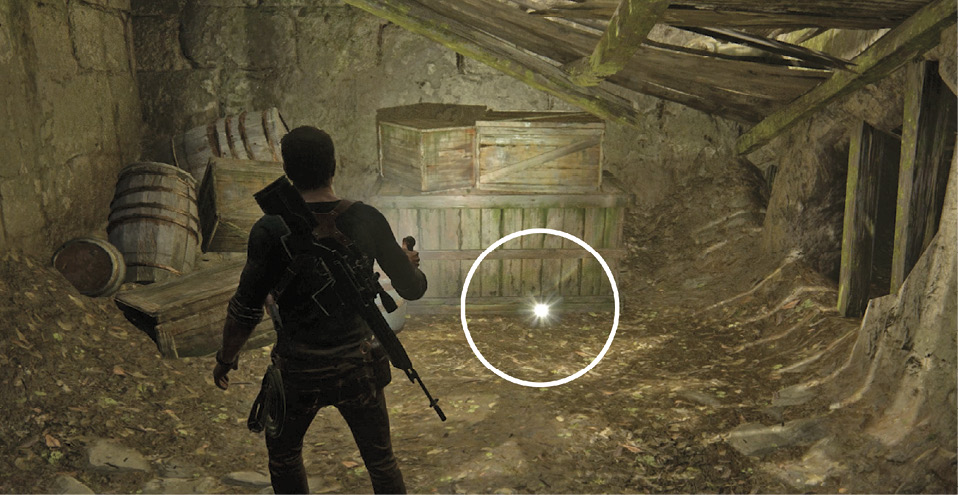 The low passage in the house leads to a hole that drops into a room. Jump down and crouch to enter a subfloor crawlspace. Follow it to a storage room full of barrels to find the Frechen Bearded Bottle. |
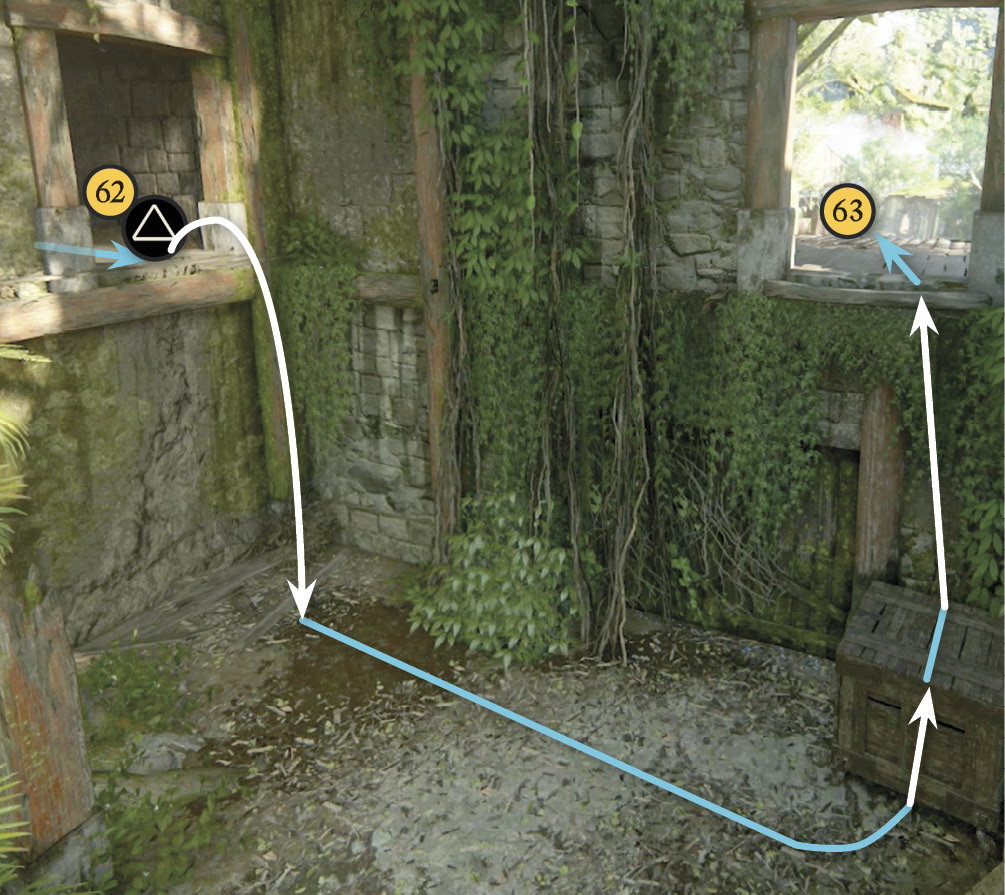
Climb the ramps to the left and duck underneath the tree root blocking the doorway. At the end of the corridor, push the crate off the ledge (62). Drop to the ground and use the crate to climb over the wall (63) to trigger the chapter-ending cutscene: Sam and Nathan gaze out upon a towering secret, lost for 300 years.