
Status: You Will Emerge!
Initial Preparationsfor Life Outside Vault 76
Looking Good: Character Creation
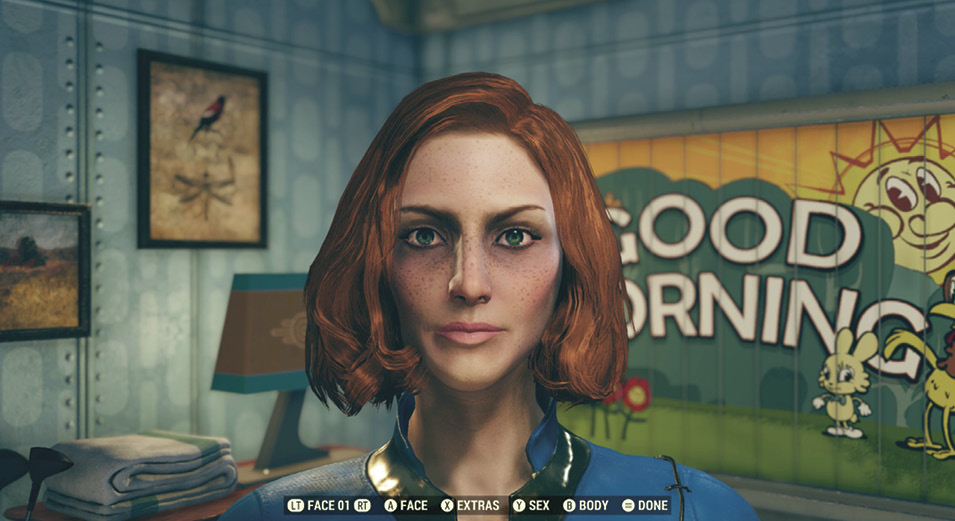

You begin in Vault 76 with some adjustments to your appearance. Spend as long as you like changing your gender, face, and body. Then name your character, and take a photo for your Vault 76 Resident Card. Don’t worry! This image (and your entire look) can be changed later.
The Pip-Boy 2000
Once you leave your Vault chamber, you’ll have attached a RobCo Industries technological wonder to your wrist; the Pip-Boy 2000! This grants you a variety of useful information and a HUD (Heads-Up Display) to augment your normal sight, but getting to know where all of this information is, and what it means, may take a few moments.
Optimized Viewing Portal
This is your optimized viewing portal, or “view”. Pip-Boy functionality helps you navigate the hostile environment, whether you’re wearing Power Armor or not.

 Top Left Corner Section

Information from Vault-Tec: When you encounter something, Vault-Tec sends a helpful note.
Item Pick-up: When an item is gathered and stored, the name (and amount) is noted.
Radio: If a radio station becomes available, you are informed here.
New Effect: If your well-being changes, a Vault-Boy icon appears (such as when you’re crippled, famished or parched, or receive a disease).
 Top Middle Section

Quest Start and Completion: If a new quest becomes available, its name and Vault-Boy animation appear here. Completion rewards are also shown here.
Entity Information: When an entity is in visual range, its health, level, and sub-type are shown. Sub-types include: Boss (Crown), Legendary (Star), Radioactive (Radiation), Toxic (Poison Drip), Weak, Extra Difficulty (Stars), or too-powerful to handle yourself (Skull).
Sneaking Level: If you’re Sneaking, your Level of Detection is indicated.
 Top Right Section

Quest Objectives: With one or more active quests (for you and your teammates), the latest objectives are listed here, with the compass showing the checkpoint or area to explore.
 Central Section

Target and Damage Taken: This changes from a dot to a target of varying dimensions depending on the weapon or action you’re undertaking. Use this to target a foe when firing from the hip, and the curved red marks to determine where you’re being wounded from.
Context Sensitive Information: When interacting with an object, be it a door, fallen foe, trader, container, or anything else, the button required is shown here, along with your Carry Weight if you’re gathering an item.
 Bottom Left Corner Section

Health Bar: This shows your Health as a percentage. The right side indicates how many of the 1,000 Rads you can take, as after receiving Rad damage, the right side of the bar fills up red. Take Rad-X (and protective clothing) before entering radioactive areas, and take RadAway after contracting radiation to restore your Health Bar.
Damage Type: This indicates the type of damage. Normal damage isn’t flagged, but there are icons for Explosive, EMP/Pulse, Radiation, Energy, and Poison damage.
Reward Information: If you’ve completed a Challenge or other feat, information is briefly displayed here.
Teammate Information: If you’re partnered with friends, their icon and health bar are shown here.
 Bottom Middle Section

Compass: This displays pertinent information including: nearby locations, enemies, quest checkpoints, checkpoint areas, events, CAMPs, your last death, other players, your Team Leader, Hostile Players, and the Custom Marker.
Other Information: Also expect this area to show location names, your Caps Total when you gain or lose Caps, your Critical Hit Meter (in V.A.T.S.), Experience Points (XP) rewards, when you level up, and you or another’s Wanted Level (if you or they have slain other players).
 Bottom Right Section

Server-Related Information: When you enter the game world, join a team, or the server has information to impart, it is listed here.
Ammo and Projectiles: The current ranged weapon ordnance you’re carrying, along with your currently-equipped projectile, are flagged here.
Hunger and Thirst: This indicates how much food and drink you need to consume to gain bonuses and avoid penalties. If you don’t see either meter, you’re usually okay. Both meters drain over time (Thirst more rapidly).
Action Points (APs) and Current Conditions: APs are used up by sprinting, Power Attacks, V.A.T.S., and steadying your aim. If your AP meter is too low, these actions may be blocked or canceled. AP constantly regenerates unless you’re hungry, thirsty, or over-encumbered. Agility (total AP) and Endurance (Sprinting and AP) grant you a higher AP. Under the AP bar are any effects (penalties or buffs) you are suffering from, like being Well-Rested or Mutated.


 Core (Power Armor only)

This measures the remaining energy in your Power Armor’s Fusion Core. Once the Fusion Core drains, movement and AP actions are impossible for your Power Armor. Fusion Cores are automatically swapped, so always carry a spare. Or eight.
Pip-Boy 2000: Menu Access Activated!

RobCo Industries has constructed a tough wrist-mounted device with analog counters for the Date and Time, as well as a Rad-Meter. Here is how to read all four of the menus, vitally important to your well-being, on your Pip-Boy:
Active Menu: This menu allows you to bring up your C.A.M.P., switch between regular and “Quick-Boy” views, and access your Perks.
STAT: Stimpak and RadAway: Immediately access these Chems for faster narcotic delivery!
ITEM: Fav, Inspect, Drop and Sort, Play: Favorite the 12 items, weapons, apparel, and aid you use the most. Inspect anything you pick up for additional data, drop items you don’t want to carry any more, and play Holotapes.
DATA: Toggle Active, Hide, Show on Map: Toggle quest information, turn it on your off if your HUD is getting cluttered, as well as showing Quests on your map.
STAT Tab (Status): Maintain your health and well-being as well as your SPECIAL abilities from this tab.
ITEM Tab: Check your arsenal, outfits, chems, collection, and auxiliary objects in your collection from this tab. Access information for your Weapons, Apparel, Aid, Misc (items that don’t fit into other categories), Holo (your Holotapes), Notes (clues you’ve picked up as well as Recipes and Plans), Junk (“useless” items you break down into useful crafting, modding, or building components), Mods (for advanced weaponry or armor), and Ammo.
DATA Tab: Access and highlight all the various quest-related activities you are undertaking from this tab.
RADIO Tab: Highlight and tune in to any available music or transmitting station within a specific radius.
Pip-Boy Flashlight

Remember that your Pip-Boy, certain mining helmets, and Power Armor helmets all have flashlight capabilities for exploring in dark places. Though the green-tinged hue you give off attracts both enemies and Vault-Dwellers alike (making this a non-starter for a stealthy infiltration of an area), you’re far less likely to get lost, miss loot or enemies, or lose your footing. To turn on your Pip-Boy’s (or Power Armor’s) flashlight (or headlamp), hold down the button you used to access the Pip-Boy, and again to turn it off again.
Initial Interactions
With basic functionality out of the way (and other menus of interest covered later into this Training chapter), it is worth learning some basic passive techniques to help overcome your initial trepidations.
Active Effects

As previously discussed, it is worth adding as many bonuses to your statistics as possible. This is primarily achieved through the use of Perk Cards, but there are temporary effects too. Aside from eating and drinking, using chems, gathering collectibles like Bobbleheads and Magazines, wearing outfits and armor, or using weapons, there are a couple simple effects you can add, essentially for free, such as the Well Tuned bonus (for playing a musical instrument). Gain the Rested or Well Rested bonuses by sleeping on a nice bed, but avoid any mattress or sleeping bag on the ground (not in your Camp or Workshop), which may give you a disease if you attempt to sleep in filthier conditions. Conversely, there are diseases to worry about, too, and these are discussed in their own section of this Training chapter, along with mutations.
Object Interactions

Activate: Whether you’re inspecting the contents of a desk (or a Mole Rat’s innards), unlocking a door, activating a terminal, or disarming a trap, use this function.
Transfer: If you wish to transfer a large amount of loot into or out of inventory, then complete this function.
Entity Interactions: Friend or Foe?

The survivors in Appalachia, along with your previous Vault-dwelling community, are likely to be eking out a subsistent existence. Friendly or neutral entities appear with a pale yellow Health bar; usually they won’t attack unless provoked. Hostile entities appear with a red Health bar, so you must either engage them or tactically withdraw from combat. Interact with such nonhuman entities and receive information from them, including getting possible quests. If talking to another human, exercise the etiquette discussed later in the Training chapter.
POSSIBLE CHECKPOINT INTERACTIONS:ARE WE THERE YET?

If you’re in doubt about where you’re going and what you’re doing, then visit a checkpoint (aka a “waypoint”). Switch these yellow diamond icons off and on in your Data > Quests Pip-Boy menu, and read your quest descriptions to get a clue about what you might find or get up to when you reach one. Sometimes, if you need to reach an unknown location, there will be a search area to navigate, which is represented by a circle on your compass. Also remember that not all quests trigger a checkpoint after each objective, so don’t rely on them constantly.
First- and Third-Person Perspectives


Toggling your POV (point of view) is an important asset. Need to see behind you? That’s a good idea, as the adjacent pictures demonstrate; you’re able to enhance your peripheral vision considerably, but at the expense of completing more complex and pinpoint-accurate maneuvers, especially jumping.
Jumping
Leaping over low walls and across gaps, or ascending steep or rocky slopes is made possible if you jump! It also prevents a tiny amount of Rad damage if you clear a small patch of irradiated materials, like a puddle of toxic water. It also makes you a bit more difficult to hit with a weapon.
Running and Sprinting
Need to quicken the pace? Then run, which allows faster movement, and doesn’t consume AP. Need an even faster option? Press and hold the Sprint action, and move at the maximum speed your attributes and perks allow. This consumes AP (shown in the bottom-right bar), and is useful if you’re closing in on a target, attempting to flee from combat, or needing to explore at speed. Due to the AP usage, be very careful sprinting while low on health, while you’re being attacked, or if you’re over-encumbered (your pace will slow anyway if you’re carrying too much). You can easily run out of AP and be exhausted, then overwhelmed if enemies are in pursuit. Need to sprint for longer? Increase your AP and how fast those points regenerate by using chems and, more importantly, AP-increasing perks like the Agility perk Action Boy/Girl.
Aggressive Interactions
Now that you have more control of your actions, it is time to learn how to react if you’re faced with situations that may turn violent. If diplomacy fails or you’re encountering an entity that you can’t reason with, prove your point with aggression.
Attacking

Enemies are easy to spot, from their red Health bars to the wild glints in their eyes, or for the more base creatures, a leap and a chew in your general direction. You should have prepared an offensive tool to remedy this situation. Early into your outing, experiment with the available weaponry, ideally a ranged weapon from the initial selection you scavenge, as well as a melee implement.
Then as you progress, choose bigger or better weapons, pick Perk Cards that help you make the most of the weapons you’ve chosen to specialize in, and craft better-quality or modified versions of the weapons. For your first few battles, though, scramble to use what you can and place at least two weapons in your Favorites Menu Wheel so you’re not fumbling around on your Pip-Boy after your pitchfork breaks and you didn’t assign another weapon to quickly swap to!
Fists (or Pitchforks) of Fury: Melee Combat

If you’re using a fist or a one- or two-handed melee weapon, you must close the gap to the enemy as soon as possible. Then comes a “dance of death”—countering your foe if they employ similar weapons or quickly cutting or bludgeoning them if they’re carrying a ranged weapon. Remember you have some techniques at your disposal:
- Bash: Attack normally to inflict the regular damage for the melee weapon you’re using and to quickly hit your foe if they’re attempting a slower “Power” attack with a melee weapon; time this correctly and you can stagger them, allowing you to press forward and strike again.
- Power Attack: Break a foe’s block with a Power Attack (and hopefully stagger them, too!). This strike takes a long time to build (by tapping the Power Attack button in question), during which time you can be struck and staggered yourself, but this attack provides more devastating damage. Timing is key here, and you can always begin a battle by starting a Power Attack as you charge in to meet your foe, releasing it just as you reach melee range.
- Block: If a foe swings at you using a melee strike (you can’t block projectiles), quickly block just before the swing connects. This greatly reduces, and sometimes nullifies all, damage, may stagger your foe, and allows you to quickly counterattack.
- Charge: Sprint into the fray if your opponent is reloading, confused, hasn’t seen you, is preoccupied, or has been staggered. Then bring them to heel with a bump if you have Power Armor and the Pain Train perk, or strike with a melee weapon before they can react.
The Long and the Short of It: Ranged Combat

If you don’t want to see the reds of your opponents’ eyes when you drop them, use a ranged weapon. Any gun will do, though the various types have their own strengths and weaknesses (detailed meticulously in the Inventory chapter). Just be aware of the different techniques you can muster when you pull the trigger:
- Hip Fire and Aiming: Hip-firing is any shooting done without pressing the Aim button. Your onscreen crosshairs are wide when hip-firing and narrower when aiming. Fire from the hip during normal combat conditions or when neutralizing a chaotic situation and your manual dexterity, copious bullets, and a weapon designed for such purposes (e.g., an automatic rifle) are needed, like mass combat. Look for the most dangerous threats and neutralize them. Focus on attributes and perks that help in this regard, using the character archetypes later in this Training chapter as a guide.
- Aiming: Aiming is any shooting done by aiming down the barrel or through a sight. Aiming is for situations where you have a little more time, perhaps with a weapon designed for such a shot (like a sniper rifle). Looking or zooming down the sights of a weapon, or even lining up a barrel, gives a more accurate shot but at the cost of speed. Remember this is compounded by the weight of your weapon; the larger it is, the slower you are to react.
- Crouch-Firing: Hip-firing and aiming can be done while crouching, in order to add accuracy to your shots, especially if you’re aiming. This comes at additional cost to your maneuverability and speed; you’re essentially a sitting duck unless you’re behind cover. You also cannot run or sprint (unless perks are used), so use crouch more frequently during sneaking movements.
- Damage Types: Both you and your enemies inflict different types of damage
- Ballistic: Bullets, shells, or normal projectile damage: By far the most common damage type.
- Energy: Powerful blasts of electricity, laser, or plasma fire, usually inflicted by robots.
- Radiation: Damage with a radioactive element, usually environmental or inflicted by radioactive enemies or a camp defense trap.
- Poison: Usually attacks from certain types of unclean claws or projectile spittle.
- Firing: Shoot at your foes until only one of you is standing. Let’s hope it’s you. Is the foe running? Aim for the legs; better to earn some XP for expending your bullets by killing your target.
- Reloading: This reloads the ammunition you’re expending, refilling the chamber of the gun, at the expense of your ammo reserves. Scavenge to find more ammunition, or craft it at a Tinker’s Workbench. Note the speed in which you reload and try to time it during a lull in the action. You automatically reload if your chamber is empty, but you gain a little more control by reloading manually, when it is safe to do so. Sometimes it is safer to switch to a secondary weapon to kill a foe rather than risk damage while reloading, especially if you are being overrun, have low AP, or your preferred weapon is low on ammunition. Also consult the Perks section to learn about several Perk Cards that significantly improve your reloading.
- Weapon Bash: Remember, you can use the weapon (even a ranged one) you’re carrying to hit foes that are too close for comfort! This is usually followed by you stepping back afterward and firing. Use this in place of a reload or to finish off a badly wounded foe instead of (or in addition to) using bullet fire. Check the Strength perk Basher if you want to inflict more bashing (and possibly crippling) damage.
Area Effect: Projectile (and Explosive) Combat

Grenades: Don’t forget the third main method of foe disposal—using and throwing projectile weaponry, like grenades. Utilize them to soften up the enemy as you close in; hold down to throw and aim the arc of the throw so the projectile lands just in front of an enemy who is moving toward you; this means the attack detonates on them, not behind them. As ever, there are perks to increase the potency of these attacks.
Mines: Placing static, explosive charges on the ground, floor, or roof is more of a stealth-based option. Also drop them on enemy patrol paths, at chokepoints, or in thoroughfares or through doorways in your camps or workshops.
V.A.T.S.: Vault-Tec Assisted Targeting System Combat

Overview: Augmented by your Perception (hit chance), your Agility (Action Points), and your Luck (the refill of your Critical Hits meter), V.A.T.S. combat allows you to utilize an HUD targeting system that easily flags multiple enemies in your vision field, allowing you to aim and shoot them with a percentage chance of a successful hit indicated on your HUD. It offers increased combat precision and tactical awareness at the cost of AP, speed, and instant peripheral vision.
Recommended Situations: V.A.T.S. is preferable over firing from the hip or aiming, in the following types of situations:
- If you have a target in an area that’s difficult to manually hit (such as undergrowth) and can’t easily see the enemy to aim at them.
- If the target is moving more quickly than you can manually aim and shoot at them.
- If the target is far away, and your long-range aiming is less proficient than the pinpoint accuracy of V.A.T.S.
- If you’re executing stealth combat and the situation is advantageous to use it.
- If you’ve picked a number of Perk Cards that more fully augment V.A.T.S., adding features like enemy information, the ability to target limbs, AP bonuses, and more. The Perks section has the perks to look for.
Circumventing Drawbacks: The biggest drawback is the increased use of AP. Need to maximize your V.A.T.S. potential? Then augment your AP by using chems, Bobbleheads, and Magazines; increasing your agility; and most importantly, using perks. Due to increased AP use, limit your sprinting just before entering V.A.T.S.
Other Advantages: V.A.T.S. is helpful in tracking foes and noting other dangers such as mines, which are automatically spotted if nearby.
Critical Hits: Note the Critical Hit Meter in the adjacent picture. This is a key advantage in V.A.T.S.; each successful hit fills this Meter (and how quickly this occurs, or refills afterwards, can be augmented with Perks). When the Meter is full, you can execute a Critical Hit; a devastating, higher-than-normal attack that inflicts far more damage than normal, and it always hits! If you want the additional XP, and a better damage-per-bullet ratio, pick V.A.T.S. and use Critical Hits to remove threats.
Maximizing Critical Hit: Aside from chem and perk use, if you want to maximize the frequency of your Critical Hits, start your attack with a weapon that uses a small amount of APs (like a pistol). Build your meter up with that weapon before quickly swapping it for a weapon with a much larger base Damage value, and execute the Critical with the second weapon: The resulting hit will be far more damaging!
If your foe is in the distance or difficult to hit, build up your Critical Meter on easy-to-hit targets (usually closer to your location, including stationary hostile targets like turrets); then unleash a critical on the far target, as criticals always hit!
Shadowy Stealth: Crouching and Sneaking

Crouching: Simply crouch when you wish to sneak, reduce your physical size to the enemy, remove your location from the world map, hide behind lower defensive structures during a battle, or check a menu.
Stealth: Those placing points in their Agility attribute, and even those who don’t, should still think about sneaking to avoid detection by enemies (usually nonhuman, though crouching removes your map location). To sneak, simply crouch: Your current level of detection will be displayed onscreen. There are four levels of detection:
- Hidden: No nearby characters detect you. The brackets around the word “HIDDEN” indicate how close you are to being detected. The farther apart the brackets, the more successful your sneaking. While hidden, any attacks you make are considered “Sneak Attacks” and deal increased damage (which can be further augmented by perks and your weapon’s damage value), but attacking risks exposing your position. You may wish to try long-range takedowns with silenced weaponry as well.
- Detected: Nonhostile characters nearby have been alerted to your presence. The only immediate danger you face is possible embarrassment.
- Caution: Enemies have detected you and are actively searching for you. The farther apart the brackets around “CAUTION,” the closer you are to returning to “HIDDEN.” Evade foes by watching the brackets around the word “CAUTION” expand and return to Hidden status. Sneak attacks are still counted. If you can evade them for long enough, enemies return to their previous activity.
- Danger: Enemies have spotted you and will begin attacking. Another type of combat is now preferable, as is running away.
Sneaking Successfully: Sneaking is affected by several factors:
- Light Level: The darker the spot you’re sneaking in, the harder it is for enemies to spot you. If you’re close to being detected, try ducking into the shadows to remain hidden. Stay in the shadows and turn off the Pip-Boy’s flashlight, you muppet!
- Line of Sight: If enemies don’t have line of sight to you, they’re much less likely to detect you.
- Movement: You’re hardest to detect while motionless and easier to spot while moving. It’s significantly harder to sneak while moving quickly (although this can be improved with perks). Slow down.
- Sound: Attacking with nonsilenced or heavy weapons makes noise, which may alert enemies to your presence.
- Armor: The higher your armor’s weight, the more noise it makes while moving. Sneaking is extremely challenging in Power Armor. Also choose armor that increases your Agility or your sneaking, and also find, purchase, or craft Stealth Boys or Phantom Devices (enhanced Stealth Boys), which further add to your stealth.
- Environmental Distractions: Enemies will also react to loud noises in the environment. If you can trigger an explosion or trap without being detected, you can lure away unsuspecting enemies.
- Bracket Watching: Check the brackets around your detection level; if they begin to move, you can be alerted before you even see an enemy.
- Human Watching: Sneak attacks, and being stealthy is still possible when facing a human opponent, though they are obviously governed with the same vision as you. Crouch and creep in behind your foe after learning where they like to stand or rest, and pounce when they are stationary or looking at their Pip-Boy.
Check the Appalachian Archetypes section for an example of what abilities and perks it takes to become a successful stealth operative.