Fallout 76 Guide Crafting and C.A.M.P.ing
C.A.M.P.ING and Workshops
Country Roads, Take Me Home: Construction Overview


One of the key aspects of surviving and thriving in the Appalachian wilderness is to find and return to the safety of your own dwelling. Achieve this by setting up a Construction and Assembly Mobile Platform, or C.A.M.P., in a tactically advantageous location and use it as your base of operations. In addition, and using the same construction menu, are Public Workshops: Larger-scale, immovable bases that are usually part of an existing structure or facility, workshops provide key resources. Some have unique object-creating capabilities, and all are subject to attack from rival humans, teams, and your nonhuman enemies.
Part 1 details all the pertinent information for creating the very best C.A.M.P. you can, including a step-by-step tutorial on building and examples of different types of camps.
Part 2 reveals the key tactics in building (and defending) workshops across Appalachia, along with examples of different defenses within a workshop.
Part 3 lists the different building structures available when you access the (almost identical) C.A.M.P. and Workshop construction menus. It also lists relevant perks and bonuses to use when building.
Camps and Workshops: A Menu

When you place a C.A.M.P. on the ground or access a workshop after claiming it, you can head to it and interact with the “Build” prompt. However, once you step through the perimeter of the camp or workshop, you can hold down the Build button and access the menu well away from the C.A.M.P. or workshop workbench, which speeds up construction considerably. What you can do at the C.A.M.P. or workshop workbench is “Repair all Structures”; this is a shortcut to fix all damaged objects, broken by creatures or unpleasant humans. The structures are then repaired, if you have the necessary component materials.
 Object Tab Menu: Stretching across the top of the screen are all the different types of objects you can build. At the beginning, the vast majority of them are not accessible, either due to you not placing a foundation yet or you not having the necessary plans to unlock the object. This chapter details the entire list of what each object menu contains.
 Objects: The Object Tab menu shows a variety of objects, all of which you can eventually place within your camp or workshop boundary.
Object and Variant Arrow: Each small box has a type of object in it, which you can place within the boundary if you have the necessary components. The arrow (either on the left or right of an object box) indicates a variant for the type of object selected. Cycle through these to widen your choice of the object type.
 Inaccessible Icon: This indicates the object is available, but it can’t currently be placed for some reason. The reason is listed by the object’s name, on the right side of the menu. It’s usually because you don’t have the components, or it needs a foundation, but there are other reasons.
 Lock: The lock indicates that the object’s Plan has not been found yet. Obtain the Plan to unlock the object (or object variant) and make it usable.
 Budget: This ever-increasing bar indicates how much of the camp or workshop’s budget you’ve used. Every time you place an object, the budget creeps up. When it fills, no more objects can be placed. Think about ensuring your camp or workshop has good structural integrity before the budget is exceeded. The one object that uses up the budget compared to everything else? Turrets.
 Object Name: This shows the name of the object you have highlighted, and what variant number it is (if applicable). This is the same name as the plans you’re collecting.
 Requirements: Most importantly, this shows what components the object requires in order to be made. In addition, if extra requirements are needed (e.g., electricity from a generator or a perk), they are listed here. If the object gives you back components (like a Resource generator), that is also listed here.
 Warnings: This appears if you’re trying to place an object and are unable to. The reason is listed here.
 Build, Tag for Search, Variant, Switch to Modify, Exit: The menu at the bottom of the screen allows you to build an object you’ve selected, switch between crafting and modifying menus. With the Modify menu active, you can edit, make a blueprint of it, or switch back to the Build menu.
Part 1: Going C.A.M.P.ing

This section details all the pertinent information for creating the very best C.A.M.P. possible, including a step-by-step tutorial on building and examples of different types of camps.
Accessing your C.A.M.P.

You receive your C.A.M.P. when you pick it up during your departure from Vault 76. To access it, bring up your Pip-Boy menu, and select the Camp option. Do this in relative safety, as you don’t have a weapon handy until the C.A.M.P. is placed or you switch to a weapon. When the C.A.M.P. appears, it hovers above the ground in front of you. Move around normally, and when the C.A.M.P. turns green, you can place it. Don’t worry about dropping it in an exact location; you can move it later. If you’re moving a C.A.M.P. from a different location, prepare to pay a small Caps fee for this.
 When you drop your C.A.M.P., it becomes visible on your world map. Only you and your friends (and teammates) can see where it is (and you can see their camps too). Great news! When you want to return to your camp (or your friend’s), you can Fast-Travel from anywhere in Appalachia, and it doesn’t cost any Caps! However, you can’t if you’re overencumbered before you Fast-Travel (normal rules apply), so don’t overindulge in the foraging.
Preparation: Camping Components
Before you can do any important construction (even though your camp’s budget only allows a cabin-sized structure), you must forage for components. But what do you need to construct a camp? The short answer: wood, steel, and a bit of concrete. The long answer: See below!
What Components You Need to Forage
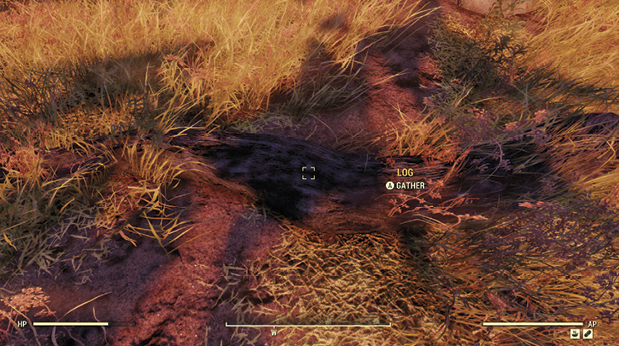
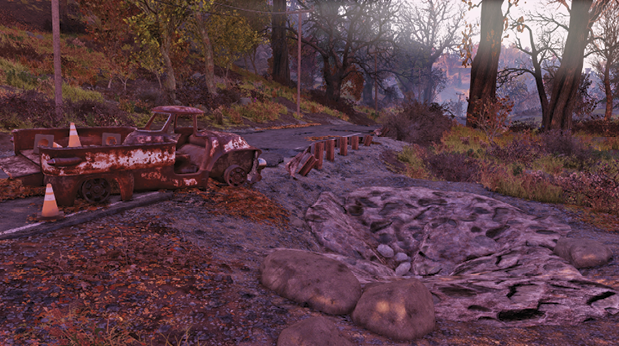

There are three main components to find during initial construction: wood, concrete and steel.
Just like when you’re crafting, there’s a large list of components needed for camp construction. In fact, all of the components are the same ones you find in junk, other items you break down into parts, and the other types of materials you use when crafting. The Junk section of the inventory has a complete list of all components for every type of building activity (both crafting and camping/workshops), along with advice on what items the components contain and general advice on locating each component. The following section details just the components needed to build objects in a camp or workshop.
Foraging Time
Early in your adventures, you’ll want to focus your foraging on the essential components for constructing the plans you’ve discovered so far. You will always have need for wood, so collect it often and in quantity.
Other components worth foraging for include concrete, steel, copper, oil, screws, and gears.
As you start collecting more plans, you may be glad to have some of the rarer components on hand. Keep an eye out for aluminum, rubber, circuits, cloth, springs, plastic, glass, and ceramic.
Certain materials are pretty rare, so pick these up when you find them: asbestos, fiberglass, fiber optics, lead, and nuclear material.
Later in your game, when you’ve unlocked most of the available plans and are ready to get really creative with your defenses and decorations, you’ll still need an ample supply of wood, steel, and concrete, but will benefit from having spent the time to collect those rarer ingredients. Nothing gets in the way of crafting like discovering you’ve run out of screws, circuits, or ceramic!
Preparation: Location, Location, Creation
Choose your camp’s location. Don’t worry, you can move it later if you make a mistake! Base your decision on several factors (some of them are diametrically opposed to one another, so you can’t check all the following metaphorical boxes). Note that “Beginner” and “Expert” flags indicate the advice is usually more pertinent for an “initial” (low-level) player or an “expert” (higher level) player.

Near Stations and Workbenches (Beginner): You need to scrap items, make food and drink, and tinker with ammunition, and you may not have plans to unlock Crafting Workbenches yet. So why not place your camp within dashing distance of a location with your favorite stations?
Near (Main) Resources (Beginner): To begin with, you need wood to construct walls and concrete to make foundations. You find logs in the forest and concrete in large divots along the main ruined roads (among other places). So you may want to put your camp close to these main sources of building components.
Near Civilization (Beginner): Drop a camp down on the road junction near the covered bridge and Overseer’s Camp; you won’t be invaded by marauding creatures (too often), and you won’t get lost and overwhelmed in the wilderness or savaged by creatures too tough to fend off.
Away from Civilization (Expert): Drop a camp well away from the road junction near the covered bridge and Overseer’s Camp. Why? Because it’s a high-traffic area, and you can’t trust those Vault Dwellers not to start bashing your building! Get away from it all but still find a spot in the valley between Vault 76 and Flatwoods until you get your bearings—just more of a hidey-hole where you won’t be bothered.

Near Primary Locations (Expert): This is usually what you should attempt after finishing your first camp—select it (or sections of it), save it as a Blueprint, then move to a location you want to explore (hopefully with teammates), and place the camp nearby. Then you can prepare food, ammo, repair items, and ready yourself properly without needing to spend Caps (or other resources) on Fast-Traveling or manually slogging to and from a location and your far-off camp.
Near Secondary Locations (Expert): There are hundreds of smaller, unmarked locations across Appalachia that you can find by cross-referencing the Atlas. These are usually odd totems, strange shacks, or other remote or abandoned hovels. Check each one; some are near resources or vistas. Build a camp near one, or make the secondary location part of your camp if you can.
Near a Vendor (Beginner): If you’re using your camp as a drop point with your Stash Box, or you’ve started to craft for fun and profit, being close to a vendor (usually at a train station) shortens the distance between selling sessions. While you’re at a vendor, you can also check his vending machine (or any you’ve placed in your camp), as these occasionally give out random rare loot...as long as you pay for it!
Away from Enemies (Beginner): If your camp is always swamped by irradiated wildlife or worse, you may have built it near a location where enemies spawn. Move it to a quieter area. If you want to concentrate on building and haven’t got the hang of switching quickly between menus, think about putting your camp well away from where you’ve seen monsters.
Near Enemies (Expert): If you’re out camping for a cryptid or want to accrue some XP or get some great monster loot, then drop your camp close to where you saw a good number of monsters. Ready a turret-filled tower and place it within shooting distance of a fissure (though that’s not going to end well unless you have teammates with their own turret towers). Better yet, drop a camp in a zone that’s about to be nuked, flee the area, and return after the explosion and see what new foes the camp has killed for you!

Near Power Boxes (Beginner): Some locations, such as electrical substations (listed in the Atlas), have power boxes you can connect to for some free power. While they always have a little power you can draw on, they provide much more power if their power plant is online. If it’s broken down, head over to the plant and complete Event: Powering Up to get the current flowing again.
Near Valuable Resources (Expert): Workshops tend to have deposits you can mine; in fact, it’s one of the reasons to claim a workshop. But there are remote mineral or rare material deposits throughout Appalachia; situating your camp there can yield impressive numbers, as a Resource Collector is available to build if you place your camp within the deposit. Just be sure the collector is powered, and no one steals the collected components from your device!
Near Friends (Beginner and Expert): While there’s safety in numbers when you’re first starting out, having a camp near friends is extremely beneficial no matter what level you are. You can’t build too close to another camp, but from within walking distance of your friends, you can watch (and copy) their construction, ask them to forage while you build, and strategically place extra defenses, workbenches, and pooled resources!
Away from Friends (Expert): Perhaps you’re a loner. Perhaps you want a bit of peace and quiet. Or perhaps you’re part of a team, moving to a remote, “forward operations” area of uncharted territory and setting up a camp so your teammates can join you, creating up to four linked team camps you can Fast-Travel between.

Near a Workshop (Expert): Defending any workshop you claim is a lot easier if you (and your team) have all constructed their camps (along with defenses and turrets) on the workshop’s perimeter. Now enemies must contend with both your camps and the workshop defenses, and you have another place to retreat to, spawn at, build items at, and, if you’ve built a camp with numerous turrets, another free workshop turret tower!
Near a Quest Location (Expert): Drop a camp close to a high-traffic (and usually dangerous and large) location that you know has a quest you wish to complete. During a lull in the action, head into the location and complete the quest, Fast-Traveling back if under duress or after claiming some rare loot.

On Flat and Open Ground (Beginner): If you’re having trouble placing foundations, or you’re falling when trying to build your structure, you may be on steeper ground than is necessary. Why not seek out a flatter area? Think about areas close to farms, under electrical pylons, or on cliff edges.
On Steep and Unforgiving Ground (Expert): Steeper terrain is still a viable spot for some daring campers; just be prepared to build something a little more vertical, and usually in two, three, four, or more separate areas, all linked (hopefully) by stairs to give the ground a bit of stability. The good news is that you’re less likely to be attacked (or found at all) in the more remote area of rougher terrain.
Near a Spectacular View (Expert): If you want to attempt a bit of sightseeing, situate yourself so you know where east and west are, and place your camp atop a promontory with views of the nuclear sunset (or sunrise), weather formations, or large landmarks. Or sit yourself down in a forest where the sunlight dapples through the leaves, near a once-idyllic, now only slightly radioactive lake.
Camp Construction: My First Camp (Levels 5–10)
Welcome to the My First Camp tutorial! This takes you through a step-by-step building and decoration of a small cabin, using mostly basic objects that are unlocked from the start of your exploration, with a smattering of objects requiring plans to unlock them. Think about constructing your first camp when you’re between Levels 5 and 10. It’s also recommended that you’ve finished the Responder quests in Flatwoods and met the amusingly named Protectron in the woods north of Morgantown and completed the camp-related quest there first. This tutorial assumes you’ve foraged for enough materials to create a rudimentary camp, though you can always finish some of the camp, go forage, and return to complete the job.
Step 1: Foundation Creation

Ignore all other objects; you can’t construct anything without having to place down either wood or concrete foundations first. Concrete is sometimes preferred, as you’ll use most or all of your wood on the walls. For this example, create an eight-block floor; you want this to be manageable, defensible, and within budget (unless you can live without a roof).
Notice in the pictures that the “footprint” of the foundation isn’t a simple rectangle (though it could be!); you may want your cabin to have an interesting shape, where furniture can fit into nooks and crannies, rather than a large box. Either option is fine.
If you’re building on a slope, place a lower and upper connected foundation and adjust the height before placement so all foundations slot together without becoming hidden (as walls may not snap to the foundations). If you make a mistake, do not scrap the foundation! Instead, edit it and maneuver it until it’s in a better position, or store it and use it later.
If you’re building on a steep slope, be mindful that you’re likely to use more resources and may need to separate different parts of your camp due to the topography. To start with, keep your foundations on lower, shallower slopes or flat areas like farmland or clearings near electrical pylons.
Choose one or two foundations with stairs, or add the short wood stairs, so you have easy access from ground level. Finally, while in Modify mode, pick up your C.A.M.P. and move it onto the middle of the foundation, so it’s not in the way. You can make minor adjustments to its position later.
Step 2: The Walls Go In

Though you may wish to add a single staircase now, if you’re worried about its position, the best next step is to place the outer walls of your cabin on the foundation. Check the three variants of wall—wall, doorway, and window. Cycle left and right, and think about having at least one door (in case you need to escape!), two or three shutters (which you can open when you quit out of the Build menu), and the rest regular walls.
It’s easiest follow the perimeter of the foundation floors with your walls. But you can also leave one (or more) foundation sections outside the walls to act as a porch, or a place behind your cabin wall to set a generator for later. Or, you can add more foundations now (or later) to create the same effect.
Step 3: The Roof and Door Go On

No second level? Not in this example; look to the alternate build for a second floor! As this cabin is limited by the relatively few plans that were available, the roof was a simple flat section of steel and wood, with eight of them placed directly above their foundation section counterparts. The structural skeleton of the cabin is now complete!
Finishing the main structure, we added a door for a bit of security, and opened all the shutters. Though enemies can see inside, you can see out, so it’s up to you to determine how much you want outsiders to see! We also moved the C.A.M.P. into a corner of the cabin, as it offers a small amount of free illumination.
Step 4: Outside Perimeter—Crops and a Campfire

Corn was available for us to plant, so we periodically harvest it to bolster our raw food materials. Of course, the crops are also available for any ne’er-do-well to steal, so we added a scarecrow, which makes no impact whatsoever but looks suitably apropos. Then we added a fence and a gate, which actually helps a little. Continuing with that “farm to table” vibe, we added a cooking station, a water pump, a fold-out table and deck chair, and a radio that plays all your Appalachian favorites. Two plastic flamingos finish the look. And that look is “yokel.”
Step 5: Outside Perimeter—Defenses and Power

There was a method to our madness when choosing this location; the rear of the premises brush up against an old oak tree, and jamming a small power generator in there hides and protects it slightly, keeps the generator fumes out of your cabin, and allows you to string along a power connector in an aesthetically pleasing manner from the generator to the far corner of the cabin. That way, any lights you place will light up (they don’t have to be linked; just close to the connector).
Step 6: Inside Cabin—Let There Be Lights

With limited choices from the Lights menu, we opted for ceiling bulbs, a table and floor lamp, and the C.A.M.P. in a corner, giving off a nice warm glow. What would a cabin be without a backlit poster of Mr. Pebbles (the First Cat in Space)? A dreary shack, that’s what!
Step 7: Inside Cabin—Furniture and Finishing Touches

With some working illumination, the rugs and then the heavy furniture were moved in. Next, we moved on to the lighter furniture: shelves, side tables, wall paintings, smaller coolers on those shelves, a wall clock, a mattress, a My Stash Box in the windowed alcove, and a welcome mat at the doorway. With a few object edits, we finished the first cabin and stayed just under budget!
Camp Example 1: My First Cabin

Here’s the finished cabin, with this guide’s arbitrary rating. Aesthetically, it looks great, especially considering you’re able to build something similar to this early on and with only a few unlocked plans. It loses a point due to a smoky Armor Workbench indoors. How gauche!
Functionally, it does the job well, offering good workbench and crops, though a Tinker’s or Chemistry workbench would have helped (which is why the cabin is next to Tyler County Dirt Track; there’s a small farm adjacent to it that has a Chemistry Station in a barn). The only real issue is the placement of the Stash Box; placing it by the front door would have meant quicker access to your stored loot.
Defense-wise, this is somewhat problematic, but this is an issue for all initial camps; there’s no turrets, the crops are easily stolen, and you can break apart most of the structure rather easily. Even adding a sloping roof (so grenades roll off it and down to the ground) would have helped.
Camp Construction: My Expert Camps (Level 10+)
With the basics down, you should now learn the construction techniques necessary for optimal camp creation, as well as moving camps and working with friends.
Going Over (and Under) Budget

Be ever mindful of your budget. Depending on your needs, and as a general rule of thumb, think about stopping when your Workshop Budget bar fills to a certain state:
Structure: Try not to have your bar filled more than one-half to two-thirds.
Defenses: Turrets will wipe out your budget almost immediately! Try not to add more than three (unless you’re primarily building a turret tower), and augment your defenses with walls, traps, and other objects that aren’t so budget-intensive. A well-placed turret behind partial cover can be more effective than three sitting on a mesh floor.
Exterior Decorations: Limit your exterior elements to only a few lights and a scattering of chairs, containers, and other objects. For quick use, have your Stash Box by the main door. You can create a lightshow, but at the expense of other elements. Or as part of a team camp.
Crafting Locations: Only place the workbenches and stations you’re sure to use regularly. Share workbenches with teammates across camps. And make workbenches easy to access: for example, close to a main door rather than three floors up in a bedroom (unless you have specific reasons for this placement).
Interior Decorations: Many builders fall into the trap of constructing a large dwelling but run out of decorations to make it look lived in. Place lights and rugs first, followed by the larger pieces of furniture, then the smaller objects, and finally the smallest objects and containers you can put on shelving. Don’t use up every space on a wall, or area in a floor; make it lived in, not cramped!
Going Up and Going Out

Camp structures can be built upward and outward. Expect to run out of room after around four vertical floors (and build towers rather than wide and tall structures). A particularly flat structure can be around 20 foundation squares in total, though it won’t look particularly great. A good, large-scale two-level structure should have around three by five squares in its footprint, as one of our examples demonstrates.
Going to the Garage

Your camp doesn’t have to be one structure. Aesthetically, or for ease of access, you may wish to place all your workbenches in a shed, away from your living structure. This is easily achieved, as long as you make both buildings smaller than normal.
Balconies and Indestructible Flooring

Floors are particularly interesting, as they are indestructible. You can break all other objects (including walls, rooftops, generators, and basically anything else), but not floors. However, mesh floors can be shot through (in both directions), so bear this in mind when placing upper floors in your camp. Shoot down through them to remove enemy threats, using the height to your advantage. Or place wooden floors that completely shield you from anyone stupid enough to fire up or down at them.
Balconies are another aspect of building structures, as they are easy to create, offer places to put turrets or fire down on foes from, and add an extra layer of security; you can look out and spot enemies from a greater height. Think about attaching floors around and outside upper walls, but don’t overdo it!
Looking Good: Aesthetics

Don’t worry too much about aesthetics; build a camp using the objects you’ve unlocked (via plan acquisition), and gradually add to it using foraged components and a whole load of log looting! If you’re concerned your camp is looking too “boxy,” vary the foundation footprint so it’s less rectangular. Lower the foundation so bushes, grass, and trees envelop your camp. Change the roof line and add a dormer window. Swap out wall styles like the picture shows. Add crops and a variety of different objects in places you’d usually expect them to be. Divide the house into living, eating, sleeping, and workbench areas. Study and take photographs of camps whose looks you like. But most importantly, if you’re happy with it, that’s all that matters!
Looking Odd: Freakish Functionality

There is one overriding rule: Your camp must connect to the ground foundations. Other than that, you’re free to move the majority of your camp into the air, ignoring the rules of physics, in favor of supreme defensiveness. If you can block the path from the ground, up into your floating home with only a staircase to access it, then very few enemies will be able to enter. The Escher Lodge example (below) is one to think about attempting in this regard. If you don’t like the aesthetic of such a camp, try adding steel posts (in the Stairs menu) to give the illusion the structure is on stilts, though this realism is done at the cost of your budget!
Looking Good: Impressively Defensible
Make your walls out of metal or brick when possible; these types of walls are tougher and may dissuade attackers. Add mesh floors that both attacker and defender can fire through, but hopefully you’re up top with the advantage. Add a variety of traps, including just inside doorways or at the tops of dark stairs to wound foes without the traps being spotted. Create distractions, or even a rude message spelled out in neon letters, on a prominent wall to dissuade thieves coming after your resources, and use it as a camp and a workshop.
Turrets Syndrome: Defensive Structures

Forget those comfy sofas and giant copper lion statues; why not focus on a tower bristling with defenses instead? Learn the reason why there are so many odd-shaped sloped wall sections in your Walls menu; they aren’t just there to create dormer windows! Place triangular sections in front of a turret so it can still fire out but is protected from enemy fire or grenades. Add to the protection by setting turrets on a wooden second floor that can’t be shot through. Add a roof with sloping sections so grenades roll down and away from the turret.
Moving House: Rebuilding Camps

When it’s time to move camps, for whatever reason, simply return to your camp, locate or take a blueprint if you wish to save the camp for later, and head to the new location. Place your C.A.M.P. down again, and don’t be startled if your camp budget is almost full; your previous camp is likely to have been placed in the Build > Stored menu. You can now:
- Use the Blueprint menu and place the camp at the new location, with some minor adjustments based on topography. Note that you can blueprint pieces of your camp so sections (and perhaps improvements) can be placed one at a time.
- Place the old camp from the Stored menu, break it up manually, and reuse the individual parts.
- Or if you don’t care about destroying half your components, scrap everything and start over.
Building One for the Team: Multiple Camps

Circling Your Wagons: Are you part of a movement? A band of like-minded Vault Dwellers ready to rebuild for America? Then why not come together and build yourselves a series of relatively-close camps along a road or across an expanse of land? Each of you volunteer to create a different type of space: Perhaps two of you each work on a defensive tower brimming with turrets, while a third player outfits a garage with workbenches, and a fourth player constructs living quarters with an instrument stage and bunk beds. Bring the same planning to your quartet of camps as you do to creating a workshop base. Pool resources and create four separate dwellings accessible by the team, all looking out for each other. Now imagine if four more players turn up and add their dwellings too!
The Wagon Train: Alternatively, team up and place camps across Appalachia, so you have a free Fast-Travel site wherever you wish to generally get to. Perhaps at each checkpoint of a quest (one camp at the start, one at the end)? Or between two trading locations. As you can freely Fast-Travel to any of your team’s camps, this is three times as helpful!
Destruction, Not Construction: Camp Attack!

Of course, there’s a fair amount of destruction you can attempt on another player’s camp, whether they’re at the location or (ideally) when they’re away exploring. Breaking a few walls or a fence is one thing, but if you really want to do some damage, take out their generator (as this knocks out anything requiring power in their camp), and ensure you’re far enough away before trying to blow up their turret. Or perhaps you want to try a spot of “scrumping”: stealing crops, mined resources, or items any Protectrons have collected. Of course, acts of vandalism instantly make you Wanted; continued misbehavior against other players’ camps increases your Wanted Level.
How do you stop this damage? With blind, ugly violence, by ensuring your turrets are covering all angles, by moving your generator so it can’t easily be seen or struck (hide it on the roof or inside the structure), building a structure around a resource collector, and build locks for your resource containers.
Maintenance, Not Construction: Camp Repair
Finally, it’s worth remembering that your camp requires some light maintenance work. This mainly takes the form of checking (at the C.A.M.P.) each time you return to see if anything has been damaged; use “Repair All” for a quick, overall repair. Of course, if your turrets are smoking and the generator’s out, some rapscallion has been by and done a number on your hard work. So always keep an amount of components at the ready, especially those needed for repairing the type(s) of turrets you’ve chosen, to keep your camp in tip-top shape.
Camp Examples
To conclude the section on camps, we provide a series of examples of what a camp budget and various found and unlocked plans can get you. Note that some of these camps could be rebuilt inside a workshop or as part of a team camp. Also don’t forget to check the Build Resources list at the end of this chapter for more construction ideas.
Camp Example 1: The Turret Toilet

Here’s a camp for someone who hates building camps; it’s a low-cost, no-frills, easy-to-erect outhouse-sized dwelling with a turret at the top and a sleeping bag and Stash Box in the “outhouse” living space. A little too compact, but it’s easy moving around the map and is quick to repair if attacked. The base functionality allows you to come and go as you please, and its small footprint makes it easy to place almost anywhere.
Camp Example 2: Wixon Field Quarters

This large, blocky dwelling had to be built on a large area of flat ground. It features two floors and a balcony and was constructed with functionality in mind, as well as the ability to defend the location. There’s only one way in and a balcony over the entrance so the owner can see foes coming. The visibility continues inside; there’s nowhere to hide, the owner has a balcony to shoot down from, and any lighting is by gas, which doesn’t require a generator. This is an early exploration construction, if a large, full budget dwelling that’s great to defend and doesn’t need generators is what you’re wanting.
Camp Example 3: New Gorge Forge

When you’re able to access the later wall sections (metal and brick in this example), as well as constructing linked sections that connect the two main structures together (and use angled wall sections to join to the sloping roof line), you can create some excellent structures, complete with spotlights, wind-powered generators, and defenses to ensure that the “open” welcome isn’t taken as a sign of weakness!
Camp Example 4: A River Runs Through It

Who says you need to construct a camp over dry ground? As long as the river is shallow enough, you can enjoy constructing a larger, barn-like structure that fords both sides of the river. You’ve plenty of water, can take a slightly irradiated dip whenever you want, and there are wonderful views to be had watching the sunlight glint off the water. Also try variants that start on one side of a cliff edge, and end at the other, if you have the building skill!
Camp Example 5: Mechanic’s domain

This section of a larger camp features brick and corrugated metal walls, giving the place an authentic and grimy feel, but shows that you don’t need to worry about the weather; situate whatever you like outside (worry more about it getting damaged than being rained on). Augment such a place with a whole load of appropriate containers, workbenches, stations, furniture, and in pride of place; a suit of Power Armor. If it’s rusting, it’s likely to be sitting somewhere around this tinkerer’s paradise.
Camp Example 6: Newly Arisen Prison

The thick-walled metal sections give this relatively small structure a sheen of imposing protection; everything is blue metal and concrete, with doors and furniture chosen to complement the place’s look. Inside, there’s a particularly interesting surprise—a stairwell leading to a turret-laden roof, but the real revelation is a resource generator, attached to power, within an inner cell, which the entire structure was built around. This is one way to keep out thieves!
Camp Example 7: Tower of Power

This is a large example of a “turret camp,” which is self-contained; smaller variants are usually placed close to where enemies have been spotted spawning (so you’re getting your Caps’ worth out of those turrets!). As you get XP from foes the turrets kill, and you can loot the foes’ corpses for fun and profit, it’s worth moving this type of camp to a dangerous area. These camps are particularly helpful when mopping up terrifying or recently nuked parts of Appalachia, softening up the newly mutated creatures so you can step in, finish them off, and claim some amazing loot. Note the diagonally-shaped wall sections added to protect turrets from attackers.
Camp Example 8: The Bucolic Caboose

What a view! Forget for a moment that it was an insanely difficult hike to reach this location, with treacherous cliff drops to contend with. But once you’re here, you can Fast-Travel and take in the sunsets and the weather and listen to old-timey songs on the radio. The structure is built to take advantage of the view, with a large expansive deck, a place to twang a banjo, and no real defenses, except the difficulty of getting here in the first place!
Camp Example 9: Banjo Tower Extension

This is a good example of a camp that considers two types of planning; it is built to be attached to a structure already in Appalachia, which is usually impossible. It is also built at a secondary location to take advantage of it, essentially giving you a “second tower” to utilize (mainly for playing the banjo or mouth harp). The structure doesn’t technically touch the secondary location, but platforms are close enough for you to get back and forth. It also offers good defense, views, and elements like a sleeping bag that are already in the landscape. Check the Atlas (the Forest Zone A: Secondary Locations) for this tower’s location.
Camp Example 10: The Escher Lodge

Placed on a steep slope, this features the most reinforced staircase ever seen (two of them stacked atop each other). It has the minimal foundation necessary, with a floating house atop the staircase, like a mad, gravity-defying hypno-shack! A turret on the front porch puts pay to anything that manages to climb the steps, but larger creatures won’t even try. Notice the floor of the floating house is wood and impenetrable; enemies need to be inside the house to even damage most of it! If it all looks too weird, think about adding metal pole stilts to fake some foundations, or make a stilt house, which can have much the same effect.
Camp Example 11: Mount Blair Berth

Donning Power Armor and working in the choking air of the Ash Heap, near the gigantic excavator arm, this camp demonstrates how to separate different areas into three steeply sloped locations, with a viewing hut at the top. A lucrative quest occurs here, and this is a great place to watch other players move to and from the excavator, before launching an exploration when the coast is clear. Should the quest become overwhelming, it’s an easy sprint or Fast-Travel back to this home base, which features resource-collecting robots, an artillery cannon, vending machines (for inquisitive players of if you want to check for randomly appearing Legendary items!), and a lower metal shed with workbenches and a bed.
Part 2: Workshops

What Is a Workshop?

 A public workshop is a primary location appearing on your world map (and throughout this guide’s Atlas). When you discover a workshop, hover over the map icon to gain some important information, such as whether the workshop has been claimed, who has claimed it, and what resources the workshop has to offer you.
Workshops are usually large, industrial, military, or agricultural in nature. Unlike camps, they are immovable. Think of public workshops as large-scale camps that you or your team can claim, exploit, and own temporarily. Each public workshop has a single large red workbench.
Workshop workbenches are perhaps the most important location within a workshop. They are the hub of the location and act as a “flag” you need to “capture” (or in this case, claim), then defend from others contesting your claim. They also act as large, stationary C.A.M.P.s, offering the same Build and Modify construction menu, allowing you to build exactly the same sort of structures that you did when erecting your camp, albeit on a larger scale. Therefore, it’s wise to learn all facets of camp building before staking your claim on a workshop.
Where Are the Workshops?
There are 22 different workshops throughout Appalachia. All of them are different in size, location, difficulty, and the types of resources that are available to you once you claim the workshop. For a closer look at each workshop, along with a map showing an “unimproved” workshop with the perimeter boundary of each, consult the Atlas. Below is a list of all available Appalachian workshops, along with their location and expected resources:
Appalachian Workshop Location
| # | Region and Zone | # and Name | Resources |
|---|---|---|---|
|
1 |
Food [10], Water [3], Packaged Food [1]*, Fertilizer [3], Junk [1], Aluminum [1], Concrete [1] |
||
|
2 |
Food [1], Water [3], Fertilizer [1], Junk [1], Silver [3], Aluminum [1], Steel [1] |
||
|
3 |
31. Gorge Junkyard |
Food [5], Water [3], Junk [1], Titanium [1], Concrete [1], Wood [1] |
|
|
4 |
Food [5], Water [3], Fertilizer [1], Crystal [1], Gold [1], Copper [1] |
||
|
5 |
Food [9], Water [8], Fusion Core [3], Lead [1], Aluminum [1], Nuclear [1], Concrete [1] |
||
|
6 |
Food [6], Water [8], Junk [3], Aluminum [1], Copper [1], Steel [1] |
||
|
7 |
83. Wade Airport |
Food [5], Water [5], Silver [1], Copper [1], Oil [3] |
|
|
8 |
86. Lakeside Cabins |
Food [6], Water [6], Silver [1], Crystal [1], Lead [1], Wood [1] |
|
|
9 |
2. Toxic Valley |
Food [3], Water [3], Crystal [1], Gold [1], Acid [3] |
|
|
10 |
2. Toxic Valley |
23. Grafton Steel |
Food [2], Water [2], Lead [1], Copper [1], Steel [4], Oil [1] |
|
11 |
3. The Ash Heap: Zone A |
9. Beckley Mine Exhibit |
Food [6], Water [8], Crystal [1], Gold [1], Oil [3] |
|
12 |
3. The Ash Heap: Zone A |
17. Mount Blair |
Food [9], Water [8], Ore [1] |
|
13 |
Food [7], Water [8], Junk [1], Ammo [1]*, Silver [1], Lead [1], Aluminum [1], Oil [1] |
||
|
14 |
Food [5], Water [8], Junk [1], Aluminum [3], Nuclear [1], Steel [1] |
||
|
15 |
20. Monongah Power Plant Yard |
Food [8], Water [9], Fusion Core [3], Silver [1], Acid [1], Nuclear [1], Wood [1] |
|
|
16 |
80. Spruce Knob |
Food [4], Water [4], Gold [3], Copper [1], Acid [1] |
|
|
17 |
Food [9], Water [4], Acid [1], Nuclear [3], Oil [1] |
||
|
18 |
Food [9], Water [7] |
||
|
19 |
20. Thunder Mountain Power Plant Yard |
Food [7], Water [9], Fusion Core [3], Crystal [1], Nuclear [1], Steel [1], Wood [1] |
|
|
20 |
25. Berkeley Springs West |
Food [1], Water [10], Crystal [1], Lead [1], Aluminum [1] |
|
|
21 |
41. Dabney Homestead |
Food [6], Water [8], Fertilizer [1], Junk [1], Copper [3], Concrete [1], Wood [1] |
|
|
22 |
Food [7], Water [3], Silver [1], Gold [1], Acid [1], Concrete [3], Oil [1] |
||
|
(* Indicates a unique resource requiring a possible small quest to unlock, and generators to power) |
|||
Now that you have an overview of where to find each workshop, it’s time to drill a bit deeper into what workshops contain and why they are so valuable.
Step 1: Learning Your Workshop’s Assets

The 22 different workshops are used for extracting food, water, and materials from the ground; ensuring your continued well-being; crafting; and camping. They offer alternatives to gathering components the old-fashioned way (from junk and other items), and resource generating collectors also offer higher quantities of rare minerals and other items, providing you can keep them powered and away from thieves. Here are the various important locations within a workshop:
Workshop Workbench: This is like an immobile C.A.M.P., which you claim and use the (identical) Build menu, along with the workshop’s stack of components, which you don’t need to collect yourself. It’s the most important object in the workshop.
Food and Water Resources: If a location lists food or water as a resource, the number indicates the maximum amount produced per cycle. For example, a Water value of 4 means that up to four Water Purifiers will produce each cycle. If you have more than four Water Purifiers, the Workshop will randomly select and produce at four of the available purifiers. Water Purifiers that aren’t powered or at full inventory are ignored, so if you had six purifiers but three were full, the other three purifiers would produce.
Resource Deposits (Collectors): If a location has any other listed asset, it’s usually a deposit requiring a collector to farm. Access these collectors from the Build > Resources menu. They need power (from power plants or your own generators) in order to work. They produce the listed item, usually in a component format that doesn’t need to be smelted or changed; it’s immediately usable for crafting. Simply gather produced materials from a collector while it is powered, or steal from it. Beware of thieves gathering your materials; place a lock to prevent this from happening. Collectors have inventory limits, so gather resources frequently to keep them producing.
Unique Resources: Certain workshops may have a small Miscellaneous Quest to complete that unlocks a unique resource at the location. For example, Sunshine Meadows Industrial Farm (the Forest Zone A) has a system inside the main facility structure that churns out boxed food. The Converted Munitions Factory (Savage Divide Zone A) has a system that churns out specialized ammunition (once you power the control terminal)! Check a workshop to see if there are additional assets like this.
Enemies (and Their Loot): Though various types of foes are likely to attack you, certain locations (like the Converted Munitions Factory) tend to spawn a particular type of enemy (Super Mutants in this case) over others. As each enemy drops a particular type of loot, focus on a workshop where you know a certain foe type is likely to be.
Power Boxes: Some workshops have power boxes. These always yield at least some power, but provide much more if their power plant is online. To make the most of your time at the workshop, head to the plant and complete Event: Powering Up, then use the power boxes to run your Resource Collectors and other defenses.
Vertibot Landing Pads: Certain workshops may have one or more landing pads: Wade Airport (the Forest Zone E), Grafton Steel (Toxic Valley), and the Converted Munitions Factory (Savage Divide Zone A), for example. Access the Signal Grenade Box (usually on the edge of the circular landing pad) and lob a grenade to summon the airborne attack (or another if the previous one was destroyed). The Vertibot is an autonomous attack craft that targets enemies on the ground. It’s useful in open outdoor areas; it doesn’t target foes inside buildings. Use these during times of extended combat!
Also check for existing Military Turret defenses (in Workshops like the Converted Munitions Factory or Grafton Steel Yard). Access, repair, and bring online to defend attacks and reduce the need to make your own turrets.
Perimeter: The exterior boundary of the workshop is delineated by a green line, like the one around your camp. Collect and build all assets inside this area, and optionally add your own camps just outside a workshop for extra defense. Keep enemies away from this line; if they get in, your base could be damaged. This guide’s Atlas maps show the perimeter of each workshop. The workshop perimeter may only be a small part of the overall location.
Step 2: Claiming (and Contesting) a Workshop

Unowned: If a workshop is unowned, then expect the location and its immediate surroundings to have a scattering of (random) enemies you must remove as part of the Claim Workshop at [Location] quest. Simply defeat all the foes, move to the red Workshop Workbench, and activate it. If you can’t because there are enemies left to kill, they are usually tagged with a diamond icon, allowing you to finish the quest easily.
Contested: If a workshop is owned by a player, then expect the location around the Workshop Workbench to be bristling with complex and dangerous defenses, including walls, turrets, buildings, traps, and rival human forces with little time for your infiltration! Or, you may find a badly defended, completely open workshop that is ripe for the taking! At this point, you can:
- Leave: If the enemies present too much of a threat, simply find a different workshop to claim.
- Contest: If you believe the workshop is valuable enough to risk time, health, and resources to contest, you can maneuver in, head to the Workshop Workbench, and contest it.
If you’re contesting a workshop, the human enemy will be informed and a tough battle will follow. If you attack before contesting it, you become Wanted.
Staking Your Claim! Claiming Workshop Workbenches

The physical act of claiming or contesting a workshop depends on the status of the workbench. Look for a metal pole with a tiny satellite dish cluster at the top:
- Unowned: If it is retracted into the main body of the workbench, the place is unowned. Step up to the workbench, activate it, and wait in a small glowing green circle as the Workshop Claim bar fills. When it’s full, the workshop is officially yours! Note you will have to pay Caps for this privilege.
- Contested: If the pole is extended, the workshop must be contested, and any defenses (such as turrets) will be hostile to you. After you pay a Caps fee for the contesting, you must wait in a small glowing green circle as the workbench metal pole retracts down and it resets. Remain in the green circle as the Workshop Claim bar refills as you go from contesting to claiming the workshop.
Note that contesting a workshop usually takes twice as long as claiming a workshop, and costs more Caps (as you’re essentially usurping another human’s hard work!). Also, contesting is usually never as cut and dry as standing around, waiting for the workbench pole to retract and extend, as the contesting usually stalls when you have to take cover from enemy fire.
Once you’ve claimed the workshop, the new claimant (usually you or your team leader) appears on the world map, and you are able to start building.
Step 3: Building Up Your Workshop Structures
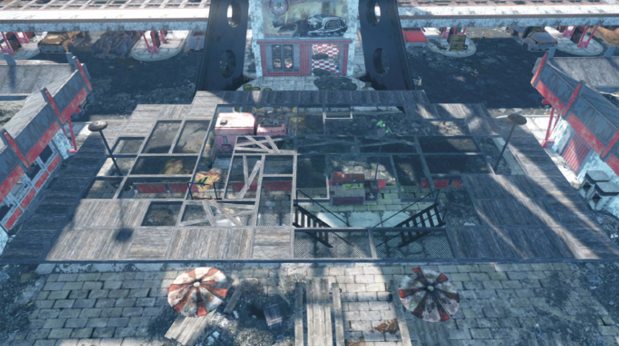

Turn this (picture 1) into this (picture 2) with some rapid defensive structural construction.
Immediately upon claiming your workshop, you can repair any existing structures and start to build your own, using the same building methods as we described for a camp. You must set about defending your workshop and then exploiting the resources within its green boundary perimeter. To achieve success, there are some simple rules to follow:
Rule 1: Defend Your Workshop Workbench at All Costs!
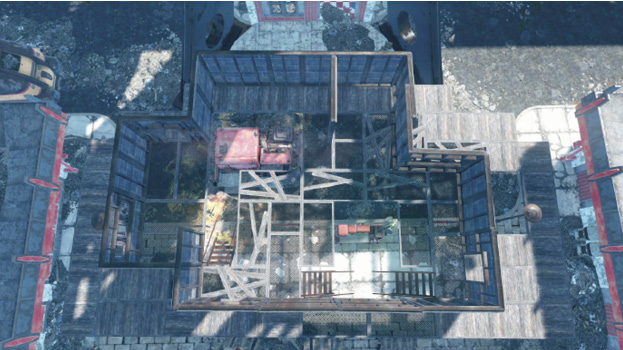
You’ve just demonstrated why the Workshop Workbench is the most important part of this location: It’s the only object that an enemy player can claim; once claimed, all the workshop defenses and structures revert to the new claimant. Your goal is to make it impossible for the enemy to reach the workbench. Think about the following tactical defenses (efficacy may change with post-launch game changes):
- Turrets and Traps: As soon as you claim a base, start dropping turrets for some instant protection. Feel free to add traps of various kinds too, anything to wound a foe or cause them to think twice before reaching your workbench.
- Raised Turrets: Then start creating rudimentary two- or three-floor defenses and place turrets at the top.
- Workbench Encasement: But the real trick is to “encase” a workbench, or hide it so it’s almost impossible to reach, possibly by either side. Remember, once the workshop is yours, you can access the Build menu anywhere inside the perimeter.
- Jam a wall close to the bench so only a single narrow opening is accessible to the bench, and fill that choke point with traps.
- Wrap an entire structure with walls, doors, floor and wall traps, around a workbench if the location allows it (like the Red Rocket Mega Stop).
- Place defenses directly above the workbench (mesh floor towers with turrets) so you can fire down on foes as they approach.
Rule 2: Scrap Existing Trash, Defend Resource Collectors

With an initial stopgap measure to protect the workbench complete, begin to construct and farm the resources:
Scrapping Scenery: With the workbench now under turret guard, start to remove any trash lying around the location. This doesn’t add anything to your raw materials or components; the scenery is lost. Only remove areas you don’t aesthetically like the look of or want to build on without any obstacles.
Resource Collector Encasement: Place a resource collector on top of any deposits (ground pits) within the perimeter. Hook each one up to power (ideally a generator you can hide near the collector). Then place defensive walls, access doors, floors, outer walls, defenses, turrets, and whatever else you wish to create an encasement, making it difficult for enemies to reach the collector. With multiple collectors, you may have to leave it out in the open but close to a turret tower. Any player can access resource collectors in a public workshop. To prevent theft, build a lock for the collector or move the collected items into your private Stash Box.
Generator Placement: Alternatively, place generators on rooftops, away from enemy attackers. Or place them well away from a collector but linked with power connectors; this way an enemy can’t easily bring a collector offline!
Rule 3: Build Proper Defenses
By now, you may have had to fend off some lighter attacks from non-human enemies. While this is occurring, start to build your workshop bases in earnest: Attempt any or all of the following:

Wall Defenses (Type A: Wall Menu): Start with a few foundation pieces, then build stairs and an upper walkway floor running the length of your wall. Next, connect wall sections below the floating upper wall so you don’t waste budget building foundations all the way across. A mesh walkway and triangular wall sections between your turrets allow them some protection but can still fire on infiltrating foes. Add a second interior wall so foes breaking through the first wall have an inner wall to get through—if your budget allows. Then take a blueprint of this and construct a second, third, fourth, and fifth version of varying lengths, depending on the workshop’s size.

Wall Defenses (Type B: Defenses Menu): The tall defensive wall of concrete and steel (with the climbing hooks on it) is a great barricade: It’s tall enough so foes can’t fire or climb over it. It erects quickly, can be sunk into the ground easily, doesn’t need to “snap” into other objects, and can be used to seal gaps if your workshop already has a perimeter fence or defenses around a resource collector. Position both types of defenses so you’re forcing an enemy into a choke point.

Choke Points: A narrow gap between wall defenses Types A and B should be just wide enough so the enemy thinks this is the quickest and best way into a workshop. Naturally, you and your team should have clustered turrets aimed directly at this “choke point of death,” along with traps, dead-end wall sections, turrets, and anything else you feel like throwing down to waylay enemies. If they get through this, give them a final hurdle:

Wall Defenses (Type C: Interior): Either paste in a blueprint of wall defense Type A (or a section of it), or create a final inner wall, perhaps attached to the structure that houses your most important collector or workshop workbench. It helps to look at the footprint of a fortified medieval castle, with an inner “bailey.” Force foes up and down stairs through narrow areas. If you and your team have planned this, you can erect an inner wall first, building outward until you hit a perimeter.

Turret Towers and Defensive Towers: At the corners of your workshop, think about erecting a three- or four-floor tower, offering good lookout potential and advantageous sniping (due to your height). Make the tower high and narrow (the ready-made stairs with the mesh floor is a quick way to complete this). Populate the tower with turrets. Then copy the tower into a blueprint and paste a second, third, and possibly fourth tower so your workshop is bristling with defenses!

Stations and Workbenches: Place any stations and workbenches you’re likely to need during a protracted battle in an easy-to-reach location, but one that doesn’t expose you to enemy fire when you’re hammering away, crafting more ammo, or repairing your weapons: Place these inside a structure, against a defensive wall, and close to your workshop workbench and resource collectors.

Switched Defenses: Check the list of object types at the end of this chapter, and figure out whether the more complex defenses can serve your purposes. Link your turrets to a switch so you have more control over them. Think about adding an alarm (triggered by trespassers). But be mindful that these accoutrements eat into your budget!

Camps and Other Building Types: While you can place a mess hall type of structure (which could even be a ready-made camp you’ve blueprinted), with beds, vending machines (which can be checked periodically for rare items to purchase), and paintings on the walls, this eats into your workshop budget. So think about moving your camp and including non-defensive objects (like a bed) to the edge of the workshop perimeter. Or have all your team craft four additional camps in the shape of a turret tower to really impact those defenses and act as early warning locations!

Distractions: Got a bit of budget left? Why not slap a Scorchbeast head on a wall, place a blinking arrow pointing in the direction of a choke point, spell out a neon-lit threat, or otherwise add some finishing touches to your workshop. Instead of making them aesthetically pleasing (as you might during camp construction), place these to cause your human foes to pause for a second, either to figure out what the distractions mean or to laugh at them. By which time, you’re able to massacre them.
Rule 4: Controlling Your Budget
A good rule of thumb is to expect a workshop to have between three to five times the budget of a camp, depending on its size and location. This means you must stringently follow budgeting rules, knowing that turrets are going to be the costliest item by far. Unlike camps, you’ll probably want all your budget to go into defenses, with objects such as floors, walls, roofs, turrets, traps, collectors, generators, and some lighting taking precedence. Make your workshop defensible first and aesthetically pleasing second.
Rule 5: Teamwork Makes the Workshop Work
Effective workshop claiming and defending depends on competence and working well with your teammates. As all four of you can essentially build your own Camp around a workshop perimeter, this can add a large amount of “free” defense to the workshop area. Divide your teammates into different responsibilities and ensure you’re all part of the same team—if you aren’t teamed up, turrets—which normally will not fire on teammates unless they are Wanted—may start firing on humans it thinks are intruders! Ensure your team leader is the “claimant”; he or she is responsible for the way your structures link to each other. Although anyone can build defenses, only the Vault Dweller who claimed the Workshop Workbench can remove defenses he or she doesn’t like, even those built by teammates! Or, you can do it all yourself and invite teammates in afterward. Or, you can do it all yourself, ignore any other players, and try to defend it all by yourself, without a team: Which is far more difficult.
Rule 6: Battles, Exploitation, and Abandonment

With effective defenses, you must now prepare to repel any invaders. Spread out to vantage points; ensure you have enough provisions, ammunition, and quality gear and weapons to last a while; and hunker down! After you successfully purge waves of enemies, expect some quest reward loot, including plans and mods! Keep this up until enemies overrun the workshop, you run out of items to repair damaged turrets or defenses with, or you’ve exploited all the resources you want.
Even the finest defenses will fail one day: This is particularly true of workshops, which are ephemeral; that is, you can only keep a workshop until you log out, and it resets in the game world after one week. If you’re on a team, the leader becomes the owner if you disconect. Don’t expect to be here for months; instead, gather the resources you need, learn from your defensive structure building, take blueprints (especially your teammates’ construction ideas that might be better than your own), and then move on. There’s plenty more workshops out there to discover!
Part 3: The Construction Collection
Recent Menu
This offers access to objects you’ve previously utilized recently and is helpful if you’ve left your building to forage before returning and want to add some of the previously built objects (e.g., continuing a floor, wall, or roof). What were you doing when you last left your structure? Find out here!
Stored Menu
This is where you’ll find objects you’ve previously built but haven’t placed in the landscape, including the blueprints stored when you move your camp. This might be because you’re rebuilding and you can’t place the item yet (like a piece of roof when you’re working on the foundations), it’s something you’re waiting to place, or it contains your previously built camp. Is your workshop budget almost full, with not much on the ground? Then you could have a lot of objects stored here. Storing is better than scrapping, as you get to keep and reuse the object, but don’t get into the habit of hoarding stored items at the expense of your budget; sometimes you’re going to make mistakes, scrap everything (for half the components of the original object), and start over!
Blueprints Menu

These are previously saved sections of a camp or workshop that you built and copied into a blueprint and named for later use. Ideally, these should be sections of a camp, a defensive tower, a wall, or another feature you want to instantly erect. This way you can make an impressive structure and place it down instantly when you reach a new location (or the same location that you want to rebuild in the same way). Blueprints save a considerable amount of time, so use them! You can select someone else’s work and save it as a blueprint if you’ve unlocked all pieces in the blueprint; otherwise, you can take a photo of the structure (even if a rival Vault Dweller built it and you’re attacking the camp or workshop!), study it, and rebuild it from the pictures before selecting and saving it as a blueprint yourself.
Floors

A wood or concrete foundation? That depends on the aesthetics and available materials. Foundations must be placed first, and a camp or workshop structure must have an “anchor” into the ground using this type of floor. However, the upper floor sections are of particular interest, as they are indestructible—the only piece of your camp that is. Create a “stilt” camp with a floor the enemy can’t shoot through and with all your best stuff hidden in the air! Bear in mind that mesh flooring may be indestructible, but unlike the wood variant, it can be fired through; use your tactical forethought to determine if you want to fire down (or up) at foes during an attack, and place the right type of floors for this. On sloping ground, use the ramp foundation.
Walls

There is a huge selection of styles and shapes in this menu, though many are locked, requiring plans to obtain them. There are doorways and shutter variants, as well as full wall sections. Leave the construction menu, and you can open any shutters, if you want to see outside! Play around with the styles and, most importantly, the shapes of the walls. Certain angled wall sections are used as battlement protection (as shown) or to create a dormer window or more complex roof. Use the rolling metal door to create your own garage, and use the powered doors (power link required) with a switch if you want a door opened with a timer. More expensive wall types, like brick and metal, have higher defensive values.
Roofs

Roof sections are designed to slot together in a variety of ways. To begin, just use the flat roof. Later on, add triangular wall sections and sloping roof lines for aesthetics and so grenades roll back down when thrown by an intruder. Create dormer windows (as shown), add a cupola to your barn, and note there are some roof sections with holes at the end for attaching to subsequent sections or for lobbing grenades through if you’re inside and defending your home.
Stairs
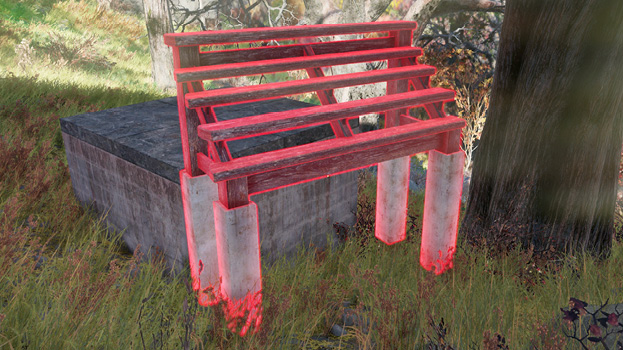
This is the method of reaching a second or subsequent floor, and allow you to build vertically with speed. The stairs with foundation offers an immediate two-floor structure you can quickly add walls to (when creating a defensive tower). Use the posts with wall sections of different shapes, or as stilts to lift up a building or for aesthetics if a building is “floating” and defying gravity. Connect them to the upper floor sections and ground.
Doors

These can be opened once you exit the Build menu. Close doors when you leave (so you can see if it was opened in your absence). Lay traps nearby to dissuade trespassing. Close doors to add protection. Doors can only be connected to the doorway wall sections. You can lock doors to keep other players out; you or your teammates can freely open locked doors.
Crafting

This is relatively straightforward. When you receive the plans, choose any of the crafting benches you wish to place, and add some excellent functionality to your abode. If space is a consideration, and you have the plans, pick the smaller variant when picking a Cooking Station, Chemistry Station, Weapons Workbench, or Power Armor Station.
Turrets and Traps

Turrets: Be sure you have a selection of fast-firing turrets, especially at optimal locations around a workshop base, like higher ground, with ability to fire through mesh floors at foes or over wooden defenses (use the triangular wall sections with gaps where the gun points out). Link turrets to a terminal or switch so you can turn them off if a Wanted teammate saunters into camp (otherwise, the turrets are team-friendly). Use your perks to construct turrets with a higher defensive value, though machine-gun turrets are still very effective. Turrets are likely to suffer damage the most, so check on the components they need to be repaired with, and gather enough of them. And remember that nothing uses up your budget like placing turrets!
Traps: These range from jingling bone chimes announcing the arrival of someone to high-tech radiation and electrical emitters requiring perks and careful placement. Put traps close to high-value locations, like resource extractors (collectors) and your workshop workbench to dissuade even the most keen invader.
Defenses

Place these to discourage enemies from wandering into your camp or workshop; give your structures and high-value objects (like resource collectors) a bit of protection, as well as yourself and your team. Place barricades, especially the defensive wall (due to its height) along gaps in a workshop boundary. Create choke points where you can herd enemies. Hook up the siren to a different switch (from the Power Connectors menu) if you need to turn it on remotely. Use the perimeter wall frames just as their name suggests. Don’t forget to hook up the artillery piece to power; it provides 6 Defense, launching mortars on foes marked by your smoke grenade!
Generators

There are five different types of generators. The usual ones are noisy, give off smoke, and allow you to connect powered devices that need up to 3/5/10 units of power (small/medium/large). The Fusion Generator is silent and requires some rare materials to make, but it gives you all the power you’ll ever need (100 units); however, if an enemy destroys it, all power is lost, so keep it even more well defended than with normal generators). There’s also a large but earth-friendly wind generator which is big but quiet (3 units an hour).
Power Connectors

This is perhaps the most involved menu, due to the large number of switchable and programmable objects, designed to automate, give you control, and neaten up the way power runs through your camp or workshop. The power pylons and power conduits are basically all you need to run wiring from a generator (or power plant box) to your object requiring power. But there are various additional features to think about:
- Switched Power Pylons and Switches: Allowing you to switch the powered device on and off, in case you don’t want lights or a resource collector on while you explore.
- Pressure Plate: Stand on this to switch a device on, Step off to turn it off. Use this to add a measure of security to your base, opening otherwise-sealed doors for teammates, for example.
- Conduits: These copper tubes feed power, and some variants can be pushed through walls, connected by neat and snaking pipework to all your interior sources that need power, or lighting if you want a specific, tidy look. There’s a wide variety of junctions, lights attached to conduit junctions, and curved sections to clamp to your walls and ceilings. And even floors!
- Terminal: Connect a terminal to a circuit, and you gain control of some switches and all spotlights, powered speakers, and light boxes that are running off that circuit. From here, you can turn anything off and on. For turrets, this is helpful if a friend is heading into your base but they are Wanted (so switch off the connected turrets to avoid them firing on your teammate). Spotlights can be used to train their lights on enemies or humans. Powered speakers allow you to switch them of and on if you suddenly want silence. Light boxes can be programmed to change color; this is a great idea as a form of signaling to other nearby teammates: Place light boxes where they can be seen, and change the color to indicate the type of enemy attacking or if you’re low on a certain item.
- Powered Speakers: Place these around a workshop to bewilder and distract.
Lights

Need illumination? Then there’s a whole host of lighting options, mainly split into two groups: those requiring power (usually just a power connector on the same wall or roof as the light is fixed to) and those requiring no power (candles and oil-based lighting). Naturally, you can hook up some of the cooler lights and signs (like the lightbox) to a terminal and program it to change color. Or you can create a message using neon letters, beckoning in strangers with a promise of high-value loot. Whether you keep that promise is entirely up to you!
Food

While you have wilderness plants (like Soot Flowers and Glowing Fungus) that offer particular bonuses when made into a meal or drink at a cooking station, you also have a selection of crops, offering stable, free, and delicious consumables, with less chance of disease if cooked. Place them in dirt. For each point of food production in a location (always 1 at camps), one plant per cycle (17 cycles per hour) becomes harvestable. More plants allow more food storage, but not more production capacity. If you planted 17 plants at your camp, all of them would be harvestable in one hour. Remember these quickly spoil, but can be an easy meal when you return to your camp or workshop—if they haven’t been harvested by someone else!
Water

Need water quickly? Install a water pump, which allows you to obtain Dirty Water. To obtain water with no Rads, it needs to be purified. Instead of using a Chemistry Station and recipe, you could install one of three types of purifiers—small, large, or industrial—depending on how many units of water you want them to produce every hour (providing they are connected to power). This stops you from needing to forage for water once one is placed in water. Gather water frequently so they continue producing without reaching storage capacity, and keep them locked to protect from theft.
Resources

Are you tired of forging for items by yourself when you could have a couple of friendly Protectron types doing the work for you? Then place down one of these resource-generating machines; the Scavenging Station produces 13 junk units every hour. The fertilizer produces 25 units every hour. And if your camp or workshop is near a deposit, this menu automatically updates with a Resource Extractor (aka “Collector”), which, when powered up, will churn out a specific amount of valuable ore, mineral, or other material. Use the Locksmith perk to add locks to these devices, stopping thieves from stealing your resources.
Appliances

Stand-out objects in the appliance range definitely include both types of radios; switch them on and they’ll either play Appalachia or Peacetime Radio, two of the stations your Pip-Boy picks up. The rest are more for decorative purposes, so if you’ve got a section of wall or yard that needs a large object to spruce it up a bit, drop in a toilet, ashtray, or non-working stove.
Beds

Need a place to rest that’s off the ground (so you’re not susceptible to a disease) and that has the option for a Well Rested bonus? Then place some kind of sleeping quarters in your dwelling. It doesn’t have to be fancy; though you can go functional or all out with a large carved bed, if space allows.
Chairs

Including airplane seats, an electric chair, rocking chairs, patio chairs, benches, pews, and couches, if you can sit on it, you can build it and add a rest spot in your abode. Don’t stop there; if your plans allow, there’s a number of different musical instruments you can place near a chair, and play to acquire the Well Tuned bonus. Expect a tuba, acoustic and steel guitars, a banjo, a bass, a snare drum, and an upright and a grand piano.
Stash Boxes

Top of the list of “most important containers” is your My Stash Box, which is the key to placing and retrieving items. These all function in the same way; they are linked, no matter if they are in your camp or another location (meaning you can grab anything wherever you find one, and components in your Stash Box are used when crafting or building). Otherwise, these containers all look familiar, can be left unlocked (they can’t be stolen from), and dress up your dingy hovel quite nicely.
Floor Decor

Designed to be placed on the ground or a table, there’s a wide variety of carved object d’art. Use this for both interior and exterior placement to finish off a bare area or a field, or to act as a grand entrance, assuming you can spare the copper for those two lions and a fountain! Honor the classic Vault Boy in a variety of styles.
Shelves

You can place your smaller containers on these shelving units of various styles and types. The display cases actually require power (after which, it can be opened or closed with a switch).
Tables

Need something to put your lamps, radios, bric-a-brac, and containers on? Then there’s a wide selection of every size, style, and (component) budget. Most are created using wood. If you want cohesiveness to your dwelling, try adding multiple types of tables of the same style. Or, vary your tables (and chairs) for that eclectic look.
Wall Decor
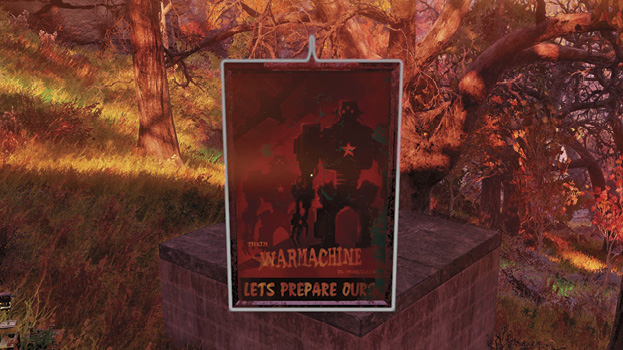
Wall decor is designed to fit on your interior and exterior walls. Add a touch of realism (and whimsy!) to your structures with some light posters (hook one of the types up to a wire). Get patriotic with the U.S. flag, or place a variety of clocks on your wall or a large selection of Vault posters.
Misc. Structures

These are relatively large and functional objects, and ones that could be used to hide behind (the toilet and tent). The Fast-Travel Target is a floor mat that moves your Fast-Travel appearance spot to the mat. Use this if you want to appear at a specific location in your camp, like your Stash Box or a workbench. The decontamination shower requires power, but once activated, it will remove Rads—the perfect entrance to a camp in Toxic Valley!
Perks and Magazines
Finally, the following table lists the available perks, along with their associated attribute and level, as well as two Magazines that are explicitly related to both camping and workshop-based activities. Be sure to have them active to get the very best bonuses to your construction.
| Attribute | Perk Name | Level | Description |
|---|---|---|---|
|
Homebody |
19 |
Gain gradual health regeneration/improved health and limb regeneration while in your camp or workshop. |
|
|
Fireproof |
27 |
Required to construct Flamethrower Trap. |
|
|
Happy Camper |
3 |
Hunger and thirst grow 40/80% more slowly when in camp or in a team workshop. |
|
|
Contractor |
18 |
Crafting workshop items now cost 25/50% fewer materials. |
|
|
Demolition Expert |
10 |
Required to construct Laser Tripwire. |
|
|
Grease Monkey |
33 |
Workshop items are 30/60% cheaper to repair. |
|
|
Locksmith |
11 |
You can now craft Level 1/2/3 locks for your containers (plans required). |
|
|
Science |
20 |
Required to construct Laser Turret, Tesla Arc, Radiation Emitter |
|
|
Wrecking Ball |
29 |
You deal +40/80/120% damage to workshop objects. |
|
|
Home Defense |
22 |
Required to construct Heavy Machine-Gun Turret, Laser Turret, Missile Turret, Spotlight, Spring Board, Spike Trap, Tesla Arc, Flamethrower Trap, Radiation Emitter |
| Magazine | Description |
|---|---|
|
Backwoodsman 9 |
Repairs to your camp or workshop cost 50% fewer materials. |
|
Backwoodsman 10 |
Turrets in your camp or workshop do 50% more damage. |