
Fallout 76 Guide Training Status: You Have Emerged!
Onward to Flatwoods: Eight Steps in Your Initial Exploration (Levels 2–10)
Survey the wooded valley from the exit of Vault 76. Pick out structures you can see (a lookout tower, the old Wixon property, a rusting lumber yard, and other nearby locations hidden in the forest). Then take your first tentative steps. But only after you read this section, which provides recommendations for your immediate courses of action!
Step 1: Finding a Firearm: Your First Weapons

After leaving the Vault, your first priority is to protect yourself. You’re inadequately prepared for life outside, so immediately begin searching for two weapons: one you wield in your hands (a melee weapon like a lead pipe, pitchfork, or a machete) and a pistol or rifle with ranged capabilities (like a pipe pistol, 10-mm pistol, or .44 revolver). Simply check the guide’s Atlas for nearby locations to check. Or just take the gun from the Responder corpse lying just to the side of the Vault 76 entrance.
Step 2: Thirst: When in Doubt, Boil It Out!

To survive in postwar Appalachia, it’s important to make sure you’re always stocked with food and water. Thirst and hunger can kill you just as sure as any Scorchbeast, and your Thirst (Water) and Hunger (Food) meters are constantly decreasing (though you get thirsty more often). Natural water sources (including water pumps) are irradiated and carry disease, and drinking directly from rivers and streams is perilous. When in doubt, boil it out! This is simply a matter of collecting the water and boiling it at a cooking station (there are two in Flatwoods). Check inside the church at Flatwoods to purify the water, too, which removes the slight radiation damage you take, even from boiled water. Then learn a recipe for Purified Water, and make this your default drink for your first few levels. Then consult the Crafting chapter for more potent drinks.
Step 3: Hunger: If the Food Is Raw, Keep a Closed Jaw!

Receive a boost to your Hunger by harvesting ingredients from the wilderness or killing animals and looting their still-twitching corpses. Though devouring raw meat and plant ingredients may satisfy hunger, cooking them will increase their effectiveness and removes the risk of disease. Basic cooking recipes (for both food and drink) will unlock when you first pick up a new type of raw food. Also be aware that raw plants and meat, as well as food and (some) drink cooked with these ingredients, have a very short shelf life; they spoil quickly, leaving you rotten ingredients that are just as bad for you as raw ones. So scarf down food when you make it (unless you have a perk that lengthens the time before food spoils). The other option? Head to any location and scavenge their boxed or tinned foodstuffs; they offer a slight radiation uptick but satisfy hunger and don’t spoil.
Step 4: I Haven’t Got a Stitch to Wear: Your First Clothing and Armor
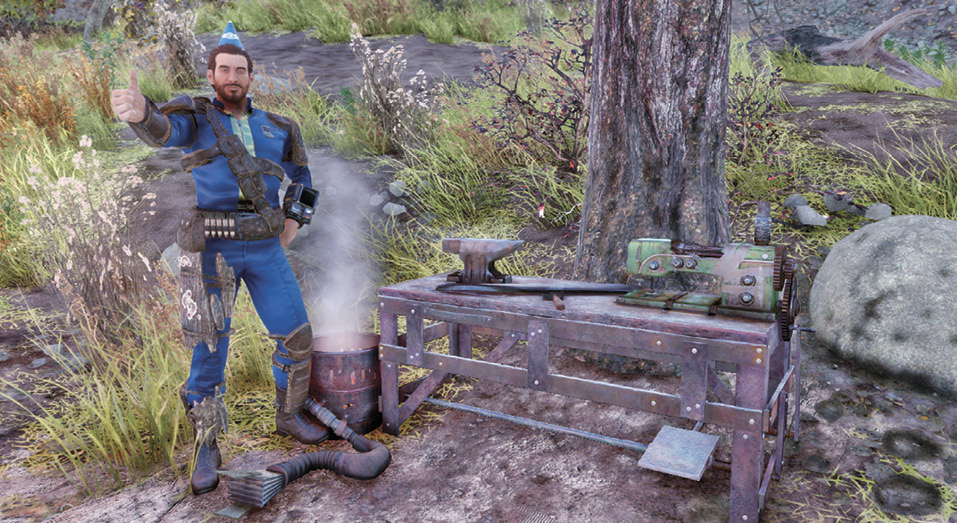
Where’s my Power Armor? We’ll get to that in a few levels. For the moment, head down to the Overseer’s Camp and attempt to construct your first armor part. Due to the items lying around the camp (especially inside the cache), you should have enough component parts to construct some protective Leather Armor. Wear this by highlighting it in your Pip-Boy’s Items > Apparel menu. Note that as you level up, you create “Leveled” versions of these items, which have better statistics. For now, you lack the experience (XP) and Plans to craft better armor (or the Caps to buy it). However, as you progress, other types of armor become available to build, trade, and modify:
- Combat: Designed to protect soldiers in any situation, Combat Armor gives the wearer equal amounts of resistance to physical and energy damage.
- Leather: Thick layers of animal hide make Leather Armor particularly suited to protecting against energy damage.
- Marine Combat: Outclassed only by Power Armor, every piece of Marine Combat Armor provides exceptional protection in nearly every battlefield scenario.
- Metal: Constructed of thick, hand-welded steel or aluminum, Metal Armor offers additional protection against physical damage.
- Robot: Crafted from destroyed robots, the high-tech plating of Robot Armor offers additional protection against energy damage.
- Underarmor: If you’re worried your Vault Suit doesn’t offer enough protection, you can mix and match pieces of all armor types and wear them directly over it.
In addition, you can wear clothing, headgear, hats, and other items that are aesthetically pleasing, offer a bonus, or provide both. There are functional pieces of clothing, too, like gas masks and hazmat suits, which enable breathing across inhospitable environments (e.g., the Ash Heap).
For more information on armor and the Armor Workbench you’ll make these items on, consult the Crafting chapter.
Step 5: You Little Tinker: Ammunition Assistance

Although ammo can be bought from Robot Vendors or traded for with other players, your best method of gathering bullets (which nets you the most XP) is by crafting them at the Tinker’s Workbench. Find one of your first Tinker’s Workbenches at Gilman’s Lumber Mill, at the bottom of the valley Vault 76 sits in. Scrap junk items you’re scavenging (to lighten your load), and you should start to become self-sufficient regarding your ammunition use.
Assuming you’re using ranged weaponry with bullets (and if you’re purely melee, make ammo to sell instead, as it’s extremely lightweight with few components), scroll down the Workbench menu to see the base components necessary to make more ammo for your favorite (or current) weapon, and then get searching! Need gunpowder? Then craft it at a chemistry station (using its own set of components) instead of searching for it.
Step 6: Firearm Forte: Weapon Constructing
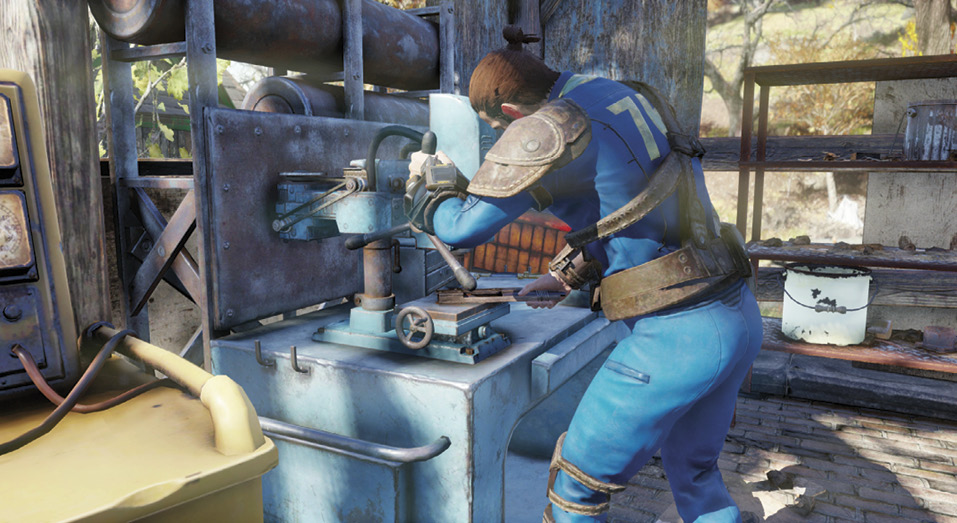
Should you visit the Overseer’s Camp (and you should), one of your first miscellaneous tasks is to craft a weapon on the workbench there. Fortunately, the Overseer’s Cache and other junk lying around should give you enough base components to make your own weapon. If you need more components, break down (scrap) weapons you’ve picked up (usually from fallen Scorched), especially as this sometimes gives you a new weapon plan! Need even more components? Start a scavenge around Wixon Homestead and other nearby locations. Compare the stats between a found and a crafted weapon (and remember you can craft significantly better versions of weapons at Levels 5, 10, 15, 20, etc.), learn to Repair your weapon (and stockpile the components needed so you can repair quickly and frequently), and look for plans to gain more weaponry. Check the Weapons section of the Inventory chapter for a list of weaponry. Don’t worry about modding yet; that’s what the Crafting chapter of this guide is for!
Step 7: Chemical Independency: Chemistry Station Crafting

Overlook the benefits of the chemistry station at your peril. Aside from the Caps to be made churning out chems for your friends and robot vendors (they are lucrative, as they don’t weigh much, so they have a great weight-to-value ratio), focus on concocting chems to boost your statistics (i.e., “buffs”). Be careful taking too many chems. Not only do you risk addiction, but also many chems increase Hunger and Thirst. Check the Perks section for chem-related perks to offset addiction, allowing you to craft or use additional chems. Note that Chemistry Stations also allow you to craft Flamer Fuel and ingredients like gunpowder or smelted ore.
Below are the dozen best chems to try to concoct, after you find recipes):
- Addictol: Completely cures its user of all addictions.
- Buffout: A powerful steroid granting temporary bonuses to Strength, Endurance, and maximum Health.
- Calmex: Highly sought after by hunters and assassins throughout the Wasteland, Calmex grants a temporary bonus to Perception, Agility, and Sneak Attack damage.
- DaddyO: Who needs friends when you’re this smart? Using Daddy-O grants a temporary bonus to Intelligence and Perception, but also a temporary penalty to Charisma.
- Daytripper: Sold as “happiness in a bottle,” Daytripper grants a temporary bonus to Charisma and Luck, and a temporary penalty to Strength.
- MedX: A powerful painkiller, Med-X grants a temporary bonus to Damage Resistance.
- Mentats: Popular with students and scientists alike, Mentats grant a temporary bonus to Perception and Intelligence.
- Psycho: Developed by the U.S. military as a combat drug, Psycho grants a temporary bonus to damage dealt and Damage Resistance.
- Radiation Chems: To fight radiation, use the chems Rad-X and RadAway. Take Rad-X to temporarily increase your Radiation Resistance. Take RadAway if you’ve already been exposed.
- Stimpak: The medication inside a Stimpak heals injuries and can even restore damaged limbs.
- X-Cell: The experimental chem X-Cell grants a temporary bonus to every SPECIAL attribute.
Step 8: Staking a Claim:
Camping and Workshops (Levels 5–10)

This is an optional but recommended last course of action, though you should perhaps have ventured a bit farther afield to the woods north of Morgantown to complete a Camp-related Tutorial Quest for the Responders after finishing the related quests in Flatwoods. Find a patch of ground, bring out your C.A.M.P., and create a small but suitably rustic, imaginative, functional, and defensive camp of your own. Initially, this is a movable location that’s free to Fast-Travel to, with a My Stash Box you can place to keep your Inventory manageable. Later on, there are numerous enhancements (via perks and plans) you can make to your home.
You can also visit a workshop location; the closest is either Sunshine Meadows near Flatwoods or Gorge Junkyard north of the Overseer’s Camp. With some Caps and a modicum of chutzpah, you can stake a claim to a workshop, build up defenses (using the workshop’s already-stocked inventory of components), and start to farm the resources these workshop locations are renowned for. Check the Crafting and Workshops chapters for more details.
Later On: Power Armor Activities (Level 15+)
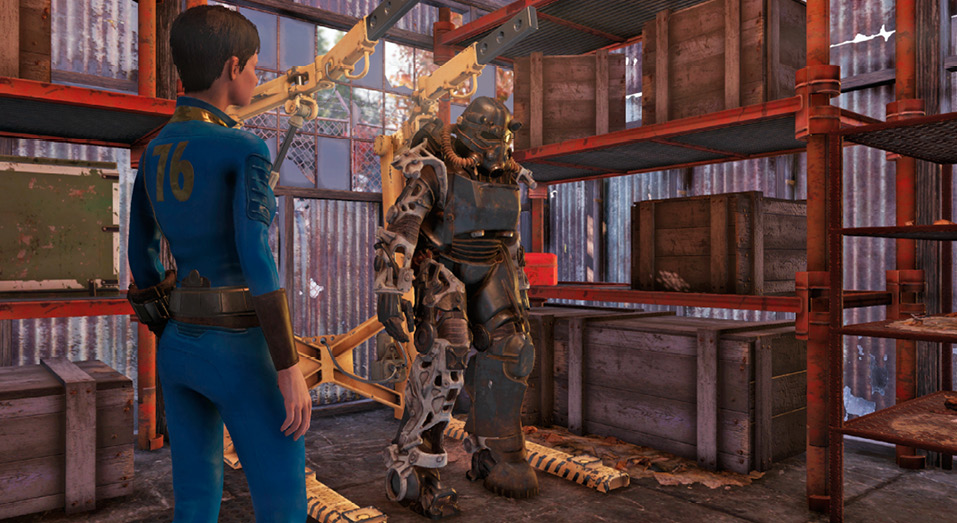
Many Vault Dwellers may be itching to clamber into a variety of impressive-looking exoskeletons known as Power Armor. Unfortunately, the initial area around Vault 76 is bereft of such armor, though the closest frame is located at Morgantown Trainyard, to the north. You can gather Power Armor Frames right now, but you must be Level 15 or higher to start adding armor pieces to the frame (and even then, you’re limited to Raider pieces).
But what is Power Armor? Well, it’s only the most advanced form of protection you can find! It provides the following benefits:
- Significantly reduces incoming damage.
- Increases melee damage.
- Increases Carry Weight.
- Prevents all damage from falling.
- With a helmet equipped, increases how long you can stay underwater.
Walk up to a suit of Power Armor and enter it. Hold the Action button to exit it.
Claiming Power Armor
You can claim any suit of Power Armor (that another player does not own) by walking up to it and interacting with it. If you are told that you are not high enough level to enter the Power Armor, then you can still claim the Power Armor Frame by stripping the armor pieces from the suit, via the Transfer menu. Then try to enter the suit again.
Collecting and Recalling
Once you claim a suit of Power Armor, you can place it in your inventory by exiting the suit and collecting the Power Armor. Your suit will be added to your inventory under Items > Apparel with the name Power Armor Chassis. Your Power Armor will also automatically be recalled to your inventory if you exit it and leave the area, disconnect, or after a period of time has passed.
Deploying and Dropping
You can deploy your Power Armor from your inventory by opening your Pip-Boy, selecting Power Armor Chassis, then placing it; you need to place it in a valid spot, which will turn the highlight around the armor green. Deployed Power Armor is owned by you, and other players cannot enter it. As you are the owner, the Power Armor will be recalled into your inventory if you do not enter it. If you want to give up ownership of the Power Armor, you can select it from your inventory and drop it. Dropped Power Armor will appear next to you in the world and can be claimed by any other player.
Fusion Cores
Power Armor runs on Fusion Cores. Performing any of the following actions will reduce your Power Armor core’s charge: running, sprinting, Power Attacks, and V.A.T.S. Once your Fusion Core has been emptied, you will move at a reduced rate and will be unable to Power Attack or use V.A.T.S. If you have another Fusion Core in your inventory when your current core runs out, it will automatically be installed in your suit. Otherwise, you’ll need to find a new core to restore your Power Armor’s functionality.
Power Armor Pieces
All Power Armor is made from two major components: a frame and a set of armor pieces.
Each armor piece attached to your frame increases your Damage Resistance, but a Power Armor frame does not require armor pieces to function. A frame without armor pieces will still provide protection against falling, increased melee damage, extra Carry Weight, and some Damage Resistance.
Armor pieces can become damaged over time. The current state of your armor pieces is visible on the suit icon to the screen’s left. Pieces in red have taken significant damage and should be repaired. Empty sections mean a piece is either missing or destroyed and must be replaced.
You can view an armor piece’s current condition by opening your Pip-Boy and going to Items > Apparel, or by using a Power Armor Station. To add or remove an armor piece from your frame, open your Pip-Boy and go to Items > Apparel, select the piece you want to add or remove, and use it.
You can also equip or unequip armor pieces at a Power Armor Station or by approaching your Power Armor suit and opening the Transfer menu.
Power Armor Stations
A Power Armor Station allows you to craft new armor pieces, modify existing pieces, and make repairs to pieces. In order to use a Power Armor Station, first walk into the station while wearing the Power Armor, then exit the armor. Walk over to the Power Armor Station and access it. Otherwise, use Power Armor Stations to scrap junk or other items. The nearest Power Armor Station to Vault 76 is at Wilson Brother’s Auto Repair or the Gorge Junkyard.
Power Armor Variants
Power Armor Frame: Even without additional limb armor, a Power Armor frame still provides tactical advantages, like increased Carry Weight, greater melee damage, and the elimination of falling damage. You can access and wear these frames at any Level.
Excavator: Developed by Garrahan Mining Co., the “Excavator” class of Power Armor never saw full production, despite being heavily advertised in Appalachia as the future of mining.
Raider: Scavenged and restored by Appalachia’s vicious and anarchistic gangs, Raider Power Armor features crude plating, rusty spikes, and significant battlefield protection.
T45: Built by defense contractor West-Tek, the T-45 series of Power Armor was the first to be successfully deployed on the battlefield. Its introduction changed the nature of modern warfare.
T51: The Battle of Anchorage saw the first deployment of the advanced T-51 series of Power Armor. With advanced servos and composite armor plating, it was a vast improvement over earlier models.
T60: The most advanced suits of Power Armor to see extensive use were the T-60 models. By the time of the Great War, they were a common sight in all U.S. military engagements.