
Fallout 76 Guide Training Status: You Have Emerged!
Montani Semper Liberi: Adventuring Across Appalachia
By now you should have studied the entirety of the Appalachian wilderness in map form (and even glanced at the guide’s Atlas). When you feel ready, and you’ve learned the threat level posed in each of the six major regions, you should pluck up the courage to venture farther afield.
You Will Explore: The Environment of Appalachia
The biggest concern when leaving the (relative) normalcy of the Forest region is the threats that each of the other regions pose. As a quick overview, read the guide’s introduction to each region, and study the threat levels, as shown below:
Enemy Threat Levels
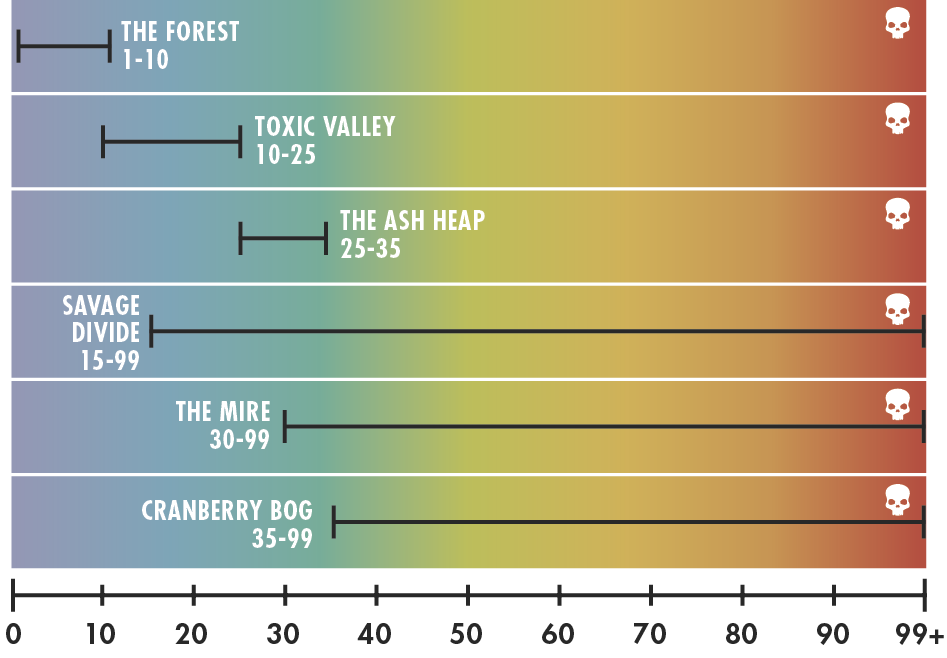
A threat level indicates the usual level of the enemies within a particular region, though this can change over time. For regions where the threat level peaks at Level 99, expect the highest level enemy to be matched to the highest level player in that region. So if a Level 75 player is wandering around Cranberry Bog, expect the toughest foes to be around that level too.
You Will Explore: Mapped (Primary) Locations

Start an exploration of a new area you haven’t seen before by checking the guide’s Atlas (there are around 358 of these!) and locating the nearest primary location. These are marked places on your in-game world map, and your compass, and the main source of scavenging, items, enemies, quest information, and other information. Read the Atlas to learn how big, problematic, or easy each location is to conquer, and then go explore. Feel free to return to each location a day later to clear it out a subsequent time, and repeat the process for more items and XP (e.g., if collectibles didn’t appear the first time you checked).
You Will Explore: Unmapped (Secondary) POI Locations

There are hundreds (literally; this guide tracks 494, but there are sure to be more) of odd, small, and usually out-of-the-way locations across Appalachia too. These are unlikely to have other players near them, and they have their fair share of items to scavenge. They may have a bizarre Mothman totem, an impressive rock formation, or other, more dangerous secrets....
You Will Explore: Player Locations

If you see a small dwelling, usually with turrets and a generator, and it doesn’t appear as a primary or secondary location on this guide’s Atlas map, then we’ve either made a grave mistake or you’ve stumbled upon a player location (or camp). Exercise caution (or don’t; wreck the place if you’re sure you can survive). Inspect the place to see how it was built. Take a photo before and after wrecking it. Or befriend the player and start a new and beautiful friendship....
You Will Explore: Navigating Your Paths to Success
While there’s a certain thrill when you try to sprint in a direct path from one location to the next, the difficult terrain, many hazards, and general dangers present in Appalachia means you should think about using the natural geography to your advantage, when you’re trekking and ensuring you’ve explored every nook and cranny of a particular area.
Roads
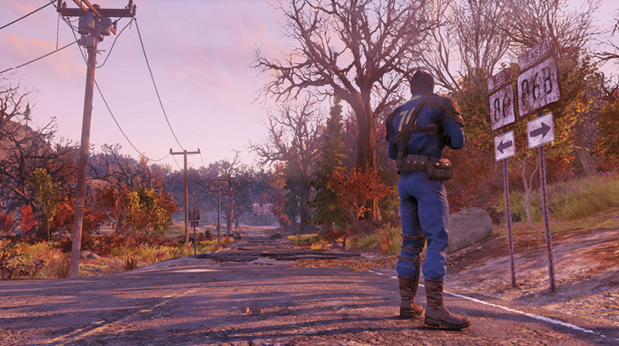
This is obvious, but the clogged arterial interstate, route, and road network is a great way to get about. You’re more likely to encounter other players, wandering vendors, quests, and possibly enemies, as well as primary locations along the roadside. Plus, there are gravel pits along the roads if you need to mine concrete. Even if you’re wandering in the wilderness, keep yourself within a quick sprint of the road, and segment road, rail, and river sections into quadrants and explore within those boundaries to thoroughly inspect each part of a region.
Rivers

The meandering rivers, including ponds, dried up sludge beds, toxic streams, and other bodies of water, are another natural landmark and boundary to follow.
Railroads

The buckled railroads snaking throughout West Virginia, including the once-impressive but now derelict monorail system to the southeast (in Savage Divide and Cranberry Bog) also allow you to stay within a quadrant and find more areas of interest if you keep close by.
Footpaths and Trails

If you’re ready for a slightly tougher adventure, set off into the wilderness, but utilize the many footpaths, which are still in relatively good shape. If you want exceptional vistas; smaller, out-of-the-way locations to explore; and more chances of being ambushed, trek along the trails and footpaths that start at the side of most roads and usually lead to another road or a location.
Signposts

Read (and possibly shoot at) every signpost you spot, so you know which road you’re on and what towns are coming up ahead of you. There are a host of smaller signs, too, like trailhead and campsite information, and areas daubed with the logo of a particular faction, so you know who was here before you.
Landmarks

Another fantastic way to navigate around West Virginia is via the landmarks; if you’ve seen that Landview Lighthouse a few too many times, you know you’re wandering in circles! Check your world map for drawings of the largest landmarks, and see if you can spot them from your vantage point. Use the larger and smaller landmarks when navigating.
Bog Channels

Special mention must be made of the sunken channels that snake through Cranberry Bog. These provide a modicum of cover (and danger, as they’re not easy to jump out of), and you can more easily sneak around this region by using the channels. Plus, there’s a secret tunnel system from Watoga to the Abandoned Bog Town no one knows about yet!
Off the Beaten Path

Finally, just throw caution to the wind, pick a point on the map, and journey to it. Find interesting flora and fauna, deadly encounters, majestic vistas, and much, much more along the way. Have you found the tightrope walk yet?
You Will Do More: Interactions in the Environment*
While the RobCo Robot Pods (located in most larger towns) have yet to go online (but might be accessible right now!), there are other actions you can undertake during your Appalachian exploration. Here are some of the more helpful and entertaining that haven’t yet been mentioned:
Purifying the Air

Two of the regions are known for their inhospitable atmosphere, which can cause health problems and diseases if you’re not wearing a gas mask, hazmat suit, or Power Armor. However, should you chance upon a large Aerosolizer (Toxic Valley; pictured) or Purifier (the Ash Heap), and it happens to be functional, it creates a pocket of breathable air. These devices are scattered across the two regions and offer a brief respite to the choking weather pervading the northwest and southwest.
Powering up Power Plants

 There are three massive power plants: Poseidon near Charleston in the Forest, Monongah on the border with Savage Divide, and Thunder Mountain in the Mire. All three of these large plants (with cooling towers) used to provide power to the substations and certain other locations around the map. Complete a quest to restore power, and you can hook up camp or workshop wiring to these power boxes and siphon power without the need for a generator (which can be vandalized). Free power is most helpful. Oh, and don’t leave a power plant without switching the Fusion Core collectors; these pump out Fusion Cores on the hour, allowing you to collect them like any other resource.
Lookout Towers: Survey Areas

 If you find yourself close to a lookout tower, which are scattered throughout Appalachia, and need some additional knowledge of the local landmarks, climb to the top and onto the lookout’s balcony. A “Survey Area” prompt appears, allowing you to immediately spot a few additional primary locations (unless you’ve already been to them). Now descend, and check them out.
Other Location Types: Vaults

 Rumors abound that Vault 76 wasn’t the only Vault-Tec-approved subterranean habitat in the Appalachian wilderness! In fact, there are three other Vaults to discover and a special demonstration vault beneath Vault-Tec University in Morgantown. All but one of these Vaults has a special “cog” map icon instead of the normal, light gray map icon. But where is the last Vault? And why can’t you enter yet?
Other Location Types: Workshops

 There is a chapter devoted to workshops, which are essentially large, stationary camps you can build with components already stocked at the workshop. You gain XP by fending off waves of foes or stop other humans from contesting the workshop, but mainly you just exploit the natural resource hubs these locations provide for you. There are 22 to find.
Other Location Types: Fissures
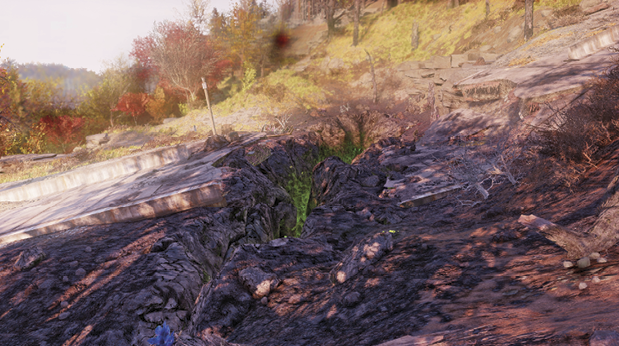
 Should this icon appear on your map, exercise extreme caution! This is a Scorchbeast lair and features this particularly deadly enemy, along with a whole horde of Scorched. Unless you’re tooled up, and with a competent set of teammates, give these locations a wide berth; even the fissure the Scorchbeast rises from can kill you!
You Will Explode: Dangers in the Environment*

Aside from enemies to worry about, there’s other, more environmental areas that are even more than inhospitable; they can be downright deadly! Here are some dangers to be concerned about:
- Can and Bone Chimes: Brush against these, and enemies (or other players) can hear you coming.
- Explosive Canisters: Shoot these barrels and longer canisters, usually colored red, and expect an area-of-effect explosion.
- Flamethrower Traps: Trigger these and receive heat damage.
- Grenade Traps: Trigger these, and a “bouquet” falls to the ground and explodes. Try to disarm these before this happens.
- Heat: Wear special protective gear (firefighter outfits, Power Armor, or hazmat suits) when exploring the extreme heat of some underground mines in the Ash Heap.
- Radtoad Egg Mines: Watch the spawn of the rad-toad; they explode with the same ferocity as a mine.
- Traps: Punji boards, spike boards, tension triggers, tripwires, tesla arcs, radiation emitters...you name it, a location, camp, or workshop may have one of these traps to either step over or disarm.
- Long Drops: Fall too far, and without certain mutations or Power Armor, and expect to cripple your legs. Fall even farther and you die. So exercise extreme caution on clifftops and other vertigo-inducing locations.
- Mines: Placed mines, easy to see in V.A.T.S., may explode with area-of-effect damage at your feet if you don’t shoot or disarm them.
- Oil: Light this on fire and it burns quickly, igniting any nearby explosive items like barrels.
- Radiation: Very common, varying in strength from weak (dirty water) to deadly (radioactive ponds). Reduce radiation with Rad-X and RadAway, or use perks that benefit you when you’re irradiated.
- Turrets: Varied, placed on the ground or rooftops of camps and workshops, or set into ceilings and walls. Shoot them, avoid them, or turn them off at a terminal.
* Most interactions and dangers are flagged for interest throughout this guide’s Atlas. OTHER DANGERS: Expect health loss when breathing smoke plumes in Ash Heap, the toxic vents in Toxic Valley, and Sundew Spores in Cranberry Bog.
You Will Explode: Nuked!
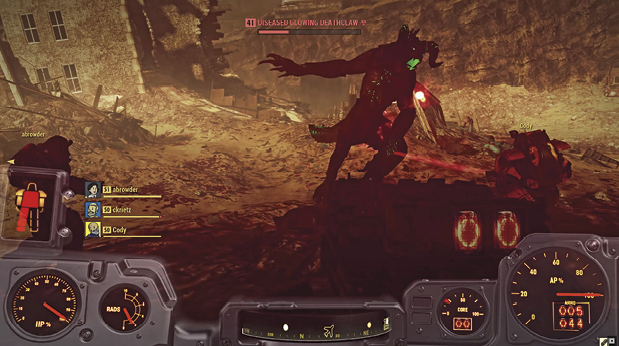
There may come a time when you’re caught off guard by an impromptu nuclear strike. First, check where you are: Are you in the blast radius of the nuke (shown as a giant red circle on your world map)? If so, then panic, unless you’re clad in Power Armor. If not, remain outside the blast radius, as the ensuing Rad storms and utterly inhospitable terrain are anathema to your survival! But there is reason to be hopeful:
- Nuclear Strikes Are Notoriously Difficult to Launch: They require an extremely difficult and convoluted method of launching, and do not occur often. This guide’s quest chapter has the mission where a strike becomes available. Peruse it at your peril!
- Not Everywhere Is Unsafe: You will receive a countdown and warning if a nuclear strike is imminent. This allows you to flee to your Camp if it is outside the blast zone or to Vault 76 (which cannot be targeted by a strike, along with some parts of the Forest). This enables you to escape the attack.
- Strikes Are Ephemeral: The explosive force of the attack is impressive, but the landscape reverts back to its previous state after a few hours. So why launch an attack at all? Because:
- Blast Zones Have Loot: Expect the blast zone to feature highly irradiated, glowing, and specific types of mutated and very high-level enemies. While these foes may be hard to kill if you’re not prepared, the items you can loot from their corpses are among the best you’ll ever find!
- Blast Zones Have Flora: The flora within the blast zone is replaced with strange plants known as “Flux,” which comes in a variety of colors. Gather them all and use them to craft some of the most helpful and high-level items, such as Fusion Cores, if you have the appropriate plans.
Almost Heaven: Death in Appalachia
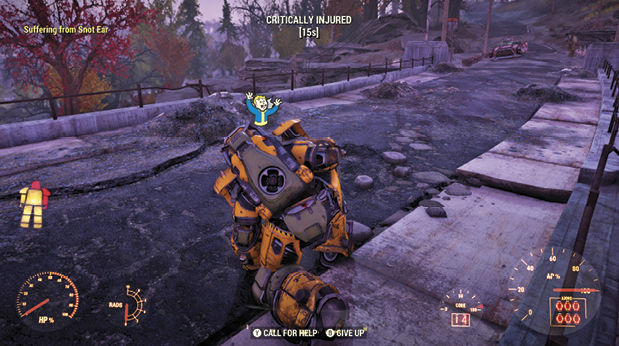
 It’s a fact of life in these parts: Death occurs whenever your Health drops to zero.
Plans for Revival: You drop to the ground and a timer begins. If another player revives you before the timer runs out, you will stand back up. Otherwise, you will need to respawn when the timer runs out or if you press the Give Up button.
When you respawn, you need to pick a location on the map. Locations far away from you will cost Caps to respawn there, but you will always be able to respawn at your C.A.M.P. or Vault 76 for free.
Corpses and Dropped Loot: After you respawn, you’ll have left behind a corpse. This appears on your map and the compass as a skull and crossbones icon. Your corpse contains any crafting materials you had on you when you died. These are typically objects found in the Items > Junk section of the Pip-Boy. Other players can loot your dropped objects. They will also go away if you die again or disconnect from the game, so get back to your corpse with haste! Or drop your junk in a Stash Box more frequently, so you’re not frantically attempting to gather junk you just spent hours foraging for.