
Fallout 76 Guide Training Status: You Have Emerged!
You Will Explore: General Activities to Undertake
Now that you have a good understanding of the critical activities (your first eight steps), and you’ve perhaps discovered around 10 to 20 primary locations between or around Vault 76 and Flatwoods, it’s time to widen your scope of exploration: Check out the Forest, including trips to the two largest settlements of Morgantown (northeast) and Charleston (south). Do this only when you feel ready, usually between Levels 5 and 10, and after Level 15 if you want to start utilizing Power Armor. During this time, learn the finer points of the following techniques:
Coughs and Sneezes (and Almost Everything Else) Spread Diseases
Diseases
Diseases are temporary negative effects. You have a chance to catch a disease when you do any of the following:
- Sleep on a bed without a frame (like a mattress or sleeping bag), that isn’t in your Camp or Workshop.
- Receive melee damage by a diseased enemy.
- Drink Dirty Water.
- Move through environmental hazards.
- Eat raw food.
- Swim in dirty water.
- Get hit by a trap.
- Move through an area that has bad weather.
The chance to catch a disease is based on your Endurance. The higher your Endurance, the lower the chance you’ll catch any disease. Also be aware that catching a Disease in a Region of Appalachia with a higher Threat Level causes the duration of the disease to last longer. Prevent catching a disease entirely by:
- Sleeping only in beds that have a frame, or a mattress or sleeping bag in your own Camp or Workshop.
- Avoiding getting close to diseased enemies, so they can’t hit you.
- Boiling Dirty Water at a cooking station before drinking it.
- Wearing a hazmat suit or gas mask before moving through environmental hazards, swimming through water, or exploring outside in bad weather.
- Cooking raw food at a cooking station before eating it.
- Watching out for traps and disarming them before they spring.
If you catch a disease, you can open your Pip-Boy and go to STAT > Effects to see more information on the penalties you’ll face until the disease is cured. Disease cures and antibiotics will remove one disease. Diseases will also expire on their own, given enough time. You can craft remedies for diseases at a cooking station or chemistry station. Without a remedy, a disease will run its course and go away after enough time has passed.

Mutations
Mutations give you a mixture of powerful positive and negative effects. Whenever you take radiation damage (which is also sometimes related to certain diseases), you have a chance to gain a mutation.
You can see the effects of any mutations you have by opening the Pip-Boy and going to STAT > Effects.
Mutations are semi-permanent. Every time you use RadAway, there is a chance it will remove a mutation. You can keep using RadAway for more attempts to remove a mutation (the lower your current rads when RadAway is consumed, the higher the chance the removal, up to 100 percent if you have no rads). Or, you can pick a perk that negates this, if you actually want the mutation! You can actually inject yourself (or others) with mutations by using serums: These are consumable items that will grant a specific mutation as soon as you use it. If you already have that mutation, the serum will temporarily suppress the mutation’s negative effects and increase the positive effects.
You’re more likely to get mutations if you have high Rads, and cure them with low Rads. Also note there’s a cooldown period after receiving one mutation, before you can obtain another.
A complete list of diseases and mutations is listed in the Active Effects section of the “Being a Better You!” chapter.
Quests

As you gradually progress away from the cradle of Vault 76, you will be called upon to perform certain activities, investigate odd or important happenings, solve disappearances, and handle other quest-related activities. (These are covered, in impressive detail, in other chapters of this guide.) If you’re unsure of what to do in your current environment, it is always an excellent idea to complete a nearby quest. Why?
- To obtain a boost of items, including recipes, mods, and plans, which are (randomly) awarded upon the completion of a quest.
- To gain Experience Points (XP), allowing you to more quickly level up, craft better items, and use better “leveled” equipment.
- To uncover the secrets of Appalachia!
Quests begin in a variety of ways. There are different types (all covered in the Main Quests, Side Quests, Miscellaneous Quests, Events, and Challenges chapters). Here are the main methods of adding a quest to your Pip-Boy:
Announcements
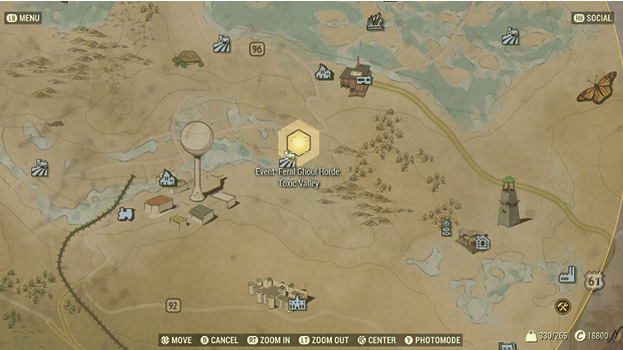
Vault-Tec’s automated systems intermittently announce special quests that are available in your area and sometimes far into a different region of Appalachia. These are usually events, and some require multiple players to complete, as enemy forces may be too great to face on your own. These events are indicated by a yellow hexagon; check these sooner rather than later since most are timed (and are repeatable).
Notes

You may find notes along your travels, usually fragments of paper with musings, alarming scribbling, or printed advertisements. Pick up every note you see (the Atlas tracks locations with a high chance of finding one), and follow the instructions, if you wish.
Holotapes

Similar to notes are orange-and-white holotapes, designed to be played on your Pip-Boy and most terminals. The audio information contained on the holotape may prove extremely useful and can further your questing, give hints on a new quest, or offer information on a location you’ve not yet visited. Or the holotape could contain the ramblings of a madman.
Robots

Robots are an excellent source of quest information; you can speak or listen to them, and some of them (usually a Mr. Handy or Protectron variant with a yellow health bar on your screen) have requests they wish you to perform. You may also gain access to a mainframe robot computer, such as the Mayor of Grafton; these sentient supercomputers may also have requirements of you.
Overseer Caches

Look for large trunks, about the size of your My Stash Box, with the Vault logo on them. These not only contain a wealth of supplies but also clues to the travels and recent whereabouts of the Vault Overseer. For additional information, look for smaller, dark blue Vault-Tec holotape cases and tapes with audio from the Overseer.
Sharing

If you are a team member with other friends active, you can help with any of the quests your team leader has activated. Get together and pool your resources, and finish tasks together!
Maps (Menu) and Miscellaneous
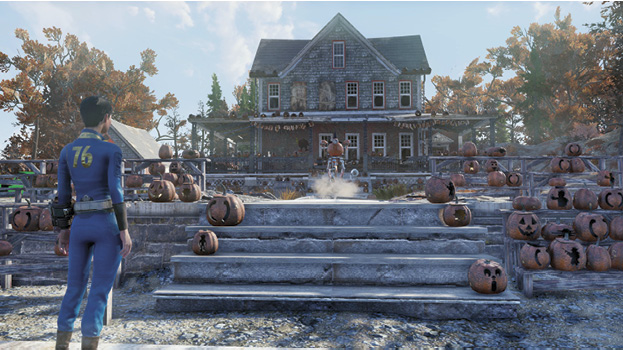
From time to time, you may wander past a location (or dash past it while being savaged by the Scorched) and not realize there was a quest there. Periodically check your world map, as well as your Data > Quests menu on your Pip-Boy to see if there are tasks (particularly in the “Miscellaneous” part of the menu) that require attention.
The Crafty Art of Foraging
Exploit the natural (and unnatural) flora and deposits across Appalachia;



Components that you need for recipes (food, chems, ammo), as well as mods and plans can be broken down either from natural resources (foraging) or junk items (scavenging or looting). Every region in Appalachia has interesting indigenous plant life to find and utilize, usually for consumables. Also present are large sunken deposits, primarily within a workshop, but also across the wilderness. There are also smaller, naturally occurring veins of certain mineral ores. The latter two types of resources can be mined (without the need of any special equipment—not even an ax!). Deposits, though, can be farmed using collectors you can build, either inside a workshop or as one of your resource objects if you set up a camp nearby. The resulting items can be broken down or crafted into usable base components and/or sold to vendors, teammates, or strangers.
The Finer Arts of Looting
A variety of looting opportinities:


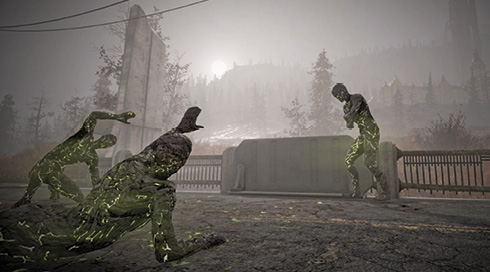


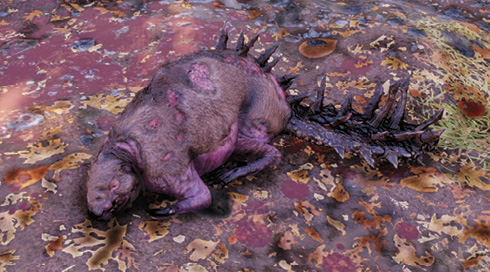
Loot man-made items or those belonging to foes you’ve recently killed. As shown in the adjacent examples, there are numerous containers, ranging from corpses to ice boxes; all of them contain random items. Simply grab what you need! Here are some specific containers to look out for:
Usual Lootable Objects
* Denotes an item possibly flagged for interest throughout this guide’s Atlas.
Items in the Environment*: Every location has a large amount of junk items, detritus, and other abandoned objects and foodstuffs for you to gather. If you can see them (i.e., they’re on a table), they are usually not random, but may sometimes be substituted by a different piece of junk. Also make sure you figure out which are valuable to you, and remember to come back for them again in a day, when they reappear.
Corpses: These are arguably the most important of all the “objects” you can loot; after each kill, check what the enemy has on them. Animals give you raw meat, while other species, monsters, and rarer entities may (randomly) give you exceptional or rare loot!
Petrified Corpses: You can also loot the dead that are about to turn into Scorched—usually for a small radioactive addition and a few Caps; this is helpful if you need to clear an area of these. Shoot them from range to avoid the radiation.
Tool Boxes, Lunch Pails, Suitcases, Wood Crates: This is just a small example of all the different containers that hold items. Simply check each one, unlocking them using bobby pins if they are locked at Levels 0 (Normal), 1 (Advanced), 2 (Expert), or 3 (Master).
Ammo Boxes, Duffel Bags*: Find ammunition and more explosive items in these military-style containers.
Industrial Trunks*: These large trunks are usually green or red and sometimes have a star insignia. These often indicate that a location you’ve explored has concluded, as they are housed in the last chamber, though you can find them anywhere. Expect a reasonably better selection of items from these containers.
Safes*: A free-standing or floor-mounted immovable safe, mostly locked and requiring a picklocking minigame to obtain the interior contents.
Worker’s Item Boards: Don’t forget to check the walls of garages, basements, and sheds used by mechanics or other working folk; this hanging board usually has a number of handyman items.
Machines: Nuka Cola Machines, Ice Boxes, Fertilizer Storage, Eat-O-Matic machines—all of these could hold items, usually the type the machine used to store before the War.
Unusual Lootable Objects
A variety of unusual looting opportunites.


Specific Enemy Corpses: Specific enemies also give you specific loot; Legendary enemies always drop a piece of Legendary equipment, and robots may have Fusion Cores or circuits for your more specific crafting needs.
Vending Machines*: Found at gas stations, train stations, and (once you have the plans) at your camp if you build one, these sell a random selection of items to anyone who’s buying. Check these periodically for rare items to purchase. Note there are location-specific vending machines, too, with specific items to obtain (examples include prize-awarding machines after collecting tokens, or U-Mine-It! vending machines offering information on where rare minerals and ores can be farmed).
Government Air Drops: If you see a dropped item or one close to a hovering Vertibot, or if you find a holotape or terminal at one of the many small hilltop relay towers across Appalachia, quickly gather the high-quality military items inside. The air drop case has a brightly colored smoke trail visible to all.
Treasure Maps and Other Oddities and Trinkets: If you chance upon a parchment with a sketch on it (found randomly across Appalachia), compare the picture to a location you’ve visited; if you can find the same vantage point as the picture indicates, you can find a hidden treasure stash there! You’ll also start to discover odd trinkets in the landscape, like souvenir lighthouses at the Landview Lighthouse. What are these for? Perhaps you’ll find out later.
The Addictive Art of Collecting
Your collection of more valuable objects includes:
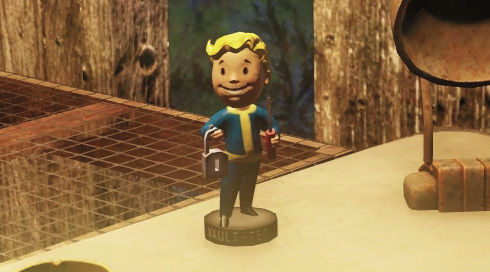

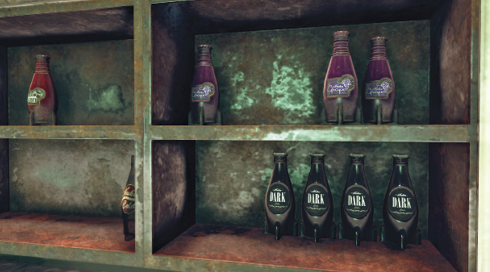
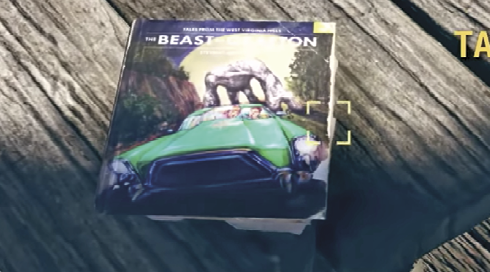
Though there’s not a category of items known as “collectibles,” this guide has flagged certain high-value items as such. Note that in the case of Bobbleheads, Caps Stashes, holotapes, Magazines, and Nuka Colas (as well as Power Armor frame locations), these items semi-randomly appear. This means they are sometimes at a location, but their appearance is random. They have a set location (e.g., on a picnic table just north of the Landview Lighthouse), but the object may or may not appear. And it definitely won’t if another player has just grabbed it! Here are some high-value items to look for:
* Denotes an item possibly flagged for interest throughout this guide’s Atlas.
Bobbleheads*: There are 20 different types of Bobbleheads to find, and a random one is found each time you visit a location where one was previously located. Sadly, these have already been taken out of the packaging. But they do bestow a fancy improvement for a limited time period.
Caps Stashes*: These lunch tins contain a good number of Caps and randomly appear in the same location every time.
Holotapes*: These could tell the frightening story of the Mothman, provide knowledge of the Overseer’s past, offer clues to solving a quest, or simply be the ravings of a nutcase. Some, found at Magazine locations, have a RobCo Fun! game you can play.
Magazines*: There are 12 different Magazine publications for you to gather, including one set with a free holotape game you simply must attempt! They all have effects related to the Magazine series they are from, and a random one is found each time you visit a location where one was previously located (so you won’t get Grognak the Barbarian #4 at the same place twice!).
Nuka Colas*: Sometimes, the locations of a regular Nuka Cola may be replaced by a rarer Nuka Cherry or an even rarer Nuka Cola Quantum (both have more pronounced bonus effects when consumed). There are even rarer Nuka Colas out there too. Now, how do you get into The Whitespring Resort again?
Power Armor Frames*: Appalachia has a large number of Power Armor frames, with attached armor sections on each suit. Each also comes with a Fusion Core. Pick off the armor pieces and store them until you’re high enough level to use them.
Note there are a whole host of other items to think about searching for, such as: Arms and Ammo, Health and Chems, Fusion Cores, Harvestables, Notes, Recipes/Mods/Plans, and Trunks. These are all described at the start of the Atlas chapter.
Note the statistical improvements you receive for Bobbleheads and Magazines are detailed in the Active Effects section of the Being a Better You! chapter.
The Impressive Arts of Hacking and Lockpicking
Terminals
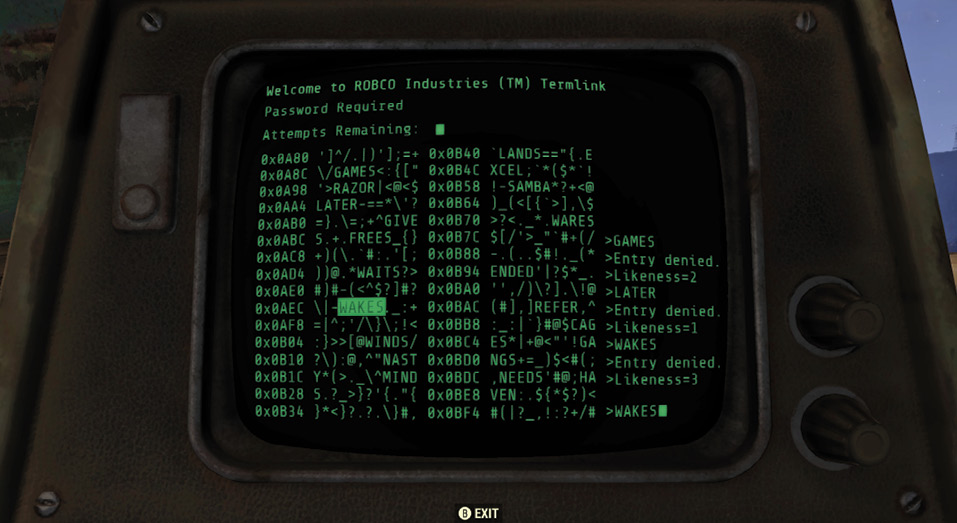
Terminals are plentiful across Appalachia, whether set into a wall, on a desk, or as part of a vending unit. Some are locked, at various levels of difficulty. Access terminals to uncover useful information; unlock secure doors; take control of linked turrets, bots, and spotlights; or play holotapes. Some terminals can hold (or contain) holotapes. To enter a terminal, approach and access it.
Hacking a Terminal
Hacking lets you access terminals locked with a password. Locked terminals have a difficulty level, usually between 0 (Normal) and 3 (Master). A level 0 terminal can always be hacked, but higher-level terminals will require you to equip the perks Hacker, Expert Hacker, and Master Hacker. Each perk you equip increases your Hacking skill by 1. You will need to equip all three perks to hack Level 3 terminals.
When hacking, a terminal will display a list of potential passwords and random characters. Only one word listed is the correct password:
- Move the cursor and select a word, and use it as the password by clicking on it.
- If the guess is correct, the terminal will unlock.
- If the guess is wrong, a “likeness” number will be displayed in the corner of the terminal screen.
The likeness number tells you how many letters, in the correct position, match the actual password. For example, if the password is BOOK and you guess BACK, the likeness number is 2, because there’s a B in position 1 and a K in position 4. But if you guess OATS, the likeness number is 0. Even though both BOOK and OATS contain the letter O, the word OATS has an O in position 1, and the letter in position 1 of the actual password is B, so it’s not a match.
Use the likeness number to narrow your search by comparing the letters and letter positions of your guess to the remaining options.
As you move your cursor through the lists of characters, keep an eye out for pairs of matching brackets—for example, (){}. If a matching pair of brackets becomes highlighted, then selecting the brackets might remove a dud word or reset your number of attempts for the hack.
You have four attempts to select the right password. If you fail to find the correct entry after four attempts, you’ll be locked out of the terminal for 10 seconds.
You can exit the terminal at any time.
Container and Doors: Lockpicking

Many containers (including safes) and doors across Appalachia are already unlocked or open. But some are locked (and you can add locks to some camp and workshop objects to stop thievery). Picking locks will let you open doors, safes, and containers.
Locks have a difficulty level, usually between 0 (Normal) and 3 (Master). A Level 0 lock can always be picked, but higher-level locks will require you to equip the perks Picklock, Expert Picklock, and Master Picklock. Each perk you equip increases your Picklock skill by 1. You will need to equip all three perks to pick level 3 locks.
To pick a lock, you must have at least one bobby pin in your inventory. To find bobby pins, explore Appalachia, purchase them from robot vendors, or trade for them with other players. Once you have a bobby pin, approach the locked door or container and start to pick it:
- Rotate the bobby pin, then rotate the screwdriver.
- If the lock resists, release the screwdriver and reposition the bobby pin before trying again. The closer the bobby pin is to the correct position, the farther the lock will rotate before you either encounter resistance or the bobby pin breaks.
- When the bobby pin is in the correct position, the lock will fully rotate and open. More difficult locks require more precise placement of the bobby pin.
Some locks require a key and cannot be opened through lockpicking.
Banking on It: Caps Collecting

As money no longer has any value, the survivors of Appalachia are utilizing a new type of currency: Caps! The tops of Nuka Cola bottles allow you to gain wealth, and any item with value is measured in Caps. Caps are used up when you Fast-Travel to anywhere you’ve previously explored or revealed, except your camp or Vault 76. You use them when you start a new camp, claim a workshop, trade, or pay off a bounty (usually with your life).
Find your Caps total in the bottom-right of your world map or the bottom-middle of most of your Pip-Boy menus. But how do you get more Caps?
- From Nuka Cola Bottles: You may not think to do this, but drinking down any Nuka Cola bottle allows you to keep the bottle cap, adding one to your Caps total.
- From the Environment: Single caps are sometimes strewn about on tables, floors, or chessboards.
- From Caps Stashes: These lunch boxes are crammed with Caps (or they will be if you have the Luck perk Cap Collector active).
- From Corpses: Check the contents of that Mole Rat, Super Mutant, or other even more revolting specimen you just defeated; they might have carried (or swallowed) some Caps.
- From Petrified Corpses: The static ash statues that form the Scorched almost always have a Cap if you search them and can withstand the slight radiation poisoning when these corpse statues disintegrate.
- From Containers: Open anything and everything you can interact with; there could be Caps inside!
- From Vendors (Robots): Head to a Vendor and sell them your scavenged or crafted equipment.
- From Trading (Players): Beckon a fellow Vault Dweller over for a spot of bartering, selling them your scavenged or crafted equipment.
- From Bounties (Players): We made time to take out that troublesome “Vito” and his older, sweatier brother “Pepper,” known as “the heavy-set bandits” who’ve been massacring innocent folks near Mama Dolce’s Food Processing factory for a while now. The bounty comes out of their own Caps totals, making their comeuppance all the sweeter!
- From Quests: After completing a quest, expect a jingle of additional Caps along with other rewards.
Vendors

Vendors are typically robots that have been programmed by the previous survivors of Appalachia to sell goods. They are found in settlements previously occupied by the Responders Faction, as well as every train station in Appalachia. Expect vendors from different regions to have a variety of items specific to that region. Also expect to see “wandering vendors,” usually a Protectron with a Brahmin caravan behind them. There’s also a friendly Super Mutant vendor who sells some pretty choice wares.
When you find a vendor, a Trade prompt appears. In the Trade menu, the list on the left contains your inventory, and the list on the right contains all the items the vendor is selling. At the bottom of each list are the number of Caps you each have. A vendor that is out of Caps will not be able to purchase your items. You must have enough Caps to purchase the items, or the transaction will fail.
If you’re interested in selling items, collect the items that have a good ratio to them: look at the value of an item in your Pip-Boy, and compare it to the item’s weight, or the general availability, and decide to focus on items that are light, valuable, and easy to come by.
One of the ways to make Caps is to sell your crafted items to vendors, but due to their limited budgets, you won’t make a huge amount at one time. Not so if you try trading with other players instead (see later in this chapter for trading information).