
Main Quests
 Reclamation Day

I Just Want to Start...

Rise and shine! After adjusting your appearance after last night’s festivities, eject the Nuka Tapper game from the terminal, inspect your room, and clamp the Pip-Boy to your wrist. Then head out into the mezzanine forecourt. Mr. Handy robots are here to grant you verbal encouragement as you pass the other vault rooms (all inaccessible), and head down the stairs from the cafeteria.
Pass by Crutchley, and follow the cardboard Vault-Boy’s pointed finger up the stairs to the first Vault-Tec standee, designed to grant some friendly reminders before you go. They are numbered so you don’t miss any. Check each one as you continue on your way:
1: Stay Hydrated: Learn about the importance of water and gather Purified water as well as Rad-X.
2: Health & Medication: Learn about Stimpaks and gather five as well as some RadAway.
3: Power Is Key: Learn about the infrastructure (there isn’t any) and grab a bag of building supplies.
4: Join a Team: Learn about other vault dwellers who have already left Vault 76. Grab a party hat.
...a Flame in Your Heart

Just after the fourth Vault Tec informational standee, veer off into the adjacent Overseer’s room and access her terminal. Check her reports and learn about her mission by ejecting the holotape in the terminal and playing it on your Pip-Boy (from the ITEMS > HOLO menu).
Continue to check out the Vault-Tec standees as you head toward the exit:
5: Camping Made Easy: Learn about the rudiments of C.A.M.P.ing, and grab a portable unit to use yourself.
6: Get a Job: Gather your Perk Cards, and assign the first of them. Nab the pencil and black-rimmed glasses while you’re at it; there’s no reason to leave loot behind, especially when the loot contains a slick pair of spectacles.
After this, it’s simply a matter of waving goodbye to your robot chums and stepping out into the world.
First Contact
Country Road

Survey the hills and forests stretching out to the horizon, as well as the larger landmarks you can use to orientate yourself. Then head down the Vault-Tec entrance steps and speak to a Mr. Handy robot about the Overseer’s whereabouts. Head down to the road and walk roughly south. Before your exploration goes any further, it’s worth scavenging for a few weapon-based items.
C.A.M.P.ing Trip

Head along Route 88 East, across a covered bridge, and find the Overseer’s C.A.M.P. just above the road junction. Though it may lack the most basic of defenses, it does have some key crafting stations and is empty of occupants (unless another Vault Dweller is active in the area). Start by inspecting the indicated Locations to Explore within the camp.
Survival Basics

You now have two Miscellaneous Quest objectives to fulfill: crafting a piece of armor and a weapon. Continue your inspection of the C.A.M.P., and discover some pertinent objects to interact with (all of which were built using the C.A.M.P., so you can too!):
- The Overseer’s Cache: Contains helpful items and a holotape to play to further this quest line.
- My Stash Box: Allows you to remove and claim items, then gather them again at subsequent My Stash Boxes dotted throughout the world.
- Toolbox: Containers like the red toolbox to the left of the weapons workbench contain a slew of junk items that can be used as components for crafting. Also look for chests, boxes, and other containers like this one to find the goods you need to survive in Appalachia.
- Armor Workbench: Craft, scrap, repair, or modify wearable armor at these benches.
- Weapons Workbench: Craft, scrap, repair, or modify weapons at these benches.
- Cooking Station: Use these to craft recipes mainly related to food and drink.
Complete both the Miscellaneous Quests by scavenging all the components on the table just left of the My Stash Box; this should give you enough components to craft some armor and a weapon at the respective workbenches.
Flatwoods or Bust

When the Overseer’s Log finishes playing, you realize she headed to the town of Flatwoods. Head there by journeying southwest along the road, passing the Green Country Lodge and eventually reaching the town, which was once a hub of activity for a group known as the Responders. Various structures in the town have been repurposed, and many of the buildings have signs or are adorned with a heart sign—the logo of the Responders.
Enter the church at Flatwoods, which has a “Command Post” sign outside its entrance. Though the Overseer isn’t here, another one of her caches is: Open it and claim the contents. Among the items is another holotape to listen to. The Overseer stresses the importance of working with the Responders (if any are still alive).

Having found the Responder’s Outposts at Flatwoods and listened to the Overseer’s remarks, head inside the Flatwoods Tavern (with the “Volunteers Needed!” sign outside). Access either of the Self-Serve Registration Kiosks. Register as a volunteer, after which you’re instructed to find one of the responders, Kesha McDermott. Optionally look her up in the Responder database at the kiosk.
Thirst Things First
Water, Water Everywhere

Head west to the river within the town’s boundaries, where you find Kesha’s remains. Search her for a holotape and Water Testing Kit. Then crouch at the water’s edge and collect some Dirty Water. Stay on the bank rather than wading into the river to avoid radiation. Then wander roughly south to the Community Garden, collecting water from either of the water pumps near the shed.
Creating a Drop to Drink

Journey back to the church and enter. Head to the back where the makeshift lab is located. Access the diagnostic terminal. Choose “Analyze Water Sample”: As expected, the results aren’t good; the water needs to be purified before being fit for human consumption:
- Plan A: If you haven’t collected any water or wood yet, do so now. Find some logs at the wood pile and a log in the graveyard near the church’s north side. Then find any cooking station (like the two located in the parking lot on the tavern’s south side) and boil the Dirty Water. The requirements for Boiled Water are Dirty Water (2) and wood (1).
- Even if you already have Boiled Water in your inventory, you can’t skip this part.
Once you have crafted the Boiled Water, check back at the self-serve kiosk, check your Volunteer status, and conclude this quest. Responder Quest: Second Helpings now begins.
Second Helpings
Man of God

Look up Delbert Winters in the People Directory, then head to his trailer on the south side of town. Enter, and inspect his dwelling until you uncover Reverend Delbert. Access Delbert’s terminal. Now you know the password, you can access all of his entries. It seems Delbert had a hankering for some juicy ribeye steak!
Making a Meal

Cooking a ribeye steak is a simple process:
- Plan A: Step out of Delbert’s trailer, search one of the nearby Brahmin corpses, or kill and loot any living Brahmin in the vicinity. Gather Brahmin meat from the corpse, and then visit any cooking station (such as one of the two adjacent to the tavern in the parking lot). Craft a Ribeye Steak by combining Brahmin meat (1) and wood (1).
- Even if you already have a Ribeye Steak in your inventory, You will have to go through the process of cooking one for this objective.
Head back to the Flatwoods tavern, enter the pantry, access the nearby kiosk, and become a full volunteer. Next, head inside to the back of the church and access the Responders Database Terminal. You can now log on as a volunteer (not just a guest), which enables you to contact the main Responders Headquarters. Once you’ve read the emergency message, the quest concludes.
Final Departure
Catching a Flight

Trek northeast from Flatwoods, along Interstate 59, to eventually reach the remains of Morgantown Airport. On the way, feel free to tune your radio to the Responders Emergency Signal. Enter the grounds, and go interior the Morgantown Airport Terminal. Find the marked room on the upper floor and inspect the Overseer’s Cache inside. Among other items, grab and listen to the Overseer’s Log.
Inoculation Investigations

The report mentions an “Inoculation Project”; further your search outside, passing the old field-ops tower. Head east along the runway camp to an area marked “Quarantine.” Expect heavy resistance from Scorched forces. Fight your way into the curved-roofed hangars labeled “Medical,” and use the terminal on the second floor. Select “Inoculation Project Announcement” to complete the quest.
An Ounce of Prevention
Doctor’s Visit

Head to the basement of the Scorched-filled AVR Medical Center. The easiest way to do that is to use the stairs to the right of the building’s north entrance. Be careful and take things slow. If you are impatient, you can easily become surrounded by the hordes of Scorched occupying this space. Once down below, use the AVR Medical Laboratory Terminal and read the “Inoculation Project Overview” entry.
Science Experiment

You will need to collect a handful of items to complete this next series of objectives. We’ll start with the Type-T Fuse, which is located in Greg’s Mine Supply northeast of the AVR Medical Center and south of the Morgantown Airport.
After reaching Greg’s Mine Supply, head to the house across the street and use the basement at the rear of the house. Follow the path through the basement and you’ll eventually end up inside Greg’s Mine Supply. Find the Type-T Fuse inside the yellow wooden crate just up the stairs out of the basement.
Sampling the Wild Life

Once you have the fuse in your possession, head back to the AVR Medical Center. Hold off from installing the fuse. Your next task is to get blood samples from a Feral Ghoul, a Wolf, and a Mole Rat, all of which are located at the objective markers east and west of the medical center.
To collect blood samples, kill one of the three enemies listed, then approach them as if you were looting their bodies. Look in the bottom-right corner of the loot window for the button to press for collecting a sample. You only need to do this once for each enemy type, so after you get a sample, move on to the remaining enemies.
After collecting all three samples, head back to the AVR Medical Center, insert the Type-T Fuse into the fuse box to the terminal’s right, insert the blood samples into the centrifuge, and use the terminal to analyze them. Once done, use the Sympto-Matic (one of the gigantic tubes to the terminal’s left) to administer the newly created vaccine. You’ll immediately start the next quest, “Into the Fire,” after completing this one.
Into the Fire
Knowledge Is Power

Head to the Charleston Fire Department, which is located southeast of AVR Medical Center. You’ll need to take the Fire Breather Knowledge Exam to be granted entry in the ranks of the prestigious Fire Breathers. The questions mostly require common sense (danger bad, safety good), but if you’re an overachiever, you can collect the answer key from the main office upstairs, or search the room the terminal is in and read marked notes scattered around the station. You can find two of the marked notes on the desks in the same room as the terminal; another one is in the locker room next door in an open locker. The final note is in the fire truck garage inside another open locker.
When you’re ready to take the test, use the Fire Breather Training System terminal and select the Knowledge Exam entry.
Once you’ve completed the Knowledge Exam, leave the department and head north toward your next destination.
But Might Makes Right


You’ll need to reach a terminal inside the Charleston Herald building in order to start the physical exam. While this isn’t Charleston proper, it is still Charleston, and Charleston spells danger. The easiest and safest route up to the terminal is to stay on the outskirts of the town and head to its east side. You’ll see a set of stairs attached to the outside of a tall apartment building not far from the objective. Climb to the top of the stairs, enter the building, then head down a floor and head west toward the objective. You’ll cross a bridge of scrap onto the next building. Once there, drop down another floor and follow the red, painted arrows lining the floor and walls, but do so backward. They’ll lead you to the next building, where you’ll reach the terminal.
A Need to Speed

Once you initiate the physical exam, hit Button A—which is right in front of the terminal—then race to the south side of Charleston Herald and hit Button B. Return and hit Button A again. Oh! And you’ll need to do it while avoiding Scorched and also within a three-minute time limit.
We’re making it sound more intimidating than it actually is. You really just need to focus on getting off and out of the buildings into Charleston Herald proper as quickly as you can. From there, head toward the objective marker while following the arrows marking the walls. Once you hit Button B, head around the outside of the city, making your way to the east set of stairs we took up to the terminal the first time. Once you reach the stairs, just follow the path you took to the terminal and you’re home free.
A Real Fire Breather

Initiate the final exam on the terminal, then head southwest of Charleston Herald to Belching Betty to reach your next objective. Once you arrive, pick up your gear and get ready for your final test.
Listen to the Fire Breathers Final Exam Briefing Holotape in your inventory. Once you’ve listened to your final exam instructions, suit up and enter the mine.
Only You Can Prevent…

Once inside, use the terminal to the right of the locked door to unlock it. Follow the path and eventually you’ll reach a fork in the road. You can pick either path: both have plenty of resistance and both lead you to your destination.
After you push the emergency beacon, more Scorched enter the room. Get behind cover and fight your way out carefully. Once you’ve back on the surface, speak with Bernie, then head back to the Charleston Fire Department and register yourself in the Fire Breather’s computer system.
Head to the room next to the second-floor terminal and hit the button to play the priority message to complete the quest. You’ll be launched into the “The Missing Link” quest immediately following this one.
The Missing Link
On Top of the Top of the World

You need to reach Top of the World in the center of the map. It’s a long journey, but a relatively quiet one, provided you take the proper route. If you take the southern route, you’ll run straight through 98 NAR Regional, a checkpoint that is filled with deadly robots—most of whom explode shortly after getting destroyed by gunfire. It’s a deadly place, so proceed with caution. Instead, Fast-Travel to Morgantown (or Morgantown Airport) northwest of Top of the World and approach from the northern path. There are Mole Men, Super Mutants, and plenty of combat hot zones, but you’ll be encountering enemies that are roughly around Levels 5 to 10, which is a far cry from Levels 25 to 30.
After you build Rose’s Signal Repeater, she’ll let you take the elevator up to the third floor of Top of the World. Once there, you’ll find where Madigan’s trail ended. Rose knows what Madigan was looking for, but she’s not willing to share that info unless you help her out with something else.
At this point, you need to complete all of Rose’s other quests to progress beyond this objective.
Back on Track

After you finish Rose’s quest, grab the Broken Uplink from inside the Raider’s Cache. We’re taking a long trip to the Mire in the northeast corner of Appalachia. Fast-Travel to Sunnytop Ski Lanes or the Palace of the Winding Path, and start making your way east.
Once at the door to Abbie’s Bunker, hack the terminal next to the door and head on in. When you do, the quest will be complete (finally!).
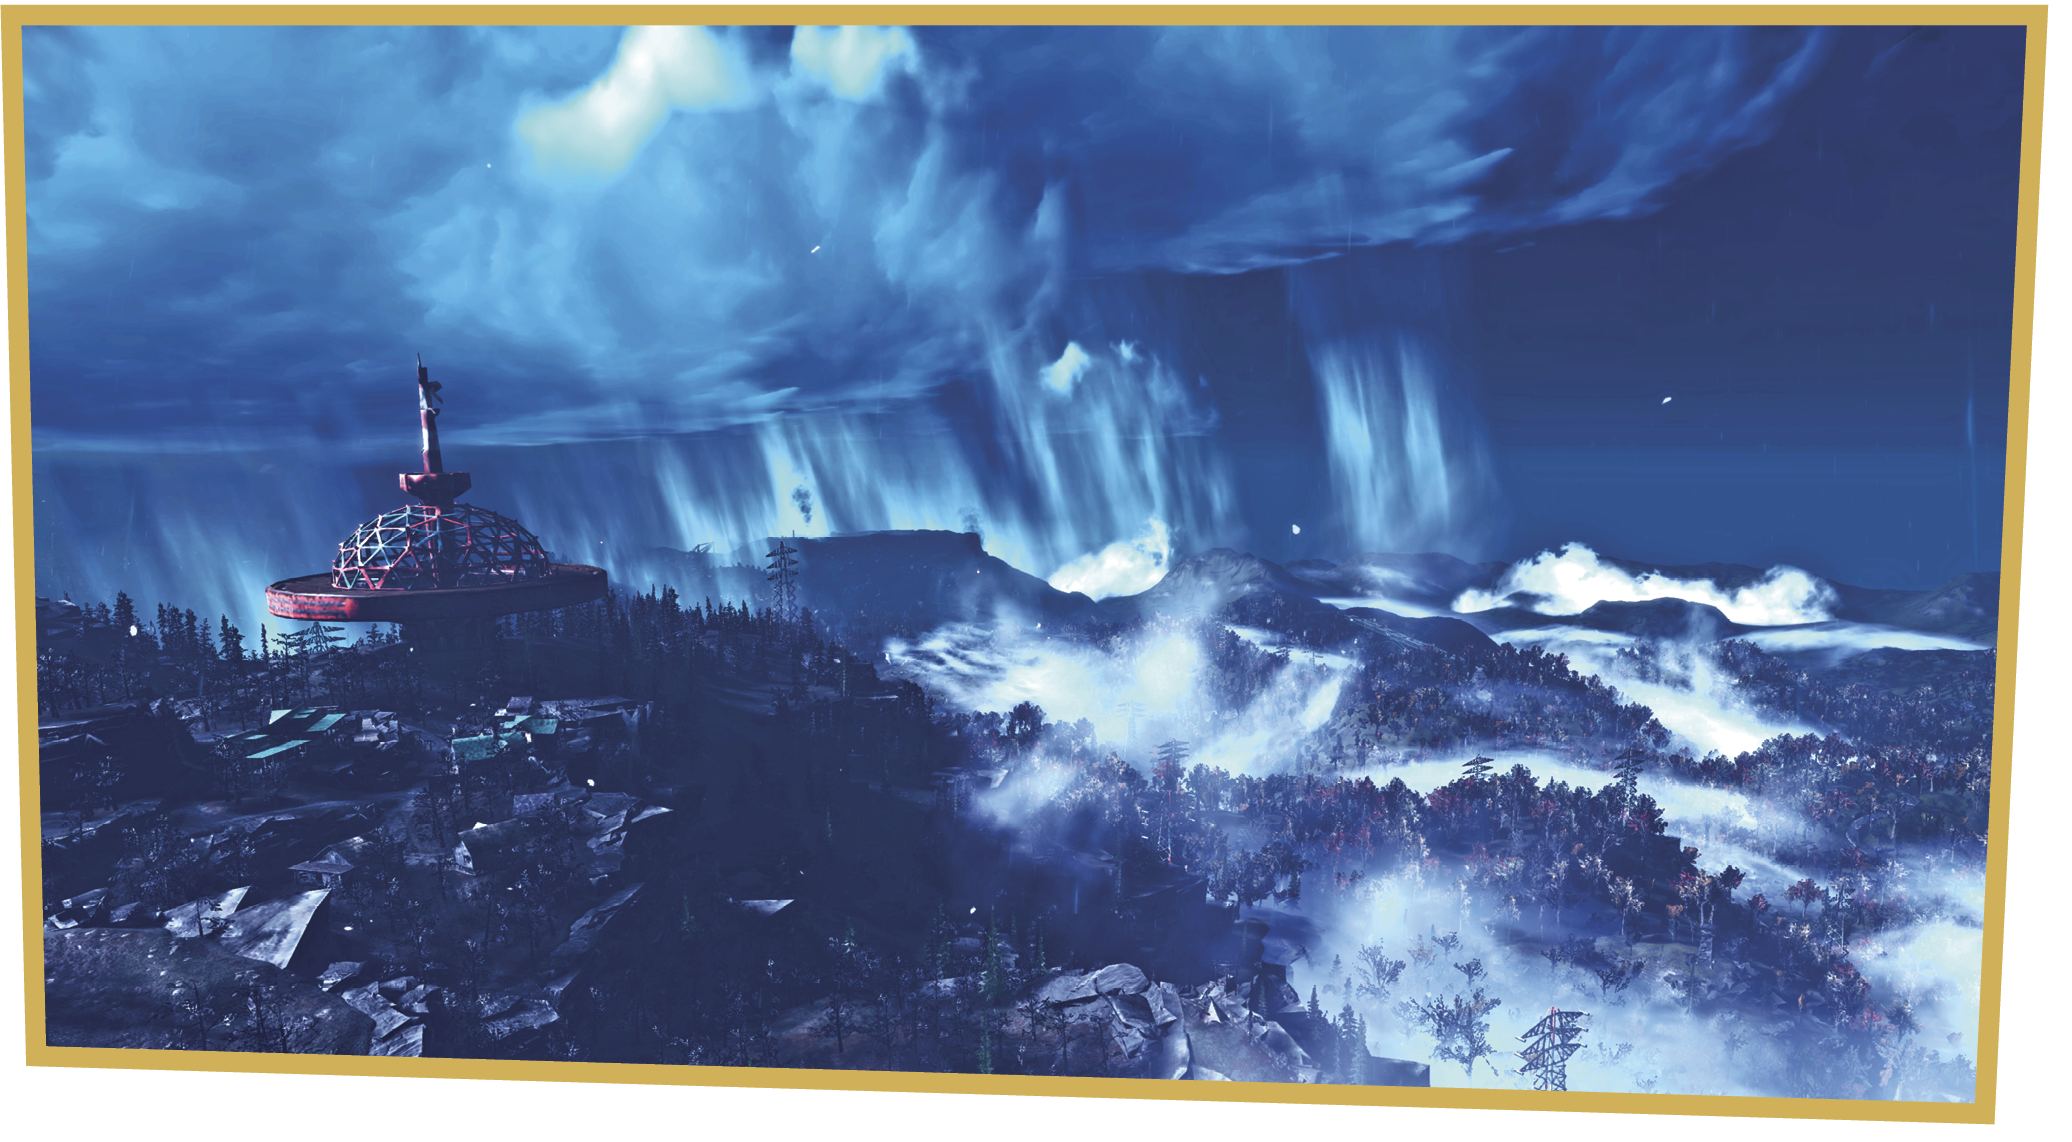
Signal Strength
Running Errands

Rose wants you to find a Signal Repeater Schematic and she won’t help you until you do. Head north of Top of the World until you reach the Seneca Rocks Visitor Center. Head slightly northwest of that to find a small motel. You need to loot the Signal Repeater Notes and Signal Repeater Schematics off of Major Darion Jones’s body on the second floor.

Read the Signal Repeater Notes and you’ll be tasked with tracking down two parts necessary for constructing the Repeater: one west and slightly south of your position and one south of Top of the World. The western part is just south of Greg’s Mine Supply, so you can Fast-Travel there to shorten the trip. You’ll need to scale up Horizon’s Rest and enter the plane wreckage therein. The SMU-97 Transponder is in the plane’s cockpit.

Fast-Travel back to Top of the World and make your way south while following the train tracks on your map. You’ll eventually reach 98 NAR Regional: an apparent train graveyard. You’ll find the RCX01-A39 Duplexer in a circuitry panel sitting in a busted train car on the north side of 98 NAR Regional.
With both parts in hand, find your nearest Tinker’s Workbench and construct the Signal Repeater under the “Quest Items” option.
Reaching the Masses

Your next task is to install the Repeater at the National Isolated Radio Array, located southeast of Top of the World. After you install it, you must divert power to it from a terminal in a small station just southwest of the Repeater’s position. Select “Auxiliary Component Control,” then “Divert Power to Auxiliary Component” to get the Repeater the energy it needs to function.
Head back to Top of the World. Now that Rose has what she wants, she’s willing to let you up to the third floor. Speak with her to complete the quest.
Flavors of Mayhem
Just a Little Prick

To start, head to the second floor of Top of the World (the mezzanine level), and use the marked Weapons Workbench. Switch to the Modify menu and select Rose’s Syringer. Rose provides everything you need to make the necessary modifications: two Firecracker Berries, one Glowing Resin, one Psycho, and one Steel. Some of these are perishable, so don’t delay.
No One Bear Should Have All That Power

Your next task is to shoot a Yao Guai with Rose’s Syringer equipped with the Karma Syringe Barrel, survive its terrible 60-second rampage, and then kill it when the effects of the drugs wear off. You can find a Yao Guai north of Top of the World. Fast-Travel to Seneca Rocks Visitor Center and head north from there to reach the marked destination faster. Now, you could just shoot any organic enemy and kill them while they’re jacked up on Karma, but Rose wouldn’t like that and we wouldn’t want to upset Rose . . . would we?
But Wait!

Your next task is to locate a Tinker’s Workbench and craft Explosive Bait. The objective marker will lead you to both a Tinker’s Workbench and a nearby container holding all of the components you need to craft Explosive Bait. Once at the Workbench, craft the Explosive Bait from the “Mines” crafting category, then head back outside and use it on some poor, unsuspecting, irradiated monstrosity.
It Gets Even Better!

Because Rose has a few screws loose (no pun intended), your next task is to . . . “make friends” with a Deathclaw. You have to approach it and hit the Activate button to complete the objective. After that, you’ll be given the choice to either flee from the Deathclaw or kill it. If you’ve approached it and it saw you, fleeing probably isn’t going to help. Use obstacles and drops to keep the Deathclaw at a distance. If it gets close, you’re toast, but dropping off of ridges and keeping trees between you and it can help you keep it at a distance while you unload your strongest weapon on it.
Rose Is Trying to Kill Us ...

Now, because what we’ve done isn’t absurd enough, your next objective is to steal from a Super Mutant Camp. Your objective marker will lead you to a container holding the item you need to steal (a Missile Launcher) to complete this objective.

Rose’s next little field trip leads us to the south side of the Savage Divide. If you visited The Whitespring Resort to get the Radstag meat, Fast-Travel there and head south. If you didn’t, you’ve got a longer trip ahead of you.
When you arrive, you need only dispatch a Feral Ghoul or two while in the circle to complete the objective. You can equip the Cannibalize perk (if you have it and meet the level requirement) to snack on the dead Ghoul for Rose’s amusement. Once you’re done, head back to Rose in Top of the World.
Key to the Past
Password Please!

The quest to please Rose continues. This time, we’re collecting five fragments of a password to open a Raid cache filled with treasure. Head south from Top of the World, or use The Whitespring Resort, which is slightly west of your destination; then head for the objective marker.
Enter Blackwater Mine and use the terminal just inside. Select any entry (except that last one of the main three options) to complete the objective; then head deeper into the mine. You’ll have to kill an irradiated woman by the name of Freddie Lang to find the mine’s Key Fragment. Grab the fragment; then leave the mine.
Late to the Party

Your next Key Fragment is east of the Blackwater Mine at a local Trappers’ Camp on the Devil’s Backbone. You can Fast-Travel from the National Isolated Radio Array north of the objective, but the West Tek Research Center below it is a dangerous place; you might end up spending more time there than if you had just walked from Blackwater Mine.
The camp was hit by a local Super Mutant group, and they took the one guy carrying our next Key Fragment. Follow the road west to Huntersville. You’ll find the Trappers’ Key Fragment on the body of Walter Griswold in the center of the town.
Ski Trip

Your next stop is Sunnytop Ski Lanes on the north side of the Savage Divide. You can Fast-Travel to Monongah Power Plant or Seneca Rocks Visitor Center (both of which are north of Top of the World); then head northeast to reach the marked location.
Hitting the Slopes

Sunnytop is packed with enemies and mountains of traps. Move through this place carefully if you want to avoid getting blown up by a hanging grenade trap or a missile launcher trip wire. Thankfully, you don’t have to do a lot of exploring to find what you’re looking for. Just enter through the front entrance (watch out for the Punji Board in front of the front door), then hang a left. You can’t access the room the objective is in from outside, but getting there once inside is just a matter of clearing the rooms of Super Mutants, then walking on over.
After listening to the holotape, go to the opposite end of the lodge and head downstairs the first chance you get. You’ll find a terminal at the far end of the lower floor. Use it, select “Inbox,” then read the “Admin Password” entry.
Double Digits

Margie’s group’s Key Fragment has been destroyed, but a way to replicate it has been preserved. Head northwest from the lodge to reach the Palace of the Winding Path. You’ll find the Palace Admin Password in a dresser just a short trip into the palace.
Once you have the password, head downstairs and use the Holotape Duplication Terminal to create the Diehards Key Fragment by selecting “DUPLICATE FROM ARCHIVES,” then “Diehards Key Fragments.”
A Round of Golf

Your next task is to search around Bolton Greens for notes on the next Key Fragment. Reach it quickly by Fast-Traveling to Monongah Power Plant, then heading west. Once you reach Bolton Greens, go inside and head to the top floor to find the Gourmands Note.
The note leads us back to Savage Divide to find the Gourmands’ Key Fragment in a place known ominously as the Wendigo Cave. Fast-Travel back to Top of the World and go northeast from there to reach the Wendigo Cave.
There’s a Wendigo in the Wendigo Cave

The Wendigo Cave is a winding, twisting, Mirelurk-filled death maze. You’ll have a lot of fighting ahead of you, and the enemies are powerful. It’s a tough place, but if you use the map we’ve provided in the Atlas, you can keep this trip as short and sweet as a cave full of murdering, hate-beasts will allow.
Reach the objective, grab the Gourmands Key Fragment, and get the hell out of Dodge.
David Must Die

Fast-Travel back to Top of the World and head southeast. Your next destination, Big Fred’s BBQ Shack, is a short trip from there. When you arrive at your destination, Feral Ghouls almost immediately swarm you. Find the nearest cover and take them down. David Thorpe, now a Scorched, will be attacking the Feral Ghouls along with you. Use this distraction to target David, as he is significantly more powerful than the other enemies here.
Once he’s dead and gone, loot his body to find the Cutthroats Key Fragment.
Digging Up the Past

With all the Key Fragments in hand, head back to Rose at Top of the World and slide them her way. Rose will task you with heading into Charleston to find the body of a woman named Rosalynn at the Charleston Capitol Building. It’s not a place we’d suggest you go if it wasn’t a necessity; it’s a dangerous, unfriendly place with plenty of dangers around, above and below you.
You can hop to Charleston Fire Department just southwest of the Capitol Building. It’s a short trip and a much safer journey than coming in from Charleston proper. Head into the Charleston Capitol Courthouse and head down to the basement. Use the marked terminal and select the entry on “Doe, J.” Head into the room behind the terminal.
Just Like Old Times

Head back to Top of the World and head east to the Pleasant Valley Ski Resort. Enter the resort and head down into the basement. The door to the cache is locked; check under the welcome mat for the key. Use the keycard you find on the keycard reader to the left of the door. Enter the cache to complete the quest.

Although the quest is technically over, head to the back left corner of the room and grab the Broken Uplink before leaving.
Early Warnings
Bunker Blunders

Head to Abbie’s Bunker on the north side of the Mire. Enter the back room and use the marked Tinker’s Workbench. Head down to the Quest Items tab and select “Uplink.” Create the Uplink to “repair” it. Head back to the entry room and use the Scorched Detection System Terminal at the objective marker. Select the “Communications Uplink Repaired” entry to check in; then back out and listen to what Abbie has to say via the intercom.
Number One Fans

Exit the bunker and follow the road south to reach Raleigh Clay’s Bunker. Use the terminal to unlock the front door; then head inside. Listen to Abbie and you’ll receive your next objective: Find the Fan Motors.
Enter the hall on the bunker’s southeastern side and you’ll receive an optional quest to find Raleigh’s Schematics. Find them by entering the first door on the right of the southeastern hall. The Schematics are on the cabinet on the room’s north side.
Now head to the room on the hall’s opposite side and investigate the marked cabinet to find all five of the Fan Motors.
Next, you must locate a series of Heating Coils from several locations to explore across the Mire (and one in Savage Divide). To find the first coil, head to the room at the hall’s end and open the toolbox at the objective marker.
Beat the Heat

Leave the bunker and follow the road north; then head off-road a bit west to reach Ella Ames’ Bunker. Once inside the main room, use the door on the south side and then take the door on the left to track down the second Heating Coil.
Exit the bunker and head west to Relay Tower LW-B1-22; wrap around the mountains between the tower and Ella Ames’ Bunker. Enter the Relay Tower and grab the Heating Coil from the toolbox on the room’s southeast side.

Fast-Travel back up to Abbie’s Bunker on the north side of the Mire. Head to the back room on the building’s north side (where the Tinker’s Workbench is located). Look in the cupboards on the room’s left side to find your last two Heating Coils; then go to the Tinker’s Workbench and craft five Upgraded Motors under the Quest Items tab. Once you have all five, head back to the SDS Terminal in the main room and select “Motors Upgraded” to complete the quest. You’ll roll right into “Reassembly Required” from here.
Reassembly Required
Updating Security

Grab the holotape For Rose from in the desk in front of the SDS Terminal; then exit the bunker.
Next, you must walk along Route 65 and install the Upgraded Motors into the Scorched Detectors lining the road. The first is on the road a short trip northeast of the bunker. Head there, then follow the road south, upgrading the Scorched Detectors as you go.
Old Friends

After you finish upgrading all the Scorched Detectors, Fast-Travel to Top of the World and hand Rose the holotape you picked up in Abbie’s Bunker.
When you’re finished with Rose, Fast-Travel back to Abbie’s Bunker and enter it to complete the quest. You’ll immediately start the next quest, “Coming to Fruition,” after wrapping up this one.
Coming to Fruition
On the Road Again

Head to the bunker’s main room and grab the Master Holotape out of the desk in front of the Scorched Detection System Terminal. Exit the bunker and head south down Route 65 to reach the Harpers Ferry. Go to the Armory Access Terminal on the south side of Harpers Ferry and insert the Master Holotape. Select “Play Holotape” to hack the terminal; then unlock the door to the armory.

After entering the armory compound, take a right through the first opening available to enter the armory proper. Use the door terminal ahead to open the sealed door and pass through the large gray fence. Head upstairs, turn around, and use the planks to cross into the building ahead.
Smash the State

Drop downstairs and use the next terminal up ahead to open a second door. Exit the building from the door ahead and enter the neighboring building. Go upstairs and hack the terminal to gain access to Raleigh’s terminal. Insert the Master Holotape, then listen to what Abbie has to say.
A Capitol Idea!
Fast-Travel to the Charleston Capitol Building on the southwest side of Appalachia. Head to the third floor, where you find Sam’s terminal. No dice! The terminal is locked tight. Head down to the basement and use the marked security terminal. Select “Accounts/Account Lockdowns/Samuel Blackwell” to unlock Sam’s computer. Now head back up to the third floor and try loading the Master Holotape again.
Relay Race

Your next task is to put the Master Holotape into a Relay Tower computer. You can head to the Relay Tower southwest of you in the Ash Heap, or you can Fast-Travel to the one you already visited during “Early Warnings”—Relay Tower LW-B1-22, in the map’s northeastern corner. Whatever you choose, head to a Relay Tower and use the Master Holotape on the terminal there.
After you insert the Master Holotape and download the data, head back to Abbie’s Bunker and restart the system from the Scorched Detection System Terminal in the main room to complete the quest.
You’ll roll right into “Defiance Has Fallen” from here.
Defiance Has Fallen
Hunting Fort Defiance

In order to find Fort Defiance, you’ll need to find clues. The best place to look is Camp Venture. If you follow Route 65 south and keep going south after it turns east, you’ll be on track to reach the camp.

When you arrive, head to the camp’s upper level to find the Command Center. The room is locked and you’ll need to locate the password to the terminal next to the door to get inside. Check the terminal to get an optional objective to locate the password to the terminal. You didn’t need the objective, but the marker will help you locate the password with greater ease.
Breaking and Entering

Now head to the camp’s lower level and enter the Storage and Supplies building (its sign is sitting sideways next to the front entrance of the building). Enter and head left; then go downstairs. Use your lockpick abilities to unlock the door ahead; then approach the locked door at the end of the basement. Read the note to the door’s right to receive an optional quest to locate the room’s key.
To find the key, head back to the camp’s upper level and enter the building south of the Command Center terminal. Loot the marked locker to find the key to the storage closet. Head back to the Storage and Supplies building and open the door. Read the note on the table to get the password to the Command Center terminal.
From here, head back to the Command Center terminal, input the password, and then enter. There are two tables in the center of the room; read the note on the back of the table on the right to find Fort Defiance’s location.
The Acts of Defiance

Fort Defiance is located southwest of Camp Venture, right on the border between Savage Divide and Cranberry Bog. Fort Defiance was built out of an old asylum and has not seen a lot of activity in some time. We’re here to discover what happened to the Brotherhood of Steel, but to do that we need to repower the building by flipping the circuit breaker on the top floor.

The path to the circuit breaker is very straightforward. Head down the hall and up each floor and you’ll arrive at the top floor quickly. Once there, you find that most of it has broken apart and fallen to the floor below. With the gap in front of you, head through the door on your left. From here, progress through the rooms ahead, then cross over the makeshift bridge to the room’s right side. Continue this pattern of room hopping and bridge crossing to arrive at the circuit breaker. Activate it, then head back downstairs via the ramp just outside the circuit breaker’s room.

If you keep moving toward the objective marker, you’ll find a hole in the ground that will drop you right back in front of the locked room near the building’s entrance. Read the note to complete the quest.
Back to Basic
You’re in the Army Now!

After speaking with Master Sergeant Gutsy, leave the room and drop to the first-floor foyer. You find a Uniform Disbursement Log on the desk in the center of the room. Take it to discover the location of a Uniform Voucher.
Exit the building and head to the barracks on the base’s south side. Enter the first set of barracks. The Uniform Voucher is in a container somewhere in this building. It changes every time you do this quest, so we can only tell you it’s in this building.
Take the voucher back into the first-floor foyer of the main building and use the Uniform Dispenser to get your fatigues and helmet. Go into your inventory and equip the Dirty Army Fatigues and Dirty Army Helmet, both of which are under the Apparel tab in the Item menu. Once you’re geared up, head back up to Master Sergeant Gutsy to continue your training.
Your next task is to complete each of the camp’s three basic training courses: Marksmanship, Agility, and Patriotism. You can do these in any order, but we’re going to start with the Agility course.
Agility Course

Use the training terminal and select “Begin Course” when you’re ready to go. You’ll have two minutes to run through the obstacle course and hit every button along the way. Follow the objective markers and make sure to walk or crawl through any marked obstacle; it’s not enough to simply hit the buttons. If you miss an objective marker, the next set won’t appear, so be thorough. You need to keep moving, but don’t rush.
Patriotism Course

This is a test of your ability to root out Commie threats to the good and decent people of the U.S. of A. You’ll need to investigate Jimmy’s, Topher’s, and Jianjun’s rooms, and speak with each of them to figure out who bleeds red and who bleeds red, white, and blue. Once you feel you have enough evidence to support your argument, head back to the Patriotism Training Terminal to make your accusation.
Marksman Course

You’ll have 30 seconds to hit all the targets as quickly as possible. Before starting, equip a weapon with decent range and a fast fire rate—something explosive is totally acceptable as well. Once you hit “Begin Course,” you’ll have a short countdown before all of the targets pop up in front of you. Shoot them all within the time to complete the course.
Live Fire

Now that you’ve got the speed of a cheetah, the aim of a trickshooter, and the wits of fiction’s finest detective, it’s time to put your life on the line with a live fire exercise. Head southwest out of the base to reach the live fire test grounds.
You must defeat and destroy three waves of “Communist” robots to complete this leg of the quest. There are no tricks to this objective. Simply use your natural ability to shoot and dodge your way to victory. Be warned that the last will drop tougher enemies on you, so be sure to reload and heal up between waves.
After you finish the Live Fire Training Exercise, head back to the Master Sergeant and report your results to complete the quest.
Recruitment Blues
Cracking the Code

Starting from the bulletin board where you finished “Defiance Has Fallen,” look to the right and head into the opening ahead. Take another right to find an elevator with a laser grid blocking your path.
You must register yourself on the fort’s security system. To do that, head back to the bulletin board. Now follow the hall and up the first ramp you see. Follow the hall on the second floor and climb the metal stairs at the end. Take the hall on the third floor and eventually you’ll come to another laser-grid-blocked elevator. Use the terminal in front of the laser grid and select “Register new personnel.” Access will be denied, which means we have to find clues on how to bypass security.
Head to the room at the hall’s other end and read the note on the set of shelves near the middle of the room labeled “Squire Evelyn’s Journal—Page 16.”
You need a military-issue ID, which you can obtain by completing basic training at Camp McClintock. If you’ve done that already, you must have your ID printed. Buckle up, because you’re going to the DMV.
Three Letters, Endless Dread

Your next stop is the Charleston Capitol Building southwest of your location. Enter the Charleston Capitol DMV building. Use the terminal on the room’s left side and select “Government ID Application.” Fill out the information, then approach DMV Bot B2. Print a number from the printer to the robot’s right, then head to the computer terminal in the center of the room. Select “Boot up Department B.” The DMV Bots now start working their way through the numbers. Fight off waves of Feral Ghouls as you wait for your number to be called.
Once your number is called, speak with DMV Bot B2; then leave the building. Head west from the DMV and follow the objective marker to an old mailbox on the ground. Pull the Junk Mail out of it, and then reenter the DMV.
Hand the Junk Mail over to DMV Bot B2 and he tells you that you need to get YET ANOTHER form.
Even in the Apocalypse the DMV Is the Worst

Exit the DMV again and head west a short distance to reach the Charleston Capitol Courthouse. Drop to the bottom floor and grab the DMV form.
With form in hand, head back to the DMV yet again. Hand the form to DMV Bot B2, and then openly weep when he tells you you’re in the wrong department. Speak with DMV Bot C1; then use the number printer next to him. Use the terminal in the center of the room, select “Boot up Department C,” and fight over Feral Ghouls while waiting for your number to be called. Once your number is called, talk to DMV Bot C1. Wait for him to finish his awful, awful coffee break, and then have an emotional breakdown when he asks you to obtain a birth certificate.

Use the terminal on the room’s west side to learn about Error 34B/1. As DMV Bot C1 mentioned earlier, the error occurred because you don’t have a valid birth certificate. You must use a stamp from the governor’s office in order to validate your application. Head through the doors on the room’s south side and continue south; then go west to find the Governor’s Seal. Use it to stamp your document, and return to the DMV to turn it in. Get your picture taken and you’ll earn your ID. Now let’s get back to Fort Defiance.
Becoming the Brotherhood

Once inside Fort Defiance, head through the left door and go to the top of the building. Once you reach the terminal, select “Register new personnel” and then “Scan military ID card.” You are now a full-fledged member of the Brotherhood of Steel.
With your name registered in the Brotherhood of Steel database, you are now free to use the elevator. Head to the fourth floor and enter the room at the end of the hall on the left. At the computer terminal here, select “URGENT: Touchdown Recovery” to complete the quest.
The next quest, “Belly of the Beast,” begins immediately after concluding this one.
Belly of the Beast
Transponder Hunting


If you’re still in Fort Defiance after completing the last quest, exit the building and head northeast. When you enter the boundary of the quest objective, turn on the Brotherhood Emergency Transponder radio station. You need to use periodically use the signal strength indicator that appears in the screen’s top-left corner to locate a transponder. You’ll find the first transponder atop a bridge near the center of the circle. Sync with the transponder; then head east to search for a second one.
The Second Transponder

The next transponder is in the center of the circle. It’s sitting next to a crashed aircraft. When you find it, sync with the transponder and continue east.
The Third Transponder

The third transponder is in Survey Camp Alpha slightly to the left of the circle’s center. When you’ve synced with the transponder, continue east.
The Fourth Transponder

The fourth transponder is atop Drop Site V9 just left of the circle’s center. Sync with it, and then head east until you reach the Glassed Cavern.
Danger Around Every Turn

Things start out quiet in the Glassed Cavern, but they definitely don’t end that way. Use the Brotherhood Emergency Transponder and the objective marker to find your way through the cave (the Atlas section also has a handy detailed map that makes navigating this area a breeze).
The cavern containing the transponder is also home to a living Scorchbeast. You must fight it and its Scorched minions in order to reach the transponder. It’s not an easy fight, so make sure you’re prepared when your transponder starts receiving 50 percent signal.

The cave’s restricted space definitely favors you and not the Scorchbeast in this fight. It won’t take flight, limiting its mobility tremendously, but that doesn’t mean it’s not still a complete killer. It shoots out energy waves from its mouth repeatedly, which is the attack you’ll spend the most time avoiding. Spring to the left or right of the Scorchbeast while it’s shooting these waves and you’ll have a good chance of avoiding them completely.

Keep your distance and use the rocky terrain to your advantage. Getting in close will push the Scorchbeast to swat at you with its claws and release a burst of toxic gas into the air around it. Use the giant rock near the room’s center to keep the Scorchbeast away from you, and take potshots at it while it tries to catch up. If you have any mines, place them while you run—the Scorchbeast sets them off when it follows you.

After defeating the Scorchbeast and its lackies, investigate the transponder and Taggerdy’s body next to it. Loot Taggerdy’s ID, then return to Fort Defiance.
What Are the Scorched?

Once back in Fort Defiance, head through the door on the left; then make an immediate right to reach the elevator. Take the elevator to the fourth floor. Use Taggerdy’s terminal and select “Ultimate Solution” to finish the quest.
You’ll start the next quest, “Uncle Sam,” immediately after this one.
Uncle Sam
A Study of Sam

Fast-Travel to Charleston Herald. If you don’t have it as a Fast-Travel location, visit any Charleston location (all of which are in the southwest corner of the map, right on the border of the Ash Heap). Follow the objective marker into the nearby building and read the note hidden inside a box of papers on the upper floor of the Herald.
What a Dump!

Sam Blackwell’s Bunker is on the map’s east side, hidden deep in the Deathclaw-filled Abandoned Waste Dump. Find the dump east of Route 65 in the Mire.
Finding the bunker’s entrance can be a bit of a challenge. As we mentioned before, the dump is no stranger to Deathclaws and you’ll find a couple of them every time you enter these caves.
Once you reach the elevator, use the control panel. You’re denied access and the quest concludes, but you start “Bunker Buster” immediately afterward.
Bunker Buster
Hunting for Holotapes

Head to the cave’s northern corner to find an agent’s body. Loot the Operation Summary—Blackwell Holotape off of it.
Listening to the tape will reveal the existence of a Bypass Holotape, which you can use to crack through Blackwall’s bunker security. You must search through the Deathclaw Nests (the pile of refuse on the ground) around the cave to find the holotape. When you find it, take it back to the elevator.
While in the elevator, pull up your Pip-Boy and use the Bypass Holotape under the Holo tab in your Items menu. This unlocks the panel to the elevator, giving you full access to its functions. You can now use the elevator to enter Sam Blackwell’s bunker.
Mission: Impregnable

Once in the bunker, head down the stairs and through the blue door ahead of you. Take the northern door to reach a laser grid; you must find a way to pass this laser grid if you want to have any hope of exploring deeper into the bunker.
Turn around, head back up the stairs, and exit the bunker’s main room. Hang a right and head through the door. Follow the path until it dead ends at a room with a large set of blue machinery. One of those machines is a computer terminal that you can hack to shut off the laser grid below. If you don’t have the Hacking skill level to break through, you can force a system restart by following these three steps:

1. From the blue terminal room, backtrack until you’re on the catwalk in the center of the previous room. Walk onto the air ducts ahead and head left. Now press the switch on the wall to activate the circuit conduit.

2. Return to the bunker’s main room and head through the door on the left. Open the circuit breaker lid to the left of the washing machine, and activate the circuit breaker.

3. Head to the door on the other side of the bunker’s main room. Take the first left, and activate the Air Flue valve stationed on the pipes in the room’s top-left corner (above the two red lights).
After you perform a system reboot or hack the terminal, return to the laser grid room and use the hand scanner to register yourself and gain control over the grid.
021584

There’s a keypad on the dividing wall in the center of the room. Sam Blackwell has some well-guarded secrets in here, but to reach them you must crack that code.

Return to the room and search through the filing cabinets. One of them contains the “Senate Orientation Letter,” another holds “Record of Divorce: The Blackwells,” and a third has “Intelligence Memo—8/16/77.” Find and read all three, and then read the “Judy’s Gone” entry on Sam’s terminal. One of these holds Sam Blackwell’s access code.
Approach the keypad mounted on the wall separating the first half of the room from the second, and input the codes until one of them works.
Sam I Am

After inputting the proper code, return to the other half of the room and investigate the indicated painting. You’ll get the Welcome to The Whitespring Holotape and the Congressional Access Card from the back of the painting.
Listen to the Welcome to The Whitespring Holotape to complete the quest and start “One of Us.”
One of Us
MODUS Operandi

The Whitespring Resort, if you recall, is located almost directly south of Top of the World. We mentioned visiting it when you were tasked with making Explosive Bait for Rose; if you took that advice, you can simply Fast-Travel there now. If not, you can Fast-Travel to either Top of the World or 98 NAR Regional and head south to the The Whitespring Bunker.
The bunker entrance is blocked by a vault door, but a mysterious figure inside the bunker will open it and let you in. Accept his invitation and enter.
Make your way down the right corridor. Approach the marked button and press it to have your picture taken. Head over to the dispenser slightly to your left and activate it to obtain some Operative Underarmor, courtesy of the house. Now head through the “Orientation” door and go downstairs.
Exam Week

After speaking with our benevolent host, head farther downstairs by following the passage to the left. MODUS will request that you take an exam to prove your intelligence. If you’re not in the mood, or find tests anxiety provoking, you can use the MODUS terminal behind the testing computer to skip the exam altogether. Scoring well on the test is recommended; MODUS will immediately reward you for any score higher than four points, and send backup to aid you later if you score well enough.
MODUS will grant you an item based off the result of the examination and a System Access Tape, which you’ll need to help him hack into a SigInt System terminal in Sugar Grove, near Route 65.
Corporate Espionage

Fast-Travel to Camp Venture on the east side of the Appalachia (on the border between Cranberry Bog and the Ash Heap); then head toward the objective marker to reach Sugar Grove. The southern door requires a key to open, but the northern door is available with the touch of a button on a nearby computer terminal.
Go downstairs to the SigInt System terminal and insert the System Access Tape; then follow the terminal prompts. Head up a floor and use the Archival Dispenser to get MODUS’s lost data. Fast-Travel back to The Whitespring Bunker.
This Is Definitely a Good Idea

Once back in The Whitespring Bunker, use the control panel to open the vault door back into the bunker. This time, instead of heading to the right to enter the room where you got your picture taken, take a left through the laser grid. Use the elevator to reach the exam room. Follow MODUS’s directions and he’ll pass you an Uplink Module with instructions to install it.

Just south of Sugar Grove (or between the National Isolated Radio Array and Camp Venture) is the Radio Astronomy Research Center, which is your next destination. Enter the building and head to the top floor to reach the roof. Insert the Uplink Module on the Connection Platform machine on the research center roof.
Leave the research center and head east along the road a short distance to find a care package containing both an Orbital Scan Beacon and an Orbital Strike Beacon. Grab the care package’s contents, and head back to The Whitespring Bunker. Take the elevator back down to the exam room and speak with MODUS to complete the quest.
Officer on Deck
Commendable

Make your way to the Military Wing. Go through the laser grid in the exam room, head downstairs, and go to the end of the restaurant. Take the door on the left, then head down the stairs. The Military Wing is through the first door on your left.

As soon as you enter the Military Wing, MODUS begins explaining the American military’s nuclear system (more on that later). Once he’s finished, use the terminal in the room’s back corner to activate the Automated Promotion System.
From here, you must rise up the ranks of The Whitespring Automated Promotion System, which requires you to complete a myriad of tasks and objectives to earn Promotion Commendations. Earn enough and you’ll gain a promotion; get promoted enough and you’ll gain power and influence in The Whitespring Bunker, which unlocks some fascinating new opportunities.
Let’s break down how Promotion Commendations work:
- Basic Combat Commendations: earned by killing Epic Creatures with three or fewer stars next to their names. Each time you accomplish this, you’ll earn a single Commendation.
- High-Risk Combat Commendations: earned by killing Scorchbeasts or Epic Creatures with four or five stars next to their names. Every time you kill a creature that falls into one of these categories, you’ll earn a single Commendation.
- You’ll also earn Commendations for completing Enclave Events. Completing “Dropped Connection” and “Bots on Parade” earn one Commendation each; “A Real Blast” earns two Commendations.
Once you have enough Commendations, you’ll be promoted automatically and the quest will conclude. The next quest, “I Am Become Death,” begins immediately after.
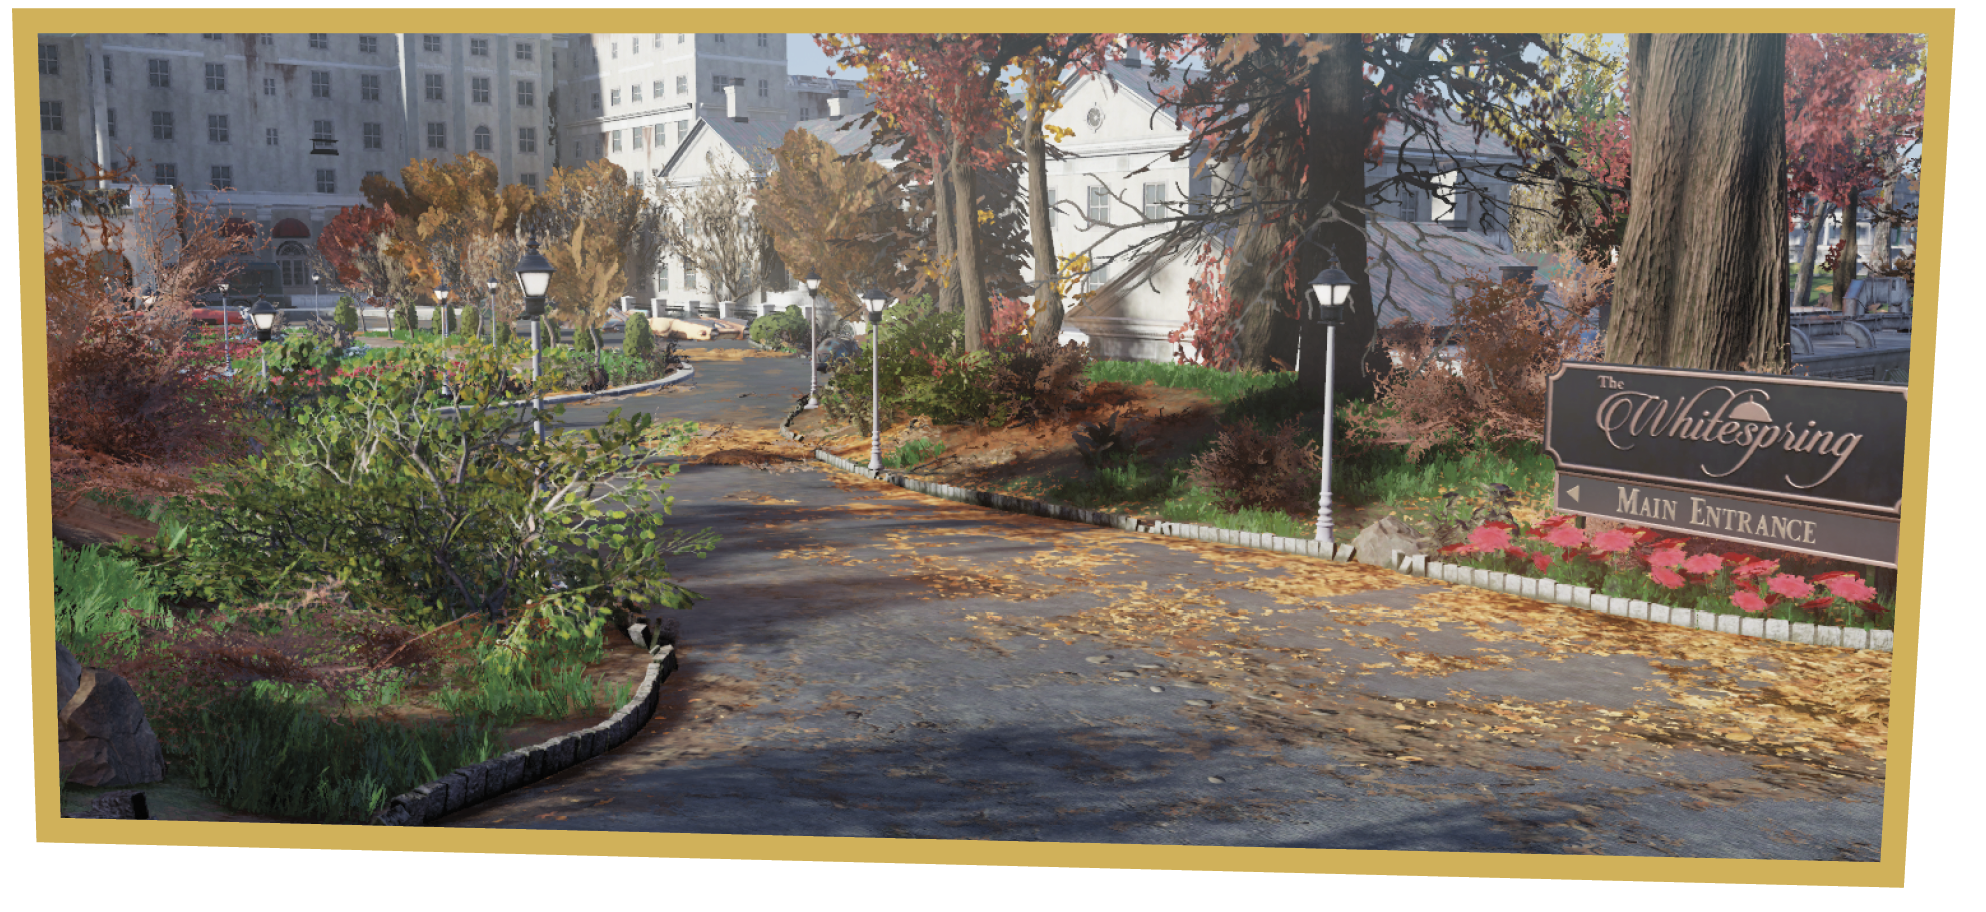
I Am Become Death
War Never Changes

Head back into The Whitespring Bunker and reenter the Military Wing. Take a right and head through the laser grid that has the “Command” label above its door. Go upstairs and you’ll receive the task of using each of four terminals; all are meant to teach you the fine art of firing a nuke.
Attention! Launching a nuke is not a one-person activity. To accomplish anything, you need to work together with friends and strangers, which means you’ll want to talk to others online and see if they’ve made any strides toward cracking the Launch Codes.
Now let’s break the steps down:
- Step 1: Obtain a Nuclear Keycard. There are several security measures that have been implemented so that some sociopath with a loathing for humanity can’t launch a nuke. You have to locate a Vertibot, which is being escorted somewhere around Appalachia. Shoot it down, then take the Nuclear Keycard out of its supply box. These are single-use keycards, so once you fire a nuke (or if you enter the wrong Launch Code), you’ll have to get back out there and track down another Vertibot to find a new card.


- Step 2: Obtain the Launch Codes: While exploring Appalachia, you’ll occasionally see a Ghoul or Scorched Officer carrying a beacon on its back that beeps loud enough to be heard over vast distances. There are three nuclear missile silos—Alpha, Bravo, and Charlie. To fire a nuke from any of them, you must gather eight Silo Codes for a specific silo, put the numbers together, then use a cypher key to decode the Launch Code. If that wasn’t enough of a challenge, your codes last for only one week before dissolving into nothing.
- We can’t tell you the exact method for deciphering the Silo Codes or government assassins will promptly escort us to the afterlife. We’d tell you everything, we swear! But, sadly, our hands are tied and our lips are sealed.

- Wait...were those letters on the wall in the command center always there? It seems like they spell something. It almost looks like an actual word. Whoever created it is either a genius or a maniac. We’ve never been good at deciphering word scrambles...They take a keen eye that we simple don’t possess.

- We can tell you that the solution for the code is global, but it changes from week to week. If someone has figured it out and puts the code online, it will work for you just as well as it worked for them. Once your codes dissolve, you need a fresh code and a new code hunt.
- Step 3: Once you have the Nuclear Keycard and the Launch Codes, you must overcome the automated silos. These are some of the toughest areas in the game; if you want to survive them, you must work with a group of people. You’ll receive a quest at the start of a silo; completing its objectives is the only way to reach the launch console.

- If you activate each of the pins on the maps inside the command center, the locations of each site will be permanently revealed on your map.
- Step 4: Nuclear fallout. After you complete a silo and reach the launch console, you’ll be asked to select your target. While the Forest from Vault 76 down to Flatwoods is off-limits, the rest of Appalachia is your plaything. Select a spot, then fire and the area will become irradiated for a time—you’ll also kill all players caught in the blast for good measure. While the area is irradiated, the creatures, flora, and mining locations will be transformed. Enemies will be stronger and drop better gear and the obtainable resources will become irradiated versions of themselves, which can only be obtained in a fallout zone.
Cracking the Code

Now it’s time to put the pieces together and launch a nuke (undoubtedly with the help of others). First things first, head into the back room and use the terminal. Select Ellen Santiago’s archive, then choose “The Code Pieces” entry. You’ll receive the Fujiniya Facility Password. You can also use the Surveillance System terminal on the southeast side of the command room to track the location of the Nuclear Keycard and Nuclear Code Pieces. Using it to track either the Keycard or the Code Pieces will initiate the “Hide and Seek and Destroy” quest. Use this quest to locate both until you have everything you need.
Once you have all eight Code Pieces for a single silo and a Launch Keycard, head to Mama Dolce’s Food Processing, right next to Morgantown in the Forest. We’re going to learn about how to crack this code.

Go to the southeastern corner of Mama Dolce’s and drop behind the giant blue pipe. There’s a hatch on the pipe’s side; head inside it. You’ll eventually reach a card-locked door. Use the card reader and enter to reach the Fujiniya Intelligence Base.
Party Time

Once you reach the end of the road, open the hatch on your left to enter the base. Head to the lowest floor and follow the objective marker until you reach the open room with the set of tables sitting in front a large piece of blue machinery. Head northwest and use the terminal behind this machinery. Put in the password you acquired in The Whitespring Bunker.
Mission: Countdown
Down for the Count
Mission: Countdown is a gauntlet of enemies and obstacles that will test even the most seasoned band of survivors. If you don’t feel up to the challenge just yet, spend more time on other quests and exploration first. Set out for new adventures and return once you’ve gained the levels, items, perks, and techniques you need to take on this penultimate challenge.
Here’s what you’re up against:
- Each silo has five major events. In each, you’ll have to take down the initial defenders, then complete a series of objectives while holding the line against an endless stream of powerful robots, including Assaultrons, Robobrains, Protectrons, and Mr. Gutsys.
- This is a war of attrition. Your foes really are endless, and award little experience or useful loot, so you need to press forward as quickly as you can without being overwhelmed. Take too long, and they’ll wear you down to the point that you can’t continue.
- Regardless of the silo you select, study the maps, learn the route, and know where you’re going. Every second counts.
- Only after you complete all five events can you access the launch control system. If you’re here to launch a nuke, be absolutely sure you have a Nuclear Keycard and the correct launch code before you get started. You only get one shot at this—if you mistype the code (and didn’t bring an extra Keycard), you’ll have to do it all over again.
- Glutton for punishment? You can challenge Mission: Countdown as often as you want. You’ll only earn the quest’s rewards once per silo per day.
I Do Want To Set The World On Fire
If you’re determined to press on, here are some tips to help you prepare:
1. Gather your team. While it is possible to solo Mission: Countdown, it’s dramatically easier to complete with a team. Talk things over with your group in advance, discuss your builds, and make sure everyone knows their role. Are you going to focus on the objectives for each event? Run interference and tank the enemy robots? Who’s handling support skills? If you have a large enough group, it may be worth having one player set up camp outside the silo and run supplies to the rest of the group as they push forward.
2. Rebuild your build. This is a good time to review and hone your build. If there are Perk Cards you aren’t taking full advantage of, duplicate the abilities of someone else on your team, or just aren’t useful in a combat-intensive environment (like Aquagirl or Woodchucker), swap them out for something you can use. You can always switch back later.
3. Consider Hacking and Picklock. If you’re on a team, it pays to bring top-tier Hacker and Picklock skills—both are useful throughout the silo, and together, they allow you to skip one of the five events entirely.
4. Optimize your inventory. At a minimum, you’re going to want:
- 2-3 of your preferred weapons and hundreds of rounds of ammo. If there’s any chance you might run out, bring a fall-back weapon that uses a different type of ammo.
- Fully modded and repaired weapons and armor. As you repair your gear, keep track of the components you use to repair it. Your gear will break down (probably multiple times) during this mission, and there’s no guarantee you’ll find the components you need to repair it along the way. Make sure to bring them with you.
- The best food and drink you can find. Stock up on steaks and purified water, or focus on meals that fortify your combat attributes.
- All the Stimpaks you can carry.
- Several RadAways.
- MedX, RadX, and any other chems or items that support your build or playstyle.
- A Hazmat Suit (from “Tracking Unknowns,” or found randomly in the world), OR the best radiation protection you can find, plus even more RadX and RadAway.
- Explosives. Basic Fragmentation Grenades are fine, although better grenades or a missile launcher work, too. Given the close quarters, Mini Nukes are not recommended.
- For the Storage Area, one person on your team should bring 45 Scrap Steel and 30 Circuits to quickly rebuild the Mainframe Cores in that event.
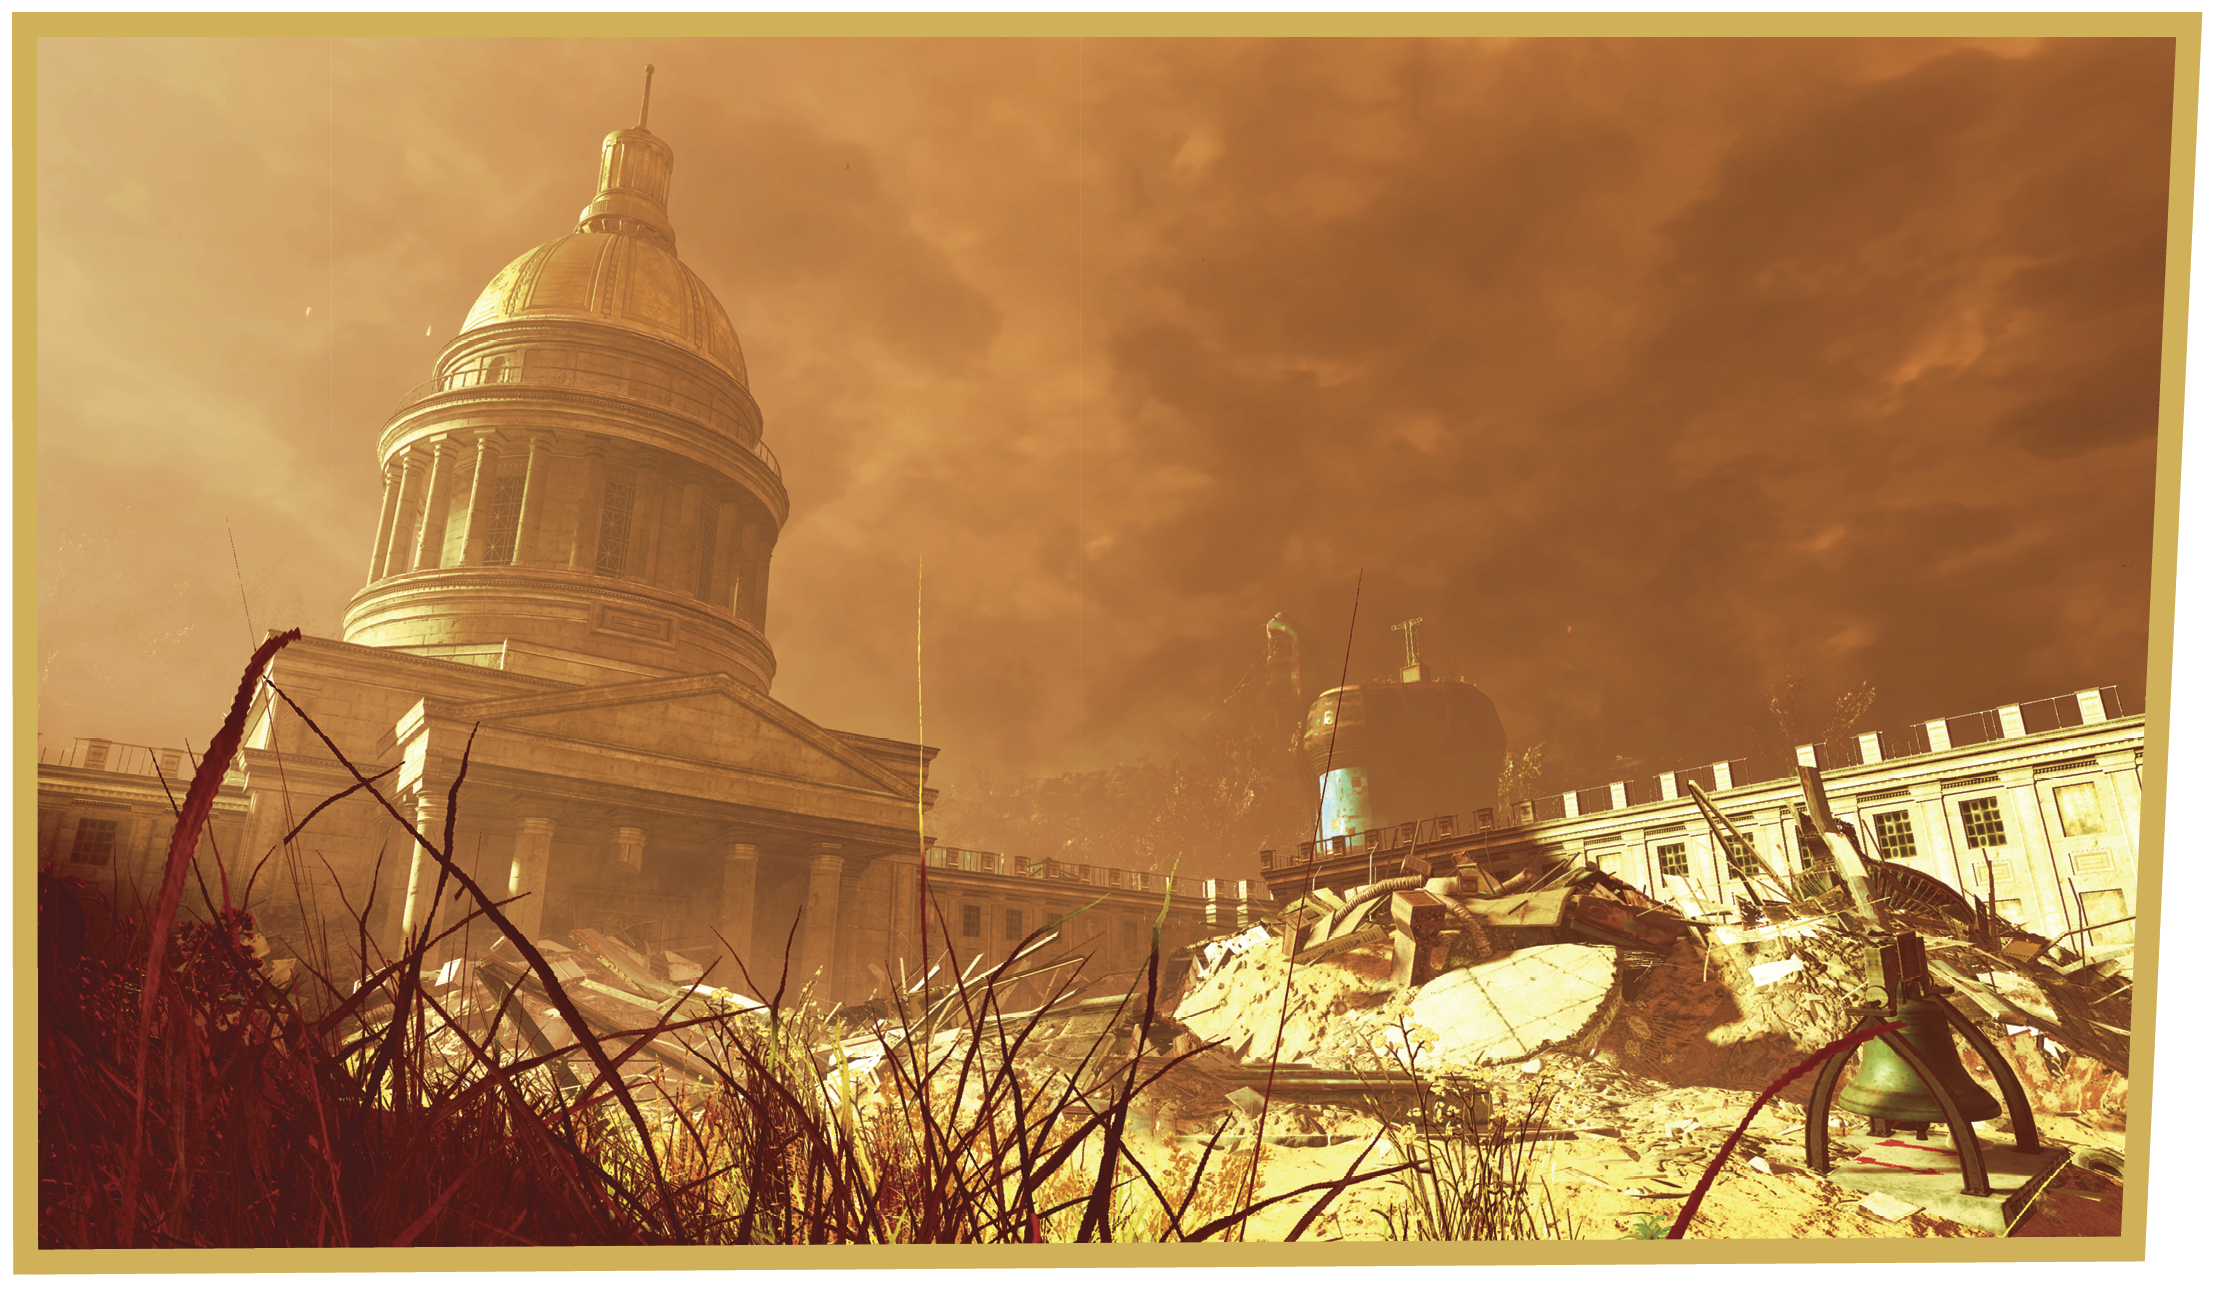
Into the Fire
There are a variety of ways to approach each event, depending on the size of your group and your particular assortment of skills, but a good general strategy is:
- Take a deep breath. Before heading into each event space, make sure you’ve healed up, reloaded your weapons, repaired your gear, and dealt with any hunger or thirst you’ve built up.
- Hack in. Each event area includes multiple terminals to hack. The most valuable is usually the one nearest the entrance, which often allows you to frenzy or disable the turrets in the next few rooms, and deactivate the Robobrain Supervisor for that sector. Many terminals also provide specific bonuses that are well worth your time, such as enabling allied robots, or activating the Decontamination Arches in the radiation-filled Reactor Area.
- Clear the room. In two of the five areas (Reactor and Control), the security system isn’t triggered until you actually begin working on the task for that area. Take a moment to clear out the initial robots and turrets, orient yourself, and heal up before you get to work.
- Your foes are endless. Once the security system is tripped, the only way to stem the tide of security robots is to finish the event. Focus on completing those objectives!
- Don’t get swarmed. Keep an eye on the robots, and don’t let yourself get overwhelmed or boxed into a corner. While it may be tempting to concentrate your fire on weaker robots, it pays to take down the Assaultrons first—wait too long, and you may find yourself facing two or more of them simultaneously. If things do get rough, retreat, recover, and retry.
- Focus on mandatory objectives. Our agents have identified a number of objectives (marked with an * in the descriptions below) that aren’t strictly necessary. If you don’t complete them, you may miss out on guidance about what to do next, but you can buy yourself time.
A few other key notes, before you get started:
- Don’t give up. If you leave a silo for more than a few minutes, all of your personal progress will be lost, and you’ll have to complete the Residential Area again before rejoining your group. If your entire group leaves the silo for a few minutes, the entire space will reset. Don’t dally!
- Find the repair stations. There are a number of workbenches located throughout the silo. Take a moment to stop and repair your gear before pressing forward.
- Open the shortcut. Once you reach the Storage Area, you can use a terminal to unlock a door that connects back to the first part of the silo. If you respawn (or wipe), this allows you to get back to the action much more quickly.
The Rundown
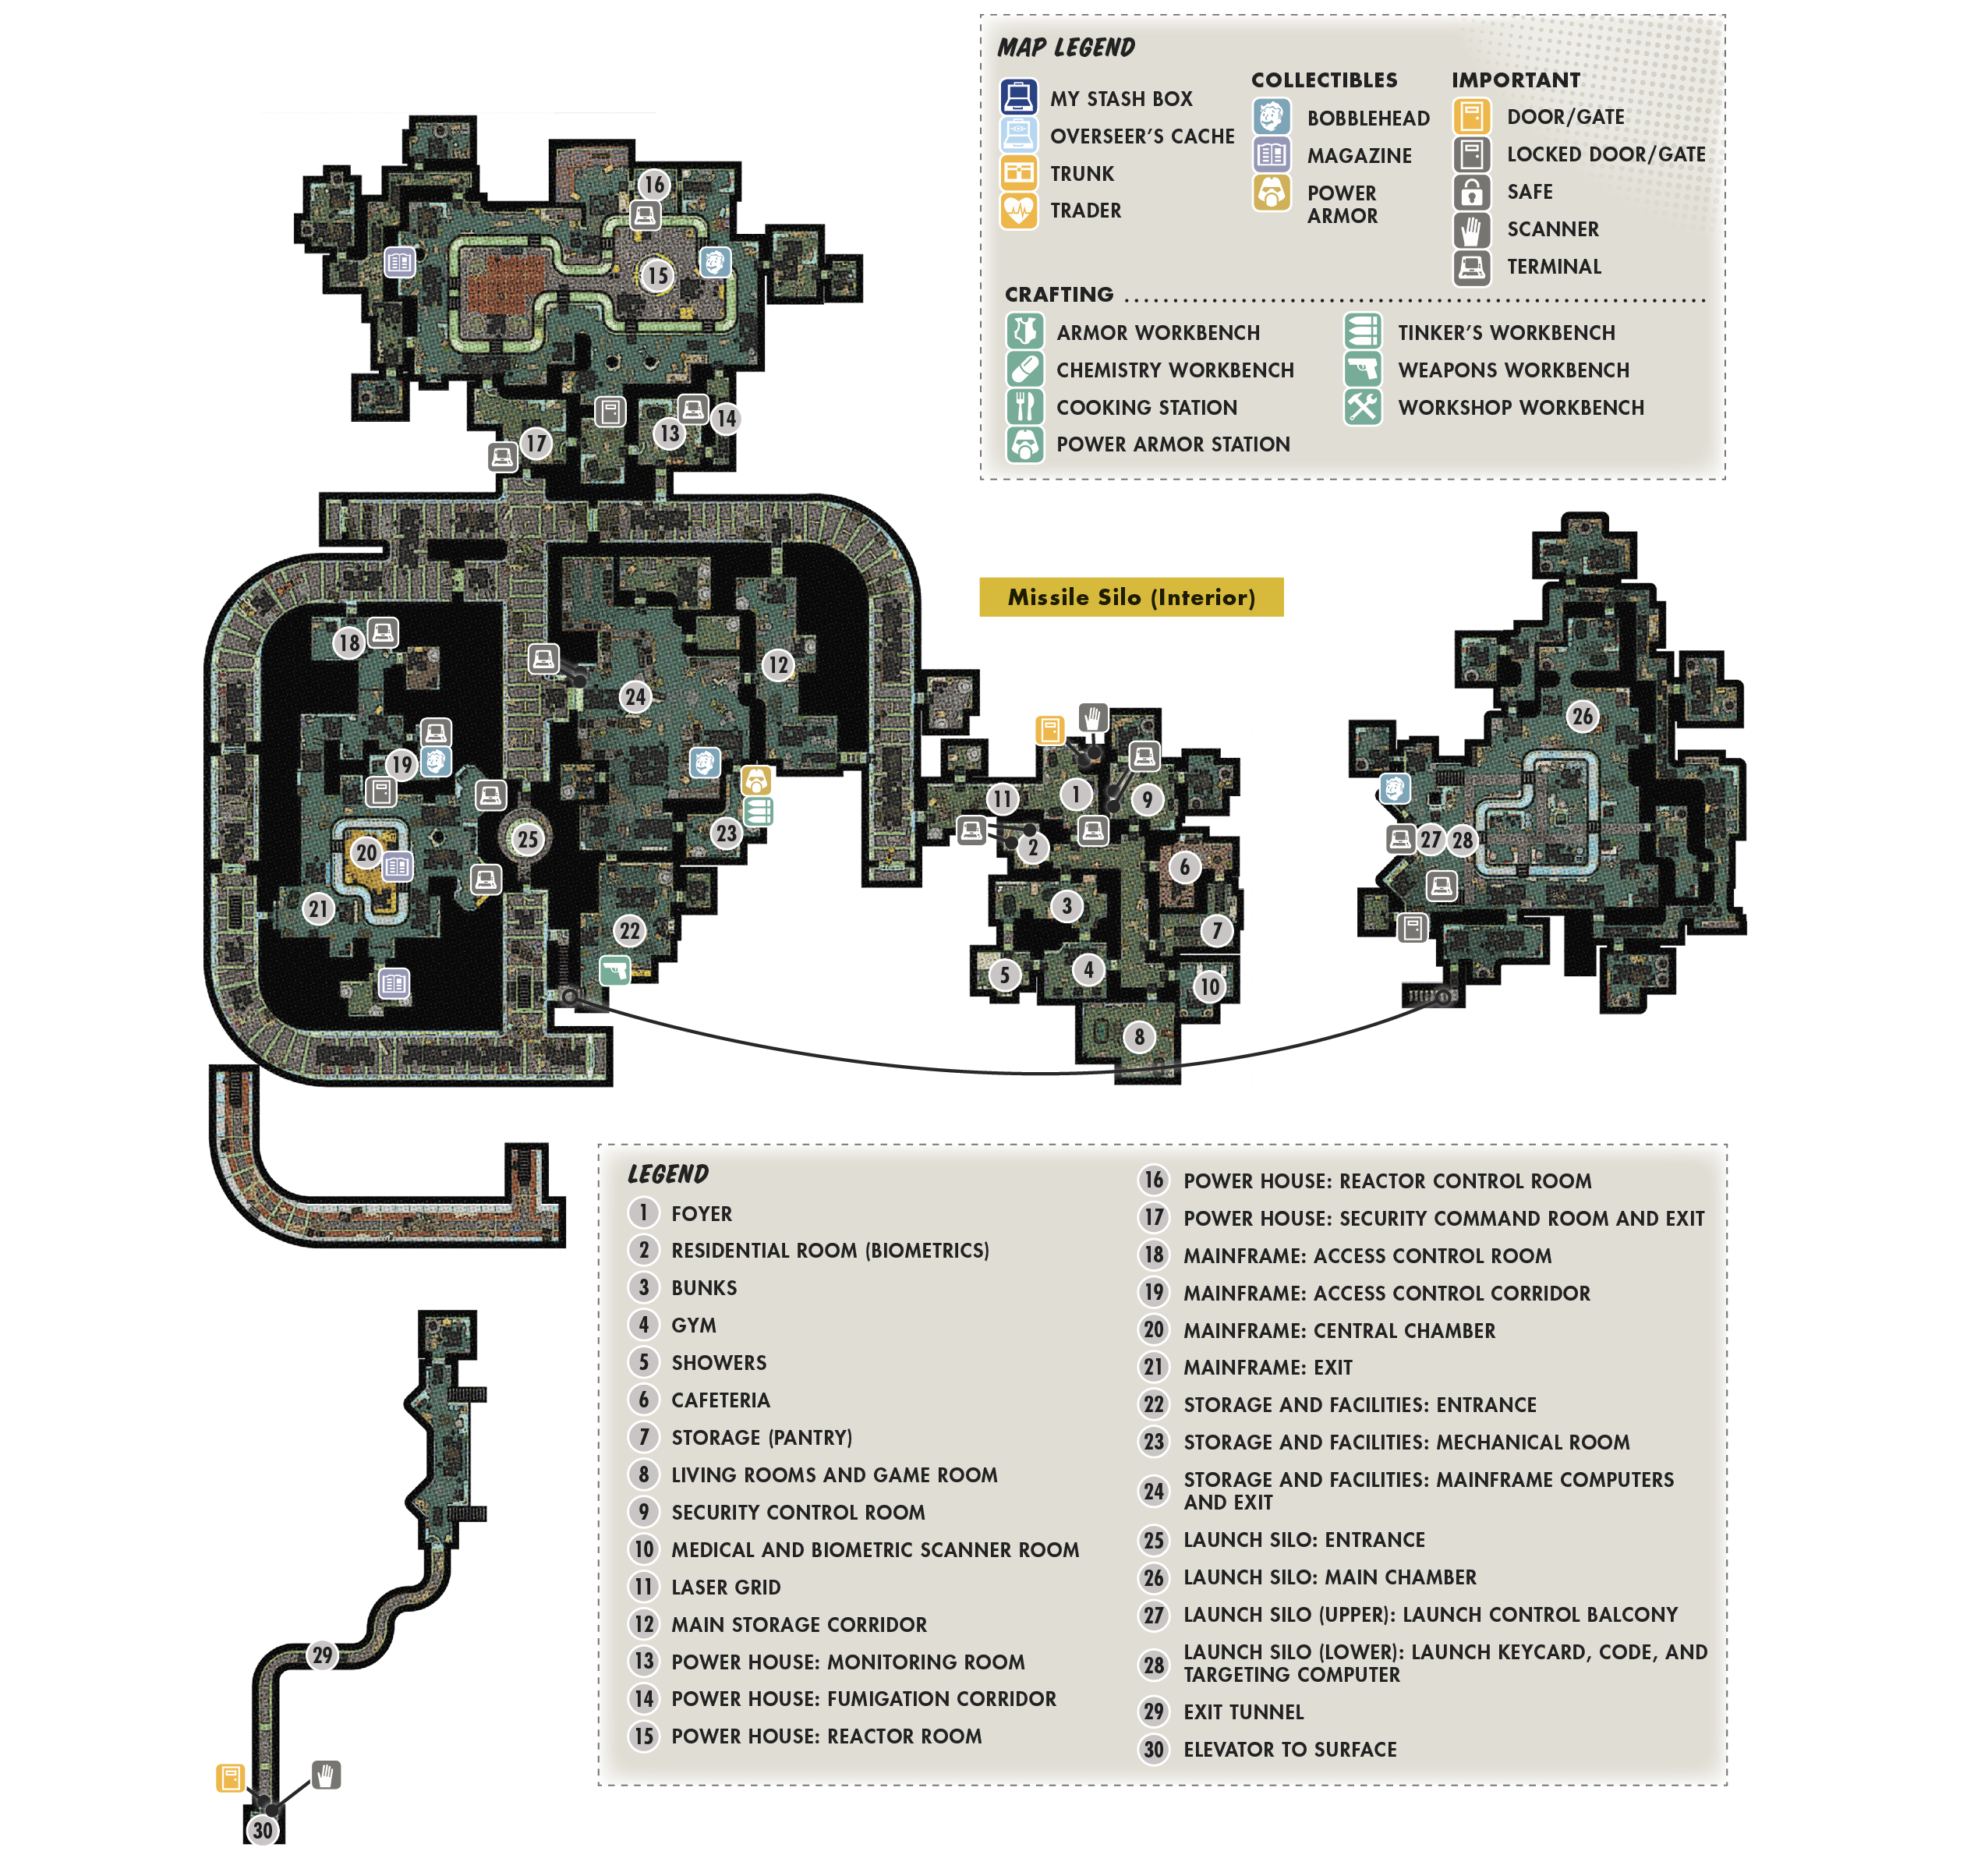
Event 1: The Residential Area
Hack the terminal in the entryway, and use it to disable the Supervisor and turrets. Then head in and clear out the rest of the area. If you’re careful (don’t kill the Supervisor!), you can avoid triggering the security system here and buy yourself some time to look around.
Each member of your team must complete this event individually. A good strategy is to have half your team run through the objectives while the other half fends off the robots, and then alternate. Once everyone has acquired and registered their own Biometric ID, the security system shuts down, and you can make your way forward.
Event 2: The Reactor Area
The Reactor Area is flooded with lethal levels of radiation. If you brought a Hazmat Suit, equip it before getting anywhere near the door to this area. Otherwise, equip your best radiation protection gear, take a RadX, and have your RadAway favorited. A couple of Hazmat Suits can be found in the first room of this area, although you’ll be taking significant radiation damage already by that point.
In the first room, hack the terminal and use it to disable the Supervisor and turrets. You can also use it to turn on the Decontamination Arches, which is highly recommended—it’s much faster and cheaper than burning through your own supply of RadAway. Terminals elsewhere in the Reactor Area will allow you to activate robot allies to help in the fight that follows.
If your entire team has Hazmat Suits, it’s worth clearing the room, and then taking a minute to locate all of the broken pipes. You can’t repair them until you shut down the reactor (which also sets off the security system here), but you can map them out and make sure your team is spread out and ready to hit them as soon as the system shuts down.
Once you do shut down the reactors, repair the pipes as quickly as possible, and then restart the reactor to end the security alarm. If you have a small team, it may be worth ignoring the enemies entirely and just rushing the repairs—you don’t have a lot of time, and you’re likely to run out if you keep stopping to fight.
Event 3: The Operations Center
There’s no time to waste here—the security alarm sounds as soon as you set foot in the Operations Center. A terminal in the first room will allow you to disable the Supervisor and turrets, though.
The key to completing the Operations Center efficiently is explosives—a single well-placed grenade can take out an entire bank of console panels and their Mainframe Cores (as well as any nearby robots). Be careful to coordinate your actions with your team, though—grenade accidents can be messy.
Event 4: The Storage Area
In the first room of the Storage Area, pick the lock on the side office door to get to the terminal, where you can disable the Supervisor and turrets. Then head into the main room and deal with the Sentry Bot and the other robots.
Once you’ve cleared the room, find the terminal on the side wall and use it to open the terminal-locked door leading back to the entrance—if you have to respawn, this shortcut makes rejoining your group a whole lot quicker.
The security system in this area will trip as soon as you interact with the Facilities Mainframe terminal or any of the Mainframe Cores. If you want, you can take a moment to locate (but don’t pick up) the Mainframe Cores you’re going to need.
An even better solution is to repair the damaged cores. Have one member of your team quickly remove all 15 Damaged Mainframe Cores from the Facilities Mainframe, then head in to the Tinker’s Workbench in the next room. If you brought the Scrap Steel and Circuits we recommended, you can quickly repair all 15 cores, return to the mainframe, and slot them in, no scrounging required.
Event 5: The Control Room
At the top of the stairs, find the terminal in the first room and use it to deal with the Supervisor and Turrets. Then head in and clear the Control Room.
In this event, your team needs to defend the Section Chiefs as they make their way to their posts and complete the launch prep process. There are no shortcuts here and no avoiding combat. But you have all the time you need to orient yourself, find good defensive spots, and (ideally) lay down some mines. The security alarm won’t sound until you initiate launch prep.
Ideally, keep one (or two) members of your team on the upper level, near the Launch Control Chief’s post—he’s the easiest to defend, and as long as he’s active, launch prep will finish eventually. Larger groups can take a more aggressive approach, holding the entrances to the main room.
If a Section Chief is destroyed, you can use the terminal near its fabrication pod to construct a new one. But don’t do this unless you feel you have the fight well under control—there’s nothing worse than rebuilding one Chief, only to return to the room and find you’ve lost another.
As soon as launch prep is completed, Mission: Countdown comes to an end.
It’s Been a Blast

With launch prep completed, the launch control console is now active. Insert your Nuclear Keycard into the keycard receptacle. Once you do this, there’s no turning back. If you enter the wrong Launch Code, you’ll have to track down another Nuclear Keycard and repeat the entire silo—so enter the code carefully.
Once your code is accepted, approach the targeting computer and choose the location you want to nuke. A suggested target is available, but you’re free to select any point in Appalachia except portions of the Forest region. Confirm your choice, and you’ll exit the targeting system.
Death from Above
If you like, you can watch the launch from inside the silo. Shortly after the launch, you’ll be notified of an automated lockdown. Collect your belongings and exit the silo. The silo will be locked down until a new missile is ready for launch (in about three hours).
If you hurry outside (don’t forget to loot the chest on your way out), you can also watch the launch from there. And, depending on the target you selected, you may be able to see the blast, too. It’s always spectacular, and all three silos provide excellent vantage points.
Any players in the blast zone will receive an automated warning of the incoming nuke, and have a short time to run to safety. Anyone who doesn’t make it out will be killed, and any workshops or camps caught in the blast will be utterly destroyed.
In the Aftermath

Steel yourself for the most difficult (and rewarding) challenge yet. Put on your Hazmat Suit and head into the blast zone, where all of the flora and fauna are now heavily irradiated. Expect far more difficult encounters, and rare resources that can be obtained nowhere else.
Rinse, Repeat

Launching a nuke is hardly the end of the game. You can repeat the process anytime you’re willing to track down a Nuclear Keycard and decipher the Launch Codes. There’s no better way to get high-end gear and resources, and you definitely won’t get everything you need on the first go.
Good luck! And watch out for the Scorchbeasts…
Scorched Earth
Details

The Prime Fissure has opened, disgorging an enormous Scorchbeast Queen. Defeat her before she leaves to make a new nest elsewhere!