
Halo 4 Guide Infinity Infinity Multiplayer
Weapons Detail
This section presents—in alphabetical order—every piece of UNSC, Forerunner, and other weapon available in Halo 4 . Any major advantages and disadvantages of each armament are discussed in general gameplay terms. This is all designed to improve your tactical weapons knowledge.
UNSC Infantry Weapons
| WEAPON NAME | TYPE | RANGE | MAGAZINE CAPACITY | HEADSHOTS? | INITIAL ROUNDS | ZOOM |
|---|---|---|---|---|---|---|
| Assault Rifle | Fully-Automatic | Short-Mid | 32 | 160 | ||
| Battle Rifle | Semi-Automatic 3-round burst | Mid-Long | 36 | * | 108 | 2x |
| DMR | Semi-Automatic | Mid-Long | 14 | * | 42 | 3x |
| Frag Grenade | Grenade | N/A | N/A | |||
| Machine Gun | Fully-Automatic | Short-Mid | 255 (detached) | |||
| Magnum | Semi-Automatic | Short-Long | 8 | 24 | 2x | |
| Railgun | Charged, Single Shot Explosive | Short-Mid | 1 | 4 | ||
| Rocket Launcher | Explosive | Mid-Long | 2 | 4 | 1.8x | |
| SAW | Fully-Automatic | Short-Mid | 72 | 216 | ||
| Shotgun | Semi-Automatic | Short | 6 | 18 | ||
| Sniper Rifle | Semi-Automatic | Long | 4 | * | 12 | 4x, 9x |
| Spartan Laser | Charged, Single Shot Explosive | Mid-Long | 1 (energy based) | 4 | 2.5x | |
| Sticky Detonator | Latched Explosive | Short-Mid | 1 | 4 |
UNSC Vehicle Weapons
| WEAPON NAME | TYPE | RANGE | MAGAZINE CAPACITY | HEADSHOTS? | INITIAL ROUNDS | ZOOM |
|---|---|---|---|---|---|---|
| Scorpion, Main Cannon | Explosive | Long | N/A | |||
| Scorpion, Machine Gun | Fully-Automatic | Short-Mid | N/A | |||
| Warthog, Gauss Cannon | Semi-Automatic | Mid-Long | N/A | |||
| Warthog, Machine Gun | Fully-Automatic | Short-Mid | N/A | |||
| Warthog, Rocket Launcher | Explosive 5-rocket volley | Mid-Long | N/A | |||
| Mantis, Machine Gun | Fully-Automatic | Short-Mid | N/A | |||
| Mantis, Missile Launcher | Semi-Automatic | Mid | 5 | |||
| Mantis, Foot Stomp | Melee w/Cooldown | Short | N/A |
Covenant Weapons
| WEAPON NAME | TYPE | RANGE | MAGAZINE CAPACITY | HEADSHOTS? | INITIAL ROUNDS | ZOOM |
|---|---|---|---|---|---|---|
| Beam Rifle | Semi-Automatic w/Overheat | Long | Overheat | * | 10 | 3.5x, 9.5x |
| Concussion Rifle | Semi-Automatic | Short-Mid | 6 | 18 | ||
| Covenant Carbine | Semi-Automatic | Mid-Long | 18 | * | 72 | 2x |
| Energy Sword | Melee | Short | N/A | |||
| Fuel Rod Cannon | Explosive | Mid | 5 | 15 | 2x | |
| Gravity Hammer | Melee w/AoE | Short | N/A | |||
| Needler | Fully-Automatic | Short-Mid | 22 | 44 | ||
| Needler (Supercombine) | Explosive | Short-Mid | N/A | |||
| Plasma Cannon | Fully-Automatic | Short-Mid | 255 (detached) | |||
| Plasma Grenade | Grenade | N/A | N/A | |||
| Plasma Pistol | Semi-Automatic | Short-Mid | Overheat | 50 | ||
| Plasma Pistol (charged shot) | Charged EMP | Short-Mid | 5 | |||
| Storm Rifle | Fully-Automatic | Short-Mid | Overheat | 166 |
Covenant Vehicle Weapons
| WEAPON NAME | TYPE | RANGE | MAGAZINE CAPACITY | HEADSHOTS? | INITIAL ROUNDS | ZOOM |
|---|---|---|---|---|---|---|
| Banshee, Fuel Rod Cannon | Explosive | Mid-Long | N/A | |||
| Banshee, Plasma Cannon | Fully-Automatic | Mid-Long | N/A | |||
| Ghost, Plasma Cannon | Fully-Automatic | Short-Mid | N/A | |||
| Wraith, Plasma Cannon | Fully-Automatic | Short-Mid | N/A | |||
| Wraith, Plasma Mortar | Explosive | Mid-Long | N/A |
Forerunner Weapons
| WEAPON NAME | TYPE | RANGE | MAGAZINE CAPACITY | HEADSHOTS? | INITIAL ROUNDS | ZOOM |
|---|---|---|---|---|---|---|
| Binary Rifle | Semi-Automatic | Long | 2 | * | 6 | 4x, 10x |
| Boltshot | Semi-Automatic | Short-Mid | 10 | * | 30 | |
| Boltshot (Charged shot) | Charged Energy Blast | Short | 2 | 6 | ||
| Incineration Cannon | Explosive w/submunitions | Mid | 1 | 4 | 1.8x | |
| LightRifle (Hip-fired) | Semi-Automatic (3-round burst) | Mid-Long | 36 | * | 108 | 3x |
| LightRifle (Scoped) | Semi-Automatic | Mid-Long | 12 | * | 36 | 3x |
| Pulse Grenade | Grenade | N/A | N/A | |||
| Scattershot | Semi-Automatic | Short | 5 | 15 | ||
| Suppressor | Fully-Automatic | Short | 48 | 192 |
UNSC Weapons
Assault Rifle
Standard fully automatic firearm of all UNSC branches, effective at both close-range and mid-range combat.
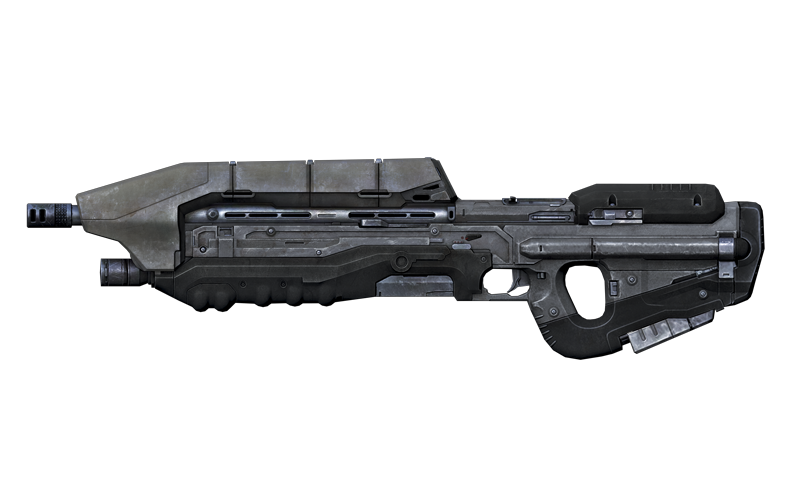
- Magazine Capacity: 32 rounds
- Description: The Assault Rifle is an exceptionally resilient gas-operated, magazine-fed, automatic rifle designed to execute close-quarters combat with lethal efficiency, regardless of hostile counter-op environmental conditions or duration of use in the field.
Tactical Notes
- The amount of ammunition in a clip is 32 bullets.
- In FFA game types, players with mid-range weapons may finish your kills if you choose to roll with this weapon.
- When you hold the right trigger, the crosshair will bloom (expand slightly), so if you’re far away from a fight or battle, it’s wise to pace your shot, thus increasing your chance of killing an enemy by tapping the trigger.
- This is an exceptionally good weapon to use in close melee fights. You can inflict two melees in under just two seconds, making it a better weapon overall to use during some mid-range fights and just about all close-range-combat opportunities.
- The reload time isn’t bad if you’re going from one takedown to the next. Just like any other UNSC weapon, it’s smarter to reload before you run out of all your ammo in a clip, because you’ll perform the reload more quickly.
Developer Commentary
I’m not sure exactly what it is, but I definitely feel like I have more control over my bullet spread when pulsing my AR starts than in past games. No doubt about it, the Assault Rifle is definitely still at its best in close quarters.
– David Ellis (Mission Designer)
Relative to other Halos, this feels to me like a slightly more powerful Halo 3 AR. Some people might have some prejudice against the weapon because it’s not the newest, flashiest weapon on the block and there are a lot of other things that will catch your eye first. That being said, this is one of the best looking weapons in the game IMO. Gameplay-wise, we’ve tried to extend the range on the AR a bit from what it’s traditionally been and made it a tad more accurate. This is one of my favorite weapons in Halo 4 and I’m particularly fond of pairing it with a long-range rifle in MP using the Firepower Armor Abilities.
– Chris King (Lead MP Level Designer)
Battle Rifle
Utilizes precise, three-round burst functionality, making it a formidable mid-range, semi-automatic weapon.
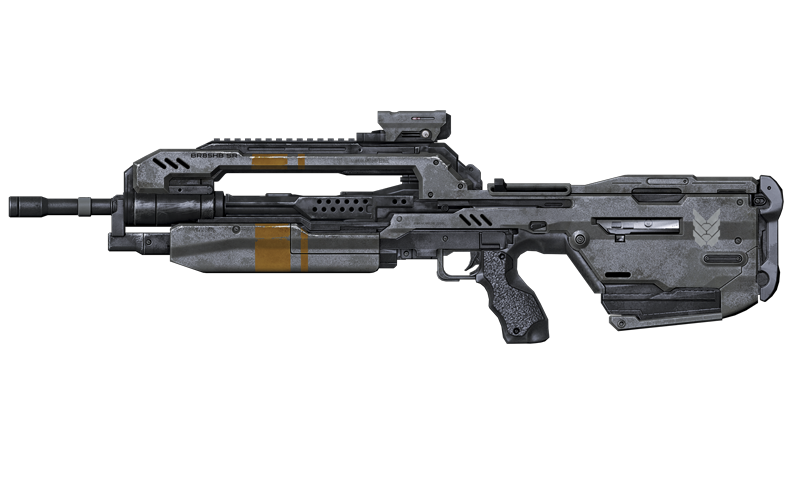
- Magazine Capacity: 36 rounds
- Description: The Battle Rifle is a gas-operated, magazine-fed, semi-automatic rifle optimized for three-round burst firing and proven to be an extraordinarily versatile weapon at a wide variety of ranges in the hands of a capable marksman.
Tactical Notes
- The amount of ammo in a clip is 36, which equates to 12 shots due to the three-round burst firing.
- The Battle Rifle is a semi-automatic weapon, that fires in three round bursts.
- This weapon is arguably one of the best weapons that can be employed at long, mid-, or close-range.
- Accuracy is key with this weapon: The three-shot burst affects when you take down an enemy, as missing with any of the three bullets can prolong a foe’s life. Therefore, it is imperative that each burst entirely strikes a foe for quicker takedowns. Aiming for the head is the most effective way to eliminate enemies with this weapon.
- The Battle Rifle reload time varies if you use up all of the ammo in a clip prior to reloading, but it reloads relatively fast between multiple battles.
- The Battle Rifle’s zoom feature makes it even more effective in helping you aim and place shots more accurately; this gives you an even easier time to complete objectives that you or your team are requesting.
- Melee strikes can be relatively fast after shooting, so use this at close-range as a backup takedown technique in case you’re not hitting with all the shots you fire. Even if an enemy is up a shot—that is, has taken less damage—as you both enter closer combat, the high damage of this weapon’s melee can allow you to win a fight.
Developer Commentary
Like a well-oiled baseball glove, pick up the Battle Rifle in Halo 4 and you’ll feel right at home. With the Battle Rifle being hitscan (projectiles register hits immediately upon trigger pull), it is definitely a force to be reckoned with at mid- to long-range. Roll into battle with a teammate or two at your side, and enemies will turn and run at the mere threat of your group shots. There’s just something inherently satisfying about that triple thud unleashed with each trigger pull.
– David Ellis (Mission Designer)
DMR
Premiere marksman rifle of the UNSC, offering impressive single-fire accuracy at reasonably long distances.
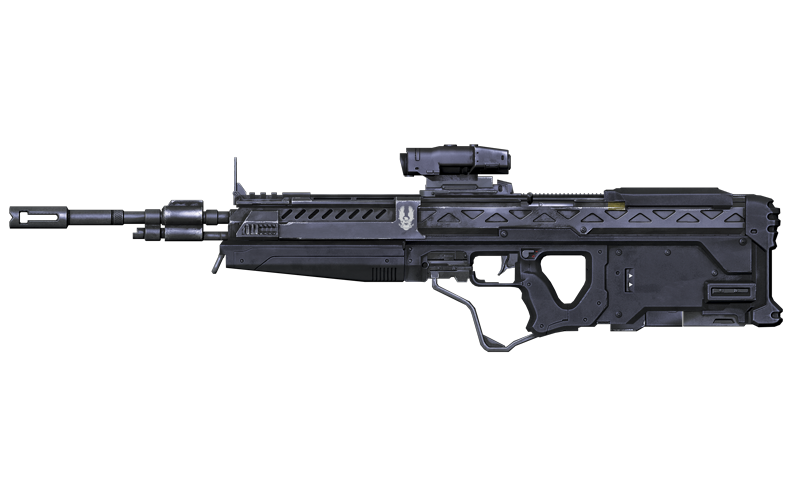
- Magazine Capacity: 14 rounds
- Description: The DMR is a gas-operated magazine-fed marksman rifle that maintains a smart-linked, telescopic, rail-mounted sight for scout personnel. This rifle favors mid-range to long-range combat and offers impressive stopping power.
Tactical Notes
- The DMR has 14 shots per clip, and a max reserve capacity of 42 shots to expend before reload.
- This rifle has the advantage of being effective at any range and can remove a threat quickly. This rifle competes with the Battle Rifle in close and mid-range combat, but it is better at long-range takedowns.
- Further advantages include only a slight bloom when the weapon is fired, meaning this is recommended for those players relying on accuracy. The rifle’s zoom feature optimizes this rifle still further.
- Due to the single-shot fire, you need to work on when to time your shot for maximum damage and impact. In close-combat situations, line up your reticle as best you can.
- The reloading speed is quick, but always reload between bouts of violence, when you’re in relative safety, and prior to emptying your clip, as a clip reload takes slightly longer—a disadvantage that can get you killed.
- This is an extremely well-balanced weapon and is arguably the best choice of all UNSC weaponry.
Developer Commentary
This thing is absolutely ridiculous long-range. While it does feature a slight amount of bloom to balance it at extreme distances, for the majority of mid to long-range encounters it doesn’t really come into play. The combination of the accuracy, headshot functionality and the improvements we have made to the aim assist system make this one of the best feeling guns in any Halo game IMO. One other thing worth mentioning on this one… I can’t get over how awesome this weapon sounds – it has an insanely meaty punch to each shot and gives me an adrenaline rush just firing it!
– Chris King (Lead MP Level Designer)
This might surprise some people, but based solely on pure lethality, I’d have to give the ever-so-slight edge to the DMR right now. It’s incredibly precise and simplified with lower rate of fire than in Halo: Reach . Now the only info you need to juggle in your head when going toe-to-toe is the middle of the reticle as you line it up to dome your unfortunate foe. For my money, Battle Rifle with group shot is greater than DMR, but if you’re lone wolfing, DMR is the way to go.
– David Ellis (Mission Designer)
Machine Gun
Fixed weapon emplacement which can be removed and brought into combat with limited ammo and mobility.
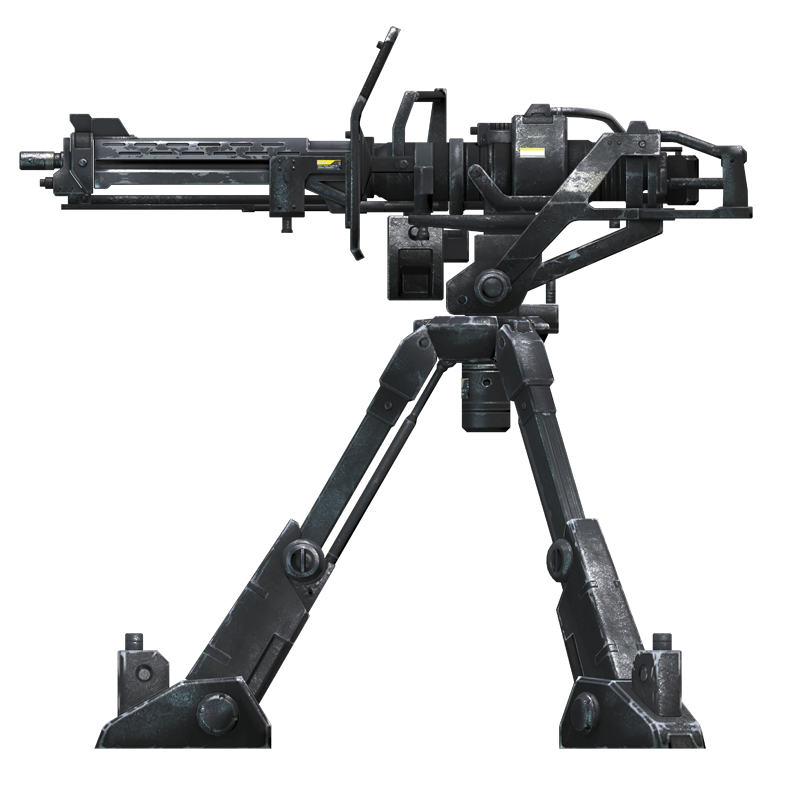
- Magazine Capacity: 255 rounds (detached)
- Description: The Heavy Machine Gun is an air-cooled, gas-operated, drum-fed automatic weapon that is primarily used from a full-range, tripod-mounted position, although it can be removed from its mount and hefted into battle if the operator is physically capable.
Tactical Notes
- The Machine Gun lays some heavy damage on enemies very quickly; simply point, shoot, and rake the foe with massive bullet expenditure!
- When mounted, you have infinite ammunition.
- You can hold the right trigger and simply unload on foes, but the weapon does have an overheat point if held for too long. The recover time forces you to wait a few seconds before starting to fire again.
- The Machine Gun can be detached at any time to become a mobile weapon to help out teammates at any time (following them into an enemy base ether killing or weakening foes).
- When detached, the Machine Gun can run out of ammo. However, carrying a Machine Gun allows you to maneuver however you wish, jumping or strafing in any direction, which is usually better for enemy takedowns than standing at a fixed point.
- Machine Guns have about a 180-degree arc to aim around you. Never let enemies get behind you. If this happens, detach or flee from the turret.
- Choosing Gunner as your Support Upgrade will significantly improve your turret abilities. You’ll be able to shoot longer when attached without overheating, and you’ll get more ammo and move significantly faster when detached, turning the Machine Gun from a situational weapon to a deadly force.
Magnum
UNSC’s personal sidearm of choice due to its excellence at close-range to mid-range engagements.
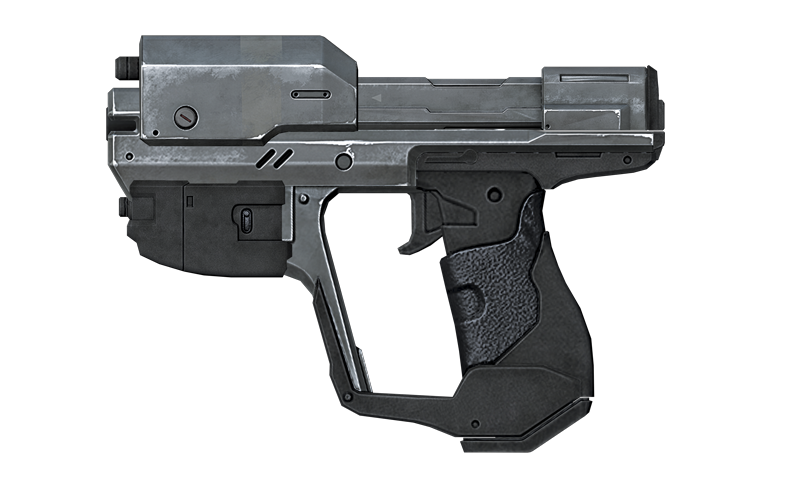
- Magazine Capacity: 8 rounds
- Description: The Magnum is a semi-automatic, recoil-operated, magazine-fed handgun and the standard personal sidearm of all branches of the UNSC post-2555. This weapon is surprisingly effective at reasonably long distances, proving its universal value in the field.
Tactical Notes
- The Magnum has eight shots per clip.
- Those with previous Halo experience may instinctively overlook the Magnum. This is unwise, as the weapon packs a considerable punch, even keeping up with most long- and mid-ranged weapons! Although mostly used as a last resort, its excellent damage and accuracy means it’s well worth considering, even at the expense of a primary weapon.
- Pace your shots to secure an accurate kill on an enemy. Employ this plan, as you only have eight shots to either kill or weaken a foe before reloading (which leaves you vulnerable).
- The Magnum is a single-shot weapon, so precision is the key to using it properly, if you’re expecting to win any fights.
- The Magnum has a useful zoom feature that can aid you in battle; use it to gain that additional accuracy you may need.
- This is a recommended secondary weapon, but expert players should find themselves switching between the Magnum and their primary weapon as the situation calls for it, rather than keeping it holstered.
- The Magnum has an average melee speed, with only a brief time to recover, making it reasonable to employ in these type of strikes.
Developer Commentary
The Magnum in Halo 4 is designated as a secondary weapon and as such it should be a just a little weaker than your primary options. With a faster rate of fire, it’s more deadly than the DMR close-range, but a twitchy trigger finger will limit its effectiveness at longer ranges.
– David Ellis (Mission Designer)
The Halo 4 Magnum isn’t meant to compete with the big boys (DMR, Battle Rifle, Covenant Carbine, LightRifle) so its role is a bit different than in the past. It definitely won’t compete with the Halo: Combat Evolved Magnum (although, what weapon will?) It’s still lethal but best used as a backup (switch to a Magnum to finish someone vs. waiting for a long reload on your primary weapon) or to pair with a fully auto primary weapon like the AR or Storm Rifle (drop an enemy’s shields and then finish them with a single headshot). In the hands of a skilled player though, this thing can still be a beast as it’s one of the fastest firing guns in the game. The other big change I think players will notice is that we have drastically sped up animation times when using a pistol. So you will be able to switch to it quicker, pull off melees and grenade throws faster, etc. than you will with primary weapons.
– Chris King (Lead MP Level Designer)
railgun
Powerful linear accelerator that fires explosive rounds at tremendous speed to efficiently eliminate targets.
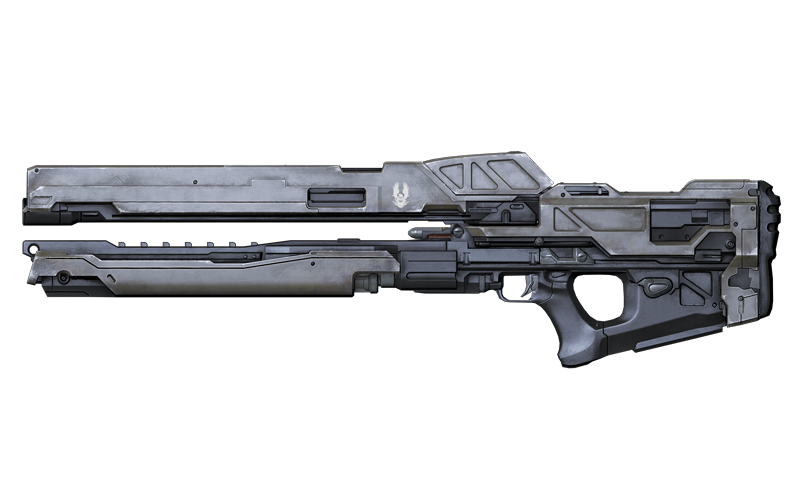
- Magazine Capacity: 1 HE Round
- Description: The Railgun is a compact-channel linear accelerator that fires a high-explosive round at incredible speed, delivering kinetic and explosive force to both hard and soft targets alike. The brutal combination of accuracy, speed, and Firepower make the Railgun extremely capable at eliminating large, well-armored enemy personnel.
Tactical Notes
- The Railgun has only one bullet per clip, but it has a one-hit kill if the bullet directly connects with a foe.
- You can hold down the trigger and wait until the Railgun fires on its own, or you can shoot it as soon as the charge up bar fills. You have a 1- to 2-second window to decide when to fire the bullet (usually as soon as the foe’s head is lined up in your sights).
- For advanced players, you should try to use the charge bar on the reticle to your advantage and become more accurate, instead of always waiting for the gun to fire on its own. When the gun is charged fully, there is a small delay before it is actually fired. Simply release the trigger after the bar fills up to control the release of the weapon. This ensures you’ll be aiming at your target when it goes off at your control, rather than attempting to time the release.
- If the Railgun is shot on the ground adjacent to an enemy, the bullet causes some splash damage, removing the enemy’s shields. If this occurs, immediately pull out another weapon (such as the Battle Rifle) to finish the job.
- Charging up the Railgun and using it to “peek and shoot” around a wall is a great way to surprise the enemy with a quick charge-up and release.
Developer Commentary
First described to me as a junior Spartan Laser, the Railgun is anything but. The quicker charge times allow me to be a little more fast and free in engaging in 1v1 showdowns. I also find it more useful against vehicles in situations where, say, a Banshee gets a drop on me in the open. The lack of a zoom means you have to be careful at what range you’re attempting to engage others, but when you do, the feeling of satisfaction is fantastic.
– David Ellis (Mission Designer)
I like the Railgun since it’s basically a Sniper Rifle, Rocket Launcher, and Spartan Laser all wrapped into one. You charge it up to shoot a direct damage shot that explodes on impact. WIN!
– Kynan Pearson (Lead MP Level Designer)
Rocket Launcher
Devastating from close-range to mid-range and capable of tracking airborne vehicles.
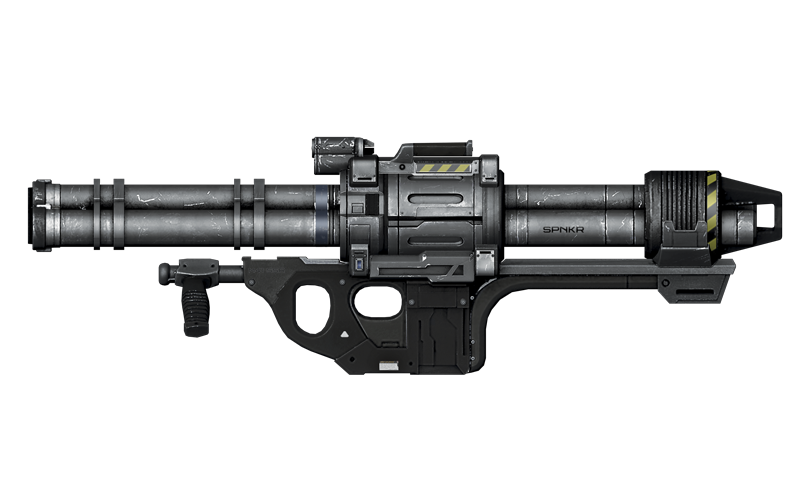
- Magazine Capacity: 2 rockets
- Description: The Rocket Launcher is a portable, twin-tube, shoulder-fired rocket launcher capable of firing two 102-mm rockets with excellent destructive potency. It is easily one of the most pervasive explosive weapons within the UNSC’s arsenal.
Tactical Notes
- This weapon carries up to two rockets at a time, and it has a 2x scope.
- The only time it heat-seeks its target is when fired on any flying vehicle. Aim your reticle at the Banshee and your rocket tracks the foe’s movements and follows them. This is obviously advantageous.
- The Rocket Launcher’s payload causes massive splash damage and is extremely adept at taking down enemies at close and mid-ranges. It causes major damage against vehicles as well.
- This powerful weapon becomes vital to control any locations where rockets spawn on a map during any game type. It’s easy to use and is one of the most powerful weapons available.
- However, it has a fairly long reloading time. Reload both rockets at once; this is more efficient than simply shooting one and reloading immediately afterward.
Developer Commentary
If you know anything about me, you’ll know that I love any advantage I can use, and the Rocket Launcher is the ultimate advantage for me. It’s big, it fires rockets. What’s not to love?
– David Ellis (Mission Designer)
Functionally, it’s similar to past versions. The big differences from past versions are that the projectile speed has been upped a hair to help compensate for the overall faster pace of our game and the splash damage is a bit larger.
– Chris King (Lead MP Level Designer)
SAW
Squad automatic weapon used during protracted engagements where sustained fire is required.
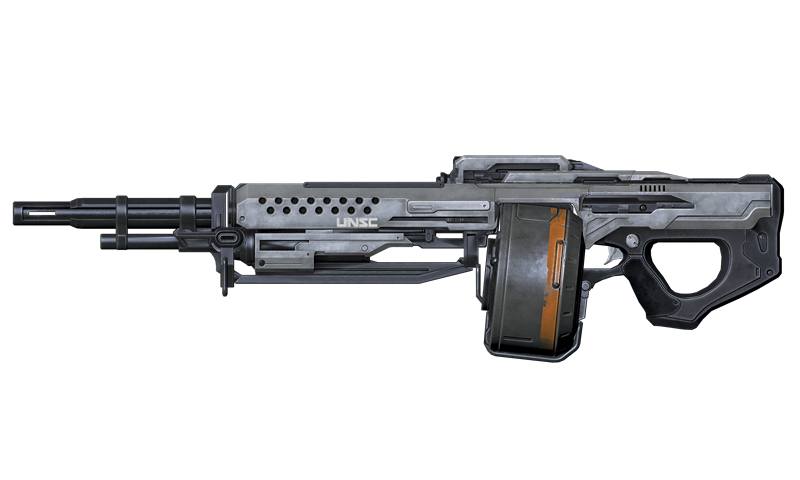
- Magazine Capacity: 72 rounds
- Description: The SAW (Squad Automatic Weapon), is a gas-operated, drum-fed, fully automatic machine gun that provides incredible sustained fire in the field and is capable of suppressing even the most heavily armored of infantry targets.
Tactical Notes
- The SAW is a light machine gun with 72 bullets per clip.
- It is extremely effective at close-range; you can drop a foe with around 15 to 18 bullets.
- This can be devastating if you’re expecting close combat and charge into an enemy territory to rake your foes with fire instead of resorting to one or two shots from your usual Battle Rifle or DMG.
- This is easily one of the best close- and mid-range weapons available.
- When holding down the trigger, the reticle’s bloom expands, so if you employ it at shorter mid-range, try tapping the trigger to control the bloom; this makes the SAW more accurate.
- The SAW has a fairly long reload time. This is problematic, as you’re usually ‘fully used up’ at the wrong time and in the wrong place. We recommend that you wait until you’re safe before reloading
- This is a formidable weapon at close-range combat. Beware of foes using it for this purpose.
Developer Commentary
This is my favorite weapon. It’s like the AR’s mean older brother, or a more mobile turret emplacement.
– Chris Howard (SDE)
The SAW is, without a doubt, the most psychologically intimidating GUN in the game. It looks unlike any gun you’ve seen before in a Halo game, and packs a world champion-class punch when spraying molten projectiles at everything in your way. The SAW is also incredibly useful as a force modifier when encountering a vehicle on foot. A skilled SAW user will use every tool at his disposal to clear space while shredding surrounding vehicles. The comparison to the AR is apt, but whereas a skilled AR user (yes, they do exist) will use finesse to drop a foe, the SAW almost demands of you to unleash its fury by burning down enemies with overwhelming force. You do want to keep an eye out on the ammo count as before you know it you’ll be hearing that familiar “click, click, click” of impending death.
– David Ellis (Mission Designer)
Shotgun
Dominant close-quarters weapon specializing in boarding actions, breach maneuvers, and urban operations.
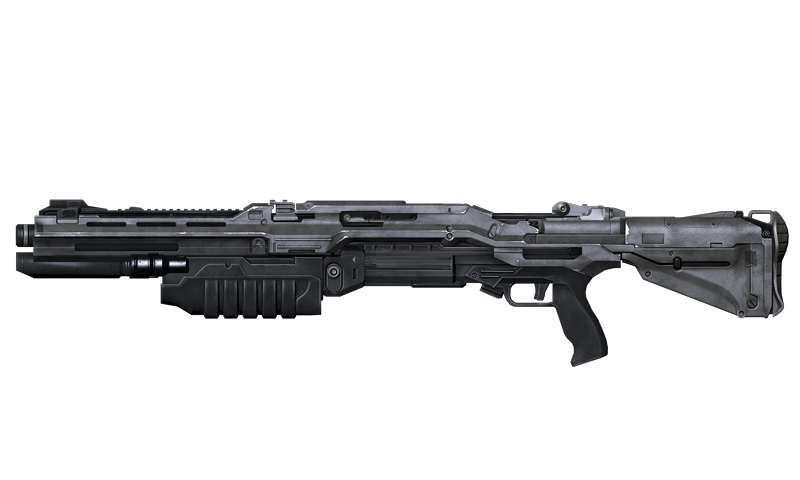
- Magazine Capacity: 6 shells
- Description: The Shotgun is a pump-action weapon that fires 8-gauge cartridges with ruthless proficiency, making it the UNSC’s most effective and useful close-quarters arm, particularly during urban engagements and boarding actions.
Tactical Notes
- This Shotgun has six shells in the chamber and a maximum capacity of 24.
- This is one of the most powerful weapons that the UNSC uses. Although seen by many as overpowered, the Shotgun has several disadvantages that can leave you without proper self defense on the battleground.
- Slow reloading and a vicious kickback are the two biggest downsides to this otherwise monstrous weapon. In addition, this has only six shots, so ensure you’re as close as possible when firing on foes. In between shots, expect to lose your aiming precision due to the kickback. As this can cause you to spend too long reaiming and cost you a fight, timing your firing is important (fire when you have a clean shot and when you can survive after a missed shot).
- Firepower certainly isn’t lacking here, so simply line up your target and fire. One or two shots take out just about any foe easily. Never use this gun for anything other than close-combat takedowns.
- Increase your chances of success by staying close to walls or in enclosed areas, and fully utilize this gun when the foes appear nearby.
Developer Commentary
I’ve always been the kind of guy who loves to jump in the middle of a squad of enemies to see how many I can take out in my blaze of glory. As such, the Shotgun, if I might borrow a phrase, scratches that particular itch for me. With the aesthetic redesign, the Shotgun feels like a future bangstick designed with one purpose: to blow heads clean off their shoulders. I actually find this shotgun to be easier to use than the one in Halo: Reach , but when getting the jump on enemies, you better make that first shot count. Otherwise, you’ll be left wondering what could have been while waiting to respawn.
– David Ellis (Mission Designer)
The new Shotgun model is SICK and definitely reads as a bit more futuristic than the previous versions. It actually has a lot longer range now, less damage falloff, and is quite a bit more powerful than say the Halo: Reach version overall, but some of that dialed up power is countered by the other changes in the game like Sprint by default, mobility-based armor abilities, and generally faster movement speeds. This is definitely one of my favorite ordnance weapons. I especially love finding one when I have the Speed Boost in MP.
– Chris King (Lead MP Level Designer)
Sniper Rifle
Considered the UNSC’s best long-range rifle, boasting formidable stopping power and unparalleled accuracy.
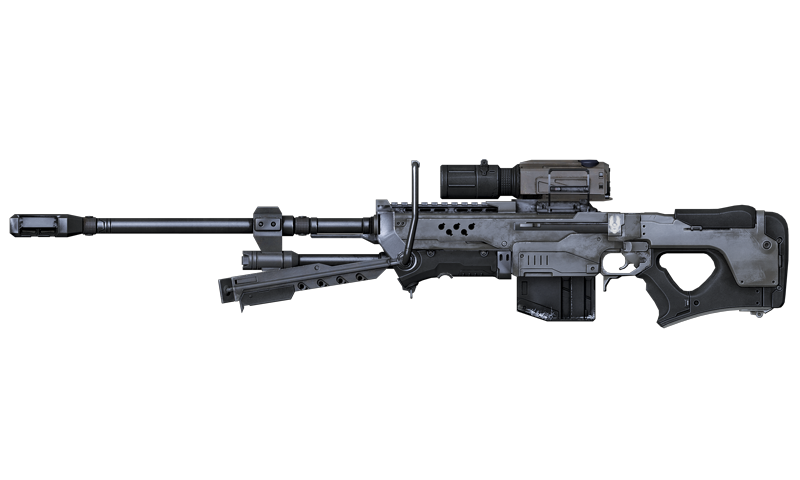
- Magazine Capacity: 4 rounds
- Description: The Sniper Rifle is a gas-operated, magazine-fed, semi-automatic sniper rifle with exceptional accuracy and the ability to simultaneously breach both energy-shielding and high-density armor, making swift kills nearly effortless when this weapon is properly utilized.
Tactical Notes
- The UNSC Sniper Rifle holds four shots per clip before reloading.
- This is best at long-range, especially as the weapon has a 4x and 9x zoom scope. However, it can also be effective at middle-short ranges if you use “no-scoping” (firing without a scope) or “quick-scoping” (firing with very fast scoped line-up shots between firings).
- At melee range, striking with a “no-scoped” shot to the body and then connecting with a melee strike directly afterward is an effective way to utilize the Sniper Rifle in close combat.
- Scoring headshots with the Sniper Rifle is excellent for obtaining your own kills (instead of assisting in them), but if you’re playing a team game, it’s sometimes better to strike with body shots, as they’re much easier to succeed in. Then give your teammates the opportunities to pick up the kill on the wounded foe.
- In a mid-range fight, hitting the body of a foe and then pulling out a Battle Rifle, DMR, or Covenant Carbine is a great way to finish off a foe instead of trying to hit with another sniper rifle shot.
- Ammunition conservation is key here; don’t feel like you need to rush to fire off all of your bullets. Taking your time is key to obtaining some accurate shots into your opponents.
- This is also a great antivehicle weapon. For example, it takes only five shots to demolish a Banshee. To defeat a Scorpion tank, shoot the entry door twice to expose the opponent driver’s head, and defeat him with a headshot. Try taking down an enemy Wraith driver if you’re on higher ground; shoot the entry door once to expose the opponent’s head, and drop him with a headshot. For Ghost and Warthog takedowns, simply fire at the enemy, as they’re already exposed.
Developer Commentary
The UNSC Sniper Rifle feels really, REALLY powerful this time around. I went back and tried the Halo 3 and Halo: Reach Sniper rifles a few weeks back and was surprised how much more visceral ours felt. I think the big changes causing this are the new sound FX and the firing recoil (resets back to center after each shot). The recoil makes it a bit harder to line up again between shots but we have adjusted the accuracy and aim assist to help compensate. Overall, I find that I can be more successful with our Sniper Rifle than I could with the Halo 3 or Halo: Reach ones so it’s probably a tad bit easier to use.
– Chris King (Lead MP Level Designer)
Spartan Laser
Formidable nonlinear rifle that is highly proficient at destroying vehicles over long distances.
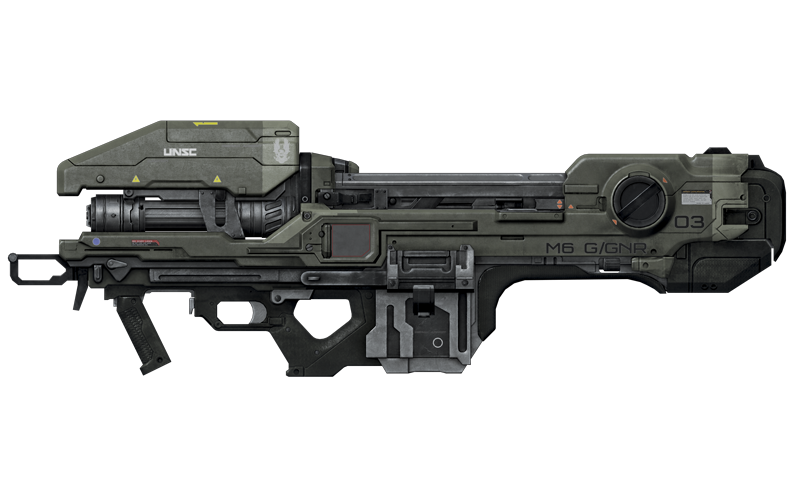
- Magazine Capacity: 1 (energy based), 4 shots
- Description: The Spartan Laser is a shoulder-fired, smart-linked nonlinear rifle that projects a superheated beam of energy that is incredibly effective at destroying both enemy personnel and vehicles. Design for this weapon occurred in parallel with the GUNGNIR-class of Mjolnir GEN1 armor, resulting in the informal name “Spartan Laser.”
Tactical Notes
- The Spartan Laser’s ammunition works differently from other weapons; it reduces in percentage terms (100 percent would be a fully loaded Spartan Laser). This weapon becomes empty when you reach 0 percent, negating the need to worry about reloading.
- This is mainly used to take out moving vehicles and other objects. The advantage of using this on a vehicle is the resulting explosion kills every enemy riding the vehicle too.
- This isn’t recommended for firing unless you’re zoomed in to take advantage of the increased accuracy and to avoid the lengthy time it takes to charge each shot. One exceptional feature of this weapon is that the scope has a bar that allows you to see how close you are to firing off the shot.
- This weapon is best utilized when fired from long-range, but a mid-range shot is also possible, depending on the wielder’s accuracy. You can actually melee using this, too, but it isn’t something to actively engage in!
- Try charging the Spartan Laser as you move, releasing the charge prior to firing if you haven’t found an enemy to hit. Repeat this tactic, staying on the move and charging until you’ve removed the enemy threat.
Developer Commentary
Currently, I’d put the Laser just below Halo 3 ’s “red dot of death” and slightly above the Halo: Reach variant. It seems to have slightly less aim assist than Halo 3 , but still packs a mean punch when you connect. In matchmaking, you will primarily see this as an occasional ordnance drop on maps and modes designed for BTB.
– David Ellis (Mission Designer)
Those are pretty accurate assessments. Still tears apart vehicles and still can be lethal against guys on foot when in the hands of a skilled player.
– Chris King (Lead MP Level Designer)
Sticky Detonator
Single-hand, short-range explosives launcher which can detonate remotely and at the operator’s discretion.
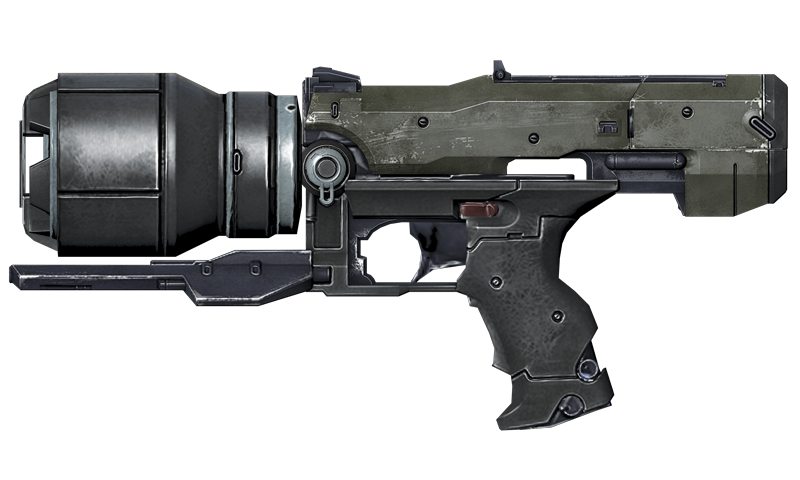
- Magazine Capacity: 1 grenade
- Description: The Sticky Detonator is a low-profile single-shot weapon that launches a magnetically latched explosive, which the operator can remotely detonate when at a safe distance. Although previously manufactured in low quantities, this weapon’s size and ease of transportability has made it ubiquitous in the years that followed the Covenant War.
Tactical Notes
- The Sticky Detonator can hold 4 explosive charges.
- This charge can be stuck to your opponent, a flag, a wall, a vehicle, or even the ball, and can be detonated at your leisure by pulling the trigger.
- Failure to pull the trigger results in the charge exploding after 30 seconds.
- This weapon has a built-in Motion Sensor system, which is a good way to check whether opponents are by your placed charge. If your enemy is in any part of the white circle when you detonate the charge, then they die in the ensuing explosion. However, your opponent can also crouch-walk next to the charge, as this doesn’t show up on your Motion Sensor. Beware of these sneaky tactics, or try them yourself!
- This can be fired approximately 60 meters before exploding on its own (in midair) if it hasn’t found a surface to stick to. Finding situations where you can fire a charge all the way across a map so it explodes in midair and hits enemies below is an effective way to take down their shields.
- When facing foes at mid-range, fire the charge onto the floor or a wall close to the enemy, and then detonate it immediately afterward. This usually results in a kill or, at the very least, shield depletion.
- Remember that if opponents spot a sticky charge waiting for them, they can shoot it once and blow it up on their own, retreating to avoid the explosion.
- Try firing charges so they stick onto enemies, and track them as they dash across a map; hopefully into a stronghold or a cluster of foes. Then detonate and try to take down multiple foes in the blast!
Developer Commentary
This is a really satisfying gun to use! The other thing I love about it is that it really lends itself to creativity on the part of players. I have seen members of the team employ some hilariously awesome tactics with this thing like hiding the sticky detonator projectile inside of empty vehicles, in clever locations on a map like behind grenade pickups, sticking it to a vehicle and then driving said vehicle at enemies and hopping out and detonating it, etc.
– Chris King (Lead MP Level Designer)
I love the Sticky Detonator because it’s fun to stick a few grenades on a Warthog and drive it around like a parade float with festive streamers trailing behind.
– Bill Clark (Software Development Engineer)
Frag Grenade
The Fragmentation Grenade, which has existed relatively unchanged for centuries, is used to efficiently clear any dug-in enemies.
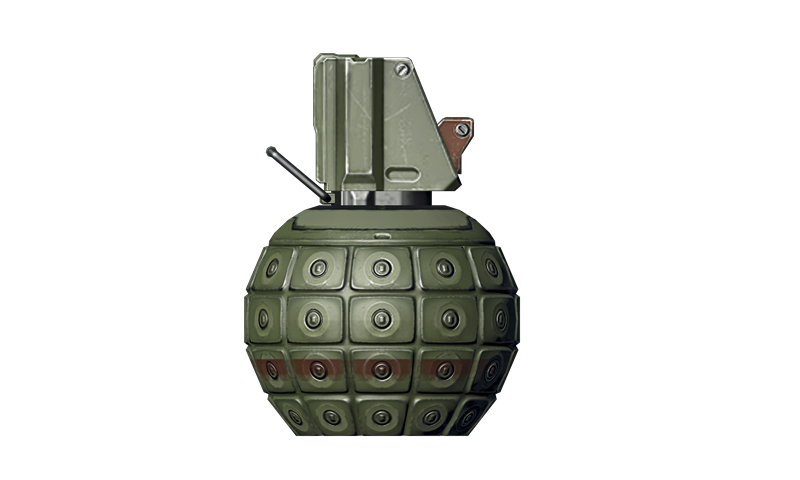
- Description: The Frag Grenade is a standard, high-explosive, dual-purpose grenade that is extremely effective against personnel, particularly those who are dug in or fixed behind cover, due to its ability to ricochet around corners.
Tactical Notes
- The Frag Grenade is the most basic but arguably the most beneficial of all the grenade types.
- This grenade is useful prior to you or your team attempting a push forward: It cripples the enemy’s shields, making them much more straightforward to clean up and kill with your mid-ranged weapons, such as the Battle Rifle, DMR, or Covenant Carbine.
- One excellent trick to try is instead of throwing the grenade at your opponent, lob it so it bounces where your foe is moving to, so they have no time to evade the explosion.
- Every map has a number of “grenade points,” places around the map where you can throw a grenade at a wall or piece of scenery and watch the grenade bounce to where your opponent is standing. Use these ricochet points to surprise your enemy. Then finish them off as their shields are removed.
covenant Weapons
Beam Rifle
Extreme-range sniper rifle, charging ionized hydrogen gas into a lethal beam of accelerated particles.
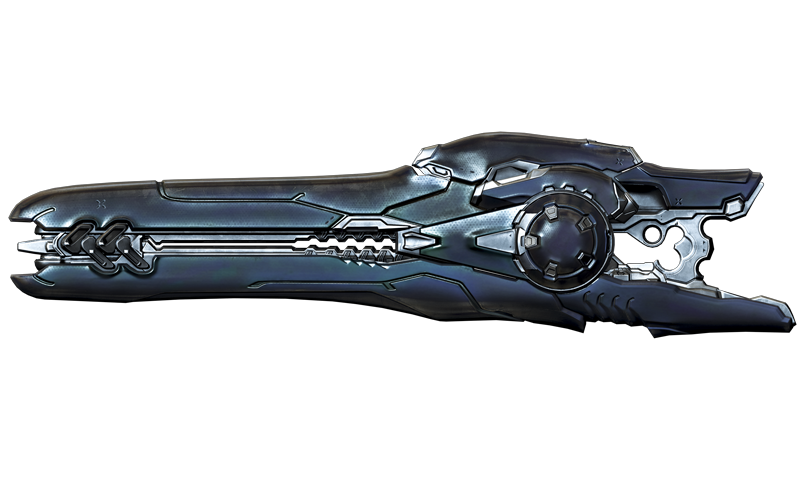
- Magazine Capacity: 10 shots
- Description: The Particle Beam Rifle is now the Covenant’s primary long-range special application weapon, used almost exclusively by scouting personnel and designated marksmen. Through the ionization of hydrogen gas and the use of a linear accelerator, a powerful beam is emitted at hypervelocity speeds, lethally striking enemy targets.
Tactical Notes
- Choose this weapon if you intend to take out enemy snipers, as it has a couple of key advantages over the Sniper Rifle.
- As is the case with all energy weapons, this gun does not need to be reloaded. However, if you fire off too many shots at a rapid pace, the gun is liable to overheat, forcing a delay in additional shots.
- Overcome this by pausing between bursts of shots. In fact, just like the Sniper Rifle, two shots to the body or a single headshot is usually enough to defeat most foes.
- The advantage this weapon has over other “sniping” weaponry is that you’re able to get two shots off more rapidly than the Sniper Rifle, allowing you to defeat rival enemy snipers much more quickly. The Beam Rifle is also slightly less cumbersome.
- Aiming for the head isn’t always necessary with this weapon because of how quickly you can get off two body shots. When the situation calls for it, don’t be afraid to go for the safer body shot.
Developer Commentary
First off, I love that the Covenant sniper weapon is back for Halo 4 . It’s been sorely missed. Secondly, the new HUD elements on the Beam Rifle when zoomed in really help to sell this as a piece of alien technology. As before, the meta-game of managing the heat of your rifle and firing on enemies means that every shot counts. Get too hasty and you’ll be looking down at your dead body in the flash of venting gas.
– David Ellis (Mission Designer)
The Beam Rifle is sick. What’s not to like about being able to clear out an enemy team with a single weapon that when used correctly doesn’t require a reload… and the sound is so satisfying.
– Kynan Pearson (Lead MP Level Designer)
Concussion Rifle
Heavy rifle which launches explosive bolts of plasma similar to Covenant mortar weapons.
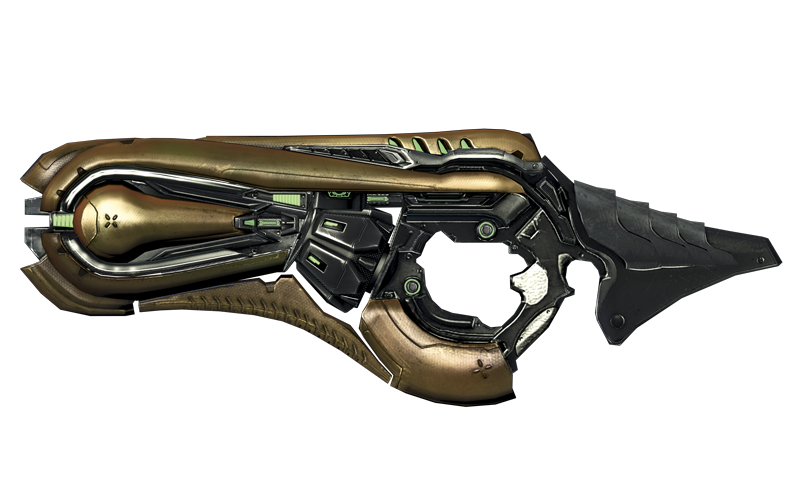
- Magazine Capacity: 6 shots
- Description: The Concussion Rifle is a short-range antimateriel weapon that launches bursts of explosively charged plasma much like other mortar weapons. Upon impact, the plasma explodes concussively, threatening opposing infantry, equipment, and even light-armored vehicles.
Tactical Notes
- Firing into groups usually results in a kill, its reliable at knocking players off ledges or into grenade blasts (when used in tandem), and it can easily overturn some vehicles if used right.
- It takes three direct shots to kill an enemy at close quarters (the only time it makes sense to use this over other weaponry), but if your foe jumps during one of your shots and are struck, they’re likely to go flying in the air, making it extremely difficult to hit with the remaining shots.
- It can be entertaining to shoot this weapon down at the ground and give yourself a boost up into the air (although using this to climb structures is far less preferable than employing a more useful weapon and moving normally).
- This weapon’s main use is to stop a Mongoose or Warthog in their tracks.
Developer Commentary
The Concussion Rifle and Brute shot have always been somewhat controversial in that players either love them or hate them – there doesn’t seem to be an in-between. The biggest change to the Halo 4 Concussion Rifle are the stronger physics impulses from the explosions along with faster projectile speed, which makes it work better in more open spaces and from a longer distance. That being said, I wouldn’t recommend trying to use this in a duel with a DMR from across the map. I love the firing rate on this weapon but IMO, the best part about it is the emergent sandbox moments you can get from the strong physics impulses on the explosion. Try drilling a speeding enemy Warthog from the side, and watch as hilarity ensues!
– Chris King (Lead MP Level Designer)
I am impressed with the precision the AI can wield the Concussion Rifle with in Spartan Ops. They are really good at juggling my lifeless body after they obliterate me.
– Chris Howard (SDE)
Covenant Carbine
Notable semi-automatic mid-range accuracy, firing ballistic rounds unlike most other Covenant weapons.
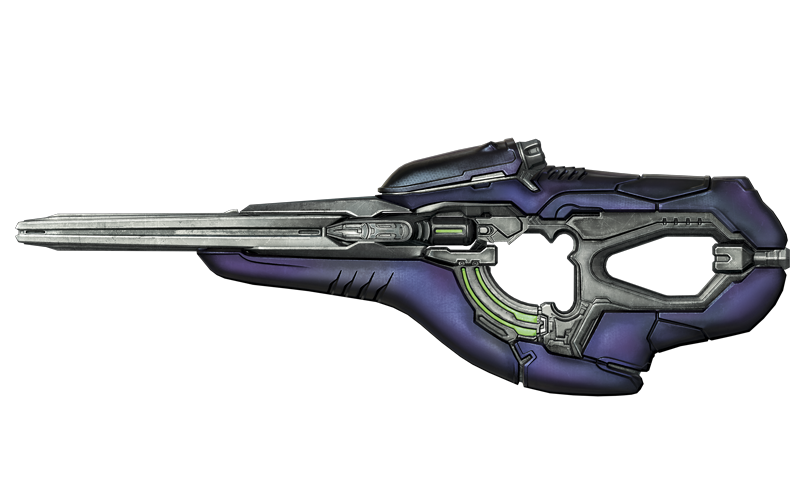
- Magazine Capacity: 18 rounds
- Description: The Covenant Carbine is a recoil-operated, semi-automatic, charger-fed marksman rifle capable of firing ballistic rounds at significant range. It is somewhat unique among Covenant weapons in that it is not dependent on superheated plasma or other energy-based material, but rather fires radioactively charged ballistic projectiles.
Tactical Notes
- This weapon usually takes eight shots to kill an opponent. This compares to the DMR and Battle Rifle, both of which use up five shots to take down a foe.
- Although this appears to be less powerful than either the DMR or Battle Rifle, the Covenant Carbine’s rate of fire makes up for its low damage.
- If you’re a marksman with extremely adept accuracy, consider choosing the Covenant Carbine, as it can take down foes more quickly than the DMR or Battle Rifle.
- This weapon is also extremely accurate, and unlike the DMR, the Covenant Carbine’s target reticle does not “bloom”; where you aim is where the bullets will impact.
- The Covenant Carbine is a great support weapon, allowing you to put a lot of damage on opponents from across the map without having to focus on finishing them with headshots.
Developer Commentary
I can’t decide if it’s the size of the bolts you fire or some other intangible, but the Covenant Carbine feels (to me) like the most accurate weapon in the game. I find it especially useful for when I’m waiting to launch an ambush. Against inexperienced foes, the barrage of rapid fire shots can cause enemies to panic and make mistakes… to their doom. As Chris mentions below, it’s great as a finishing weapon. I would recommend pairing it with a Plasma Pistol or Storm Rifle.
– David Ellis (Mission Designer)
Mathematically, this is the most lethal long-range rifle in the game in a one-on-one encounter. It fires extremely fast – double the rate of the other rifles, but it doesn’t have the range of the DMR or LightRifle, and each individual shot is relatively weak. A player that can land the bulk of their shots and manage their ammo well can be extremely successful with it, though. Because of its headshot capability, it is also a great weapon for playing cleanup with teammates (have them drop opponent shields and then score the headshot). I love using this weapon but I can only use it in short bursts. The firing rate is so fast, it makes my fingers tired after a while!
- Chris King (Lead MP Level Designer)
Energy Sword
Composed of superheated plasma, this sword remains the preferred close-quarters weapon of Elites.
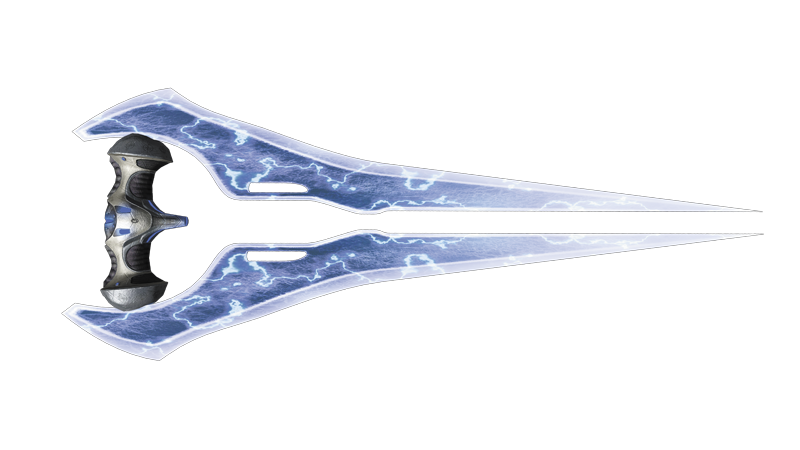
- Description: The Energy Sword, exclusively wielded by Sangheili, is a close-engagement weapon intended to express its owner’s personal skill, clerical honor, and combat viability. The blade is composed of superheated plasma and folded against magnetic lines extending from its hilt, effectively creating a razor-sharp martial weapon with lethal functionality.
Tactical Notes
- This is a close-quarter weapon only. You’re obviously at an extreme disadvantage at any range except melee.
- This Energy Sword differs from the one in Halo: Reach , where you could deflect a sword lunge with a regular weapon melee counter; it kills enemies in one strike.
- This is a great secondary weapon to stow and retrieve when you’re fighting in close quarters to gain the edge on a foe.
- When facing an enemy who is holding the Gravity Hammer, attempt to “juke” them by backing up and darting forward until the foe swings their hammer and misses, giving you a short opening to take them down.
- This sword is excellent to employ with the Speed Boost and Overshield Ordnance Drops.
- If you see an enemy with an Energy Sword, immediately slam backward on your movement thumbstick and try to keep your distance. If you have the Hardlight Shield, you can attempt to block one of their attacks if they’re already in range.
Developer Commentary
I think one of the mistakes I see people making with our sword is that now that players move faster with Sprint by default, they assume they can just run at opponents and kill them with the lunge from far away. This is a mistake – you still need to be somewhat sneaky with it. That being said, if you can restrain yourself and just use it in tight spaces, it’s as lethal as ever. Important changes include making it swing much faster than it has in the past and eliminating those pesky melee parries (no more “CLAAAAAANG!” unless the other person also has a sword). One final pro tip: when sprinting with normal weapons, if opponents shoot you, the shots will slow you down a tad. A sword wielding player is immune to this!
– Chris King (Lead MP Level Designer)
I love the sword in combination with the Thruster Pack. There’s no better feeling than sprint jumping off the roof of a building into a crowd below and then thrusting to dodge or close distance, putting you perfectly in range to cut through them all like butter.
– Kynan Pearson (Lead MP Level Designer)
Fuel Rod Cannon
Typically used against heavy armor by launching charged fuel rods which violently detonate upon impact.
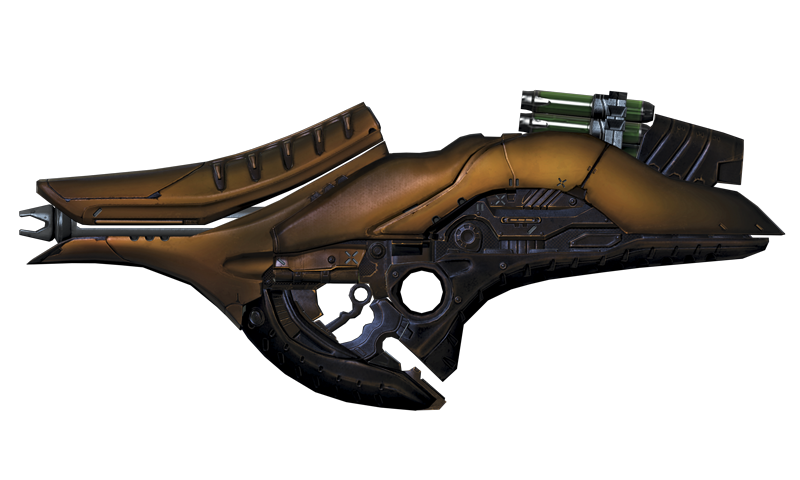
- Magazine Capacity: 5 fuel rods
- Description: The Fuel Rod Cannon is a shoulder-mounted ballistic weapon that launches extremely volatile 38 mm fuel rods at enemy targets, detonating on contact. The result is extraordinarily effective against armor, though it can be used rather viciously against infantry and other soft targets.
Tactical Notes
- This is a powerful weapon but not as damaging as a Rocket Launcher against vehicles.
- The Fuel Rod Cannon kills an opponent if you hit them directly.
- If you are moving backward or from left to right, there is a short distance in which you can aim to bounce the shots off the ground; this can lead to some epic kills!
- Although you can hit enemy infantry with this, adept foes are likely to dodge the attacks from all but the longest ranges.
- Be wary of the splash damage—you don’t want to end up killing yourself or your teammates with an ill-placed blast.
Developer Commentary
For me, the Fuel Rod Cannon sits somewhere between the Rocket Launcher and the Brute Shot, with regard to how I use it. Against Covenant or Promethean forces, you can clear out the cannon fodder with relative ease, but against more evenly matched enemies, expect to need multiple hits to drop them.
– David Ellis (Mission Designer)
Traditionally, the Fuel Rod hasn’t gotten a lot of love in Halo War Games. This has changed in Halo 4 . This is another case where I am really excited about the direction the audio and FX teams went in with the weapon. It’s not drastically different but the changes just make it feel that much more satisfying and visceral. As with the other “area of effect” weapons in the game, the projectile speeds have been increased on this one, and we’ve fine-tuned the blast radiuses just a tad. Despite the faster speeds, you will still need to land a couple Fuel Rod shots to finish off an opponent, as an individual blast isn’t powerful enough to kill someone. Because of the large magazine size on this one, it’s also great for area of denial as well.
– Chris King (Lead MP Level Designer)
Gravity Hammer
Crude yet formidable close-range Brute weapon, substantially improved by way of a powerful gravity drive.
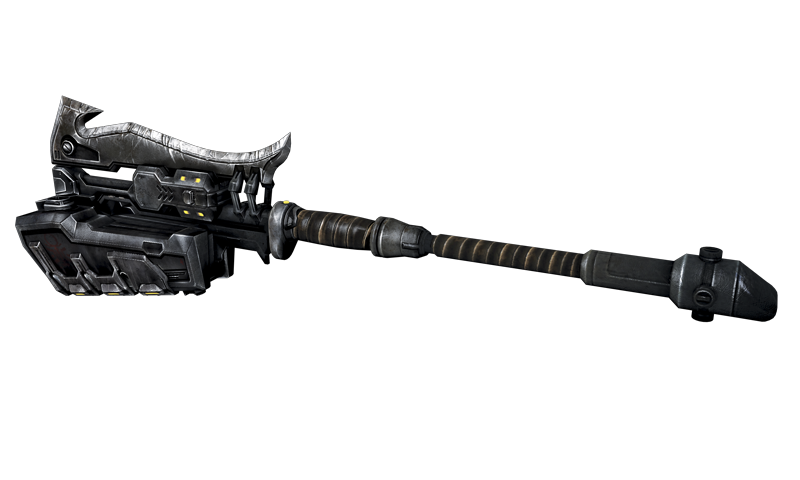
- Description: The Gravity Hammer, though rarely encountered in recent years, is a powerful close-range weapon hailing from the totemistic traditions of the previous Covenant species known as the Jiralhanae. This hammer maintains a shock-field-generating gravity drive that increases damage on impact and can manipulate localized energy fields.
Tactical Notes
- This powerful weapon excels at close-range damage and little else.
- This is the weapon to use during Grifball matches.
- Simply rush your target, strike them down, and move on. The impact crushes foes and takes them out with a single strike.
- If you encounter a foe with an Energy Sword, expect to trade blows with them unless you’re able to strike first. Timing your swing is imperative to avoid being dodged and countered.
- The Gravity Hammer is excellent to employ with the Speed Boost and Overshield Ordnance Drops.
- If you see an enemy with a Gravity Hammer, immediately slam backward on your movement thumbstick and try to keep your distance.
Developer Commentary
The saying “If it ain’t broke, don’t fix it” applies here. This is one of my all-time favorite Halo weapons. There aren’t a ton of changes that we made to it – more like nuanced tweaks. The animation speeds are a tad quicker, the area of effect has been expanded, the damage tuning tweaked but overall, it’s pretty similar to past incarnations. Probably the biggest change comes in the form of the physics impulses – they are much more powerful now to compensate for the beefier vehicles in the game. This has the awesome side effect of making the Gravity Hammer ragdoll players and objects much more than it has in the past. In short, you should expect the hammer to function similar to past versions, but with more showboating flair!
– Chris King (Lead MP Level Designer)
Needler
Exotic guided-munitions weapon, firing crystalline shards that home in, impale, and detonate on soft targets.
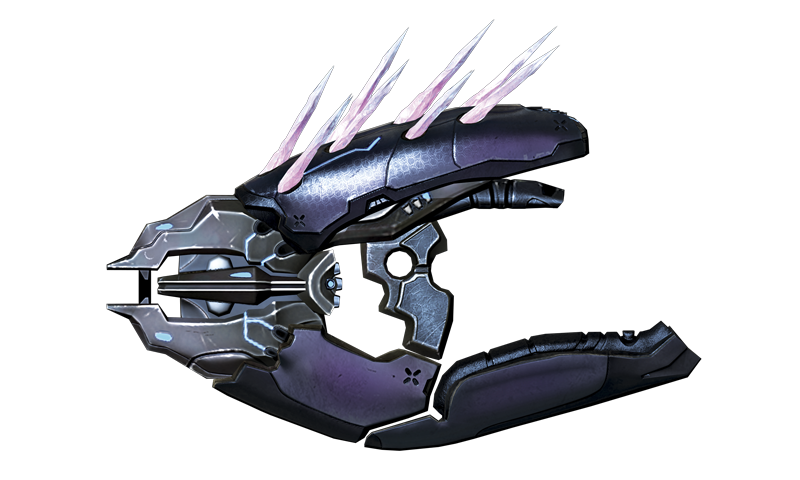
- Magazine Capacity: 22 needles
- Description: The Needler is a compact, fully automatic guided-munitions launcher that breaks off shards of chemically charged crystalline. When fired, the shards home in on sighted targets with specific heat signatures, impaling the targets just prior to simultaneously and violently detonating.
Tactical Notes
- Attempt to pick up this weapon at all times. Why? Because it’s an incredibly powerful mid-range weapon that can turn the tide against foes armed with a Battle Rifle, DMR, or Covenant Carbine.
- Even against experienced players in short-range battles, they need to hit you with all of their shots, while you unload with a stream of pink needles and (usually) emerge victorious!
- If you surprise your enemy from behind and get the first shot off, then you’re almost assured a takedown.
- The best defense is cover or dodging this weapon if you’re at sufficient range, so if you’re intending on using the Needler, it is vital to get in close or launch the attack first.
- If you hear this weapon being fired in your vicinity, it’s time to dip, duck, and dodge your way to safety.
Developer Commentary
The Halo 4 Needler is probably the most powerful version of the gun to date. I love the new, more mechanical firing sounds of the gun as it feels more visceral. One of the big changes this time around is that the needles stick to shields again (in Halo: Reach , the needles only supercombined when shields were down). This makes it deadly for sure. However, its effectiveness is tempered by the overall faster pace of the game, which gives players a better chance of avoiding the needles. If you catch an opponent off-guard, they are in for a world of hurt.
– Chris King (Lead MP Level Designer)
The Needler is so bad-ass, some of us call it the “noobler”. It feels like the Halo 2 Needler to me. It will wreck your -Yoink!
– Josh Lindquist (Sr. Software Development Engineer)
Plasma Cannon
Fully automatic energy turret, capable of being hefted into combat with limited mobility and operation.
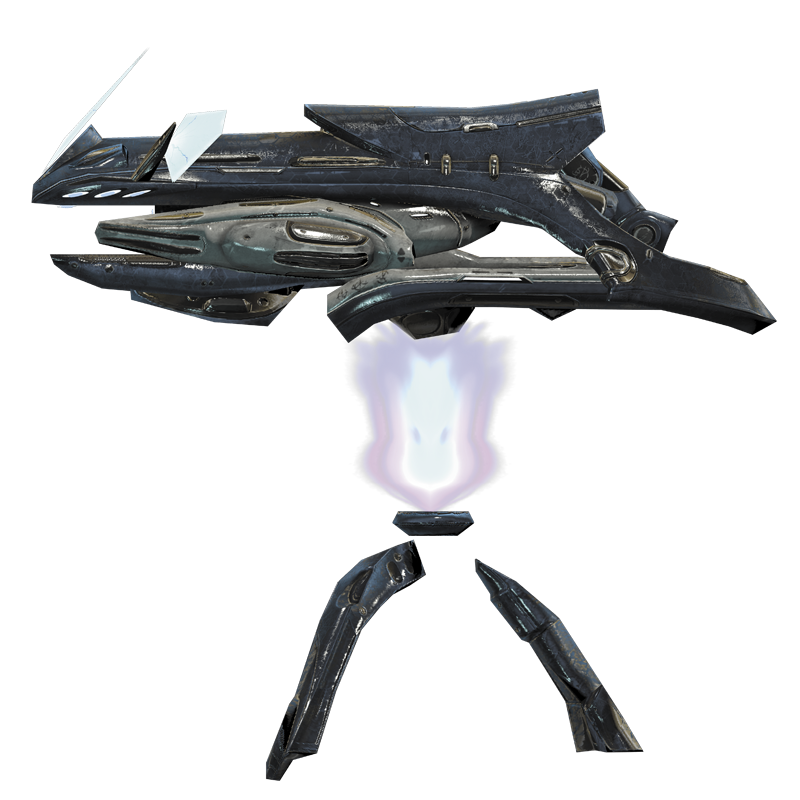
- Magazine Capacity: 255 shots (detached)
- Description: The Plasma Cannon is a fully automatic directed-energy weapon, typically mounted on a gravity-synched fulcrum tripod with the capacity for a full range of fire. A capable operator can even decouple the cannon from the mount and carry it into combat.
Tactical Notes
- This hulking great weapon is mostly used for obtaining kills at short range, just like the Machine Gun.
- Short-range takedowns are preferred, as this weapon is very inaccurate at mid- and long-ranges.
- It doesn’t overheat when detached and eventually overheats when mounted, so you may want to detach just before the Cannon gets too hot to shoot.
- The Plasma Cannon has about a 180-degree arc to aim around you. Never let enemies get behind you. If this happens, detach or flee from the turret.
- Choosing Gunner as your Support Upgrade will significantly improve your turret abilities. You’ll be able to shoot longer when attached without overheating, and you’ll get more ammo and move significantly faster when detached, turning the Plasma Cannon from a situational weapon to a deadly force.
Plasma Grenade
The Plasma Grenade, when triggered, is engulfed in latent plasma, allowing it to cling to targets before detonating.
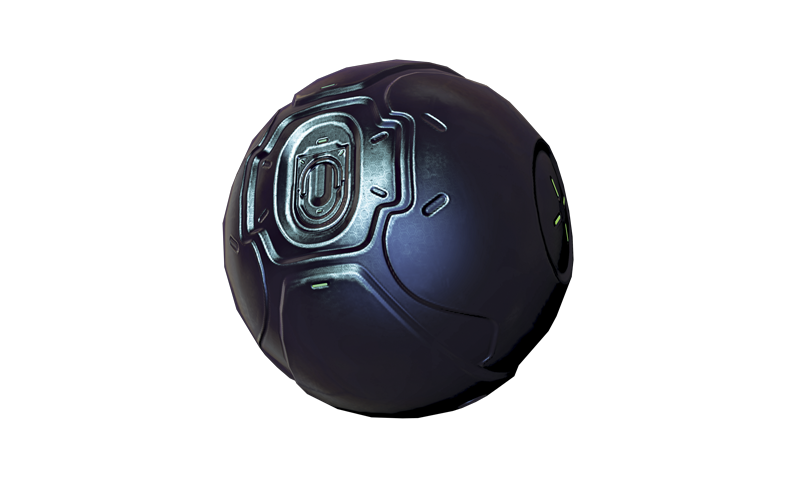
- Description: The Plasma Grenade is the Covenant’s primary explosive, which, when triggered, becomes engulfed in latent plasma, allowing it to cling to specific heat signatures before violently exploding on a timed fuse. This grenade is particularly useful against vehicles, as targets with larger silhouettes are more susceptible to the explosive’s adhesive properties.
Tactical Notes
- A Plasma Grenade packs a lot of power but is easily dodged by opponents.
- Therefore, this grenade is most effective when you’re trying to stick it onto an enemy.
- This is also useful when trying to stop or slow an enemy as they try to escape along a route well trafficked by your foes. For example, if you’re winning a 1v1 battle, throw one of these grenades behind the enemy so they won’t attempt to run away; instead they have to commit to combat with you, even though they are weakened.
- This is also an excellent grenade to lob onto vehicles, since you can stick them to the surface, and the ensuing explosion slows or destroys the vehicle.
Plasma Pistol
Semi-automatic energy weapon capable of a scaled-burst effect which disables electronics.
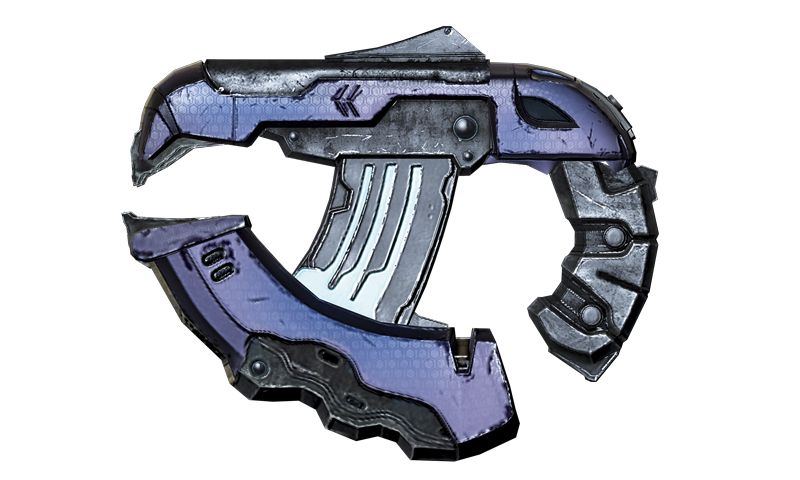
- Magazine Capacity: 50 shots, 5 charged shots
- Description: The Plasma Pistol is the standard sidearm for most Covenant infantry. Typically used as a semi-automatic, directed-energy pistol, this weapon’s scaled burst functionality allows it to fire an overcharged collection of plasma, temporarily incapacitating the power systems on both armor and vehicles.
Tactical Notes
- The Plasma Pistol is a powerful weapon to combine with a mid- or long-range primary weapon.
- Charge the weapon by holding down your shooting trigger, wait for a lock-on symbol around your target reticle, and then release the trigger to shoot a charged bolt that depletes the enemy’s shields. This allows you to shoot them (ideally in the head) with your primary weapon, such as the Battle Rifle, DMR, or Covenant Carbine.
- It’s often advantageous to dash around with this weapon charged, priming it in case you run into an enemy. However, this drains your energy quickly, and the key to using this weapon successfully is learning when to time your charge (usually when you see a foe or know you’re able to engage one) and when to hold off (when no threats present themselves or when employing a different weapon).
- Don’t become fixated on the charged shot; it’s also an excellent idea to rapidly fire the Plasma Pistol at foes in close quarters and drain their shields using this technique as well.
- The Plasma Pistol is useful in Big Team Battle variants, as you’re able to use the EMP (Electromagnetic Pulse) on vehicles, stopping them quickly if you don’t have a heavy-duty weapon for the job.
Developer Commentary
Don’t be deceived by the toy-ish looks. This is a powerful gun! To be effective with the normal shot, you will need to use it at close-ranges because the projectiles are extremely slow relative to other weapons. And since players spawn with it from the get-go as a secondary weapon, we’ve had to retune the number of charge shots down from the past (when charging, the energy drains pretty quickly in War Games compared to the past). It’s still a great choice, though, especially on vehicle maps. If you are a fan of the Noob Combo, I’d recommend trying to scavenge a Magnum as a backup. The Halo 4 pistols all have faster animation timings than in the past, allowing you to switch to them faster than any other weapon in the game. Charged Plasma Shot + Magnum headshot = WIN!
– Chris King (Lead MP Level Designer)
Storm Rifle
Fully automatic energy weapon widely considered the successor to the traditional Plasma Rifle.
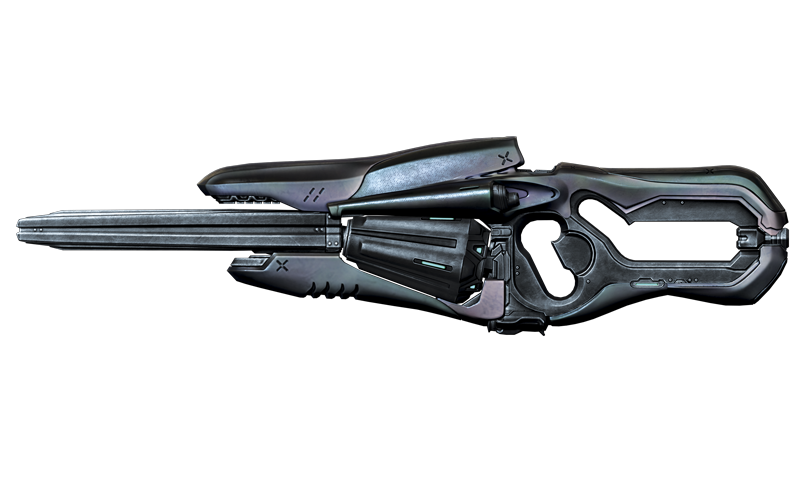
- Magazine Capacity: 166 shots
- Description: The Storm Rifle is the evolution of the standard Plasma Rifle and served various infantry during the violent Sangheili civil conflicts that followed the Covenant War. The weapon now includes a modular coil set, a high-mounted cooling shroud, and an extended barrel, all contributing to greater overall performance in the field.
Tactical Notes
- The Storm Rifle is a powerful weapon for short- and mid-range firing.
- Its main purpose is to knock down the shields of an opponent very rapidly.
- For best results, carry this with a Battle Rifle, DMR, Covenant Carbine, LightRifle, or Magnum, and then switch to one of those weapons to finish the foe off, once their shields are whittled down.
- You can also pair this weapon with a nice melee to your opponent’s face, resulting in some phenomenally quick kills.
- Like the assault rifle, if you choose to rock this as your primary weapon in FFA games, you may see your kills picked off by opponents wielding headshot-capable weapons.
Developer Commentary
The Storm Rifle fills a role similar to that of the UNSC Assault Rifle, but somehow the Storm Rifle is just plain more frightening to come up against. Early in development, there weren’t a lot of people using this weapon, despite how effective it was at close-range. That changed overnight when the weapons effects and sounds started to come online.
– David Ellis (Mission Designer)
This is a fantastic close-range weapon, once you figure out the rhythm on the overheat. I especially love using this weapon on smaller maps or in tight areas as it’s incredibly lethal. It doesn’t have the range or accuracy of the AR but if you manage the heat well, you can continue firing for quite a while and it will give you a significant advantage over other weapons that require longer reloads. It takes some getting used to, though. If you just hold the trigger down and let the gun reach its overheat state, you are faced with a long cool down penalty.
– Chris King (Lead MP Level Designer)
forerunner Weapons
Binary Rifle
Extreme-range sniper rifle, designed to take down heavily armored infantry.
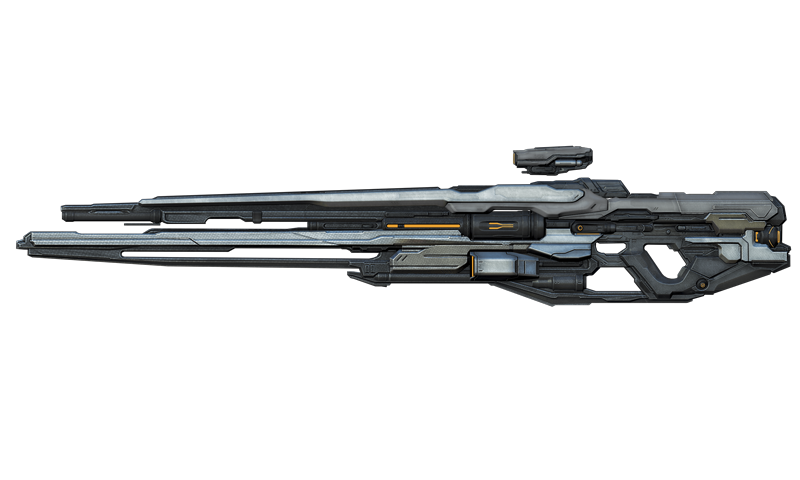
- Magazine Capacity: 2 shots
- Description: The Binary Rifle leverages the power of twin, core-mounted particle accelerators, offering the ability to neutralize enemies with a single shot, even those of considerable mass. The Binary Rifle was specifically designed to deal with the threat of the Flood, allowing infantry to snipe at extreme ranges with unparalleled accuracy and stopping power.
Tactical Notes
- This weapon is thoroughly recommended by MLG, which they refer to as “the Boss” and with good reason—it’s unstoppable!
- This weapon is a one-hit kill no matter where you shoot your enemy. Have you hit your foe with this? Then they won’t be getting up again. Line up more foes one behind another for multihit kills!
- However, the Binary Rifle has only two bullets per clip (although this is compensated for by the power each blast inflicts).
- This weapon also has a disadvantage when zoomed in; it emits three red lasers from your sights to the location where you’re aiming, therefore giving the enemy notice prior to their execution.
- The laser sight could also be seen as an advantage, intimidating an opponent and startling them off their combat plans as they realize this extremely powerful rifle has targeted them.
- Combine this with the Promethean Vision for extremely satisfying enemy takedowns.
Developer Commentary
Poo-inducing. That’s how I describe the gut-clenching terror shuddering through my body every time I see the telltale laser sight of the Binary Rifle projecting across the map. Unlike other sniper rifles, this beastly harbinger of death is a one-hit kill rifle. ONE HIT. It’s a pretty rare ordnance drop and in Matchmaking, it doesn’t carry much ammo. But if you see the HUD marker announcing its arrival on the battlefield, RUN. Either towards the Binary Rifle in a mad scramble or away as fast as possible in the hopes that person wielding this weapon has difficulties tracking targets over extreme distances.
– David Ellis (Mission Designer)
The Binary Rifle is my favorite Halo power weapon ever. It’s like Christmas every time you pick it up. A one-hit kill no matter where you hit an enemy. It’s sooo good when you just barely clip someone’s foot and then watch as they fragment into thousands of angry burning embers. I also love that even though it’s incredibly powerful, when someone is zoomed in and looking to take a shot, you can see a laser leading to everything they are looking at. Points you right to where they are.
– Kynan Pearson (Lead MP Level Designer)
Boltshot
Forerunner particle dilator used for both its precision at mid-range and its burst functionality when up close.
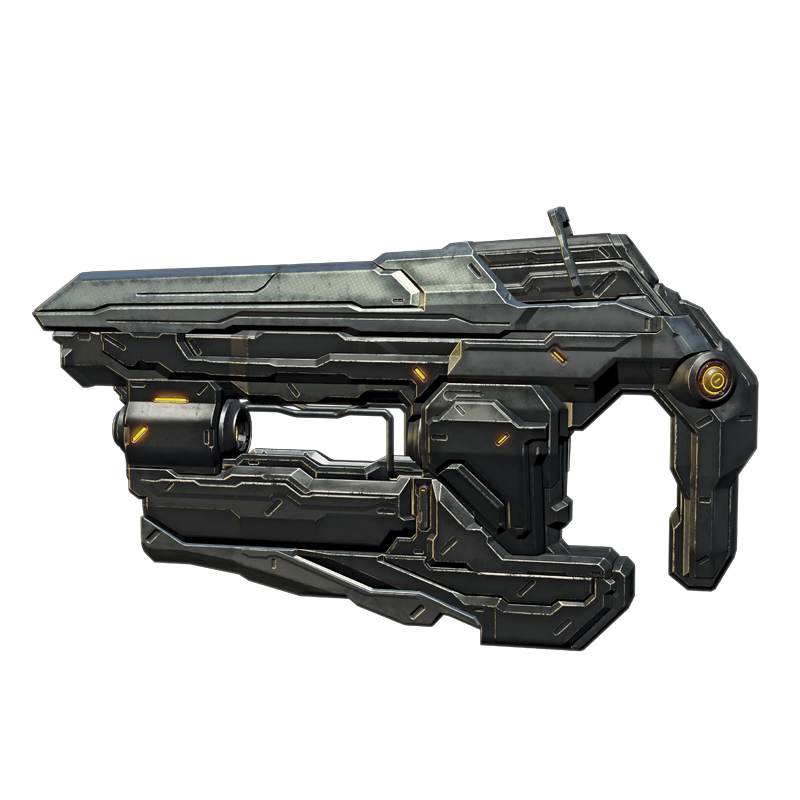
- Magazine Capacity: 10 shots, 2 charged shots
- Description: The Boltshot is a close-range particle dilator designed for precision-based infantry combat against organic material. The Forerunners began using weapons like these toward the end of the first century of their prodigious conflict with the Flood, and continued to do so till its conclusion 200 years later.
Tactical Notes
- Use this weapon for it’s single fire accuracy, solid rate of fire, or charged shot.
- This weapon is primarily used to extract you out of a problematic situation when enemies are closing in on your location and other (or preferred) weapons are not available.
- Although you can utilize the Boltshot as a typical “pistol” by pulling the trigger, try holding the trigger to release a powerful charged shot that can kill even a fully shielded enemy.
- Practice holding and releasing the charged shot, and then employ it to really infuriate your foes! Play “possum” by staying by a wall or in cover, and bait your foe, beckoning them in close before giving them the business end of a charged Boltshot.
- Do not underestimate this weapon—charging a weak player with a Boltshot is a surefire way to end up on the wrong side of a tea bag.
Developer Commentary
The Boltshot has become my go-to sidearm in MP because of the double functionality of the charge blast. Nailing someone coming around the corner with a one-shot kill is always satisfying.
– Paul Featherstone (Assistant Director of Photography)
I love the Boltshot because of its secondary fire mode. It’s the ultimate risk/reward trade-off: you have to start charging at exactly the right time or the blast will fire before your enemy is at point-blank range. Get your timing right, though, and this handy little Forerunner pistol will send your opponents straight to Death Cam with a single shot. Unleashing the Boltshot on an unsuspecting player coming around a corner is immensely satisfying. It’s also a great weapon to pair with weapons that are more effective at longer ranges, like the Battle Rifle, DMR, and LightRifle. Charging opponents wielding short-range weapons got you down? Don’t worry, a couple of encounters with your trusty Boltshot will make them think twice about coming near you, making it that much easier to pick them off with a series of well-aimed headshots from your rifle of choice.
– Sam Wolpert (SDE)
Incineration Cannon
Extremely powerful shoulder-mounted particle weapon with an explosive after effect.
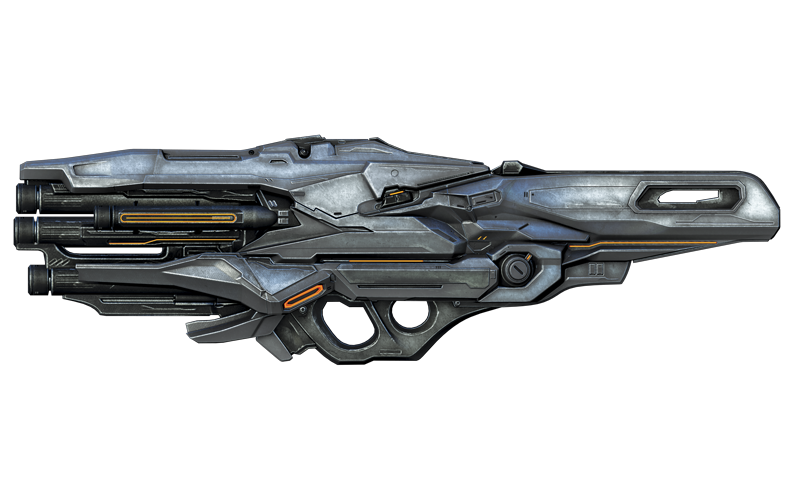
- Magazine Capacity: 1 shot
- Description: The Incineration Cannon is a shoulder-mounted munitions launcher that fires a high concentration of explosive particles along multiple streams, typically generating obliterative results. Such a weapon is equally effective against single enemy combatants and vehicles.
Tactical Notes
- Think of the Incineration Cannon as a rocket launcher on steroids. It should be given a wide berth, but use one against foes for a quick death.
- After the initial explosion, several additional detonations shoot out from the impact point, causing massive damage.
- Naturally, this takes down your enemies in a single shot, and all vehicles as well (as long as the secondary explosions connect).
- This weapon is to be feared.
- Use this weapon with precaution when around teammates, as the explosion radius doesn’t care whether you’re friend or foe.
Developer Commentary
This is another Forerunner weapon that has the ability to incinerate opponents. This can lead to especially impressive multi-kills given the large area-of-effect/submunitions. Not too long ago, I was able to kill four enemies with one shot, and watching them all dissolve in front of me was about as satisfying as it gets. Another cool moment I witnessed with this one involved a teammate firing it near a speeding Warthog with three enemy passengers, all of which were killed and starting dissolving while seated in the ‘Hog. Rad! Worth noting here, this weapon has an especially long reload time; you have to reload between every shot, and the projectile itself is fairly slow. This means you really need to connect with your shot, or you will be at a disadvantage to your opponents.
– Chris King (Lead MP Level Designer)
This thing is a beast. If you see it pop up on your HUD, get ready with your grenades as you close distance because there’s going to be another few Spartans making a beeline for it. Once you have this beauty in your hands, aim carefully because you have to reload after each shot. But it’s so very, very worth it: the gentle pull of the trigger sends out a number of projectiles weaving towards your foe. Upon impact, these projectiles then blossom out from the initial detonation into a cascade of secondary explosions. Nothing feels better than slamming a fresh round into the cannon while watching three or four of your enemies disintegrate into electronic dust.
– Tom Mathews (SDE II)
Lightrifle
Precision weapon that fires beams of hard light for mid-range to long-range combat.
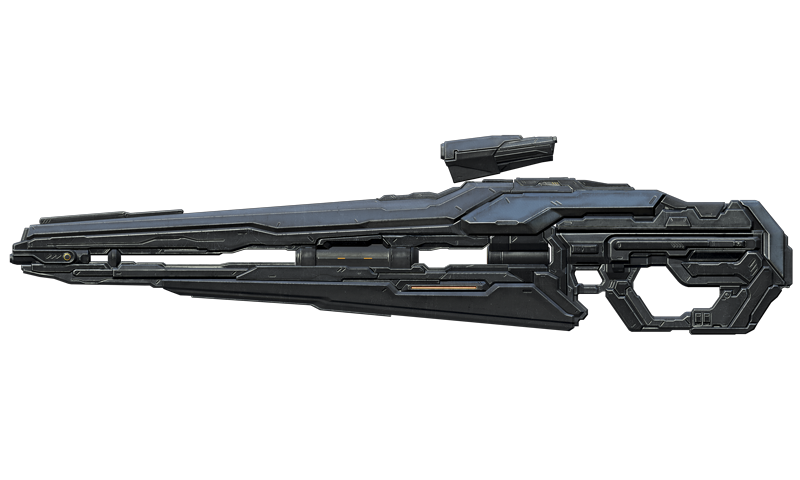
- Magazine Capacity: 36 shots, 12 (scoped)
- Description: The LightRifle was originally designed to achieve precision-based sniping with light-mass componential particle acceleration. The overall effect of the weapon is impressive, accurately firing a collection of hard light particles toward a target at incredible speed.
Tactical Notes
- It takes five shots to kill a foe using this weapon. However, if you zoom in with the LightRifle, you can drop a foe in four shots.
- When looking through the scope, if you strike a foe with every shot, you can remove three enemies using a single clip, making this a more impressive piece of equipment to use for those with excellent accuracy to their shots.
- This is a weapon that a talented player can use supremely well.
- If you see an enemy using this weapon, be sure to get in their face to counteract the increased damage dealt when zoomed. If they’re foolish enough to try and zoom in a close-range battle, you’ll find them easy prey.
Developer Commentary
Best of both worlds, master of subtlety, these are terms that I just wrote to describe the LightRifle. Neither quite captures the complexity of this piece of kit. I find both firing modes are a tiny bit less forgiving than the DMR and Battle Rifle, but definitely put in the time to master the subtle idiosyncrasies of the LR. Your efforts will be rewarded.
– David Ellis (Mission Designer)
The LightRifle is a long-range semi-auto precision rifle. It features a 3x zoom, hitscan projectiles that do headshots, but, most importantly, it features two firing modes. The best way to think of it is a hybrid of the Battle Rifle and DMR. When firing from the hip, it fires in three-round bursts, similar to a Battle Rifle. Once the player zooms however, the gun switches over to a more powerful firing mode and combines the normal three projectiles into a singular shot. When zoomed, the LightRifle can kill a Spartan in four shots (w/headshot). That being said, there are still tradeoffs here that make it balanced in line with the other semi-auto weapons. It fires slightly slower when zoomed, and it’s just a smidge less viable from the hip versus the other stuff. Overall, this is a formidable weapon and has developed a cult following internally at 343.
– Chris King (Lead MP Level Designer)
Suppressor
Fully automatic Forerunner infantry weapon, firing bolts of hard light in rapidly accelerating succession.
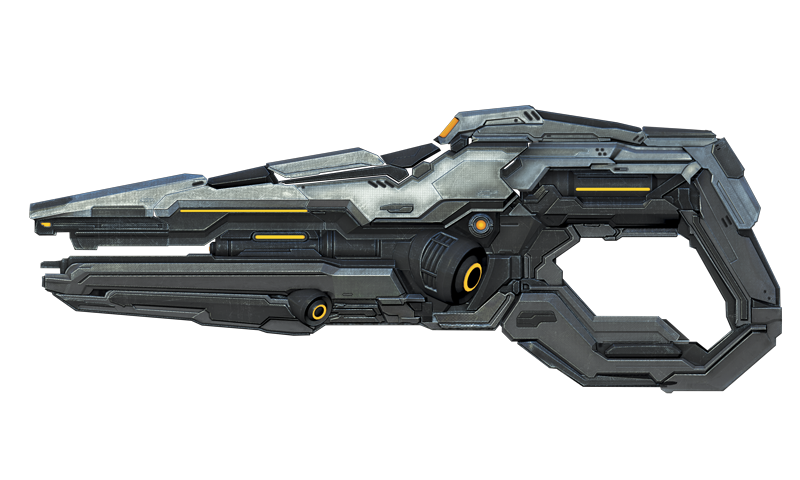
- Magazine Capacity: 48 bolts
- Description: The Suppressor leverages a classic coil set architecture, accelerating charged bolts of hard light energy at high speeds toward enemy personnel. This weapon eventually proved to be an integral part of the Forerunner’s arsenal when battling the Flood but remains incredibly useful against any and all organic material.
Tactical Notes
- This weapon is extremely effective at short ranges. However, move away from closer combat and you’ll find this much more problematic at taking down foes.
- It is definitely wise to get the jump on enemies and shoot first, as you can quickly remove them as a threat if they’re within range.
- This is another weapon that can take down an enemy quickly when paired with a melee.
- This weapon has an SMG quality to it, so if you’ve familiarized yourself with that weapon in previous Halo games, you’ll feel comfortable with the Suppressor right away.
- Contrary to its name, this weapon isn’t silent—you’ll still show up on Motion Sensor when firing it, and your weapon emanates enough noise to draw nearby enemies to your location.
Developer Commentary
If you like close-quarters combat in tight spaces, this is the gun for you! Individual shots are relatively weak, but it more than makes up for it with sheer brute force. It features an enormous clip (48 bullets) and the fastest firing rate of any of the fully-auto primary weapons (roughly 150% faster firing than the AR or Storm Rifle). The projectiles slow down over time so to be effective, you really need to use it like an SMG, although you can still psychologically overwhelm enemies at range with a barrage of projectiles. I find myself always rolling with the Suppressor on Adrift as the tight hallways really favor the strengths of the gun. It’s oh-so-satisfying to have someone come around a corner and be able to unload half a clip into them before they even realize what hit them.
- Chris King (Lead MP Level Designer)
At very close-range, the Suppressor lays down the smack far more quickly than either the AR or Storm Rifle. It’s a great weapon in maps such as Adrift where you have plenty of cover and corners. If you play the ambush game or use cover to quickly close distance, you can be devastating with it. The Suppressor’s effective range drops off quickly, so you don’t want to get caught in the open or a long hallway with it. Pair that sucker with some form of precision weaponry - a Magnum or use the Firepower Tactical Package to get a second precision primary.
- Brad Welch (Lead Designer)
Scattershot
Close-combat weapon with a deadly blast at short-range and a versatile ricochet effect against hard surfaces.
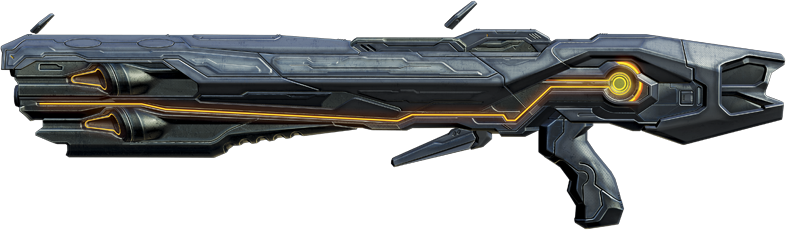
- Magazine Capacity: 5 shots
- Description: The Scattershot is a prominent Forerunner channel weapon that was used for close-range defense toward the end of their war with the Flood. While practically unstoppable up close, the most remarkable attribute of the Scattershot is its schismatic dispersal effect, allowing its particles to strategically ricochet off hard surfaces.
Tactical Notes
- This is an excellent (and new) alternative to the Shotgun.
- It has a longer range than the Shotgun and can inflict damage at almost twice the speed.
- However, the impact damage is weaker. Still, the range and speed make up for this deficit.
- If you kill your enemy and every spread of the Scattershot’s bullet blast connects, expect to witness an impressive death!
- Do you have an enemy behind you but don’t think you’ll have time to turn around and blast them? Then aim at a wall in front of you and avoid the ricochet. Use this “bullet bounce” plan to shoot around corners at hiding or incoming enemies too.
Developer Commentary
I love the Scattershot because it’s so much freaking fun to use. I can’t compare it to any other weapon. You can aim for your target like most weapons, which is no doubt how you will fire it for the first time like I did, but once I understood the projectiles and how they ricochet off hard surfaces (the non-meat-made surfaces), I started using it more strategically – aiming at floors, walls and ceilings. I’ve been able to bounce shots off corners and nail players, taking out shields then going in for the death blow. (It’s true, I have been known to shriek wildly when I get one of these in a game).
– Vic DeLeon (Lead Mission Artist)
By now, I’m sure most people are pretty familiar with this one. It’s a Forerunner shotgun, with ricocheting bullets that allow for really interesting tactics in tight spaces. Oh, and if you blast a guy up close, you get that totally sweet Forerunner incineration effect. This gun is definitely in my top three favorite power weapons. The FX, the animations, and it’s just so satisfying to fire. If you use it correctly, you can go on an absolute terror. One pro-tip – I see some people try to use this from longer distances than they should. Don’t be fooled by the projectiles; this weapon is lethal up close but you won’t have much luck starting a dual against a DMR player 100’ away.
– Chris King (Lead MP Level Designer)
Pulse Grenade
The Pulse Grenade forcefully detonates and forms a hazardous ionization sphere which eventually collapses, destroying any nearby targets.
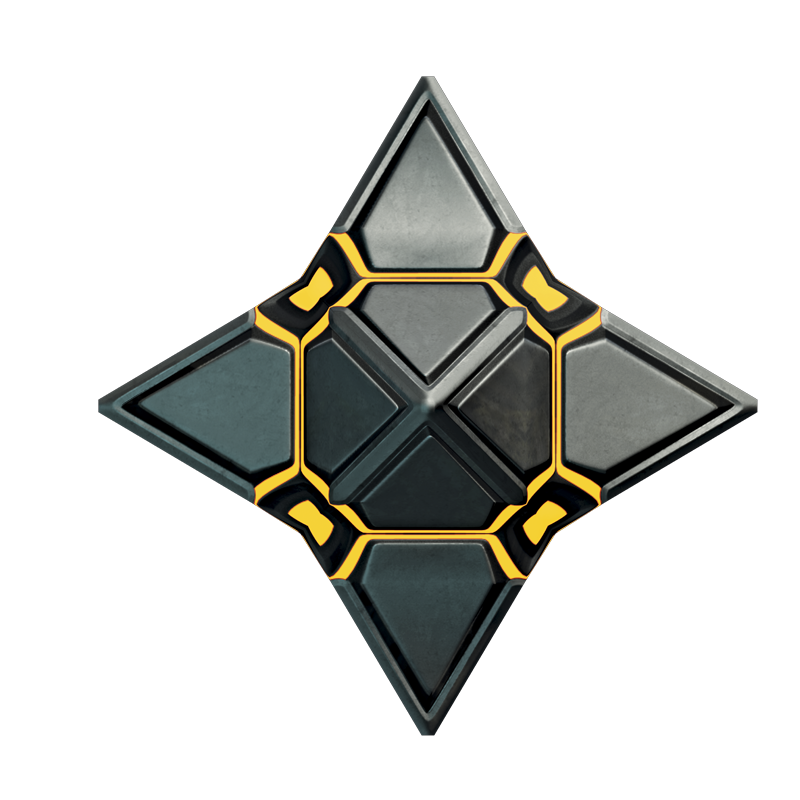
- Description: The Pulse Grenade is a field-generating attenuation device used to damage any targets which fall within its ionization radius, eventually collapsing in a violent and deadly pulse of energy. This device appears to have been used to clear locations where the Flood had sufficient room to gather, organize, and grow, such as the vast redoubts formed during the parasite’s Coordinated Stage.
Tactical Notes
- When you throw this grenade, the impact point becomes the center of a radius that charges up and drains enemy shields if they pass through, and then the grenade detonates.
- This is very effective if your foes are trying to push through in close-quarter combat and are attempting to reach you. Instead, they must step through a shield-removing grenade radius, becoming considerably weaker in the process.
- These grenades don’t stick onto opponents, so you’re likely to use them to force foes to move in a different direction. Try blocking your foe’s preferred paths with these grenades, then “herd” them to a hot spot where your teammates have an ambush ready.
- This works very well against vehicles, as it drains your foe’s shields even when they drive through the grenade’s radius.
When detonated it releases a pulse blast, damaging players in its spherical radius. The sphere of energy eventually collapses on itself, disintegrating anything in radius.