
Halo 4 Guide Infinity Infinity Multiplayer
Top 7: Weapons
These seven weapons are the ones you don’t want to pass up if you come across them on the battlefield. Pick these up at all costs, even if just to keep them out of your enemy’s hands. Just remember to do your best to properly pair it with your existing weapons. Don’t end up with two snipers or two shotguns, severing your ability to compete in specific combat scenarios unless you properly weigh the risks.
1. Binary Rifle
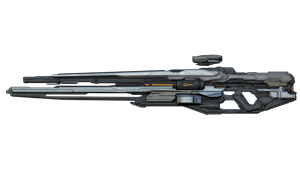
This weapon is referred to as “the Boss” by the MLG players. Everyone who loved sniping in the past Halo games is going to love this new one-shot killing machine. There’s never been a weapon like this in any previous Halo game, so you can only imagine how surprised your opponents will be when you’re killing them with this weapon. Prepare for your foes to flee when they spot the three red lasers the gun emits when you’re zoomed in. This weapon is mostly for mid- to long-range fights but can still be deadly at close range if you master the no-scope.
You have only two shots per clip, so make them count. You don’t get zoomed out when you’re struck by an enemy’s shot either, so line up your reticle and fire away! In addition, you receive a total of six bullets: These should be six guaranteed kills. If this weapon appears in an ordnance drop, it is your number-one priority to make sure you or your team retrieves it first. The only counter to this weapon is the Hardlight Shield. You do not want this in your opponent’s hands!
2. Incineration Cannon
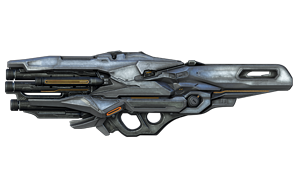
Think of this weapon as a Rocket Launcher on steroids! Its splash damage covers a larger area than a normal rocket, making it exceptional for short- or mid-range fights. The weapon is pretty much unstoppable when it comes to taking down all vehicles with one direct shot. This is the optimal piece of killing equipment to have on a vehicle-friendly map.
3. Rocket Launcher
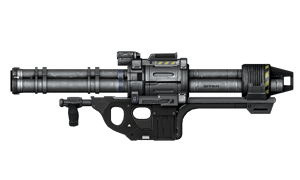
This is another weapon that excels on vehicle-friendly (and smaller) maps, as you’re able to take down and inflict massive damage on vehicles. It also excels at taking down numbers of foes with its splash damage, as long as your foes are clustered near one another. It has an advantage over the Incineration Cannon too: You can fire off two rockets before needing to reload (compared to one with the Cannon); if you shoot a “Puckett” rocket (named after MLG commentator “Chris Puckett,” who’s known for his inability to net kills with the Rocket Launcher) at your enemy on your first attempt, you still have another chance to take down your opponent.
4. Sniper Rifle
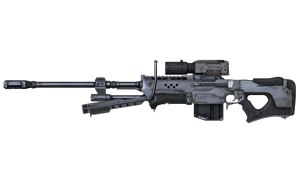
This has always been a firm favorite; those playing previous Halo games know sniping is always entertaining! You have four shots in the rifle’s clip, and these can take down an entire team with headshots before you need to reload! By placing yourself behind the rest of your team, you can pick enemies off while your team draws attention away from your position. This weapon is supremely adept at dropping foes and is exceptional at mid- or long-range battles. Even at close range, when you master the no-scope firing, it is lethal.
5. ScatterShot
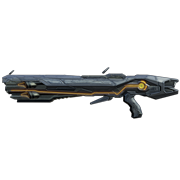
Think of this as the evolution of the UNSC Shotgun. It fires almost twice as quickly and has almost double the range. This is an extremely important weapon to carry on every one of the small enclosed maps or in tight or restrictive areas. You can take down multiple enemies with a single clip. Try sneaking up on your foes brandishing this gun, and they won’t know what hit them! If you need to take control in a close-range battle, bring this out; it is unbelievably powerful in 1v1 close-range fights!
6. SAW
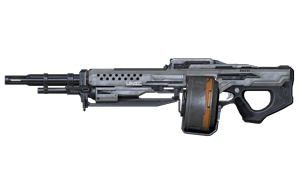
The SAW is an exceptional weapon. It is spectacular in short-range fights and works very well at mid-range as well. Compared to other short- to mid-range weapons, this one has more than the edge, simply because it partners extreme power with fast killing potential. Just aim at your adversary and spray away!
7. Beam Rifle
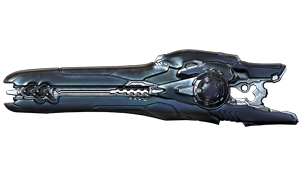
The Beam Rifle is one of the best sniping weapons available. It may not have the same power as a Binary Rifle, but it certainly stands up to the Sniper Rifle for sheer killing power and accuracy. It retains its accuracy even while fired from the hip, which allows for some amazing snapshots. What makes the Beam Rifle unique is that unlike the other two sniping weapons, it does not need to reload after two, four or even six shots. A fresh Beam Rifle comes with ten shots in the battery, and the only thing that will slow it down is if it overheats.You will not have to break visual contact with a potential victim just to reload, so you can stay scoped in on a target for follow-up shots.
Of course, the potential for overheating a Beam Rifle means that you will have to control your trigger finger and not fire the weapon too rapidly. However, even with this restriction, you can still put more shots on a target faster than the other two sniping weapons.
Big Team Battle: General Tactics
.jpg)
The large-scale and bewildering Big Team Battles require a different mind-set. Here’s the information to pour into your brain.
When the maps are large and the vehicles are rolling, you need a specific set of tactical plans to emerge victorious. If you want to survive and thrive at Big Team Battle games, be sure to familiarize yourself with the following loadouts and tactical knowledge.
Big Team Battles (BTBs) are predominantly played on Halo 4 ’s large maps:
BTB Loadout Planning
Make sure that you have a good balance of loadouts throughout your team of eight so you can take advantage of as many armor abilities, Tactical Packages, Support Upgrades, and weapons as you need.
Primary Weapons
Choose primary weapons that are the most dangerous at long range, such as the DMR and the LightRifle. And you can never go wrong with picking the Battle Rifle. If you have “Firepower” on, then definitely pick at least one of the long-range weapons (DMR or LightRifle).
Secondary Weapons
The best option is definitely the Plasma Pistol, simply because you can stall vehicles with EMP and therefore take them down much more easily. You can also never go wrong with the Boltshot, which makes your close-range combat untouchable (when charging the weapon up) if the situation presents itself.
Grenades
Any of the three grenade types are a good option: Frag Grenades are the most basic grenade to choose for obvious reasons; they can get you some kills, but Plasma Grenades could be a better option, as you can stick them to vehicles (like the Banshee or Ghost) and inflict some serious and crippling damage.
armor abilities
Promethean Vision, Jet Pack, Hardlight Shield, and the Regeneration Field are the best choices. Promethean vision is good for every game type, but make sure that some teammates choose a different ability: Have two or three players with Promethean Vision and have the other players use a combination of the other Abilities previously mentioned. The Regeneration Field is very useful if you have multiple teammates next to you; drop it down to heal them all if the situation presents itself.
Tactical Packages
You can never go wrong picking Mobility, Shielding, AA Efficiency, or Firepower, but the Tactical Package to really consider is Wheelman. This increases the long-term durability of your vehicle and reduces the downtime if your vehicle gets hit with an EMP. Having this is incredibly important in BTB, because vehicles are such a large factor in controlling and dominating large maps: Having your designated driver or pilot players opting for Wheelman makes it a lot more difficult for the opposing team to take down your vehicles.
Support Upgrades
Ammo, Dexterity, Sensor, Stability, Stealth, or Nemesis are all great choices, but having a couple players on your team with Gunner and Drop Recon is very important. When playing BTB, there is a lot of turret usage (mounted or detached) throughout the game from Warthogs and Scorpions. Having teammates with Gunner allows them to dominate more with the Warthog (or any other vehicles with turrets that overheat), since the overheating time is greatly increased, which in turn leads to nonstop shooting.
Detaching turrets is a lot more powerful, since you can run a lot faster and catch other players off guard by taking them down very quickly with this strong weapon. Turrets are a critical part of BTB gameplay. Having a player with Drop Recon as well allows them to call out what and where the weapons are dropping 10 seconds before they appear on the map. This is crucial for controlling the power weapons (such as rockets or the Spartan Laser), and these power weapons are your best bet for taking down enemy vehicles.
Vehicle Command and Control
.jpg)
Every Big Team Battle player’s worst nightmare.
Before starting a BTB game, be sure you’ve already planned who is controlling each of the vehicles (including who is running to each particular vehicle). Those players should be equipped with Wheelman or Gunner in their loadouts; their mission is to begin controlling the map with vehicles from the very start. Having vehicles under your team’s control and using them properly are the main keys to victory. Knowing where each vehicle spawns at the start makes it easier to plan which of your team is going for vehicles, so no vehicle is left behind. Treating vehicles like power weapons, and controlling both the vehicles and power weapons, allows your team to dictate the pace of play.
Employ vehicles like the Warthog, Mongoose, and Ghost to charge an enemy base or objective. Attempting an impressive team push with the Warthog or Mongoose allows your team to (for example) pick up the enemy’s flag and immediately mount a vehicle to make an escape back to your own base and score. Using the Ghost to quickly boost across the map is an excellent way to head behind enemy lines and start to outflank them.
Employ vehicles like the Scorpion, Wraith, Mantis, or Banshee to rack up the kills. In particular, the Ghost can potentially be one of the most dominant vehicles on the field. Combining speed and accurate Plasma Cannons, a good Ghost driver can be a nightmare to deal with. Staying alive and playing a little more passively allows you to keep control of these vehicles for longer periods of time. You don’t want the enemy to hijack or EMP your vehicles due to your team being too aggressive with their driving or piloting. Keeping these vehicles for as long as possible is critical to winning. The Ghost can potentially be one of the most dominant vehicles on the field. Combining speed and accurate Plasma Cannons, a good Ghost driver can be a nightmare to deal with.
Sniping
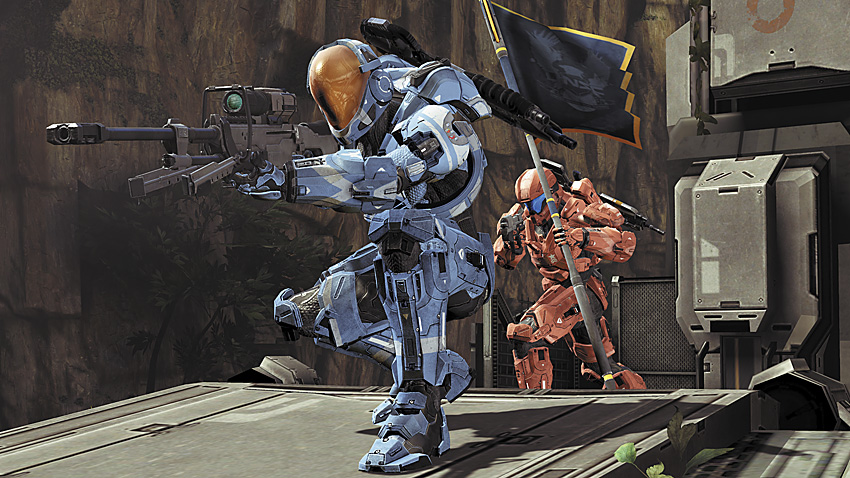
Ignore the cries of anguish and rude words emanating from your victims: Sniping is critical to your team’s success!
Utilizing the Sniper Rifle, Beam Rifle, or Binary Rifle and being extremely passive (or defensive) with these weapons enables you to go on some impressive killing sprees. The enemy team won’t be able to charge to your base freely if you’re raining down high-caliber shots from the edge of a cliff, behind your own base. You have up to eight players who can snipe the opposition, so taking your time and waiting for your foes to close in on your base helps you land some easier headshots and even some clutch flag stops.
Resource Control
Expanding on Vehicle Command and Control, you generally want to control all the resources on a map as best as you can. If you’re playing with ordnance drops, know where they tend to spawn, and be ready to win the battles for power weapons. On vehicle heavy maps, do everything in your power to deny the enemy vehicles of their own, either by stealing them for your team, or just destroying them before the enemy can use them. Controlling resources and controlling spawns will all but help guarantee victory!
Objectives
.jpg)
Completing an objective needs more than dogged determination: Try vehicular supremacy too.
The best way to capture a flag, or just an objective in general, is to begin a team push with vehicles like the Warthog and Mongoose, along with any ground forces that can come along for the ride. Immediately get your flag carrier in the backseat of a Mongoose or the side seat of a Warthog, as this is the most efficient way to capture the enemy flag.
Additionally, if your team has full control of a map, waiting for the right time to pull the flag is important, but don’t be afraid to get sneaky when running the flag. There is such a large amount of combat carnage blowing up around both teams that you can sometimes get away with running the flag back to your base by yourself, or at least getting it far enough for one of your teammates to finish the run for you.
Don’t forget, waypoints point to everything that needs to be dealt with during objective based game types. Even flag carriers and newly crowned kings will show up on the HUDs of enemies across the whole map, with the word KILL flashing brightly next to their icons. Because objectives will always have an indicator pointing towards them, it’s important to remember the “team” part of a Big Team Battle. Work together to accomplish your objectives.
Ordnance Drops
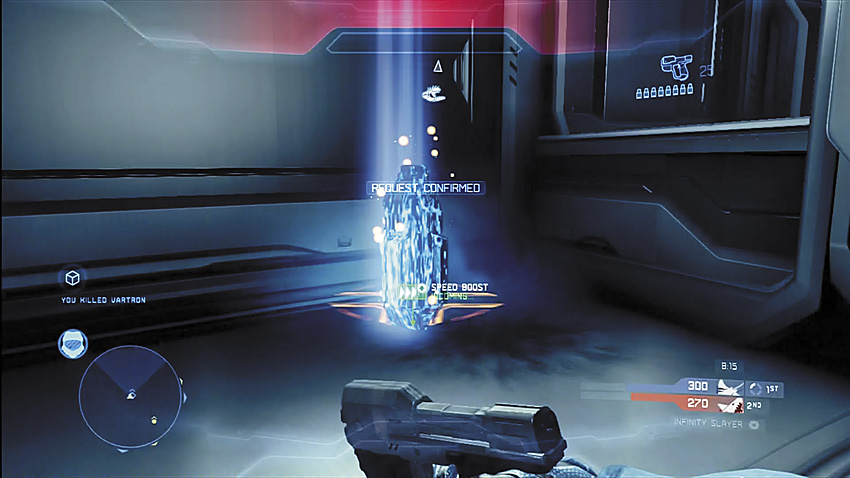
The sky is falling, and it’s raining power weapons.
When playing a game type that has personal ordnance drops, you want to rack up as many points as you can in order to fill your Ordnance meter to finally call in the ordnance. When your Ordnance meter fills up, you’re rewarded with three options from which to choose. One of these choices is sent down next to you (using the directional pad) and then picked up. There are some Tactical Packages and Support Upgrades to use with ordnance game types, such as Requisition, Ordnance Priority, and Drop Recon.
Don’t be near the ordnance drop impact point because it can hurt you, and even kill you if it lands directly on top of your head. Obtaining multiple kills (like a Double Kill or Triple Kill) rewards you with more points that fill your Ordnance meter at a quicker pace compared to normal kills. You can save your personal ordnance drop (even after you die), so keeping it for the right opportunity is a smart idea. When obtaining personal ordnance, the weapons and power-ups that you choose from are random and weighted to be balanced (for example, you don’t get power weapons every time).
Game types: An Overview
The term “game types” refers to the many different rule settings that are available in Halo 4 . Many of these game types will be familiar to veteran players, but some of them don’t exhibit the same gameplay as they did in past Halo games (such as Flood or King of the Hill). There are also a few new game types as well, such as Dominion, Extraction, and Regicide. Playing as many game types as you can helps you figure out all of the most pertinent strategies for them. These include all-new tactics such as throwing the Oddball or using the Magnum while running a flag.
This section reveals as much tactical knowledge as possible about every game type (listed here). For more general tactics, consult earlier in this Training section.
- Capture the Flag
- Dominion
- Extraction
- King of the Hill
- Oddball
- Infinity Slayer
- SWAT
- Slayer Pro
- Regicide
- Grifball
- Flood
Game types: Tactical Knowledge
Capture the Flag (CTF)
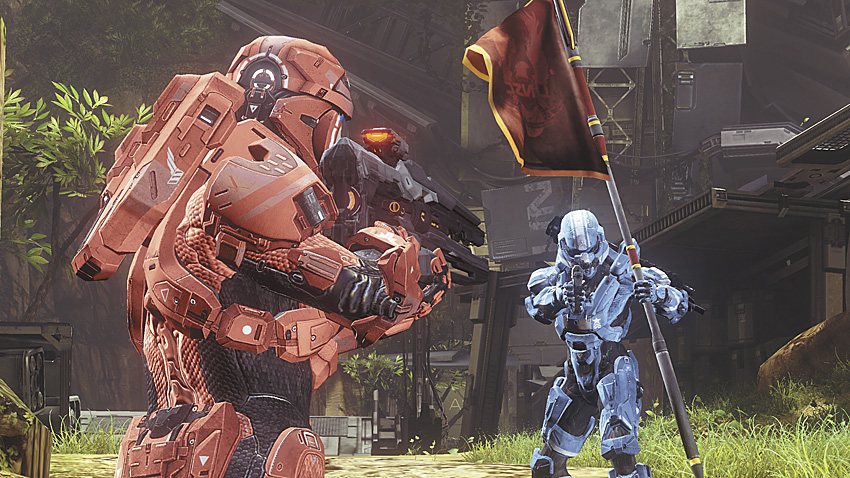
The goal is to infiltrate the other team’s base, grab their flag, and deliver it back to your own base.
General Tactics
- Always know where your flag is at all times.
- When going for a flag, remove it at the enemy’s base. You almost never want to grab it while holding or attempting to find a power weapon; this is because you can’t drop the flag once you’ve picked it up (unless you score or die).
- Follow the teammates who are running the flag back to your base to ensure a successful flag capture.
- The flag carrier is not completely defenseless—you’re able to utilize a Magnum and hold on to the flag itself—so when running a flag, team up with someone to help you take down enemies and protect you.
- The flag is also a one-hit kill when using it as a bludgeoning device, so go ahead and give anyone who gets in your way a good thwack.
- Although the weapon you’re carrying is a Magnum and has the same benefits and problems, it’s more difficult to wield it as effectively with a flag on your arm. It’s better to avoid all battles unless it’s a last resort; your overriding goal is getting that flag home!
Team Tactics
- Coordinate with the rest of your team when preparing for a flag run: Attempt a “push” into the enemy base when the opposition has players down—that is, just defeated or in a disadvantageous position compared to your side.
- Never attempt to run with a flag without your team knowing or in a direction they aren’t preparing to help defend; that simply makes it more difficult for your team if you’re taken down during the run.
- Utilize vehicles whenever possible to attempt a swift run into the other team’s base. However, be sure that any Warthogs have a gunner positioned on the turret, or you’re simply wasting your own time and resources!
- Prepare for moments when you have to give up the flag to the opposition: Do this when you know you’re going to be overstretched; it is better to return with a competent team later into the match.
- If your team is repeatedly succumbing to the enemy as they try to stop the opposing side from capturing your flag, pause and rethink: Instead of this stalemate, regain control of your own base and regroup. This ensures that the other team doesn’t end up obtaining a second flag capture. If you continue to throw yourself hopelessly at defending a capture that’s already long gone, you may end up giving up more than just that one point.
- It is always better to give up on a flag that you’re trying to capture so you don’t end up overextending yourself and relinquishing an important position to the enemy. Instead, bait the flag (with a grenade or Sticky Detonator), then hide nearby and try to ambush one or two foes.
- Similarly, when a team dies with a flag and you’re nearby, there are likely to be enemies guarding the immediate area. The flag carrier’s death should catch them off guard or confuse them; pounce on this killing opportunity.
Dominion
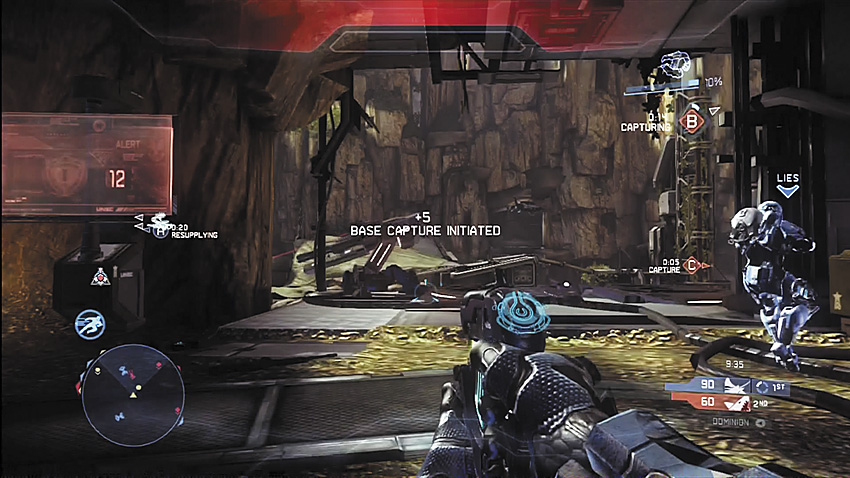
Capture bases and hold them for a set period of time, building them up to defend them against the other team, who are also attempting to seize control of the same base. Turrets, Shield Walls, and other defensive equipment can be added. Multiple bases can be seized at once.
General Tactics
- The most important point to remember is to always hold one base no matter what else is happening. Default to this tactic at all times!
- It takes up to 15 seconds to capture a base and 30 seconds to fortify it. Embed this knowledge into your brain!
- Whenever the Auto-Terminal is down, rebuild as much as possible, as these systems are extremely efficient against vehicles.
- Utilize the Shield Barrier to your advantage when enemies are charging your base—this will cut off the number of routes into your base and allow you to focus defenses.
Team Tactics
- Construct a plan at the beginning of the game regarding which base you’re going to capture, and head there from the start. Claim a base as early as you can.
- Don’t ignore any vehicles that may be parked on a particular map; these can mean the difference between holding down an area or giving it up. Pick players especially skilled in piloting or driving to obtain particular vehicles as early as possible.
- Make certain to defend your base for 45 seconds in order to score the points. Also, never leave the base when it’s close to resupplying: Communication with your team to protect a base at this point is critical to your victory, as there’s no way you can hold down a base by yourself!
Extraction
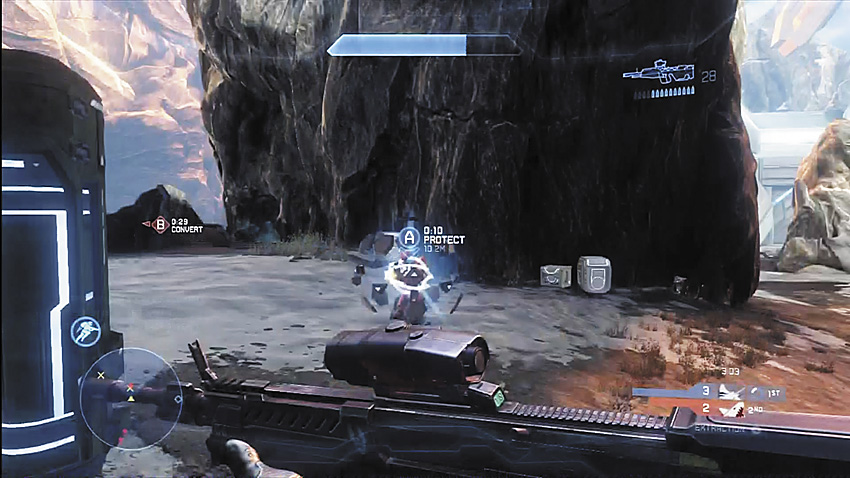
Two locations that must be taken over appear on the map at any one time. By securing a location for a period of time, you earn a point and a subsequent location on the map appears and becomes accessible. Secure the most points to win.
General Tactics
- Think of this game type as Dominion (and utilize the tactics detailed for that game type) but at a faster pace. Be warned: If you’re not working together, the opposition will extract a control point with relative haste.
- Try to run the maps mostly in pairs of two (or more) to extract a control point more effectively. Strength in numbers is the key here.
- The armor ability Hardlight Shield is highly recommended for Extraction games.
King of the Hill (KOTH)
.jpg)
Maneuver to the indicated area (a “hill”), which one or more of your team must stay within in order to earn time and eventually win the game. The time a hill is accessible varies, depending on the settings. Earn points by controlling the hill and keeping the enemy away at the same time. More than one hill may be active at once.
General Tactics
- When you’re “in the hill,” you cannot use armor abilities or Sprint. Instead, try to keep your fighting down to a minimum unless you have help from a teammate. Huddle or snipe behind cover and let the points build up.
- If you can make it to the hill when an opposing player is already in there, contest it as soon as possible; halt the time they are accruing as quickly as possible.
- If you’re close to capturing time in a hill, inform your other teammates to set up for the next hill rush; there should be an indicator when the rush is going to happen, too.
- If your team knows it is becoming pointless to keep rushing a hill that is too well protected, then ignore it and instead set up for a rush on the next hill.
Team Tactics
- Quickly set your team up around the hill to protect it, ideally from multiple angles. Learn all the choke points from which the enemy will attack.
- Cover all angles: Look for where the enemy tends to push up from in order to slay the player in the hill, and focus your defenses there.
- There shouldn’t be a need for more than one team member to be inside the hill unless you have only two players working together to accrue time or your team requires only a few seconds to win the game. The reason is simple: you need the fewest teammates without armor abilities and Sprint as possible.
- When possible, switch out players in the hill who are weak with fresh teammates. This makes it much more difficult for the enemy team to finish hill dwellers and keeps a constant flow of “hill time” for your team.
Oddball
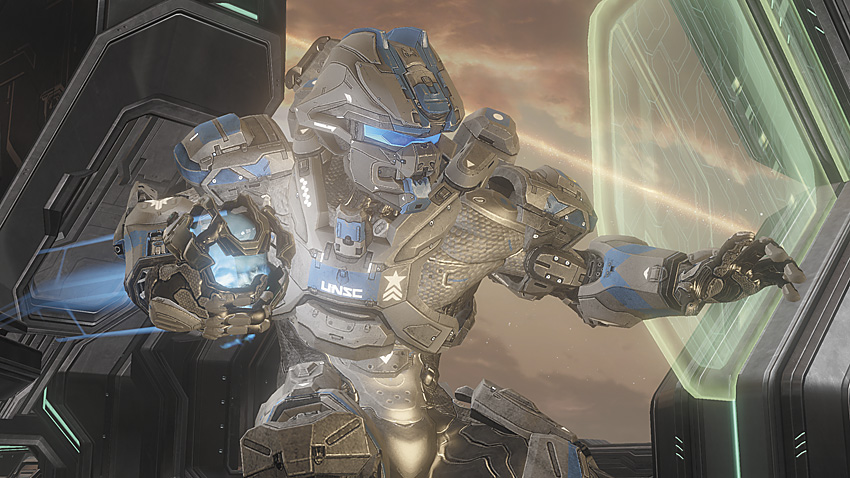
Locate and hold on to the ball for as long as you can without letting the other team take and hold it. Simply keep the ball away from the other team to win.
General Tactics
- Always move with the team. Never roam by yourself with the ball.
- While holding the ball, utilize the throwing feature when you’re close to being killed; throw the ball to a teammate to keep it out of your opponents’ hands.
- Learn from your King of the Hill matches, and have your team set up defenses around the ball holder: Protect the carrier at all costs, and position him in a location that your foes will have a hard time reaching.
- Are you close to the edge of a map and about to die? Then a cunning tactic is to throw the ball off the map and out of play, if possible. The ball respawns somewhere else on the map, allowing your teammates more of an opportunity to respawn themselves and fight for control.
- Typically, there are several places were a ball spawns on each map. Therefore, you want to react quickly when a “play ball” occurs.
- One of the best new tactics in Oddball involves passing the ball to your opponent as they try and take you down. By throwing them the ball, they’ll be forced to pick it up. If they don’t react quickly, you’ll have time to take them down before they can drop the ball to kill you.
Infinity Slayer
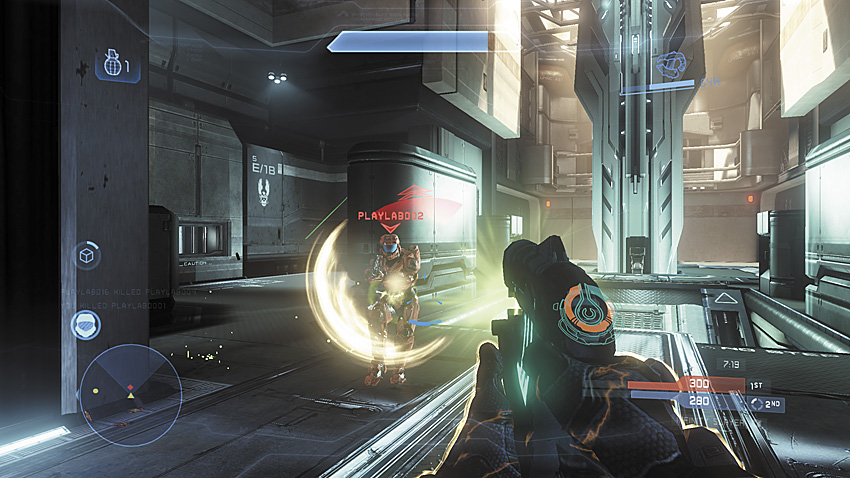
Earn points to call in ordnance from overhead. These ordnance drops consist of three randomly generated weapons or power-ups, the latter of which can alter a Spartan’s speed, shielding or ability to issue damage.
General Tactics
- This game type rewards players who control the power weapons and inflict kills with them: This is the best way to fill your ordnance or multikills and to complete sprees of any sort.
- When you finally pick up the available ordnance, choose the weapon or power-up based on your situational awareness: For example, if there are several enemies around a wall or behind you, and you have a power-up such as Overshield available to drop, then that is an optimal pick to make. Another example: The Damage Boost is best for situations when you’re trying to tear through opponents and pick up as many points as you can.
- Are you in a highly dangerous area (where you’re most likely to be killed), but you’ve just received an ordnance drop? Then it’s actually smarter not to use it. Wait until you’ve been killed: There’s little use in dropping ordnance just to have it stolen by the other team.
SWAT
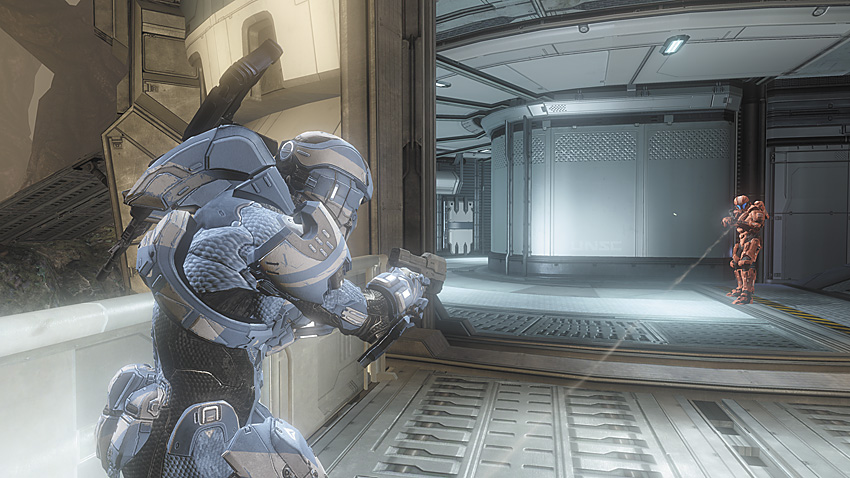
Your Spartan’s armor has no shields. This means you can be killed with a single headshot.
General Tactics
- Accuracy kills in this game type: Always aim for the head and attempt one-shot kills at every opportunity.
- Use height and cover: Stay in high positions and away from the middle of maps!
- The use of long-range weapons, such as the Battle Rifle, DMR, LightRifle, Magnum, and Covenant Carbine, is not only encouraged but is also imperative!
- Try to stay in an enclosed area (for example, inside a building) without exposing your head.
- Keep a lookout for shieldless players and freshly spawning players in order to pick off some easy kills.
- Stay close to your teammates, but don’t make the mistake of clustering around one another; this simply creates multiple opportunities for your foes.
- Verbal communication in the form of callouts is even more important than normal here, as having the element of surprise and the knowledge of your enemy’s position is key.
Slayer Pro
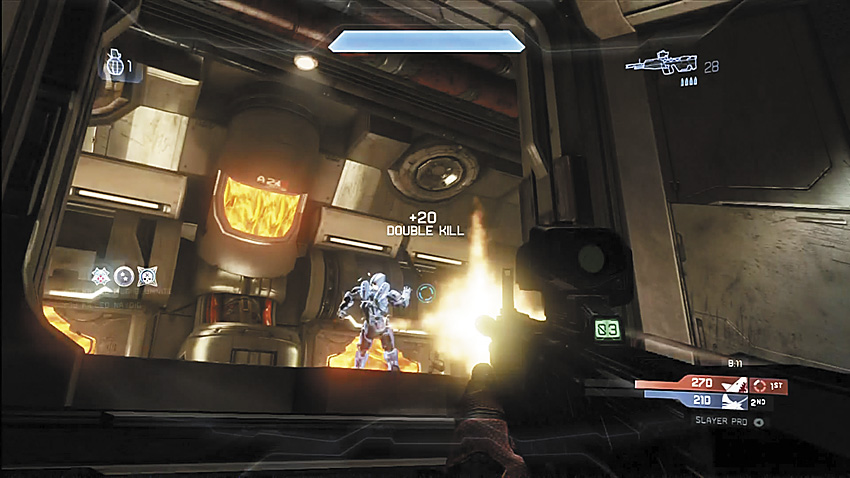
This has the same rules as Team Slayer but without any ordnance drops, and you spawn with a few predetermined loadout choices.
General Tactics
- Begin your match by ensuring you have appropriate loadouts: Choose two players to arm with Battle Rifles and the other two with DMRs. The variety of ranges these weapons offer best helps your team as they patrol the battlefield.
- Scan the combat zone for the drop weapons as soon as the match begins, and control these as often as you can to gain the upper hand.
- The combat taking place in this game type almost always occurs at mid- to long range, so it becomes imperative to stay alive whenever you’re in a weakened state; take the time to recover your shield. Without a full shield, you’re liable to be easily picked off from across the map.
- Scoop up grenades when you’re around a drop area as often as you can.
Regicide
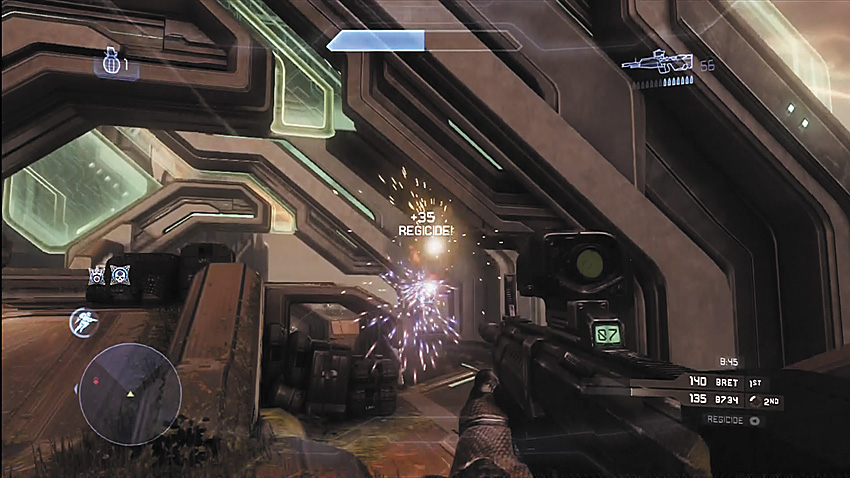
The objective of this game type is to slay the person in the lead, known colloquially as the “King.” If you’re playing Team Regicide, protecting the King (if he’s on your side, of course) becomes imperative.
General Tactics When You Are NOT the King
- When the match begins, immediately search for the nearest enemy to slay, and execute them with haste. Even if this means being a little more reckless, you need to go for the first kill each time.
- To become the King, you must have the first kill of the game. As the game progresses, expect some back-and-forth fighting with another player for the King title. Instead of simply rushing a kill to get back at a King, take your time once a King has been initially “crowned.”
- Deaths and time as King don’t matter when it’s all said and done—just focus on having the highest score at the end of the game.
- In a Free For All Regicide match, you still want to slay the King, but don’t do so at the expense of your shields or ammunition supplies. Remember that every other player is likely to be stalking the King as well, so wait for the battles to begin, and steal kills to rack up points more safely (and sneakily!).
- Does the King have a power-up? Unless you have one as well, it isn’t wise to fight a King at this time. Instead, run away and stay alive until the King becomes damaged or less powerful.
- Search for weapons around the map that better help you take the King down from long range; the safest method of Regicide is picking the King off while he’s engaged in battle with another foe.
- Try to save power weapon ammunition, such as Rockets. Then employ them when confronting a King.
- Have you yet to be crowned? Don’t panic! Even if you’re never the King throughout most of the game, it’s more important to become King during the final minutes of the match, where a clutch kill of the King (and the bonus that comes from doing so) can catapult you into first place just as the score to win is reached or the time expires.
General Tactics When You ARE the King
- If you’re King for 30 seconds, you gain an Overshield. If you’re King for 90 continuous seconds, you gain a Damage Boost. The power-up durations for each of these vary. For example, the Overshield power-up will last 120 seconds or until depleted from damage. The Damage Boost power-up will last 30 seconds and the Speed power-up will last 45 seconds.
- There’s little time to wave at your subjects when you become King, especially as there’s an indicator over your head that lets all the other players know where you are on the map!
- If you haven’t armed yourself properly already, your first order of business is to look for a mid- to long-range weapon and a close-range one as backup.
- Remember that the enemy usually comes to you, so weapons like the Scattershot are useful for battles around corners. This is a great choice of weapon, as are any of the other power weapons if you’re planning on decimating those who challenge you in close-quarter combat.
- You need to remain the King for as long as possible; therefore, it’s less important to patrol the map looking for foes to slay. Instead, stalk a particularly defensible area of the map and let the enemies come to you. The longer you’re King, the better your chances are for victory.
- Of course, the more kills you accrue, the greater the bounty on your head. When a foe finally takes you down, they receive a large number of points. So pay attention to whoever is in second place, and never fight them to the death if you can help it. Make a “tactical withdrawal” (that is, run away) from this foe, lest they overtake you in points.
- Resist the temptation to run around looking for kills. Letting your enemies come to you is a better plan, and be sure to have a weapon designed for close combat to deal with them. Remember, every time you die, you reward your foes with extra points.
Grifball
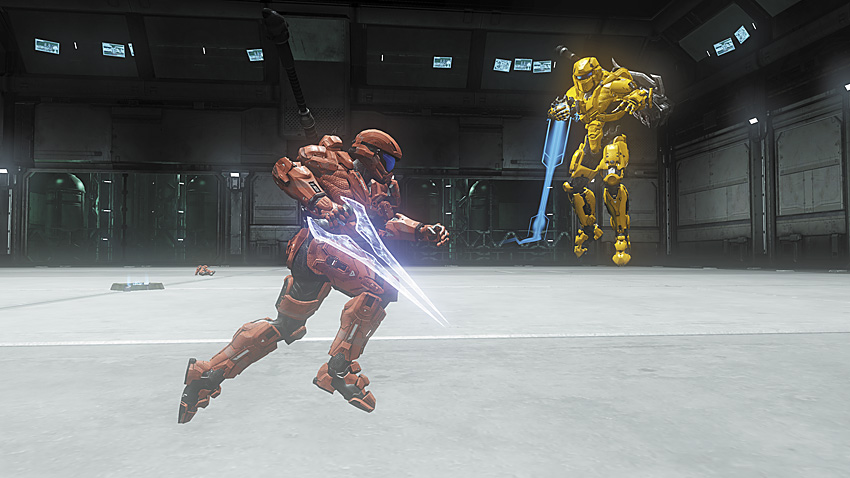
The addition of being able to throw the ball adds a whole new dimension to this game type.
General Tactics
- Practice using the Gravity Hammer and Energy Sword until you learn the precise range of each.
- Use the ball-throwing technique (see the Oddball section for additional tactics) to your advantage. Work on passing to open teammates or throwing the ball before a sure death to force your opponent to spend more time trying to set up for a score.
- Remember that the Gravity Hammer isn’t only a weapon, but it also works as a tool to pass the ball.
- As someone famous once said, “A good Grifball defense is the best offense.” Waiting for the other team to come to you can be the secret to scoring some points of your own.
- Focus on working as a team and positioning your team to maximize the chances of keeping the ball away from the opposition.
- Never lose sight of the ball!
- Scoring occurs only when you walk into the “score point” with the ball. Throwing the ball there doesn’t grant your team any points.
Flood
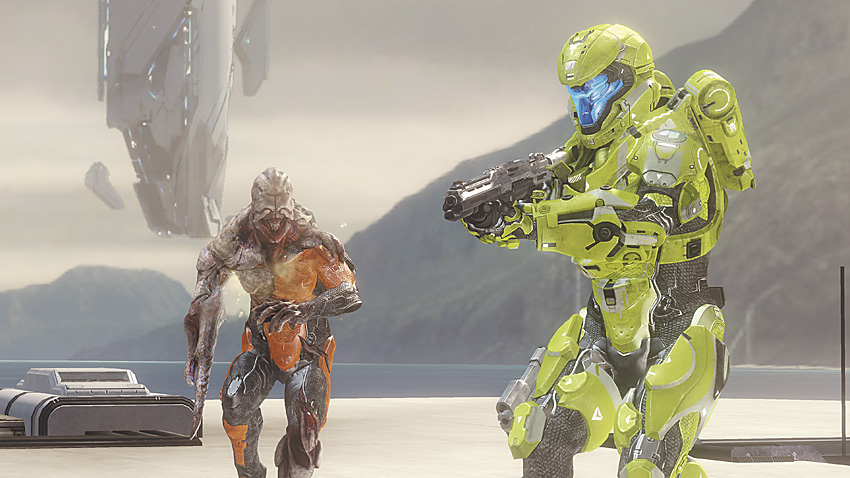
They’re coming for your braaaaaaains!
Players infected with the Flood are forced to destroy uninfected Spartans, converting them into Flood combat form allies. The goal for uninfected Spartans is to survive the never-ending Flood onslaught, staving off transformation into the parasite.
General Tactics
- Wipe the impending sense of panic and doom from your mind, and work together with your teammates at all times, even when you’ve “changed sides” and you’re working with your Flood brethren.
- Barricading is a good plan. Set yourself up in a room where there’s only one way in and out.
- Bring out your Magnum for easier headshots until you’re out of ammunition or you’re overwhelmed.
Readying for War Games: Final Thoughts
HUD Overview
Although you may be familiar with all of the icons and information displayed on the inside of your visor, it is worth remembering what everything means.
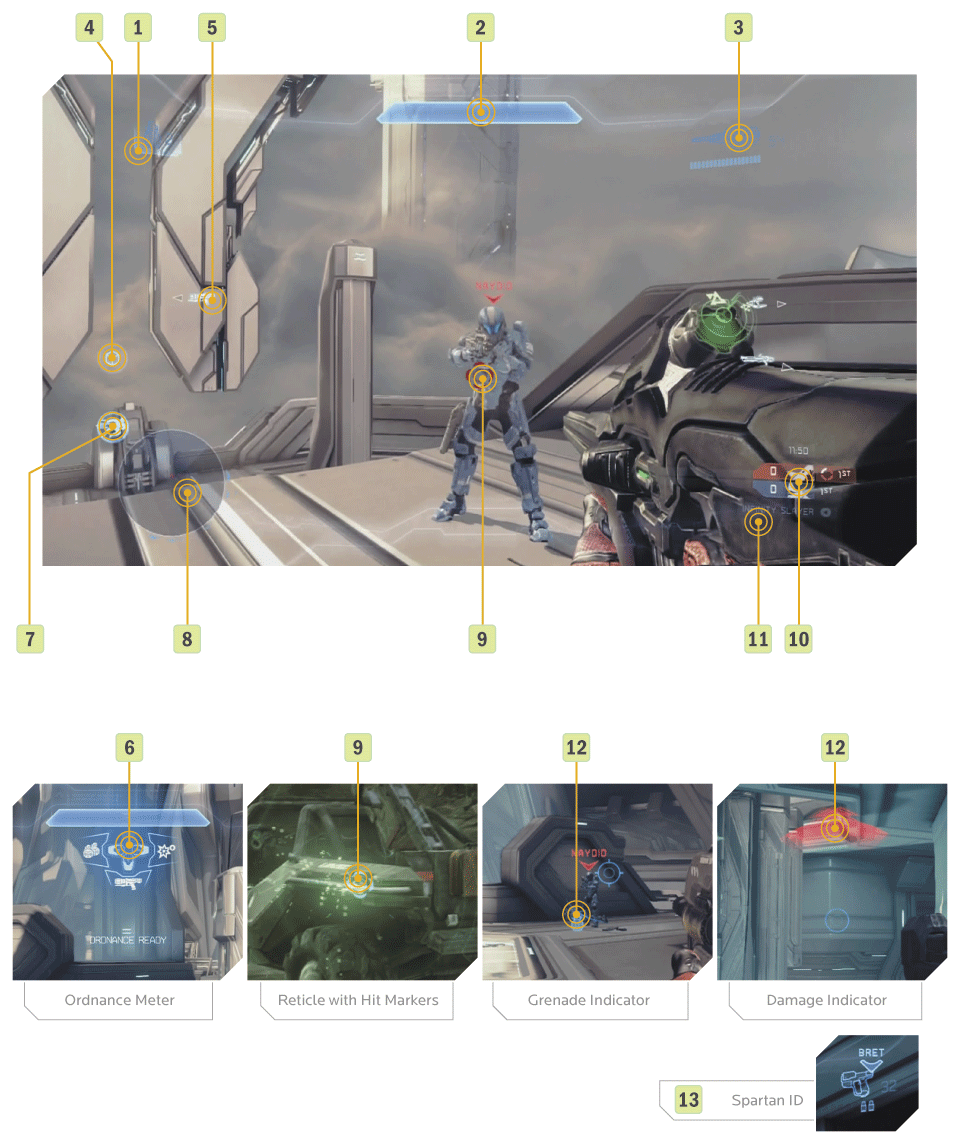
- [1] Grenade supply: In the top left of your HUD is the amount of each type of grenade (Frag, Plasma, Pulse) you have.
- [2] Shield: In the top center of your HUD is the amount of shields you have. This will indicate how close you are to dying. When your shields are depleted, this part of your HUD will flash red.
- [3] Weapon and Ammunition: In the top right of your HUD is the weapon you are currently using along with how many bullets you have in the clip. The number indicates how much ammunition you have left with which to reload.
- [4] Ordnance: If you earn enough points to receive personal ordnance, the Ordnance menu will appear right below your shield. In this menu, you can use the D-pad to choose which weapon or power-up you wish to drop next to you.
- [5] Waypoints: When a weapon from an ordnance is on the map, a waypoint and the item’s exact location (in meters) will appear on your screen.
- [6] Ordnance meter: On the left side of your HUD in Ordnance game types is a small circle with the ordnance logo in the center. When you earn points, the circle starts to fill up. This is how you know how close you are to getting a personal ordnance.
- [7] Armor ability meter: Just above your motion sensor is your armor ability meter, which shows you how much time you have left to use your armor ability. When your armor ability is running out, it starts to flash red and shows an exclamation point.
- [8] Motion sensor: On the bottom left of your HUD is your motion sensor. This reveals a variety of information: The edge of the motion sensor has arrows indicating where weapons and enemies are if they can’t be shown directly on the motion sensor, so you are more aware of where everything is on the map. The motion sensor also shows if weapons/enemies are above or below you. If there is an up arrow above a red dot of a weapon/enemy, then you know the weapon/enemy is above you on the map. If there is a down arrow below a red dot of a weapon/enemy, then you know the weapon/enemy is below you on the map. If there is no arrow at all, then they are on the same level of ground as you.
- [9] Reticle: In your screen’s center is the weapon reticle. This is how you aim your weapon to connect with shots. Every weapon has a different reticle, so familiarizing yourself with them all and learning where to aim the reticles improves your shot.
- [10] Score/time limit: The bottom right of your HUD shows the players/teams, what place the players/teams are in, and the amount of points the top players/teams have. Above the score is the amount of time left in the game. Being aware of both the time and score will allow you to make better decisions in-game. Knowing if you are in a tie game or if the time limit is running out will allow you to make smarter plays in a lot of situations.
- [11] Game type: Below the score is what game type you are currently playing.
- [12] Shot/Grenade/Damage markers: When you connect with shots, indicators appear around your reticle. When grenades are near you, an indicator appears around your reticle showing you which direction the grenade is moving so you can move away. If you take damage, a red arrow points in the direction of the damage (and this damage marker also appears around your reticle).
- [13] Spartan IDs: Finding your teammate’s Spartan IDs in-game is the optimal method of locating a buddy with whom to team-shoot. Look out for those IDs that appear right above your teammate with an arrow pointing down showing where they are located.
Settings and Files
Controls: Finding the right control settings for yourself is a good way to change your game for the better; overlook this at your peril! Becoming comfortable with the way you hold your controller and what settings you play on is key to having confidence while playing. Don’t be afraid to try new settings for a couple of games to see if you prefer something new: While you’re trying these adjustments, it’s important to give yourself a few games instead of giving up immediately.
Changing the way you use the controller takes time, but sometimes switching to a new controller setting can make a world of difference in your play. Ultimately, it’s all about being comfortable—there is no setting that is universally better than any other, so figure out what works for you!
Button Layouts
There are many different button layouts to pick from. Here is a brief breakdown of each of them.
Default: This default layout for Halo 4 moves away from past Halo games by having the Sprint ability on the left joystick button and having crouch now on the B button. Melee is your right bumper and Action/Reload is on the X button. New players will have no problem with this layout, but players with past Halo experience might have an issue with the relocation of crouch.
Southpaw: Southpaw is made for left-handed players, and compared to the Default setting, it simply switches the Fire Weapon and melee to the left side and the Throw Grenade and Use armor ability to the right side. If you’re a leftie, you owe it to yourself to try this set up.
Boxer: This is the layout for players who want to concentrate and hone their melee combat talents. Melee is now your left trigger while Throw Grenade is your right bumper. Sprint is now your B button while Crouch is the left joystick button. This can improve some players’ melees by switching to this layout since you can quickly pull the left trigger and aim melees a little more quickly and accurately.
Green Thumb: This switches the zoom to your right bumper and melee to your right joystick button. This is a very unorthodox button layout, with the intention of making it a little easier to scope in and shoot and allowing you to more easily use your melees. Having the Melee button on your right joystick button allows you to aim your melee and lunge without moving your thumb.
Bumper Jumper: This was an extremely popular layout in both Halo 3 and Halo: Reach : The layout enables some players to jump and melee a little more easily. Jump is your left bumper, while melee is your right bumper. This allows you to have more of a “clawlike” style of play, making it easier to jump and aim. Your armor ability is now the X button and sprint is the A button. Previous bumper jumper users are likely to gravitate to this setup.
Recon: Recon was introduced in Halo: Reach to mimic the default button layout of Halo 3 . Recon in Halo 4 is almost identical to the layout in Halo: Reach as well, but with the new addition of the X button being Sprint. Players who used the Recon configuration in Halo: Reach should be just as proficient using this during Halo 4 .
Fishstick: This is the newest addition to the Halo button layouts. If you prefer to zoom with your left trigger and melee with your right thumbstick, give this control setup a try, although pressing in thumbsticks isn’t usually as accurate as button or trigger presses.
Stick Layouts
Inverted or Default (Not Inverted)
Inverted or Default is a choice between how you want your reticle to react to your thumbstick while aiming. It does not affect your movement in any way.
The default layout is not inverted. Move your right thumbstick up and your reticule will go up; move it down and your reticule will go down. This is the most basic setup and easiest to use if you haven’t played a first-person shooter before.
For some players, inverted settings feel more natural. Often nicknamed flight controls , this setup reverses your aiming, meaning that moving the thumbstick down will move your reticule up and vice versa. There isn’t an advantage to using either; it is personal preference and what you play best with.
Southpaw or Default
The default thumbstick setup in Halo 4 means that you control your character’s movement with the left thumbstick and your reticule with the right thumbstick. With Southpaw, the left thumbstick becomes your aim control and the right thumbstick handles player movement. This can be great for a left-handed person getting into FPS games. In addition to the Default and Southpaw stick layouts, there are the Legacy and Legacy Southpaw layouts.
Again, there isn’t an advantage to using either; it is personal preference and what you play best with.
Sensitivity (1–10)
Being comfortable with your sensitivity speed is important. Each sensitivity mark between 1 and 10 is going to make you play differently during a game. Having a faster sensitivity (5 to 10) allows you to react more quickly, helping yourself and your teammates and allowing you to check your flanks (left and right sides) for enemies with greater haste.
Conversely, having a lower sensitivity (1–4) can allow for a more accurate shot (with any weapon) compared to higher sensitivities, but at the expense of turning quickly (to deal with a threat from your flanks or from any other direction where swift movement is necessary).
Most players choose a sensitivity range between 3 and 5, but figuring out which is optimal for you is vital, as it gives you more confidence in your shot placement and accuracy. Practicing on the same sensitivity for a long period of time will allow you to develop consistency in your shot.
Postgame Stats Coverage
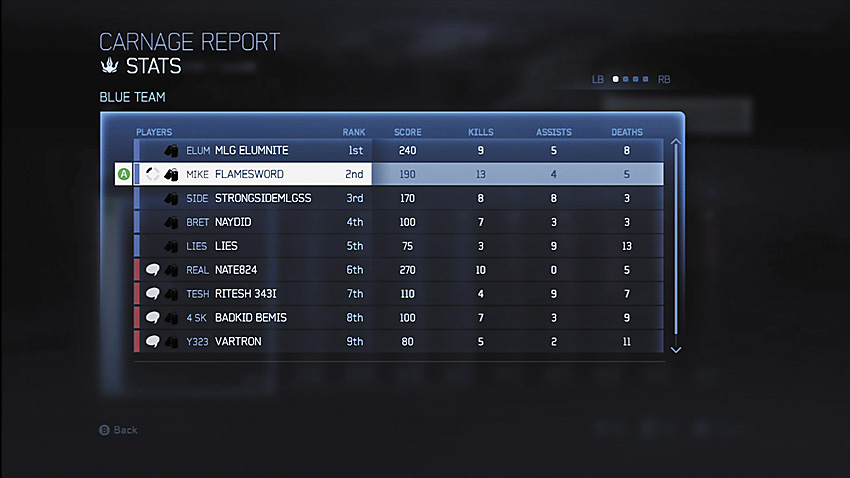
Looking for bragging rights? Even the player with the worst game can usually find something to crow about here.
In reality, stats don’t mean anything when playing a team game, because you always want to make the right play for your team instead of playing for a K/D (kill/death) ratio. However, looking at the stats can be an entertaining way to break down what happened during a game.
On the first page of the aptly named Carnage Report, you can view your total score, total kills, total assists, and total deaths. On the second page is your average life span, K/D spread, longest kill spree, and total medals. On the third page is your total weapon kills, total grenade kills, total melee kills, and total “other” kills.
When you click on a player’s name, you bring up another page, allowing you to browse through every player’s medals and tool of destruction. You’ll also see who you killed the most, who killed you the most, and top medals.
Guide to a Good Playing Environment
It’s difficult to win if you are distracted, or otherwise are suffering from less than ideal conditions. If you improve your game-playing environment, your kill/death ration is sure to improve.
Having complete focus is vital when you play. Having people trying to talk to you, a sibling listening to loud music, the TV blaring, or even your parents or significant other screaming on the other side of the door threatening to unplug the Internet leads to distraction. Distraction leads to failure.
Remove as many distractions as possible to focus on your gameplay. Some gamers like to sit on a sofa, a computer chair, or even lie down on a bed or recliner. Find the position you’re most comfortable in, and attempt to play that way every time you game.
If you’re going to be gaming for a while, make sure you’re comfortable but keep a good posture; hunching your back or leaning to one side isn’t good for your body. Poor posture can lead to back or arm pain at the end of a gaming session.
If you notice you’re getting tired and starting to slouch, your game is probably suffering too. Take a break (ideally every hour) and raid the fridge or take a power nap. Then return refreshed and invigorated.
Keep the temperature of your room comfortable. Some enjoy air-conditioning, while others prefer the heat. Also be sure to play in comfortable clothing.
Everyone can get sick, and during those times you might still feel like playing some Halo 4 . However don’t be surprised if your performance suffers. Being sick can affect your mental state, which can lead to some questionable judgement calls. Your reactions might be slower, which can also be quite frustrating. Simply put, if you’re not feeling well, get the rest, food, and medicine you need so you can recover. If that means you need to take some time off from the game, it might be for the best that you do so.
Being competitive can help you get better at anything you do in life, and Halo 4 is no exception. However, being competitive doesn’t mean you can’t show some common courtesy, either over Xbox LIVE or when you’re playing in the same room with a group of friends. Being a generally chill and agreeable person can make any match or event you participate in a more enjoyable time.
Top 7: Tactics to Perfect and Focus On
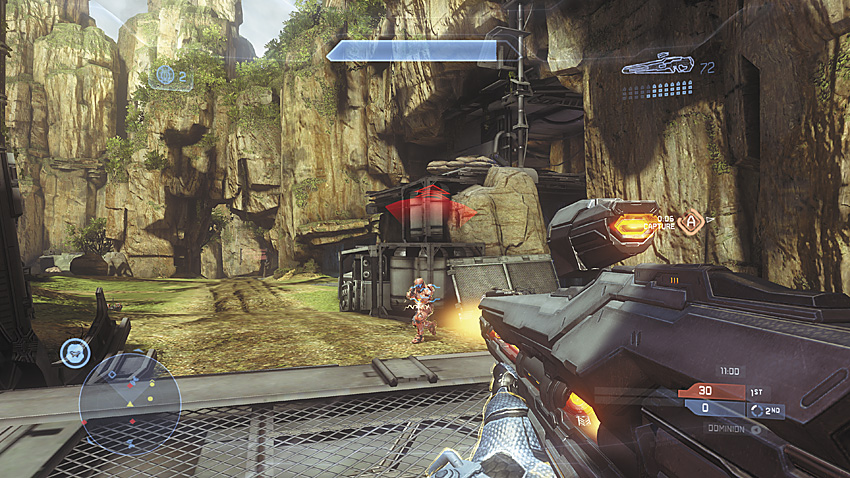
Learn where your foes will be and how long they take to reach there, and drop them as they arrive.
1. Enemy Movement: Pay attention to where your enemies tend to move to, camp, or snipe from. If you memorize the “hot spots” of each map (detailed in this guide), you’ll have the edge on your opponent with an early nade or first shot on them in the battle.
- Know where your enemies like to snipe from: It decreases the kills they inflict on you when you’re running around looking for them. You can then find a safe route to take them out.
- Know the hot spots or routes that your opponents like to frequent. This also gives you a head start as you prepare to fight them. If you can predict your enemies, you’ll be one step closer to becoming a better player.
- You always need to be thinking where your opponent is or where your opponent is spawning.
2. Shots and Strafing: Focus on your shots and your strafing. You need to be sure you’re hitting with all of your shots, as missing with even one shot allows your foe the upper hand in battle. Bring the pitch and yaw sensitivity down if you’re having trouble aiming. Playing on a fast sensitivity is excellent if you want to turn around quickly, but it takes both time and practice to control the speed and accuracy of your aim.
- Take notice of your surroundings by using a wall or rock to peek and shoot at your opponent. This makes you infuriatingly difficult to hit, and your foe usually gets angry and makes a mistake.
- Pay attention to how you move when you’re shooting: Are you moving forward in a straight line, standing still, or moving left to right? Moving in a straight line or standing still is the easiest way to aim and shoot your opponent...but it’s easy for them to strike you as well.
- Left to right strafing works the best in most situations, as your opponent has the additional effort of using his right thumbstick to keep his reticle trained on you.
- However, jumping and crouching also make it harder for you to shoot your opponent, although this problem is negated after lengthy practice sessions.
3. Backing Down: It doesn’t make you any less of a Spartan killing machine to back down from a fight. In fact, it takes extra intelligence and cunning to realize when it’s beneficial to break off from a fracas, rest, and then return to take down a troublesome foe.
- If you’re down in shots during a protracted battle, retreat to stay alive, regain your shields, and return again. If possible, call for your teammates to help keep you alive. It isn’t worth fighting to your death and giving your enemies another kill. This is just pride messing with you: Forget pride.
4. Power Weapons Knowledge: It’s incredibly important to study and learn all the locations within a map, especially where the power weapons are placed. When a game begins, sprint to the power weapons on the map (splitting up your team to secure more than one, if necessary). Once you obtain the power weapon, you have the advantage.
5. Learn the loadouts: Knowing how all of the different loadouts affect your gameplay is critical to your continued well-being.
- There are counters to every armor ability.
- Make multiple loadouts so you can swap them throughout a game if your foes are controlling the game due to their armor abilities. This keeps your game from becoming stale or predictable.
- It is advisable to have at least three of your favorite loadouts to choose from.
6. Sometimes Slaughtering. Sometimes Sneaky: It isn’t necessary to plan every attack run around a tanklike, violent, running-and-gunning style of game. In fact, it’s the quickest way to earning yourself a reputation for being predictable. Mimicking the style of a suicide Grunt is usually frowned upon in professional team circles.
- Instead, if you’re behind multiple enemies, wait for the right moment to attack them. Don’t simply start shooting and have them turn around and cut you down. Instead, bide your time, cut them down with quick, brief blasts from a location they don’t predict, and stay stealthy.
- Or, attempt a subtle and quiet run up to your foe at the perfect moment, and initiate the battle with a well-timed assassination!
7. Wait. Did You Hear Anything? You’re likely to hear the battle going on and your teammates radioing to each other. But there’s a world of difference between hearing and actually listening. And then responding with intelligence:
- Listen to where shots are coming from and you’ll have an idea of your opponent’s location.
- Listen to what your teammates are calling out, and respond when needed. Keep your chatter to a minimum and help when you can.
- Utilize headphones. Play in a quiet environment. Invest in a surround-sound audio setup. Gain every advantage you can; if you can hear precisely where in the 360-degree sound field that sounds are coming from, you can react more quickly and instinctively.
Theater: Improving as a Player
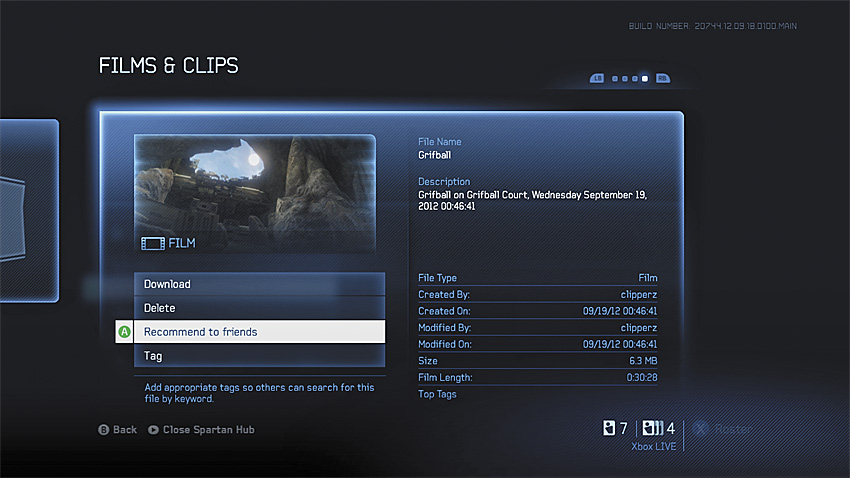
If you just got your posterior handed to you, consult the theater for the reasons why. This film doesn’t lie.
For those with previous knowledge of the theater in Halo: Reach , expect a similar setup in Halo 4 . Consult the instruction manual and onscreen menu for the basics of using this mode. The following section details how to use this mode to improve as a player:
- You can improve as a player simply by studying the gameplay footage you’ve stored on your console: Save some matches that you both win and lose throughout an extended gaming session, and then watch them in Theater mode later. Study them to figure out what you did correctly and incorrectly:
- With every game you lost, pinpoint the mistakes you made, and understand what you could have done differently to minimize that from occurring in the future.
- With every game you won, notice what you were doing to achieve victory. What locations were you successfully holding? What angles were you shooting from? Note that for future matches.
- Pour over footage of your enemies and enemy teams during games that you lost. See what you could have done to clinch the game for you or your team. You can always find several tips, tricks, jumps, grenade-impact points, and strategies by watching these replays.
- Watching replays allows you to predict your opponents throughout future games—seeing their patrol routes, the locations they favor, their preferred weapons, and the angles they shoot from.
- Did your opponent or opposing team implement a particularly impressive tactic or takedown? Then mimic what they did if it worked well for them, or add some of your own strategic planning and refine the tactic, making it your own.
- Viewing your gameplay helps minimize the mistakes you consistently make and allows you to advance both confidently and competently at a much faster rate than normal.
Forge
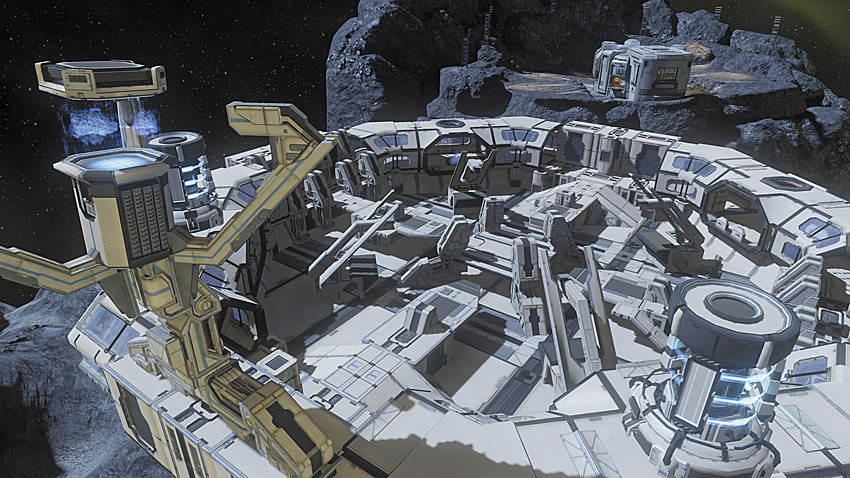
Returning to Halo 4 in grand style is the Forge. This special editing tool allows players to take existing maps and modify them with the Forge tool set. Introduced in Halo 3, Forge has resulted in changed levels and new Game Types created by the Halo community, soaring well above the expectations of the developers behind the games.
Forge has allowed dedicated fans to create enduring modifications of existing levels that have gained their own dedicated following. Over time, perhaps you will be able to create a new map variation, or a new battleground on one of the three Forge maps that thousands around the world will enjoy!
Updates to Forge
Players familiar with Forge will recognize old features from previous iterations, but there are many key improvements to the toolset that 343 Industries has brought to the table, all of whom will help map-makers create more ambitious levels than ever before.
- Highlight Selection – No longer will players be confused as to which object they have selected for editing.
- Magnets – Objects can now be properly aligned without spending long minutes or hours ensuring that everything is connected just right.
- Duping Assets – You’re now able to copy assets easily, which can help speed up the creation of more complex structures.
- Locking – No more accidentally ruining a whole section of a map because you moved something out of place. If you’re satisfied with something, lock it into place.
Additionally, Forge mode has seen improvements to its visuals.
- Overall Lighting System - Single Probe Spherical Harmonic lighting (no really, that is what its called) ensures objects match the lighting of the map much more closely. A nice aesthetic improvement that can help make user maps look closer to what the proffessionals create.
- Object Integration – Cast shadows help integrate the forge objects into the map they are placed in, as well as helping place them spatially as a player.
- Visual Overhaul of Forge Objects – Updated geometry, materials and textures for increased visual fidelity and better integration with static map objects.
Forge users now have the ability to modify the properties of different sections of their creations, as opposed to making map-wide changes. Have low gravity environments outside of normal gravity zones!
- Player Movement – Forgers can create zones where player movement speed and jump height are greatly altered
- Shield power – Zones can be created to dramatically increase/decrease shield power
- Player visibility – Zones can be created to affect player visibility
- Physics – Zones can be created to affect the physics/gravity of players and objects
- Damage – Zones can be created to affect players’ Damage resistance / invulnerability
Forge Maps
Forge allows for modifications to the 10 existing maps that come with Halo 4 , with some limitations to the tools that can be used on these pre-fabricated locations. However, there are three specific Forge maps available for players to use that will allow them complete access to the entire Forge tool set.
IMPACT
LOCATION: Impact site with peculiar qualities.
This observation outpost was established to examine the site of a spectacularly violent meteor collision recorded by an ONI patrol drone in 2547. When researchers first arrived, they were startled to find a non-native fragment of the impacting agent had actually survived and was of unknown alien origin. More recently, interest in the site has grown as the fragment has proven to have originated from long before the earliest of known Forerunner artifacts.
EROSION
LOCATION: Underground on Eudemon X49-05, potential future UNSC colony world.
DESCRIPTION: With hundreds of human colonies now razed in the wake of the Covenant War, the UNSC has dispatched large numbers of advanced pioneer groups to survey potential new worlds. The discovery of Eudemon X49-05 was considered lucky, but concerns remain about the moon’s structural integrity.
RAVINE
LOCATION: A ravine on Requiem.
DESCRIPTION: When ONI dispatched its first expeditionary group to this sector, it was believed that these impressive citadels were individual constructs strategically organized to protect this portion of Requiem. Teams on the ground now believe that they are actually the ramparts and battlements of an impossibly large structure below the surface of the sea.