
Weapons
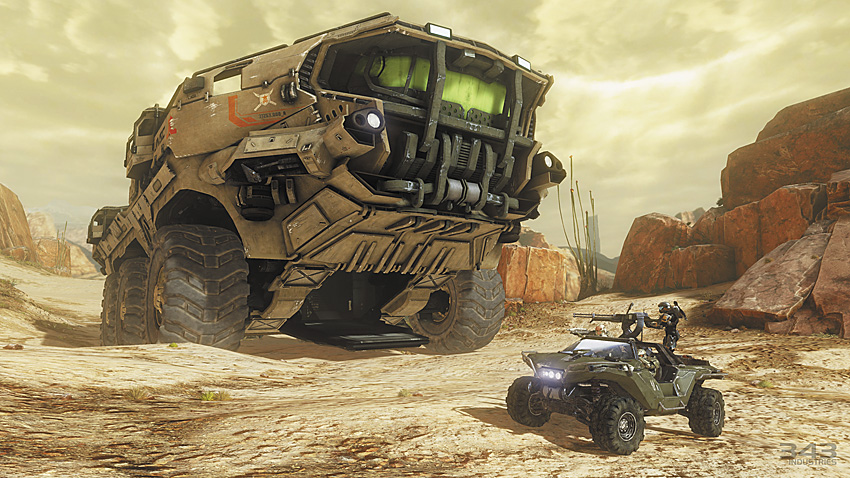
Fast reflexes, sharp aim, and good instincts are all important aspects of surviving a firefight. However, if you’re going to survive Requiem, you need every advantage you can muster. You need intel. Knowing the tools at your disposal, how to apply them, and what you’ll be up against is an enormous advantage that shouldn’t be taken lightly.
Weapons
Halo 4 offers 32 equipable weapons from three different factions. It would not be a stretch to say that for every situation you ever encounter in this game, there exists a weapon best suited for making it go away. You can only equip two weapons, not including grenades. At first, beginners may feel overwhelmed, but there are a few basic rules that you can follow to help you stay armed and ready.
- Use the right weapons for the job: Put simply, some guns work better in certain situations. The vast majority of the UNSC arsenal, for example, fires solid ammunition. Against flesh, they are quite effective. Energy shields that mask Elites and Promethean Knights, severely reduce the power of bullets. However, weapons like the Plasma Pistol or the Storm Rifle all fire plasma bolts that chew through energy shielding swiftly, but struggle to finish the job once the enemy’s skin is exposed. Try to base your arsenal around this dynamic: One weapon to defeat the enemy’s protection, the other to finish them off. Note that some weapons buck this trend somewhat. For example, the LightRifle is an excellent general-purpose weapon that allows for some additional flexibility in your second slot.
- Be flexible: You’re not always going to have your favorite weapons available during the Campaign. Switch out weapons if they are low on ammo, or if you’re finding that they are not suited to your current predicament.
- Headshots are the best shots: Halo has always distinguished weapons in a variety of ways, the obvious being factors such as the rate of fire, whether or not a weapon fires solid ammunition or plasma, or how much damage they cause. The biggest of these is whether or not a weapon is capable of killing an enemy with a single headshot. On Easy or Normal, this may not matter much. On Heroic and Legendary, survival depends on eliminating enemies quickly, and headshots are the fastest way to do this. You should always try to keep at least one headshot-capable weapon on hand at all times.
- Balance your loadout: Although it may sound cool to carry an Incineration Cannon and a Binary Rifle, just because you can doesn’t necessarily mean you should. If you want to carry a power weapon, compliment it with something that can be more general-purpose. Another bad example would be to carry a Sniper Rifle and a Beam Rifle. Both are exceptional weapons, but both suffer from limited ammunition, and both are primarily geared for long-range shooting. A lot of your fighting will be done at shorter ranges, and these weapons are limited in such circumstances.
UNSC Weapons
Assault Rifle
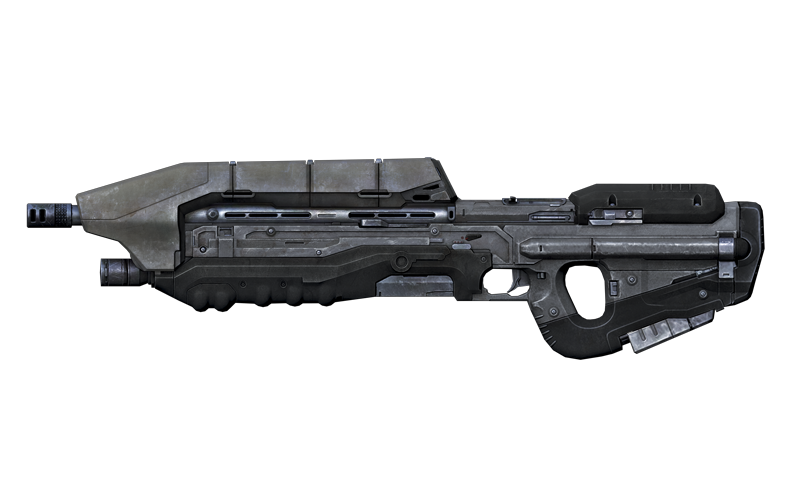
Designation: MA5D Individual Combat Weapon System
- Ammunition Type: M118 FMJ-AP
- Ammunition Caliber: 7.62 mm x 51 mm
- Magazine Capacity: 32 rounds
The workhorse weapon of the UNSC. Leverages a high rate of fire in order to overwhelm defensive shielding and armor, though players are encouraged to fire in short, controlled bursts to conserve ammunition per magazine. Most effective at short- and mid-ranged combat.
- “Short, controlled bursts” isn’t just a neat catchphrase. If you’re engaging the enemy outside of close- or mid-range and want your bullets to actually hit the target consistently, don’t hold down the trigger. Used correctly, the Assault Rifle can even be effective against Elites on Heroic difficulty.
- Best complimented by weapons like the Plasma Pistol, DMR, Magnum, or even the Storm Rifle. Once the shielding on Elites or Knights are down, the AR can kill them very quickly at close- to mid-range.
- On Legendary you will want to find another gun. The Assault Rifle loses a lot of its effectiveness due to increased enemy health and shield pools. Even enemies like the Promethean Crawlers can absorb a distressing amount of ammunition, and the 32-round magazine of the AR will feel entirely too small to threaten Elites and Knights without having something else to soften them up first. While the AR can still score kills on Legendary, there are usually better options available.
Battle Rifle
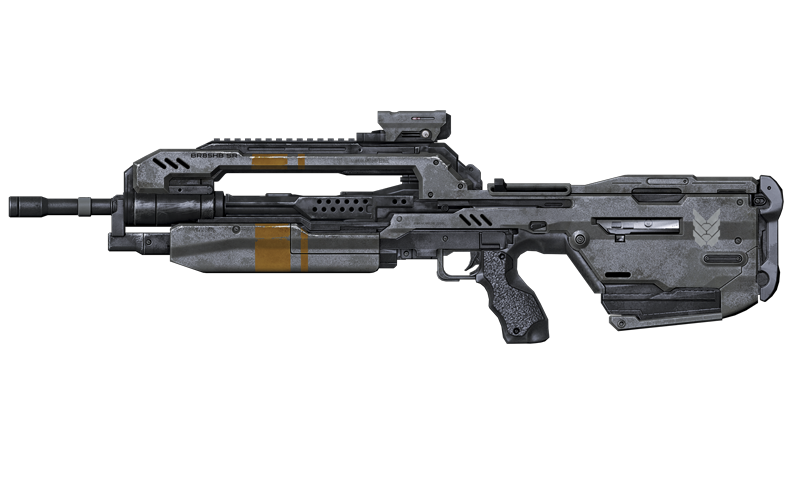
Designation: BR85 Heavy-Barrel Service Rifle
- Ammunition Type: M634 X-HP-SAP
- Ammunition Caliber: 9.5 mm x 40 mm
- Magazine Capacity: 36 rounds
Stressing accuracy over a high rate of fire, the Battle Rifle is an effective weapon at nearly any range, provided the operator is skilled enough to use it. Recoil is minimal and easily controlled. Veteran users of the weapon are actually capable of using the recoil to take advantage of enemy vulnerabilities.
- Hands down one of the most effective weapons in the game. Even by itself, on any difficulty level from Easy to Heroic, the Battle Rifle is a solution to most problems.
- The burst fire is extremely useful against Elites. Each bullet in a burst counts as a hit, so it’s possible for a burst to break the Elite’s shields and score a headshot.
- The overall lower rate of fire of the Battle Rifle is actually a luxury, not a curse; it allows users to stay on target easier.
- Works extremely well alongside Covenant plasma weaponry, specifically the Plasma Pistol. Break Elite shields with a charged Plasma Pistol shot, then use one burst of the Battle Rifle to finish them off.
- The Battle Rifle remains an exceptional weapon on Legendary if paired with the Plasma Pistol, but is somewhat less effective by itself due to increased health and shielding pools.
DMR
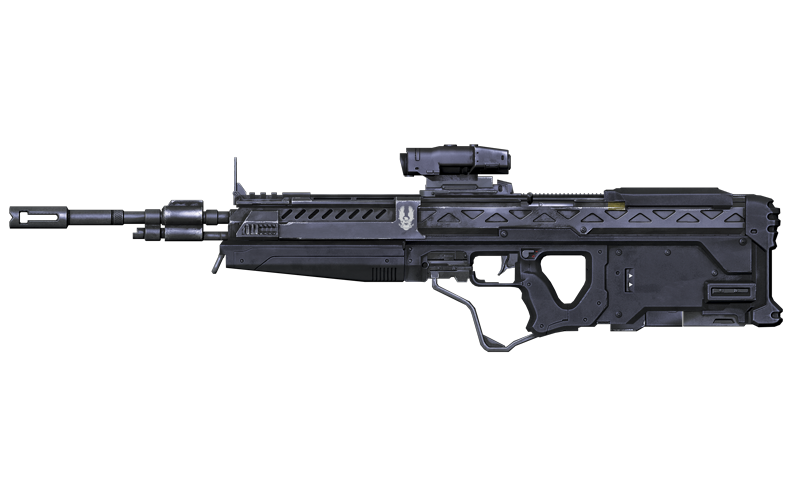
Designation: M395 Designated Marksman Rifle
- Ammunition Type: M118 FMJ-AP
- Ammunition Caliber: 7.62 mm x 51 mm
- Magazine Capacity: 14 rounds
A rifle that brings near-sniper rifle accuracy and power in a compact package. The DMR fills much the same role on the battlefield that a Battle Rifle does, and shares the same ease of control and maneuverability under similar circumstances. However, the DMR is primarily favored for longer ranged engagements.
- As with the Battle Rifle, the DMR is arguably one of the best UNSC weapons available. Laser-like accuracy makes this weapon the bane of any non-shielded infantry, short of a Hunter.
- Can be somewhat difficult to use at close range for less skilled players. Every missed DMR shot is more costly than with other weapons due to its slow rate of fire. Unlike the Battle Rifle, the DMR can’t kill an Elite with the same shot that defeats its shielding.
- Paired with a Plasma Pistol or Storm Rifle, you should fear no Elite, and even Knights and their armored face plating are not safe from the armor-piercing capabilities of the DMR
- One of the better UNSC weapons for Legendary, it’s only held back by its relatively low ammunition pool and lower rate of fire. Always know where adequate replacement weapons are available if you’re taking a DMR into a big firefight.
Magnum
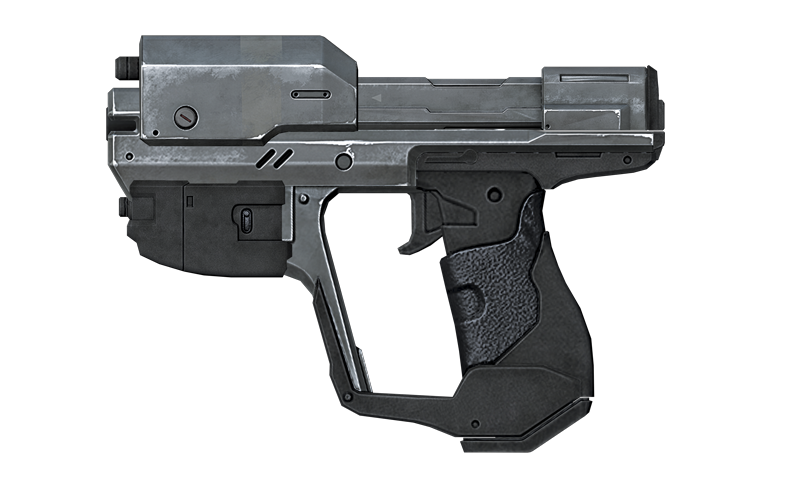
Designation: M6H Personal Defense Weapon System
- Ammunition Type: M225 SAP-HE
- Ammunition Caliber: 12.7 mm x 40 mm
- Magazine Capacity: 8 rounds
The Magnum has been the premier personal sidearm among UNSC personnel since its inception—and for good reason. The stopping power of a raging bull is contained within the weapon’s compact frame, and its helmet-linked 2x scope allows users to counter-snipe marksmen from surprisingly long ranges.
- The Magnum is amazing for a pistol, and like the DMR and Battle Rifle, is a headshot-capable weapon. If it had a larger ammunition pool (only 40 rounds total can be carried), it would be overpowered. You are never at a serious disadvantage with this weapon on hand.
- Works extremely well with shield-breaking weapons. Some may actually prefer the Magnum to fill in the role normally reserved for the Battle Rifle and the DMR, while carrying a Storm Rifle to defeat shielding.
- As with any weapon on Legendary, some effectiveness is lost due to increased enemy health totals, but its headshot capability still keeps it in the fight. Just keep an eye firmly on your ammo count.
Sniper Rifle
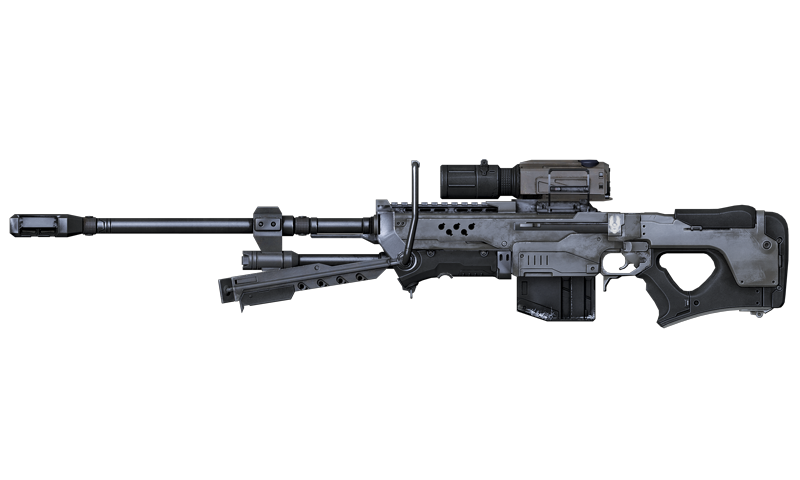
Designation: Sniper Rifle System 99-Series 5/Anti-Materiel
- Ammunition Type: M232 APFSDS
- Ammunition Caliber: 14.5 mm x 114 mm
- Magazine Capacity: 4 rounds
One of the most demoralizing weapons to face, the Sniper Rifle combines extreme accuracy, range, and killing power. Its armor-piercing rounds are capable of breaking through shielding while maintaining their full momentum for potentially lethal shots. The rifle is exceptionally balanced for its size, and the recoil stabilizers allow a marksman to fire all four rounds per magazine at a high rate with little detriment to accuracy.
- An uncommon weapon, but generally most welcome whenever it’s available. Particularly prominent during Campaign Mission 5.
- Surprising amount of accuracy even when not using the scope. For situations when an Elite surprises you while you are sniping distant targets, the Sniper Rifle can be rapidly hip-fired at said Elite for a kill.
- The scope has two levels of zoom. The second level should not be maintained for anything beyond extreme long-range shooting, as it removes nearly all of your situational awareness.
- Sniper Rifle rounds can bounce off hard surfaces if the angle is shallow enough. This can result in some unfortunate mishaps.
- Sniper Rifle shots will penetrate almost all enemy infantry. Only heavy armor found on vehicles and on Hunters can withstand these rounds.
- Many enemies that fall to single Sniper Rifle shots to the body on Heroic can possibly survive two or even three rounds before falling on Legendary. Headshots are essential. Elites and Knights in particular are more frustrating to deal with. Once they know they have been targeted by a sniper, they will make it difficult to score the multiple shots necessary to break their shields and bring them down. Couple that with the general lack of ammunition and it makes the Sniper Rifle a less attractive option.
Railgun
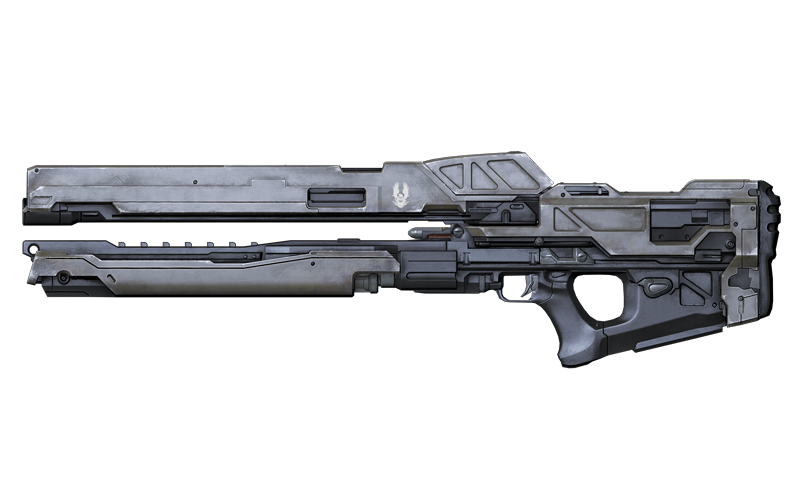
Designation: Asymmetric Recoilless Carbine-920
- Ammunition Type: M645 FTP-HE
- Ammunition Caliber: 16 mm x 65 mm
- Magazine Capacity: 1 HE Round
Firing high-explosive armor-piercing shells via a linear acceleration system, the Railgun for short, can defeat infantry and light armored vehicles with ease. Fully charged, a single shell can blow through multiple targets at once before detonation. The delay before firing a shell at full power requires a certain amount of nerve in users of the weapon.
- Utterly brutal and powerful. Can one-shot most any infantry it is deployed against on any difficulty up to Legendary, even the most dangerous variants of Elites and Knights.
- Limited ammo requires that the weapon be employed judiciously. Take a primary weapon such as a LightRifle or Battle Rifle for the smaller fry, and break out the Railgun when the real nasties show their faces.
- There is no form of scope for the Railgun—its other major deficiency. The weapon is still accurate, but suffers at long-range shooting. Because of this, it is actually better to think of the Railgun as a mid-range weapon.
- The Railgun will automatically fire its shot once it has accumulated a full charge. This does not affect how much damage the shot does. However, if you let go of the trigger too soon, you will not fire. You can use the charge-up time to fine tune your aim at the last moment.
- Knights of all varieties can survive a fully charged Railgun shot on Legendary, which is a serious blow to its overall effectiveness. It is still one of the fastest ways to destroy their shielding and expose them to follow-up shots from other weapons.
SAW
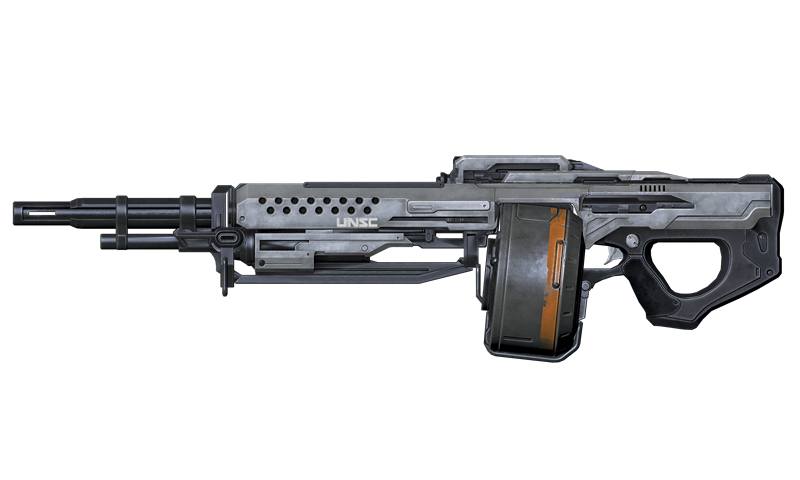
Designation: M739 Light Machine Gun
- Ammunition Type: M118 FMJ-AP
- Ammunition Caliber: 7.62 mm x 51 mm
- Magazine Capacity: 72 rounds
The SAW is a light machine gun that overwhelms armor and energy shielding by raining a high volume of lead on a target. Few other weapons possess the same combination of raw power and suppressive capability. Even Spartans have difficulty managing the intense recoil of the weapon on full-auto.
- If you ever have a choice between a SAW and an Assault Rifle, take the SAW every time. The SAW is more powerful per shot, and if you control its recoil can be more accurate in short to mid-range encounters. The weapon has a tendency to “walk” upward while firing at full-auto, but this is easy to compensate for. Controlled bursts are still the way to go.
- Remarkably effective against Elites and Knights alike, as their shield systems are unable to handle so much hitting them at once.
- The 72-round magazine suffers from taking too much time to reload. As a general rule, if your current magazine is near a quarter capacity, consider finding a safe spot to fall back and reload before you continue to press the attack.
- The SAW is still a capable weapon on Legendary, but as with any other weapon not capable of headshots, it struggles more to chew through the enemy’s increased health and shields. The weapon remains an excellent choice for non-shielded opponents.
Sticky Detonator
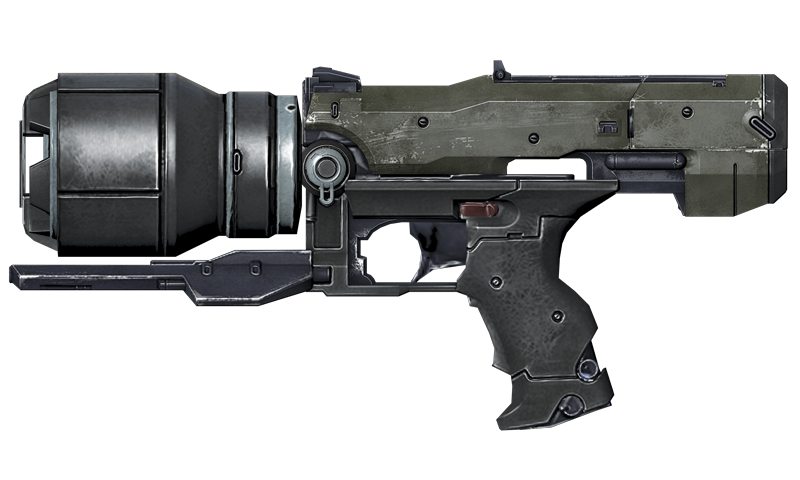
Designation: M363 Remote Projectile Detonator
- Ammunition Type: M9030 HEI/RD
- Ammunition Caliber: 12 cm
- Magazine Capacity: 1 grenade
The weapon is a simple design; it fires a single grenade over a distance to a target surface or infantryman. What the Sticky Detonator fires is complex. The sticky grenade is a time-delayed explosive that can be manually triggered by the gun, even in mid-flight. A motion sensor built into the launcher and the grenades allows users to wait for the optimal moment before detonation. The grenade contains enough explosive power to destroy grouped squads.
- Appearing only in Mission 7, this is one of the rarest weapons in the game. It’s a shame, as the Sticky Detonator is easily one of the most amusing weapons available.
- Amazing killing power. A single properly placed grenade can kill almost a dozen Covenant light infantry, and still take out the shields of any Elites that stray into the blast radius.
- Very effective weapon to use against Hunters, requiring finesse and good reflexes to use. Get behind them and stick a grenade directly to their exposed flesh to cause serious damage.
- Can stick to any enemy and almost any surface. Most enemies stuck by the mine should be considered dead aliens walking. One possible use of the weapon is to stick a Grunt, who in their ensuing panic may run toward their friends. Watch the motion sensor display on the gun to detonate the grenade at the right moment.
- High-ranking Elites can survive being stuck on Legendary, but their shields will not. Compliment the Sticky Detonator with a DMR or Magnum to handle situations like this.
Shotgun
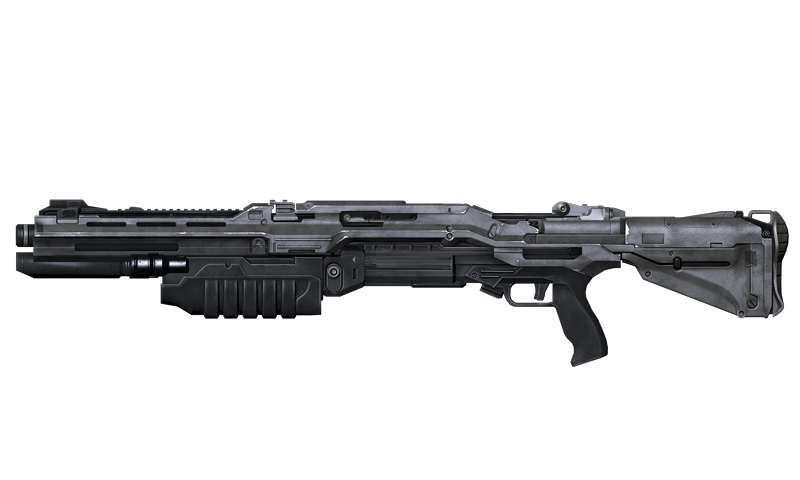
Designation: M45D Tactical Shotgun
- Ammunition Type: M296 TS
- Ammunition Caliber: 8 Gauge
- Magazine Capacity: 6 shells
One of the most effective close-quarters weapons in the UNSC arsenal, the Shotgun has enough stopping power to make even Elite Zealots stagger from the 8-gauge blasts striking their shields. One blast is usually enough to overwhelm personal shielding, and few species can stand up to multiple shots. Brave Marines and Spartans have used this weapon successfully against the mighty Hunters.
- Intense killing power limited to very short range. Don’t expect to snipe anyone with this weapon. Popping the defensive shielding on an Elite or Knight requires that you get close before firing.
- High-risk weapon. If you’re in effective range to use the Shotgun, you are definitely in range of the enemy. Against Elites, Hunters, and Knights, this is not at all a safe choice to make due to their melee capabilities.
- The Shotgun retains much of its power on Legendary, but due to increased enemy resilience, Elites, Knights, and Hunters may not stagger even from point-blank shots to their respective weak spots, which can result in your taking a fatal melee strike from these enemies.
Rocket Launcher
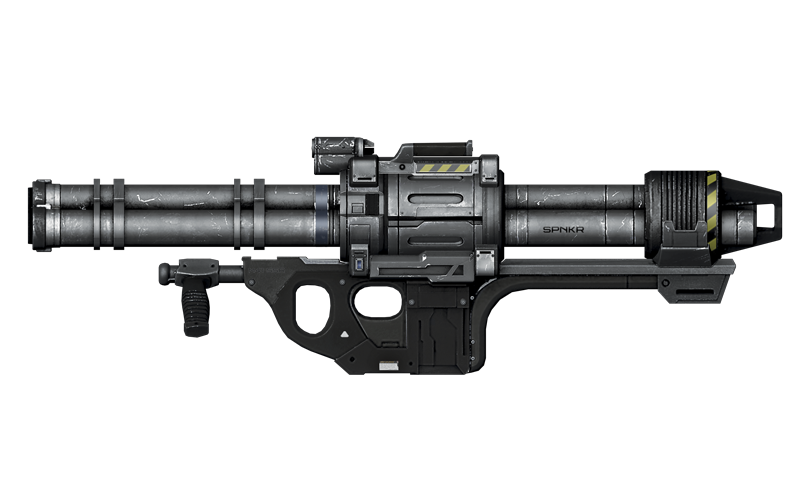
Designation: M41 SSR Medium Anti-Vehicle/Assault Weapon
- Ammunition Type: M19 SSM
- Ammunition Caliber: 102 mm Rocket
- Magazine Capacity: 2 rockets
A classic anti-tank rocket system, the “SPNKR” saw increasing use as an antipersonnel weapon as the Covenant War raged on. The unique design of the launcher allows for two rockets to be fired in rapid succession at a target. The weapon can also lock onto aerial targets, and the rockets will guide themselves to the victim, making it a solid choices for bringing down Banshees.
- Nearly all Covenant infantry, save for the Hunter, will fall to a single rocket. Most Elites won’t even survive a near miss, and those that do will always be staggered by the blast and therefore defenseless.
- The lock-on system for the Rocket Launcher does not always perform as well as advertised. Banshees can evade rockets with alarming frequency, which forces you to wait until the Banshee commits to an attack and is in fairly close range before firing to guarantee a kill.
- Limited ammunition means that each use should be carefully considered.
- The Rocket Launcher is still a powerful weapon on Legendary, but enemy reactions are heightened on this difficulty, so they are more likely to evade direct hits from the rockets. Counter this by firing at their feet, using the blast radius to score kills.
Spartan Laser
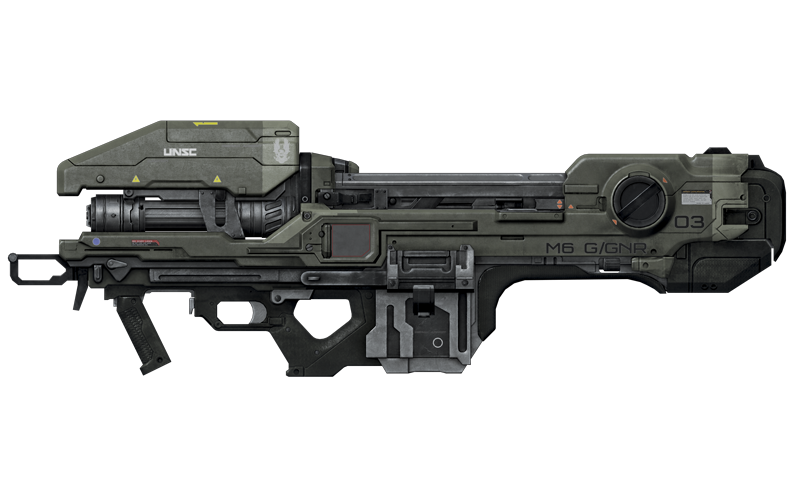
Designation: Weapon/Anti-Vehicle M6 Grindell/Galileian Nonlinear Rifle
- Ammunition Type: Battery Cell
- Magazine Capacity: 1 (energy based), 4 shots
The iconic Spartan Laser continues to shine its crimson light across whole battlefields, destroying armor and infantry alike with disturbing ease. Little can stand up to a single shot, let alone multiple shots. Unlike traditional anti-armor weapons, the Spartan Laser reaches its target almost instantaneously upon discharge, but requires a lengthy charge up just before firing.
- Another extremely rare weapon, found primarily in Mission 7 of the Campaign, and only near the very end of the mission.
- A guaranteed kill against most infantry. Hunters will probably survive all four shots a Spartan Laser can manage unless it is hit in its weak points.
- The charge delay before firing requires that users keep their intended target sighted nearly at all times. This can tempt users into taking up unsafe positions while trying to line up a shot.
- There honestly isn’t much call for this weapon on any difficulty. The vaunted power this weapons system possesses is unfortunately overshadowed by the readily available Mantis combat mech. However, during Co-op gameplay, the player with the Spartan Laser can still contribute to the final battle of Mission 7 on foot. Spartan Ops players may see this weapon appear in ordnance drops for larger battles.
Target Designator
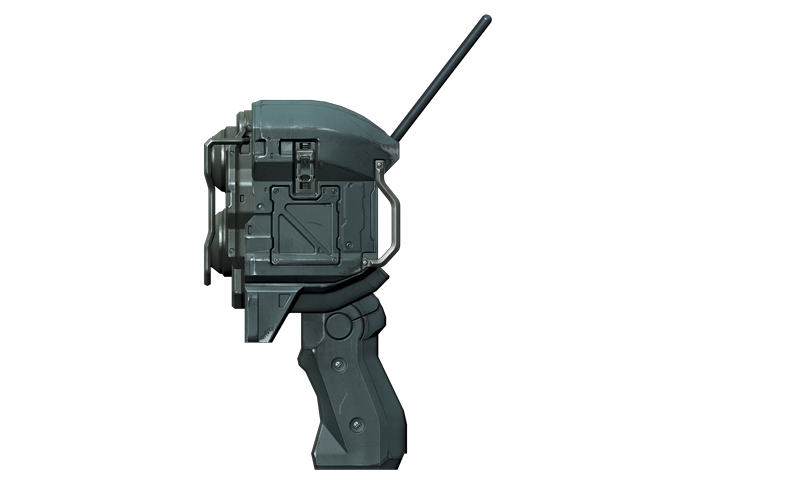
Designation: H-165 Forward Observer Module
Artillery is only at its best when guided in by those who can actually see the target. If satellite surveillance can’t do it, the boots on the ground have to. The Target Designator allows infantry to guide weapons mounted on larger platforms such as the UNSC Infinity , or the Mammoth.
- Not necessarily a weapon on its own, the Target Designator fires a guidance laser that paints a target for destruction. It appears only in Mission 5 of the Campaign.
- Outside of destroying the Mission 5 objectives, the Designator can be used to help the Mammoth blot Phantom dropships out of the sky.
Machine Gun
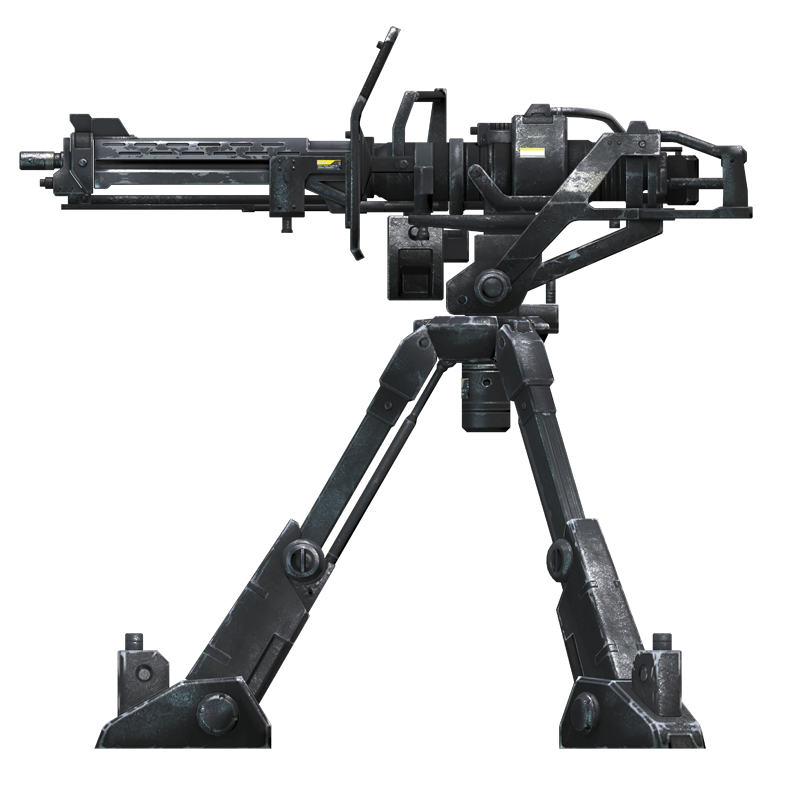
Designation: M247 Heavy Machine Gun
- Ammunition Type: M340 HVE
- Ammunition Caliber: 12.7 mm x 99 mm
- Magazine Capacity: 255 rounds (detached)
One of a number of machine gun emplacements deployed in the field, the M247 is the weapon used by UNSC to lock a defensive position. Powerful, yet very heavy, the weapon is typically locked to a tripod mount. However, Spartans are able to rip the weapon free of the mount and carry it into direct contact with the enemy.
- When mounted to its tripod, the Machine Gun has unlimited ammunition and a limited range of fire. Should a Spartan tear it free, it loses the unlimited supply. Ammo is tracked via a percentage meter. If you’re manning the weapon while it’s mounted, don’t tear it free unless you absolutely must.
- Overheating issues make it necessary to stop firing the weapon to allow it to cool. Avoid this by firing only when targets are available, and then occasionally cutting off your bursts.
- Takes a second or two to spin up to full firing speed.
- Spartans are strong, but not strong enough to sprint around carrying this weapon. The lack of mobility makes this a very dangerous weapon to take into battle, particularly on Legendary. As powerful as the Machine Gun is, taking it into a head-on encounter with tough and fast enemies like Elites or Knights is almost a death wish.
Frag Grenade
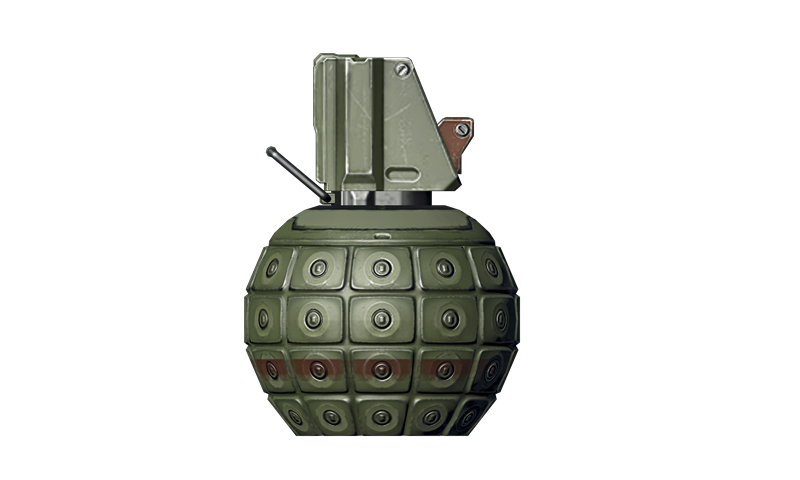
Designation: M9 High Explosive Dual-Purpose Grenade
- Filler Type: ComL
- Filler Volume: 6.7 oz (190 g)
The traditional Frag Grenade follows concepts refined over the course of centuries. A high explosive distributes metal fragments in a radius around the grenade, killing or wounding enemy personnel.
- Powerful, but has limited range. Attentive enemies, particularly on Legendary, will easily get out of the lethal blast radius.
- Grenade will not detonate until it strikes a hard surface, and then only after a short delay. You can use this to your advantage by skipping a grenade off a surface directly at an enemy. This is a good way to catch Elites off guard, or kill clusters of light infantry.
- Not a particularly effective weapon against Knights and Elites on Legendary. They will shrug off one or two Frags unless they are practically on top of the grenades when they detonate.
Covenant Weapons
Plasma Pistol
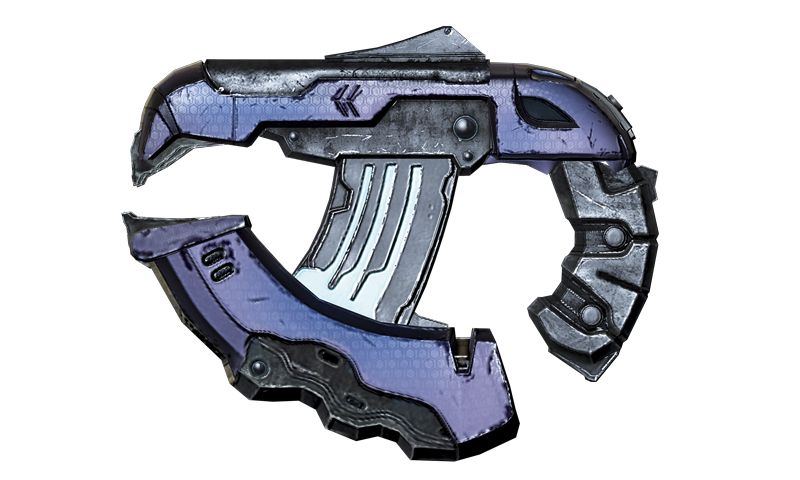
Designation: T-25 Directed Energy Pistol
- Ammunition Type: Superheated Plasma
- Magazine Capacity: 50 shots, 5 charged shots
The Plasma Pistol is the Covenant equivalent to the Magnum, acting as a personal sidearm for most Covenant infantry. Its standard firing mode is somewhat weak, but its secondary function is where the weapon truly shines. Sacrificing much of its internal plasma reserves, the pistol can fire a charged shot that destroys most personal shielding in a single blow, tacking on an additional EMP effect that disables vehicles.
- One of the single most useful weapons in the game. The Covenant tend to carry a lot of them on the field. The charged shot sets up what is fondly called “the combo” or “newb combo” by some players: Use one charged shot to take out the shields, then switch to a headshot-capable weapon to finish them off. The standard firing mode is also effective against shielding, particularly if you are in a close-quarters situation where you do not have the time to wait for a charge shot to build up.
- The EMP effect can cripple even the Scorpion tank and the Mantis combat mech, the latter of which suffers from the longest EMP recovery time in the entire game.
- Charged shots can be locked onto infantry and vehicles. Wait for the target reticle to turn red and display three additional red triangles, signifying a lock, before firing.
- The weapon can overheat after rapid fire or after a charged shot, and cannot be fired again until it cools.
- Absolutely essential for Legendary or any speed run. Enemies with shields can be taken out quickly with good use of the combo, and Legendary requires that you have this concept mastered.
Needler
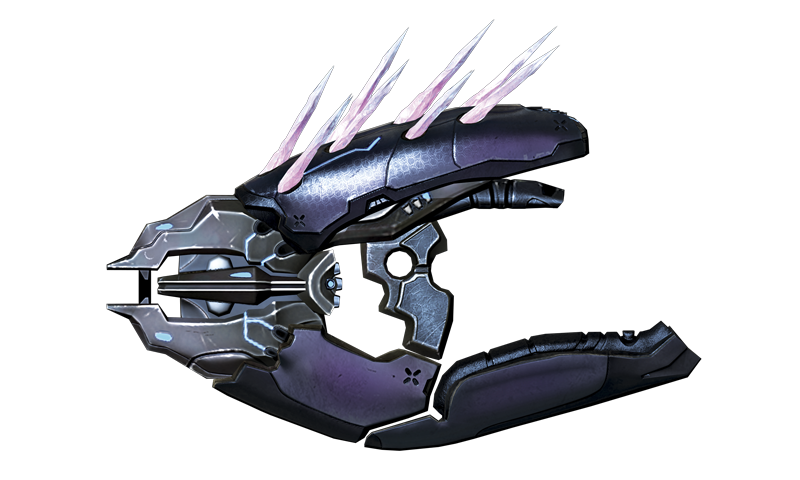
Designation: T-33 Guided Munitions Launcher
- Ammunition Type: Crystalline Shards
- Magazine Capacity: 22 needles
Through means the UNSC has yet to fully grasp, the Needler fires crystalline shards that home in on targets from a significant distance. The shards themselves are not powerful individually, but should a target be hit by enough shards, an energy reaction is triggered that is on par with a small-scale Frag Grenade, almost assuredly killing the victim.
- The subject of nerfs and buffs throughout the franchise, the Needler is back in fine form. Its homing ability can guarantee hits even at mid-range.
- The “supercombine” that occurs after a target receives enough needles can trigger the detonation of nearby grenades. Remember this while firing.
- Needler shots do not home in around corners. Use this knowledge to your advantage if you’re on the receiving end of the weapon.
- While it remains quite lethal even on Legendary, certain Elite variants can survive a supercombine, and Knights can survive multiple supercombine blasts. There are simply more efficient ways to kill the enemy than a Needler on Legendary.
Storm Rifle
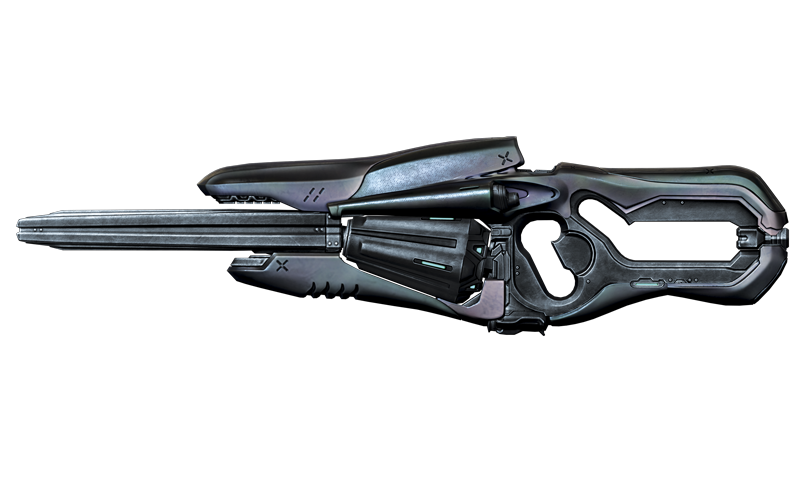
Designation: T-55 Directed Energy Rifle/Advanced
- Ammunition Type: Superheated Plasma
- Magazine Capacity: 166 shots
Like the Plasma Rifle, the Storm Rifle has characteristics found in weapons like the Assault Rifle. The Storm Rifle is a stable firing platform, and has an impressive rate of fire while maintaining similar accuracy found in the Assault Rifle.
- The Storm Rifle is an effective general-purpose weapon, but leans more toward anti-shield duty. It’s much more powerful per shot than the standard Plasma Pistol shot.
- High rate of fire easily destroys personal shielding, but the weapon tends to overheat quickly.
- On Legendary, this weapon is solid if there is no Plasma Pistol available. Generally you will want to switch to something more powerful once the enemy defenses are down.
Covenant Carbine
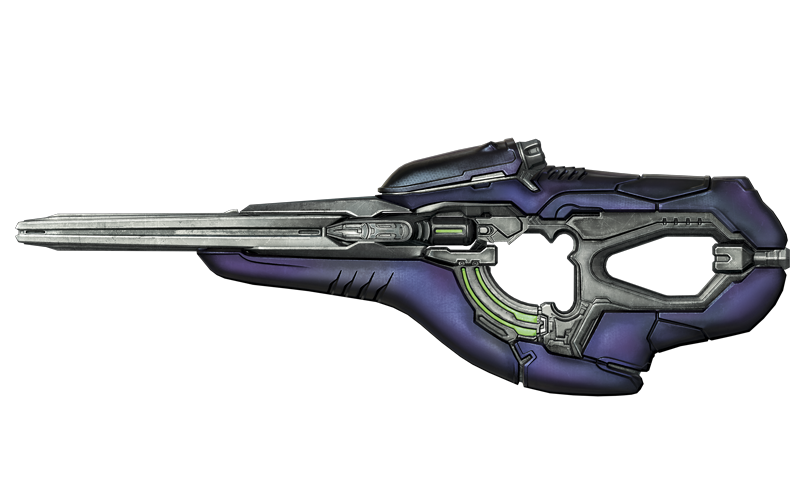
Designation: T-51 Carbine
- Ammunition Type: Caseless Radioactive Round
- Ammunition Caliber: 8.7 mm x 60 mm
- Magazine Capacity: 18 rounds
Similar to the DMR, the Covenant Carbine is meant for skilled marksmen, and is used primarily by Jackal Snipers, Rangers, and Elites across their ranks. Although each individual shot fired by a Covenant Carbine is fairly weak, the weapon features almost zero noticeable recoil, which allows a sharpshooter to rapidly and accurately fire at a target from considerable distances, despite the weapon’s low-power scope.
- Despite the lack of stopping power, the Covenant Carbine is one of the best headshot-capable weapons in the game, so it is a prime candidate for use in conjunction with the Plasma Pistol or Storm Rifle. Amazingly accurate with or without its integrated scope, it is the bane of all unshielded hostiles in the game.
- Note that unshielded Knights require two headshots to kill with the Covenant Carbine: one to blast off the armor in front of their weak point, and another to finish off the Knight.
- Features more ammunition than the DMR (and the Battle Rifle, in practical terms), and a rate of fire that is more dependent on how fast you can pull the trigger.
- Retains its usefulness on Legendary. Despite its lack of power, you can still score headshots, and that’s what you need most on Legendary. Always use it alongside something that can really break down enemy shielding, and the Covenant Carbine should be more or less as effective on Legendary as it is on easier difficulty settings.
Beam Rifle
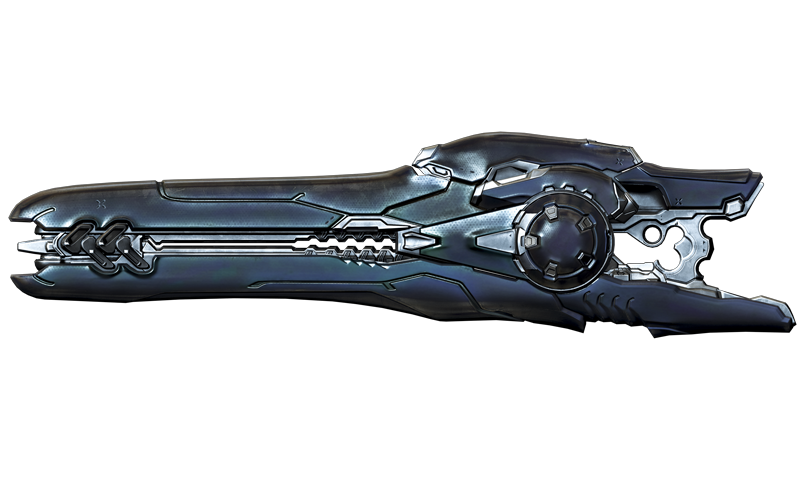
Designation: T-27 Special Application Sniper Rifle
- Ammunition Type: Ionized Particles
- Magazine Capacity: 10 shots
The Beam Rifle is a weapon favored by Jackal Snipers and Rangers. It’s able to overload most defensive shielding in a single shot, and the lack of recoil allows for a fatal follow-up shot moments later. The shots are powerful, yet have been observed to skip or bounce off hard surfaces, while still resulting in kills. Possessing a powerful dual-range scope, the Beam Rifle is exceptionally accurate. Overheating and limited battery life remain a concern for operators of the Beam Rifle.
- Equivalent to the Sniper Rifle in many ways, the Beam Rifle has two distinct advantages. One, as an energy weapon, it is better suited to tearing apart defensive shielding, which makes it dangerous even to the Mantis mech. Two, it does not have to be reloaded after four shots. Players using the weapon to score kills on follow-up shots don’t have to stop to reload and thereby give the target a chance to escape.
- It takes a Beam Rifle a long time to recover from overheating, so do not fire the weapon too rapidly.
- Arguably the best pure sniping weapon in the game for all practical purposes. Only the Binary Rifle is more powerful, and it suffers the reloading issue that the Sniper Rifle does, and is nowhere near as accurate as the Beam Rifle when fired from the hip.
- Sniping on Legendary is hard for reasons that have already been mentioned, but the Beam Rifle’s nature makes a player keen to take rapid shots on targets, which usually leads to the weapon overheating. So long as you stay calm, you can still use the Beam Rifle effectively on Legendary.
Shade Turret
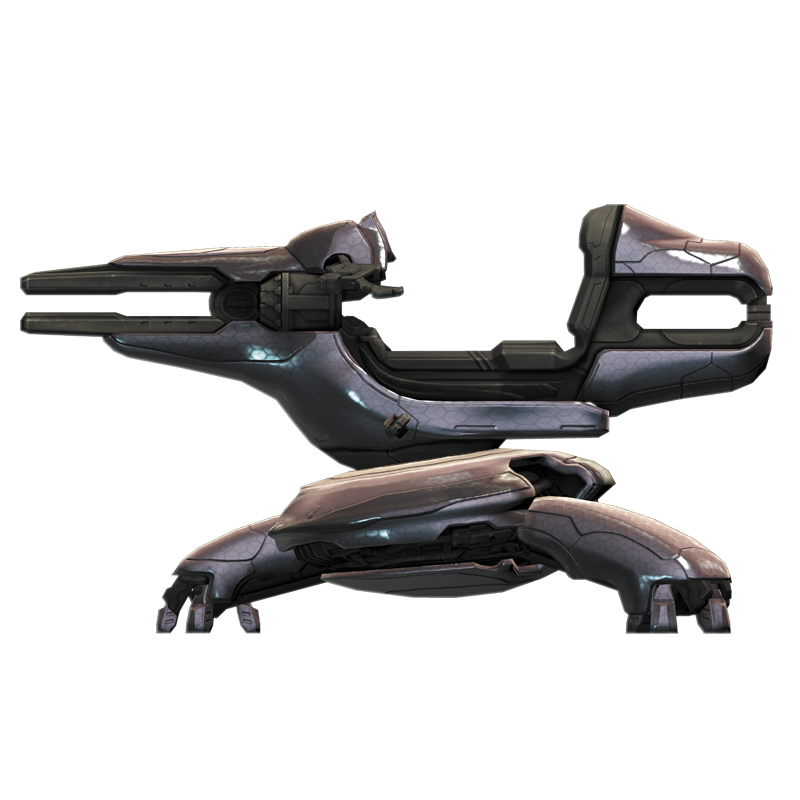
Designation: T-55 Anti-Infantry Stationary Gun
- Ammunition Type: Superheated Plasma
A powerful defensive turret that is typically turned on infantry, yet is quite capable at destroying light armor or aircraft if given the chance. The gunner is unfortunately exposed to incoming fire, and the Shade Turret’s immobile nature makes it a prime target for Rocket Launchers and Sniper Rifles alike.
- The Shade Turret is encountered throughout the campaign, but honestly, there is little call to man it. If you do, you’re completely exposed to enemy fire, you’re immobile, and mounting or dismounting from the weapon takes time that you may not have in emergencies. On Legendary, it’s best if you destroy them to prevent other Grunts or Elites from trying to take the controls.
Concussion Rifle
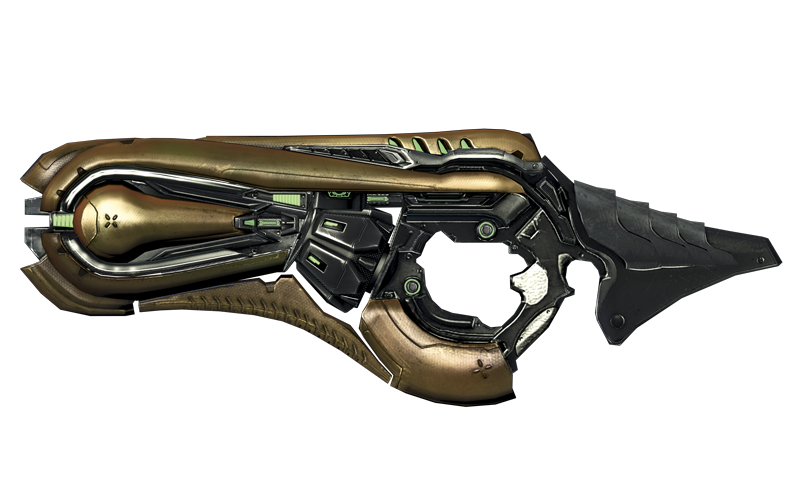
Designation: T-50 Directed Energy Weapon/Heavy
- Ammunition Type: Explosive Plasma
- Magazine Capacity: 6 shots
Firing bursts of explosive plasma, the Concussion Rifle is a weapon designed to suppress and disorient enemy infantry while still causing significant damage to equipment and personnel. Light vehicles can be upended by repeated concussive blasts.
- On Easy and Normal, you can get away with using the Concussion Rifle whenever it appears. The concussion shots can set off grenades lying on the ground, which can lead to some hilarious moments.
- Although they are surprisingly long-ranged, the shots travel so slowly that the enemy can easily evade them, unless you’re up close or you’re playing on easier difficulties and enemies just stand there and take the hits.
- Direct hits or hits on the ground near the enemy will knock them a short distance away. This can be useful at suppression duty, but there are plenty of weapons that can suppress and kill the enemy faster than the Concussion Rifle does.
- Don’t use the weapon on Legendary. Even Grunt Heavies have been observed to survive up to three direct hits by this weapon. Pass it up any time you see it.
Fuel Rod Cannon
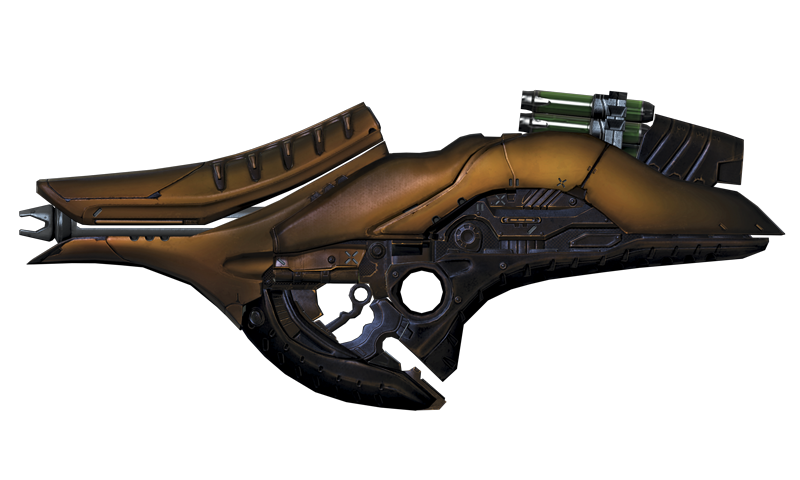
Designation: T-33 Light Anti-Armor Weapon
- Ammunition Type: Fuel Rod
- Ammunition Caliber: 38 mm
- Magazine Capacity: 5 fuel rods
The Fuel Rod Cannon is primarily used for anti-armor purposes, but is also effective in anti-infantry roles. Often carried by Grunt Heavies and high-ranking Elites, the weapon can be devastating in the right hands. Light vehicles are especially vulnerable, but even heavy armor, such as that of the Scorpion tank, are prime targets for fuel rods.
- The weapon is highly effective against infantry and armor alike. Only the relatively slow speed of the projectiles holds the Fuel Rod Cannon back.
- Five rods per magazine, along with a larger ammo pool, allows it to be a powerful general-purpose weapon in your hands for longer than the Rocket Launcher or Railgun’s ammo would allow.
- There is a delay before the fuel rod activates after contact with the air, which can be used to bounce fuel rods around corners. This can also cause accidental misses in close-range fighting.
- A dangerous life-taker even on Legendary, but especially when you are on the receiving end. Direct hits are harder to manage but remain lethal against most unprotected infantry, and even the toughest Elites fall after a few direct hits.
Energy Sword
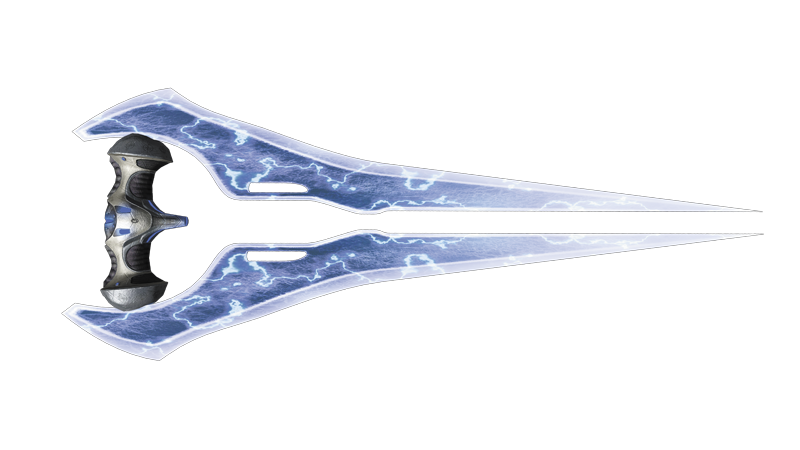
Designation: T-1 Energy Weapon/Sword
- Ammunition Type: Shaped Plasma
The Energy Sword is a traditional dueling weapon that is seen both as a symbol of honor, and a last resort for cornered Elites. Used primarily by Elite Zealots, the Energy Sword has been seen to defeat all known forms of personal defensive shielding. Blows from the Energy Sword are almost always instantly fatal; the rare survivors are those lacking a limb or two.
- As with weapons like the Shotgun or Scattershot, the Energy Sword is a high-risk, high-reward weapon. Manage to get close to the enemy, and they will suffer greatly for letting you near.
- The Energy Sword retains its lock-on lunge strike from previous Halo appearances. There are two attack buttons with an Energy Sword: the Right Trigger, and the Right Bumper. Both attacks are capable of lunging you towards the enemy, however the Right Trigger strike has the best range.
- Avoid the weapon on Legendary. As it does with Elites, having an Energy Sword seems to inspire players into making suicidal charges at large groups of enemies in the hopes of scoring one more kill. Of course, if you pull it off, you’ll look like a big boss at close-quarters combat. The other, more tangible problem is that some high-ranking Elites can survive a full-on lunge strike if it isn’t from behind.
Gravity Hammer
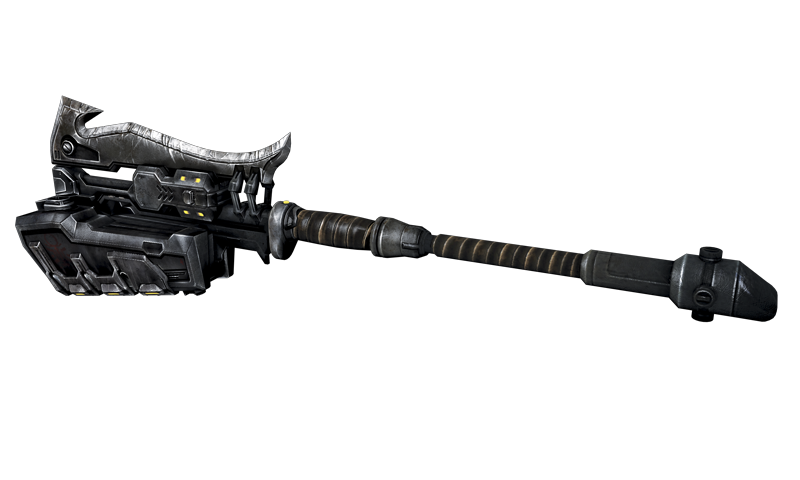
Designation: T-2 Energy Weapon/Hammer
- Ammunition Type: Electromagnetic Energy
Once the symbol of a Brute Chieftain’s authority, this melee weapon has not been seen in the field since the Brutes virtually disappeared in the aftermath of the Covenant’s defeat. Emitting powerful gravity waves, each swing of a Gravity Hammer crushes enemies with many times more force than what seems possible.
- Behold the rarest weapon in the game, which is presented to you in the very last mission—just in time to use it against enemies that excel at ranged combat and will cut short any reckless charges against them. As much love as we have for this weapon based on previous showings, its appearance in the Campaign is too little, too late. On Easy and Normal, you might find it useful and fun to mash Crawlers and Knights, but on Heroic and Legendary, this is a weapon that screams “Please kill the person holding onto me, they asked for it.” The Prometheans are more than eager to oblige.
Plasma Cannon
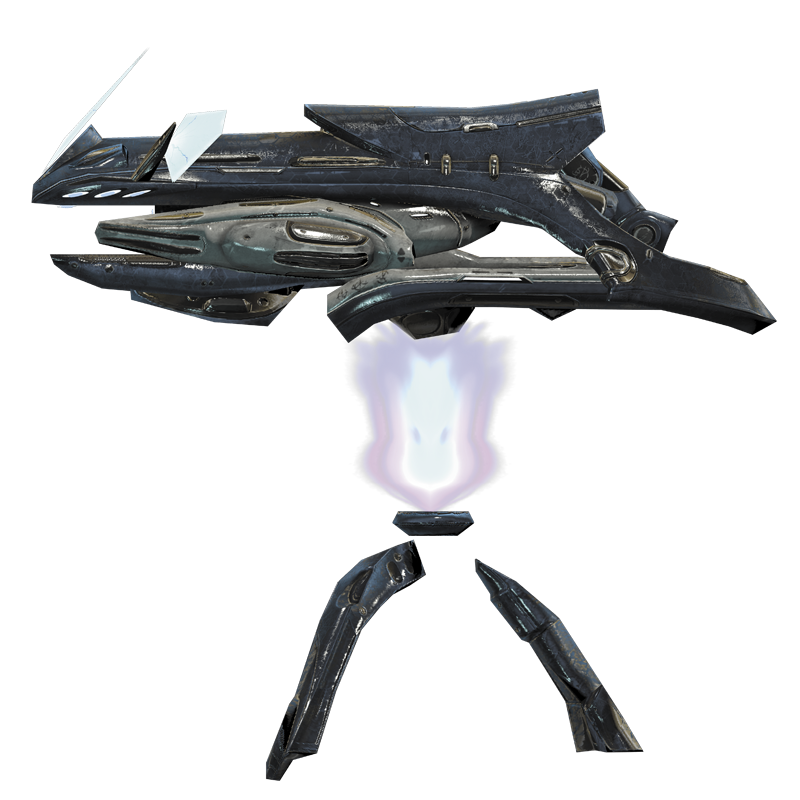
Designation: T-52 Directed Energy Support Weapon
- Ammunition Type: Superheated Plasma
- Magazine Capacity: 255 shots (detached)
The Covenant equivalent to the UNSC M247 Heavy Machine Gun, the Plasma Cannon (and its many variations) can be found on all manner of Covenant vehicles, and has been used to hold key positions in concert with infantry. These heavy weapons have been seen torn free of their mounts and carried into battle by Spartans.
- Take what you know about the Machine Gun, take away some of its effectiveness against flesh, and then add some more effectiveness against shielding, and you’ll have the Plasma Cannon. It, too, contains unlimited ammunition until ripped free of its mount. The Plasma Cannon does overheat a little faster than the Machine Gun.
Plasma Grenade
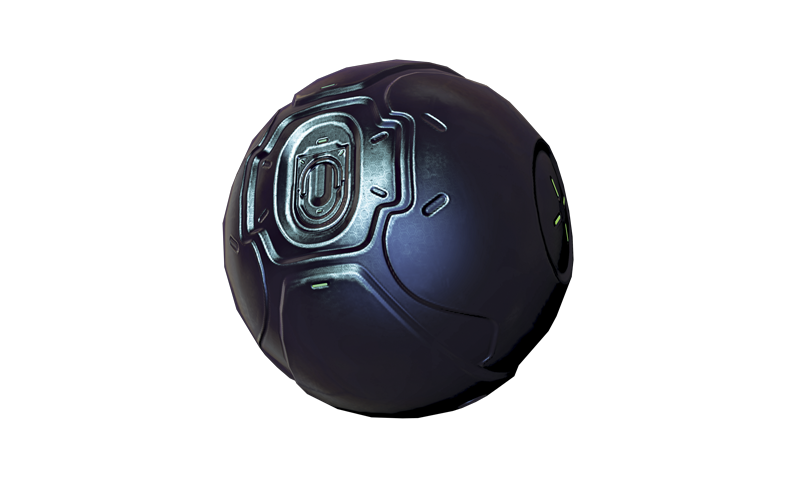
Designation: T-1 Antipersonnel Grenade
- Filler Type: Latent Plasma
- Filler Volume: 9.3 oz (263.7 g)
The Plasma Grenade is a cruel and effective weapon. When the latent plasma filler ignites, the grenade can then “bond” with organic material or most surfaces, once it is thrown, allowing victims a brief moment of abject terror before the grenade detonates.
- The iconic Plasma Grenade is one of the best tools to have in your kit, provided you’ve got a good eye and a good arm. Sticking most Covenant infantry results in a kill, unless it’s a high-ranking Elite or a Hunter, or unless you are playing on Legendary.
- Prometheans Crawlers and Watchers tend to evade most Plasma Grenade tosses (and in the case of the latter, tend to throw them back at you), but Knights can be de-shielded on Heroic and Legendary with a good toss.
- The Plasma Grenade has a weaker area of effect blast than the Frag Grenade, and can take longer to detonate. As such, it isn’t the best weapon for scoring mass kills on lower difficulties, though stuck Grunts might panic and flee into the arms of their comrades.
Forerunner Weapons
Boltshot
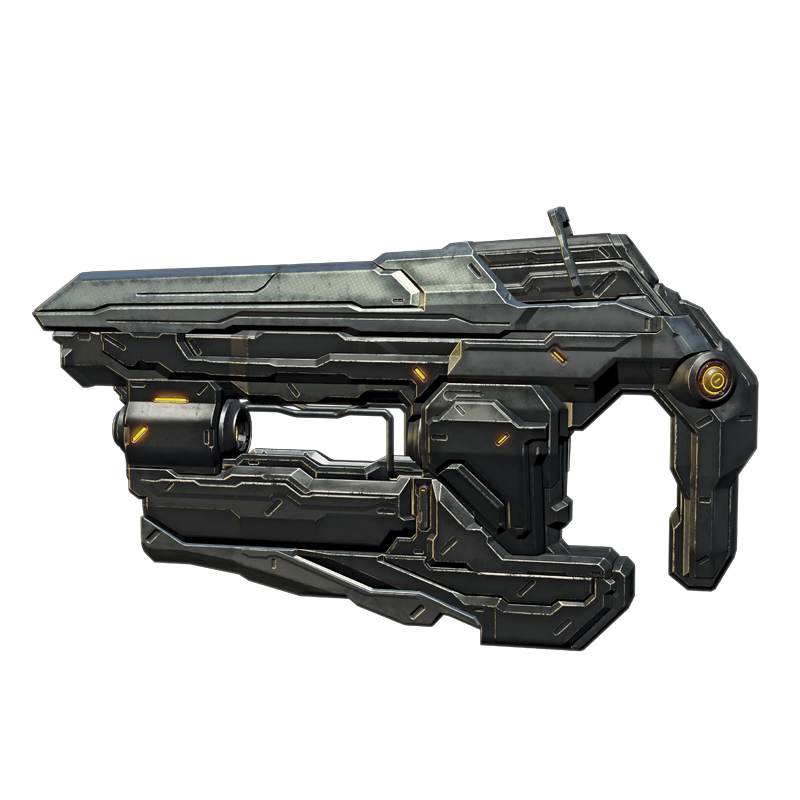
Designation: Z-110 Directed Energy Pistol/Exotic
- Ammunition Type: Ionized Particles
- Magazine Capacity: 10 shots, 2 charged shots
This Forerunner sidearm shoots charged particles at targets accurately and as quickly as the user is willing to pull the trigger. The secondary function of the Boltshot allows the user to charge five shots at once, unleashing them as a short-range shotgun-style burst that can destroy personal shielding.
- Accurate and headshot-capable in its standard firing mode, yet deceptively powerful up close with its secondary mode, the Boltshot is an effective secondary weapon to have on hand.
- Unlike the Magnum, the Boltshot does not come with a scope. This can make longer ranged engagements with the Boltshot more difficult.
- The secondary fire mode uses up to five shots in the magazine, and can be used even if less than five shots are available. However, the charge shot only fires after a full charge has been collected. This delay makes it dangerous to use in close quarters unless you anticipate enemy movements in advance. You can’t rely on it as a defensive reaction, especially on Legendary.
- You can still use the Boltshot on Legendary, but as with all other difficulties, the Boltshot typically appears alongside of the LightRifle, which ultimately is a better weapon for most of the fighting you’ll be doing. That said, it doesn’t make a bad secondary weapon, and being headshot-capable makes it great for clearing out Grunts, Jackals, and Crawlers.
Suppressor
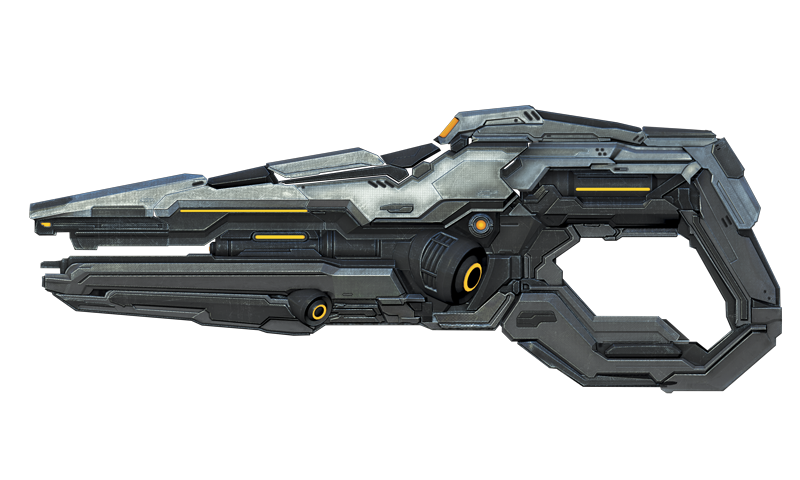
Designation: Z-130 Directed Energy Automatic Weapon
- Ammunition Type: Light Mass
- Magazine Capacity: 48 bolts
The Suppressor could be considered the equivalent to a UNSC Submachine Gun; it features a high rate of fire and peppers targets with light bolts, devastating organic material. While not particularly accurate, the Suppressor appears to be made to cover a wide area.
- The Suppressor is effective against defensive shielding and organic material. Like the Boltshot, its bolts are a little slower than the shots fired by most UNSC and Covenant weapons, which limits it to close range for maximum effectiveness.
- The magazine feels bottomless, but mostly because it has to. Even at short ranges, the accuracy of the weapon makes it ill-suited for smaller targets, with many shots potentially going wild.
- While it can be useful, on Legendary you’re better off looking for weapons that can kill fast. The Suppressor is not one of those weapons.
Scattershot
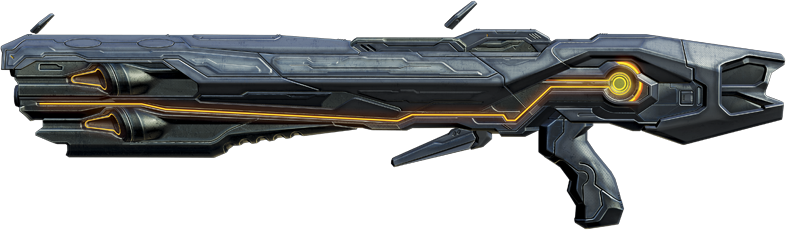
Designation: Z-180 Close Combat Rifle/Asymmetric Engagement Mitigator
- Ammunition Type: Ionized Particles
- Magazine Capacity: 5 shots
A powerful Forerunner shotgun that was designed for maximum firepower. The Scattershot can be fired incredibly fast, and like the charged shot from a Boltshot, it devastates personnel up close. It appears to be a further evolution of weaponry specifically designed to destroy organic material in such a way that nothing remains. Victims hit by this weapon at point-blank range have been observed to completely disintegrate.
- While limited to close-range, the Scattershot is unmatched in its class. Even the Shotgun doesn’t wreck faces quite like the Scattershot.
- The individual bolts fired by a Scattershot can be deflected off hard surfaces, turning any small corridor into a potential kill zone.
- As it is such a specialized weapon, it is hard to recommend for Legendary. Getting up close to the enemy is already a dangerous proposition, and the Scattershot can have only five shots chambered before it needs reloading. This might be fine against a lone Elite or Knight, but you will find that they are rarely alone. Still, the Scattershot is an excellent weapon to compliment other Forerunner weapons, like the LightRifle or Boltshot.
LightRifle
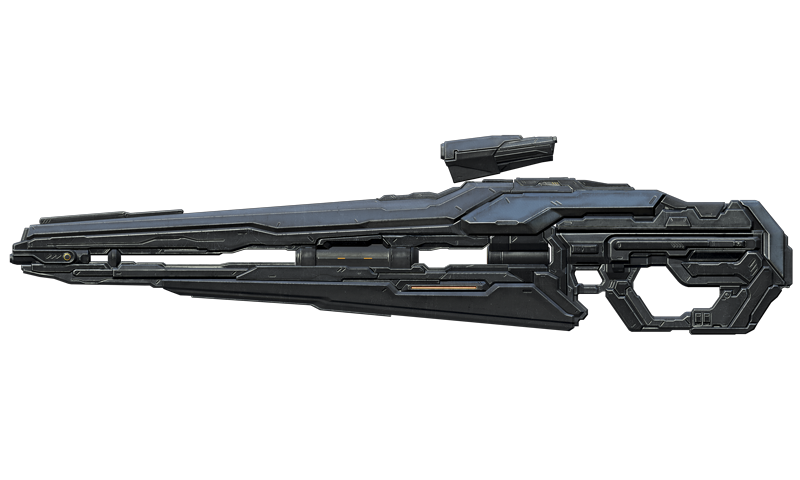
Designation: Z-250 Directed Energy Engagement Weapon
- Ammunition Type: Light Mass
- Magazine Capacity: 36 shots, 12 (scoped)
A unique weapon, the LightRifle fires hardlight bolts in groups of three, similar to how the Battle Rifle is normally set to fire. When scoped in, the weapon switches to a different firing mode, combine three bolts into one for devastating effectiveness on targets. The LightRifle is a precision weapon, easily as accurate as its UNSC and Covenant equivalents.
- This is possibly the best gun in the game. Combining the three-shot burst of the Battle Rifle, and the single-shot power of the DMR, the LightRifle is capable of outmatching either weapon.
- Capable of headshots in either firing mode, the LightRifle is best paired with weapons better designed for anti-shield duty.
- One of the best weapons to have on hand for Legendary, particularly for some of the later missions, where ammo for it is plentiful. Can fill any role in combat, at any range. The only caveat against it is that, like any precision weapon, using it well while under fire can be somewhat demanding, but if you’re playing on Legendary you are probably used to that by now.
Binary Rifle
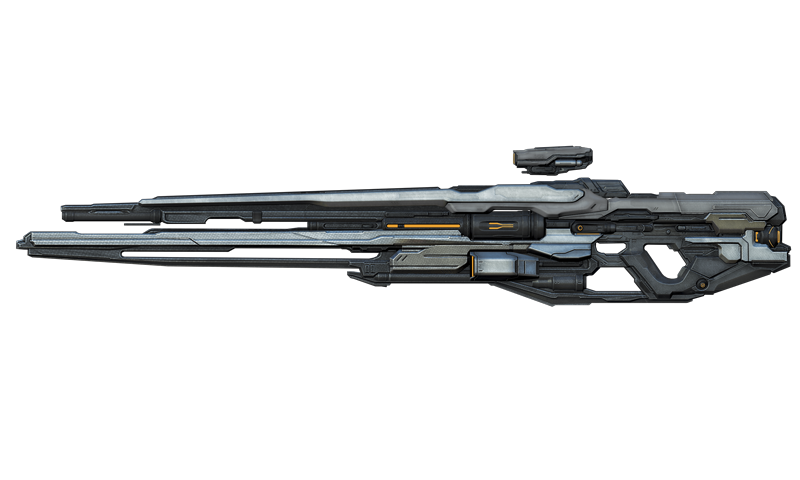
Designation: Z-750 Special Application Sniper Rifle
- Ammunition Type: Ionized Particles
- Magazine Capacity: 2 shots
A further evolution of the scoped rifle in single-shot firing mode found on the LightRifle, the Binary Rifle fires a powerful stream of ionized particles that can destroy organic matter entirely in a single shot. No other weapon in any arsenal combines such extreme precision and power into one package.
- If it weren’t limited to two shots per magazine, this would be the best, purest sniping weapon in the game. However players who are great shots might argue that it already is the best, and the limited magazine is just a balancing factor. As with the other sniper rifles, the Binary Rifle has a scope with two zoom modes.
- Can kill weaker Elites on Legendary in a single headshot, while higher ranking Elites and Promethean Knights will require two headshots: One for their shields, one for their faces.
- A weapon this specialized is not a good call to waste on small fry, though you may be tempted at times to destroy Watchers with single shots from a Binary Rifle.
- Highly inaccurate when hip fired. If you’re ever in a situation where this is necessary, switch to something else. If you have nothing else, well, you can always get lucky or try the battle again.
- In a way, this weapon is better in the hands of an allied Marine or Spartan. Trade it to them and enjoy their benefits of having unlimited ammo to snipe the enemy with.
Incineration Cannon
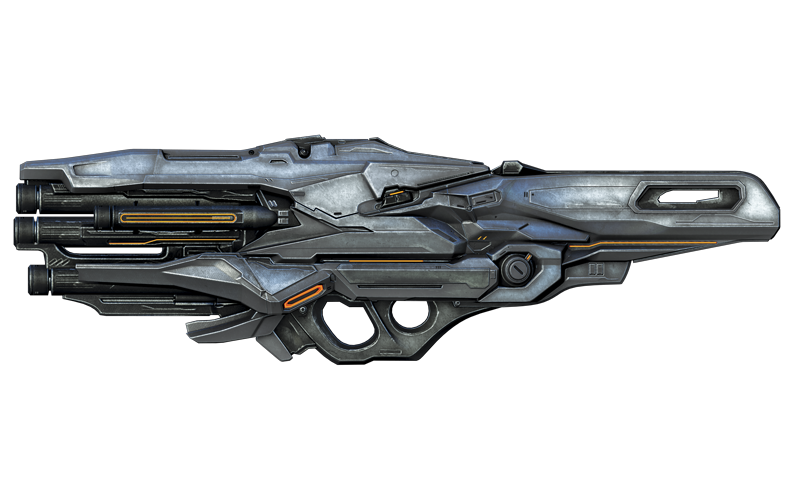
Designation: Weapon/Anti-Material Z-390 High-Explosive Munitions Rifle
- Ammunition Type: Ionized Particles
- Magazine Capacity: 1 shot
The ultimate particle weapon found in the hands of Promethean Knight Commanders throughout the game, the Incineration cannon destroys targets it directly hits with a bundle of explosive ionized particles. After impact, the particle bundle scatters, further saturating the target area with the weapon’s damaging effects. Very little can survive a direct hit from this weapon.
- There isn’t a more powerful infantry weapon in the game. On any difficulty, the Incineration Cannon is a guaranteed kill on a direct hit on any Covenant or Promethean short of a Phantom dropship, a Wraith, or a Hunter.
- Accurate and possessing a zoom function, the Incineration Cannon is capable of scoring kills at ranges usually reserved for sniper rifles. The shot travels a bit slow, so it’s best to use it at mid range for guaranteed kills.
- This weapon can make certain portions of Mission 6 and Mission 8 significantly easier on Legendary, and so we highly recommend it as a staple weapon in your arsenal.
Pulse Grenade
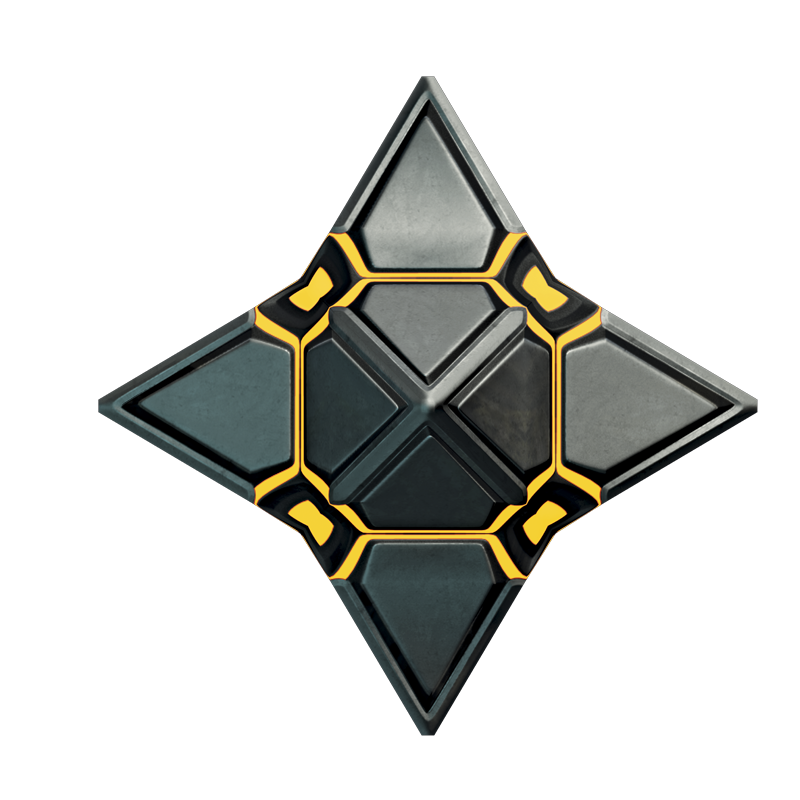
Designation: Z-040 Attenuation Field Generator/Localized
- Ammunition Type: Electromagnetic Energy
A small-scale attenuation field generator that can be used to drive hostiles out of prepared positions. The spherical field generated lasts for nearly four seconds. Afterward, the generator explodes, obliterating nearby organic material still caught within the blast radius.
- The Pulse Grenade is not as immediately lethal as the Frag or Plasma Grenades, but it does have some special uses. It does not bounce. Where it impacts after it is thrown is where the pulse field is generated. You can use this to seriously damage Elites and Knights by throwing it at their feet.
- It is an excellent area-denial weapon. You can drive enemies out of cover by throwing the Pulse Grenade at them, and also prevent them from returning to it right away.
- The field generated by the Pulse Grenade is especially effective against opponents with little room to maneuver as well as large targets in general. However, to get the full effects on Knights and Elites, you will have to display a certain amount of finesse to throw it accurately while also taking into account their evasive ability.